Embed Size (px)
Citation preview

FireArrow KPI Odometer
Installation and User Guide
1
Notice
This document is a proprietary product of FireArrow and is protected by copyright laws and international treaty. Information in this manual is subject to change without notice and does not represent a commitment on the part of FireArrow. While reasonable efforts have been made to ensure the accuracy of the information contained herein, FireArrow assumes no liability for errors or omissions. No liability is assumed for direct, incidental, or consequential damages resulting from the use of the information contained in this document.
The copyrighted software that accompanies this document is licensed to the End User for use only in strict accordance with the End User License Agreement, which the Licensee should read carefully before commencing use of the software. No part of this publication may be reproduced, transmitted, stored in a retrieval system, nor translated into any human or computer language, in any form or by any means, electronic, mechanical, magnetic, optical, chemical, manual or otherwise, without the prior written permission of the copyright owner. This document may use fictitious names for purposes of demonstration; references to be actual persons, companies, or
organizations are strictly coincidental.
2
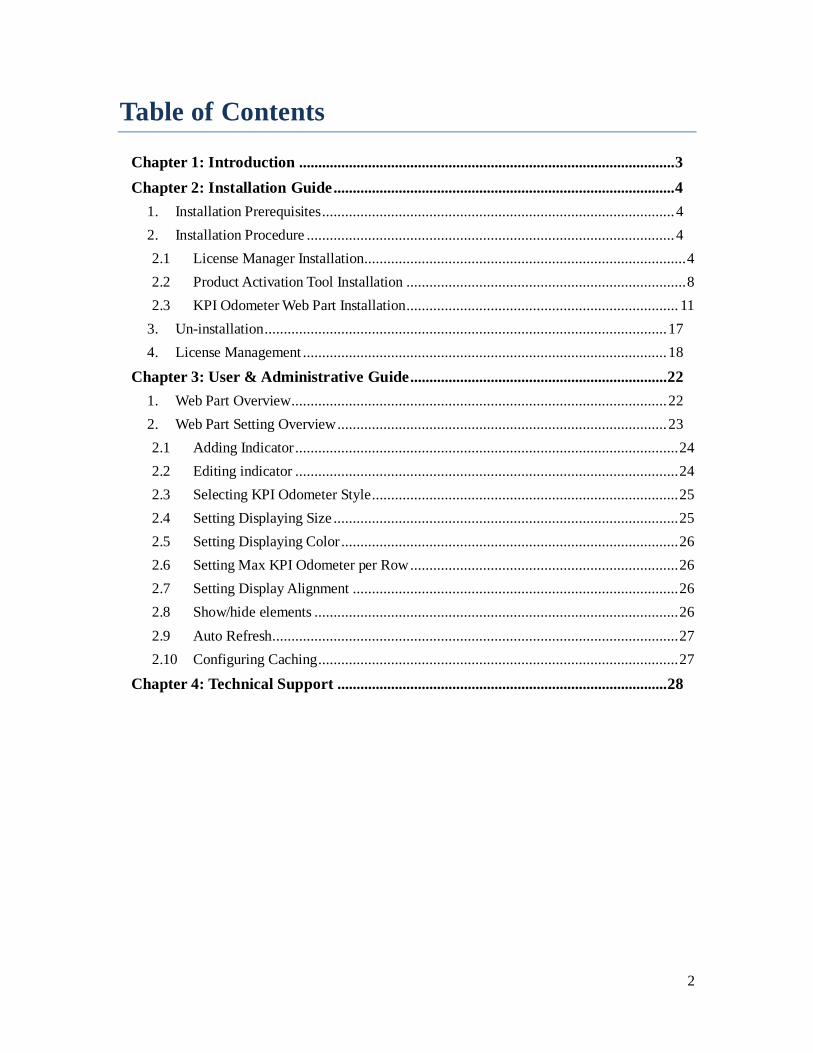
Table of Contents
Chapter 1: Introduction .................................................................................................. 3
Chapter 2: Installation Guide ......................................................................................... 4
1. Installation Prerequisites ............................................................................................ 4
2. Installation Procedure ................................................................................................ 4
2.1 License Manager Installation .................................................................................... 4
2.2 Product Activation Tool Installation ......................................................................... 8
2.3 KPI Odometer Web Part Installation ....................................................................... 11
3. Un-installation ......................................................................................................... 17
4. License Management ............................................................................................... 18
Chapter 3: User & Administrative Guide ................................................................... 22
1. Web Part Overview .................................................................................................. 22
2. Web Part Setting Overview ...................................................................................... 23
2.1 Adding Indicator .................................................................................................... 24
2.2 Editing indicator .................................................................................................... 24
2.3 Selecting KPI Odometer Style ................................................................................ 25
2.4 Setting Displaying Size .......................................................................................... 25
2.5 Setting Displaying Color ........................................................................................ 26
2.6 Setting Max KPI Odometer per Row ...................................................................... 26
2.7 Setting Display Alignment ..................................................................................... 26
2.8 Show/hide elements ............................................................................................... 26
2.9 Auto Refresh .......................................................................................................... 27
2.10 Configuring Caching .............................................................................................. 27
Chapter 4: Technical Support ...................................................................................... 28
3
Chapter 1: Introduction
The FireArrow KPI Odometer Web Part enables you to display KPI data in a graphical way in
SharePoint. It visualizes KPI data through odometer styles with customizable display colors and flexible configurations. Key Feature List:
Display KPI data as KPI odometer
Provide two elegant display styles
Customizable display colors and size
Configurable Min/Max scale values for KPI data
Ability to manage KPI indicator source list
Ability to set the numbers of KPI odometers to be displayed horizontally
Adjust display alignment
Arrange display order of selected KPIs
Auto refresh using AJAX technology
Configurable auto-refresh time interval
Manual refresh using AJAX technology
Caching capability
Support SharePoint 2007&2010
Release Notes:
The latest product release is version 1.0.0.0
About This Guide:
This guide covers the information you need to install and use the KPI Odometer web part. It
walks you through the process of installing and activating the web part in your SharePoint
environment. In addition, it describes the configuration options and features provided by the web
part in detail.
4
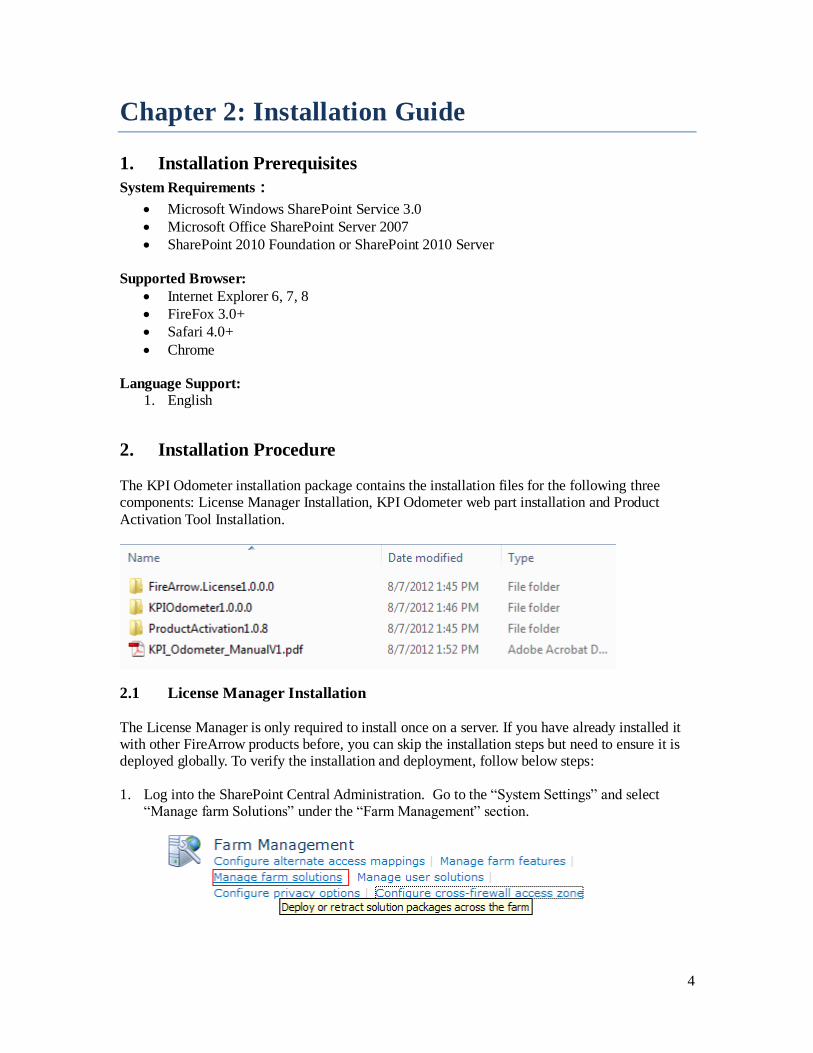
Chapter 2: Installation Guide
1. Installation Prerequisites
System Requirements:
Microsoft Windows SharePoint Service 3.0
Microsoft Office SharePoint Server 2007
SharePoint 2010 Foundation or SharePoint 2010 Server
Supported Browser:
Internet Explorer 6, 7, 8
FireFox 3.0+
Safari 4.0+
Chrome
Language Support:
1. English
2. Installation Procedure The KPI Odometer installation package contains the installation files for the following three components: License Manager Installation, KPI Odometer web part installation and Product
Activation Tool Installation.
2.1 License Manager Installation
The License Manager is only required to install once on a server. If you have already installed it with other FireArrow products before, you can skip the installation steps but need to ensure it is deployed globally. To verify the installation and deployment, follow below steps: 1. Log into the SharePoint Central Administration. Go to the “System Settings” and select
“Manage farm Solutions” under the “Farm Management” section.
5
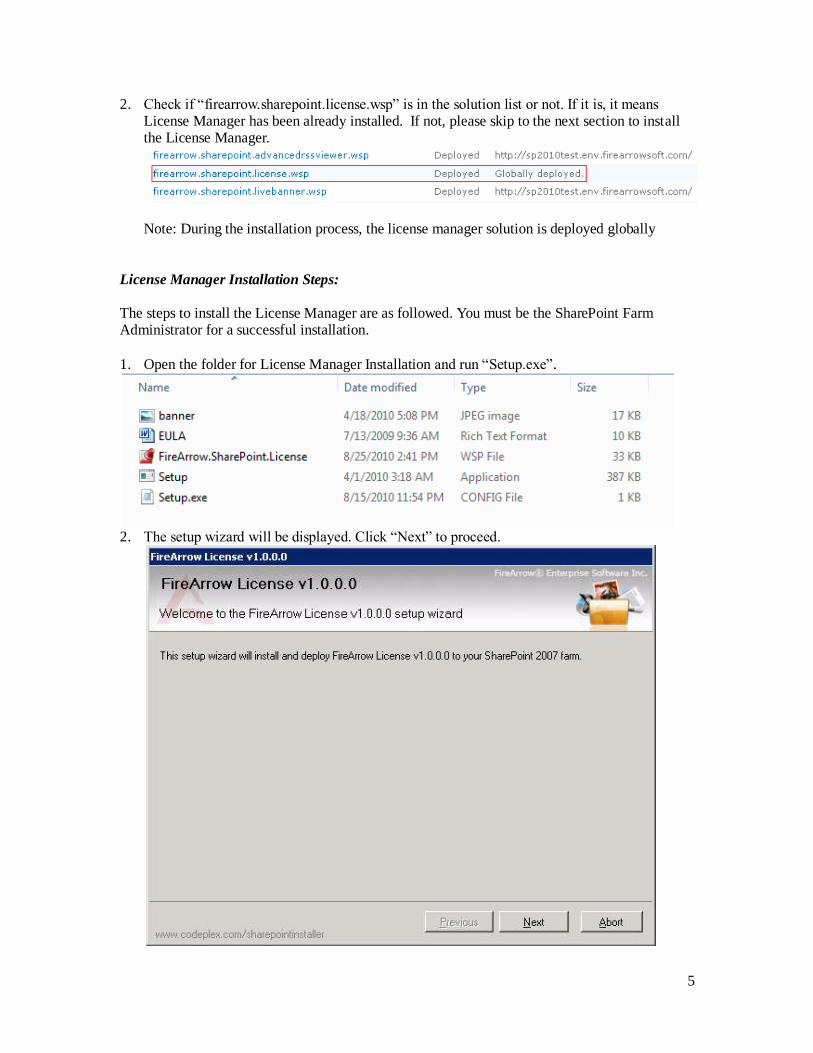
2. Check if “firearrow.sharepoint.license.wsp” is in the solution list or not. If it is, it means License Manager has been already installed. If not, please skip to the next section to install the License Manager.
Note: During the installation process, the license manager solution is deployed globally
License Manager Installation Steps:
The steps to install the License Manager are as followed. You must be the SharePoint Farm Administrator for a successful installation.
1. Open the folder for License Manager Installation and run “Setup.exe”.
2. The setup wizard will be displayed. Click “Next” to proceed.
6
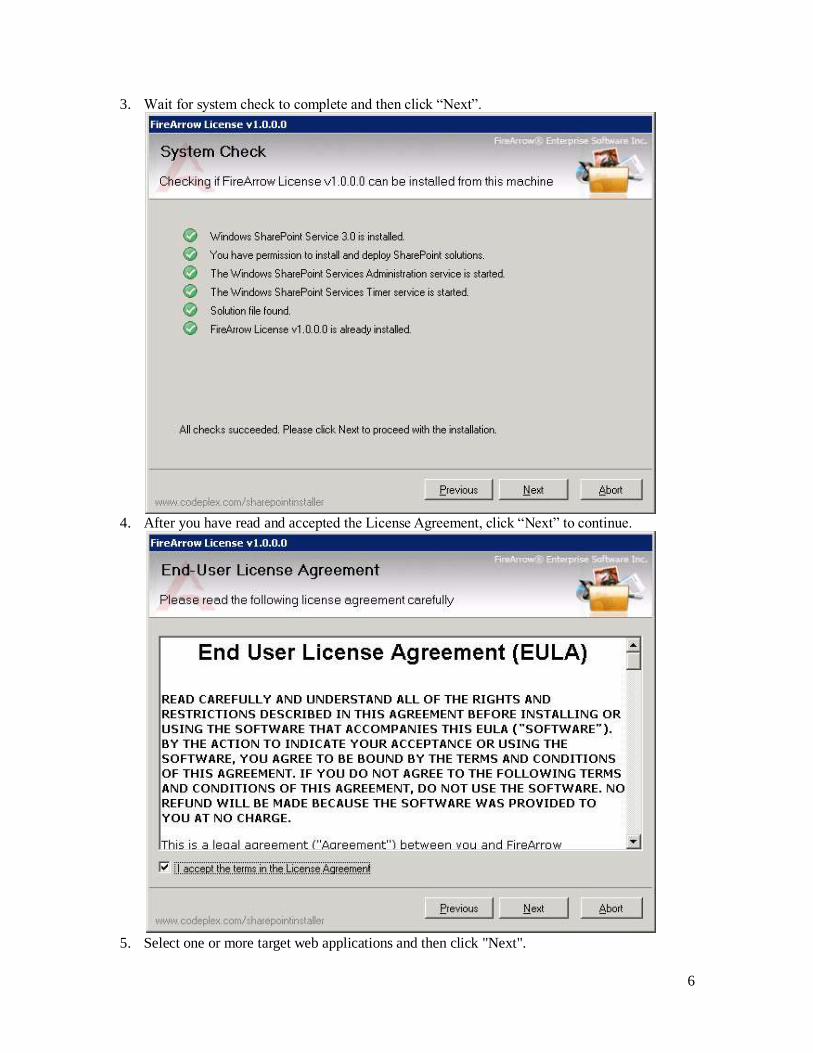
3. Wait for system check to complete and then click “Next”.
4. After you have read and accepted the License Agreement, click “Next” to continue.
5. Select one or more target web applications and then click "Next".
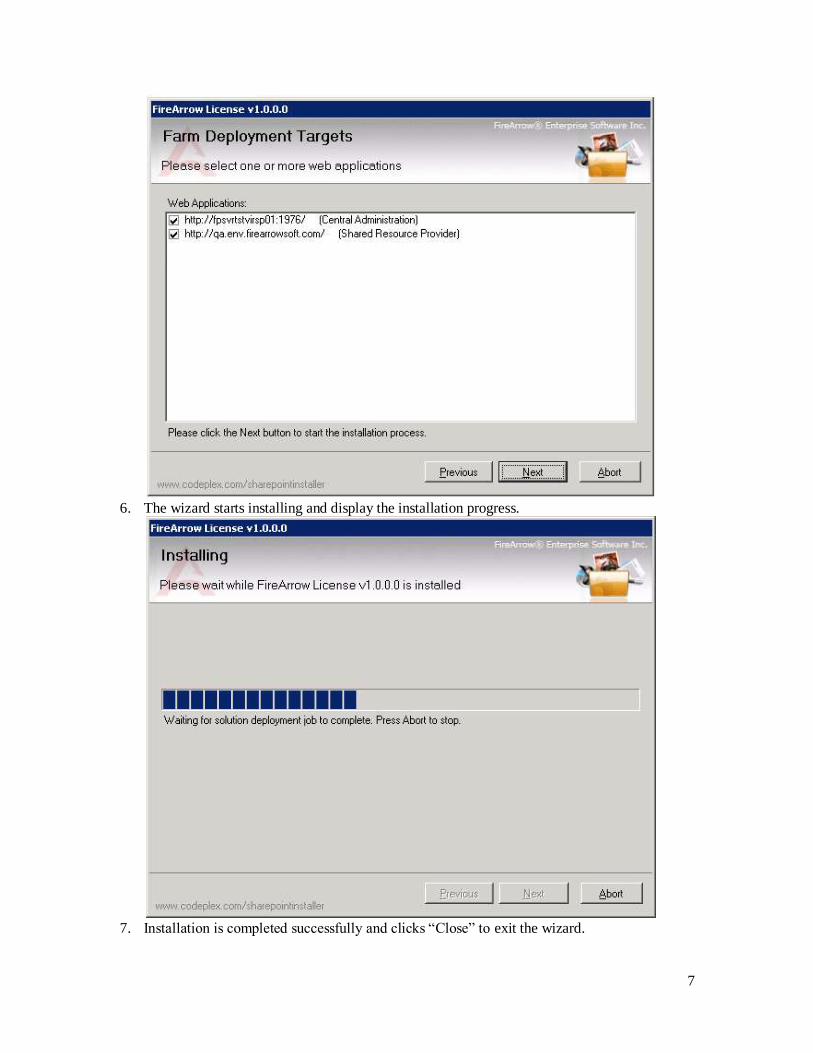
7
6. The wizard starts installing and display the installation progress.
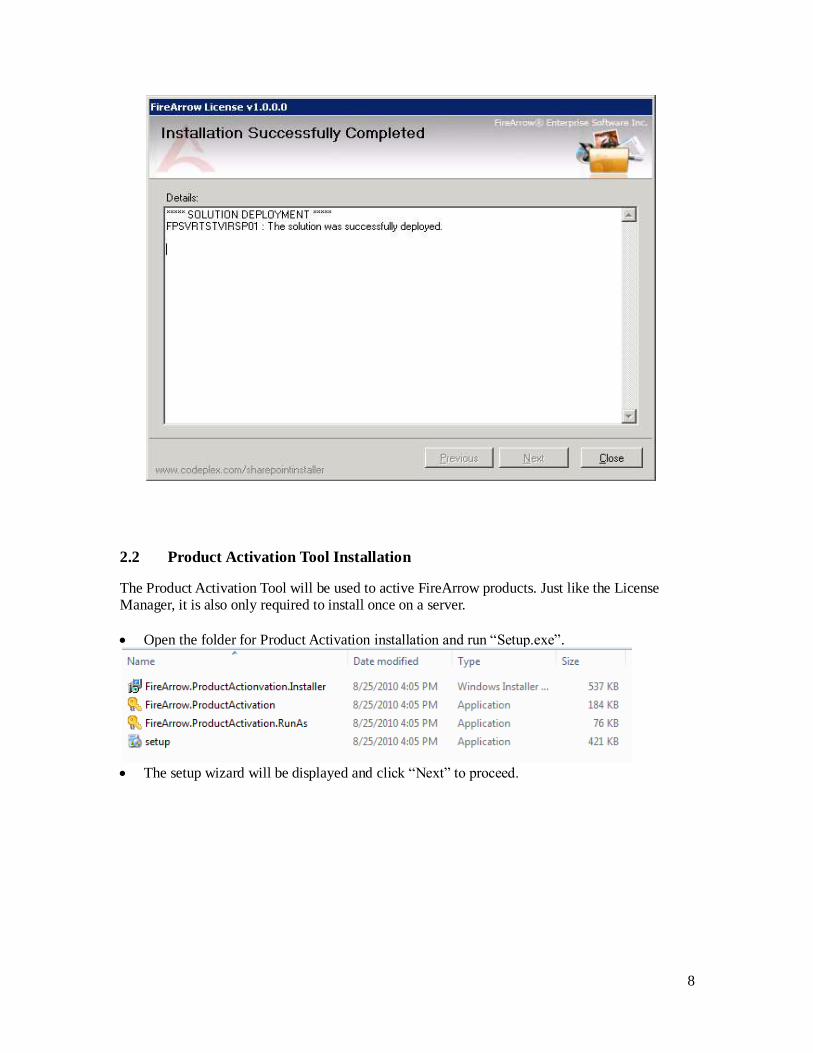
7. Installation is completed successfully and clicks “Close” to exit the wizard.
8
2.2 Product Activation Tool Installation
The Product Activation Tool will be used to active FireArrow products. Just like the License Manager, it is also only required to install once on a server.
Open the folder for Product Activation installation and run “Setup.exe”.
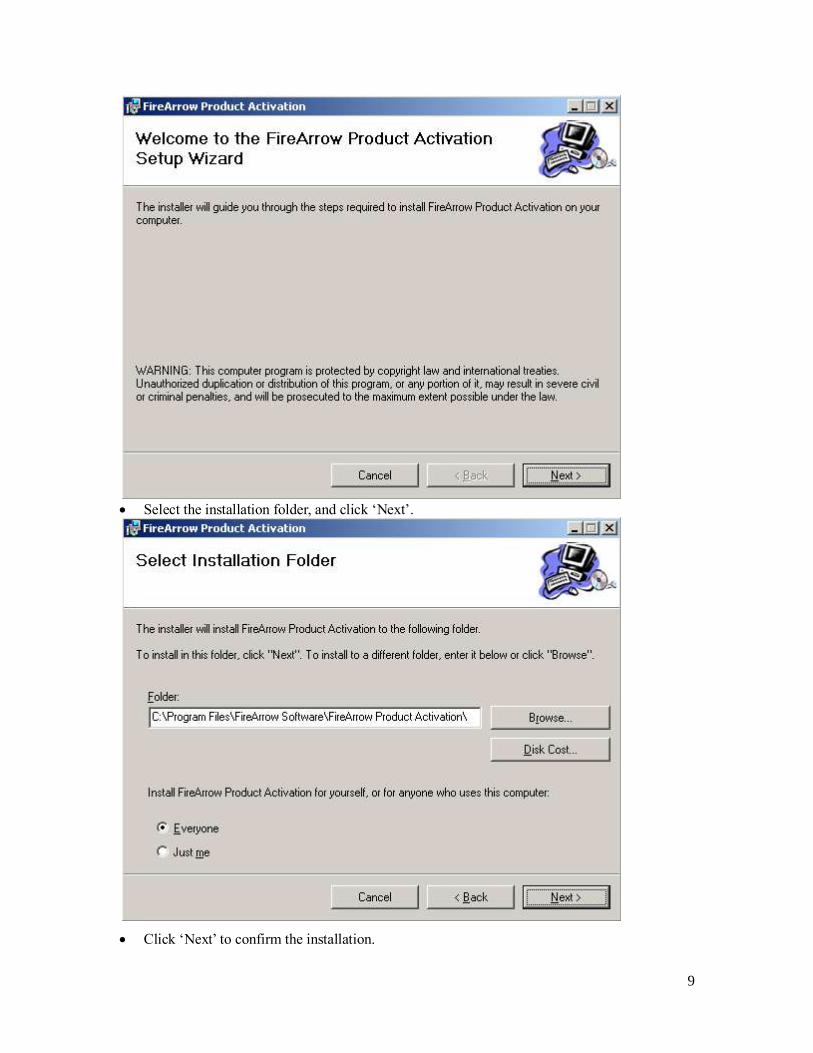
The setup wizard will be displayed and click “Next” to proceed.
9
Select the installation folder, and click ‘Next’.
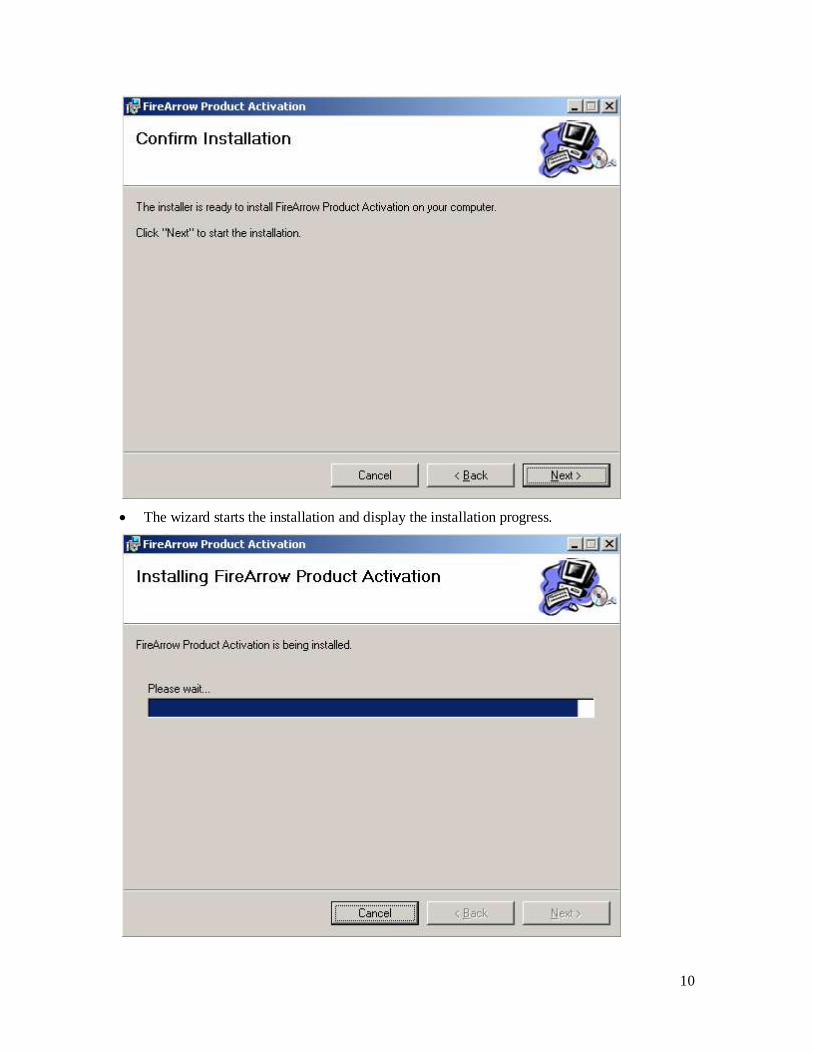
Click ‘Next’ to confirm the installation.
10
The wizard starts the installation and display the installation progress.

11
Installation is completed successfully and clicks “Close” to exit the wizard.
2.3 KPI Odometer Web Part Installation We provide two installation approaches for KPI Odometer web part installation. One is to use the
installation wizard for automatic installation. The other way is to use STSADM command tool for manual installation. This section describes both approaches in detail.
Automatic Installation Approach
The KPI Odometer installation package contains the installer file, solution package file, image, and etc. You must be the SharePoint Farm Administrator for a successful installation. Please follow the following steps for installation.
1. Open the folder for KPI Odometer installation and double click the “Setup.exe” to start the
installation.
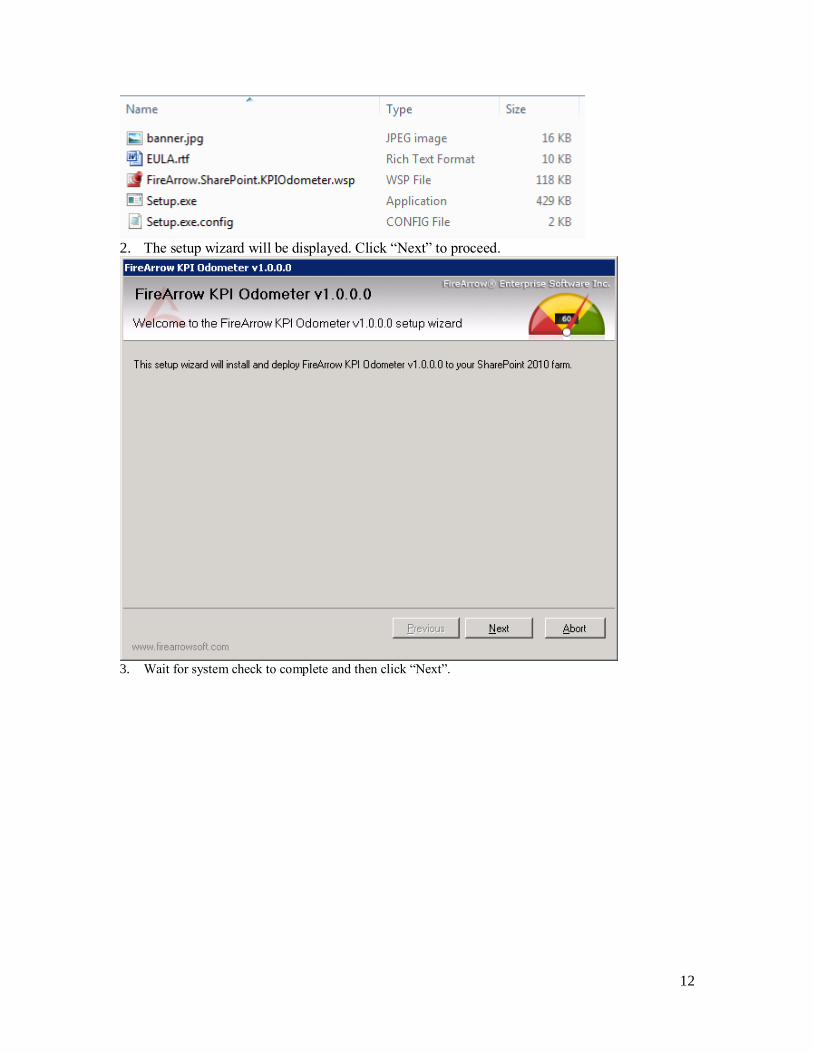
12
2. The setup wizard will be displayed. Click “Next” to proceed.
3. Wait for system check to complete and then click “Next”.
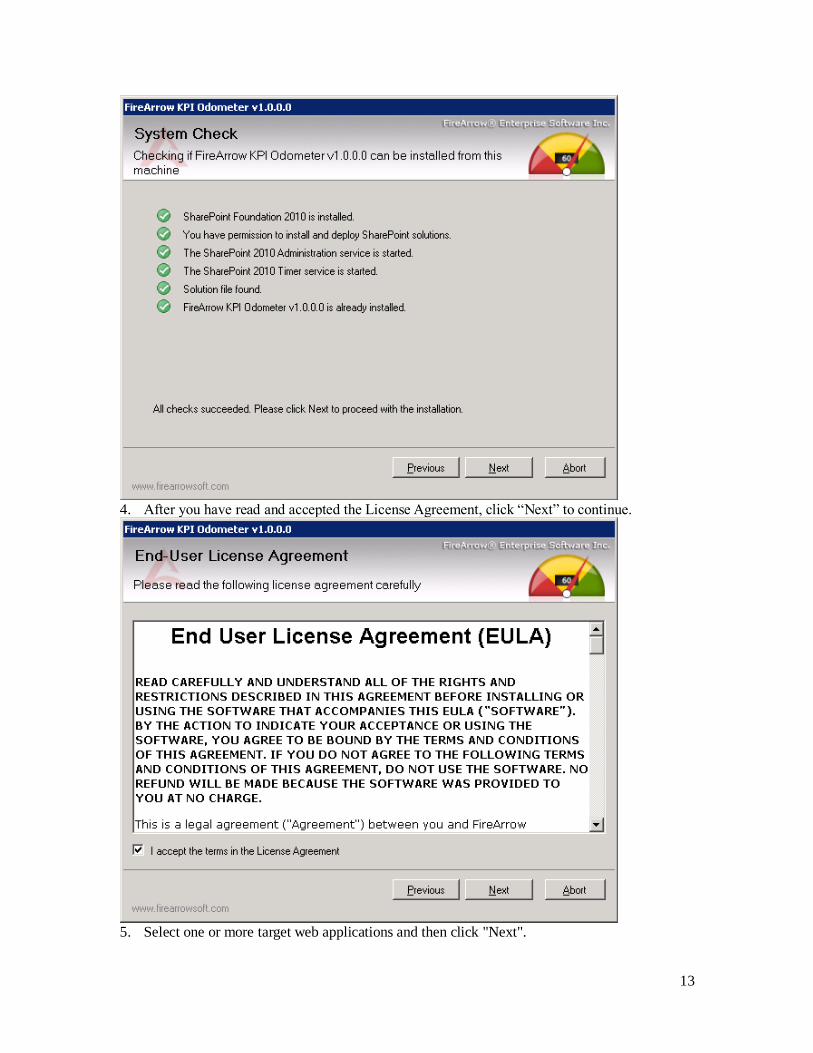
13
4. After you have read and accepted the License Agreement, click “Next” to continue.
5. Select one or more target web applications and then click "Next".
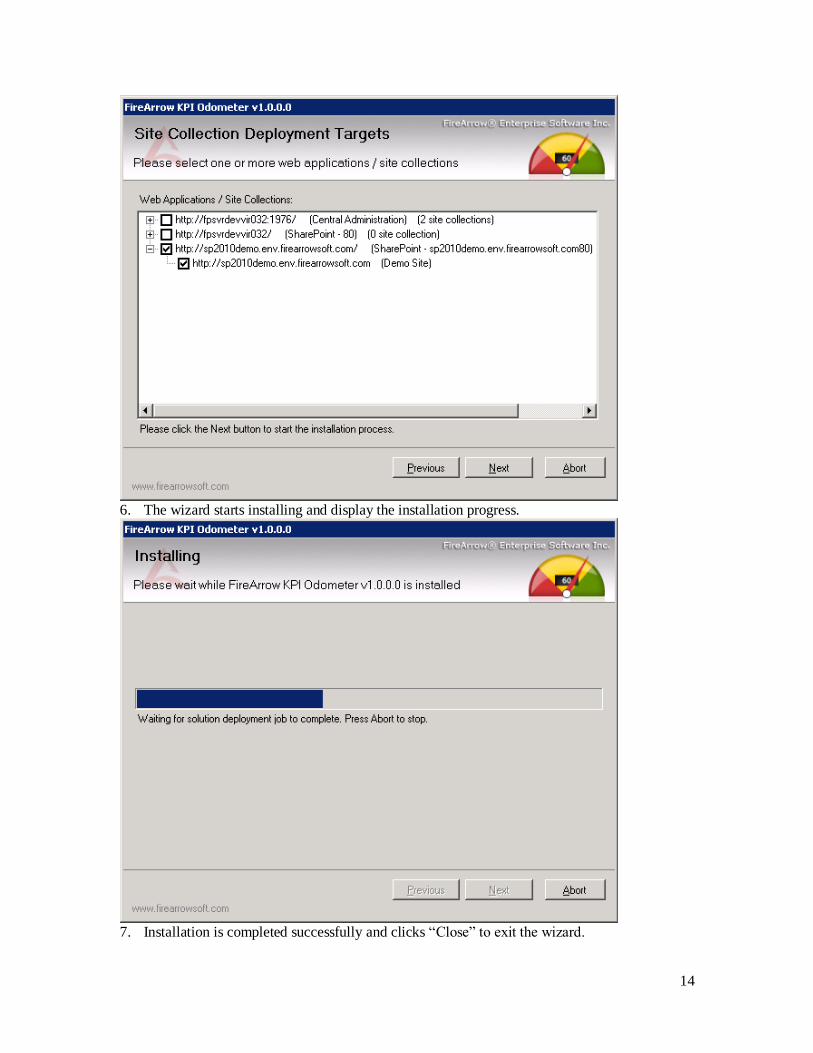
14
6. The wizard starts installing and display the installation progress.
7. Installation is completed successfully and clicks “Close” to exit the wizard.
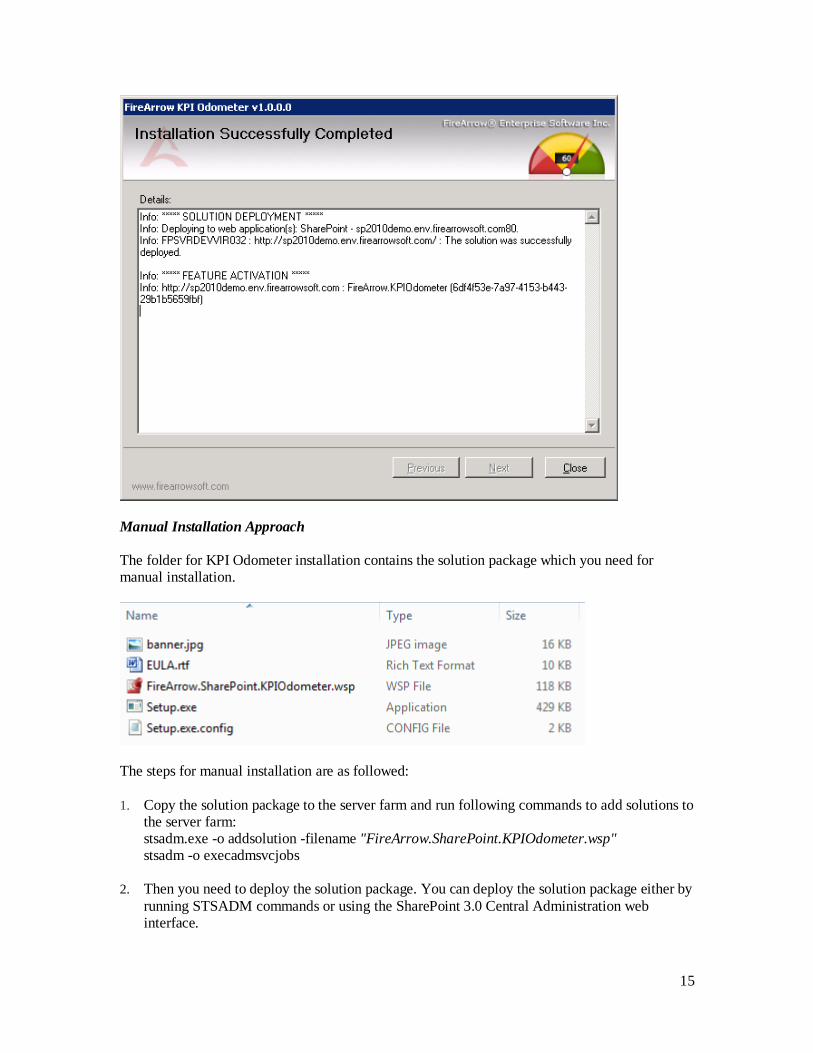
15
Manual Installation Approach
The folder for KPI Odometer installation contains the solution package which you need for manual installation.
The steps for manual installation are as followed:
1. Copy the solution package to the server farm and run following commands to add solutions to
the server farm: stsadm.exe -o addsolution -filename "FireArrow.SharePoint.KPIOdometer.wsp" stsadm -o execadmsvcjobs
2. Then you need to deploy the solution package. You can deploy the solution package either by
running STSADM commands or using the SharePoint 3.0 Central Administration web interface.
16
8. Option 1: running STSADM commands You need to run the following two commands for solution deployment:
1) stsadm -o deploysolution -name "FireArrow.SharePoint.KPIOdometer.wsp" -immediate -url http://qa.test.FireArrowsoft.com -force -allowCasPolicies
Note: replace the url (http://qa.test.firearrowsoft.com) with your target web application's url. 2) stsadm -o execadmsvcjobs
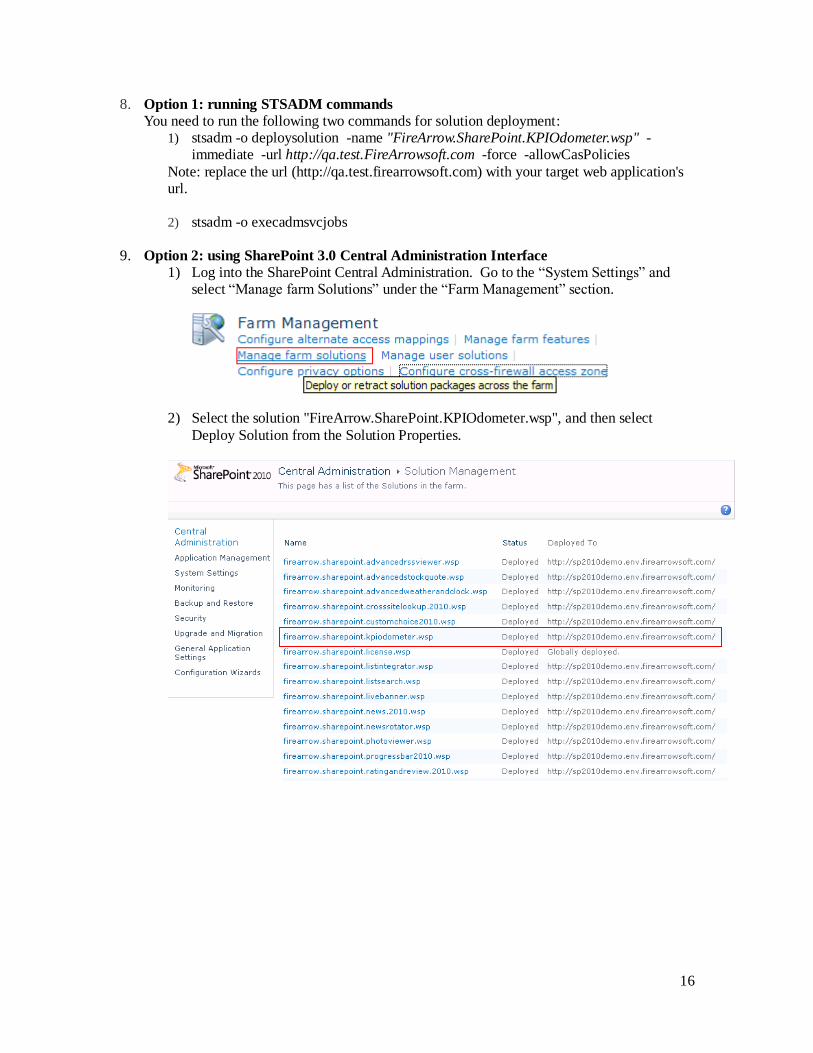
9. Option 2: using SharePoint 3.0 Central Administration Interface
1) Log into the SharePoint Central Administration. Go to the “System Settings” and select “Manage farm Solutions” under the “Farm Management” section.
2) Select the solution "FireArrow.SharePoint.KPIOdometer.wsp", and then select
Deploy Solution from the Solution Properties.
17
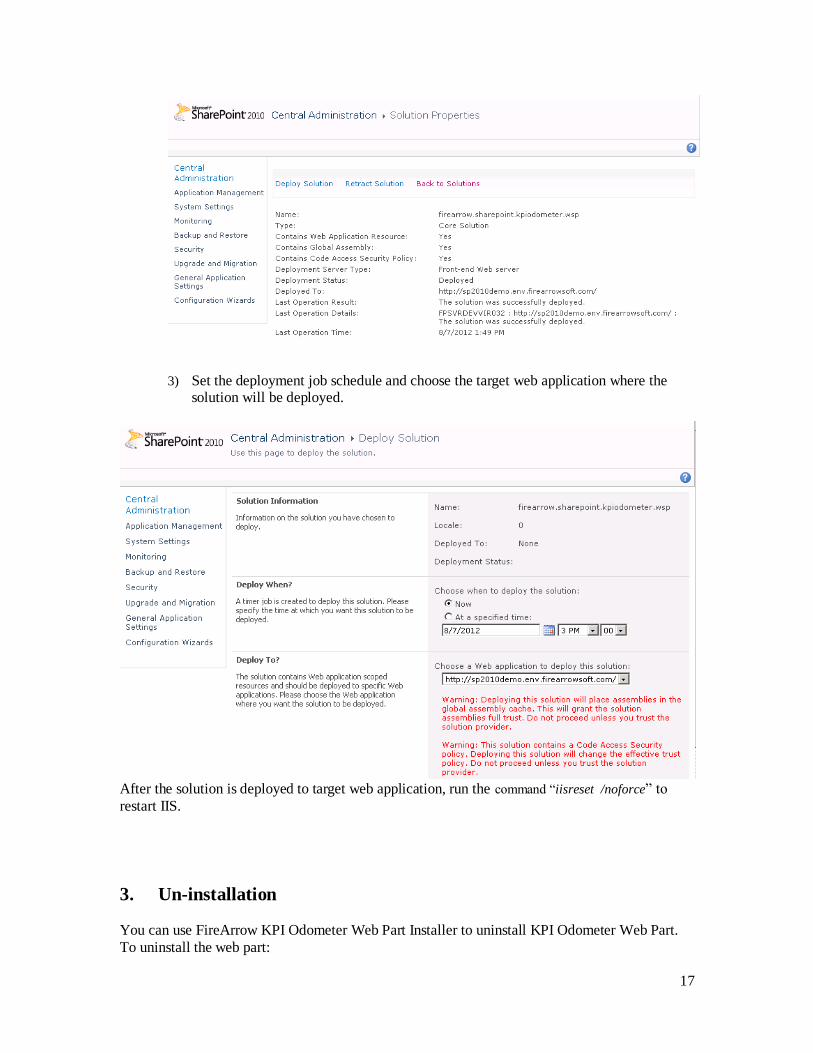
3) Set the deployment job schedule and choose the target web application where the solution will be deployed.
After the solution is deployed to target web application, run the command “iisreset /noforce” to
restart IIS.
3. Un-installation You can use FireArrow KPI Odometer Web Part Installer to uninstall KPI Odometer Web Part.
To uninstall the web part:
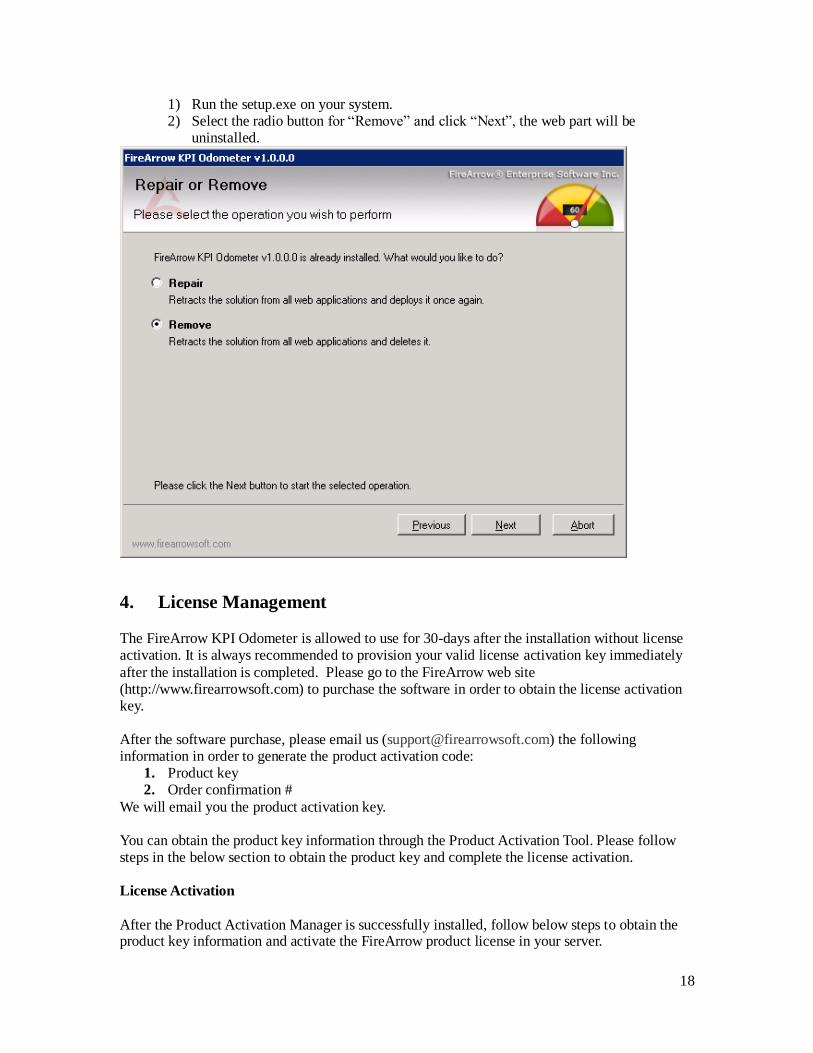
18
1) Run the setup.exe on your system. 2) Select the radio button for “Remove” and click “Next”, the web part will be
uninstalled.
4. License Management The FireArrow KPI Odometer is allowed to use for 30-days after the installation without license activation. It is always recommended to provision your valid license activation key immediately
after the installation is completed. Please go to the FireArrow web site (http://www.firearrowsoft.com) to purchase the software in order to obtain the license activation key. After the software purchase, please email us ([email protected]) the following information in order to generate the product activation code:
1. Product key
2. Order confirmation #
We will email you the product activation key. You can obtain the product key information through the Product Activation Tool. Please follow steps in the below section to obtain the product key and complete the license activation. License Activation
After the Product Activation Manager is successfully installed, follow below steps to obtain the product key information and activate the FireArrow product license in your server.
19
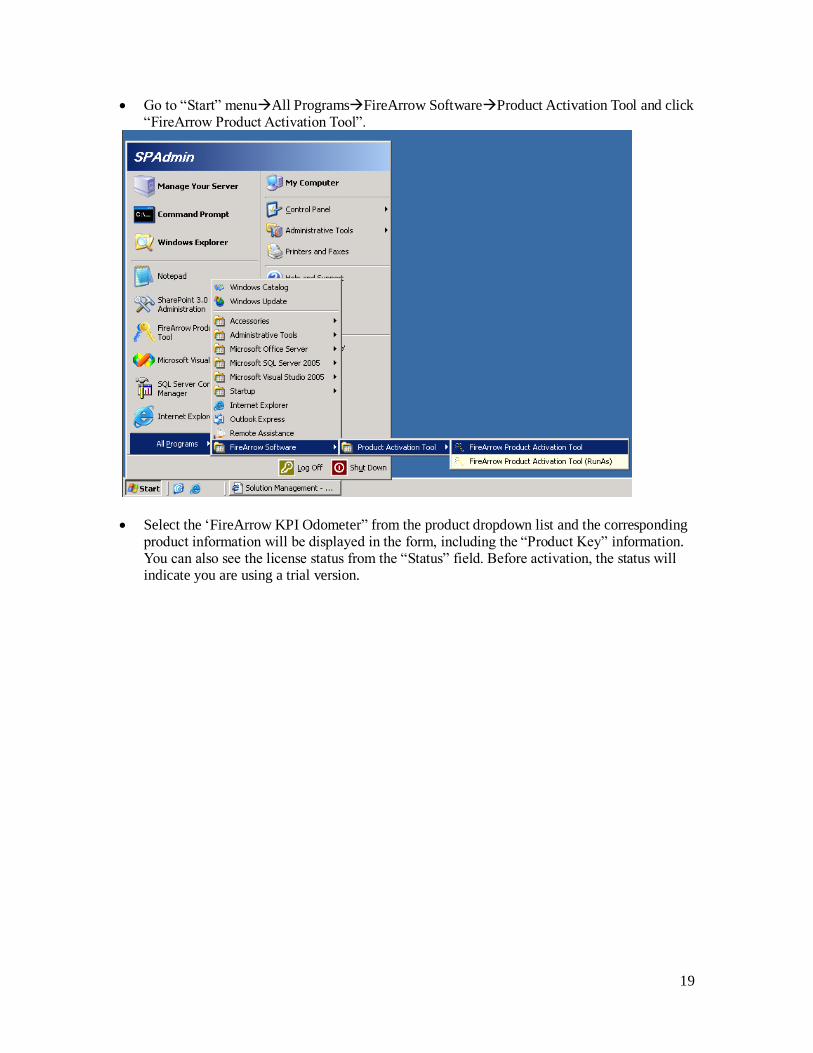
Go to “Start” menuAll ProgramsFireArrow SoftwareProduct Activation Tool and click “FireArrow Product Activation Tool”.
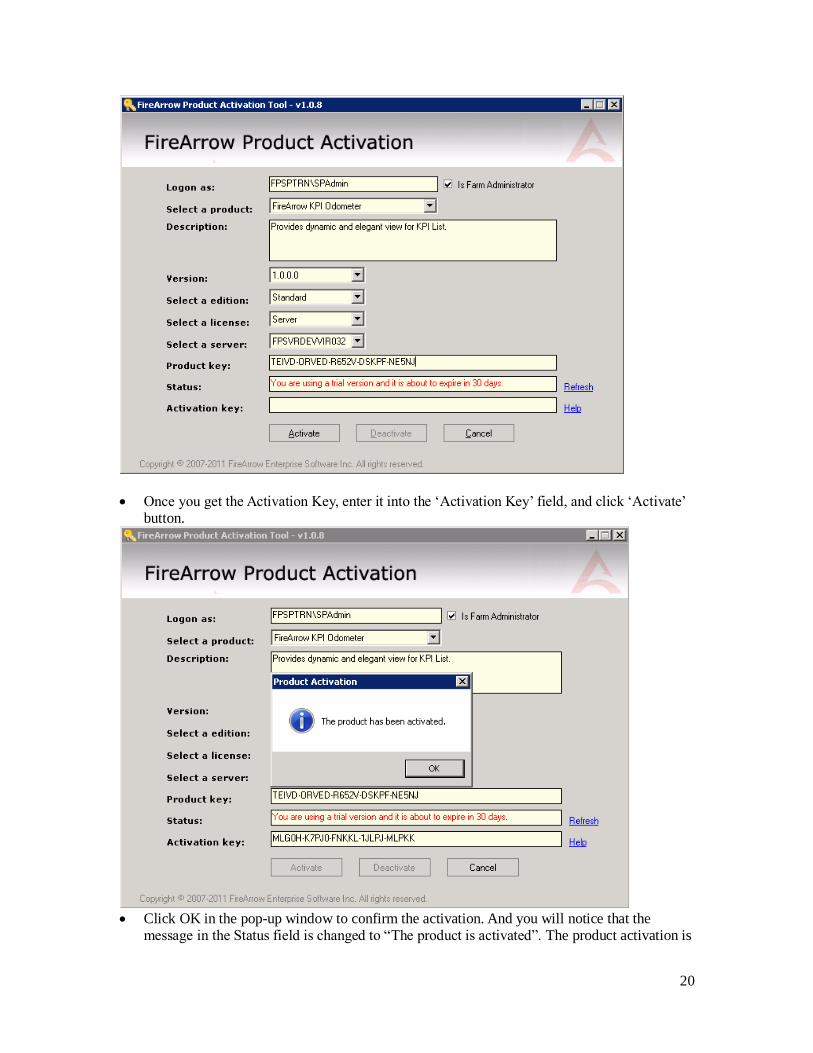
Select the ‘FireArrow KPI Odometer” from the product dropdown list and the corresponding product information will be displayed in the form, including the “Product Key” information. You can also see the license status from the “Status” field. Before activation, the status will indicate you are using a trial version.
20
Once you get the Activation Key, enter it into the ‘Activation Key’ field, and click ‘Activate’ button.
Click OK in the pop-up window to confirm the activation. And you will notice that the
message in the Status field is changed to “The product is activated”. The product activation is
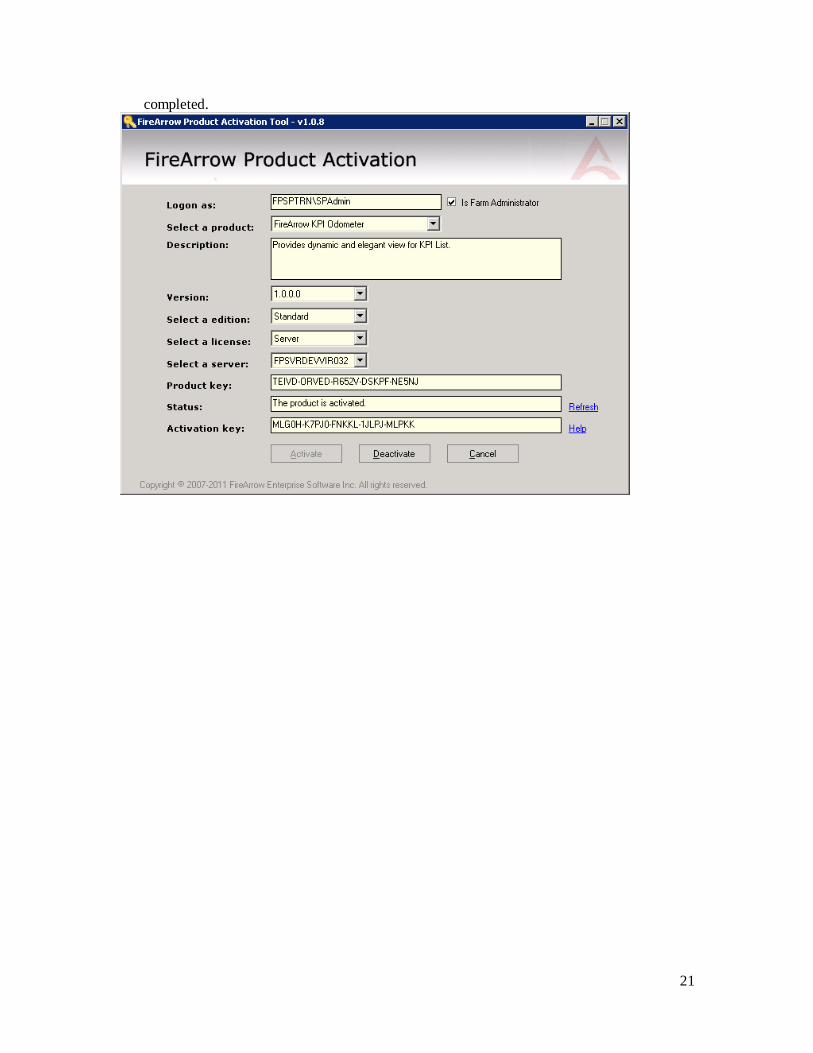
21
completed.
22
Chapter 3: User & Administrative Guide
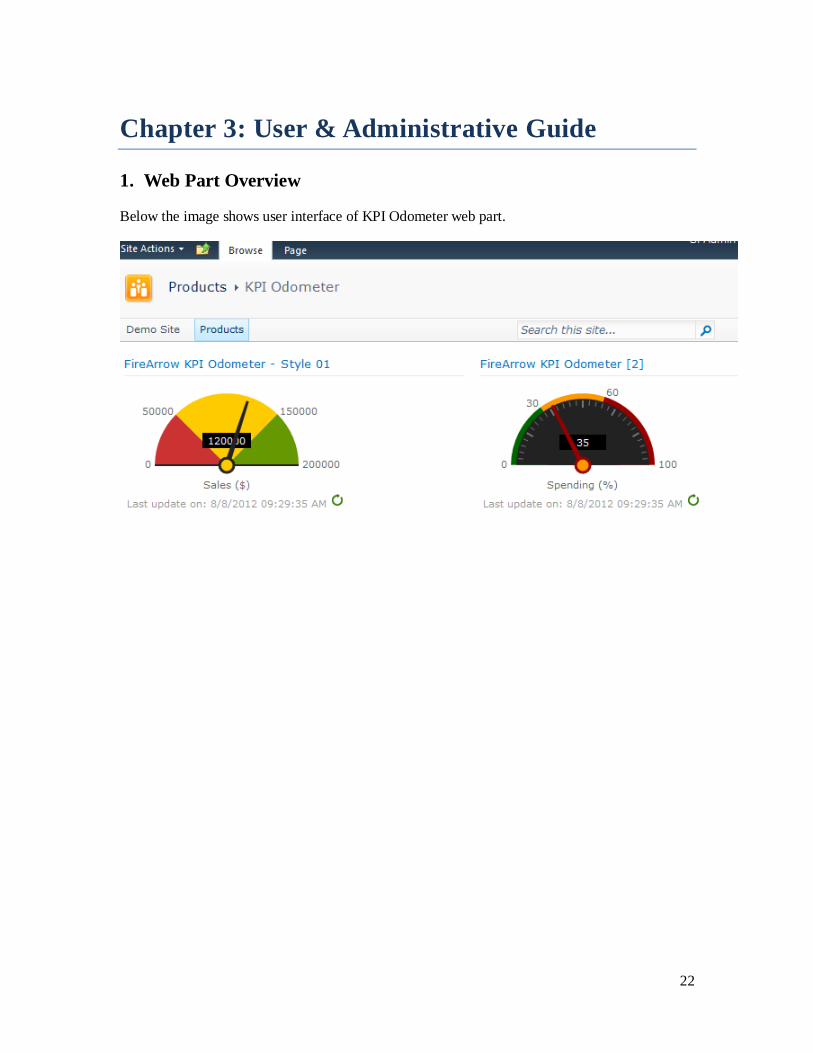
1. Web Part Overview Below the image shows user interface of KPI Odometer web part.
23
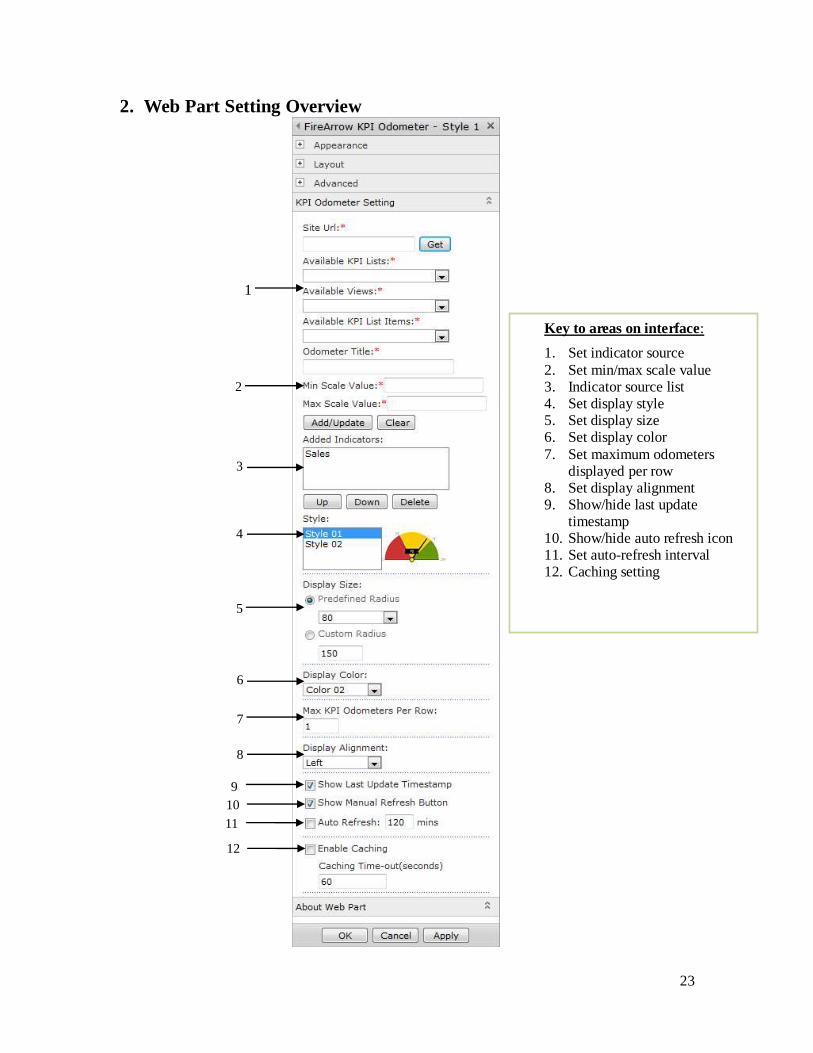
2. Web Part Setting Overview
9
1
Key to areas on interface:
1. Set indicator source
2. Set min/max scale value 3. Indicator source list 4. Set display style 5. Set display size 6. Set display color
7. Set maximum odometers displayed per row
8. Set display alignment 9. Show/hide last update
timestamp 10. Show/hide auto refresh icon 11. Set auto-refresh interval 12. Caching setting
2
3
4
5
6
7
8
11
10
12
24
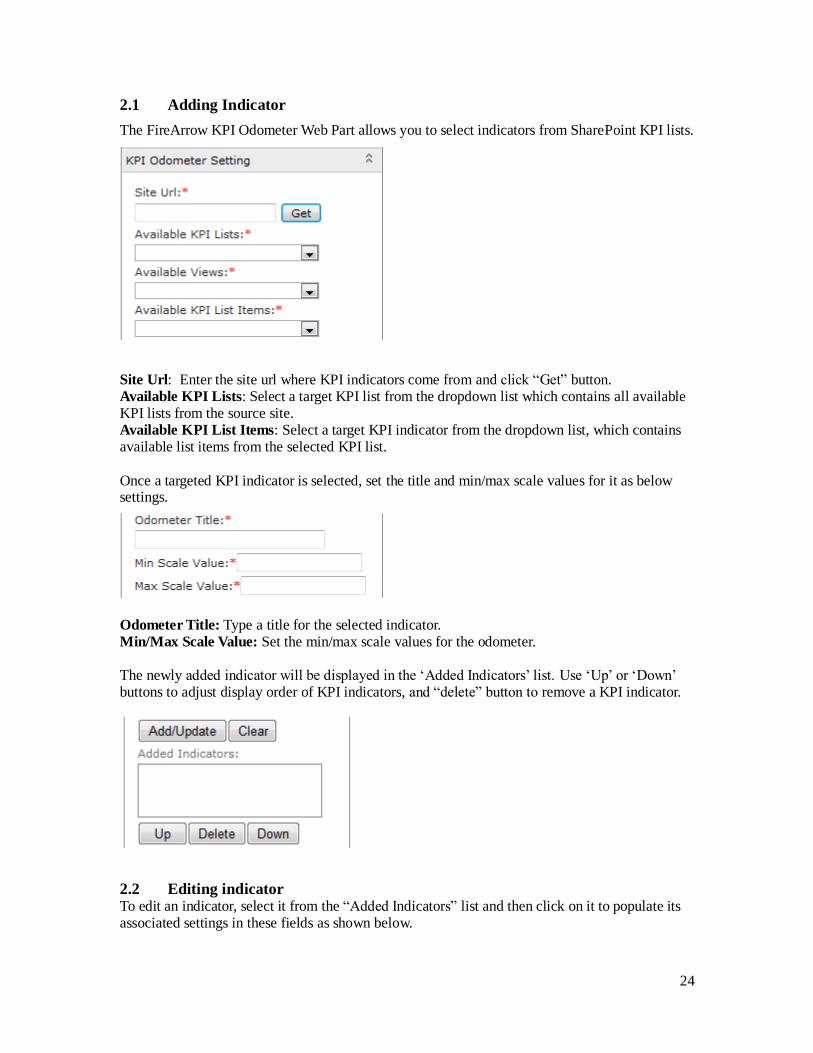
2.1 Adding Indicator
The FireArrow KPI Odometer Web Part allows you to select indicators from SharePoint KPI lists.
Site Url: Enter the site url where KPI indicators come from and click “Get” button. Available KPI Lists: Select a target KPI list from the dropdown list which contains all available KPI lists from the source site. Available KPI List Items: Select a target KPI indicator from the dropdown list, which contains available list items from the selected KPI list.
Once a targeted KPI indicator is selected, set the title and min/max scale values for it as below settings.
Odometer Title: Type a title for the selected indicator. Min/Max Scale Value: Set the min/max scale values for the odometer.
The newly added indicator will be displayed in the ‘Added Indicators’ list. Use ‘Up’ or ‘Down’ buttons to adjust display order of KPI indicators, and “delete” button to remove a KPI indicator.
2.2 Editing indicator To edit an indicator, select it from the “Added Indicators” list and then click on it to populate its associated settings in these fields as shown below.
25
Once editing is finished, click on ‘Add/Update’ button to save changes. Note: If the title of a KPI indicator is changed, clicking on ‘add/update’ button will add a new KPI indicator to the source list instead of updating the existing one.
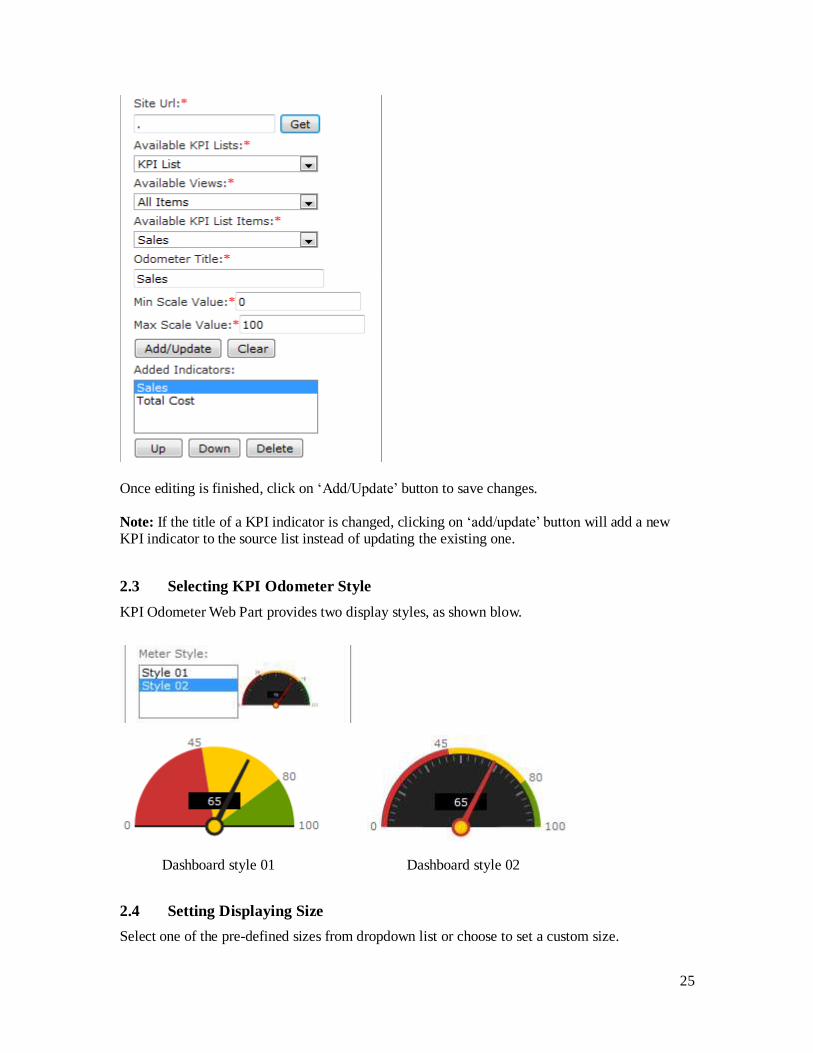
2.3 Selecting KPI Odometer Style
KPI Odometer Web Part provides two display styles, as shown blow.
2.4 Setting Displaying Size
Select one of the pre-defined sizes from dropdown list or choose to set a custom size.
Dashboard style 01 Dashboard style 02
26
.
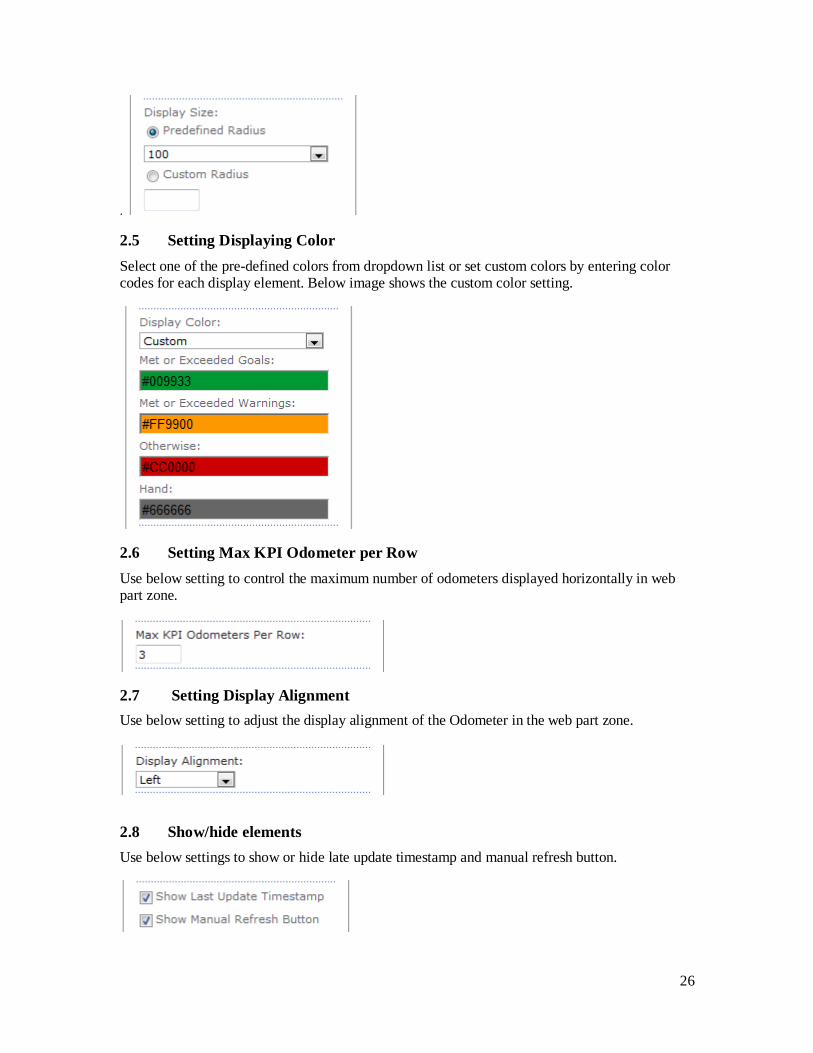
2.5 Setting Displaying Color
Select one of the pre-defined colors from dropdown list or set custom colors by entering color codes for each display element. Below image shows the custom color setting.
2.6 Setting Max KPI Odometer per Row
Use below setting to control the maximum number of odometers displayed horizontally in web part zone.
2.7 Setting Display Alignment
Use below setting to adjust the display alignment of the Odometer in the web part zone.
2.8 Show/hide elements
Use below settings to show or hide late update timestamp and manual refresh button.
27
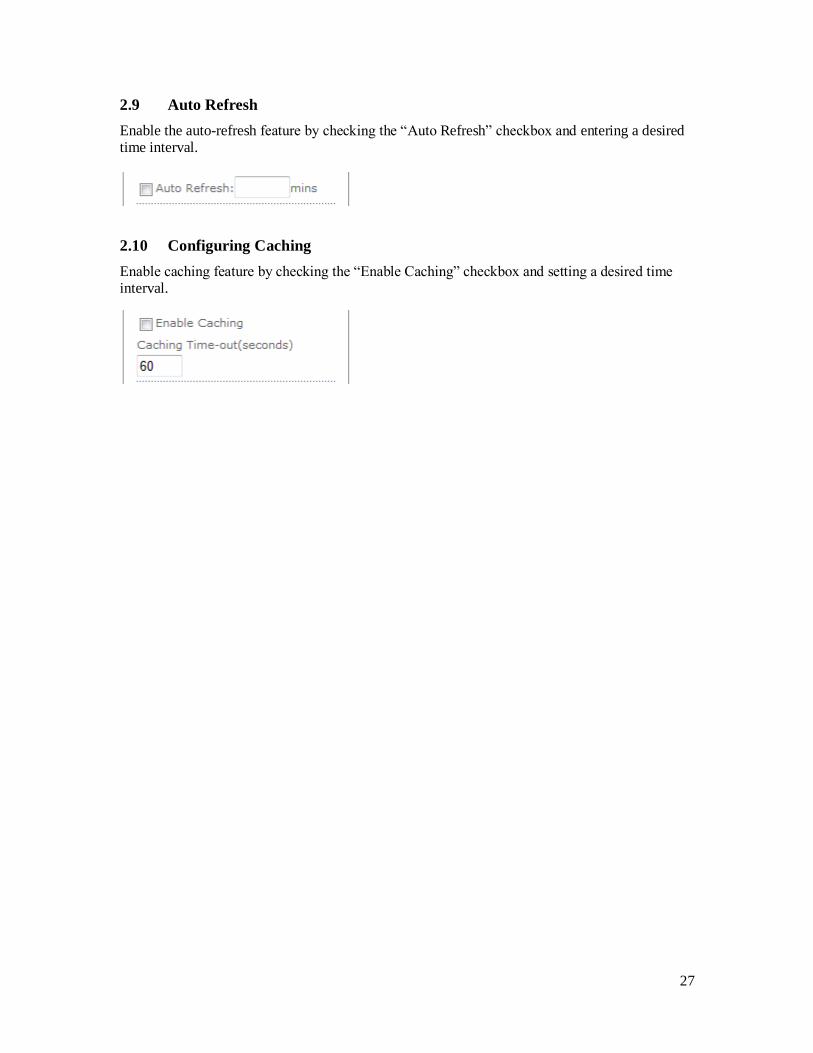
2.9 Auto Refresh
Enable the auto-refresh feature by checking the “Auto Refresh” checkbox and entering a desired time interval.
2.10 Configuring Caching
Enable caching feature by checking the “Enable Caching” checkbox and setting a desired time interval.

28
Chapter 4: Technical Support
Please feel free to contact our technical support team if you have any question or encounter any
technical difficulty. Technical Support: [email protected] Please visit our web site (http://www.firearrowsoft.com) for any product update and answers to frequently asked questions.