Embed Size (px)
Citation preview
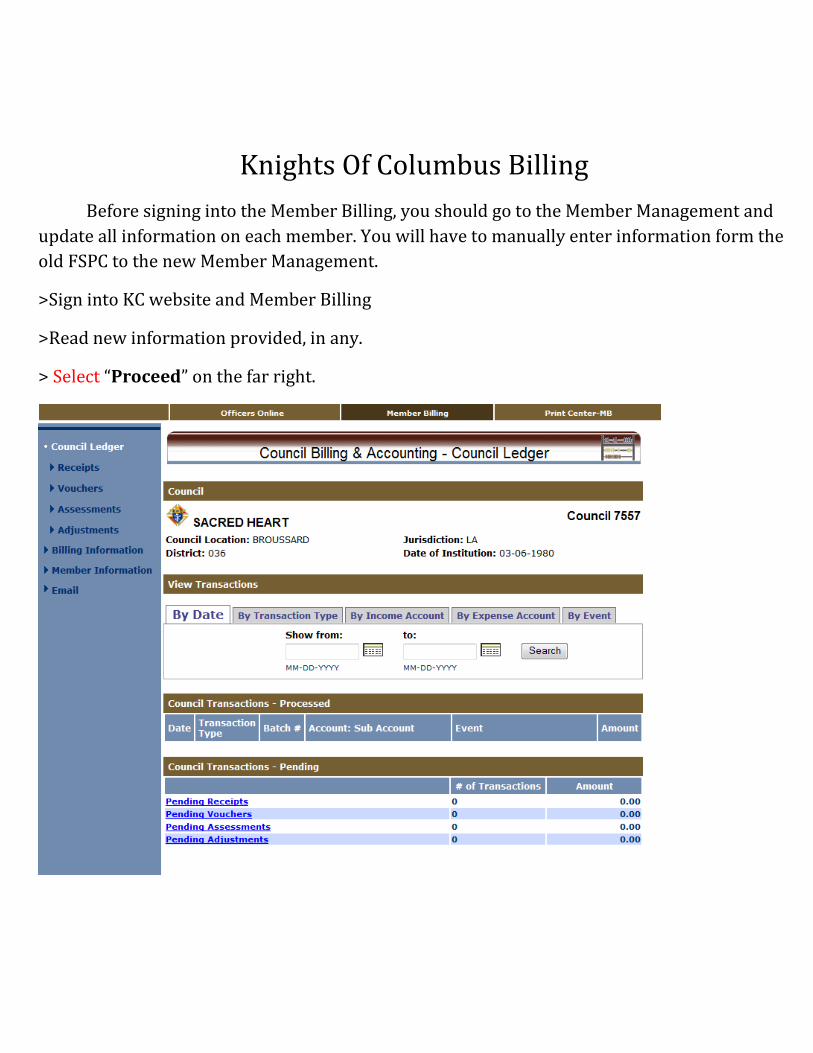
Knights Of Columbus Billing
Before signing into the Member Billing, you should go to the Member Management and
update all information on each member. You will have to manually enter information form the
old FSPC to the new Member Management.
>Sign into KC website and Member Billing
>Read new information provided, in any.
> Select “Proceed” on the far right.
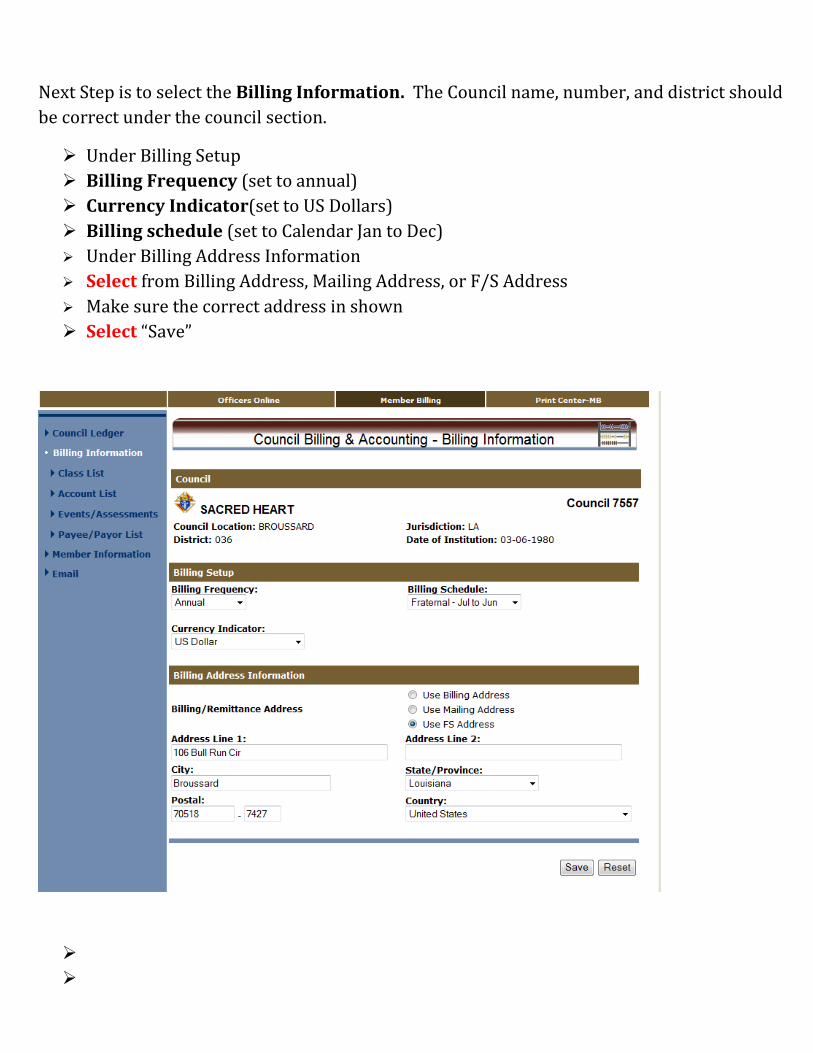
Next Step is to select the Billing Information. The Council name, number, and district should
be correct under the council section.
Under Billing Setup
Billing Frequency (set to annual)
Currency Indicator(set to US Dollars)
Billing schedule (set to Calendar Jan to Dec)
Under Billing Address Information
Select from Billing Address, Mailing Address, or F/S Address
Make sure the correct address in shown
Select “Save”
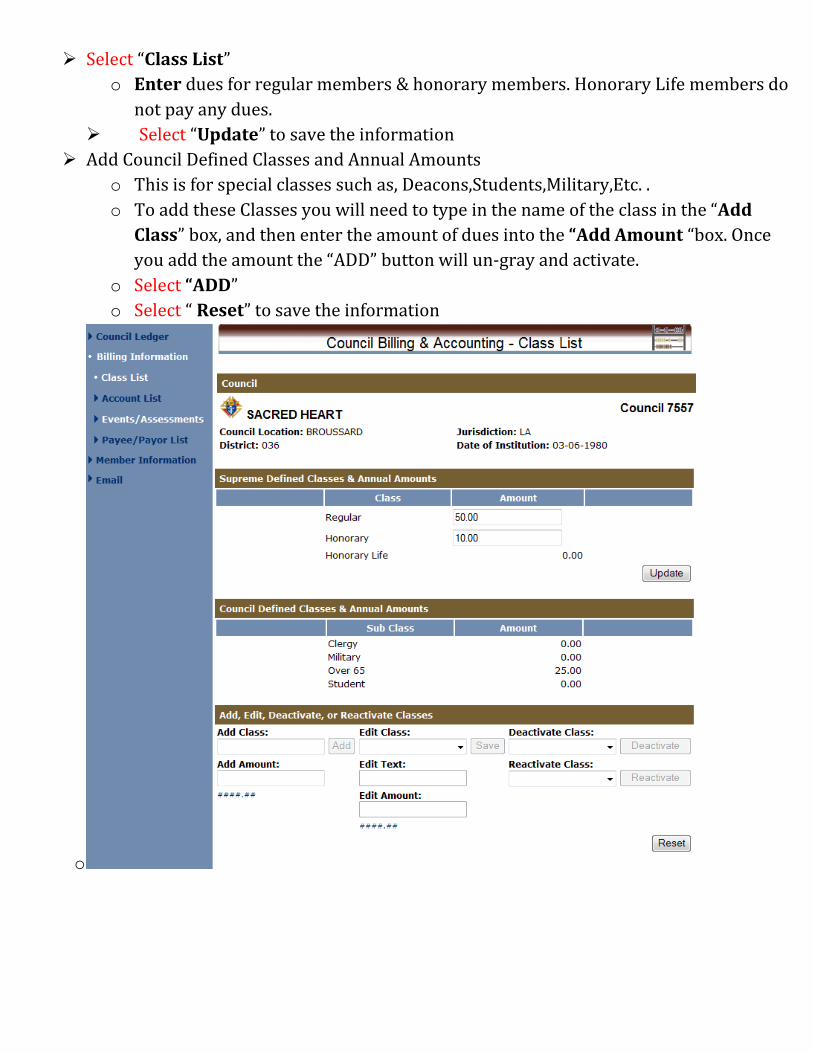
Select “Class List”
o Enter dues for regular members & honorary members. Honorary Life members do
not pay any dues.
Select “Update” to save the information
Add Council Defined Classes and Annual Amounts
o This is for special classes such as, Deacons,Students,Military,Etc. .
o To add these Classes you will need to type in the name of the class in the “Add
Class” box, and then enter the amount of dues into the “Add Amount “box. Once
you add the amount the “ADD” button will un-gray and activate.
o Select “ADD”
o Select “ Reset” to save the information
o
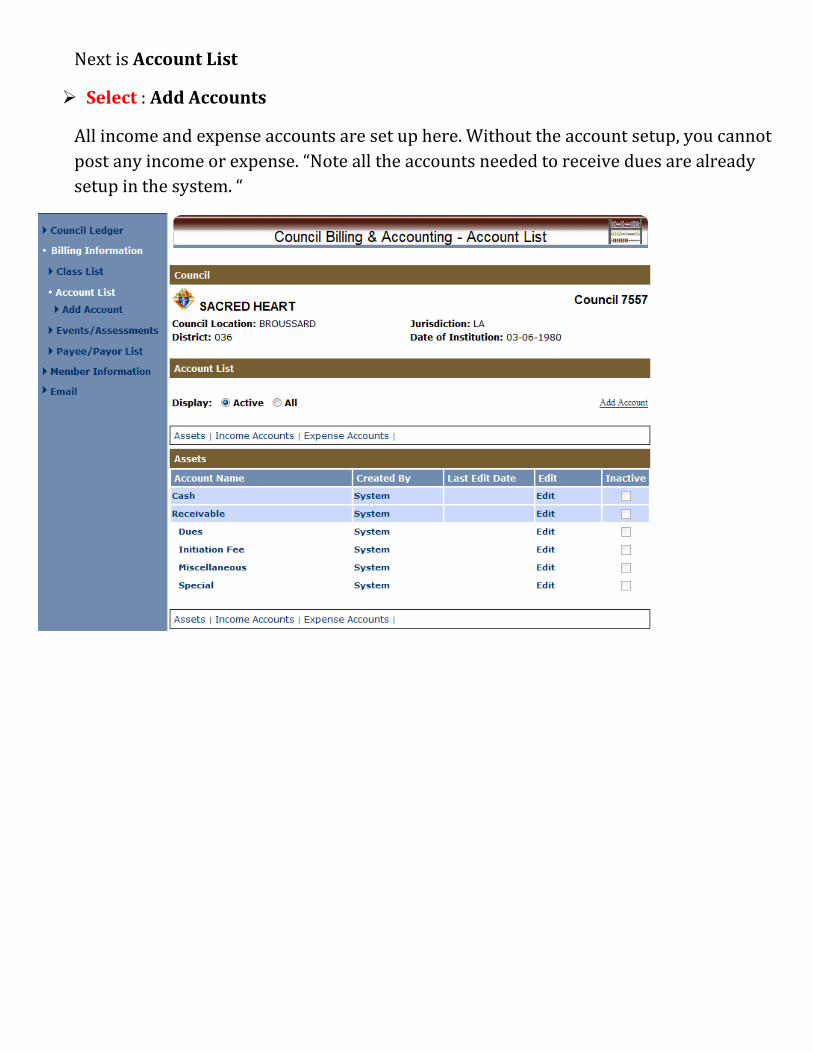
Next is Account List
Select : Add Accounts
All income and expense accounts are set up here. Without the account setup, you cannot
post any income or expense. “Note all the accounts needed to receive dues are already
setup in the system. “

Add Account screen
Make sure to Select “ Save Account” to save the information entered
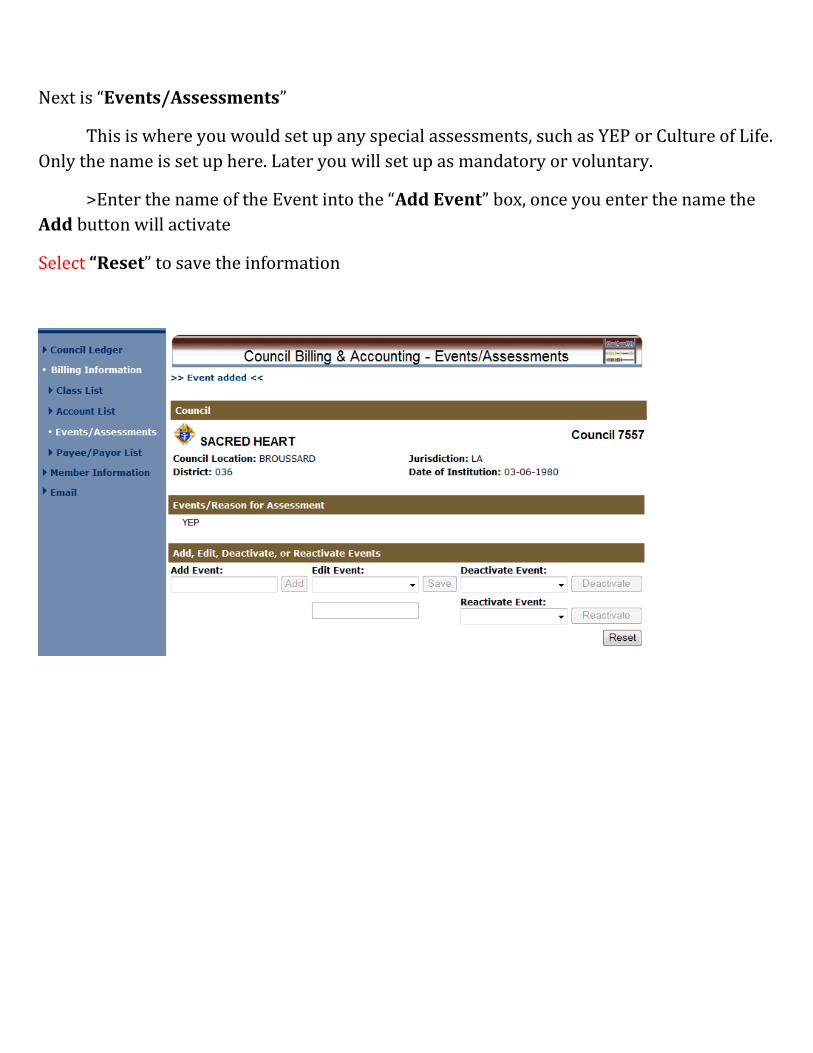
Next is “Events/Assessments”
This is where you would set up any special assessments, such as YEP or Culture of Life.
Only the name is set up here. Later you will set up as mandatory or voluntary.
>Enter the name of the Event into the “Add Event” box, once you enter the name the
Add button will activate
Select “Reset” to save the information

To Assess Dues
Select “Council Ledger”
Select “ Assessments”
o Billing Period should be correct. Enter the as of Date (usually December 15 of the
current year.)
Select “Assess Dues “
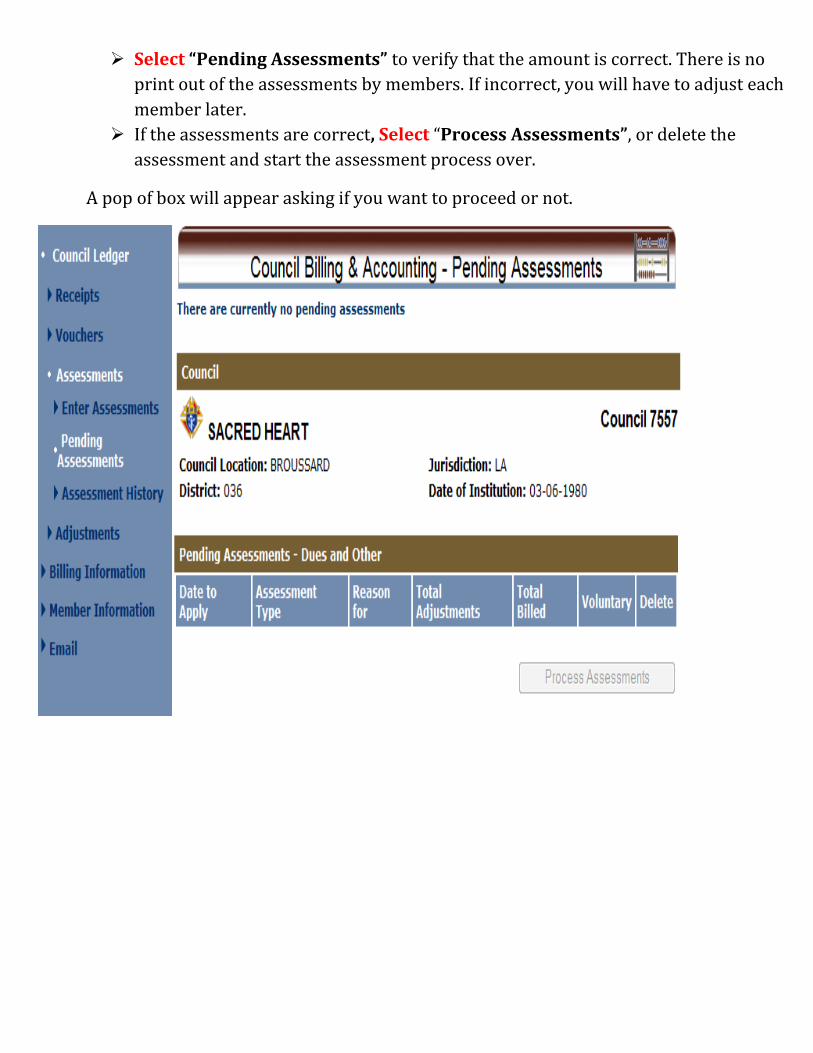
Select “Pending Assessments” to verify that the amount is correct. There is no
print out of the assessments by members. If incorrect, you will have to adjust each
member later.
If the assessments are correct, Select “Process Assessments”, or delete the
assessment and start the assessment process over.
A pop of box will appear asking if you want to proceed or not.

Go back to “Enter Assessments”
“Asses Other” – Here you will set up the assessments on the other items. Each
assessment must be setup separately along with the dollar amount. Select which
group of members are to be assessed. Indicate whether it is Special or Misc.
Select the reason for the assessment and setup the dollar amount for each.
Indicate whether it is voluntary or mandatory.
If it is Voluntary enter a “Valid thru date”, after this date you will be able to adjust
member’s ledgers who have not paid these assessments.
Select “Asses Other” to assess these assessments.
Check “Pending Assessments” to verify that the correct amount has been
assessed.
Information on Deleting Voluntary Assessments
A Voluntary Assessment is a Special or Miscellaneous Assessment that is not mandatory for a
member to pay, When entering a Voluntary Assessment, you will need to enter a Valid
Through Date; after this date the Forgive process can be accomplished, which will provide a
credit transaction for any member that has not paid this assessment.
How to Adjust off a Voluntary Assessment
The process to adjust off a Voluntary Assessment for those members that did not pay the
assessment is called Forgiving an Assessment:
- Under the Council/Assembly Ledger section, click on Assessment link on the left menu.
- Click on Assessment History link under the Assessment section.
- Search by either date range or the type of the assessment. Once the search criteria has
been entered, click the Search button.
o + Click on either the date in the Valid thru Date column or the assessment type in
the Assessment Type column to go to the Assessment Details screen.
o + On the Assessment Details Screen, clicking the Forgive check box will populate
the Date Forgiven field with the current date. Clicking the Save button will
generate a credit adjustment transaction for all members that were assessed this
voluntary assessment but had not paid the assessment.
Note: A voluntary Assessment cannot e Forgiven until after the Valid Thru
Date entered on the Assessment. Once a voluntary assessment is ‘Forgiven”
it cannot be deleted.
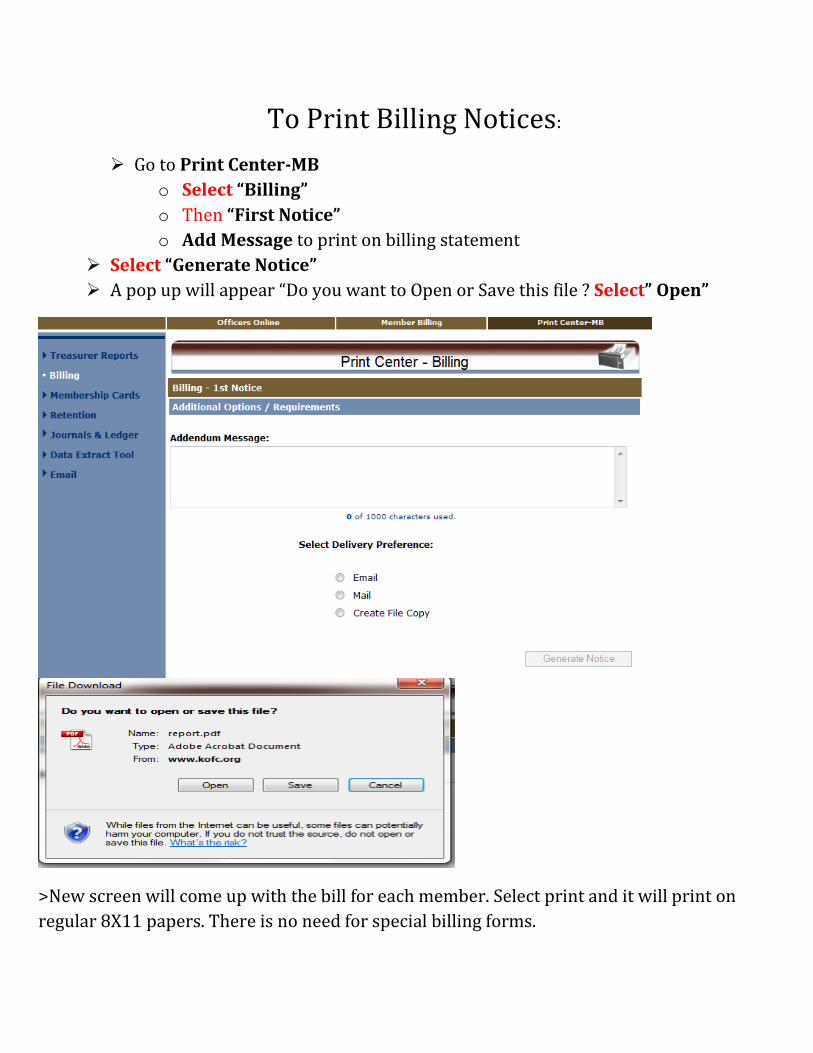
To Print Billing Notices:
Go to Print Center-MB
o Select “Billing”
o Then “First Notice”
o Add Message to print on billing statement
Select “Generate Notice”
A pop up will appear “Do you want to Open or Save this file ? Select” Open”
>New screen will come up with the bill for each member. Select print and it will print on
regular 8X11 papers. There is no need for special billing forms.
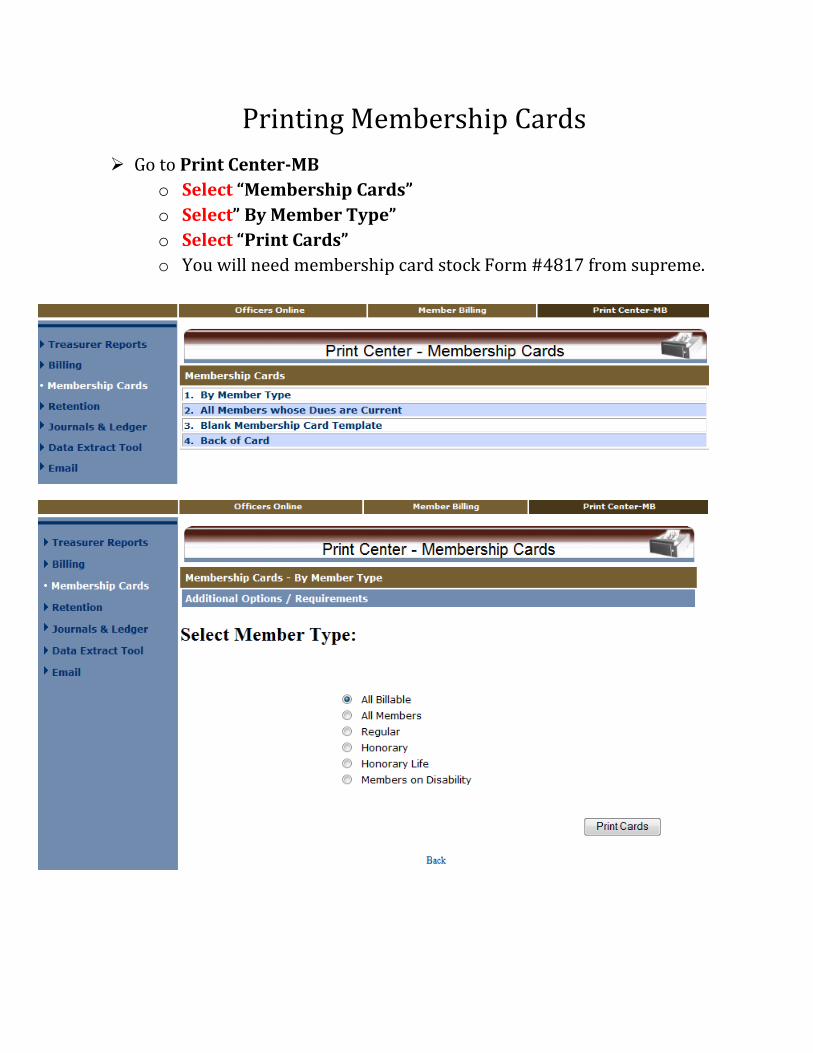
Printing Membership Cards
Go to Print Center-MB
o Select “Membership Cards”
o Select” By Member Type”
o Select “Print Cards”
o You will need membership card stock Form #4817 from supreme.
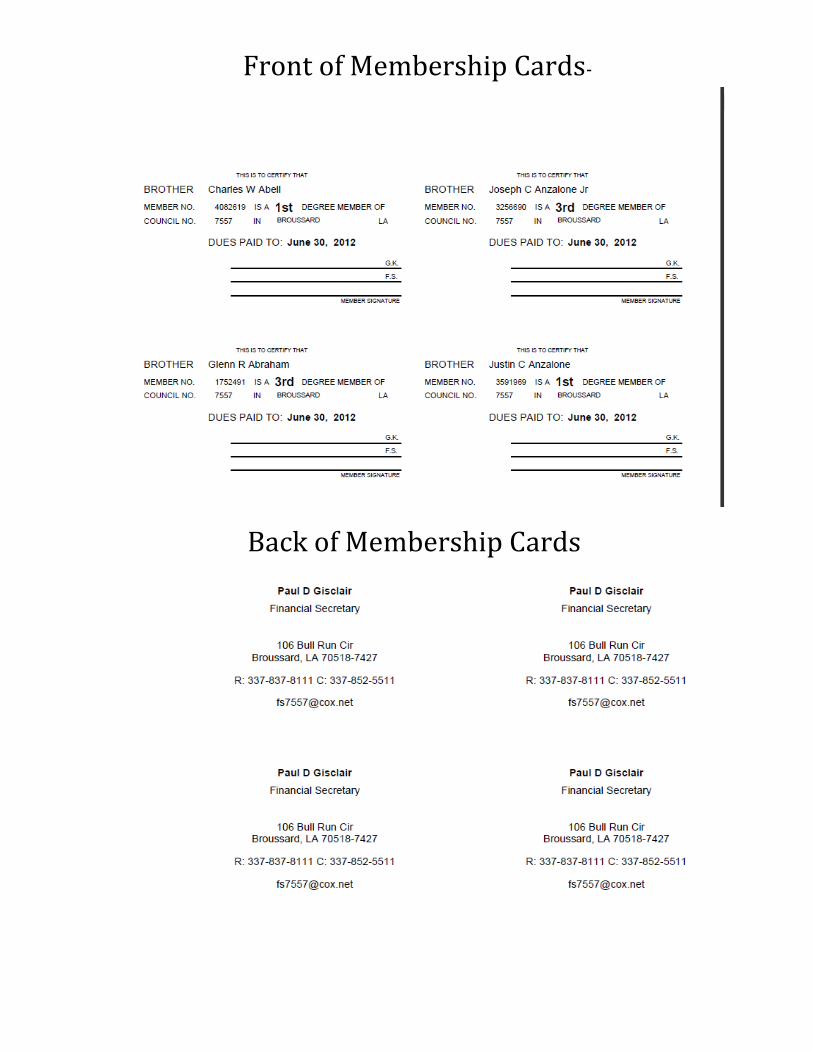
Front of Membership Cards-
Back of Membership Cards

Recording Receipts of Dues
Member Billing
Under-- Council Ledger
Receipts
Dues Collection Tool
o Select the letter of the Members last name in order to access the members
information
o Select the member. If the member paid the entire outstanding balance you
can just check the box and the Amount Received with automatically
populate with that amount. Once the amount is entered and you press enter
(or click on Save), the members name will go away.
o Select another member and enter amount paid.
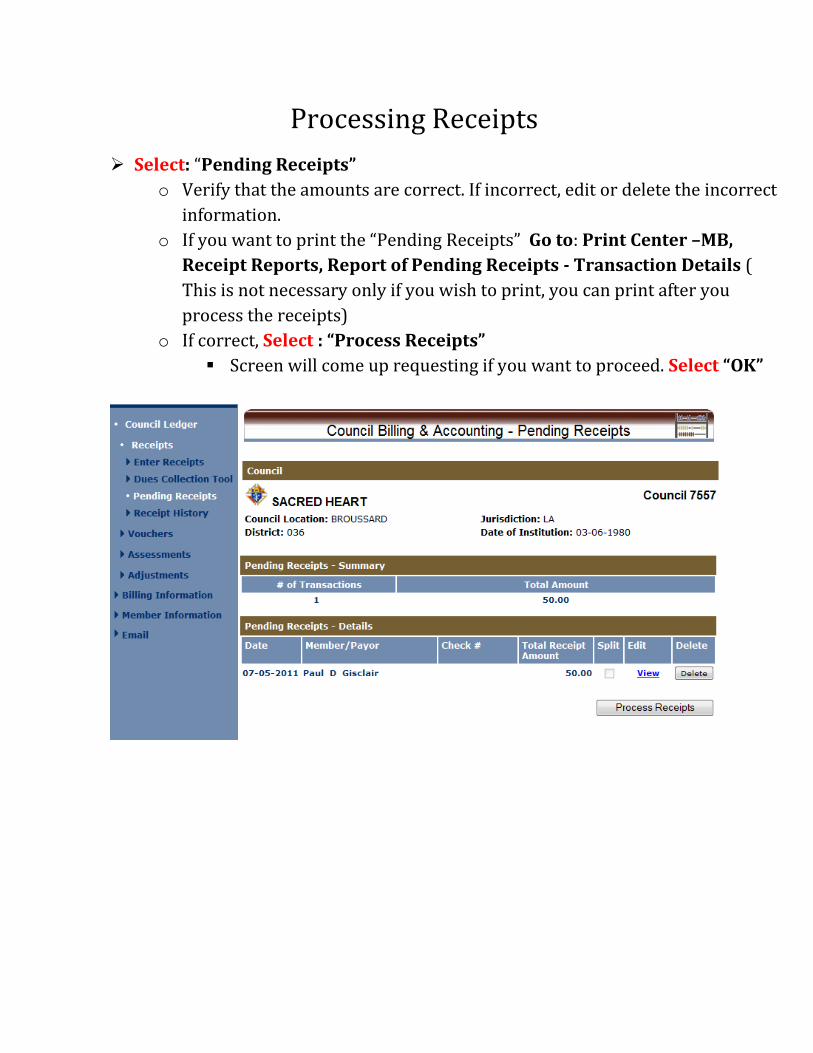
Processing Receipts
Select: “Pending Receipts”
o Verify that the amounts are correct. If incorrect, edit or delete the incorrect
information.
o If you want to print the “Pending Receipts” Go to: Print Center –MB,
Receipt Reports, Report of Pending Receipts - Transaction Details (
This is not necessary only if you wish to print, you can print after you
process the receipts)
o If correct, Select : “Process Receipts”
Screen will come up requesting if you want to proceed. Select “OK”

Printing Treasurer Reports Go to Print Center-MB
Select: “Report of Receipts “
Select either:” Report of Receipts” or “Report of Receipts-Transaction
Details”
Chose : “Posted By Date “
Select:” Run Report”
Select: “Open”
Print 2 copies one for you and one for the treasurer. This is your receipt for funds
turned over the treasurer.
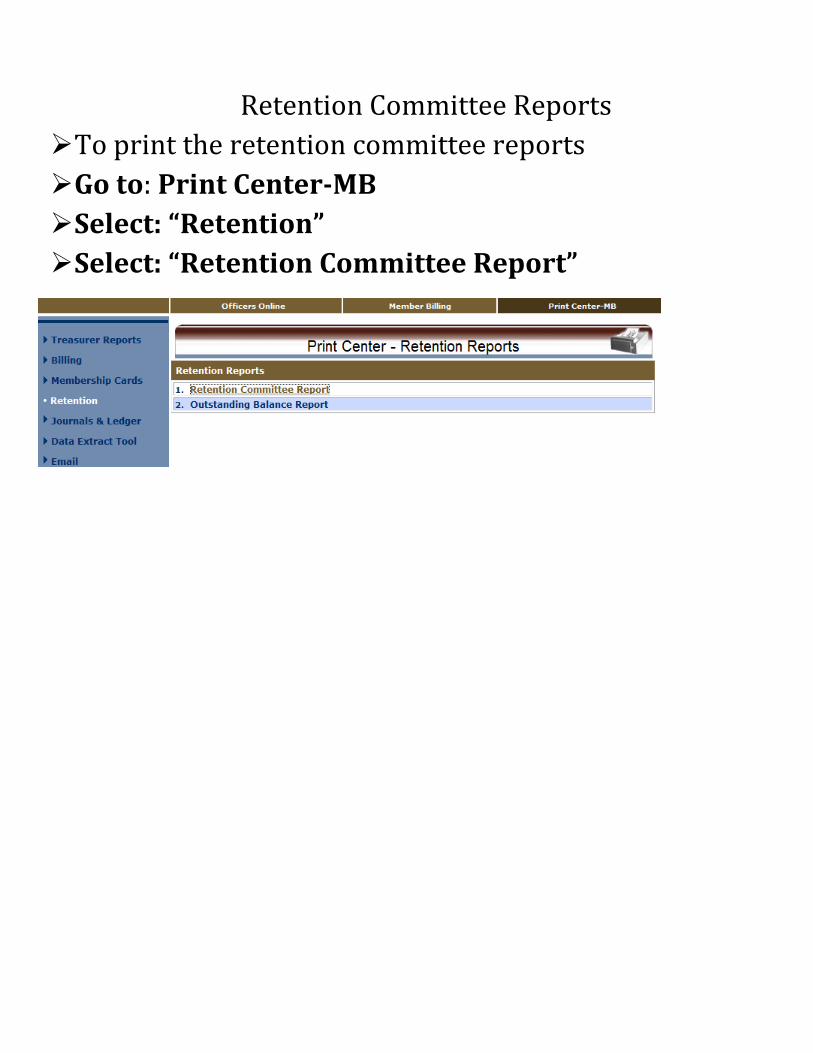
Retention Committee Reports
To print the retention committee reports
Go to: Print Center-MB
Select: “Retention”
Select: “Retention Committee Report”
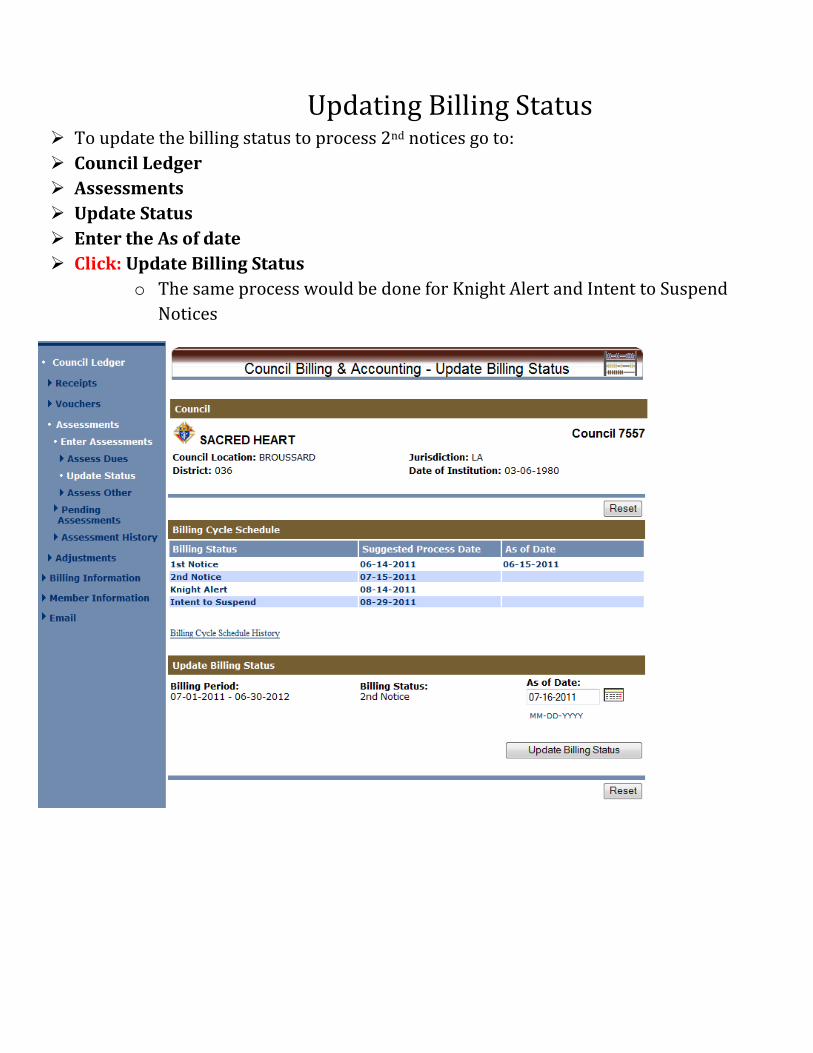
Updating Billing Status To update the billing status to process 2nd notices go to:
Council Ledger
Assessments
Update Status
Enter the As of date
Click: Update Billing Status
o The same process would be done for Knight Alert and Intent to Suspend
Notices
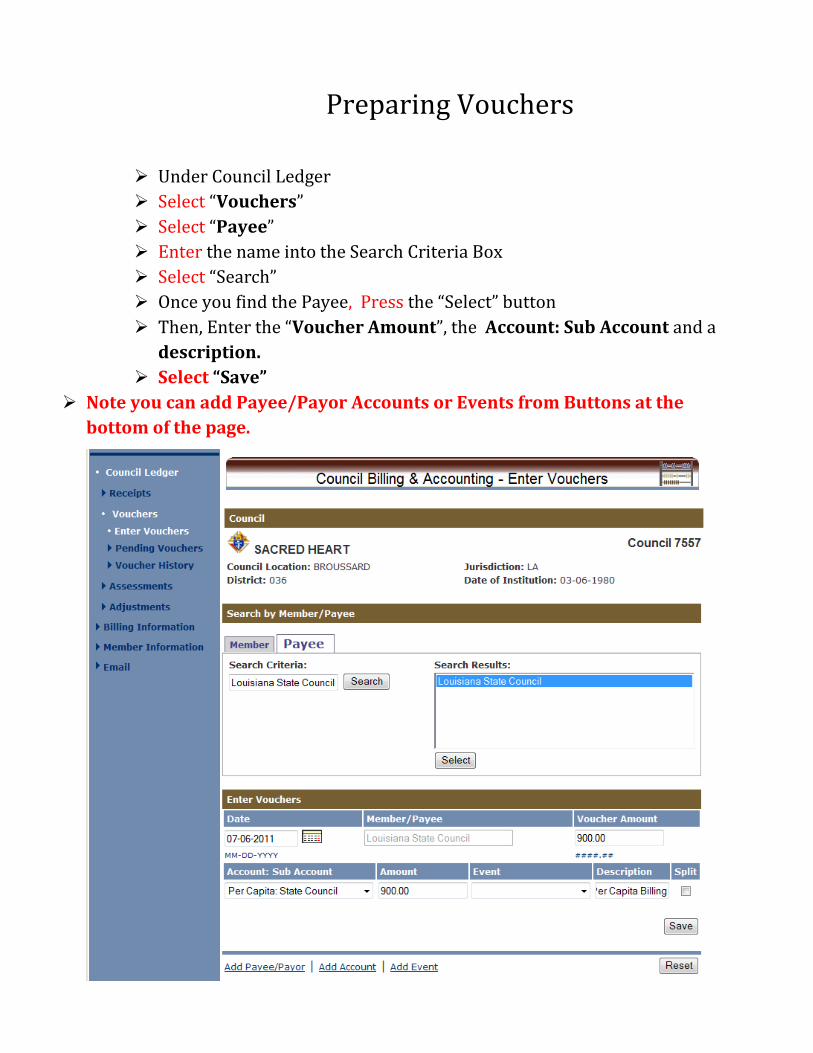
Preparing Vouchers
Under Council Ledger
Select “Vouchers”
Select “Payee”
Enter the name into the Search Criteria Box
Select “Search”
Once you find the Payee, Press the “Select” button
Then, Enter the “Voucher Amount”, the Account: Sub Account and a
description.
Select “Save”
Note you can add Payee/Payor Accounts or Events from Buttons at the
bottom of the page.
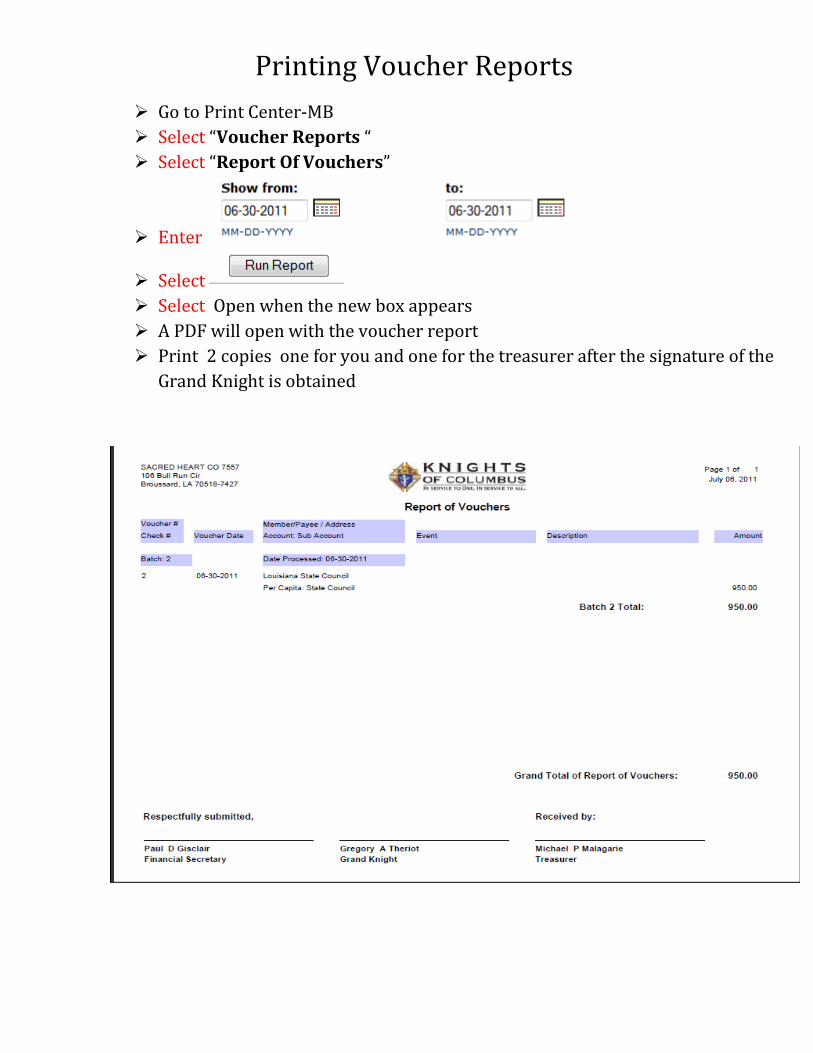
Printing Voucher Reports
Go to Print Center-MB
Select “Voucher Reports “
Select “Report Of Vouchers”
Enter
Select
Select Open when the new box appears
A PDF will open with the voucher report
Print 2 copies one for you and one for the treasurer after the signature of the
Grand Knight is obtained