Embed Size (px)
Citation preview

King WingUSER MANUAL
PLEASE READ ALL INSTRUCTIONS PRIOR TO USE
1Adventure Kings King Wing
CONTENTS
1. GENERAL INFORMATION .............................................................2
2. FITTING INSTRUCTIONS .......................................................... 3-5
3. SETUP INSTRUCTIONS .............................................................6-7
4. PACK UP INSTRUCTIONS ........................................................ 8-9
5. CARE INSTRUCTIONS ..................................................................9
6. WARRANTY ................................................................................. 10

2Adventure Kings King Wing
GENERAL INFORMATION
CONDITIONS OF USE: The King Wing awning is a rotating 4x4 recreational awning suitable for outdoor use. It is designed to provide UV & wet weather protection whilst being securely fixed to the side of a stationary vehicle.
It is not designed to be setup in extreme weather events or whilst the vehicle is moving. The awning must be correctly packed up before moving the vehicle.
See setup & pack away procedures for more detailed operational information.
INSPECTIONS & MAINTENANCE: • Before & during trips regularly check that all fasteners securing your awning to your vehicle are
tight and in good condition.• Prior to travelling ensure that the awning bag is zipped shut and that the awning bag is in good
condition. • Each time the awning is setup check that the pivot connections are tight and in good condition.
SAFETY WARNING• DO NOT ATTEMPT TO SETUP AWNING IN WINDY CONDITIONS
OR EXTREME WEATHER EVENTS.
• ALL GUY ROPES MUST BE ATTACHED AND PEGGED TO THE GROUND AT ALL TIMES.
• ALL VERTICAL POLES MUST BE PEGGED TO THE GROUND AT ALL TIMES.
• GUY ROPES ARE TRIP HAZARDS IN THE DAY AND NIGHT.
• KEEP HANDS AWAY FROM PIVOTTING MECHANISMS WHEN SETTING UPOR PACKING UP AWNING.
• KEEP ALL FLAME AND HEAT SOURCES AWAY FROM THE AWNING MATERIALS.
• UNDER NO CIRCUMSTANCE SHOULD ANY NAKED FLAME SOURCES OR HEATING DEVICES BE USED UNDER OR NEAR THE AWNING.
• KEEP A LOOK OUT FOR ANY AIRBORNE BURNING EMBERS THAT MAY COME INTO CONTACT WITH THE AWNING.
• DO NOT OPERATE ANY DEVICE WHICH BURNS FUEL INSIDE OF THE AWNING.KEEP EXIT CLEAR
• THE AWNING CANVAS IS NOT DESIGNED TO SUPPORT ANY WEIGHT.
3Adventure Kings King Wing
FITTING INSTRUCTIONSPlease read the following instructions which include three of the most common methods for fitting the King Wing to your vehicle. It is the owner’s responsibility to ensure that the awning is securely fastened and safe for use as well as vehicle travel. It is important when mounting the awning to ensure that all the mounting brackets supplied are spaced far enough apart to adequately support the weight of the awning. When you are positioning the awning check that there is enough clearance for the vehicle doors to open. Remember to check vehicle roof and roof rack load capacities prior to fitting accessories to your vehicle. Take into account when mounting vehicle roof accessories that off-road travel increases the dynamic stresses on your vehicle. For more information on load carrying capacities contact the applicable manufacturer.
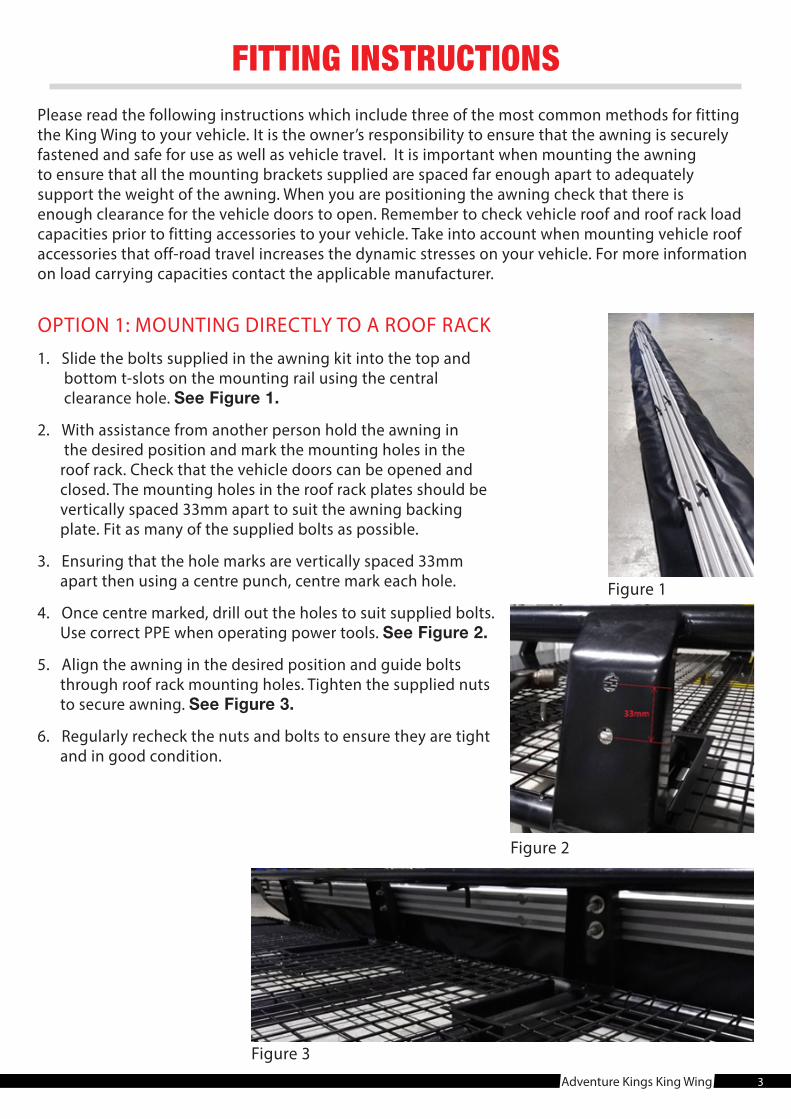
OPTION 1: MOUNTING DIRECTLY TO A ROOF RACK 1. Slide the bolts supplied in the awning kit into the top and bottom t-slots on the mounting rail using the central clearance hole. See Figure 1.
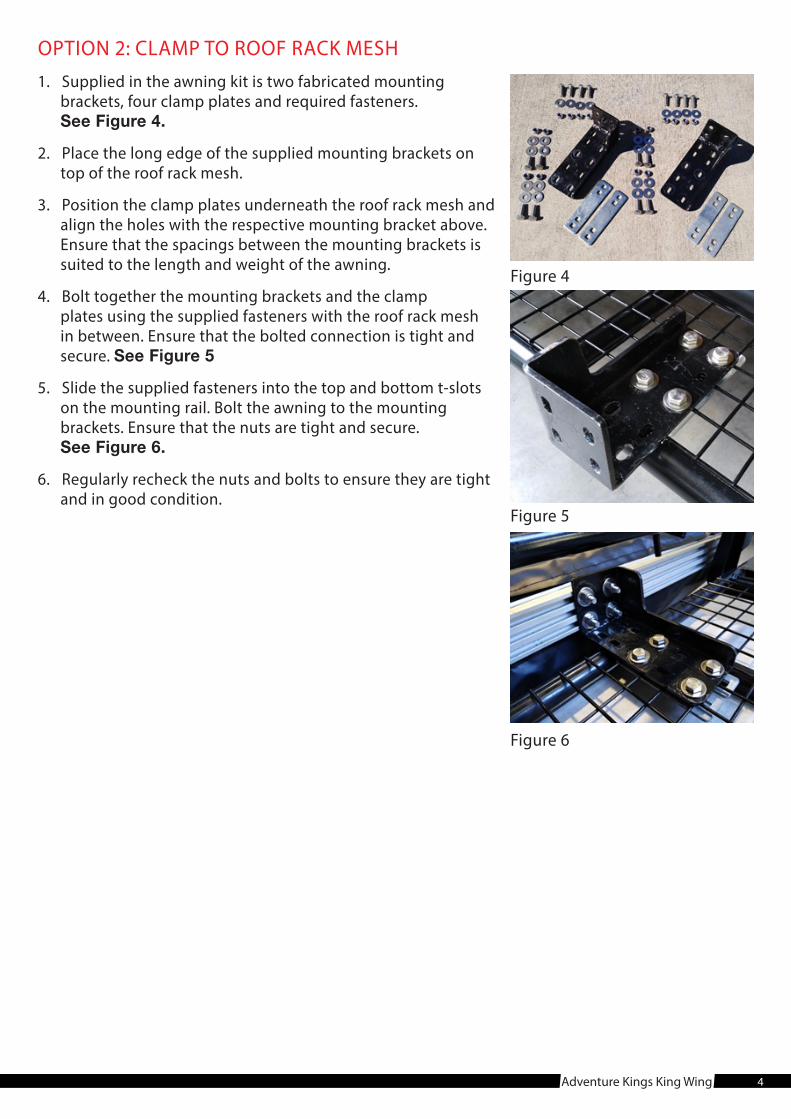
2. With assistance from another person hold the awning in the desired position and mark the mounting holes in the roof rack. Check that the vehicle doors can be opened and closed. The mounting holes in the roof rack plates should be vertically spaced 33mm apart to suit the awning backing plate. Fit as many of the supplied bolts as possible.
3. Ensuring that the hole marks are vertically spaced 33mm apart then using a centre punch, centre mark each hole.
4. Once centre marked, drill out the holes to suit supplied bolts. Use correct PPE when operating power tools. See Figure 2.
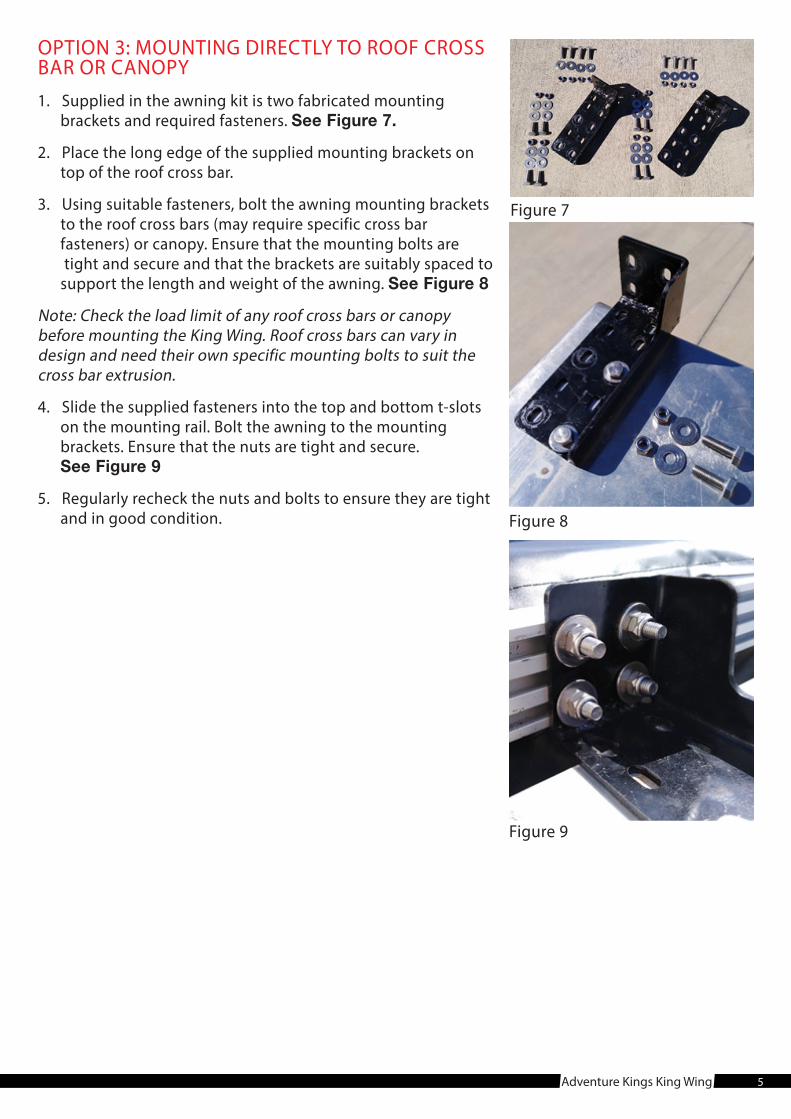
5. Align the awning in the desired position and guide bolts through roof rack mounting holes. Tighten the supplied nuts to secure awning. See Figure 3.
6. Regularly recheck the nuts and bolts to ensure they are tight and in good condition.
Figure 1
Figure 2
Figure 3
4Adventure Kings King Wing
OPTION 2: CLAMP TO ROOF RACK MESH 1. Supplied in the awning kit is two fabricated mounting brackets, four clamp plates and required fasteners. See Figure 4.
2. Place the long edge of the supplied mounting brackets on top of the roof rack mesh.
3. Position the clamp plates underneath the roof rack mesh and align the holes with the respective mounting bracket above. Ensure that the spacings between the mounting brackets is suited to the length and weight of the awning.
4. Bolt together the mounting brackets and the clamp plates using the supplied fasteners with the roof rack mesh in between. Ensure that the bolted connection is tight and secure. See Figure 5
5. Slide the supplied fasteners into the top and bottom t-slots on the mounting rail. Bolt the awning to the mounting brackets. Ensure that the nuts are tight and secure. See Figure 6.
6. Regularly recheck the nuts and bolts to ensure they are tight and in good condition.
Figure 4
Figure 5
Figure 6
5Adventure Kings King Wing
OPTION 3: MOUNTING DIRECTLY TO ROOF CROSS BAR OR CANOPY 1. Supplied in the awning kit is two fabricated mounting brackets and required fasteners. See Figure 7.
2. Place the long edge of the supplied mounting brackets on top of the roof cross bar.
3. Using suitable fasteners, bolt the awning mounting brackets to the roof cross bars (may require specific cross bar fasteners) or canopy. Ensure that the mounting bolts are tight and secure and that the brackets are suitably spaced to support the length and weight of the awning. See Figure 8
Note: Check the load limit of any roof cross bars or canopy before mounting the King Wing. Roof cross bars can vary in design and need their own specific mounting bolts to suit the cross bar extrusion.
4. Slide the supplied fasteners into the top and bottom t-slots on the mounting rail. Bolt the awning to the mounting brackets. Ensure that the nuts are tight and secure. See Figure 9
5. Regularly recheck the nuts and bolts to ensure they are tight and in good condition. Figure 8
Figure 9
Figure 7
6Adventure Kings King Wing
SETUP INSTRUCTIONS1. Prior to setting up the King Wing awning ensure that the vehicle is stationary with the handbrake applied and that the desired awning setup area is suitable and safe.
NOTE: The King Wing can be setup by one person, but it is easier if two people work together. It is not recommended that the King Wing be setup in strong winds or extreme weather events.
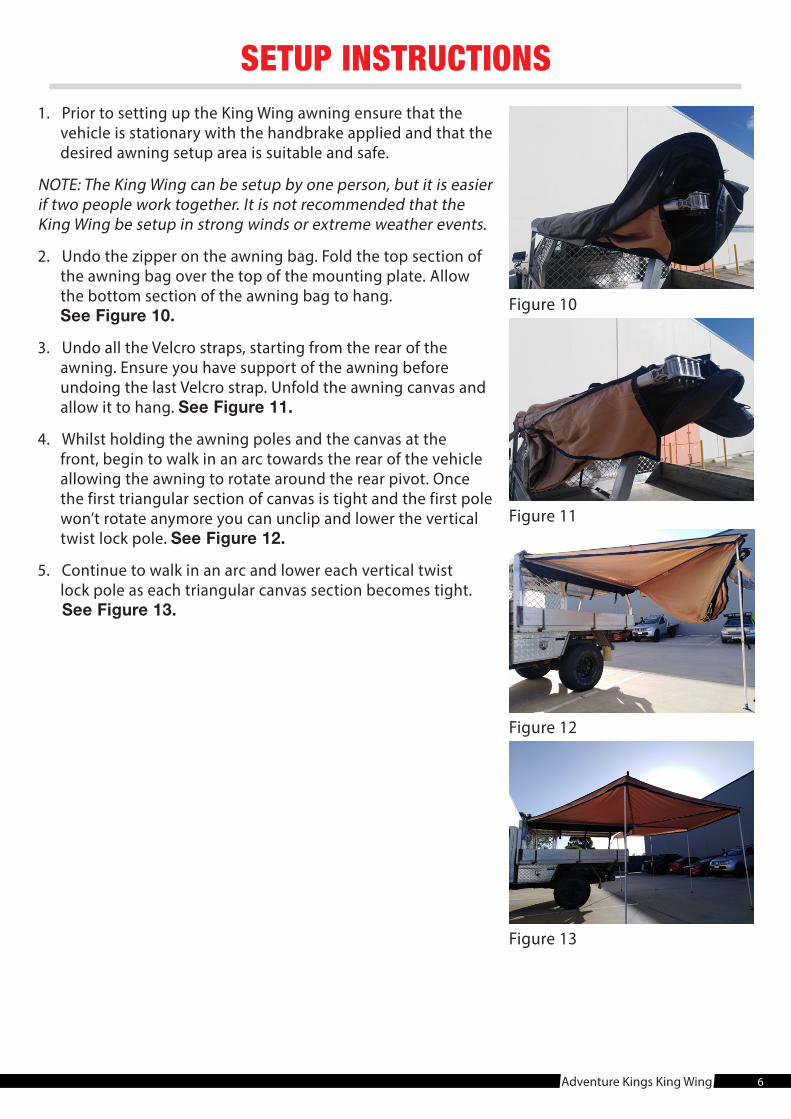
2. Undo the zipper on the awning bag. Fold the top section of the awning bag over the top of the mounting plate. Allow the bottom section of the awning bag to hang. See Figure 10.
3. Undo all the Velcro straps, starting from the rear of the awning. Ensure you have support of the awning before undoing the last Velcro strap. Unfold the awning canvas and allow it to hang. See Figure 11.
4. Whilst holding the awning poles and the canvas at the front, begin to walk in an arc towards the rear of the vehicle allowing the awning to rotate around the rear pivot. Once the first triangular section of canvas is tight and the first pole won’t rotate anymore you can unclip and lower the vertical twist lock pole. See Figure 12.
5. Continue to walk in an arc and lower each vertical twist lock pole as each triangular canvas section becomes tight. See Figure 13.
Figure 10
Figure 11
Figure 12
Figure 13
7Adventure Kings King Wing
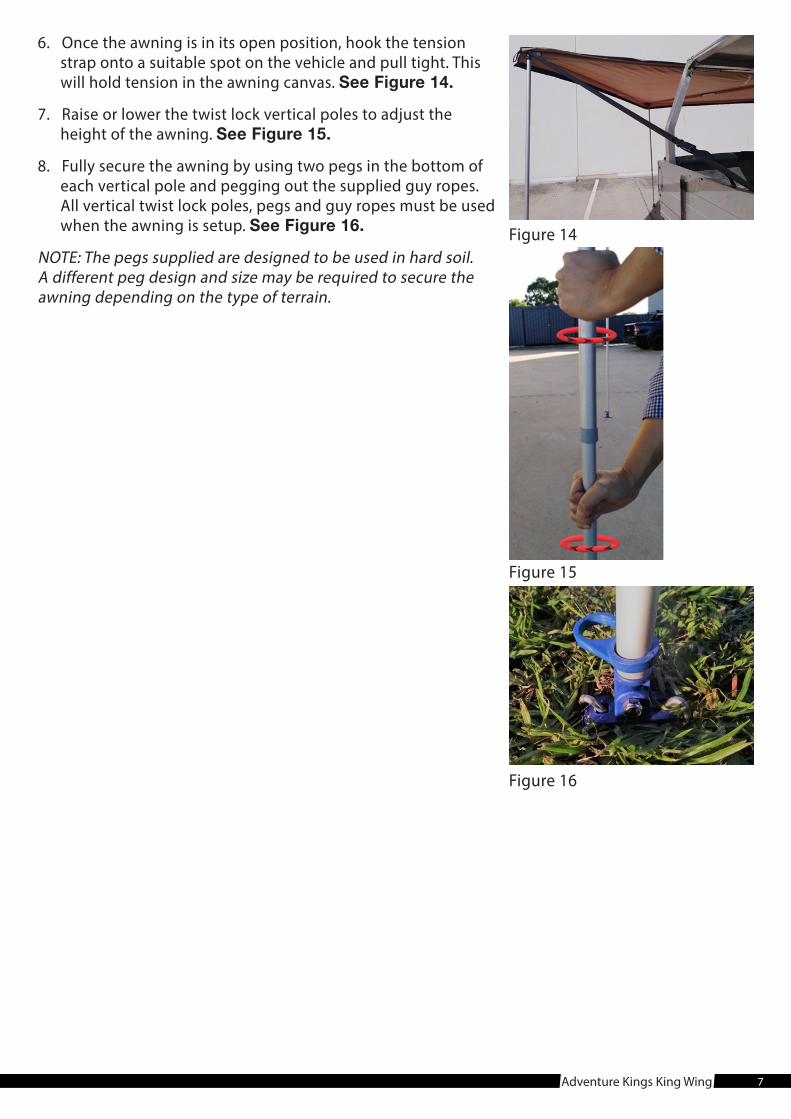
6. Once the awning is in its open position, hook the tension strap onto a suitable spot on the vehicle and pull tight. This will hold tension in the awning canvas. See Figure 14.
7. Raise or lower the twist lock vertical poles to adjust the height of the awning. See Figure 15.
8. Fully secure the awning by using two pegs in the bottom of each vertical pole and pegging out the supplied guy ropes. All vertical twist lock poles, pegs and guy ropes must be used when the awning is setup. See Figure 16.
NOTE: The pegs supplied are designed to be used in hard soil. A different peg design and size may be required to secure the awning depending on the type of terrain.
Figure 14
Figure 15
Figure 16
8Adventure Kings King Wing
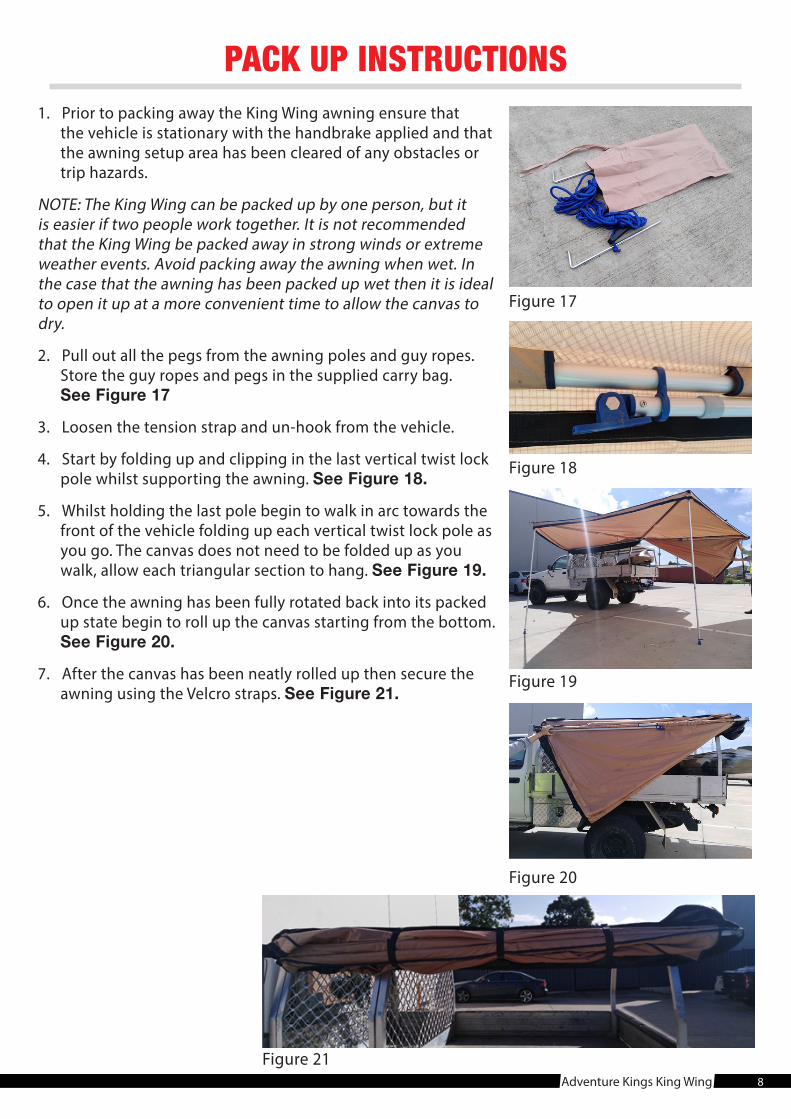
PACK UP INSTRUCTIONS1. Prior to packing away the King Wing awning ensure that the vehicle is stationary with the handbrake applied and that the awning setup area has been cleared of any obstacles or trip hazards.
NOTE: The King Wing can be packed up by one person, but it is easier if two people work together. It is not recommended that the King Wing be packed away in strong winds or extreme weather events. Avoid packing away the awning when wet. In the case that the awning has been packed up wet then it is ideal to open it up at a more convenient time to allow the canvas to dry.
2. Pull out all the pegs from the awning poles and guy ropes. Store the guy ropes and pegs in the supplied carry bag. See Figure 17
3. Loosen the tension strap and un-hook from the vehicle.
4. Start by folding up and clipping in the last vertical twist lock pole whilst supporting the awning. See Figure 18.
5. Whilst holding the last pole begin to walk in arc towards the front of the vehicle folding up each vertical twist lock pole as you go. The canvas does not need to be folded up as you walk, allow each triangular section to hang. See Figure 19.
6. Once the awning has been fully rotated back into its packed up state begin to roll up the canvas starting from the bottom. See Figure 20.
7. After the canvas has been neatly rolled up then secure the awning using the Velcro straps. See Figure 21.
Figure 17
Figure 18
Figure 19
Figure 20
Figure 21
9Adventure Kings King Wing
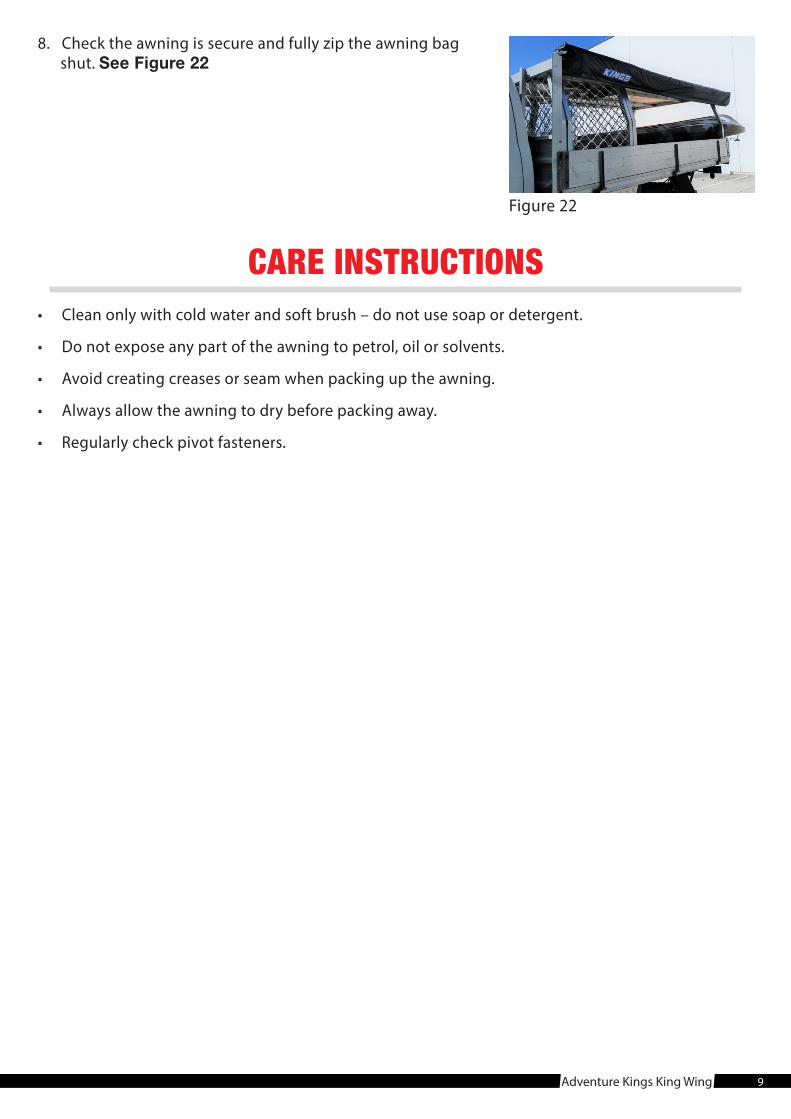
8. Check the awning is secure and fully zip the awning bag shut. See Figure 22
Figure 22
CARE INSTRUCTIONS• Clean only with cold water and soft brush – do not use soap or detergent.
• Do not expose any part of the awning to petrol, oil or solvents.
• Avoid creating creases or seam when packing up the awning.
• Always allow the awning to dry before packing away.
• Regularly check pivot fasteners.
10Adventure Kings King Wing
WARRANTY PERIOD:
Full 12 month warranty from date of purchase against all manufacturing defects.
WHAT DOES THE WARRANTY COVER?
Under normal usage conditions, this warranty covers:
a. Any defect in design or manufacture which results in the product failing to perform substantially as described in authorised advertising or literature.
b. We will either repair or replace the product at our discretion providing that the fault is found to have been caused by a design or manufacturing defect and not misuse or tampering.
Our goods come with guarantees that cannot be excluded under the Australian Consumer Law. You are entitled to a replacement or refund for a major failure and for compensation for any other reasonably foreseeable loss or damage. You are also entitled to have the goods repaired or replaced if the goods fail to be of acceptable quality and the failure does not amount to a major failure. The benefits provided to you as the consumer by this warranty are in addition to other rights and remedies available to you under the law.
THE WARRANTY DOES NOT COVER:
a. Any damage resulting from improper use
b. Faulty installation or modification made during installation
c. The cost of removing and reinstalling the product
d. Travel and /or other expenses due to customer’s remote location
e. Transport charges and damage in transit. It is your responsibility to deliver and pick up your product, including any costs associated with the postage of your repair or replacement product. If you do freight your product we recommend that you insure against loss or damage.
f. Any loss directly or indirectly associated with the product failing to operate.
g. Damage caused by mould, insects, animals, misuse, incorrect operation, adverse weather, accidents and fair wear and tear.
12 MONTH LIMITED
WARRANTY
OUTDOOR SUPACENTRE PTY LTD2 Stanley St Silverwater NSW, 2128PHONE: 1800 88 39 64www.4wdsupacentre.com.au
TO MAKE A CLAIM UNDER THIS WARRANTY PLEASE CALL
1800 88 39 64

11Adventure Kings King Wing