Embed Size (px)
Citation preview
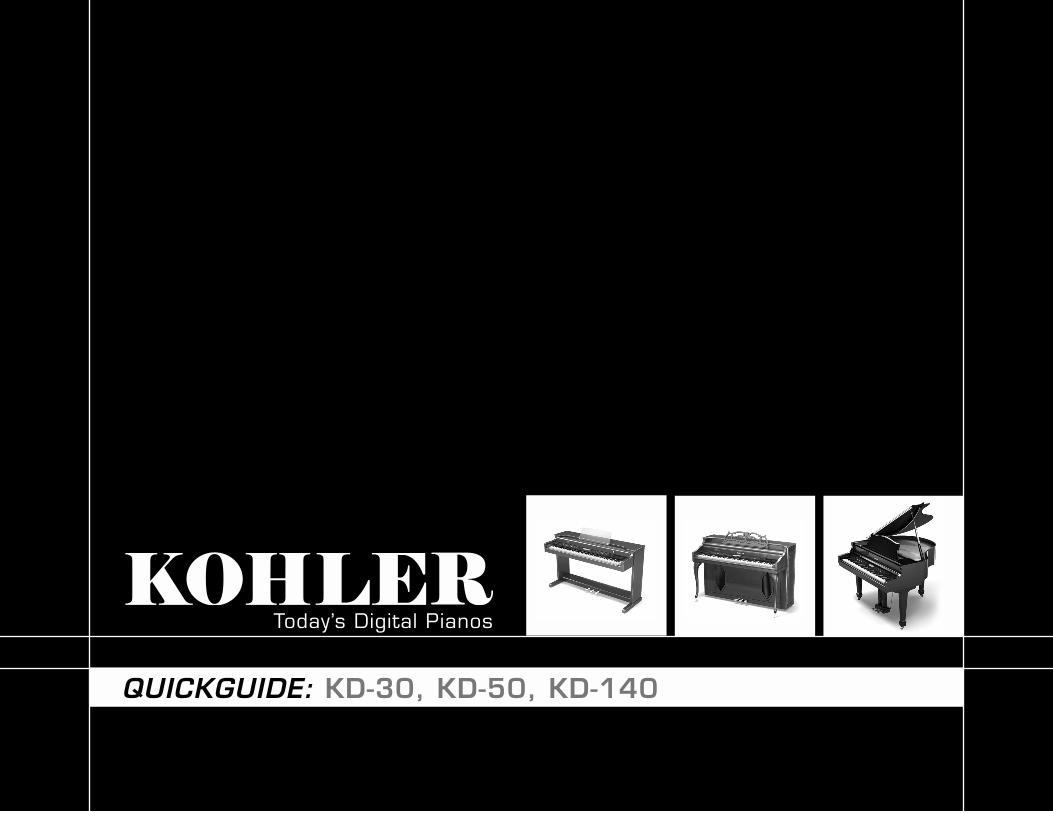
Today’s Digital Pianos
QUICKGUIDE: KD-30, KD-50, KD-140
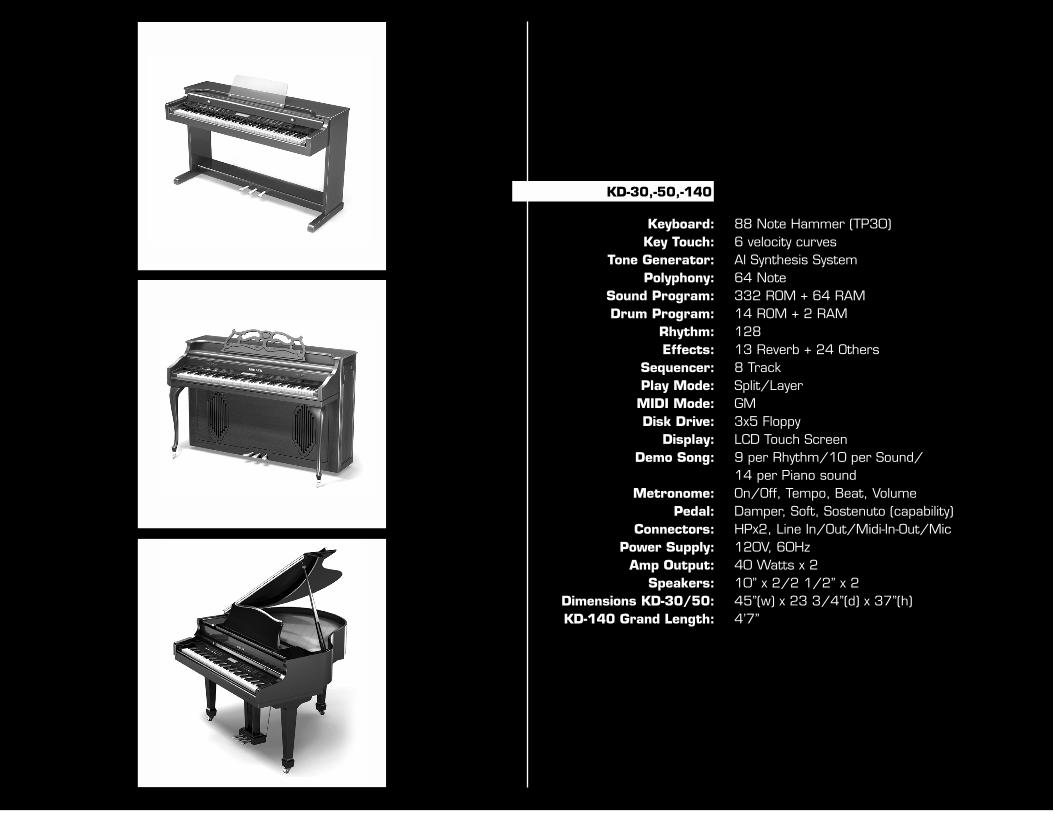
Keyboard:Key Touch:
Tone Generator:Polyphony:
Sound Program:Drum Program:
Rhythm:Effects:
Sequencer:Play Mode:MIDI Mode:Disk Drive:
Display:Demo Song:
Metronome:Pedal:
Connectors:Power Supply:
Amp Output:Speakers:
Dimensions KD-30/50:KD-140 Grand Length:
KD-30,-50,-140
88 Note Hammer (TP30)6 velocity curvesAl Synthesis System64 Note332 ROM + 64 RAM14 ROM + 2 RAM12813 Reverb + 24 Others8 TrackSplit/LayerGM3x5 FloppyLCD Touch Screen9 per Rhythm/10 per Sound/14 per Piano soundOn/Off, Tempo, Beat, VolumeDamper, Soft, Sostenuto (capability)HPx2, Line In/Out/Midi-In-Out/Mic120V, 60Hz40 Watts x 210” x 2/2 1/2” x 245”(w) x 23 3/4”(d) x 37”(h)4’7”

BASIC OPERATION
Using the LCD screenThe objects displayed in the LCD screen can be chosen with a light touch of the fi ngertip. If they are pressed with excessive force, they may fail to respond, or the screen may malfunction. If a displayed object is shown in gray, it is not possible to select that object.
The main screenThis is the page that is displayed when the power is turned on. Most of the time, you will be playing the KD-140/KD-50/KD-30 in this main screen.
——1

The KD-140/KD-50/KD-30 contains fourteen piano demo songs, ten sound demo songs, and nine style demo songs. Listen to these demo performances to get an introduction to the rich sounds of the KD-140/KD-50/KD-30 and their expressive potential.
DEMO SONGS
——2
To listen to the demo songs 1. Press the [DEMO] switch
The [DEMO] switch indicator will light, and the “Demo” page will appear.
Composer Name
Song Name
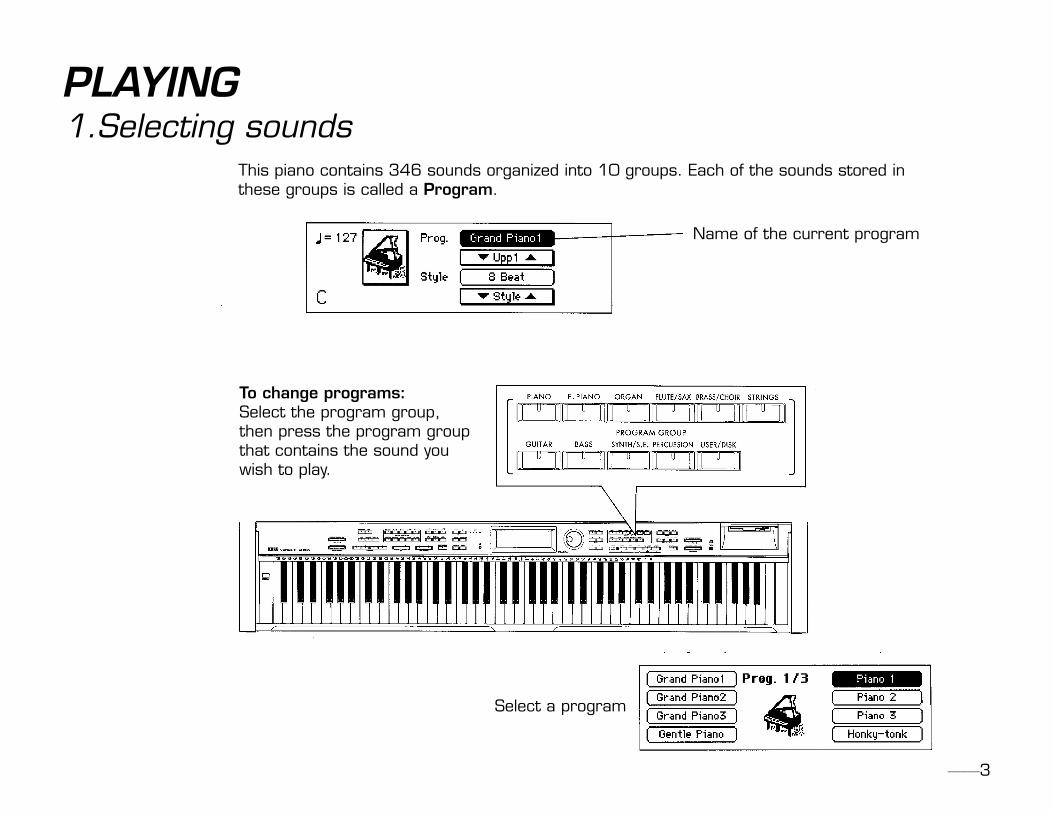
To change programs: Select the program group, then press the program group that contains the sound you wish to play.
Select a program
1.Selecting sounds This piano contains 346 sounds organized into 10 groups. Each of the sounds stored in these groups is called a Program.
PLAYING
Name of the current program
——3
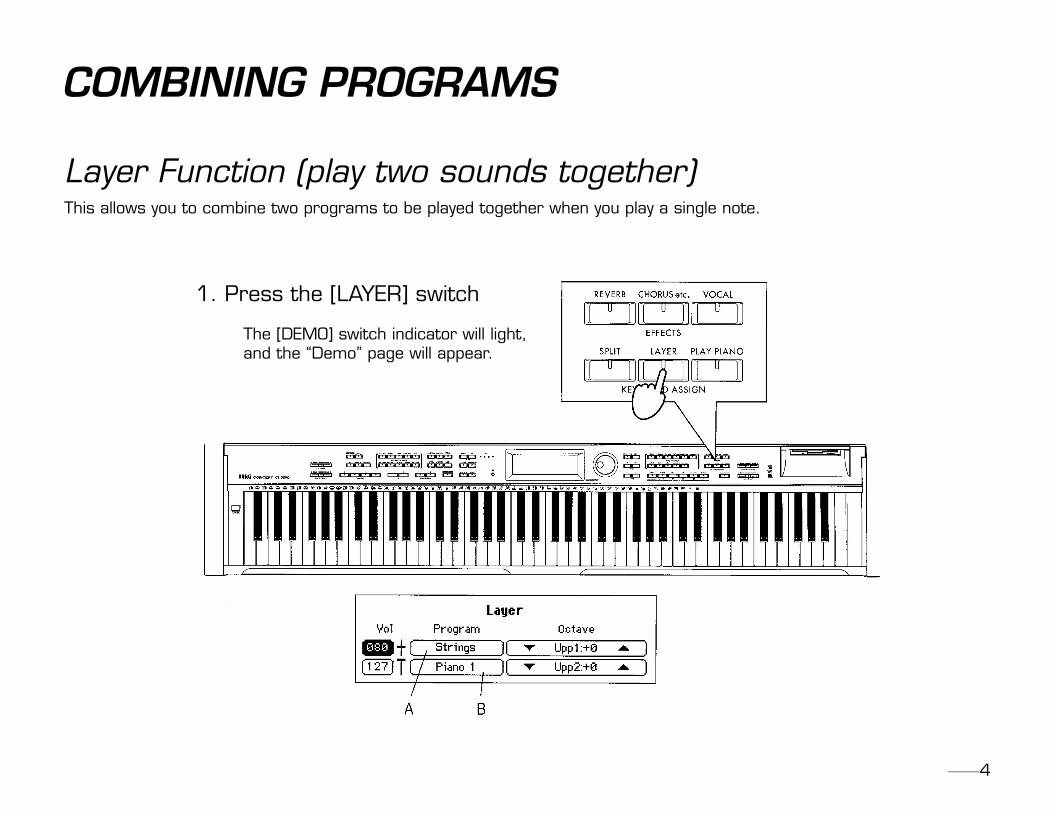
Layer Function (play two sounds together)This allows you to combine two programs to be played together when you play a single note.
COMBINING PROGRAMS
1. Press the [LAYER] switch The [DEMO] switch indicator will light, and the “Demo” page will appear.
——4

Split Function This allows you to select different sounds for the lower and upper ranges of the keyboard.
1. Press the [SPLIT] switch
2. Select each sound Use the “A” cell to select the “Uppl” (upper range), and the “B” cell to select the “Low” (lower range).
——5
Split point

Adding Reverb to the sound Applying this effect to a selected sound will create the illusion that you are playing in various acoustical spaces such as a concert hall. This is called Reverb.
1. Press the [REVERB] switch The [REVERB] switch indicator will light, and reverb will be applied to the sound.
——6
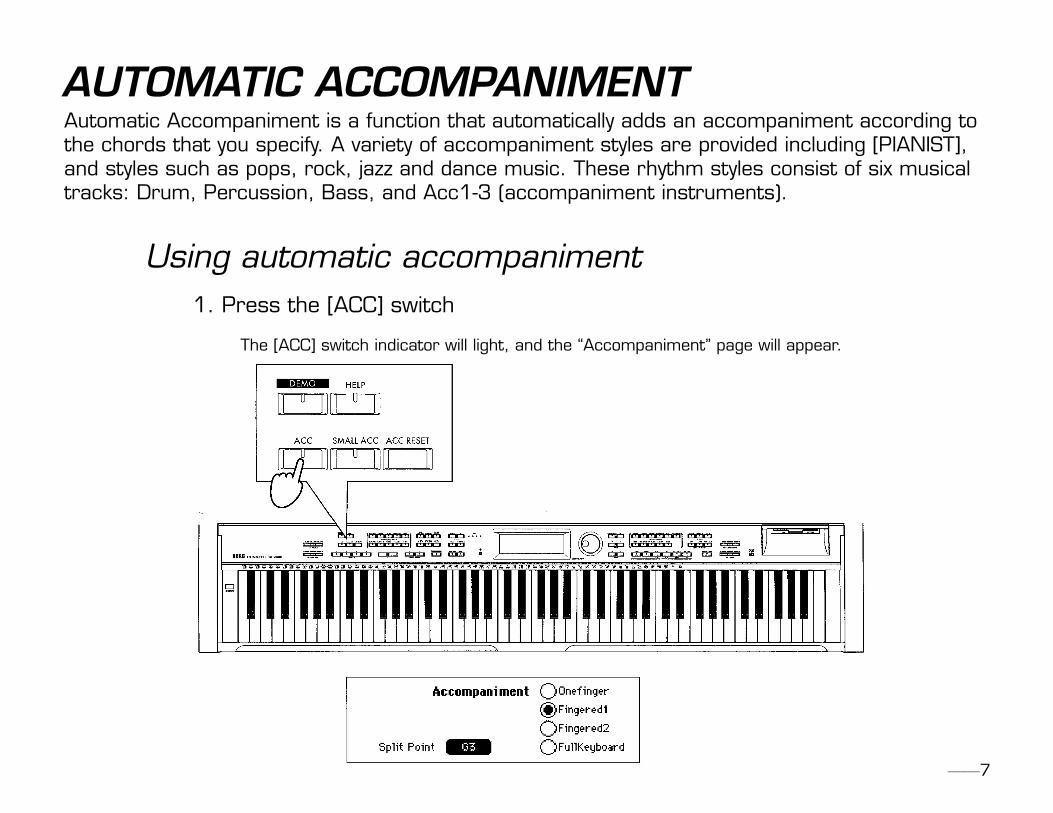
Automatic Accompaniment is a function that automatically adds an accompaniment according to the chords that you specify. A variety of accompaniment styles are provided including [PIANIST], and styles such as pops, rock, jazz and dance music. These rhythm styles consist of six musical tracks: Drum, Percussion, Bass, and Acc1-3 (accompaniment instruments).
AUTOMATIC AC COM PA NI MENT
Using automatic accompaniment 1. Press the [ACC] switch The [ACC] switch indicator will light, and the “Accompaniment” page will appear.
——7

Selecting a rhythm style Press one of the [RHYTHM STYLE GROUP] switches and select a style.
1. Press the [START/STOP] switch The automatic accompaniment will begin playing according to the chord shown in the LCD screen. Now you can play along with the automatic accompaniment.
Changing how you specify the chords There are several different ways to use the keyboard to specify chords, as appropriate for your preferences and abilities.
1. Press the [START/STOP] switch The [ACC] switch indicator will light, and the “Accompaniment” page will appear.
2. Select the method of specifying chords
——8
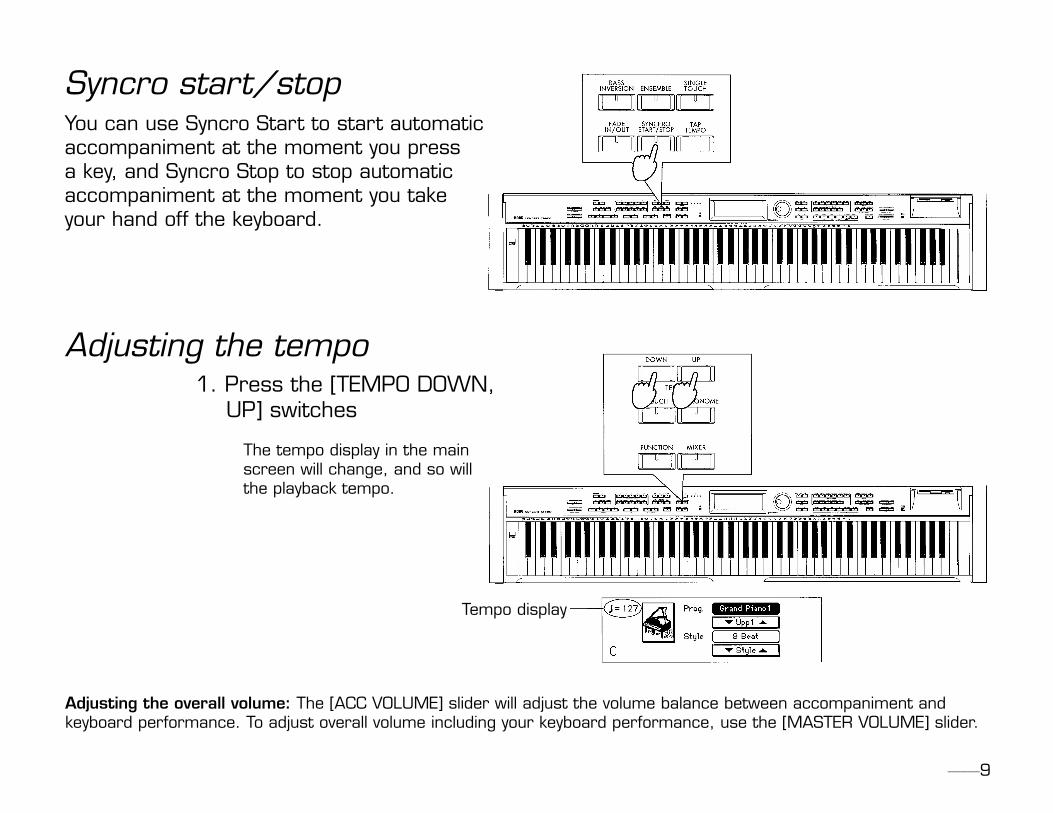
Adjusting the overall volume: The [ACC VOLUME] slider will adjust the volume balance between accompaniment and keyboard performance. To adjust overall volume including your keyboard performance, use the [MASTER VOLUME] slider.
Syncro start/stop You can use Syncro Start to start automatic accompaniment at the moment you press a key, and Syncro Stop to stop automatic accompaniment at the moment you take your hand off the keyboard.
Adjusting the tempo 1. Press the [TEMPO DOWN, UP] switches The tempo display in the main screen will change, and so will the playback tempo.
——9
Tempo display

Adjusting the volume of individual partsTo adjust the volume of each automatic accompaniment part and of the keyboard, make settings in the screen that appears when you press the [MIXER] switch.
1. Press the [MIXER] switch The [MIXER] switch indicator will light, and the “Mixer” page will appear.
2. Select the part whose volume you wish to adjust Press the “Vol” cell for the part whose volume you wish to adjust. Upp1: Volume of the Upper1 if [LAYER] switch or [SPLIT] switch are on, or volume of the keyboard if [LAYER] switch and [SPLIT] switch are off Upp2: Volume of layered sound: if [LAYER] switch is on Low: Volume of the sound to the left of the spIit point when [SPLIT] switch is on Drum, Perc, Bass, Acc1-3: Volume of the automatic accompaniment parts
3. Adjust the volume
——10
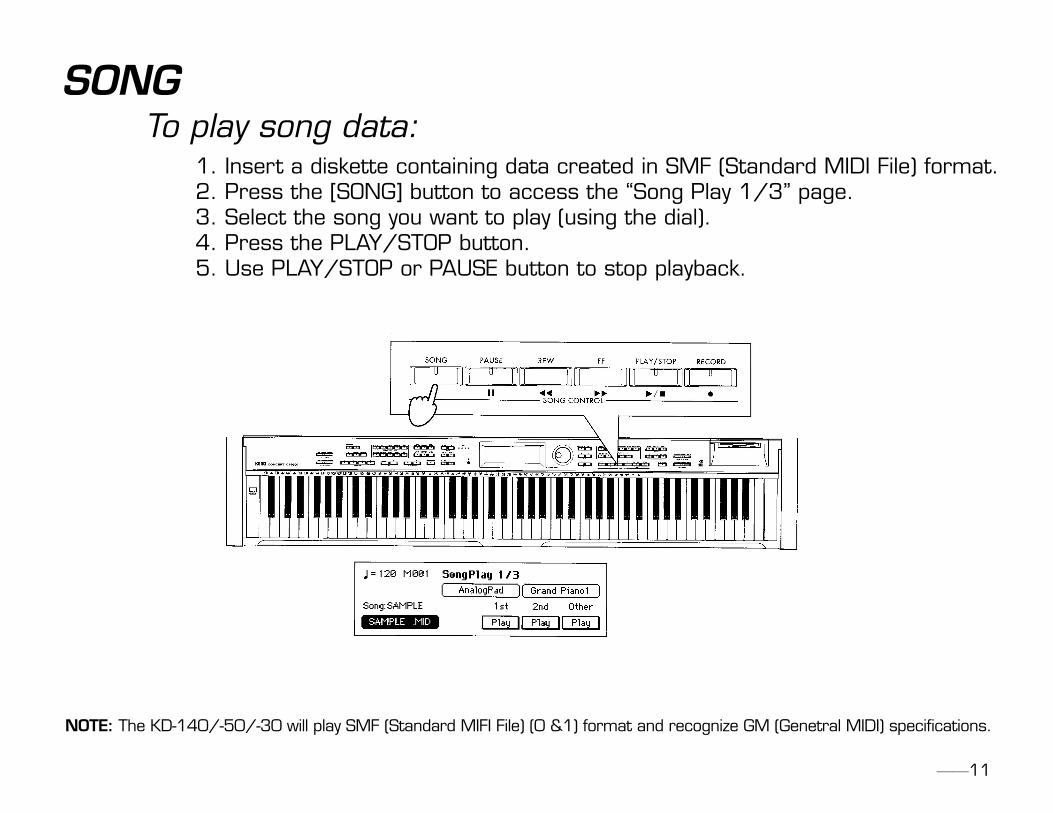
SONGTo play song data: 1. Insert a diskette containing data created in SMF (Standard MIDI File) format. 2. Press the [SONG] button to access the “Song Play 1/3” page. 3. Select the song you want to play (using the dial). 4. Press the PLAY/STOP button. 5. Use PLAY/STOP or PAUSE button to stop playback.
NOTE: The KD-140/-50/-30 will play SMF (Standard MIFI File) (0 &1) format and recognize GM (Genetral MIDI) spec i fi ca tions.
——11

Adjusting the volume of a songYou can adjust the [ACC VOLUME] slider to adjust the entire volume of the automatic accompaniment and the volume of the keyboard performance. To adjust the overall volume, use the [MASTER VOLUME] slider.
Adjusting the volume of individual partsTo adjust the volume of each part and volume the keyboard, make settings in the Mixer screen.
1. Press the [MIXER] switch The [MIXER] switch indicator will light, and the “Mixer” page will appear.
——12
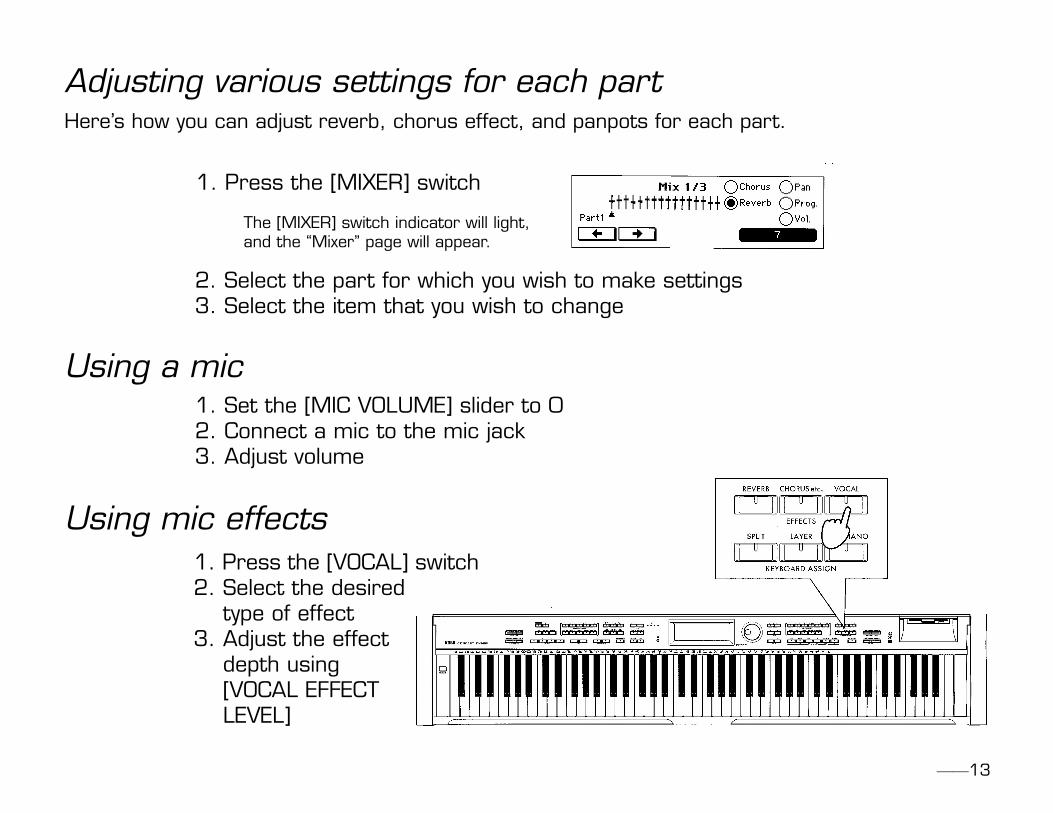
Adjusting various settings for each partHere’s how you can adjust reverb, chorus effect, and panpots for each part.
1. Press the [MIXER] switch The [MIXER] switch indicator will light, and the “Mixer” page will appear.
2. Select the part for which you wish to make settings 3. Select the item that you wish to change
Using a mic 1. Set the [MIC VOLUME] slider to 0 2. Connect a mic to the mic jack 3. Adjust volume
Using mic effects1. Press the [VOCAL] switch2. Select the desired type of effect3. Adjust the effect depth using [VOCAL EFFECT LEVEL]
——13
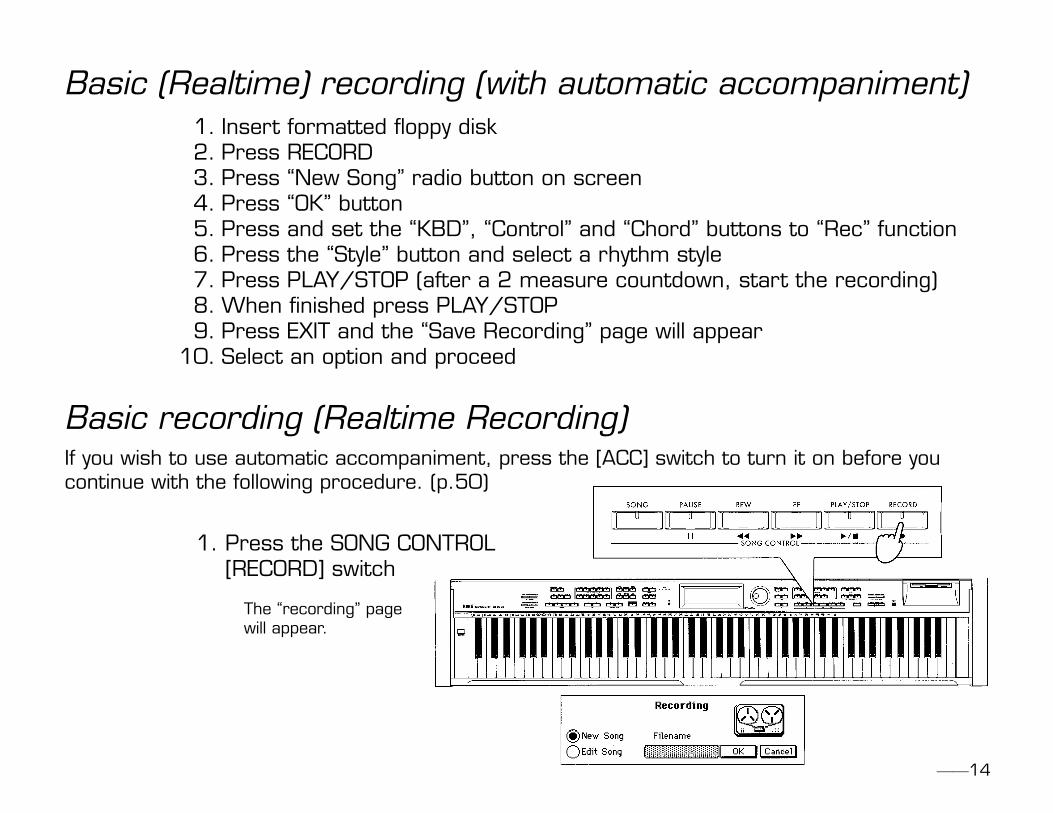
Basic (Realtime) recording (with automatic accompaniment)1.2.3.4.5.6.7.8.9.
10.
Insert formatted fl oppy diskPress RECORDPress “New Song” radio button on screenPress “OK” buttonPress and set the “KBD”, “Control” and “Chord” buttons to “Rec” functionPress the “Style” button and select a rhythm stylePress PLAY/STOP (after a 2 measure countdown, start the recording)When fi nished press PLAY/STOPPress EXIT and the “Save Recording” page will appearSelect an option and proceed
Basic recording (Realtime Recording)If you wish to use automatic accompaniment, press the [ACC] switch to turn it on before you continue with the following procedure. (p.50)
1. Press the SONG CONTROL [RECORD] switch The “recording” page will appear.
——14

Multitrack recordingYou can layer up to fi ve tracks of recording onto the data that was recorded in “KBD,” “Control,” and “Chord.” Here’s how to load the fi le that you saved on: a fl oppy disk in “Basic Recording,” and use multi-track recording to add more tracks.
1. Load the previously saved song data From a fl oppy disk, load the song data fi le that you saved in “Basic Recording” or “Step Recording.” (p.88)
2. Access the “Rec 2/3” page Press the [PAGE >] to access the “Rec 2/3” page.
3. Select the track that you wish to record Press the “Track” button for the track that you wish to record, it should say “Rec.”
4. Select a sound program Press the “Program” cell, and select a program for the track on which you will be performing. (p.29)
——15
“Program” cell

——16
CONNECTING OTHER EQUIPMENTRear Panel:

Diverse Sounds:Use the keyboard to play 332 different sounds produced by Korg’s proprietary Al-squared synthesis system. You can use the Layer function to play two sounds simultaneously or the Split function to divide the keyboard and play two different sounds in separate ranges.
Versatile Rhythm Styles:The automatic accompaniment styles include various rhythm styles from all around the world. You can enjoy adding the musical flavors of different countries to your playing.
Effects: Two digital effect processors (37 effect types) are built-in, letting you add reverberation to create the impression of playing in a concert hall or apply chorus to create fuller sounds.
Pedal Effects: To support an important aspect of piano performance, the KD-30,-50,-140 provide a damper pedal that features a half-damper effect. It also has a soft pedal and a sostenuto pedal as found on most acoustic grand pianos.
Metronome:The included metronome is available at the touch of a switch. Its volume and speed can be adjusted to the desired tempo for your song or situation.
Recorder:The built-in recorder is as easy to use as a tape recorder. Since you can record seven tracks in addition to the keyboard, you can even input small chamber ensembles or band scores. Of course, you can easily record the automatic accompaniment.
Step Recording: The step recording function lets you record an automatic accompani-ment by inputting chords and panel operations one by one. By using this, you can easily input music from a chord chart even if you are not a skilled pianist.
Touch Control: Playing touch is a vital aspect of a piano’s response, and you can choose from six different touch settings. This allows the KD-30,-50,-140 to be played by anyone from children (who tend to have a lighter touch) to expe-rienced pianists. You can also select a setting in which playing dynamics will have no effect on the sound—ideal for playing organ sounds etc.
Temperaments: You can use ten different temperaments, including classical temperaments and tunings used in ethnic music. Four user scales can also be created.
Pitch Adjustment (Transpose): The transpose function lets you change keys easily with a push of a button to the key that is comfortable for your voice.
MIDI/PCIF: MIDI (or switch-selectable PCIF) connectors are provided for connechon to a computer or other MIDI device. This allows you to record your playing to a computer with music software.
Mic Effects: Effects frequently used for karaoke, such as reverb and echo, are provided. You can enjoy karaoke using the automatic accompaniment function or the SMF karaoke function.
XG Tone Generator: A built-in XG tone generator with full support for the XG specifi cation allows playback of commercially available Standard MIDI File song data for XG tone generators.
Karaoke Function: Karaoke supports XF and SMF with Iyrics.
Touch-View LCD Screen: The 64 x 256 pixel LCD graphic display makes operation intuitive and easy. Selections shown in the LCD screen can be operated simply by touching them.
18521 Railroad Street | City of Industry, CA 91748 | 800-592-9393 | 626-964-4700 | Fax: 626-965-5224
www.kohlerdigitals.com