Embed Size (px)
Citation preview
Kaleidoscope Eyes (Trinket-Powered NeoPixel LED RingGoggles)
Created by Phillip Burgess
Last updated on 2019-04-09 06:03:16 PM UTC

Overview
Here’s a project to dazzle onlookers at Halloween parties, cosplay conventions, raves or at Burning Man. These full-color animated LED goggles attract a LOT of attention!
Adafruit NeoPixel LED rings fit perfectly inside the eyecups of most 50mm round goggles — a very common size. It’salmost as if these rings were made with this project in mind!
Tools Needed
This guide was written for the Trinket Mini boards, but can be done with either the Trinket Mini or Trinket M0.We recommend the Trinket M0 as it is easier to use and is more compatible with modern computers!�
© Adafruit Industries https://learn.adafruit.com/kaleidoscope-eyes-neopixel-led-goggles-trinket-gemma Page 3 of 24

This is a soldering project, albeit a small one. You will need the common soldering paraphernalia of a soldering iron,solder and tools for cutting and stripping wire.
You’ll need some method of securing the electronics inside the goggles. Hot-melt glue (with a glue gun) works well forthis. Watch your fingers! Or craft glue (such as E6000) is an Adafruit favorite. Tape could be used for a quick andtemporary setup.
Parts Needed
We have a DIY kit with all the necessary pieces (including goggles), or you can “bring your own goggles” for a custom-made design.
The kit version includes our costume
goggles (https://adafru.it/e1O), two NeoPixel
rings (https://adafru.it/dyU), a Trinket
M0 (https://adafru.it/Agg) or Trinket Mini
Microcontroller (https://adafru.it/dyV), JST
connector (http://adafru.it/1769), rechargeable 150 mAh
LiPoly battery (https://adafru.it/dYY), enough wire for all
the connections, plus a USB battery
charger (https://adafru.it/doR).
…or Bring-Your-Own-Goggles
If you already have a favorite pair of goggles that you’d rather build this around (these Germangoggles (https://adafru.it/cFm) from Restoration Hardware are pretty cool), then you just need to add the electronicparts linked above. You also then have the option of stepping up to a larger 500 mAh LiPolybattery (https://adafru.it/drL) or a less costly 3x AAA battery case (https://adafru.it/dYF). You’ll need to provide yourown wire and perhaps some heat-shrink tubing.
An assortment of goggles…the ones in front are safety
and welding goggles, while the two in back are costume
shop and toy store finds. Yet they all use 50mm round
lenses!
© Adafruit Industries https://learn.adafruit.com/kaleidoscope-eyes-neopixel-led-goggles-trinket-gemma Page 4 of 24

�
If you go the custom route, the design must be adapted to fit your reality.
Great thing about our costume goggles (https://adafru.it/e1O) is that you can assemble all the electronics first, outsidethe goggles, then install them. That’s not always the case with these alternates…you may need to snake wires in andout of the eye cups and solder parts with them already in the goggles…this can be tricky! Soldering novices mayprefer the kit version for this reason.
If you choose a 3x AAA battery case (instead of a rechargeable LiPoly battery), it won’t fit inside the goggles. Thiscould be attached to the strap, or run longer wires and keep the battery pack in a pocket.
Can I use a Gemma instead of a Trinket?�
© Adafruit Industries https://learn.adafruit.com/kaleidoscope-eyes-neopixel-led-goggles-trinket-gemma Page 5 of 24

© Adafruit Industries https://learn.adafruit.com/kaleidoscope-eyes-neopixel-led-goggles-trinket-gemma Page 6 of 24

Wiring & Soldering
Before starting, take inventory of all your parts:
Goggles
NeoPixel rings (2)
Trinket M0 or Trinket Mini Microcontroller
JST connector
Micro LiPo USB charger
LiPoly battery
Wire
Your kit might have a couple of extra bits; a small power
cable and some pin headers. If present, they can be
tossed in your spare parts drawer; they’re not used
here.
If this is your first time using the Adafruit Trinket microcontroller, work through the Adafruit TrinketM0 (https://adafru.it/Agg) or Introducing Trinket (https://adafru.it/dhx) guide first. This explains how to set up theArduino IDE software and load code onto the board. Don’t continue here until you have something like the “pulse”example working.
If you encounter problems, post on the Adafruit Forums (https://adafru.it/cer) for help…it’s much easier to troubleshootand replace parts before they’re soldered together and glued into some goggles!
Let’s get the trickiest soldering out of the way first, installing the JST battery connector on the underside side of theTrinket board…
© Adafruit Industries https://learn.adafruit.com/kaleidoscope-eyes-neopixel-led-goggles-trinket-gemma Page 7 of 24
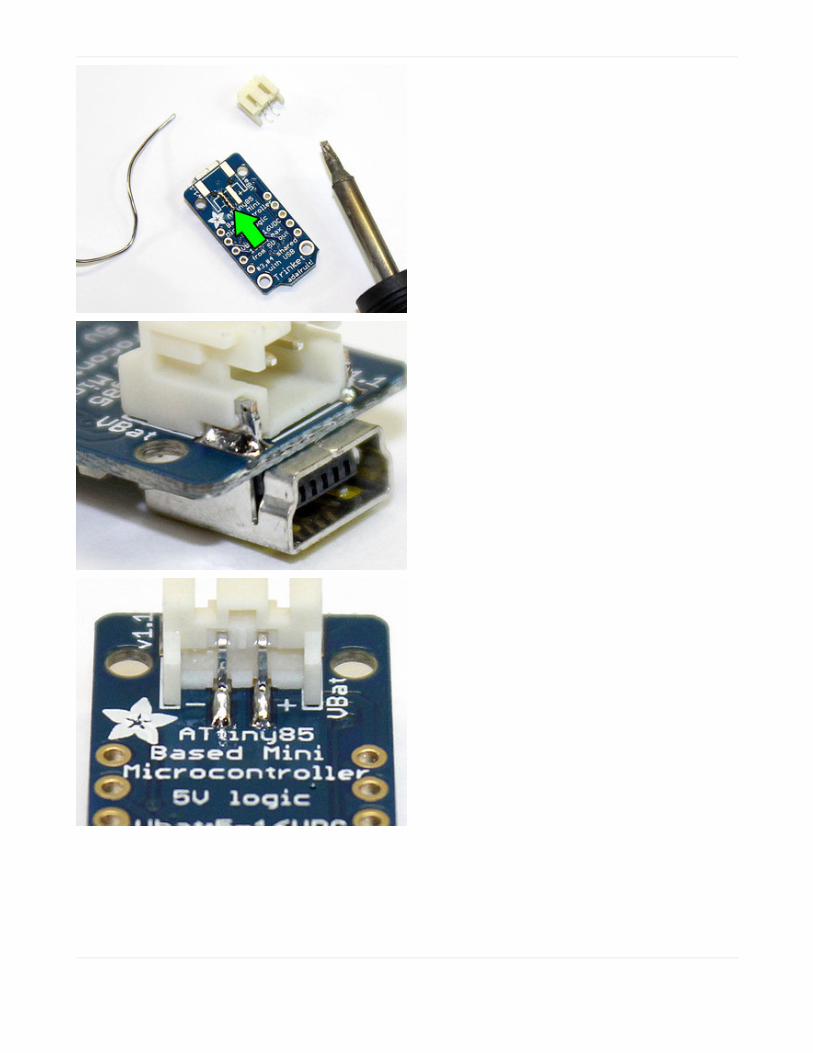
Start by “tinning” one of the JST pads on the back of the
Trinket…heat the pad and apply solder so the whole
surface is covered.
Hold the JST socket in place (tweezers recommended)
and re-melt the solder, allowing the part to sink into
position.
Once this first pin is tacked down, the rest are easy.
Remember to heat the parts, then apply solder…do not
melt solder on the iron and “wipe” it on the parts…that
makes a weak cold solder joint. Properly done, the
connections should be shiny and smooth.
Congrats, you’ve done surface-mount soldering!
© Adafruit Industries https://learn.adafruit.com/kaleidoscope-eyes-neopixel-led-goggles-trinket-gemma Page 8 of 24
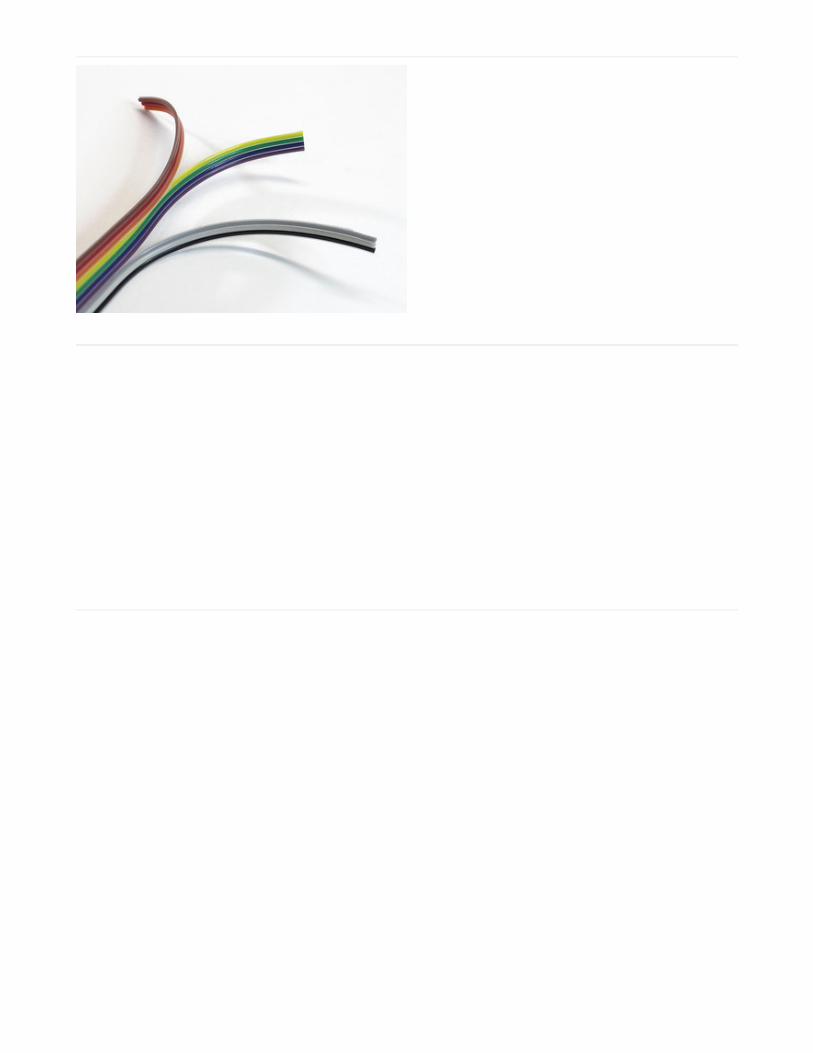
Next, peel away two sets of three wires each from the
included bit of ribbon cable. (If you’re building your own
custom goggles, you can just use separate pieces of
wire for this, it’s all good.)
If using our costume goggles, one of these 3-wire cables
will be visible on the outside, so pick a color
combination that you like.
Separate the wires by about 1 inch at both ends, strip
away a little insulation and give the wires a twist to
prevent fraying. Optionally tinning the wire ends makes
them a little more manageable…heat each one with a
soldering iron and melt just a tiny bit of solder into the
strands.
If you mess this part up, that’s okay. Trim the wires back
a little further and try again. Or use the left-over wire
from the original ribbon cable.
Here’s a circuit diagram of what we’re aiming for. Of course the real thing won’t be all rectilinear like this…we’ll walkyou through each step.
This diagram uses the original Trinket but you can also use the Trinket M0 with the exact same wiring!�
© Adafruit Industries https://learn.adafruit.com/kaleidoscope-eyes-neopixel-led-goggles-trinket-gemma Page 9 of 24

Solder one end of the 3-wire cables to the IN, V+ and G points on the two NeoPixel rings. There are two V+ and two Gholes on each ring…either one is fine, they’re connected.
Keep track of the colors you use for IN, V+ and G…it’s vitally important to make the right connections at the other end.
(These are the labels on the front of the rings. The back-side labels are a little more verbose.)
Notice how the wires are inserted from the front, then soldered on the back of the ring. Do it this way if you’re new tosoldering…it’s much easier. It can work the other way too…insert from back, solder on front…but the componenttolerances are extremely tight and beginners often get a blob of solder in the wrong place and the LEDs don’t work.
Next we connect the other ends of the 3-wire cables…first one to the Trinket, second one joins the two rings…
The second cable is the “visible from the outside” one, if that matters to your color scheme.
Notice here how the second cable enters the first ring from behind, then the wires are inserted from the front andsoldered on the back…the cables should not overlap any LEDs on the front.
Trinket First Ring
BAT+ V+ (either one)
Gnd G (either one)
#0 IN
First Ring Second Ring
V+ (either one) V+ (either one)
G (either one) G (either one)
out IN
© Adafruit Industries https://learn.adafruit.com/kaleidoscope-eyes-neopixel-led-goggles-trinket-gemma Page 10 of 24

If possible, try to align the rings so they’re pointed nearly the same direction (use a landmark like the Adafruit logo forreference). This is not required, but it’s a little easier to program animation effects when both rings have the sameorientation.
If using the “bring your own goggles” method, things
may be a lot more complex…for example, these goggles
have wires passing in and out through side perforations,
so it’s not possible to build and test the whole circuit
separately first…it must be built around the goggles and
is later folded into place. This is tricky!
We’ll clip the wire ends flush in a moment, but let’s test that everything works first…
© Adafruit Industries https://learn.adafruit.com/kaleidoscope-eyes-neopixel-led-goggles-trinket-gemma Page 11 of 24

Arduino Code
If you haven’t already worked through the Adafruit Trinket M0 (https://adafru.it/Agg) or IntroducingTrinket (https://adafru.it/cEu) guide, do that first. Once you have the Arduino IDE up and running, then download andinstall the NeoPixel library:
https://adafru.it/cDj
https://adafru.it/cDj
Installing Arduino libraries is a frequent stumbling block. If this is your first time, or simply needing a refresher, pleaseread the All About Arduino Libraries (https://adafru.it/aYM) tutorial.
Create a new Arduino sketch (File→New), then copy and paste the following code:
The Arduino code presented below works equally well on all versions of Trinket Mini and Trinket M0. But ifyou have an M0 board, consider using the CircuitPython code on the next page of this guide, no Arduino IDErequired!
�
// Low power NeoPixel goggles example. Makes a nice blinky display// with just a few LEDs on at any time.
#include <Adafruit_NeoPixel.h>#ifdef __AVR_ATtiny85__ // Trinket, Gemma, etc. #include <avr/power.h>#endif
#define PIN 0
Adafruit_NeoPixel pixels = Adafruit_NeoPixel(32, PIN);
uint8_t mode = 0, // Current animation effect offset = 0; // Position of spinny eyesuint32_t color = 0xFF0000; // Start reduint32_t prevTime;
void setup() {#ifdef __AVR_ATtiny85__ // Trinket, Gemma, etc. if(F_CPU == 16000000) clock_prescale_set(clock_div_1);#endif pixels.begin(); pixels.setBrightness(85); // 1/3 brightness prevTime = millis();}
void loop() { uint8_t i; uint32_t t;
switch(mode) {
case 0: // Random sparks - just one LED on at a time! i = random(32); pixels.setPixelColor(i, color); pixels.show();
© Adafruit Industries https://learn.adafruit.com/kaleidoscope-eyes-neopixel-led-goggles-trinket-gemma Page 12 of 24

From the Tools→Board menu, select either Adafruit Trinket 8 MHz or Adafruit Trinket 16 MHz (either one will work).Also make sure to select USBTinyISP from the Tools:Programmer menu. Connect the USB cable between thecomputer and Trinket, press the reset button on the board, then click the upload button (right arrow icon) in theArduino IDE.
Nothing will happen at first, this is normal. The LEDs only work on battery power! Unplug the USB cable, then connectthe battery to the JST plug on the back of the Trinket. If all goes well, you should get a sparkly light show from theLEDs.
Success! Unplug the battery and we’ll move on to the
final assembly…
(These rings are running a different sketch…more on that
in a bit.)
pixels.show(); delay(10); pixels.setPixelColor(i, 0); break; case 1: // Spinny wheels (8 LEDs on at a time) for(i=0; i<16; i++) { uint32_t c = 0; if(((offset + i) & 7) < 2) c = color; // 4 pixels on... pixels.setPixelColor( i, c); // First eye pixels.setPixelColor(31-i, c); // Second eye (flipped) } pixels.show(); offset++; delay(50); break; }
t = millis(); if((t - prevTime) > 8000) { // Every 8 seconds... mode++; // Next mode if(mode > 1) { // End of modes? mode = 0; // Start modes over color >>= 8; // Next color R->G->B if(!color) color = 0xFF0000; // Reset to red } for(i=0; i<32; i++) pixels.setPixelColor(i, 0); prevTime = t; }}
© Adafruit Industries https://learn.adafruit.com/kaleidoscope-eyes-neopixel-led-goggles-trinket-gemma Page 13 of 24

If the code refuses to compile it’s usually one of the following:
The Trinket extensions to the Arduino IDE are not correctly installed (use the ready-made IDE, it’s easier).The NeoPixel library is not correctly installed.The wrong board type is selected (should be Adafruit Trinket M0, Adafruit Trinket 8 MHz or 16 MHz, not anyversion of the Pro Trinket).
If the code compiles and uploads but nothing happens with the battery connected:
Compare your connections against the wiring diagram…for example, maybe you’ve accidentally connectedTrinket pin #0 to the first ring’s OUT instead of IN?An electrical short…a blob of solder or bit of wire making inadvertent contact with something nearby.A cold solder joint…solder isn’t properly melted between the wire and board.
If you can’t identify the source of the problem, you can post in the Adafruit Forums (https://adafru.it/cer) for assistance.It’s very helpful if you can get a well-lit, in-focus photo (or several) of the project, showing all the wires and solderconnections. We’ll look it over for any gremlins and recommend fixes.
© Adafruit Industries https://learn.adafruit.com/kaleidoscope-eyes-neopixel-led-goggles-trinket-gemma Page 14 of 24

CircuitPython Code
Program the Trinket M0 w/ CircuitPython
Trinket M0 Setup for CircuitPython
Now it's time to set up the Trinket M0 for use with CircuitPython (https://adafru.it/zB0) and our ScreamingCauldron code.
If you haven't already, follow this guide (https://adafru.it/ABS) to preparing the Trinket M0, including updating it withthe latest version of CircuitPython.
After prepping the Trinket M0 to run CircuitPython we'll also need to add a NeoPixel library. This guide tells youhow (https://adafru.it/Euo), as well as providing a good primer on using NeoPixels on the TrinketM0 with CircuitPython.
Installing NeoPixel Library
Download the latest adafruit-circuitpython-bundle-xxxx.zip (or newer) from the releases directory (https://adafru.it/zB-
)and then unzip it somewhere easy to find, such as your desktop. Then, copy the neopixel.mpy file to your
CIRCUITPY's lib directory on the Trinket M0.
Finally, if you had a neopixel.py file that was already in that same lib directory you can delete it (the mpy is a
compressed version)
Saving CircuitPython Code
Once you've got things working, you can edit the main.py file on the Trinket M0 to adjust what it actually does. No
need for a software IDE, complaining tools, or flashing the chip -- when you code with CircuitPython all you need is atext editor. Edit the code, save it to the Trinket M0, and it immediately runs!
## Kaleidoscope_Eyes_NeoPixel_LED_Goggles.py#import time
import boardimport neopixel
try: import urandom as random # for v1.0 API supportexcept ImportError: import random
numpix = 32 # Number of NeoPixelspixpin = board.D0 # Pin where NeoPixels are connected
mode = 0 # Current animation effectoffset = 0 # Position of spinny eyes
rgb_colors = ([255, 0, 0], # red [0, 255, 0], # green [0, 0, 255]) # blue
© Adafruit Industries https://learn.adafruit.com/kaleidoscope-eyes-neopixel-led-goggles-trinket-gemma Page 15 of 24

Copy that code, and then paste it into a new text document in your favorite text/coding editor. Then, save it to yourTrinket M0's CIRCUITPY drive as main.py
[0, 0, 255]) # blue
rgb_idx = 0 # index counter - primary color we are oncolor = rgb_colors[rgb_idx]prevtime = 0
pixels = neopixel.NeoPixel(pixpin, numpix, brightness=.3, auto_write=False)
prevtime = time.monotonic()
while True: i = 0 t = 0
# Random sparks - just one LED on at a time! if mode == 0: i = random.randint(0, (numpix - 1)) pixels[i] = color pixels.write() time.sleep(0.01) pixels[i] = (0, 0, 0)
# Spinny wheels (8 LEDs on at a time) elif mode == 1: for i in range(0, numpix): c = 0
# 4 pixels on... if ((offset + i) & 7) < 2: c = color
pixels[i] = c # First eye pixels[(numpix - 1) - i] = c # Second eye (flipped)
pixels.write() offset += 1 time.sleep(0.05)
t = time.monotonic()
if (t - prevtime) > 8: # Every 8 seconds... mode += 1 # Next mode if mode > 1: # End of modes? mode = 0 # Start modes over
if rgb_idx > 2: # reset R-->G-->B rotation rgb_idx = 0
color = rgb_colors[rgb_idx] # next color assignment rgb_idx += 1
for i in range(0, numpix): pixels[i] = (0, 0, 0)
prevtime = t
© Adafruit Industries https://learn.adafruit.com/kaleidoscope-eyes-neopixel-led-goggles-trinket-gemma Page 16 of 24

© Adafruit Industries https://learn.adafruit.com/kaleidoscope-eyes-neopixel-led-goggles-trinket-gemma Page 17 of 24

Final Assembly and Use
With the electronics squared away, let’s move on to the arts & crafts part of the project!
First, if you haven’t already, clip off the tips of the
soldered wires.
Gather these up and throw them away…make sure the
clipped bits don’t end up inside the goggles where
they’d cause electrical shorts.
© Adafruit Industries https://learn.adafruit.com/kaleidoscope-eyes-neopixel-led-goggles-trinket-gemma Page 18 of 24
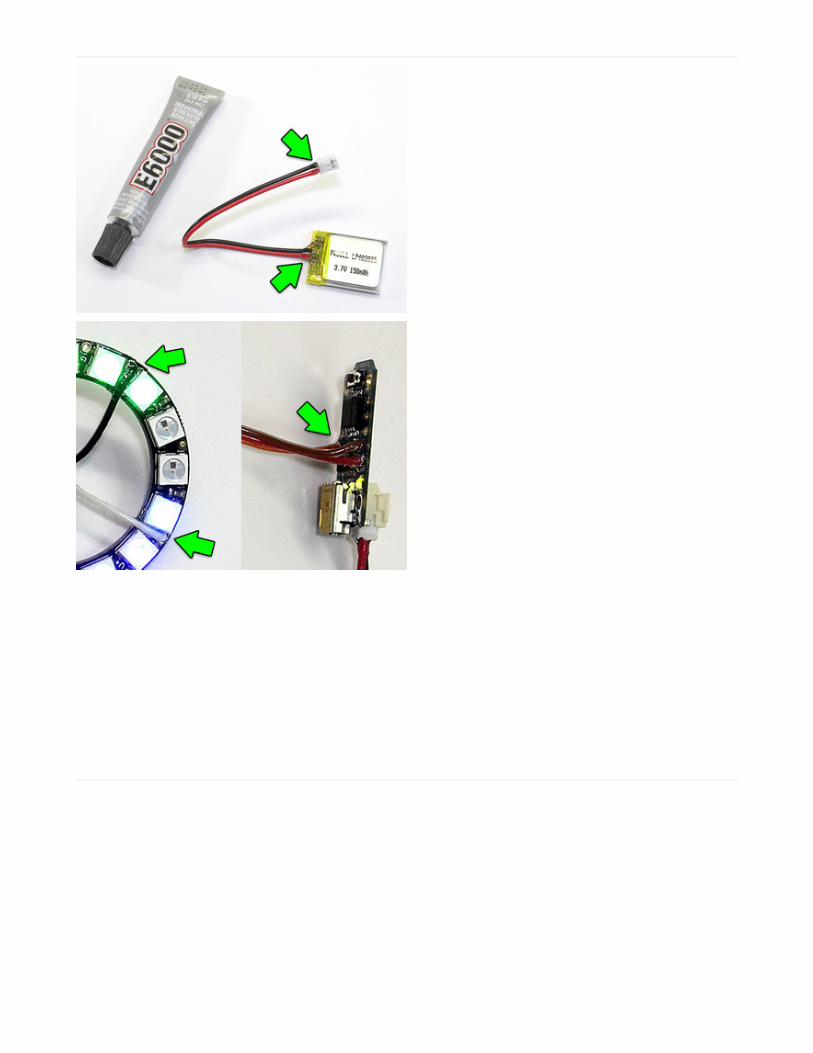
This step is optional but recommended: if you have
some 5-minute epoxy or craft adhesive such as E6000,
add a small bead at the base of each wire where it
meets the board…and especially on the LiPoly battery
and JST connector. This creates a strain relief, so wires
aren’t likely to break off when flexed. On the NeoPixel
rings, it helps the wires sit flat.
Wait until the glue or epoxy is fully cured before final
assembly or charging the battery.
© Adafruit Industries https://learn.adafruit.com/kaleidoscope-eyes-neopixel-led-goggles-trinket-gemma Page 19 of 24
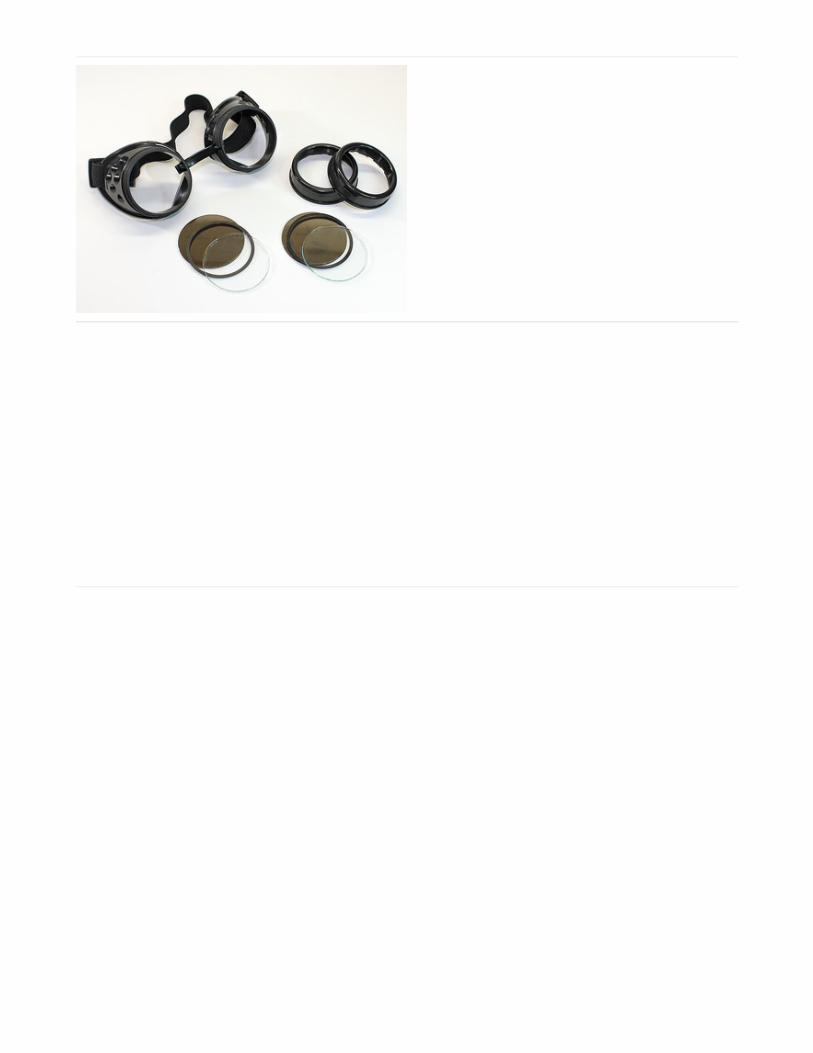
Unscrew the rings holding the lenses in place. Most
goggles (whether our costume variety or the bring-your-
own type) will have a couple different layers inside,
some clear, some darkened. Set the dark lenses aside,
we’ll just be using the clear ones.
The costume goggles have slots near the nose piece,
bridged by a tiny bit of plastic. If these are clipped away,
then all the electronics can be slid in place from the
front. You might also cut the slots just a little wider so
they don’t gouge the wires.
Bring-your-own goggles usually aren’t built this way,
which is why assembly is more involved.
The NeoPixel LEDs are very bright and focused. Let’s make some diffusers to soften the light.
Trace one of the lenses on a piece of paper, then cut it out with scissors. Ordinary printer/copier paper works just fine,or I had this fancy-pants vellum on-hand (it required two layers).
© Adafruit Industries https://learn.adafruit.com/kaleidoscope-eyes-neopixel-led-goggles-trinket-gemma Page 20 of 24

If you have access to a laser cutter (through a local hackerspace, your school, whatever), measure the diameter of thelenses for cutting new ones. 1/16" white acrylic works well for this.
Some of our early photos show ring-shaped diffusers, but we found the goggles were best used as a decorativehatband and not worn (more on this later). So go ahead and make solid diffusers. It’s much easier and looks cool.
Insert the electronics into the goggles from the front,
with the ring-to-ring ribbon cable across the bridge of
the nose.
Prepare the lenses — clear layer first, then the diffuser,
then optionally the spacer ring from the original lenses.
Screw the lenses in place, being super extra careful not
to gouge the wires!
© Adafruit Industries https://learn.adafruit.com/kaleidoscope-eyes-neopixel-led-goggles-trinket-gemma Page 21 of 24

Connect the battery briefly to make sure all the electronics are happy prior to final assembly. It’s easier to troubleshootwhile everything’s out in the open.
If using metal goggles, make sure there’s no contact between the goggles and any exposed conductors.
The rings are then secured in place with a few dabs of hot glue or fast-setting epoxy. Glue just a couple spots at atime, so you can hold the rings centered while it sets.
Finally, the Trinket is then glued to the outer edge of the eye cup, with the USB port and battery connector bothaccessible. (If using metal goggles, use tape or something to provide an insulating layer.) The wires can be folded andheld in place with additional dabs of glue.
PRO TIP: if you used hot glue and need to remove the rings later, dip a Q-Tip in rubbing alcohol, touch it to the edge ofeach blob of glue and allow it to soak in for a few seconds. This doesn’t dissolve the glue; it seeps between the twoparts and cleanly breaks the bond. The glue should peel away with little effort. Science!
© Adafruit Industries https://learn.adafruit.com/kaleidoscope-eyes-neopixel-led-goggles-trinket-gemma Page 22 of 24
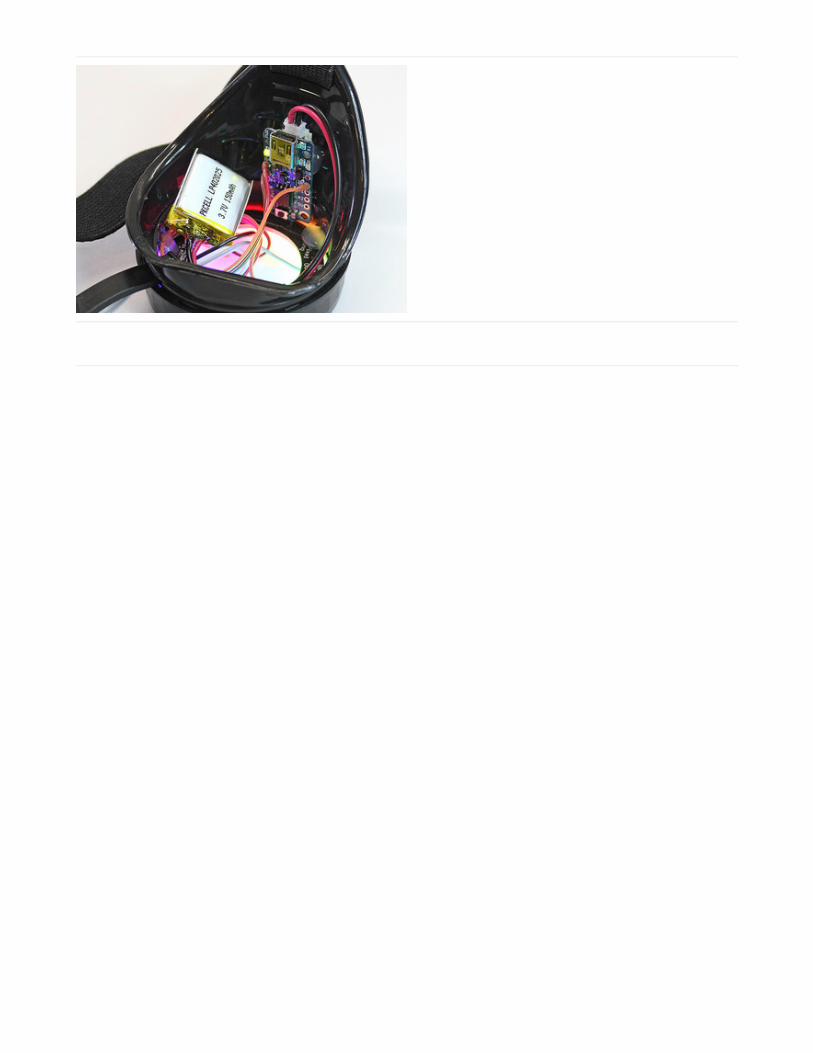
Power on the goggles by connecting the battery.
The battery is small enough to tuck away inside the eye
cup. Add a bit of masking tape to hold it in place if
needed.
SAFETY AND COMMON SENSE
Your LED goggles are a fashion accessory — they should be worn on your forehead or on a hat, not over youreyes. Even if you block most of the light inside, even a small scattered bit is still very bright and will cause headaches,maybe even vomiting (https://adafru.it/cFK). If you leave out the diffusers and try to see through the rings, peripheralvision is severely limited. Wearing these goggles on one’s face is just not smart…stick them up above!
If you’ve modified a pair of welding or safety goggles, their design is now compromised and they should no longer beused for welding or safety!
For the same reasons, if attending an event like Burning Man, take one (or several) pairs of “real” sealed dust gogglesin addition to your LED “fun” goggles. Don’t rely on the latter for protection.
Safety Checklist:
Never use the altered goggles for safety or eyewear; they’re strictly a fashion item.If your goggles have metal frames, make sure there's no contact with exposed conductors on the Trinket board,NeoPixel rings or wires.
© Adafruit Industries https://learn.adafruit.com/kaleidoscope-eyes-neopixel-led-goggles-trinket-gemma Page 23 of 24

© Adafruit Industries Last Updated: 2019-04-09 06:03:16 PM UTC Page 24 of 24