Embed Size (px)
Citation preview
- 1 -
Jukebox Multimedia 20, 120 & ARCHOS VIDEO AV140
English
Quick Start Guide 1.1 for Jukebox Multimedia 20, 120 & AV140 (no. 101890V11) Please visit our web site to download the most recent manual and software for this product
P. XX
Complete PDF Manual on included
CD-ROM
Learn to use us with Flash™ interactive
manuals on the included CD-ROM
Jukebox Multimedia 20 Jukebox Multimedia 120 & ARCHOS VIDEO AV140
- 2 -
Warranty and Limited Liability This product is sold with a limited warranty and specific remedies are available to the original purchaser in the event the product fails to conform to the limited warranty. Manufacturer’s liability may be further limited in accordance with its sales contract. In general, the manufacturer shall not be responsible for product damages caused by natural disasters, fire, static discharge, misuse, abuse, neglect, improper handling or installation, unauthorized repair, alteration or accident. In no event shall the manufacturer be liable for loss of data stored on disk media. MANUFACTURER SHALL NOT BE LIABLE FOR ANY SPECIAL, INCIDENTAL OR CONSEQUENTIAL DAMAGES. EVEN IF INFORMED OF THE POSSIBILITY THEREOF IN ADVANCE. ARCHOS licensor(s) makes no warranties, express or implied, including, without limitation, the implied warranties of merchantability and fitness for a particular purpose, regarding the licensed materials. ARCHOS’s licensor(s) does not warrant, guarantee or make any representations regarding the use or the results of the use of the licensed materials in terms of its correctness, accuracy, reliability, correctness or otherwise. The entire risk as to the results and performance of the licensed materials is assumed by you. The exclusion of implied warranties is not permitted by some jurisdictions. The above exclusion may not apply to you. In no event will ARCHOS’s licensor(s), and their directors, officers, employees or agents (collectively ARCHOS’ licensor) be liable to you for any consequential, incidental or indirect damages (including damages for loss of business profits, business interruption, loss of business information, and the like) arising out of the use of inability to use the licensed materials even if ARCHOS’ licensor has been advised of the possibility of such damages. Because some jurisdiction do not allow the exclusion or limitation of liability for consequential or incidental damages, the above limitations may not apply to you.
Please see your sales contract for a complete statement of warranty rights, remedies and limitation of liability. Furthermore, warranty does not apply to: • Damages or problems resulting from misuse, abuse, accident, alteration or incorrect electrical current or
voltage. • Any product tampered-with or damaged warranty seal or serial number label. • Any product without a warranty or serial number label. • Batteries and any consumable items delivered with or in the equipment.
Warnings and Safety Instructions CAUTION To prevent risks of electric shock, this unit must only be opened by qualified service personnel. Power off and disconnect the power supply cable before opening the unit. WARNING To prevent fire or shock hazard, do not expose the unit to rain or moisture. Use of this product is for personal use only. Copying CDs or loading music, video, or picture files for sale or other business purposes is or may be a violation of copyright law. Copyrighted materials, works of art, and/or presentations may require authorization to be fully or partially recorded. Please be aware of all such applicable laws concerning the recording and use of such for your country and jurisdiction.
FCC Warning Statement FCC Compliance This equipment has been tested and found to comply with limits for a Class B digital device, pursuant to Part 15 of the FCC Rules. These limits are designed to provide reasonable protection against harmful interference in a residential installation. This equipment generates, uses and can radiate radio frequency energy and, if not installed and used in accordance with instructions, may cause harmful interference to radio communications. However, there is no guarantee that interference will not occur in a particular installation. If this equipment does cause harmful interference to radio or television reception, which can be determined by turning the equipment off and on, the user is encouraged to try to correct the interference by one or more of the following measures:
• Reorient or relocate the receiving antenna. • Increase the separation between the equipment and receiver. • Connect the equipment into an outlet on a circuit different from that to which the receiver is
connected. • Consult the dealer or an experienced radio/TV technician for help.
- 3 -
Note: During file transfer or in the PC mode, if the End User Terminal (EUT) or computer suddenly freezes or does not respond, it may be due to the electrostatic phenomenon. Please follow the procedures below to recover the operation: Unplug the USB cable from the End User Terminal (EUT) Close the software application in the computer (or re-boot the computer if necessary) Re-connect the USB cable to the End User Terminal (EUT) CAUTION : Modifications not authorized by the manufacturer may void users authority to operate this device. FCC Part 15 - Operation is subject to the following two conditions: 1. This device may not cause harmful interference; 2. This device must accept any interference received including interference that may cause undesired operation.
Copyright Notice Copyright ARCHOS © 2002 All rights reserved. This document may not, in whole or part, be copied, photocopied, reproduced, translated or reduced to any electronic medium or machine-readable form without prior consent, in writing, from ARCHOS. All brands and products names are registered trademarks and the property of their respective owners. Specifications are subject to change without notification. Errors and omissions accepted. Images and illustrations may not always match contents. Copyright ® ARCHOS. All rights reserved. Disclaimer of warranty: to the extent allowed by applicable law, representations and warranties of non-infringement of copyrights or other intellectual property rights resulting from the use of the product under conditions other than as here above specified, are hereby excluded.
Table of Contents 1. Starting up the Jukebox Multimedia ..........................4 2. Ports Connections and Buttons.................................5 3. Playing MP3 music....................................................6 4. Settings......................................................................7 5. Recording MP3 Music ..............................................8 6. Playing Video.............................................................8 7. Creating MPEG 4 Movies..........................................9 8. Viewing Photos..........................................................9 9. Connecting / Disconnecting from your Computer ...10 10. Using Music Match software .................................11 11. Optional add-ons*..................................................11 12. Technical Support .................................................13
Dear Customer, ARCHOS thanks you for the purchase of this exciting multimedia product. Never before has one been able to carry with him or her so much information, be it MP3 music, MP4 videos or JPEG pictures, and be able to play these without a computer. We are sure that your Jukebox Multimedia will give you years of listening and viewing enjoyment. Of course you can always use it as a regular hard drive too. Please check our web site also as we periodically update the Jukebox Multimedia’s internal operating software to offer new features. Wishing you the best Music, Picture, and Video experience, The ARCHOS TEAM PS. Don’t forget to check out the Flash™ interactive manual on the CD-ROM.
- 4 -
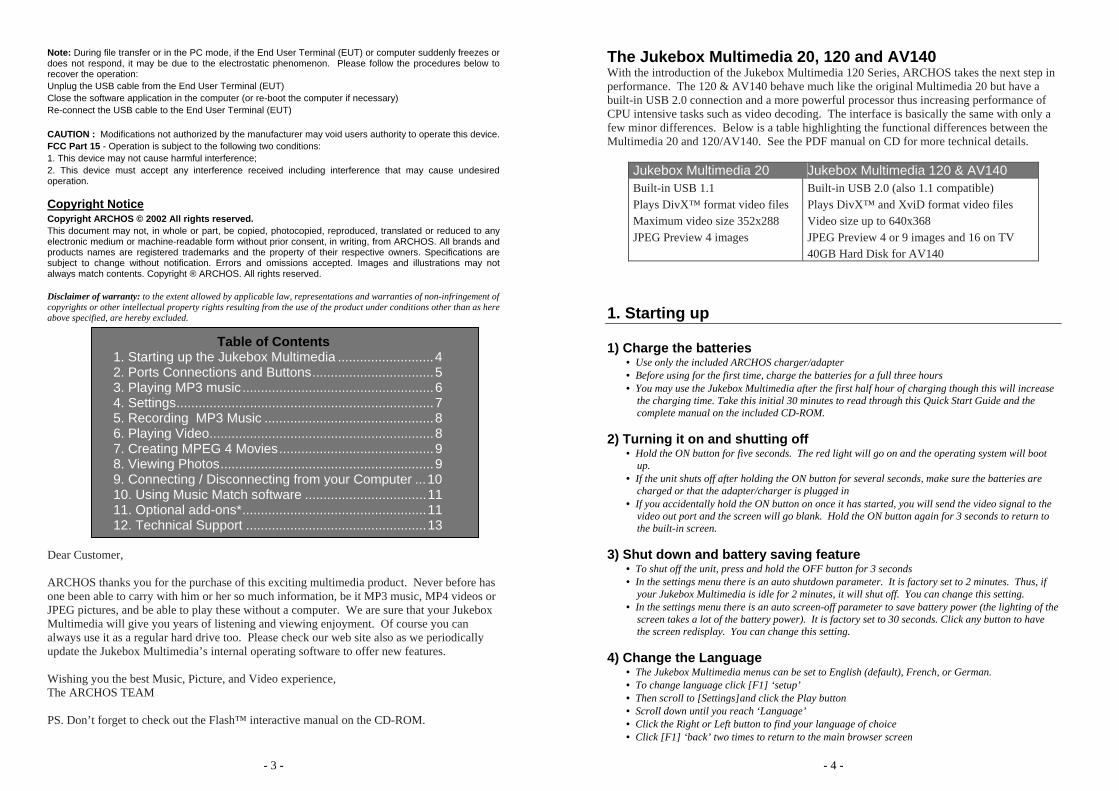
The Jukebox Multimedia 20, 120 and AV140 With the introduction of the Jukebox Multimedia 120 Series, ARCHOS takes the next step in performance. The 120 & AV140 behave much like the original Multimedia 20 but have a built-in USB 2.0 connection and a more powerful processor thus increasing performance of CPU intensive tasks such as video decoding. The interface is basically the same with only a few minor differences. Below is a table highlighting the functional differences between the Multimedia 20 and 120/AV140. See the PDF manual on CD for more technical details.
Jukebox Multimedia 20 Jukebox Multimedia 120 & AV140 Built-in USB 1.1 Plays DivX™ format video files Maximum video size 352x288 JPEG Preview 4 images
Built-in USB 2.0 (also 1.1 compatible) Plays DivX™ and XviD format video files Video size up to 640x368 JPEG Preview 4 or 9 images and 16 on TV 40GB Hard Disk for AV140
1. Starting up 1) Charge the batteries
• Use only the included ARCHOS charger/adapter • Before using for the first time, charge the batteries for a full three hours • You may use the Jukebox Multimedia after the first half hour of charging though this will increase
the charging time. Take this initial 30 minutes to read through this Quick Start Guide and the complete manual on the included CD-ROM.
2) Turning it on and shutting off
• Hold the ON button for five seconds. The red light will go on and the operating system will boot up.
• If the unit shuts off after holding the ON button for several seconds, make sure the batteries are charged or that the adapter/charger is plugged in
• If you accidentally hold the ON button on once it has started, you will send the video signal to the video out port and the screen will go blank. Hold the ON button again for 3 seconds to return to the built-in screen.
3) Shut down and battery saving feature
• To shut off the unit, press and hold the OFF button for 3 seconds • In the settings menu there is an auto shutdown parameter. It is factory set to 2 minutes. Thus, if
your Jukebox Multimedia is idle for 2 minutes, it will shut off. You can change this setting. • In the settings menu there is an auto screen-off parameter to save battery power (the lighting of the
screen takes a lot of the battery power). It is factory set to 30 seconds. Click any button to have the screen redisplay. You can change this setting.
4) Change the Language
• The Jukebox Multimedia menus can be set to English (default), French, or German. • To change language click [F1] ‘setup’ • Then scroll to [Settings]and click the Play button • Scroll down until you reach ‘Language’ • Click the Right or Left button to find your language of choice • Click [F1] ‘back’ two times to return to the main browser screen
- 5 -
2. Ports Connections and Buttons
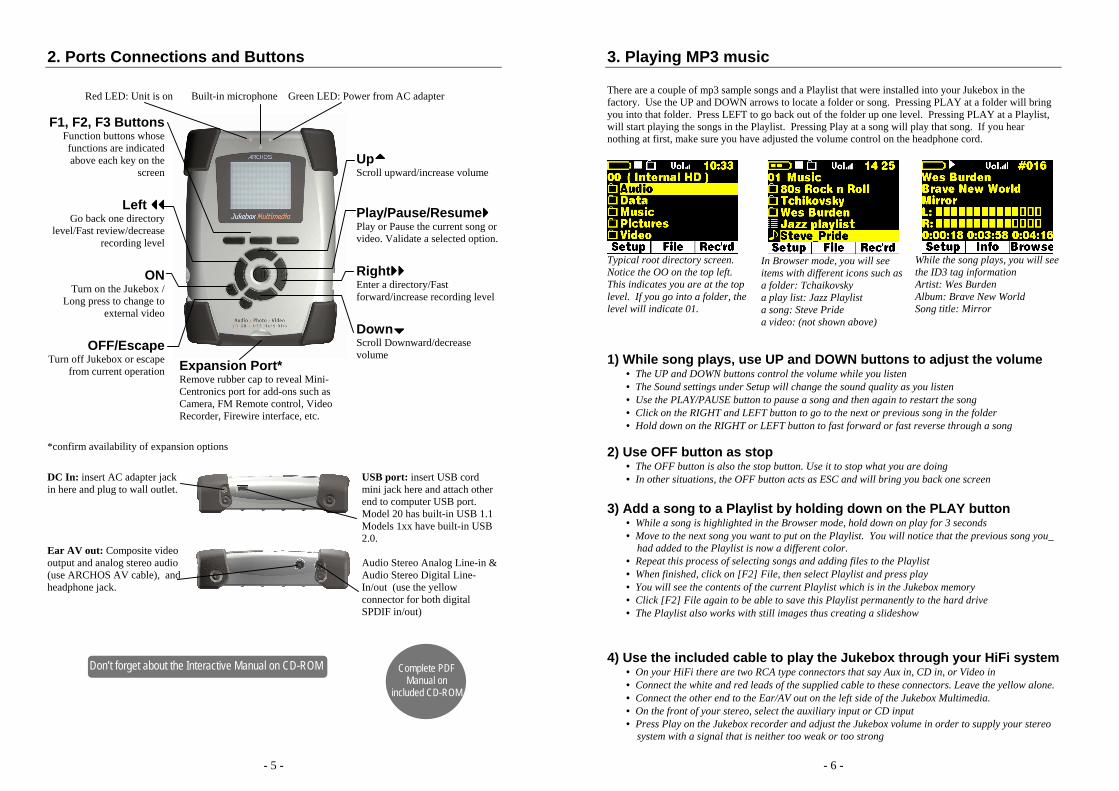
Red LED: Unit is on Built-in microphone Green LED: Power from AC adapter F1, F2, F3 Buttons
Function buttons whose functions are indicated above each key on the
screen
Left !!!!!!!!Go back one directory
level/Fast review/decrease recording level
ON
Turn on the Jukebox / Long press to change to
external video
OFF/EscapeTurn off Jukebox or escape
from current operation Expansion Port* Remove rubber cap to reveal Mini-Centronics port for add-ons such as Camera, FM Remote control, Video Recorder, Firewire interface, etc.
Up"""" Scroll upward/increase volume Play/Pause/Resume#### Play or Pause the current song or video. Validate a selected option. Right######## Enter a directory/Fast forward/increase recording level Down$$$$ Scroll Downward/decrease volume
*confirm availability of expansion options DC In: insert AC adapter jack in here and plug to wall outlet.
USB port: insert USB cord mini jack here and attach other end to computer USB port. Model 20 has built-in USB 1.1 Models 1xx have built-in USB 2.0.
Ear AV out: Composite video output and analog stereo audio (use ARCHOS AV cable), and headphone jack.
Audio Stereo Analog Line-in & Audio Stereo Digital Line-In/out (use the yellow connector for both digital SPDIF in/out)
Don’t forget about the Interactive Manual on CD-ROM Complete PDF Manual on
included CD-ROM
- 6 -
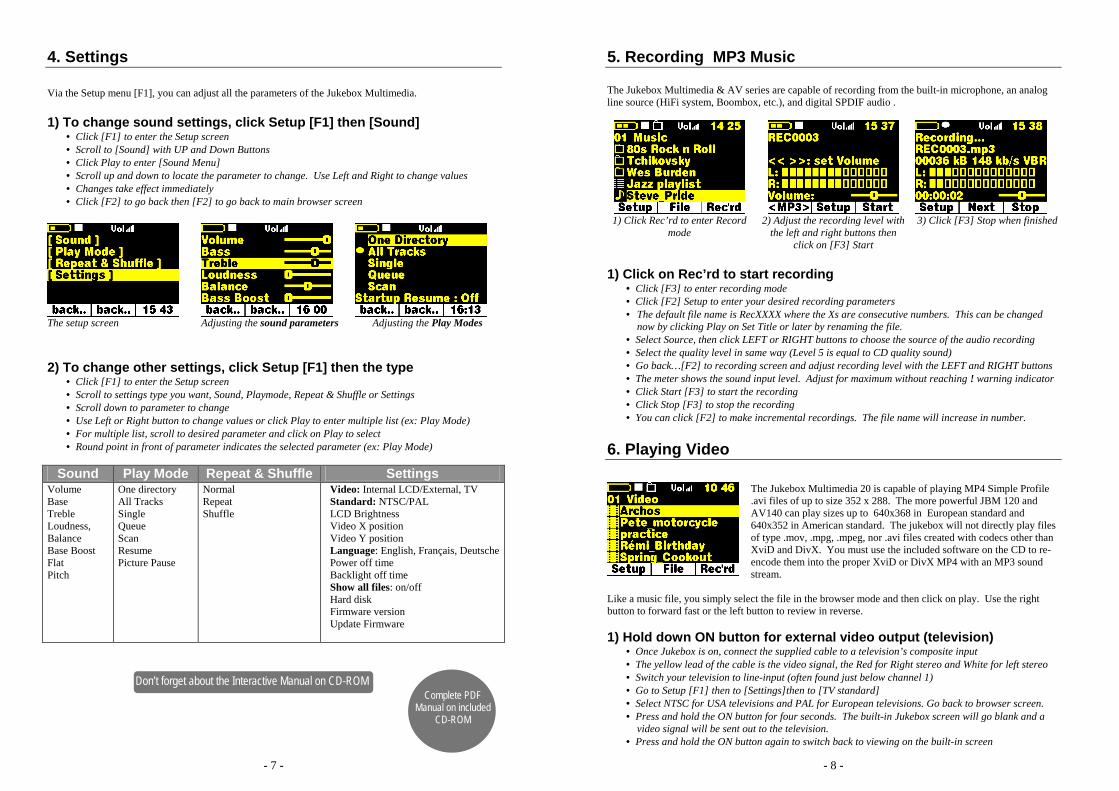
3. Playing MP3 music There are a couple of mp3 sample songs and a Playlist that were installed into your Jukebox in the factory. Use the UP and DOWN arrows to locate a folder or song. Pressing PLAY at a folder will bring you into that folder. Press LEFT to go back out of the folder up one level. Pressing PLAY at a Playlist, will start playing the songs in the Playlist. Pressing Play at a song will play that song. If you hear nothing at first, make sure you have adjusted the volume control on the headphone cord.
Typical root directory screen. Notice the OO on the top left. This indicates you are at the top level. If you go into a folder, the level will indicate 01.
In Browser mode, you will see items with different icons such as a folder: Tchaikovsky a play list: Jazz Playlist a song: Steve Pride a video: (not shown above)
While the song plays, you will see the ID3 tag information Artist: Wes Burden Album: Brave New World Song title: Mirror
1) While song plays, use UP and DOWN buttons to adjust the volume
• The UP and DOWN buttons control the volume while you listen • The Sound settings under Setup will change the sound quality as you listen • Use the PLAY/PAUSE button to pause a song and then again to restart the song • Click on the RIGHT and LEFT button to go to the next or previous song in the folder • Hold down on the RIGHT or LEFT button to fast forward or fast reverse through a song
2) Use OFF button as stop
• The OFF button is also the stop button. Use it to stop what you are doing • In other situations, the OFF button acts as ESC and will bring you back one screen
3) Add a song to a Playlist by holding down on the PLAY button
• While a song is highlighted in the Browser mode, hold down on play for 3 seconds • Move to the next song you want to put on the Playlist. You will notice that the previous song you_
had added to the Playlist is now a different color. • Repeat this process of selecting songs and adding files to the Playlist • When finished, click on [F2] File, then select Playlist and press play • You will see the contents of the current Playlist which is in the Jukebox memory • Click [F2] File again to be able to save this Playlist permanently to the hard drive • The Playlist also works with still images thus creating a slideshow
4) Use the included cable to play the Jukebox through your HiFi system
• On your HiFi there are two RCA type connectors that say Aux in, CD in, or Video in • Connect the white and red leads of the supplied cable to these connectors. Leave the yellow alone. • Connect the other end to the Ear/AV out on the left side of the Jukebox Multimedia. • On the front of your stereo, select the auxiliary input or CD input • Press Play on the Jukebox recorder and adjust the Jukebox volume in order to supply your stereo
system with a signal that is neither too weak or too strong
- 7 -
4. Settings Via the Setup menu [F1], you can adjust all the parameters of the Jukebox Multimedia.
1) To change sound settings, click Setup [F1] then [Sound]
• Click [F1] to enter the Setup screen • Scroll to [Sound] with UP and Down Buttons • Click Play to enter [Sound Menu] • Scroll up and down to locate the parameter to change. Use Left and Right to change values • Changes take effect immediately • Click [F2] to go back then [F2] to go back to main browser screen
The setup screen
Adjusting the sound parameters
Adjusting the Play Modes
2) To change other settings, click Setup [F1] then the type
• Click [F1] to enter the Setup screen • Scroll to settings type you want, Sound, Playmode, Repeat & Shuffle or Settings • Scroll down to parameter to change • Use Left or Right button to change values or click Play to enter multiple list (ex: Play Mode) • For multiple list, scroll to desired parameter and click on Play to select • Round point in front of parameter indicates the selected parameter (ex: Play Mode)
Sound Play Mode Repeat & Shuffle Settings
Volume Base Treble Loudness, Balance Base Boost Flat Pitch
One directory All Tracks Single Queue Scan Resume Picture Pause
Normal Repeat Shuffle
Video: Internal LCD/External, TV Standard: NTSC/PAL LCD Brightness Video X position Video Y position Language: English, Français, Deutsche Power off time Backlight off time Show all files: on/off Hard disk Firmware version Update Firmware
Don’t forget about the Interactive Manual on CD-ROM Complete PDF
Manual on included CD-ROM
- 8 -
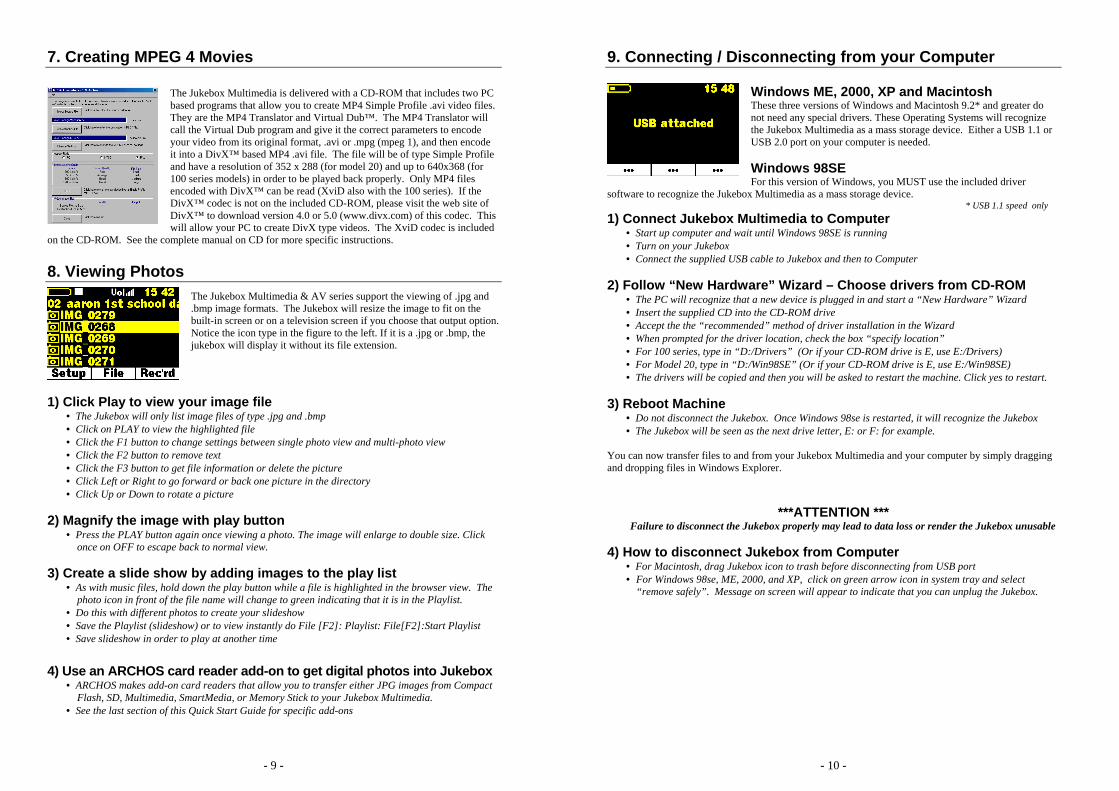
5. Recording MP3 Music The Jukebox Multimedia & AV series are capable of recording from the built-in microphone, an analog line source (HiFi system, Boombox, etc.), and digital SPDIF audio .
1) Click Rec’rd to enter Record
mode
2) Adjust the recording level with
the left and right buttons then click on [F3] Start
3) Click [F3] Stop when finished
1) Click on Rec’rd to start recording
• Click [F3] to enter recording mode • Click [F2] Setup to enter your desired recording parameters • The default file name is RecXXXX where the Xs are consecutive numbers. This can be changed
now by clicking Play on Set Title or later by renaming the file. • Select Source, then click LEFT or RIGHT buttons to choose the source of the audio recording • Select the quality level in same way (Level 5 is equal to CD quality sound) • Go back…[F2] to recording screen and adjust recording level with the LEFT and RIGHT buttons • The meter shows the sound input level. Adjust for maximum without reaching ! warning indicator • Click Start [F3] to start the recording • Click Stop [F3] to stop the recording • You can click [F2] to make incremental recordings. The file name will increase in number.
6. Playing Video The Jukebox Multimedia 20 is capable of playing MP4 Simple Profile .avi files of up to size 352 x 288. The more powerful JBM 120 and AV140 can play sizes up to 640x368 in European standard and 640x352 in American standard. The jukebox will not directly play files of type .mov, .mpg, .mpeg, nor .avi files created with codecs other than XviD and DivX. You must use the included software on the CD to re-encode them into the proper XviD or DivX MP4 with an MP3 sound stream.
Like a music file, you simply select the file in the browser mode and then click on play. Use the right button to forward fast or the left button to review in reverse. 1) Hold down ON button for external video output (television)
• Once Jukebox is on, connect the supplied cable to a television’s composite input • The yellow lead of the cable is the video signal, the Red for Right stereo and White for left stereo • Switch your television to line-input (often found just below channel 1) • Go to Setup [F1] then to [Settings]then to [TV standard] • Select NTSC for USA televisions and PAL for European televisions. Go back to browser screen. • Press and hold the ON button for four seconds. The built-in Jukebox screen will go blank and a
video signal will be sent out to the television. • Press and hold the ON button again to switch back to viewing on the built-in screen
- 9 -
7. Creating MPEG 4 Movies
The Jukebox Multimedia is delivered with a CD-ROM that includes two PC based programs that allow you to create MP4 Simple Profile .avi video files. They are the MP4 Translator and Virtual Dub™. The MP4 Translator will call the Virtual Dub program and give it the correct parameters to encode your video from its original format, .avi or .mpg (mpeg 1), and then encode it into a DivX™ based MP4 .avi file. The file will be of type Simple Profile and have a resolution of 352 x 288 (for model 20) and up to 640x368 (for 100 series models) in order to be played back properly. Only MP4 files encoded with DivX™ can be read (XviD also with the 100 series). If the DivX™ codec is not on the included CD-ROM, please visit the web site of DivX™ to download version 4.0 or 5.0 (www.divx.com) of this codec. This will allow your PC to create DivX type videos. The XviD codec is included
on the CD-ROM. See the complete manual on CD for more specific instructions.
8. Viewing Photos
The Jukebox Multimedia & AV series support the viewing of .jpg and .bmp image formats. The Jukebox will resize the image to fit on the built-in screen or on a television screen if you choose that output option. Notice the icon type in the figure to the left. If it is a .jpg or .bmp, the jukebox will display it without its file extension.
1) Click Play to view your image file • The Jukebox will only list image files of type .jpg and .bmp • Click on PLAY to view the highlighted file • Click the F1 button to change settings between single photo view and multi-photo view • Click the F2 button to remove text • Click the F3 button to get file information or delete the picture • Click Left or Right to go forward or back one picture in the directory • Click Up or Down to rotate a picture
2) Magnify the image with play button
• Press the PLAY button again once viewing a photo. The image will enlarge to double size. Click once on OFF to escape back to normal view.
3) Create a slide show by adding images to the play list
• As with music files, hold down the play button while a file is highlighted in the browser view. The photo icon in front of the file name will change to green indicating that it is in the Playlist.
• Do this with different photos to create your slideshow • Save the Playlist (slideshow) or to view instantly do File [F2]: Playlist: File[F2]:Start Playlist • Save slideshow in order to play at another time
4) Use an ARCHOS card reader add-on to get digital photos into Jukebox
• ARCHOS makes add-on card readers that allow you to transfer either JPG images from Compact Flash, SD, Multimedia, SmartMedia, or Memory Stick to your Jukebox Multimedia.
• See the last section of this Quick Start Guide for specific add-ons
- 10 -
9. Connecting / Disconnecting from your Computer Windows ME, 2000, XP and Macintosh These three versions of Windows and Macintosh 9.2* and greater do not need any special drivers. These Operating Systems will recognize the Jukebox Multimedia as a mass storage device. Either a USB 1.1 or USB 2.0 port on your computer is needed. Windows 98SE For this version of Windows, you MUST use the included driver
software to recognize the Jukebox Multimedia as a mass storage device. * USB 1.1 speed only
1) Connect Jukebox Multimedia to Computer • Start up computer and wait until Windows 98SE is running • Turn on your Jukebox • Connect the supplied USB cable to Jukebox and then to Computer
2) Follow “New Hardware” Wizard – Choose drivers from CD-ROM
• The PC will recognize that a new device is plugged in and start a “New Hardware” Wizard • Insert the supplied CD into the CD-ROM drive • Accept the the “recommended” method of driver installation in the Wizard • When prompted for the driver location, check the box “specify location” • For 100 series, type in “D:/Drivers” (Or if your CD-ROM drive is E, use E:/Drivers) • For Model 20, type in “D:/Win98SE” (Or if your CD-ROM drive is E, use E:/Win98SE) • The drivers will be copied and then you will be asked to restart the machine. Click yes to restart.
3) Reboot Machine
• Do not disconnect the Jukebox. Once Windows 98se is restarted, it will recognize the Jukebox • The Jukebox will be seen as the next drive letter, E: or F: for example.
You can now transfer files to and from your Jukebox Multimedia and your computer by simply dragging and dropping files in Windows Explorer.
***ATTENTION *** Failure to disconnect the Jukebox properly may lead to data loss or render the Jukebox unusable
4) How to disconnect Jukebox from Computer
• For Macintosh, drag Jukebox icon to trash before disconnecting from USB port • For Windows 98se, ME, 2000, and XP, click on green arrow icon in system tray and select
“remove safely”. Message on screen will appear to indicate that you can unplug the Jukebox.
- 11 -
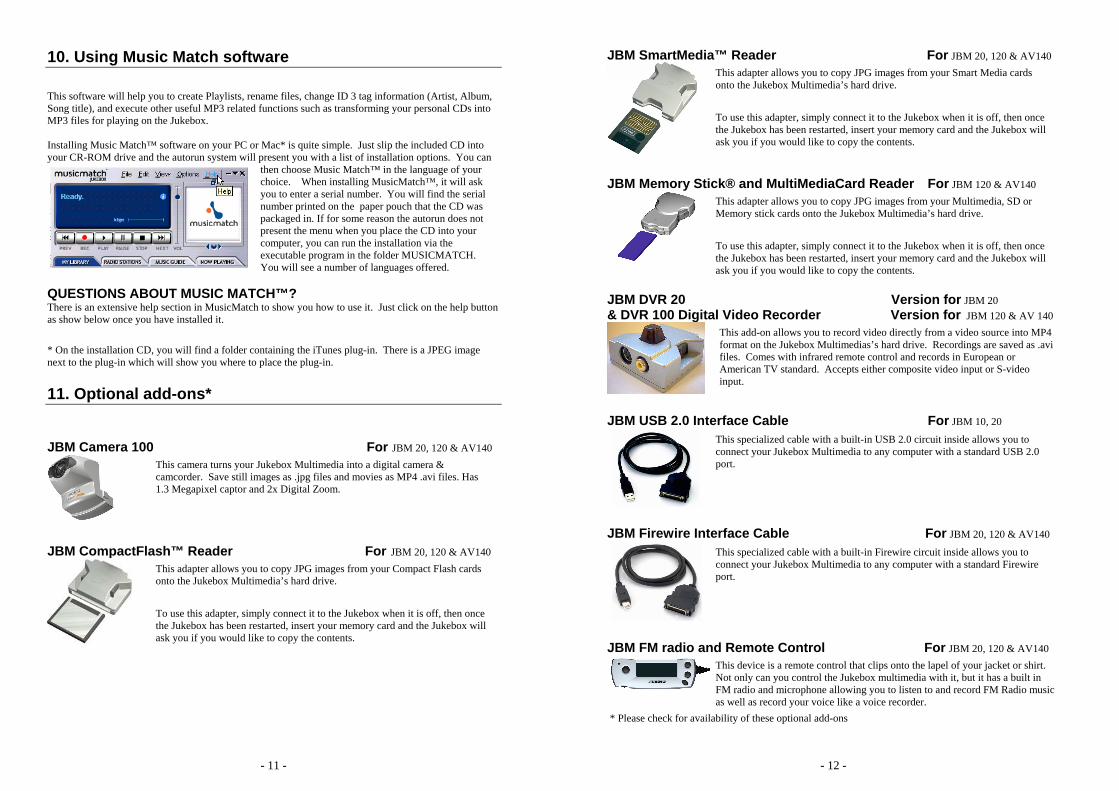
10. Using Music Match software This software will help you to create Playlists, rename files, change ID 3 tag information (Artist, Album, Song title), and execute other useful MP3 related functions such as transforming your personal CDs into MP3 files for playing on the Jukebox. Installing Music Match™ software on your PC or Mac* is quite simple. Just slip the included CD into your CR-ROM drive and the autorun system will present you with a list of installation options. You can
then choose Music Match™ in the language of your choice. When installing MusicMatch™, it will ask you to enter a serial number. You will find the serial number printed on the paper pouch that the CD was packaged in. If for some reason the autorun does not present the menu when you place the CD into your computer, you can run the installation via the executable program in the folder MUSICMATCH. You will see a number of languages offered.
QUESTIONS ABOUT MUSIC MATCH™? There is an extensive help section in MusicMatch to show you how to use it. Just click on the help button as show below once you have installed it. * On the installation CD, you will find a folder containing the iTunes plug-in. There is a JPEG image next to the plug-in which will show you where to place the plug-in.
11. Optional add-ons* 1. 2.
JBM Camera 100 For JBM 20, 120 & AV140
This camera turns your Jukebox Multimedia into a digital camera & camcorder. Save still images as .jpg files and movies as MP4 .avi files. Has 1.3 Megapixel captor and 2x Digital Zoom.
JBM CompactFlash™ Reader For JBM 20, 120 & AV140
This adapter allows you to copy JPG images from your Compact Flash cards onto the Jukebox Multimedia’s hard drive. To use this adapter, simply connect it to the Jukebox when it is off, then once the Jukebox has been restarted, insert your memory card and the Jukebox will ask you if you would like to copy the contents.
- 12 -
JBM SmartMedia™ Reader For JBM 20, 120 & AV140
This adapter allows you to copy JPG images from your Smart Media cards onto the Jukebox Multimedia’s hard drive. To use this adapter, simply connect it to the Jukebox when it is off, then once the Jukebox has been restarted, insert your memory card and the Jukebox will ask you if you would like to copy the contents.
JBM Memory Stick® and MultiMediaCard Reader For JBM 120 & AV140
This adapter allows you to copy JPG images from your Multimedia, SD or Memory stick cards onto the Jukebox Multimedia’s hard drive. To use this adapter, simply connect it to the Jukebox when it is off, then once the Jukebox has been restarted, insert your memory card and the Jukebox will ask you if you would like to copy the contents.
JBM DVR 20 Version for JBM 20 & DVR 100 Digital Video Recorder Version for JBM 120 & AV 140
This add-on allows you to record video directly from a video source into MP4 format on the Jukebox Multimedias’s hard drive. Recordings are saved as .avi files. Comes with infrared remote control and records in European or American TV standard. Accepts either composite video input or S-video input.
JBM USB 2.0 Interface Cable For JBM 10, 20
This specialized cable with a built-in USB 2.0 circuit inside allows you to connect your Jukebox Multimedia to any computer with a standard USB 2.0 port.
JBM Firewire Interface Cable For JBM 20, 120 & AV140
This specialized cable with a built-in Firewire circuit inside allows you to connect your Jukebox Multimedia to any computer with a standard Firewire port.
JBM FM radio and Remote Control For JBM 20, 120 & AV140
This device is a remote control that clips onto the lapel of your jacket or shirt. Not only can you control the Jukebox multimedia with it, but it has a built in FM radio and microphone allowing you to listen to and record FM Radio music as well as record your voice like a voice recorder.
* Please check for availability of these optional add-ons
- 13 -
12. Technical Support • Only the unit is under warranty and not the accessories • For technical specifications, please see the full manual on CD-ROM. • If technical support determines that your product needs to be returned, please contact the place of
purchase to have your product repaired or replaced (depending on problem type). • There is an FAQ – Frequently Asked Questions section at the ARCHOS Website
www.archos.com that can help answer many of your questions. • If you need technical help, you may contact ARCHOS directly in your own language via these phone
numbers. For other countries, please use e-mail technical support.
Telephone Support: 949-609-1400 (USA, Canada) 01 70 20 00 30 (France) 0207-949-0115 (UK) 069-6698-4714 (Germany)
09-1745-6224 (Spain) 02-4827-1143 (Italy) 02-050-405-10 (Netherlands)
E-mail Support: [email protected] (United States and Canada customers) English [email protected] (Europe and rest of the planet) English and French [email protected] (German) To respond to your e-mails efficiently, when sending one, please indicate the product name and question type in the Subject of the e-mail. For example: To: [email protected] Subject: Jukebox Multimedia 120 – USB connection to Macintosh
Worldwide Offices
United States & Canada Europe & Asia ARCHOS Technology 3, Goodyear – Unit A Irvine, CA 92618 USA Phone: 1 949-609-1400 Fax: 1 949-609-1414
ARCHOS S.A. 12, rue Ampère 91430 Igny France Phone: +33 (0) 169 33 169 0 Fax: +33 (0) 169 33 169 9
United Kingdom Germany ARCHOS (UK) Limited Regus House Windmill Hill Business Park Whitehill Way Swindon Wiltshire SN5 6QR UK Phone: +44 (0) 1793 44 15 10 Fax: +44 (0) 1793 44 16 10
ARCHOS Deutschland GmbH Bredelaerstrasse 63 40474 Düsseldorf Germany Tel: +49 211 1520 384 Fax: +49 211 1520 349
WWW.ARCHOS.COM
- 14 -