Embed Size (px)
Citation preview
Joshua Tree Dusk by Sophie Graine (Linocut Print 5” x 7”)
.............................................................................................................................. 1
............................................................................................................ 2 Paper Type ................................................................................................................................................................................................................. 3
Ink ............................................................................................................................................................................................................................... 4
Ink Modifiers .............................................................................................................................................................................................................. 5
Linoleum and Brayers ................................................................................................................................................................................................ 6
Carving Tool ............................................................................................................................................................................................................... 7
Drying Times............................................................................................................................................................................................................... 8
Print Storage ............................................................................................................................................................................................................ 10
.............................................................................................................................. 13 Lori Biwer Stewart .................................................................................................................................................................................................... 13
Jonathan Blackmore ................................................................................................................................................................................................. 14
Boarding All Rows .................................................................................................................................................................................................... 15
Laura Boswell ........................................................................................................................................................................................................... 16
Stuart Brocklehurst .................................................................................................................................................................................................. 17
Gail Brodholt ............................................................................................................................................................................................................ 18
Alexandra Buckle ...................................................................................................................................................................................................... 19
Elizabeth Busey ........................................................................................................................................................................................................ 20
Victoria Cowan ......................................................................................................................................................................................................... 21
Jeanne DeBonis ........................................................................................................................................................................................................ 22
Fay Dunstan.............................................................................................................................................................................................................. 23
Danny Evarts ............................................................................................................................................................................................................ 24
Tian Gan ................................................................................................................................................................................................................... 25
Eric Gaskell ............................................................................................................................................................................................................... 26
Sophie Graine ........................................................................................................................................................................................................... 27
Kellie Hames ............................................................................................................................................................................................................. 28
William Hays ............................................................................................................................................................................................................. 29
Olivia Kiers ................................................................................................................................................................................................................ 30
Lenny Lane ............................................................................................................................................................................................................... 31
Dave Lefner .............................................................................................................................................................................................................. 32
Richard Shimell......................................................................................................................................................................................................... 33
Hannah Skoonberg ................................................................................................................................................................................................... 34
Anne Lewis ............................................................................................................................................................................................................... 35
Kelli MacConnell ....................................................................................................................................................................................................... 36
Robin McKenzie........................................................................................................................................................................................................ 37
Natalia Moroz ........................................................................................................................................................................................................... 38
Annamie Pretorius ................................................................................................................................................................................................... 39
3 Fish Studios Eric Rewitzer and Annie Galvin ......................................................................................................................................................... 40
Kate Robinson .......................................................................................................................................................................................................... 41
Julie Robinson-Southward ....................................................................................................................................................................................... 42
Doug Thomas ........................................................................................................................................................................................................... 43
Sinead Wall............................................................................................................................................................................................................... 44
Roddy Williams......................................................................................................................................................................................................... 45
Sharon Williamson ................................................................................................................................................................................................... 46
Sherrie York .............................................................................................................................................................................................................. 47
....................................... 48
.......................................... 50
1
About This Book: In spring 2016, 50 linocut printmakers responded to a survey about their process. The purpose of the survey was
to create a resource where printmakers can find information about which papers work with which inks, which printing processes are
most popular, and what the artists they admire say and do.
Thank you so much to all of the printmakers who took the time to answer this survey! Your generosity is so appreciated and will help
newer printmakers learn from your experience.
This book was compiled by Sophie Graine of Two Hoots Creative (http://twohootscreative.com/). If this was useful to you, please do
let me know! You can email me at [email protected].
Feel free to share this guide with anyone who you think might benefit. (Just not for commercial purposes, please – that’s a pretty
reasonable thing to ask, right?)
Happy carving, happy printing!
~ Sophie Graine
2
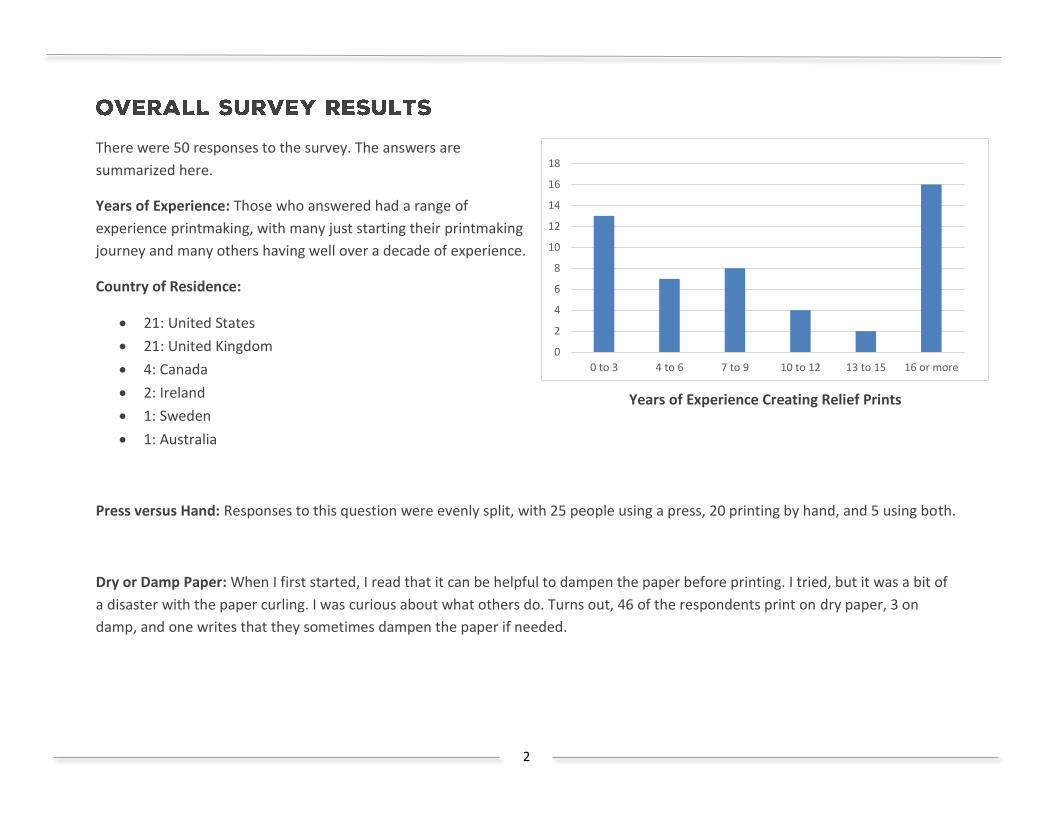
There were 50 responses to the survey. The answers are
summarized here.
Years of Experience: Those who answered had a range of
experience printmaking, with many just starting their printmaking
journey and many others having well over a decade of experience.
Country of Residence:
21: United States
21: United Kingdom
4: Canada
2: Ireland
1: Sweden
1: Australia
Press versus Hand: Responses to this question were evenly split, with 25 people using a press, 20 printing by hand, and 5 using both.
Dry or Damp Paper: When I first started, I read that it can be helpful to dampen the paper before printing. I tried, but it was a bit of
a disaster with the paper curling. I was curious about what others do. Turns out, 46 of the respondents print on dry paper, 3 on
damp, and one writes that they sometimes dampen the paper if needed.
0
2
4
6
8
10
12
14
16
18
0 to 3 4 to 6 7 to 9 10 to 12 13 to 15 16 or more
Years of Experience Creating Relief Prints
3
Paper Type: More details about paper can be found in the printmaker profiles. There was a lot of diversity in paper choice. Rives BFK
was most popular, with 9 printmakers using this paper. Somerset and Hosho had 5 users each. Zerkall, Stonehenge, Masa, Fabriano
and Arches each were used by 3 artists. Some comments about paper:
Rives BFK
o Rives BFK Heavyweight White 280 gsm - It's a fairly substantial paper, which I need because I usually print 7-10 colors
(layers) and it accepts the ink well, and deckles well when I hand-deckle the edges after the print is complete.
o Rives BFK 250gsm and 300gsm. It gives me consistently great results.
Hosho
o Affordable, good size to work with, and nice to print by hand
Arches
o Gives a nice emboss and provide a nice clean print for matting
Fabriano
o Cheap, the bright white version doesn't fade, and tough enough to hold up to multiple layers
Masa
o Affordable and one side is smooth and other side fuzzy
o Masa from Intaglio Printmakers. I like any Mulberry based paper but this has a strong white, is light (83gsm) but very
tough needed for many layers
o It's strong, inexpensive (compared to rice papers), pure white, and very absorbent - great for printing multiple colors
Zerkall
o Zerkall White - a lovely, smooth, moulded paper
Other
o Yamato Chiri - old paper which becomes stronger as it ages. Very sensitive to the plate
o 100lbs Winsor andNewton Cartridge paper. Smooth so takes the ink well and robust enough to stand being hand
rubbed with a Japanese baren on the back
o GF Smith Naturalis 250GSM Very smooth, acid free and good colour
o Kitakata roll paper. I love everything about this paper. It's a thinner kitakata then the sheet stuff. I like both
4
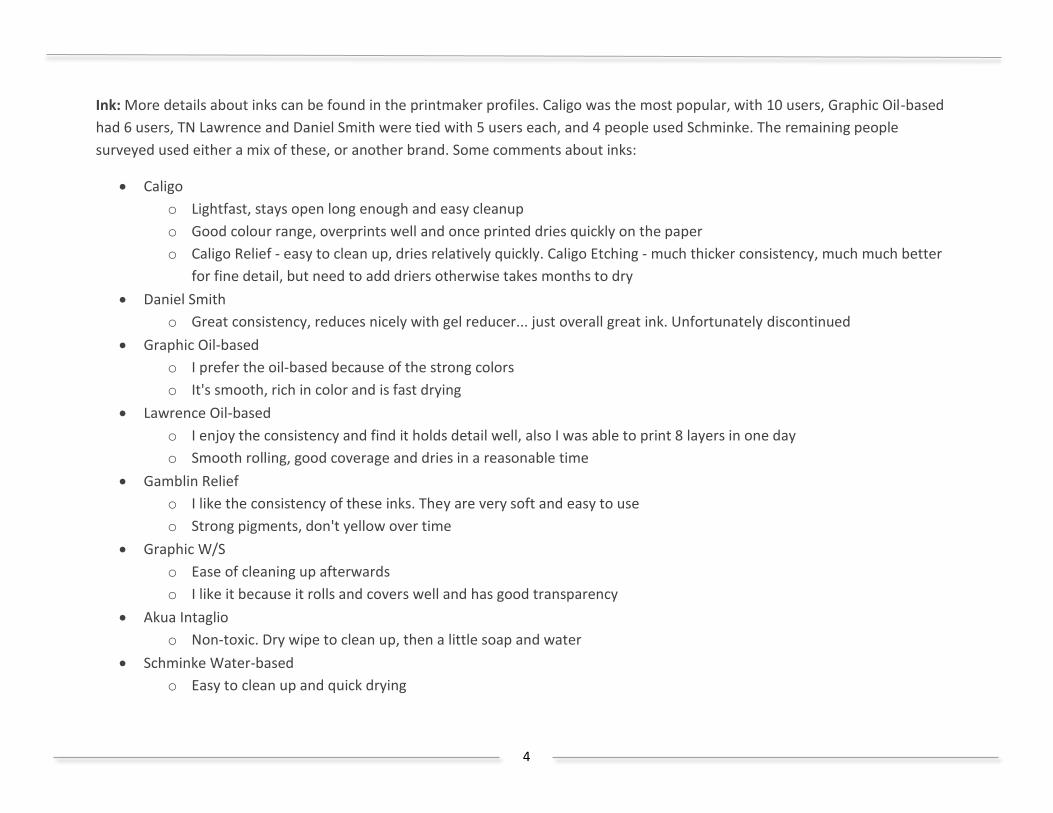
Ink: More details about inks can be found in the printmaker profiles. Caligo was the most popular, with 10 users, Graphic Oil-based
had 6 users, TN Lawrence and Daniel Smith were tied with 5 users each, and 4 people used Schminke. The remaining people
surveyed used either a mix of these, or another brand. Some comments about inks:
Caligo
o Lightfast, stays open long enough and easy cleanup
o Good colour range, overprints well and once printed dries quickly on the paper
o Caligo Relief - easy to clean up, dries relatively quickly. Caligo Etching - much thicker consistency, much much better
for fine detail, but need to add driers otherwise takes months to dry
Daniel Smith
o Great consistency, reduces nicely with gel reducer... just overall great ink. Unfortunately discontinued
Graphic Oil-based
o I prefer the oil-based because of the strong colors
o It's smooth, rich in color and is fast drying
Lawrence Oil-based
o I enjoy the consistency and find it holds detail well, also I was able to print 8 layers in one day
o Smooth rolling, good coverage and dries in a reasonable time
Gamblin Relief
o I like the consistency of these inks. They are very soft and easy to use
o Strong pigments, don't yellow over time
Graphic W/S
o Ease of cleaning up afterwards
o I like it because it rolls and covers well and has good transparency
Akua Intaglio
o Non-toxic. Dry wipe to clean up, then a little soap and water
Schminke Water-based
o Easy to clean up and quick drying
5
Ink Modifiers: 16 survey respondents used ink modifiers. Some comments about these:
Cobalt Drier
o On occasion I will use Cobalt Drier. I try not to use it since it's not considered very good for a person’s health, but
when time becomes an issue I will add some to help speed things up
o I use it only very occasionally when I need to speed up drying
Burnt Plate Oil
o To make the ink easier to roll out
Tack Reducer
o It makes the ink less tacky, easier to mix, roll, and print
Magnesium Carbonate, Cobalt Drier, Miracle Gel Reducer
o Magnesium Carbonate and Miracle Gel Reducer were my go-to combination. Mag to increase the body, and MGR to
allow it to release onto the paper
6
Linoleum – Battleship Grey: Most people used battleship grey linoleum, mounted or unmounted. Comments about it include:
It holds detail but can get "stale" with age. Don't buy more than you can use in one year
Easy to cut and gives a crisp line without crumbling
It holds a tight carved line/edge, inks up smoothly
It is completely uniform and is hard enough to stand up to using my Foredom drill with an engraving bit, and go through the
press for multiple colors
Linoleum – Other: Some people used other mediums to carve into. They said:
Traditional brown battleship Lino - it crumbles less than the artist grey kind
Richeson Clear Carve - I like it because the cuts are very clean-edged and because it's transparent, it helps with the reduction
process because I don't have to transfer the next cut/image to the plate
Speedball Speedy Carve (unmounted) - it is readily available in my local art store in the sizes I prefer (smaller, 3 x 5" or 4 x 6")
Unmounted softoleum - can be cut easily and is thick enough to 'stamp' when placement is important
Vinyl floor tiles. It's a harder material to cut but because of this gives a crisper line. They are uniform in size which helps
registration with multiple blocks
Brayer (Roller): Some comments about brayers:
I like the Takach hand brayer because it has a good diameter
I use Takach Hand Brayer because they are the best quality brayers... they are last forever- well-made and easy to clean
10 inch Heavy duty aluminum professional brayer (ground neoprene rubber roller)- It rolls out a perfectly uniform layer of ink
Hawthorn, huge one. Large enough diameter to get right across the print in one go
Japanese, rubber, medium. Re-handled for better balance for me. The balance is important, allows application of many light
layers, or can be pushy and firmly used. Ability to "Float like a Butterfly". Free movement. Easy to clean
7
Carving Tool: Speedball and Pfeil were the most popular carving tools. 12 people used Speedball and 14 used Pfeil exclusively. 9
people used a mix of tools, 5 used Japanese tools and two used TN Lawrence. Some comments about carving tools:
Pfeil
o They are sharp, comfortable to use and easy to re-sharpen
o Great to handle. Beautiful cutting. Very precise
o Lovely well-made tools and easy to keep sharp
o Remain sharp for long time
Speedball
o I use Speedball gouges, but I changed the red plastic handle for more round wooden ones. They fit better in my hand
and more convenient to use
o I use Speedball red handled carving tools. I like them because they are readily available for me to get and if a blade
gets dull I can just easily replace it rather than attempting to sharpen them
o Just good ol' Speedball red handles! I've tried a lot of other brands, but always come back to Speedball. The trick is
having to find the replacement cutter nib that feels right
o Inexpensive, so I can have several and not keep changing blades
o Easy to get nibs, nice in the palm, storage in the butt, it’s what I learned with
TN Lawrence
o They are the best I can buy and they fit my hand well
Japanese
o I used Futatsu Wari Moku Hanga To. Excellent blades and a good feel in the hand
o I used Japanese carving tools from McClains. These keep their edges sharper longer. I also use a Foredom rotary drill
with a flex shaft -- and use dremel engraving bits to achieve texture on the linoleum
Other
o I used cheap hardware shop no name brand tools. I also have a set of intaglio printmaker shop's mushroom handle
tools
o I used Alvin linoleum carving tool set. The blades are not the best quality, but are easily replaceable and you only
need to buy one handle (they are removable)
8
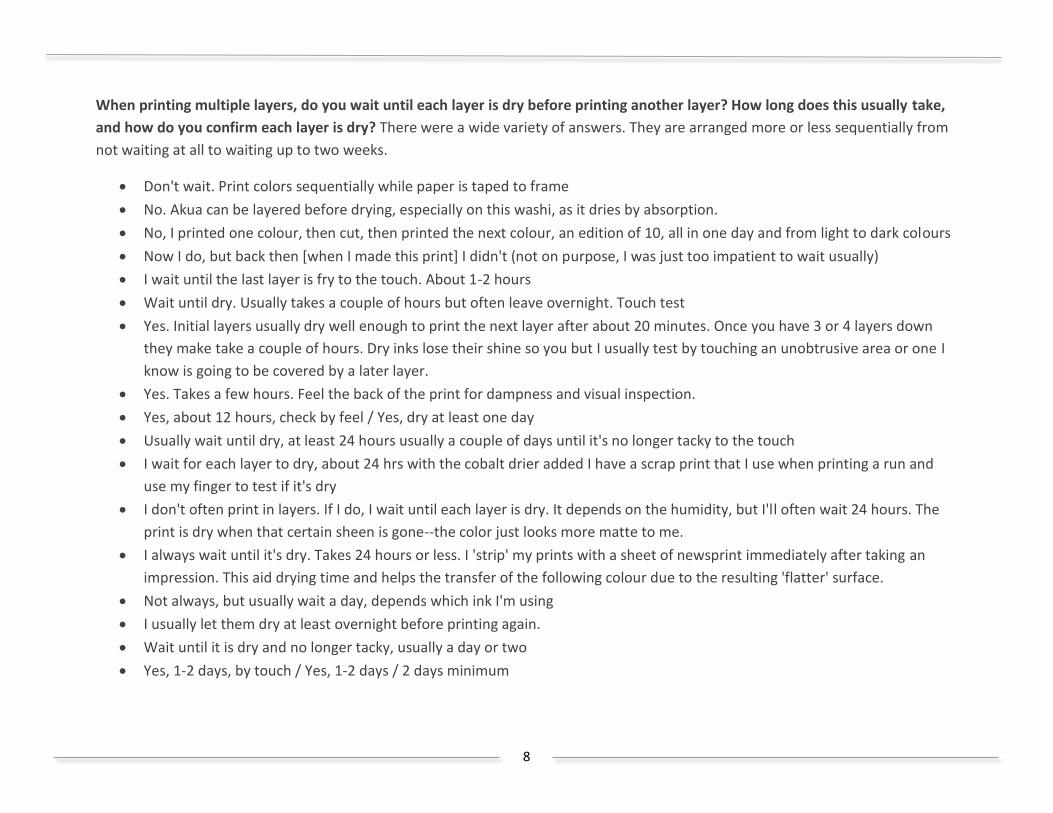
When printing multiple layers, do you wait until each layer is dry before printing another layer? How long does this usually take,
and how do you confirm each layer is dry? There were a wide variety of answers. They are arranged more or less sequentially from
not waiting at all to waiting up to two weeks.
Don't wait. Print colors sequentially while paper is taped to frame
No. Akua can be layered before drying, especially on this washi, as it dries by absorption.
No, I printed one colour, then cut, then printed the next colour, an edition of 10, all in one day and from light to dark colours
Now I do, but back then [when I made this print] I didn't (not on purpose, I was just too impatient to wait usually)
I wait until the last layer is fry to the touch. About 1-2 hours
Wait until dry. Usually takes a couple of hours but often leave overnight. Touch test
Yes. Initial layers usually dry well enough to print the next layer after about 20 minutes. Once you have 3 or 4 layers down
they make take a couple of hours. Dry inks lose their shine so you but I usually test by touching an unobtrusive area or one I
know is going to be covered by a later layer.
Yes. Takes a few hours. Feel the back of the print for dampness and visual inspection.
Yes, about 12 hours, check by feel / Yes, dry at least one day
Usually wait until dry, at least 24 hours usually a couple of days until it's no longer tacky to the touch
I wait for each layer to dry, about 24 hrs with the cobalt drier added I have a scrap print that I use when printing a run and
use my finger to test if it's dry
I don't often print in layers. If I do, I wait until each layer is dry. It depends on the humidity, but I'll often wait 24 hours. The
print is dry when that certain sheen is gone--the color just looks more matte to me.
I always wait until it's dry. Takes 24 hours or less. I 'strip' my prints with a sheet of newsprint immediately after taking an
impression. This aid drying time and helps the transfer of the following colour due to the resulting 'flatter' surface.
Not always, but usually wait a day, depends which ink I'm using
I usually let them dry at least overnight before printing again.
Wait until it is dry and no longer tacky, usually a day or two
Yes, 1-2 days, by touch / Yes, 1-2 days / 2 days minimum
9
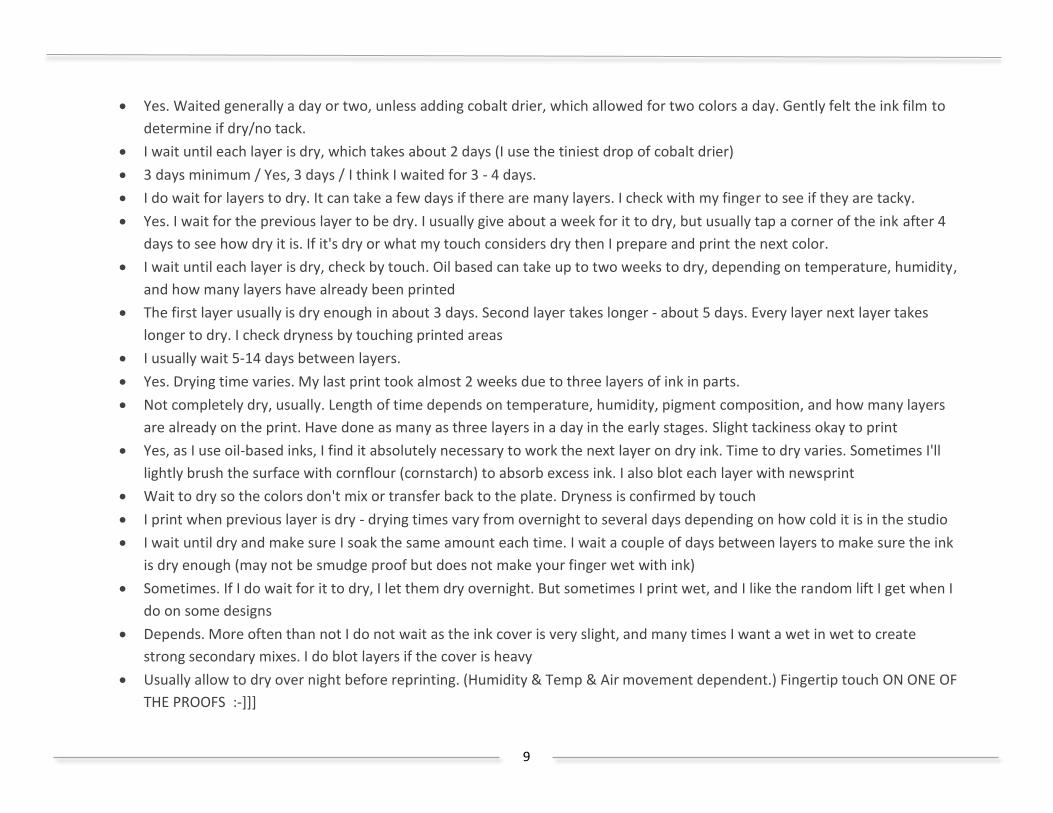
Yes. Waited generally a day or two, unless adding cobalt drier, which allowed for two colors a day. Gently felt the ink film to
determine if dry/no tack.
I wait until each layer is dry, which takes about 2 days (I use the tiniest drop of cobalt drier)
3 days minimum / Yes, 3 days / I think I waited for 3 - 4 days.
I do wait for layers to dry. It can take a few days if there are many layers. I check with my finger to see if they are tacky.
Yes. I wait for the previous layer to be dry. I usually give about a week for it to dry, but usually tap a corner of the ink after 4
days to see how dry it is. If it's dry or what my touch considers dry then I prepare and print the next color.
I wait until each layer is dry, check by touch. Oil based can take up to two weeks to dry, depending on temperature, humidity,
and how many layers have already been printed
The first layer usually is dry enough in about 3 days. Second layer takes longer - about 5 days. Every layer next layer takes
longer to dry. I check dryness by touching printed areas
I usually wait 5-14 days between layers.
Yes. Drying time varies. My last print took almost 2 weeks due to three layers of ink in parts.
Not completely dry, usually. Length of time depends on temperature, humidity, pigment composition, and how many layers
are already on the print. Have done as many as three layers in a day in the early stages. Slight tackiness okay to print
Yes, as I use oil-based inks, I find it absolutely necessary to work the next layer on dry ink. Time to dry varies. Sometimes I'll
lightly brush the surface with cornflour (cornstarch) to absorb excess ink. I also blot each layer with newsprint
Wait to dry so the colors don't mix or transfer back to the plate. Dryness is confirmed by touch
I print when previous layer is dry - drying times vary from overnight to several days depending on how cold it is in the studio
I wait until dry and make sure I soak the same amount each time. I wait a couple of days between layers to make sure the ink
is dry enough (may not be smudge proof but does not make your finger wet with ink)
Sometimes. If I do wait for it to dry, I let them dry overnight. But sometimes I print wet, and I like the random lift I get when I
do on some designs
Depends. More often than not I do not wait as the ink cover is very slight, and many times I want a wet in wet to create
strong secondary mixes. I do blot layers if the cover is heavy
Usually allow to dry over night before reprinting. (Humidity & Temp & Air movement dependent.) Fingertip touch ON ONE OF
THE PROOFS :-]]]
10
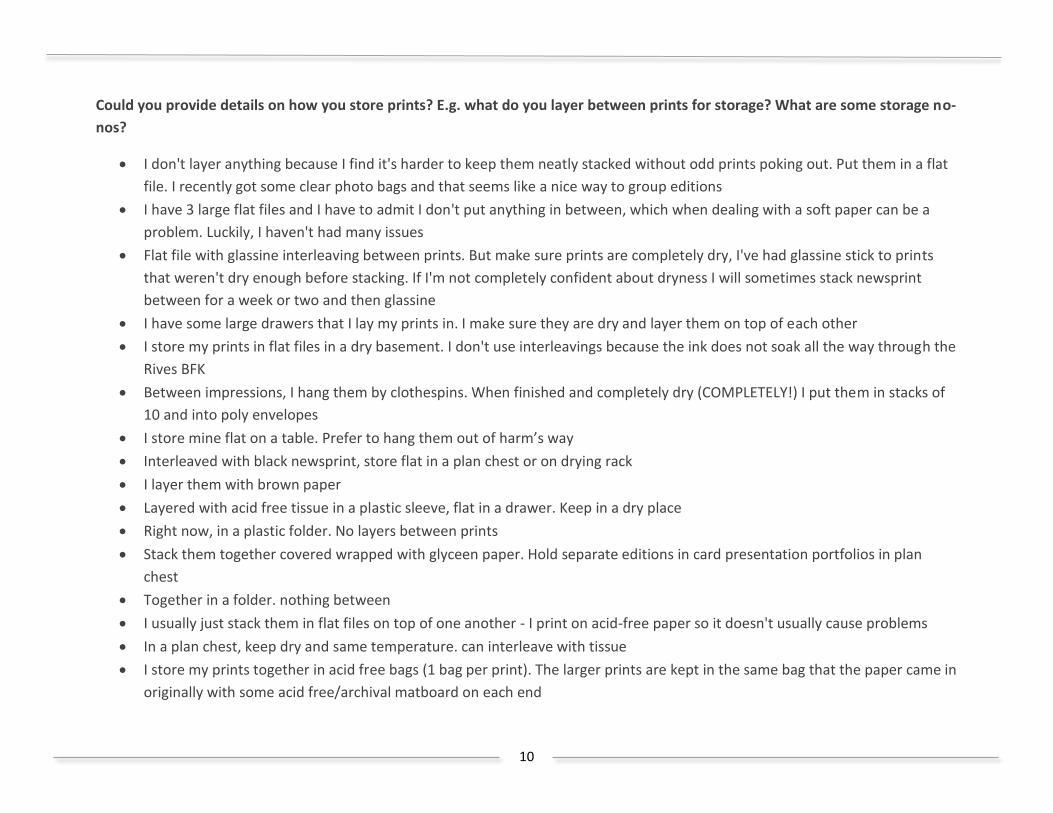
Could you provide details on how you store prints? E.g. what do you layer between prints for storage? What are some storage no-
nos?
I don't layer anything because I find it's harder to keep them neatly stacked without odd prints poking out. Put them in a flat
file. I recently got some clear photo bags and that seems like a nice way to group editions
I have 3 large flat files and I have to admit I don't put anything in between, which when dealing with a soft paper can be a
problem. Luckily, I haven't had many issues
Flat file with glassine interleaving between prints. But make sure prints are completely dry, I've had glassine stick to prints
that weren't dry enough before stacking. If I'm not completely confident about dryness I will sometimes stack newsprint
between for a week or two and then glassine
I have some large drawers that I lay my prints in. I make sure they are dry and layer them on top of each other
I store my prints in flat files in a dry basement. I don't use interleavings because the ink does not soak all the way through the
Rives BFK
Between impressions, I hang them by clothespins. When finished and completely dry (COMPLETELY!) I put them in stacks of
10 and into poly envelopes
I store mine flat on a table. Prefer to hang them out of harm’s way
Interleaved with black newsprint, store flat in a plan chest or on drying rack
I layer them with brown paper
Layered with acid free tissue in a plastic sleeve, flat in a drawer. Keep in a dry place
Right now, in a plastic folder. No layers between prints
Stack them together covered wrapped with glyceen paper. Hold separate editions in card presentation portfolios in plan
chest
Together in a folder. nothing between
I usually just stack them in flat files on top of one another - I print on acid-free paper so it doesn't usually cause problems
In a plan chest, keep dry and same temperature. can interleave with tissue
I store my prints together in acid free bags (1 bag per print). The larger prints are kept in the same bag that the paper came in
originally with some acid free/archival matboard on each end
11
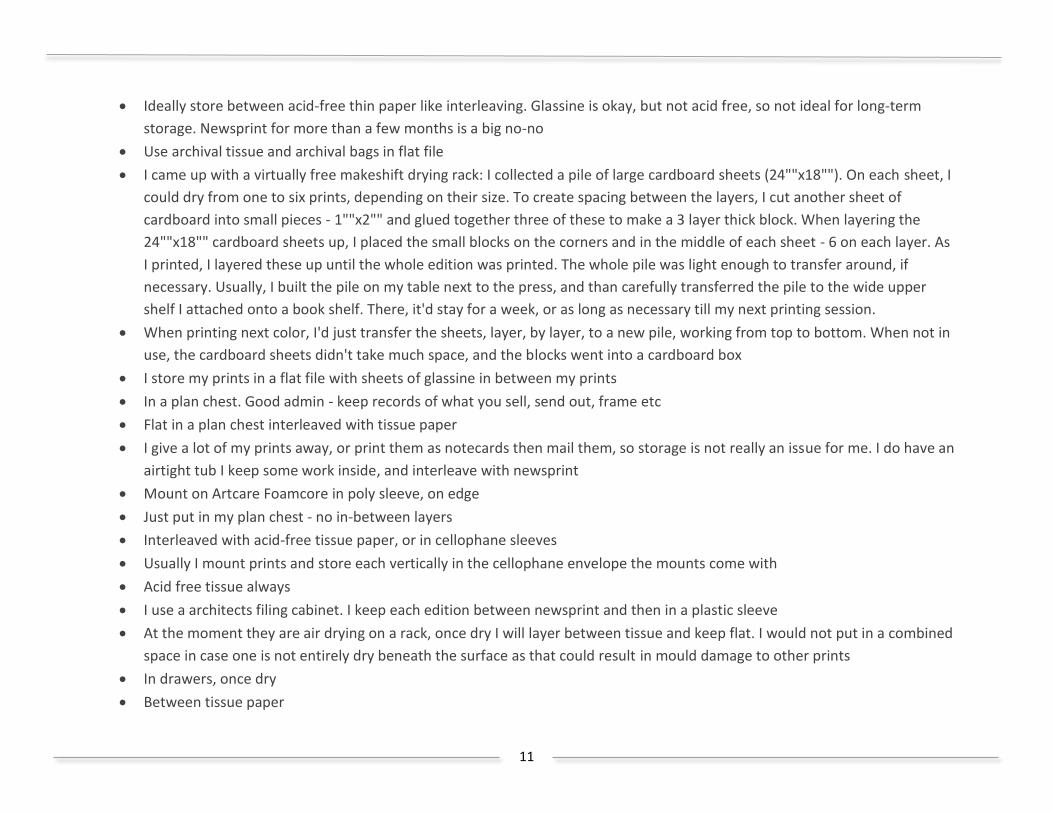
Ideally store between acid-free thin paper like interleaving. Glassine is okay, but not acid free, so not ideal for long-term
storage. Newsprint for more than a few months is a big no-no
Use archival tissue and archival bags in flat file
I came up with a virtually free makeshift drying rack: I collected a pile of large cardboard sheets (24""x18""). On each sheet, I
could dry from one to six prints, depending on their size. To create spacing between the layers, I cut another sheet of
cardboard into small pieces - 1""x2"" and glued together three of these to make a 3 layer thick block. When layering the
24""x18"" cardboard sheets up, I placed the small blocks on the corners and in the middle of each sheet - 6 on each layer. As
I printed, I layered these up until the whole edition was printed. The whole pile was light enough to transfer around, if
necessary. Usually, I built the pile on my table next to the press, and than carefully transferred the pile to the wide upper
shelf I attached onto a book shelf. There, it'd stay for a week, or as long as necessary till my next printing session.
When printing next color, I'd just transfer the sheets, layer, by layer, to a new pile, working from top to bottom. When not in
use, the cardboard sheets didn't take much space, and the blocks went into a cardboard box
I store my prints in a flat file with sheets of glassine in between my prints
In a plan chest. Good admin - keep records of what you sell, send out, frame etc
Flat in a plan chest interleaved with tissue paper
I give a lot of my prints away, or print them as notecards then mail them, so storage is not really an issue for me. I do have an
airtight tub I keep some work inside, and interleave with newsprint
Mount on Artcare Foamcore in poly sleeve, on edge
Just put in my plan chest - no in-between layers
Interleaved with acid-free tissue paper, or in cellophane sleeves
Usually I mount prints and store each vertically in the cellophane envelope the mounts come with
Acid free tissue always
I use a architects filing cabinet. I keep each edition between newsprint and then in a plastic sleeve
At the moment they are air drying on a rack, once dry I will layer between tissue and keep flat. I would not put in a combined
space in case one is not entirely dry beneath the surface as that could result in mould damage to other prints
In drawers, once dry
Between tissue paper
12
Don't need any protection between sheets as ink dries perfectly. Keep editions in a plastic folder. Try to store vertically
The prints I care about, I keep separated by interleaving in acid-free boxes. Most of my prints I toss in a drawer
Store flat with newspaper between when dry
I bag each print in a clear plastic sleeve with an archival backing board. No-nos would be using the wrong material for a
backing board - it can yellow the prints. Prints are stored in drawers or displayed in print racks
My prints (usually) are absolutely dry when I take them down from hanging. So I generally bag the edition in a cellophane bag
and lay flat in one of the plan chest drawers
Being a true professional I store them flat in a box under my bed with nothing in between each print. As long as they are not
stored in a damp environment, the paper and inks I use are quite robust
No layers, don't put away until completely dry - week minimum
Newsprint layers
Flat, in boxes, plastic or card. Acid free tissue paper interleaved. Stacked only after extended drying period hanging. Too
many stacked up. Any residual moisture - from any source.
I store prints flat in a plastic box, sometimes layered with acid free tissue
13
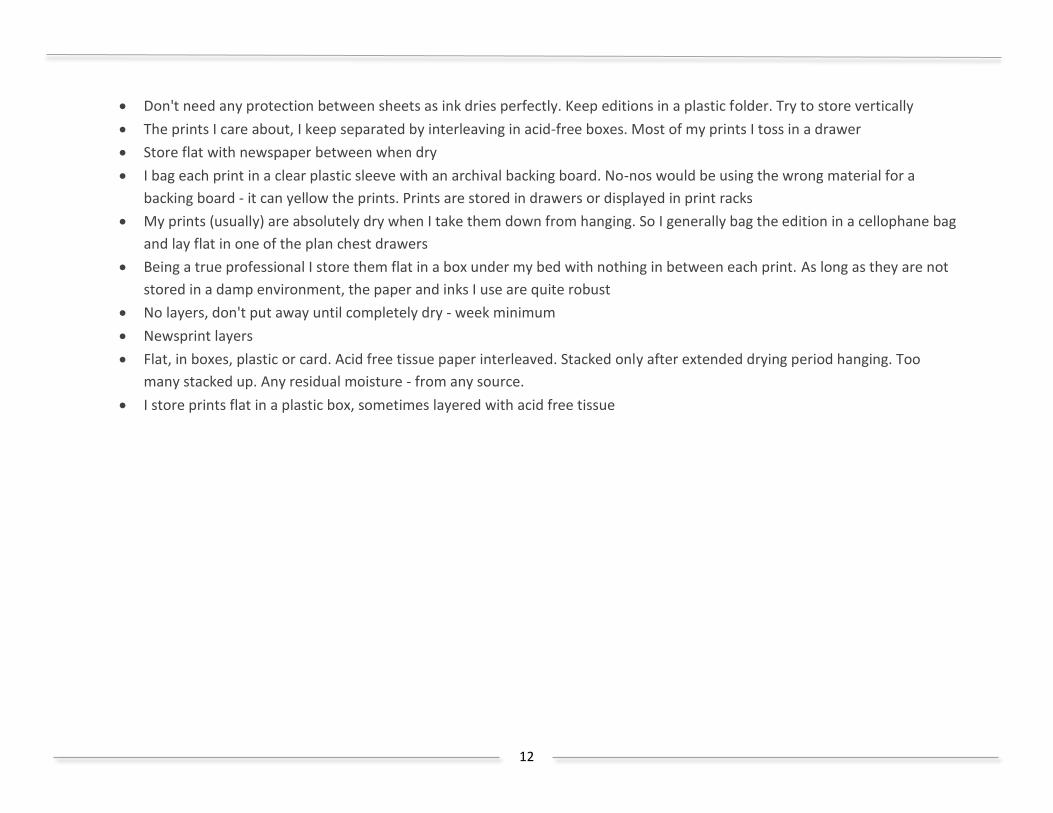
:
Title: Milkweed (5” x 16”)
Website: http://lbstewart.com/
Printed: With a press
Ink: Graphic Oil-based Block Print
I like this ink because: I prefer the oil-based because of the strong colors
Paper: Rives BFK Tan 280 gsm
Other: [I use] Josei Moku Hanga To carving tools. Very nice tool and they stay sharp for quite a
while
14
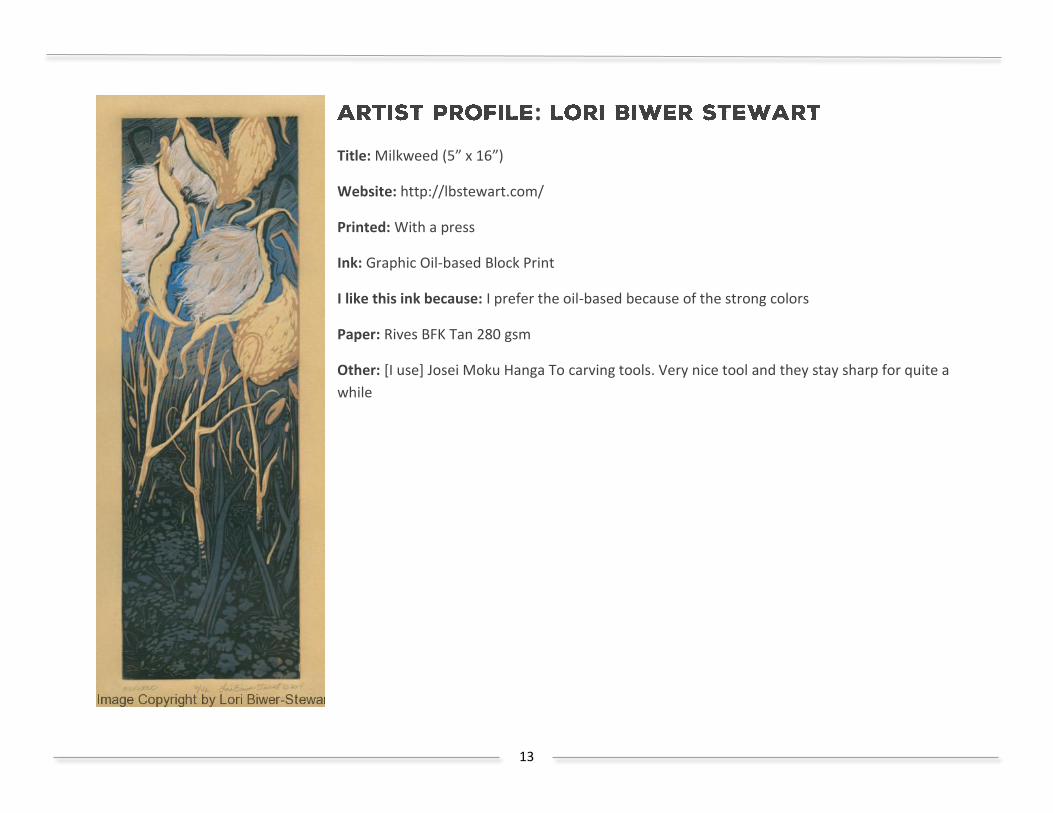
:
Title: Scissor Arch (30cm x 40cm)
Website: http://www.ink-wells.co.uk/
Printed: By hand (without a press)
Ink: Jackson's Art Supplies
I like this ink because: Good water-based ink
Paper: Strathmore 280 gsm
15
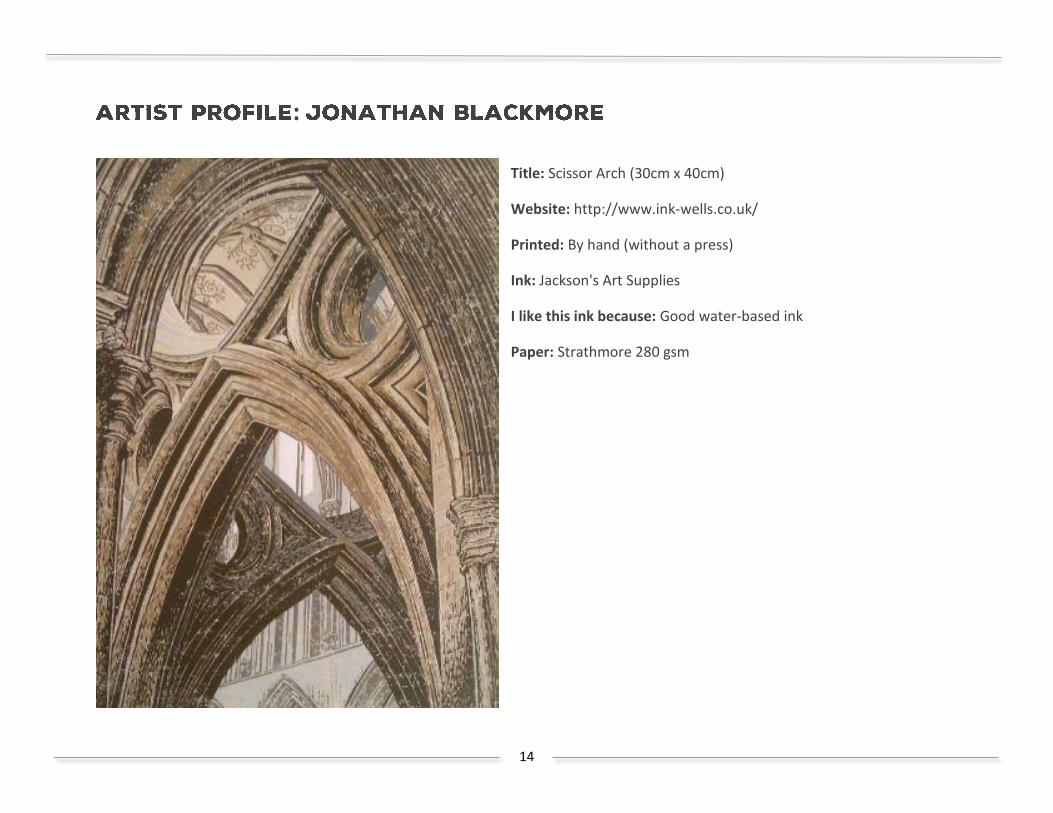
:
Title: A Noble Sheet of Blue Water
(dimensions unknown)
Website: http://www.boardingallrows.com/
Printed: Mostly by etching press, small
portion burnished by hand.
Ink: Caligo Safe Wash Relief Ink
I like this ink because: Lightfast, stays open
long enough and easy cleanup.
Paper: White, Acid-Free Stonehenge 250 gsm
Other: I usually wait 5-14 days between
layers [before printing the next layer]
16
:
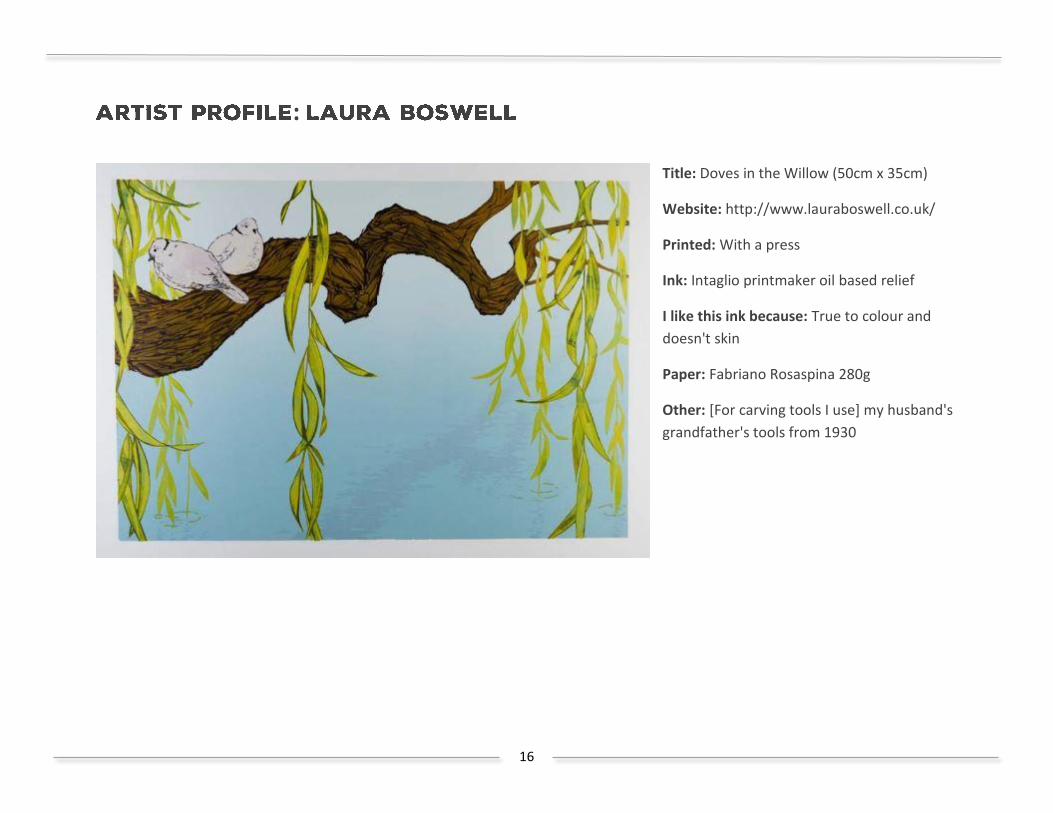
Title: Doves in the Willow (50cm x 35cm)
Website: http://www.lauraboswell.co.uk/
Printed: With a press
Ink: Intaglio printmaker oil based relief
I like this ink because: True to colour and
doesn't skin
Paper: Fabriano Rosaspina 280g
Other: [For carving tools I use] my husband's
grandfather's tools from 1930
17
:
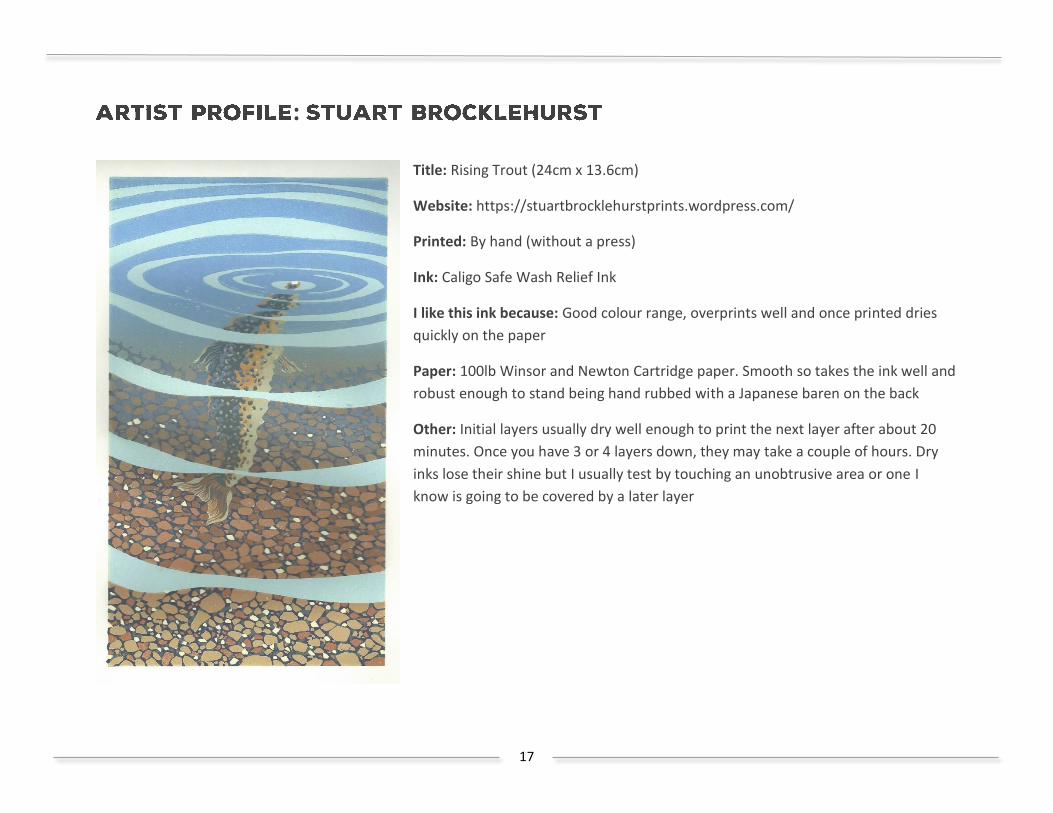
Title: Rising Trout (24cm x 13.6cm)
Website: https://stuartbrocklehurstprints.wordpress.com/
Printed: By hand (without a press)
Ink: Caligo Safe Wash Relief Ink
I like this ink because: Good colour range, overprints well and once printed dries
quickly on the paper
Paper: 100lb Winsor and Newton Cartridge paper. Smooth so takes the ink well and
robust enough to stand being hand rubbed with a Japanese baren on the back
Other: Initial layers usually dry well enough to print the next layer after about 20
minutes. Once you have 3 or 4 layers down, they may take a couple of hours. Dry
inks lose their shine but I usually test by touching an unobtrusive area or one I
know is going to be covered by a later layer
18
:
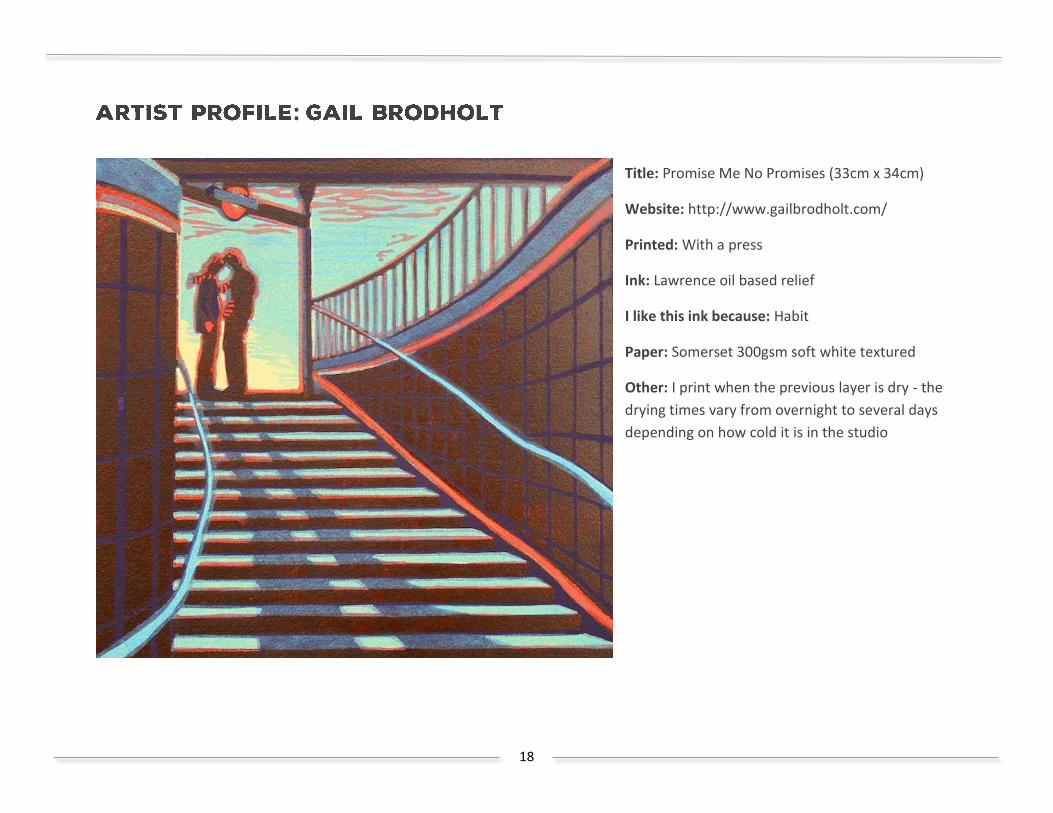
Title: Promise Me No Promises (33cm x 34cm)
Website: http://www.gailbrodholt.com/
Printed: With a press
Ink: Lawrence oil based relief
I like this ink because: Habit
Paper: Somerset 300gsm soft white textured
Other: I print when the previous layer is dry - the
drying times vary from overnight to several days
depending on how cold it is in the studio

19
:
Title: Sunshine Fields – detail (40cm x 30cm)
Website: http://www.alexandrabuckle.co.uk/
Printed: By hand (without a press)
Ink: Schmincke
I like this ink because: It is the brand I am used to
Paper: Somerset Satin white 300gsm
Problem solved by changing your approach: bad
wrists from too much burnishing! Bought a press
20
:
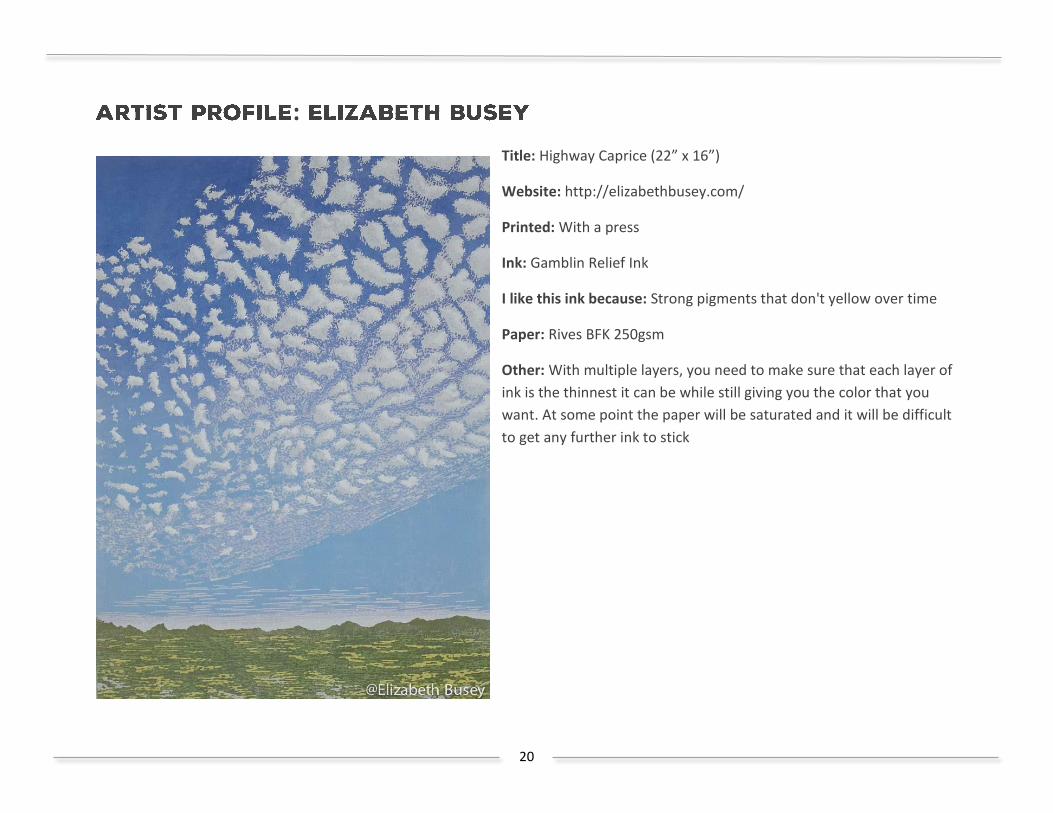
Title: Highway Caprice (22” x 16”)
Website: http://elizabethbusey.com/
Printed: With a press
Ink: Gamblin Relief Ink
I like this ink because: Strong pigments that don't yellow over time
Paper: Rives BFK 250gsm
Other: With multiple layers, you need to make sure that each layer of
ink is the thinnest it can be while still giving you the color that you
want. At some point the paper will be saturated and it will be difficult
to get any further ink to stick
21
:
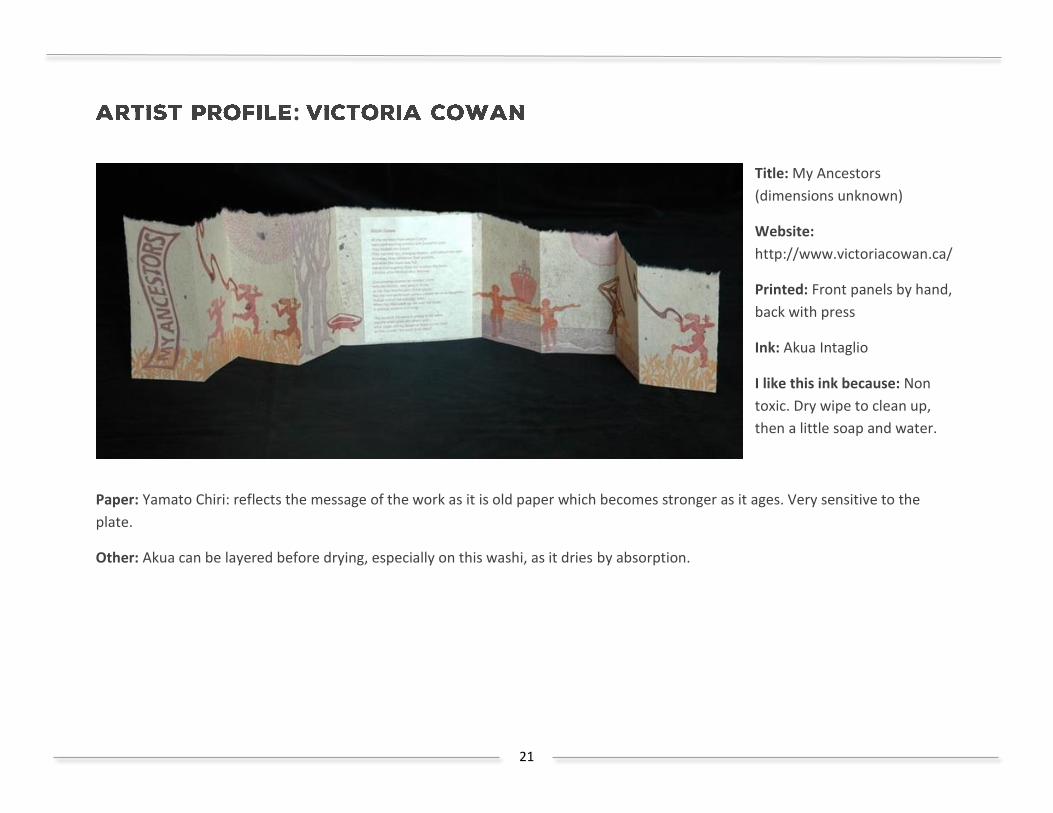
Title: My Ancestors
(dimensions unknown)
Website:
http://www.victoriacowan.ca/
Printed: Front panels by hand,
back with press
Ink: Akua Intaglio
I like this ink because: Non
toxic. Dry wipe to clean up,
then a little soap and water.
Paper: Yamato Chiri: reflects the message of the work as it is old paper which becomes stronger as it ages. Very sensitive to the
plate.
Other: Akua can be layered before drying, especially on this washi, as it dries by absorption.
22
:
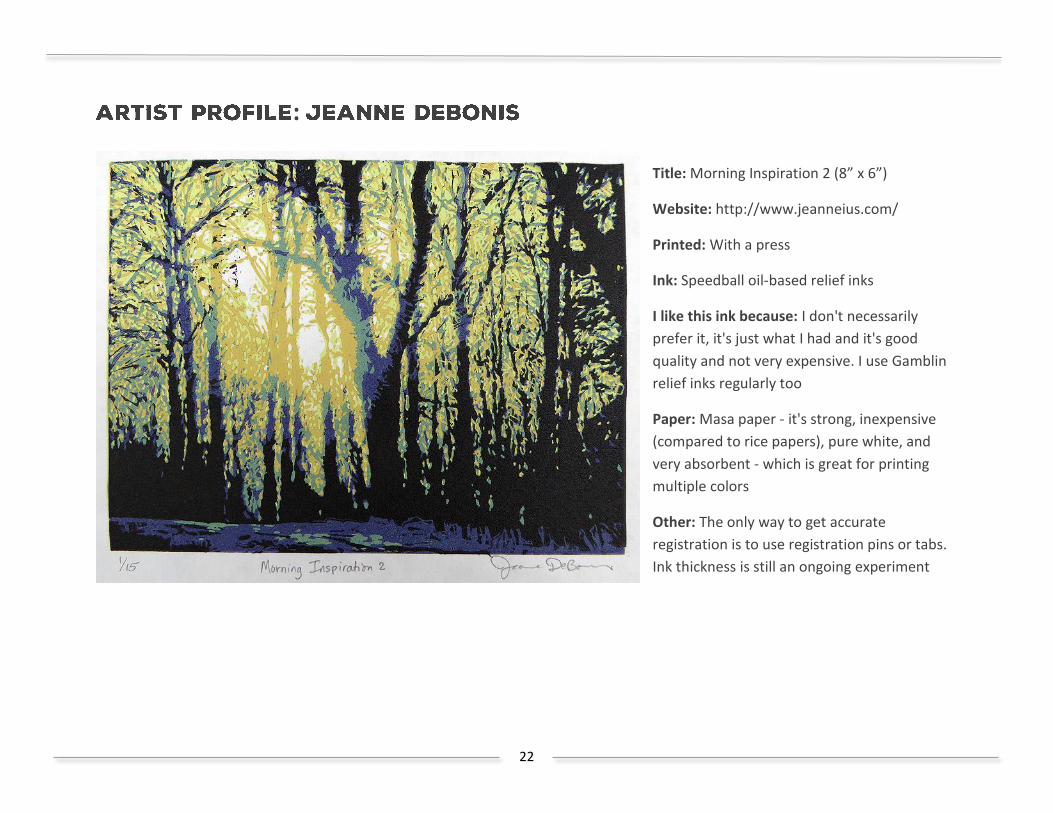
Title: Morning Inspiration 2 (8” x 6”)
Website: http://www.jeanneius.com/
Printed: With a press
Ink: Speedball oil-based relief inks
I like this ink because: I don't necessarily
prefer it, it's just what I had and it's good
quality and not very expensive. I use Gamblin
relief inks regularly too
Paper: Masa paper - it's strong, inexpensive
(compared to rice papers), pure white, and
very absorbent - which is great for printing
multiple colors
Other: The only way to get accurate
registration is to use registration pins or tabs.
Ink thickness is still an ongoing experiment
23
:
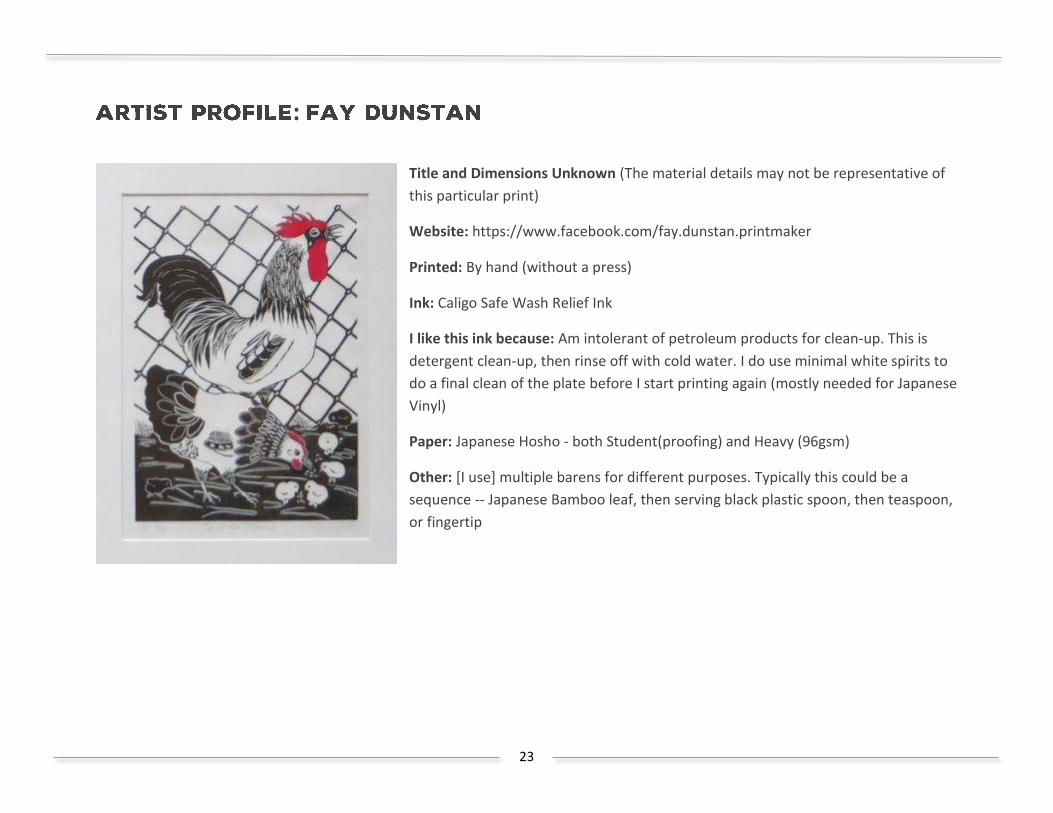
Title and Dimensions Unknown (The material details may not be representative of
this particular print)
Website: https://www.facebook.com/fay.dunstan.printmaker
Printed: By hand (without a press)
Ink: Caligo Safe Wash Relief Ink
I like this ink because: Am intolerant of petroleum products for clean-up. This is
detergent clean-up, then rinse off with cold water. I do use minimal white spirits to
do a final clean of the plate before I start printing again (mostly needed for Japanese
Vinyl)
Paper: Japanese Hosho - both Student(proofing) and Heavy (96gsm)
Other: [I use] multiple barens for different purposes. Typically this could be a
sequence -- Japanese Bamboo leaf, then serving black plastic spoon, then teaspoon,
or fingertip

24
:
Title: First Chase: Autumn (9” x 12”)
Website:
http://gallery.dannyevarts.net/
Printed: By hand (without a press)
Ink: I think it was a mix of Daniel
Smith water-based relief (no longer
made) and Speedball water-based
I like this ink because: I use mostly
oil-based now (Gamblin mostly,
though love the no-longer made
Daniel Smith relief black)
Paper: Rives BFK white
Other: When I only used water-
based inks, I had problems with
getting clear colours and crisp lines.
Switching to oil-based has solved
much of this
25
:
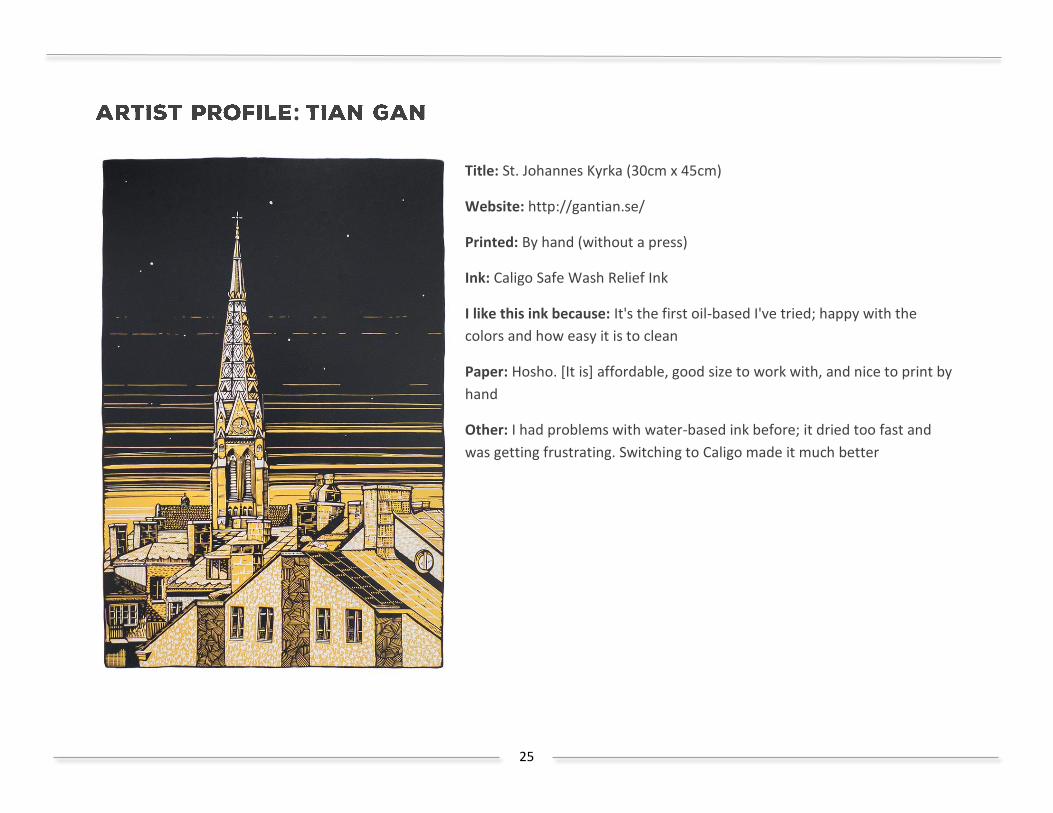
Title: St. Johannes Kyrka (30cm x 45cm)
Website: http://gantian.se/
Printed: By hand (without a press)
Ink: Caligo Safe Wash Relief Ink
I like this ink because: It's the first oil-based I've tried; happy with the
colors and how easy it is to clean
Paper: Hosho. [It is] affordable, good size to work with, and nice to print by
hand
Other: I had problems with water-based ink before; it dried too fast and
was getting frustrating. Switching to Caligo made it much better
26
:
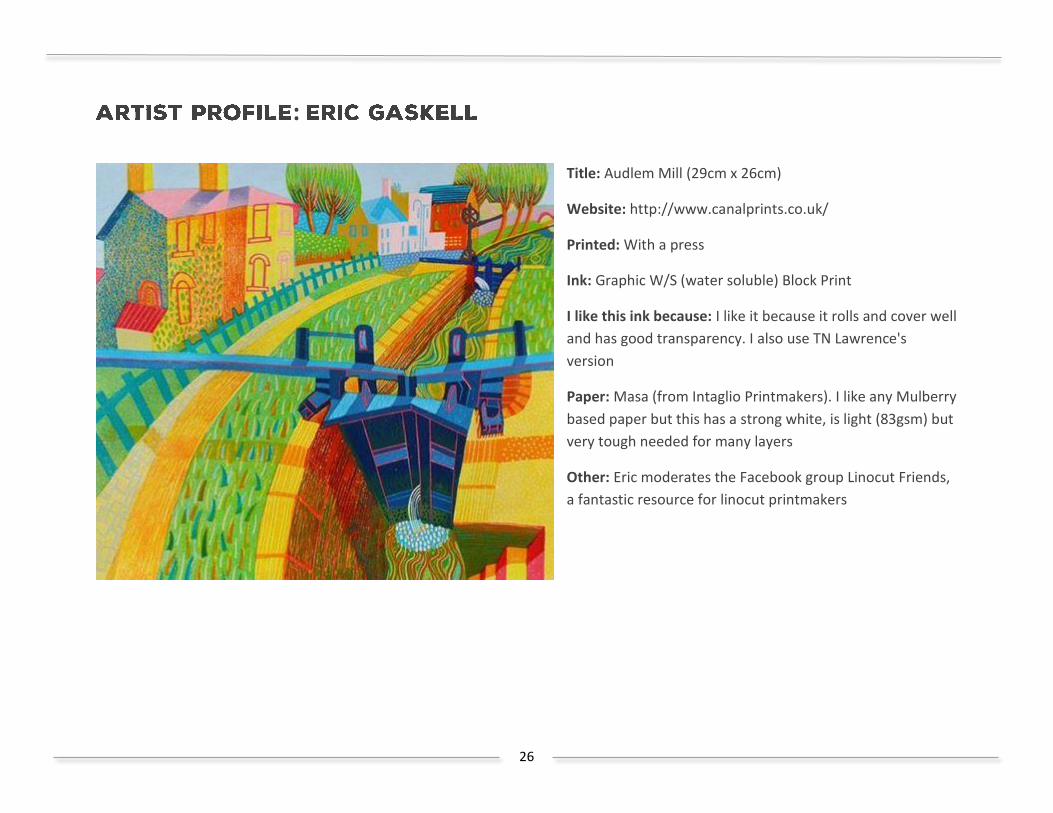
Title: Audlem Mill (29cm x 26cm)
Website: http://www.canalprints.co.uk/
Printed: With a press
Ink: Graphic W/S (water soluble) Block Print
I like this ink because: I like it because it rolls and cover well
and has good transparency. I also use TN Lawrence's
version
Paper: Masa (from Intaglio Printmakers). I like any Mulberry
based paper but this has a strong white, is light (83gsm) but
very tough needed for many layers
Other: Eric moderates the Facebook group Linocut Friends,
a fantastic resource for linocut printmakers
27
:
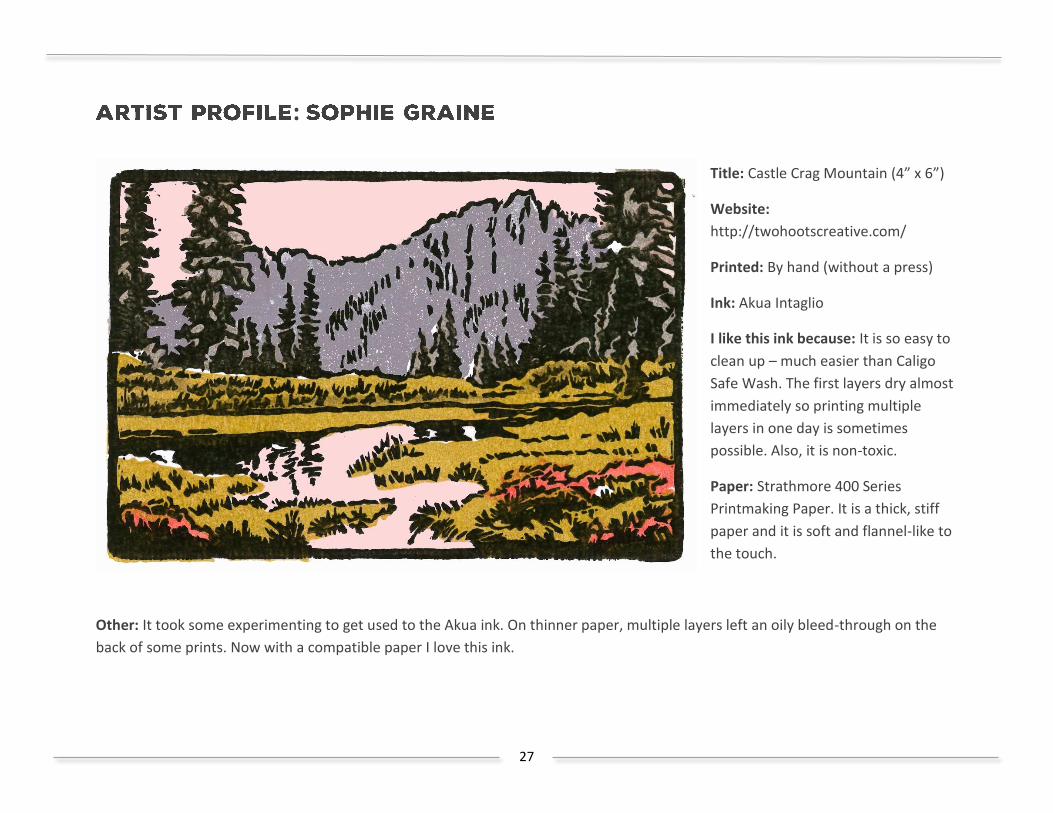
Title: Castle Crag Mountain (4” x 6”)
Website:
http://twohootscreative.com/
Printed: By hand (without a press)
Ink: Akua Intaglio
I like this ink because: It is so easy to
clean up – much easier than Caligo
Safe Wash. The first layers dry almost
immediately so printing multiple
layers in one day is sometimes
possible. Also, it is non-toxic.
Paper: Strathmore 400 Series
Printmaking Paper. It is a thick, stiff
paper and it is soft and flannel-like to
the touch.
Other: It took some experimenting to get used to the Akua ink. On thinner paper, multiple layers left an oily bleed-through on the
back of some prints. Now with a compatible paper I love this ink.
28
:
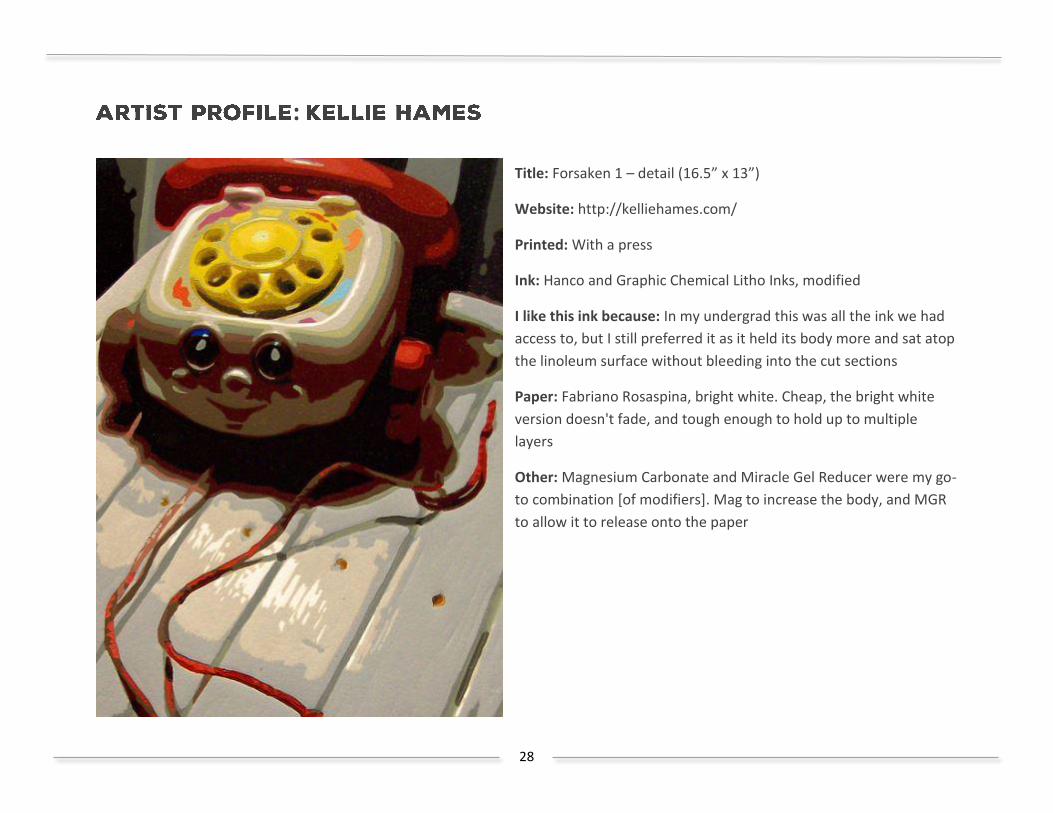
Title: Forsaken 1 – detail (16.5” x 13”)
Website: http://kelliehames.com/
Printed: With a press
Ink: Hanco and Graphic Chemical Litho Inks, modified
I like this ink because: In my undergrad this was all the ink we had
access to, but I still preferred it as it held its body more and sat atop
the linoleum surface without bleeding into the cut sections
Paper: Fabriano Rosaspina, bright white. Cheap, the bright white
version doesn't fade, and tough enough to hold up to multiple
layers
Other: Magnesium Carbonate and Miracle Gel Reducer were my go-
to combination [of modifiers]. Mag to increase the body, and MGR
to allow it to release onto the paper
29
:
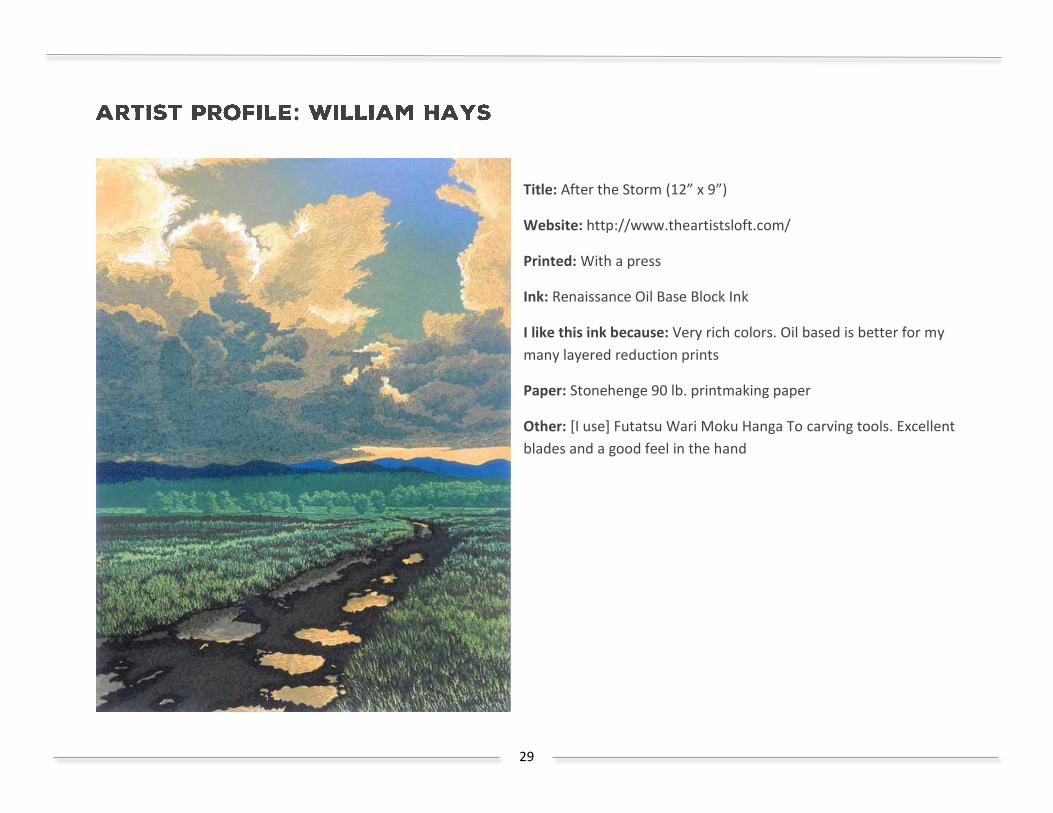
Title: After the Storm (12” x 9”)
Website: http://www.theartistsloft.com/
Printed: With a press
Ink: Renaissance Oil Base Block Ink
I like this ink because: Very rich colors. Oil based is better for my
many layered reduction prints
Paper: Stonehenge 90 lb. printmaking paper
Other: [I use] Futatsu Wari Moku Hanga To carving tools. Excellent
blades and a good feel in the hand

30
:
Title: Boston City Hall (4” x 6”)
Website: https://okayart.wordpress.com/
Printed: By hand (without a press)
Ink: Graphic W/S (water soluble) Block Print
Paper: Ease of cleaning up afterwards. I print out of
my very small apartment. There's no designated
studio space, just my desk and a kitchen sink
Other: BFK Reeve lightweight, or mulberry. I like the
soft look my print's negative spaces when using
mulberry
31
:
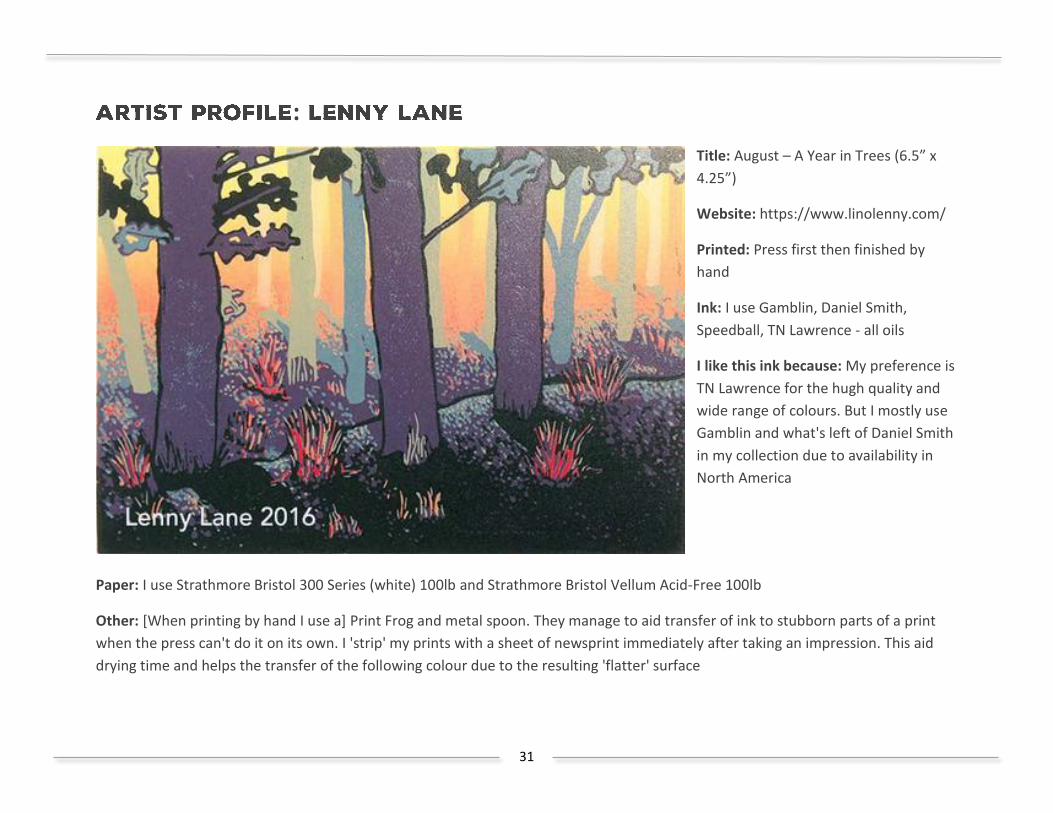
Title: August – A Year in Trees (6.5” x
4.25”)
Website: https://www.linolenny.com/
Printed: Press first then finished by
hand
Ink: I use Gamblin, Daniel Smith,
Speedball, TN Lawrence - all oils
I like this ink because: My preference is
TN Lawrence for the hugh quality and
wide range of colours. But I mostly use
Gamblin and what's left of Daniel Smith
in my collection due to availability in
North America
Paper: I use Strathmore Bristol 300 Series (white) 100lb and Strathmore Bristol Vellum Acid-Free 100lb
Other: [When printing by hand I use a] Print Frog and metal spoon. They manage to aid transfer of ink to stubborn parts of a print
when the press can't do it on its own. I 'strip' my prints with a sheet of newsprint immediately after taking an impression. This aid
drying time and helps the transfer of the following colour due to the resulting 'flatter' surface
32
:
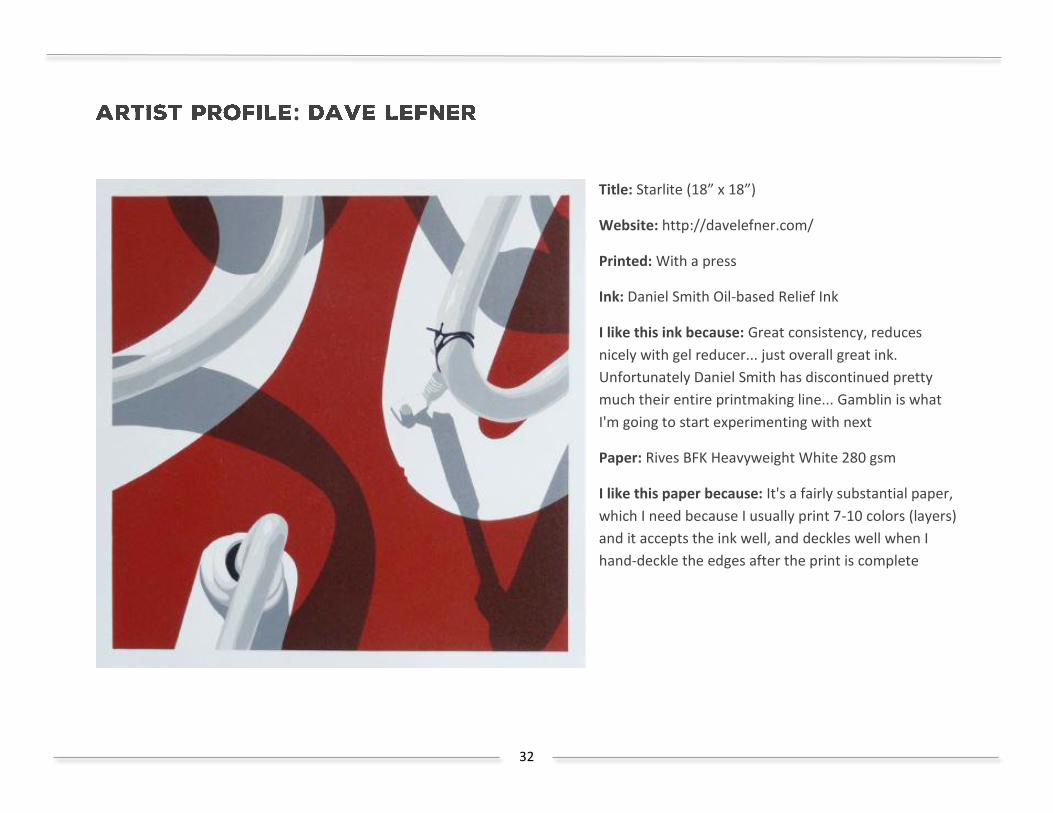
Title: Starlite (18” x 18”)
Website: http://davelefner.com/
Printed: With a press
Ink: Daniel Smith Oil-based Relief Ink
I like this ink because: Great consistency, reduces
nicely with gel reducer... just overall great ink.
Unfortunately Daniel Smith has discontinued pretty
much their entire printmaking line... Gamblin is what
I'm going to start experimenting with next
Paper: Rives BFK Heavyweight White 280 gsm
I like this paper because: It's a fairly substantial paper,
which I need because I usually print 7-10 colors (layers)
and it accepts the ink well, and deckles well when I
hand-deckle the edges after the print is complete
33
:
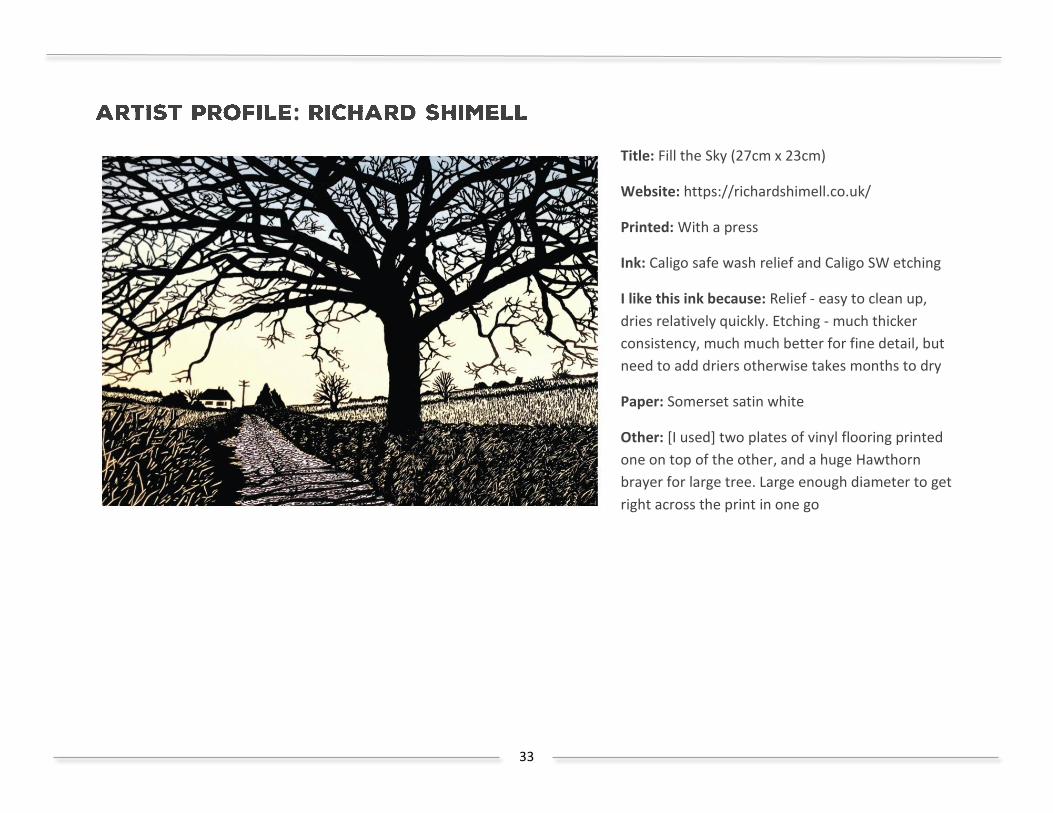
Title: Fill the Sky (27cm x 23cm)
Website: https://richardshimell.co.uk/
Printed: With a press
Ink: Caligo safe wash relief and Caligo SW etching
I like this ink because: Relief - easy to clean up,
dries relatively quickly. Etching - much thicker
consistency, much much better for fine detail, but
need to add driers otherwise takes months to dry
Paper: Somerset satin white
Other: [I used] two plates of vinyl flooring printed
one on top of the other, and a huge Hawthorn
brayer for large tree. Large enough diameter to get
right across the print in one go
34
:
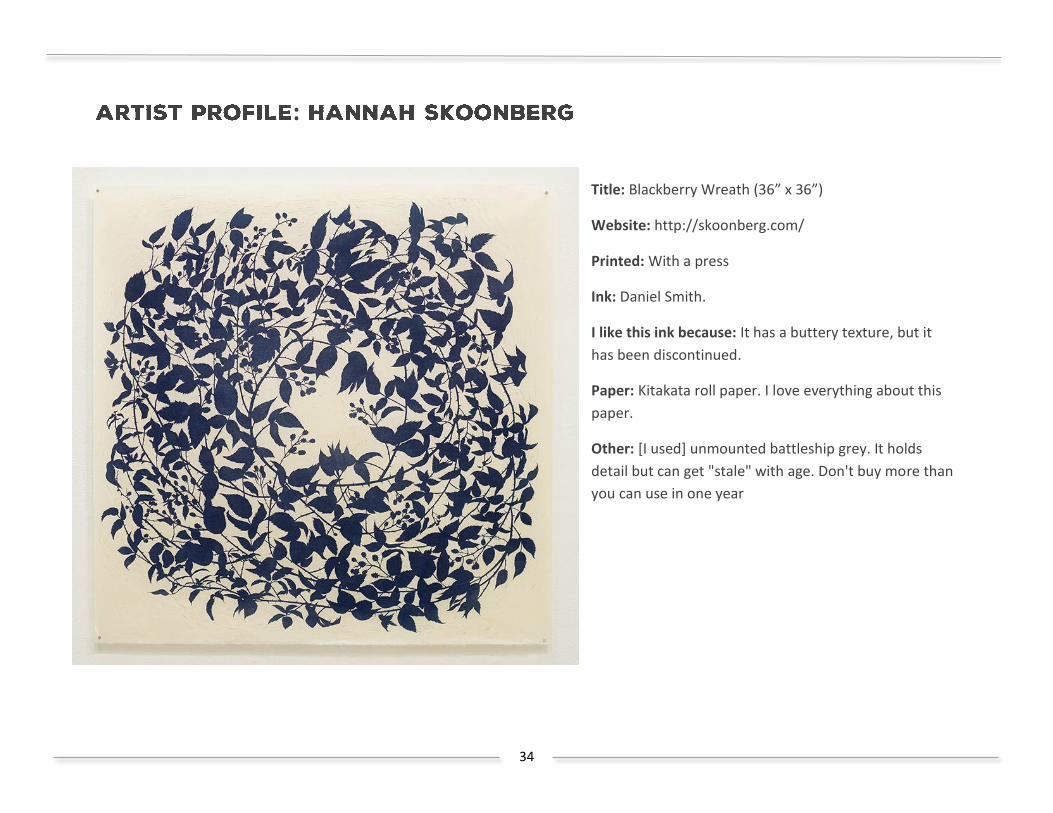
Title: Blackberry Wreath (36” x 36”)
Website: http://skoonberg.com/
Printed: With a press
Ink: Daniel Smith.
I like this ink because: It has a buttery texture, but it
has been discontinued.
Paper: Kitakata roll paper. I love everything about this
paper.
Other: [I used] unmounted battleship grey. It holds
detail but can get "stale" with age. Don't buy more than
you can use in one year
35
:
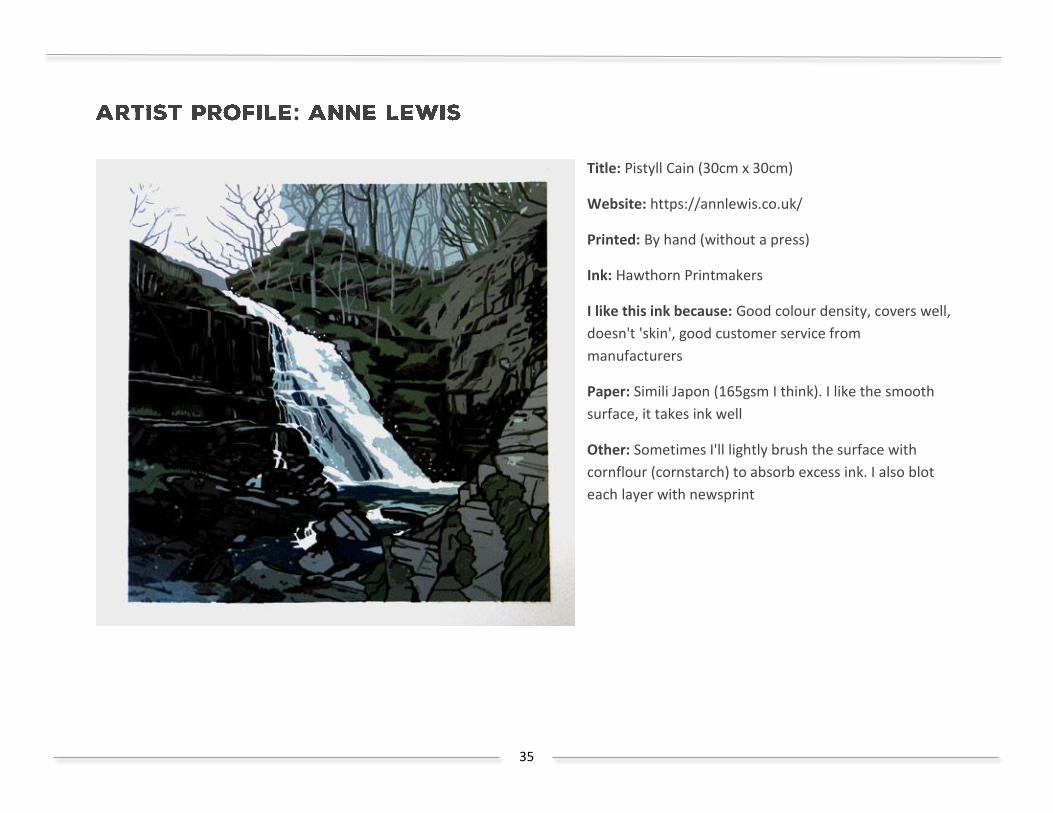
Title: Pistyll Cain (30cm x 30cm)
Website: https://annlewis.co.uk/
Printed: By hand (without a press)
Ink: Hawthorn Printmakers
I like this ink because: Good colour density, covers well,
doesn't 'skin', good customer service from
manufacturers
Paper: Simili Japon (165gsm I think). I like the smooth
surface, it takes ink well
Other: Sometimes I'll lightly brush the surface with
cornflour (cornstarch) to absorb excess ink. I also blot
each layer with newsprint
36
:
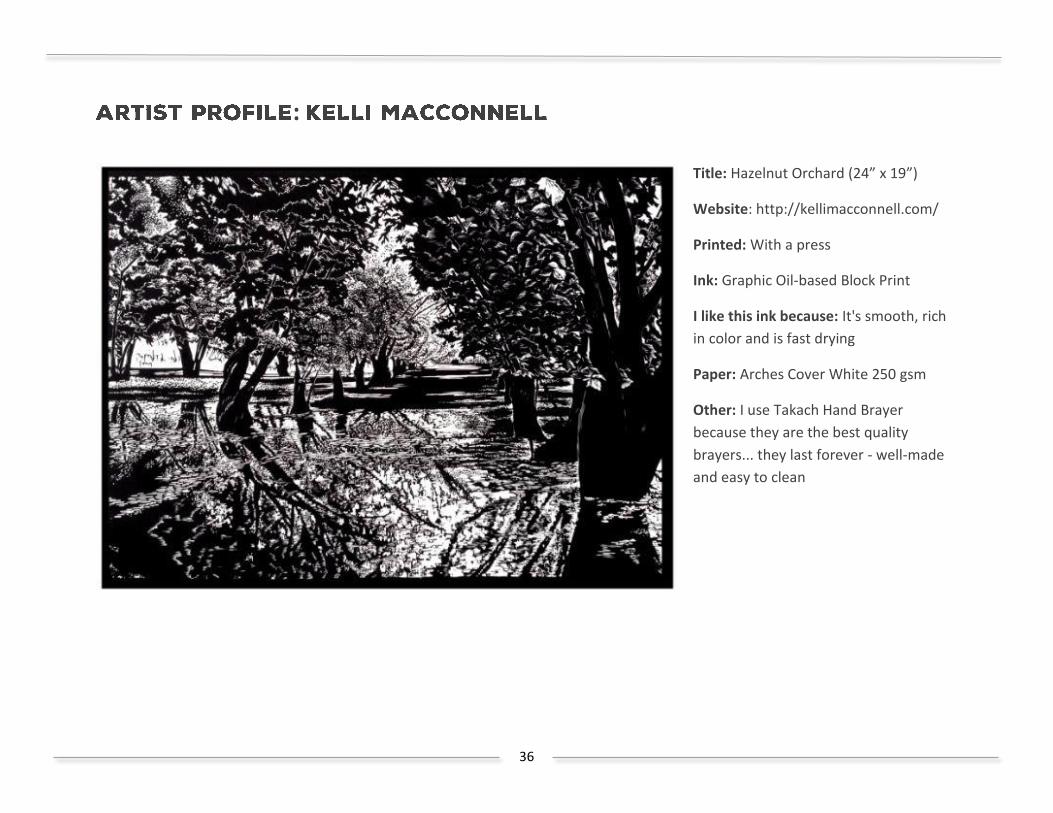
Title: Hazelnut Orchard (24” x 19”)
Website: http://kellimacconnell.com/
Printed: With a press
Ink: Graphic Oil-based Block Print
I like this ink because: It's smooth, rich
in color and is fast drying
Paper: Arches Cover White 250 gsm
Other: I use Takach Hand Brayer
because they are the best quality
brayers... they last forever - well-made
and easy to clean

37
:
Title: Window (A2, 16.5” x 23.4”)
Website: http://robinmackenzie.co.uk/
Printed: With a press
Ink: Lawrence relief
I like this ink because: Smooth rolling, good coverage and dries in a
reasonable time
Paper: GF Smith Naturalis 250 gsm. Very smooth, acid free and good colour.
Other: [I use] Lawrence durathene rollers, best quality rubber and feels
good to use
38
:
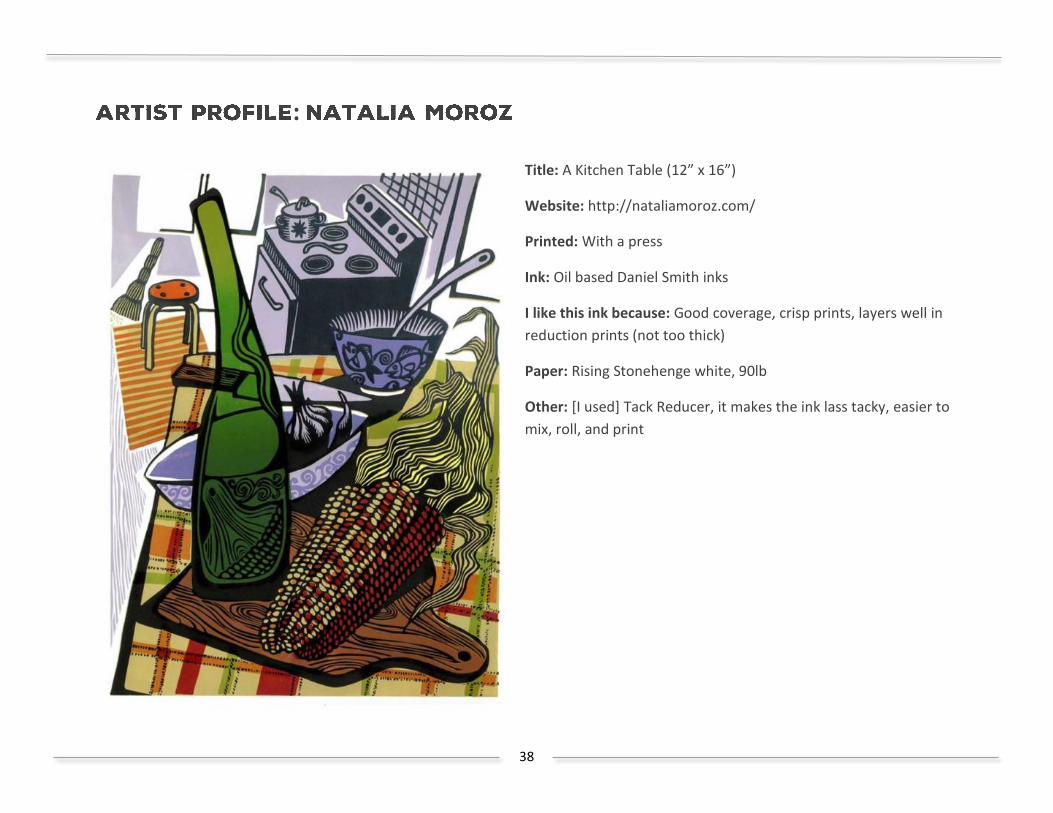
Title: A Kitchen Table (12” x 16”)
Website: http://nataliamoroz.com/
Printed: With a press
Ink: Oil based Daniel Smith inks
I like this ink because: Good coverage, crisp prints, layers well in
reduction prints (not too thick)
Paper: Rising Stonehenge white, 90lb
Other: [I used] Tack Reducer, it makes the ink lass tacky, easier to
mix, roll, and print
39
:
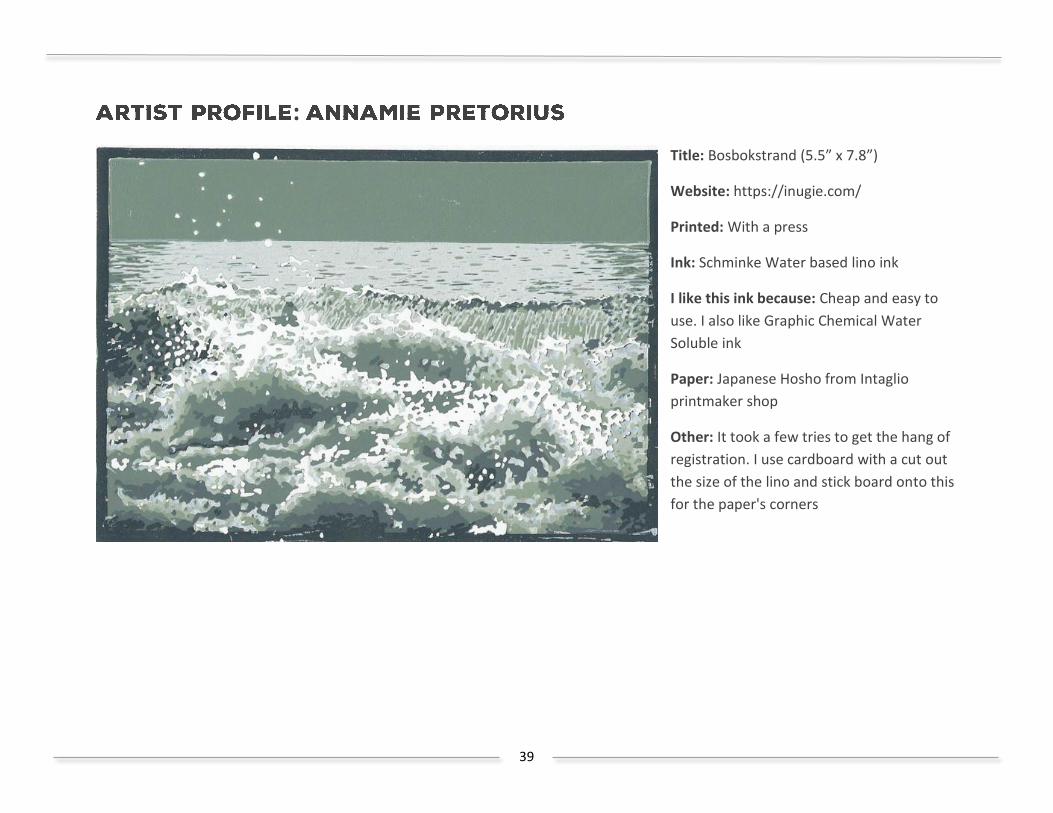
Title: Bosbokstrand (5.5” x 7.8”)
Website: https://inugie.com/
Printed: With a press
Ink: Schminke Water based lino ink
I like this ink because: Cheap and easy to
use. I also like Graphic Chemical Water
Soluble ink
Paper: Japanese Hosho from Intaglio
printmaker shop
Other: It took a few tries to get the hang of
registration. I use cardboard with a cut out
the size of the lino and stick board onto this
for the paper's corners
40
:
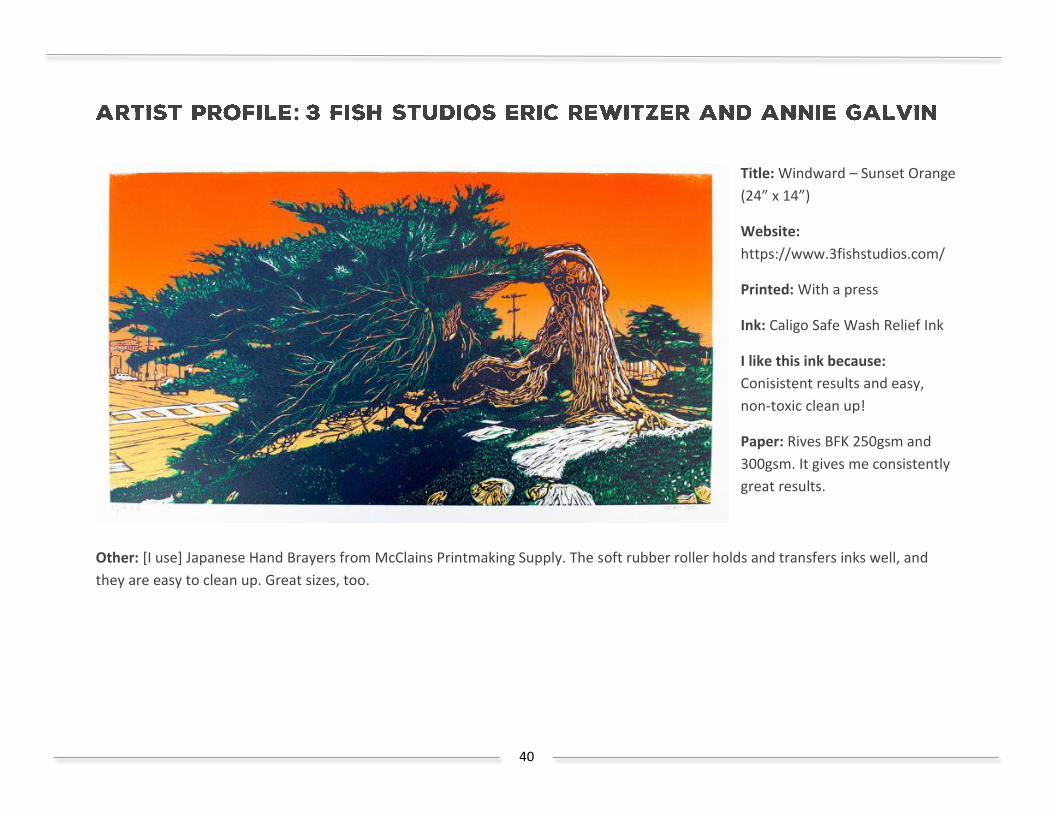
Title: Windward – Sunset Orange
(24” x 14”)
Website:
https://www.3fishstudios.com/
Printed: With a press
Ink: Caligo Safe Wash Relief Ink
I like this ink because:
Conisistent results and easy,
non-toxic clean up!
Paper: Rives BFK 250gsm and
300gsm. It gives me consistently
great results.
Other: [I use] Japanese Hand Brayers from McClains Printmaking Supply. The soft rubber roller holds and transfers inks well, and
they are easy to clean up. Great sizes, too.
41
:
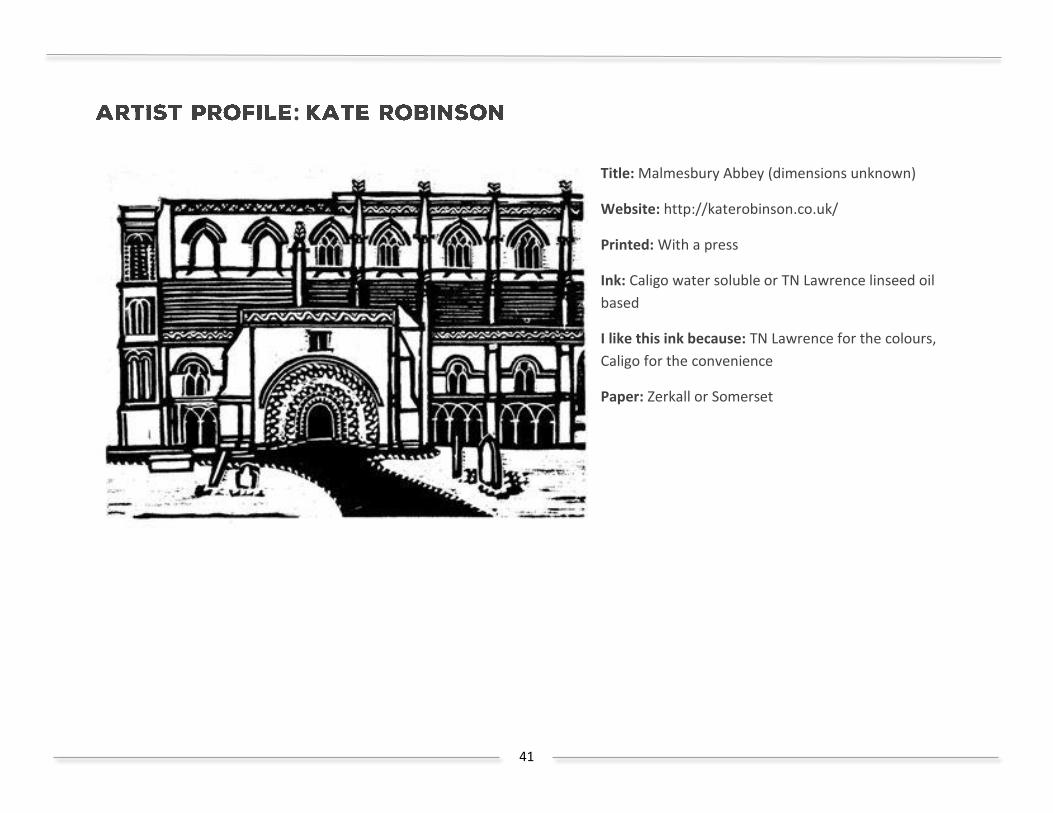
Title: Malmesbury Abbey (dimensions unknown)
Website: http://katerobinson.co.uk/
Printed: With a press
Ink: Caligo water soluble or TN Lawrence linseed oil
based
I like this ink because: TN Lawrence for the colours,
Caligo for the convenience
Paper: Zerkall or Somerset
42
: -
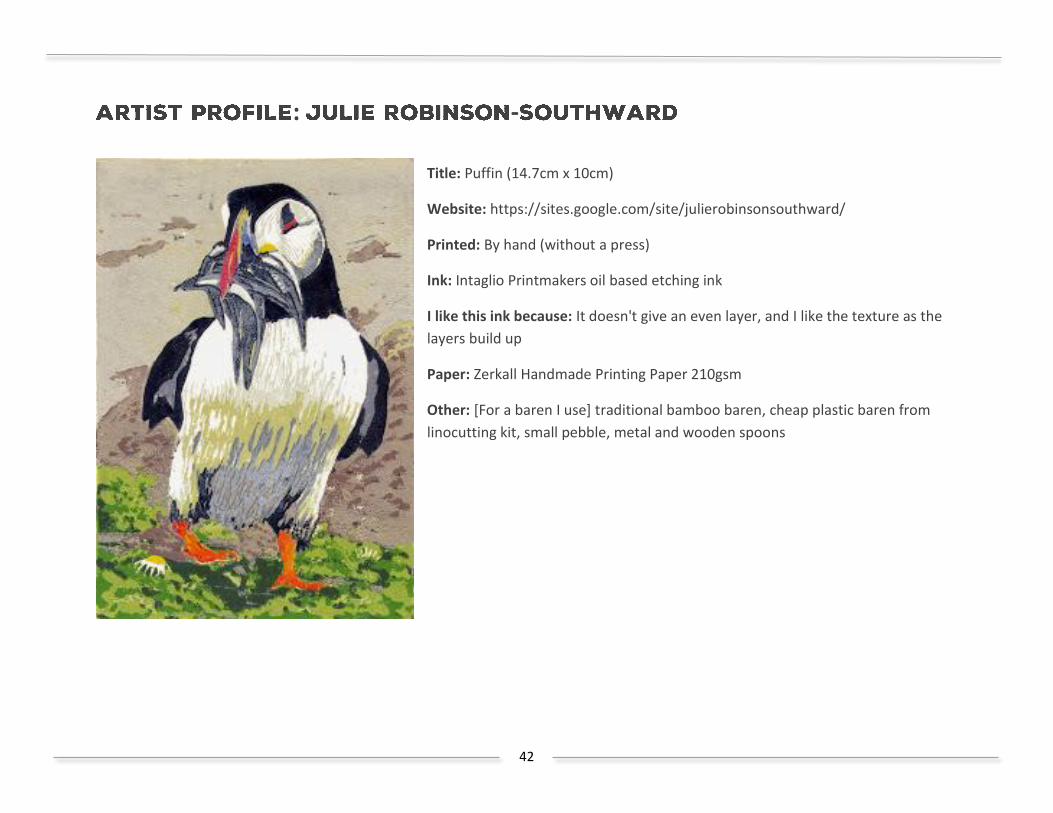
Title: Puffin (14.7cm x 10cm)
Website: https://sites.google.com/site/julierobinsonsouthward/
Printed: By hand (without a press)
Ink: Intaglio Printmakers oil based etching ink
I like this ink because: It doesn't give an even layer, and I like the texture as the
layers build up
Paper: Zerkall Handmade Printing Paper 210gsm
Other: [For a baren I use] traditional bamboo baren, cheap plastic baren from
linocutting kit, small pebble, metal and wooden spoons

43
:
Title: Cozy Cone Motel 8 (dimensions
unknown)
Website: http://dougthomas.blogspot.ca/
Printed: With a press
Ink: Gamblin Relief Ink
I like this ink because: I like the consistency
of these inks. They are very soft and easy to
use. The only downside is that they come in
cans and I'm learning that there is a lot of
waste with canned inks
Paper: I usually use Canson Edition paper -
250gsm - Bright White
Other: I've had issues with inks not adhering to one another and other times where the ink was too thick. The first problem occurred
during a class and was remedied by switching from the etching inks that the instructor had to relief inks that I purchased myself. The
second problem is remedied by not recharging the ink well when printing
44
:
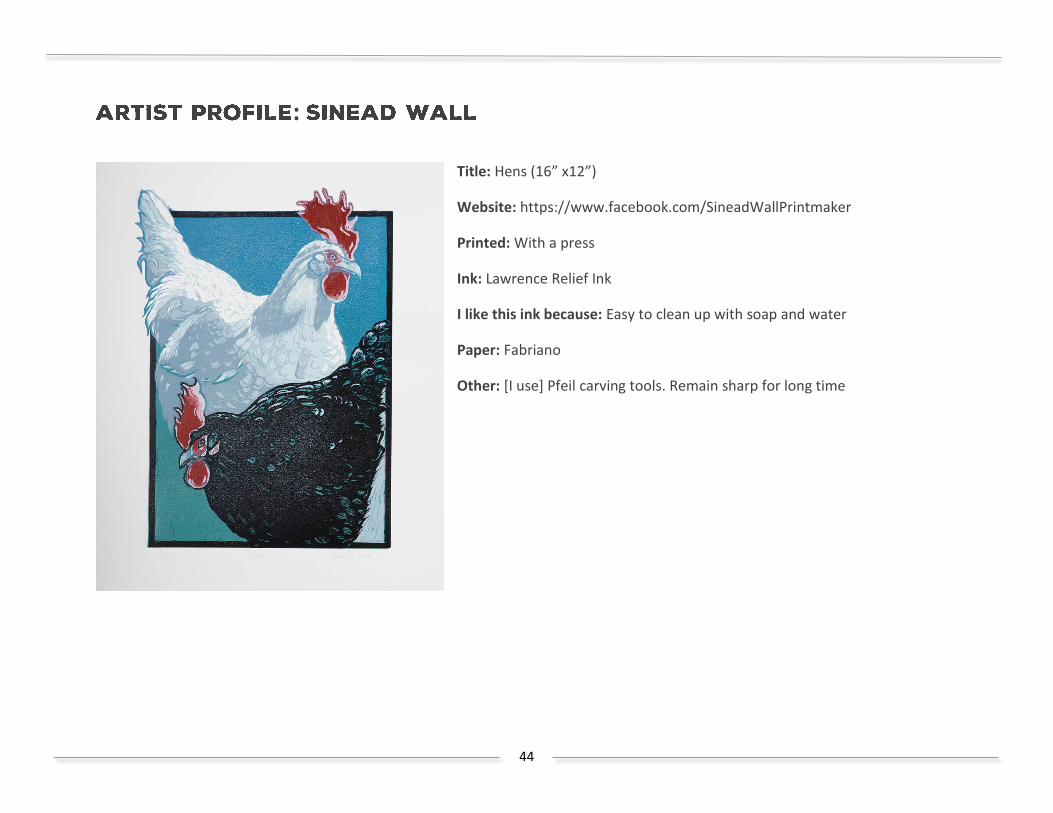
Title: Hens (16” x12”)
Website: https://www.facebook.com/SineadWallPrintmaker
Printed: With a press
Ink: Lawrence Relief Ink
I like this ink because: Easy to clean up with soap and water
Paper: Fabriano
Other: [I use] Pfeil carving tools. Remain sharp for long time
45
:
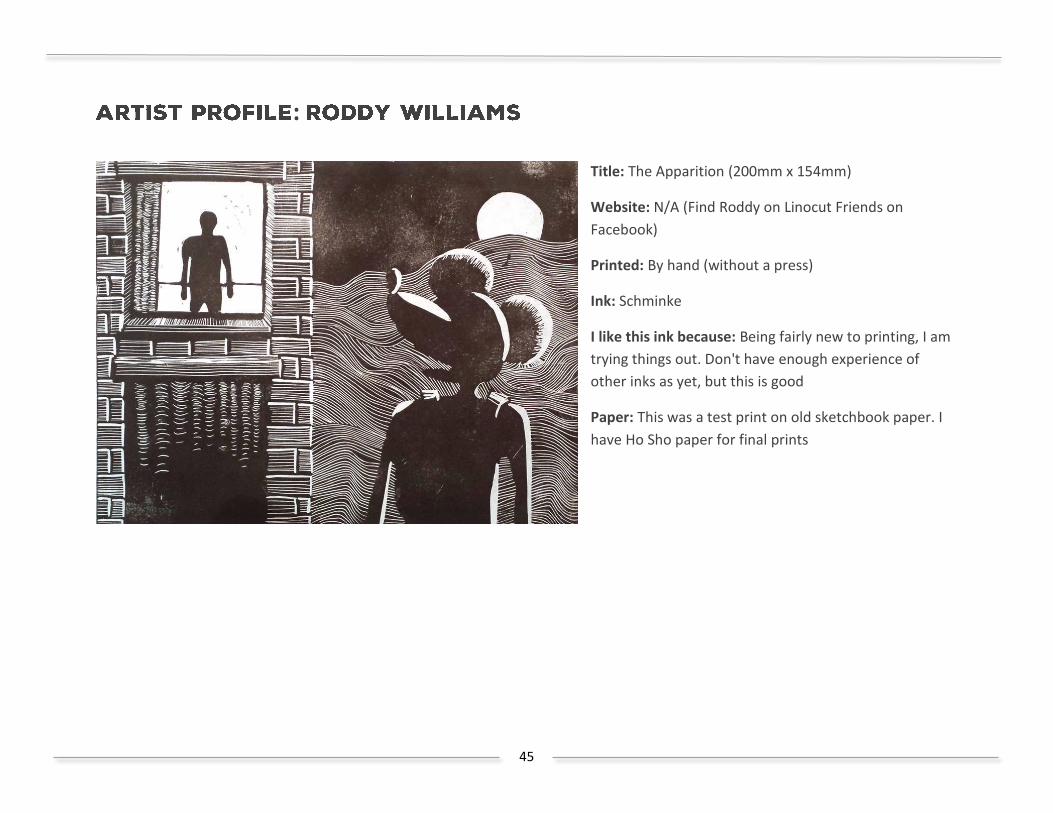
Title: The Apparition (200mm x 154mm)
Website: N/A (Find Roddy on Linocut Friends on
Facebook)
Printed: By hand (without a press)
Ink: Schminke
I like this ink because: Being fairly new to printing, I am
trying things out. Don't have enough experience of
other inks as yet, but this is good
Paper: This was a test print on old sketchbook paper. I
have Ho Sho paper for final prints
46
:
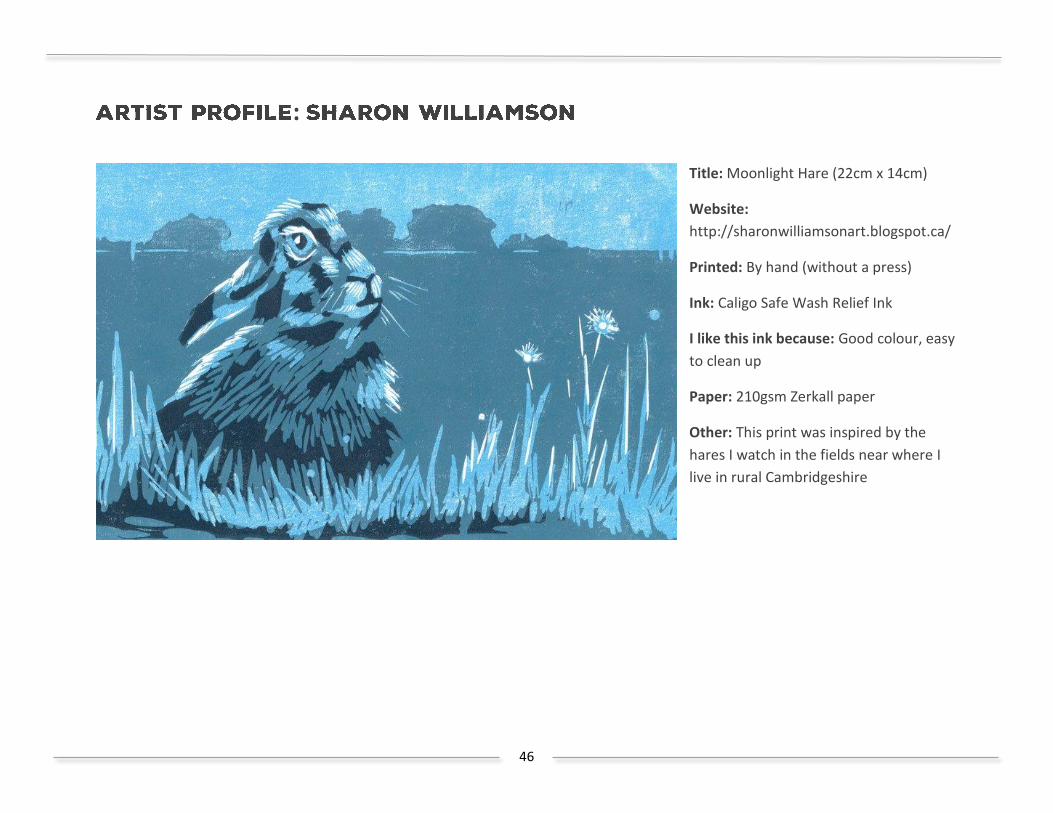
Title: Moonlight Hare (22cm x 14cm)
Website:
http://sharonwilliamsonart.blogspot.ca/
Printed: By hand (without a press)
Ink: Caligo Safe Wash Relief Ink
I like this ink because: Good colour, easy
to clean up
Paper: 210gsm Zerkall paper
Other: This print was inspired by the
hares I watch in the fields near where I
live in rural Cambridgeshire
47
:
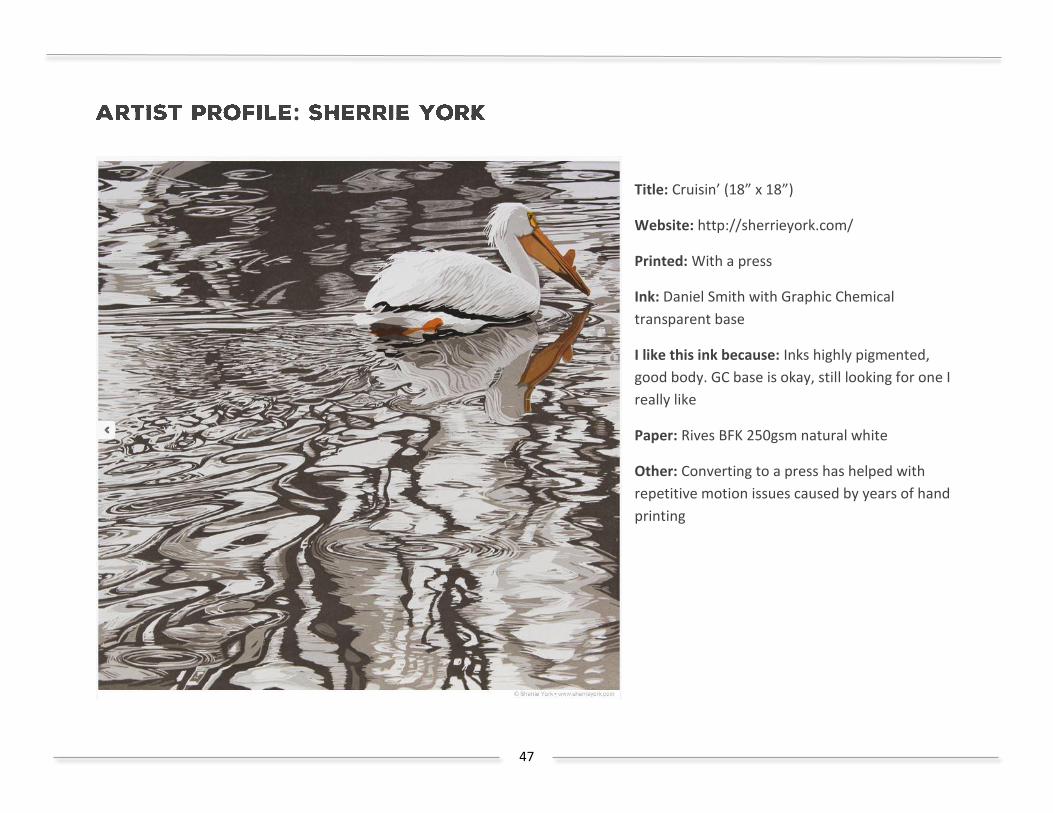
Title: Cruisin’ (18” x 18”)
Website: http://sherrieyork.com/
Printed: With a press
Ink: Daniel Smith with Graphic Chemical
transparent base
I like this ink because: Inks highly pigmented,
good body. GC base is okay, still looking for one I
really like
Paper: Rives BFK 250gsm natural white
Other: Converting to a press has helped with
repetitive motion issues caused by years of hand
printing
48
Patience
Spend a little more time mixing the exact color you want" rather than getting impatient and printing a close enough color
Measure twice, cut once
Take time to prepare properly, have patience in your work
Focus on composition. Do not transfer a sketch on a plate before you feel the composition is strong
Patience with carving
Really look at a subject before you start drawing and try drawing direct with a pen and ink. It will improve your observation and
concentration on the subject
Plan working layer colours before cutting, and write down how mixed colours
Take your time, you can only cut once, and draw, draw, draw
If you make a mistake in cutting, you have ONLY 3 choices..... Redesign, Love it and Leave it, or just throw it OUT. Saves a lot of time
Tools and Techniques
Get a magnifying lamp
Hmm, to use oil-based ink, perhaps
Keep your fingers behind the blades!
Sand the Lino first
Always start with the number 1 "v" nib to create a moat around your image. Now you can test print and if you slip, your moat can stop
before you cut something you don't want to
Make sure the ink is the right consistency
Don't over press
Ink should never manage to travel past your knuckles!
Sand the lino with wet and dry sandpaper before you start. Mount the lino onto thin board
Advice on multi block printing and registering work so it lines up exactly
I do so love Lenny Lanes Blotting Tip.... “Just blot it, every time you take a print off the press or table - just blot it."
49
Experiment
You learn the most through printing, making mistakes and trying again.
Keep experimenting and always learn from your mistakes / Just keep playing. Experiment and see what happens
Every perceived failure is just another step in the learning process. Keep going and don't let failures slow down your progress
Invent a solution when you have a problem
Try things out and experiment - it's the best way to learn (and have happy accidents!)
There is no "bad" work ... at worst, problems are learning opportunities
From another printmaker who said doing something that seems ambitious can result in the greatest learning and greatest satisfaction
Resist perfection. If you make a mistake, paint it red
Just Keep Going and Other Emotional Concerns
Do it for yourself because you love it
Keep trying even if you feel that your work is not good enough, it's making art that's most important, not the result, and if you stick to
that the results often follow automatically
Don't start an art career trying to make work that will sell. You'll never be happy and your heart won't be in it. The audience for your art
is out there, you just have to be patient and diligent in finding it
Continue to make the things you love and don't worry about people accepting your work
Over so many years, it varies. I think what is important is to trust your own judgement and not work for the approval of others
You don't have to take everyone's advice, but you do have to listen
The best advice I received was encouragement by a college professor to take any opportunity to show my work
"The artist may use any form which his expression demands... A deliberate search for personality and 'style' is not only impossible, but
comparatively unimportant." --Vassily Kandinsky. From "Concerning the Spiritual in Art."
"Don't be an artist - you won't make any money." How true...
Make art for yourself rather than trying to produce something that you think might sell well
Never stop working, especially during a creative slump
Be true to yourself, Follow your whimsy
Stop making excuses and just do it / Just enjoy it / Just do it!
50
Registering Prints
How to register.
How to register accurately.
I wish I had been taught about using pins and tabs for registration. I was taught using pencil marks, which is not exact. Pins and tabs
(taped on part of the paper that I will tear away) is the most accurate registration method I have found.
Using inverted drawing pins for registration.
I wish I knew earlier how to use registration for reduction prints. I learned it quite late and it was so simple.
Invest in Good Tools, Understand and Take Care of Them
Get good quality tools and learn how to sharpen them from the start.
Invest in the best quality tools and materials you can afford.
Invest in quality tools.
Don't be a penny pincher, buy the best tools, ink, paper you can.
Learning to sharpen tools is just as important as learning how to carve the relief print.
Use a press if you can (unless you're making woodcuts) - buy a small one or join a studio where you can use one. It makes the process so
much less painful.
Good quality printmaking paper is crucial, and thinner papers almost always give better results. Oh, and always print on the smooth
side...
Using a baren - I used a spoon when I started.
Always cut away from your body.
Not all inks will overprint. Read the small print first. When I started I bought a set of inks and struggled for weeks with them as every
time I printed with them the underlying layers lifted off. It was only when I read the small print on the bottles that I noticed it said not
suitable for overprinting - I hadn't realised that and I nearly gave up!
51
Experiment
To experiment with materials more
Experiment more with multiple blocks and ink transparencies
Embrace Mistakes
Be patient. Each print is a learning experience and it takes years to make any process like this part of one's creative vocabulary
Find your own style and don't be afraid of taking risks
Expect it to take time to learn your craft and time to build your audience
Stop worrying and just do it
Learn to accept and work around the mistakes you make
Be prepared to make lots of mistakes
Don't be afraid to make a mistake, you learn more from mistakes once you've figured out why you've made them
Don't stress over imperfections, they add interest to the work / Stop trying so hard
Listen to Your Inner Voice
Your print doesn't have to be in an edition for your printmaking practice to be valid. A surprising number of my printmaking professors
and fellow students were fixated by the multiple. I'm more interested in the processes of carving, inking and working in a mirrored way
and how that affects the image--I only need to print one for my curiosity to be satisfied
Doing something that seems ambitious can result in the greatest learning and greatest satisfaction…I was told I was trying to run before I
could walk, that undermined my confidence
Use Colour, or Don’t
Use color
Do Black & White for one year before moving on to color reduction
52
Linocut Friends
I was taught a lot of misinformation by teachers who were in fact not relief printers, and who seemed to think they could " wing and
prayer it"- 'cos it "was only linoprinting" -- I have corrected more misinformation this last 18 months on Linocut Friends --- so my one
piece of advice NOW would be to join this group, and LEARN from this amazing group of learners
Look at Linocut friends frequently. You constantly see a variety of work and can learn from the questions that are asked
Keep Track of Your Work
Keep excel spreadsheets of all of your editions
Make a note of everything you do, keep sketches, take photos of stages
Unique Answers
Share techniques that work and communicate more clearly. Don't assume that I know what you are talking about when you use
abbreviated language that only you know what it means
None. I had a master teacher! He taught me all I needed to get me here today
Beware! Linocutting is addictive!


![Now ]by linocut - Stanford Universityweb.stanford.edu/~marykw/classes/CS250_W18/lectureNotes/Lectur… · To RECAP the storyofConcatenatedCodes:-Weconsidered (RScode)° (BinaryLinearCodeontheGVbound)-Because](https://img.pdfslide.us/doc/110x75/5fd7a1b3845b0041362fcbda/now-by-linocut-stanford-marykwclassescs250w18lecturenoteslectur-to-recap.jpg)