Embed Size (px)
DESCRIPTION
This Jooomla templating tutorial was written to help a novice create their own Joomla 1.5 template. This tutorial aims to keep template development for Joomla free by using free and/or open source webdev tools. If you found this tutorial helpful, please rate it and leave a comment. Feedback is always nice.
Citation preview
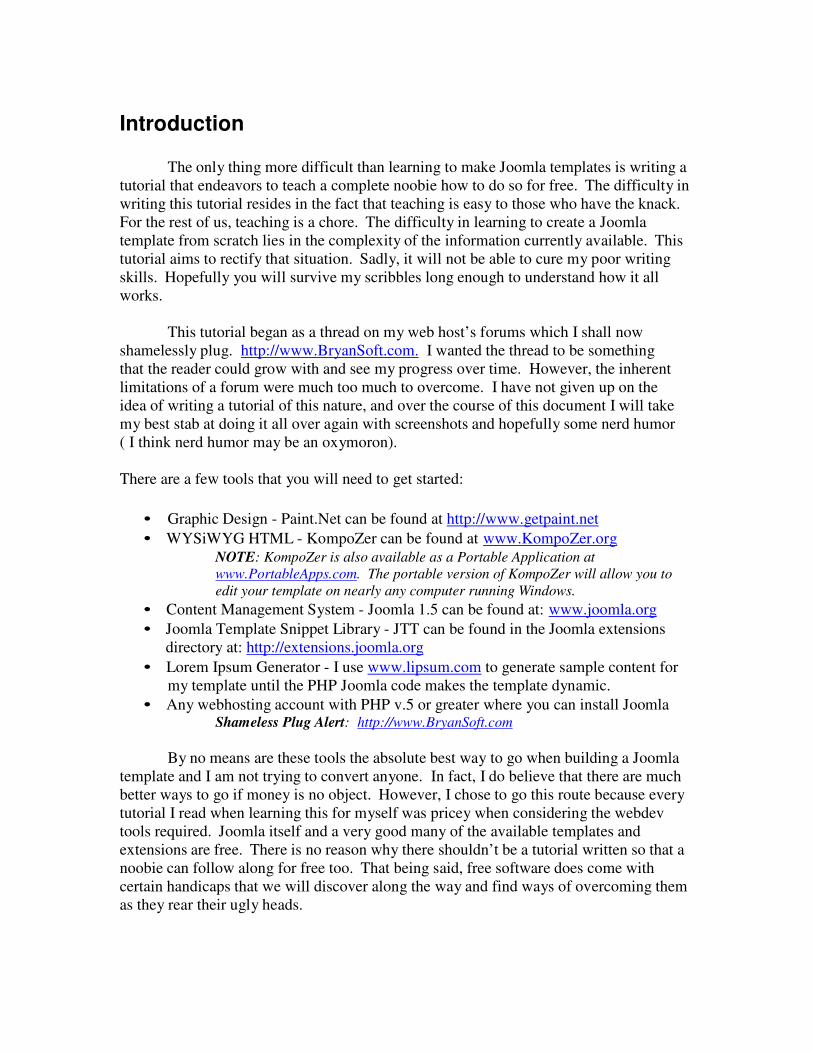
Introduction
The only thing more difficult than learning to make Joomla templates is writing a
tutorial that endeavors to teach a complete noobie how to do so for free. The difficulty in
writing this tutorial resides in the fact that teaching is easy to those who have the knack.
For the rest of us, teaching is a chore. The difficulty in learning to create a Joomla
template from scratch lies in the complexity of the information currently available. This
tutorial aims to rectify that situation. Sadly, it will not be able to cure my poor writing
skills. Hopefully you will survive my scribbles long enough to understand how it all
works.
This tutorial began as a thread on my web host’s forums which I shall now
shamelessly plug. http://www.BryanSoft.com. I wanted the thread to be something
that the reader could grow with and see my progress over time. However, the inherent
limitations of a forum were much too much to overcome. I have not given up on the
idea of writing a tutorial of this nature, and over the course of this document I will take
my best stab at doing it all over again with screenshots and hopefully some nerd humor
( I think nerd humor may be an oxymoron).
There are a few tools that you will need to get started:
• Graphic Design - Paint.Net can be found at http://www.getpaint.net
• WYSiWYG HTML - KompoZer can be found at www.KompoZer.org
NOTE: KompoZer is also available as a Portable Application at
www.PortableApps.com. The portable version of KompoZer will allow you to
edit your template on nearly any computer running Windows.
• Content Management System - Joomla 1.5 can be found at: www.joomla.org
• Joomla Template Snippet Library - JTT can be found in the Joomla extensions
directory at: http://extensions.joomla.org
• Lorem Ipsum Generator - I use www.lipsum.com to generate sample content for
my template until the PHP Joomla code makes the template dynamic.
• Any webhosting account with PHP v.5 or greater where you can install Joomla Shameless Plug Alert: http://www.BryanSoft.com
By no means are these tools the absolute best way to go when building a Joomla
template and I am not trying to convert anyone. In fact, I do believe that there are much
better ways to go if money is no object. However, I chose to go this route because every
tutorial I read when learning this for myself was pricey when considering the webdev
tools required. Joomla itself and a very good many of the available templates and
extensions are free. There is no reason why there shouldn’t be a tutorial written so that a
noobie can follow along for free too. That being said, free software does come with
certain handicaps that we will discover along the way and find ways of overcoming them
as they rear their ugly heads.
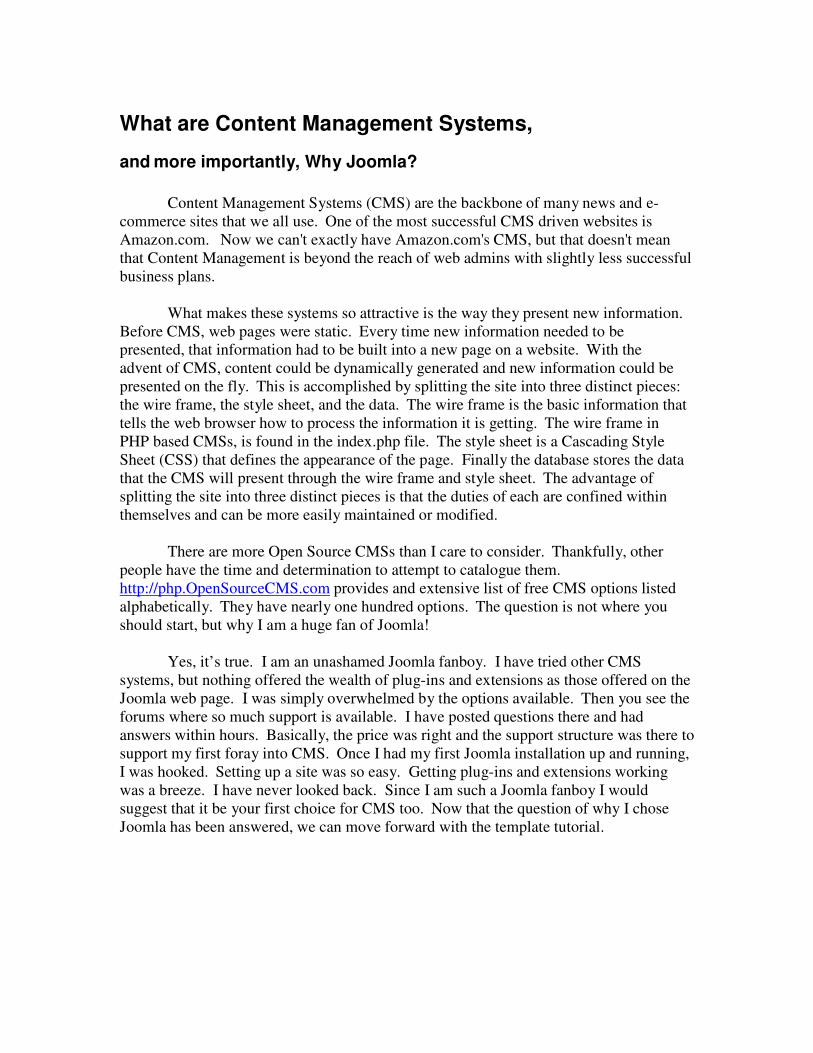
What are Content Management Systems, and more importantly, Why Joomla?
Content Management Systems (CMS) are the backbone of many news and e-
commerce sites that we all use. One of the most successful CMS driven websites is
Amazon.com. Now we can't exactly have Amazon.com's CMS, but that doesn't mean
that Content Management is beyond the reach of web admins with slightly less successful
business plans.
What makes these systems so attractive is the way they present new information.
Before CMS, web pages were static. Every time new information needed to be
presented, that information had to be built into a new page on a website. With the
advent of CMS, content could be dynamically generated and new information could be
presented on the fly. This is accomplished by splitting the site into three distinct pieces:
the wire frame, the style sheet, and the data. The wire frame is the basic information that
tells the web browser how to process the information it is getting. The wire frame in
PHP based CMSs, is found in the index.php file. The style sheet is a Cascading Style
Sheet (CSS) that defines the appearance of the page. Finally the database stores the data
that the CMS will present through the wire frame and style sheet. The advantage of
splitting the site into three distinct pieces is that the duties of each are confined within
themselves and can be more easily maintained or modified.
There are more Open Source CMSs than I care to consider. Thankfully, other
people have the time and determination to attempt to catalogue them.
http://php.OpenSourceCMS.com provides and extensive list of free CMS options listed
alphabetically. They have nearly one hundred options. The question is not where you
should start, but why I am a huge fan of Joomla!
Yes, it’s true. I am an unashamed Joomla fanboy. I have tried other CMS
systems, but nothing offered the wealth of plug-ins and extensions as those offered on the
Joomla web page. I was simply overwhelmed by the options available. Then you see the
forums where so much support is available. I have posted questions there and had
answers within hours. Basically, the price was right and the support structure was there to
support my first foray into CMS. Once I had my first Joomla installation up and running,
I was hooked. Setting up a site was so easy. Getting plug-ins and extensions working
was a breeze. I have never looked back. Since I am such a Joomla fanboy I would
suggest that it be your first choice for CMS too. Now that the question of why I chose
Joomla has been answered, we can move forward with the template tutorial.
Taking over the world AKA: Devious Plan “A”
The first place to start in any webdev project is to have a good plan. In the case of
creating a template, the plan is, more often than not, actually a picture. In this case, I have
created what is possibly the most boring and plain picture possible. The point of this
tutorial is to teach you how to make a Joomla template; not a pretty Joomla template. You
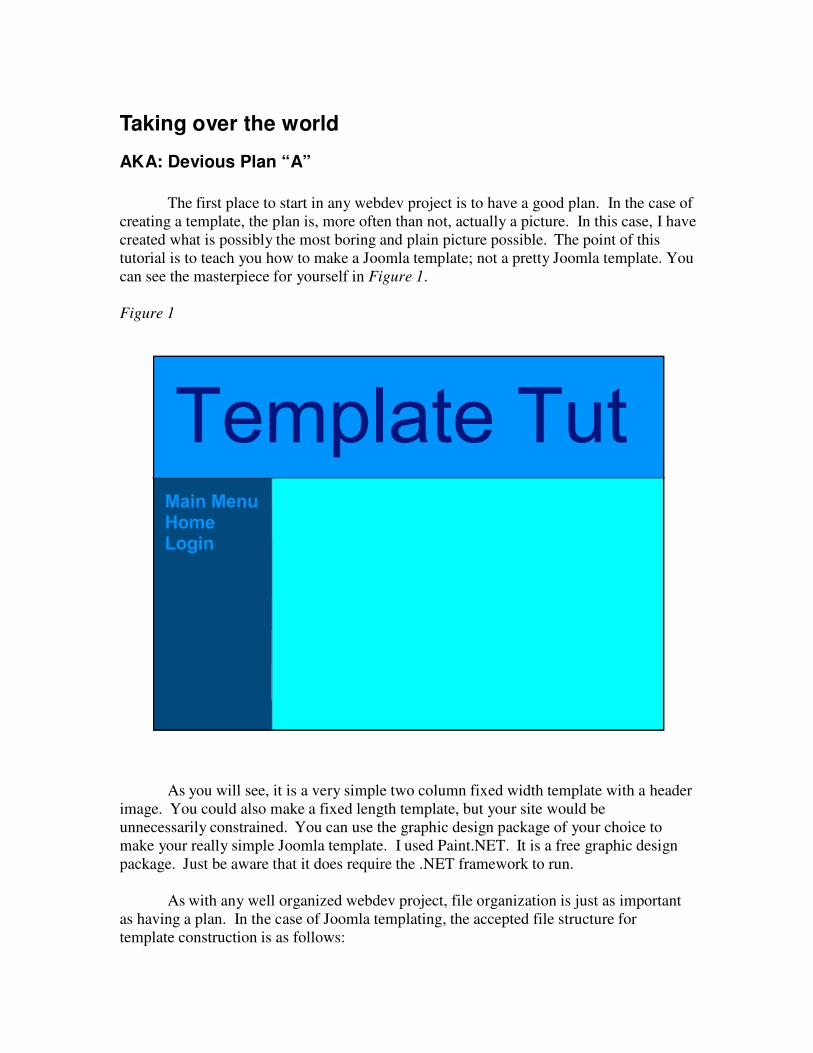
can see the masterpiece for yourself in Figure 1.
Figure 1
As you will see, it is a very simple two column fixed width template with a header
image. You could also make a fixed length template, but your site would be
unnecessarily constrained. You can use the graphic design package of your choice to
make your really simple Joomla template. I used Paint.NET. It is a free graphic design
package. Just be aware that it does require the .NET framework to run.
As with any well organized webdev project, file organization is just as important
as having a plan. In the case of Joomla templating, the accepted file structure for
template construction is as follows:
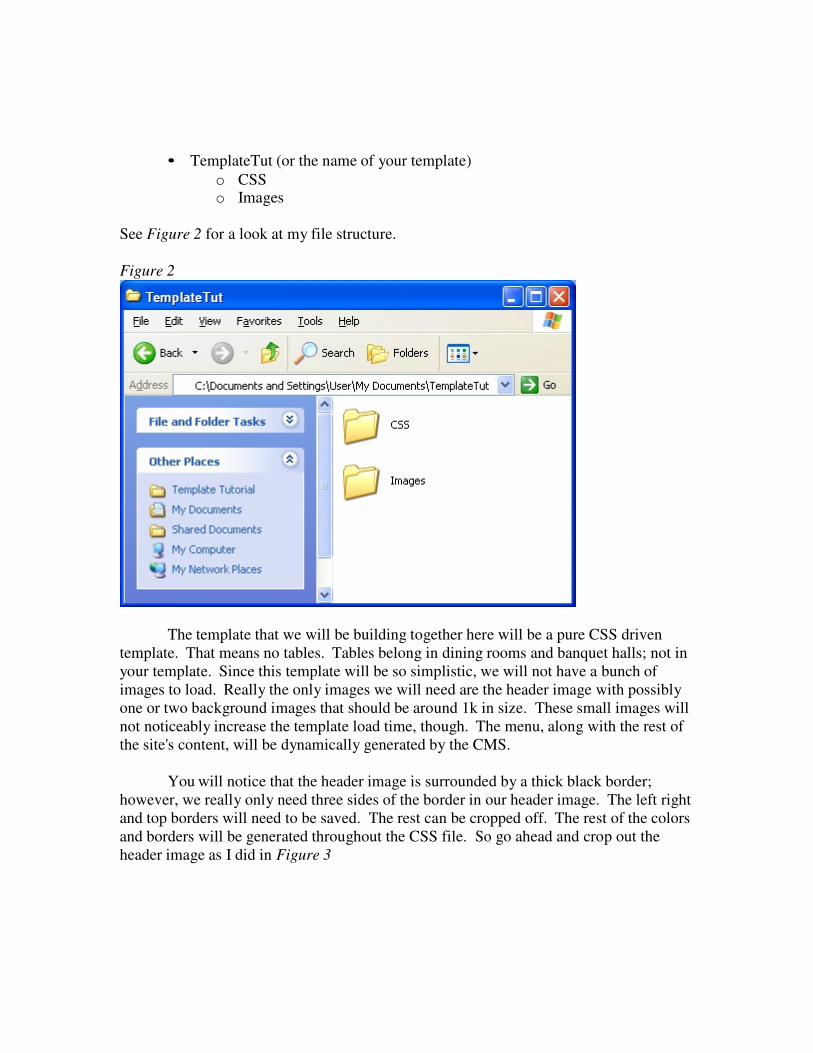
• TemplateTut (or the name of your template)
o CSS o Images
See Figure 2 for a look at my file structure.
Figure 2
The template that we will be building together here will be a pure CSS driven
template. That means no tables. Tables belong in dining rooms and banquet halls; not in
your template. Since this template will be so simplistic, we will not have a bunch of
images to load. Really the only images we will need are the header image with possibly
one or two background images that should be around 1k in size. These small images will
not noticeably increase the template load time, though. The menu, along with the rest of
the site's content, will be dynamically generated by the CMS.
You will notice that the header image is surrounded by a thick black border;
however, we really only need three sides of the border in our header image. The left right
and top borders will need to be saved. The rest can be cropped off. The rest of the colors
and borders will be generated throughout the CSS file. So go ahead and crop out the
header image as I did in Figure 3
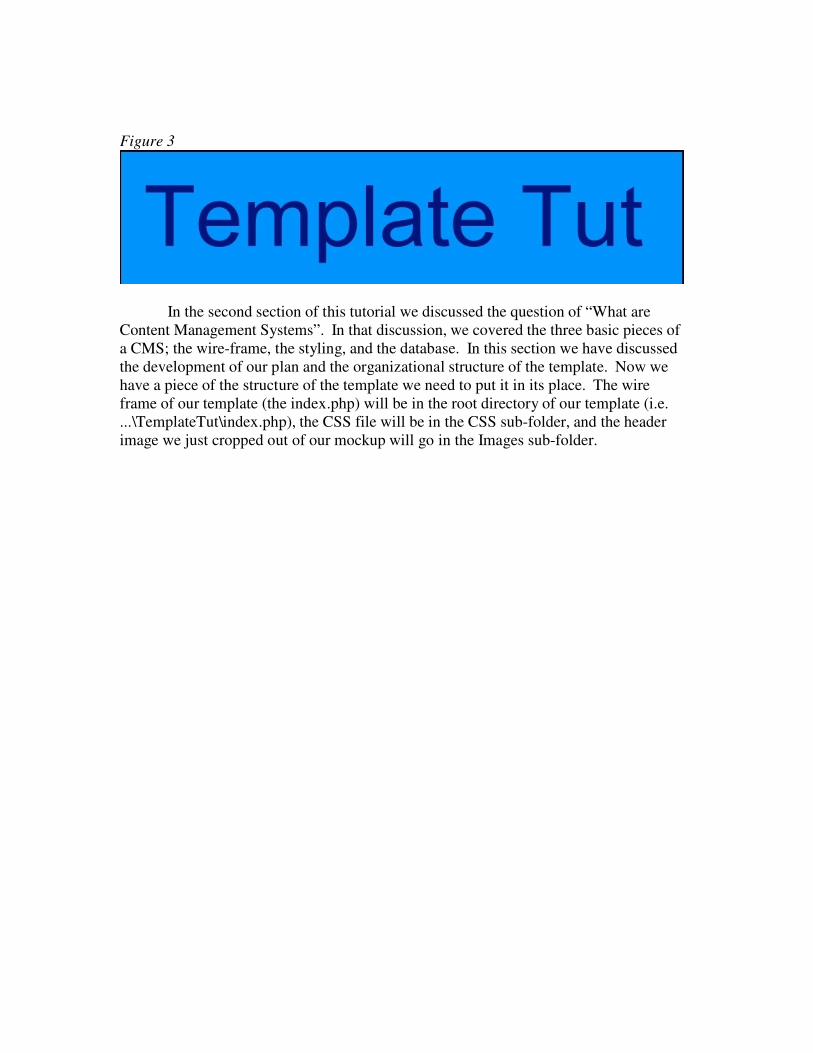
Figure 3
In the second section of this tutorial we discussed the question of “What are
Content Management Systems”. In that discussion, we covered the three basic pieces of
a CMS; the wire-frame, the styling, and the database. In this section we have discussed
the development of our plan and the organizational structure of the template. Now we
have a piece of the structure of the template we need to put it in its place. The wire
frame of our template (the index.php) will be in the root directory of our template (i.e.
...\TemplateTut\index.php), the CSS file will be in the CSS sub-folder, and the header
image we just cropped out of our mockup will go in the Images sub-folder.
Gold Diggers and Mozart Using KompoZer
I am going to have to assume that you have already downloaded KompoZer and
delve into the more complicated part of building a Joomla template. Joomla templates
begin in much the same way as any static HTML page. Basically we are going to build
an HTML page with a linked CSS file and then add the PHP bits that make it work as a
template in Joomla.
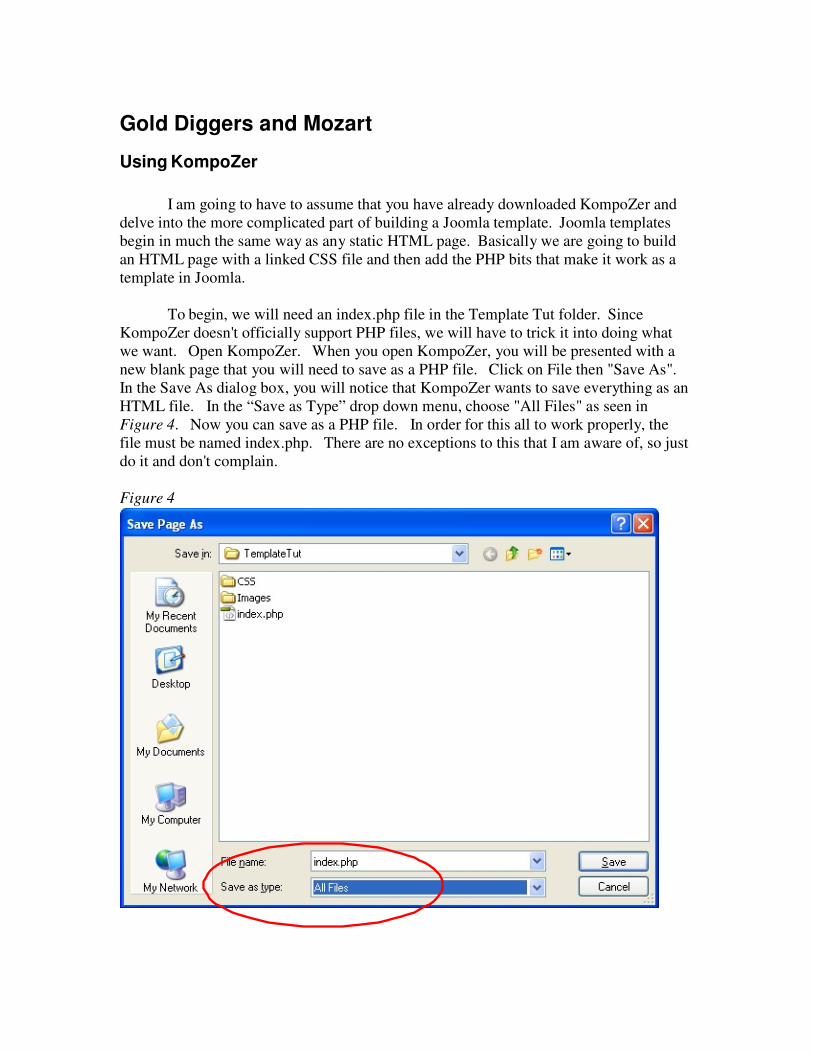
To begin, we will need an index.php file in the Template Tut folder. Since
KompoZer doesn't officially support PHP files, we will have to trick it into doing what
we want. Open KompoZer. When you open KompoZer, you will be presented with a
new blank page that you will need to save as a PHP file. Click on File then "Save As".
In the Save As dialog box, you will notice that KompoZer wants to save everything as an
HTML file. In the “Save as Type” drop down menu, choose "All Files" as seen in
Figure 4. Now you can save as a PHP file. In order for this all to work properly, the
file must be named index.php. There are no exceptions to this that I am aware of, so just
do it and don't complain.
Figure 4
Once your blank PHP file is saved, we can get started. In an earlier post, I said
that we would be making a purely CSS driven template which means NO TABLES. If
there are no tables, we must use CSS to create divisions in the page. I know that tables
are easy and many of you may have been using tables successfully for years, but there
are advantages to divs that tables cannot compare. Divs provide the possibility for
source ordering. Source ordering is important for SEO, but it is also important for
creating sites that are accessible to handicapped visitors who use screen readers. We
are not going to cover SEO or accessible website design in this tutorial, but I think we
can all agree that it is best to start off right than have to go back to be beginning again
when those issues become important.
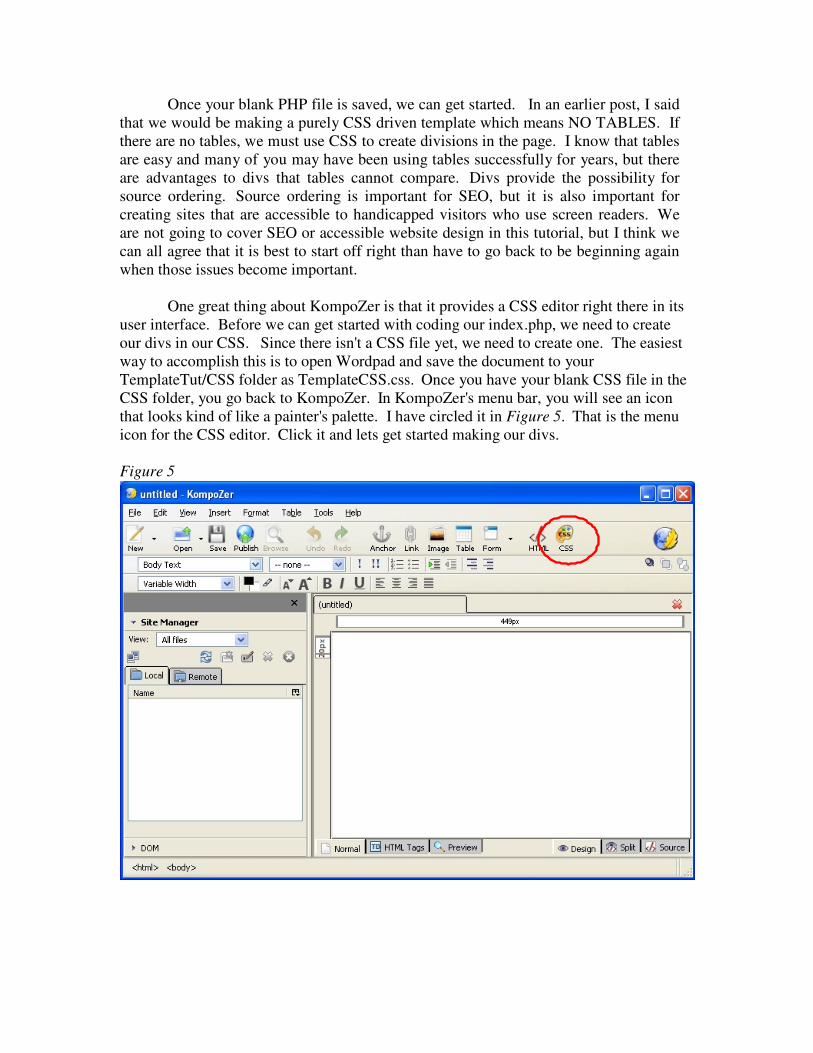
One great thing about KompoZer is that it provides a CSS editor right there in its
user interface. Before we can get started with coding our index.php, we need to create
our divs in our CSS. Since there isn't a CSS file yet, we need to create one. The easiest
way to accomplish this is to open Wordpad and save the document to your
TemplateTut/CSS folder as TemplateCSS.css. Once you have your blank CSS file in the
CSS folder, you go back to KompoZer. In KompoZer's menu bar, you will see an icon
that looks kind of like a painter's palette. I have circled it in Figure 5. That is the menu
icon for the CSS editor. Click it and lets get started making our divs.
Figure 5

When you open the CSS editor, you will see the CSS Stylesheets window. CSS is
a very versatile structure for changing the look of the content of your website. While it is
possible to use CSS right in the code of your index.php file, we want to keep our CSS file
as a separate file from the index.php. This allows us to easily modify the CSS without
having to look through all of the code in our index file. By default, the CSS Editor wants
to use an internal stylesheet. Refer to Figure 6 for a screenshot. There are two types of
stylesheets; internal and linked. What we want is called a "Linked Stylesheet". A linked
stylesheet is a stylesheet that is in a file separate from the PHP code. In the top left
corner of the CSS Stylesheets window, you will see another painter's palette icon. Click
it and you will see that there are several options to choose from. Since it is what we
want, a linked stylesheet will be the obvious choice. By this point, you may have noticed
that we already have a stylesheet; but it is an internal stylesheet. Feel free to delete the
internal stylesheet at will as we don’t need it. Deleting stylesheets is easy. Simply select
the unwanted stylesheet and click the red “X” icon in the menu bar. It will be the fourth
icon from the left.
Figure 6
Once we choose the linked stylesheet option, we will be presented with the New
Linked Stylesheet dialog. Once again look at Figure 6. Since we have already created a
blank CSS file, we will want to choose that file for ourselves by clicking on the "Choose
File" button. Once we have clicked on the choose file button we can surf our site structure
to the TemplateTut/CSS folder and select our TemplateCSS.css file. To make the linked
CSS file be linked in the index.php file, click the "Create Stylesheet" button.
There is one quirky thing about KompoZer’s CSS editor that takes a little getting
used to that you will need to know now. KompoZer’s CSS editor does not save changes
to your CSS file until you click ok. If you click Cancel or the red “X” in the top right
corner or the Cancel button in the bottom right hand corner, all of your CSS work will be
lost. If you want to keep your changes and exit, always click the OK button. If, at some
point you want to delete a stylesheet or any single element of a stylesheet, select the sheet
or element in the "Sheets and Rules" panel and click the red x in the menu bar.
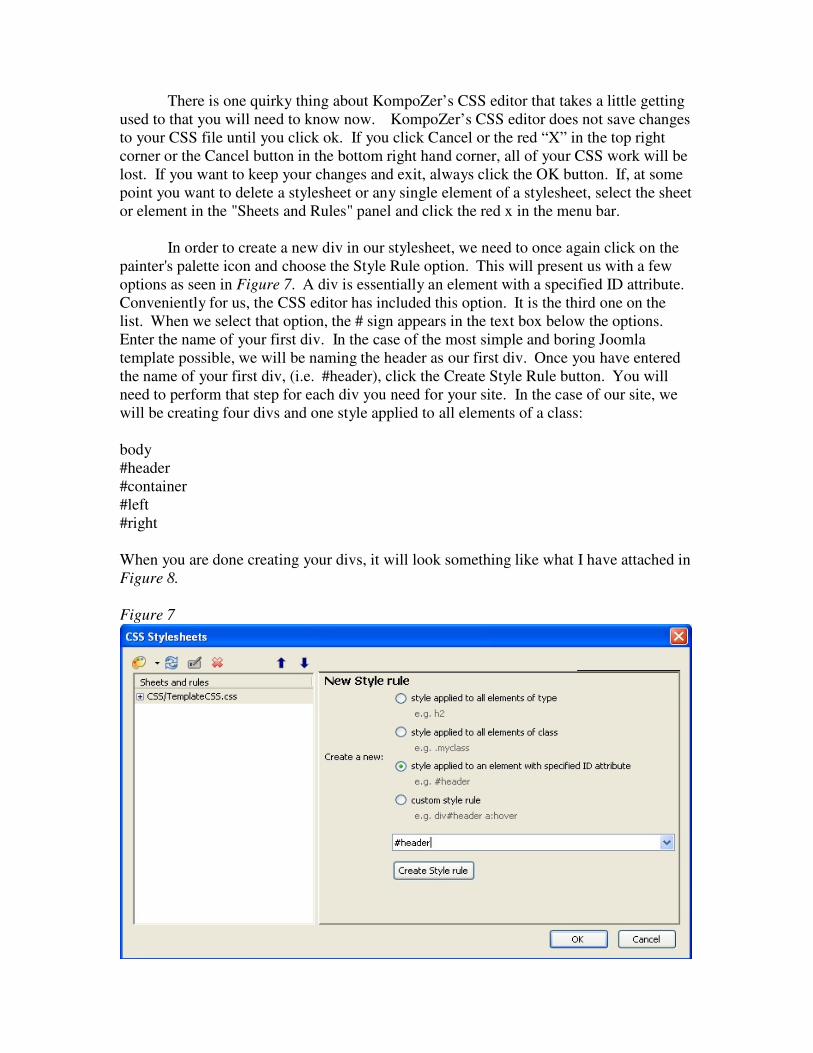
In order to create a new div in our stylesheet, we need to once again click on the
painter's palette icon and choose the Style Rule option. This will present us with a few
options as seen in Figure 7. A div is essentially an element with a specified ID attribute.
Conveniently for us, the CSS editor has included this option. It is the third one on the
list. When we select that option, the # sign appears in the text box below the options.
Enter the name of your first div. In the case of the most simple and boring Joomla
template possible, we will be naming the header as our first div. Once you have entered
the name of your first div, (i.e. #header), click the Create Style Rule button. You will
need to perform that step for each div you need for your site. In the case of our site, we
will be creating four divs and one style applied to all elements of a class:
body
#header
#container
#left
#right
When you are done creating your divs, it will look something like what I have attached in
Figure 8.
Figure 7
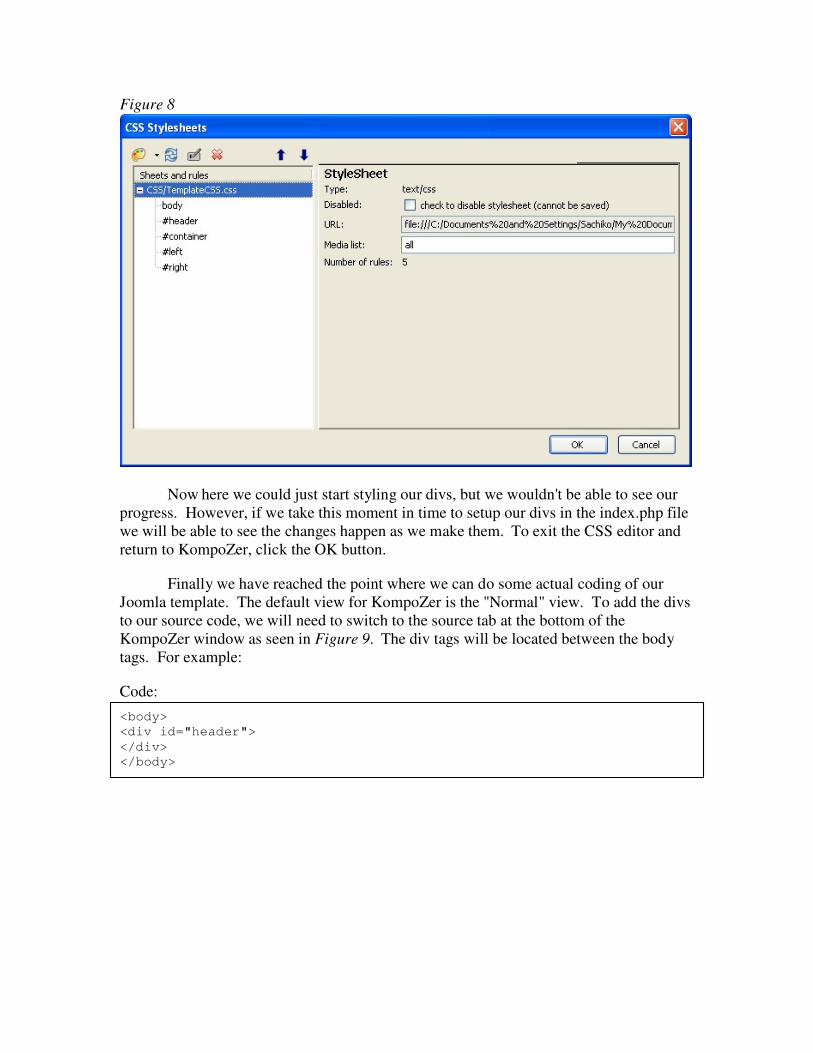
Figure 8
Now here we could just start styling our divs, but we wouldn't be able to see our
progress. However, if we take this moment in time to setup our divs in the index.php file
we will be able to see the changes happen as we make them. To exit the CSS editor and
return to KompoZer, click the OK button.
Finally we have reached the point where we can do some actual coding of our
Joomla template. The default view for KompoZer is the "Normal" view. To add the divs
to our source code, we will need to switch to the source tab at the bottom of the
KompoZer window as seen in Figure 9. The div tags will be located between the body
tags. For example:
Code:
<body>
<div id="header">
</div>
</body>
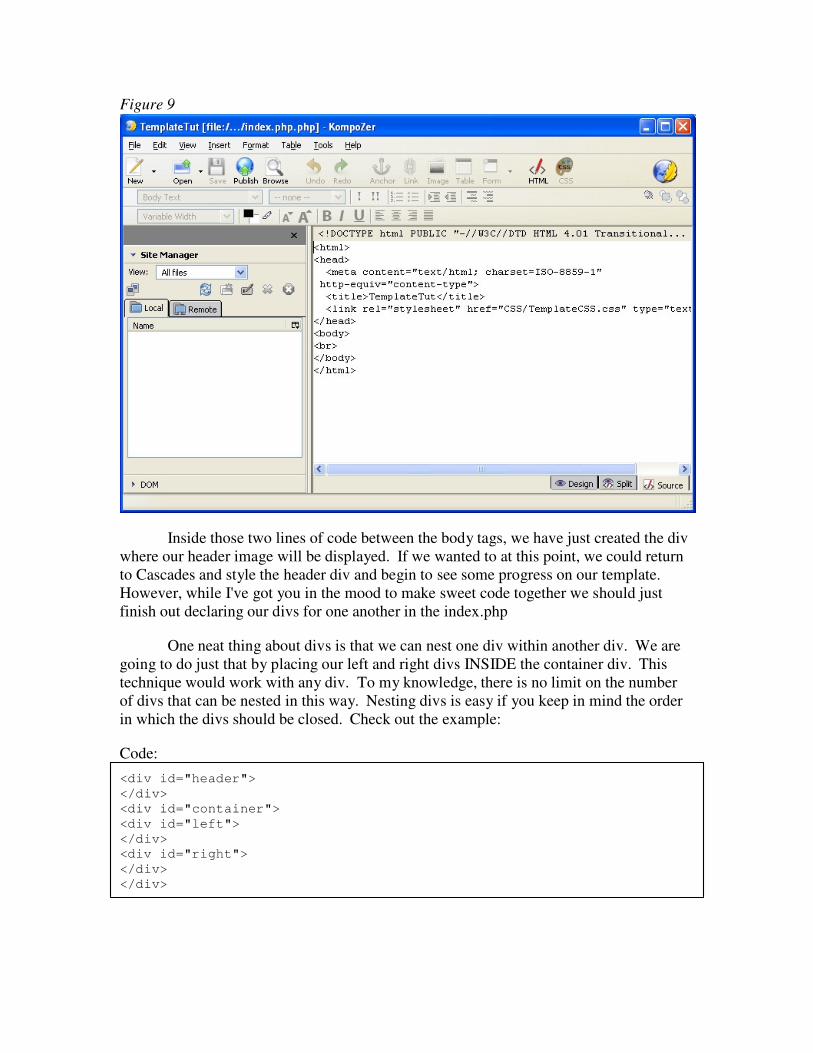
Figure 9
Inside those two lines of code between the body tags, we have just created the div
where our header image will be displayed. If we wanted to at this point, we could return
to Cascades and style the header div and begin to see some progress on our template.
However, while I've got you in the mood to make sweet code together we should just
finish out declaring our divs for one another in the index.php
One neat thing about divs is that we can nest one div within another div. We are
going to do just that by placing our left and right divs INSIDE the container div. This
technique would work with any div. To my knowledge, there is no limit on the number
of divs that can be nested in this way. Nesting divs is easy if you keep in mind the order
in which the divs should be closed. Check out the example:
Code:
<div id="header">
</div>
<div id="container">
<div id="left">
</div>
<div id="right">
</div>
</div>
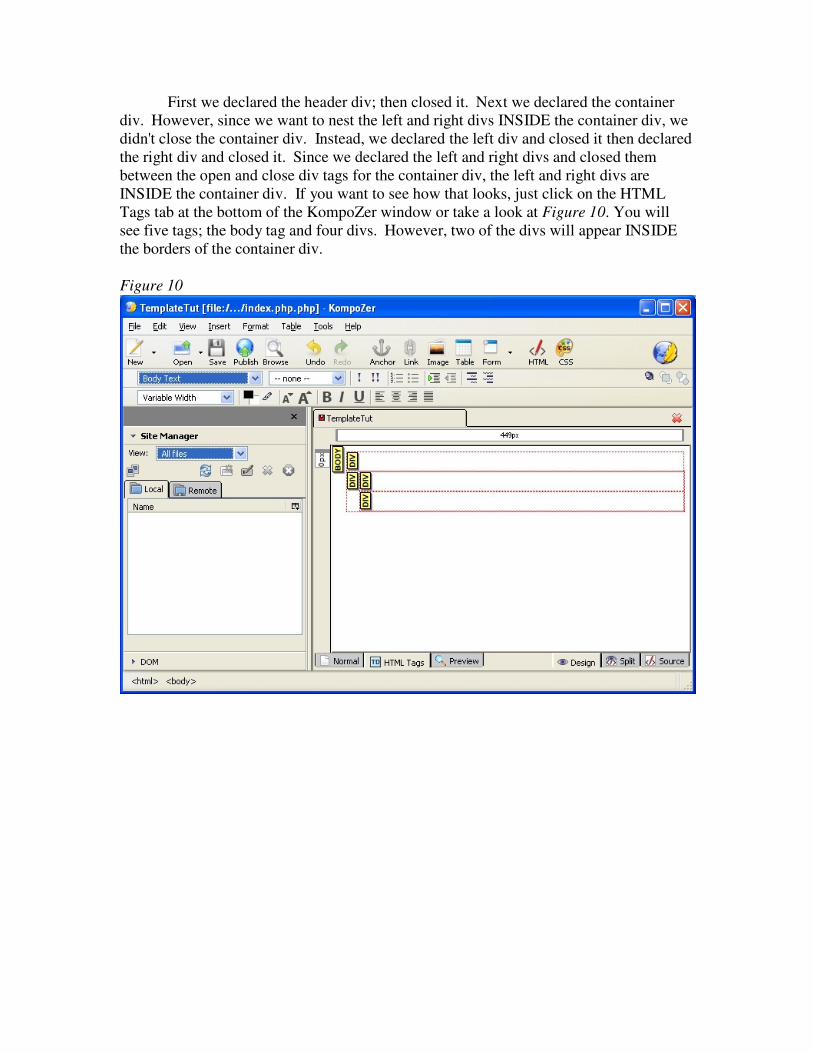
First we declared the header div; then closed it. Next we declared the container
div. However, since we want to nest the left and right divs INSIDE the container div, we
didn't close the container div. Instead, we declared the left div and closed it then declared
the right div and closed it. Since we declared the left and right divs and closed them
between the open and close div tags for the container div, the left and right divs are
INSIDE the container div. If you want to see how that looks, just click on the HTML
Tags tab at the bottom of the KompoZer window or take a look at Figure 10. You will
see five tags; the body tag and four divs. However, two of the divs will appear INSIDE
the borders of the container div.
Figure 10
Style You’ll know when you’ve got it
As it stands right now, our Joomla template doesn't look like much. Essentially, it
is all substance and absolutely no style. That is where the stylesheet re-enters the picture.
If you recall, we created a linked stylesheet in the CSS editor and defined some style rules
that are our divs. However, we didn't apply any styling to any of our divs. That leaves
our template even more boring than our plan. We can't have that, now can we. First we'll
add just a touch of panache to our header div. Essentially all we will do to the header div
is add a background picture and set the dimensions of the div. The background picture is
our header image, and the dimensions of the div will be the exact same size as our
background image. This is the longest segment of this tutorial so if you want to take a
break, now would be the time to do it. Go ahead and stretch your legs, or continue if you
are a nerdy glutton for punishment.
If you haven't already done so, re-open KompoZer and open your index.php file.
Before we begin styling the divs, we will need some sample content in the left and right
divs. This content will only be filler text and we will be deleting it when we start
Joomlatizing the template. However, if we were to continue without adding any static
sample content to the divs we wouldn’t be able to view our changes as they occur. Our
changes would take place, but our preview would be the header image and nothing else.
For this, I will use http://www.lipsum.com to generate sample content for my template
until the PHP Joomla code makes the template dynamic. The site itself is pretty self
explanatory. If you choose not to use Lorem Ipsum text, you can use any plain text placed
between paragraph tags in the div where you want the text to appear. You will need to be
in the source tab of KompoZer to add the sample text to the divs. The left div will
contain our menu and the right div will be the body of our page where the actual content
will be displayed. Now that we have a very raw template with some sample content we
can get started styling our divs. Open the CSS editor so that we can start applying our
styles.
We will click on the header div in the Sheets and rules panel of the CSS editor to
add a background image to the header div. Next we will look at the panel on the right
hand side of the CSS editor. We haven't spent any quality time there yet, but from this
point until we begin adding the PHP code that makes a template a Joomla template we
will be here most of the time. If you noticed the tabs in the right hand panel in the CSS
editor, you probably clicked on a few to see what they held. The tab labels are pretty
descriptive. If you want to control the background appearance of a div, you would define
those parameters in the Background tab. Let’s go there now and define the background
image of the header div. In the background tab, we could define a color but in this case
we want to assign an image to the background. Click the choose file button and surf on
over to the Template Tut/Images folder and select the header.jpg file that we cropped out
of the plan earlier in the tutorial. That will be the header image for our template. Since
our div is going to be resized to be exactly the dimensions of the header image, we don't
want the image to be "tiled". Now the image is in the header div, but we can't see all of it
because the header div isn't sized properly.
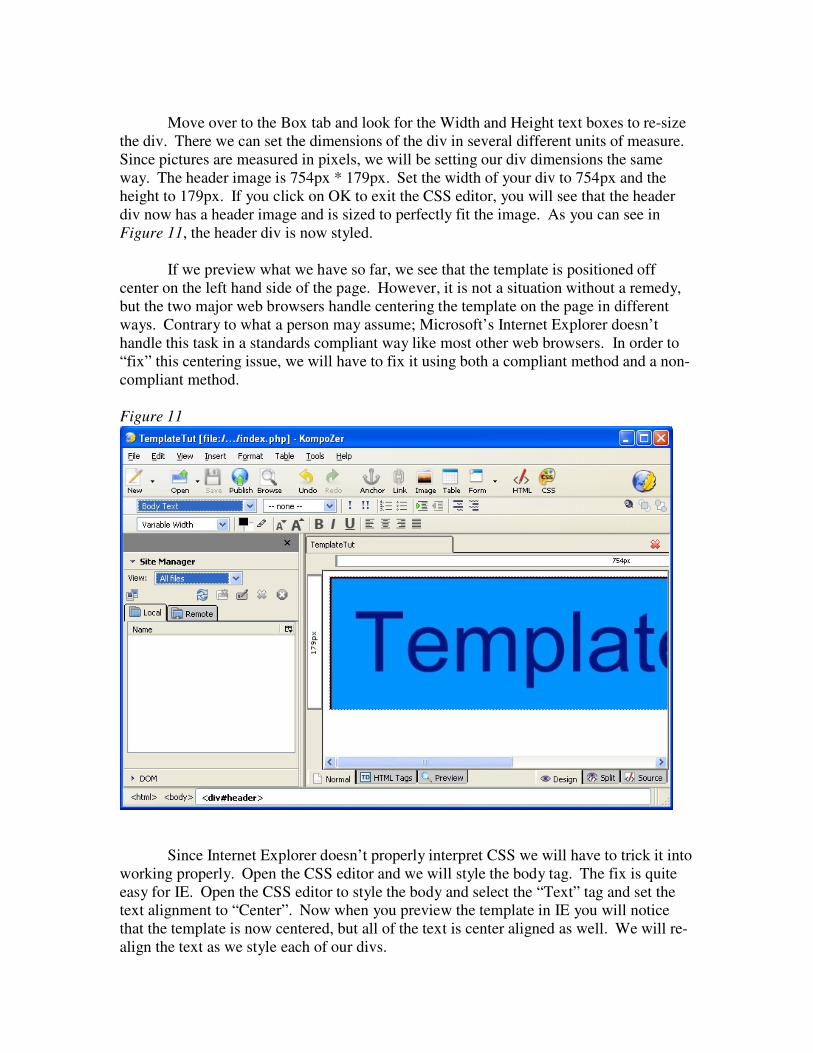
Move over to the Box tab and look for the Width and Height text boxes to re-size
the div. There we can set the dimensions of the div in several different units of measure.
Since pictures are measured in pixels, we will be setting our div dimensions the same
way. The header image is 754px * 179px. Set the width of your div to 754px and the
height to 179px. If you click on OK to exit the CSS editor, you will see that the header
div now has a header image and is sized to perfectly fit the image. As you can see in
Figure 11, the header div is now styled.
If we preview what we have so far, we see that the template is positioned off
center on the left hand side of the page. However, it is not a situation without a remedy,
but the two major web browsers handle centering the template on the page in different
ways. Contrary to what a person may assume; Microsoft’s Internet Explorer doesn’t
handle this task in a standards compliant way like most other web browsers. In order to
“fix” this centering issue, we will have to fix it using both a compliant method and a non-
compliant method.
Figure 11
Since Internet Explorer doesn’t properly interpret CSS we will have to trick it into
working properly. Open the CSS editor and we will style the body tag. The fix is quite
easy for IE. Open the CSS editor to style the body and select the “Text” tag and set the
text alignment to “Center”. Now when you preview the template in IE you will notice
that the template is now centered, but all of the text is center aligned as well. We will re-
align the text as we style each of our divs.
To center the template as it is displayed in Firefox, we will use the standards
compliant method. The two methods do not conflict with one another so there will be no
further worries about having our template display properly once the IE patch and the CSS
standards compliant method are applied. Re-enter the CSS editor and we will be styling
the “header” div and the “container” div by setting the left and right margins in the “Box”
tab to “Auto”. Once that is done for the header and container divs, preview it in Firefox
to bask in the glow of a job well done and prepare to begin styling our nested divs.
In the header div, we used a background image. The background image had a
thick black border around the left, top, and right, but no border along the bottom. To
recreate that border and the remaining borders as seen in our plan, we will style the
container div to have a thick black border. There is a selection of choices here. We can
set up the borders to be the same on all four sides or we can have different line styles,
weights, and colors depending on the side of the div and our personal preferences. In this
case our preference is that the border to be solid and black with a line weight of 2 pixels.
We could make the border wrap all the way around the Container div, but since we will
be applying a background image to the container that includes the border, we will only
apply borders to the top and bottom of the Container. Re-enter the CSS editor and select
the container style rule in the left hand pane of the CSS editor. Now choose the
“Borders” tab in the right hand pane of the CSS editor and setup your borders as
described. We will also want to set the fixed width of the Container in the Box tab of the
CSS editor at the same width as our Header, which if you recall, was 754 pixels. Click
OK to exit the CSS editor and you will see that now the header image appears the same as
it does in our plan with a border around all four sides.
Next we add the simple background image. Basically, we could use CSS to
define the background color of our nested divs. This would help keep our template size
down, but the template would eventually begin to show some white space as we massage
the size of the divs to suit our needs. In order to do this, we need a very small section of
the plan. Crop out a one pixel tall strip of the plan that is the complete width of the plan
and save it to the images folder of the template. Now define that image as the
background of the container image.
Now that our container is styled, we can move on to the divs nested within the
container div. The left div will contain our menu and the right div will be the body of our
page where the actual content will be displayed. We will start with the left div. Re-enter
the CSS editor and select the left style rule to begin.
As you will see in Figure 12, our plan shows a simple two column fixed width
template. In order to make a two column template we defined two divs in our wire frame
where we will display the content assigned to each of those columns. The left div will be
the area where Joomla will display its menu. Since simple menu systems do not require a
lot of space, we will style this div as a narrow strip down the left hand side like we
originally planned.
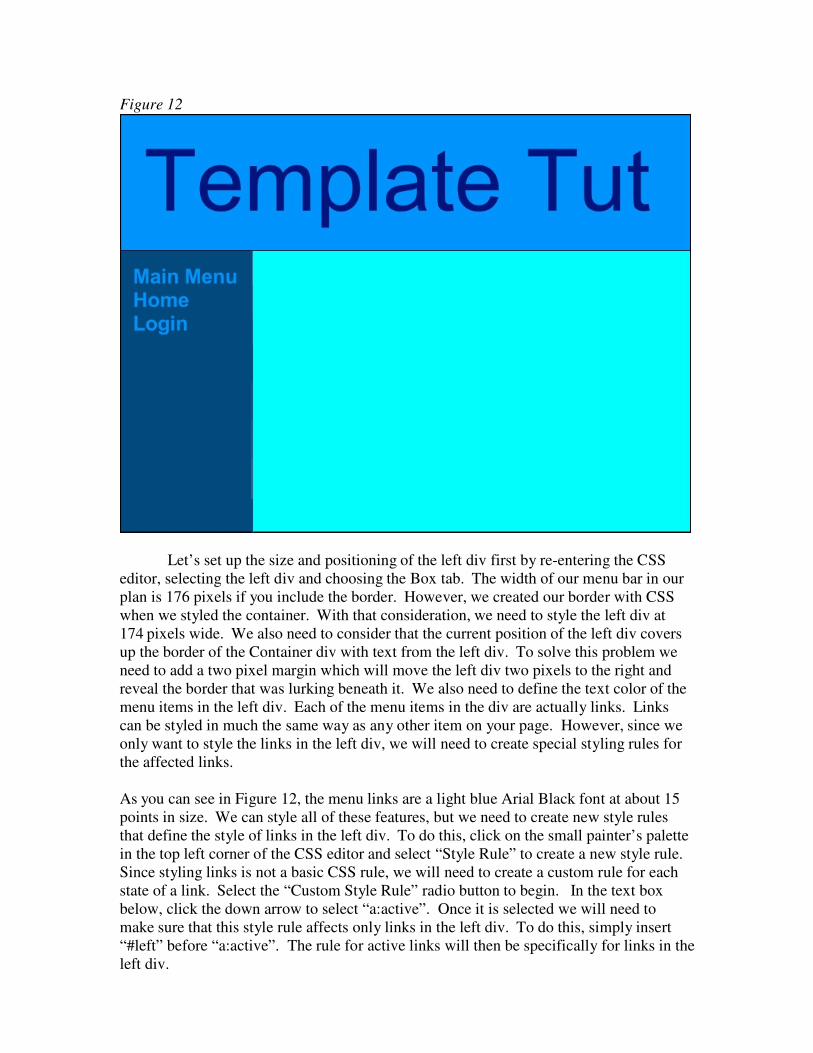
Figure 12
Let’s set up the size and positioning of the left div first by re-entering the CSS
editor, selecting the left div and choosing the Box tab. The width of our menu bar in our
plan is 176 pixels if you include the border. However, we created our border with CSS
when we styled the container. With that consideration, we need to style the left div at
174 pixels wide. We also need to consider that the current position of the left div covers
up the border of the Container div with text from the left div. To solve this problem we
need to add a two pixel margin which will move the left div two pixels to the right and
reveal the border that was lurking beneath it. We also need to define the text color of the
menu items in the left div. Each of the menu items in the div are actually links. Links
can be styled in much the same way as any other item on your page. However, since we
only want to style the links in the left div, we will need to create special styling rules for
the affected links.
As you can see in Figure 12, the menu links are a light blue Arial Black font at about 15
points in size. We can style all of these features, but we need to create new style rules
that define the style of links in the left div. To do this, click on the small painter’s palette
in the top left corner of the CSS editor and select “Style Rule” to create a new style rule.
Since styling links is not a basic CSS rule, we will need to create a custom rule for each
state of a link. Select the “Custom Style Rule” radio button to begin. In the text box
below, click the down arrow to select “a:active”. Once it is selected we will need to
make sure that this style rule affects only links in the left div. To do this, simply insert
“#left” before “a:active”. The rule for active links will then be specifically for links in the
left div.
Enter the various tabs in the “#left a:active” style rule to style the links in a manner
you find pleasing. You will need to keep in mind that since the background to the div is a
dark color, you may need to choose a light color for the text so that it is easily read. Once
the new style rule is completed, remember that you must do the same thing for each of the
other three link states: a:link, a:hover, and a:visited. If you don’t, the link will revert to its
default style when the link state changes. There is just one more element to style in the
left div, but we will get to that after a brief interruption in the form of styling the right div.
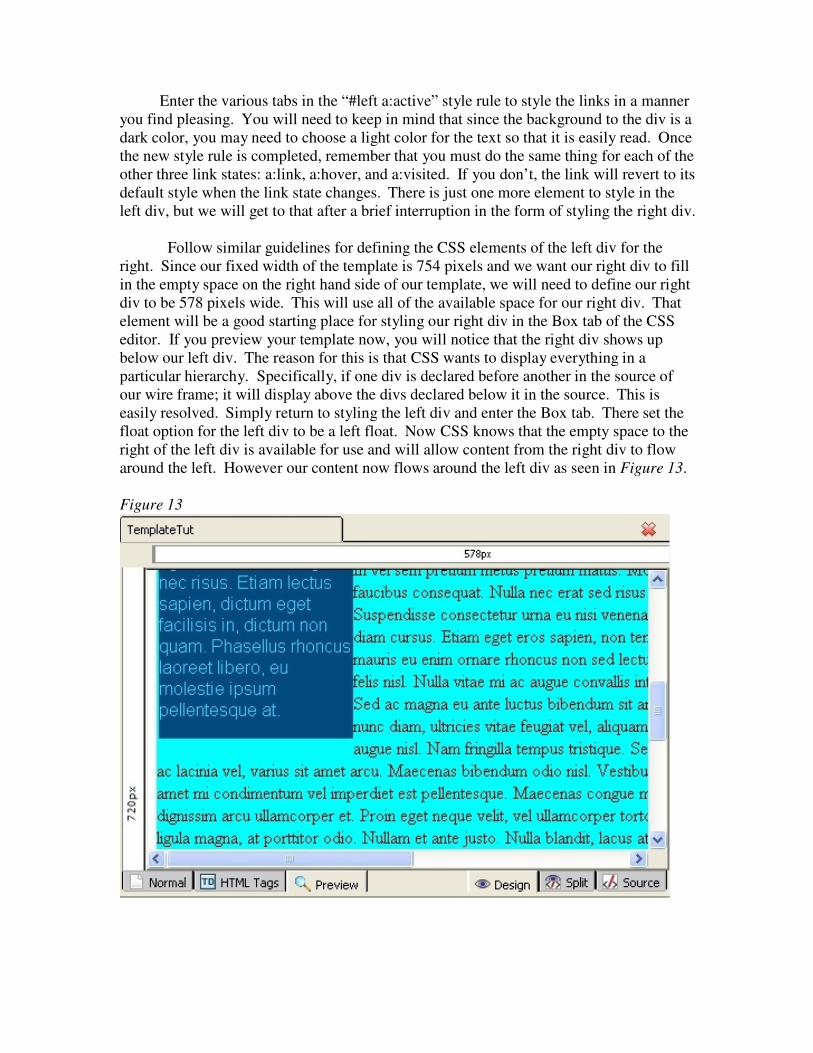
Follow similar guidelines for defining the CSS elements of the left div for the
right. Since our fixed width of the template is 754 pixels and we want our right div to fill
in the empty space on the right hand side of our template, we will need to define our right
div to be 578 pixels wide. This will use all of the available space for our right div. That
element will be a good starting place for styling our right div in the Box tab of the CSS
editor. If you preview your template now, you will notice that the right div shows up
below our left div. The reason for this is that CSS wants to display everything in a
particular hierarchy. Specifically, if one div is declared before another in the source of
our wire frame; it will display above the divs declared below it in the source. This is
easily resolved. Simply return to styling the left div and enter the Box tab. There set the
float option for the left div to be a left float. Now CSS knows that the empty space to the
right of the left div is available for use and will allow content from the right div to flow
around the left. However our content now flows around the left div as seen in Figure 13.
Figure 13
In some situations that effect may be desirable, but in our template plan we want
to see the left hand div extend for the full length of the page. What we need to do is
define a left hand margin to the right div so that the content of the right div clears the left
div. Since we want the content of the right hand div to clear the content of the left div,
we will require a minimum margin of 176 pixels to be set in the Box tab of the CSS
editor. Now our content clears the left hand div, but it completely fills up the empty
space. This may not be desirable depending on your design preferences. I prefer to show
a little skin around the content. It just looks better to have a little empty space around the
edges. To accomplish this, I add a little extra margin and set the margin to 185 pixels to
add that pleasant empty space. However, that shifts the entire div to the right beyond the
fixed width of the template. Decrease the width of the div in the Box tab of the CSS
editor to bring the div to size. Our left and right divs have one more bit of styling to have
defined before we can call it styled. If you notice that all of the text is center aligned in
the left and right divs; that is a side effect of the non-standard CSS styling we applied to
fix the template centering issue in IE. To fix this, simply set the text align in each div to
align to the left. Now you can preview your work in Firefox or IE to see your
handiwork.
What we now have is an HTML template that will function as a Joomla template
once the PHP bits are added. Go ahead and play with the styling to see if there are any
extra little bits of CSS that you want to see in your template. CSS is a very versatile
framework for styling the content of your site and is better in some ways than using
rollover gifs or Flash to get graphic effects on your site because it keeps the overall file
size of your template low and the site load time low too. Once you are done tweaking
your CSS styling of your template we be finished with KompoZer and begin adding the
bits that make this template a Joomla template. We’re almost there!
Joomlatizing Your Template Or “Let there be Joomla!!!!”
In the introduction to this tutorial, we discussed the fact that free software often
comes with functional limitations not found in commercial alternatives. If you recall, we
saw one limitation in KompoZer in that it doesn’t natively support PHP files. It is here
that we find another limitation of KompoZer. KompoZer, in an effort to make HTML
easy, manages the header information of your page for you. While this is a very useful
option for beginners who only wish to use HTML, it can’t be turned off for those of us
who wish to do a bit more than HTML. If we were to change the header, KompoZer
would automatically reverse the change. Since we do need to change the header, it is
here that we bid a fond farewell to KompoZer. She served us well. Since we have
abandoned our trusty KompoZer, you may be wondering how we will continue without
an HTML editor. We’ll simply use a text editor like Wordpad. I know it seems like an
awful step backward, but it really is the best way to move forward while keeping our
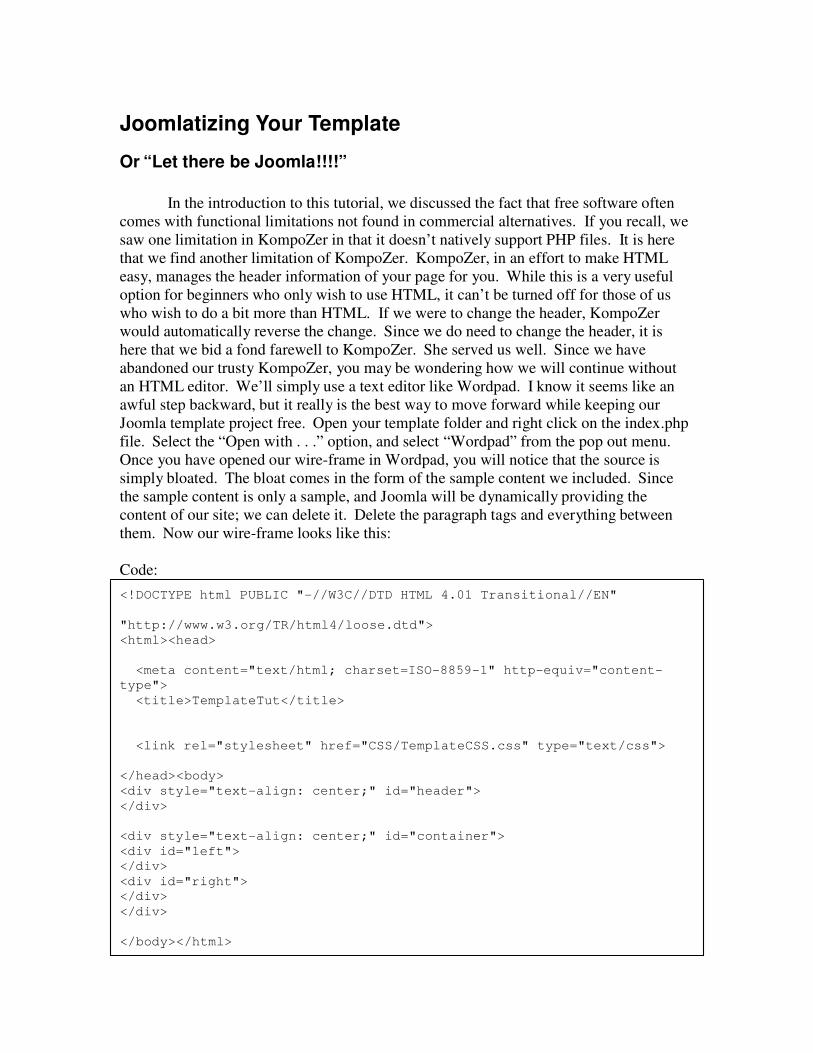
Joomla template project free. Open your template folder and right click on the index.php
file. Select the “Open with . . .” option, and select “Wordpad” from the pop out menu.
Once you have opened our wire-frame in Wordpad, you will notice that the source is
simply bloated. The bloat comes in the form of the sample content we included. Since
the sample content is only a sample, and Joomla will be dynamically providing the
content of our site; we can delete it. Delete the paragraph tags and everything between
them. Now our wire-frame looks like this:
Code:
<!DOCTYPE html PUBLIC "-//W3C//DTD HTML 4.01 Transitional//EN"
"http://www.w3.org/TR/html4/loose.dtd">
<html><head>
<meta content="text/html; charset=ISO-8859-1" http-equiv="content-
type">
<title>TemplateTut</title>
<link rel="stylesheet" href="CSS/TemplateCSS.css" type="text/css">
</head><body>
<div style="text-align: center;" id="header">
</div>
<div style="text-align: center;" id="container">
<div id="left">
</div>
<div id="right">
</div>
</div>
</body></html>

If you haven’t already gotten the Joomla 1.5 Template Toolbar yet, you will need
to get it because you won’t be able to move forward without it. You can get it here:
http://extensions.joomla.org. The version I used in writing this tutorial was version
0.8.4. You will also need to have the latest version of the .NET Framework from
Microsoft. The Joomla 1.5 Template Toolbar (JTT) is a code snippet program. It places
a selection of code on your clipboard so that you can paste it in your code. Open JTT,
your index.php file in Wordpad, and lets get started. You can see the JTT user interface
in Figure 14.
Figure 14
Click on the “Insert Module” button and you will see that there are loads of
options from which to choose. The first bit that we want to select is the “Header”. Once
you have it, you can paste it over the header information of your index.php file. Your
index.php file will now look like this:
Code:
<?php
/*
*
* Brief Info
*
*/
defined( '_JEXEC' ) or die( 'Access to this location is RESTRICTED.' );
?>
<!DOCTYPE html PUBLIC "-//W3C//DTD XHTML 1.0 Transitional//EN"
"http://www.w3.org/TR/xhtml1/DTD/xhtml1-transitional.dtd">
<html xmlns="http://www.w3.org/1999/xhtml" xml:lang="<?php echo $this-
>language; ?>" lang="<?php echo $this->language; ?>" >
<head>
<jdoc:include type="head" />
<link rel="stylesheet" href="templates/_system/css/general.css"
type="text/css" />
<link rel="stylesheet" href="templates/<?php echo $this->template
?>/css/template.css" type="text/css" />
</head>
<body>
<div style="text-align: center;" id="header">
</div>
<div style="text-align: center;" id="container">
<div id="left">
</div>
<div id="right">
</div>
</div>
</body></html>
<div style="text-align: center;" id="container">
<div id="left">
</div>
<div id="right">
</div>
</div>
</body>
</html>
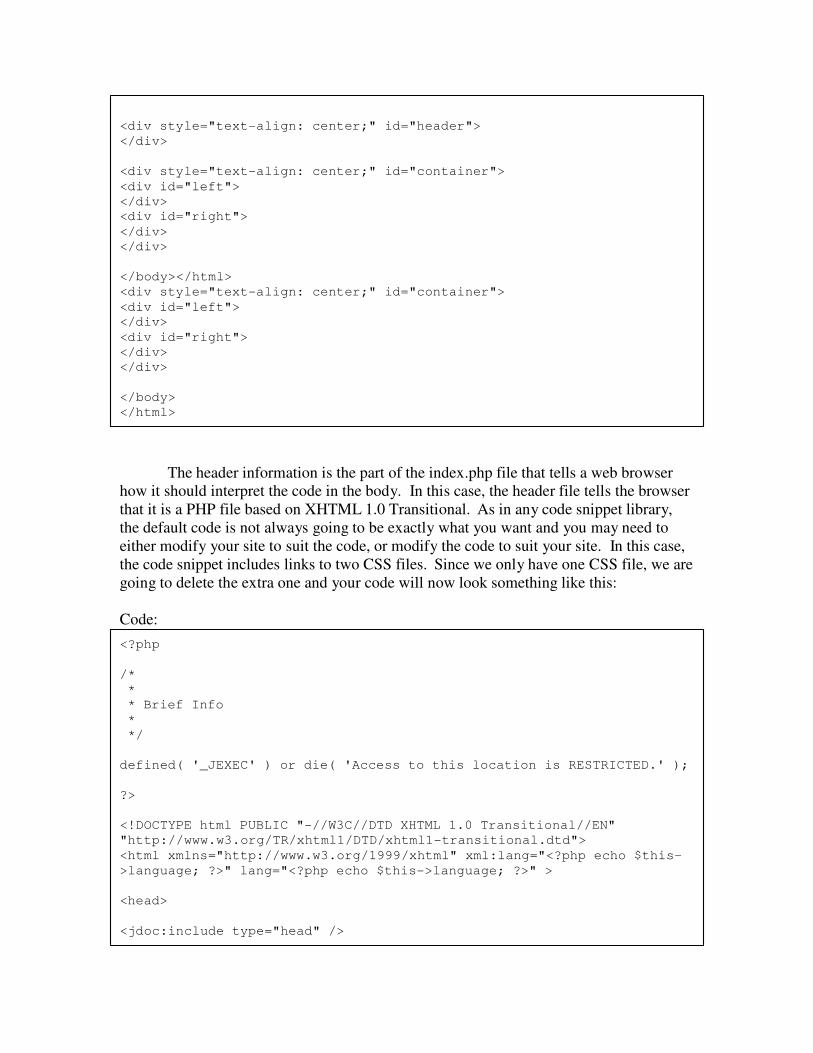
The header information is the part of the index.php file that tells a web browser
how it should interpret the code in the body. In this case, the header file tells the browser
that it is a PHP file based on XHTML 1.0 Transitional. As in any code snippet library,
the default code is not always going to be exactly what you want and you may need to
either modify your site to suit the code, or modify the code to suit your site. In this case,
the code snippet includes links to two CSS files. Since we only have one CSS file, we are
going to delete the extra one and your code will now look something like this:
Code:
<?php
/*
*
* Brief Info
*
*/
defined( '_JEXEC' ) or die( 'Access to this location is RESTRICTED.' );
?>
<!DOCTYPE html PUBLIC "-//W3C//DTD XHTML 1.0 Transitional//EN"
"http://www.w3.org/TR/xhtml1/DTD/xhtml1-transitional.dtd">
<html xmlns="http://www.w3.org/1999/xhtml" xml:lang="<?php echo $this-
>language; ?>" lang="<?php echo $this->language; ?>" >
<head>
<jdoc:include type="head" />
<link rel="stylesheet" href="templates/<?php echo $this->template
?>/css/template.css" type="text/css" />
</head>
<body>
<div style="text-align: center;" id="header">
</div>
<div style="text-align: center;" id="container">
<div id="left">
</div>
<div id="right">
</div>
</div>
</body></html>
<div style="text-align: center;" id="container">
<div id="left">
</div>
<div id="right">
</div>
</div>
</body>
</html>
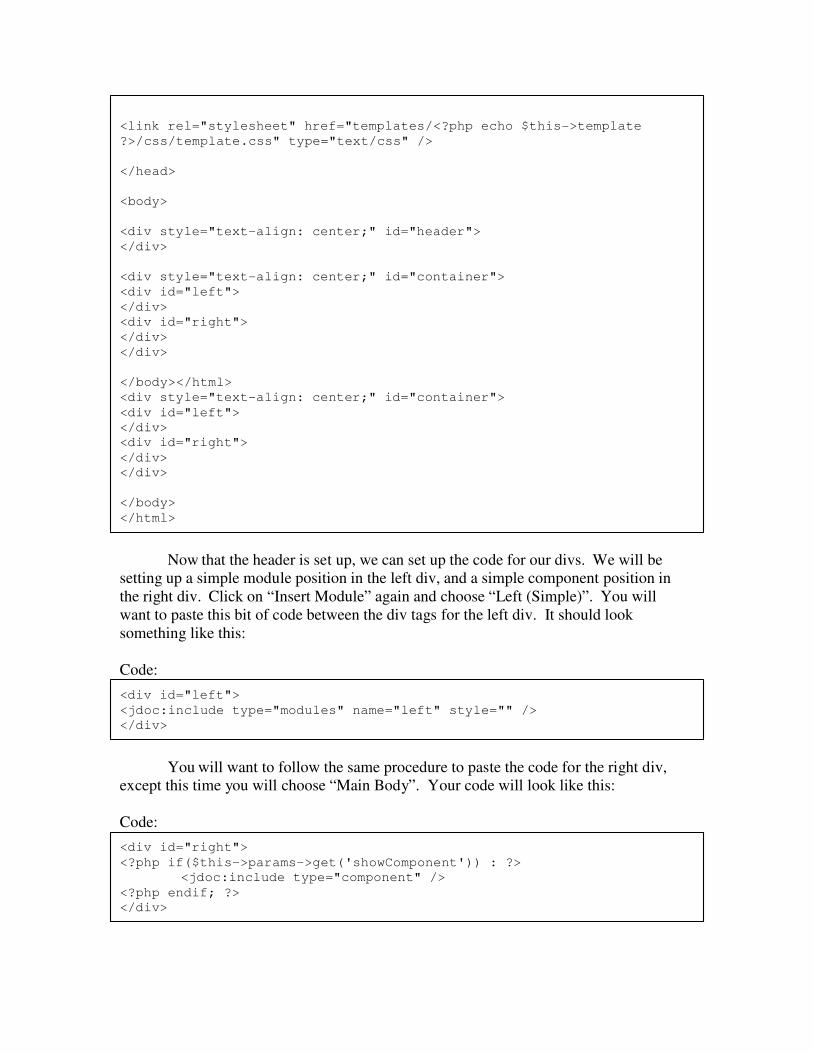
Now that the header is set up, we can set up the code for our divs. We will be
setting up a simple module position in the left div, and a simple component position in
the right div. Click on “Insert Module” again and choose “Left (Simple)”. You will
want to paste this bit of code between the div tags for the left div. It should look
something like this:
Code:
<div id="left">
<jdoc:include type="modules" name="left" style="" />
</div>
You will want to follow the same procedure to paste the code for the right div,
except this time you will choose “Main Body”. Your code will look like this:
Code:
<div id="right">
<?php if($this->params->get('showComponent')) : ?>
<jdoc:include type="component" />
<?php endif; ?>
</div>
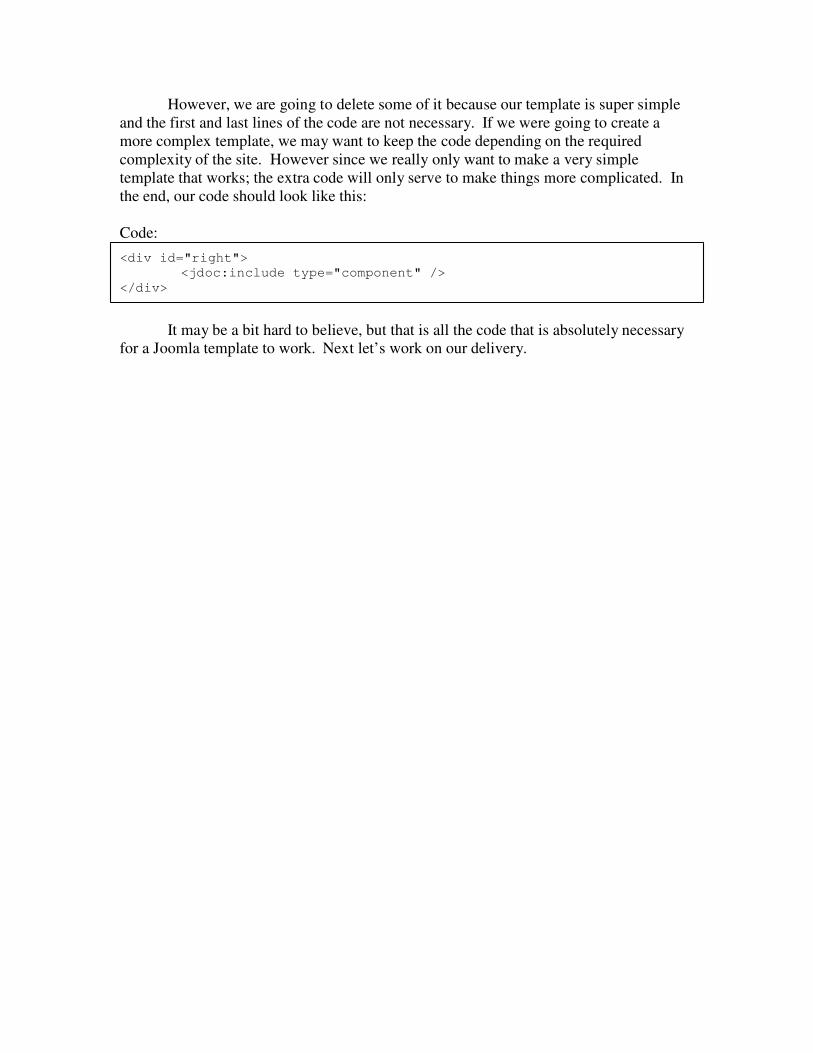
However, we are going to delete some of it because our template is super simple
and the first and last lines of the code are not necessary. If we were going to create a
more complex template, we may want to keep the code depending on the required
complexity of the site. However since we really only want to make a very simple
template that works; the extra code will only serve to make things more complicated. In
the end, our code should look like this:
Code:
<div id="right">
<jdoc:include type="component" />
</div>
It may be a bit hard to believe, but that is all the code that is absolutely necessary
for a Joomla template to work. Next let’s work on our delivery.

It’s not Pizza Hut . . . but it is delivery.
Every Joomla template is wrapped up in a zip file. Inside that zip file are all of
the folders and files that make up your Joomla template. There is one required file that
we have not yet discussed. The XML file is a file that tells Joomla what type of file is to
be installed. Essentially it describes the template to Joomla. Fortunately, JTT offers a
solution for that too. Click the “XML Editor” button to open the XML Editor. See
Figure 15.
Figure 15
Select all of the files in the Template Files section then click on the “Add Files”
button. Surf to the folder where the TemplateTut folder is located and click OK. The
XML Editor in JTT will scan the folder and add the files and their file structure and add
them in the Template Files section. Now fill in the blanks in the Template Info section of
the XML Editor. Now that the XML file is complete, click create and save it in the
TemplateTut folder. The file structure of your first Joomla template is complete. All that
remains is to Zip the contents of the TemplateTut folder and install.
Note from the author:
While this Joomla template is very simple, it should serve as a basis for your
continued learning regarding Joomla templating. This tutorial was written with the focus
of using free software in order to make Joomla templating accessible to everyone who
has a MS Windows XP or higher based computer. It is my sincere hope that you have
learned something worthy of sharing with a like minded friend.
I would like to thank Pop for proof reading this and turning me on to Cascading
Style Sheets. You aren’t a Joomla fanboy yet, but I’m working on converting you. Big
thanks go to S-Fraz for being my guinea pig and testing the tutorial. Last but not least, I
will thank my web host with one more shameless plug http://www.BryanSoft.com.
Happy Joomlaing!
wjp