Embed Size (px)
Citation preview
Java Prog. Techniques for Games. JOGL-ES 1. Rotating Boxes Draft #2 (27th April 07)
1 © Andrew Davison 2007
JOGL-ES 1. Rotating Boxes
With the release of the Java Wireless Toolkit (WTK) 2.5, developers now have two 3D APIs to play with in their MIDlets – the familiar M3G (also known as Mobile 3D, and JSR-184), and a new Java binding for the OpenGL ES API (JSR-239). The new API doesn’t have an official nickname or abbreviation, but I’ll be using the name JOGL-ES.
I examined M3G at some length in a series of chapters available at the Killer Game Programming in Java website (http://fivedots.coe.psu.ac.th/~ad/jg/). Starting with this chapter, I’ll run through the basics of programming with JOGL-ES.
I’ll begin by describing a basic programming framework for utilizing JOGL-ES inside a MIDlet. It’s essentially an animation loop inside a thread, which repeatedly updates the application’s state, renders the 3D scene, and perhaps sleeps for a while so that the animation maintains the desired frame rate. This chapter’s example also shows how to:
• initialize JOGL-ES inside a GameCanvas instance;
• create a 3D textured floor;
• create rotating textured cubes;
• mix 3D and 2D rendering (for drawing 2D textual overlays at the front of the 3D scene);
• control a moveable camera with keypresses. The camera can translate forward, backward, left, right, up, and down, and rotate around the x- and y- axes;
• utilize lighting;
• shutdown JOGL-ES at termination time.
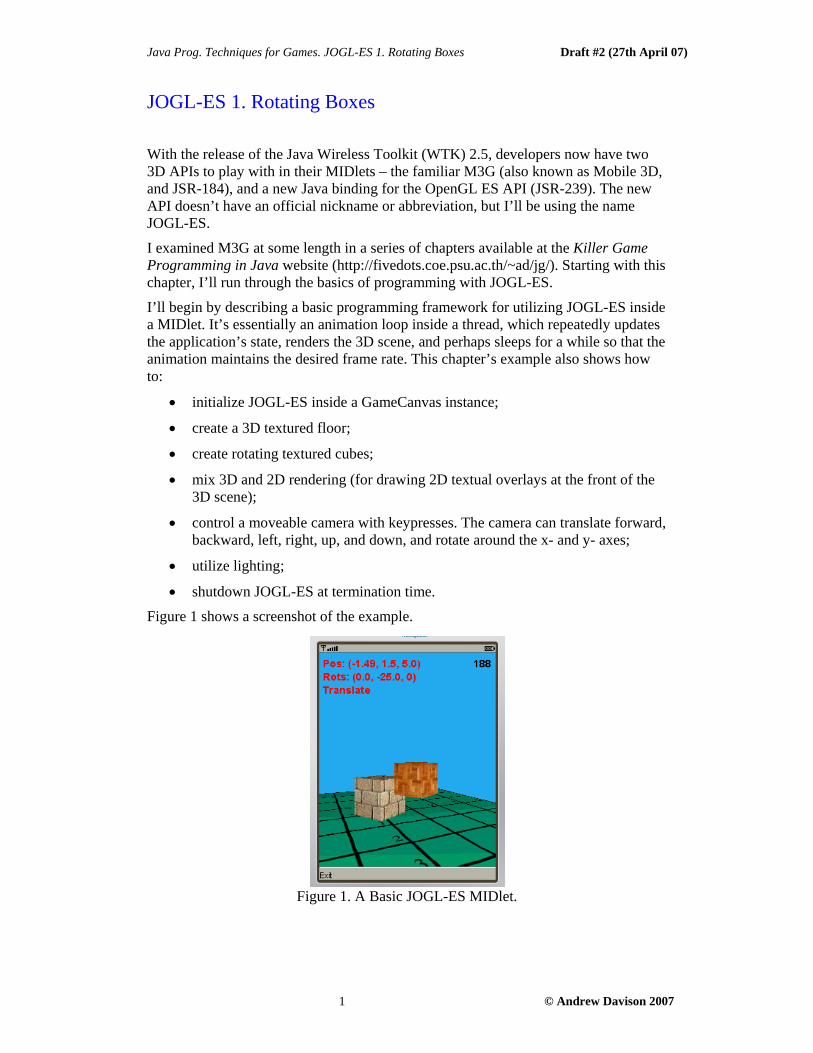
Figure 1 shows a screenshot of the example.
Figure 1. A Basic JOGL-ES MIDlet.
Java Prog. Techniques for Games. JOGL-ES 1. Rotating Boxes Draft #2 (27th April 07)
2 © Andrew Davison 2007
The two textured cubes continuously rotate around the y-axis; the one with the brick texture is centered at the origin, while the wooden cube orbits a short distance from the y-axis. A cube’s texture is repeated on each of its faces.
The floor is covered in a grid image with x- and z- axes.
The text at the top of the display is drawn by 2D commands after the 3D scene has been rendered. The red text on the left-hand side shows positional, rotational, and mode information for the camera, and the black number on the right is how long the execution of the current frame took to complete in milliseconds.
1. A Brief Introduction to OpenGL ES
JOGL-ES is a Java binding around OpenGL ES, so before I get stuck into JOGL-ES coding, I should explain OpenGL ES.
OpenGL ES (OpenGL for Embedded Systems) is a subset of OpenGL aimed at smaller devices such as mobile phones, PDAs, and games consoles (the official website is at http://www.khronos.org/opengles/). It only requires around 50 KB of memory, and yet its capabilities are very similar to OpenGL’s.
The most obvious loss of functionality is probably the OpenGL glBegin()/glEnd() technique for grouping instructions for shape creation. In OpenGL ES, the programmer defines arrays for a shape’s vertices, normals, colours, and texture coordinates. You’ll see this approach when I explain how the floor and cubes are generated in this chapter’s RotBoxES example.
Another significant loss are the GLU and GLUT utility libraries. GLU includes convenience functions for such tasks as positioning the camera, setting up the viewing volume, generating basic shapes, and texture mipmapping. You’ll see how the lack of camera support and view setting in JOGL-ES can be remedied by code in RotBoxES. GLUT is mainly utilized in OpenGL applications for its I/O support; in JOGL-ES that’s handled by Java ME’s GameCanvas.
OpenGL ES differs from OpenGL in its support for fixed-point numbers in addition to floats, to better match the limited computational hardware of smaller devices. Its 16.16 fixed-point data type utilizes the first 16 bits for a signed two’s compliment integer, and the other 16 bits for a fractional part. A shape defined using fixed-point vertices should render much more quickly than one employing floats.
OpenGL ES employs profiles – the Common profile has both the float and fixed-point types, and is aimed at more powerful devices such as consoles and mobile phones. The Common Lite profile only offers fixed-point data, and is intended for more basic devices. In this chapter, I’ll build my shapes using floats, but I plan to look at fixed-point coding in a later chapter. There’s also a third profile, Safety Critical, for safety-critical embedded applications where testability and certification is crucial.
OpenGL ES only has primitives for creating shapes out of points, lines, or triangles; polygons and quadrilaterals (quads) primitives are missing. The shapes in this chapter utilize triangle strips.
Java Prog. Techniques for Games. JOGL-ES 1. Rotating Boxes Draft #2 (27th April 07)
3 © Andrew Davison 2007
OpenGL ES is a ‘moving’ specification, with three incarnations at the moment. OpenGL ES 1.0 is based upon OpenGL 1.3, OpenGL ES 1.1 is defined relative to OpenGL 1.5, and OpenGL ES 2.0 is derived from the OpenGL 2.0 specification.
OpenGL ES 1.1 includes support for multitexturing, mipmap generation, and greater control over point rendering (useful for particle systems). OpenGL ES 2.0 is a more radical change which uses a programmable rendering model based around shaders, with only floating point operations. The motivation behind this design is the belief that mobile devices will very shortly have the rendering power of today’s desktop and laptop machines.
WTK 2.5 supports both OpenGL ES 1.0 and 1.1, but I’ll restrict myself to 1.0 functionality in this chapter. I hope to use multitexturing and mipmaps from 1.1 in a later chapter.
All my coding will be done on the WTK 2.5 emulator, but OpenGL ES is present on many real devices (with JOGL-ES hopefully not far behind). For example, the PlayStation 3 utilizes a modified version of OpenGL ES 1.0 called PSGL. It includes the Cg shader language, so is OpenGL ES 2.0 compliant. On mobile devices, OpenGL ES has been part of the Symbian OS since version 8.0. The GLBenchmark site (http://www.glbenchmark.com/result.jsp) includes a long list of OpenGL ES devices, and their results against its benchmarking software.
1.1. More Information on OpenGL ES
The Khronos Group is in charge of OpenGL ES, so it’s website (http://www.khronos.org/opengles/) is an excellent starting point for more details about the technology.
A good beginner’s tutorial on OpenGL ES programming is offered by ZeusCMD at http://www.zeuscmd.com/tutorials/opengles/index.php. It’s structured into 25 parts, starting with the basics, and becoming progressively more advanced. The focus is on programming in Windows and the Pocket PC.
Jacobo Rodríguez Villar has a seven part tutorial available at his Typhoon Labs site (http://www.typhoonlabs.com/), complete with source code, and a fun Space Invaders game.
A collection of presentations from SIGGRAPH 2005 giving an overview of OpenGL ES can be found at http://people.csail.mit.edu/kapu/siggraph_course/.
The only textbook on OpenGL ES is OpenGL ES Game Development by Dave Astle and David Durnil, Course Technology PTR, 2004.
A good strategy for learning OpenGL ES is to study OpenGL first. There’s a large overlap between the two, which will become larger as the two move closer together over time. There’s a wide range of tutorial material on OpenGL, much of which is applicable to OpenGL ES. The place to start is the OpenGL Architecture Review Board website at http://www.opengl.org/.
Java Prog. Techniques for Games. JOGL-ES 1. Rotating Boxes Draft #2 (27th April 07)
4 © Andrew Davison 2007
1.2. OpenGL ES and Java
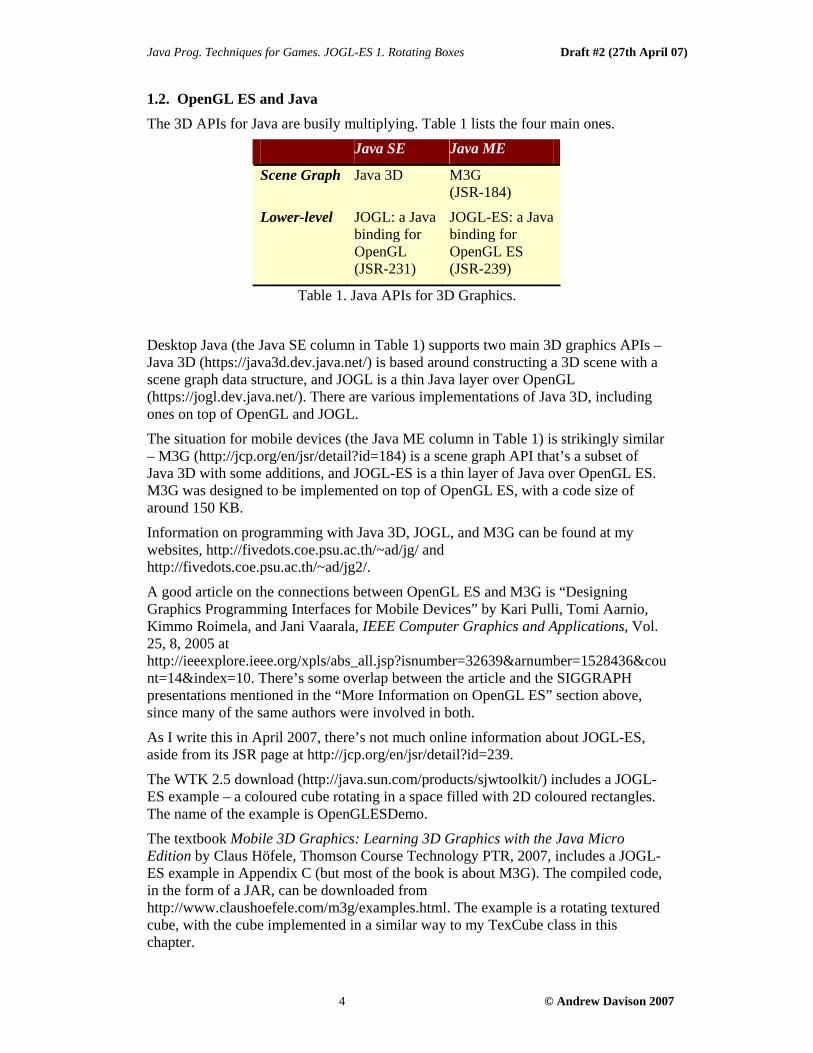
The 3D APIs for Java are busily multiplying. Table 1 lists the four main ones.
Java SE Java ME
Scene Graph Java 3D M3G (JSR-184)
Lower-level JOGL: a Java binding for OpenGL (JSR-231)
JOGL-ES: a Java binding for OpenGL ES (JSR-239)
Table 1. Java APIs for 3D Graphics.
Desktop Java (the Java SE column in Table 1) supports two main 3D graphics APIs – Java 3D (https://java3d.dev.java.net/) is based around constructing a 3D scene with a scene graph data structure, and JOGL is a thin Java layer over OpenGL (https://jogl.dev.java.net/). There are various implementations of Java 3D, including ones on top of OpenGL and JOGL.
The situation for mobile devices (the Java ME column in Table 1) is strikingly similar – M3G (http://jcp.org/en/jsr/detail?id=184) is a scene graph API that’s a subset of Java 3D with some additions, and JOGL-ES is a thin layer of Java over OpenGL ES. M3G was designed to be implemented on top of OpenGL ES, with a code size of around 150 KB.
Information on programming with Java 3D, JOGL, and M3G can be found at my websites, http://fivedots.coe.psu.ac.th/~ad/jg/ and http://fivedots.coe.psu.ac.th/~ad/jg2/.
A good article on the connections between OpenGL ES and M3G is “Designing Graphics Programming Interfaces for Mobile Devices” by Kari Pulli, Tomi Aarnio, Kimmo Roimela, and Jani Vaarala, IEEE Computer Graphics and Applications, Vol. 25, 8, 2005 at http://ieeexplore.ieee.org/xpls/abs_all.jsp?isnumber=32639&arnumber=1528436&count=14&index=10. There’s some overlap between the article and the SIGGRAPH presentations mentioned in the “More Information on OpenGL ES” section above, since many of the same authors were involved in both.
As I write this in April 2007, there’s not much online information about JOGL-ES, aside from its JSR page at http://jcp.org/en/jsr/detail?id=239.
The WTK 2.5 download (http://java.sun.com/products/sjwtoolkit/) includes a JOGL-ES example – a coloured cube rotating in a space filled with 2D coloured rectangles. The name of the example is OpenGLESDemo.
The textbook Mobile 3D Graphics: Learning 3D Graphics with the Java Micro Edition by Claus Höfele, Thomson Course Technology PTR, 2007, includes a JOGL-ES example in Appendix C (but most of the book is about M3G). The compiled code, in the form of a JAR, can be downloaded from http://www.claushoefele.com/m3g/examples.html. The example is a rotating textured cube, with the cube implemented in a similar way to my TexCube class in this chapter.
Java Prog. Techniques for Games. JOGL-ES 1. Rotating Boxes Draft #2 (27th April 07)
5 © Andrew Davison 2007
2. The Rotating Cubes Example
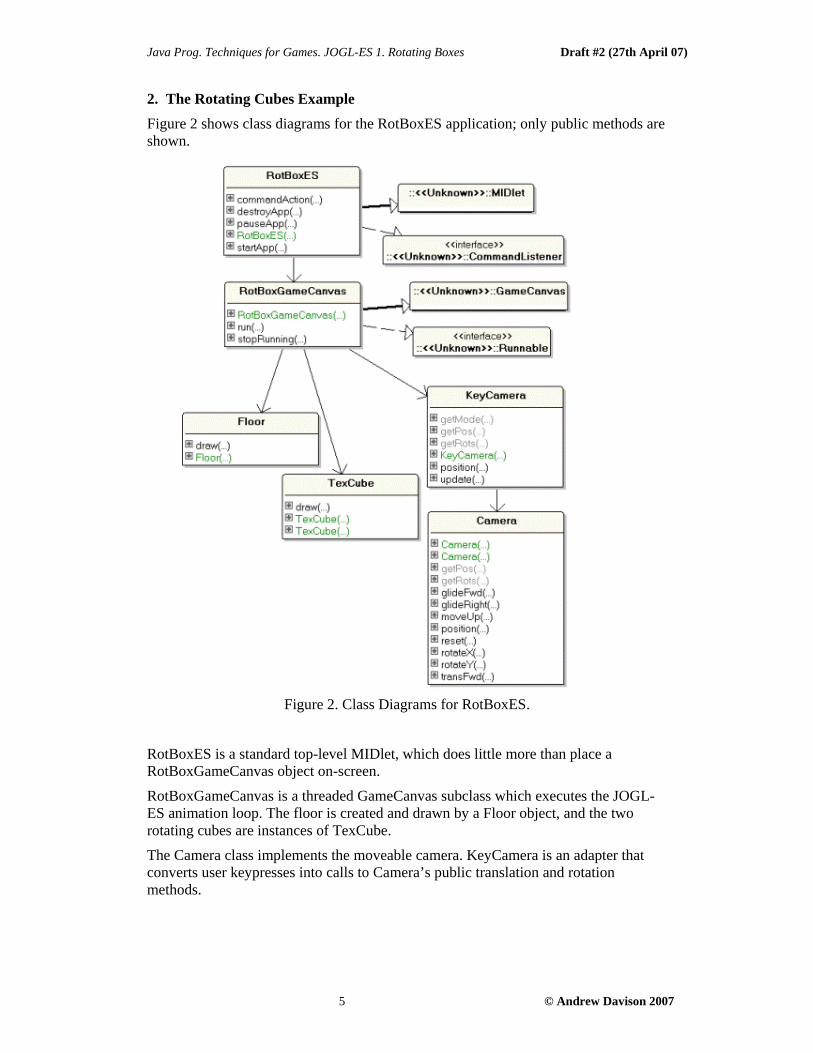
Figure 2 shows class diagrams for the RotBoxES application; only public methods are shown.
Figure 2. Class Diagrams for RotBoxES.
RotBoxES is a standard top-level MIDlet, which does little more than place a RotBoxGameCanvas object on-screen.
RotBoxGameCanvas is a threaded GameCanvas subclass which executes the JOGL-ES animation loop. The floor is created and drawn by a Floor object, and the two rotating cubes are instances of TexCube.
The Camera class implements the moveable camera. KeyCamera is an adapter that converts user keypresses into calls to Camera’s public translation and rotation methods.
Java Prog. Techniques for Games. JOGL-ES 1. Rotating Boxes Draft #2 (27th April 07)
6 © Andrew Davison 2007
2.1. Animating the Canvas
The RotBoxGameCanvas constructor starts its own thread, and run() executes the animation loop. run() can be summarized with the following pseudo code: public void run() { // initialize the graphics engines (3D and 2D); // initialize the 3D scene; while (isRunning) { // process any user input; // update the application state; // draw the scene (3D and 2D); // perhaps sleep a while to maintain the frame rate; } // shutdown the 3D graphics engine; }
The isRunning boolean is set to true initially, and to false by the public method stopRunning(): public void stopRunning() { isRunning = false; }
stopRunning() is called from RotBoxES, the top-level MIDlet, when the application is about to terminate.
The run() method in RotBoxGameCanvas is: // globals private static final int PERIOD = 220; // frame rate (in ms) private static final float ROT_INCR = 4.0f; // rotation increment for the cubes private volatile boolean isRunning; private long frameDuration; // in ms // how long one iteration of the animation loop takes private float angle; // rotation angle of the cubes private KeyCamera keyCamera; public void run() { if (!initGraphics()) return; // give up if there's an error during initialization initScene(); long startTime; while (isRunning) { startTime = System.currentTimeMillis(); keyCamera.update( getKeyStates() ); angle = (angle + ROT_INCR) % 360.0f; drawScene(); frameDuration = System.currentTimeMillis() - startTime;
Java Prog. Techniques for Games. JOGL-ES 1. Rotating Boxes Draft #2 (27th April 07)
7 © Andrew Davison 2007
try { // sleep a bit maybe, so one iteration takes PERIOD ms if (frameDuration < PERIOD) Thread.sleep(PERIOD - (int)frameDuration); } catch (InterruptedException e){} } shutdown(); } // end of run()
The highlighted method calls will be explained in more detail in the rest of this chapter.
The processing of keypresses is handled by an instance of the KeyCamera class, which converts them into camera moves. The keyCamera object is passed the current keys state via a call to KeyCamera.update().
The only state update carried out inside the animation loop is a change to the angle variable. drawScene() uses it to rotate the cubes.
The frame rate period (PERIOD) is set to be 220 ms, a value arrived at by noting the frame duration displayed by the MIDlet at run time (it’s the number at the top right of Figure 1). The chosen period gives the thread a little sleeping time between iterations so that other threads (perhaps at the OS level) have a chance to execute. The sleep duration is adjusted at run time by comparing the frame duration with the required period.
2.2. Initializing the Graphics Engines
Most of initGraphics() is taken up with the initialization of the 3D graphics engine. There are several stages:
• Initialize OpenGL ES.
• Set up a display connection, which involves choosing a rendering configuration.
• Initialize the OpenGL ES context (the internal state of the graphics engine).
• A drawing surface is specified. This is usually the device’s screen, but can also be an off-screen data structure.
• The display, context, and drawing surface are linked to the application thread.
initGraphics() is quite involved, with lots of error checking, but most of it will remain unchanged across different applications. The method: // globals private Graphics g2d; // for 2D graphics private EGL10 egl; // OpenGL ES link from Java private GL10 gl; // for calling JOGL-ES private EGLDisplay eglDisplay; private EGLContext eglContext; // the OpenGL ES state private EGLSurface eglWinSurface; // for on-screen rendering private boolean initGraphics() {
Java Prog. Techniques for Games. JOGL-ES 1. Rotating Boxes Draft #2 (27th April 07)
8 © Andrew Davison 2007
// initialize OpenGL ES egl = (EGL10) EGLContext.getEGL(); if (egl == null) { System.out.println("Error: could not initialize OpenGL ES"); return false; } // initialize the OpenGL ES connection to the display eglDisplay = egl.eglGetDisplay(EGL10.EGL_DEFAULT_DISPLAY); if (eglDisplay == null) { System.out.println("Error: no connection to display"); return false; } int[] majorMinor = new int[2]; if (!egl.eglInitialize(eglDisplay, majorMinor)) { System.out.println("Error: could not initialize display"); return false; } System.out.println("EGL version: " + majorMinor[0] + "." + majorMinor[1]); // determine the number of available configurations int[] numConfigs = new int[1]; egl.eglGetConfigs(eglDisplay, null, 0, numConfigs); if (numConfigs[0] < 1) { System.out.println("Error: no configurations found"); return false; } // specify an 8/8/8 RGB configuration int configAttributes[] = { EGL10.EGL_RED_SIZE, 8, EGL10.EGL_GREEN_SIZE, 8, EGL10.EGL_BLUE_SIZE, 8, // RGB EGL10.EGL_ALPHA_SIZE, 0, // no alpha necessary EGL10.EGL_DEPTH_SIZE, 16, // use a 16-bit z-buffer EGL10.EGL_SURFACE_TYPE, EGL10.EGL_WINDOW_BIT, // use a window buffer EGL10.EGL_NONE }; // use the first matching configuration EGLConfig eglConfigs[] = new EGLConfig[numConfigs[0]]; if (!egl.eglChooseConfig(eglDisplay, configAttributes, eglConfigs, eglConfigs.length, numConfigs)) { System.out.println("Error: could not find a suitable config"); return false; } EGLConfig eglConfig = eglConfigs[0]; /* initialize the OpenGL ES rendering state (the context) with the display and configuration */ eglContext = egl.eglCreateContext(eglDisplay, eglConfig, EGL10.EGL_NO_CONTEXT, null); if (eglContext == null) { System.out.println("Error: could not create rendering state"); return false; } // initialize 2D and 3D graphics: the APIs are called through these objects

Java Prog. Techniques for Games. JOGL-ES 1. Rotating Boxes Draft #2 (27th April 07)
9 © Andrew Davison 2007
g2d = getGraphics(); // 2D gl = (GL10) eglContext.getGL(); // 3D if (gl == null) { System.out.println("Error: could not create a 3D context"); return false; } // set drawing surface to be a window for on-screen rendering eglWinSurface = egl.eglCreateWindowSurface(eglDisplay, eglConfig, g2d, null); if (eglWinSurface == null) { System.out.println("Error: no drawing surface window"); return false; } // bind the display, drawing surface, and context to this thread if (!egl.eglMakeCurrent(eglDisplay, eglWinSurface, eglWinSurface, eglContext)){ System.out.println("Error: could not make the context current"); return false; } return true; // everything worked! } // end of initGraphics()
In this chapter, I restrict myself to using OpenGL ES 1.0, which means I only need instances of the EGL10 and GL10 classes. For 1.1 functionality, WTK 2.5 has EGL11 and GL11 classes; currently there’s no support in WTK for OpenGL ES 2.0.
A side-effect of calling EGL10.eglInitialize() is that the OpenGL ES version information is produced (in a two-element integer array). The method also returns a boolean which is tested to see if the operation actually succeeded. If the method returns false, then EGL10.eglGetError() can be called to return an integer constant denoting the reason. Many JOGL-ES configuration methods work this way, but I’ve not bothered examining the EGL10.eglGetError() value if they fail (initGraphics() is long enough already).
The number of available display configurations is retrieved with EGL10.eglGetConfigs(). Then my list of required attributes is used by EGL10.eglChooseConfig() to whittle down the configurations to only those that match (or surpass) my needs.
My desired attributes include the bit sizes for the RGB and alpha components of the display, and also the size of the depth buffer. Most attributes have sensible defaults, listed in the documentation for EGL10.eglChooseConfig(). For instance the default alpha size is 0, so that attribute could be left out of my configAttributes[] array in initGraphics(). The list of attributes in the array must be terminated with EGL10.EGL_NONE.
The OpenGL ES state (its context) can be initialized once a display and configuration are available. Once there’s a context, a GL10 object gl, can be instantiated; it will be the entry point for calling JOGL-ES operations. I also get a Graphics object (called g2d) so I can utilize 2D graphics.
The on-screen 2D and 3D drawing surface (the device’s window) is set with EG10.eglCreateWindowSurface(). The surface can also be an off-screen pbuffer (a pixel buffer managed by OpenGL ES) or a pixmap (managed by the OS).
Java Prog. Techniques for Games. JOGL-ES 1. Rotating Boxes Draft #2 (27th April 07)
10 © Andrew Davison 2007
Once I have a display, drawing surface, and context, they can then be bound to the application thread with EG10.eglMakeCurrent(). From here on, the current thread can make JOGL-ES calls via the gl object, and their results will be displayed on-screen.
2.3. Initializing the 3D Scene
Various aspects of the 3D scene can be initialized before the animation loop starts, including the viewing volume, camera, lighting, and scenery. However, all rendering and object transformations (e.g. rotating a cube) is left to drawScene(), which is called from inside the animation loop. // globals private GL10 gl; // for calling JOGL-ES private KeyCamera keyCamera; private void initScene() { setView(60.0f, 0.1f, 50.0f); keyCamera = new KeyCamera(gl); gl.glClearColor(0.17f, 0.65f, 0.92f, 1.0f); // sky blue background // z-(depth) initialization for hidden surface removal gl.glEnable(GL10.GL_DEPTH_TEST); gl.glHint(GL10.GL_PERSPECTIVE_CORRECTION_HINT, GL10.GL_NICEST); gl.glShadeModel(GL10.GL_SMOOTH); // use smooth shading addLight(); createScenery(); } // end of initScene()
Depth testing is essential if the scene has multiple 3D objects. Although it’s enabled in initScene(), it will only work correctly if the display configuration (set up in initGraphics()) has set a depth size.
setView() creates a perspective view into the scene. It’s arguments are the field-of-view angle along the y-axis, and the near and far clipping planes. // globals private int width, height; // dimensions of the device’s screen private void setView(float fovy, float near, float far) { gl.glViewport(0, 0, width, height); // set size of drawing area to be the screen size // set the viewing frustum (similar to gluPerspective()) float aspectRatio = (float)width/(float)height; float top = near * (float)Math.tan((fovy*Math.PI)/360.0); float bottom = -top; float left = bottom * aspectRatio;
Java Prog. Techniques for Games. JOGL-ES 1. Rotating Boxes Draft #2 (27th April 07)
11 © Andrew Davison 2007
float right = top * aspectRatio; gl.glMatrixMode(GL10.GL_PROJECTION); // set the view attributes gl.glLoadIdentity(); gl.glFrustumf(left, right, bottom, top, near, far); } // end of setView()
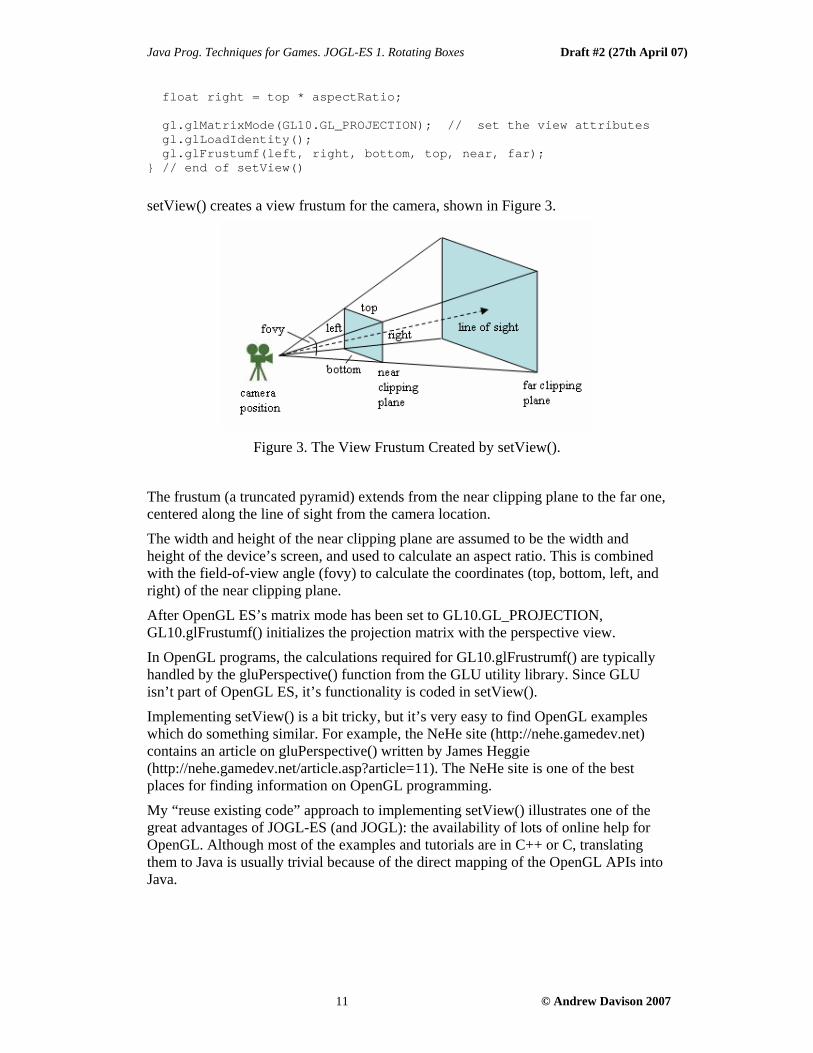
setView() creates a view frustum for the camera, shown in Figure 3.
Figure 3. The View Frustum Created by setView().
The frustum (a truncated pyramid) extends from the near clipping plane to the far one, centered along the line of sight from the camera location.
The width and height of the near clipping plane are assumed to be the width and height of the device’s screen, and used to calculate an aspect ratio. This is combined with the field-of-view angle (fovy) to calculate the coordinates (top, bottom, left, and right) of the near clipping plane.
After OpenGL ES’s matrix mode has been set to GL10.GL_PROJECTION, GL10.glFrustumf() initializes the projection matrix with the perspective view.
In OpenGL programs, the calculations required for GL10.glFrustrumf() are typically handled by the gluPerspective() function from the GLU utility library. Since GLU isn’t part of OpenGL ES, it’s functionality is coded in setView().
Implementing setView() is a bit tricky, but it’s very easy to find OpenGL examples which do something similar. For example, the NeHe site (http://nehe.gamedev.net) contains an article on gluPerspective() written by James Heggie (http://nehe.gamedev.net/article.asp?article=11). The NeHe site is one of the best places for finding information on OpenGL programming.
My “reuse existing code” approach to implementing setView() illustrates one of the great advantages of JOGL-ES (and JOGL): the availability of lots of online help for OpenGL. Although most of the examples and tutorials are in C++ or C, translating them to Java is usually trivial because of the direct mapping of the OpenGL APIs into Java.
Java Prog. Techniques for Games. JOGL-ES 1. Rotating Boxes Draft #2 (27th April 07)
12 © Andrew Davison 2007
2.4. Adding Lights
The lighting capabilities of OpenGL ES are almost unchanged from OpenGL: ten light sources can be defined, each with their own ambient, diffuse, specular, shininess, and emissive parameters. A light can have a position or be directional, and positional lights attenuate (weaken) with distance. Light source 0 (GL.GL_LIGHT_0) comes with useful default values for these parameters, which reduces the coding required for basic scene lighting.
The addLight() method: private void addLight() { gl.glEnable(GL10.GL_LIGHTING); gl.glEnable(GL10.GL_LIGHT0); gl.glEnable(GL10.GL_NORMALIZE); float[] ambientLight = { 0.125f, 0.125f, 0.125f, 1.0f }; // weak gray ambient gl.glLightfv(GL10.GL_LIGHT0, GL10.GL_AMBIENT, ambientLight, 0); float[] diffuseLight = { 0.9f, 0.9f, 0.9f, 1.0f }; // white diffuse gl.glLightfv(GL10.GL_LIGHT0, GL10.GL_DIFFUSE, diffuseLight, 0); } // end of addLight()
Light source 0 is enabled, and its ambient and diffuse parameters set.
Positional information for the light is missing from addLight(); it’s defined in the drawScene() method for reasons I’ll explain when I consider the code in the “Drawing in 3D” section.
Java Prog. Techniques for Games. JOGL-ES 1. Rotating Boxes Draft #2 (27th April 07)
13 © Andrew Davison 2007
2.5. Making the Scenery
The scenery in the RotBoxES application consists of the floor and the two rotating cubes. Scenery is manipulated in three stages: it’s created at initialization time, then updated and drawn repeatedly inside the animation loop. createScenery() carries out the initialization stage, using the Floor and TexCube classes to create the necessary objects: // globals private Floor floor; private TexCube texCube1, texCube2; // two textured cubes private void createScenery() { gl.glEnable(GL10.GL_CULL_FACE); // cull backfaces gl.glEnable(GL10.GL_COLOR_MATERIAL); // set material properties // use default material properties floor = new Floor(gl, "/bigGrid.png", 8); // 8 by 8 size texCube1 = new TexCube(gl, "/brick2.png", 0, 0.5f, 0, 0.5f); // arguments: GL10 object, texture filename, (x, y, z), scale texCube2 = new TexCube(gl, "/wood.png", -2.0f, 1.2f, -1.3f, 0.25f); } // end of createScenery()
createScenery() enables backface culling which is a simple way of improving the application’s running time. In the WTK, it reduces the average frame duration from 260 ms to around 200 ms. The drawback is that the insides of the cubes and the underside of the floor aren’t rendered.
Material properties are switched on in createScenery(). Later on, the floor and cubes will have enable texturing, but their material settings aren’t adjusted. The default material properties (which are described in the documentation for the GL10.glMaterialfv() method) cause the shapes to respond to ambient and diffuse light, which is sufficient for my needs.
The filenames passed to the Floor and TexCube constructors are for files holding textures. The texture image should in PNG format, and be square with dimensions that are a power of two (e.g. 32 by 32, 64 by 64). It’s advisable not to use too large an image; 256 by 256 is probably the largest ‘safe’ size that’s supported across a majority of devices.
The final argument of the Floor constructor is the length of the floor’s sides when drawn in the scene.
The third, fourth, and fifth arguments of the TexCube constructor collectively specify the (x, y, z) position of the cube’s center, and the final argument is the scale factor applied to the cube at render time. By default, a cube is centered at the origin, and has sides of length 2.
Java Prog. Techniques for Games. JOGL-ES 1. Rotating Boxes Draft #2 (27th April 07)
14 © Andrew Davison 2007
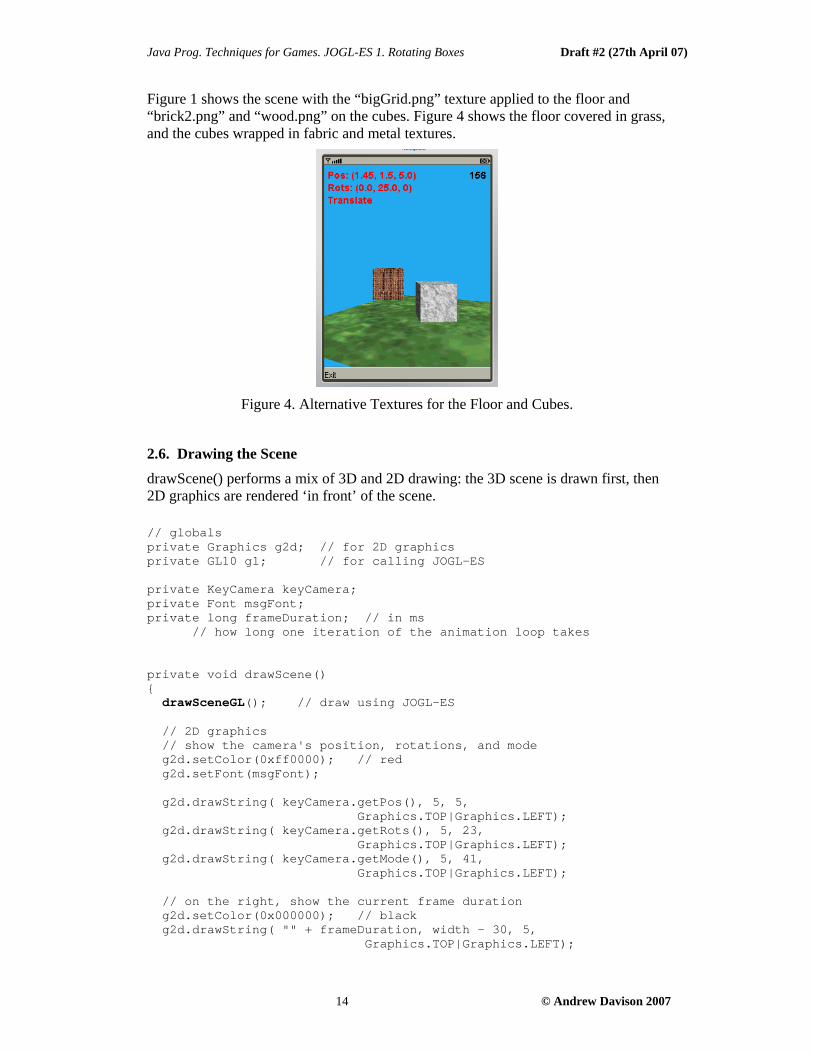
Figure 1 shows the scene with the “bigGrid.png” texture applied to the floor and “brick2.png” and “wood.png” on the cubes. Figure 4 shows the floor covered in grass, and the cubes wrapped in fabric and metal textures.
Figure 4. Alternative Textures for the Floor and Cubes.
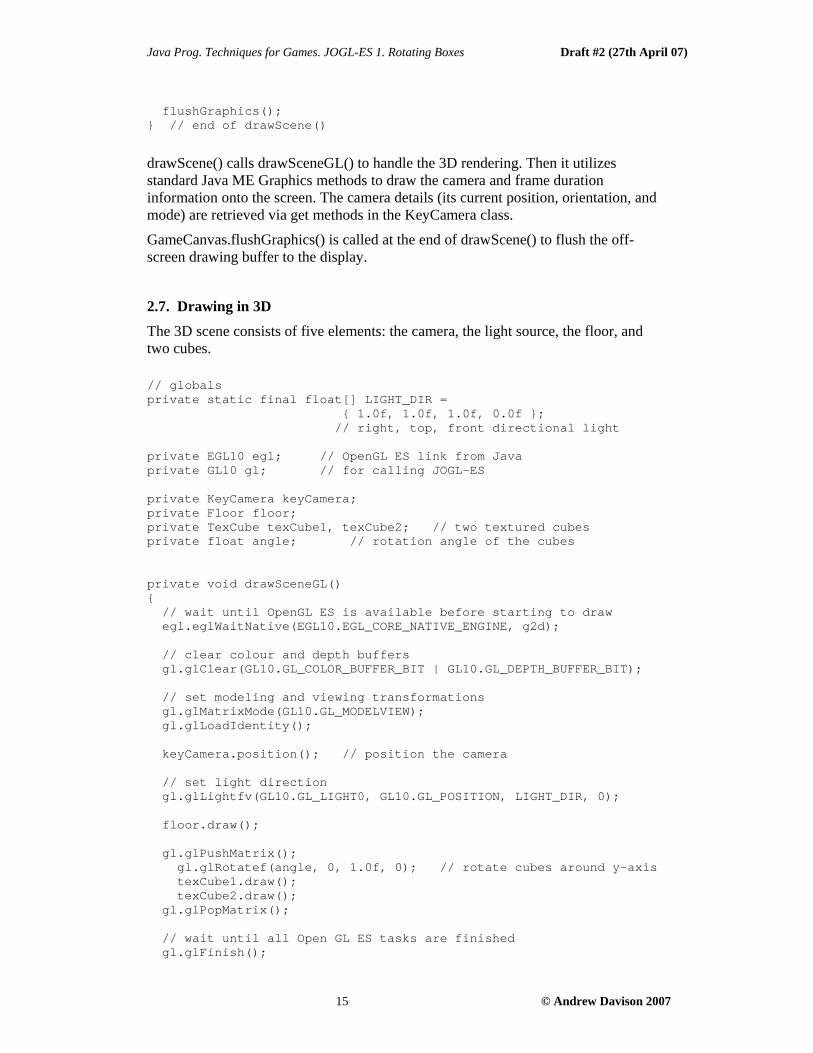
2.6. Drawing the Scene
drawScene() performs a mix of 3D and 2D drawing: the 3D scene is drawn first, then 2D graphics are rendered ‘in front’ of the scene. // globals private Graphics g2d; // for 2D graphics private GL10 gl; // for calling JOGL-ES private KeyCamera keyCamera; private Font msgFont; private long frameDuration; // in ms // how long one iteration of the animation loop takes private void drawScene() { drawSceneGL(); // draw using JOGL-ES // 2D graphics // show the camera's position, rotations, and mode g2d.setColor(0xff0000); // red g2d.setFont(msgFont); g2d.drawString( keyCamera.getPos(), 5, 5, Graphics.TOP|Graphics.LEFT); g2d.drawString( keyCamera.getRots(), 5, 23, Graphics.TOP|Graphics.LEFT); g2d.drawString( keyCamera.getMode(), 5, 41, Graphics.TOP|Graphics.LEFT); // on the right, show the current frame duration g2d.setColor(0x000000); // black g2d.drawString( "" + frameDuration, width - 30, 5, Graphics.TOP|Graphics.LEFT);
Java Prog. Techniques for Games. JOGL-ES 1. Rotating Boxes Draft #2 (27th April 07)
15 © Andrew Davison 2007
flushGraphics(); } // end of drawScene()
drawScene() calls drawSceneGL() to handle the 3D rendering. Then it utilizes standard Java ME Graphics methods to draw the camera and frame duration information onto the screen. The camera details (its current position, orientation, and mode) are retrieved via get methods in the KeyCamera class.
GameCanvas.flushGraphics() is called at the end of drawScene() to flush the off-screen drawing buffer to the display.
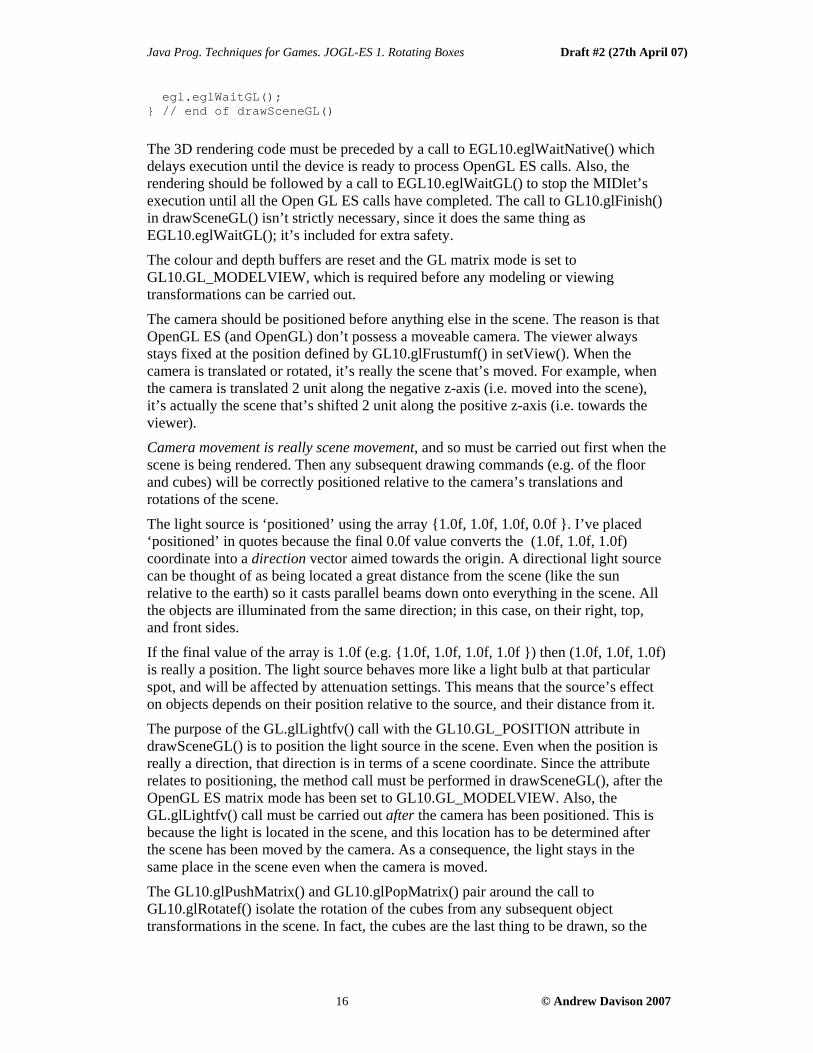
2.7. Drawing in 3D
The 3D scene consists of five elements: the camera, the light source, the floor, and two cubes. // globals private static final float[] LIGHT_DIR = { 1.0f, 1.0f, 1.0f, 0.0f }; // right, top, front directional light private EGL10 egl; // OpenGL ES link from Java private GL10 gl; // for calling JOGL-ES private KeyCamera keyCamera; private Floor floor; private TexCube texCube1, texCube2; // two textured cubes private float angle; // rotation angle of the cubes private void drawSceneGL() { // wait until OpenGL ES is available before starting to draw egl.eglWaitNative(EGL10.EGL_CORE_NATIVE_ENGINE, g2d); // clear colour and depth buffers gl.glClear(GL10.GL_COLOR_BUFFER_BIT | GL10.GL_DEPTH_BUFFER_BIT); // set modeling and viewing transformations gl.glMatrixMode(GL10.GL_MODELVIEW); gl.glLoadIdentity(); keyCamera.position(); // position the camera // set light direction gl.glLightfv(GL10.GL_LIGHT0, GL10.GL_POSITION, LIGHT_DIR, 0); floor.draw(); gl.glPushMatrix(); gl.glRotatef(angle, 0, 1.0f, 0); // rotate cubes around y-axis texCube1.draw(); texCube2.draw(); gl.glPopMatrix(); // wait until all Open GL ES tasks are finished gl.glFinish();
Java Prog. Techniques for Games. JOGL-ES 1. Rotating Boxes Draft #2 (27th April 07)
16 © Andrew Davison 2007
egl.eglWaitGL(); } // end of drawSceneGL()
The 3D rendering code must be preceded by a call to EGL10.eglWaitNative() which delays execution until the device is ready to process OpenGL ES calls. Also, the rendering should be followed by a call to EGL10.eglWaitGL() to stop the MIDlet’s execution until all the Open GL ES calls have completed. The call to GL10.glFinish() in drawSceneGL() isn’t strictly necessary, since it does the same thing as EGL10.eglWaitGL(); it’s included for extra safety.
The colour and depth buffers are reset and the GL matrix mode is set to GL10.GL_MODELVIEW, which is required before any modeling or viewing transformations can be carried out.
The camera should be positioned before anything else in the scene. The reason is that OpenGL ES (and OpenGL) don’t possess a moveable camera. The viewer always stays fixed at the position defined by GL10.glFrustumf() in setView(). When the camera is translated or rotated, it’s really the scene that’s moved. For example, when the camera is translated 2 unit along the negative z-axis (i.e. moved into the scene), it’s actually the scene that’s shifted 2 unit along the positive z-axis (i.e. towards the viewer).
Camera movement is really scene movement, and so must be carried out first when the scene is being rendered. Then any subsequent drawing commands (e.g. of the floor and cubes) will be correctly positioned relative to the camera’s translations and rotations of the scene.
The light source is ‘positioned’ using the array {1.0f, 1.0f, 1.0f, 0.0f }. I’ve placed ‘positioned’ in quotes because the final 0.0f value converts the (1.0f, 1.0f, 1.0f) coordinate into a direction vector aimed towards the origin. A directional light source can be thought of as being located a great distance from the scene (like the sun relative to the earth) so it casts parallel beams down onto everything in the scene. All the objects are illuminated from the same direction; in this case, on their right, top, and front sides.
If the final value of the array is 1.0f (e.g. {1.0f, 1.0f, 1.0f, 1.0f }) then (1.0f, 1.0f, 1.0f) is really a position. The light source behaves more like a light bulb at that particular spot, and will be affected by attenuation settings. This means that the source’s effect on objects depends on their position relative to the source, and their distance from it.
The purpose of the GL.glLightfv() call with the GL10.GL_POSITION attribute in drawSceneGL() is to position the light source in the scene. Even when the position is really a direction, that direction is in terms of a scene coordinate. Since the attribute relates to positioning, the method call must be performed in drawSceneGL(), after the OpenGL ES matrix mode has been set to GL10.GL_MODELVIEW. Also, the GL.glLightfv() call must be carried out after the camera has been positioned. This is because the light is located in the scene, and this location has to be determined after the scene has been moved by the camera. As a consequence, the light stays in the same place in the scene even when the camera is moved.
The GL10.glPushMatrix() and GL10.glPopMatrix() pair around the call to GL10.glRotatef() isolate the rotation of the cubes from any subsequent object transformations in the scene. In fact, the cubes are the last thing to be drawn, so the
Java Prog. Techniques for Games. JOGL-ES 1. Rotating Boxes Draft #2 (27th April 07)
17 © Andrew Davison 2007
GL10.glPushMatrix() and GL10.glPopMatrix() calls could be omitted. Nevertheless, it’s good idea to include them just in case drawSceneGL() is changed in the future.
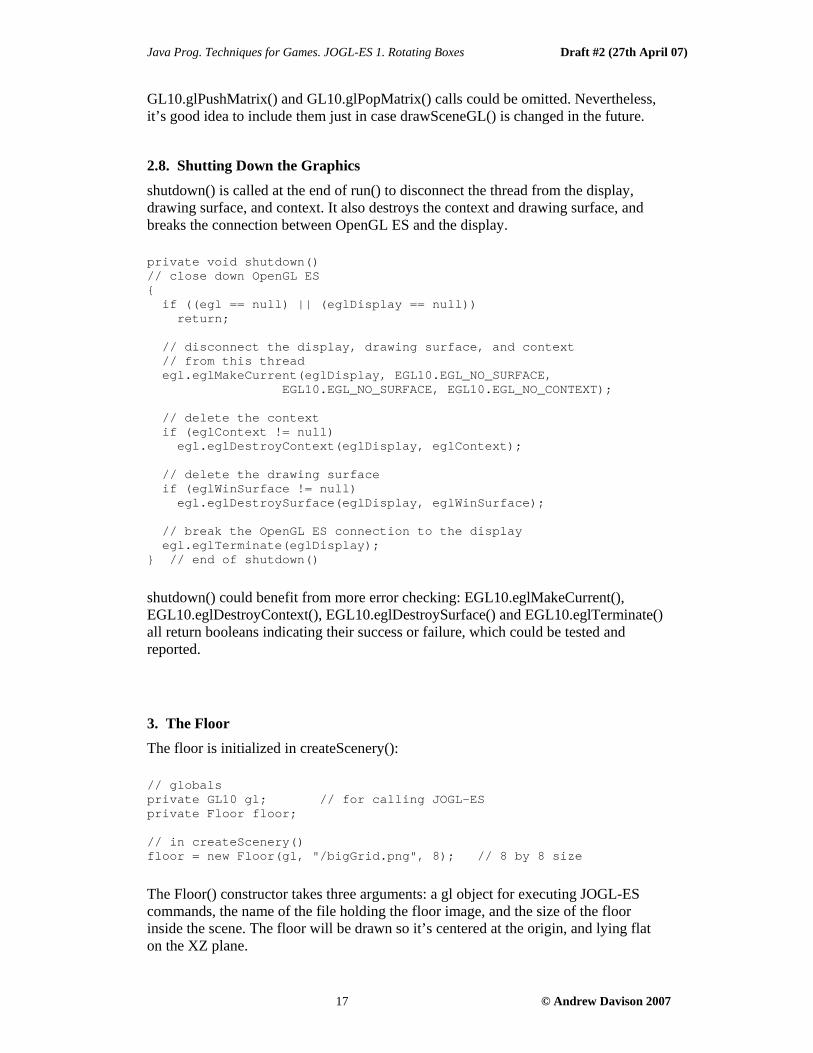
2.8. Shutting Down the Graphics
shutdown() is called at the end of run() to disconnect the thread from the display, drawing surface, and context. It also destroys the context and drawing surface, and breaks the connection between OpenGL ES and the display. private void shutdown() // close down OpenGL ES { if ((egl == null) || (eglDisplay == null)) return; // disconnect the display, drawing surface, and context // from this thread egl.eglMakeCurrent(eglDisplay, EGL10.EGL_NO_SURFACE, EGL10.EGL_NO_SURFACE, EGL10.EGL_NO_CONTEXT); // delete the context if (eglContext != null) egl.eglDestroyContext(eglDisplay, eglContext); // delete the drawing surface if (eglWinSurface != null) egl.eglDestroySurface(eglDisplay, eglWinSurface); // break the OpenGL ES connection to the display egl.eglTerminate(eglDisplay); } // end of shutdown()
shutdown() could benefit from more error checking: EGL10.eglMakeCurrent(), EGL10.eglDestroyContext(), EGL10.eglDestroySurface() and EGL10.eglTerminate() all return booleans indicating their success or failure, which could be tested and reported.
3. The Floor
The floor is initialized in createScenery(): // globals private GL10 gl; // for calling JOGL-ES private Floor floor; // in createScenery() floor = new Floor(gl, "/bigGrid.png", 8); // 8 by 8 size
The Floor() constructor takes three arguments: a gl object for executing JOGL-ES commands, the name of the file holding the floor image, and the size of the floor inside the scene. The floor will be drawn so it’s centered at the origin, and lying flat on the XZ plane.
Java Prog. Techniques for Games. JOGL-ES 1. Rotating Boxes Draft #2 (27th April 07)
18 © Andrew Davison 2007
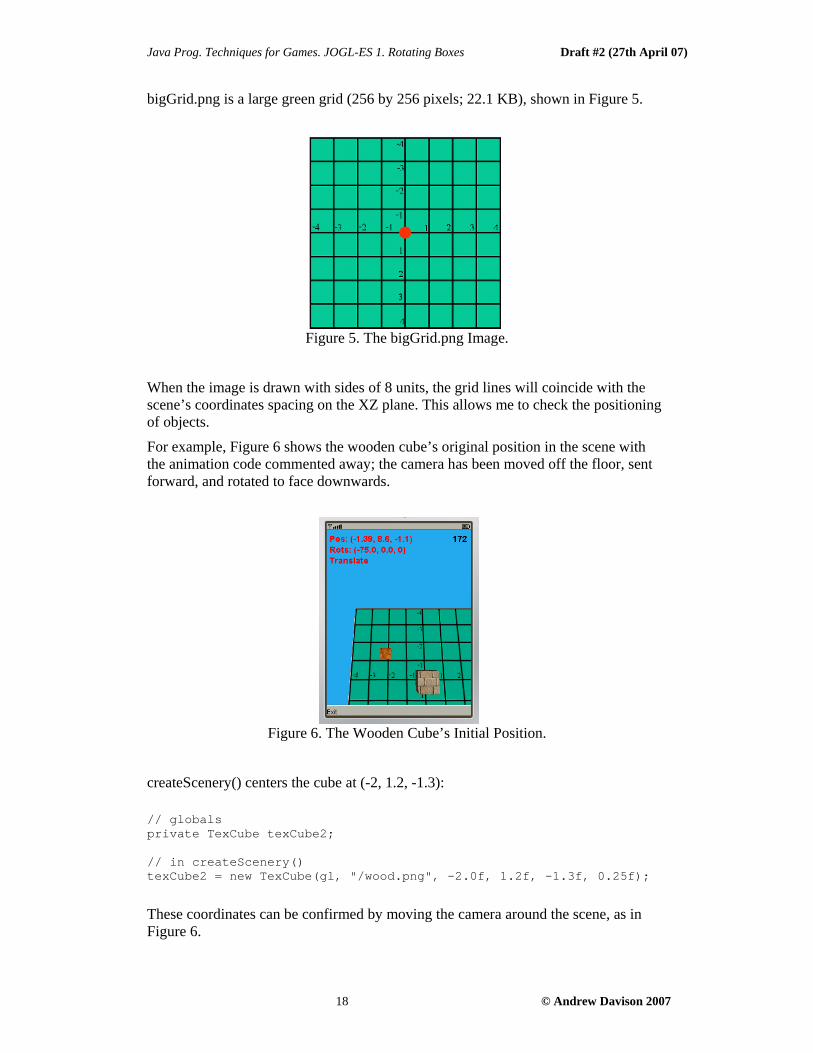
bigGrid.png is a large green grid (256 by 256 pixels; 22.1 KB), shown in Figure 5.
Figure 5. The bigGrid.png Image.
When the image is drawn with sides of 8 units, the grid lines will coincide with the scene’s coordinates spacing on the XZ plane. This allows me to check the positioning of objects.
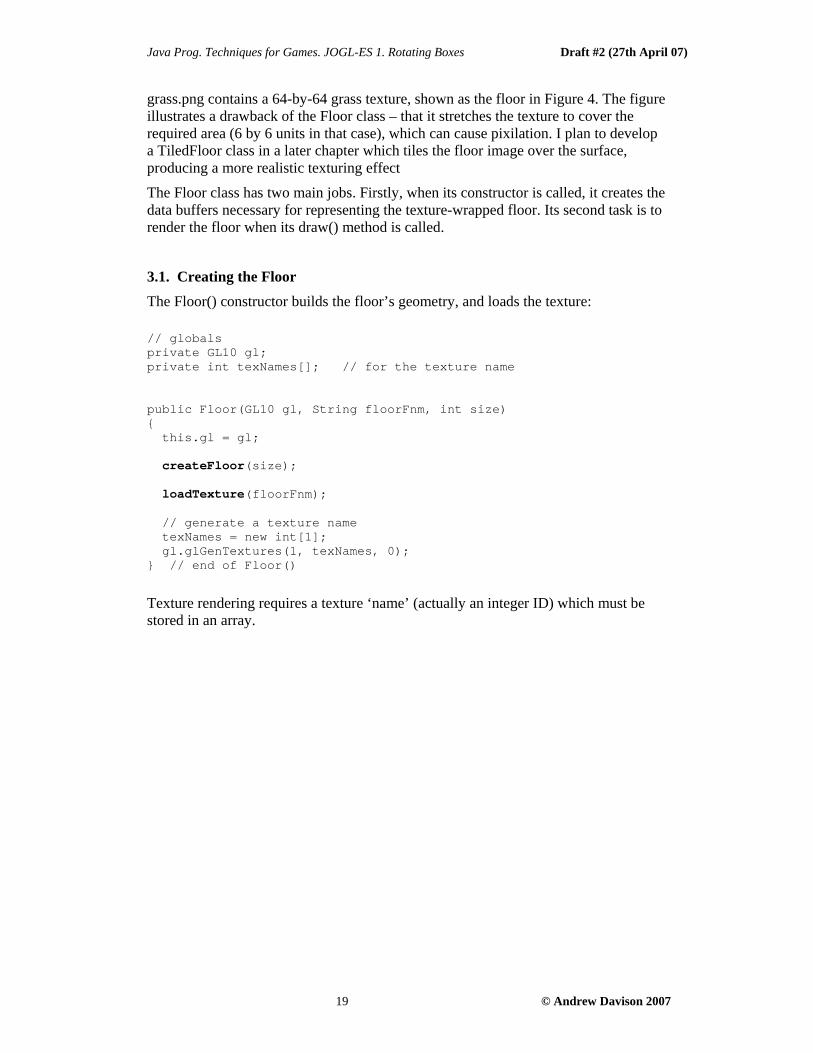
For example, Figure 6 shows the wooden cube’s original position in the scene with the animation code commented away; the camera has been moved off the floor, sent forward, and rotated to face downwards.
Figure 6. The Wooden Cube’s Initial Position.
createScenery() centers the cube at (-2, 1.2, -1.3): // globals private TexCube texCube2; // in createScenery() texCube2 = new TexCube(gl, "/wood.png", -2.0f, 1.2f, -1.3f, 0.25f);
These coordinates can be confirmed by moving the camera around the scene, as in Figure 6.
Java Prog. Techniques for Games. JOGL-ES 1. Rotating Boxes Draft #2 (27th April 07)
19 © Andrew Davison 2007
grass.png contains a 64-by-64 grass texture, shown as the floor in Figure 4. The figure illustrates a drawback of the Floor class – that it stretches the texture to cover the required area (6 by 6 units in that case), which can cause pixilation. I plan to develop a TiledFloor class in a later chapter which tiles the floor image over the surface, producing a more realistic texturing effect
The Floor class has two main jobs. Firstly, when its constructor is called, it creates the data buffers necessary for representing the texture-wrapped floor. Its second task is to render the floor when its draw() method is called.
3.1. Creating the Floor
The Floor() constructor builds the floor’s geometry, and loads the texture: // globals private GL10 gl; private int texNames[]; // for the texture name public Floor(GL10 gl, String floorFnm, int size) { this.gl = gl; createFloor(size); loadTexture(floorFnm); // generate a texture name texNames = new int[1]; gl.glGenTextures(1, texNames, 0); } // end of Floor()
Texture rendering requires a texture ‘name’ (actually an integer ID) which must be stored in an array.
Java Prog. Techniques for Games. JOGL-ES 1. Rotating Boxes Draft #2 (27th April 07)
20 © Andrew Davison 2007
The floor’s geometry is a square resting on the XZ plane, centered at the origin. If the constructor receives a sz value for the length of the floor’s sides then the floor’s coordinates will be as shown in Figure 7, when viewed from above.
Figure 7. The Floor’s Coordinates.
The coordinates are ordered to define the floor’s shape in terms of triangles (OpenGL ES doesn’t support quads). I chose to use a triangle strip, with the coordinates ordered as shown by the numbers in circles in Figure 7. The initial counter-clockwise order for the first three points (0, 1, and 2), means that the “front” face of the floor is pointing upwards along the y-axis.
The floor also requires texture coordinates, which are shown in Figure 8.
Figure 8. The Floor’s Texture Coordinates.
2D texture coordinates are specified in terms of s and t values, which can range between 0 and 1. For example, (0,0) denotes the bottom-left of a texture, (1,1) the top-right. In Figure 8, the four coordinates match the four corners of the image, so the entire image will be utilized for texturing.
The ordering of the coordinates in Figure 8 (the numbers in the circles) is the same as the ordering of the vertices in Figure 7. This ensures that when the vertices and texture coordinates are matched up at render time, that the floor is correctly covered with the image. For instance, the bottom-left texture coordinate is mapped to front-left vertex of the floor, and the top-right coordinate to the back-right vertex.
The vertices and texture coordinates are stored in two byte buffers by createFloor():
Java Prog. Techniques for Games. JOGL-ES 1. Rotating Boxes Draft #2 (27th April 07)
21 © Andrew Davison 2007
// globals private ByteBuffer vertsBuf; // floor vertices private ByteBuffer tcsBuf; // tex coords private void createFloor(int size) /* create the vertices and tex coords buffers for the floor of size-by-size */ { // create vertices byte pt = (byte)(size/2); byte npt = (byte) (-size/2); // negative pt byte[] verts = {npt,0,pt, pt,0,pt, npt,0,npt, pt,0,npt}; vertsBuf = ByteBuffer.allocateDirect(verts.length); vertsBuf.put(verts).rewind(); // create texture coordinates byte[] tcs = {0,0, 1,0, 0,1, 1,1}; tcsBuf = ByteBuffer.allocateDirect(tcs.length); tcsBuf.put(tcs).rewind(); } // end of createFloor()
The texture image must also be loaded and stored in its own byte buffer. This is done by loadTexture(): // globals private ByteBuffer texBuf; // RGB texture image private int imWidth, imHeight; // dimensions of the texture image private void loadTexture(String fnm) // load the image stored in fnm into a byte buffer { try { Image image = Image.createImage(fnm); imWidth = image.getWidth(); imHeight = image.getHeight(); int pixels[] = new int[imWidth]; // for a row of pixels texBuf = ByteBuffer.allocateDirect(imWidth * imHeight * 3); // read the image in reverse row order for (int i = imHeight-1; i >= 0; i--) { image.getRGB(pixels, 0, imWidth, 0, i, imWidth, 1); // get a pixel row for (int j = 0; j < imWidth; j++) { // store each pixel in the row as three bytes texBuf.put((byte) (pixels[j] >> 16 & 0xff)); // red texBuf.put((byte) (pixels[j] >> 8 & 0xff)); // green texBuf.put((byte) (pixels[j] >> 0 & 0xff)); // blue } } texBuf.rewind(); } catch (Exception e) { System.out.println("Error creating texture for " + fnm); } } // end of loadTexture()
Java Prog. Techniques for Games. JOGL-ES 1. Rotating Boxes Draft #2 (27th April 07)
22 © Andrew Davison 2007
The texture is loaded as an Image object, then transferred to the byte buffer a row of pixels at a time, with each pixel stored as three bytes. The rows are read in reverse order to flip the image vertically in the buffer. This will order the texture correctly for OpenGL's coordinate system, where (0,0) is the lower left.
The code doesn’t extract alpha values from the image.
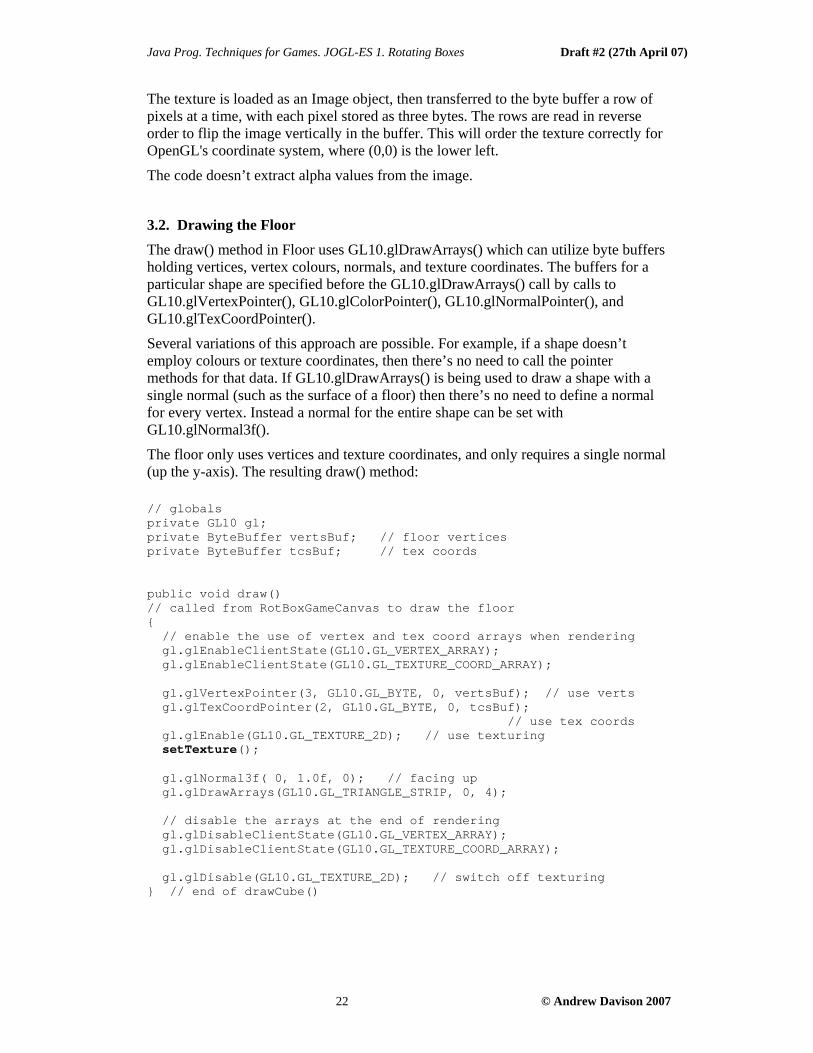
3.2. Drawing the Floor
The draw() method in Floor uses GL10.glDrawArrays() which can utilize byte buffers holding vertices, vertex colours, normals, and texture coordinates. The buffers for a particular shape are specified before the GL10.glDrawArrays() call by calls to GL10.glVertexPointer(), GL10.glColorPointer(), GL10.glNormalPointer(), and GL10.glTexCoordPointer().
Several variations of this approach are possible. For example, if a shape doesn’t employ colours or texture coordinates, then there’s no need to call the pointer methods for that data. If GL10.glDrawArrays() is being used to draw a shape with a single normal (such as the surface of a floor) then there’s no need to define a normal for every vertex. Instead a normal for the entire shape can be set with GL10.glNormal3f().
The floor only uses vertices and texture coordinates, and only requires a single normal (up the y-axis). The resulting draw() method: // globals private GL10 gl; private ByteBuffer vertsBuf; // floor vertices private ByteBuffer tcsBuf; // tex coords public void draw() // called from RotBoxGameCanvas to draw the floor { // enable the use of vertex and tex coord arrays when rendering gl.glEnableClientState(GL10.GL_VERTEX_ARRAY); gl.glEnableClientState(GL10.GL_TEXTURE_COORD_ARRAY); gl.glVertexPointer(3, GL10.GL_BYTE, 0, vertsBuf); // use verts gl.glTexCoordPointer(2, GL10.GL_BYTE, 0, tcsBuf); // use tex coords gl.glEnable(GL10.GL_TEXTURE_2D); // use texturing setTexture(); gl.glNormal3f( 0, 1.0f, 0); // facing up gl.glDrawArrays(GL10.GL_TRIANGLE_STRIP, 0, 4); // disable the arrays at the end of rendering gl.glDisableClientState(GL10.GL_VERTEX_ARRAY); gl.glDisableClientState(GL10.GL_TEXTURE_COORD_ARRAY); gl.glDisable(GL10.GL_TEXTURE_2D); // switch off texturing } // end of drawCube()
Java Prog. Techniques for Games. JOGL-ES 1. Rotating Boxes Draft #2 (27th April 07)
23 © Andrew Davison 2007
The two calls to GL10.glEnableClientState() allow vertex and texture coordinate buffers to be utilized at render time. They are disabled once the drawing is completed so they aren’t inadvertently used in the drawing operations for other shapes.
The call to GL10.glDrawArrays() includes the geometry scheme used by the buffers (a triangle strip), and how many coordinates are in the strip (four).
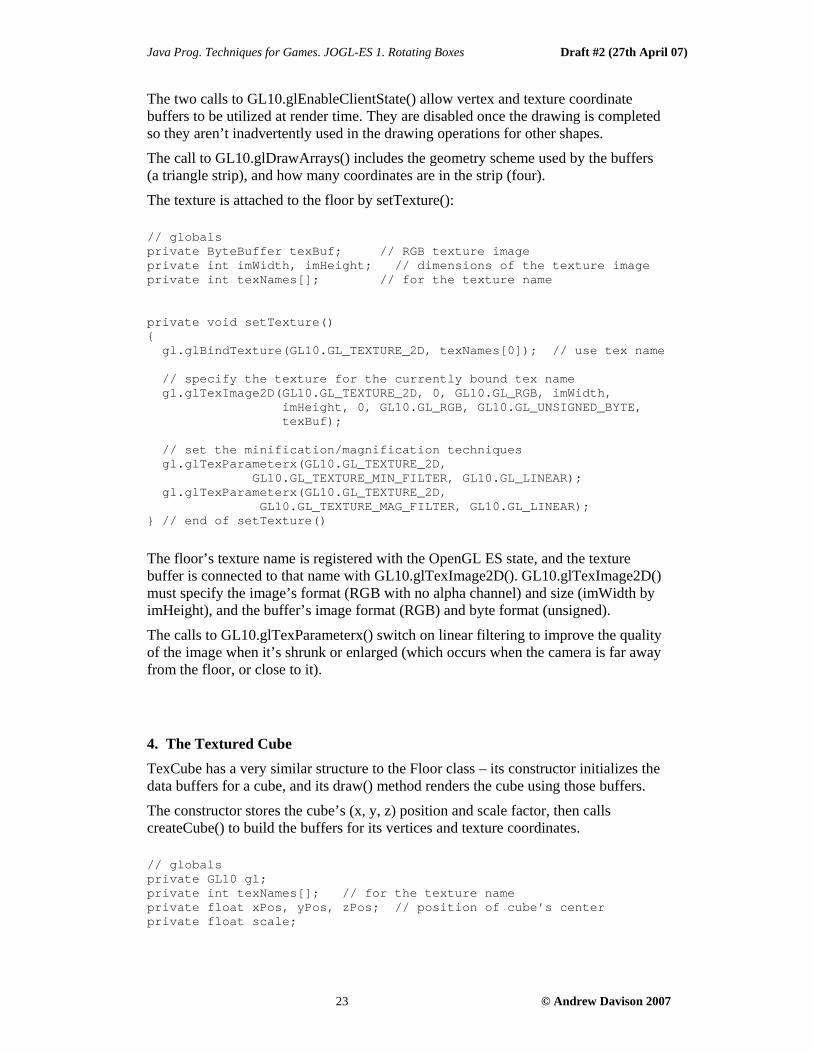
The texture is attached to the floor by setTexture(): // globals private ByteBuffer texBuf; // RGB texture image private int imWidth, imHeight; // dimensions of the texture image private int texNames[]; // for the texture name private void setTexture() { gl.glBindTexture(GL10.GL_TEXTURE_2D, texNames[0]); // use tex name // specify the texture for the currently bound tex name gl.glTexImage2D(GL10.GL_TEXTURE_2D, 0, GL10.GL_RGB, imWidth, imHeight, 0, GL10.GL_RGB, GL10.GL_UNSIGNED_BYTE, texBuf); // set the minification/magnification techniques gl.glTexParameterx(GL10.GL_TEXTURE_2D, GL10.GL_TEXTURE_MIN_FILTER, GL10.GL_LINEAR); gl.glTexParameterx(GL10.GL_TEXTURE_2D, GL10.GL_TEXTURE_MAG_FILTER, GL10.GL_LINEAR); } // end of setTexture()
The floor’s texture name is registered with the OpenGL ES state, and the texture buffer is connected to that name with GL10.glTexImage2D(). GL10.glTexImage2D() must specify the image’s format (RGB with no alpha channel) and size (imWidth by imHeight), and the buffer’s image format (RGB) and byte format (unsigned).
The calls to GL10.glTexParameterx() switch on linear filtering to improve the quality of the image when it’s shrunk or enlarged (which occurs when the camera is far away from the floor, or close to it).
4. The Textured Cube
TexCube has a very similar structure to the Floor class – its constructor initializes the data buffers for a cube, and its draw() method renders the cube using those buffers.
The constructor stores the cube’s (x, y, z) position and scale factor, then calls createCube() to build the buffers for its vertices and texture coordinates. // globals private GL10 gl; private int texNames[]; // for the texture name private float xPos, yPos, zPos; // position of cube’s center private float scale;
Java Prog. Techniques for Games. JOGL-ES 1. Rotating Boxes Draft #2 (27th April 07)
24 © Andrew Davison 2007
public TexCube(GL10 gl, String texFnm, float x, float y, float z, float sc) // (x,y,z) is the cube's position, and sc the scaling factor { this.gl = gl; xPos = x; yPos = y; zPos = z; scale = sc; createCube(); loadTexture(texFnm); // generate a texture name texNames = new int[1]; gl.glGenTextures(1, texNames, 0); } // end of TexCube()
The loadTexture() method is the same as the one in Floor – it loads the texture image into a buffer. Also as in Floor(), it’s necessary to generate a texture name.
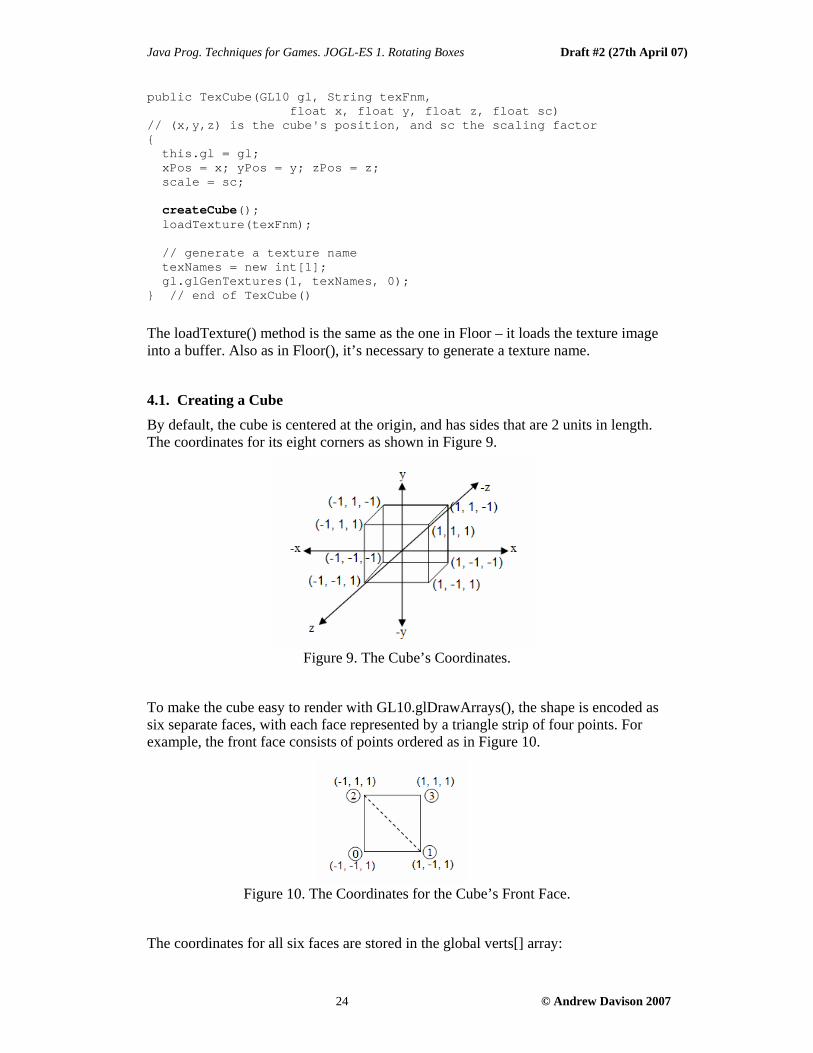
4.1. Creating a Cube
By default, the cube is centered at the origin, and has sides that are 2 units in length. The coordinates for its eight corners as shown in Figure 9.
Figure 9. The Cube’s Coordinates.
To make the cube easy to render with GL10.glDrawArrays(), the shape is encoded as six separate faces, with each face represented by a triangle strip of four points. For example, the front face consists of points ordered as in Figure 10.
Figure 10. The Coordinates for the Cube’s Front Face.
The coordinates for all six faces are stored in the global verts[] array:
Java Prog. Techniques for Games. JOGL-ES 1. Rotating Boxes Draft #2 (27th April 07)
25 © Andrew Davison 2007
// global private byte verts[] = { // organized into 6 faces -1, -1, 1, 1, -1, 1, -1, 1, 1, 1, 1, 1, // front face 1, -1, -1, -1, -1, -1, 1, 1, -1, -1, 1, -1, // back 1, -1, 1, 1, -1, -1, 1, 1, 1, 1, 1, -1, // right -1, -1, -1, -1, -1, 1, -1, 1,-1, -1, 1, 1, // left -1, 1, 1, 1, 1, 1, -1, 1, -1, 1, 1, -1, // top -1, -1, -1, 1, -1, -1, -1, -1, 1, 1, -1, 1 // bottom };
The data is conveniently arranged for GL10.glDrawArrays(), which will be called six times by draw(), once for each face. The downside of this approach is the size of the array, which holds 24 coordinates representing the eight corners of the cube.
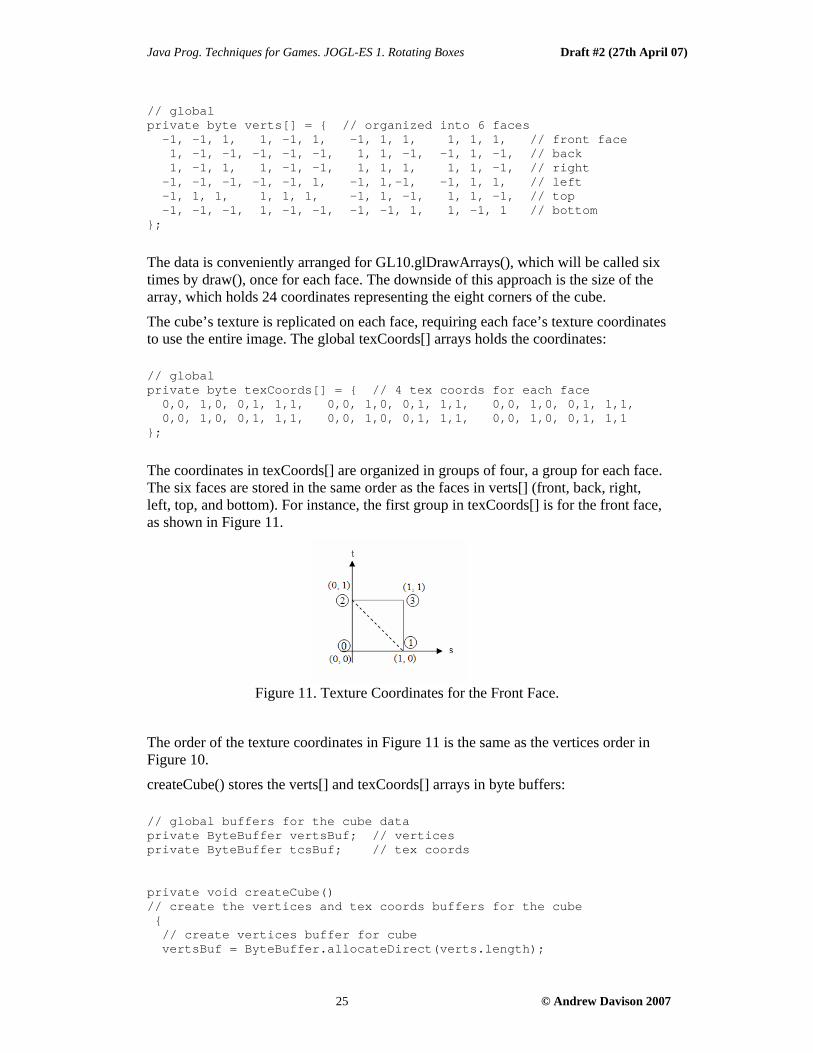
The cube’s texture is replicated on each face, requiring each face’s texture coordinates to use the entire image. The global texCoords[] arrays holds the coordinates: // global private byte texCoords[] = { // 4 tex coords for each face 0,0, 1,0, 0,1, 1,1, 0,0, 1,0, 0,1, 1,1, 0,0, 1,0, 0,1, 1,1, 0,0, 1,0, 0,1, 1,1, 0,0, 1,0, 0,1, 1,1, 0,0, 1,0, 0,1, 1,1 };
The coordinates in texCoords[] are organized in groups of four, a group for each face. The six faces are stored in the same order as the faces in verts[] (front, back, right, left, top, and bottom). For instance, the first group in texCoords[] is for the front face, as shown in Figure 11.
Figure 11. Texture Coordinates for the Front Face.
The order of the texture coordinates in Figure 11 is the same as the vertices order in Figure 10.
createCube() stores the verts[] and texCoords[] arrays in byte buffers: // global buffers for the cube data private ByteBuffer vertsBuf; // vertices private ByteBuffer tcsBuf; // tex coords private void createCube() // create the vertices and tex coords buffers for the cube { // create vertices buffer for cube vertsBuf = ByteBuffer.allocateDirect(verts.length);
Java Prog. Techniques for Games. JOGL-ES 1. Rotating Boxes Draft #2 (27th April 07)
26 © Andrew Davison 2007
vertsBuf.put(verts).rewind(); // 2D tex coords buffer for cube tcsBuf = ByteBuffer.allocateDirect(texCoords.length); tcsBuf.put(texCoords).rewind(); } // end of createCube()
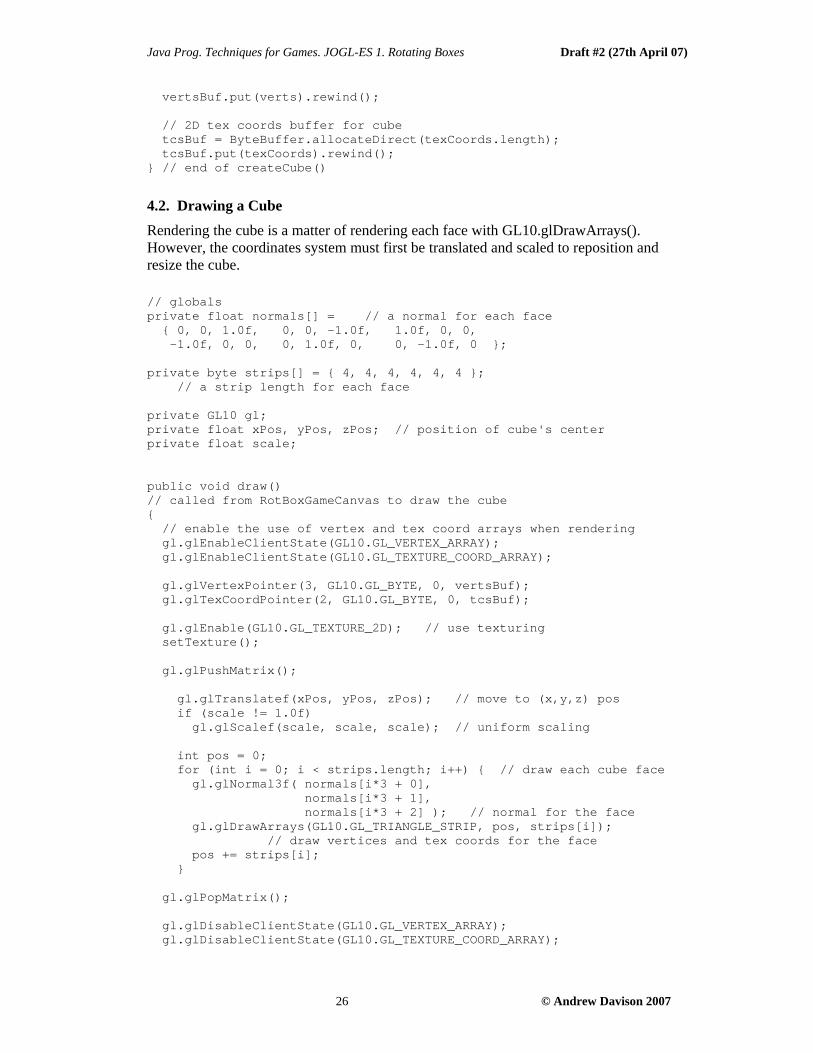
4.2. Drawing a Cube
Rendering the cube is a matter of rendering each face with GL10.glDrawArrays(). However, the coordinates system must first be translated and scaled to reposition and resize the cube. // globals private float normals[] = // a normal for each face { 0, 0, 1.0f, 0, 0, -1.0f, 1.0f, 0, 0, -1.0f, 0, 0, 0, 1.0f, 0, 0, -1.0f, 0 }; private byte strips[] = { 4, 4, 4, 4, 4, 4 }; // a strip length for each face private GL10 gl; private float xPos, yPos, zPos; // position of cube's center private float scale; public void draw() // called from RotBoxGameCanvas to draw the cube { // enable the use of vertex and tex coord arrays when rendering gl.glEnableClientState(GL10.GL_VERTEX_ARRAY); gl.glEnableClientState(GL10.GL_TEXTURE_COORD_ARRAY); gl.glVertexPointer(3, GL10.GL_BYTE, 0, vertsBuf); gl.glTexCoordPointer(2, GL10.GL_BYTE, 0, tcsBuf); gl.glEnable(GL10.GL_TEXTURE_2D); // use texturing setTexture(); gl.glPushMatrix(); gl.glTranslatef(xPos, yPos, zPos); // move to (x,y,z) pos if (scale != 1.0f) gl.glScalef(scale, scale, scale); // uniform scaling int pos = 0; for (int i = 0; i < strips.length; i++) { // draw each cube face gl.glNormal3f( normals[i*3 + 0], normals[i*3 + 1], normals[i*3 + 2] ); // normal for the face gl.glDrawArrays(GL10.GL_TRIANGLE_STRIP, pos, strips[i]); // draw vertices and tex coords for the face pos += strips[i]; } gl.glPopMatrix(); gl.glDisableClientState(GL10.GL_VERTEX_ARRAY); gl.glDisableClientState(GL10.GL_TEXTURE_COORD_ARRAY);
Java Prog. Techniques for Games. JOGL-ES 1. Rotating Boxes Draft #2 (27th April 07)
27 © Andrew Davison 2007
gl.glDisable(GL10.GL_TEXTURE_2D); } // end of draw()
The GL10.glPushMatrix() and GL10.glPopMatrix() pair ensure that the translation and scaling of the cube won’t affect any subsequent rendering of other shapes.
The for-loop calls GL10.glDrawArrays() for each face, and supplies it with the length of each face’s triangle strip from strips[].
A face’s normal come from normals[], which employs the same face ordering as the vertices and texture coordinates data (i.e., front, back, right, left, top, and bottom). For example, the first triplet in normals[] is (0, 0, 1) for the front face, which is a vector pointing along the z-axis.
setTexture() is the same method as in Floor: it binds the cube’s texture name to the OpenGL state, and links the texture buffer to that name.
5. The Camera
Most OpenGL programs use the gluLookAt() function from the GLU library to position the camera. However, that library’s absence from OpenGL ES forces me to implement camera navigation myself.
My Camera class offers several translation and rotation methods that move the camera forward, backward, left, right, up, and down, and rotate it around the x- and y- axes. There’s a “glide forward” operation that moves the camera forward or backward without any change in it’s y-axis position, which is useful when the camera is pointing up or down. The Camera.reset() method returns the camera to its starting position and orientation.
Rotation around the z-axis isn’t supported since it complicates the implementation.
Faced with a somewhat tricky coding exercise, I deployed my “reuse existing code” strategy again. My Camera class is based on an OpenGL example coded in C++ by Philipp Crocoll (at http://www.codecolony.de/opengl.htm#camera). His website also includes a more advanced camera example which can rotate around all three axes.
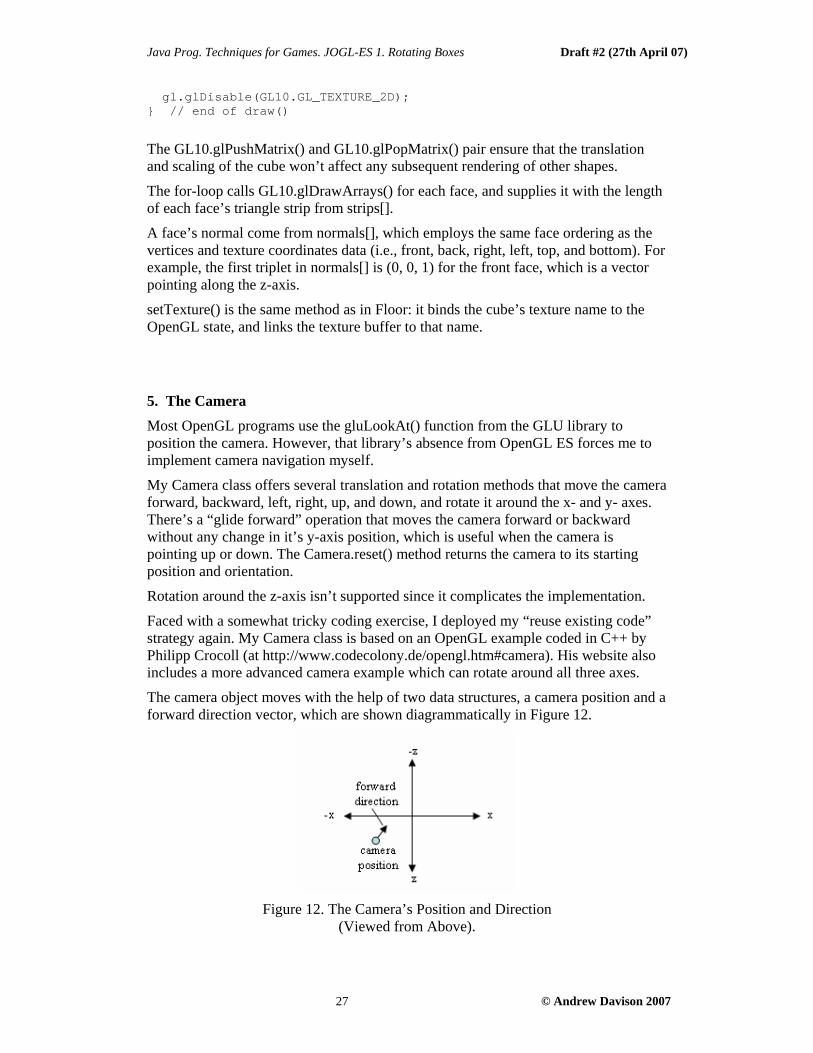
The camera object moves with the help of two data structures, a camera position and a forward direction vector, which are shown diagrammatically in Figure 12.
Figure 12. The Camera’s Position and Direction
(Viewed from Above).

Java Prog. Techniques for Games. JOGL-ES 1. Rotating Boxes Draft #2 (27th April 07)
28 © Andrew Davison 2007
When the user rotates the camera, its forward direction is affected (i.e. the arrow in Figure 12 moves left or right, up or down). When the camera is translated, it uses the forward direction to calculate its step forward, back, left, or right.
The starting position is passed to the Camera object when it’s created. // globals private GL10 gl; private double xStart, yStart, zStart; // starting position public Camera(GL10 gl, double x, double y, double z) { this.gl = gl; xStart = x; yStart = y; zStart = z; reset(); } // end of Camera()
reset() initializes the camera position and forward direction, placing the camera at the starting position, and aiming it along the negative z-axis. // globals private double xCamPos, yCamPos, zCamPos; // camera position private double xFwdDir, yFwdDir, zFwdDir; // forward direction private double rotX, rotY; // rotation in degrees around x- and y- axes public void reset() { xCamPos = xStart; yCamPos = yStart; zCamPos = zStart; xFwdDir = 0; yFwdDir = 0; zFwdDir = -1.0; // forward direction is along -z-axis rotX = 0; // no rotations initially rotY = 0; } // end of reset()
The position and direction are stored as their component x-, y-, and z- axis values. The current rotations of the camera around the x- and y- axes are held in the rotX and rotY variables.
5.1. Rotating the Camera
rotateX() and rotateY() modify the rotX and rotY variables: public void rotateX(double angle) { rotX = (rotX + angle) % 360; updateFwdDir(); // since the rotation has changed } // end of rotateX() public void rotateY(double angle) { rotY = (rotY + angle) % 360; updateFwdDir(); // since the rotation has changed

Java Prog. Techniques for Games. JOGL-ES 1. Rotating Boxes Draft #2 (27th April 07)
29 © Andrew Davison 2007
} // end of rotateY()
When a rotation changes, the forward direction vector needs to be recalculated by updateFwdDir(): private void updateFwdDir() { /* Calculate x- and z- direction components when fwd dir is rotated around the y-axis. The angle is measured from the + x-axis. */ double yRotRad = Math.toRadians(rotY + 90); double xDir = Math.cos(yRotRad); double zDir = -Math.sin(yRotRad); /* Calculate XZ plane component when fwd dir is rotated around the x-axis */ double xRotRad = Math.toRadians(rotX); double xzProj = Math.cos(xRotRad); // combine the components to get the forward direction xFwdDir = xDir * xzProj; yFwdDir = Math.sin(xRotRad); zFwdDir = zDir * xzProj; } // end of updateFwdDir()
The forward direction is a unit vector rotated around the x- and y- axes. The task of updateFwdDir() is to convert the two rotation angles (in rotY and rotX) into (x, y, z) values for xFwdDir, yFwdDir, and zFwdDir.
The conversion is done in two steps. First the y-axis rotation around the XZ plane is translated into x- and z- components, as shown in Figure 13.
Figure 13. Converting the y-axis Rotation
(Viewed from Above).
The angle is assumed to be relative to the positive x-axis, so 90 degrees must be added to the rotY value which records the angle relative to the negative z-axis.
Java Prog. Techniques for Games. JOGL-ES 1. Rotating Boxes Draft #2 (27th April 07)
30 © Andrew Davison 2007
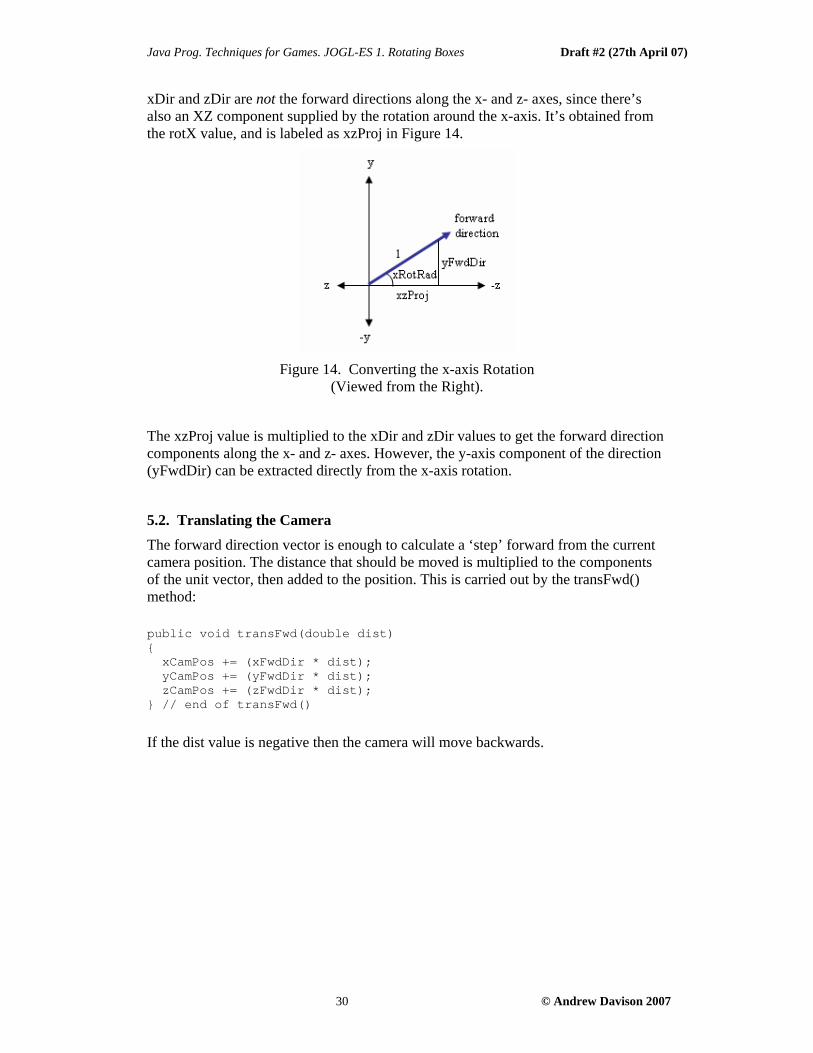
xDir and zDir are not the forward directions along the x- and z- axes, since there’s also an XZ component supplied by the rotation around the x-axis. It’s obtained from the rotX value, and is labeled as xzProj in Figure 14.
Figure 14. Converting the x-axis Rotation
(Viewed from the Right).
The xzProj value is multiplied to the xDir and zDir values to get the forward direction components along the x- and z- axes. However, the y-axis component of the direction (yFwdDir) can be extracted directly from the x-axis rotation.
5.2. Translating the Camera
The forward direction vector is enough to calculate a ‘step’ forward from the current camera position. The distance that should be moved is multiplied to the components of the unit vector, then added to the position. This is carried out by the transFwd() method: public void transFwd(double dist) { xCamPos += (xFwdDir * dist); yCamPos += (yFwdDir * dist); zCamPos += (zFwdDir * dist); } // end of transFwd()
If the dist value is negative then the camera will move backwards.

Java Prog. Techniques for Games. JOGL-ES 1. Rotating Boxes Draft #2 (27th April 07)
31 © Andrew Davison 2007
The forward direction vector can also be used to move the camera right and left. Figure 15 shows how the x- and z- components of the forward vector can be converted into a translation to the right.
Figure 15. Moving to the Right
(Viewed from Above).
This is implemented by the glideRight() method: public void glideRight(double dist) // move right in the x- and z- dirs, without any y-axis move { xCamPos += (-zFwdDir * dist); // no change to yCamPos zCamPos += (xFwdDir * dist); } // end of glideRight()
The distance to move is supplied by the dist value.
glideRight() doesn’t include a change to the y-axis component of the camera, which would be: yCamPos += (yFwdDir * dist);
This line is missing since it seems more natural for a translation to the right not to affect the camera’s height.
A movement to the left is possible by supplying a negative dist value to glideRight().
There’s also a ‘glide forward’ method, which moves the camera forward without adjusting its height, and an up/down translator: public void glideFwd(double dist) // move forward in the x- and z- dirs, without any y-axis move { xCamPos += (xFwdDir * dist); // no change to yCamPos zCamPos += (zFwdDir * dist); } // end of glideFwd() public void moveUp(double dist)
Java Prog. Techniques for Games. JOGL-ES 1. Rotating Boxes Draft #2 (27th April 07)
32 © Andrew Davison 2007
{ yCamPos += dist; }
5.3. Positioning the Camera
The rotation and translation methods given above change the values stored in rotX, rotY, xCamPos, yCamPos, and zCamPos. The camera position is only updated on screen when Camera.position() is called from the animation loop in RotBoxGameCanvas. The position() method: public void position() { gl.glRotatef((float)-rotX, 1.0f, 0, 0); // x-axis rotation gl.glRotatef((float)-rotY, 0, 1.0f, 0); // y-axis rotation gl.glTranslatef((float)-xCamPos, (float)-yCamPos, (float)-zCamPos); } // end of position()
As mentioned earlier, OpenGL ES (and OpenGL) doesn’t support a moveable camera. The scene is moved instead, in the opposite direction from the rotation and translation values for the camera.
6. Using Keypresses to Move the Camera
It’s useful to separate the camera’s user interface from the processing required to translate and rotate the camera. The processing is located in the Camera class, while the user interface is managed by KeyCamera.
KeyCamera reads the current state of the device’s keys and converts them into calls to Camera’s translation and rotation methods. This decoupling makes it easier to change the keys-to-method-calls mapping in KeyCamera without affecting Camera. Also, the low-level details of maintaining the camera’s position and forward direction are hidden inside Camera.
The most obvious user interface design is to use the device’s arrow keys to drive the camera. However, the large number of possible translations and rotations means that the user interface must be moded.
The camera utilizes three modes: translation, rotation, and floating/gliding. The arrow keys have different effects on the camera depending on the current mode.
The modes can be cycled through by pressing the game-A key. Also, the fire key causes the camera to be reset to its starting position and orientation.
6.1. Creating the Camera
The KeyCamera class constructor creates a Camera instance, and places it at a predetermined starting position along the z-axis. // globals // initial camera position private static final double X_POS = 0.0;
Java Prog. Techniques for Games. JOGL-ES 1. Rotating Boxes Draft #2 (27th April 07)
33 © Andrew Davison 2007
private static final double Y_POS = 1.5; private static final double Z_POS = 5.0; private Camera camera; public KeyCamera(GL10 gl) { camera = new Camera(gl, X_POS, Y_POS, Z_POS); }
6.2. Updating the Camera KeyCamera.update() is called at the start of each iteration of the animation loop inside RotBoxGameCanvas, and is passed the current keys state. public void update(int keysState) { readKeys(keysState); updateCamera(); }
readKeys() examines the keys state, and sets various booleans to true if the keys are being pressed. // globals for the keys private boolean upKey, downKey, leftKey, rightKey, fireKey, gameAKey; private void readKeys(int keysState) { // reset key booleans upKey = false; downKey = false; leftKey = false; rightKey = false; fireKey = false; gameAKey = false; // record key presses as booleans if ((keysState & GameCanvas.LEFT_PRESSED) != 0) leftKey = true; if ((keysState & GameCanvas.RIGHT_PRESSED) != 0) rightKey = true; if ((keysState & GameCanvas.UP_PRESSED) != 0) upKey = true; if ((keysState & GameCanvas.DOWN_PRESSED) != 0) downKey = true; if ((keysState & GameCanvas.FIRE_PRESSED) != 0) fireKey = true; if ((keysState & GameCanvas.GAME_A_PRESSED) != 0) gameAKey = true; } // end of readKeys()
updateCamera() examines the key booleans to decide which translation or rotation methods to call in the camera object. // globals // key modes private static final int TRANSLATE = 0; private static final int ROTATE = 1; private static final int FLOAT_GLIDE = 2;
Java Prog. Techniques for Games. JOGL-ES 1. Rotating Boxes Draft #2 (27th April 07)
34 © Andrew Davison 2007
private static final int NUM_MODES = 3; // number of key modes // translation and rotation increments private static final double MOVE_INCR = 0.1; private static final double ANGLE_INCR = 5.0; // in degrees private int keyMode; private void updateCamera() /* The three modes (TRANSLATE, ROTATE, and FLOAT_GLIDE) cause the key presses to be interpreted differently. */ { // cycle the key mode if (gameAKey) keyMode = (keyMode+1) % NUM_MODES; // reset the camera position/orientation if (fireKey) camera.reset(); if (keyMode == TRANSLATE) { if (upKey) camera.transFwd(MOVE_INCR); // translate forward if (downKey) camera.transFwd(-MOVE_INCR); // translate backward if (leftKey) camera.glideRight(-MOVE_INCR); //move left parallel to XZ plane if (rightKey) camera.glideRight(MOVE_INCR); //move right parallel to XZ plane } else if (keyMode == ROTATE) { if (upKey) camera.rotateX(ANGLE_INCR); // rotate camera up around x-axis if (downKey) camera.rotateX(-ANGLE_INCR); // rotate camera down if (leftKey) camera.rotateY(ANGLE_INCR); // rotate camera left around y-axis if (rightKey) camera.rotateY(-ANGLE_INCR); // rotate camera right } else if (keyMode == FLOAT_GLIDE) { if (upKey) camera.moveUp(MOVE_INCR); // move camera up if (downKey) camera.moveUp(-MOVE_INCR); // move camera down if (leftKey) camera.glideFwd(MOVE_INCR); // move fwd parallel to XZ plane if (rightKey) camera.glideFwd(-MOVE_INCR); // move back parallel to XZ plane } else // should not happen System.out.println("Unknown key mode"); } // end of updateCamera()
updateCamera() starts by updating the keyMode variable, which can cycle through three values, TRANSLATE, ROTATE, and FLOAT_GLIDE. After a possible camera

Java Prog. Techniques for Games. JOGL-ES 1. Rotating Boxes Draft #2 (27th April 07)
35 © Andrew Davison 2007
reset, the rest of updateCamera() is a set of if-tests that processes the arrow keys differently depending on the mode.
readKeys() and updateCamera() illustrate a convenient separation of tasks – readKeys() handles the examination of the keysState integer, storing relevant information as easily accessible boolean values. This makes the mapping from key presses to camera operations in updateCamera() easier to understand and modify.
6.3. Positioning the Camera
The keypresses update the camera’s state, but it’s new position is only rendered when RotBoxGameCanvas calls KeyCamera.position(). KeyCamera passes the call onto the Camera object. public void position() { camera.position(); }
6.4. A Repeating Key Bug?
GameCanvas.getKeyStates() in WTK 2.5 on Windows appears to have a problem when a key is held down for a while. A key’s state bit is sometimes never cleared after the key is released, which causes the keypress to be acted upon forever. The result is a camera that keep moving or rotating even when no keys are being pressed.
The problem doesn’t occur consistently, and wasn’t present in earlier versions of the WTK.