Embed Size (px)
Citation preview

Jill R. Sommer
Sommer Translation & Net Services
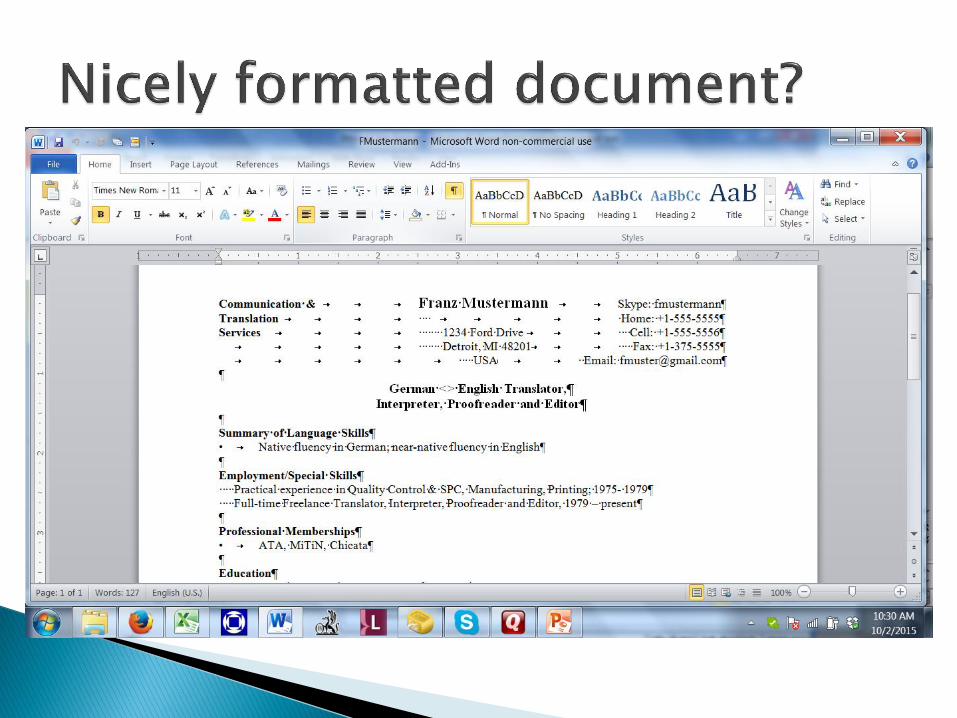
If you've worked with Word much at all, you know how frustrating it can be getting formatting just the way you want it.
Too many translators use spaces and multiple tabs to “format” their documents.
Just because it looks good on your end does not mean it looks good on the client/end client end.
Clients appreciate cleanly formatted documents because they do not have to tinker with them.


ABBYY FineReader (https://finereaderonline.com/en-us or http://www.abbyy.com/finereader/)
ABBYY PDF Transformer (http://www.abbyy.com/pdf-transformer/)
OmniPage (http://www.nuance.com/for-individuals/by-product/omnipage/index.htm)
http://www.onlineocr.net/ http://www.free-online-ocr.com/ OCR Convert (http://www.ocrconvert.com/)

Hidden Characters Paste Special Tabs/Ruler Table Alignment Font (expansion) Page breaks Format Painter Headers/Footers Page numbers Text boxes Symbols Shapes

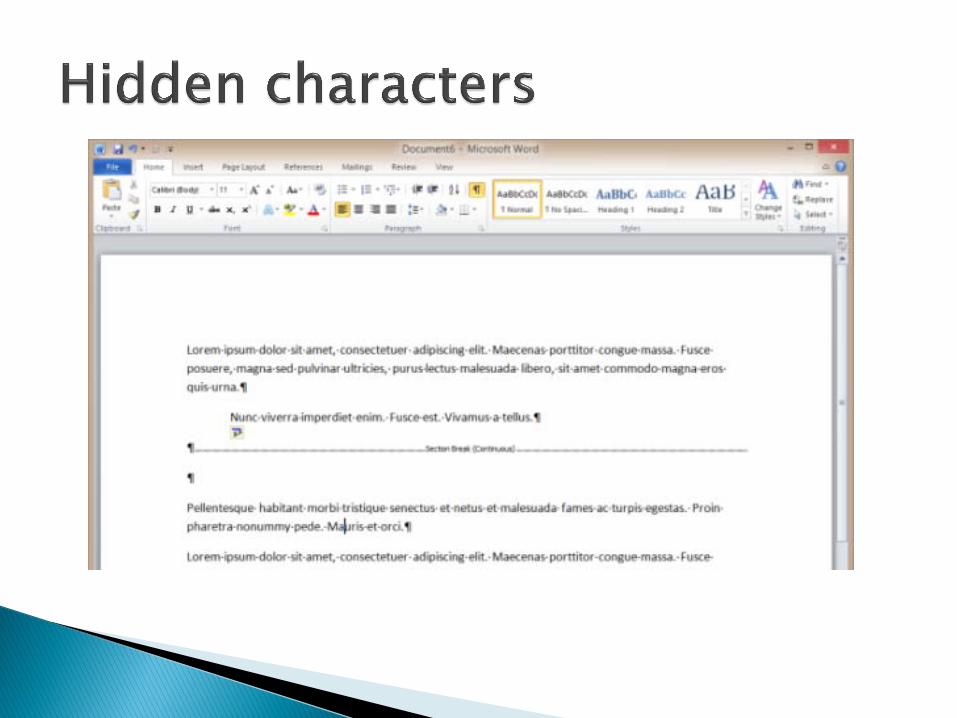
On the Home toolbar, click the Show/Hide button (it looks like a paragraph mark: ¶) to turn on Word's hidden characters.
In Word, every non-navigational key you press inserts a character in the document.
Tabs, returns, spaces, and paragraph marks are all just characters in Word (even though they contain some extra information) and Word treats them like characters.

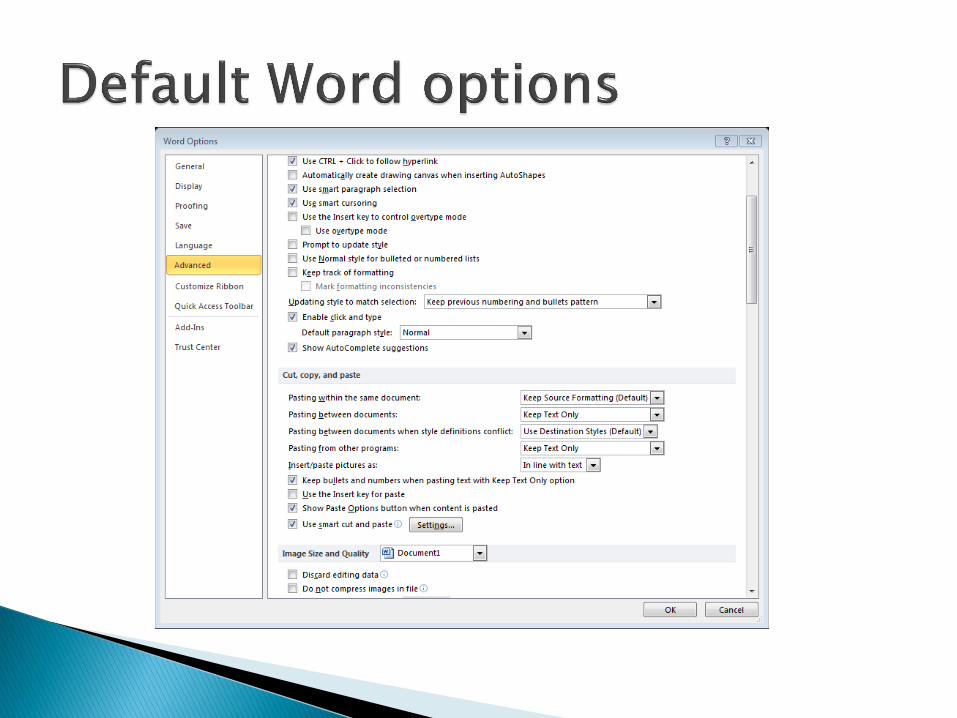
You can also control exactly what hidden characters are revealed by going to File > Options > Display and selecting items in the Always show these formatting marks on the screen section.
This ensures you don’t accidentally delete a formatting and explains why you might have problems if you do.
Paste Special is a feature gives you more control of how the content is displayed or functions when pasted from the clipboard.
For example, text copied from a Web page often retains much or all of the HTML formatting, which may not match the colors, fonts, or other text formatting being used in the document. By using Paste Special, you can choose to paste unformatted text (doesn't have a different font, isn't bold, doesn't contain links, etc.).

From the File menu, click Edit and then choose Paste special or Paste text to open a dialog box similar to the above example. If you want to paste text that is not formatted, click Unformatted text or Plain text.

In new versions of Microsoft Office when pasting text a paste box will appear in the bottom corner of the pasted text, as shown in the picture.

Tabs and indentations can give shape to your Microsoft Office document, making it more readable and accessible.
Click View -> Ruler to show the Ruler.
Indentations are settings applied to the entire document or certain sections.
Tabs are set by each occurrence.
Both create breaks in otherwise large bulks of text.

Both tabs and indentations are controlled on the Ruler.

To fine-tune tabs you set, just click on the tab mark on the ruler. Be careful to click it exactly, however, so the program doesn't think you are trying to set a new tab nearby.


The ruler can be used to indent the first line of a paragraph or all lines but the first line.
Hanging indent is the typographical term for a paragraph in which the first line is not indented, but subsequent lines in the paragraph are. Typically, hanging indents are used for numbered and bulleted lists.
Choose Paragraph from the Home menu. In the Special drop-down list, choose Hanging and adjust the By field as needed. Click OK.

You can also create a hanging indent manually by:
Clicking on the View tab and checking the Ruler box on the Show section of the Ribbon.
Once the ruler is displayed, click and drag the bottom of the indent slider over to .5"
If it's not already there, click and drag the top portion of the indent slider back to the left margin marker.

Use the ruler to quickly create a first line indent so the first line of a paragraph is indented more than the other lines.
Click Home and then, in the Paragraph group, click the dialog box launcher to open the Paragraph dialog box. On the Indents and Spacing tab, under Indentation, select First line.

You can adjust the tabs using left tabs, center tabs and right tabs
Or line up columns to meet as needed
But it’s easier to use a table for this.
Tables are used when you have several columns and don’t want to use tabs.
Insert a table by clicking Insert -> Table.
Choose the number of columns and rows you need.
Add a new row by hitting the tab key.
To merge cells highlight multiple rows or columns and right-click.
Insert or delete columns and rows or split cells or columns as needed by right-clicking.

Right click to fine-tune the table, such as removing the borders or adjusting the cell alignment.

Alignment allows you to control how the text is shown.
Flush left alignment means that text is lined up along the left margin.
Flush right alignment lines up text along the right margin.
Centered alignment means that text is aligned around a midpoint.
Justified alignment means that text lines up along both margins. (use sparingly!!!)


In German medical reports or government documents sometimes last names are spelled like “S C H M I D T”
Instead of adding a space to spread it out like the source text, I open the Font dialog by clicking on the little arrow in the right corner
I then click on the Advanced tab and select Spacing -> Expanded.


Highlight text and press
Shift + F3 to change case of letters (title case, upper case and lower case)
Ctrl+Shift+> to increase font size
Ctrl+Shift+< to decrease font size
Ctrl+Shift+F to change font and size

Click where you want to start a new page.
hit Ctrl+Enter or on the Insert tab, in the Pages group, click Page Break.

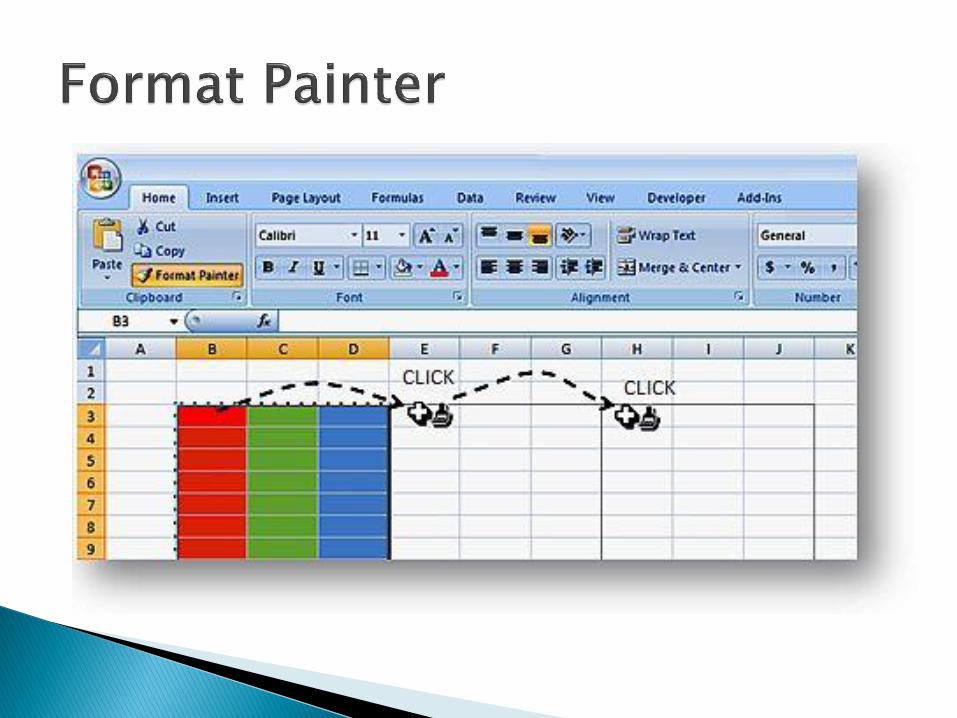
Use Format Painter to quickly copy formatting from one selection of text or graphics in a document to another.
Select the text or graphic that has the formatting that you want to copy.
On the Home tab, click Format Painter.
Once the cursor changes to a paintbrush, select the text or graphic that you want to format.

Headers and footers are areas in the top, bottom, and side margins of each page in a document.
Use when text repeats at top or bottom of page (page numbers, file names, Bates numbers, etc.)
On the Insert tab, in the Header & Footer group, click Header or Footer.
Insert text you want and click Save.


There are lots of different options: - Make header or footer different for odd and even pages - Make first page different from the rest of the pages - Use no header or footer on the first page - Make header or footer different in each section or chapter.
The information on how to do this is out there. Simply Google it.

Word can automatically label each page with a page number and place it in a header, footer, or side margin. When you need to number some pages differently, Word allows you to restart page numbering.
Double-click anywhere on the header or footer to unlock it (or on top or bottom of page).
Place cursor where you want the page number and click Page Number.


Try to use text boxes sparingly.
A text box is an object that you can add to your document to emphasize or set off text.
On the Insert tab, in the Text group, click Text Box.


Click in your document window and drag to set the dimensions of the box. When you release the mouse button, the text box appears.
Click inside the box to type text, or you can paste text into the box that you copy from another location.
You can move the text box by dragging it where you want to position it.

You can use the Symbol dialog box to insert symbols, such as ¼ and ©, or special characters, such as an em dash (—) or ellipsis (…) that are not on your keyboard, as well as Unicode characters.
The types of symbols and characters that you can insert depend on the font that you choose.
The Wingdings font allow you to add decorative symbols.


To insert, click where you want to insert the symbol.
On the Insert tab, in the Symbols group, click Symbol.
Do one of the following: ◦ Click the symbol that you want in the drop-down list. ◦ If the symbol that you want to insert is not in the list, click
More Symbols. In the Font box, click the font that you want, click the symbol that you want to insert, and then click Insert.
◦ Note If you are using an expanded font, such as Arial or Times New Roman, the Subset list appears. Use this list to choose from an extended list of language characters, including Greek and Russian (Cyrillic), if available.
Click Close.


To insert a special character, click where you want to insert the special character.
On the Insert tab, in the Symbols group, click Symbol, and then click More Symbols.
Click the Special Characters tab.
Click the character that you want to insert, and then click Insert.
Click Close.

You can add shapes, such as boxes, circles, and arrows, to your documents, email messages, slide shows, and spreadsheets. To add a shape, click Insert, click Shapes, select a shape, and then click and drag to draw the shape.
After you add one or more shapes, you can add text, bullets, numbering, and Quick Styles to them.

You can find this PowerPoint presentation at: www.jill-sommer.com/ beyondthebasics.pdf