Embed Size (px)
Citation preview
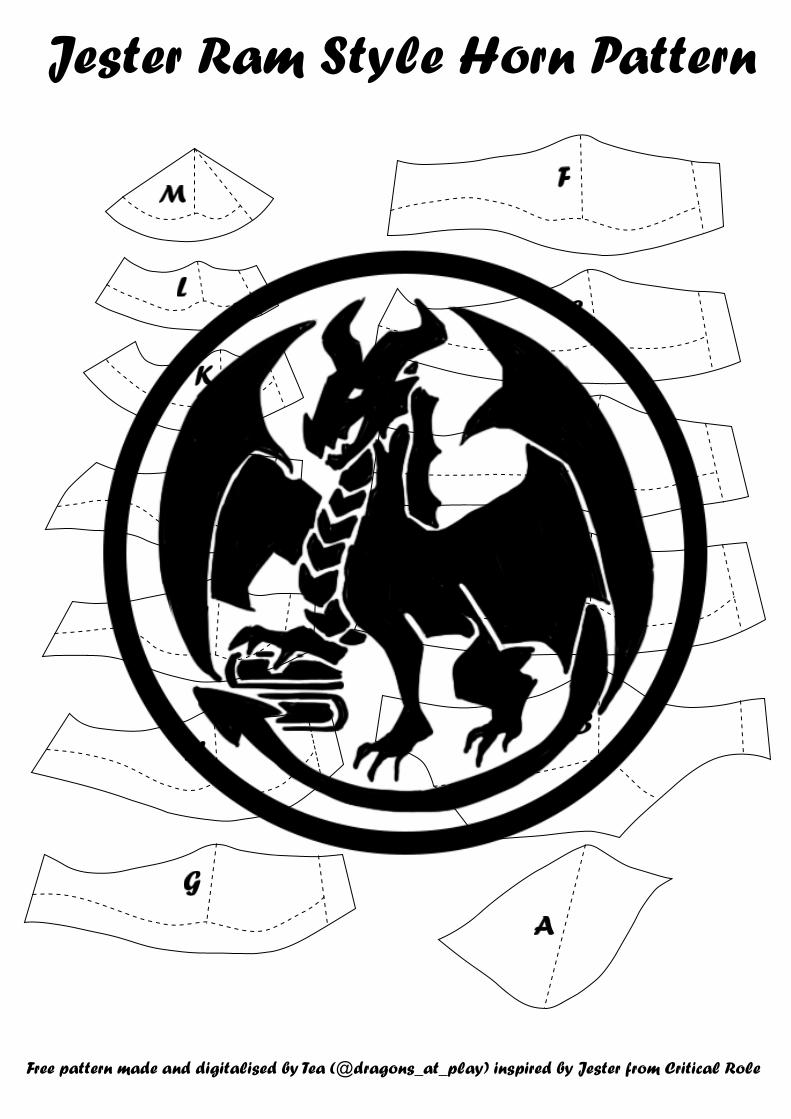
Jester Ram Style Horn Pattern
Free pattern made and digitalised by Tea (@dragons_at_play) inspired by Jester from Critical Role

This pattern will make 9x8x4cm horns feel free to scale up accordingly!
For this project I used 2mm high density foam and foam clay (this could be substituted for Worbla or Papier Mache).
First cut out the pattern pieces around the solid line and lay them out on your foam, mark them out, label them and cut them out. (Figure 1)
Next, cut to the dotted line of each pattern piece but leaving the central line intact. Then trace them back onto their cut-out pieces, cut a zig-zag line up from the bottom line to the new line (Figure 2). Trace the central dotted line onto your foam pieces as well as they line up to form the curve, this will help you know where to glue each piece together accurately.
Before you glue them together, I would recommend heating them and curling them in on themselves as it will help them hold their shape when gluing them together.
With all the pieces cut-out and heat shaped begin gluing them together starting from M and working down to A, at this stage it should really being to take shape. (Figure 3)
Once that is complete carefully heat the horn and gently shape the horn further.
It can be left here but I chose to then cover the horn in thin layer of foam clay to hide the seams and accentuate the point and each ridge of the horn. (Figure 4)
Finally, seal or paint or varnish your finished horns!
I would love to see your horns so please tag me! (@dragons_at_play on Instagram)
Please don’t hesitate to message me as well if you have any questions or want to have a chat!
Free pattern made and digitalised by Tea (@dragons_at_play) inspired by Jester from Critical Role
Jester Ram Style Horn PatternInstructions:
Figure 1 Figure 2 Figure 3 Figure 4