Embed Size (px)
Citation preview

JBoss EAP 6 Clustering
JBoss Enterprise Application Platform 6.1High Availability, configuration and best practices
Babak Mozaffari
Member of Technical Staff
Systems Engineering
Version 1.1
November 2013

100 East Davie StreetRaleigh, NC 27601 USAPhone: +1 919 754 3700Phone: 888 733 4281Fax: +1 919 754 3701PO Box 13588Research Triangle Park NC 27709 USA
JBoss, Hibernate, Infinispan and HornetQ are registered trademarks of Red Hat, Inc. in the United States and other countries.
Linux is a registered trademark of Linus Torvalds. JBoss, Red Hat, Red Hat Enterprise Linux and the Red Hat "Shadowman" logo are registered trademarks of Red Hat, Inc. in the United States and other countries.
Microsoft and Windows are U.S. registered trademarks of Microsoft Corporation.
All other trademarks referenced herein are the property of their respective owners.
© 2013 by Red Hat, Inc. This material may be distributed only subject to the terms and conditions set forth in the Open Publication License, V1.0 or later (the latest version is presently available at http://www.opencontent.org/openpub/).
The information contained herein is subject to change without notice. Red Hat, Inc. shall not be liable for technical or editorial errors or omissions contained herein.
Distribution of modified versions of this document is prohibited without the explicit permission of Red Hat Inc.
Distribution of this work or derivative of this work in any standard (paper) book form for commercial purposes is prohibited unless prior permission is obtained from Red Hat Inc.
The GPG fingerprint of the [email protected] key is:CA 20 86 86 2B D6 9D FC 65 F6 EC C4 21 91 80 CD DB 42 A6 0E
www.redhat.com ii [email protected]

Comments and FeedbackIn the spirit of open source, we invite anyone to provide feedback and comments on any reference architectures. Although we review our papers internally, sometimes issues or typographical errors are encountered. Feedback allows us to not only improve the quality of the papers we produce, but allows the reader to provide their thoughts on potential improvements and topic expansion to the papers.
Feedback on the papers can be provided by emailing [email protected]. Please refer to the title within the email.
Staying In TouchJoin us on some of the popular social media sites where we keep our audience informed on new reference architectures as well as offer related information on things we find interesting.
Like us on Facebook:
https://www.facebook.com/rhrefarch
Follow us on Twitter:
https://twitter.com/RedHatRefArch
Plus us on Google+:
https://plus.google.com/u/0/b/114152126783830728030/
[email protected] III www.redhat.com

Table of Contents1 Executive Summary......................................................................................... 1
2 JBoss Enterprise Application Platform 6........................................................... 2
2.1 Overview............................................................................................................................ 2
2.2 Clustering........................................................................................................................... 3
2.3 HTTP Sessions.................................................................................................................. 5
2.4 Stateless Session Beans................................................................................................... 8
2.5 Stateful Session Beans..................................................................................................... 9
2.6 Transaction Subsystem................................................................................................... 10
2.7 Java Persistence API (JPA)............................................................................................. 11
2.8 HornetQ Messaging......................................................................................................... 13
2.9 HTTP Connectors............................................................................................................ 17
2.9.1 mod_cluster............................................................................................................... 19
3 Reference Architecture Environment.............................................................. 20
3.1 Overview.......................................................................................................................... 20
3.2 JBoss EAP Apache HTTP Server................................................................................... 20
3.3 JBoss Enterprise Application Platform............................................................................ 21
3.4 PostgreSQL Database..................................................................................................... 22
4 Creating the Environment............................................................................... 24
4.1 Prerequisites.................................................................................................................... 24
4.2 Downloads....................................................................................................................... 24
4.3 Installation....................................................................................................................... 25
4.3.1 JBoss EAP Apache HTTP Server.............................................................................. 254.3.2 JBoss Enterprise Application Platform....................................................................... 25
4.4 Configuration................................................................................................................... 26
4.4.1 JBoss EAP Apache HTTP Server.............................................................................. 274.4.2 PostgreSQL Database............................................................................................... 284.4.3 JBoss Enterprise Application Platform....................................................................... 29
4.5 Review............................................................................................................................. 36
4.5.1 JBoss EAP Apache HTTP Server.............................................................................. 364.5.2 PostgreSQL Database............................................................................................... 404.5.3 JBoss Enterprise Application Platform....................................................................... 41
www.redhat.com iv [email protected]

5 Clustering Applications................................................................................... 70
5.1 Overview.......................................................................................................................... 70
5.2 HTTP Session Clustering................................................................................................ 71
5.3 Stateful Session Bean Clustering.................................................................................... 75
5.4 Distributed Messaging Queues....................................................................................... 81
5.5 Java Persistence API, second-level caching................................................................... 84
6 Configuration Scripts (CLI)............................................................................. 91
6.1 Overview.......................................................................................................................... 91
6.2 Java / CLI Framework..................................................................................................... 92
6.3 Domains......................................................................................................................... 111
6.4 Sample Servers............................................................................................................. 114
6.5 Profiles........................................................................................................................... 117
6.5.1 mod_cluster............................................................................................................. 1206.5.2 HornetQ Messaging................................................................................................. 121
6.6 Socket Bindings............................................................................................................. 127
6.7 Server Group Setup...................................................................................................... 129
6.8 Database Connectivity.................................................................................................. 131
6.9 Application Deployment................................................................................................. 133
6.10 Server Startup............................................................................................................. 134
7 Conclusion.................................................................................................... 135
Appendix A: Revision History......................................................................... 136
Appendix B: Contributors............................................................................... 137
Appendix C: IPTables configuration............................................................... 138
[email protected] v www.redhat.com

1 Executive SummaryEnsuring the availability of production services is critical in today's IT environment. A service that is unavailable for even an hour can be extremely costly to a business. In addition to the need for redundancy, large servers have become less and less cost-efficient in recent years.
Through its clustering feature, JBoss Enterprise Application Platform 6 (EAP) allows horizontal scaling by distributing the load between multiple physical and virtual machines and eliminating a single point of failure. Efficient and reliable group communication built on top of TCP or UDP enables replication of data held in volatile memory, thereby ensuring high availability, while minimizing any sacrifice in efficiency. Through its new domain configuration, EAP 6 mitigates governance challenges and promotes consistency among cluster nodes.
This reference architecture stands up two EAP 6 Clusters, each set up as a separate domain, one active and another passive, to eliminate any downtime due to maintenance and upgrades. Each cluster consists of three EAP instances running a custom profile based on the provided full-ha profile. Through in-memory data replication, each cluster makes the HTTP and EJB sessions available on all nodes. A second-level cache is set up for the JPA layer with the default option to invalidate cache entries as they are changed. The HornetQ JMS subsystem is configured to use in-memory message replication. An instance of Apache HTTP Server sits in front of the each cluster, balancing web load with sticky behavior while also ensuring transparent failover in case a node becomes unavailable.
The goal of this reference architecture is to provide a thorough description of the steps required for such a setup, while citing the rationale and explaining the alternatives at each decision juncture, when applicable. Within time and scope constraints, potential challenges are discussed, along with common solutions to each problem. JBoss EAP command line interface (CLI) scripts, configuration files and other attachments are provided to facilitate the reproduction of the environment and to help the reader validate their understanding, along with the solution.
[email protected] 1 www.redhat.com

2 JBoss Enterprise Application Platform 6
2.1 OverviewRed Hat JBoss Enterprise Application Platform 6 (EAP 6) is a fast, secure and powerful middleware platform built upon open standards and compliant with the Java Enterprise Edition 6 (Java EE) specification. It provides high-availability clustering, powerful messaging, distributed caching and other technologies to create a stable and scalable platform.
The new modular structure allows for services to be enabled only when required, significantly increasing start-up speed. The Management Console and Management Command Line Interface (CLI) remove the need to edit XML configuration files by hand, adding the ability to script and automate tasks. In addition, it includes APIs and development frameworks that can be used to develop secure, powerful, and scalable Java EE applications quickly.
www.redhat.com 2 [email protected]
2.2 ClusteringClustering refers to using multiple resources, such as servers, as though they were a single entity.
In its simplest form, horizontal scaling can be accomplished by using load balancing to distribute the load between two or more servers. Such an approach quickly becomes problematic when the server holds non-persistent and in-memory state. Such a state is typically associated with a client session. Sticky load balancing attempts to address these concerns by ensuring that client requests tied to the same session are always sent to the same server instance.
For web requests, sticky load balancing can be accomplished through either the use of a hardware load balancer, or a web server with a software load balancer component. This architecture covers the use of a web server with a specific load balancing software but the principles remain largely the same for other load balancing solutions, including those that are hardware based.
While this sticky behavior protects callers from loss of data due to load balancing, it does not address the potential failure of a node holding session data. Session replication provides a copy of the session data, in one or several other nodes of the cluster, so they can fully compensate for the failure of the original node.
Session replication, or any similar approach to provide redundancy, presents a tradeoff between performance and reliability. Replicating data through network communication or persisting it on the file system is a performance cost and keeping in-memory copies on other nodes is a memory cost. The alternative, however, is a single point of failure where the session is concerned.
JBoss EAP 6 supports clustering at several different levels and provides both load balancing and failover benefits. Some of the subsystems that can be made highly available include:
• Instances of the Application Server
• The Web Subsystem / Servlet Container
• Enterprise JavaBeans (EJB), including stateful, stateless, and entity beans
• Java Naming and Directory Interface (JNDI) services
• Single Sign On (SSO) Mechanisms
• Distributed cache
• HTTP sessions
• JMS services and message-driven beans (MDBs)
[email protected] 3 www.redhat.com

Ideally, a cluster of JBoss EAP 6 servers is viewed as a single EAP 6 instance and the redundancy and replication is transparent to the caller.
www.redhat.com 4 [email protected]
Figure 2.2.1: EAP 6 Cluster
2.3 HTTP SessionsAn HTTP session is implicitly or explicitly created for an HTTP client and it is maintained until such time that it is either explicitly invalidated, or naturally times out. The existence of an HTTP session makes a web application stateful and leads to the requirement of an intelligent clustering solution.
Once a JBoss EAP 6 cluster is configured and started, a web application simply needs to declare itself as distributable1 to take advantage of the EAP 6 session replication capabilities.
JBoss EAP 6 uses Infinispan to provide session replication. By default, EAP 6 is configured to use the replication mode for this purpose. A replicated cache is preconfigured and will replicate all session data across all nodes of the cluster asynchronously. This cache can be fine-tuned in various ways by configuring the predefined repl cache of the web cache container.
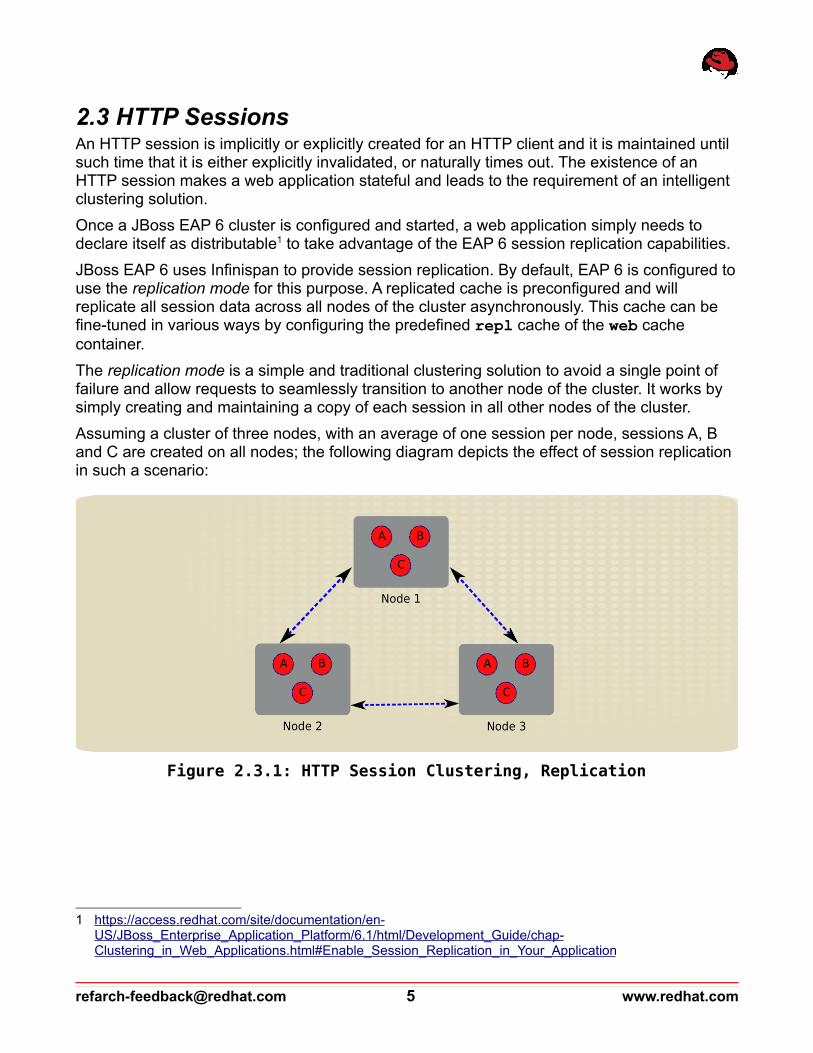
The replication mode is a simple and traditional clustering solution to avoid a single point of failure and allow requests to seamlessly transition to another node of the cluster. It works by simply creating and maintaining a copy of each session in all other nodes of the cluster.
Assuming a cluster of three nodes, with an average of one session per node, sessions A, B and C are created on all nodes; the following diagram depicts the effect of session replication in such a scenario:
1 https://access.redhat.com/site/documentation/en-US/JBoss_Enterprise_Application_Platform/6.1/html/Development_Guide/chap-Clustering_in_Web_Applications.html#Enable_Session_Replication_in_Your_Application
[email protected] 5 www.redhat.com
Figure 2.3.1: HTTP Session Clustering, Replication
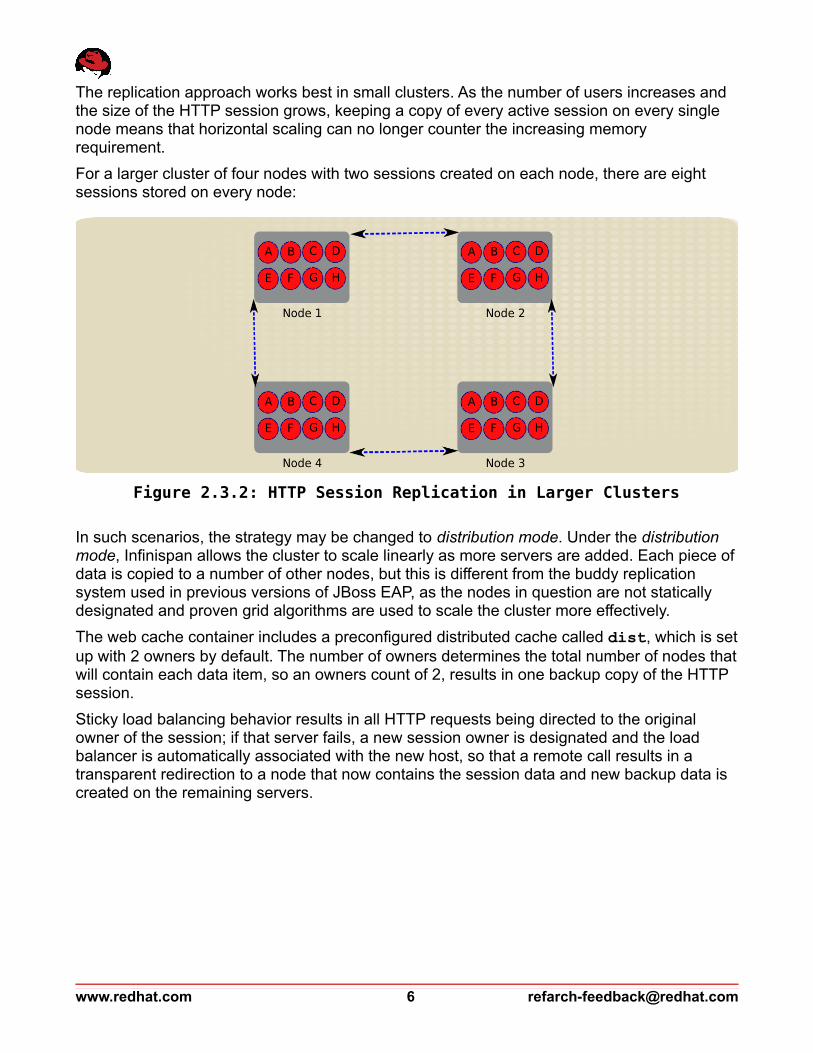
The replication approach works best in small clusters. As the number of users increases and the size of the HTTP session grows, keeping a copy of every active session on every single node means that horizontal scaling can no longer counter the increasing memory requirement.
For a larger cluster of four nodes with two sessions created on each node, there are eight sessions stored on every node:
In such scenarios, the strategy may be changed to distribution mode. Under the distribution mode, Infinispan allows the cluster to scale linearly as more servers are added. Each piece of data is copied to a number of other nodes, but this is different from the buddy replication system used in previous versions of JBoss EAP, as the nodes in question are not statically designated and proven grid algorithms are used to scale the cluster more effectively.
The web cache container includes a preconfigured distributed cache called dist, which is set up with 2 owners by default. The number of owners determines the total number of nodes that will contain each data item, so an owners count of 2, results in one backup copy of the HTTP session.
Sticky load balancing behavior results in all HTTP requests being directed to the original owner of the session; if that server fails, a new session owner is designated and the load balancer is automatically associated with the new host, so that a remote call results in a transparent redirection to a node that now contains the session data and new backup data is created on the remaining servers.
www.redhat.com 6 [email protected]
Figure 2.3.2: HTTP Session Replication in Larger Clusters

Reproducing the previous example of a larger cluster of four nodes, with two sessions created on each node, there would only be four sessions stored on every node with distribution:
Note: Refer to Red Hat's JBoss EAP 6 documentation for details on configuring the web clustering mode, including the number of copies in the distribution mode.2
Administrators can also specify a limit for the number of currently active HTTP sessions and result in the passivation of some sessions, to make room for new ones, when this limit is reached. Passivation and subsequent activation follows the Least Recently Used (LRU) algorithm. The maximum number of active sessions or the idle time before passivation occurs can be configured through CLI, as described in the EAP 6 documentation.3
2 https://access.redhat.com/site/documentation/en-US/JBoss_Enterprise_Application_Platform/6.1/html/Development_Guide/chap-Clustering_in_Web_Applications.html#Configure_the_Web_Session_Cache
3 https://access.redhat.com/site/documentation/en-US/JBoss_Enterprise_Application_Platform/6.1/html/Development_Guide/Configure_HttpSession_Passivation_in_Your_Application.html
[email protected] 7 www.redhat.com
Figure 2.3.3: HTTP Session Distribution in Larger Clusters

2.4 Stateless Session BeansBy definition, a stateless session bean avoids holding data on behalf of its client. This makes it easier to cluster stateless sessions beans, and removes any concern about data loss resulting from failure.
Contrary to stateful HTTP conversations and stateful session beans, the lack of state in a stateless bean means that sequential calls made by the same client through the same stub can be load balanced across available cluster nodes. This is in fact the default behavior of stateless session beans in JBoss EAP 6, when the client stub is aware of the cluster topology. Such awareness can either be achieved by designating the bean as clustered or through EJB client configuration that lists all server nodes.
The JNDI lookup of a stateless session bean returns an intelligent stub, which has knowledge of the cluster topology and can successfully load balance or fail over a request across the available cluster nodes. This cluster information is updated with each subsequent call so the stub has the latest available information about the active nodes of the cluster.
www.redhat.com 8 [email protected]

2.5 Stateful Session BeansWith a stateful session bean, the container dedicates an instance of the bean to each client stub. The sequence of calls made through the stub are treated as a conversation and the state of the bean is maintained on the server side, so that each call potentially affects the result of a subsequent call.
Once again, the stub of the stateful session bean, returned to a caller through a JNDI lookup, is an intelligent stub with knowledge of the cluster. However, this time the stub treats the conversation as a sticky session and routes all requests to the same cluster node, unless and until that node fails.
Much like HTTP session replication, JBoss EAP 6 uses an Infinispan cache to hold the state of the stateful session bean and enable failover in case the active node crashes. Once again, both a replicated and a distributed cache are preconfigured under the ejb cache container and again, the replicated cache is set up as the default option in EAP 6. The ejb cache container can be independently configured to use one of these caches or a new cache that is set up by an administrator.
[email protected] 9 www.redhat.com
2.6 Transaction SubsystemA TRANSACTION consists of two or more actions which must either all succeed or all fail. A successful outcome is a commit, and a failed outcome is a roll-back. In a roll-back, each member's state is reverted to its state before the transaction attempted to commit. The typical standard for a well-designed transaction is that it is Atomic, Consistent, Isolated, and Durable (ACID).4
Red Hat's JBoss EAP 6 defaults to using the Java Transaction API (JTA) to handle transactions. Java Transaction Service (JTS) is a mechanism for supporting JTA transactions when participants are distributed.
Whether it is JTS, distributed JTA, or even plain JTA used with shared resources or shared object stores, a cluster environment increases the risk of conflict between nodes and requires a proper naming convention for the transaction identifier that would identify the participating node. The node-identifier attribute of the transaction subsystem is provided for this purpose and should always be configured in a cluster so that each node has a unique identifier value. This attribute is then used as the basis of the unique transaction identifier.
Refer to the Red Hat documentation on configuring the transaction manager for further details5.
4 https://access.redhat.com/site/documentation/en-US/JBoss_Enterprise_Application_Platform/6-Beta/html/Development_Guide/sect-Transaction_Concepts.html
5 https://access.redhat.com/site/documentation/en-US/JBoss_Enterprise_Application_Platform/6.1/html/Administration_and_Configuration_Guide/chap-Transaction_Subsystem.html#Configure_the_Transaction_Manager1
www.redhat.com 10 [email protected]
2.7 Java Persistence API (JPA)The Java Persistence API (JPA) is the standard for using persistence in Java projects. Java EE 6 applications use the Java Persistence 2.0 specification. Hibernate EntityManager implements the programming interfaces and life-cycle rules defined by the specification. It provides JBoss EAP 6 with a complete Java persistence solution. JBoss EAP 6 is 100% compliant with the Java Persistence 2.0 specification. Hibernate also provides additional features to the specification.
When using JPA in a cluster, the state is typically stored in a central database or a cluster of databases, separate and independent of the JBoss EAP cluster. As such, requests may go through JPA beans on any node of the cluster and failure of an EAP instance does not affect the data, where JPA is concerned. For these purposes, JPA itself is considered stateless, since the state is outside and independent of the JPA subsystem.
First-level caching in JPA relates to the persistence context, and in JBoss EAP 6, the hibernate session. This cache is local and considering that it is short-lived and applies to individual requests, it does not change the stateless nature of JPA technology and introduces no risk in horizontal scaling and clustering of JPA.
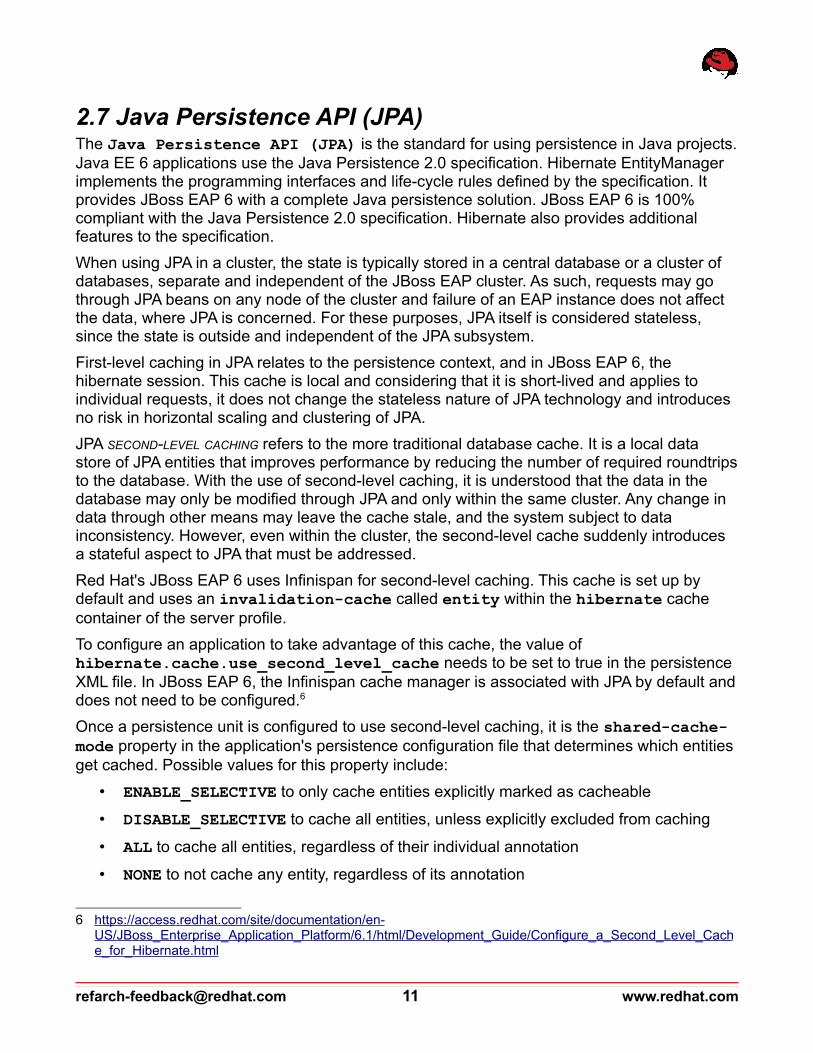
JPA SECOND-LEVEL CACHING refers to the more traditional database cache. It is a local data store of JPA entities that improves performance by reducing the number of required roundtrips to the database. With the use of second-level caching, it is understood that the data in the database may only be modified through JPA and only within the same cluster. Any change in data through other means may leave the cache stale, and the system subject to data inconsistency. However, even within the cluster, the second-level cache suddenly introduces a stateful aspect to JPA that must be addressed.
Red Hat's JBoss EAP 6 uses Infinispan for second-level caching. This cache is set up by default and uses an invalidation-cache called entity within the hibernate cache container of the server profile.
To configure an application to take advantage of this cache, the value of hibernate.cache.use_second_level_cache needs to be set to true in the persistence XML file. In JBoss EAP 6, the Infinispan cache manager is associated with JPA by default and does not need to be configured.6
Once a persistence unit is configured to use second-level caching, it is the shared-cache-mode property in the application's persistence configuration file that determines which entities get cached. Possible values for this property include:
• ENABLE_SELECTIVE to only cache entities explicitly marked as cacheable
• DISABLE_SELECTIVE to cache all entities, unless explicitly excluded from caching
• ALL to cache all entities, regardless of their individual annotation
• NONE to not cache any entity, regardless of its annotation
6 https://access.redhat.com/site/documentation/en-US/JBoss_Enterprise_Application_Platform/6.1/html/Development_Guide/Configure_a_Second_Level_Cache_for_Hibernate.html
[email protected] 11 www.redhat.com
Individual Entity classes may be marked with @Cacheable(true) or @Cacheable(false)to explicitly request caching or exclusion from caching.
The entity cache is an INVALIDATION CACHE, which means that entities are cached on each node only when they are loaded on that node. Once an entity is changed on one node, an invalidation message is broadcast to the cluster to invalidate and remove all cached instances of this entity on any node of the cluster. That results in the stale version of the entity being avoided on other nodes and an updated copy being loaded and cached on any node that requires it, at the time when it's needed.
www.redhat.com 12 [email protected]
Figure 2.7.1: JPA Second-Level Cache with Invalidation

2.8 HornetQ MessagingMessaging systems allow us to loosely couple heterogeneous systems together with added reliability. Java Messaging Service (JMS) providers use a system of transactions to commit or roll back changes atomically. Unlike systems based on a Remote Procedure Call (RPC) pattern, messaging systems primarily use an asynchronous message passing pattern, with no tight relationship between requests and responses. Most messaging systems also support a request-response mode, but this is not a primary feature of messaging systems.
HornetQ is a multi-protocol, asynchronous messaging system developed by Red Hat. HornetQ provides high availability (HA) with automatic client failover to guarantee message reliability in the event of a server failure. HornetQ also supports flexible clustering solutions with load-balanced messages.
HornetQ uses the concept of connectors and acceptors as a key part of the messaging system. ACCEPTORS and CONNECTORS determine the method of accepting incoming connections and making connections to the server (by other HornetQ servers or JMS clients), respectively. In other words, an ACCEPTOR determines the listen address of a HornetQ server. A CONNECTOR, on the other hand, is used to communicate with the HornetQ server and is therefore used by clients or other HornetQ servers. HornetQ servers use BROADCAST GROUPS to advertise their connector information to other HornetQ servers who are listening, as determined by their DISCOVERY GROUP. When a JMS client looks up a CONNECTIONFACTORY through JNDI and uses it to send messages to a HornetQ destination, the CONNECTIONFACTORY is making use of the connector.
Two types of acceptors and connectors exist:
• invm is a more efficient approach for connections within the same JVM
• netty enables connections to remote JVMs within or outside the physical machine.
Each configured connector is only successful in reaching a server if there is a matching acceptor configured on that server (same protocol and if netty is used, same host and port).
In the context of clustering, JMS messages themselves can be considered the state of a cluster node. Due to the asynchronous FIRE AND FORGET nature of JMS, messages often accumulate on servers and are gradually consumed within new transactions. These messages are often set up to be persistent, and are only removed from the data store once their transactions have successfully been committed. When an EAP instance fails, it could have a number of unprocessed JMS messages persisted in its store. A proper JMS server clustering solution would fail over these messages, so that they can be consumed on another node as soon as possible.
In a HornetQ cluster configured for high availability (HA), multiple HornetQ servers may be linked together as live - backup groups where each live server can have one or more backup servers. A backup server is owned by only one live server. Backup servers are not operational until failover occurs; however, one chosen backup, which will be in passive mode, announces its status and waits to take over the live server's work.
[email protected] 13 www.redhat.com

As of JBoss EAP 6.1, HornetQ supports two high availability modes:
1. Shared Store: HornetQ allows the use of a high-performance shared file system, where the live and backup servers in each backup group share the same entire data directory. This includes the paging directory, journal directory, large messages, and the binding journal. When failover occurs and a backup server takes over, it will load the persistent storage from the shared file system.
www.redhat.com 14 [email protected]
Figure 2.8.1: HornetQ HA: Shared Store

2. Message Replication: HornetQ now supports in-memory replication of the messages between a live server and a selected backup, when shared store is turned off. In this scenario, message replication is achieved via network traffic. All the journals are replicated between the two servers as long as the two servers are within the same cluster and have the same cluster username and password. Only persistent messages received by the live server get replicated to the backup server, so it is important to remember that persistence still needs to be enabled and non-persistent messages will not fail over.
As demonstrated in the figure above, when message replication is used, each HornetQ server uses a local store for its journal. The state of the live server is replicated to backup servers within the same backup group and as a result, the local store of the backup server contains journals with the same data and is ready to take over for the live server, when necessary.
The choice of high availability mode depends largely on the cluster environment. Message replication can result in some increased network traffic but a shared store requires a high-performance shared file system, and that is not always available. Regardless of the HA mode that is selected, failover always happens from a live server to a backup server, and that backup server is inactive prior to the failure. Such a backup server does not normally run active HornetQ components and therefore does not support all the functions of a regular HornetQ-enabled EAP instance, such as the deployment of a message-driven bean. However, a HornetQ server is not synonymous with an EAP server. An EAP instance may in fact be configured to include several HornetQ servers.
To support load balancing and failover for various components, including HornetQ, it is possible to configure additional HornetQ backup servers on the same EAP instances where a live server is running. When a shared store is used and the live server fails, the backup server using the same shared store picks up its duties. With shared store turned off, the journal is replicated so that a backup server can have a replicated journal to use if the live server fails. The backup-group-name configuration of HornetQ specifies which backup servers replicate
[email protected] 15 www.redhat.com
Figure 2.8.2: HornetQ HA: Message Replication
a given live server's journal. This makes it possible to configure backup servers to avoid pairing up with a live server that is co-located in the same EAP instance, so that a crash of the EAP instance does not result in data loss. It is important to remember that any consumers (most notably MDBs) would normally only be listening to destinations on the live servers, so when a backup server comes online, it will have no consumers. The redistribution feature of HornetQ can help us here, as it will notice the absence of consumers on a queue and redistribute its messages to other live server in the same cluster that have consumers. To enable this feature, redistribution-delay on the backup server must be set; its default value of -1 disables redistribution.
There are other HornetQ configuration constraints to take into account when setting up a cluster. Netty connectors and acceptors for each HornetQ servers must be assigned a unique port within the JVM, so it is advised to add socket binding definitions for this purpose. The in-vm acceptor and connector requires a server id that is also unique within a JVM. It is important to assign a backup-group-name to each backup server of an EAP instance, that is different from that of its live server; otherwise, the backup server is likely to act as the backup of its co-located HornetQ live server, with little to no benefit for redundancy purposes. This means that more than one EAP profile is required to alternate the backup-group-nameof the live server and co-located backup servers.
To summarize, a simple EAP 6 cluster to include failover and load balancing can consist of two nodes, configured to be part of the same EAP cluster, where each has one live and one backup HornetQ server. Each would have a different EAP profile, with node 1 having its live server belong to backup group 1 and its backup server belong to backup group 2, whereas node 2 would swap those values and have its live server be part of backup group 2 so that it would pair with the backup server of the first node. All live and backup servers would share the same cluster configuration and discovery and broadcast groups. Both profiles could use a port value of 5446 for the netty connector/acceptor of the backup server. In such a setup, the backup HornetQ server of node 1 would pair up with the live server of node 2 and keep its data in sync with it. In case node 2 fails, the backup server on node 1 would come online and contain all the unprocessed messages, but no consumer to process them. As such, redistribution would kick in and move those messages to the co-located live server on node 1, which would have an MDB deployed to consume those messages.
www.redhat.com 16 [email protected]
2.9 HTTP ConnectorsJBoss EAP 6 can take advantage of the load-balancing and high-availability mechanisms built into external web servers, such as Apache Web Server, Microsoft IIS, and Oracle iPlanet. JBoss EAP 6 communicates with an external web server using an HTTP Connector. These HTTP connectors are configured within the Web Subsystem of JBoss EAP 6. Web Servers include software modules which control the way HTTP requests are routed to JBoss EAP 6 worker nodes. Each of these modules works differently and has its own configuration method. Modules may be configured to balance work loads across multiple JBoss EAP 6 server nodes, move work loads to alternate servers in case of a failure event, or do both.
JBoss EAP 6 supports several different HTTP connectors. The one you choose depends on both the Web Server you connect to and the functionality you require.
The table below lists the differences between various available HTTP connectors, all compatible with JBoss EAP 6. For the most up-to-date information about supported configurations for HTTP connectors, refer to the Red Hat's Customer Support Portal7.
7 https://access.redhat.com/site/articles/111663
[email protected] 17 www.redhat.com

Connector Web Server SupportedOperating
System
SupportedProtocols
Adapts toDeployment Status
SupportsSticky
Session
mod_cluster JBoss Enterprise Web Server, Native HTTPD (Red Hat Enterprise Linux, Hewlett-Packard HP-UX)
Red Hat Enterprise Linux, Microsoft Windows Server, Oracle Solaris, Hewlett-Packard HP-UX
HTTPHTTPSAJP
Yes. Detects deployment and undeployment of applications and dynamically decides whether to direct client requests to a server based on whether the application is deployed on that server.
Yes
mod_jk JBoss Enterprise Web Server, Native HTTPD (Red Hat Enterprise Linux, Hewlett-Packard HP-UX)
Red Hat Enterprise Linux, Microsoft Windows Server, Oracle Solaris, Hewlett-Packard HP-UX
AJP No. Directs client requests to the container as long as the container is available, regardless of application status.
Yes
mod_proxy JBoss Enterprise Web Server
Red Hat Enterprise Linux, Microsoft Windows Server, Oracle Solaris
HTTPHTTPSAJP
No. Directs client requests to the container as long as the container is available, regardless of application status.
Yes
ISAPI Microsoft IIS Microsoft Windows Server
AJP No. Directs client requests to the container as long as the container is available, regardless of application status.
Yes
NSAPI Oracle iPlanet Web Server
Oracle Solaris AJP No. Directs client requests to the container as long as the container is available, regardless of application status.
Yes
Table 2.9-1: HTTP Connectors
www.redhat.com 18 [email protected]
2.9.1 mod_clustermod_cluster is an HTTP load balancer that provides a higher level of intelligence and control over web applications, beyond what is available with other HTTP load balancers. Using a special communication layer between the JBoss application server and the web server, mod_cluster can not only register when a web context is enabled, but also when it is disabled and removed from load balancing. This allows mod_cluster to handle full web application life cycles. With mod_cluster, the load of a given node is determined by the node itself. This allows load balancing using a wider range of metrics including CPU load, heap usage and other factors. It also makes it possible to use a custom load metric to determine the desired load balancing effect.
mod_cluster has two modules: one for the web server, which handles routing and load balancing, and one for the JBoss application server to manage the web application contexts. Both modules must be installed and configured for the cluster to function.
The mod_cluster module on JBoss EAP is available by default but may be further configured to AUTO-DISCOVER the proxy through multicast (advertise) or contact it directly through IP address and port.
[email protected] 19 www.redhat.com

3 Reference Architecture Environment
3.1 OverviewThis reference architecture consists of two EAP 6 CLUSTERS, each containing three nodes. The two clusters provide active/passive redundancy in an effort to approach a ZERO-DOWNTIME ARCHITECTURE. Having two distinct and separate clusters allows for upgrades and other types of maintenance, without requiring an operational maintenance window.
Two instances of Apache HTTP Server are also deployed, each to front-end one of the EAP clusters for incoming HTTP requests. A single instance of PostgreSQL database is used for JPA persistence in the back-end.
At any given time, the active setup simply includes an HTTP Server that redirects to a logical EAP 6 Application Server for all functionality, which in turn uses the PostgreSQL database instance for its persistence.
3.2 JBoss EAP Apache HTTP ServerTwo instances of JBoss EAP 6 Apache HTTP Server (based on Apache's httpd) are installed on a separate machine to front-end the active and passive EAP clusters, providing STICKY-SESSION LOAD BALANCING and FAILOVER. The HTTP servers use mod_cluster and the AJP protocol, to forward HTTP requests to an appropriate EAP node. The advertise feature of mod_cluster is turned off and the proxy's host and port are configured on the mod_cluster plugin of the application servers, so that servers can directly contact and update the proxy.
Where requests over HTTP are concerned, the one instance of HTTP Server front-ending an EAP cluster can be considered a single point of failure. The HTTP Server itself can also be clustered but the focus is the enterprise application platform and clustering of the HTTP Server is beyond the scope of this reference architecture.
www.redhat.com 20 [email protected]
3.3 JBoss Enterprise Application PlatformTwo JBoss EAP 6 clusters are deployed and configured with nearly identical settings to provide active/passive redundancy. The clusters are front-ended by different HTTP Servers and as such, use a different URL in their mod_cluster proxy-list configuration.
In an effort to strike a balance in proposing an economical solution, while still providing high availability, each of the three nodes of the passive cluster is co-located with a node of the active cluster on the same machine. In a basic non-virtualized environment, this allows whichever cluster is active at any given time to take full advantage of the available hardware resources. The tradeoff is that certain maintenance tasks may affect both clusters and require downtime.
Alternatively, having two virtual machines on each physical server, one to host the active cluster node and another for the passive cluster node, allows certain OS-level maintenance work to be performed independently for each cluster. With such a setup, the efficiency loss from a resource usage perspective is insignificant. In this virtualized environment, certain maintenance tasks may require the shutdown of the host OS, which would still impact both clusters. To tilt yet further towards reliability at the expense of cost-efficiency, a distinct physical machine may be used for each node of each cluster, resulting in the use of 6 physical servers for the JBoss EAP 6 instances in this architecture.
The configuration of the EAP 6 cluster nodes is based on the provided full-ha profile. This profile is duplicated three times to provide three distinct HornetQ backup group names to control the pairing of live and backup HornetQ servers. The profile copies are used by the server groups while unused profiles including the original full-ha are removed to avoid confusion and simplify maintenance. The profiles allow for HTTP SESSION REPLICATION as well as CLUSTERING support for STATEFUL SESSION BEANS. HornetQ is also set up and clustered with (in-memory) MESSAGE REPLICATION. SECOND-LEVEL CACHING is configured for JPA in both clusters.
[email protected] 21 www.redhat.com

3.4 PostgreSQL DatabaseTo configure and demonstrate the functionality of JPA second-level caching in an EAP 6 cluster, an external database instance must be installed and configured. JPA is largely portable across various RDBMS vendors and switching to a different database server can easily be accomplished with minor configuration changes. This reference architecture uses PostgreSQL Database Server. JBoss EAP 6 uses hibernate for its JPA implementation, which has the ability to create the necessary schema, so the only required configuration on the database is the creation of a database as well as a user with privileges to create tables and modify data in that database. A single PostgreSQL database instance can serve both the active and passive EAP 6 clusters.
For client requests that result in JPA calls, the one instance of PostgreSQL Database can be considered a single point of failure. The Database itself can also be clustered, but the focus of this effort is JBoss EAP 6 and clustering of the Database is beyond the scope of this reference architecture.
www.redhat.com 22 [email protected]

4 Creating the Environment
4.1 PrerequisitesPrerequisites for creating this reference architecture include a supported Operating System and JDK. Refer to Red Hat documentation for supported environments.8
With minor changes, almost any RDBMS may be used in lieu of PostgreSQL Database, but if Postgres is used, the details of the download and installation are also considered a prerequisite for this reference architecture. On a RHEL system, installing PostgreSQL can be as simple as running:
# yum install postgresql-server.i686.
4.2 DownloadsDownload the attachments to this document. These scripts and files will be used in configuring the reference architecture environment:
https://access.redhat.com/site/node/524633/40/ 0
If you do not have access to the Red Hat customer portal, See the Comments and Feedback section to contact us for alternative methods of access to these files.
Download the following JBoss EAP, HTTP Server and supporting components from Red Hat's Customer Support Portal9:
• Red Hat JBoss Enterprise Application Platform 6.1.1 Apache HTTP Server
• Red Hat JBoss Enterprise Application Platform 6.1.1 Webserver Connector Natives
• Red Hat JBoss Enterprise Application Platform 6.1.1
For a 64-bit version of RHEL 6, the filenames would be:
• jboss-ews-httpd-2.0.1-RHEL6-x86_64.zip
• jboss-eap-native-webserver-connectors-6.1.1-RHEL6-x86_64.zip
• jboss-eap-6.1.1.zip
Users can also optionally download and set up native components10 for their operating system in an effort to increase system performance. These components are available for download asRed Hat JBoss Enterprise Application Platform 6.1.1 Native Components but their inclusion has no direct impact on clustering and is therefore not discussed in this reference architecture.
8 https://access.redhat.com/site/articles/1116639 https://access.redhat.com/jbossnetwork/restricted/listSoftware.html?
downloadType=distributions&product=appplatform&version=6.1.110 https://access.redhat.com/site/solutions/222023
www.redhat.com 24 [email protected]

4.3 Installation
4.3.1 JBoss EAP Apache HTTP ServerInstalling the HTTP Server is very simple and mainly involves extracting the downloaded archive file:
# unzip jboss-ews-httpd-2.0.1-RHEL6-i386.zip
On a linux system, depending on the version of the OS, the HTTP Server may have certain dependencies such as krb5-workstation, mod_auth_kerb and elinks, or apr, apr-util and mailcap. These can be installed using yum or rpm. Run ldd on the httpd binary file to find out the missing dependencies and install them.
Once the HTTP Server itself is set up correctly, extract the web server connector archive and copy the native libraries to the modules directory of the web server installation:
# unzip jboss-eap-native-webserver-connectors-6.1.0-RHEL6-i386.zip
# cp jboss-eap-6.1/modules/system/layers/base/native/lib/httpd/modules/* jboss-ews-2.0/httpd/modules/
Aside from the native libraries, the web server connector archive also includes sample configuration files under modules/system/layers/base/native/etc/httpd/conf/. These files serve as the basis of the attached httpd configuration files.
Note: Previous installations of httpd on a system may clash with this web server. Available service scripts may point to a previous httpd installation and system variables and links can often cause confusion. It is prudent to ensure that the intended installation of the web server is being configured and used.
4.3.2 JBoss Enterprise Application PlatformRed Hat's JBoss EAP 6.1 does not require any installation steps. The archive file simply needs to be extracted after the download. This reference architecture installs two sets of binaries for EAP 6 on each machine, one for the active cluster and another for the passive cluster:
# unzip jboss-eap-6.1.1.zip -d /opt/# mv /opt/jboss-eap-6.1 /opt/jboss-eap-6.1_active# unzip jboss-eap-6.1.1.zip -d /opt/# mv /opt/jboss-eap-6.1 /opt/jboss-eap-6.1_passive
[email protected] 25 www.redhat.com

4.4 ConfigurationIn the reference environment, several ports are used for intra-node communication. This includes ports 6667 and 6668 on the web servers' mod-cluster module, being accessed by all three cluster nodes, as well as the 5432 Postgres port. Web clients are routed to the web server through ports 81 and 82. The EAP cluster nodes also require many different ports for access, including 8080 or 8180 for HTTP access, 8009 and 8109 for AJP, 4447 or 4547 for remote EJB calls, 9999 for domain management and so on. This reference architecture uses IPTables, the default Red Hat Firewall, to block all network packets by default and only allow configured ports and addresses to communicate. Refer to the Red Hat documentation on IPTables11 for further details and see the appendix on IPTables configuration for the firewall rules used for the active cluster in this reference environment.
This reference environment has been set up and tested with Security-Enhanced Linux (SELinux) enabled in ENFORCING mode. Once again, refer to the Red Hat documentation on SELinux for further details on using and configuring this feature.12 For any other operating system, consult the respective documentation for security and firewall solutions to ensure that maximum security is maintained while the ports required by your application are opened.
Various other types of configuration may be required for UDP and TCP communication. For example, Linux operating systems typically have a low maximum socket buffer size configured, which is lower than the default cluster JGroups buffer size. It may be important to correct any such warnings observed in the EAP logs. For example, in this case for a Linux operating system, the maximum socket buffer size may be configured as follows. Further details are available on Red Hat's Customer Support Portal.13
# sysctl -w net.core.rmem_max=26214400# sysctl -w net.core.wmem_max=1048576
11 https://access.redhat.com/site/documentation/en-US/Red_Hat_Enterprise_Linux/6/html/Security_Guide/sect-Security_Guide-IPTables.html
12 https://access.redhat.com/site/documentation/en-US/Red_Hat_Enterprise_Linux/6/html/Security-Enhanced_Linux/
13 https://access.redhat.com/site/solutions/190643
www.redhat.com 26 [email protected]
4.4.1 JBoss EAP Apache HTTP ServerA freshly installed version of the HTTP Server includes default configuration under httpd/conf/httpd.conf. It is best to delete this file to avoid any confusion. The provided cluster1.conf and cluster2.conf and common.conf files should be placed in the httpd/conf directory instead.
This reference architecture envisions running two instances of the web server using the same installed binary. The main configuration file has therefore been separated into cluster1.conf and cluster2.conf, both pointing to common.conf for common configuration. Edit cluster1.conf and cluster2.conf and modify the root directory of the web server installation as appropriate for the directory structure. The ServerRoot file will have a default value such as:
ServerRoot "/files/jboss-ews-2.0/httpd"
Review common.conf for other relevant file system references. This file points to /var for the location of static content, images, error files and so on. This reference architecture does not use the web server to host any content, but this location can be adjusted as appropriate if any of these items are required.
Edit the provided httpd.sh script to correct the file system references for the given installation. This script takes 1 or 2 as its first argument and start or stop as the second argument. The first argument determines the instance of web server that is targeted, and the second argument starts or stops that instance.
[email protected] 27 www.redhat.com

4.4.2 PostgreSQL DatabaseAfter a basic installation of the PostgreSQL Database Server, the first step is to initialize it. On Linux systems where proper installation has been completed through yum or RPM files, a service will be configured, and can be executed to initialize the database server:
# service postgresql initdb
Regardless of the operating system, the control of the PostgreSQL database server is performed through the pg_ctl file. The -D flag can be used to specify the data directory to be used by the database server:
# pg_ctl -D /usr/local/pgsql/data initdb
By default, the database server may only be listening on localhost. Specify a listen address in the database server configuration file or set it to “*”, so that it listens on all available network interfaces. The configuration file is located under the data directory and in version 9.3 of the product, it is available at /var/lib/pgsql/data/postgresql.conf.
Uncomment and modify the following line:
listen_addresses = '*'
Another important consideration is the ability of users to access the database from remote servers, and authenticate against it. Java applications typically use password authentication to connect to a database. For a PostgreSQL Database Server to accept authentication from a remote user, the corresponding configuration file needs to be updated to reflect the required access. The configuration file in question is located under the data directory and in version 9.3 of the product, it is available at /var/lib/pgsql/data/pg_hba.conf.
One or more lines need to be added, to permit password authentication from the desired IP addresses. Standard network masks and slash notation may be used. For this reference architecture, a moderately more permissive configuration is used:
host all all 10.16.139.0/24 password
PostgreqSQL requires a non-root user to take ownership of the database process. This is typically achieved by a postgres user being created. This user should then be used to start, stop and configure databases. The database server is started using one of the available approaches, for example:
# /usr/bin/pg_ctl start
www.redhat.com 28 [email protected]
To create a database and a user that JBoss EAP instances use to access the database, perform the following:
# su – postgres# /usr/bin/psql -U postgres postgresCREATE USER jboss WITH PASSWORD 'password';CREATE DATABASE eap6 WITH OWNER jboss;\q
Making the jboss user the owner of the eap6 database ensures the necessary privileges to create tables and modify data are assigned.
4.4.3 JBoss Enterprise Application PlatformThis reference architecture includes six distinct installations of JBoss EAP 6.1. There are three machines, where each includes one node of the primary cluster and one node of the backup cluster. The names node1, node2 and node3 are used to refer to both the machines and the EAP nodes on the machines. The primary cluster will be called the active cluster while the redundant backup cluster will be termed the passive cluster. This reference architecture selects node1 to host the domain controller of the active cluster and node2 for the passive cluster.
Adding Users
The first important step in configuring the EAP 6.1 clusters is to add the required users.
Admin User
An administrator user is required for each cluster. Assuming the user ID of admin and the password of password1! for this admin user:
On node1:
# /opt/jboss-eap-6.1_active/bin/add-user.sh admin password1!
On node2:
# /opt/jboss-eap-6.1_passive/bin/add-user.sh admin password1!
This uses the non-interactive mode of the add-user script, to add management users with a given username and password.
Node User
The next step is to add a user for each node that will connect to the cluster. For the active cluster, that means creating two users called node2 and node3 (since node1 hosts the domain controller and does not need to use a password to authenticate against itself), and for the passive cluster, two users called node1 and node3 are required. This time, provide no argument to the add-user script and instead follow the interactive setup. The first step is to specify that it is a management user. The interactive process is as follows:
[email protected] 29 www.redhat.com
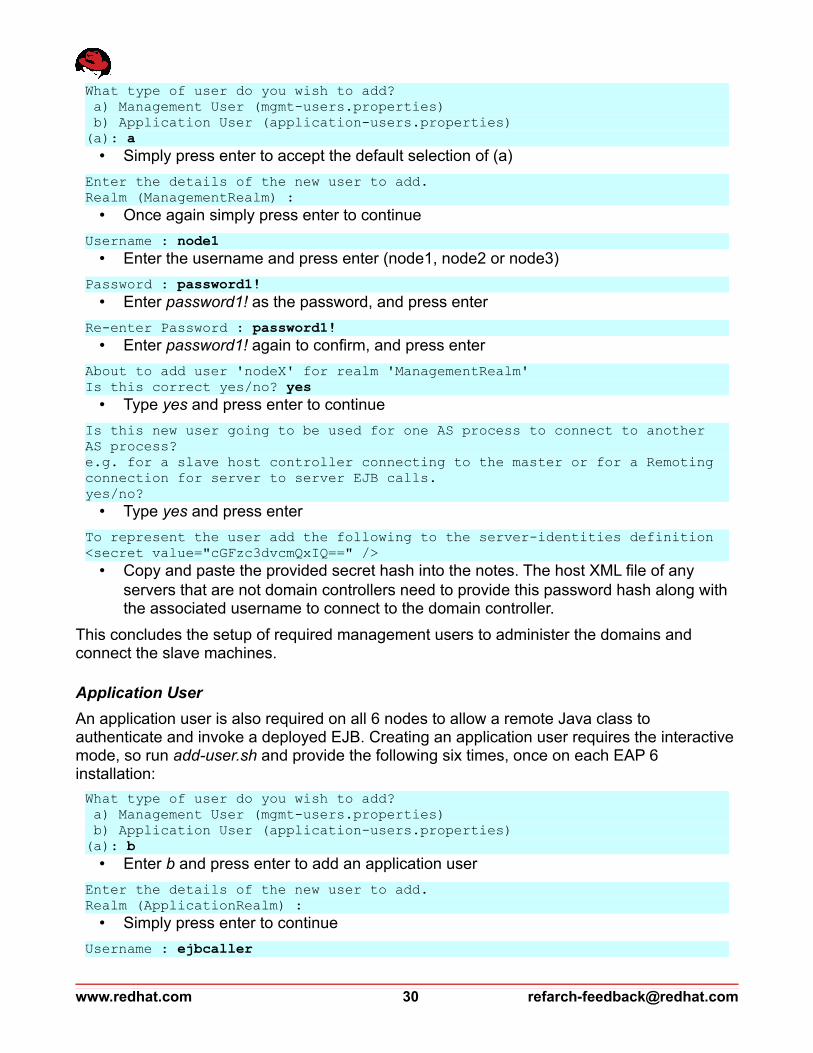
What type of user do you wish to add? a) Management User (mgmt-users.properties) b) Application User (application-users.properties)(a): a
• Simply press enter to accept the default selection of (a)
Enter the details of the new user to add.Realm (ManagementRealm) :
• Once again simply press enter to continue
Username : node1• Enter the username and press enter (node1, node2 or node3)
Password : password1!• Enter password1! as the password, and press enter
Re-enter Password : password1!• Enter password1! again to confirm, and press enter
About to add user 'nodeX' for realm 'ManagementRealm'Is this correct yes/no? yes
• Type yes and press enter to continue
Is this new user going to be used for one AS process to connect to another AS process? e.g. for a slave host controller connecting to the master or for a Remoting connection for server to server EJB calls.yes/no?
• Type yes and press enter
To represent the user add the following to the server-identities definition <secret value="cGFzc3dvcmQxIQ==" />
• Copy and paste the provided secret hash into the notes. The host XML file of any servers that are not domain controllers need to provide this password hash along with the associated username to connect to the domain controller.
This concludes the setup of required management users to administer the domains and connect the slave machines.
Application User
An application user is also required on all 6 nodes to allow a remote Java class to authenticate and invoke a deployed EJB. Creating an application user requires the interactive mode, so run add-user.sh and provide the following six times, once on each EAP 6 installation:
What type of user do you wish to add? a) Management User (mgmt-users.properties) b) Application User (application-users.properties)(a): b
• Enter b and press enter to add an application user
Enter the details of the new user to add.Realm (ApplicationRealm) :
• Simply press enter to continue
Username : ejbcaller
www.redhat.com 30 [email protected]
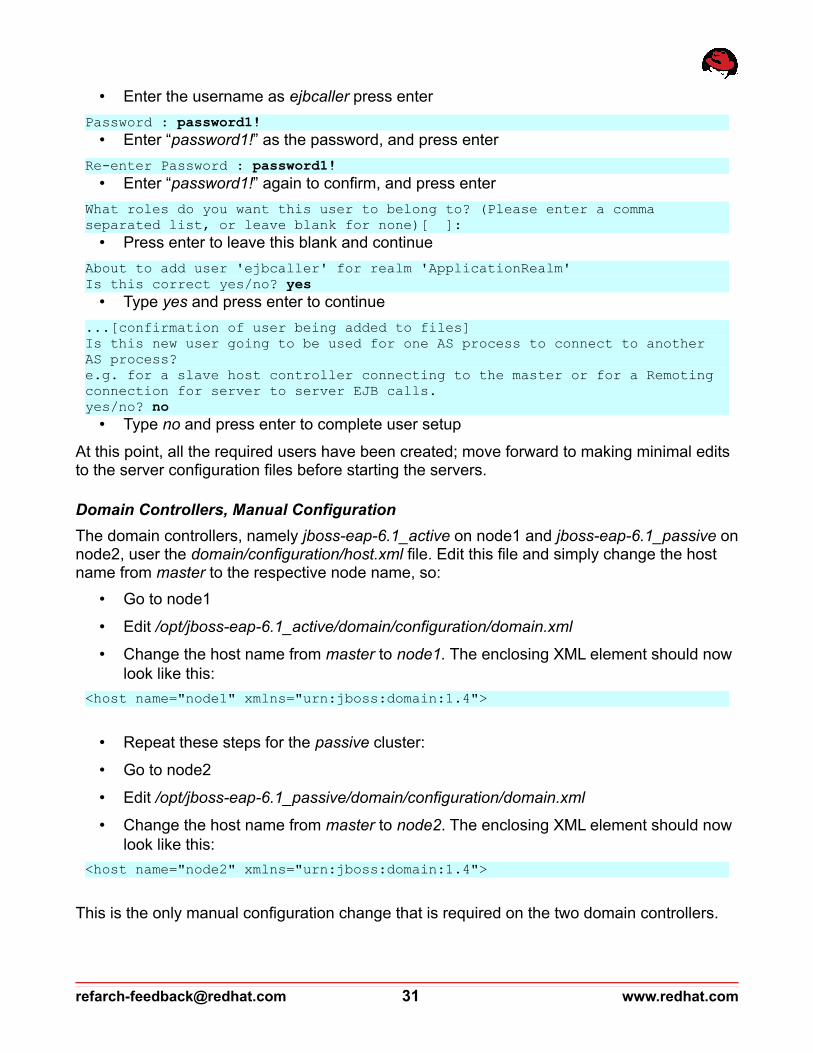
• Enter the username as ejbcaller press enter
Password : password1!• Enter “password1!” as the password, and press enter
Re-enter Password : password1!• Enter “password1!” again to confirm, and press enter
What roles do you want this user to belong to? (Please enter a comma separated list, or leave blank for none)[ ]:
• Press enter to leave this blank and continue
About to add user 'ejbcaller' for realm 'ApplicationRealm'Is this correct yes/no? yes
• Type yes and press enter to continue
...[confirmation of user being added to files]Is this new user going to be used for one AS process to connect to another AS process? e.g. for a slave host controller connecting to the master or for a Remoting connection for server to server EJB calls.yes/no? no
• Type no and press enter to complete user setup
At this point, all the required users have been created; move forward to making minimal edits to the server configuration files before starting the servers.
Domain Controllers, Manual Configuration
The domain controllers, namely jboss-eap-6.1_active on node1 and jboss-eap-6.1_passive on node2, user the domain/configuration/host.xml file. Edit this file and simply change the host name from master to the respective node name, so:
• Go to node1
• Edit /opt/jboss-eap-6.1_active/domain/configuration/domain.xml
• Change the host name from master to node1. The enclosing XML element should now look like this:
<host name="node1" xmlns="urn:jboss:domain:1.4">
• Repeat these steps for the passive cluster:
• Go to node2
• Edit /opt/jboss-eap-6.1_passive/domain/configuration/domain.xml
• Change the host name from master to node2. The enclosing XML element should now look like this:
<host name="node2" xmlns="urn:jboss:domain:1.4">
This is the only manual configuration change that is required on the two domain controllers.
[email protected] 31 www.redhat.com
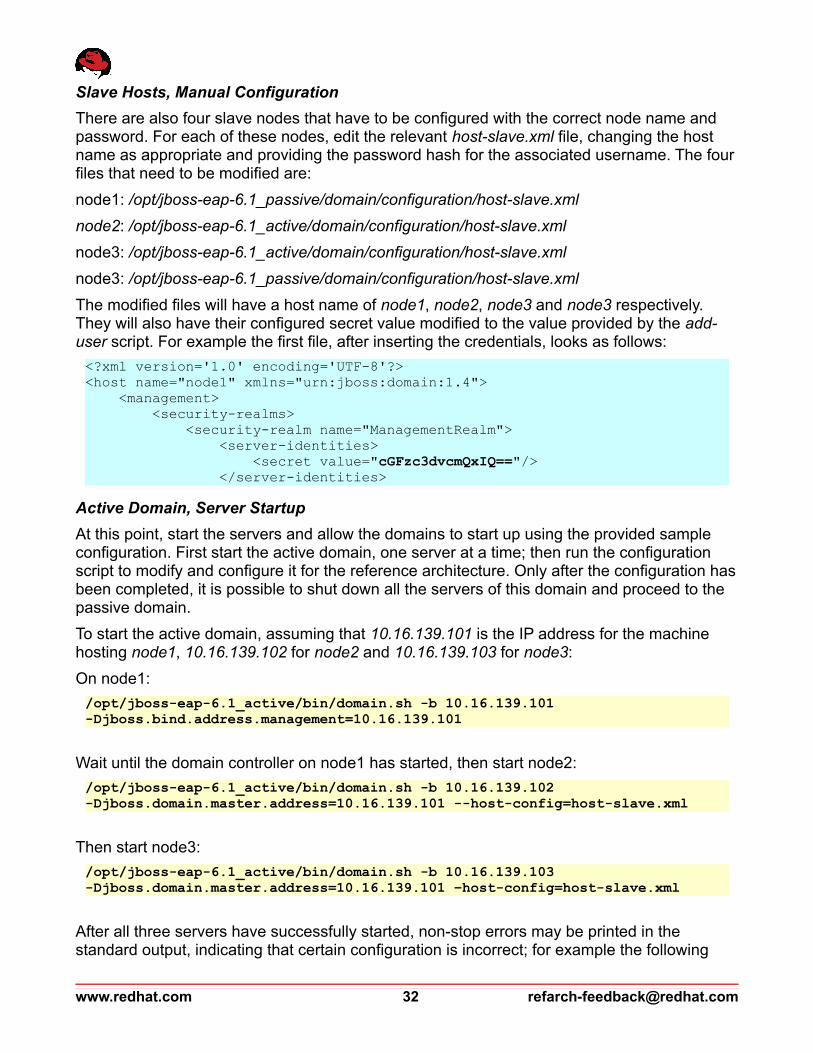
Slave Hosts, Manual Configuration
There are also four slave nodes that have to be configured with the correct node name and password. For each of these nodes, edit the relevant host-slave.xml file, changing the host name as appropriate and providing the password hash for the associated username. The four files that need to be modified are:
node1: /opt/jboss-eap-6.1_passive/domain/configuration/host-slave.xml
node2: /opt/jboss-eap-6.1_active/domain/configuration/host-slave.xml
node3: /opt/jboss-eap-6.1_active/domain/configuration/host-slave.xml
node3: /opt/jboss-eap-6.1_passive/domain/configuration/host-slave.xml
The modified files will have a host name of node1, node2, node3 and node3 respectively. They will also have their configured secret value modified to the value provided by the add-user script. For example the first file, after inserting the credentials, looks as follows:
<?xml version='1.0' encoding='UTF-8'?><host name="node1" xmlns="urn:jboss:domain:1.4"> <management> <security-realms> <security-realm name="ManagementRealm"> <server-identities> <secret value="cGFzc3dvcmQxIQ=="/> </server-identities>
Active Domain, Server Startup
At this point, start the servers and allow the domains to start up using the provided sample configuration. First start the active domain, one server at a time; then run the configuration script to modify and configure it for the reference architecture. Only after the configuration has been completed, it is possible to shut down all the servers of this domain and proceed to the passive domain.
To start the active domain, assuming that 10.16.139.101 is the IP address for the machine hosting node1, 10.16.139.102 for node2 and 10.16.139.103 for node3:
On node1:
/opt/jboss-eap-6.1_active/bin/domain.sh -b 10.16.139.101 -Djboss.bind.address.management=10.16.139.101
Wait until the domain controller on node1 has started, then start node2:
/opt/jboss-eap-6.1_active/bin/domain.sh -b 10.16.139.102 -Djboss.domain.master.address=10.16.139.101 --host-config=host-slave.xml
Then start node3:
/opt/jboss-eap-6.1_active/bin/domain.sh -b 10.16.139.103 -Djboss.domain.master.address=10.16.139.101 –host-config=host-slave.xml
After all three servers have successfully started, non-stop errors may be printed in the standard output, indicating that certain configuration is incorrect; for example the following
www.redhat.com 32 [email protected]

error message can be expected:
Unable to validate user: HORNETQ.CLUSTER.ADMIN.USER
These errors can be safely ignored, as the sample configuration is only used to start up the servers and is replaced and overwritten in the next step.
Active Domain, Server Configuration
Automated scripts are provided to make the setup of this reference architecture less error-prone and more easily repeatable. To run the configuration script, the following dependencies must be satisfied:
• Access to the EAP cluster nodes through port 9999
• JDBC Driver for Postgres
• The provided deployable application, clusterApp.war
• The provided configuration.properties, edited as appropriate
• The provided configuration.jar
• Local EAP 6.1 installation
Make sure to edit configuration.properties and modify it as appropriate for the active domain. The following items might need to be changed:
domainController: the IP address of the domain controller, running on node1domainName: “active” for the active domainoffsetUnit: “0” for the active domainpostgresDriverName: simple file name of the postgres driverpostgresDriverLocation: the directory of the postgres driver on the local machinepostgresUsername: username used by EAP to access the Postgres databasepostgresPassword: password used by EAP to access the Postgres databaseconnectionUrl: the connection URL to the Postgres databasedeployableApp: the fully qualified location of the clusterApp WAR filemodClusterProxy: The “host:port” value of the Web Server mod_cluster
To run the configuration class in question, the configuration.properties file should be available in the current working directory, with the following items in the Java classpath:
• The provided configuration.jar
• jboss-eap-6.1/bin/client/jboss-cli-client.jar from an EAP 6.1 installation
Assuming that configuration.jar and configuration.properties are in the current working directory, run the configuration script as follows:
java -cp configuration.jar:/opt/jboss-eap-6.1/bin/client/jboss-cli-client.jar org.jboss.refarch.eap6.cluster.Configuration
The configuration script takes several minutes to run. The CLI commands are printed in the standard output as they're being issued. Once the process is complete, as the last step, the
[email protected] 33 www.redhat.com

configuration script attempts to start the servers in each of the three server groups. It will then disconnect from the domain controller and indicate that the configuration is completed.
At this point, review the output of the three servers to verify that they have indeed been stopped, reconfigured and restarted. The final startup should be free of errors. Now stop the three servers by contacting the domain controller and first asking it to shut down the two slave hosts before shutting itself down. For the active domain:
/opt/jboss-eap-6.1/bin/jboss-cli.sh --connect --controller=10.16.139.101 /host=node2:shutdown --user=admin –password=password1!
/opt/jboss-eap-6.1/bin/jboss-cli.sh --connect --controller=10.16.139.101 /host=node3:shutdown --user=admin –password=password1!
/opt/jboss-eap-6.1/bin/jboss-cli.sh --connect --controller=10.16.139.101 /host=node1:shutdown --user=admin –password=password1!
Once again, 10.16.139.101 is the IP address for node1. It is important that node1 would be the last shutdown command that is issued, since it will not be able to shut down other nodes once it itself has been shut off.
This concludes the configuration of the active domain. Complete these last two steps for the passive domain as well, with minor differences.
Passive Domain, Server Startup
Now start the servers in the passive domain with the provided sample configuration. Assuming that 10.16.139.101 is the IP address for the machine hosting node1, 10.16.139.102for node2 and 10.16.139.103 for node3:
On node2:
/opt/jboss-eap-6.1_passive/bin/domain.sh -b 10.16.139.102 -Djboss.bind.address.management=10.16.139.102
Wait until the domain controller on node 2 has started. Then on node1:
/opt/jboss-eap-6.1_passive/bin/domain.sh -b 10.16.139.101 -Djboss.domain.master.address=10.16.139.102 --host-config=host-slave.xml
Then on node3:
/opt/jboss-eap-6.1_passive/bin/domain.sh -b 10.16.139.103 -Djboss.domain.master.address=10.16.139.102 --host-config=host-slave.xml
After all three servers have successfully started, non-stop errors may again be printed in the standard output, indicating that certain configuration is incorrect. One example of such errors is the following message:
Unable to validate user: HORNETQ.CLUSTER.ADMIN.USERSafely ignore such errors, since the sample configuration is only used to start up the servers and will be replaced and overwritten in the next step.
www.redhat.com 34 [email protected]
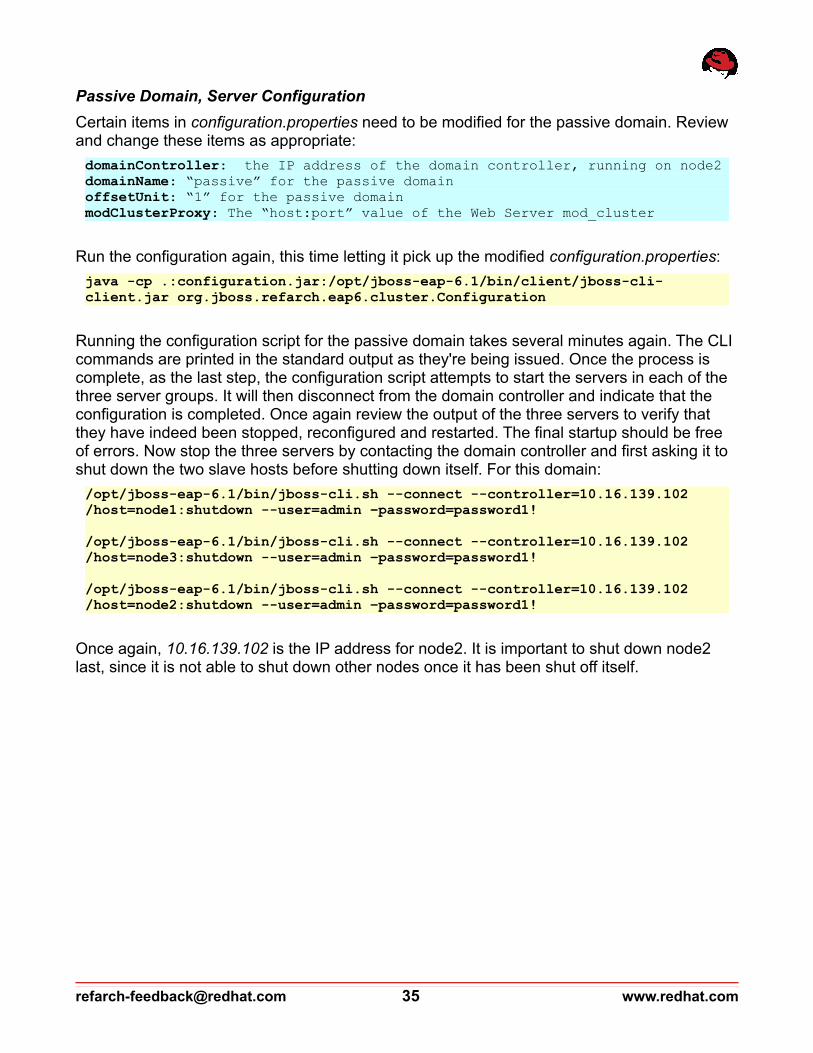
Passive Domain, Server Configuration
Certain items in configuration.properties need to be modified for the passive domain. Review and change these items as appropriate:
domainController: the IP address of the domain controller, running on node2domainName: “passive” for the passive domainoffsetUnit: “1” for the passive domainmodClusterProxy: The “host:port” value of the Web Server mod_cluster
Run the configuration again, this time letting it pick up the modified configuration.properties:
java -cp .:configuration.jar:/opt/jboss-eap-6.1/bin/client/jboss-cli-client.jar org.jboss.refarch.eap6.cluster.Configuration
Running the configuration script for the passive domain takes several minutes again. The CLI commands are printed in the standard output as they're being issued. Once the process is complete, as the last step, the configuration script attempts to start the servers in each of the three server groups. It will then disconnect from the domain controller and indicate that the configuration is completed. Once again review the output of the three servers to verify that they have indeed been stopped, reconfigured and restarted. The final startup should be free of errors. Now stop the three servers by contacting the domain controller and first asking it to shut down the two slave hosts before shutting down itself. For this domain:
/opt/jboss-eap-6.1/bin/jboss-cli.sh --connect --controller=10.16.139.102 /host=node1:shutdown --user=admin –password=password1!
/opt/jboss-eap-6.1/bin/jboss-cli.sh --connect --controller=10.16.139.102 /host=node3:shutdown --user=admin –password=password1!
/opt/jboss-eap-6.1/bin/jboss-cli.sh --connect --controller=10.16.139.102 /host=node2:shutdown --user=admin –password=password1!
Once again, 10.16.139.102 is the IP address for node2. It is important to shut down node2 last, since it is not able to shut down other nodes once it has been shut off itself.
[email protected] 35 www.redhat.com

4.5 Review
4.5.1 JBoss EAP Apache HTTP ServerThis reference architecture assumes that JBoss EAP's Apache HTTP Server has been downloaded along with the Application Platform and installed at /opt/jboss-ews-2.0/.
Providing two separate httpd configurations with distinct ports makes it possible to start two separate instances of the web server. The attached httpd.sh script helps start and stop each instance:
#!/bin/shHTTPD_DIR=/opt/jboss-ews-2.0/httpd$HTTPD_DIR/sbin/httpd -f $HTTPD_DIR/conf/cluster$1.conf -E $HTTPD_DIR/logs/httpd$1.log -k $2
The first line may be configured to point to the correct directory, should the web server be installed in a different location.
The first argument passed to this script may have be either 1 or 2 and results in the corresponding web server instance being targeted and either cluster1.conf or cluster2.conf being used as the main web server configuration file. Accordingly, the error file is created as httpd1.log or httpd2.log.
The second argument is passed to httpd with the -k flag and can be start or stop to respectively start up or shut down the web server.
The first and perhaps most important required configuration in an httpd configuration file is to specify the path of the web server directory structure. Some of the future references, particularly those to loading modules, will be relative to this path:
## Do NOT add a slash at the end of the directory path.#ServerRoot "/opt/jboss-ews-2.0/httpd"
Once an instance of the web server is started, its process id is stored in a file so that it can be used to determine its status and possibly kill the process in the future:
## PidFile: The file in which the server should record its process# identification number when it starts.#PidFile run/httpd1.pid
The file name is appended with 1 or 2 for the first and second instance of the web server, respectively.
This example follows a similar pattern in naming various log files:
## ErrorLog: The location of the error log file.
www.redhat.com 36 [email protected]

# If you do not specify an ErrorLog directive within a <VirtualHost># container, error messages relating to that virtual host will be# logged here. If you *do* define an error logfile for a <VirtualHost># container, that host's errors will be logged there and not here.#ErrorLog logs/error_log1
## For a single logfile with access, agent, and referer information# (Combined Logfile Format), use the following directive:#CustomLog logs/access_log1 combined
The next step in configuring the web server is to set values for a large number of parameters, and load a number of common modules that may be required. In the reference architecture, these settings remain largely unchanged from the defaults that were downloaded in the archive files. This configuration is the same for both instances of the web server so it is copied in a common.conf file and included by both cluster1.conf and cluster2.conf:
Include conf/common.conf
One important configuration in this common configuration file is the document root, where the server can attempt to find and serve content to clients. Since the reference web server is exclusively used to forward requests to the application server, this parameter is pointed to an empty directory:
## DocumentRoot: The directory out of which you will serve your# documents. By default, all requests are taken from this directory, but# symbolic links and aliases may be used to point to other locations.#DocumentRoot "/var/www/html"
Now that the basic modules and some of the dependencies have been configured, the next step is to load mod_cluster modules and configure them for each instance. The required modules are:
# mod_proxy_balancer should be disabled when mod_cluster is usedLoadModule proxy_cluster_module modules/mod_proxy_cluster.soLoadModule slotmem_module modules/mod_slotmem.soLoadModule manager_module modules/mod_manager.soLoadModule advertise_module modules/mod_advertise.so
MemManagerFile is the base name for the file names mod_manager uses to store configuration, generate keys for shared memory, or lock files. It must be an absolute path name; the referenced directories are created if required. It is highly recommended that those files be placed on a local drive and not an NFS share. This path must be unique for each instance of the web server, so again append 1 or 2 to the file name:
MemManagerFile /var/cache/mod_cluster1
[email protected] 37 www.redhat.com
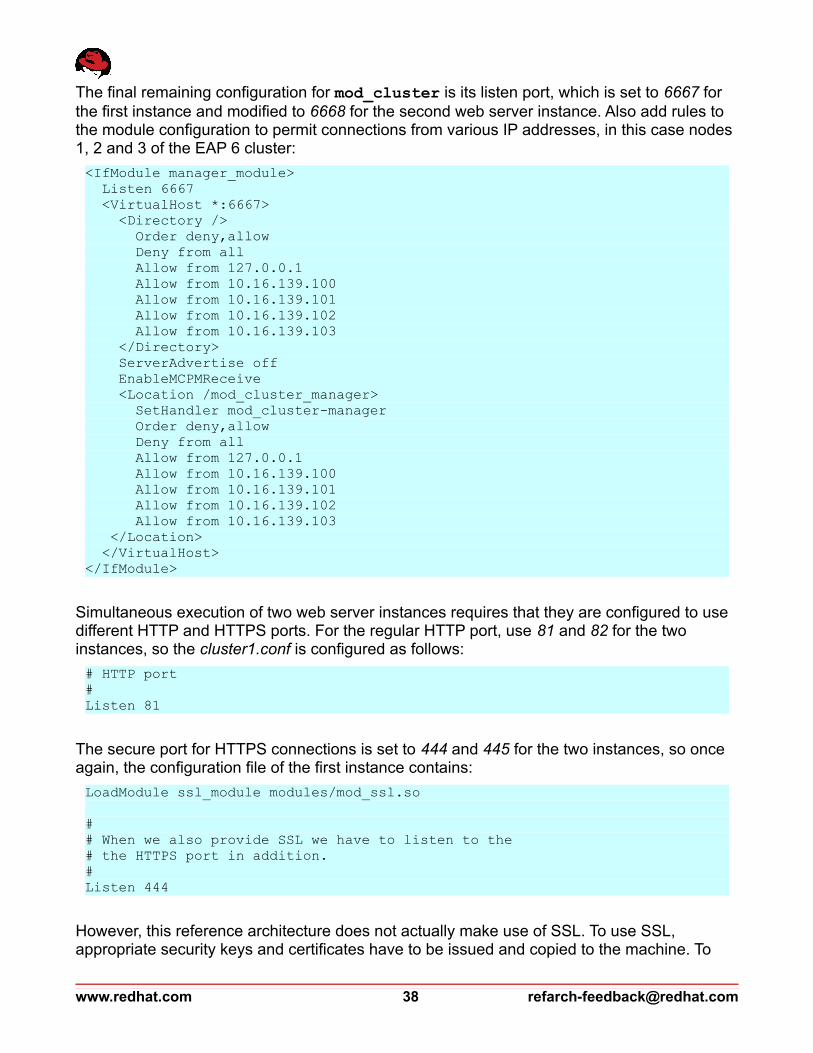
The final remaining configuration for mod_cluster is its listen port, which is set to 6667 for the first instance and modified to 6668 for the second web server instance. Also add rules to the module configuration to permit connections from various IP addresses, in this case nodes 1, 2 and 3 of the EAP 6 cluster:
<IfModule manager_module> Listen 6667 <VirtualHost *:6667> <Directory /> Order deny,allow Deny from all Allow from 127.0.0.1 Allow from 10.16.139.100 Allow from 10.16.139.101 Allow from 10.16.139.102 Allow from 10.16.139.103 </Directory> ServerAdvertise off EnableMCPMReceive <Location /mod_cluster_manager> SetHandler mod_cluster-manager Order deny,allow Deny from all Allow from 127.0.0.1 Allow from 10.16.139.100 Allow from 10.16.139.101 Allow from 10.16.139.102 Allow from 10.16.139.103 </Location> </VirtualHost></IfModule>
Simultaneous execution of two web server instances requires that they are configured to use different HTTP and HTTPS ports. For the regular HTTP port, use 81 and 82 for the two instances, so the cluster1.conf is configured as follows:
# HTTP port#Listen 81
The secure port for HTTPS connections is set to 444 and 445 for the two instances, so once again, the configuration file of the first instance contains:
LoadModule ssl_module modules/mod_ssl.so
## When we also provide SSL we have to listen to the # the HTTPS port in addition.#Listen 444
However, this reference architecture does not actually make use of SSL. To use SSL, appropriate security keys and certificates have to be issued and copied to the machine. To
www.redhat.com 38 [email protected]
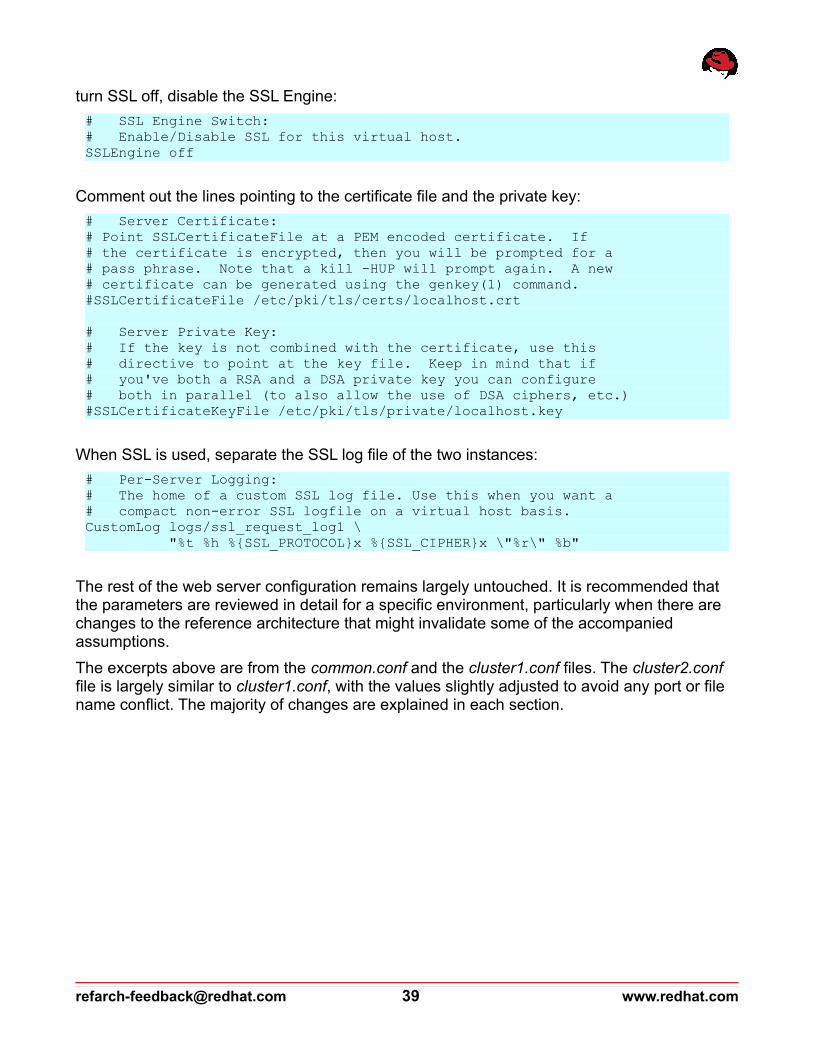
turn SSL off, disable the SSL Engine:
# SSL Engine Switch:# Enable/Disable SSL for this virtual host.SSLEngine off
Comment out the lines pointing to the certificate file and the private key:
# Server Certificate:# Point SSLCertificateFile at a PEM encoded certificate. If# the certificate is encrypted, then you will be prompted for a# pass phrase. Note that a kill -HUP will prompt again. A new# certificate can be generated using the genkey(1) command.#SSLCertificateFile /etc/pki/tls/certs/localhost.crt
# Server Private Key:# If the key is not combined with the certificate, use this# directive to point at the key file. Keep in mind that if# you've both a RSA and a DSA private key you can configure# both in parallel (to also allow the use of DSA ciphers, etc.)#SSLCertificateKeyFile /etc/pki/tls/private/localhost.key
When SSL is used, separate the SSL log file of the two instances:
# Per-Server Logging:# The home of a custom SSL log file. Use this when you want a# compact non-error SSL logfile on a virtual host basis.CustomLog logs/ssl_request_log1 \ "%t %h %{SSL_PROTOCOL}x %{SSL_CIPHER}x \"%r\" %b"
The rest of the web server configuration remains largely untouched. It is recommended that the parameters are reviewed in detail for a specific environment, particularly when there are changes to the reference architecture that might invalidate some of the accompanied assumptions.
The excerpts above are from the common.conf and the cluster1.conf files. The cluster2.conf file is largely similar to cluster1.conf, with the values slightly adjusted to avoid any port or file name conflict. The majority of changes are explained in each section.
[email protected] 39 www.redhat.com
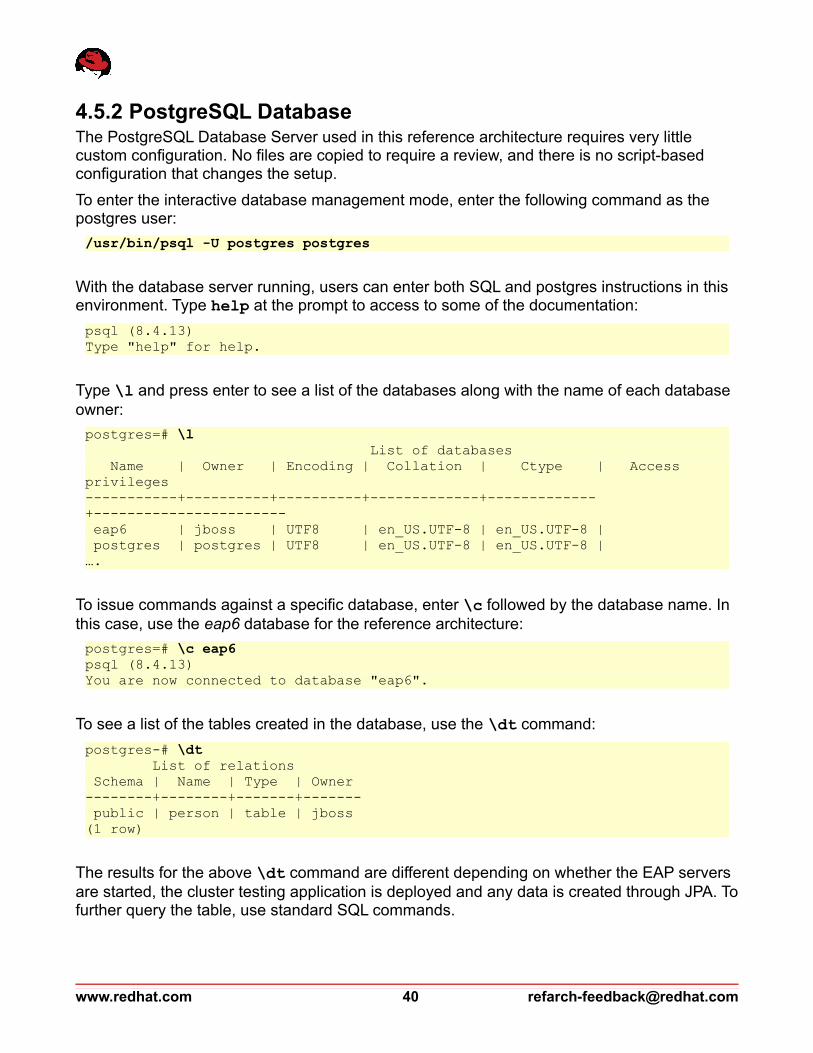
4.5.2 PostgreSQL DatabaseThe PostgreSQL Database Server used in this reference architecture requires very little custom configuration. No files are copied to require a review, and there is no script-based configuration that changes the setup.
To enter the interactive database management mode, enter the following command as the postgres user:
/usr/bin/psql -U postgres postgres
With the database server running, users can enter both SQL and postgres instructions in this environment. Type help at the prompt to access to some of the documentation:
psql (8.4.13)Type "help" for help.
Type \l and press enter to see a list of the databases along with the name of each database owner:
postgres=# \l List of databases Name | Owner | Encoding | Collation | Ctype | Access privileges -----------+----------+----------+-------------+-------------+----------------------- eap6 | jboss | UTF8 | en_US.UTF-8 | en_US.UTF-8 | postgres | postgres | UTF8 | en_US.UTF-8 | en_US.UTF-8 | ….
To issue commands against a specific database, enter \c followed by the database name. In this case, use the eap6 database for the reference architecture:
postgres=# \c eap6psql (8.4.13)You are now connected to database "eap6".
To see a list of the tables created in the database, use the \dt command:
postgres-# \dt List of relations Schema | Name | Type | Owner --------+--------+-------+------- public | person | table | jboss(1 row)
The results for the above \dt command are different depending on whether the EAP servers are started, the cluster testing application is deployed and any data is created through JPA. To further query the table, use standard SQL commands.
www.redhat.com 40 [email protected]
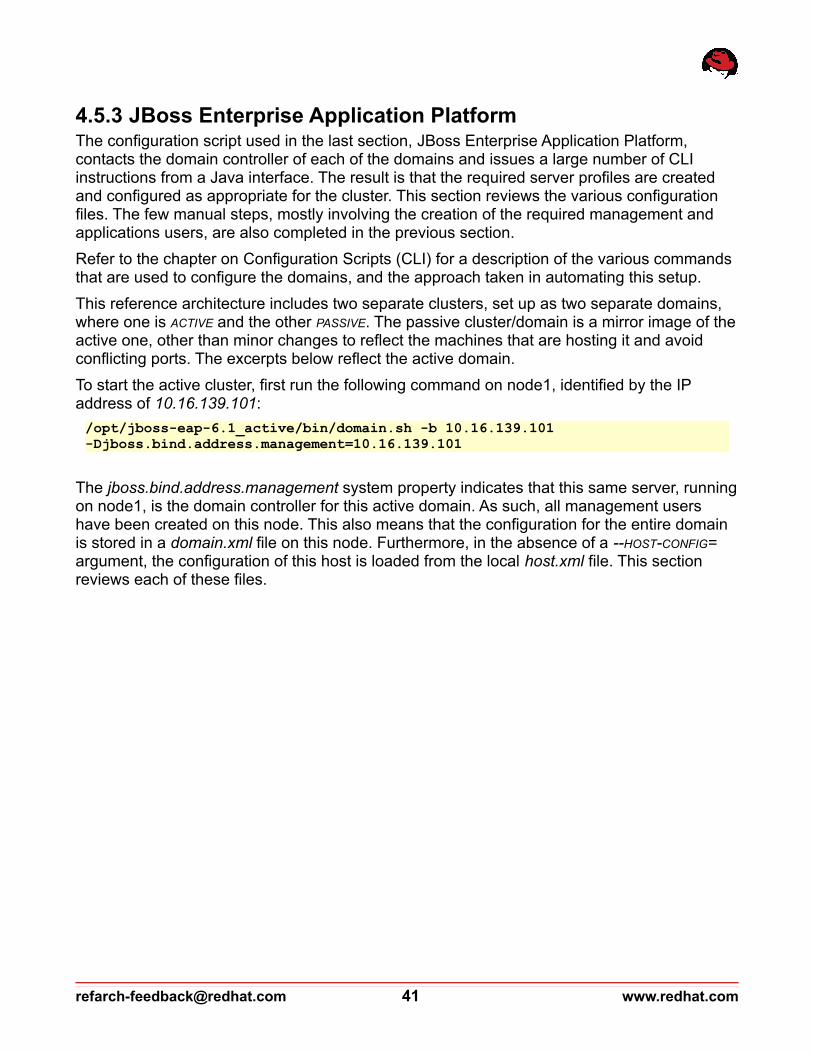
4.5.3 JBoss Enterprise Application PlatformThe configuration script used in the last section, JBoss Enterprise Application Platform, contacts the domain controller of each of the domains and issues a large number of CLI instructions from a Java interface. The result is that the required server profiles are created and configured as appropriate for the cluster. This section reviews the various configuration files. The few manual steps, mostly involving the creation of the required management and applications users, are also completed in the previous section.
Refer to the chapter on Configuration Scripts (CLI) for a description of the various commands that are used to configure the domains, and the approach taken in automating this setup.
This reference architecture includes two separate clusters, set up as two separate domains, where one is ACTIVE and the other PASSIVE. The passive cluster/domain is a mirror image of the active one, other than minor changes to reflect the machines that are hosting it and avoid conflicting ports. The excerpts below reflect the active domain.
To start the active cluster, first run the following command on node1, identified by the IP address of 10.16.139.101:
/opt/jboss-eap-6.1_active/bin/domain.sh -b 10.16.139.101 -Djboss.bind.address.management=10.16.139.101
The jboss.bind.address.management system property indicates that this same server, running on node1, is the domain controller for this active domain. As such, all management users have been created on this node. This also means that the configuration for the entire domain is stored in a domain.xml file on this node. Furthermore, in the absence of a --HOST-CONFIG= argument, the configuration of this host is loaded from the local host.xml file. This section reviews each of these files.
[email protected] 41 www.redhat.com

To see a list of all the management users for this domain, look at the content of domain/configuration/mgmt-users.properties:
# Users can be added to this properties file at any time, updates after the server has started# will be automatically detected.## By default the properties realm expects the entries to be in the format: -# username=HEX( MD5( username ':' realm ':' password))## A utility script is provided which can be executed from the bin folder to add the users: -# - Linux# bin/add-user.sh## - Windows# bin\add-user.bat## On start-up the server will also automatically add a user $local - this user is specifically# for local tools running against this AS installation.## The following illustrates how an admin user could be defined, this# is for illustration only an does not correspond to a usable password.##admin=2a0923285184943425d1f53ddd58ec7aadmin=e61d4e732bbcbd2234553cc024cbb092node1=a10447f2ee947026f5add6d7366bc858node2=5259fe18080faee6b9aafe3dc0e0edfenode3=edd25e74df6c078685576891b5b82b48
Four users called admin, node1, node2 and node3 are defined in this property file. As the comments explain, the hexadecimal number provided as the value is a hash of each user's password (along with other information) used to authenticate the user. In this example, password1! is used as the password for all four users; the hash value contains other information, including the username itself, and that is why an identical hash is not generated for all users.
The admin user has been created to allow administrative access through the management console and the CLI interface. It is through this access that the configuration script is able to run and make fundamental configuration changes to the provided sample domain, resulting in the current cluster setup.
There is a user account configured for each node of the cluster. These accounts are used by slave hosts to connect to the domain controller.
www.redhat.com 42 [email protected]
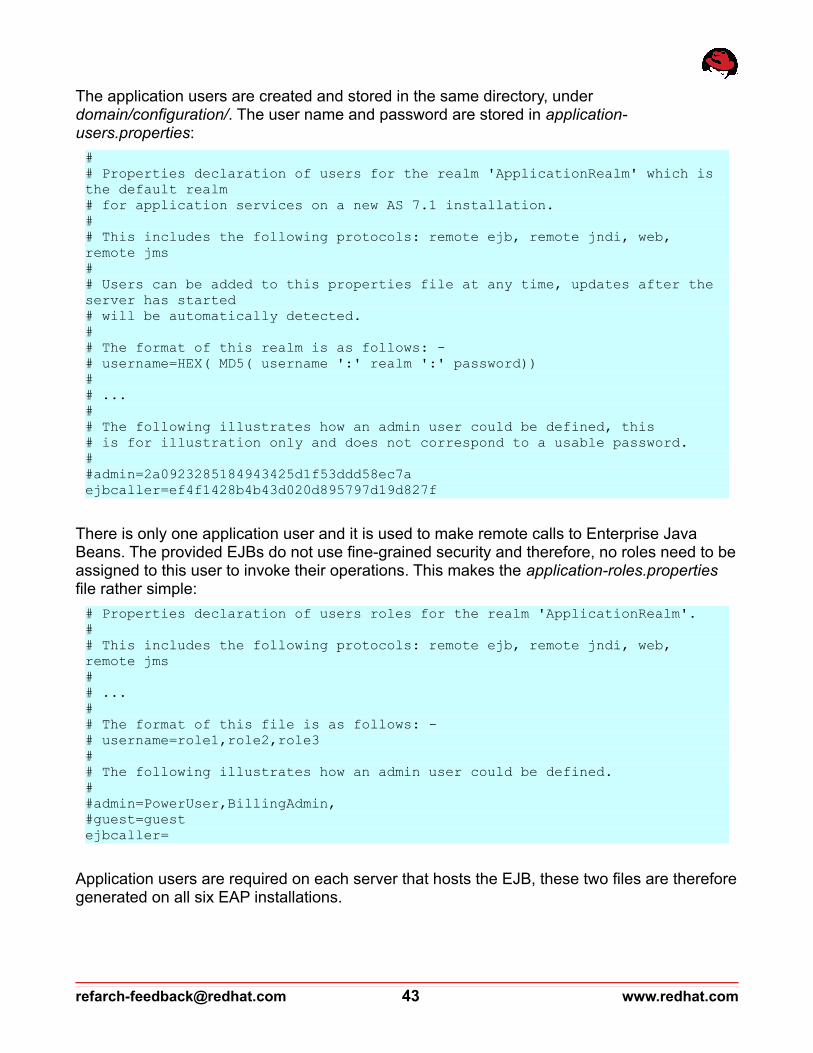
The application users are created and stored in the same directory, under domain/configuration/. The user name and password are stored in application-users.properties:
## Properties declaration of users for the realm 'ApplicationRealm' which is the default realm# for application services on a new AS 7.1 installation.## This includes the following protocols: remote ejb, remote jndi, web, remote jms## Users can be added to this properties file at any time, updates after the server has started# will be automatically detected.## The format of this realm is as follows: -# username=HEX( MD5( username ':' realm ':' password))## ...## The following illustrates how an admin user could be defined, this# is for illustration only and does not correspond to a usable password.##admin=2a0923285184943425d1f53ddd58ec7aejbcaller=ef4f1428b4b43d020d895797d19d827f
There is only one application user and it is used to make remote calls to Enterprise Java Beans. The provided EJBs do not use fine-grained security and therefore, no roles need to be assigned to this user to invoke their operations. This makes the application-roles.properties file rather simple:
# Properties declaration of users roles for the realm 'ApplicationRealm'.## This includes the following protocols: remote ejb, remote jndi, web, remote jms## ...## The format of this file is as follows: -# username=role1,role2,role3## The following illustrates how an admin user could be defined.##admin=PowerUser,BillingAdmin,#guest=guestejbcaller=
Application users are required on each server that hosts the EJB, these two files are therefore generated on all six EAP installations.
[email protected] 43 www.redhat.com

As previously mentioned, the domain controller is started with the default host configuration file. This file is manually modified to change the server name, and is then changed again by the configuration script. Each section of this file is inspected separately. The only manual modification is changing the name of this host from its default value of master to a more descriptive name that identifies its node number:
<?xml version='1.0' encoding='UTF-8'?>
<host name="node1" xmlns="urn:jboss:domain:1.4">
The security configuration remains unchanged from its default values, but a review that provides a better understanding of the authentication section is still useful. As seen below under authentication, the management realm uses both the mgmt-users.properties file, previously reviewed, as well as a local default user configuration. This local user enables SILENT AUTHENTICATION when the client is on the same machine. As such, the user node1, although created, is not necessary for the active domain. It is created for the sake of consistency across the two domains. For further information about SILENT AUTHENTICATION of a local user, refer to the product documentation14.
<management> <security-realms> <security-realm name="ManagementRealm"> <authentication> <local default-user="$local"/> <properties path="mgmt-users.properties" relative-to="jboss.domain.config.dir"/> </authentication> </security-realm>
The rest of the security configuration simply refers to the application users, and once again, it is unchanged from the default values.
<security-realm name="ApplicationRealm"> <authentication> <local default-user="$local" allowed-users="*"/> <properties path="application-users.properties" relative-to="jboss.domain.config.dir"/> </authentication> <authorization> <properties path="application-roles.properties" relative-to="jboss.domain.config.dir"/> </authorization> </security-realm> </security-realms>
14 https://access.redhat.com/site/documentation/en-US/JBoss_Enterprise_Application_Platform/6.1/html-single/Security_Guide/index.html#Secure_the_Management_Interfaces2
www.redhat.com 44 [email protected]

Management interfaces are also configured as per the default and are not modified in the setup.
<management-interfaces> <native-interface security-realm="ManagementRealm"> <socket interface="management" port="${jboss.management.native.port:9999}"/> </native-interface> <http-interface security-realm="ManagementRealm"> <socket interface="management" port="${jboss.management.http.port:9990}"/> </http-interface> </management-interfaces> </management>
With node1 being the domain controller, the configuration file explicitly reflects this fact and points to <local/>. This is the default setup for the host.xml in EAP 6:
<domain-controller> <local/> </domain-controller>
Interfaces and JVM configuration are also left unchanged:
<interfaces> <interface name="management"> <inet-address value="${jboss.bind.address.management:127.0.0.1}"/> </interface> <interface name="public"> <inet-address value="${jboss.bind.address:127.0.0.1}"/> </interface> <interface name="unsecure"> <inet-address value="${jboss.bind.address.unsecure:127.0.0.1}"/> </interface> </interfaces>
<jvms> <jvm name="default"> <heap size="64m" max-size="256m"/> <permgen size="256m" max-size="256m"/> <jvm-options> <option value="-server"/> </jvm-options> </jvm> </jvms>
[email protected] 45 www.redhat.com

The automated configuration scripts remove the sample servers that are configured by default in JBoss EAP 6 and instead create a new server as part of this cluster. This server is named in a way that reflects both the node on which it runs as well as the domain to which it belongs. All servers are configured to auto start when the host starts up:
<servers> <server name="node1-active-server" group="cluster-server-group-1" auto-start="true"/> </servers></host>
In this reference architecture, each cluster contains three nodes. To segregate the nodes and avoid the backup messaging servers from attaching to their co-located live servers, each server belongs to a distinct server group. For a more thorough discussion of messaging server failover and how the backups are designated, refer to the section on HornetQ Messaging.
In this architecture, three server groups are named sequentially with the suffix of 1 to 3. The three EAP instances each belong to a respectively numbered server group. The first server designates its live HornetQ server to belong to the backup group 1 and its backup servers are assigned to groups 2 and 3. The group 2 server provides backup servers for groups 1 and 3, while group 3 provides backup servers for groups 1 and 2. This means that the cluster can theoretically tolerate the failure of any two nodes at a given time, since any single node always has a HornetQ server from all existing backup groups configured. It also means that a HornetQ backup server never attempts to back up a co-located live server, since no server-group ever contains two HornetQ servers with the same backup group name.
This pattern changes for a cluster of a different size. For a larger cluster of 5 or 10 nodes, configuring 5 or 10 HornetQ servers on each node may not be reasonable and could in fact be counterproductive. One option is to configure a fixed set of backup groups, for example 2 or 3 groups, to cover a cluster of any size. However the number of available backup groups can affect the resilience of the system in response to multiple server failures.
www.redhat.com 46 [email protected]

To start the other nodes of the active cluster, after the domain controller has been started, run the following commands on nodes 2 and 3, identified by IP addresses of 10.16.139.102 and 10.16.139.103:
/opt/jboss-eap-6.1_active/bin/domain.sh -b 10.16.139.102 -Djboss.domain.master.address=10.16.139.101 –host-config=host-slave.xml
/opt/jboss-eap-6.1_active/bin/domain.sh -b 10.16.139.103 -Djboss.domain.master.address=10.16.139.101 –host-config=host-slave.xml
These two nodes are configured similarly, so it suffices to look at the host configuration file for one of them:
<?xml version='1.0' encoding='UTF-8'?>
<host name="node2" xmlns="urn:jboss:domain:1.4">Once again, the host name is manually modified to reflect the host name.
In the case of nodes 2 and 3, the name selected for the host is not only for display and informational purposes. This host name is also picked up as the user name that is used to authenticate against the domain controller. The hash value of the the user name and its associated password is provided as the secret value of the server identity:
<management> <security-realms> <security-realm name="ManagementRealm"> <server-identities> <secret value="cGFzc3dvcmQxIQ=="/> </server-identities>
So in this case, node2 authenticates against the domain controller running on node1 by providing node2 as its username and the above secret value as its password hash. This value is copied from the output of the add-user script when node2 is added as a user.
The rest of the security configuration remains unchanged:
<authentication> <local default-user="$local"/> <properties path="mgmt-users.properties" relative-to="jboss.domain.config.dir"/> </authentication> </security-realm> <security-realm name="ApplicationRealm"> <authentication> <local default-user="$local" allowed-users="*"/> <properties path="application-users.properties" relative-to="jboss.domain.config.dir"/> </authentication> <authorization> <properties path="application-roles.properties" relative-to="jboss.domain.config.dir"/> </authorization> </security-realm> </security-realms>
[email protected] 47 www.redhat.com

Management interface configuration also remains unchanged:
<management-interfaces> <native-interface security-realm="ManagementRealm"> <socket interface="management" port="${jboss.management.native.port:9999}"/> </native-interface> </management-interfaces> </management>
The domain controller is identified by a Java system property that is passed to the node2 JVM when starting the server:
<domain-controller> <remote host="${jboss.domain.master.address}" port="${jboss.domain.master.port:9999}" security-realm="ManagementRealm"/> </domain-controller>
Other configuration, including that of interfaces and JVMs, also remains unchanged:
<interfaces> <interface name="management"> <inet-address value="${jboss.bind.address.management:127.0.0.1}"/> </interface> <interface name="public"> <inet-address value="${jboss.bind.address:127.0.0.1}"/> </interface> <interface name="unsecure"> <inet-address value="${jboss.bind.address.unsecure:127.0.0.1}"/> </interface> </interfaces>
<jvms> <jvm name="default"> <heap size="64m" max-size="256m"/> <permgen size="256m" max-size="256m"/> <jvm-options> <option value="-server"/> </jvm-options> </jvm> </jvms>
Automated configuration scripts remove the sample servers of JBoss EAP 6 and instead create a new server as part of this cluster:
<servers> <server name="node2-active-server" group="cluster-server-group-2" auto-start="true"/>
</servers></host>
www.redhat.com 48 [email protected]

The bulk of the configuration for a cluster or a domain is stored in its domain.xml file. This file can only be edited when the servers are stopped, and is best modified through the management capabilities, which include the management console, CLI and various scripts and languages available on top of CLI. The provided configuration script uses a small number of Java classes to completely rebuild the domain configuration. This section inspects each segment of the domain configuration in detail.
The first section of the domain configuration file lists the various extensions that are enabled for this domain. This section is left unchanged and includes all the standard available extensions:
<?xml version='1.0' encoding='UTF-8'?>
<domain xmlns="urn:jboss:domain:1.4">
<extensions> <extension module="org.jboss.as.clustering.infinispan"/> <extension module="org.jboss.as.clustering.jgroups"/> <extension module="org.jboss.as.cmp"/> <extension module="org.jboss.as.configadmin"/> <extension module="org.jboss.as.connector"/> <extension module="org.jboss.as.ee"/> <extension module="org.jboss.as.ejb3"/> <extension module="org.jboss.as.jacorb"/> <extension module="org.jboss.as.jaxr"/> <extension module="org.jboss.as.jaxrs"/> <extension module="org.jboss.as.jdr"/> <extension module="org.jboss.as.jmx"/> <extension module="org.jboss.as.jpa"/> <extension module="org.jboss.as.jsf"/> <extension module="org.jboss.as.jsr77"/> <extension module="org.jboss.as.logging"/> <extension module="org.jboss.as.mail"/> <extension module="org.jboss.as.messaging"/> <extension module="org.jboss.as.modcluster"/> <extension module="org.jboss.as.naming"/> <extension module="org.jboss.as.pojo"/> <extension module="org.jboss.as.remoting"/> <extension module="org.jboss.as.sar"/> <extension module="org.jboss.as.security"/> <extension module="org.jboss.as.threads"/> <extension module="org.jboss.as.transactions"/> <extension module="org.jboss.as.web"/> <extension module="org.jboss.as.webservices"/> <extension module="org.jboss.as.weld"/> </extensions>
System properties are also left as default:
<system-properties> <property name="java.net.preferIPv4Stack" value="true"/> </system-properties>
[email protected] 49 www.redhat.com

The next section of the domain configuration is the profiles section. JBoss EAP 6.1 ships with four pre-configured profiles:
<profile name="default"><profile name="ha"><profile name="full"><profile name="full-ha">
The configuration script uses the full-ha profile as its baseline. All four profiles are removed and three new profiles are created in their place:
<profile name="full-ha-1"><profile name="full-ha-2"><profile name="full-ha-3">
The naming pattern for the server group and profile of each node is as follows:
Cluster Node Server Group Profile
node1 cluster-server-group-1 full-ha-1
node2 cluster-server-group-2 full-ha-2
node3 cluster-server-group-3 full-ha-3
Table 4.5.3-1: Server Group and Profile Assignment
The server profile contains almost all of a server's configuration. These three profiles are largely identical. They only differ in their HornetQ backup group names, so that messaging backup servers do not attempt to replicate co-located servers. This issue is discussed at some length in both this section and previous sections.
This section only reviews the first profile, while making note of the sections that are distinct in the second and third profiles:
<profiles> <profile name="full-ha-1"> <subsystem xmlns="urn:jboss:domain:cmp:1.1"/> <subsystem xmlns="urn:jboss:domain:configadmin:1.0"/> <subsystem xmlns="urn:jboss:domain:datasources:1.1"> <datasources> <datasource jndi-name="java:jboss/datasources/ExampleDS" pool-name="ExampleDS" enabled="true" use-java-context="true"> <connection-url>jdbc:h2:mem:test;DB_CLOSE_DELAY=-1</connection-url> <driver>h2</driver> <security> <user-name>sa</user-name> <password>sa</password> </security> </datasource>
The first few lines of the profile remain unchanged from the full-ha baseline. The ExampleDS datasource, using an in-memory H2 database, remains intact but is not used in the cluster.
www.redhat.com 50 [email protected]

The configuration script deploys a JDBC driver for postgres, and configures a connection pool to the eap6 database using the database owner's credentials:
<datasource jndi-name="java:jboss/datasources/ClusterDS" pool-name="ClusterDS" enabled="true"> <connection-url>jdbc:postgresql://10.16.139.100:5432/eap6</connection-url> <driver-class>org.postgresql.Driver</driver-class> <driver>postgresql-9.2-1003.jdbc4.jar</driver> <security> <user-name>jboss</user-name> <password>password</password> </security> </datasource>
The driver element includes the name of the JAR file where the driver class can be found. This creates a dependency on the JDBC driver JAR file and assumes that it has been separately deployed. There are multiple ways to make a JDBC driver available in EAP 6. The approach here is to deploy the driver, as with any other application.
The ExampleDS connection pool uses a different approach for its driver. The JDBC driver of the H2 Database is made available as a module. As such, it is configured under the drivers section of the domain configuration:
<drivers> <driver name="h2" module="com.h2database.h2"> <xa-datasource-class>org.h2.jdbcx.JdbcDataSource</xa-datasource-class> </driver> </drivers> </datasources> </subsystem>
After datasources, the profile configures the EE and EJB3 subsystems. This configuration is derived from the standard full-ha profile and unchanged:
<subsystem xmlns="urn:jboss:domain:ee:1.1"> <spec-descriptor-property-replacement>false</spec-descriptor-property-replacement> <jboss-descriptor-property-replacement>true</jboss-descriptor-property-replacement> </subsystem> <subsystem xmlns="urn:jboss:domain:ejb3:1.4"> <session-bean> <stateless> <bean-instance-pool-ref pool-name="slsb-strict-max-pool"/>...... </subsystem>
[email protected] 51 www.redhat.com
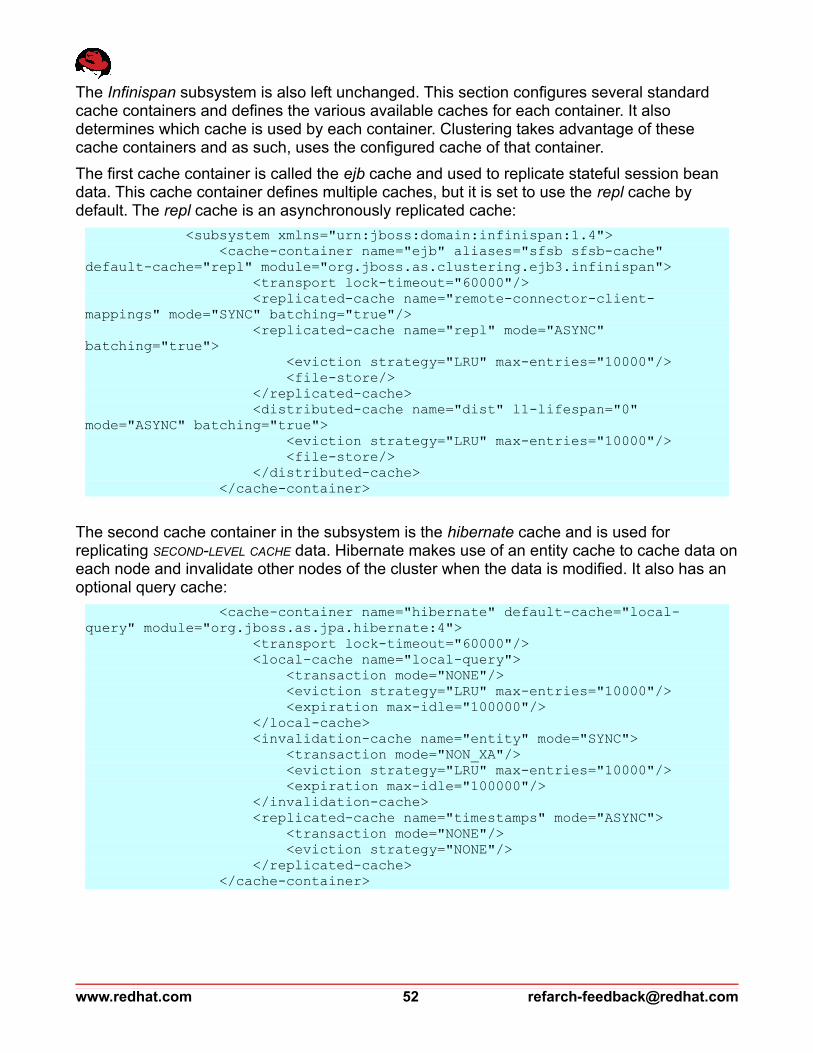
The Infinispan subsystem is also left unchanged. This section configures several standard cache containers and defines the various available caches for each container. It also determines which cache is used by each container. Clustering takes advantage of these cache containers and as such, uses the configured cache of that container.
The first cache container is called the ejb cache and used to replicate stateful session bean data. This cache container defines multiple caches, but it is set to use the repl cache by default. The repl cache is an asynchronously replicated cache:
<subsystem xmlns="urn:jboss:domain:infinispan:1.4"> <cache-container name="ejb" aliases="sfsb sfsb-cache" default-cache="repl" module="org.jboss.as.clustering.ejb3.infinispan"> <transport lock-timeout="60000"/> <replicated-cache name="remote-connector-client-mappings" mode="SYNC" batching="true"/> <replicated-cache name="repl" mode="ASYNC" batching="true"> <eviction strategy="LRU" max-entries="10000"/> <file-store/> </replicated-cache> <distributed-cache name="dist" l1-lifespan="0" mode="ASYNC" batching="true"> <eviction strategy="LRU" max-entries="10000"/> <file-store/> </distributed-cache> </cache-container>
The second cache container in the subsystem is the hibernate cache and is used for replicating SECOND-LEVEL CACHE data. Hibernate makes use of an entity cache to cache data on each node and invalidate other nodes of the cluster when the data is modified. It also has an optional query cache:
<cache-container name="hibernate" default-cache="local-query" module="org.jboss.as.jpa.hibernate:4"> <transport lock-timeout="60000"/> <local-cache name="local-query"> <transaction mode="NONE"/> <eviction strategy="LRU" max-entries="10000"/> <expiration max-idle="100000"/> </local-cache> <invalidation-cache name="entity" mode="SYNC"> <transaction mode="NON_XA"/> <eviction strategy="LRU" max-entries="10000"/> <expiration max-idle="100000"/> </invalidation-cache> <replicated-cache name="timestamps" mode="ASYNC"> <transaction mode="NONE"/> <eviction strategy="NONE"/> </replicated-cache> </cache-container>
www.redhat.com 52 [email protected]
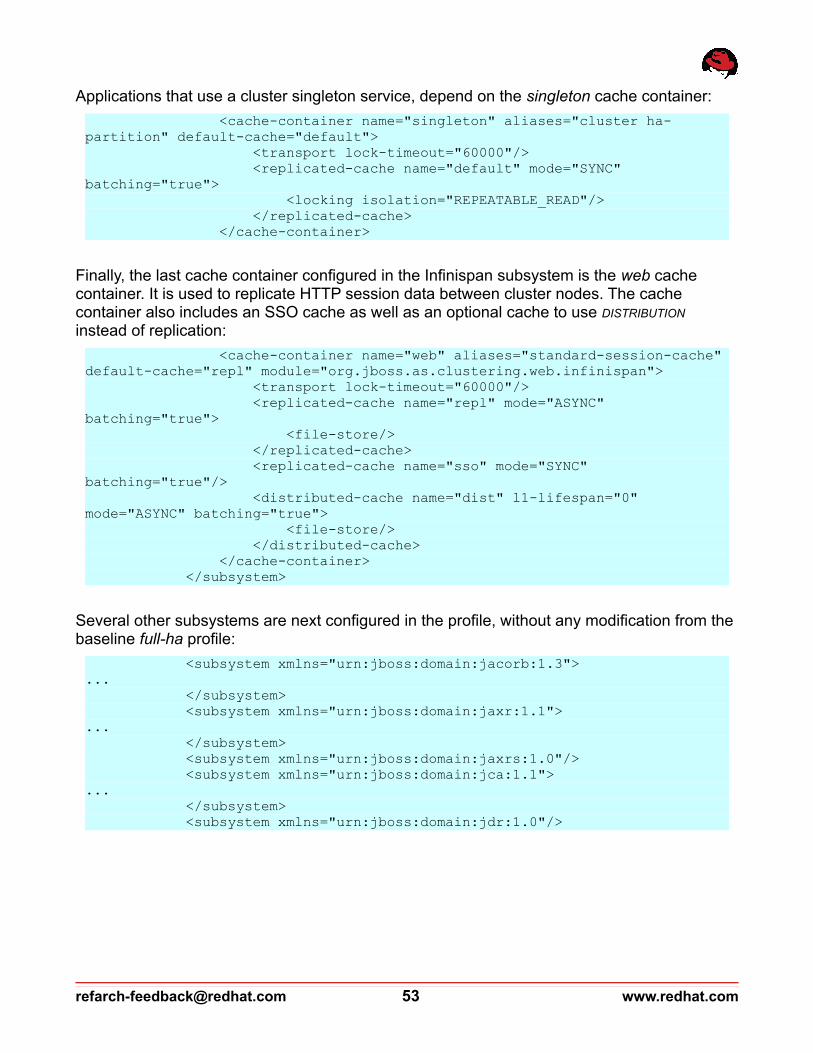
Applications that use a cluster singleton service, depend on the singleton cache container:
<cache-container name="singleton" aliases="cluster ha-partition" default-cache="default"> <transport lock-timeout="60000"/> <replicated-cache name="default" mode="SYNC" batching="true"> <locking isolation="REPEATABLE_READ"/> </replicated-cache> </cache-container>
Finally, the last cache container configured in the Infinispan subsystem is the web cache container. It is used to replicate HTTP session data between cluster nodes. The cache container also includes an SSO cache as well as an optional cache to use DISTRIBUTION instead of replication:
<cache-container name="web" aliases="standard-session-cache" default-cache="repl" module="org.jboss.as.clustering.web.infinispan"> <transport lock-timeout="60000"/> <replicated-cache name="repl" mode="ASYNC" batching="true"> <file-store/> </replicated-cache> <replicated-cache name="sso" mode="SYNC" batching="true"/> <distributed-cache name="dist" l1-lifespan="0" mode="ASYNC" batching="true"> <file-store/> </distributed-cache> </cache-container> </subsystem>
Several other subsystems are next configured in the profile, without any modification from the baseline full-ha profile:
<subsystem xmlns="urn:jboss:domain:jacorb:1.3">... </subsystem> <subsystem xmlns="urn:jboss:domain:jaxr:1.1">... </subsystem> <subsystem xmlns="urn:jboss:domain:jaxrs:1.0"/> <subsystem xmlns="urn:jboss:domain:jca:1.1">... </subsystem> <subsystem xmlns="urn:jboss:domain:jdr:1.0"/>
[email protected] 53 www.redhat.com

The JGroups subsystem is also left unchanged. This subsystem is responsible for intra-node communication between the nodes of a cluster. It uses UDP by default to send multicast messages but a protocol stack is built on top of UDP to provide reliability.
While UDP is the stack in use by the profile, as designated by the default-stack attribute, a TCP stack is also configured for potential use. In networks where UDP communication is not possible, the TCP stack is a popular alternative. Refer to the documentation for a further discussion of this topic, including how to change the default stack to TCP15.
<subsystem xmlns="urn:jboss:domain:jgroups:1.1" default-stack="udp"> <stack name="tcp"> <transport type="TCP" socket-binding="jgroups-tcp"/> <protocol type="MPING" socket-binding="jgroups-mping"/> <protocol type="MERGE2"/> <protocol type="FD_SOCK" socket-binding="jgroups-tcp-fd"/> <protocol type="FD"/> <protocol type="VERIFY_SUSPECT"/> <protocol type="pbcast.NAKACK"/> <protocol type="UNICAST2"/> <protocol type="pbcast.STABLE"/> <protocol type="pbcast.GMS"/> <protocol type="UFC"/> <protocol type="MFC"/> <protocol type="FRAG2"/> <protocol type="RSVP"/> </stack> <stack name="udp"> <transport type="UDP" socket-binding="jgroups-udp"/> <protocol type="PING"/> <protocol type="MERGE3"/> <protocol type="FD_SOCK" socket-binding="jgroups-udp-fd"/> <protocol type="FD"/> <protocol type="VERIFY_SUSPECT"/> <protocol type="pbcast.NAKACK"/> <protocol type="UNICAST2"/> <protocol type="pbcast.STABLE"/> <protocol type="pbcast.GMS"/> <protocol type="UFC"/> <protocol type="MFC"/> <protocol type="FRAG2"/> <protocol type="RSVP"/> </stack> </subsystem>
15 https://access.redhat.com/site/documentation/en-US/JBoss_Enterprise_Application_Platform/6/html/Administration_and_Configuration_Guide/Configure_the_JGroups_Subsystem_to_Use_TCP.html
www.redhat.com 54 [email protected]
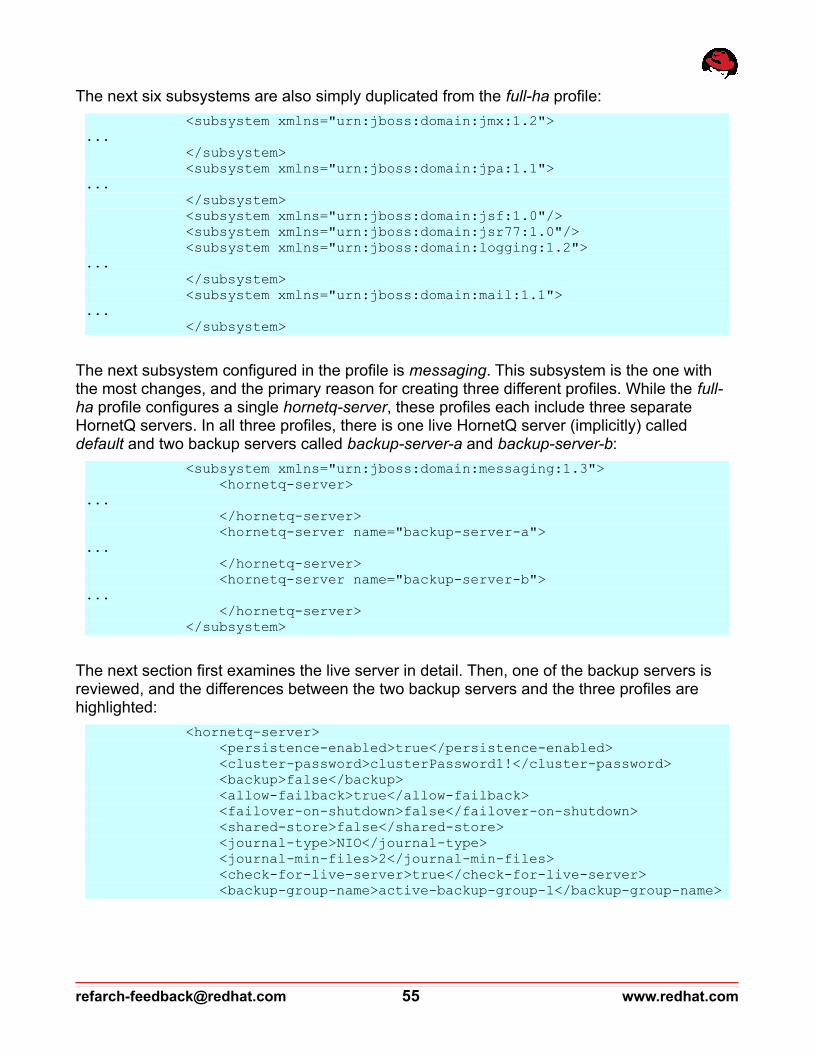
The next six subsystems are also simply duplicated from the full-ha profile:
<subsystem xmlns="urn:jboss:domain:jmx:1.2">... </subsystem> <subsystem xmlns="urn:jboss:domain:jpa:1.1">... </subsystem> <subsystem xmlns="urn:jboss:domain:jsf:1.0"/> <subsystem xmlns="urn:jboss:domain:jsr77:1.0"/> <subsystem xmlns="urn:jboss:domain:logging:1.2">... </subsystem> <subsystem xmlns="urn:jboss:domain:mail:1.1">... </subsystem>
The next subsystem configured in the profile is messaging. This subsystem is the one with the most changes, and the primary reason for creating three different profiles. While the full-ha profile configures a single hornetq-server, these profiles each include three separate HornetQ servers. In all three profiles, there is one live HornetQ server (implicitly) called default and two backup servers called backup-server-a and backup-server-b:
<subsystem xmlns="urn:jboss:domain:messaging:1.3"> <hornetq-server>... </hornetq-server> <hornetq-server name="backup-server-a">... </hornetq-server> <hornetq-server name="backup-server-b">... </hornetq-server> </subsystem>
The next section first examines the live server in detail. Then, one of the backup servers is reviewed, and the differences between the two backup servers and the three profiles are highlighted:
<hornetq-server> <persistence-enabled>true</persistence-enabled> <cluster-password>clusterPassword1!</cluster-password> <backup>false</backup> <allow-failback>true</allow-failback> <failover-on-shutdown>false</failover-on-shutdown> <shared-store>false</shared-store> <journal-type>NIO</journal-type> <journal-min-files>2</journal-min-files> <check-for-live-server>true</check-for-live-server> <backup-group-name>active-backup-group-1</backup-group-name>
[email protected] 55 www.redhat.com

Messages are marked as persistent in all three HornetQ servers of all three profiles. Even when message replication is used in a cluster, it is only persistent messages that are replicated, so it is important to always enable message persistence:
<persistence-enabled>true</persistence-enabled>
The default profile does not set a cluster password. In the reference architecture, a simple hard-coded password is set for all the servers:
<cluster-password>clusterPassword1!</cluster-password>
The default HornetQ server is designated as the live server. To make this choice explicit and obvious, its backup flag is set to false. This flag is set to true for backup-server-a and backup-server-b of each profile:
<backup>false</backup>
In a HornetQ cluster, the failure of a live server results in a designated backup server coming live and taking over that server's responsibilities. This process is commonly referred to as failover. Failures are eventually corrected, and failed servers come back online sooner or later. It is often desirable to have the recovered server take back its functions from the backup, and to have the cluster restore to its original shape. In HornetQ terminology, the process of moving control back to a server that has come back online, is called failback. This reference architecture enables failback. If disabled, backup servers would resume functionality and a restarted or recovered server would be of less use.
<allow-failback>true</allow-failback>
Failover is typically desired when a server has truly failed. To distinguish the graceful shutdown of a server from a failure and avoid failover in cases of intentional shutdowns, this flag is set to false:
<failover-on-shutdown>false</failover-on-shutdown>
HornetQ supports both Shared Store and Message Replication as high availability modes. This topic is discussed in further detail in the section called HornetQ Messaging. This reference architecture sets shared-store to false to use message replication instead.
<shared-store>false</shared-store>
Even with message replication, JMS messages are still persisted and local journals are maintained by live and backup servers. The details of persistence is configurable but left unchanged from the full-ha profile in this reference architecture:
<journal-type>NIO</journal-type> <journal-min-files>2</journal-min-files>
www.redhat.com 56 [email protected]

For failback to function properly, a backup server needs to check and be aware of the return of its original live server. This requires setting check-for-live-server to true. This attribute is required on backup servers, but its presence on a live server is also harmless. Additionally, a known issue in certain version of EAP 6 require this attribute to be set on the live server as well16.
<check-for-live-server>true</check-for-live-server>
In a cluster of HornetQ servers, a number of backup servers are started along with live servers. Backup servers look in the cluster and choose a live server with a matching backup-group-name to replicate. This property helps avoid having co-located live-backup server pairs that would fail to provide redundancy.
This reference architecture configures one live server and two backup servers on each EAP node. The three servers on each node must have unique values for this property, so that the two backup servers avoid replicating their co-located live server. However, the property for the live server on each node, must match that of backup servers on other nodes. That is in fact the reason for creating three different profiles for this reference architecture. The only difference between the three profiles is the backup-group-name for the live server and backup servers of each profile. In the active cluster, the backup-group-name for the live server of the full-ha-1 profile is configured as follows:
<backup-group-name>active-backup-group-1</backup-group-name>
The pattern used for naming the backup group of each server, ensures that each live server is always paired up with a backup server of another node. The tables below show this naming pattern for both the active and passive cluster/domains:
Cluster Node default backup-server-a backup-server-b
node1 active-backup-group-1 active-backup-group-2 active-backup-group-3
node2 active-backup-group-2 active-backup-group-3 active-backup-group-1
node3 active-backup-group-3 active-backup-group-1 active-backup-group-2
Table 4.5.3-2: Active Cluster backup-group-name for each HornetQ Server
Cluster Node default backup-server-a backup-server-b
node1 passive-backup-group-1 passive-backup-group-2 passive-backup-group-3
node2 passive-backup-group-2 passive-backup-group-3 passive-backup-group-1
node3 passive-backup-group-3 passive-backup-group-1 passive-backup-group-2
Table 4.5.3-3: Passive Cluster backup-group-name for each HornetQ Server
16 https://bugzilla.redhat.com/show_bug.cgi?id=908261
[email protected] 57 www.redhat.com

Each HornetQ server configures a set of acceptors and connectors for its incoming and outgoing communication. The in-vm connector and acceptor must have a server-id that is unique within the JVM. The default full-ha profile leaves this value to 0 and only configures one HornetQ server per EAP instance. This reference architecture configures three distinct HornetQ servers that require unique server-id values. By convention and for the sake of consistency, this reference architecture uses the server-id of 1 for live server, 2 for the first backup and 3 for the second backup:
<connectors> <netty-connector name="netty" socket-binding="messaging"/> <netty-connector name="netty-throughput" socket-binding="messaging-throughput"> <param key="batch-delay" value="50"/> </netty-connector> <in-vm-connector name="in-vm" server-id="1"/> </connectors>
<acceptors> <netty-acceptor name="netty" socket-binding="messaging"/> <netty-acceptor name="netty-throughput" socket-binding="messaging-throughput"> <param key="batch-delay" value="50"/> <param key="direct-deliver" value="false"/> </netty-acceptor> <in-vm-acceptor name="in-vm" server-id="1"/> </acceptors>
www.redhat.com 58 [email protected]

The broadcast groups, discovery groups and cluster connections are left unchanged from their default full-ha configuration:
<broadcast-groups> <broadcast-group name="bg-group1"> <socket-binding>messaging-group</socket-binding> <broadcast-period>5000</broadcast-period> <connector-ref> netty </connector-ref> </broadcast-group> </broadcast-groups>
<discovery-groups> <discovery-group name="dg-group1"> <socket-binding>messaging-group</socket-binding> <refresh-timeout>10000</refresh-timeout> </discovery-group> </discovery-groups>
<cluster-connections> <cluster-connection name="my-cluster"> <address>jms</address> <connector-ref>netty</connector-ref> <discovery-group-ref discovery-group-name="dg-group1"/> </cluster-connection> </cluster-connections>
The HornetQ server is also left with its default security settings, allowing guests to send and consume messages:
<security-settings> <security-setting match="#"> <permission type="send" roles="guest"/> <permission type="consume" roles="guest"/> <permission type="createNonDurableQueue" roles="guest"/> <permission type="deleteNonDurableQueue" roles="guest"/> </security-setting> </security-settings>
[email protected] 59 www.redhat.com

Address settings for the server determine some of the server behavior where destinations are concerned. The default full-ha configuration is appropriate for this reference architecture, but the redistribution parameter is particularly noteworthy.
HornetQ can monitor queues and react if a queue has messages waiting, but no consumers to process them. This results in REDISTRIBUTION, where messages are rerouted to other queues, which have consumers and are able to process them. The redistribution-delay configures how many milliseconds the system should wait, before determining that no consumers are available. The default value is -1 and disables redistribution. This mechanism is key to part of the message clustering solution in this reference architecture:
<address-settings> <address-setting match="#"> <dead-letter-address>jms.queue.DLQ</dead-letter-address> <expiry-address>jms.queue.ExpiryQueue</expiry-address> <redelivery-delay>0</redelivery-delay> <max-size-bytes>10485760</max-size-bytes> <address-full-policy>BLOCK</address-full-policy> <message-counter-history-day-limit>10</message-counter-history-day-limit> <redistribution-delay>1000</redistribution-delay> </address-setting> </address-settings>
Three JMS Connection Factories are configured in the full-ha profile; the first two follow their default configuration from the full-ha profile.
This reference architecture uses message-driven beans to consume messages, which default to using the hornetq-ra pooled connection factory. The script configures this factory to follow HA behavior and retry connections and message transmission:
<jms-connection-factories> <connection-factory name="InVmConnectionFactory">... </connection-factory> <connection-factory name="RemoteConnectionFactory">... </connection-factory> <pooled-connection-factory name="hornetq-ra">... <ha>true</ha> <block-on-acknowledge>true</block-on-acknowledge> <retry-interval>1000</retry-interval> <retry-interval-multiplier>1</retry-interval-multiplier> <reconnect-attempts>-1</reconnect-attempts> </pooled-connection-factory> </jms-connection-factories> </hornetq-server>
This concludes the configuration of the default live HornetQ server.
www.redhat.com 60 [email protected]
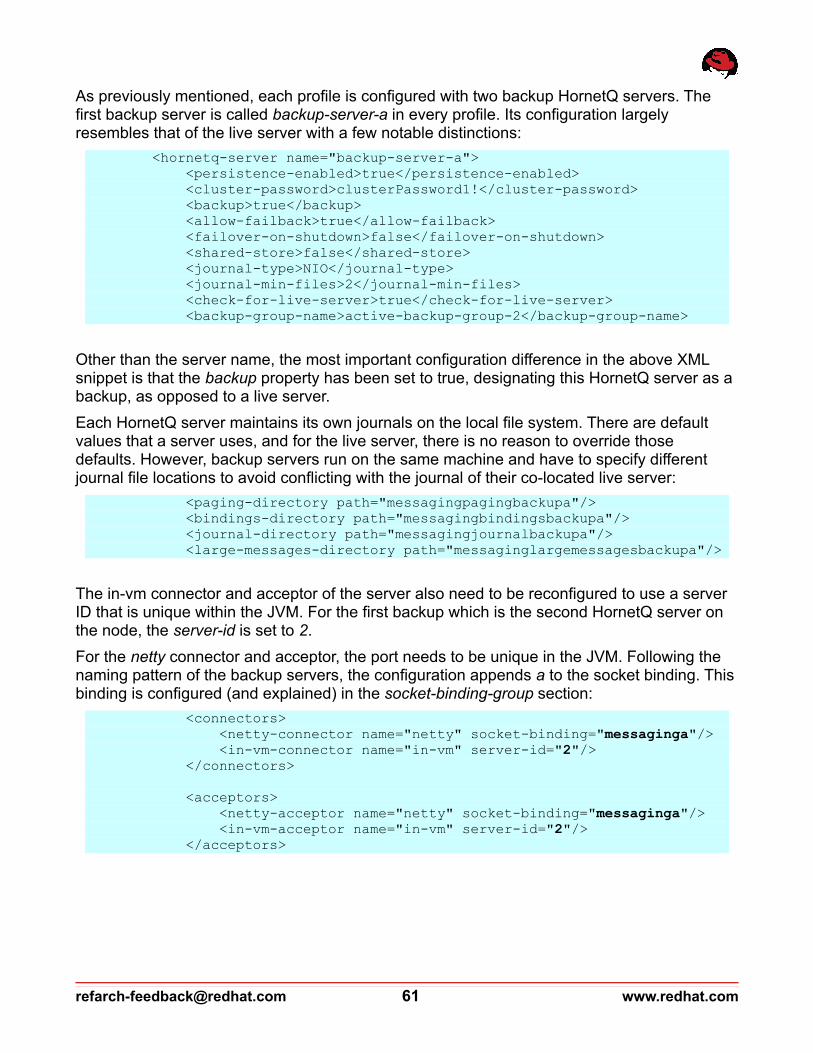
As previously mentioned, each profile is configured with two backup HornetQ servers. The first backup server is called backup-server-a in every profile. Its configuration largely resembles that of the live server with a few notable distinctions:
<hornetq-server name="backup-server-a"> <persistence-enabled>true</persistence-enabled> <cluster-password>clusterPassword1!</cluster-password> <backup>true</backup> <allow-failback>true</allow-failback> <failover-on-shutdown>false</failover-on-shutdown> <shared-store>false</shared-store> <journal-type>NIO</journal-type> <journal-min-files>2</journal-min-files> <check-for-live-server>true</check-for-live-server> <backup-group-name>active-backup-group-2</backup-group-name>
Other than the server name, the most important configuration difference in the above XML snippet is that the backup property has been set to true, designating this HornetQ server as a backup, as opposed to a live server.
Each HornetQ server maintains its own journals on the local file system. There are default values that a server uses, and for the live server, there is no reason to override those defaults. However, backup servers run on the same machine and have to specify different journal file locations to avoid conflicting with the journal of their co-located live server:
<paging-directory path="messagingpagingbackupa"/> <bindings-directory path="messagingbindingsbackupa"/> <journal-directory path="messagingjournalbackupa"/> <large-messages-directory path="messaginglargemessagesbackupa"/>
The in-vm connector and acceptor of the server also need to be reconfigured to use a server ID that is unique within the JVM. For the first backup which is the second HornetQ server on the node, the server-id is set to 2.
For the netty connector and acceptor, the port needs to be unique in the JVM. Following the naming pattern of the backup servers, the configuration appends a to the socket binding. This binding is configured (and explained) in the socket-binding-group section:
<connectors> <netty-connector name="netty" socket-binding="messaginga"/> <in-vm-connector name="in-vm" server-id="2"/> </connectors>
<acceptors> <netty-acceptor name="netty" socket-binding="messaginga"/> <in-vm-acceptor name="in-vm" server-id="2"/> </acceptors>
[email protected] 61 www.redhat.com
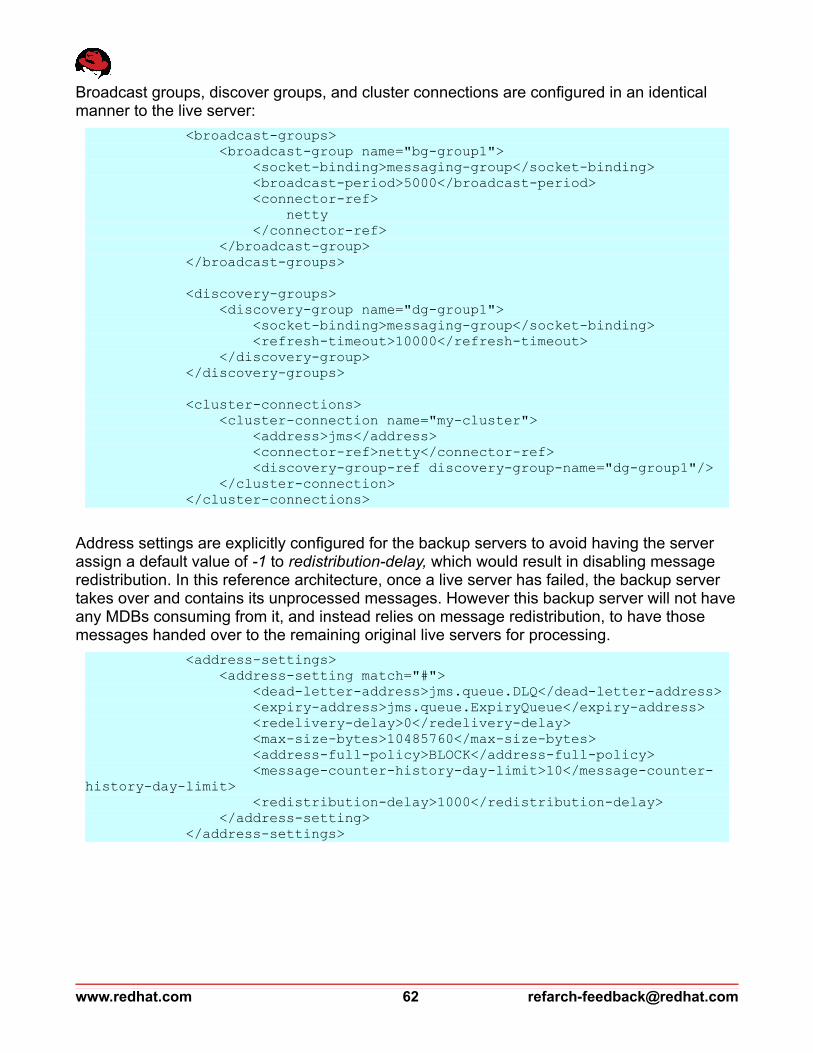
Broadcast groups, discover groups, and cluster connections are configured in an identical manner to the live server:
<broadcast-groups> <broadcast-group name="bg-group1"> <socket-binding>messaging-group</socket-binding> <broadcast-period>5000</broadcast-period> <connector-ref> netty </connector-ref> </broadcast-group> </broadcast-groups>
<discovery-groups> <discovery-group name="dg-group1"> <socket-binding>messaging-group</socket-binding> <refresh-timeout>10000</refresh-timeout> </discovery-group> </discovery-groups>
<cluster-connections> <cluster-connection name="my-cluster"> <address>jms</address> <connector-ref>netty</connector-ref> <discovery-group-ref discovery-group-name="dg-group1"/> </cluster-connection> </cluster-connections>
Address settings are explicitly configured for the backup servers to avoid having the server assign a default value of -1 to redistribution-delay, which would result in disabling message redistribution. In this reference architecture, once a live server has failed, the backup server takes over and contains its unprocessed messages. However this backup server will not have any MDBs consuming from it, and instead relies on message redistribution, to have those messages handed over to the remaining original live servers for processing.
<address-settings> <address-setting match="#"> <dead-letter-address>jms.queue.DLQ</dead-letter-address> <expiry-address>jms.queue.ExpiryQueue</expiry-address> <redelivery-delay>0</redelivery-delay> <max-size-bytes>10485760</max-size-bytes> <address-full-policy>BLOCK</address-full-policy> <message-counter-history-day-limit>10</message-counter-history-day-limit> <redistribution-delay>1000</redistribution-delay> </address-setting> </address-settings>
www.redhat.com 62 [email protected]
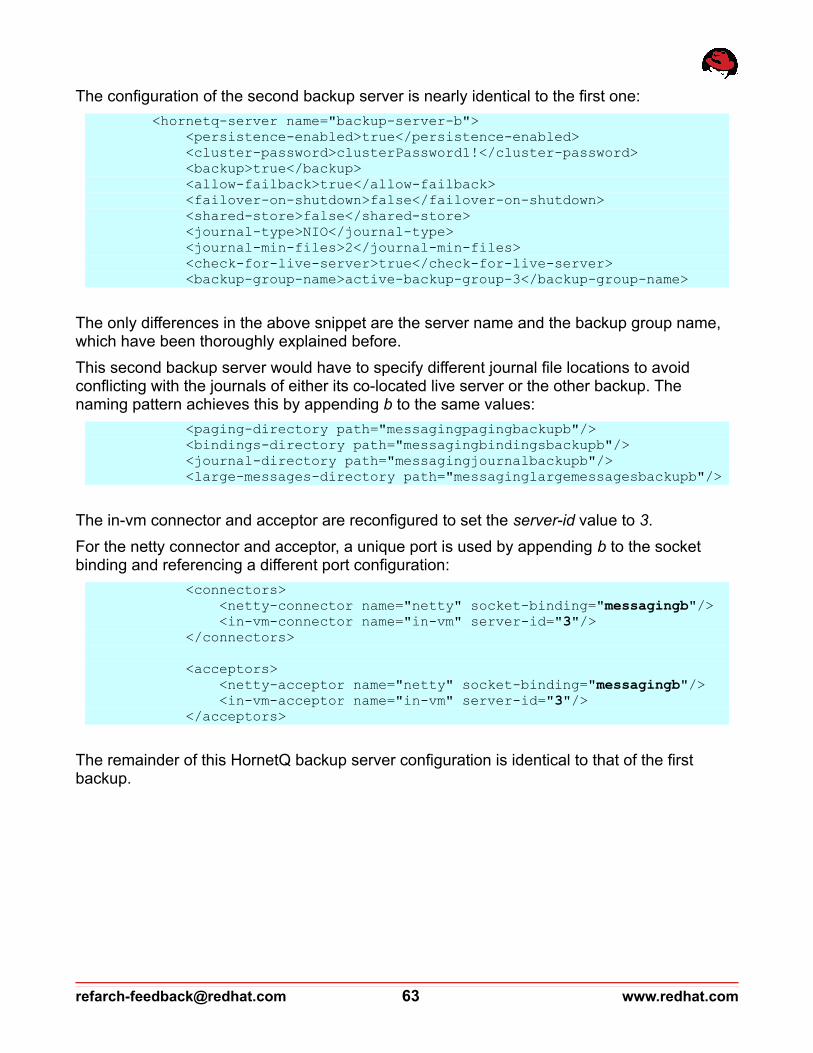
The configuration of the second backup server is nearly identical to the first one:
<hornetq-server name="backup-server-b"> <persistence-enabled>true</persistence-enabled> <cluster-password>clusterPassword1!</cluster-password> <backup>true</backup> <allow-failback>true</allow-failback> <failover-on-shutdown>false</failover-on-shutdown> <shared-store>false</shared-store> <journal-type>NIO</journal-type> <journal-min-files>2</journal-min-files> <check-for-live-server>true</check-for-live-server> <backup-group-name>active-backup-group-3</backup-group-name>
The only differences in the above snippet are the server name and the backup group name, which have been thoroughly explained before.
This second backup server would have to specify different journal file locations to avoid conflicting with the journals of either its co-located live server or the other backup. The naming pattern achieves this by appending b to the same values:
<paging-directory path="messagingpagingbackupb"/> <bindings-directory path="messagingbindingsbackupb"/> <journal-directory path="messagingjournalbackupb"/> <large-messages-directory path="messaginglargemessagesbackupb"/>
The in-vm connector and acceptor are reconfigured to set the server-id value to 3.
For the netty connector and acceptor, a unique port is used by appending b to the socket binding and referencing a different port configuration:
<connectors> <netty-connector name="netty" socket-binding="messagingb"/> <in-vm-connector name="in-vm" server-id="3"/> </connectors>
<acceptors> <netty-acceptor name="netty" socket-binding="messagingb"/> <in-vm-acceptor name="in-vm" server-id="3"/> </acceptors>
The remainder of this HornetQ backup server configuration is identical to that of the first backup.
[email protected] 63 www.redhat.com

After messaging, the next subsystem configuration in the domain configuration file is modcluster. The configuration of this subsystem is the same in all three profiles, but different between the active and passive clusters, as each has its own web server proxy. For the active cluster, it is configured as follows:
<subsystem xmlns="urn:jboss:domain:modcluster:1.1"> <mod-cluster-config advertise-socket="modcluster" proxy-list="10.16.139.100:6667" advertise="false" connector="ajp"> <dynamic-load-provider> <load-metric type="busyness"/> </dynamic-load-provider> </mod-cluster-config> </subsystem>
The rest of each profile remains unchanged from the baseline full-ha configuration:
<subsystem xmlns="urn:jboss:domain:naming:1.3">... </subsystem> <subsystem xmlns="urn:jboss:domain:pojo:1.0"/> <subsystem xmlns="urn:jboss:domain:remoting:1.1">... </subsystem> <subsystem xmlns="urn:jboss:domain:resource-adapters:1.1"/> <subsystem xmlns="urn:jboss:domain:sar:1.0"/> <subsystem xmlns="urn:jboss:domain:security:1.2">... </subsystem> <subsystem xmlns="urn:jboss:domain:threads:1.1"/> <subsystem xmlns="urn:jboss:domain:transactions:1.3">... </subsystem> <subsystem xmlns="urn:jboss:domain:web:1.4" default-virtual-server="default-host" native="false">... </subsystem> <subsystem xmlns="urn:jboss:domain:webservices:1.2">... </subsystem> <subsystem xmlns="urn:jboss:domain:weld:1.0"/> </profile>
www.redhat.com 64 [email protected]
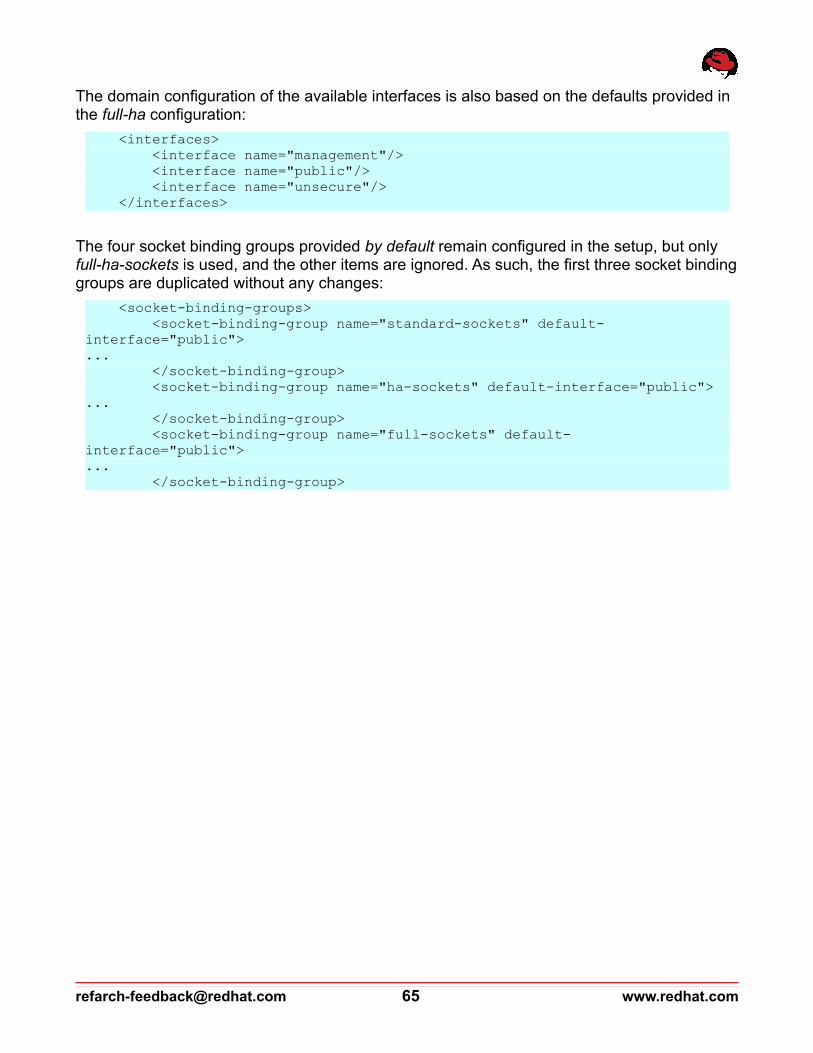
The domain configuration of the available interfaces is also based on the defaults provided in the full-ha configuration:
<interfaces> <interface name="management"/> <interface name="public"/> <interface name="unsecure"/> </interfaces>
The four socket binding groups provided by default remain configured in the setup, but only full-ha-sockets is used, and the other items are ignored. As such, the first three socket binding groups are duplicated without any changes:
<socket-binding-groups> <socket-binding-group name="standard-sockets" default-interface="public">... </socket-binding-group> <socket-binding-group name="ha-sockets" default-interface="public">... </socket-binding-group> <socket-binding-group name="full-sockets" default-interface="public">... </socket-binding-group>
[email protected] 65 www.redhat.com
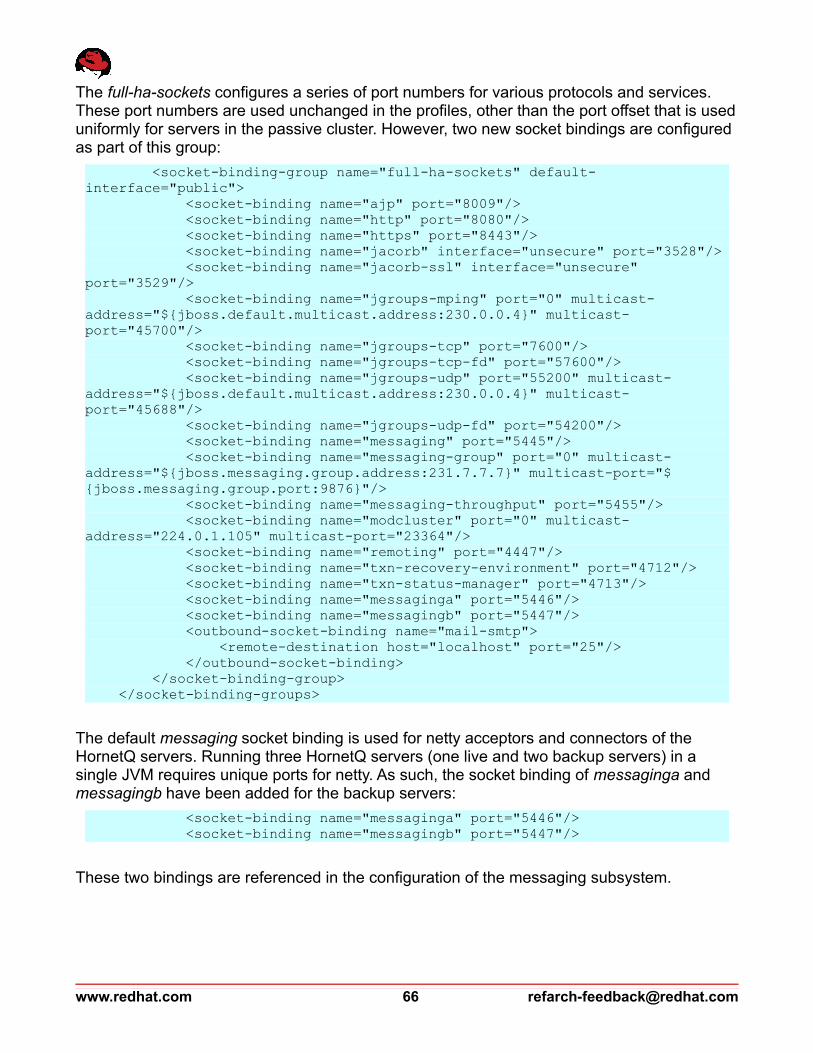
The full-ha-sockets configures a series of port numbers for various protocols and services. These port numbers are used unchanged in the profiles, other than the port offset that is used uniformly for servers in the passive cluster. However, two new socket bindings are configured as part of this group:
<socket-binding-group name="full-ha-sockets" default-interface="public"> <socket-binding name="ajp" port="8009"/> <socket-binding name="http" port="8080"/> <socket-binding name="https" port="8443"/> <socket-binding name="jacorb" interface="unsecure" port="3528"/> <socket-binding name="jacorb-ssl" interface="unsecure" port="3529"/> <socket-binding name="jgroups-mping" port="0" multicast-address="${jboss.default.multicast.address:230.0.0.4}" multicast-port="45700"/> <socket-binding name="jgroups-tcp" port="7600"/> <socket-binding name="jgroups-tcp-fd" port="57600"/> <socket-binding name="jgroups-udp" port="55200" multicast-address="${jboss.default.multicast.address:230.0.0.4}" multicast-port="45688"/> <socket-binding name="jgroups-udp-fd" port="54200"/> <socket-binding name="messaging" port="5445"/> <socket-binding name="messaging-group" port="0" multicast-address="${jboss.messaging.group.address:231.7.7.7}" multicast-port="${jboss.messaging.group.port:9876}"/> <socket-binding name="messaging-throughput" port="5455"/> <socket-binding name="modcluster" port="0" multicast-address="224.0.1.105" multicast-port="23364"/> <socket-binding name="remoting" port="4447"/> <socket-binding name="txn-recovery-environment" port="4712"/> <socket-binding name="txn-status-manager" port="4713"/> <socket-binding name="messaginga" port="5446"/> <socket-binding name="messagingb" port="5447"/> <outbound-socket-binding name="mail-smtp"> <remote-destination host="localhost" port="25"/> </outbound-socket-binding> </socket-binding-group> </socket-binding-groups>
The default messaging socket binding is used for netty acceptors and connectors of the HornetQ servers. Running three HornetQ servers (one live and two backup servers) in a single JVM requires unique ports for netty. As such, the socket binding of messaginga and messagingb have been added for the backup servers:
<socket-binding name="messaginga" port="5446"/> <socket-binding name="messagingb" port="5447"/>
These two bindings are referenced in the configuration of the messaging subsystem.
www.redhat.com 66 [email protected]

As part of the reference architecture, the configuration script deploys two items:
<deployments> <deployment name="postgresql-9.2-1003.jdbc4.jar" runtime-name="postgresql-9.2-1003.jdbc4.jar"> <content sha1="dade8c21b69663b8fd1a180058915ad871fa2e05"/> </deployment> <deployment name="clusterApp.war" runtime-name="clusterApp.war"> <content sha1="249a21bd4edf512eada410e86735074ed72a630f"/> </deployment> </deployments>
The first deployment is the JDBC driver JAR file for PostgreSQL Database. The configured datasource called ClusterDS relies on this driver, and declares its dependency on it.
The second deployment is a clustered application deployed by the configuration script, to validate and demonstrate clustering capabilities. It includes a distributable web application, stateless and clustered stateful sessions beans, a JPA bean with second-level caching enabled and message-driven beans to consume messages from a distributed queue.
Finally, the three server groups are configured to correspond to their respective profiles, and the deployments are assigned to all the server groups:
<server-groups> <server-group name="cluster-server-group-1" profile="full-ha-1"> <socket-binding-group ref="full-ha-sockets"/> <deployments> <deployment name="postgresql-9.2-1003.jdbc4.jar" runtime-name="postgresql-9.2-1003.jdbc4.jar"/> <deployment name="clusterApp.war" runtime-name="clusterApp.war"/> </deployments> </server-group> <server-group name="cluster-server-group-2" profile="full-ha-2"> <socket-binding-group ref="full-ha-sockets"/> <deployments> <deployment name="postgresql-9.2-1003.jdbc4.jar" runtime-name="postgresql-9.2-1003.jdbc4.jar"/> <deployment name="clusterApp.war" runtime-name="clusterApp.war"/> </deployments> </server-group> <server-group name="cluster-server-group-3" profile="full-ha-3"> <socket-binding-group ref="full-ha-sockets"/> <deployments> <deployment name="postgresql-9.2-1003.jdbc4.jar" runtime-name="postgresql-9.2-1003.jdbc4.jar"/> <deployment name="clusterApp.war" runtime-name="clusterApp.war"/> </deployments> </server-group> </server-groups></domain>
[email protected] 67 www.redhat.com
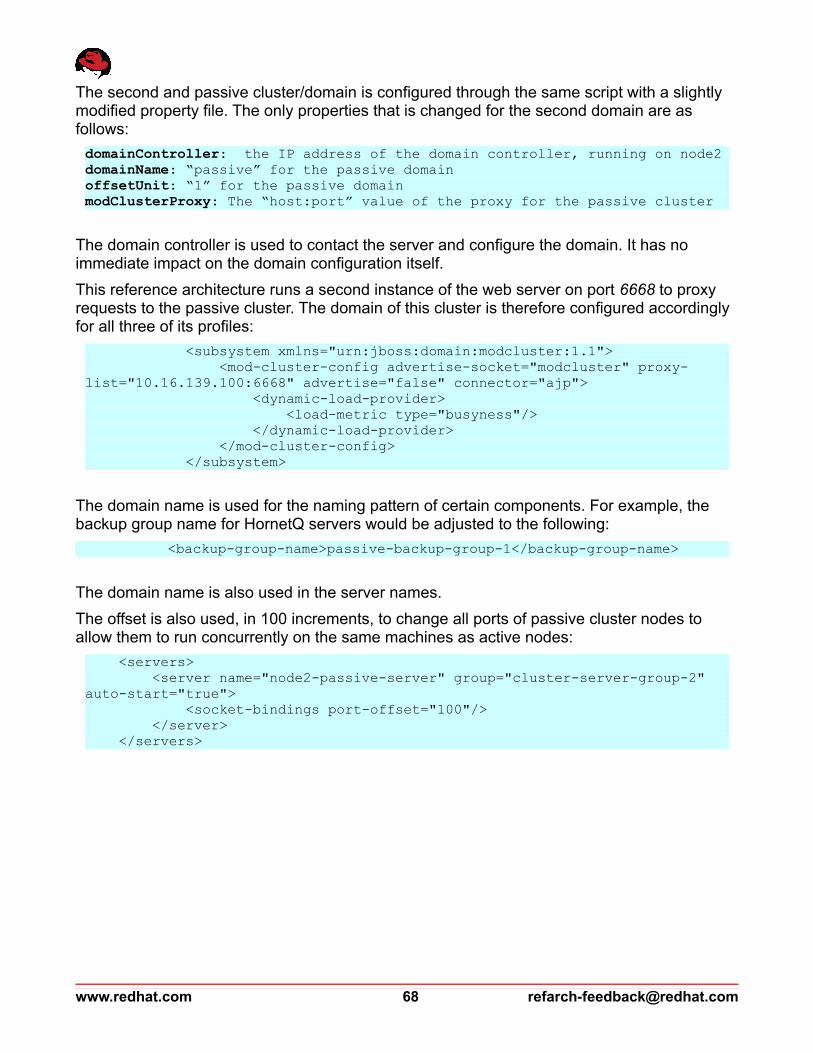
The second and passive cluster/domain is configured through the same script with a slightly modified property file. The only properties that is changed for the second domain are as follows:
domainController: the IP address of the domain controller, running on node2domainName: “passive” for the passive domainoffsetUnit: “1” for the passive domainmodClusterProxy: The “host:port” value of the proxy for the passive cluster
The domain controller is used to contact the server and configure the domain. It has no immediate impact on the domain configuration itself.
This reference architecture runs a second instance of the web server on port 6668 to proxy requests to the passive cluster. The domain of this cluster is therefore configured accordingly for all three of its profiles:
<subsystem xmlns="urn:jboss:domain:modcluster:1.1"> <mod-cluster-config advertise-socket="modcluster" proxy-list="10.16.139.100:6668" advertise="false" connector="ajp"> <dynamic-load-provider> <load-metric type="busyness"/> </dynamic-load-provider> </mod-cluster-config> </subsystem>
The domain name is used for the naming pattern of certain components. For example, the backup group name for HornetQ servers would be adjusted to the following:
<backup-group-name>passive-backup-group-1</backup-group-name>
The domain name is also used in the server names.
The offset is also used, in 100 increments, to change all ports of passive cluster nodes to allow them to run concurrently on the same machines as active nodes:
<servers> <server name="node2-passive-server" group="cluster-server-group-2" auto-start="true"> <socket-bindings port-offset="100"/> </server> </servers>
www.redhat.com 68 [email protected]
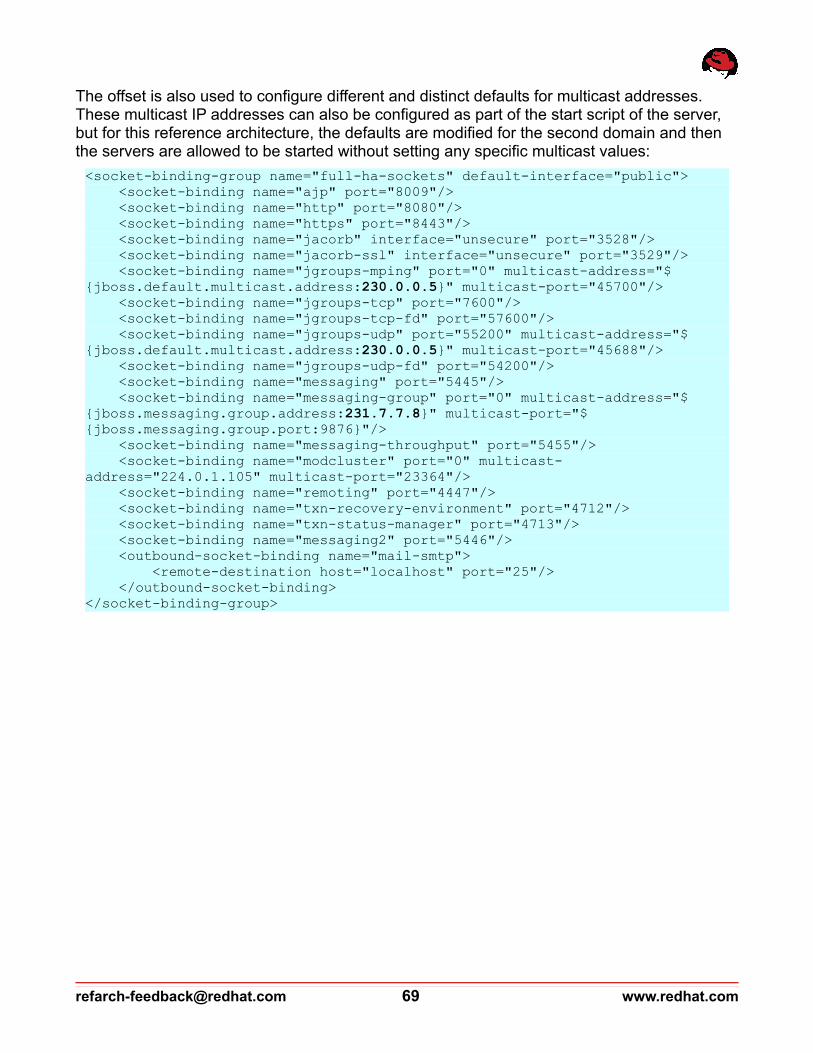
The offset is also used to configure different and distinct defaults for multicast addresses. These multicast IP addresses can also be configured as part of the start script of the server, but for this reference architecture, the defaults are modified for the second domain and then the servers are allowed to be started without setting any specific multicast values:
<socket-binding-group name="full-ha-sockets" default-interface="public"> <socket-binding name="ajp" port="8009"/> <socket-binding name="http" port="8080"/> <socket-binding name="https" port="8443"/> <socket-binding name="jacorb" interface="unsecure" port="3528"/> <socket-binding name="jacorb-ssl" interface="unsecure" port="3529"/> <socket-binding name="jgroups-mping" port="0" multicast-address="${jboss.default.multicast.address:230.0.0.5}" multicast-port="45700"/> <socket-binding name="jgroups-tcp" port="7600"/> <socket-binding name="jgroups-tcp-fd" port="57600"/> <socket-binding name="jgroups-udp" port="55200" multicast-address="${jboss.default.multicast.address:230.0.0.5}" multicast-port="45688"/> <socket-binding name="jgroups-udp-fd" port="54200"/> <socket-binding name="messaging" port="5445"/> <socket-binding name="messaging-group" port="0" multicast-address="${jboss.messaging.group.address:231.7.7.8}" multicast-port="${jboss.messaging.group.port:9876}"/> <socket-binding name="messaging-throughput" port="5455"/> <socket-binding name="modcluster" port="0" multicast-address="224.0.1.105" multicast-port="23364"/> <socket-binding name="remoting" port="4447"/> <socket-binding name="txn-recovery-environment" port="4712"/> <socket-binding name="txn-status-manager" port="4713"/> <socket-binding name="messaging2" port="5446"/> <outbound-socket-binding name="mail-smtp"> <remote-destination host="localhost" port="25"/> </outbound-socket-binding></socket-binding-group>
[email protected] 69 www.redhat.com

5 Clustering Applications
5.1 OverviewWhile much of the HA behavior provided by a container is transparent, developers must remain aware of the distributed nature of their applications and at times, might even be required to annotate or designate their applications as distributable.
This reference architecture includes and deploys a web application called clusterApp.war, which makes use of the cluster capabilities of several different container components.
The web application includes a servlet, a stateful session bean, a JPA bean that is front-ended by a stateless session bean and a message-driven bean. The persistence unit is configured with a second-level cache.
www.redhat.com 70 [email protected]

5.2 HTTP Session ClusteringThe ClusteredServlet, included and deployed as part of the clusterApp, is a simple Java servlet that creates an HTTP session and saves and retrieves data from it.
package org.jboss.refarch.eap6.cluster.http;
import java.io.IOException;import java.io.PrintWriter;import java.text.DateFormat;import java.text.SimpleDateFormat;import java.util.Date;import java.util.Enumeration;
import javax.servlet.ServletException;import javax.servlet.http.HttpServlet;import javax.servlet.http.HttpServletRequest;import javax.servlet.http.HttpServletResponse;import javax.servlet.http.HttpSession;
public class ClusteredServlet extends HttpServlet{
private static final long serialVersionUID = 1L;...
This servlet handles both GET and POST requests. Upon receiving a request, it looks for an HTTP session associated with the user. If an existing session is not found, it creates a new session and stores the current time, along with the name of the current EAP server, in that session:
HttpSession session = request.getSession( false );if( session == null ){
session = request.getSession( true );session.setAttribute( "initialization", new Date() );session.setAttribute( "initial_server",
System.getProperty( "jboss.server.name" ) );}
[email protected] 71 www.redhat.com

While these two parameters are sufficient to cause and demonstrate replication of session data, the servlet also allows clients to add other key/value pairs of data to the session:
if( request.getParameter( "save" ) != null ){
String key = request.getParameter( "key" );String value = request.getParameter( "value" );if( key.length() > 0 ){
if( value.length() == 0 ){
session.removeAttribute( key );}else{
session.setAttribute( key, value );}
}}
The servlet uses the jboss.server.name property to determine the name of the JBoss EAP server that is being reached on every invocation:
PrintWriter writer = response.getWriter();writer.println( "<html>" );writer.println( "<head>" );writer.println( "</head>" );writer.println( "<body>" );StringBuilder welcomeMessage = new StringBuilder();welcomeMessage.append( "HTTP Request received " );welcomeMessage.append( TIME_FORMAT.format( new Date() ) );welcomeMessage.append( " on server <b>" );
welcomeMessage.append( System.getProperty( "jboss.server.name" ) );welcomeMessage.append( "</b>" );writer.println( welcomeMessage.toString() );writer.println( "<p/>" );
An HTML form is rendered to facilitate the entry to additional data into the session:
writer.println( "<form action='' method='post'>" );writer.println( "Store value in HTTP session:<br/>" );writer.println( "Key: <input type=\"text\" name=\"key\"><br/>" );writer.println( "Value: <input type=\"text\"
name=\"value\"><br/>" );writer.println( "<input type=\"submit\" name=\"save\"
value=\"Save\">" );writer.println( "</form>" );
www.redhat.com 72 [email protected]

All session attributes are displayed as an HTML table by the servlet, so that they can be inspected and verified every time:
writer.println( "<table border='1'>" );Enumeration<String> attrNames = session.getAttributeNames();while( attrNames.hasMoreElements() ){
writer.println( "<tr>" );String name = (String)attrNames.nextElement();Object value = session.getAttribute( name );if( value instanceof Date ){
Date date = (Date)value;value = TIME_FORMAT.format( date );
}writer.print( "<td>" );writer.print( name );writer.println( "</td>" );writer.print( "<td>" );writer.print( value );writer.println( "</td>" );writer.println( "</tr>" );
}writer.println( "</table>" );
Finally, the response content type is set appropriately, and the content is returned:
writer.println( "</body>" );writer.println( "</html>" );response.setContentType( "text/html;charset=utf-8" );writer.flush();
}
An HTTP POST request is treated identically to a GET request:
@Overrideprotected void doPost(HttpServletRequest request, HttpServletResponse
response) throws ServletException, IOException{
this.doGet( request, response );}
}
[email protected] 73 www.redhat.com
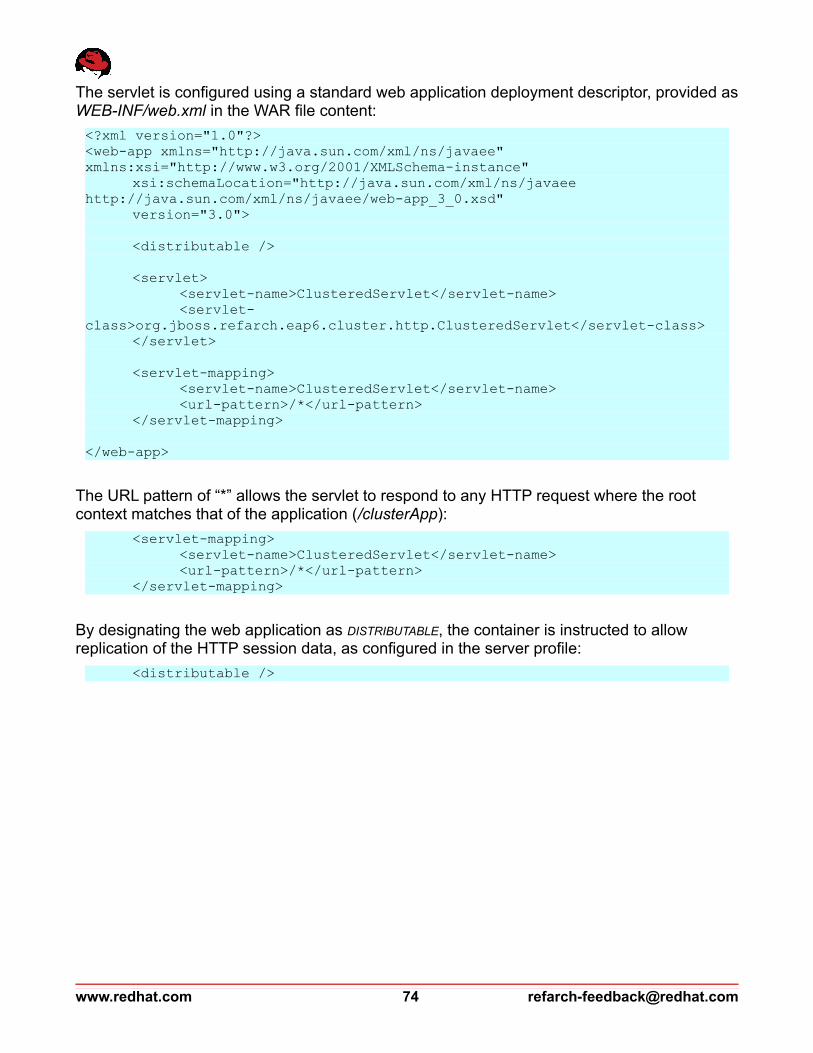
The servlet is configured using a standard web application deployment descriptor, provided asWEB-INF/web.xml in the WAR file content:
<?xml version="1.0"?><web-app xmlns="http://java.sun.com/xml/ns/javaee" xmlns:xsi="http://www.w3.org/2001/XMLSchema-instance"
xsi:schemaLocation="http://java.sun.com/xml/ns/javaee http://java.sun.com/xml/ns/javaee/web-app_3_0.xsd"
version="3.0">
<distributable />
<servlet><servlet-name>ClusteredServlet</servlet-name><servlet-
class>org.jboss.refarch.eap6.cluster.http.ClusteredServlet</servlet-class></servlet>
<servlet-mapping><servlet-name>ClusteredServlet</servlet-name><url-pattern>/*</url-pattern>
</servlet-mapping>
</web-app>
The URL pattern of “*” allows the servlet to respond to any HTTP request where the root context matches that of the application (/clusterApp):
<servlet-mapping><servlet-name>ClusteredServlet</servlet-name><url-pattern>/*</url-pattern>
</servlet-mapping>
By designating the web application as DISTRIBUTABLE, the container is instructed to allow replication of the HTTP session data, as configured in the server profile:
<distributable />
www.redhat.com 74 [email protected]

5.3 Stateful Session Bean ClusteringThe application includes a stateful session bean. Following the latest Java EE Specification, under JBoss EAP 6.1, a stateful session bean can simply be included in a WAR file with no additional descriptor.
The org.jboss.refarch.eap6.cluster.sfsb package of the application contains both the remote interface and the bean implementation class of the stateful session bean.
The interface declares a getter and setter method for its state, which is a simple alphanumeric name. It also provides a getServer() operation that returns the name of the EAP server being reached. This can help identify the node of the cluster that is invoked:
package org.jboss.refarch.eap6.cluster.sfsb;
public interface StatefulSession{
public String getServer();
public String getName();
public void setName(String name);}
[email protected] 75 www.redhat.com

The bean class implements the interface and declares it as it REMOTE interface:
package org.jboss.refarch.eap6.cluster.sfsb;
import javax.ejb.Remote;import javax.ejb.Stateful;
import org.jboss.ejb3.annotation.Clustered;
@Stateful@Remote(StatefulSession.class)@Clusteredpublic class StatefulSessionBean implements StatefulSession{
private String name;
@Overridepublic String getServer(){
return System.getProperty( "jboss.server.name" );}
public String getName(){
return name;}
public void setName(String name){
this.name = name;}
}
The class uses annotations to designate itself as a STATEFUL session bean:
@Stateful
By annotating the bean as CLUSTERED, the container is instructed to replicate the bean state as configured in the server profile:
@Clustered
www.redhat.com 76 [email protected]

Remote invocation of a clustered session bean is demonstrated in the BeanClient class, included in the clientApp JAR file and placed in the org.jboss.refarch.eap6.cluster.sfsb.client package. This class calls both a stateful and a stateless session bean:
package org.jboss.refarch.eap6.cluster.sfsb.client;
import java.util.Hashtable;
import javax.jms.JMSException;import javax.naming.Context;import javax.naming.InitialContext;import javax.naming.NamingException;
import org.jboss.refarch.eap6.cluster.entity.Person;import org.jboss.refarch.eap6.cluster.sfsb.StatefulSession;import org.jboss.refarch.eap6.cluster.slsb.StatelessSession;
public class BeanClient{
private StatefulSession sfsb;private Context context;private String applicationContext;
...
The sfsb field is created to hold a stub reference for the stateful session bean, and context is the naming context used to look up session beans. The applicationContext is the root context of the deployed web application, assumed to be clusterApp for this reference architecture.
The following code looks up and stores a reference to the stateful session bean:
Hashtable<String, String> jndiProps = new Hashtable<String, String>();jndiProps.put( Context.URL_PKG_PREFIXES, "org.jboss.ejb.client.naming" );context = new InitialContext( jndiProps );sfsb = (StatefulSession)context.lookup( "ejb:/" + applicationContext
+ "//StatefulSessionBean!org.jboss.refarch.eap6.cluster.sfsb.StatefulSession?stateful" );
Any subsequent interaction with the stateful session bean is assumed to be part of the same conversation and uses the stored stub reference:
private StatefulSession getStatefulSessionBean() throws NamingException{
return sfsb;}
[email protected] 77 www.redhat.com
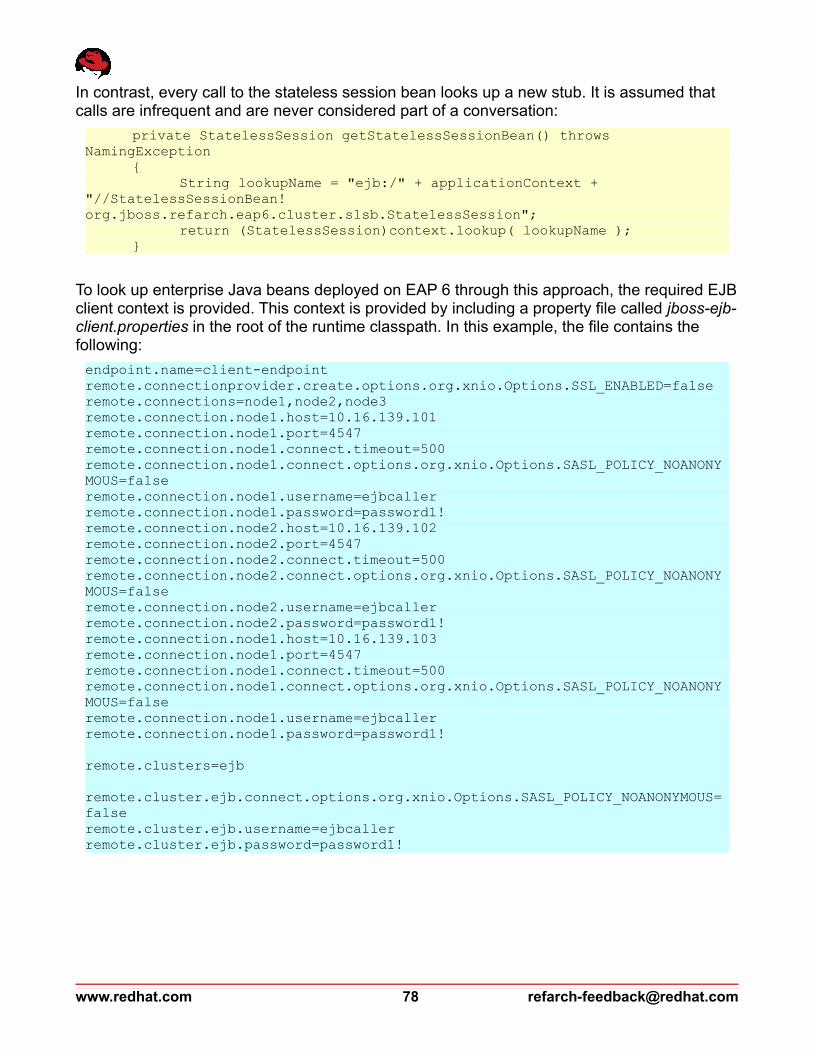
In contrast, every call to the stateless session bean looks up a new stub. It is assumed that calls are infrequent and are never considered part of a conversation:
private StatelessSession getStatelessSessionBean() throws NamingException
{String lookupName = "ejb:/" + applicationContext +
"//StatelessSessionBean!org.jboss.refarch.eap6.cluster.slsb.StatelessSession";
return (StatelessSession)context.lookup( lookupName );}
To look up enterprise Java beans deployed on EAP 6 through this approach, the required EJB client context is provided. This context is provided by including a property file called jboss-ejb-client.properties in the root of the runtime classpath. In this example, the file contains the following:
endpoint.name=client-endpointremote.connectionprovider.create.options.org.xnio.Options.SSL_ENABLED=falseremote.connections=node1,node2,node3remote.connection.node1.host=10.16.139.101remote.connection.node1.port=4547remote.connection.node1.connect.timeout=500remote.connection.node1.connect.options.org.xnio.Options.SASL_POLICY_NOANONYMOUS=falseremote.connection.node1.username=ejbcallerremote.connection.node1.password=password1!remote.connection.node2.host=10.16.139.102remote.connection.node2.port=4547remote.connection.node2.connect.timeout=500remote.connection.node2.connect.options.org.xnio.Options.SASL_POLICY_NOANONYMOUS=falseremote.connection.node2.username=ejbcallerremote.connection.node2.password=password1!remote.connection.node1.host=10.16.139.103remote.connection.node1.port=4547remote.connection.node1.connect.timeout=500remote.connection.node1.connect.options.org.xnio.Options.SASL_POLICY_NOANONYMOUS=falseremote.connection.node1.username=ejbcallerremote.connection.node1.password=password1!
remote.clusters=ejb
remote.cluster.ejb.connect.options.org.xnio.Options.SASL_POLICY_NOANONYMOUS=falseremote.cluster.ejb.username=ejbcallerremote.cluster.ejb.password=password1!
www.redhat.com 78 [email protected]
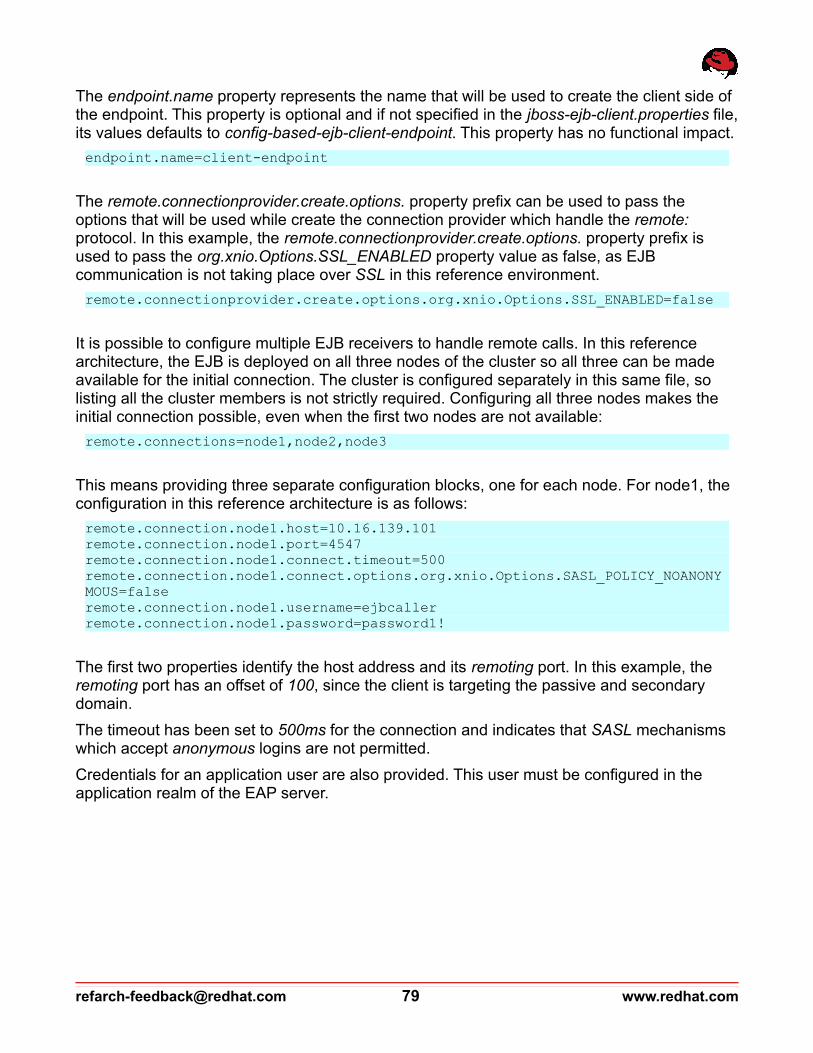
The endpoint.name property represents the name that will be used to create the client side of the endpoint. This property is optional and if not specified in the jboss-ejb-client.properties file, its values defaults to config-based-ejb-client-endpoint. This property has no functional impact.
endpoint.name=client-endpoint
The remote.connectionprovider.create.options. property prefix can be used to pass the options that will be used while create the connection provider which handle the remote: protocol. In this example, the remote.connectionprovider.create.options. property prefix is used to pass the org.xnio.Options.SSL_ENABLED property value as false, as EJB communication is not taking place over SSL in this reference environment.
remote.connectionprovider.create.options.org.xnio.Options.SSL_ENABLED=false
It is possible to configure multiple EJB receivers to handle remote calls. In this reference architecture, the EJB is deployed on all three nodes of the cluster so all three can be made available for the initial connection. The cluster is configured separately in this same file, so listing all the cluster members is not strictly required. Configuring all three nodes makes the initial connection possible, even when the first two nodes are not available:
remote.connections=node1,node2,node3
This means providing three separate configuration blocks, one for each node. For node1, the configuration in this reference architecture is as follows:
remote.connection.node1.host=10.16.139.101remote.connection.node1.port=4547remote.connection.node1.connect.timeout=500remote.connection.node1.connect.options.org.xnio.Options.SASL_POLICY_NOANONYMOUS=falseremote.connection.node1.username=ejbcallerremote.connection.node1.password=password1!
The first two properties identify the host address and its remoting port. In this example, the remoting port has an offset of 100, since the client is targeting the passive and secondary domain.
The timeout has been set to 500ms for the connection and indicates that SASL mechanisms which accept anonymous logins are not permitted.
Credentials for an application user are also provided. This user must be configured in the application realm of the EAP server.
[email protected] 79 www.redhat.com
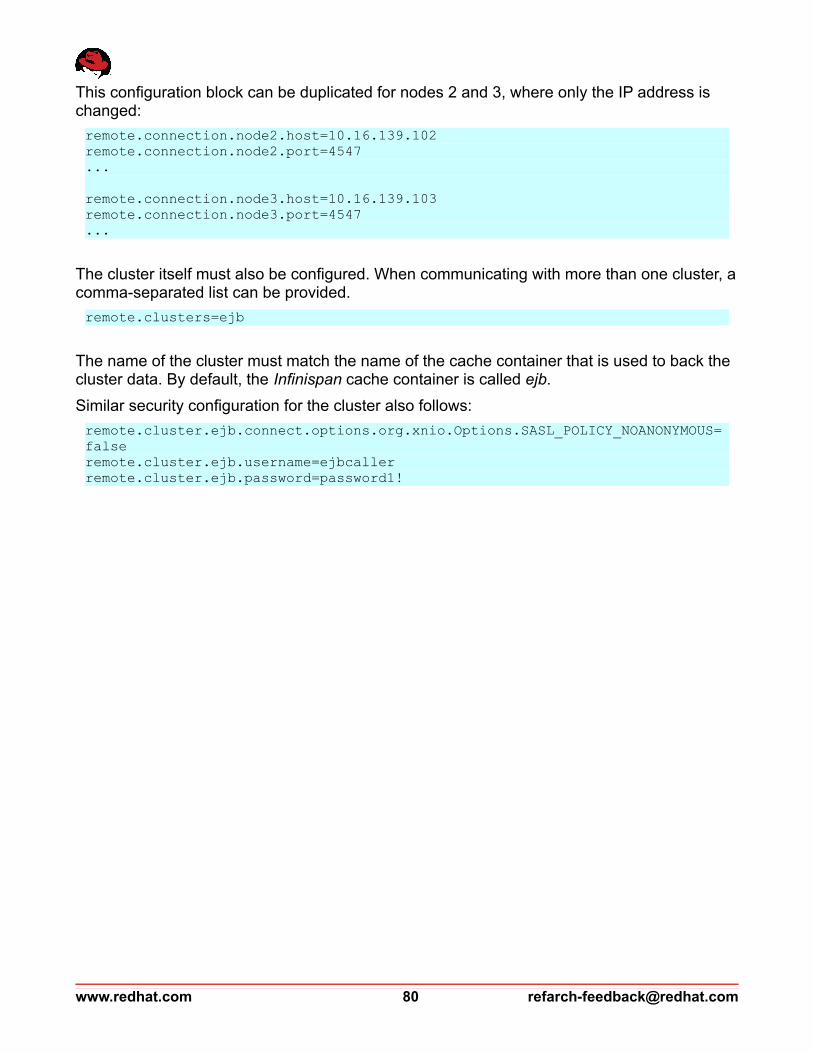
This configuration block can be duplicated for nodes 2 and 3, where only the IP address is changed:
remote.connection.node2.host=10.16.139.102remote.connection.node2.port=4547...
remote.connection.node3.host=10.16.139.103remote.connection.node3.port=4547...
The cluster itself must also be configured. When communicating with more than one cluster, a comma-separated list can be provided.
remote.clusters=ejb
The name of the cluster must match the name of the cache container that is used to back the cluster data. By default, the Infinispan cache container is called ejb.
Similar security configuration for the cluster also follows:
remote.cluster.ejb.connect.options.org.xnio.Options.SASL_POLICY_NOANONYMOUS=falseremote.cluster.ejb.username=ejbcallerremote.cluster.ejb.password=password1!
www.redhat.com 80 [email protected]

5.4 Distributed Messaging QueuesUsing the HornetQ messaging provider in JBoss EAP 6, a message queue can be configured by simply providing a -jms.xml queue definition file under the WEB-INF directory of the web application:
<?xml version="1.0" encoding="UTF-8"?><messaging-deployment xmlns="urn:jboss:messaging-deployment:1.0">
<hornetq-server><jms-destinations>
<jms-queue name="DistributedQueue"><entry name="java:/queue/DistributedQueue" /><durable>true</durable>
</jms-queue></jms-destinations>
</hornetq-server></messaging-deployment>
The queue itself does not need to be marked as distributed. Configuring clustering for HornetQ servers in the EAP 6 server profile is sufficient for a JMS queue to inherit the required behavior. However, the queue needs to be configured as DURABLE to take advantage of the HA capabilities that HornetQ offers:
<durable>true</durable>
[email protected] 81 www.redhat.com

It is common practice to use a message-driven bean to consume from a JMS queue. This application includes the MessageDrivenBean class in the org.jboss.refarch.eap6.cluster.mdb package:
package org.jboss.refarch.eap6.cluster.mdb;
import java.io.Serializable;import java.util.HashMap;
import javax.ejb.ActivationConfigProperty;import javax.ejb.MessageDriven;import javax.jms.JMSException;import javax.jms.Message;import javax.jms.MessageListener;import javax.jms.ObjectMessage;
@MessageDriven(activationConfig = {@ActivationConfigProperty(propertyName = "destinationType", propertyValue = "javax.jms.Queue"), @ActivationConfigProperty(propertyName = "destination", propertyValue = "queue/DistributedQueue"), @ActivationConfigProperty(propertyName = "maxSession", propertyValue = "1")})public class MessageDrivenBean implements MessageListener{
@Overridepublic void onMessage(Message message){
try{
ObjectMessage objectMessage = (ObjectMessage)message;Serializable object = objectMessage.getObject();@SuppressWarnings("unchecked")HashMap<String, Serializable> map = (HashMap<String,
Serializable>)object;String text = (String)map.get( "message" );int count = (Integer)map.get( "count" );long delay = (Long)map.get( "delay" );System.out.println( count + ": " + text );Thread.sleep( delay );
}catch( JMSException e ){
e.printStackTrace();}catch( InterruptedException e ){
e.printStackTrace();}
}}
www.redhat.com 82 [email protected]

The class is designated as a message-driven bean through annotation:
@MessageDriven
The annotation includes an activationConfig property, which describes this bean as a consumer of a queue, provides the JNDI name of that queue, and configures a single session for message consumption, thereby throttling and slowing down the processing of messages for the purpose of testing:
activationConfig = { @ActivationConfigProperty(propertyName = "destinationType", propertyValue = "javax.jms.Queue"), @ActivationConfigProperty(propertyName = "destination", propertyValue = "queue/DistributedQueue"), @ActivationConfigProperty(propertyName = "maxSession", propertyValue = "1")})
This MDB expects to read an Object Message that is in fact a Map, containing a string message, a sequence number called count, and a numeric delay value, which will cause the bean to throttle the processing of messages by the provided amount (in milliseconds):
String text = (String)map.get( "message" );int count = (Integer)map.get( "count" );long delay = (Long)map.get( "delay" );System.out.println( count + ": " + text );Thread.sleep( delay );
[email protected] 83 www.redhat.com
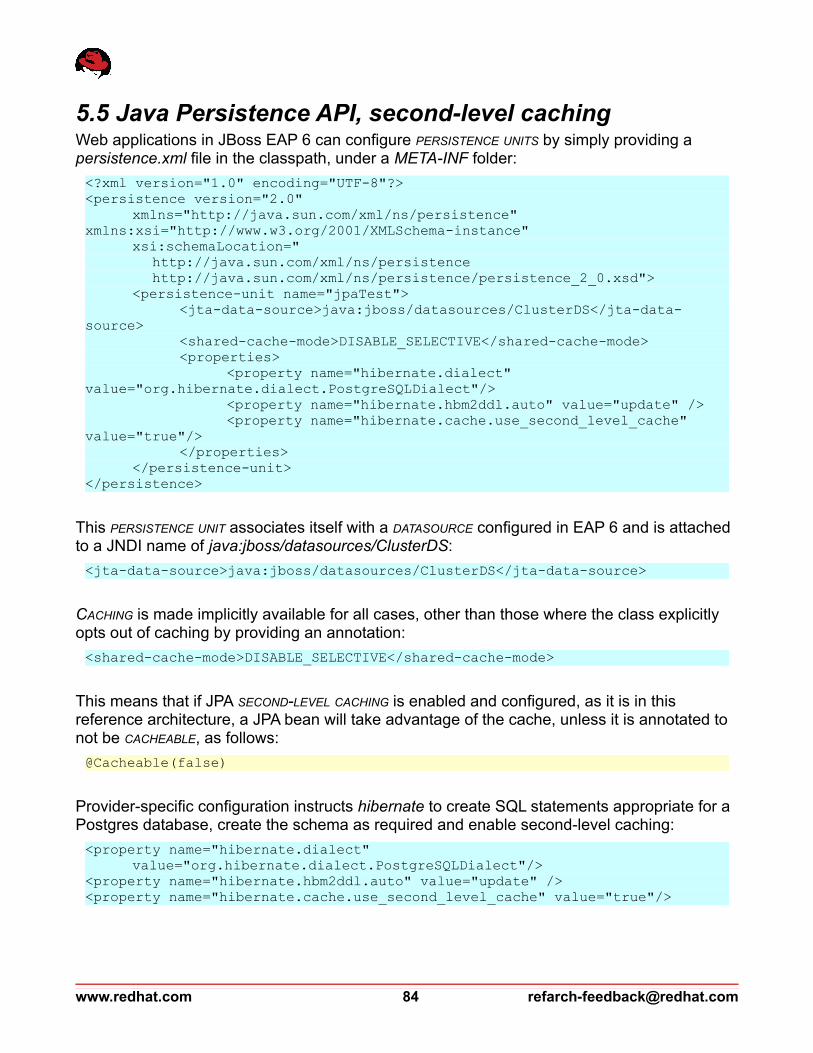
5.5 Java Persistence API, second-level cachingWeb applications in JBoss EAP 6 can configure PERSISTENCE UNITS by simply providing a persistence.xml file in the classpath, under a META-INF folder:
<?xml version="1.0" encoding="UTF-8"?><persistence version="2.0"
xmlns="http://java.sun.com/xml/ns/persistence" xmlns:xsi="http://www.w3.org/2001/XMLSchema-instance"
xsi:schemaLocation=" http://java.sun.com/xml/ns/persistence http://java.sun.com/xml/ns/persistence/persistence_2_0.xsd">
<persistence-unit name="jpaTest"><jta-data-source>java:jboss/datasources/ClusterDS</jta-data-
source><shared-cache-mode>DISABLE_SELECTIVE</shared-cache-mode><properties>
<property name="hibernate.dialect" value="org.hibernate.dialect.PostgreSQLDialect"/>
<property name="hibernate.hbm2ddl.auto" value="update" /><property name="hibernate.cache.use_second_level_cache"
value="true"/></properties>
</persistence-unit></persistence>
This PERSISTENCE UNIT associates itself with a DATASOURCE configured in EAP 6 and is attached to a JNDI name of java:jboss/datasources/ClusterDS:
<jta-data-source>java:jboss/datasources/ClusterDS</jta-data-source>
CACHING is made implicitly available for all cases, other than those where the class explicitly opts out of caching by providing an annotation:
<shared-cache-mode>DISABLE_SELECTIVE</shared-cache-mode>
This means that if JPA SECOND-LEVEL CACHING is enabled and configured, as it is in this reference architecture, a JPA bean will take advantage of the cache, unless it is annotated to not be CACHEABLE, as follows:
@Cacheable(false)
Provider-specific configuration instructs hibernate to create SQL statements appropriate for a Postgres database, create the schema as required and enable second-level caching:
<property name="hibernate.dialect" value="org.hibernate.dialect.PostgreSQLDialect"/>
<property name="hibernate.hbm2ddl.auto" value="update" /><property name="hibernate.cache.use_second_level_cache" value="true"/>
www.redhat.com 84 [email protected]

An Entity class called Person is created in the org.jboss.refarch.eap6.cluster.entity package, mapping to a default table name of Person in the default persistence unit:
package org.jboss.refarch.eap6.cluster.entity;
import java.io.Serializable;
import javax.persistence.Entity;import javax.persistence.GeneratedValue;import javax.persistence.GenerationType;import javax.persistence.Id;
@Entitypublic class Person implements Serializable{
private static final long serialVersionUID = 1L;
@Id@GeneratedValue(strategy = GenerationType.IDENTITY)private Long id;
private String name;
public Person(){}
public Person(String name){
this.name = name;}
public String getName(){
return name;}
public void setName(String name){
this.name = name;}
@Overridepublic String toString(){
return "Person [id=" + id + ", name=" + name + "]";}
}
In the absence of a Cacheable(false) annotation, Person entities will be cached in the configured second-level hibernate cache.
[email protected] 85 www.redhat.com

A Stateless Session bean called StatelessSessionBean is created in the org.jboss.refarch.eap6.cluster.slsb package to create, retrieve and modify Person entities.
The stateless session bean also sends messages to the configured JMS Queue.
Similar to the stateful bean, the stateless session beans also uses a remote interface:
package org.jboss.refarch.eap6.cluster.slsb;
import java.util.List;
import javax.jms.JMSException;
import org.jboss.refarch.eap6.cluster.entity.Person;
public interface StatelessSession{
public String getServer();
public void createPerson(Person person);
public List<Person> findPersons();
public String getName(Long pk);
public void replacePerson(Long pk, String name);
public void sendMessage(String message, Integer messageCount, Long processingDelay) throws JMSException;}
www.redhat.com 86 [email protected]

The bean implementation class is called StatelessSessionBean and declared in the same package as its interface:
package org.jboss.refarch.eap6.cluster.slsb;
import java.io.Serializable;import java.util.HashMap;import java.util.List;
import javax.annotation.Resource;import javax.ejb.Remote;import javax.ejb.Stateless;import javax.jms.Connection;import javax.jms.ConnectionFactory;import javax.jms.JMSException;import javax.jms.MessageProducer;import javax.jms.ObjectMessage;import javax.jms.Queue;import javax.jms.Session;import javax.persistence.EntityManager;import javax.persistence.PersistenceContext;import javax.persistence.criteria.CriteriaBuilder;import javax.persistence.criteria.CriteriaQuery;
import org.jboss.ejb3.annotation.Clustered;import org.jboss.refarch.eap6.cluster.entity.Person;
@Stateless@Remote(StatelessSession.class)@Clusteredpublic class StatelessSessionBean implements StatelessSession{ ...
The class uses annotations to designate itself as a STATELESS session bean:
@Stateless
The bean both implements its remote interface and declares it as REMOTE:
@Remote(StatelessSession.class)
... implements StatelessSession
The bean is annotated as CLUSTERED so the container is made aware that the bean can take advantage of cluster capabilities, such as load balancing:
@Clustered
[email protected] 87 www.redhat.com

The stateless session bean can simply inject an ENTITY MANAGER for the default persistence unit:
@PersistenceContextprivate EntityManager entityManager;
To interact with a JMS queue, both the QUEUE and a CONNECTION FACTORY can also be injected:
@Resource(mappedName = "java:/ConnectionFactory")private ConnectionFactory connectionFactory;
@Resource(mappedName = "java:/queue/DistributedQueue")private Queue queue;
To highlight the load balancing taking place, the name of the server that has been reached may be returned by calling an operation on the bean:
@Overridepublic String getServer(){
return System.getProperty( "jboss.server.name" );}
Creating a new entity object is simple with the injected entity manager. With JPA configured to map to a database table which is created by hibernate on demand, a new entity results in a new row being inserted in the RDBMS.
@Overridepublic void createPerson(Person person){
entityManager.persist( person );}
The JPA 2 Specification provides the Criteria API for queries. The findPersons() operation of the class returns all the available entities:
@Overridepublic List<Person> findPersons(){
CriteriaBuilder builder = entityManager.getCriteriaBuilder();CriteriaQuery<Person> criteriaQuery =
builder.createQuery( Person.class );criteriaQuery.select( criteriaQuery.from( Person.class ) );List<Person> persons =
entityManager.createQuery( criteriaQuery ).getResultList();return persons;
}
www.redhat.com 88 [email protected]
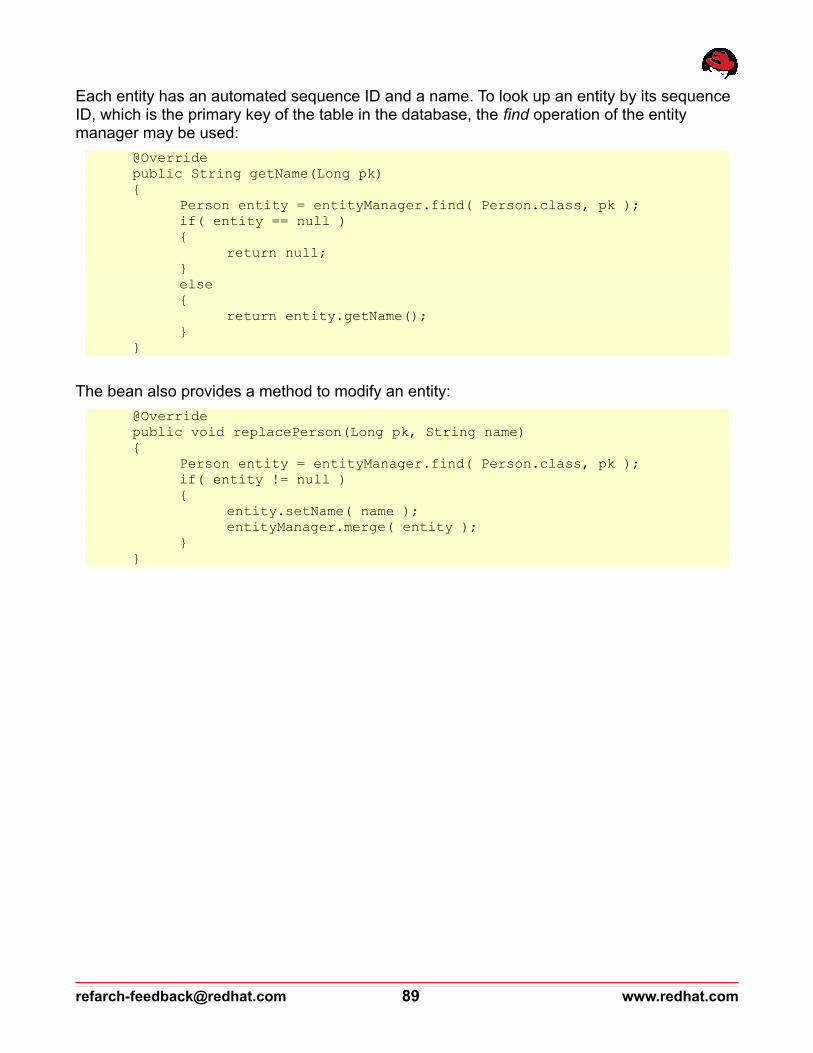
Each entity has an automated sequence ID and a name. To look up an entity by its sequence ID, which is the primary key of the table in the database, the find operation of the entity manager may be used:
@Overridepublic String getName(Long pk){
Person entity = entityManager.find( Person.class, pk );if( entity == null ){
return null;}else{
return entity.getName();}
}
The bean also provides a method to modify an entity:
@Overridepublic void replacePerson(Long pk, String name){
Person entity = entityManager.find( Person.class, pk );if( entity != null ){
entity.setName( name );entityManager.merge( entity );
}}
[email protected] 89 www.redhat.com
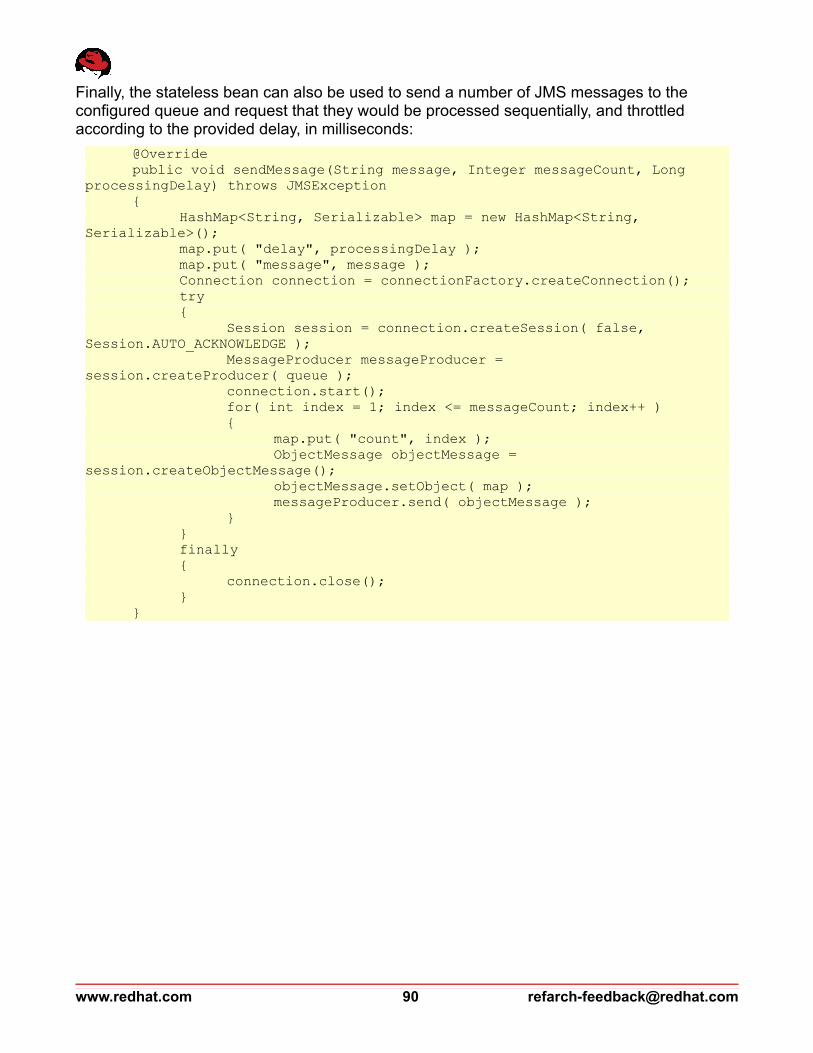
Finally, the stateless bean can also be used to send a number of JMS messages to the configured queue and request that they would be processed sequentially, and throttled according to the provided delay, in milliseconds:
@Overridepublic void sendMessage(String message, Integer messageCount, Long
processingDelay) throws JMSException{
HashMap<String, Serializable> map = new HashMap<String, Serializable>();
map.put( "delay", processingDelay );map.put( "message", message );Connection connection = connectionFactory.createConnection();try{
Session session = connection.createSession( false, Session.AUTO_ACKNOWLEDGE );
MessageProducer messageProducer = session.createProducer( queue );
connection.start();for( int index = 1; index <= messageCount; index++ ){
map.put( "count", index );ObjectMessage objectMessage =
session.createObjectMessage();objectMessage.setObject( map );messageProducer.send( objectMessage );
}}finally{
connection.close();}
}
www.redhat.com 90 [email protected]

6 Configuration Scripts (CLI)
6.1 OverviewThe management Command Line Interface (CLI) is a command line administration tool for JBoss EAP 6. The Management CLI can be used to start and stop servers, deploy andundeploy applications, configure system settings, and perform other administrative tasks.
A CLI operation request consists of three parts:
• an address, prefixed with a slash “/”.
• an operation name, prefixed with a colon “:”.
• an optional set of parameters, contained within parentheses “()”.
The configuration is presented as a hierarchical tree of addressable resources. Each resource node offers a different set of operations. The address specifies which resource node to perform the operation on. An address uses the following syntax:
/node-type=node-name
• node-type is the resource node type. This maps to an element name in the configuration XML.
• node-name is the resource node name. This maps to the name attribute of the element in the configuration XML.
• Separate each level of the resource tree with a slash “/”.
Each resource may also have a number of attributes. The read-attribute operation is a global operation used to read the current runtime value of a selected attribute.
While CLI can be a powerful tool to inspect, modify or configure a server environment, it is fairly static and makes it difficult to use the response of one operation to issue another request. Using variables in CLI is not yet supported17 and decision making, loops and other such constructs are outside the scope of JBoss EAP 6 CLI. Complex automated configuration is therefore best handled by using a scripting or programming language on top of CLI.
JBoss EAP 6 supports a Java API to handle CLI commands18.
17 https://access.redhat.com/site/solutions/32151318 https://access.redhat.com/site/solutions/323703
[email protected] 91 www.redhat.com
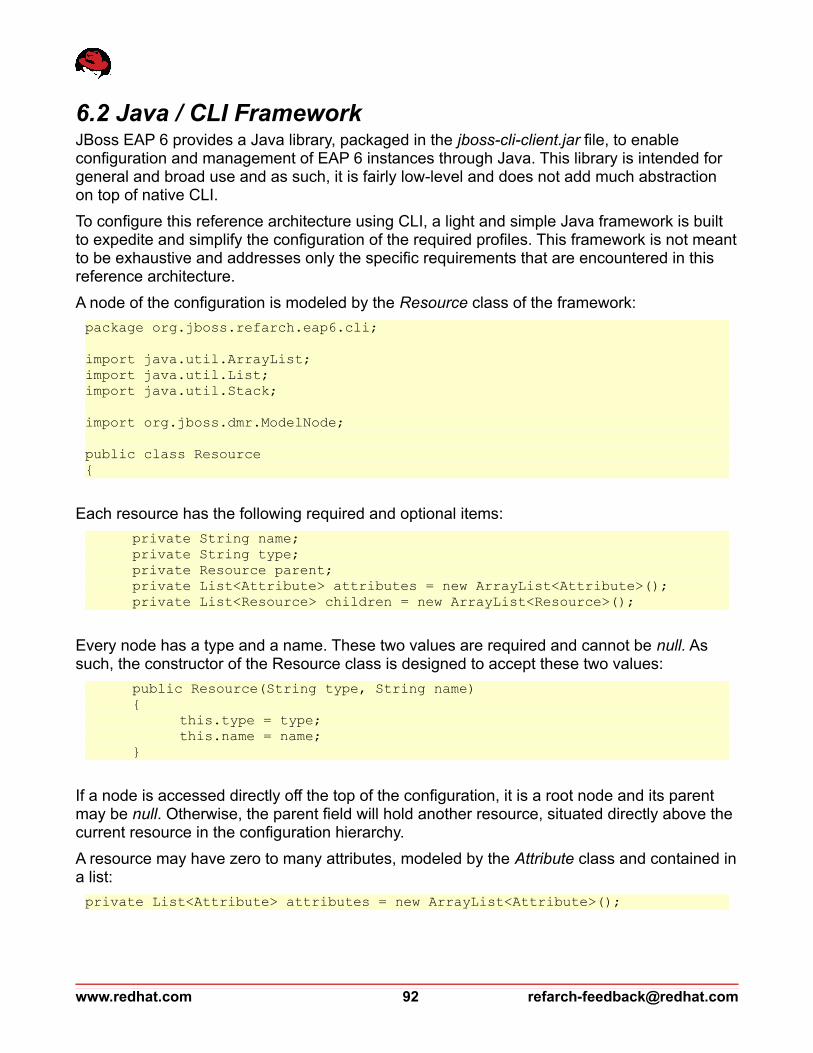
6.2 Java / CLI FrameworkJBoss EAP 6 provides a Java library, packaged in the jboss-cli-client.jar file, to enable configuration and management of EAP 6 instances through Java. This library is intended for general and broad use and as such, it is fairly low-level and does not add much abstraction on top of native CLI.
To configure this reference architecture using CLI, a light and simple Java framework is built to expedite and simplify the configuration of the required profiles. This framework is not meant to be exhaustive and addresses only the specific requirements that are encountered in this reference architecture.
A node of the configuration is modeled by the Resource class of the framework:
package org.jboss.refarch.eap6.cli;
import java.util.ArrayList;import java.util.List;import java.util.Stack;
import org.jboss.dmr.ModelNode;
public class Resource{
Each resource has the following required and optional items:
private String name;private String type;private Resource parent;private List<Attribute> attributes = new ArrayList<Attribute>();private List<Resource> children = new ArrayList<Resource>();
Every node has a type and a name. These two values are required and cannot be null. As such, the constructor of the Resource class is designed to accept these two values:
public Resource(String type, String name){
this.type = type;this.name = name;
}
If a node is accessed directly off the top of the configuration, it is a root node and its parent may be null. Otherwise, the parent field will hold another resource, situated directly above the current resource in the configuration hierarchy.
A resource may have zero to many attributes, modeled by the Attribute class and contained in a list:
private List<Attribute> attributes = new ArrayList<Attribute>();
www.redhat.com 92 [email protected]
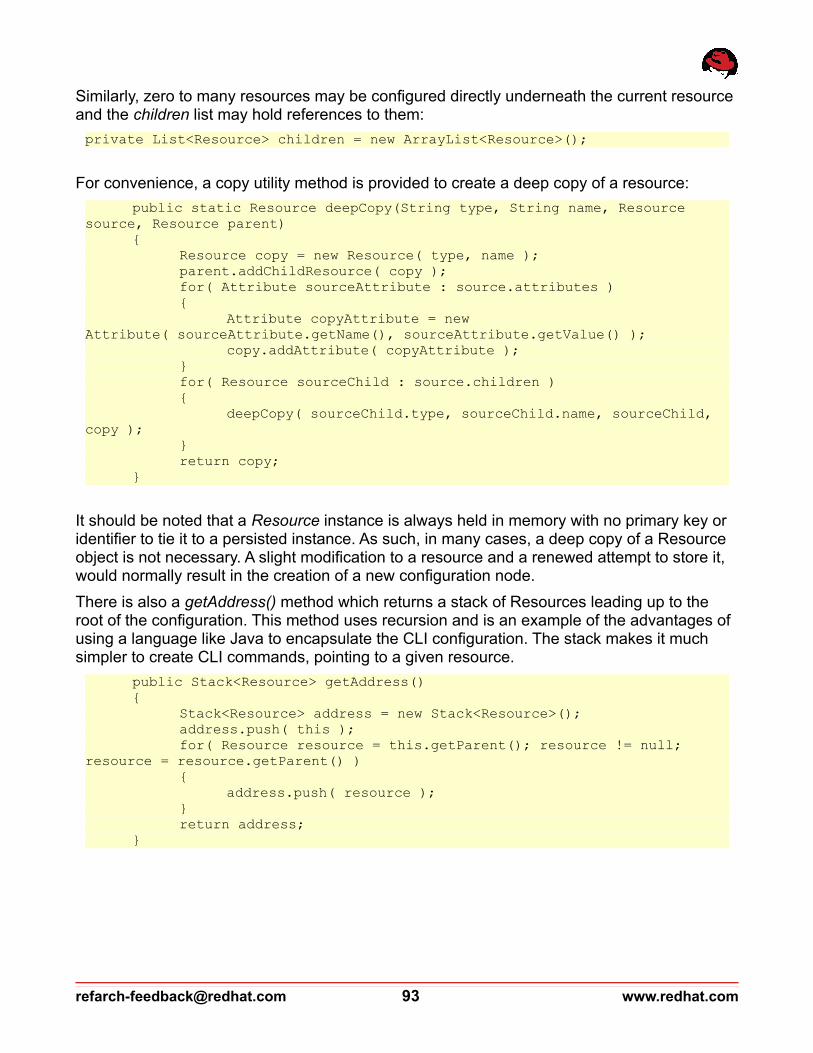
Similarly, zero to many resources may be configured directly underneath the current resource and the children list may hold references to them:
private List<Resource> children = new ArrayList<Resource>();
For convenience, a copy utility method is provided to create a deep copy of a resource:
public static Resource deepCopy(String type, String name, Resource source, Resource parent)
{Resource copy = new Resource( type, name );parent.addChildResource( copy );for( Attribute sourceAttribute : source.attributes ){
Attribute copyAttribute = new Attribute( sourceAttribute.getName(), sourceAttribute.getValue() );
copy.addAttribute( copyAttribute );}for( Resource sourceChild : source.children ){
deepCopy( sourceChild.type, sourceChild.name, sourceChild, copy );
}return copy;
}
It should be noted that a Resource instance is always held in memory with no primary key or identifier to tie it to a persisted instance. As such, in many cases, a deep copy of a Resource object is not necessary. A slight modification to a resource and a renewed attempt to store it, would normally result in the creation of a new configuration node.
There is also a getAddress() method which returns a stack of Resources leading up to the root of the configuration. This method uses recursion and is an example of the advantages of using a language like Java to encapsulate the CLI configuration. The stack makes it much simpler to create CLI commands, pointing to a given resource.
public Stack<Resource> getAddress(){
Stack<Resource> address = new Stack<Resource>();address.push( this );for( Resource resource = this.getParent(); resource != null;
resource = resource.getParent() ){
address.push( resource );}return address;
}
[email protected] 93 www.redhat.com

Simple getter and setter methods are provided for most of the fields in the Resource class:
public String getName(){
return name;}
public void setName(String name){
this.name = name;}
Attributes can be queried en-mass as a list, or individually by attribute name:public List<Attribute> getAttributes(){
return attributes;}
public Attribute getAttribute(String name){
for( Attribute attribute : attributes ){
if( attribute.getName().equals( name ) ){
return attribute;}
}return null;
}
Adding a new Attribute is simplified by providing a dedicated method:
public void addAttribute(Attribute attribute){
attributes.add( attribute );}
Attribute values may also be modified through the setAttribute method, providing the name of the attribute and the new value. In its native form, this method takes a ModelNode:
public void setAttribute(String name, ModelNode value){
Attribute attribute = getAttribute( name );if( attribute == null ){
attribute = new Attribute( name, value );addAttribute( attribute );
}else{
attribute.setValue( value );}
}
www.redhat.com 94 [email protected]

However this operation is overloaded to accept common attribute value types:
public void setAttribute(String name, boolean value)...
public void setAttribute(String name, String value)...
public void setAttribute(String name, int value)...
Finally, removing an attribute is also simplified through a convenience method:
public boolean removeAttribute(String name){
return attributes.remove( getAttribute( name ) );}
Similar methods are provided to get and set child resources:
public List<Resource> getChildren(){
return children;}
public Resource getChild(String type, String name){
for( Resource child : children ){
if( child.getType().equals( type ) && child.getName().equals( name ) )
{return child;
}}return null;
}
public void addChildResource(Resource child){
children.add( child );if( child.getParent() != this ){
child.setParent( this );}
}
public boolean removeChildResource(String type, String name){
return children.remove( getChild( type, name ) );}
[email protected] 95 www.redhat.com
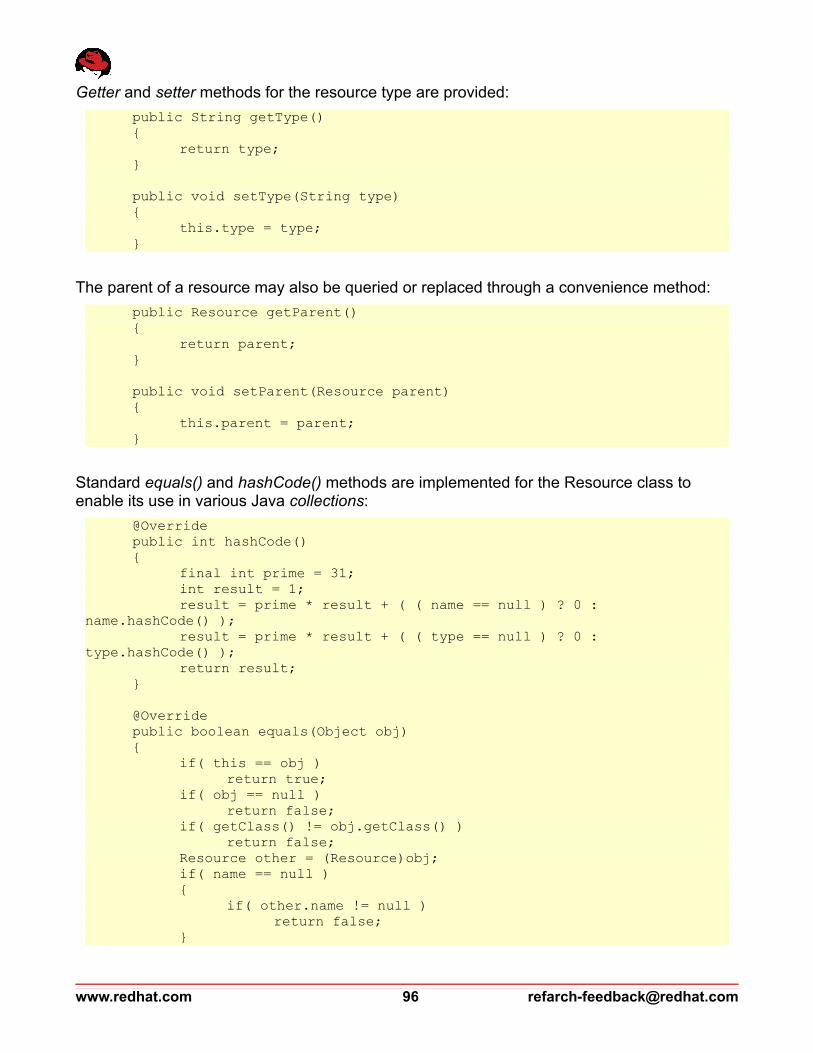
Getter and setter methods for the resource type are provided:
public String getType(){
return type;}
public void setType(String type){
this.type = type;}
The parent of a resource may also be queried or replaced through a convenience method:
public Resource getParent(){
return parent;}
public void setParent(Resource parent){
this.parent = parent;}
Standard equals() and hashCode() methods are implemented for the Resource class to enable its use in various Java collections:
@Overridepublic int hashCode(){
final int prime = 31;int result = 1;result = prime * result + ( ( name == null ) ? 0 :
name.hashCode() );result = prime * result + ( ( type == null ) ? 0 :
type.hashCode() );return result;
}
@Overridepublic boolean equals(Object obj){
if( this == obj )return true;
if( obj == null )return false;
if( getClass() != obj.getClass() )return false;
Resource other = (Resource)obj;if( name == null ){
if( other.name != null )return false;
}
www.redhat.com 96 [email protected]
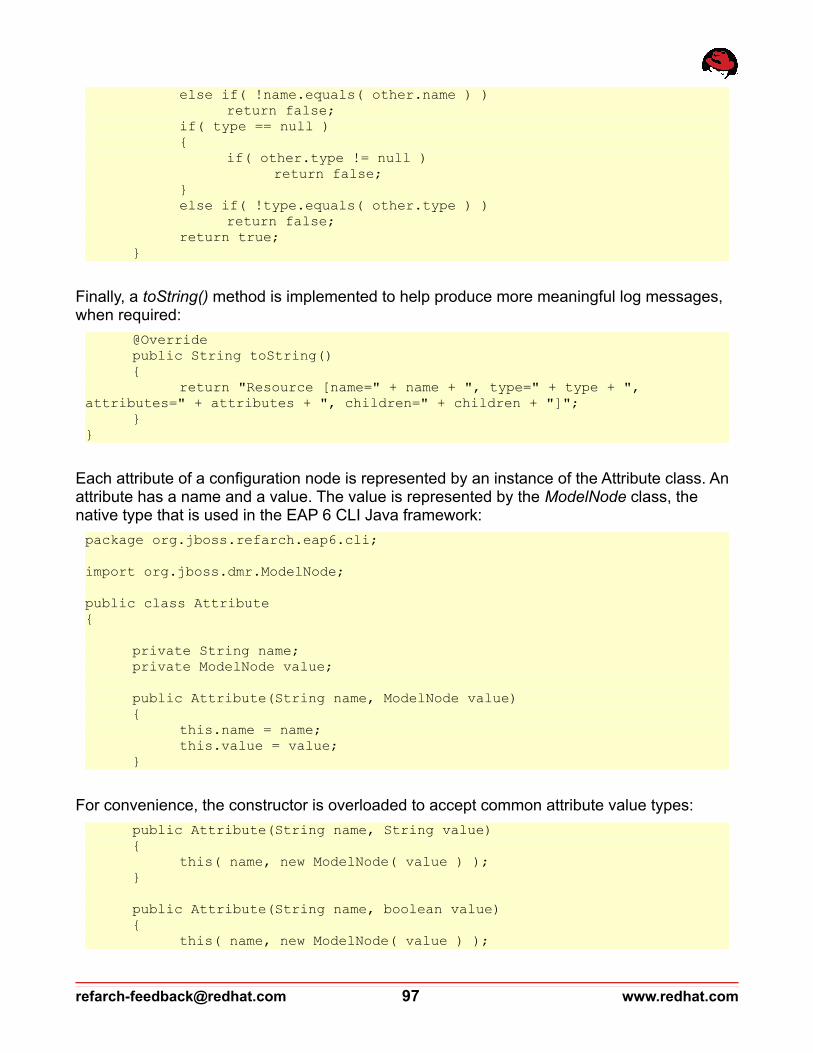
else if( !name.equals( other.name ) )return false;
if( type == null ){
if( other.type != null )return false;
}else if( !type.equals( other.type ) )
return false;return true;
}
Finally, a toString() method is implemented to help produce more meaningful log messages, when required:
@Overridepublic String toString(){
return "Resource [name=" + name + ", type=" + type + ", attributes=" + attributes + ", children=" + children + "]";
}}
Each attribute of a configuration node is represented by an instance of the Attribute class. An attribute has a name and a value. The value is represented by the ModelNode class, the native type that is used in the EAP 6 CLI Java framework:
package org.jboss.refarch.eap6.cli;
import org.jboss.dmr.ModelNode;
public class Attribute{
private String name;private ModelNode value;
public Attribute(String name, ModelNode value){
this.name = name;this.value = value;
}
For convenience, the constructor is overloaded to accept common attribute value types:
public Attribute(String name, String value){
this( name, new ModelNode( value ) );}
public Attribute(String name, boolean value){
this( name, new ModelNode( value ) );
[email protected] 97 www.redhat.com

}
public Attribute(String name, int value){
this( name, new ModelNode( value ) );}
The Attribute class provides simple getter and setter methods for its fields:
public String getName(){
return name;}
public void setName(String name){
this.name = name;}
public ModelNode getValue(){
return value;}
public void setValue(ModelNode value){
this.value = value;}
However, the setValue() method is again overloaded to accept common value types:
public void setValue(String value){
this.value = new ModelNode( value );}
public void setValue(boolean value){
this.value = new ModelNode( value );}
public void setValue(int value){
this.value = new ModelNode( value );}
www.redhat.com 98 [email protected]
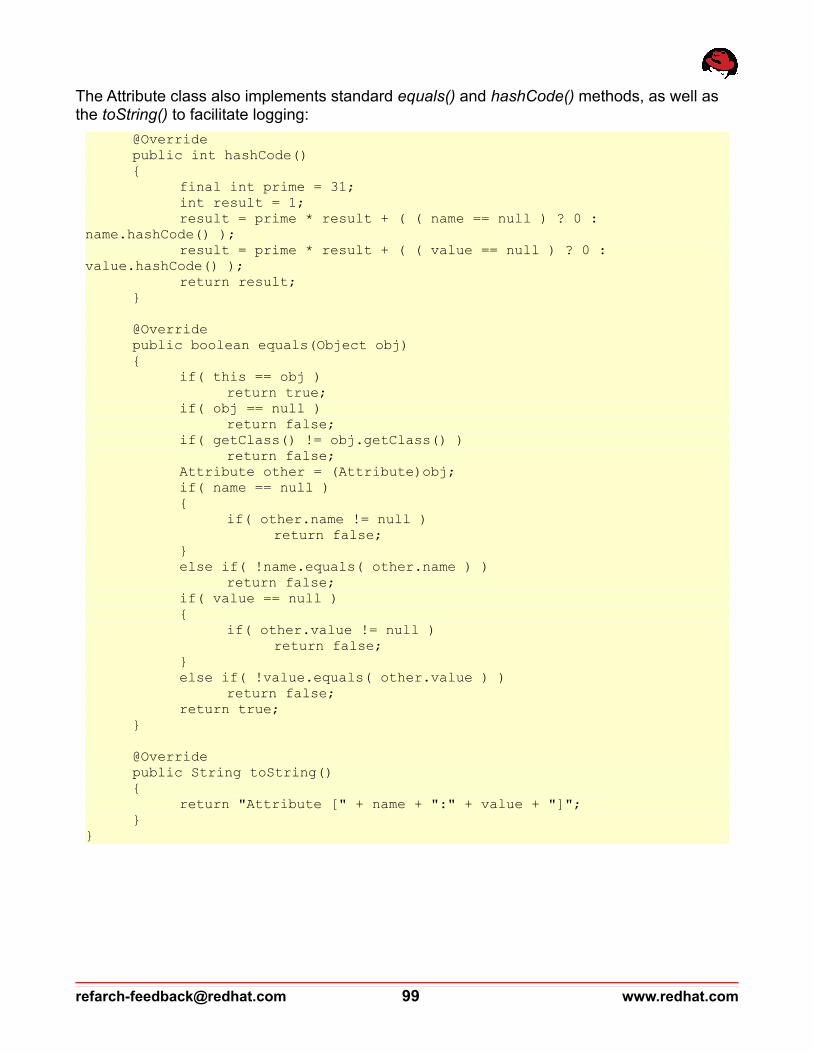
The Attribute class also implements standard equals() and hashCode() methods, as well as the toString() to facilitate logging:
@Overridepublic int hashCode(){
final int prime = 31;int result = 1;result = prime * result + ( ( name == null ) ? 0 :
name.hashCode() );result = prime * result + ( ( value == null ) ? 0 :
value.hashCode() );return result;
}
@Overridepublic boolean equals(Object obj){
if( this == obj )return true;
if( obj == null )return false;
if( getClass() != obj.getClass() )return false;
Attribute other = (Attribute)obj;if( name == null ){
if( other.name != null )return false;
}else if( !name.equals( other.name ) )
return false;if( value == null ){
if( other.value != null )return false;
}else if( !value.equals( other.value ) )
return false;return true;
}
@Overridepublic String toString(){
return "Attribute [" + name + ":" + value + "]";}
}
[email protected] 99 www.redhat.com
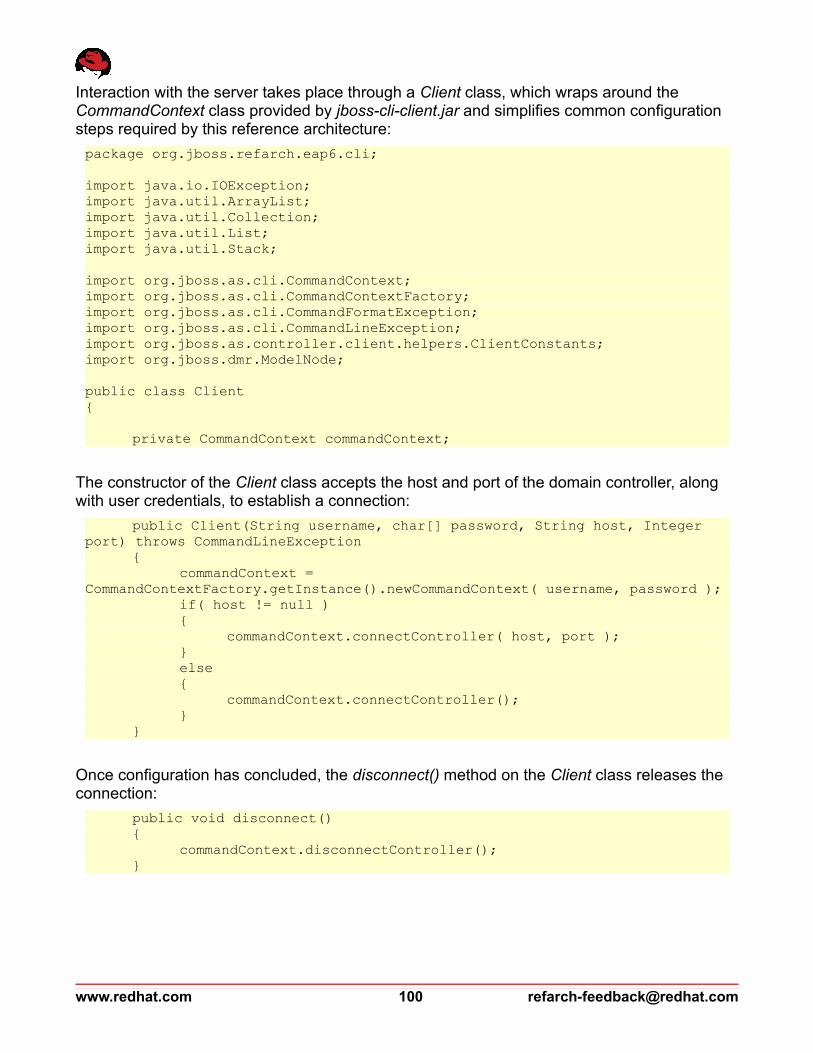
Interaction with the server takes place through a Client class, which wraps around the CommandContext class provided by jboss-cli-client.jar and simplifies common configuration steps required by this reference architecture:
package org.jboss.refarch.eap6.cli;
import java.io.IOException;import java.util.ArrayList;import java.util.Collection;import java.util.List;import java.util.Stack;
import org.jboss.as.cli.CommandContext;import org.jboss.as.cli.CommandContextFactory;import org.jboss.as.cli.CommandFormatException;import org.jboss.as.cli.CommandLineException;import org.jboss.as.controller.client.helpers.ClientConstants;import org.jboss.dmr.ModelNode;
public class Client{
private CommandContext commandContext;
The constructor of the Client class accepts the host and port of the domain controller, along with user credentials, to establish a connection:
public Client(String username, char[] password, String host, Integer port) throws CommandLineException
{commandContext =
CommandContextFactory.getInstance().newCommandContext( username, password );if( host != null ){
commandContext.connectController( host, port );}else{
commandContext.connectController();}
}
Once configuration has concluded, the disconnect() method on the Client class releases the connection:
public void disconnect(){
commandContext.disconnectController();}
www.redhat.com 100 [email protected]

The Client can load an entire configuration section with a single method invocation:
public void load(Resource resource) throws IOException{
ModelNode readResourceRequest = getModelNode( resource );readResourceRequest.get( ClientConstants.OP ).set( "read-resource-
description" );ModelNode readResourceResponse = execute( readResourceRequest );throwExceptionOnFailure( readResourceRequest, readResourceResponse,
"Failed to read resource description for " + resource.getName() );ModelNode readResourceResult =
readResourceResponse.get( ClientConstants.RESULT );ModelNode attributeModelNodes = readResourceResult.get( "attributes" );Collection<String> attributeNames = attributeModelNodes.keys();for( String attributeName : attributeNames ){
if( !attributeName.equals( ClientConstants.NAME ) ){
Attribute attribute = readAttribute( resource, attributeName, false );
if( attribute.getValue().isDefined() ){
resource.addAttribute( attribute );}
}}ModelNode childTypeModelNodes = readResourceResult.get( "children" );Collection<String> childTypes = childTypeModelNodes.keys();for( String type : childTypes ){
ModelNode readChildNamesRequest = getModelNode( resource );
readChildNamesRequest.get( ClientConstants.OP ).set( ClientConstants.READ_CHILDREN_NAMES_OPERATION );
readChildNamesRequest.get( ClientConstants.CHILD_TYPE ).set( type );ModelNode readChildNamesResponse =
execute( readChildNamesRequest );throwExceptionOnFailure( readChildNamesRequest,
readChildNamesResponse, "Failed to read children names for " + type );List<ModelNode> childNamesModelNodes =
readChildNamesResponse.get( ClientConstants.RESULT ).asList();for( ModelNode childNameModelNode : childNamesModelNodes ){
Resource childResource = new Resource( type, childNameModelNode.asString() );
childResource.setParent( resource );load( childResource );resource.addChildResource( childResource );
}}
}
[email protected] 101 www.redhat.com

When loading a Resource, the only requirement is that the provided Resource object would have its parent set to an appropriate Resource object representing its parent node type and name, and for the parent to follow the same rule and so on, all the way to the root of the configuration. Once this requirement is satisfied, a simple internal call to the getModelNode() method results in a ModelNode that contains the node address:
ModelNode readResourceRequest = getModelNode( resource );
Once a ModelNode representing the requested node is available, calling the read-resource-description operation, returns metadata information on the resource:
readResourceRequest.get( ClientConstants.OP ).set( "read-resource-description" );
The execute method invokes the domain controller and returns the response:
ModelNode readResourceResponse = execute( readResourceRequest );
The response is examined by a private method that looks for a SUCCESS outcome and throws UnsuccessfulCommandException is the operation was not successful:
throwExceptionOnFailure( readResourceRequest, readResourceResponse, "Failed to read resource description for " + resource.getName() );
The result is always a ModelNode object:
ModelNode readResourceResult = readResourceResponse.get( ClientConstants.RESULT );
The attribute names can be retrieved from the result of a previous read-resource-description operation, and for each attribute, the readAttribute() method queries the attribute value and adds it to the Resource object. The code excludes default attribute values from the response by providing false as the third argument to readAttribute():
ModelNode attributeModelNodes = readResourceResult.get( "attributes" );Collection<String> attributeNames = attributeModelNodes.keys();for( String attributeName : attributeNames ){
if( !attributeName.equals( ClientConstants.NAME ) ){
Attribute attribute = readAttribute( resource, attributeName, false );
if( attribute.getValue().isDefined() ){
resource.addAttribute( attribute );}
}}
www.redhat.com 102 [email protected]
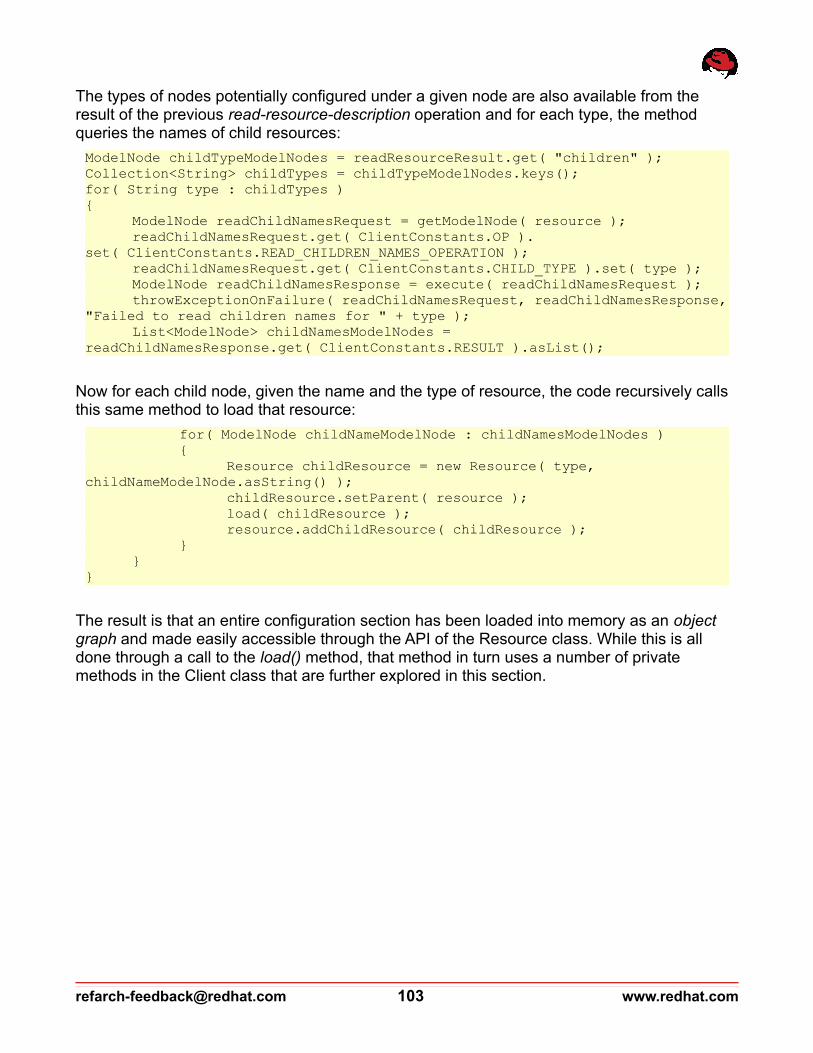
The types of nodes potentially configured under a given node are also available from the result of the previous read-resource-description operation and for each type, the method queries the names of child resources:
ModelNode childTypeModelNodes = readResourceResult.get( "children" );Collection<String> childTypes = childTypeModelNodes.keys();for( String type : childTypes ){
ModelNode readChildNamesRequest = getModelNode( resource );readChildNamesRequest.get( ClientConstants.OP ).
set( ClientConstants.READ_CHILDREN_NAMES_OPERATION );readChildNamesRequest.get( ClientConstants.CHILD_TYPE ).set( type );ModelNode readChildNamesResponse = execute( readChildNamesRequest );throwExceptionOnFailure( readChildNamesRequest, readChildNamesResponse,
"Failed to read children names for " + type );List<ModelNode> childNamesModelNodes =
readChildNamesResponse.get( ClientConstants.RESULT ).asList();
Now for each child node, given the name and the type of resource, the code recursively calls this same method to load that resource:
for( ModelNode childNameModelNode : childNamesModelNodes ){
Resource childResource = new Resource( type, childNameModelNode.asString() );
childResource.setParent( resource );load( childResource );resource.addChildResource( childResource );
}}
}
The result is that an entire configuration section has been loaded into memory as an object graph and made easily accessible through the API of the Resource class. While this is all done through a call to the load() method, that method in turn uses a number of private methods in the Client class that are further explored in this section.
[email protected] 103 www.redhat.com
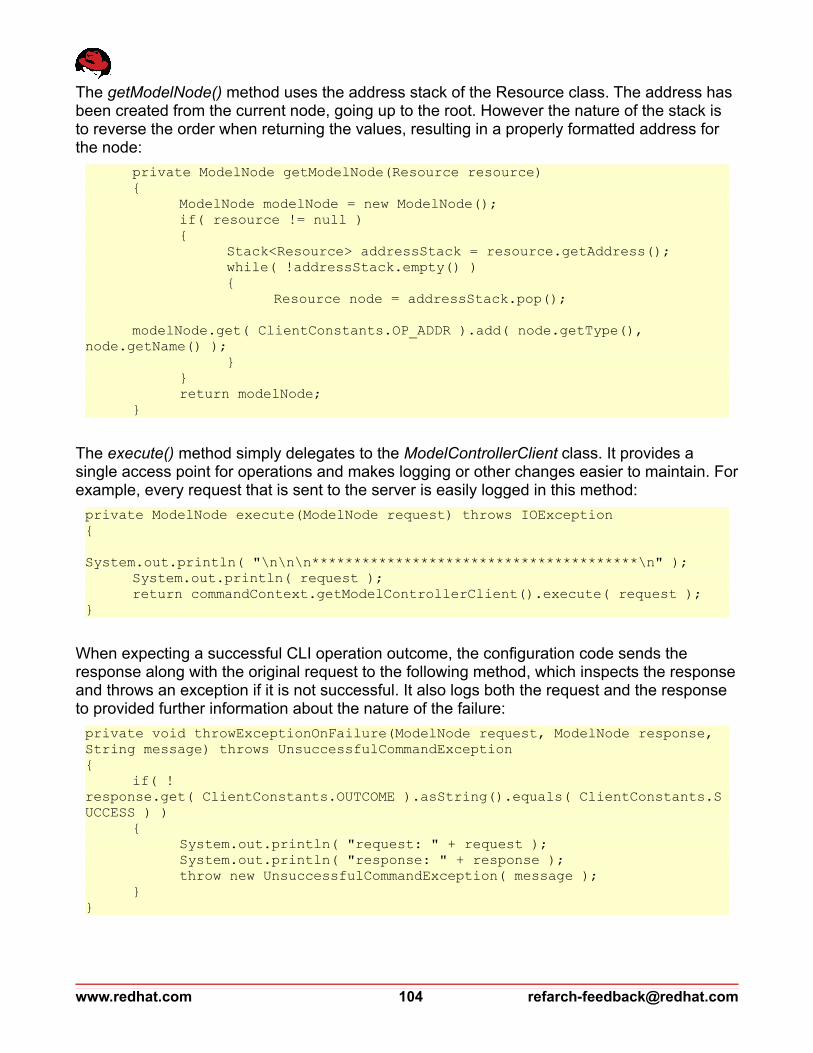
The getModelNode() method uses the address stack of the Resource class. The address has been created from the current node, going up to the root. However the nature of the stack is to reverse the order when returning the values, resulting in a properly formatted address for the node:
private ModelNode getModelNode(Resource resource){
ModelNode modelNode = new ModelNode();if( resource != null ){
Stack<Resource> addressStack = resource.getAddress();while( !addressStack.empty() ){
Resource node = addressStack.pop();
modelNode.get( ClientConstants.OP_ADDR ).add( node.getType(), node.getName() );
}}return modelNode;
}
The execute() method simply delegates to the ModelControllerClient class. It provides a single access point for operations and makes logging or other changes easier to maintain. For example, every request that is sent to the server is easily logged in this method:
private ModelNode execute(ModelNode request) throws IOException{
System.out.println( "\n\n\n***************************************\n" );System.out.println( request );return commandContext.getModelControllerClient().execute( request );
}
When expecting a successful CLI operation outcome, the configuration code sends the response along with the original request to the following method, which inspects the response and throws an exception if it is not successful. It also logs both the request and the response to provided further information about the nature of the failure:
private void throwExceptionOnFailure(ModelNode request, ModelNode response, String message) throws UnsuccessfulCommandException{
if( !response.get( ClientConstants.OUTCOME ).asString().equals( ClientConstants.SUCCESS ) )
{System.out.println( "request: " + request );System.out.println( "response: " + response );throw new UnsuccessfulCommandException( message );
}}
www.redhat.com 104 [email protected]

After receiving the names of the attributes, the readAttribute method is called to retrieve their values. This method uses the read-attribute CLI operation to query the attribute value. It respects the caller's request to include or exclude default values and automatically inspects the result for errors. A new Attribute object is created and returned, if successful:
public Attribute readAttribute(Resource resource, String attributeName, boolean includeDefaults) throws IOException{
ModelNode readAttributeRequest = getModelNode( resource );
readAttributeRequest.get( ClientConstants.OP ).set( ClientConstants.READ_ATTRIBUTE_OPERATION );
readAttributeRequest.get( ClientConstants.NAME ).set( attributeName );readAttributeRequest.get( "include-defaults" ).set( includeDefaults );ModelNode readAttributeResponse = execute( readAttributeRequest );throwExceptionOnFailure( readAttributeRequest, readAttributeResponse,
"Failed to read attribute " + attributeName + " of " + resource );return new Attribute( attributeName,
readAttributeResponse.get( ClientConstants.RESULT ) );}
Attributes can also be modified through the writeAttribute() convenience method:
public ModelNode writeAttribute(Resource resource, Attribute attribute) throws IOException{
ModelNode request = getModelNode( resource );
request.get( ClientConstants.OP ).set( ClientConstants.WRITE_ATTRIBUTE_OPERATION );
request.get( ClientConstants.NAME ).set( attribute.getName() );request.get( ClientConstants.VALUE ).set( attribute.getValue() );ModelNode response = execute( request );throwExceptionOnFailure( request, response, "Failed to write " +
attribute + " to " + resource );return response;
}
This class also provides a convenience method to execute an arbitrary operation:
public ModelNode operation(Resource resource, String operation) throws IOException{
ModelNode request = getModelNode( resource );request.get( ClientConstants.OP ).set( operation );ModelNode response = execute( request );throwExceptionOnFailure( request, response, "Failed to call " +
operation + " on " + resource );return response;
}
[email protected] 105 www.redhat.com

To find all configuration of a certain type, under a given node, the getResourcesByType convenience method is very useful:
public List<Resource> getResourcesByType(Resource parent, String type) throws IOException{
ModelNode getResourcesRequest = getModelNode( parent );getResourcesRequest.get( ClientConstants.OP ).set(
ClientConstants.READ_CHILDREN_NAMES_OPERATION );getResourcesRequest.get( ClientConstants.CHILD_TYPE ).set( type );ModelNode getResourcesResponse = execute( getResourcesRequest );throwExceptionOnFailure( getResourcesRequest, getResourcesResponse,
"Failed to query resources of type " + type );List<ModelNode> resourceNames = getResourcesResponse.get(
ClientConstants.RESULT ).asList();List<Resource> resources = new ArrayList<Resource>();for( ModelNode modelNode : resourceNames ){
Resource resource = new Resource( type, modelNode.asString() );resource.setParent( parent );resources.add( resource );
}return resources;
}
Deploying an application using CLI is a bit more complicated than it first appears. The CLI deploy command reads the application as a stream of bytes, uploads the file content to the EAP 6 deployment content repository and then assigns it to the desired server groups. To benefit from the available implementation, a string CLI command is translated to a ModelNode request:
public ModelNode deploy(String deployable) throws IOException, CommandFormatException{
StringBuilder command = new StringBuilder( ClientConstants.DEPLOYMENT_DEPLOY_OPERATION );
command.append( " " );command.append( deployable );command.append( " " );command.append( "--all-server-groups" );ModelNode request = commandContext.buildRequest( command.toString() );//avoid using execute() as it would print the deployable bytes and
pollute the logSystem.out.println( "\n\n\n**************************************\n" );System.out.println( "Deploying " + deployable );ModelNode response =
commandContext.getModelControllerClient().execute( request );throwExceptionOnFailure( request, response, "Failed to deploy " +
deployable );return response;
}
www.redhat.com 106 [email protected]
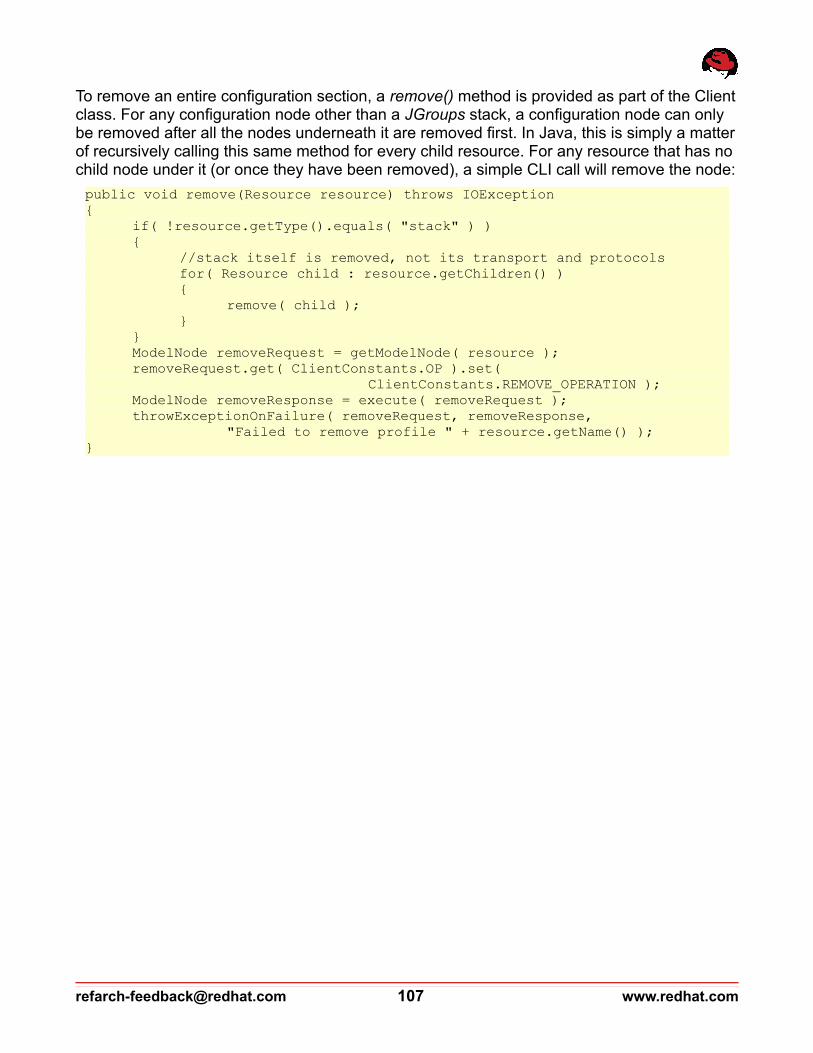
To remove an entire configuration section, a remove() method is provided as part of the Client class. For any configuration node other than a JGroups stack, a configuration node can only be removed after all the nodes underneath it are removed first. In Java, this is simply a matter of recursively calling this same method for every child resource. For any resource that has no child node under it (or once they have been removed), a simple CLI call will remove the node:
public void remove(Resource resource) throws IOException{
if( !resource.getType().equals( "stack" ) ){
//stack itself is removed, not its transport and protocolsfor( Resource child : resource.getChildren() ){
remove( child );}
}ModelNode removeRequest = getModelNode( resource );removeRequest.get( ClientConstants.OP ).set(
ClientConstants.REMOVE_OPERATION );ModelNode removeResponse = execute( removeRequest );throwExceptionOnFailure( removeRequest, removeResponse,
"Failed to remove profile " + resource.getName() );}
[email protected] 107 www.redhat.com

Creating a complete profile based on the steps above involves a number of exception paths. Creating a JGroups stack is unlike any other configuration node, so it is handled separately.
Each JGroups stack is modeled as a configuration node with a number of children and attributes. The transport of a stack is modeled as one child node with a number of attributes. The protocols of a stack are modeled as both attributes and children. However, when creating a stack, only attributes should be provided:
private void createStack(Resource stack) throws IOException{
ModelNode createStackRequest = getModelNode( stack );
createStackRequest.get( ClientConstants.OP ).set( ClientConstants.ADD );
ModelNode transport = getModelNode( stack.getChild( "transport", "TRANSPORT" ).getAttributes() );
List<ModelNode> protocols = new ArrayList<ModelNode>();//Use attributes to create protocols as children are out of order and
the order is importantfor( ModelNode protocolModelNode :
stack.getAttribute( "protocols" ).getValue().asList() ){
Resource protocolChild = stack.getChild( "protocol", protocolModelNode.asString() );
protocols.add( getModelNode( protocolChild.getAttributes() ) );}
createStackRequest.get( "transport" ).set( transport );createStackRequest.get( "protocols" ).set( protocols );ModelNode createStackResponse = execute( createStackRequest );throwExceptionOnFailure( createStackRequest, createStackResponse,
"Failed to create stack " + stack.getName() );}
To create stacks, ModelNode objects are formed based on attributes:
private boolean isEnabled(Resource datasource){
for( Attribute attribute : datasource.getAttributes() ){
if( attribute.getName().equals( "enabled" ) ){
if( attribute.getValue().asBoolean() == true ){
return true;}
}}return false;
}
www.redhat.com 108 [email protected]

To have a generic solution to creating Resources, a create() method is provided that delegates to createStack() if the Resource is found to be a JGroups stack:
{if( resource.getType().equals( "stack" ) ){
createStack( resource );return;
}ModelNode addResourceRequest = getModelNode( resource );
To create a resource other than a stack, first a CLI add operation is set up:
addResourceRequest.get( ClientConstants.OP ).set( ClientConstants.ADD );
Then all resource attributes are added to the request:
for( Attribute attribute : resource.getAttributes() ){ addResourceRequest.get( attribute.getName() ).set( attribute.getValue() );}
The add operation requires that a name attribute would be set for some configuration node types, while prohibiting such an attribute for others. This is handled by calling an internal method that determines if the name attribute is required and if it is, the resource name is set as its value:
if( isRequiredArgument( resource, ClientConstants.ADD,ClientConstants.NAME ) )
{ addResourceRequest.get( ClientConstants.NAME ).set( resource.getName() );}
This method checks the operation description to find out if name is a required attribute:
ModelNode readOperationDescriptionRequest = getModelNode( resource );readOperationDescriptionRequest.get( ClientConstants.OP ).set( "read-operation-description" );readOperationDescriptionRequest.get(ClientConstants.NAME).set( operation );ModelNode readOperationDescriptionResponse = execute( readOperationDescriptionRequest );...ModelNode requestSpec = readOperationDescriptionResponse.get( ClientConstants.RESULT ).get( "request-properties" ).get( requestProperty );if( requestSpec.isDefined() ){
return requestSpec.get( "required" ).asBoolean();}else{
return false;}
[email protected] 109 www.redhat.com

At this point, the add operation is called to create the resource:
ModelNode addResourceResponse = execute( addResourceRequest );throwExceptionOnFailure( addResourceRequest, addResourceResponse,
"Failed to create resource " + resource.getName() );
Other than a few exception cases, for all other configuration node types, the child nodes must also be created at this point. Once again, the use of Java allows for simple recursion to achieve this:
if( ( resource.getType().equals( "authorization" ) || resource.getType().equals( "authentication" ) )
&& resource.getName().equals( "classic" ) ){
//Children are created as attributes}else{
for( Resource child : resource.getChildren() ){
create( child );}
}
Creating a DATA-SOURCE configuration with an attribute of enabled is not sufficient. Datasources need to be explicitly enabled through an operation:
if( resource.getType().equals( "data-source" ) && isEnabled( resource ) ){ ModelNode enableDatasourceRequest = getModelNode( resource ); enableDatasourceRequest.get( ClientConstants.OP ).set( "enable" ); enableDatasourceRequest.get( "persistent" ).set( true ); ModelNode enableDatasourceResponse = execute( enableDatasourceRequest ); ...}
To find out if a datasource is enabled, the following method inspects its attributes:
private boolean isEnabled(Resource datasource){
for( Attribute attribute : datasource.getAttributes() ){
if( attribute.getName().equals( "enabled" ) ){
if( attribute.getValue().asBoolean() == true ){
return true;}
}}return false;
}
www.redhat.com 110 [email protected]

6.3 DomainsWhile the Resource, Attribute and Client classes are developed as a framework for generic (albeit incomplete) Java over CLI configuration, the Configuration class includes only code that specifically configures this reference architecture environment.
The Configuration class is provided in the org.jboss.refarch.eap6.cluster package and requires a number of configurable parameters to function:
package org.jboss.refarch.eap6.cluster;
...
public class Configuration{
private final Pattern IP_ADDRESS_PATTERN = Pattern.compile( "(.*?)(\\d+)\\.(\\d+)\\.(\\d+)\\.(\\d+)(.*)" );
The IP_ADDRESS_PATTERN uses regular expression syntax to parse an IPv4 address and apply an offset by incrementing it. It is used by a convenience method in this class:
private String modifyIPAddress(String expression, int offsetUnit){
Matcher matcher = IP_ADDRESS_PATTERN.matcher( expression );if( matcher.matches() ){
int octet4 = Integer.valueOf( matcher.group( 5 ) ) + 1;StringBuilder stringBuilder = new
StringBuilder( matcher.group( 1 ) );stringBuilder.append( matcher.group( 2 ) );stringBuilder.append( "." );stringBuilder.append( matcher.group( 3 ) );stringBuilder.append( "." );stringBuilder.append( matcher.group( 4 ) );stringBuilder.append( "." );stringBuilder.append( octet4 );stringBuilder.append( matcher.group( 6 ) );return stringBuilder.toString();
}else{
return expression;}
}
[email protected] 111 www.redhat.com

This is followed by the definition of ten fields, which are either directly or indirectly provided to the class in a property file:
private Client client;private String domainName;private int offsetUnit;private String postgresDriverName;private String postgresDriverLocation;private String postgresUsername;private String postgresPassword;private String connectionUrl;private String clusterApp;private String modClusterProxy;
The main method of the class can optionally accept the path to a property file as its input. If not provided, the class assumes that configuration.properties is available in the current working directory:
public static void main(String[] args) throws CommandLineException, IOException{
String propertyFile = "./configuration.properties";if( args.length == 1 ){
propertyFile = args[0];}Properties props = new Properties();props.load( new FileReader( propertyFile ) );System.out.println( "properties loaded as: " + props );Configuration configuration = new Configuration( props );
While username, password and domainController (address) are used to create and maintain a Client object, all other properties are directly mapped to a field and stored for later use:
public Configuration(Properties properties) throws CommandLineException{ String username = properties.getProperty( "username" ); String password = properties.getProperty( "password" ); String domainController = properties.getProperty( "domainController" ); client = new Client( username, password.toCharArray(), domainController, 9999 ); domainName = properties.getProperty( "domainName" ); offsetUnit = Integer.parseInt( properties.getProperty( "offsetUnit" ) ); postgresDriverName = properties.getProperty( "postgresDriverName" ); postgresDriverLocation= properties.getProperty("postgresDriverLocation"); postgresUsername = properties.getProperty( "postgresUsername" ); postgresPassword = properties.getProperty( "postgresPassword" ); connectionUrl = properties.getProperty( "connectionUrl" ); clusterApp = properties.getProperty( "deployableApp" ); modClusterProxy = properties.getProperty( "modClusterProxy" );}
www.redhat.com 112 [email protected]
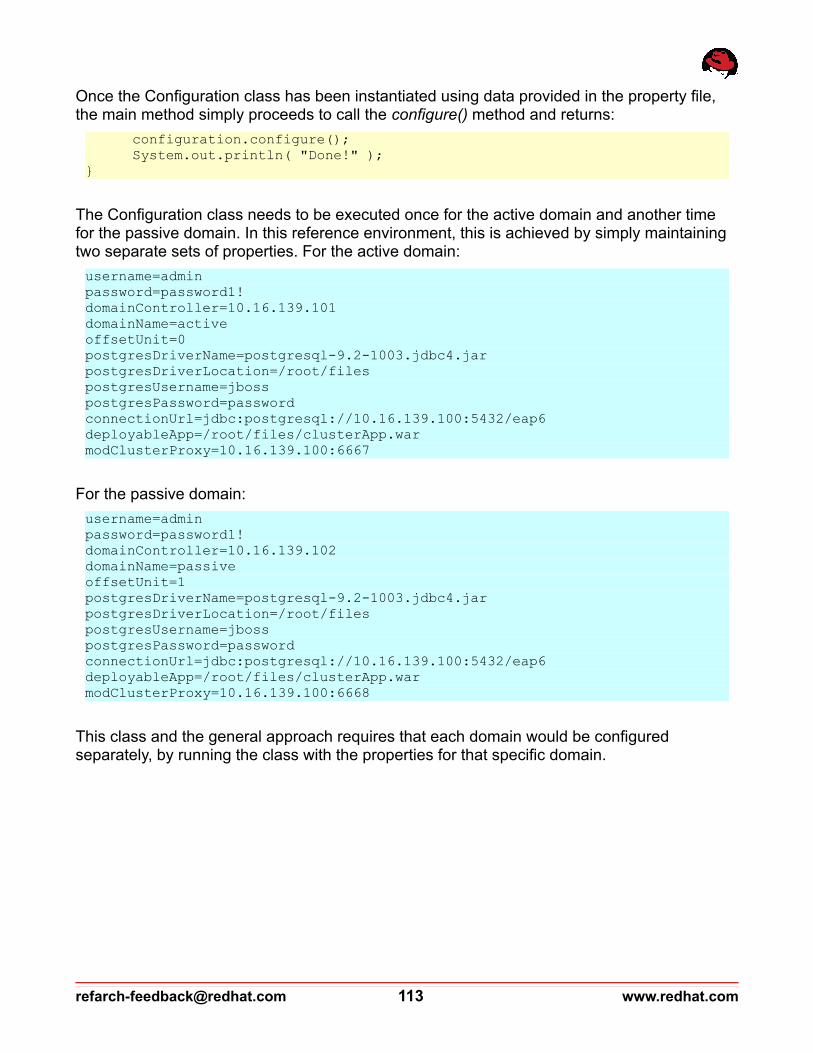
Once the Configuration class has been instantiated using data provided in the property file, the main method simply proceeds to call the configure() method and returns:
configuration.configure();System.out.println( "Done!" );
}
The Configuration class needs to be executed once for the active domain and another time for the passive domain. In this reference environment, this is achieved by simply maintaining two separate sets of properties. For the active domain:
username=adminpassword=password1!domainController=10.16.139.101domainName=activeoffsetUnit=0postgresDriverName=postgresql-9.2-1003.jdbc4.jarpostgresDriverLocation=/root/filespostgresUsername=jbosspostgresPassword=passwordconnectionUrl=jdbc:postgresql://10.16.139.100:5432/eap6deployableApp=/root/files/clusterApp.warmodClusterProxy=10.16.139.100:6667
For the passive domain:
username=adminpassword=password1!domainController=10.16.139.102domainName=passiveoffsetUnit=1postgresDriverName=postgresql-9.2-1003.jdbc4.jarpostgresDriverLocation=/root/filespostgresUsername=jbosspostgresPassword=passwordconnectionUrl=jdbc:postgresql://10.16.139.100:5432/eap6deployableApp=/root/files/clusterApp.warmodClusterProxy=10.16.139.100:6668
This class and the general approach requires that each domain would be configured separately, by running the class with the properties for that specific domain.
[email protected] 113 www.redhat.com

6.4 Sample ServersThe configuration of the domain starts with querying the available hosts, sample server groups and servers that have been included in the initial EAP 6 configuration. All the EAP 6 instances are stopped and the server groups and server configurations themselves are removed from the domain:
private void configure() throws CommandLineException, IOException{
List<Resource> serverGroups = client.getResourcesByType( null, "server-group" );
List<Resource> hosts = client.getResourcesByType( null, "host" );
stopAllServers( serverGroups );removeServerConfigs( hosts );removeServerGroups( serverGroups );
To find all server groups and hosts in straight CLI, the equivalent commands are:
:read-children-names(child-type=server-group):read-children-names(child-type=host)
Once the host names are known, servers are stopped by using the stop-servers CLI operation:
private void stopAllServers(List<Resource> serverGroups) throws IOException{
for( Resource serverGroup : serverGroups ){
client.operation( serverGroup, "stop-servers" );System.out.println( "Stopped servers in group " +
serverGroup.getName() );}
}
Assuming that the existing server groups are main-server-group and other-server-group, as is the case with the sample setup of JBoss EAP 6.1, to stop all servers in these server groups in straight CLI, the equivalent commands are:
/server-group=main-server-group:stop-servers()/server-group=other-server-group:stop-servers()
www.redhat.com 114 [email protected]

Once servers have been stopped, server configurations may be queried for each host and subsequently removed by using the remove CLI operation:
private void removeServerConfigs(List<Resource> hosts) throws IOException{
for( Resource host : hosts ){
waitForServerShutdown( host );List<Resource> serverConfigs = client.getResourcesByType( host,
"server-config" );for( Resource serverConfig : serverConfigs ){
client.operation( serverConfig, "remove" );System.out.println( "Removed server " +
serverConfig.getName() );}
}}
To make sure the servers are shut down, the code queries all server Resources on a given host. This query only succeeds when there is a running server and results in a failed outcome once the servers have all been stopped, so it is repeated until an exception is thrown by the Client code:
private void waitForServerShutdown(Resource host) throws IOException{
try{
client.getResourcesByType( host, "server" );//No exception means servers were found to not have been shut
downtry{
System.out.println( "Servers for host " + host.getName() + " not shut down yet, will wait and check again" );
Thread.sleep( 1000 );}catch( InterruptedException e ){
e.printStackTrace();}
}catch( UnsuccessfulCommandException e ){
//This means all servers have been shut downSystem.out.println( "Expected exception, which means that the
server has been successfully shut down" );return;
}}
[email protected] 115 www.redhat.com

To use straight CLI scripts to find out if a server is still running, look for server nodes on a host:
/host=node1:read-children-names(child-type=server)
Once all servers have been stopped, the above CLI command results in a failed outcome:
{ "outcome" => "failed", "result" => undefined, "failure-description" => "JBAS014793: No known child type named server", "rolled-back" => true}
To then remove server configurations, both the host name and the name of the server configurations for the host is required:
/host=node1/server-config=server-one:remove()/host=node1/server-config=server-two:remove()/host=node1/server-config=server-three:remove()
/host=node2/server-config=server-one:remove()/host=node2/server-config=server-two:remove()
/host=node3/server-config=server-one:remove()/host=node3/server-config=server-two:remove()
The same remove operation is then also able to remove server groups, once no servers are configured in a group:
private void removeServerGroups(List<Resource> serverGroups) throws IOException{
for( Resource serverGroup : serverGroups ){
client.operation( serverGroup, "remove" );System.out.println( "Removed server group " +
serverGroup.getName() );}
}
To remove server groups with given names, the CLI script syntax is as follows:
/server-group=main-server-group:remove()/server-group=other-server-group:remove()
www.redhat.com 116 [email protected]

6.5 ProfilesJBoss EAP 6.1 is configured with a number of profiles that are provided for common use cases. This reference architecture uses the full-ha profile as a baseline and builds upon it, however it requires three distinct profiles with minor differences, which this configuration names as full-ha-1, full-ha-2 and full-ha-3. To avoid further confusion and mistakes in attempting to modify behavior by editing irrelevant profiles, the configuration script also removes any unused profile from the domain.
Accomplishing all this in straight CLI script is tedious enough to be considered completely impractical. If using Java or another script to drive the CLI configuration is not possible, the recommended MANUAL alternative is to edit the domain configuration file while the servers are stopped, cut out the samples profiles and copy and paste the full-ha profile, while renaming it every time.
In the configuration script, this is all achieved by the Java code through calling the updateProfile() method internally:
updateProfile();
This method takes the following steps:
private void updateProfile() throws IOException, CommandFormatException{
Resource profile = new Resource( "profile", "full-ha" );client.load( profile );
removeExistingProfiles();setupModCluster( profile );setupMessaging( profile );
Resource fullHA1 = profile;fullHA1.setName( "full-ha-1" );client.create( fullHA1 );
Resource fullHA2 = profile;fullHA2.setName( "full-ha-2" );configureSecondaryProfile( fullHA2 );client.create( fullHA2 );
Resource fullHA3 = profile;fullHA3.setName( "full-ha-3" );configureTertiaryProfile( fullHA3 );client.create( fullHA3 );
}
The first step is to load the baseline full-ha profile into a Resource object graph:
Resource profile = new Resource( "profile", "full-ha" );client.load( profile );
[email protected] 117 www.redhat.com
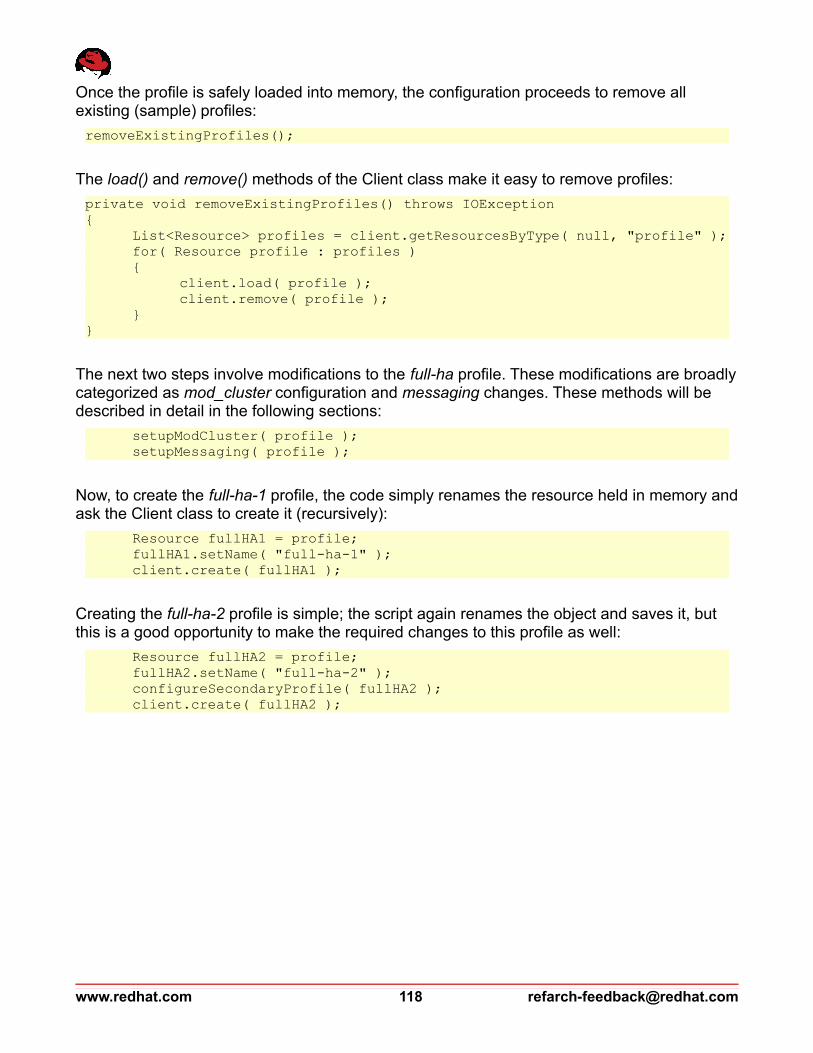
Once the profile is safely loaded into memory, the configuration proceeds to remove all existing (sample) profiles:
removeExistingProfiles();
The load() and remove() methods of the Client class make it easy to remove profiles:
private void removeExistingProfiles() throws IOException{
List<Resource> profiles = client.getResourcesByType( null, "profile" );for( Resource profile : profiles ){
client.load( profile );client.remove( profile );
}}
The next two steps involve modifications to the full-ha profile. These modifications are broadly categorized as mod_cluster configuration and messaging changes. These methods will be described in detail in the following sections:
setupModCluster( profile );setupMessaging( profile );
Now, to create the full-ha-1 profile, the code simply renames the resource held in memory and ask the Client class to create it (recursively):
Resource fullHA1 = profile;fullHA1.setName( "full-ha-1" );client.create( fullHA1 );
Creating the full-ha-2 profile is simple; the script again renames the object and saves it, but this is a good opportunity to make the required changes to this profile as well:
Resource fullHA2 = profile;fullHA2.setName( "full-ha-2" );configureSecondaryProfile( fullHA2 );client.create( fullHA2 );
www.redhat.com 118 [email protected]

The only distinctions between the three profiles are their rotation of HornetQ backup group names, as well as their transaction node identifier. Shared resources, share object stores, distributed JTA and JTS all require unique node identifiers for proper behavior.
private void configureSecondaryProfile(Resource profile){ Resource messaging = profile.getChild( "subsystem", "messaging" ); messaging.getChild( "hornetq-server", "default" ).setAttribute( "backup-group-name", domainName + "-backup-group-2" ); messaging.getChild( "hornetq-server", "backup-server-a" ).setAttribute( "backup-group-name", domainName + "-backup-group-3" ); messaging.getChild( "hornetq-server", "backup-server-b" ).setAttribute( "backup-group-name", domainName + "-backup-group-1" );
profile.getChild( "subsystem", "transactions" ).setAttribute( "node-identifier", 2 );}
Creating the full-ha-3 profile is very similar:
Resource fullHA3 = profile;fullHA3.setName( "full-ha-3" );configureTertiaryProfile( fullHA3 );client.create( fullHA3 );
Again, messaging backup group names are modified before the profile is created, and a unique node identifier is set:
private void configureTertiaryProfile(Resource profile){ Resource messaging = profile.getChild( "subsystem", "messaging" ); messaging.getChild( "hornetq-server", "default" ).setAttribute( "backup-group-name", domainName + "-backup-group-3" ); messaging.getChild( "hornetq-server", "backup-server-a" ).setAttribute( "backup-group-name", domainName + "-backup-group-1" ); messaging.getChild( "hornetq-server", "backup-server-b" ).setAttribute( "backup-group-name", domainName + "-backup-group-2" );
profile.getChild( "subsystem", "transactions" ).setAttribute( "node-identifier", 3 );}
A review of the domain configuration file or the output of the CLI interfaces shows that these few lines generate pages and pages of configuration nodes through issuing a very high number of CLI commands.
[email protected] 119 www.redhat.com

6.5.1 mod_clusterThe mod_cluster configuration is a simple matter of turning off the ADVERTISE feature of the module and instead configuring the EAP cluster nodes with the address of the proxy web server. This ensures that the two clusters remain separate from a web proxy perspective, but is also often desirable in production environments where a higher level of control is appreciated. The modClusterProxy property has been supplied in the configuration file:
private void setupModCluster(Resource profile) throws IOException{
Resource modcluster = profile.getChild( "subsystem", "modcluster" );Resource configuration = modcluster.getChild( "mod-cluster-config",
"configuration" );configuration.setAttribute( "advertise", false );configuration.setAttribute( "proxy-list", modClusterProxy );
}
To follow a manual configuration process instead of using the automated configuration, and to copy and paste the profiles, either manually edit and make the following changes to the domain file, or wait until such time that the servers have been started and do this configuration through CLI syntax:
/profile=full-ha-1/subsystem=modcluster/mod-cluster-config=configuration:write-attribute(name=advertise,value=false)
/profile=full-ha-1/subsystem=modcluster/mod-cluster-config=configuration:write-attribute(name=proxy-list,value=10.16.139.100:6667)
This would be repeated for the full-ha-2 and full-ha-3 profiles:
/profile=full-ha-2/subsystem=modcluster/mod-cluster-config=configuration:write-attribute(name=advertise,value=false)
/profile=full-ha-2/subsystem=modcluster/mod-cluster-config=configuration:write-attribute(name=proxy-list,value=10.16.139.100:6667)
/profile=full-ha-3/subsystem=modcluster/mod-cluster-config=configuration:write-attribute(name=advertise,value=false)
/profile=full-ha-3/subsystem=modcluster/mod-cluster-config=configuration:write-attribute(name=proxy-list,value=10.16.139.100:6667)
In this reference architecture, the mod_cluster module of the active cluster proxy is configured to listen on port 6667 while the proxy of the passive cluster listens on 6668. As such, when configuring the passive domain, the 6 CLI instructions provided above should be modified to reflect the differing port number.
www.redhat.com 120 [email protected]

6.5.2 HornetQ MessagingBy far, the biggest changes to the server profile involve the clustering of HornetQ. This reference architecture runs three HornetQ servers on each EAP 6 instance, which requires two new socket bindings to handle the additional port requirements:
private void setupMessaging(Resource profile) throws IOException{ Resource socketBindingGroup = new Resource( "socket-binding-group", "full-ha-sockets" ); Resource messagingA = new Resource( "socket-binding", "messaginga" ); messagingA.setParent( socketBindingGroup ); messagingA.addAttribute( new Attribute( "port", 5446 ) ); client.create( messagingA ); Resource messagingB = new Resource( "socket-binding", "messagingb" ); messagingB.setParent( socketBindingGroup ); messagingB.addAttribute( new Attribute( "port", 5447 ) ); client.create( messagingB );
The same change can be made using the following CLI syntax:
/socket-binding-group=full-ha-sockets/socket-binding=messaginga:add(port=5446)
/socket-binding-group=full-ha-sockets/socket-binding=messagingb:add(port=5447)
The code then retrieves the default HornetQ server and sets the required attributes. The clustered attribute is returned by the query but it is DEPRECATED, so the script removes from the profile to avoid producing warning messages:
Resource messaging = profile.getChild( "subsystem", "messaging" ); Resource hornetQServer = messaging.getChild( "hornetq-server", "default" ); hornetQServer.removeAttribute( "clustered" ); //deprecated hornetQServer.setAttribute( "shared-store", false ); hornetQServer.setAttribute( "cluster-password", "clusterPassword1!" ); hornetQServer.setAttribute( "backup", false ); hornetQServer.setAttribute( "allow-failback", true ); hornetQServer.setAttribute( "failover-on-shutdown", false ); hornetQServer.setAttribute( "check-for-live-server", true ); hornetQServer.setAttribute( "backup-group-name", domainName + "-backup-group-1" );
[email protected] 121 www.redhat.com

To set these attributes in CLI syntax, issue the following commands:
/profile=full-ha-1/subsystem=messaging/hornetq-server=default:write-attribute(name=shared-store,value=false)
/profile=full-ha-1/subsystem=messaging/hornetq-server=default:write-attribute(name=cluster-password,value=clusterPassword1!)
/profile=full-ha-1/subsystem=messaging/hornetq-server=default:write-attribute(name=backup,value=false)
/profile=full-ha-1/subsystem=messaging/hornetq-server=default:write-attribute(name=allow-failback,value=true)
/profile=full-ha-1/subsystem=messaging/hornetq-server=default:write-attribute(name=failover-on-shutdown,value=false)
/profile=full-ha-1/subsystem=messaging/hornetq-server=default:write-attribute(name=check-for-live-server,value=true)
/profile=full-ha-1/subsystem=messaging/hornetq-server=default:write-attribute(name=backup-group-name,value=active-backup-group-1)
In this case, the only difference between the active and passive clusters is the backup group name of the messaging server; this should be adjusted accordingly when issuing manual CLI commands.
www.redhat.com 122 [email protected]

To set unique server ID values for each HornetQ server in the JVM, the code sets the following attribute:
hornetQServer.getChild( "in-vm-connector", "in-vm" ).setAttribute( "server-id", 1 );hornetQServer.getChild( "in-vm-acceptor", "in-vm" ).setAttribute( "server-id", 1 );
The equivalent CLI syntax is:
/profile=full-ha-1/subsystem=messaging/hornetq-server=default/in-vm-connector=in-vm:write-attribute(name=server-id,value=1)
/profile=full-ha-1/subsystem=messaging/hornetq-server=default/in-vm-acceptor=in-vm:write-attribute(name=server-id,value=1)
The Java code then makes some configuration changes to the pooled connection factory used by HornetQ and the deployed MDBs:
Resource pooledCF = hornetQServer.getChild( "pooled-connection-factory", "hornetq-ra" ); pooledCF.setAttribute( "ha", true ); pooledCF.setAttribute( "block-on-acknowledge", true ); pooledCF.setAttribute( "retry-interval", 1000 ); pooledCF.setAttribute( "retry-interval-multiplier", 1 ); pooledCF.setAttribute( "reconnect-attempts", -1 );
Equivalent CLI syntax is:
/profile=full-ha-1/subsystem=messaging/hornetq-server=default/pooled-connection-factory=hornetq-ra:write-attribute(name=ha,value=true)
/profile=full-ha-1/subsystem=messaging/hornetq-server=default/pooled-connection-factory=hornetq-ra:write-attribute(name=block-on-acknowledge,value=true)
/profile=full-ha-1/subsystem=messaging/hornetq-server=default/pooled-connection-factory=hornetq-ra:write-attribute(name=retry-interval,value=1000)
/profile=full-ha-1/subsystem=messaging/hornetq-server=default/pooled-connection-factory=hornetq-ra:write-attribute(name=retry-interval-multiplier,value=1)
/profile=full-ha-1/subsystem=messaging/hornetq-server=default/pooled-connection-factory=hornetq-ra:write-attribute(name=reconnect-attempts,value=-1)
This concludes the required changes to the default live HornetQ server.
[email protected] 123 www.redhat.com
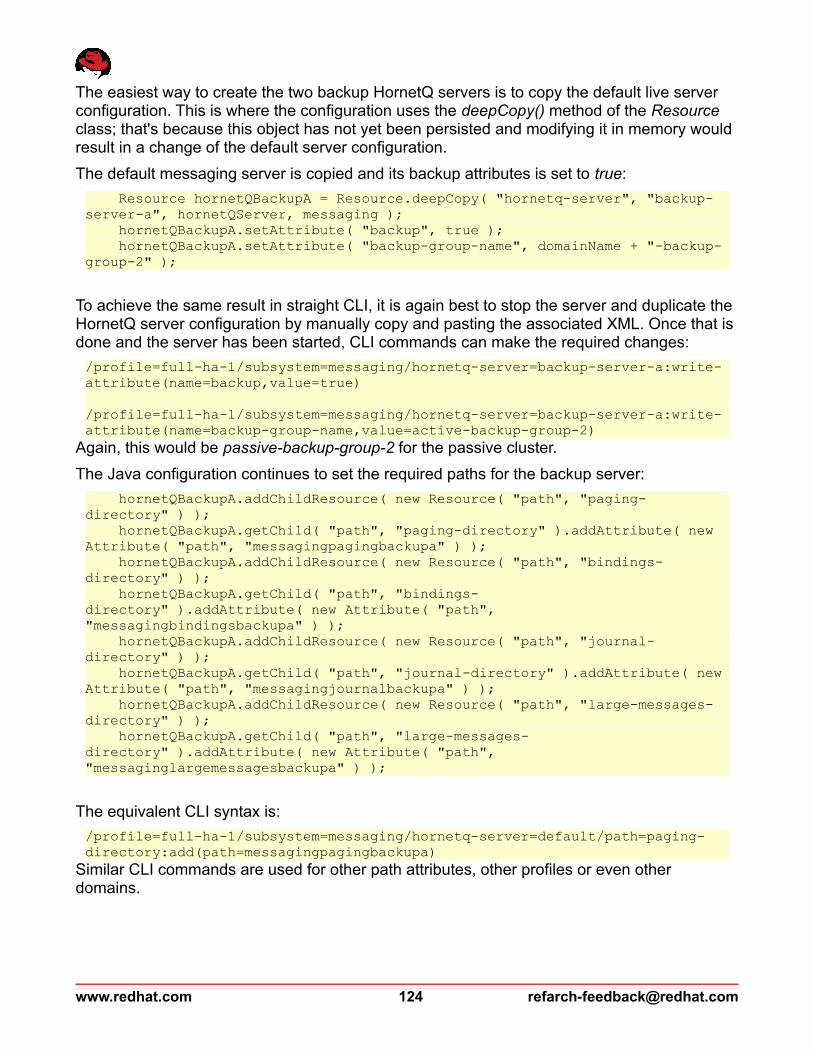
The easiest way to create the two backup HornetQ servers is to copy the default live server configuration. This is where the configuration uses the deepCopy() method of the Resource class; that's because this object has not yet been persisted and modifying it in memory would result in a change of the default server configuration.
The default messaging server is copied and its backup attributes is set to true:
Resource hornetQBackupA = Resource.deepCopy( "hornetq-server", "backup-server-a", hornetQServer, messaging ); hornetQBackupA.setAttribute( "backup", true ); hornetQBackupA.setAttribute( "backup-group-name", domainName + "-backup-group-2" );
To achieve the same result in straight CLI, it is again best to stop the server and duplicate the HornetQ server configuration by manually copy and pasting the associated XML. Once that is done and the server has been started, CLI commands can make the required changes:
/profile=full-ha-1/subsystem=messaging/hornetq-server=backup-server-a:write-attribute(name=backup,value=true)
/profile=full-ha-1/subsystem=messaging/hornetq-server=backup-server-a:write-attribute(name=backup-group-name,value=active-backup-group-2)
Again, this would be passive-backup-group-2 for the passive cluster.
The Java configuration continues to set the required paths for the backup server:
hornetQBackupA.addChildResource( new Resource( "path", "paging-directory" ) ); hornetQBackupA.getChild( "path", "paging-directory" ).addAttribute( new Attribute( "path", "messagingpagingbackupa" ) ); hornetQBackupA.addChildResource( new Resource( "path", "bindings-directory" ) ); hornetQBackupA.getChild( "path", "bindings-directory" ).addAttribute( new Attribute( "path", "messagingbindingsbackupa" ) ); hornetQBackupA.addChildResource( new Resource( "path", "journal-directory" ) ); hornetQBackupA.getChild( "path", "journal-directory" ).addAttribute( new Attribute( "path", "messagingjournalbackupa" ) ); hornetQBackupA.addChildResource( new Resource( "path", "large-messages-directory" ) ); hornetQBackupA.getChild( "path", "large-messages-directory" ).addAttribute( new Attribute( "path", "messaginglargemessagesbackupa" ) );
The equivalent CLI syntax is:
/profile=full-ha-1/subsystem=messaging/hornetq-server=default/path=paging-directory:add(path=messagingpagingbackupa)
Similar CLI commands are used for other path attributes, other profiles or even other domains.
www.redhat.com 124 [email protected]

The server-id of this HornetQ server is set to 2, so that it is unique within the JVM. The connectors and acceptors are reconfigured to use a unique port through the new socket binding. The netty-throughput connector does not need to be configured for a backup server and is therefore removed:
hornetQBackupA.getChild( "in-vm-connector", "in-vm" ).setAttribute( "server-id", 2 ); hornetQBackupA.removeChildResource( "remote-connector", "netty-throughput" ); hornetQBackupA.getChild( "remote-connector", "netty" ).setAttribute( "socket-binding", "messaginga" ); hornetQBackupA.getChild( "in-vm-acceptor", "in-vm" ).setAttribute( "server-id", 2 ); hornetQBackupA.removeChildResource( "remote-acceptor", "netty-throughput" ); hornetQBackupA.getChild( "remote-acceptor", "netty" ).setAttribute( "socket-binding", "messaginga" );
There are other configurations that are unnecessary for a backup server and are removed as well. This includes connection factories, since backup servers do not have any producers or consumers interacting with them:
hornetQBackupA.removeChildResource( "security-setting", "#" ); hornetQBackupA.removeChildResource( "connection-factory", "RemoteConnectionFactory" ); hornetQBackupA.removeChildResource( "connection-factory", "InVmConnectionFactory" ); hornetQBackupA.removeChildResource( "pooled-connection-factory", "hornetq-ra" );
Removing these items through CLI scripting is simple but they can also be manually cut out as part of the copy and pasting.
[email protected] 125 www.redhat.com
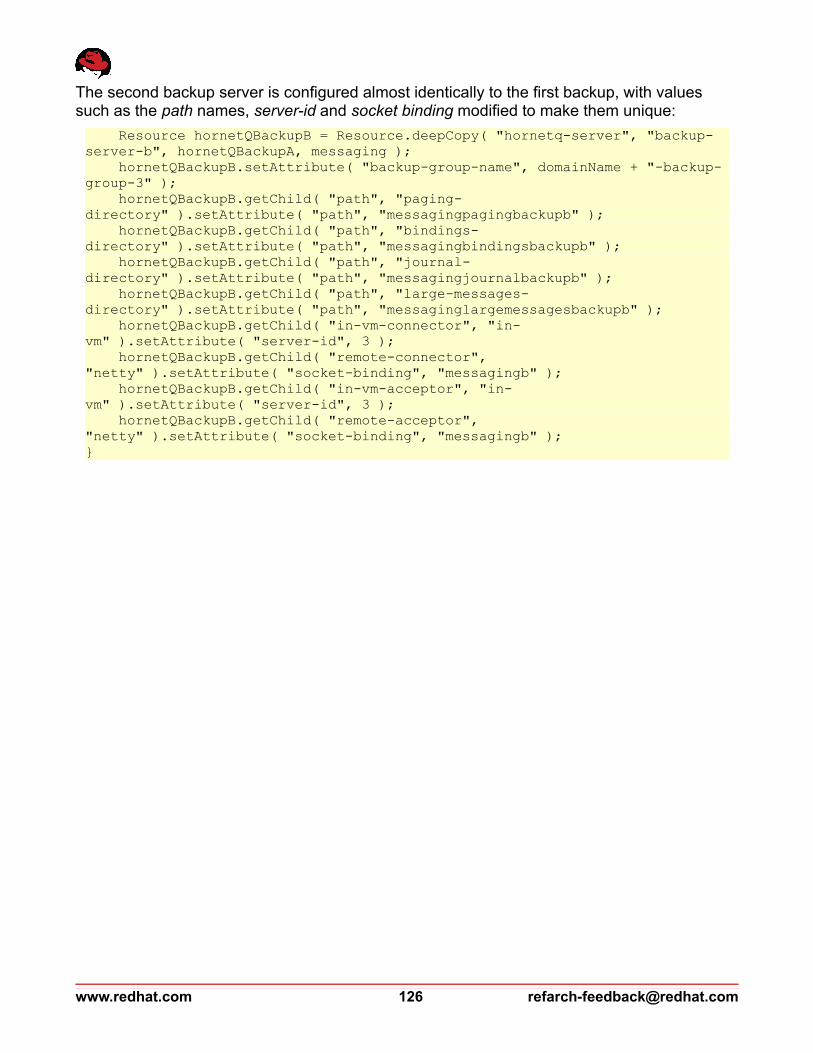
The second backup server is configured almost identically to the first backup, with values such as the path names, server-id and socket binding modified to make them unique:
Resource hornetQBackupB = Resource.deepCopy( "hornetq-server", "backup-server-b", hornetQBackupA, messaging ); hornetQBackupB.setAttribute( "backup-group-name", domainName + "-backup-group-3" ); hornetQBackupB.getChild( "path", "paging-directory" ).setAttribute( "path", "messagingpagingbackupb" ); hornetQBackupB.getChild( "path", "bindings-directory" ).setAttribute( "path", "messagingbindingsbackupb" ); hornetQBackupB.getChild( "path", "journal-directory" ).setAttribute( "path", "messagingjournalbackupb" ); hornetQBackupB.getChild( "path", "large-messages-directory" ).setAttribute( "path", "messaginglargemessagesbackupb" ); hornetQBackupB.getChild( "in-vm-connector", "in-vm" ).setAttribute( "server-id", 3 ); hornetQBackupB.getChild( "remote-connector", "netty" ).setAttribute( "socket-binding", "messagingb" ); hornetQBackupB.getChild( "in-vm-acceptor", "in-vm" ).setAttribute( "server-id", 3 ); hornetQBackupB.getChild( "remote-acceptor", "netty" ).setAttribute( "socket-binding", "messagingb" );}
www.redhat.com 126 [email protected]

6.6 Socket BindingsAfter updateProfile(), the next call of the configure() method updates the socket binding groups:
updateSocketBindingGroups();
The socket binding group of full-ha-sockets is used by all three profiles. To segregate the passive cluster from the active one, the multicast addresses are incremented according to the offset provided for the domain:
private void updateSocketBindingGroups() throws IOException{
if( offsetUnit > 0 ){
Resource socketBindingGroup = new Resource( "socket-binding-group", "full-ha-sockets" );
{Resource jgroupsMPing = new Resource( "socket-binding",
"jgroups-mping" );socketBindingGroup.addChildResource( jgroupsMPing );Attribute multicast_address =
client.readAttribute( jgroupsMPing, "multicast-address" );String newIPAddress =
modifyIPAddress( multicast_address.getValue().asString(), offsetUnit );multicast_address.setValue( newIPAddress );client.writeAttribute( jgroupsMPing, multicast_address );
}{
Resource jgroupsUDP = new Resource( "socket-binding", "jgroups-udp" );
socketBindingGroup.addChildResource( jgroupsUDP );Attribute multicast_address =
client.readAttribute( jgroupsUDP, "multicast-address" );String newIPAddress =
modifyIPAddress( multicast_address.getValue().asString(), offsetUnit );multicast_address.setValue( newIPAddress );client.writeAttribute( jgroupsUDP, multicast_address );
}{
Resource messagingGroup = new Resource( "socket-binding", "messaging-group" );
socketBindingGroup.addChildResource( messagingGroup );Attribute multicast_address =
client.readAttribute( messagingGroup, "multicast-address" );String newIPAddress =
modifyIPAddress( multicast_address.getValue().asString(), offsetUnit );multicast_address.setValue( newIPAddress );client.writeAttribute( messagingGroup, multicast_address );
}}
}
[email protected] 127 www.redhat.com

Incrementing the multicast address is a simple attribute setting and the only relative complexity is automatically calculating the new IP address based on the existing value and the offset:
String newIPAddress = modifyIPAddress( multicast_address.getValue().asString(), offsetUnit );
This method uses regular expressions to extract the four components of an IPv4 address and then increments the last component. It assumes that the last octet will not exceed 255, as is the case with the provided EAP 6 defaults:
private String modifyIPAddress(String expression, int offsetUnit){
Matcher matcher = IP_ADDRESS_PATTERN.matcher( expression );if( matcher.matches() ){
int octet4 = Integer.valueOf( matcher.group( 5 ) ) + 1;StringBuilder stringBuilder = new
StringBuilder( matcher.group( 1 ) );stringBuilder.append( matcher.group( 2 ) );stringBuilder.append( "." );stringBuilder.append( matcher.group( 3 ) );stringBuilder.append( "." );stringBuilder.append( matcher.group( 4 ) );stringBuilder.append( "." );stringBuilder.append( octet4 );stringBuilder.append( matcher.group( 6 ) );return stringBuilder.toString();
}else{
return expression;}
}
In a manual configuration process, the incremented IP address is calculated by the administrator and the attribute is set through CLI syntax. These attributes would normally remain unchanged for the active cluster but set as follows for the passive domain:
/socket-binding-group=full-ha-sockets/socket-binding=jgroups-mping:write-attribute(name=multicast-address,value=230.0.0.5)
/socket-binding-group=full-ha-sockets/socket-binding=jgroups-udp:write-attribute(name=multicast-address,value=230.0.0.5)
/socket-binding-group=full-ha-sockets/socket-binding=messaging-group:write-attribute(name=multicast-address,value=231.7.7.8)
www.redhat.com 128 [email protected]

6.7 Server Group SetupThe next step of the configuration script is to create server groups and server configurations:
createServerGroups();createServerConfigs( hosts );
A total of three server groups are created, each using one of the provided profiles and all of them using the full-ha-sockets binding group:
private void createServerGroups() throws IOException{
Resource clusterServerGroup1 = new Resource( "server-group", "cluster-server-group-1" );
clusterServerGroup1.addAttribute( new Attribute( "profile", "full-ha-1" ) );
clusterServerGroup1.addAttribute( new Attribute( "socket-binding-group", "full-ha-sockets" ) );
client.create( clusterServerGroup1 );
Resource clusterServerGroup2 = clusterServerGroup1;clusterServerGroup2.setName( "cluster-server-group-2" );clusterServerGroup2.setAttribute( "profile", "full-ha-2" );client.create( clusterServerGroup2 );
Resource clusterServerGroup3 = clusterServerGroup1;clusterServerGroup3.setName( "cluster-server-group-3" );clusterServerGroup3.setAttribute( "profile", "full-ha-3" );client.create( clusterServerGroup3 );
}
Creating server groups in straight CLI is also straight forward:
/server-group=cluster-server-group-1:add(profile=full-ha-1, socket-binding-group=full-ha-sockets)
/server-group=cluster-server-group-2:add(profile=full-ha-2, socket-binding-group=full-ha-sockets)
/server-group=cluster-server-group-3:add(profile=full-ha-3, socket-binding-group=full-ha-sockets)
[email protected] 129 www.redhat.com

Server configurations are created based on the number of hosts and although this reference architecture assumes three nodes for the three server groups, this part of the script allows having a larger number of nodes rotate among the same three server groups:
private void createServerConfigs(List<Resource> hosts) throws IOException{
for( int index = 0; index < hosts.size(); index++ ){
Resource host = hosts.get( index );int serverGroup = ( index % 3 ) + 1;Resource serverConfig = new Resource( "server-config",
host.getName() + "-" + domainName + "-server" );host.addChildResource( serverConfig );serverConfig.addAttribute( new Attribute( "auto-start", true ) );serverConfig.addAttribute( new Attribute( "group", "cluster-
server-group-" + serverGroup ) );if( offsetUnit > 0 ){
int portOffset = offsetUnit * 100;serverConfig.addAttribute( new Attribute( "socket-binding-
port-offset", portOffset ) );}client.create( serverConfig );System.out.println( "Created server config " +
serverConfig.getName() );}
}
With manual configuration, the server name is determined by the administrator and the server configuration created in the following format:
/host=node1/server-config=node1-active-server:add(auto-start=true,group=cluster-server-group-1)
/host=node2/server-config=node2-active-server:add(auto-start=true,group=cluster-server-group-2)
/host=node3/server-config=node3-active-server:add(auto-start=true,group=cluster-server-group-3)
For the passive cluster, a port offset would have to be set as well:
/host=node1/server-config=node1-passive-server:add(auto-start=true, group=cluster-server-group-1,socket-binding-port-offset=100)
/host=node2/server-config=node2-passive-server:add(auto-start=true, group=cluster-server-group-2,socket-binding-port-offset=100)
/host=node3/server-config=node3-passive-server:add(auto-start=true, group=cluster-server-group-3,socket-binding-port-offset=100)
www.redhat.com 130 [email protected]

6.8 Database ConnectivityDeploying the JDBC driver and configuring the datasource are the next two steps of the configure() operation:
client.deploy( postgresDriverLocation + "/" + postgresDriverName );
setupDataSource();
The deploy() call to the Client class simply deploys the provided JAR file, as configured in the property file.
The datasource setup is performed based on configuration.properties and makes the datasource available on all three profiles:
private void setupDataSource() throws IOException{
Resource dataSources = new Resource( "subsystem", "datasources" );Resource clusterDS = new Resource( "data-source", "ClusterDS" );dataSources.addChildResource( clusterDS );clusterDS.addAttribute( new Attribute( "enabled", true ) );clusterDS.addAttribute( new Attribute( "jndi-name",
"java:jboss/datasources/ClusterDS" ) );clusterDS.addAttribute( new Attribute( "connection-url",
connectionUrl ) );clusterDS.addAttribute( new Attribute( "driver-class",
"org.postgresql.Driver" ) );clusterDS.addAttribute( new Attribute( "driver-name",
postgresDriverName ) );clusterDS.addAttribute( new Attribute( "user-name",
postgresUsername ) );clusterDS.addAttribute( new Attribute( "password",
postgresPassword ) );dataSources.setParent( new Resource( "profile", "full-ha-1" ) );client.create( clusterDS );dataSources.setParent( new Resource( "profile", "full-ha-2" ) );client.create( clusterDS );dataSources.setParent( new Resource( "profile", "full-ha-3" ) );client.create( clusterDS );
}
[email protected] 131 www.redhat.com

Using CLI, deploying the datasource is just as easy:
deploy /root/files/postgresql-9.2-1003.jdbc4.jar --all-server-groups
Configuring the datasource requires issuing the CLI add command on all three profiles:
/profile=full-ha-1/subsystem=datasources/data-source=ClusterDS :add(enabled=true,jndi-name=java:jboss/datasources/ClusterDS,connection-url=jdbc:postgresql://10.16.139.100:5432/eap6,driver-class=org.postgresql.Driver,
driver-name=postgresql-9.2-1003.jdbc4.jar,user-name=jboss,password=password)
/profile=full-ha-2/subsystem=datasources/data-source=ClusterDS :add(enabled=true,jndi-name=java:jboss/datasources/ClusterDS,connection-url=jdbc:postgresql://10.16.139.100:5432/eap6,driver-class=org.postgresql.Driver,
driver-name=postgresql-9.2-1003.jdbc4.jar,user-name=jboss,password=password)
/profile=full-ha-3/subsystem=datasources/data-source=ClusterDS :add(enabled=true,jndi-name=java:jboss/datasources/ClusterDS,connection-url=jdbc:postgresql://10.16.139.100:5432/eap6,driver-class=org.postgresql.Driver,
driver-name=postgresql-9.2-1003.jdbc4.jar,user-name=jboss,password=password)
However setting the enabled attribute of the datasource is not enough to immediately enable it. To do this, the CLI enable command needs to be issued:
/profile=full-ha-1/subsystem=datasources/data-source=ClusterDS :enable(persistent=true)
/profile=full-ha-2/subsystem=datasources/data-source=ClusterDS :enable(persistent=true)
/profile=full-ha-3/subsystem=datasources/data-source=ClusterDS :enable(persistent=true)
www.redhat.com 132 [email protected]

6.9 Application DeploymentAt this point, the server has been properly configured and the clustered application can be successfully deployed. Deploying an application is a simple matter of calling the deploy method on the Client class and passing it the location of the deployable application, as provided in the configuration properties:
client.deploy( clusterApp );
The CLI syntax is also just as simple:
deploy /root/files/clusterApp.war --all-server-groups
Behind the scenes, in both cases, the file is read as a stream of bytes and uploaded to the domain's deployment content repository in one step, while a second step assigns and deploys the uploaded content to all server groups.
[email protected] 133 www.redhat.com
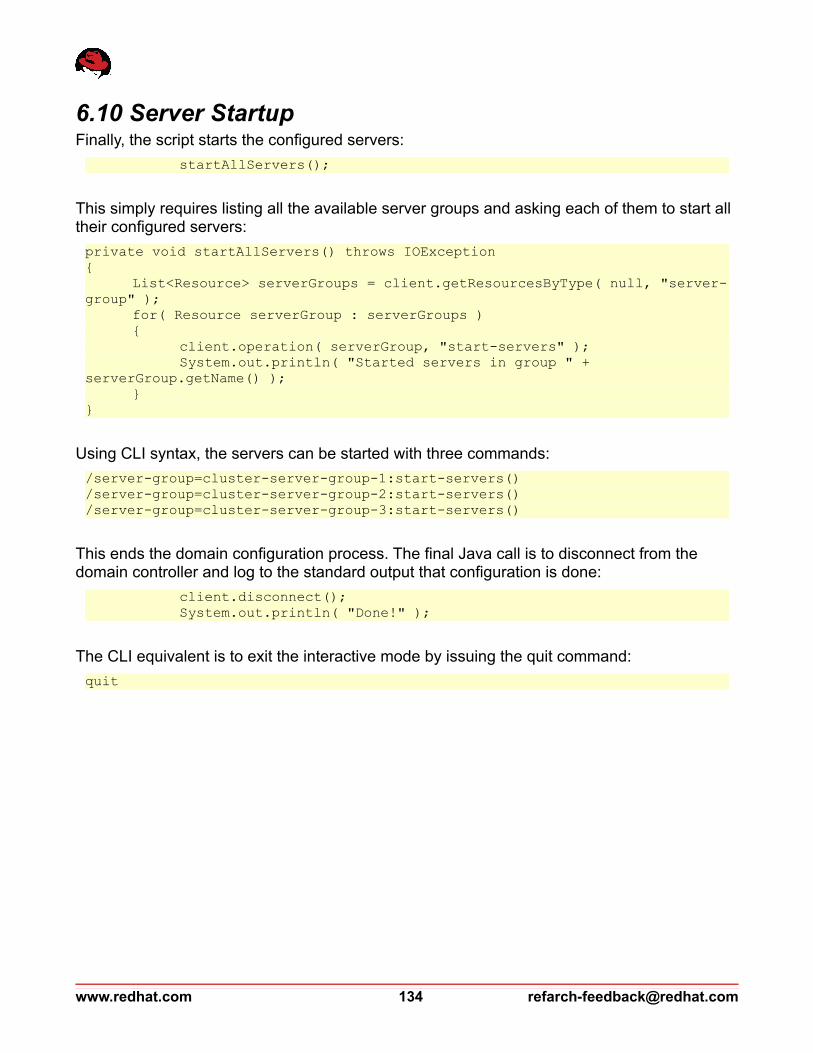
6.10 Server StartupFinally, the script starts the configured servers:
startAllServers();
This simply requires listing all the available server groups and asking each of them to start all their configured servers:
private void startAllServers() throws IOException{
List<Resource> serverGroups = client.getResourcesByType( null, "server-group" );
for( Resource serverGroup : serverGroups ){
client.operation( serverGroup, "start-servers" );System.out.println( "Started servers in group " +
serverGroup.getName() );}
}
Using CLI syntax, the servers can be started with three commands:
/server-group=cluster-server-group-1:start-servers()/server-group=cluster-server-group-2:start-servers()/server-group=cluster-server-group-3:start-servers()
This ends the domain configuration process. The final Java call is to disconnect from the domain controller and log to the standard output that configuration is done:
client.disconnect();System.out.println( "Done!" );
The CLI equivalent is to exit the interactive mode by issuing the quit command:
quit
www.redhat.com 134 [email protected]

7 ConclusionWhile the installation of Red Hat's JBoss EAP 6 is as easy as extracting an archive file, there is almost always a need for further configuration to adapt to project and environment requirements. Using the Java API on top of JBoss EAP CLI allows a repeatable and maintainable configuration setup that is much less error-prone than most other approaches. After downloading the EAP 6 binaries, the provided configuration scripts create the cluster described in the reference architecture in a few short minutes.
The EAP 6 cluster supports both failover and load balancing for several different components, allowing the horizontal scaling of an environment by distributing the load between multiple physical and virtual machines and eliminating a single point of failure. The configuration of each component may be individually tweaked as appropriate for the use cases.
[email protected] 135 www.redhat.com

Appendix A: Revision History
Revision 1.1 11/21/13 Babak Mozaffari
Added Transaction Subsystem Section, Formatting and Style Corrections
Revision 1.0 10/31/13 Babak Mozaffari
Initial Release
www.redhat.com 136 [email protected]

Appendix B: ContributorsWe would like to thank the following individuals for their time and patience as we collaborated on this process. This document would not have been possible without their many contributions.
Contributor Title Contribution
John Doyle Senior Product Manager Requirements
Rich Sharples Director, Product Management Review
Paul Ferraro Senior Software Engineer Review
Andrew Taylor Principal Software Engineer Technical Guidance (HornetQ)
Miroslav Novak Quality Engineer Review (HornetQ)
Bela Ban Consulting Software Engineer Review (JGroups)
Brett Thurber Principal Software Engineer Review, SELinux, IPTables
Tom Ross Sr. Software Maintenance Engineer Review, Transactions Feedback
Tom Jenkinson Principal Software Engineer Review (Transactions)
[email protected] 137 www.redhat.com
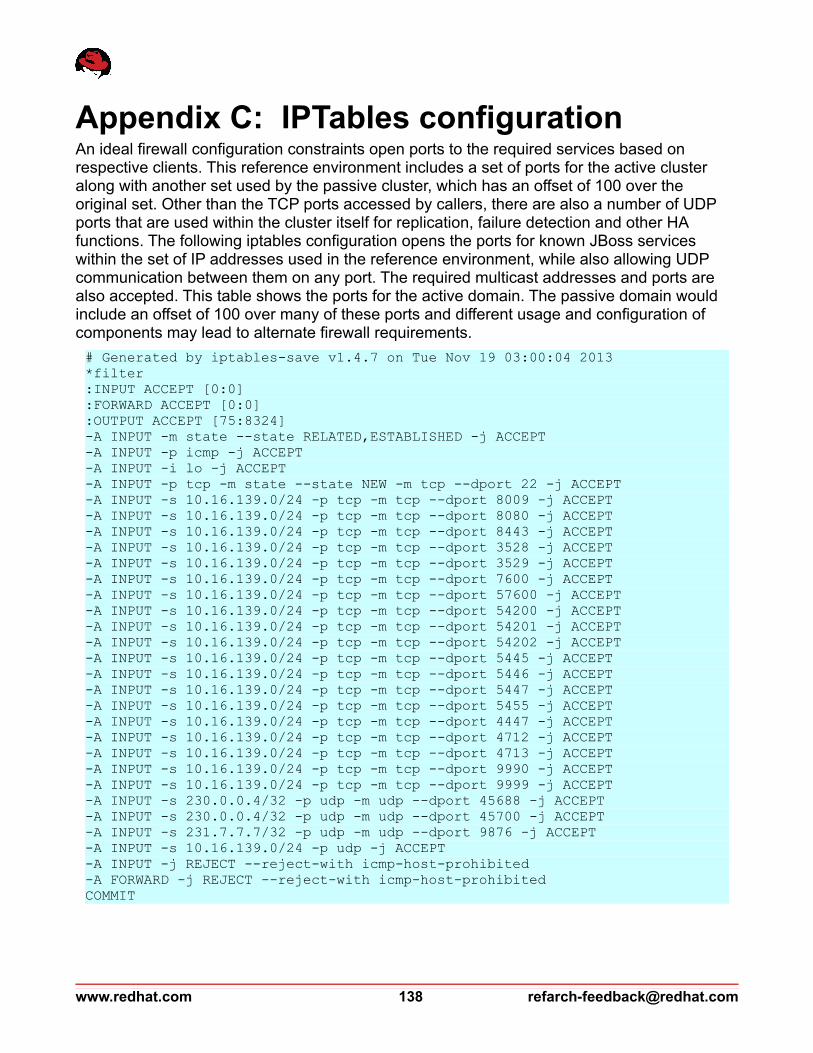
Appendix C: IPTables configurationAn ideal firewall configuration constraints open ports to the required services based on respective clients. This reference environment includes a set of ports for the active cluster along with another set used by the passive cluster, which has an offset of 100 over the original set. Other than the TCP ports accessed by callers, there are also a number of UDP ports that are used within the cluster itself for replication, failure detection and other HA functions. The following iptables configuration opens the ports for known JBoss services within the set of IP addresses used in the reference environment, while also allowing UDP communication between them on any port. The required multicast addresses and ports are also accepted. This table shows the ports for the active domain. The passive domain would include an offset of 100 over many of these ports and different usage and configuration of components may lead to alternate firewall requirements.
# Generated by iptables-save v1.4.7 on Tue Nov 19 03:00:04 2013*filter:INPUT ACCEPT [0:0]:FORWARD ACCEPT [0:0]:OUTPUT ACCEPT [75:8324]-A INPUT -m state --state RELATED,ESTABLISHED -j ACCEPT -A INPUT -p icmp -j ACCEPT -A INPUT -i lo -j ACCEPT -A INPUT -p tcp -m state --state NEW -m tcp --dport 22 -j ACCEPT -A INPUT -s 10.16.139.0/24 -p tcp -m tcp --dport 8009 -j ACCEPT -A INPUT -s 10.16.139.0/24 -p tcp -m tcp --dport 8080 -j ACCEPT -A INPUT -s 10.16.139.0/24 -p tcp -m tcp --dport 8443 -j ACCEPT -A INPUT -s 10.16.139.0/24 -p tcp -m tcp --dport 3528 -j ACCEPT -A INPUT -s 10.16.139.0/24 -p tcp -m tcp --dport 3529 -j ACCEPT -A INPUT -s 10.16.139.0/24 -p tcp -m tcp --dport 7600 -j ACCEPT -A INPUT -s 10.16.139.0/24 -p tcp -m tcp --dport 57600 -j ACCEPT -A INPUT -s 10.16.139.0/24 -p tcp -m tcp --dport 54200 -j ACCEPT -A INPUT -s 10.16.139.0/24 -p tcp -m tcp --dport 54201 -j ACCEPT -A INPUT -s 10.16.139.0/24 -p tcp -m tcp --dport 54202 -j ACCEPT -A INPUT -s 10.16.139.0/24 -p tcp -m tcp --dport 5445 -j ACCEPT -A INPUT -s 10.16.139.0/24 -p tcp -m tcp --dport 5446 -j ACCEPT -A INPUT -s 10.16.139.0/24 -p tcp -m tcp --dport 5447 -j ACCEPT -A INPUT -s 10.16.139.0/24 -p tcp -m tcp --dport 5455 -j ACCEPT -A INPUT -s 10.16.139.0/24 -p tcp -m tcp --dport 4447 -j ACCEPT -A INPUT -s 10.16.139.0/24 -p tcp -m tcp --dport 4712 -j ACCEPT -A INPUT -s 10.16.139.0/24 -p tcp -m tcp --dport 4713 -j ACCEPT -A INPUT -s 10.16.139.0/24 -p tcp -m tcp --dport 9990 -j ACCEPT -A INPUT -s 10.16.139.0/24 -p tcp -m tcp --dport 9999 -j ACCEPT -A INPUT -s 230.0.0.4/32 -p udp -m udp --dport 45688 -j ACCEPT -A INPUT -s 230.0.0.4/32 -p udp -m udp --dport 45700 -j ACCEPT -A INPUT -s 231.7.7.7/32 -p udp -m udp --dport 9876 -j ACCEPT -A INPUT -s 10.16.139.0/24 -p udp -j ACCEPT -A INPUT -j REJECT --reject-with icmp-host-prohibited -A FORWARD -j REJECT --reject-with icmp-host-prohibited COMMIT
www.redhat.com 138 [email protected]