Embed Size (px)
Citation preview

CSE 114, Computer Science 1
SUNY Korea
Pradipta De
JavaFX UI Controls and Multimedia
Acknowledgement for the slides: Dr. Paul Fodor (CS Stony Brook)
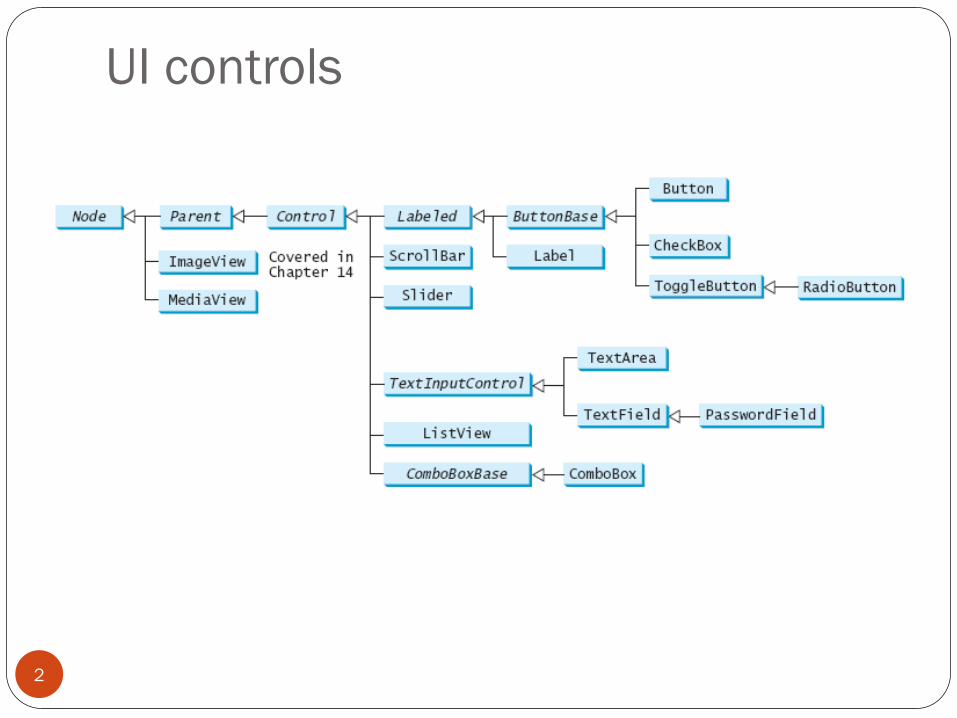
UI controls
2

Labeled class A label is a display area for a short text, a node, or both.
It is often used to label other controls (usually text fields).
Labels and buttons share many common properties: these common
properties are defined in the Labeled class.
3

Label class
4

import javafx.application.Application;
import javafx.stage.Stage;
import javafx.scene.Scene;
import javafx.scene.control.ContentDisplay;
import javafx.scene.control.Label;
import javafx.scene.image.Image;
import javafx.scene.image.ImageView;
import javafx.scene.layout.HBox;
import javafx.scene.layout.StackPane;
import javafx.scene.paint.Color;
import javafx.scene.shape.Circle;
import javafx.scene.shape.Rectangle;
import javafx.scene.shape.Ellipse;
public class LabelWithGraphic extends Application {
@Override
public void start(Stage primaryStage) {
ImageView us = new ImageView(new Image("us.jpg"));
Label lb1 = new Label("US\n50 States", us);
lb1.setStyle("-fx-border-color: green; -fx-border-width: 2");
lb1.setContentDisplay(ContentDisplay.BOTTOM);
lb1.setTextFill(Color.RED);
Label lb2 = new Label("Circle", new Circle(50, 50, 25));
lb2.setContentDisplay(ContentDisplay.TOP);
lb2.setTextFill(Color.ORANGE);
Label lb3 = new Label("Retangle", new Rectangle(10, 10, 50, 25));
lb3.setContentDisplay(ContentDisplay.RIGHT);
Label lb4 = new Label("Ellipse", new Ellipse(50, 50, 50, 25));
lb4.setContentDisplay(ContentDisplay.LEFT);
5
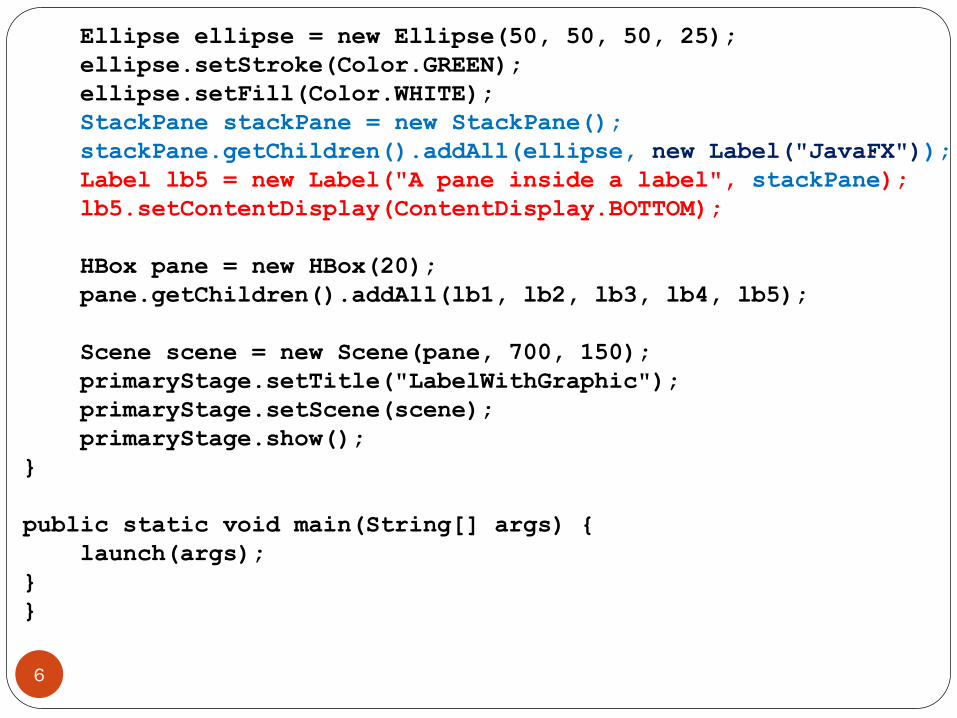
Ellipse ellipse = new Ellipse(50, 50, 50, 25);
ellipse.setStroke(Color.GREEN);
ellipse.setFill(Color.WHITE);
StackPane stackPane = new StackPane();
stackPane.getChildren().addAll(ellipse, new Label("JavaFX"));
Label lb5 = new Label("A pane inside a label", stackPane);
lb5.setContentDisplay(ContentDisplay.BOTTOM);
HBox pane = new HBox(20);
pane.getChildren().addAll(lb1, lb2, lb3, lb4, lb5);
Scene scene = new Scene(pane, 700, 150);
primaryStage.setTitle("LabelWithGraphic");
primaryStage.setScene(scene);
primaryStage.show();
}
public static void main(String[] args) {
launch(args);
}
}
6
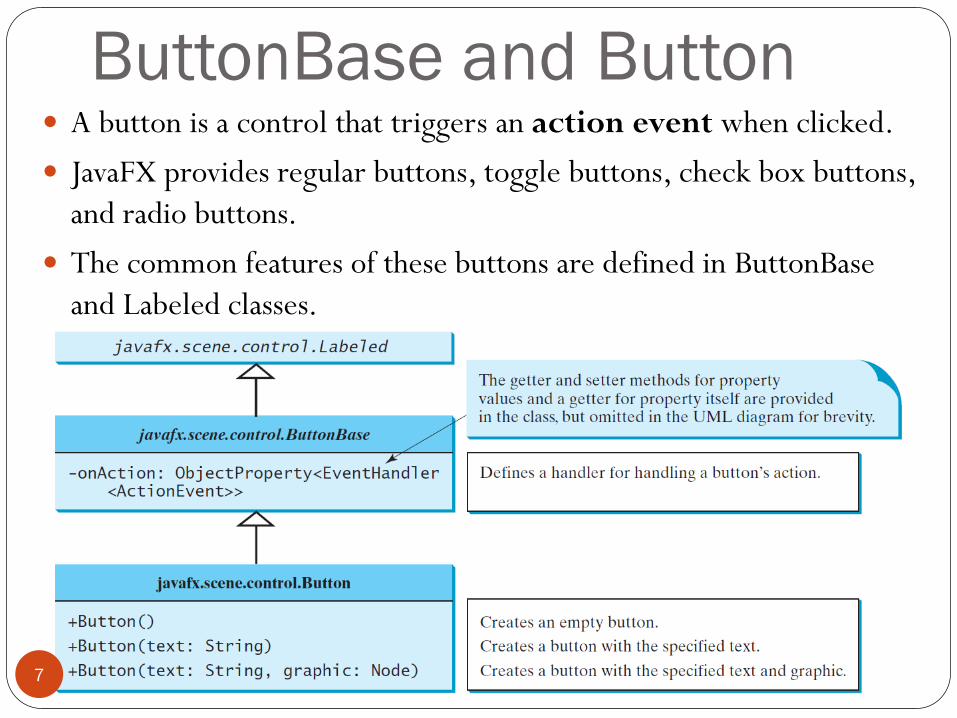
ButtonBase and Button A button is a control that triggers an action event when clicked.
JavaFX provides regular buttons, toggle buttons, check box buttons,
and radio buttons.
The common features of these buttons are defined in ButtonBase
and Labeled classes.
7

import javafx.application.Application;
import javafx.stage.Stage;
import javafx.geometry.Pos;
import javafx.scene.Scene;
import javafx.scene.control.Button;
import javafx.scene.image.ImageView;
import javafx.scene.layout.BorderPane;
import javafx.scene.layout.HBox;
import javafx.scene.layout.Pane;
import javafx.scene.text.Text;
public class ButtonDemo extends Application {
@Override
public void start(Stage primaryStage) {
Scene scene = new Scene(getPane(), 450, 200);
primaryStage.setTitle("ButtonDemo");
primaryStage.setScene(scene);
primaryStage.show();
}
protected Text text = new Text(50, 50, "JavaFX Programming");
protected BorderPane getPane() {
HBox paneForButtons = new HBox(20);
Button btLeft = new Button("Left", new ImageView("image/left.gif"));
Button btRight = new Button("Right", new ImageView("image/right.gif"));
paneForButtons.getChildren().addAll(btLeft, btRight);
paneForButtons.setAlignment(Pos.CENTER);
paneForButtons.setStyle("-fx-border-color: green");
BorderPane pane = new BorderPane();
pane.setBottom(paneForButtons); 8
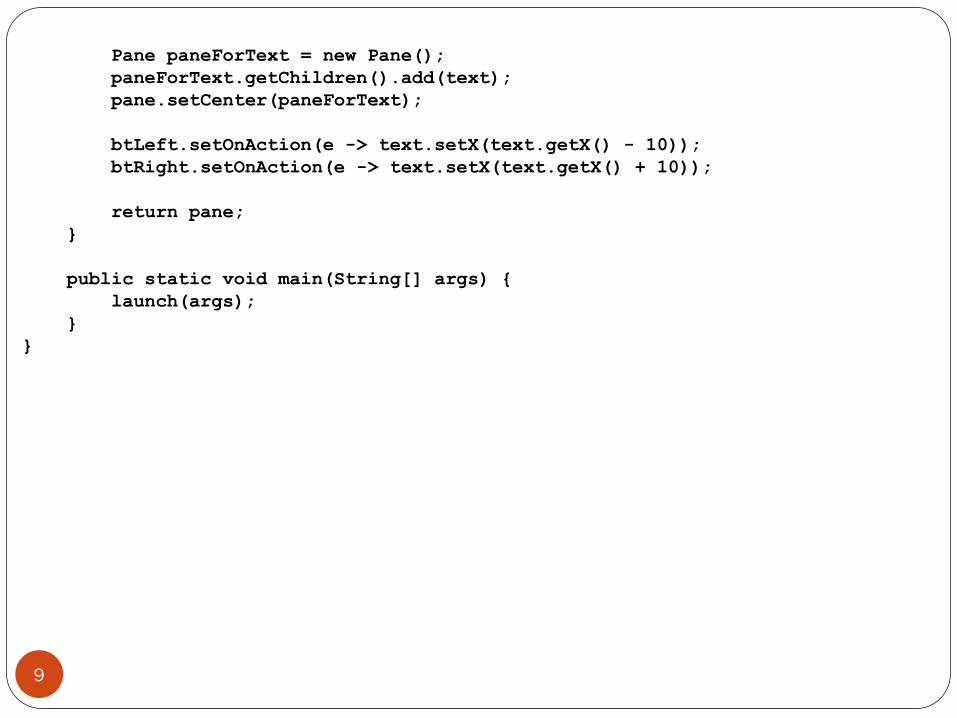
Pane paneForText = new Pane();
paneForText.getChildren().add(text);
pane.setCenter(paneForText);
btLeft.setOnAction(e -> text.setX(text.getX() - 10));
btRight.setOnAction(e -> text.setX(text.getX() + 10));
return pane;
}
public static void main(String[] args) {
launch(args);
}
}
9

CheckBox A CheckBox is used for the user to make a selection (square box).
CheckBox inherits all the properties from ButtonBase and Labeled:
onAction, text, graphic, alignment, graphicTextGap, textFill,
contentDisplay.
10

import javafx.event.ActionEvent;
import javafx.event.EventHandler;
import javafx.geometry.Insets;
import javafx.scene.control.CheckBox;
import javafx.scene.layout.BorderPane;
import javafx.scene.layout.VBox;
import javafx.scene.text.Font;
import javafx.scene.text.FontPosture;
import javafx.scene.text.FontWeight;
public class CheckBoxDemo extends ButtonDemo {
@Override // Override the getPane() method in the super class
protected BorderPane getPane() {
BorderPane pane = super.getPane();
Font fontBoldItalic = Font.font("Times New Roman",
FontWeight.BOLD, FontPosture.ITALIC, 20);
Font fontBold = Font.font("Times New Roman",
FontWeight.BOLD, FontPosture.REGULAR, 20);
Font fontItalic = Font.font("Times New Roman",
FontWeight.NORMAL, FontPosture.ITALIC, 20);
Font fontNormal = Font.font("Times New Roman",
FontWeight.NORMAL, FontPosture.REGULAR, 20);
text.setFont(fontNormal);
VBox paneForCheckBoxes = new VBox(20);
paneForCheckBoxes.setPadding(new Insets(5, 5, 5, 5));
paneForCheckBoxes.setStyle("-fx-border-color: green"); 11
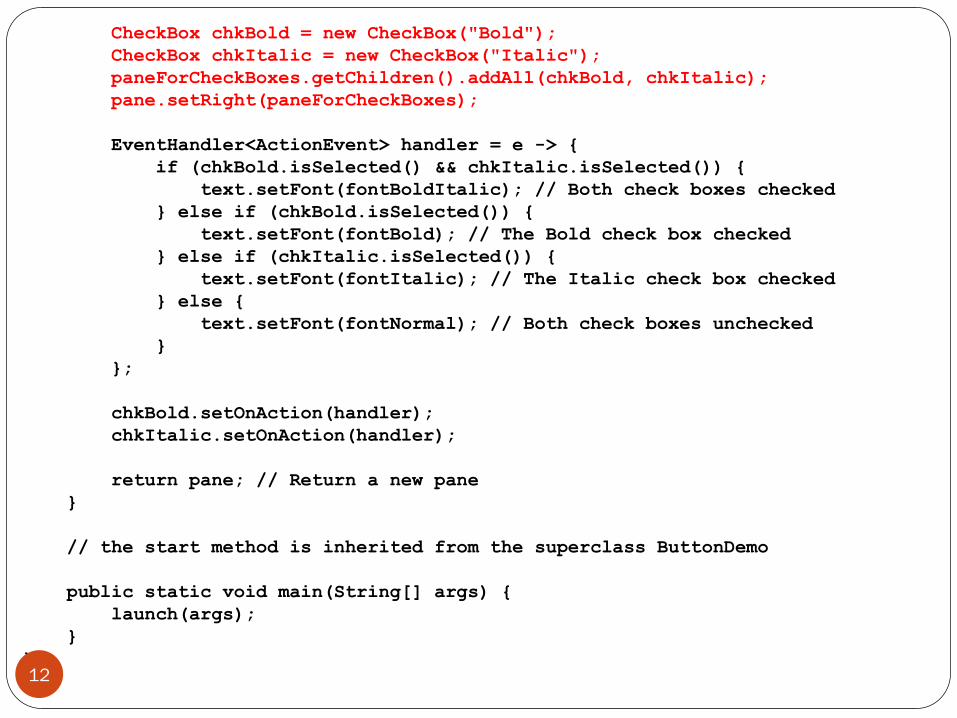
CheckBox chkBold = new CheckBox("Bold");
CheckBox chkItalic = new CheckBox("Italic");
paneForCheckBoxes.getChildren().addAll(chkBold, chkItalic);
pane.setRight(paneForCheckBoxes);
EventHandler<ActionEvent> handler = e -> {
if (chkBold.isSelected() && chkItalic.isSelected()) {
text.setFont(fontBoldItalic); // Both check boxes checked
} else if (chkBold.isSelected()) {
text.setFont(fontBold); // The Bold check box checked
} else if (chkItalic.isSelected()) {
text.setFont(fontItalic); // The Italic check box checked
} else {
text.setFont(fontNormal); // Both check boxes unchecked
}
};
chkBold.setOnAction(handler);
chkItalic.setOnAction(handler);
return pane; // Return a new pane
}
// the start method is inherited from the superclass ButtonDemo
public static void main(String[] args) {
launch(args);
}
} 12
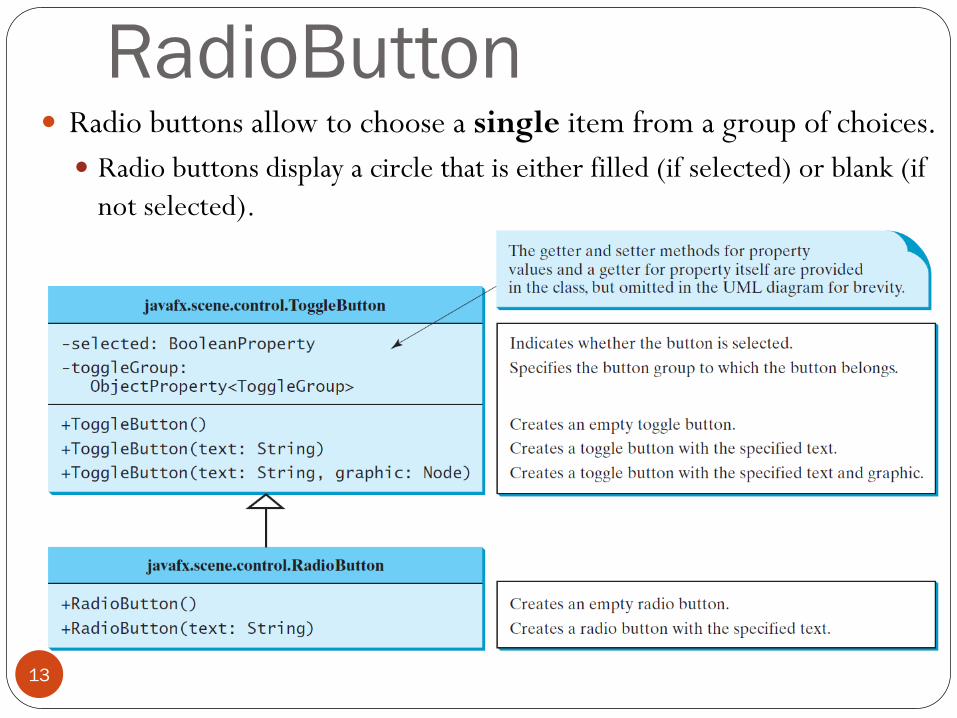
RadioButton Radio buttons allow to choose a single item from a group of choices.
Radio buttons display a circle that is either filled (if selected) or blank (if
not selected).
13
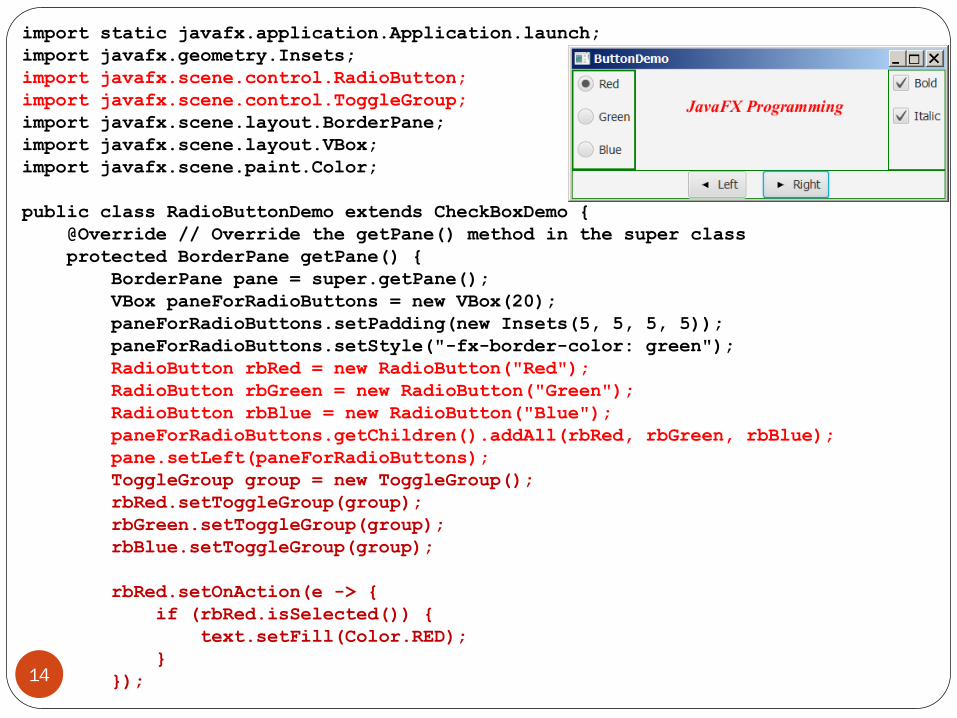
import static javafx.application.Application.launch;
import javafx.geometry.Insets;
import javafx.scene.control.RadioButton;
import javafx.scene.control.ToggleGroup;
import javafx.scene.layout.BorderPane;
import javafx.scene.layout.VBox;
import javafx.scene.paint.Color;
public class RadioButtonDemo extends CheckBoxDemo {
@Override // Override the getPane() method in the super class
protected BorderPane getPane() {
BorderPane pane = super.getPane();
VBox paneForRadioButtons = new VBox(20);
paneForRadioButtons.setPadding(new Insets(5, 5, 5, 5));
paneForRadioButtons.setStyle("-fx-border-color: green");
RadioButton rbRed = new RadioButton("Red");
RadioButton rbGreen = new RadioButton("Green");
RadioButton rbBlue = new RadioButton("Blue");
paneForRadioButtons.getChildren().addAll(rbRed, rbGreen, rbBlue);
pane.setLeft(paneForRadioButtons);
ToggleGroup group = new ToggleGroup();
rbRed.setToggleGroup(group);
rbGreen.setToggleGroup(group);
rbBlue.setToggleGroup(group);
rbRed.setOnAction(e -> {
if (rbRed.isSelected()) {
text.setFill(Color.RED);
}
}); 14
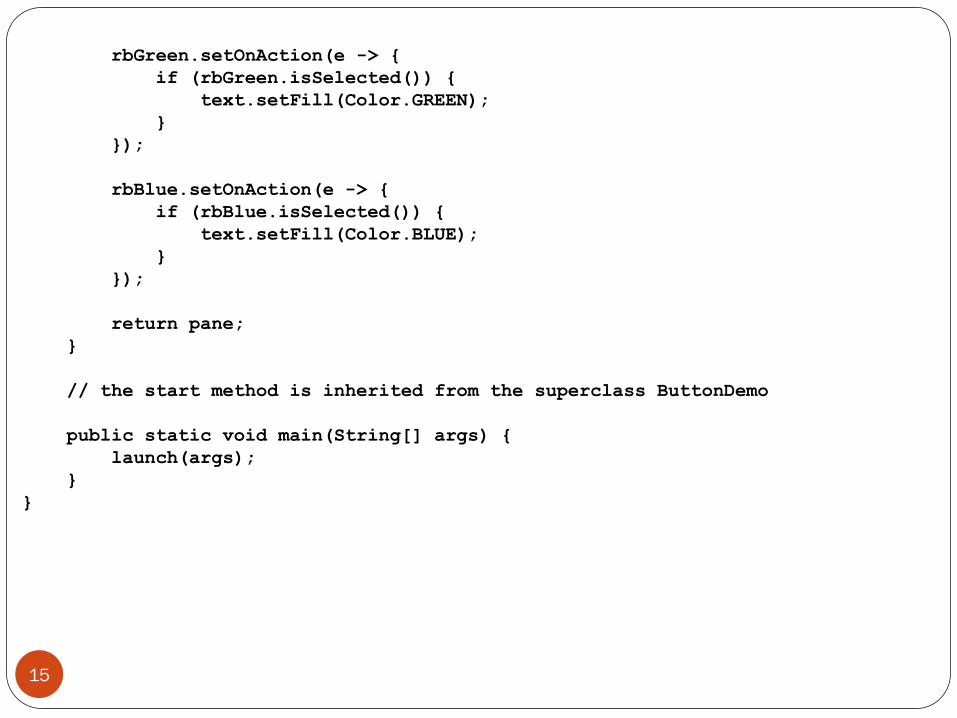
rbGreen.setOnAction(e -> {
if (rbGreen.isSelected()) {
text.setFill(Color.GREEN);
}
});
rbBlue.setOnAction(e -> {
if (rbBlue.isSelected()) {
text.setFill(Color.BLUE);
}
});
return pane;
}
// the start method is inherited from the superclass ButtonDemo
public static void main(String[] args) {
launch(args);
}
}
15

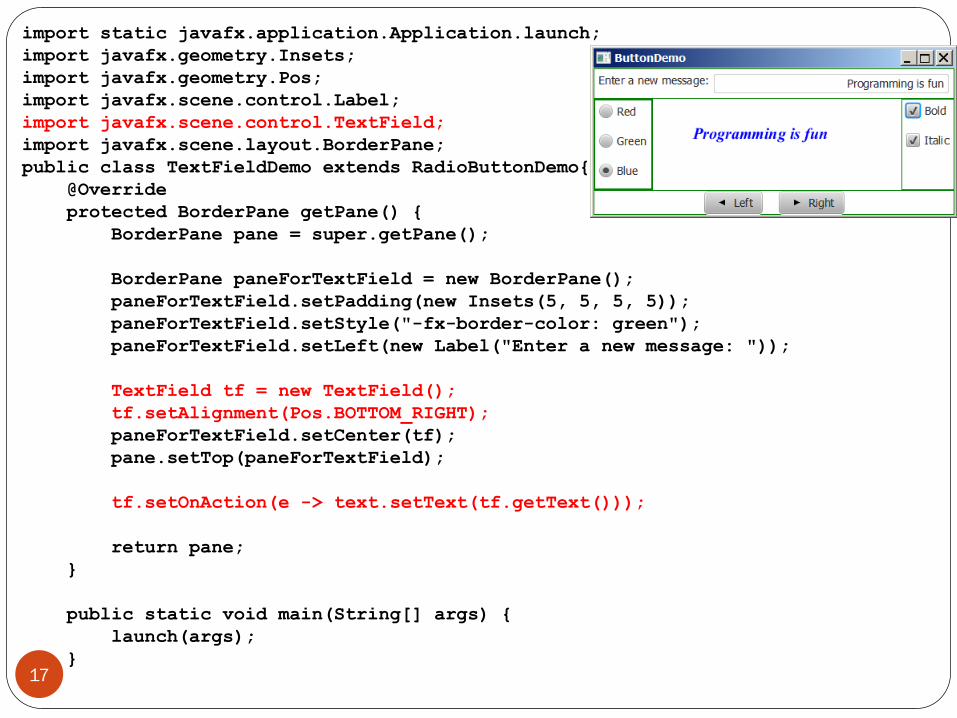
TextField A text field can be used to enter or display a string. TextField is a
subclass of TextInputControl.
16
import static javafx.application.Application.launch;
import javafx.geometry.Insets;
import javafx.geometry.Pos;
import javafx.scene.control.Label;
import javafx.scene.control.TextField;
import javafx.scene.layout.BorderPane;
public class TextFieldDemo extends RadioButtonDemo{
@Override
protected BorderPane getPane() {
BorderPane pane = super.getPane();
BorderPane paneForTextField = new BorderPane();
paneForTextField.setPadding(new Insets(5, 5, 5, 5));
paneForTextField.setStyle("-fx-border-color: green");
paneForTextField.setLeft(new Label("Enter a new message: "));
TextField tf = new TextField();
tf.setAlignment(Pos.BOTTOM_RIGHT);
paneForTextField.setCenter(tf);
pane.setTop(paneForTextField);
tf.setOnAction(e -> text.setText(tf.getText()));
return pane;
}
public static void main(String[] args) {
launch(args);
}
} 17
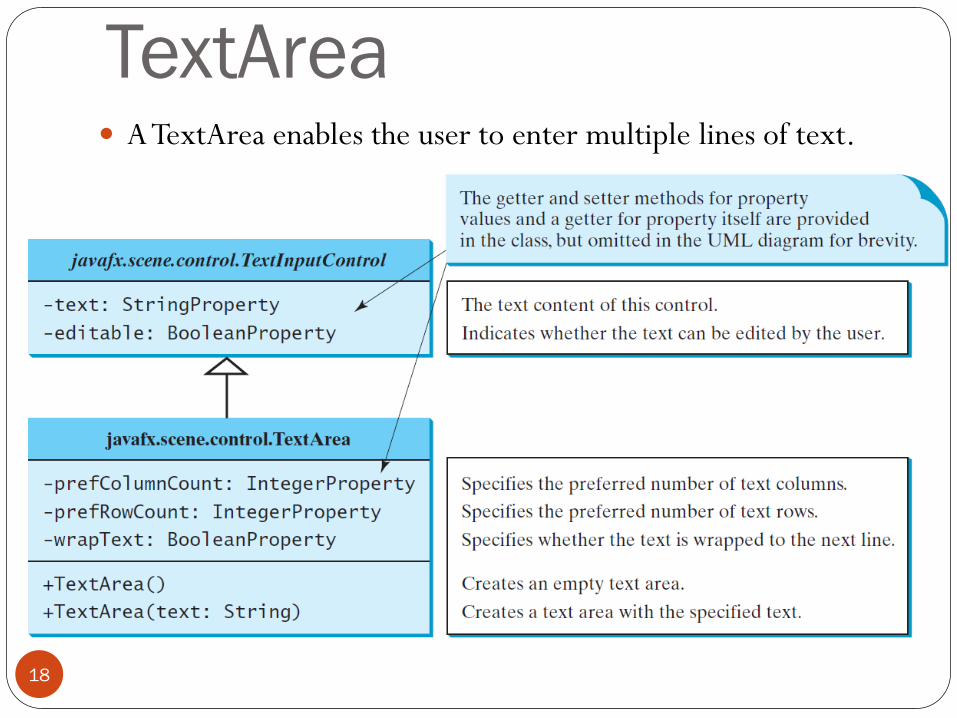
TextArea A TextArea enables the user to enter multiple lines of text.
18

ComboBox A combo box, also known as a choice list or drop-down list, contains
a list of items from which the user can choose.
19

ListView A list view is a component that performs basically the same
function as a combo box, but it enables the user to choose a
single value or multiple values.
20
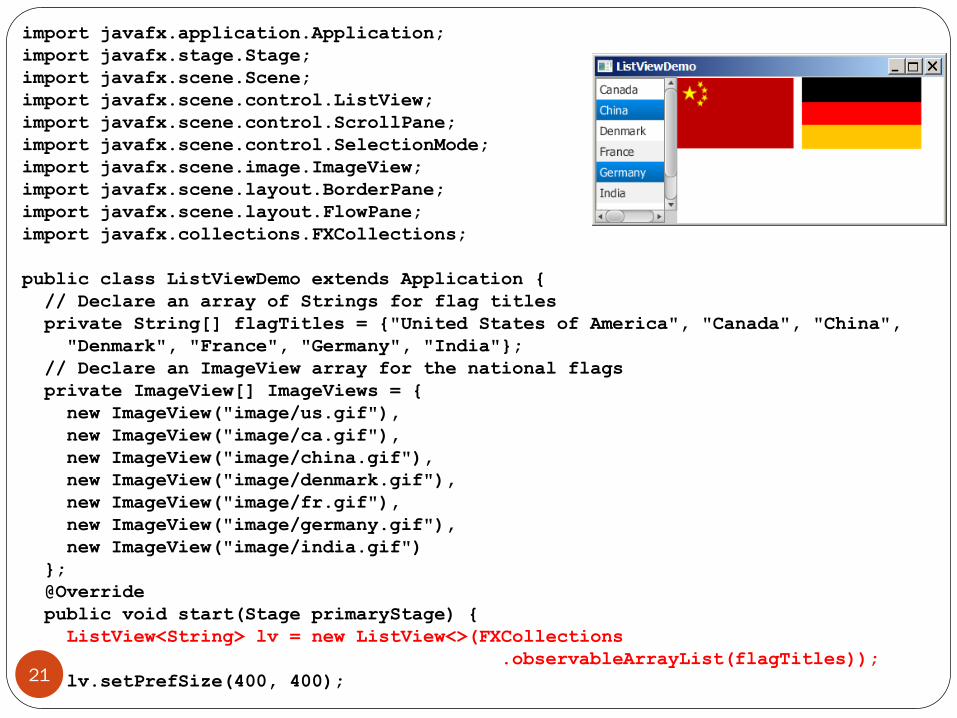
import javafx.application.Application;
import javafx.stage.Stage;
import javafx.scene.Scene;
import javafx.scene.control.ListView;
import javafx.scene.control.ScrollPane;
import javafx.scene.control.SelectionMode;
import javafx.scene.image.ImageView;
import javafx.scene.layout.BorderPane;
import javafx.scene.layout.FlowPane;
import javafx.collections.FXCollections;
public class ListViewDemo extends Application {
// Declare an array of Strings for flag titles
private String[] flagTitles = {"United States of America", "Canada", "China",
"Denmark", "France", "Germany", "India"};
// Declare an ImageView array for the national flags
private ImageView[] ImageViews = {
new ImageView("image/us.gif"),
new ImageView("image/ca.gif"),
new ImageView("image/china.gif"),
new ImageView("image/denmark.gif"),
new ImageView("image/fr.gif"),
new ImageView("image/germany.gif"),
new ImageView("image/india.gif")
};
@Override
public void start(Stage primaryStage) {
ListView<String> lv = new ListView<>(FXCollections
.observableArrayList(flagTitles));
lv.setPrefSize(400, 400); 21
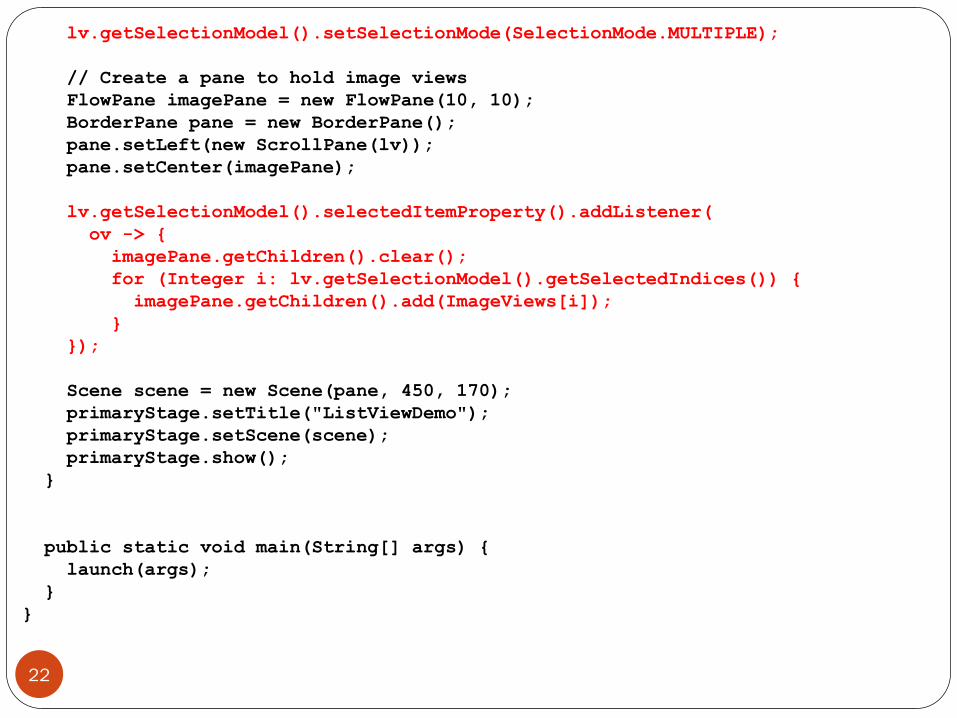
lv.getSelectionModel().setSelectionMode(SelectionMode.MULTIPLE);
// Create a pane to hold image views
FlowPane imagePane = new FlowPane(10, 10);
BorderPane pane = new BorderPane();
pane.setLeft(new ScrollPane(lv));
pane.setCenter(imagePane);
lv.getSelectionModel().selectedItemProperty().addListener(
ov -> {
imagePane.getChildren().clear();
for (Integer i: lv.getSelectionModel().getSelectedIndices()) {
imagePane.getChildren().add(ImageViews[i]);
}
});
Scene scene = new Scene(pane, 450, 170);
primaryStage.setTitle("ListViewDemo");
primaryStage.setScene(scene);
primaryStage.show();
}
public static void main(String[] args) {
launch(args);
}
}
22
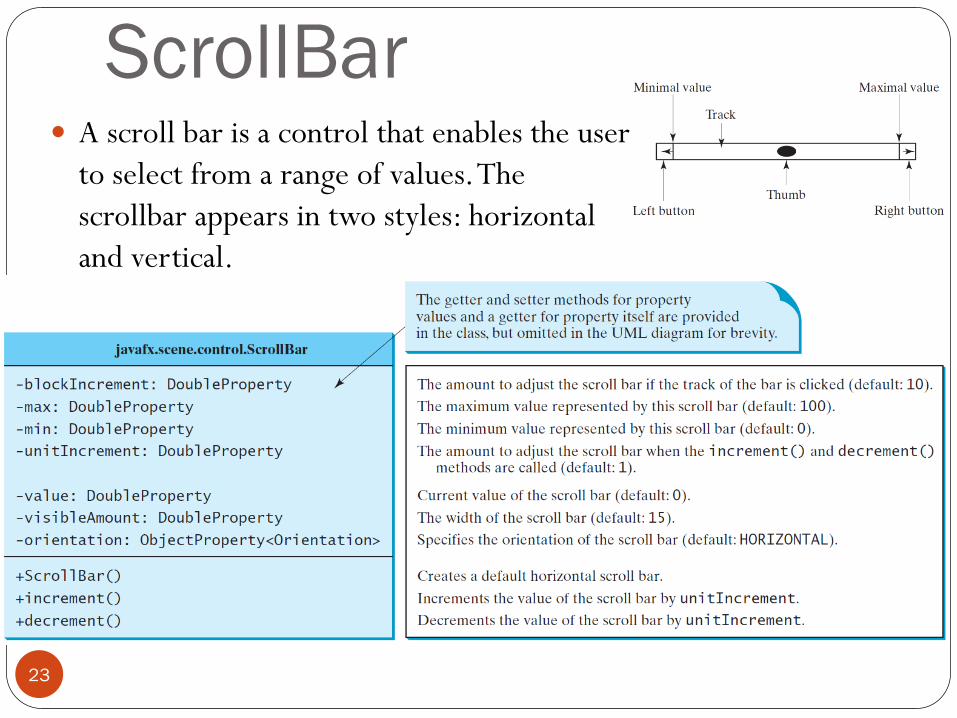
ScrollBar A scroll bar is a control that enables the user
to select from a range of values. The
scrollbar appears in two styles: horizontal
and vertical.
23
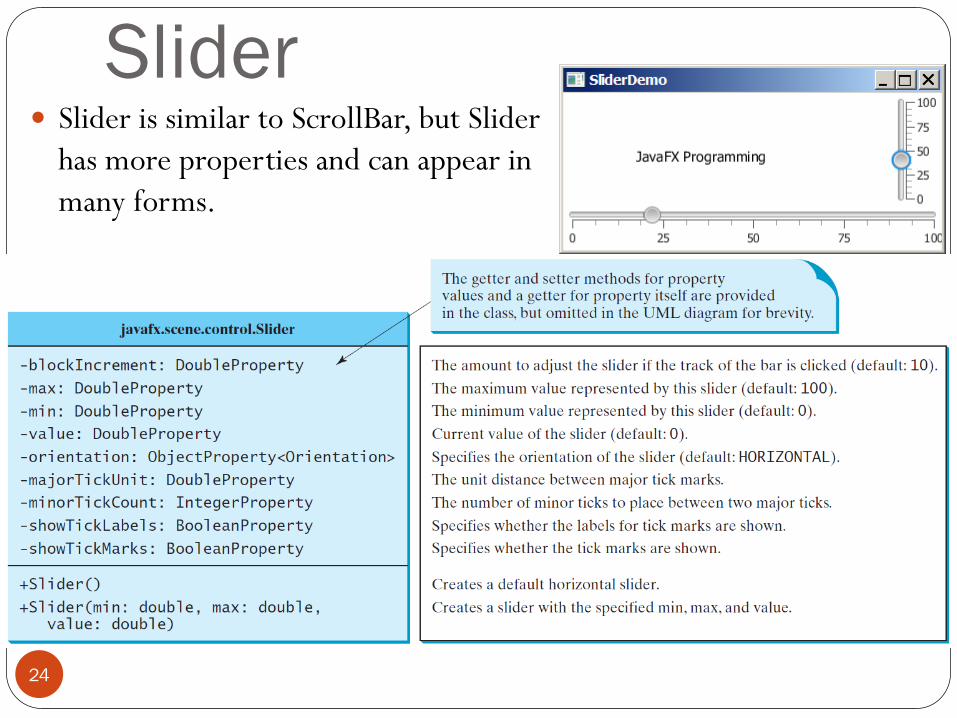
Slider Slider is similar to ScrollBar, but Slider
has more properties and can appear in
many forms.
24
25
You can check the Tic-Tac-Toe game implemented in the book
Listing 16.13
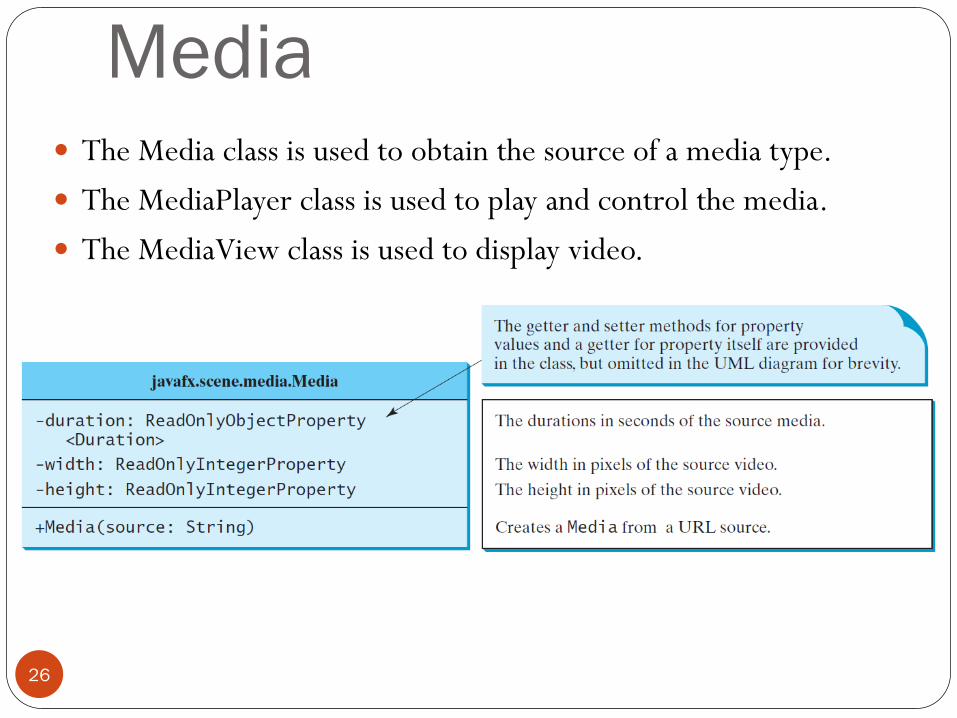
Media The Media class is used to obtain the source of a media type.
The MediaPlayer class is used to play and control the media.
The MediaView class is used to display video.
26
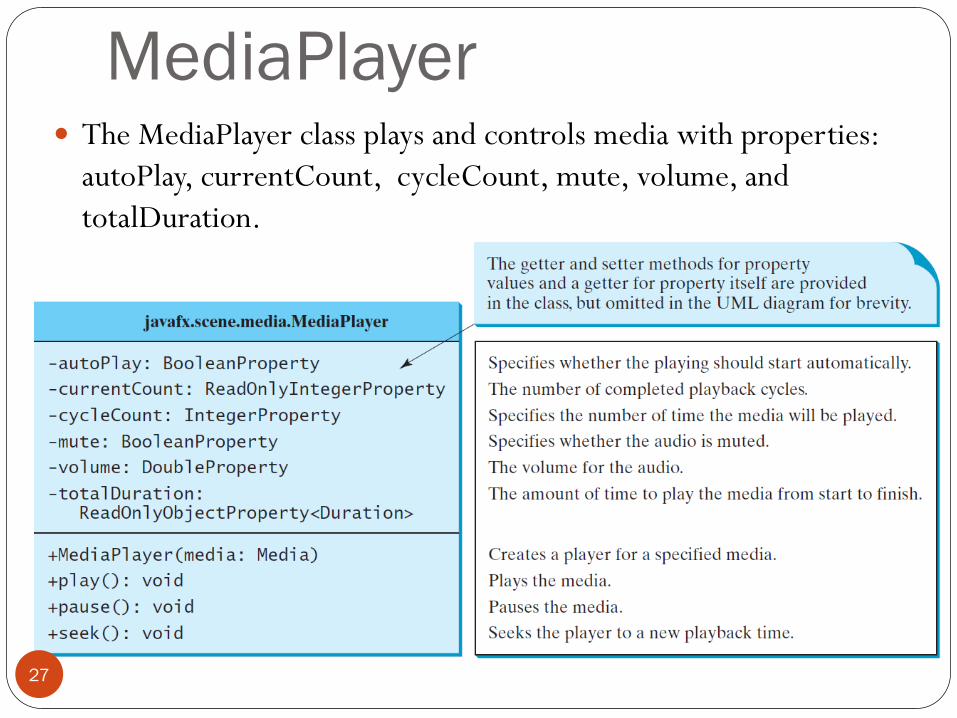
MediaPlayer The MediaPlayer class plays and controls media with properties:
autoPlay, currentCount, cycleCount, mute, volume, and
totalDuration.
27
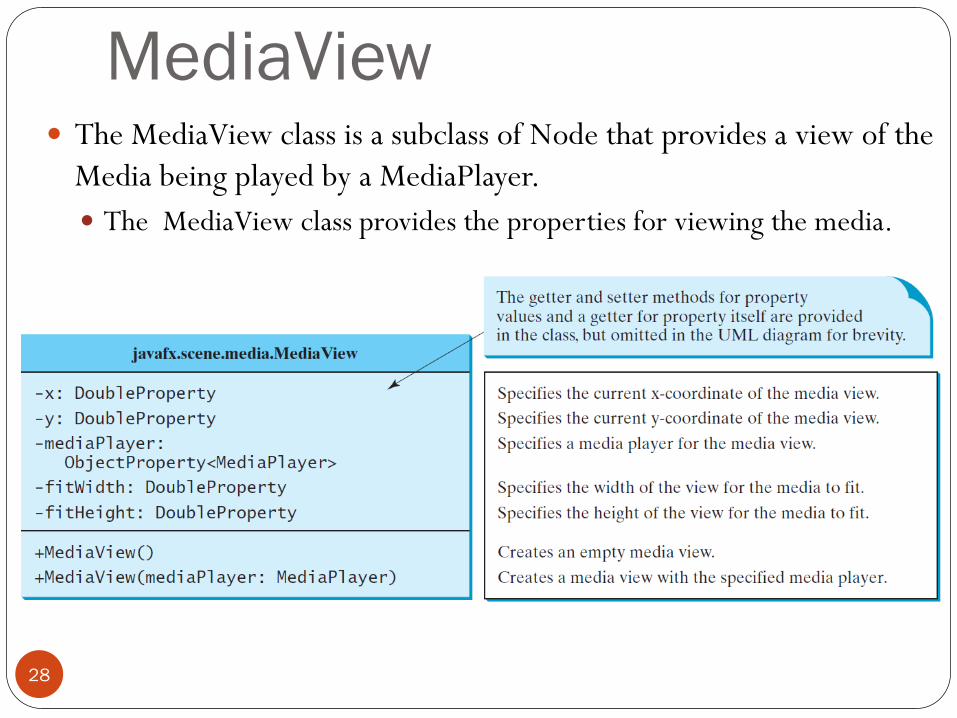
MediaView The MediaView class is a subclass of Node that provides a view of the
Media being played by a MediaPlayer.
The MediaView class provides the properties for viewing the media.
28

Example: Using Media This example displays a video in a view: use the play/pause button to
play or pause the video and use the rewind button to restart the video,
and use the slider to control the volume of the audio.
29
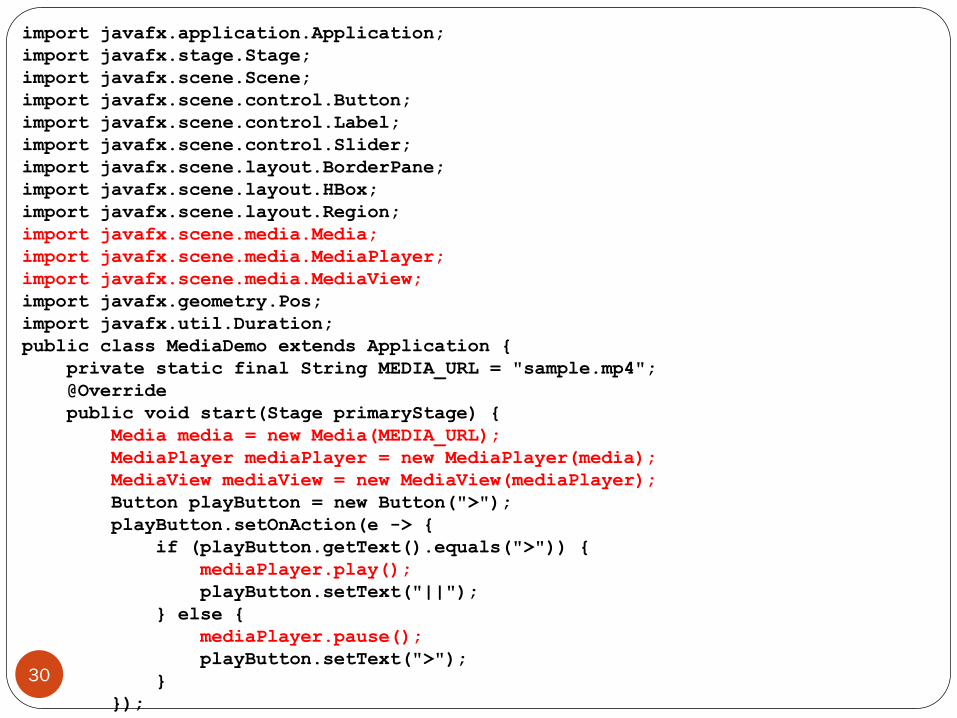
import javafx.application.Application;
import javafx.stage.Stage;
import javafx.scene.Scene;
import javafx.scene.control.Button;
import javafx.scene.control.Label;
import javafx.scene.control.Slider;
import javafx.scene.layout.BorderPane;
import javafx.scene.layout.HBox;
import javafx.scene.layout.Region;
import javafx.scene.media.Media;
import javafx.scene.media.MediaPlayer;
import javafx.scene.media.MediaView;
import javafx.geometry.Pos;
import javafx.util.Duration;
public class MediaDemo extends Application {
private static final String MEDIA_URL = "sample.mp4";
@Override
public void start(Stage primaryStage) {
Media media = new Media(MEDIA_URL);
MediaPlayer mediaPlayer = new MediaPlayer(media);
MediaView mediaView = new MediaView(mediaPlayer);
Button playButton = new Button(">");
playButton.setOnAction(e -> {
if (playButton.getText().equals(">")) {
mediaPlayer.play();
playButton.setText("||");
} else {
mediaPlayer.pause();
playButton.setText(">");
}
});
30
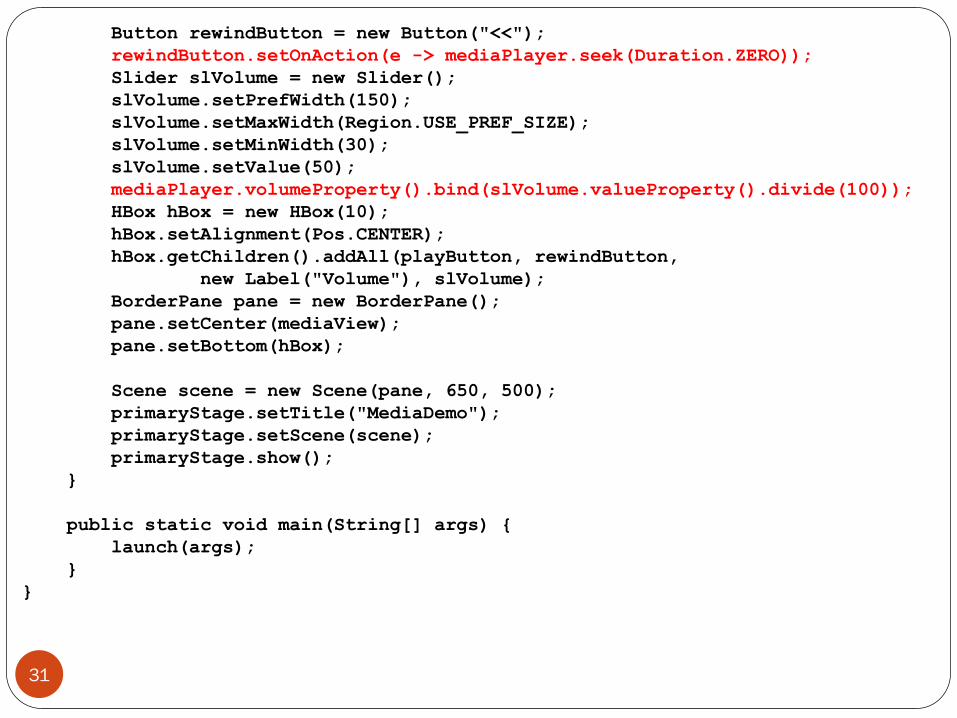
Button rewindButton = new Button("<<");
rewindButton.setOnAction(e -> mediaPlayer.seek(Duration.ZERO));
Slider slVolume = new Slider();
slVolume.setPrefWidth(150);
slVolume.setMaxWidth(Region.USE_PREF_SIZE);
slVolume.setMinWidth(30);
slVolume.setValue(50);
mediaPlayer.volumeProperty().bind(slVolume.valueProperty().divide(100));
HBox hBox = new HBox(10);
hBox.setAlignment(Pos.CENTER);
hBox.getChildren().addAll(playButton, rewindButton,
new Label("Volume"), slVolume);
BorderPane pane = new BorderPane();
pane.setCenter(mediaView);
pane.setBottom(hBox);
Scene scene = new Scene(pane, 650, 500);
primaryStage.setTitle("MediaDemo");
primaryStage.setScene(scene);
primaryStage.show();
}
public static void main(String[] args) {
launch(args);
}
}
31
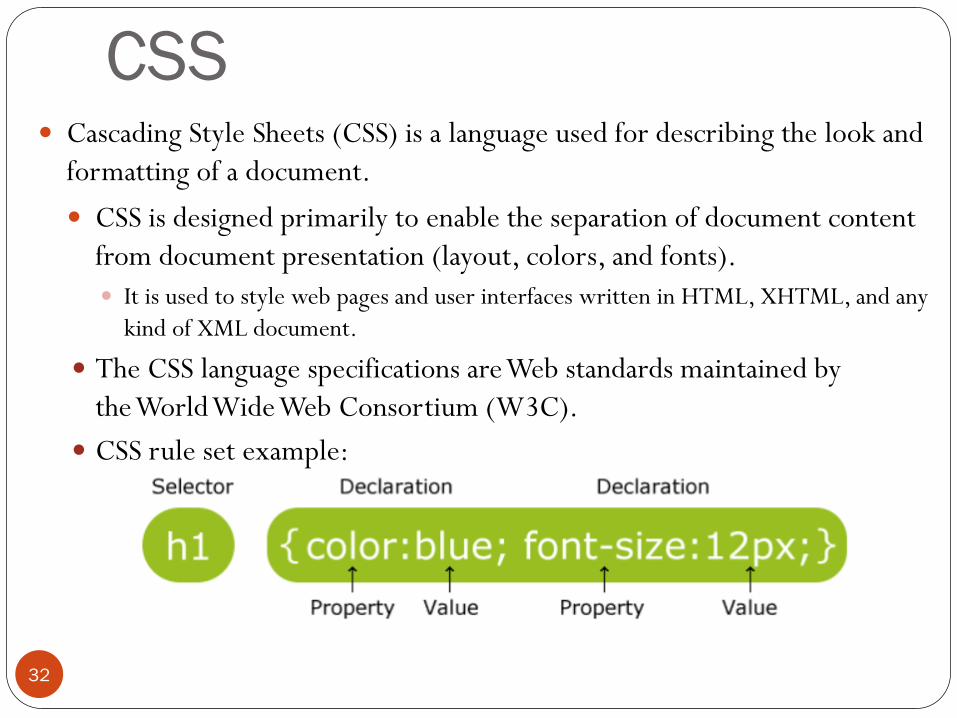
CSS Cascading Style Sheets (CSS) is a language used for describing the look and
formatting of a document.
CSS is designed primarily to enable the separation of document content
from document presentation (layout, colors, and fonts).
It is used to style web pages and user interfaces written in HTML, XHTML, and any
kind of XML document.
The CSS language specifications are Web standards maintained by
the World Wide Web Consortium (W3C).
CSS rule set example:
32
JavaFX CSS JavaFX Cascading Style Sheets (CSS) is based on the W3C CSS and
allows to customize and develop themes for JavaFX controls and
scene graph objects
http://docs.oracle.com/javafx/2/api/javafx/scene/doc-files/cssref.html
JavaFX uses the prefix "-fx-" to define its vendor CSS properties
(separate from W3C CSS).
A style sheet uses the style class or style id to define styles.
Mutiple style classes can be applied to a single node and a style id to a
unique node.
The syntax .styleclass defines a style class.
The syntax #styleid defines a style id.
33
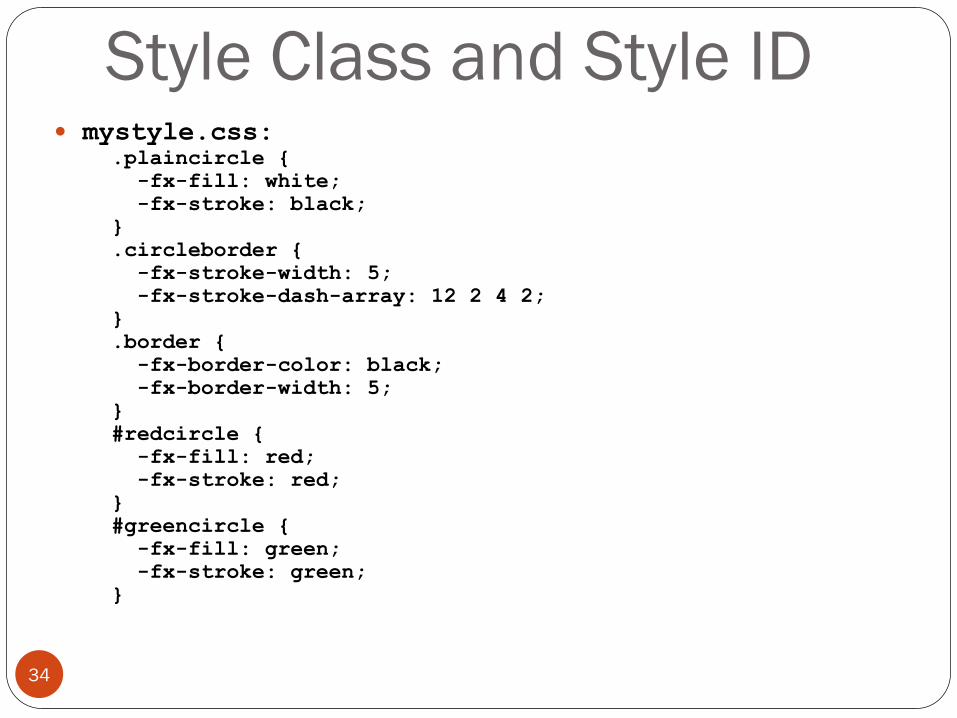
Style Class and Style ID mystyle.css:
.plaincircle {
-fx-fill: white;
-fx-stroke: black;
}
.circleborder {
-fx-stroke-width: 5;
-fx-stroke-dash-array: 12 2 4 2;
}
.border {
-fx-border-color: black;
-fx-border-width: 5;
}
#redcircle {
-fx-fill: red;
-fx-stroke: red;
}
#greencircle {
-fx-fill: green;
-fx-stroke: green;
}
34
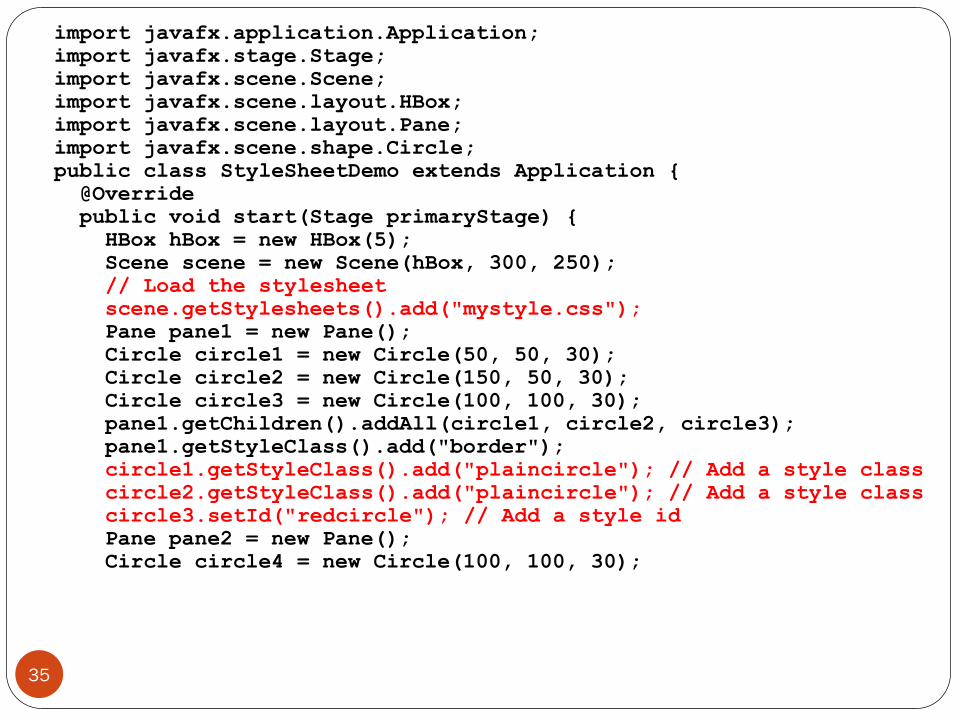
import javafx.application.Application;
import javafx.stage.Stage;
import javafx.scene.Scene;
import javafx.scene.layout.HBox;
import javafx.scene.layout.Pane;
import javafx.scene.shape.Circle;
public class StyleSheetDemo extends Application {
@Override
public void start(Stage primaryStage) {
HBox hBox = new HBox(5);
Scene scene = new Scene(hBox, 300, 250);
// Load the stylesheet
scene.getStylesheets().add("mystyle.css");
Pane pane1 = new Pane();
Circle circle1 = new Circle(50, 50, 30);
Circle circle2 = new Circle(150, 50, 30);
Circle circle3 = new Circle(100, 100, 30);
pane1.getChildren().addAll(circle1, circle2, circle3);
pane1.getStyleClass().add("border");
circle1.getStyleClass().add("plaincircle"); // Add a style class
circle2.getStyleClass().add("plaincircle"); // Add a style class
circle3.setId("redcircle"); // Add a style id
Pane pane2 = new Pane();
Circle circle4 = new Circle(100, 100, 30);
35
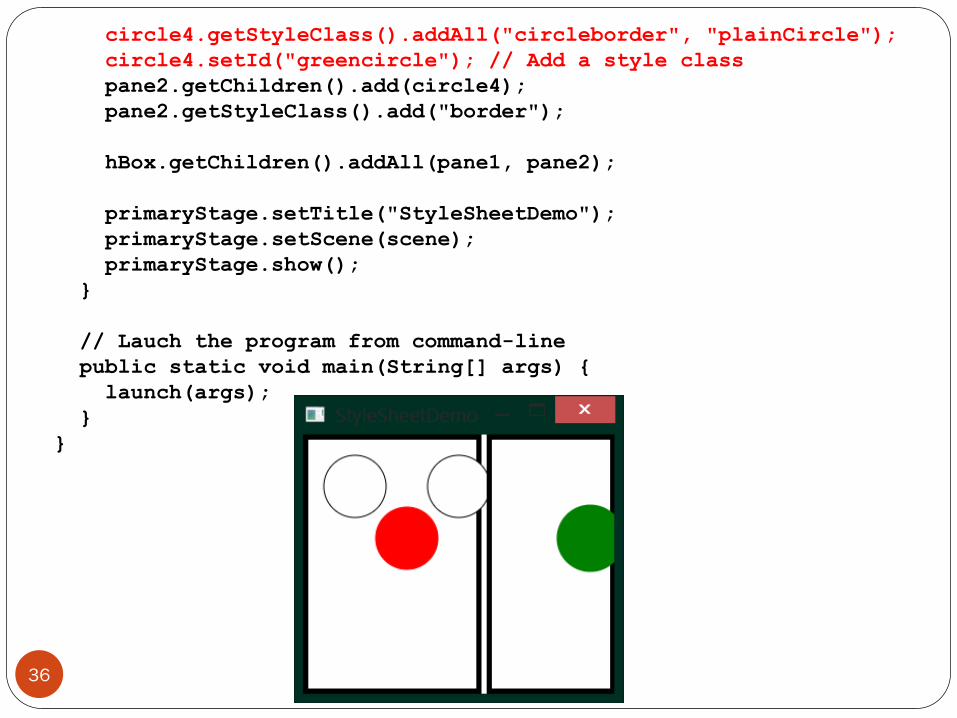
circle4.getStyleClass().addAll("circleborder", "plainCircle");
circle4.setId("greencircle"); // Add a style class
pane2.getChildren().add(circle4);
pane2.getStyleClass().add("border");
hBox.getChildren().addAll(pane1, pane2);
primaryStage.setTitle("StyleSheetDemo");
primaryStage.setScene(scene);
primaryStage.show();
}
// Lauch the program from command-line
public static void main(String[] args) {
launch(args);
}
}
36
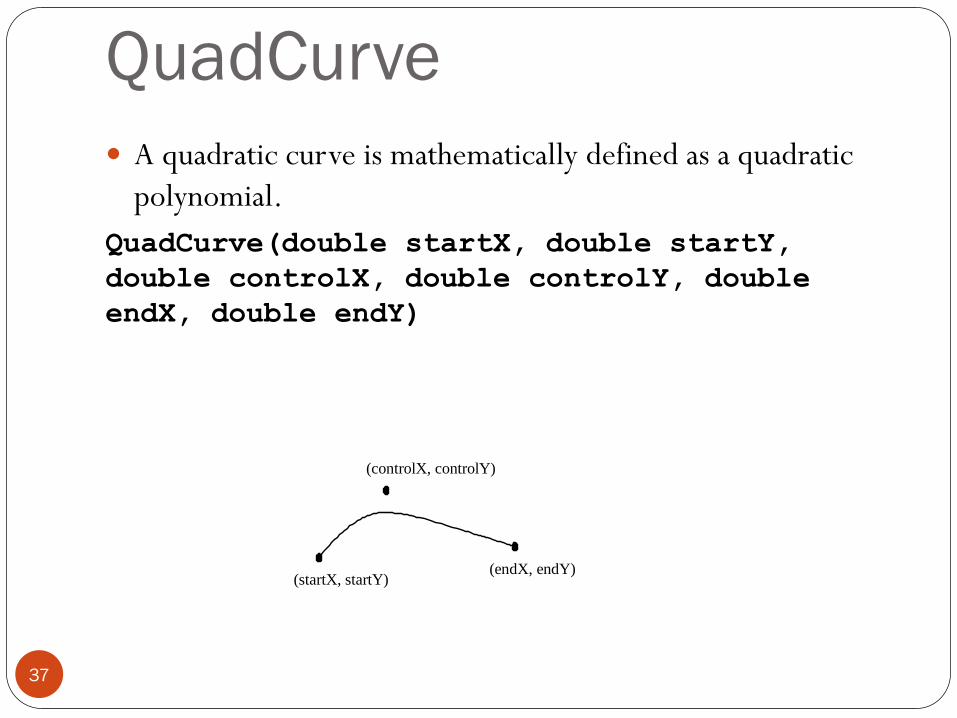
QuadCurve
A quadratic curve is mathematically defined as a quadratic
polynomial.
QuadCurve(double startX, double startY,
double controlX, double controlY, double
endX, double endY)
(controlX, controlY)
(startX, startY) (endX, endY)
37
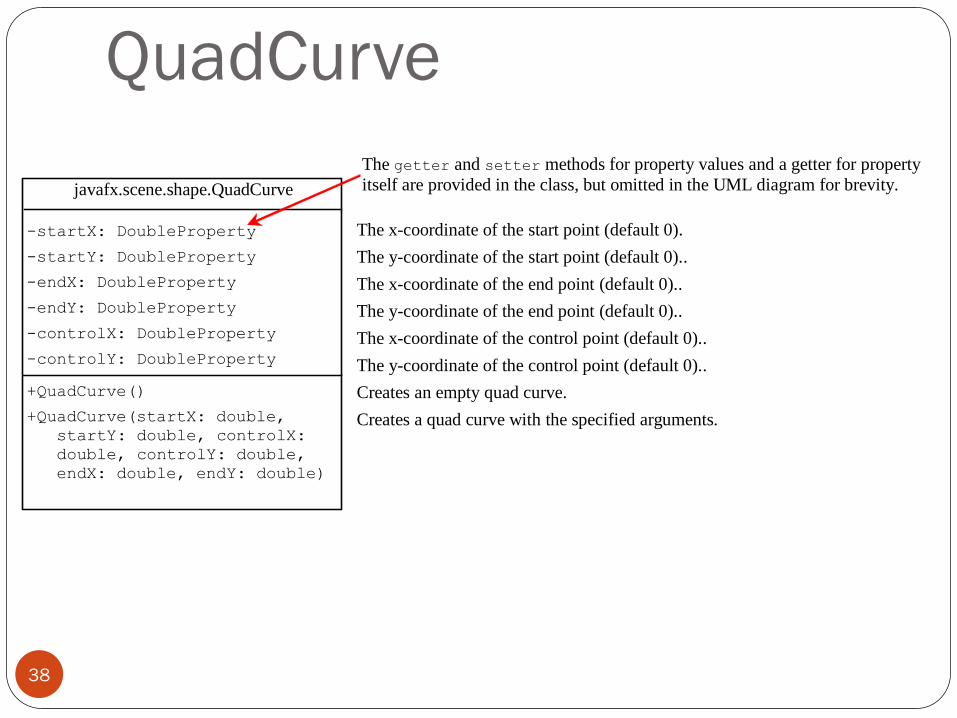
QuadCurve
javafx.scene.shape.QuadCurve
-startX: DoubleProperty
-startY: DoubleProperty
-endX: DoubleProperty
-endY: DoubleProperty
-controlX: DoubleProperty
-controlY: DoubleProperty
+QuadCurve()
+QuadCurve(startX: double,
startY: double, controlX:
double, controlY: double,
endX: double, endY: double)
The x-coordinate of the start point (default 0).
The y-coordinate of the start point (default 0)..
The x-coordinate of the end point (default 0)..
The y-coordinate of the end point (default 0)..
The x-coordinate of the control point (default 0)..
The y-coordinate of the control point (default 0)..
Creates an empty quad curve.
Creates a quad curve with the specified arguments.
The getter and setter methods for property values and a getter for property
itself are provided in the class, but omitted in the UML diagram for brevity.
38
Menus
Menus make selection easier and are widely used in window
applications.
JavaFX provides five classes that implement menus: MenuBar, Menu,
MenuItem, CheckMenuItem, and RadioButtonMenuItem.
MenuBar is a top-level menu component used to hold the menus.
A menu consists of menu items that the user can select (or toggle on
or off).
A menu item can be an instance of MenuItem, CheckMenuItem, or
RadioButtonMenuItem.
Menu items can be associated with nodes and keyboard accelerators.
39
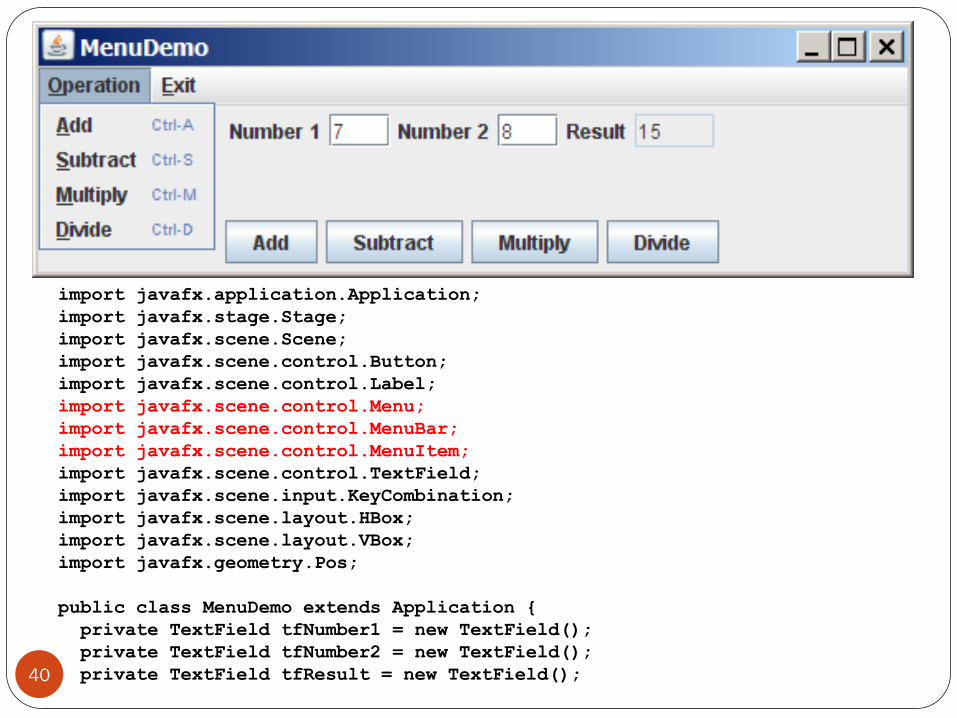
import javafx.application.Application;
import javafx.stage.Stage;
import javafx.scene.Scene;
import javafx.scene.control.Button;
import javafx.scene.control.Label;
import javafx.scene.control.Menu;
import javafx.scene.control.MenuBar;
import javafx.scene.control.MenuItem;
import javafx.scene.control.TextField;
import javafx.scene.input.KeyCombination;
import javafx.scene.layout.HBox;
import javafx.scene.layout.VBox;
import javafx.geometry.Pos;
public class MenuDemo extends Application {
private TextField tfNumber1 = new TextField();
private TextField tfNumber2 = new TextField();
private TextField tfResult = new TextField(); 40
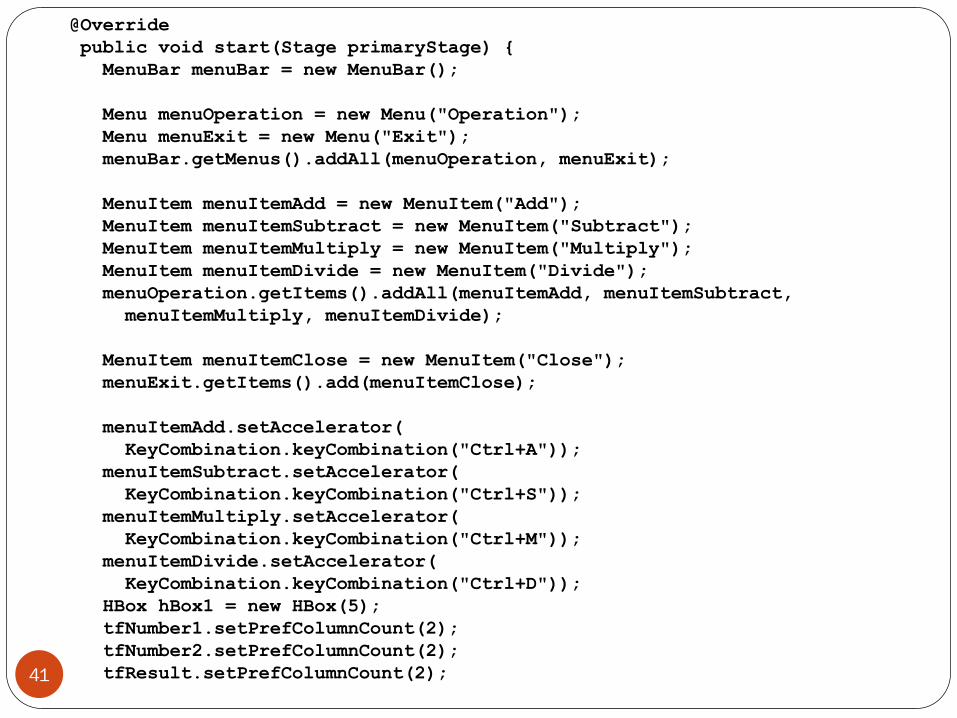
@Override
public void start(Stage primaryStage) {
MenuBar menuBar = new MenuBar();
Menu menuOperation = new Menu("Operation");
Menu menuExit = new Menu("Exit");
menuBar.getMenus().addAll(menuOperation, menuExit);
MenuItem menuItemAdd = new MenuItem("Add");
MenuItem menuItemSubtract = new MenuItem("Subtract");
MenuItem menuItemMultiply = new MenuItem("Multiply");
MenuItem menuItemDivide = new MenuItem("Divide");
menuOperation.getItems().addAll(menuItemAdd, menuItemSubtract,
menuItemMultiply, menuItemDivide);
MenuItem menuItemClose = new MenuItem("Close");
menuExit.getItems().add(menuItemClose);
menuItemAdd.setAccelerator(
KeyCombination.keyCombination("Ctrl+A"));
menuItemSubtract.setAccelerator(
KeyCombination.keyCombination("Ctrl+S"));
menuItemMultiply.setAccelerator(
KeyCombination.keyCombination("Ctrl+M"));
menuItemDivide.setAccelerator(
KeyCombination.keyCombination("Ctrl+D"));
HBox hBox1 = new HBox(5);
tfNumber1.setPrefColumnCount(2);
tfNumber2.setPrefColumnCount(2);
tfResult.setPrefColumnCount(2); 41
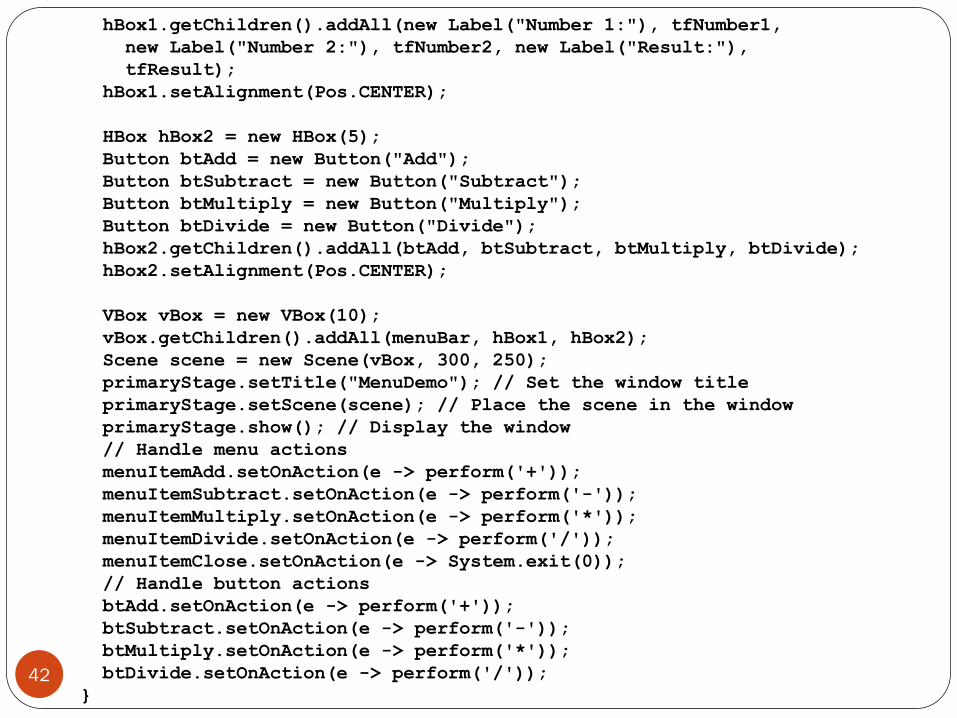
hBox1.getChildren().addAll(new Label("Number 1:"), tfNumber1,
new Label("Number 2:"), tfNumber2, new Label("Result:"),
tfResult);
hBox1.setAlignment(Pos.CENTER);
HBox hBox2 = new HBox(5);
Button btAdd = new Button("Add");
Button btSubtract = new Button("Subtract");
Button btMultiply = new Button("Multiply");
Button btDivide = new Button("Divide");
hBox2.getChildren().addAll(btAdd, btSubtract, btMultiply, btDivide);
hBox2.setAlignment(Pos.CENTER);
VBox vBox = new VBox(10);
vBox.getChildren().addAll(menuBar, hBox1, hBox2);
Scene scene = new Scene(vBox, 300, 250);
primaryStage.setTitle("MenuDemo"); // Set the window title
primaryStage.setScene(scene); // Place the scene in the window
primaryStage.show(); // Display the window
// Handle menu actions
menuItemAdd.setOnAction(e -> perform('+'));
menuItemSubtract.setOnAction(e -> perform('-'));
menuItemMultiply.setOnAction(e -> perform('*'));
menuItemDivide.setOnAction(e -> perform('/'));
menuItemClose.setOnAction(e -> System.exit(0));
// Handle button actions
btAdd.setOnAction(e -> perform('+'));
btSubtract.setOnAction(e -> perform('-'));
btMultiply.setOnAction(e -> perform('*'));
btDivide.setOnAction(e -> perform('/'));
} 42
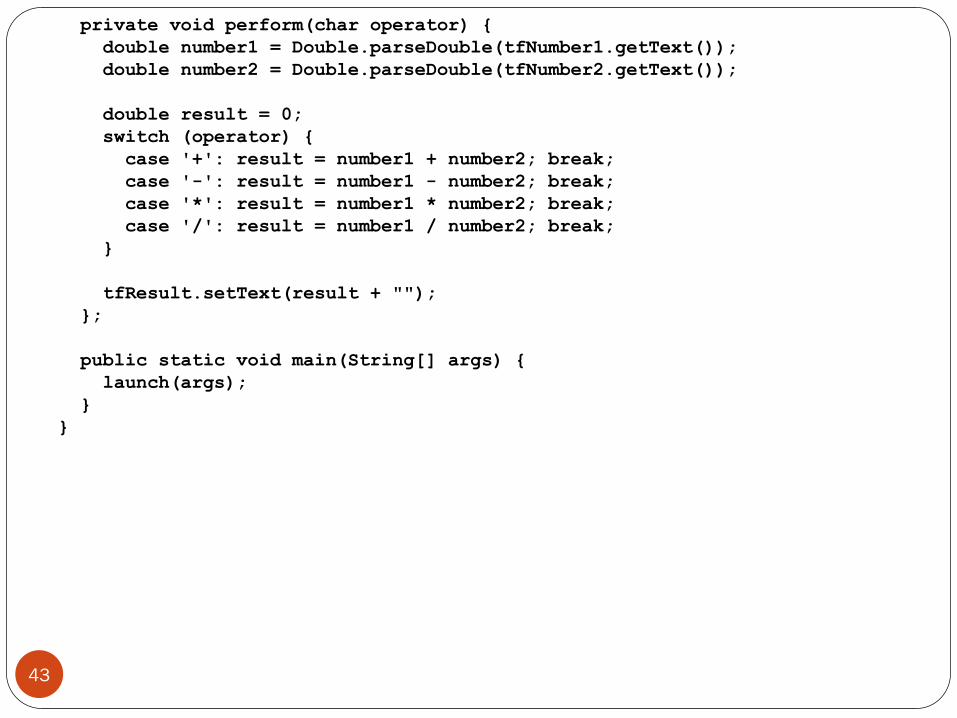
private void perform(char operator) {
double number1 = Double.parseDouble(tfNumber1.getText());
double number2 = Double.parseDouble(tfNumber2.getText());
double result = 0;
switch (operator) {
case '+': result = number1 + number2; break;
case '-': result = number1 - number2; break;
case '*': result = number1 * number2; break;
case '/': result = number1 / number2; break;
}
tfResult.setText(result + "");
};
public static void main(String[] args) {
launch(args);
}
}
43
Context Menu
A context menu (also known as a popup menu) is like a
regular menu, but does not have a menu bar and can float
anywhere on the screen.
Creating a context menu is similar to creating a regular menu.
First, create an instance of ContextMenu, then add MenuItem,
CheckMenuItem, and RadioMenuItem to the context menu.
44

import javafx.application.Application;
import javafx.stage.Stage;
import javafx.scene.Scene;
import javafx.scene.layout.Pane;
import javafx.scene.control.ContextMenu;
import javafx.scene.control.MenuItem;
import javafx.scene.image.ImageView;
public class ContextMenuDemo extends Application {
@Override
public void start(Stage primaryStage) {
ContextMenu contextMenu = new ContextMenu();
MenuItem menuItemNew = new MenuItem("New",
new ImageView("image/new.gif"));
MenuItem menuItemOpen = new MenuItem("Open",
new ImageView("image/open.gif"));
MenuItem menuItemPrint = new MenuItem("Print",
new ImageView("image/print.gif"));
MenuItem menuItemExit = new MenuItem("Exit");
contextMenu.getItems().addAll(menuItemNew, menuItemOpen,
menuItemPrint, menuItemExit);
Pane pane = new Pane();
Scene scene = new Scene(pane, 300, 250);
primaryStage.setTitle("ContextMenuDemo");
primaryStage.setScene(scene);
primaryStage.show();
45
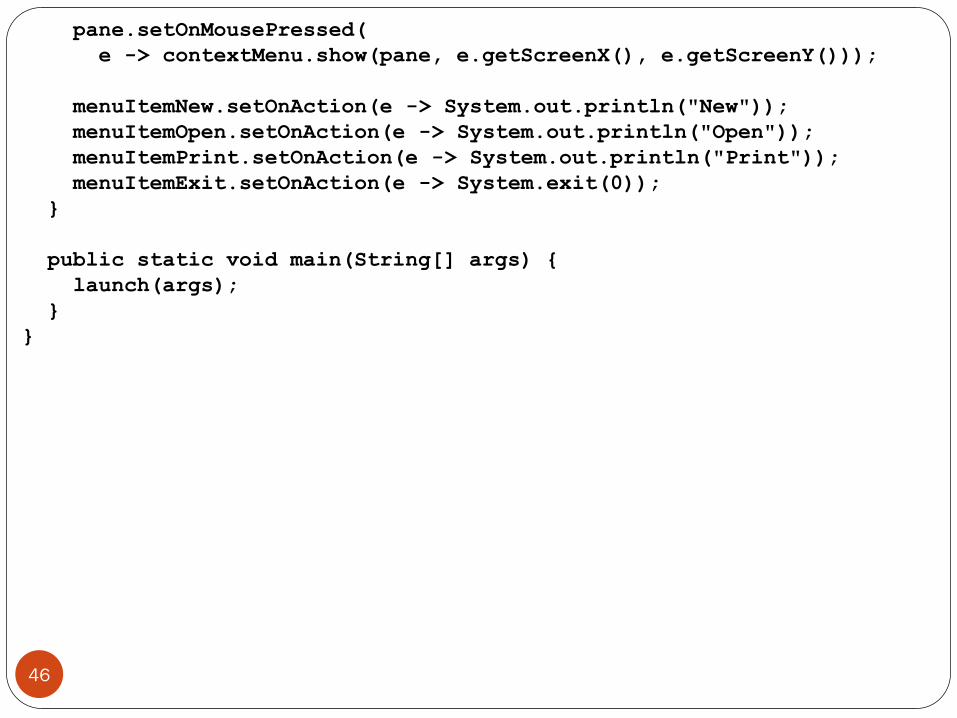
pane.setOnMousePressed(
e -> contextMenu.show(pane, e.getScreenX(), e.getScreenY()));
menuItemNew.setOnAction(e -> System.out.println("New"));
menuItemOpen.setOnAction(e -> System.out.println("Open"));
menuItemPrint.setOnAction(e -> System.out.println("Print"));
menuItemExit.setOnAction(e -> System.exit(0));
}
public static void main(String[] args) {
launch(args);
}
}
46
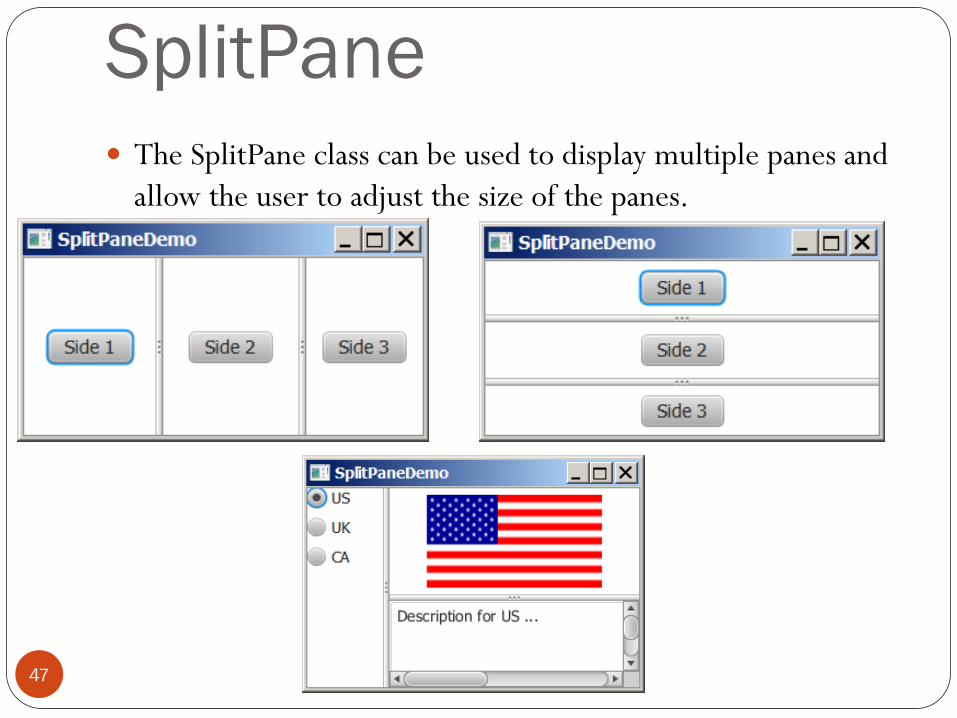
SplitPane The SplitPane class can be used to display multiple panes and
allow the user to adjust the size of the panes.
47
TabPane
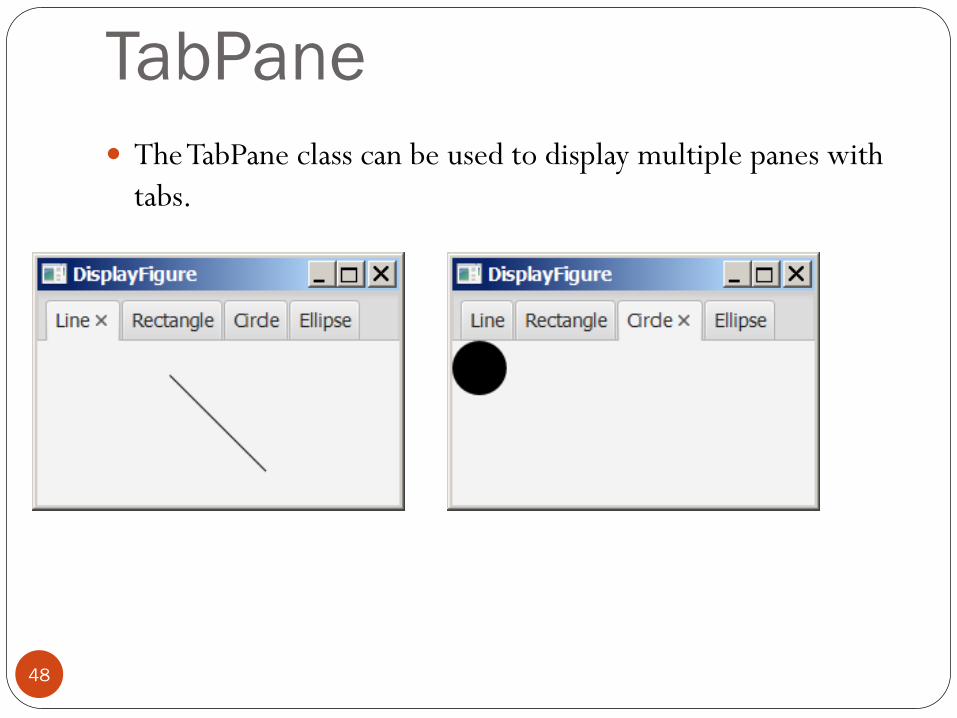
The TabPane class can be used to display multiple panes with
tabs.
48

TabPane
javafx.scene.control.TabPane
-side: ObjectProperty<Side>
+TabPane()
+getTabs(): ObservableList<Tab>
The position of the tab in the tab pane. Possible values are:
Side.TOP, Side.BOTTOM, Side.LEFT, and Side.RIGHT (default:
Side.TOP).
Creates a default tab pane.
Returns a list of tabs in this tab pane.
javafx.scene.control.Control The getter and setter methods for property values and a getter for property itself are provided in the class, but
omitted in the UML diagram for brevity.
javafx.scene.control.Tab
-content: ObjectProperty<Node>
-contextMenu:
ObjectProperty<ContextMenu>
-graphics: ObjectProperty<Node>
-id: StringProperty
-text: StringProperty
-tooltip: StringProperty
+Tab()
+Tab(text: String)
The content associated with the tab.
The context menu associated with the tab.
The graphics in the tab.
The id for the tab.
The text shown in the tab.
The tooltip associated with the tab.
java.lang.Object The getter and setter methods for property values and a getter for property itself are provided in the class, but
omitted in the UML diagram for brevity.
49
TableView
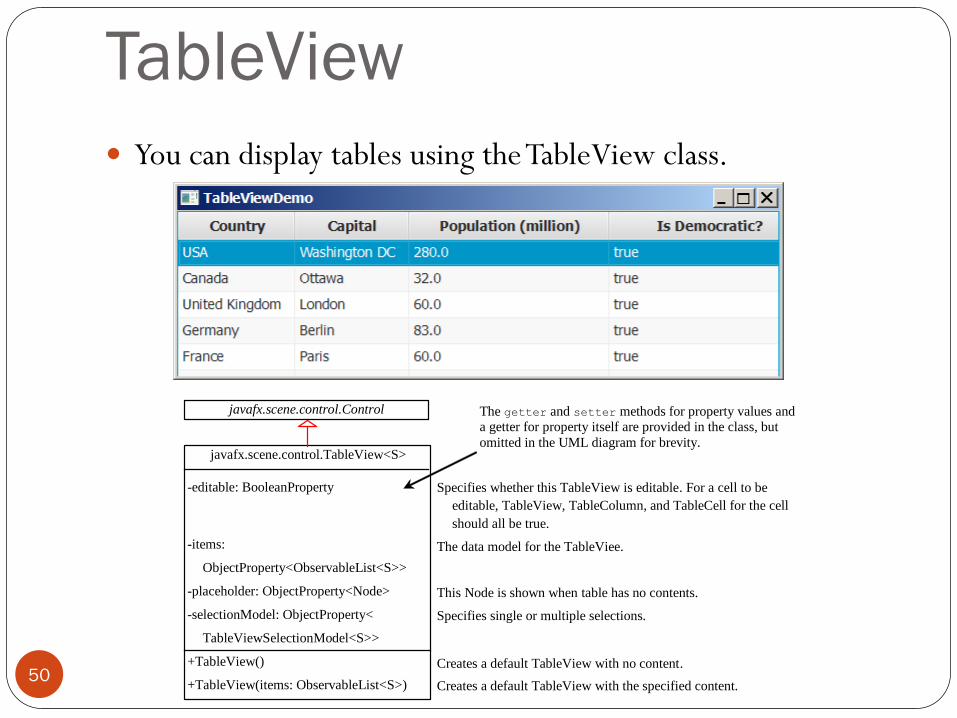
You can display tables using the TableView class.
javafx.scene.control.TableView<S>
-editable: BooleanProperty
-items:
ObjectProperty<ObservableList<S>>
-placeholder: ObjectProperty<Node>
-selectionModel: ObjectProperty<
TableViewSelectionModel<S>>
+TableView()
+TableView(items: ObservableList<S>)
Specifies whether this TableView is editable. For a cell to be
editable, TableView, TableColumn, and TableCell for the cell
should all be true.
The data model for the TableViee.
This Node is shown when table has no contents.
Specifies single or multiple selections.
Creates a default TableView with no content.
Creates a default TableView with the specified content.
javafx.scene.control.Control
The getter and setter methods for property values and a getter for property itself are provided in the class, but
omitted in the UML diagram for brevity.
50
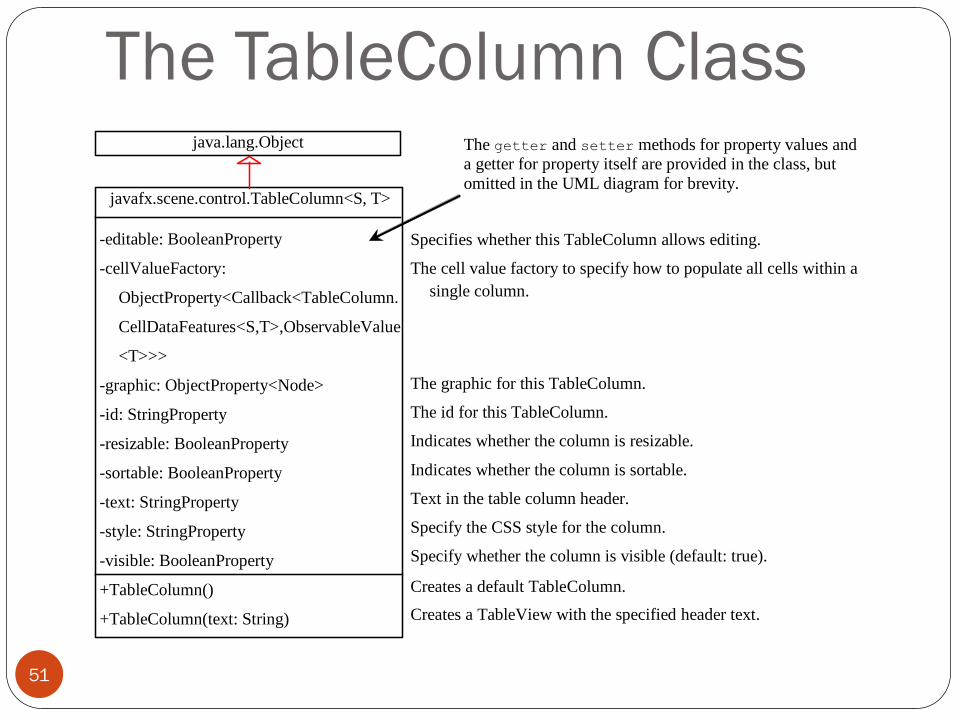
The TableColumn Class
javafx.scene.control.TableColumn<S, T>
-editable: BooleanProperty
-cellValueFactory:
ObjectProperty<Callback<TableColumn.
CellDataFeatures<S,T>,ObservableValue
<T>>>
-graphic: ObjectProperty<Node>
-id: StringProperty
-resizable: BooleanProperty
-sortable: BooleanProperty
-text: StringProperty
-style: StringProperty
-visible: BooleanProperty
+TableColumn()
+TableColumn(text: String)
Specifies whether this TableColumn allows editing.
The cell value factory to specify how to populate all cells within a
single column.
The graphic for this TableColumn.
The id for this TableColumn.
Indicates whether the column is resizable.
Indicates whether the column is sortable.
Text in the table column header.
Specify the CSS style for the column.
Specify whether the column is visible (default: true).
Creates a default TableColumn.
Creates a TableView with the specified header text.
java.lang.Object
The getter and setter methods for property values and a getter for property itself are provided in the class, but
omitted in the UML diagram for brevity.
51
FXML FXML is a declarative XML-based language created by
Oracle Corporation for defining the user interface of a
JavaFX 2.0 application.
It can be edited and created using the JavaFX Scene
Builder 2 (downloaded separately from J2SE)
Create a new JavaFX project in Netbeans and you
will get 3 files: an FXML file with the UI design, a
main application .java file that loads the FXML and a
controller for the event handlers for the UI Nodes.
52

FXML document: <?xml version="1.0" encoding="UTF-8"?>
<?import java.lang.*?>
<?import java.util.*?>
<?import javafx.scene.*?>
<?import javafx.scene.control.*?>
<?import javafx.scene.layout.*?>
<AnchorPane id="AnchorPane" prefHeight="200" prefWidth="200"
xmlns:fx="http://javafx.com/fxml/1" xmlns="http://javafx.com/javafx/8"
fx:controller="javafxapplication1.FXMLDocumentController">
<children>
<FlowPane prefHeight="200.0" prefWidth="200.0">
<children>
<Label fx:id="label" minHeight="16" minWidth="69"
text="Welcome to FXML" />
</children>
</FlowPane>
</children>
</AnchorPane>
53
54
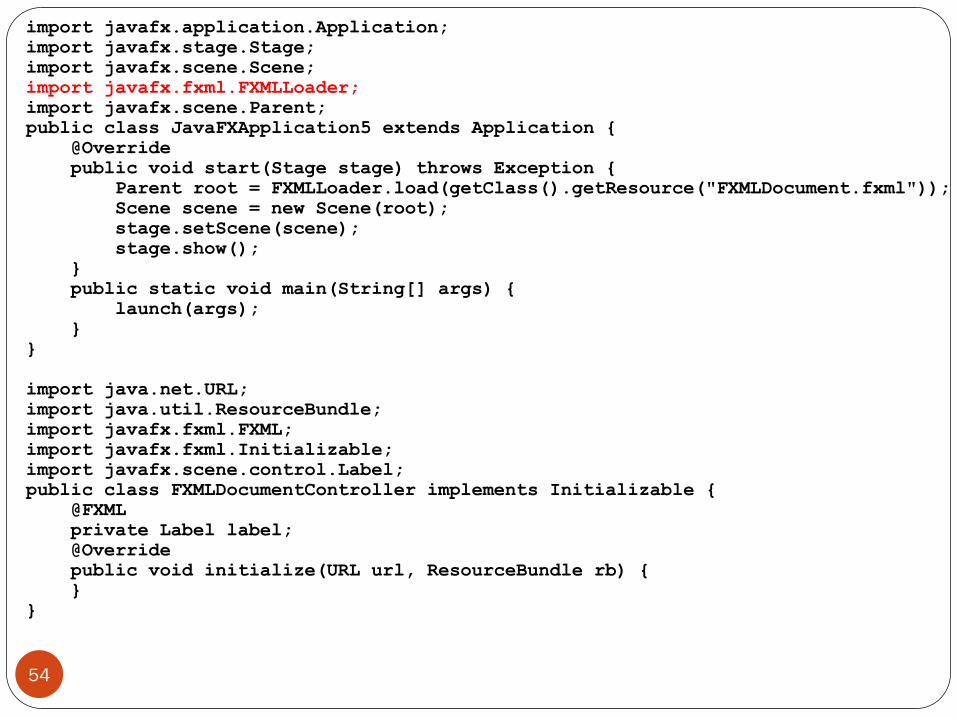
import javafx.application.Application;
import javafx.stage.Stage;
import javafx.scene.Scene;
import javafx.fxml.FXMLLoader;
import javafx.scene.Parent;
public class JavaFXApplication5 extends Application {
@Override
public void start(Stage stage) throws Exception {
Parent root = FXMLLoader.load(getClass().getResource("FXMLDocument.fxml"));
Scene scene = new Scene(root);
stage.setScene(scene);
stage.show();
}
public static void main(String[] args) {
launch(args);
}
}
import java.net.URL;
import java.util.ResourceBundle;
import javafx.fxml.FXML;
import javafx.fxml.Initializable;
import javafx.scene.control.Label;
public class FXMLDocumentController implements Initializable {
@FXML
private Label label;
@Override
public void initialize(URL url, ResourceBundle rb) {
}
}
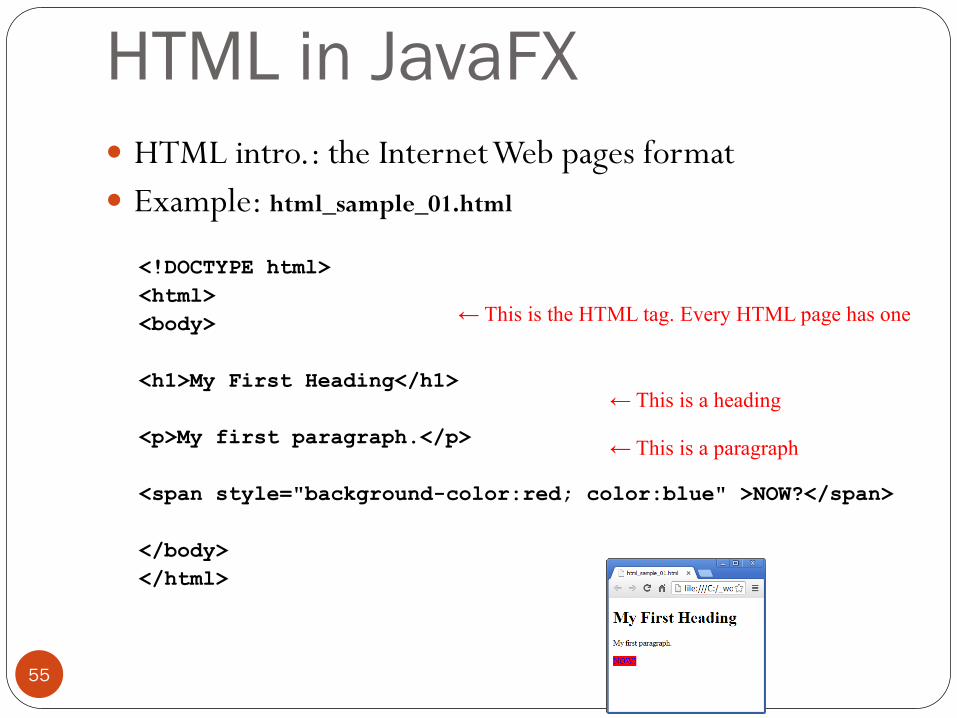
HTML in JavaFX
HTML intro.: the Internet Web pages format
Example: html_sample_01.html
<!DOCTYPE html>
<html>
<body>
<h1>My First Heading</h1>
<p>My first paragraph.</p>
<span style="background-color:red; color:blue" >NOW?</span>
</body>
</html>
55
← This is the HTML tag. Every HTML page has one
← This is a heading
← This is a paragraph

HTML
HTML is a language for describing web pages.
HTML stands for Hyper Text Markup Language
HTML is a markup language
A markup language is a set of markup tags
The tags describe document content
HTML documents contain HTML tags and plain text
HTML documents are also called web pages
56
HTML
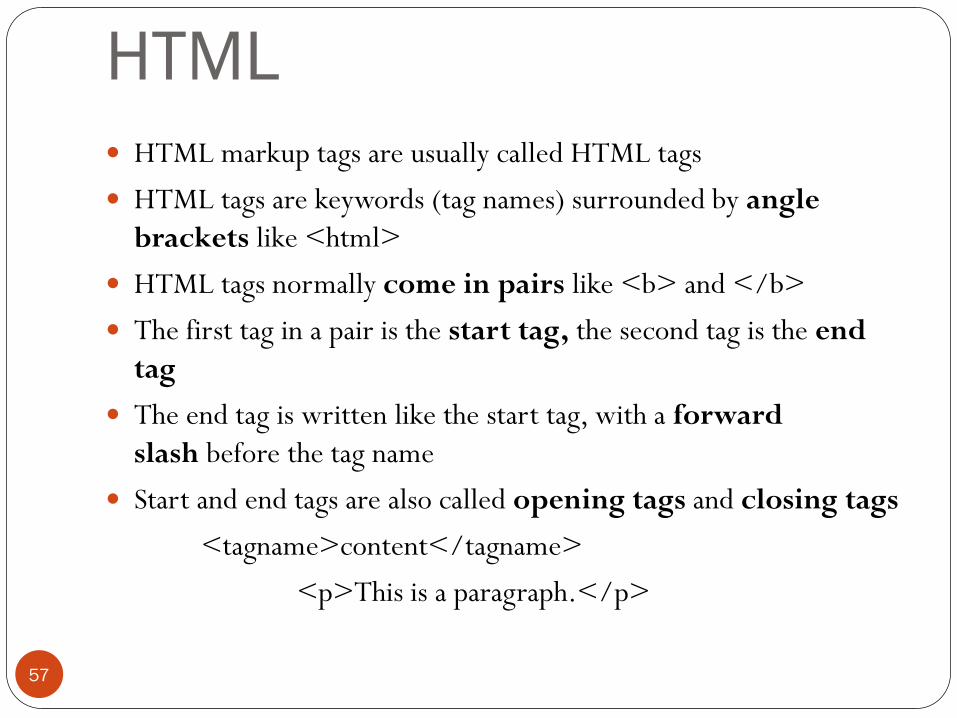
HTML markup tags are usually called HTML tags
HTML tags are keywords (tag names) surrounded by angle
brackets like <html>
HTML tags normally come in pairs like <b> and </b>
The first tag in a pair is the start tag, the second tag is the end
tag
The end tag is written like the start tag, with a forward
slash before the tag name
Start and end tags are also called opening tags and closing tags
<tagname>content</tagname>
<p>This is a paragraph.</p>
57
HTML by Examples
http://www.w3schools.com/html/html_examples.asp
HTML links:
<a href="http://www.w3schools.com">This is a link</a>
It appears as: This is a link
HTML images:
<img src="w3schools.jpg" width="104" height="142">
It appears as:
58

JavaFX with HTML You can put HTML code in JavaFX: import javafx.application.Application; import javafx.stage.Stage; import javafx.scene.Scene; import javafx.scene.layout.StackPane; import javafx.event.ActionEvent; import javafx.event.EventHandler; import javafx.scene.control.Button; import javafx.scene.web.WebEngine; import javafx.scene.web.WebView; public class HTMLDemo extends Application { @Override public void start(Stage primaryStage) { WebView browser = new WebView(); WebEngine webEngine = browser.getEngine(); webEngine.loadContent("<html><b><u>T</u>wo</b><br>lines</html>"); StackPane root = new StackPane(); root.getChildren().add(browser); Scene scene = new Scene(root, 100, 150); primaryStage.setTitle("Hello World!"); primaryStage.setScene(scene); primaryStage.show(); } public static void main(String[] args) { launch(args); } }
59
import org.w3c.dom.Document;
// ... get the document of the engine
Document doc = webEngine.getDocument();
// and the elements
import org.w3c.dom.Element;
... Element el = doc.getElementById("id1");
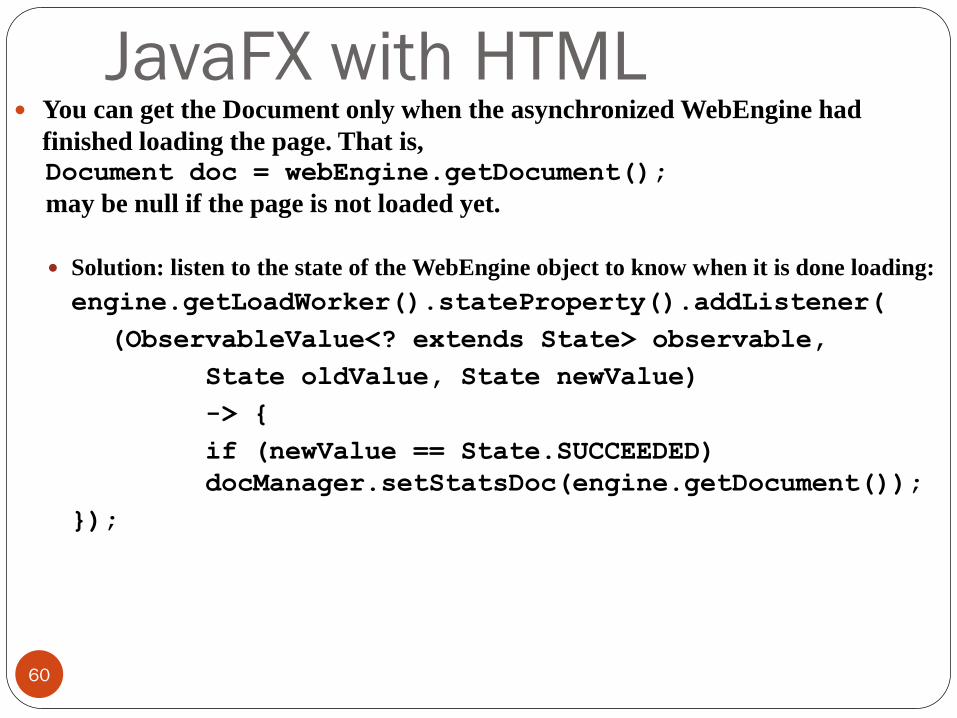
JavaFX with HTML You can get the Document only when the asynchronized WebEngine had
finished loading the page. That is, Document doc = webEngine.getDocument();
may be null if the page is not loaded yet.
Solution: listen to the state of the WebEngine object to know when it is done loading:
engine.getLoadWorker().stateProperty().addListener(
(ObservableValue<? extends State> observable,
State oldValue, State newValue)
-> {
if (newValue == State.SUCCEEDED)
docManager.setStatsDoc(engine.getDocument());
});
60
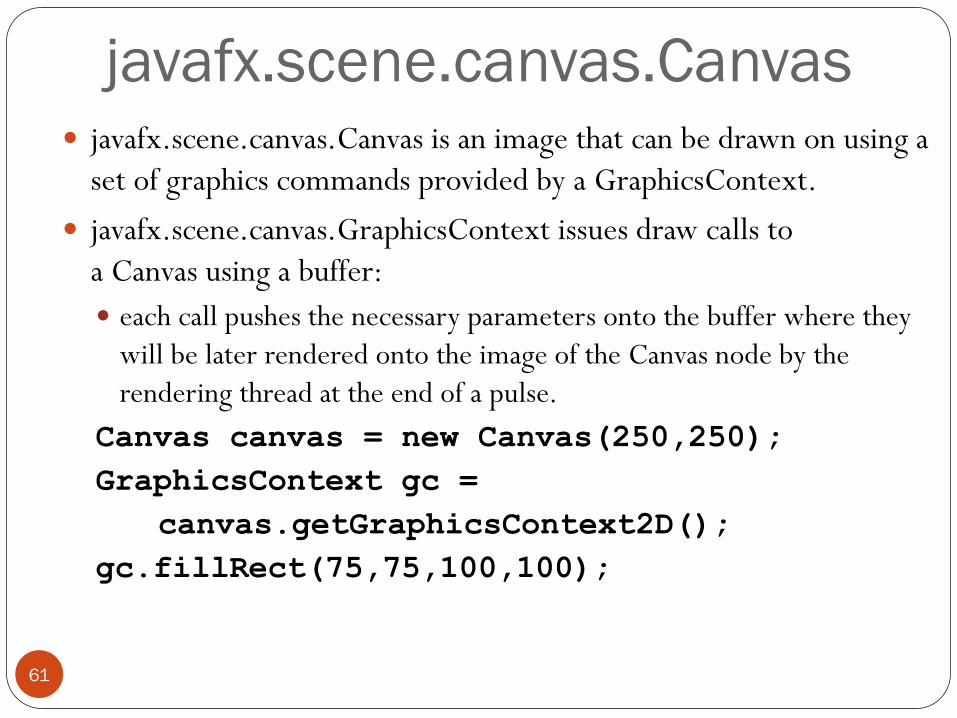
javafx.scene.canvas.Canvas javafx.scene.canvas.Canvas is an image that can be drawn on using a
set of graphics commands provided by a GraphicsContext.
javafx.scene.canvas.GraphicsContext issues draw calls to
a Canvas using a buffer:
each call pushes the necessary parameters onto the buffer where they
will be later rendered onto the image of the Canvas node by the
rendering thread at the end of a pulse.
Canvas canvas = new Canvas(250,250);
GraphicsContext gc =
canvas.getGraphicsContext2D();
gc.fillRect(75,75,100,100);
61
62
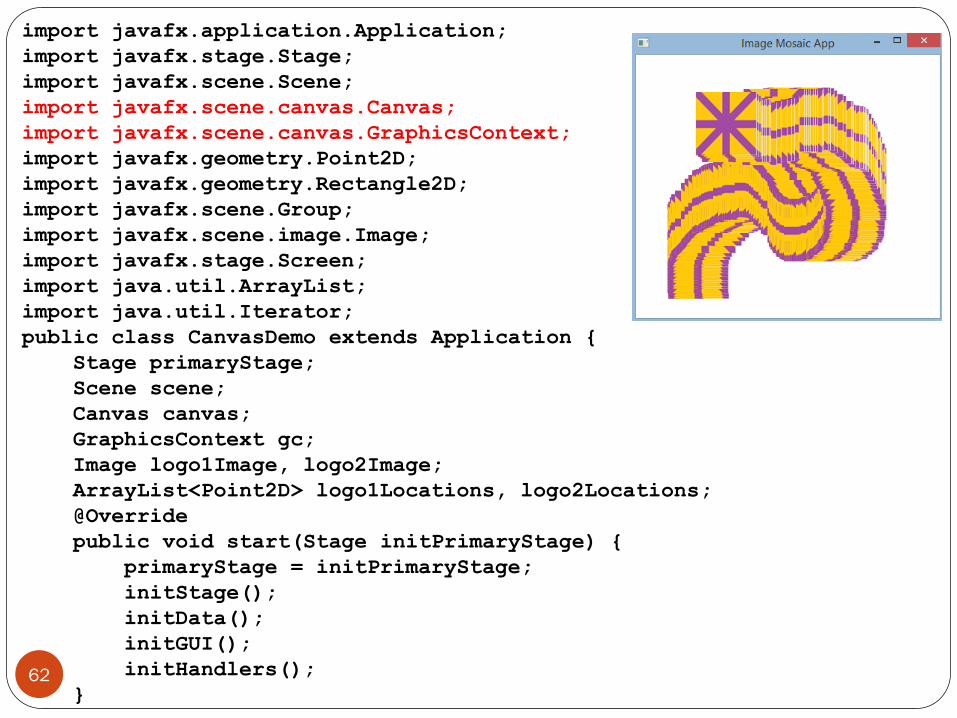
import javafx.application.Application;
import javafx.stage.Stage;
import javafx.scene.Scene;
import javafx.scene.canvas.Canvas;
import javafx.scene.canvas.GraphicsContext;
import javafx.geometry.Point2D;
import javafx.geometry.Rectangle2D;
import javafx.scene.Group;
import javafx.scene.image.Image;
import javafx.stage.Screen;
import java.util.ArrayList;
import java.util.Iterator;
public class CanvasDemo extends Application {
Stage primaryStage;
Scene scene;
Canvas canvas;
GraphicsContext gc;
Image logo1Image, logo2Image;
ArrayList<Point2D> logo1Locations, logo2Locations;
@Override
public void start(Stage initPrimaryStage) {
primaryStage = initPrimaryStage;
initStage();
initData();
initGUI();
initHandlers();
}
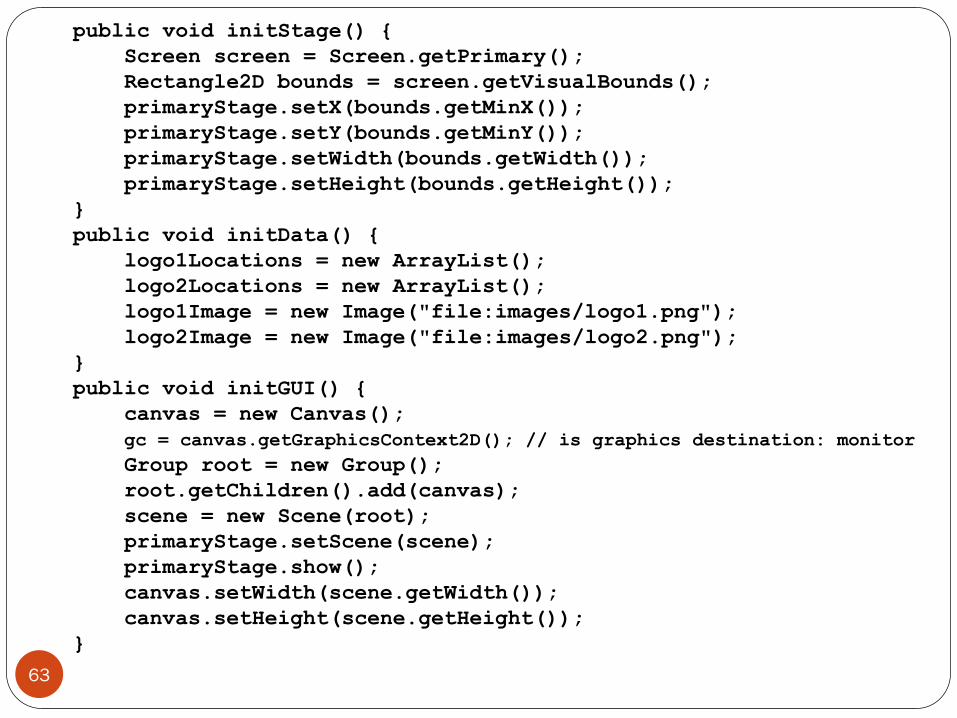
63
public void initStage() {
Screen screen = Screen.getPrimary();
Rectangle2D bounds = screen.getVisualBounds();
primaryStage.setX(bounds.getMinX());
primaryStage.setY(bounds.getMinY());
primaryStage.setWidth(bounds.getWidth());
primaryStage.setHeight(bounds.getHeight());
}
public void initData() {
logo1Locations = new ArrayList();
logo2Locations = new ArrayList();
logo1Image = new Image("file:images/logo1.png");
logo2Image = new Image("file:images/logo2.png");
}
public void initGUI() {
canvas = new Canvas();
gc = canvas.getGraphicsContext2D(); // is graphics destination: monitor
Group root = new Group();
root.getChildren().add(canvas);
scene = new Scene(root);
primaryStage.setScene(scene);
primaryStage.show();
canvas.setWidth(scene.getWidth());
canvas.setHeight(scene.getHeight());
}
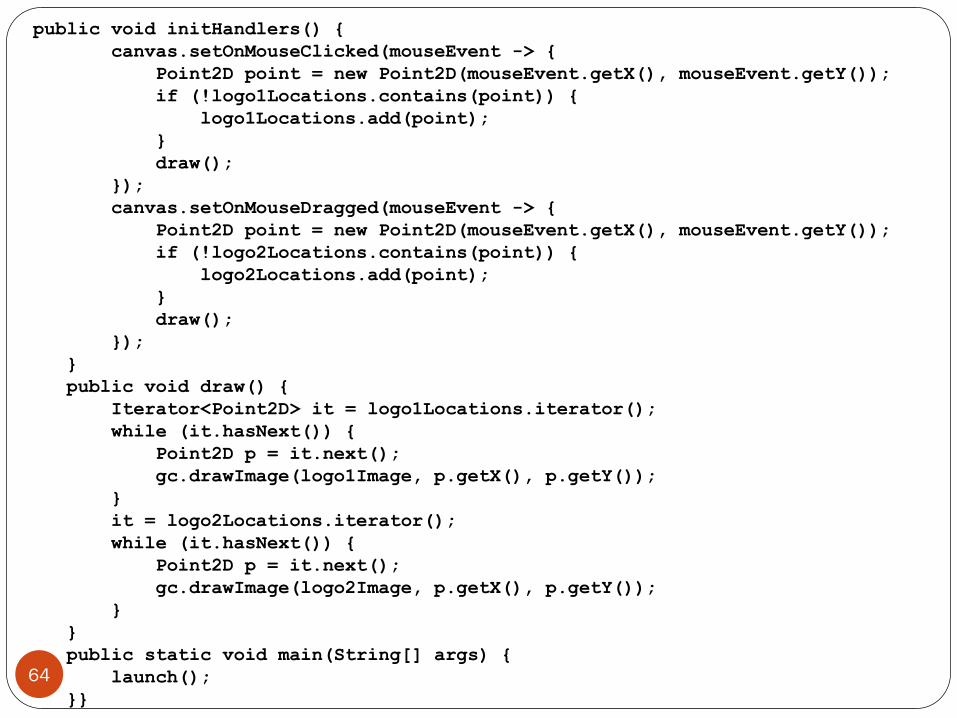
64
public void initHandlers() {
canvas.setOnMouseClicked(mouseEvent -> {
Point2D point = new Point2D(mouseEvent.getX(), mouseEvent.getY());
if (!logo1Locations.contains(point)) {
logo1Locations.add(point);
}
draw();
});
canvas.setOnMouseDragged(mouseEvent -> {
Point2D point = new Point2D(mouseEvent.getX(), mouseEvent.getY());
if (!logo2Locations.contains(point)) {
logo2Locations.add(point);
}
draw();
});
}
public void draw() {
Iterator<Point2D> it = logo1Locations.iterator();
while (it.hasNext()) {
Point2D p = it.next();
gc.drawImage(logo1Image, p.getX(), p.getY());
}
it = logo2Locations.iterator();
while (it.hasNext()) {
Point2D p = it.next();
gc.drawImage(logo2Image, p.getX(), p.getY());
}
}
public static void main(String[] args) {
launch();
}}
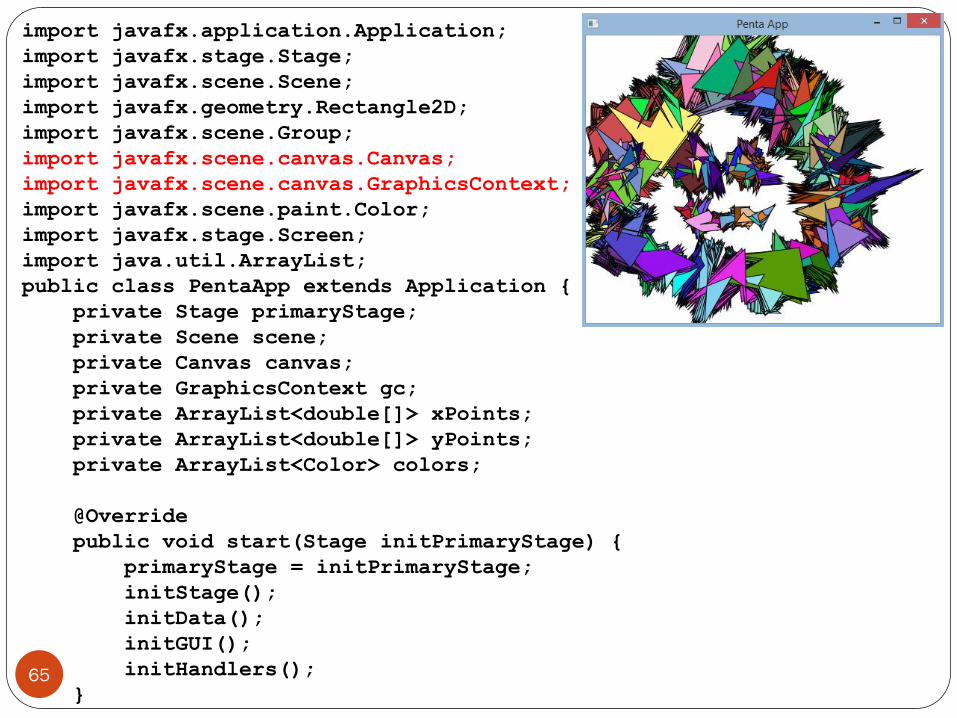
65
import javafx.application.Application;
import javafx.stage.Stage;
import javafx.scene.Scene;
import javafx.geometry.Rectangle2D;
import javafx.scene.Group;
import javafx.scene.canvas.Canvas;
import javafx.scene.canvas.GraphicsContext;
import javafx.scene.paint.Color;
import javafx.stage.Screen;
import java.util.ArrayList;
public class PentaApp extends Application {
private Stage primaryStage;
private Scene scene;
private Canvas canvas;
private GraphicsContext gc;
private ArrayList<double[]> xPoints;
private ArrayList<double[]> yPoints;
private ArrayList<Color> colors;
@Override
public void start(Stage initPrimaryStage) {
primaryStage = initPrimaryStage;
initStage();
initData();
initGUI();
initHandlers();
}
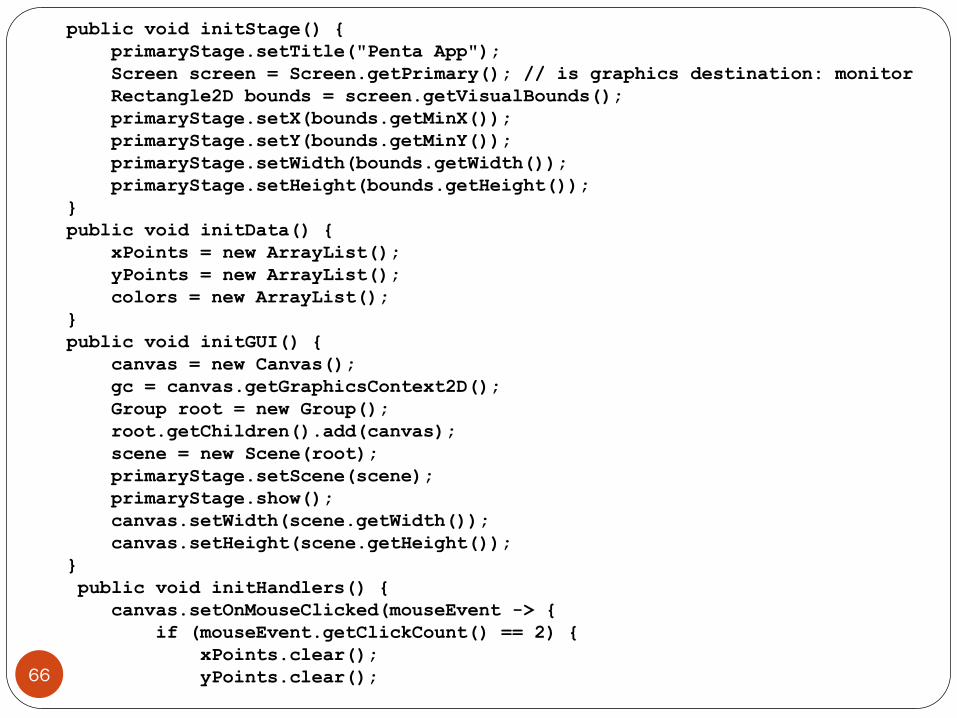
66
public void initStage() {
primaryStage.setTitle("Penta App");
Screen screen = Screen.getPrimary(); // is graphics destination: monitor
Rectangle2D bounds = screen.getVisualBounds();
primaryStage.setX(bounds.getMinX());
primaryStage.setY(bounds.getMinY());
primaryStage.setWidth(bounds.getWidth());
primaryStage.setHeight(bounds.getHeight());
}
public void initData() {
xPoints = new ArrayList();
yPoints = new ArrayList();
colors = new ArrayList();
}
public void initGUI() {
canvas = new Canvas();
gc = canvas.getGraphicsContext2D();
Group root = new Group();
root.getChildren().add(canvas);
scene = new Scene(root);
primaryStage.setScene(scene);
primaryStage.show();
canvas.setWidth(scene.getWidth());
canvas.setHeight(scene.getHeight());
}
public void initHandlers() {
canvas.setOnMouseClicked(mouseEvent -> {
if (mouseEvent.getClickCount() == 2) {
xPoints.clear();
yPoints.clear();
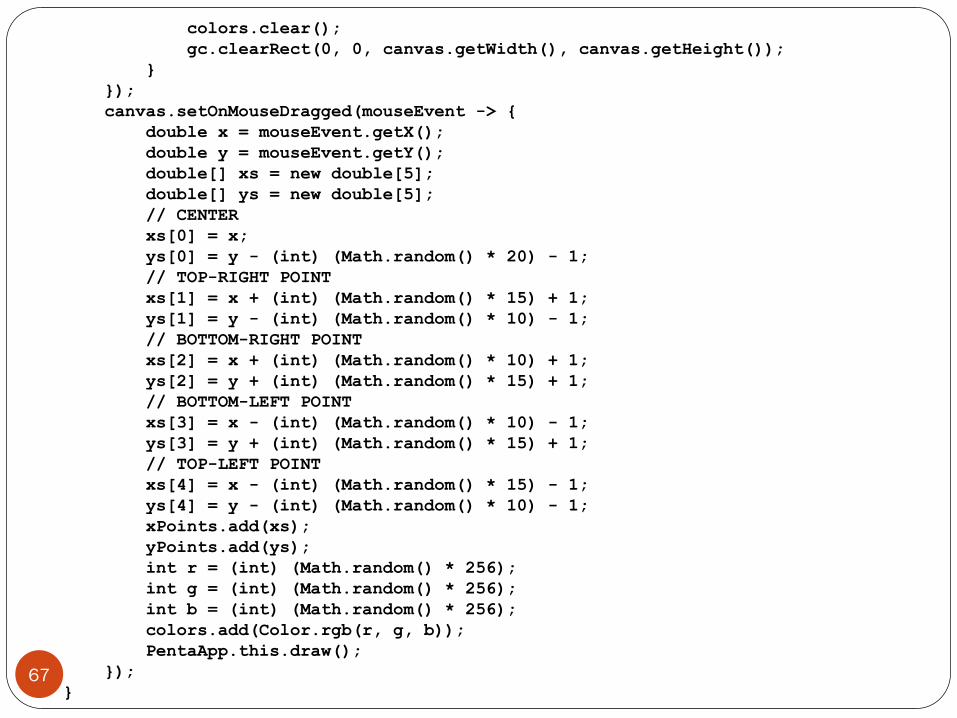
67
colors.clear();
gc.clearRect(0, 0, canvas.getWidth(), canvas.getHeight());
}
});
canvas.setOnMouseDragged(mouseEvent -> {
double x = mouseEvent.getX();
double y = mouseEvent.getY();
double[] xs = new double[5];
double[] ys = new double[5];
// CENTER
xs[0] = x;
ys[0] = y - (int) (Math.random() * 20) - 1;
// TOP-RIGHT POINT
xs[1] = x + (int) (Math.random() * 15) + 1;
ys[1] = y - (int) (Math.random() * 10) - 1;
// BOTTOM-RIGHT POINT
xs[2] = x + (int) (Math.random() * 10) + 1;
ys[2] = y + (int) (Math.random() * 15) + 1;
// BOTTOM-LEFT POINT
xs[3] = x - (int) (Math.random() * 10) - 1;
ys[3] = y + (int) (Math.random() * 15) + 1;
// TOP-LEFT POINT
xs[4] = x - (int) (Math.random() * 15) - 1;
ys[4] = y - (int) (Math.random() * 10) - 1;
xPoints.add(xs);
yPoints.add(ys);
int r = (int) (Math.random() * 256);
int g = (int) (Math.random() * 256);
int b = (int) (Math.random() * 256);
colors.add(Color.rgb(r, g, b));
PentaApp.this.draw();
});
}
68
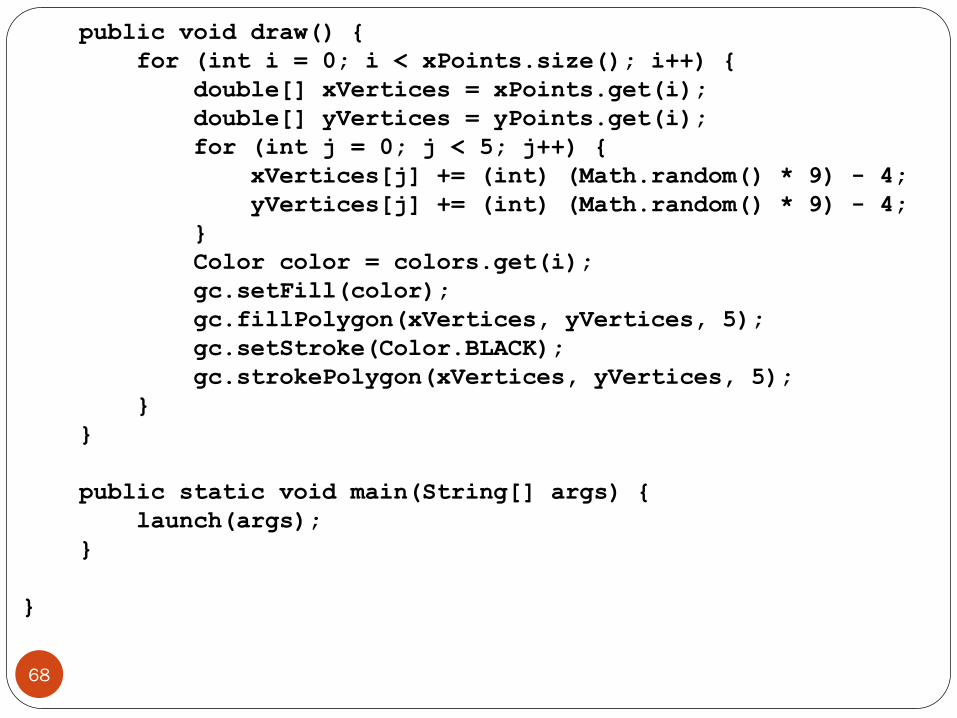
public void draw() {
for (int i = 0; i < xPoints.size(); i++) {
double[] xVertices = xPoints.get(i);
double[] yVertices = yPoints.get(i);
for (int j = 0; j < 5; j++) {
xVertices[j] += (int) (Math.random() * 9) - 4;
yVertices[j] += (int) (Math.random() * 9) - 4;
}
Color color = colors.get(i);
gc.setFill(color);
gc.fillPolygon(xVertices, yVertices, 5);
gc.setStroke(Color.BLACK);
gc.strokePolygon(xVertices, yVertices, 5);
}
}
public static void main(String[] args) {
launch(args);
}
}