Embed Size (px)
Citation preview
JavaFX: CSS
9-18-2013
JavaFX
Cascading Style Sheets (CSS)
Scene Graphs & Nodes
Convenience Methods for Event Handling
UI Controls
HW#2 posted; due 9/23/2013
Reading Assignment: Fancy Forms with JavaFX CSS
Styling an FX Button with CSS
Working with JavaFX Scene Graphs
Using JavaFX UI Controls
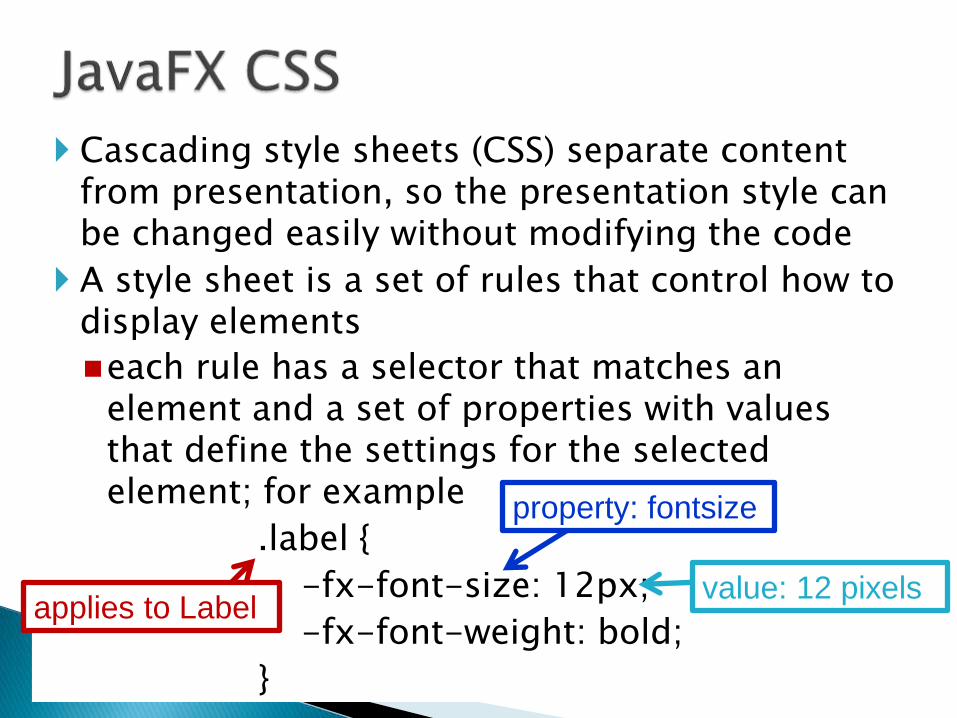
Cascading style sheets (CSS) separate content from presentation, so the presentation style can be changed easily without modifying the code
A style sheet is a set of rules that control how to display elements
each rule has a selector that matches an element and a set of properties with values that define the settings for the selected element; for example
.label {
-fx-font-size: 12px;
-fx-font-weight: bold;
}
applies to Label
property: fontsize
value: 12 pixels
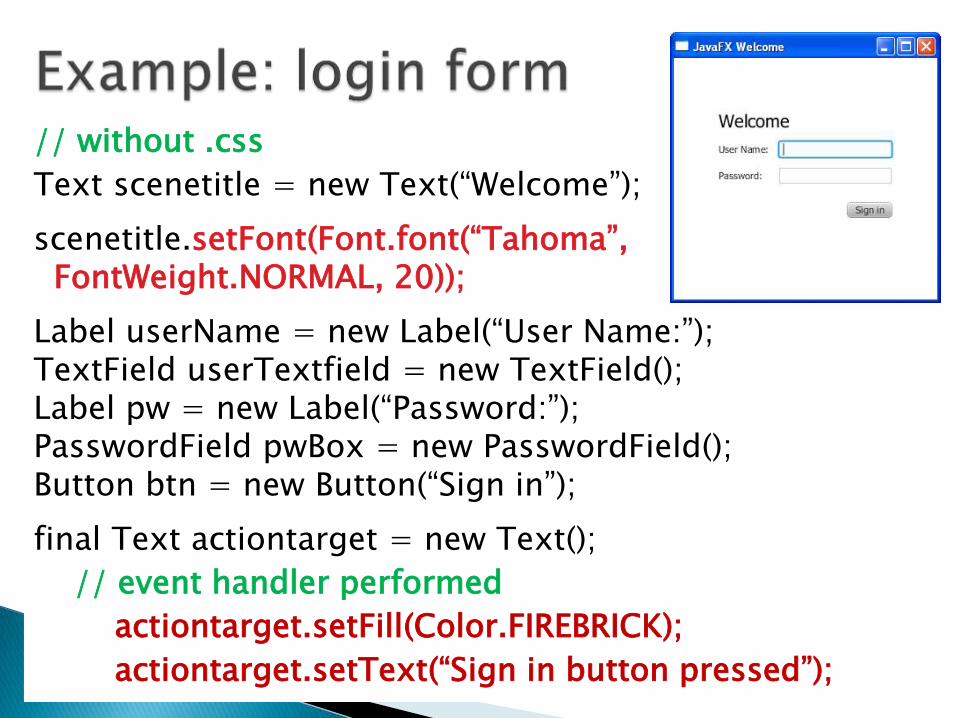
// without .css
Text scenetitle = new Text(“Welcome”);
scenetitle.setFont(Font.font(“Tahoma”, FontWeight.NORMAL, 20));
Label userName = new Label(“User Name:”); TextField userTextfield = new TextField(); Label pw = new Label(“Password:”); PasswordField pwBox = new PasswordField(); Button btn = new Button(“Sign in”);
final Text actiontarget = new Text();
// event handler performed
actiontarget.setFill(Color.FIREBRICK);
actiontarget.setText(“Sign in button pressed”);
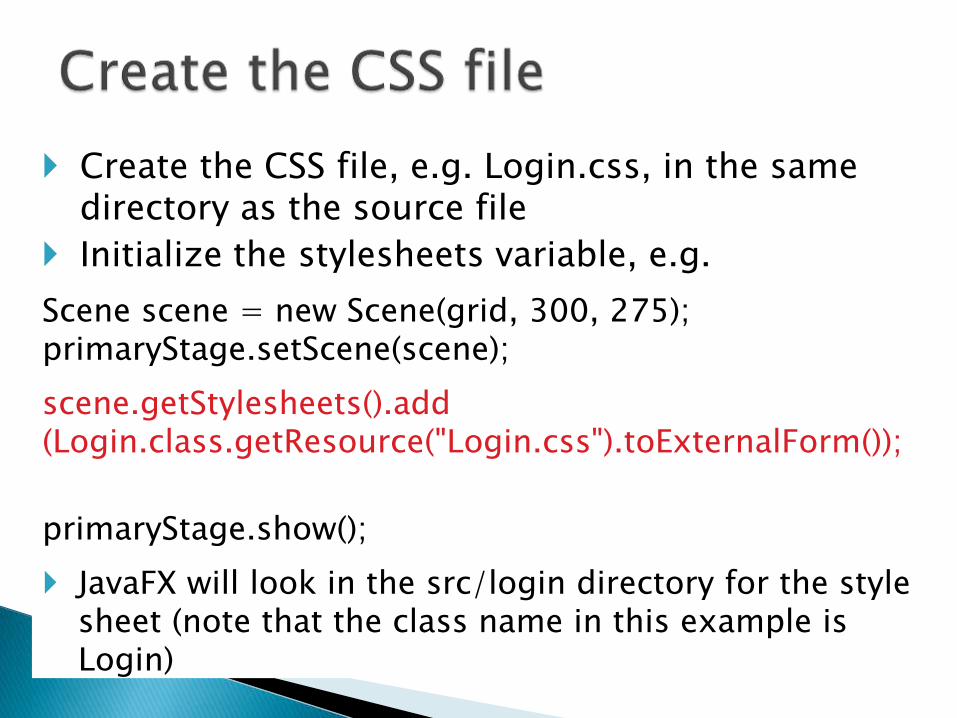
Create the CSS file, e.g. Login.css, in the same directory as the source file
Initialize the stylesheets variable, e.g.
Scene scene = new Scene(grid, 300, 275); primaryStage.setScene(scene);
scene.getStylesheets().add (Login.class.getResource("Login.css").toExternalForm());
primaryStage.show();
JavaFX will look in the src/login directory for the style sheet (note that the class name in this example is Login)
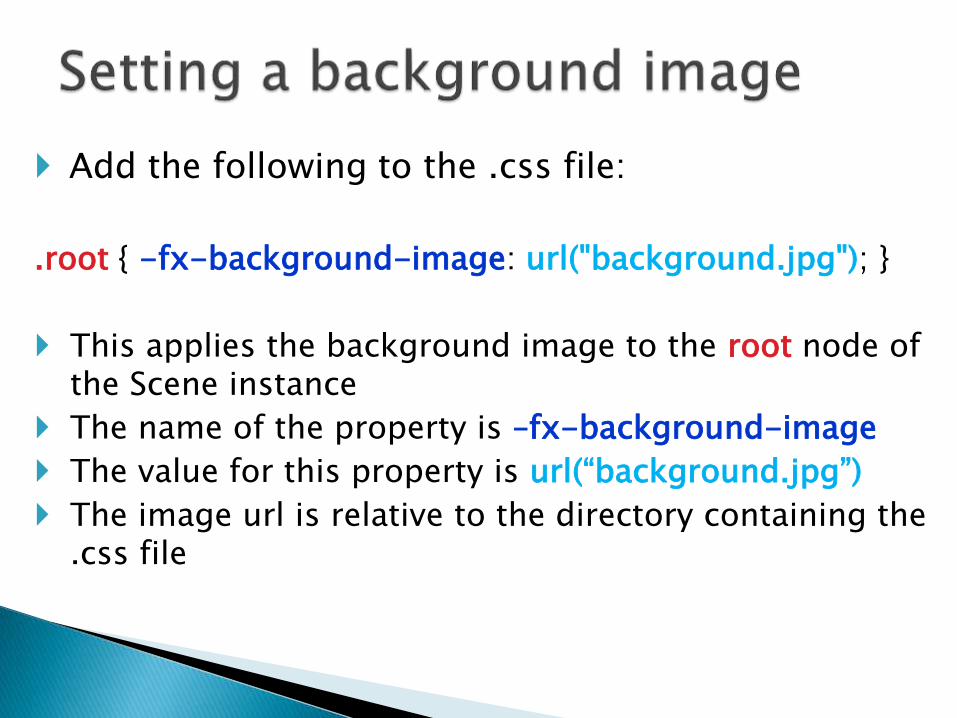
Add the following to the .css file:
.root { -fx-background-image: url("background.jpg"); }
This applies the background image to the root node of the Scene instance
The name of the property is –fx-background-image
The value for this property is url(“background.jpg”)
The image url is relative to the directory containing the .css file
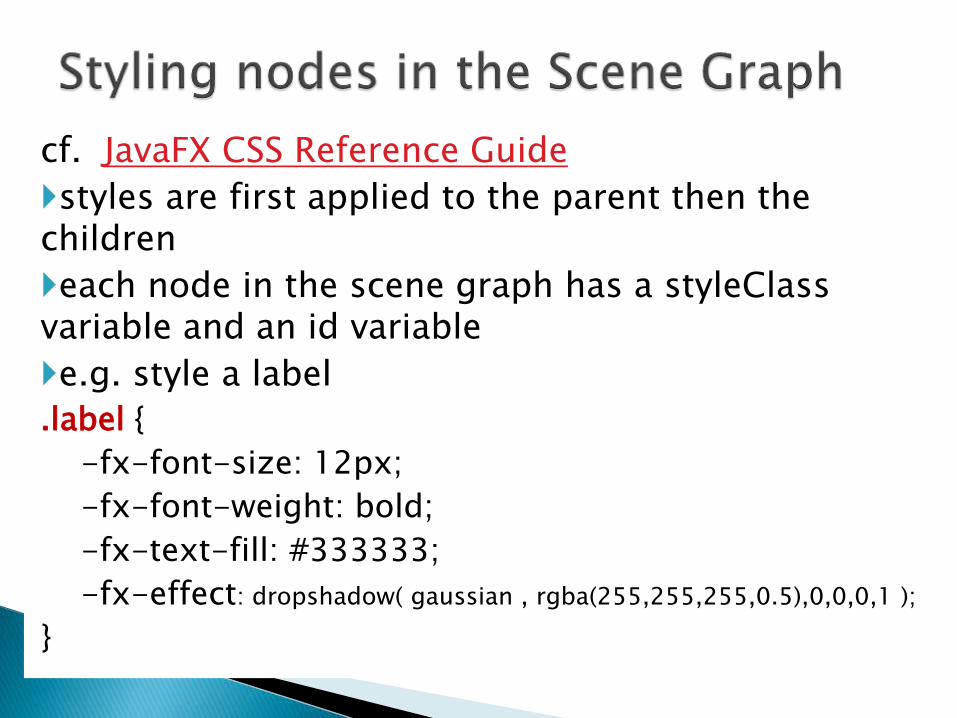
cf. JavaFX CSS Reference Guide
styles are first applied to the parent then the children
each node in the scene graph has a styleClass variable and an id variable
e.g. style a label
.label {
-fx-font-size: 12px;
-fx-font-weight: bold;
-fx-text-fill: #333333;
-fx-effect: dropshadow( gaussian , rgba(255,255,255,0.5),0,0,0,1 );
}

There were 2 text variables in the example: #welcome-text {
-fx-font-size: 32px;
-fx-font-family: "Arial Black";
-fx-fill: #818181;
-fx-effect: innershadow(three-pass-box , rgba(0,0,0,0.7),6,0.0,0,2);
}
#actiontarget {
-fx-fill: FIREBRICK;
-fx-font-weight: bold;
-fx-effect: dropshadow( gaussian , rgba(255,255,255,0.5) , 0,0,0,1 );
}
Text scenetitle = new Text(“Welcome”);
scenetitle.setId(“welcome-text”);
final Text actiontarget = new Text();
actiontarget.setId(“actiontarget”);
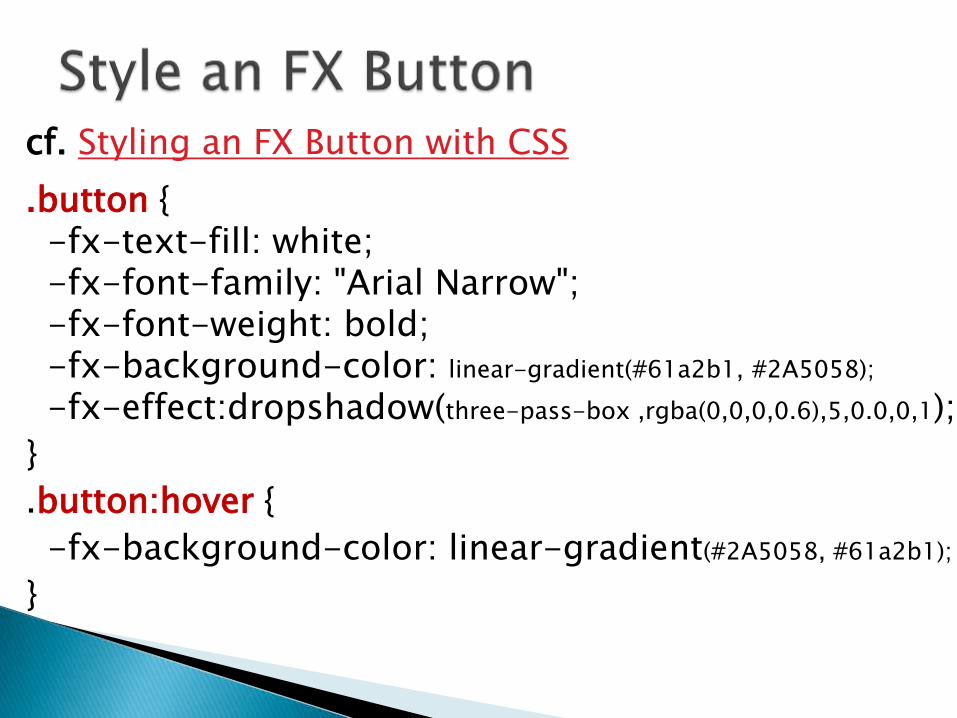
cf. Styling an FX Button with CSS
.button { -fx-text-fill: white; -fx-font-family: "Arial Narrow"; -fx-font-weight: bold; -fx-background-color: linear-gradient(#61a2b1, #2A5058);
-fx-effect:dropshadow(three-pass-box ,rgba(0,0,0,0.6),5,0.0,0,1);
}
.button:hover {
-fx-background-color: linear-gradient(#2A5058, #61a2b1);
}
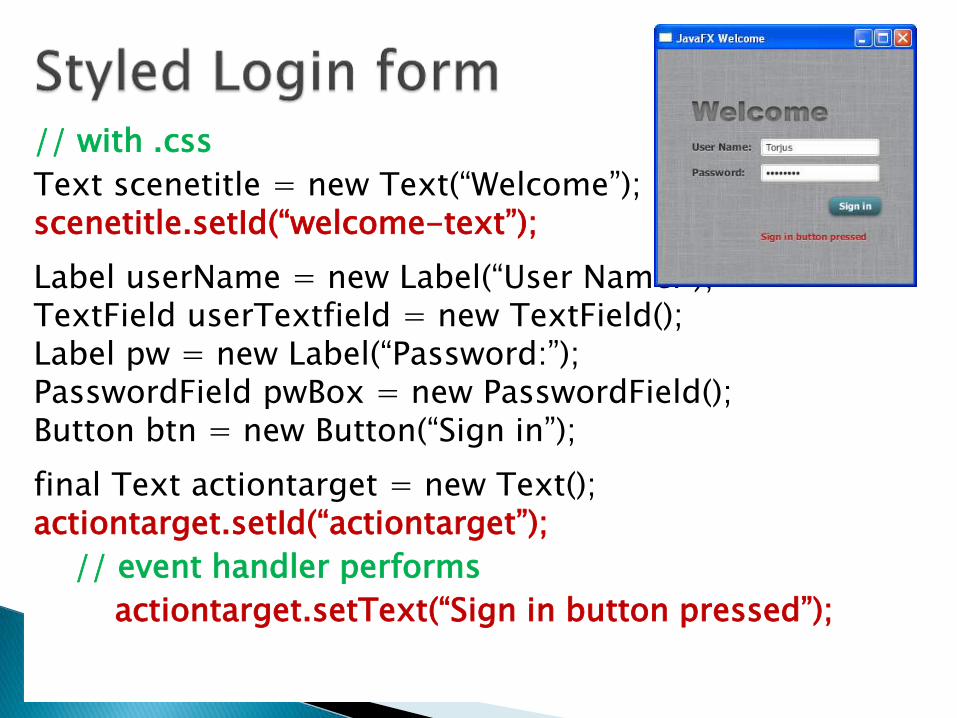
// with .css
Text scenetitle = new Text(“Welcome”); scenetitle.setId(“welcome-text”);
Label userName = new Label(“User Name:”); TextField userTextfield = new TextField(); Label pw = new Label(“Password:”); PasswordField pwBox = new PasswordField(); Button btn = new Button(“Sign in”);
final Text actiontarget = new Text(); actiontarget.setId(“actiontarget”);
// event handler performs
actiontarget.setText(“Sign in button pressed”);
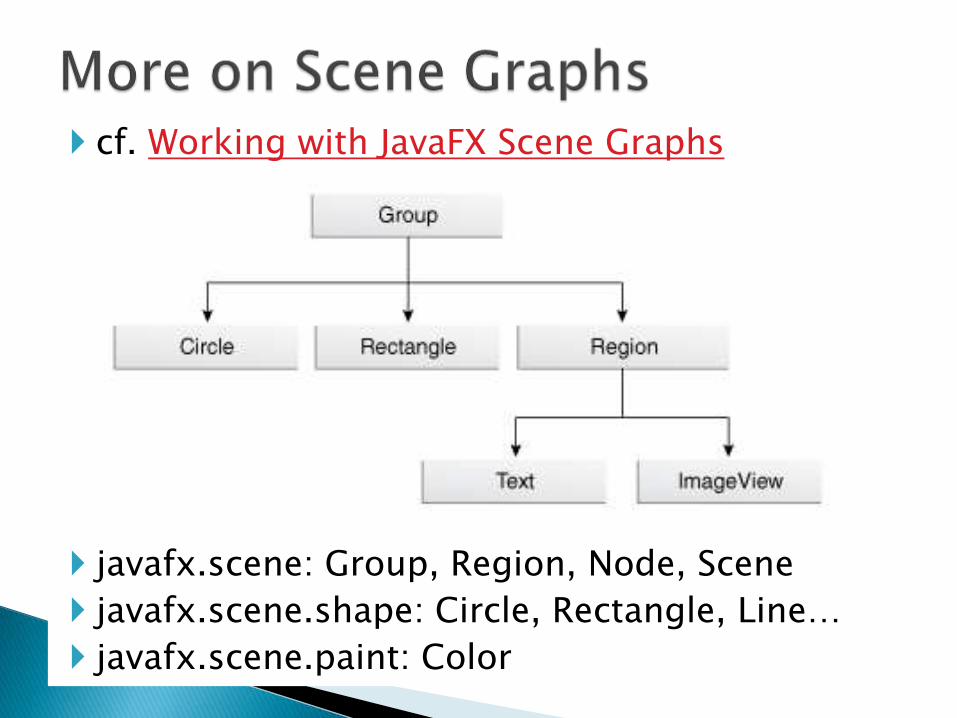
cf. Working with JavaFX Scene Graphs
javafx.scene: Group, Region, Node, Scene
javafx.scene.shape: Circle, Rectangle, Line…
javafx.scene.paint: Color
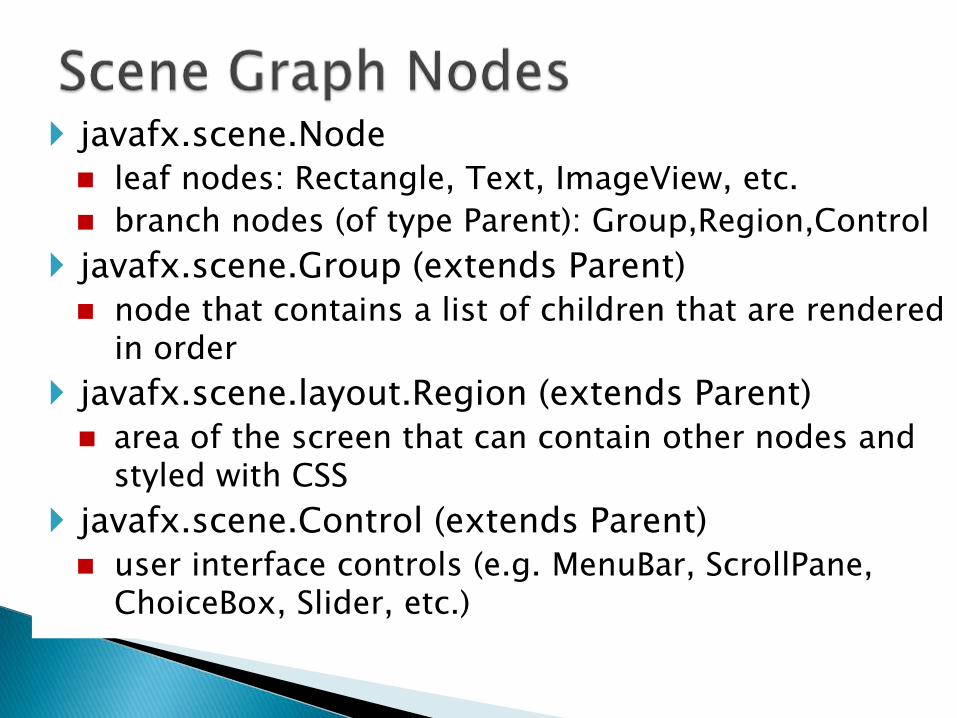
javafx.scene.Node
leaf nodes: Rectangle, Text, ImageView, etc.
branch nodes (of type Parent): Group,Region,Control
javafx.scene.Group (extends Parent)
node that contains a list of children that are rendered in order
javafx.scene.layout.Region (extends Parent)
area of the screen that can contain other nodes and styled with CSS
javafx.scene.Control (extends Parent)
user interface controls (e.g. MenuBar, ScrollPane, ChoiceBox, Slider, etc.)
The javafx.scene package includes (plus others)
Node: abstract base class for all scene graph nodes.
Parent: abstract base class for all branch nodes. (This class directly extends Node).
Scene: base container class for all content in the scene graph.
These base classes define important functionality including paint order, visibility, composition of transformations, support for CSS styling, and so on.
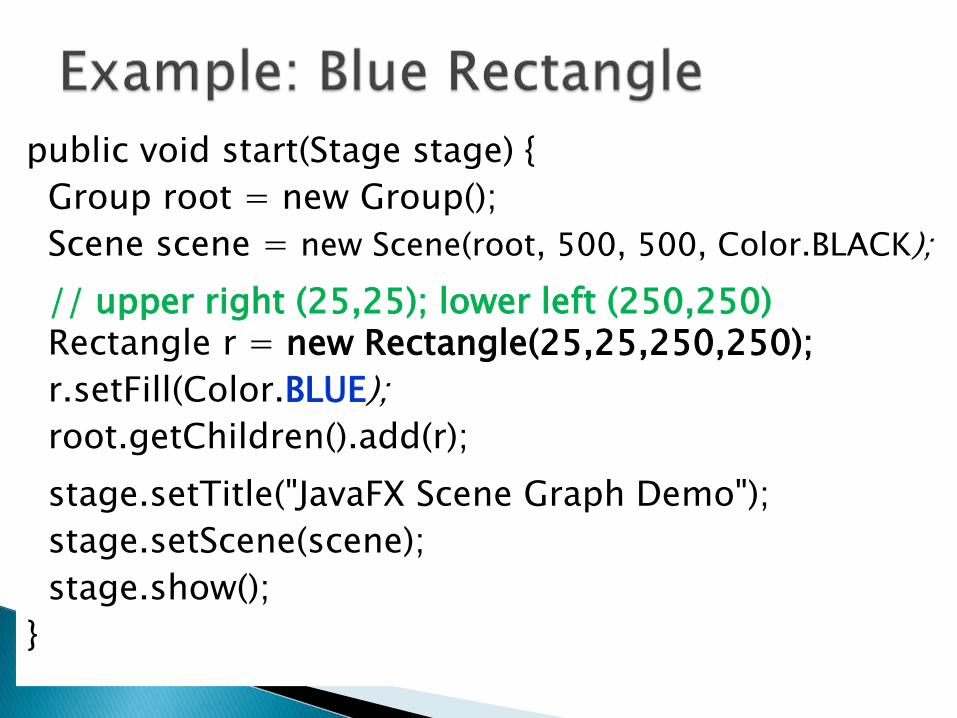
public void start(Stage stage) {
Group root = new Group();
Scene scene = new Scene(root, 500, 500, Color.BLACK);
// upper right (25,25); lower left (250,250) Rectangle r = new Rectangle(25,25,250,250);
r.setFill(Color.BLUE);
root.getChildren().add(r);
stage.setTitle("JavaFX Scene Graph Demo");
stage.setScene(scene);
stage.show();
}
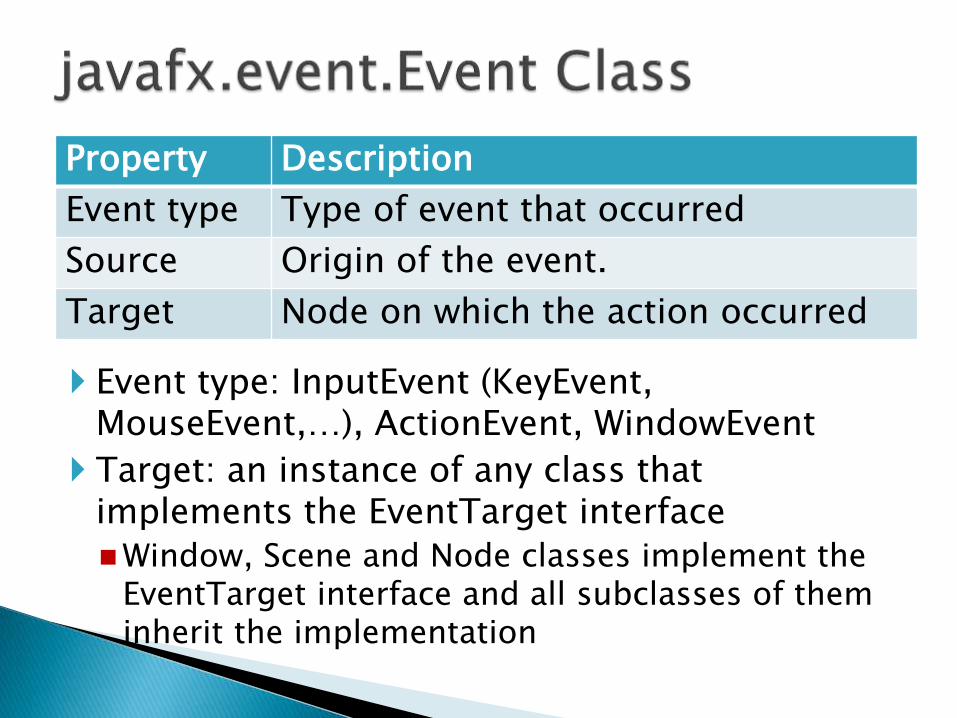
Property Description
Event type Type of event that occurred
Source Origin of the event.
Target Node on which the action occurred
Event type: InputEvent (KeyEvent, MouseEvent,…), ActionEvent, WindowEvent
Target: an instance of any class that implements the EventTarget interface
Window, Scene and Node classes implement the EventTarget interface and all subclasses of them inherit the implementation
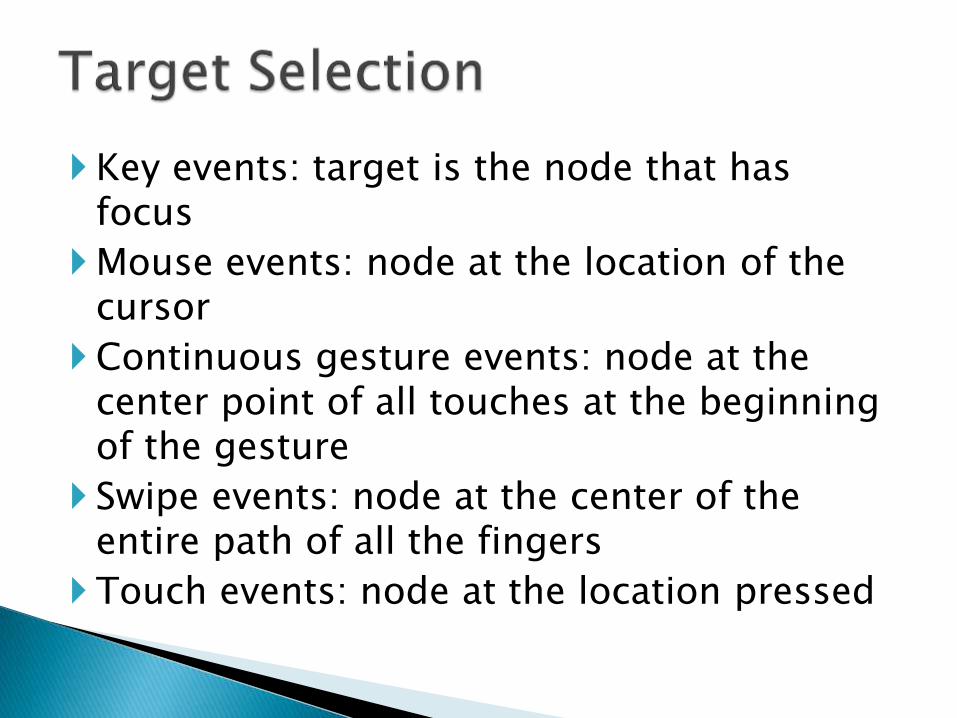
Key events: target is the node that has focus
Mouse events: node at the location of the cursor
Continuous gesture events: node at the center point of all touches at the beginning of the gesture
Swipe events: node at the center of the entire path of all the fingers
Touch events: node at the location pressed
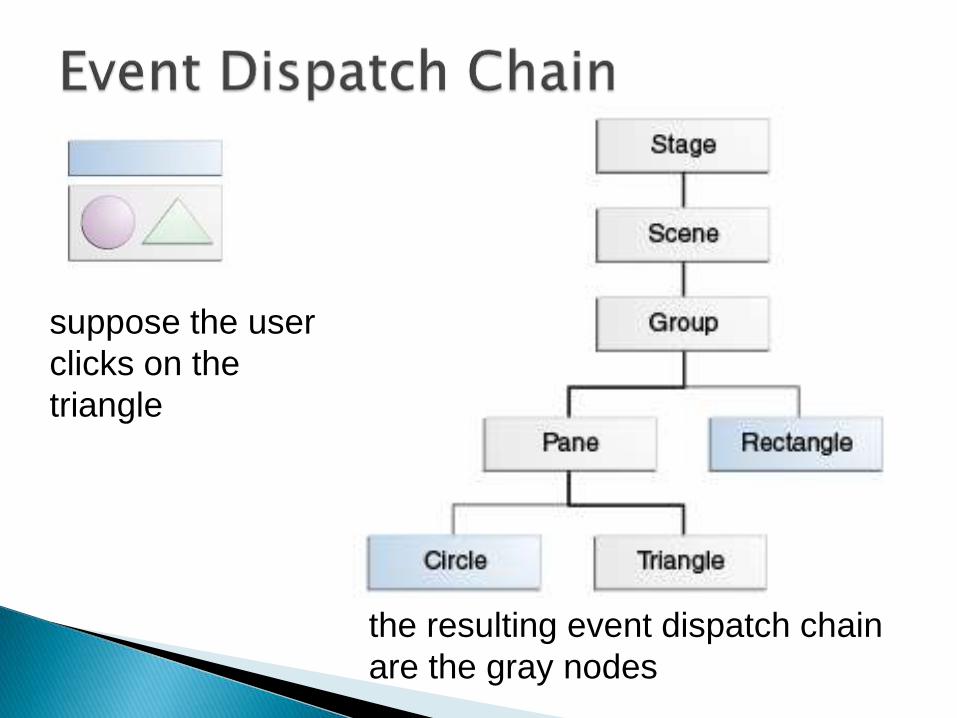
suppose the user
clicks on the
triangle
the resulting event dispatch chain
are the gray nodes
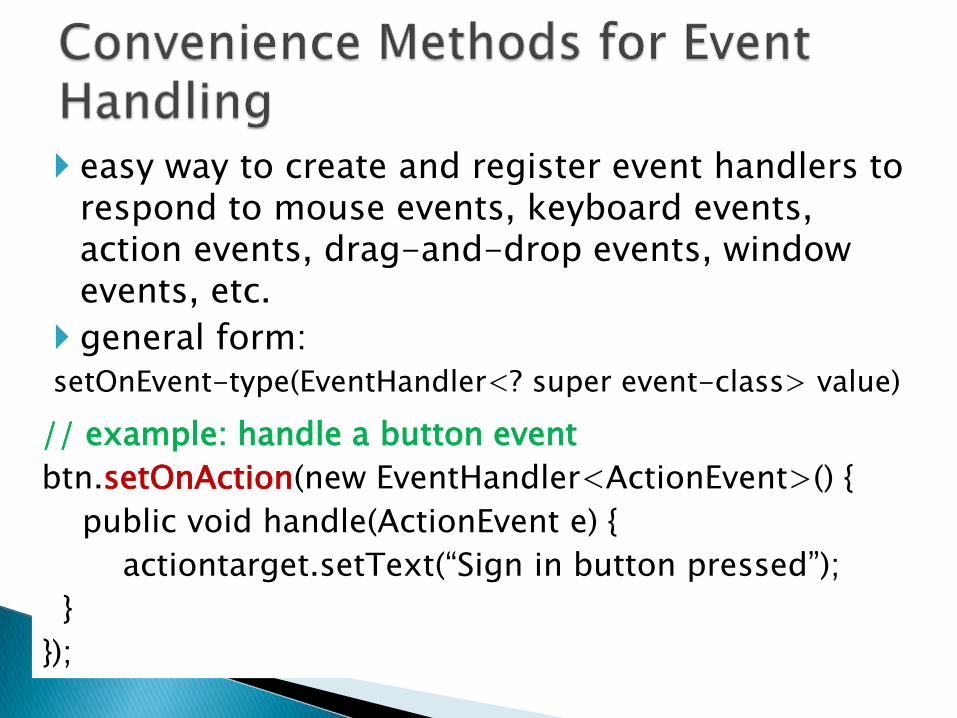
easy way to create and register event handlers to respond to mouse events, keyboard events, action events, drag-and-drop events, window events, etc.
general form: setOnEvent-type(EventHandler<? super event-class> value)
// example: handle a button event
btn.setOnAction(new EventHandler<ActionEvent>() {
public void handle(ActionEvent e) {
actiontarget.setText(“Sign in button pressed”);
}
});
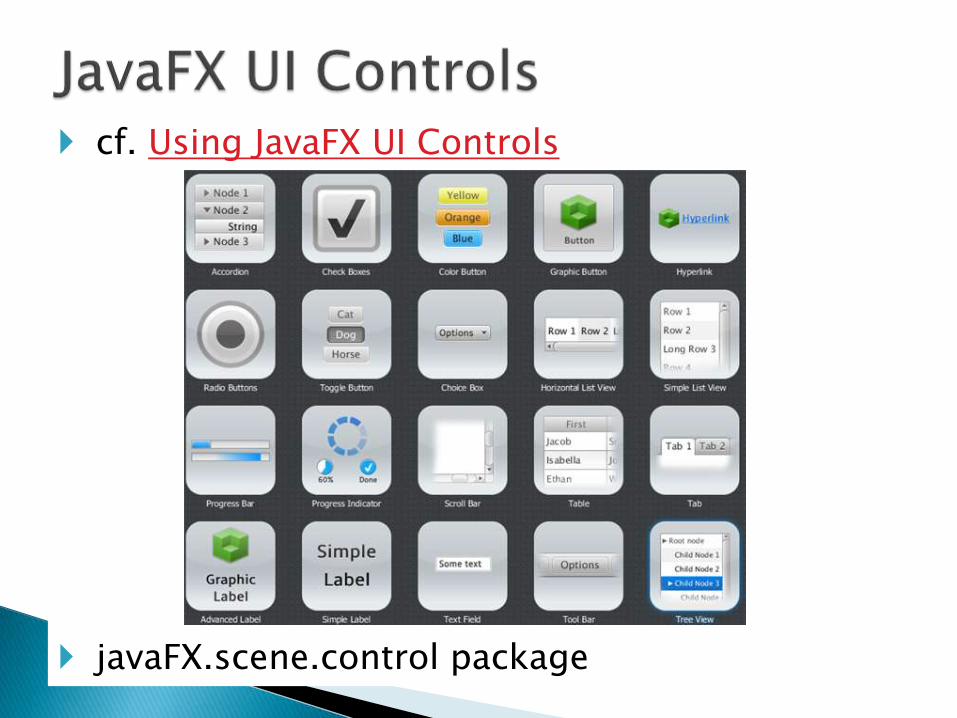
cf. Using JavaFX UI Controls
javaFX.scene.control package
Design a GUI that displays the following:
top face of a six-sided Die
Button that, when clicked, rolls the Die
Then add the ability for the user to input the number of sides desired (could use JOptionPane for this)