Embed Size (px)
Citation preview
Jane Tregenza Book Tutorial
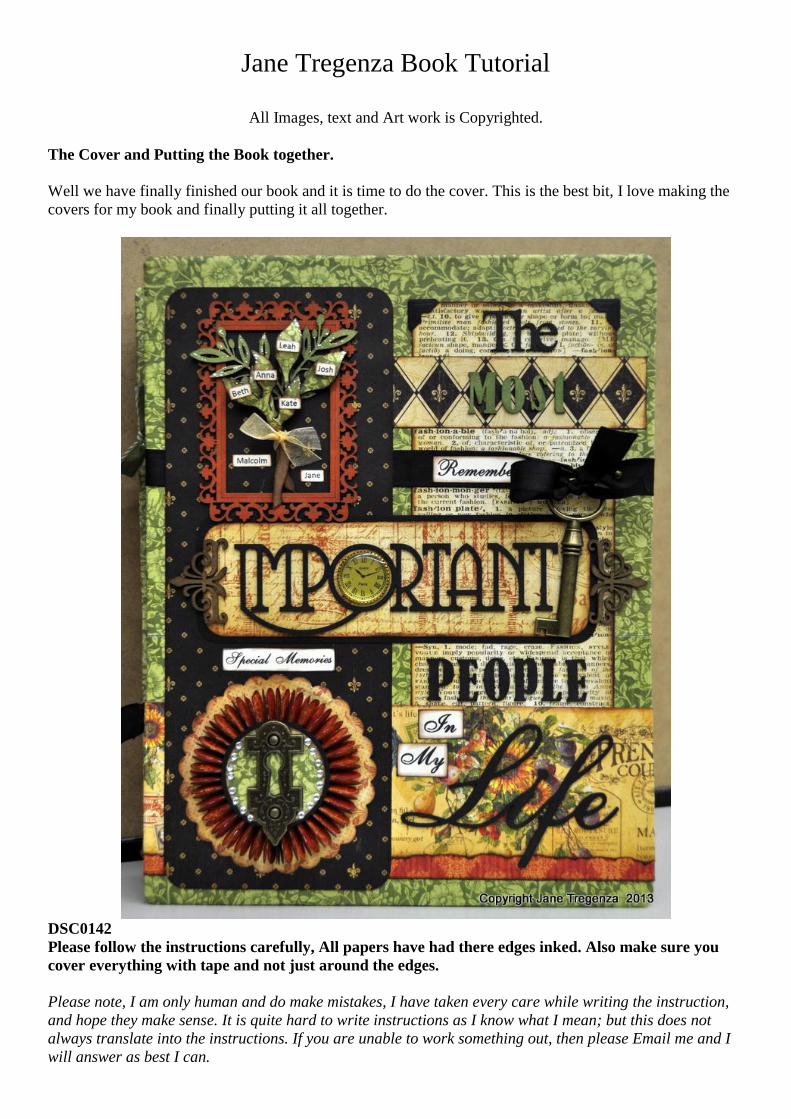
All Images, text and Art work is Copyrighted. The Cover and Putting the Book together. Well we have finally finished our book and it is time to do the cover. This is the best bit, I love making the covers for my book and finally putting it all together.
DSC0142 Please follow the instructions carefully, All papers have had there edges inked. Also make sure you cover everything with tape and not just around the edges. Please note, I am only human and do make mistakes, I have taken every care while writing the instruction, and hope they make sense. It is quite hard to write instructions as I know what I mean; but this does not always translate into the instructions. If you are unable to work something out, then please Email me and I will answer as best I can.
Materials Used Graphic 45 Print Papers G4500630 Sunflower x 3 G4500627 French Country G4500630 Promenade G4500629 Grandeur G4500079 Haute Couture G4500631 Rendezvous G4500546 Ornate Metal Key Holes Imaginarium Designs IDT0026 Kerri flourish Tiny IDS0013 Embellishment 4 Custom Designed Words Collections Chipboard Tree Shapes Stanislaus Imports Key and Clock Kaiser Craft Rhinestones Vandoros Ribbons Tim Holtz Distress inks – Peeled Paint and Vintage Photo Colour Box Inks – Dark Brown – Lime pastel Instructions for putting the book together: First up, take all the tags and mini books out of all your pages.
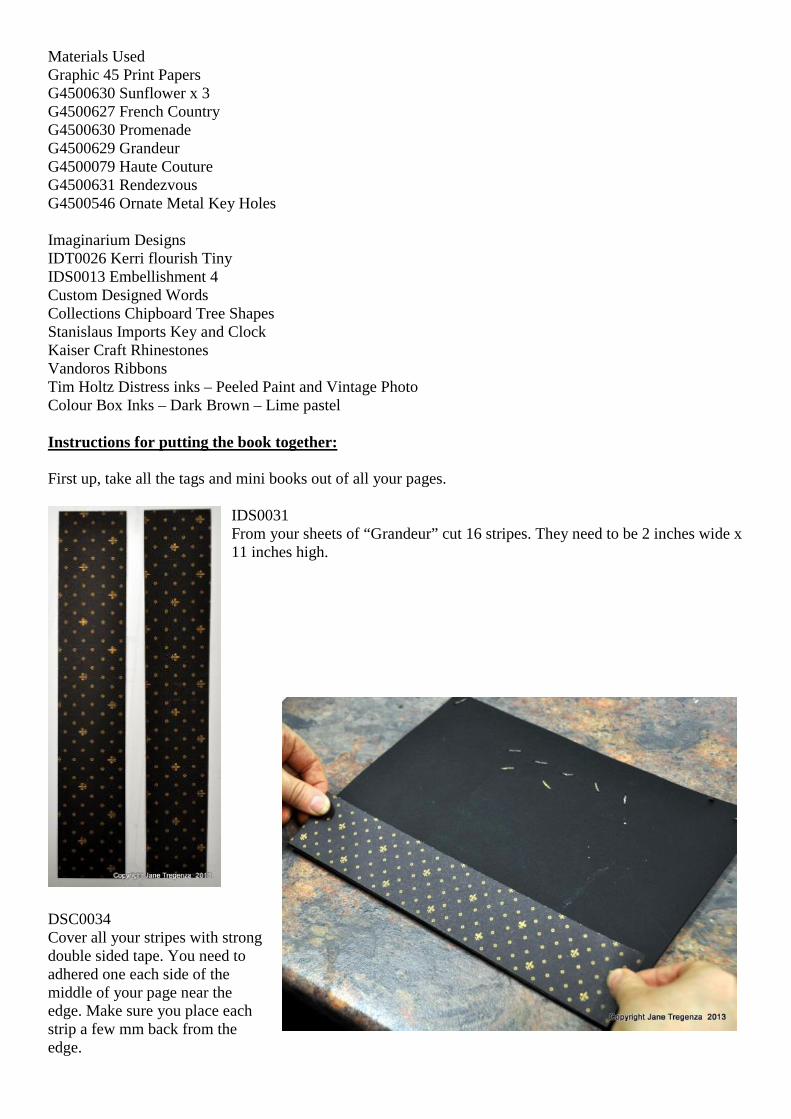
IDS0031 From your sheets of “Grandeur” cut 16 stripes. They need to be 2 inches wide x 11 inches high.
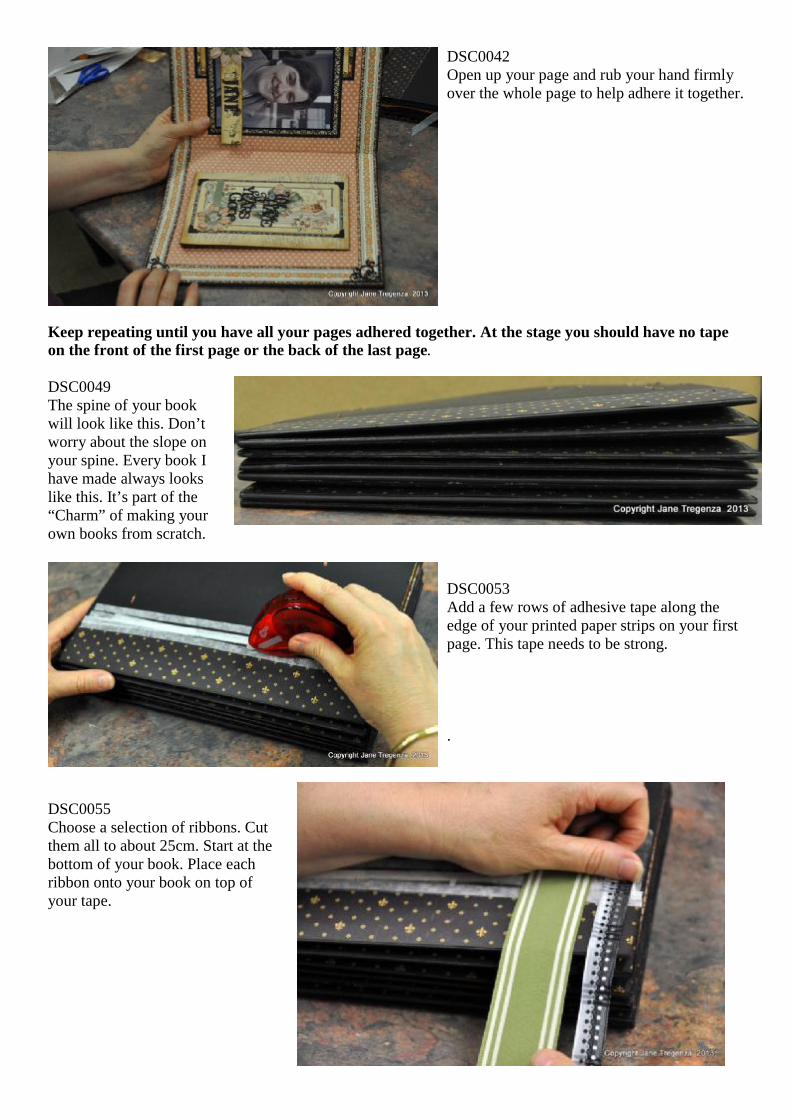
DSC0034 Cover all your stripes with strong double sided tape. You need to adhered one each side of the middle of your page near the edge. Make sure you place each strip a few mm back from the edge.

DSC0036 All your pages should look like this. Now you need to sort out your pages and work out the order in which you want them to go into your book.
DSC0044 You need to place double sided tape on the back of the first page. It needs to go on the back and not the front. This is important; you will be putting tape on the front latter. Completely cover the page to the edge of your print paper strips. Don’t remove all the backing of your tape just yet. Just fold back a little bit.
DSC0041 Now you need to adhere the front of your second page onto the back of your first page. It is important that your spines line up. Your page also needs to line up at the top and bottom edge. Once you are happy with how it fits, you can remove the rest of the backing of the tape.
DSC0042 Open up your page and rub your hand firmly over the whole page to help adhere it together.
Keep repeating until you have all your pages adhered together. At the stage you should have no tape on the front of the first page or the back of the last page. DSC0049 The spine of your book will look like this. Don’t worry about the slope on your spine. Every book I have made always looks like this. It’s part of the “Charm” of making your own books from scratch.
DSC0053 Add a few rows of adhesive tape along the edge of your printed paper strips on your first page. This tape needs to be strong. .
DSC0055 Choose a selection of ribbons. Cut them all to about 25cm. Start at the bottom of your book. Place each ribbon onto your book on top of your tape.

DSC0056 I used 7 different ribbons. I needed 12 in total. Some of them I used twice. Turn your book over and make sure all the ribbons are out from under your book.
DSC0060 Place adhesive tape on the back of your book, the same as you did for the front. Place your hand on the bottom end of your book and place a bit of pressure on it forcing it down. Starting at the bottom, wrap each ribbon from the front around your spine and adhere it to the back cover over the adhesive.
DSC0063 For something different I added another ribbon on the back in line with the ribbon on the front. This let me tie a knot in the middle of my spine to add a bit of interest. I did this twice.
DSC0064 Your spine should now look like this. You can put your book aside and we will start working on the cover.
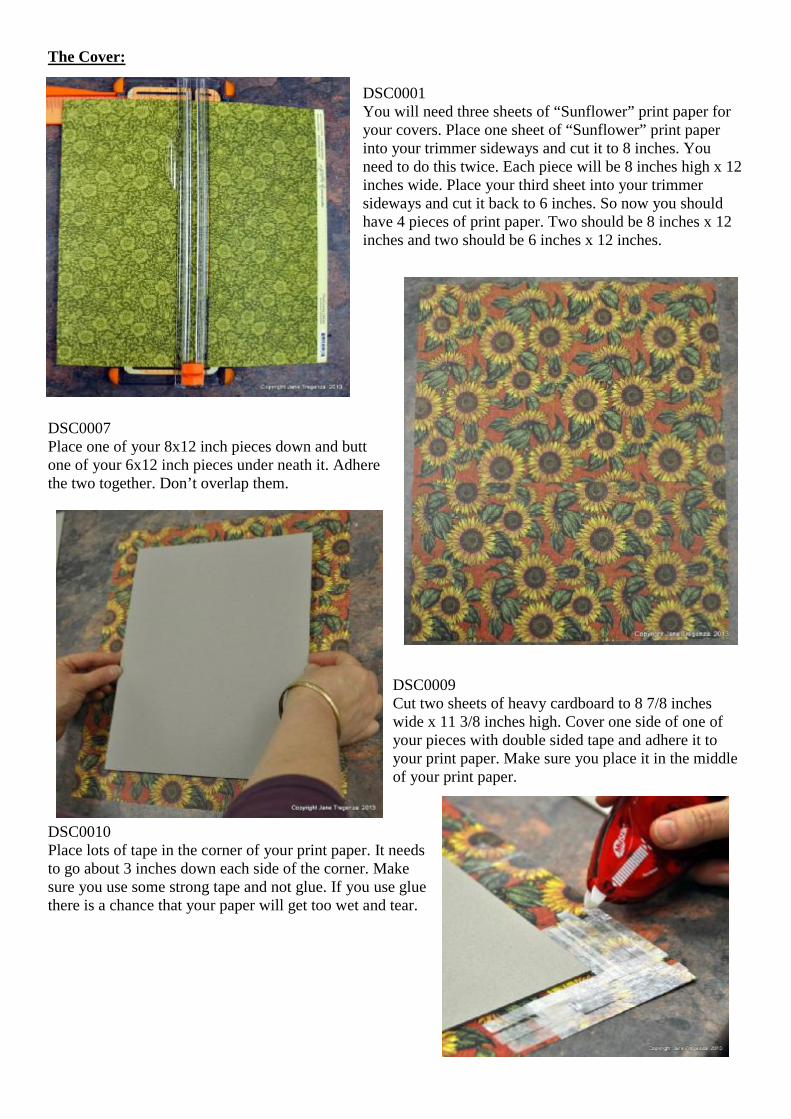
The Cover: DSC0001 You will need three sheets of “Sunflower” print paper for your covers. Place one sheet of “Sunflower” print paper into your trimmer sideways and cut it to 8 inches. You need to do this twice. Each piece will be 8 inches high x 12 inches wide. Place your third sheet into your trimmer sideways and cut it back to 6 inches. So now you should have 4 pieces of print paper. Two should be 8 inches x 12 inches and two should be 6 inches x 12 inches.
DSC0007 Place one of your 8x12 inch pieces down and butt one of your 6x12 inch pieces under neath it. Adhere the two together. Don’t overlap them.
DSC0009 Cut two sheets of heavy cardboard to 8 7/8 inches wide x 11 3/8 inches high. Cover one side of one of your pieces with double sided tape and adhere it to your print paper. Make sure you place it in the middle of your print paper.
DSC0010 Place lots of tape in the corner of your print paper. It needs to go about 3 inches down each side of the corner. Make sure you use some strong tape and not glue. If you use glue there is a chance that your paper will get too wet and tear.
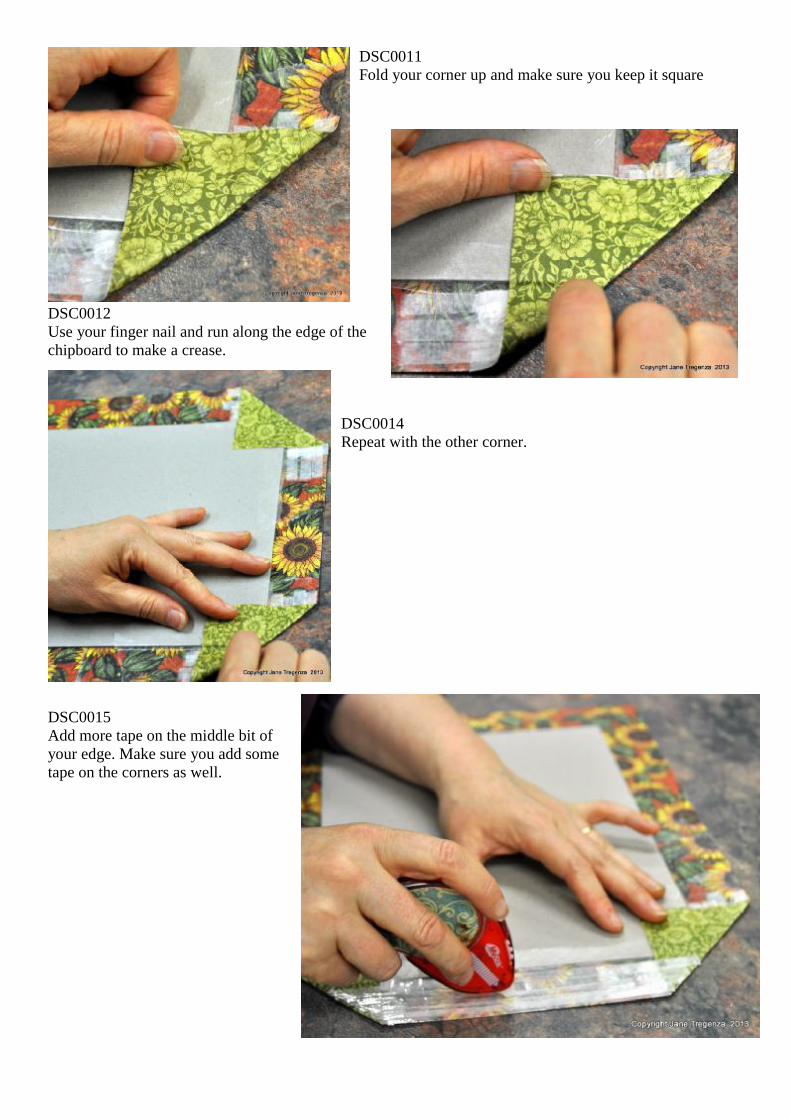
DSC0011 Fold your corner up and make sure you keep it square
DSC0012 Use your finger nail and run along the edge of the chipboard to make a crease.
DSC0014 Repeat with the other corner.
DSC0015 Add more tape on the middle bit of your edge. Make sure you add some tape on the corners as well.
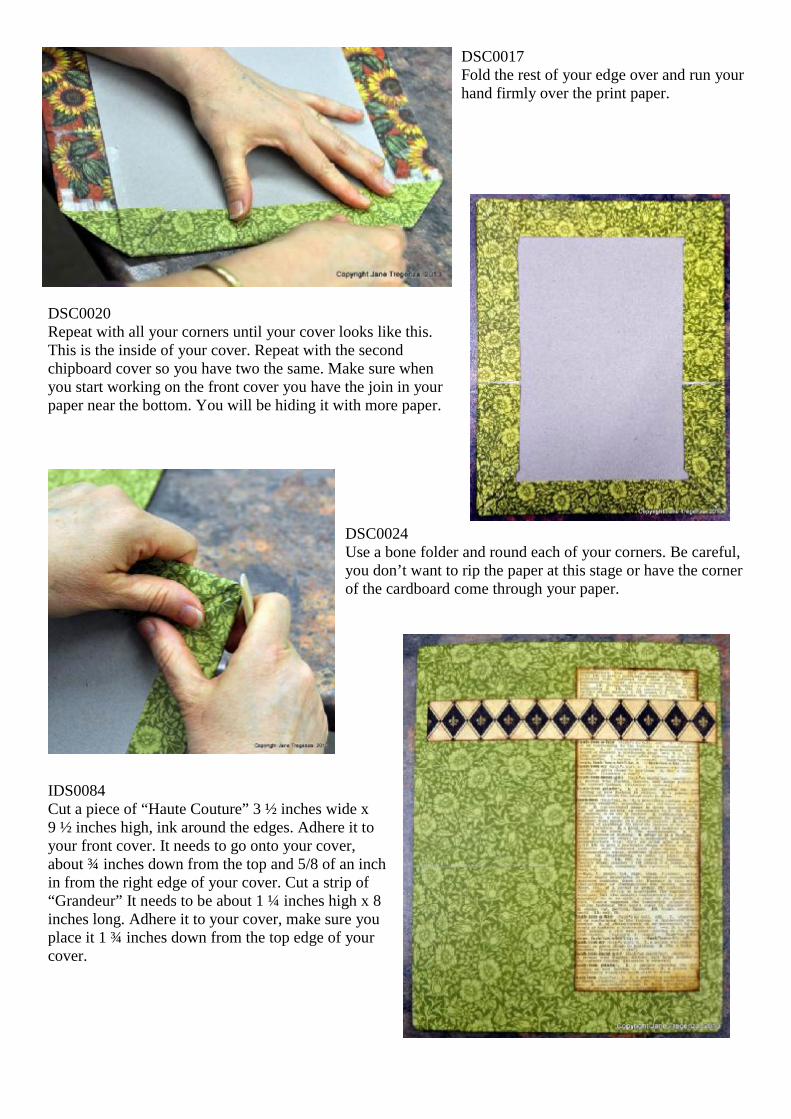
DSC0017 Fold the rest of your edge over and run your hand firmly over the print paper.
DSC0020 Repeat with all your corners until your cover looks like this. This is the inside of your cover. Repeat with the second chipboard cover so you have two the same. Make sure when you start working on the front cover you have the join in your paper near the bottom. You will be hiding it with more paper.
DSC0024 Use a bone folder and round each of your corners. Be careful, you don’t want to rip the paper at this stage or have the corner of the cardboard come through your paper.
IDS0084 Cut a piece of “Haute Couture” 3 ½ inches wide x 9 ½ inches high, ink around the edges. Adhere it to your front cover. It needs to go onto your cover, about ¾ inches down from the top and 5/8 of an inch in from the right edge of your cover. Cut a strip of “Grandeur” It needs to be about 1 ¼ inches high x 8 inches long. Adhere it to your cover, make sure you place it 1 ¾ inches down from the top edge of your cover.
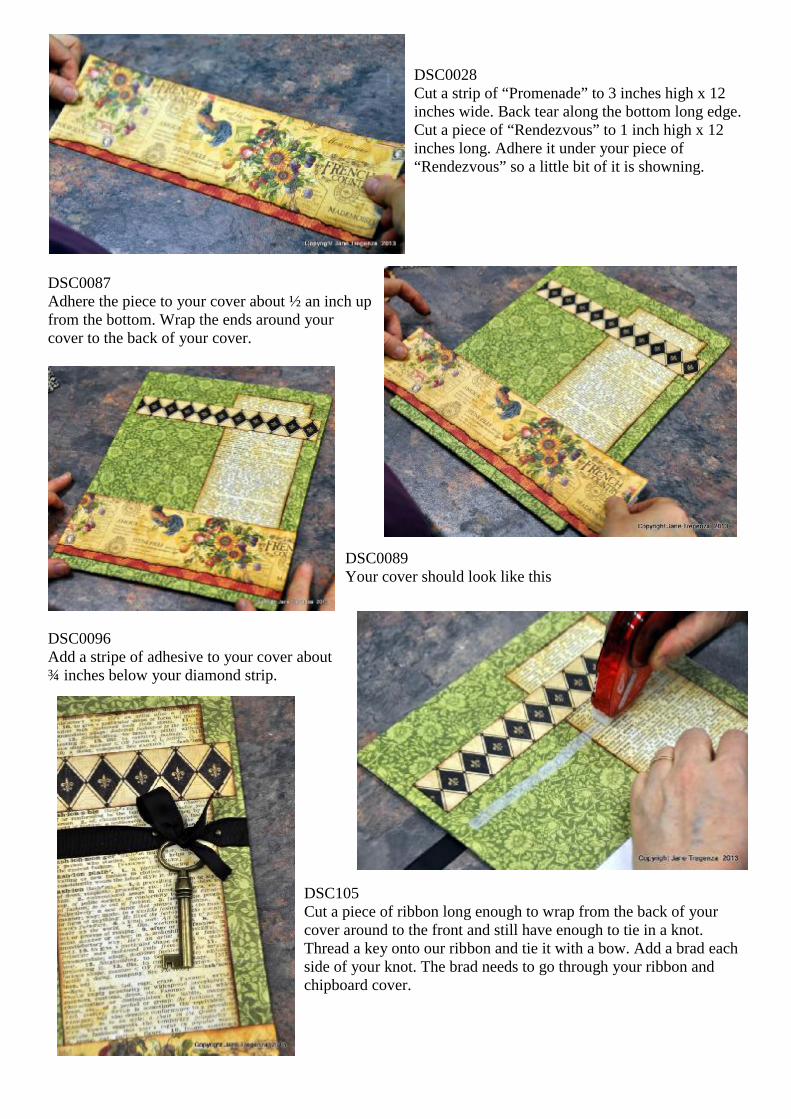
DSC0028 Cut a strip of “Promenade” to 3 inches high x 12 inches wide. Back tear along the bottom long edge. Cut a piece of “Rendezvous” to 1 inch high x 12 inches long. Adhere it under your piece of “Rendezvous” so a little bit of it is showning.
DSC0087 Adhere the piece to your cover about ½ an inch up from the bottom. Wrap the ends around your cover to the back of your cover.
DSC0089 Your cover should look like this
DSC0096 Add a stripe of adhesive to your cover about ¾ inches below your diamond strip.
DSC105 Cut a piece of ribbon long enough to wrap from the back of your cover around to the front and still have enough to tie in a knot. Thread a key onto our ribbon and tie it with a bow. Add a brad each side of your knot. The brad needs to go through your ribbon and chipboard cover.

DSC0107 Cut a piece of “Grandeur” 4 inches wide x 10 ½ inches high. Round all four corners and adhere it to your cover. It needs to go on ½ inch down from the top of your cover. It also needs to be 3/8 o f an inch in from the right edge of your cover.
DSC0094 In an Imaginarium Designs chipboard frame with Versa Colour – Paprika.
DSC00119 Glue your frame onto your cover. Cut a piece of “Rendezvous” 2 inches high x 6 ¾ inches wide. Round all four corners, cut a mat from black cardstock and round all four corners. Adhere the two pieces together and adhere it to your cover just under your frame. Now we are going to put our covers on before we work on the front any more. You need to hide the join on your back cover at this point. Cut a strip of “Grandeur” It needs to be about 1 ¼ inches high x 12 inches long. Adhere it to the front of your back cover, make sure you cover the join in your papers and wrap the ends around to the back of your cover (inside)
DS0111 Place tape on the front of your first page. The tape needs to go over the ribbons but not to the edge of your page (near the spine) Place the tape about an 1 ½ in from the spine. Only take a bit of the tape off. Place your cover face down on the table and carefully place your book onto it.

DSC0112 Open up your first page and check that the page is lined up nicely on your cover. If you are not happy with the placement you can remove it and try again Once you are happy with it, remove the rest of the backing of your tape and press down firmly.
DSC0116 Cover the back of your last page. Do the same as the front one. Place the adhesive onto the ribbons and all over the rest of your page, make sure you are about 1 ½ inches away from the spine of your pages. Again only remove a little bit of the adhesive backing, so you can place it on and line it up. Again if you are not happy with your placement you will be able to remove it and try again. I find you need to right over the book so you can see what you are doing.
DSC0117 Open up the last page of your book and check that your placement is right Once you are happy remove the rest of your backing. Now back to the cover.
DS0123 Use two chipboard branch pieces and cover them with some of your left over pieces of “Sunflower” Trim the stem off and glue the smaller one on top of your larger one. Tie a piece of ribbon around your stem and tie it in a bow. Glue them onto our cover and in the frame. DSC0129 Ink two Imaginarium Designs chipboard tiny Kerry flourishes with Peeled Paint Distress ink, go over the top with a Colour box Lime Pastel ink pad. Trim them back so they fit under your branches and hang out of your frame.
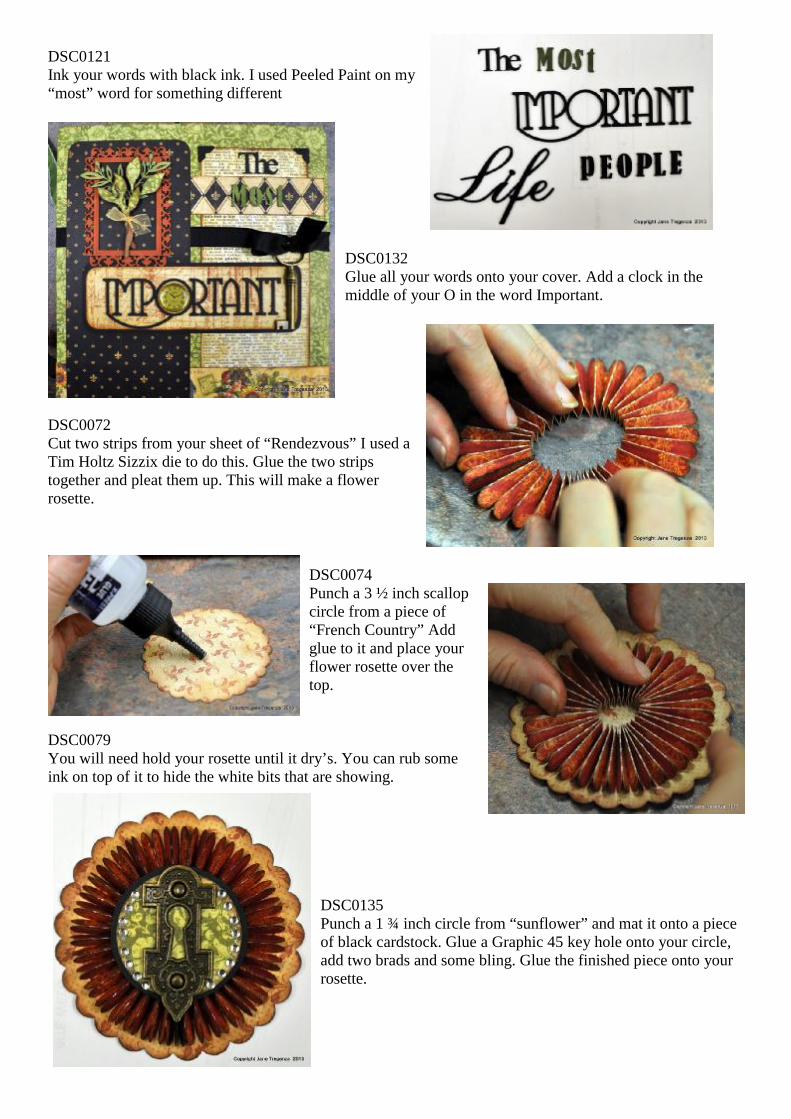
DSC0121 Ink your words with black ink. I used Peeled Paint on my “most” word for something different
DSC0132 Glue all your words onto your cover. Add a clock in the middle of your O in the word Important.
DSC0072 Cut two strips from your sheet of “Rendezvous” I used a Tim Holtz Sizzix die to do this. Glue the two strips together and pleat them up. This will make a flower rosette.
DSC0074 Punch a 3 ½ inch scallop circle from a piece of “French Country” Add glue to it and place your flower rosette over the top.
DSC0079 You will need hold your rosette until it dry’s. You can rub some ink on top of it to hide the white bits that are showing.
DSC0135 Punch a 1 ¾ inch circle from “sunflower” and mat it onto a piece of black cardstock. Glue a Graphic 45 key hole onto your circle, add two brads and some bling. Glue the finished piece onto your rosette.
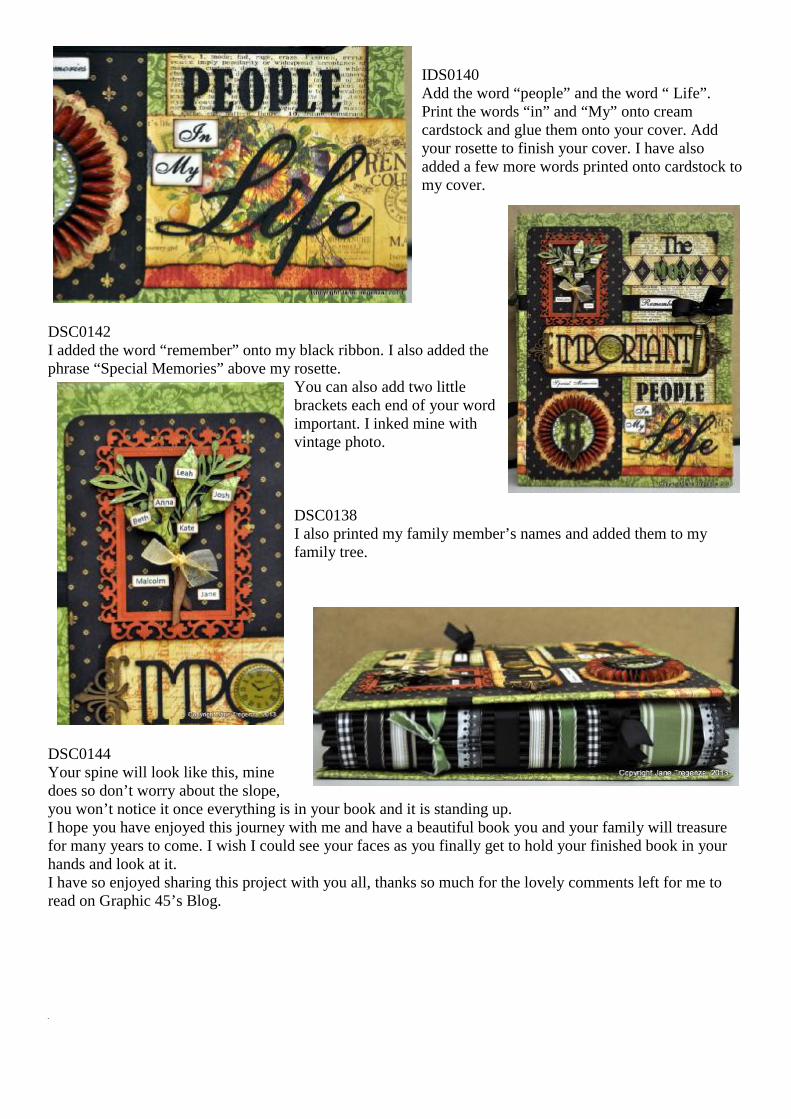
IDS0140 Add the word “people” and the word “ Life”. Print the words “in” and “My” onto cream cardstock and glue them onto your cover. Add your rosette to finish your cover. I have also added a few more words printed onto cardstock to my cover.
DSC0142 I added the word “remember” onto my black ribbon. I also added the phrase “Special Memories” above my rosette.
You can also add two little brackets each end of your word important. I inked mine with vintage photo. DSC0138 I also printed my family member’s names and added them to my family tree.
DSC0144 Your spine will look like this, mine does so don’t worry about the slope, you won’t notice it once everything is in your book and it is standing up. I hope you have enjoyed this journey with me and have a beautiful book you and your family will treasure for many years to come. I wish I could see your faces as you finally get to hold your finished book in your hands and look at it. I have so enjoyed sharing this project with you all, thanks so much for the lovely comments left for me to read on Graphic 45’s Blog. DS