Embed Size (px)
Citation preview

iRobot Create 2 Tethered Driving Using Serial Communication and Python
Nick Saxton April 2, 2015
Executive Summary: This application note will detail the necessary steps to write a simple Python script to control an iRobot Create 2 through serial port communication. Following an introduction to the topic and the technology used, a detailed walkthrough will be provided showing the reader how to write a user controlled tethered driving script. This walkthrough will start with a blank file and show all of the required steps to reach the final script. Additionally, automated driving code will be discussed, including comments on how it is used in the Automated 3D Environment Modeling project sponsored by Dr. Daniel Morris of the Michigan State University 3D Vision Lab1.
Keywords: iRobot Create Tethered Driving Serial Communication2 Python Programming
1

Introduction:
This section will introduce the technology and concepts used in this application note. First, an overview of the iRobot Create 2 Programmable Robot will be provided. Then, the Python programming language will be examined, including a brief history of the language and some of its key features. Finally, serial port communication will be discussed. Following this introduction, the objective of this application note will be looked at.
The iRobot Create 2 Programmable Robot is a fully programmable version of iRobot’s popular Roomba vacuum cleaning robot. It weighs under 8 lbs, measures a little over 13 inches in diameter and approximately 3.5 inches tall, and has a serial port on its top side, accessible after removing the top cover. An image of the Create 2 can be seen below in Figure 1.
Figure 1. iRobot Create 2 Programmable Robot
The Create 2 is powered by a rechargeable battery. The battery can be charged from
dead to full in approximately 3 hours. Two methods of charging are available, either the robot can be docked to the provided charging station or it can be charged in a more traditional way by plugging a power adapter into it. The battery powers multiple actuators on the robot, including wheel motors, a speaker, and LED lights.
The most compelling feature of the Create 2 is the ability to communicate with it through the aforementioned serial port. A computer can be connected to the robot using a provided USB to serial port cable, providing two-way communication at TTL (0-5V) levels. Commands can be sent through this connection in compliance with the iRobot Roomba Open Interface. Certain serial port settings must be used in order to successfully communicate with the Create 2. First, the robot can communicate at two possible baud rates: 115200 or 19200. Additionally, each communication contains 8 data bits, 1 stop bit, and has no flow control or parity.
2
The Open Interface (OI) has four operating modes: off, passive, safe, and full. By default, the OI is in off mode. Therefore, whenever the robot has finished charging or the on button has been pressed, it enters this mode. If the Spot, Clean, or Seek Dock buttons are pressed, the robot enters passive mode. Passive mode allows for sensor data to be requested through the serial port, but no commands can be sent that changes the actuator parameters, such as wheel speed. On the other hand, safe mode provides full control of the robot through the serial port with a few exceptions. In safe mode, the forward cliff detection and wheel drop sensors are active, meaning that the robot will stop in situations that trigger those sensors, regardless of what commands have been provided to it. Additionally, the robot cannot be charged while in safe mode. If any of the previously mentioned exceptions occurs while in safe mode, the robot reverts to passive mode. The final mode of operation is full mode. Full mode works similarly to safe mode but with the previously mentioned exceptions deactivated.
The OI provides the programmer with a multitude of commands that can be sent to the Create 2. These commands can be seen in detail by looking at the iRobot Create 2 Open Interface (OI) Specification sheet which is available on the iRobot website (link provided in the References section)2. Several of these commands will be used in the Procedure section of this document and will be given brief explanations at that time. These commands can be sent through the serial port in a few ways, most notably by either using a serial terminal such as Realterm (link in the References section)3 or by writing a program in a variety of languages. For the purposes of this application note, serial port communication is done using the Python programming language.
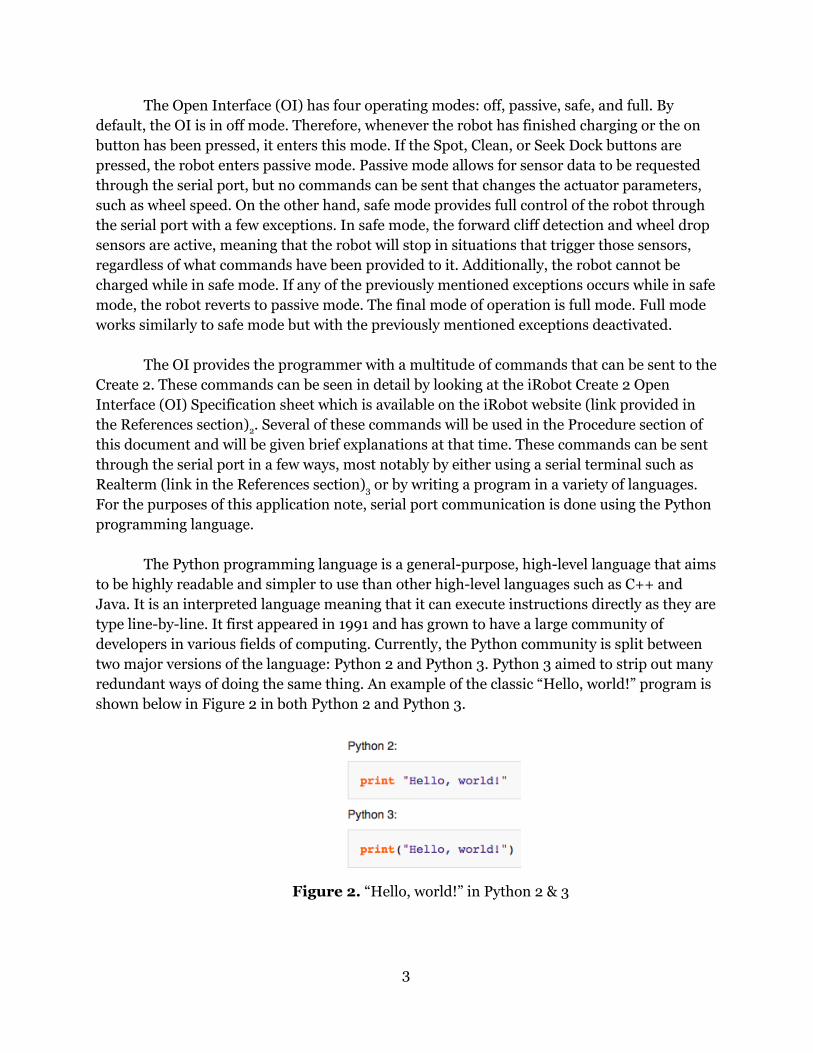
The Python programming language is a general-purpose, high-level language that aims
to be highly readable and simpler to use than other high-level languages such as C++ and Java. It is an interpreted language meaning that it can execute instructions directly as they are type line-by-line. It first appeared in 1991 and has grown to have a large community of developers in various fields of computing. Currently, the Python community is split between two major versions of the language: Python 2 and Python 3. Python 3 aimed to strip out many redundant ways of doing the same thing. An example of the classic “Hello, world!” program is shown below in Figure 2 in both Python 2 and Python 3.
Figure 2. “Hello, world!” in Python 2 & 3
3
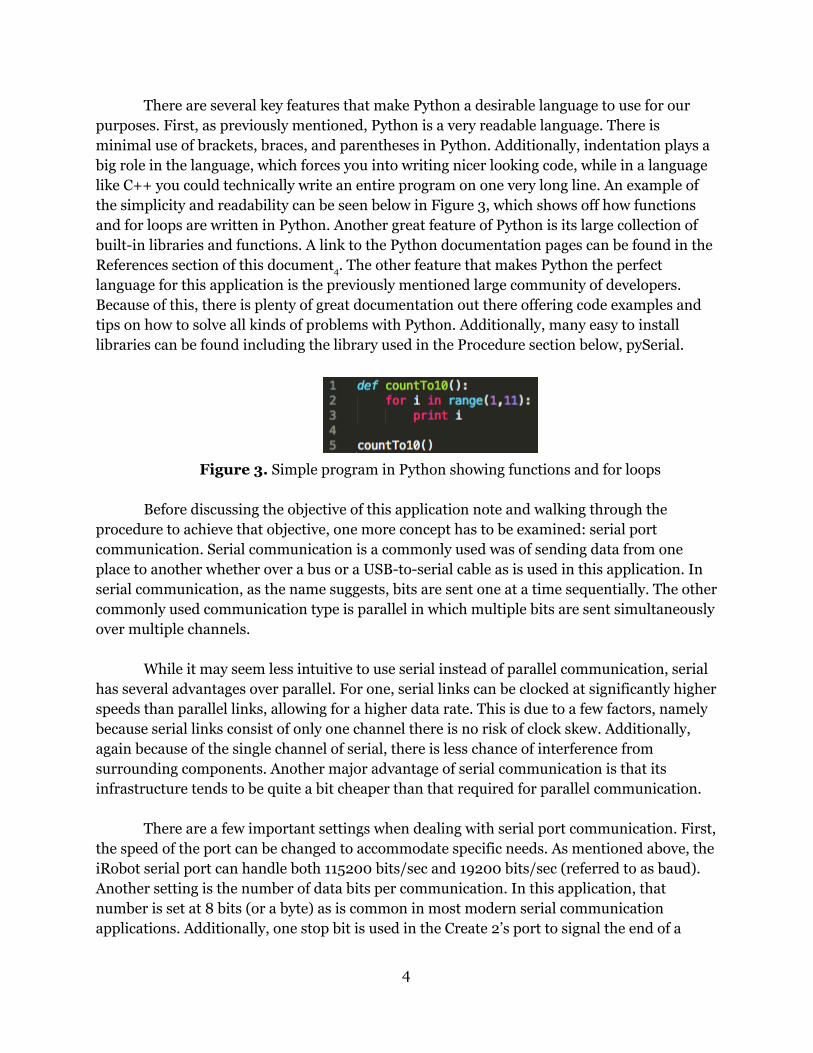
There are several key features that make Python a desirable language to use for our purposes. First, as previously mentioned, Python is a very readable language. There is minimal use of brackets, braces, and parentheses in Python. Additionally, indentation plays a big role in the language, which forces you into writing nicer looking code, while in a language like C++ you could technically write an entire program on one very long line. An example of the simplicity and readability can be seen below in Figure 3, which shows off how functions and for loops are written in Python. Another great feature of Python is its large collection of built-in libraries and functions. A link to the Python documentation pages can be found in the References section of this document4. The other feature that makes Python the perfect language for this application is the previously mentioned large community of developers. Because of this, there is plenty of great documentation out there offering code examples and tips on how to solve all kinds of problems with Python. Additionally, many easy to install libraries can be found including the library used in the Procedure section below, pySerial.
Figure 3. Simple program in Python showing functions and for loops
Before discussing the objective of this application note and walking through the
procedure to achieve that objective, one more concept has to be examined: serial port communication. Serial communication is a commonly used was of sending data from one place to another whether over a bus or a USB-to-serial cable as is used in this application. In serial communication, as the name suggests, bits are sent one at a time sequentially. The other commonly used communication type is parallel in which multiple bits are sent simultaneously over multiple channels.
While it may seem less intuitive to use serial instead of parallel communication, serial
has several advantages over parallel. For one, serial links can be clocked at significantly higher speeds than parallel links, allowing for a higher data rate. This is due to a few factors, namely because serial links consist of only one channel there is no risk of clock skew. Additionally, again because of the single channel of serial, there is less chance of interference from surrounding components. Another major advantage of serial communication is that its infrastructure tends to be quite a bit cheaper than that required for parallel communication.
There are a few important settings when dealing with serial port communication. First,
the speed of the port can be changed to accommodate specific needs. As mentioned above, the iRobot serial port can handle both 115200 bits/sec and 19200 bits/sec (referred to as baud). Another setting is the number of data bits per communication. In this application, that number is set at 8 bits (or a byte) as is common in most modern serial communication applications. Additionally, one stop bit is used in the Create 2’s port to signal the end of a
4

single communication to or from the port. The last two important settings for our needs are parity and flow control. Parity allows for error detection and is not used in this application. Flow control is also not used in this application since no situations will arise in which communication would have to be paused and restarted.
Objective: Now that the important concepts utilized in this application note have been introduced
and discussed, the objective (or the final outcome of the Procedure section) can be detailed. Upon completion of the following walkthrough, you should have a Python program that provides manual, tethered control of an iRobot Create 2 robot. Commands that will be available to be sent to the robot are as follows:
● passive - causes Create 2 to enter passive mode ● safe - causes Create 2 to enter safe mode ● full - causes Create 2 to enter full mode ● clean - causes Create 2 to begin cleaning the area ● dock - causes Create 2 to find its charging dock ● reset - resets the Create 2, which changes the mode to off ● beep - causes Create 2 to produce beep sound from its speaker ● up/down - causes Create 2 to drive forward/backward ● left/right - causes Create 2 to rotate counterclockwise/clockwise
The final program will run in a window, displaying the commands in the format that
the Create 2 accepts.
The objective of this application note is not to teach basic Python or basic computing so some knowledge of these things is expected. Additionally, though not explicitly covered in the Procedure section below, an additional section discussing automated driving will offer some thoughts on how one would go about taking the code that will be written here and reformatting it for non-user controlled driving.
5

Procedure:
This section is subdivided into three parts: initial setup, programming, and testing.
The initial setup will cover installing the required software and finding the serial port number. The programming portion will provide a step-by-step walkthrough of the code that is required to achieve the application objective. The testing subsection will give the reader a process through which they can ensure that the code they have written works properly.
This procedure assumes one is programming on a computer running a recent version of Windows (7, 8, 8.1) and does not already have Python installed.
A. Initial Setup 1. Install Python - Go to https://www.python.org and hover your mouse above
Downloads in the menu bar. Then click the Python 2.7.9 (or whatever the most current Python 2 version is at the time of reading) button in the menu that drops down in the section titled Download for Windows. You will be asked to save a Windows Installer file. Once the download is complete, click through the installer. Keeping all of the default options should be fine. Upon completion of the install, you should have a new program called IDLE. Open this up as it will be used throughout the programming section.
2. Install pySerial - The only other required download for this application is pySerial, a library developed to provide easy serial communication in Python programs. Go to pyserial.sourceforge.net and click the link for Download Page towards the top of the page. It should bring you to a new page featuring a few download options. Choose the .exe file that says “for Python 2.x” below it. Once the download has completed, run the installer (if it fails to install, run it again as administrator).
3. Find the Create 2’s serial port number - The final step of the initial setup is to find the Create 2’s serial port number. First, open up the Windows Device Manager this can be done most easily by click the Start menu and searching for “device manager”. The Device Manager window can be seen in Figure 4 below. In the Device Manager, click arrow next to where it says Ports (COM & LPT) to view its listing. Make a mental note of what you see in the Ports list. At this point, connect your computer to the Create 2 using the provided USB-to-serial cable. In the menu of the Device Manager, click Action, then click Scan for Hardware Changes in the dropdown menu. A new item should be in the Ports list now, the port name we are looking for is found at the end (EX: COM3). Write this port number down somewhere as we will need it shortly.
6

Figure 4. Device Manager on Windows
B. Programming
1. Imports and global variables - First, in IDLE, click File in the menu bar, then click New File. A new window should appear. At the very top of this new file, add the lines shown in Figure 5 below. The first three lines import tkInter (Python’s default GUI library), struct from the Python default libraries, and serial from the newly install pySerial library. The next three lines define some global variables that we will be using later. The connection variable will hold the serial connection object and the other two variables will be used to control the wheel velocities of the robot. Now click Run in the menu bar, then click Run Module. You should be prompted to save the file, choose an appropriate name and ensure it is saved with a .py file extension. The main IDLE Python shell window should come to the front of your open windows and should display nothing. If an error message appears then the most likely reason is that pySerial was not installed correctly.
Figure 5. Imports and global variables
7

2. Send command functions - The next step is to write two functions that will be responsible for sending commands to the Create 2. These functions can be seen in Figure 6 below. The first function, sendCommandASCII, takes in an ASCII command string, splits it up and then calls the second function, sendCommandRaw, to send it over the serial connection. sendCommandRaw takes in the raw form of a command and sends it to the robot before printing the sent command out to the Python shell and program window.
Figure 6. Send command functions
3. Handling keyboard events - The function to handle keyboard events is
fairly long. The first portion of the function can be seen in Figure 7 below. First, the pressed key is captured and converted to uppercase and a motionChange variable is initialized to false. Then, depending on which key was pressed, either an ASCII command is sent to the robot or some variables are changed. The second part of this function specifically handles drive commands and can be seen in Figure 8 below. First, the velocity and rotation are calculated before computing each wheel’s velocity. Then a command to send this information to the robot is packaged and sent.
8

Figure 7. First part of keyboard event function
Figure 8. Second part of keyboard event function
4. Connect and quit functions - The final two functions that need to be written
are the connect function, which is responsible for connecting the program to the Create 2, and the quit function, which simply exits the program. The functions are shown below in Figure 9. They are fairly straightforward. The important thing to note here is that while the below figure shows the port variable as “COM3”, you will use the port number you found at the end of subsection A.
9

Figure 9. Connect and quit functions
5. Main program - The final programming portion is the main body of the
program. The code for this part is shown in Figure 10 below. First, some static variables related to the callbackKey function are set. Then, the program GUI is set up. Finally, the main loop of the program is started.
Figure 10. Main body code
C. Testing
1. Save and run the module - To begin testing, ensure that the Create 2 is connected to your computer and that you have the correct port number for it. Then, run the module as you did previously. A window should open up with a menu bar consisting of Connect and Quit options, as seen in Figure 11 below.
10

Select the Connect option and you should get a message saying “Connected!”. Then press P followed by S to first enter passive mode and then safe mode. Once the robot is in safe mode, try to move around by using the arrow keys. Pressing the up key once should just barely inch the robot forward, while holding it down should provide continuous power to the wheel motors. Finally, try hitting the spacebar and listen for a beep noise from the robot. To close the program, hit Quit in the menu bar.
Figure 11. The window as seen when the program is first started
11

Conclusion:
You should now have a working Python program capable of connecting to and controlling an iRobot Create 2 robot. Hopefully you learned some things about the Create 2, Python, and serial communication. Additionally, the code written in this application note serves as a perfect base for writing more robot control code.
One example of additional work that could be done on this code is adding automated driving capability which is a crucial part of the Automated 3D Environment Modeling project. Instead of having a GUI window that accepts keyboard commands, such a program would consist of an infinite loop and would include interaction with some kind of sensor capable of detecting objects in front of the robot. Additionally, some kind of navigation algorithm would have be devised in order to move around the environment without hitting obstacles. In the case of the 3D modeling project, the sensor is a Microsoft Kinect RGB-depth camera. The Python robot code uses the middle points of the Kinect’s depth data to calculate how far it can drive before it has to stop and turn.
12

References: 1. 3D Vision Lab - http://www.egr.msu.edu/3dvision/ 2. iRobot Create 2 Open Interface (OI) Specification -
http://www.irobot.com/~/media/MainSite/PDFs/About/STEM/Create/create_2_Open_Interface_Spec.pdf
3. Realterm Serial Terminal - http://realterm.sourceforge.net 4. Python documentation - https://docs.python.org/3/
13