Embed Size (px)
Citation preview

iPad - Exporting a Gedcom File from Ancestry and uploading to the Chart Generator
The Apple operating system on an iPad is not particularly friendly when it comes to saving a text file such
as a gedcom file downloaded from an online website. However, it can be done with the help of a Dropbox
account and following these easy steps.
If you are not already using Dropbox you will need to download the app and set yourself up with a free
account and then you will have the facility to save documents. The Dropbox system is an extremely secure
online space for confidential information, but you can share folders with friends and family if you wish.
1) Whilst you are on the Ancestry website you need to go to ‘Manage Tree’ and export/download a
Gedcom file. Further instruction on how to this are available here:
https://www.my-history.co.uk/Extra_Info/FAQ-Pages/Downloading-a-GEDCOM-File-from-your-Family-
Tree-on-Ancestry.pdf
2) When the Gedcom file downloads to your ipad
it will open in a browser window like this image (left).
3) You will need to highlight the text in the
browser window and copy it.
4) Tap and hold the text to bring up the mini
menu bar (right)
5) Expand the highlighted area to include all
the text.
6) Click ‘Copy’
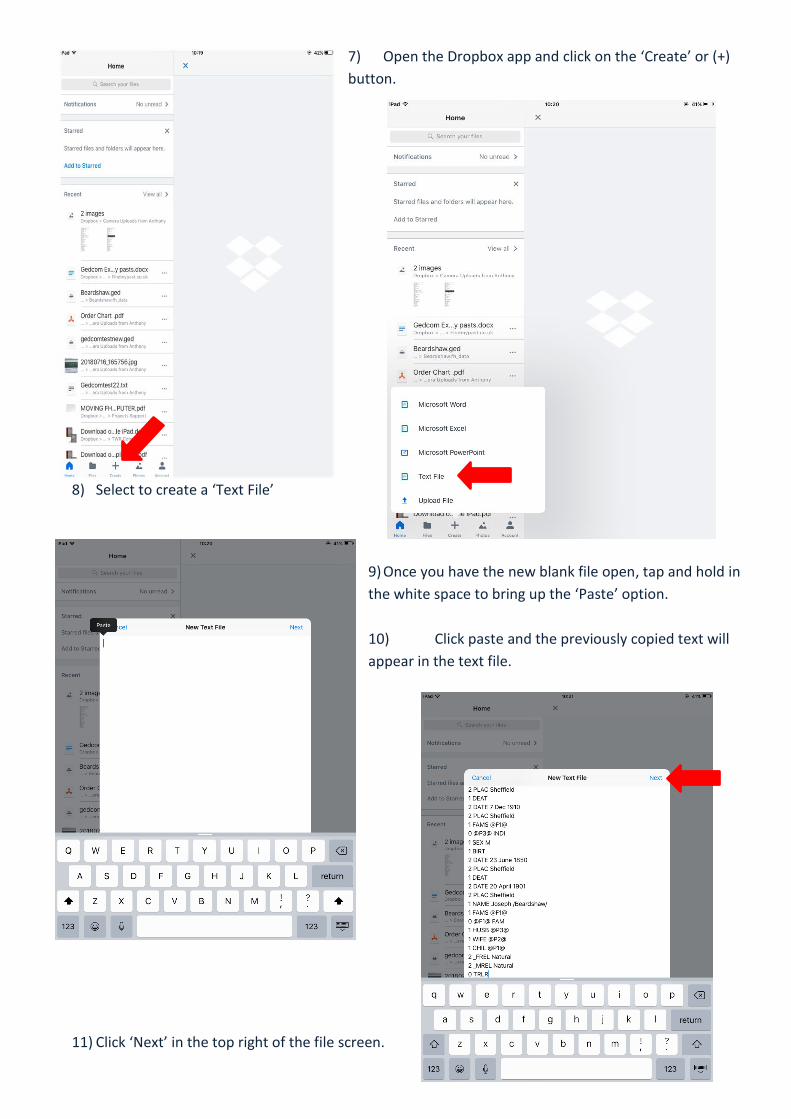
7) Open the Dropbox app and click on the ‘Create’ or (+)
button.
8) Select to create a ‘Text File’
9) Once you have the new blank file open, tap and hold in
the white space to bring up the ‘Paste’ option.
10) Click paste and the previously copied text will
appear in the text file.
11) Click ‘Next’ in the top right of the file screen.
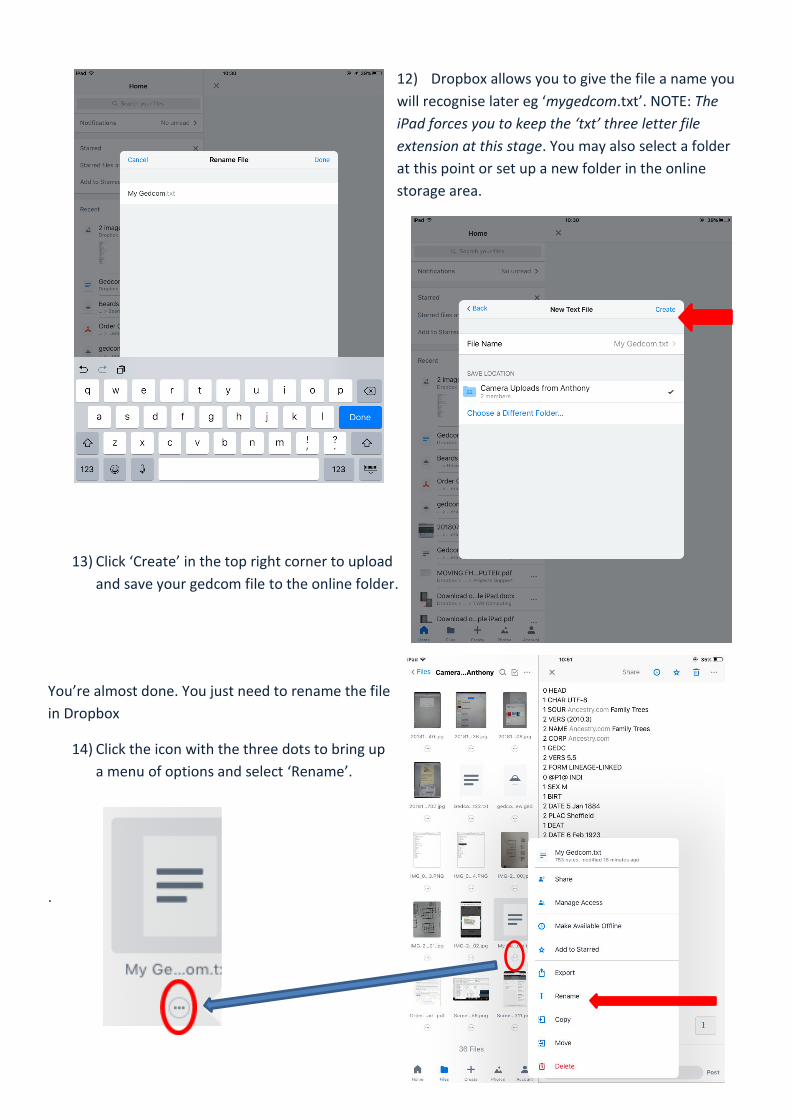
12) Dropbox allows you to give the file a name you
will recognise later eg ‘mygedcom.txt’. NOTE: The
iPad forces you to keep the ‘txt’ three letter file
extension at this stage. You may also select a folder
at this point or set up a new folder in the online
storage area.
13) Click ‘Create’ in the top right corner to upload
and save your gedcom file to the online folder.
You’re almost done. You just need to rename the file
in Dropbox
14) Click the icon with the three dots to bring up
a menu of options and select ‘Rename’.
.
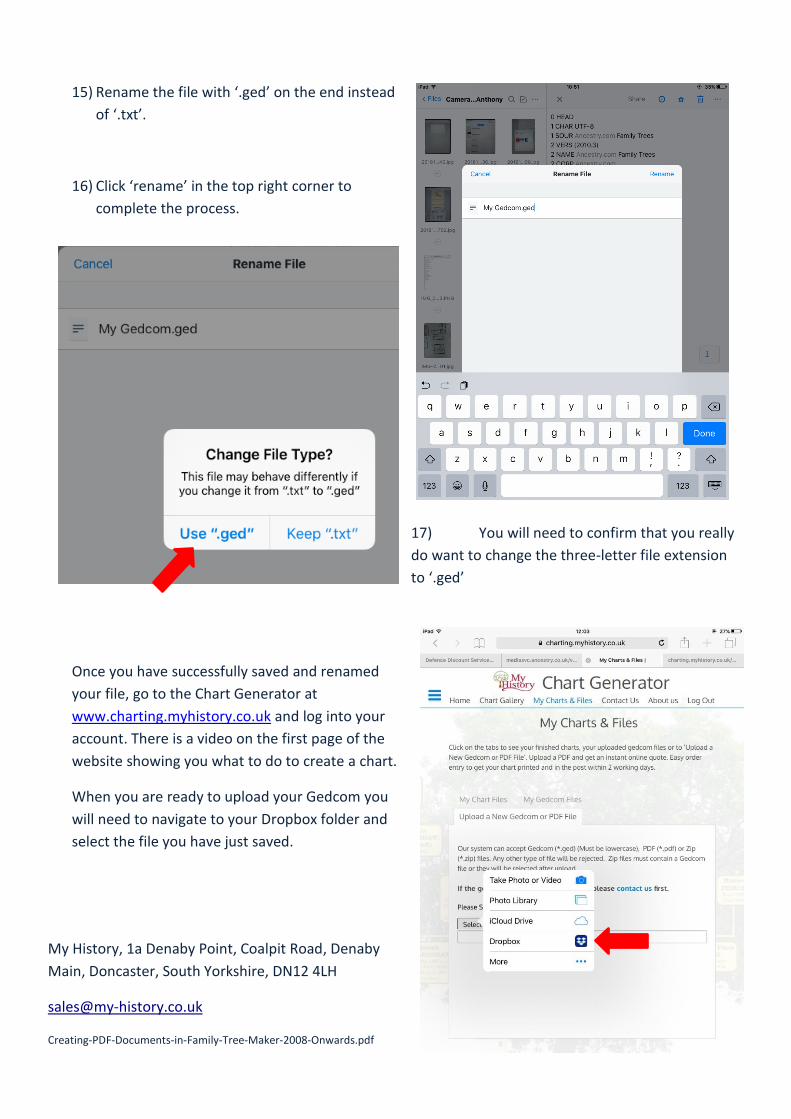
15) Rename the file with ‘.ged’ on the end instead
of ‘.txt’.
16) Click ‘rename’ in the top right corner to
complete the process.
17) You will need to confirm that you really
do want to change the three-letter file extension
to ‘.ged’
Once you have successfully saved and renamed
your file, go to the Chart Generator at
www.charting.myhistory.co.uk and log into your
account. There is a video on the first page of the
website showing you what to do to create a chart.
When you are ready to upload your Gedcom you
will need to navigate to your Dropbox folder and
select the file you have just saved.
My History, 1a Denaby Point, Coalpit Road, Denaby
Main, Doncaster, South Yorkshire, DN12 4LH
Creating-PDF-Documents-in-Family-Tree-Maker-2008-Onwards.pdf