Embed Size (px)
Citation preview
iPad: Accessibility
VoiceOver
ZOOM
iPad and AccessibilityTABLE OF CONTENTS
Overview ...............................................................................................................................page 4Part 1: iPad and the Mainstream approach: .................................................................pages 5-9
Section 1.1: Physical Controls & Navigating the Home Screen............................................page 5
Section 1.2: Navigating the Home Screen – Rearranging Apps – Folders ..........................page 5
Section 1.3: Surfing the Internet with Safari ....................................................................pages 6-7
Section 1.4: Maps App .........................................................................................................page 7
Section 1.5: Multitasking Gestures ......................................................................................page 7
Section 1.6: iBook (read a book) ..........................................................................................page 8
Section 1.7: Typing with the “Notes” app .............................................................................page 9
Part 2: iPad with VoiceOver:.......................................................................................pages 10-17Section 2.1: Physical Controls ............................................................................................page10
Section 2.2: Home Screen Navigation – Rearranging Apps – Folders – Speech .......pages 10-11
Section 2.3: Surfing the Internet with Safari..................................................................page 11-13
Section 2.4: Rearrange App Icons – Multitasking: Switching Between Apps................page 13-14
Section 2.5: iBook (read a book)..................................................................................pages 15-16
Section 2.6: Typing with the “Notes” app.....................................................................pages 16-17
Part 3: iPad with ZOOM: .............................................................................................pages 18-23Section 3.1: Physical Controls ...........................................................................................page 18
Section 3.2: Surfing the Internet with Safari ................................................................pages 19-20
Section 3.3: Accessing Maps (Accessibility ZOOM vs. Mainstream Zoom)........................page 21
Section 3.4: Multitasking Gestures....................................................................................pages 21
Section 3.5: Accessibility Feature (White on Black)............................................................page 22
Section 3.6: iBook (read a book).........................................................................................page 22
Section 3.7: Accessibility Feature (Large Text)..................................................................page 23
Section 3.8: Typing with the “Notes” app............................................................................page 23
Part 4: iPad with VoiceOver and the Refreshabraille 18: ........................................pages 24-33Section 4.1: Physical Controls ....................................................................................pages 24-25
Section 4.2: Making the connection (VoiceOver and the Braille Display)...........................page 25
Section 4.3: Navigating the “Home” Screen .....................................................................pages 26
Section 4.4: Surfing the Internet with Safari ................................................................pages 27-30
Section 4.5: iBook (read a book)..................................................................................pages 31-32Developed by Robert Miller – Oklahoma School for the Blind – Last updated 24 April 2012 Page 2 of 58
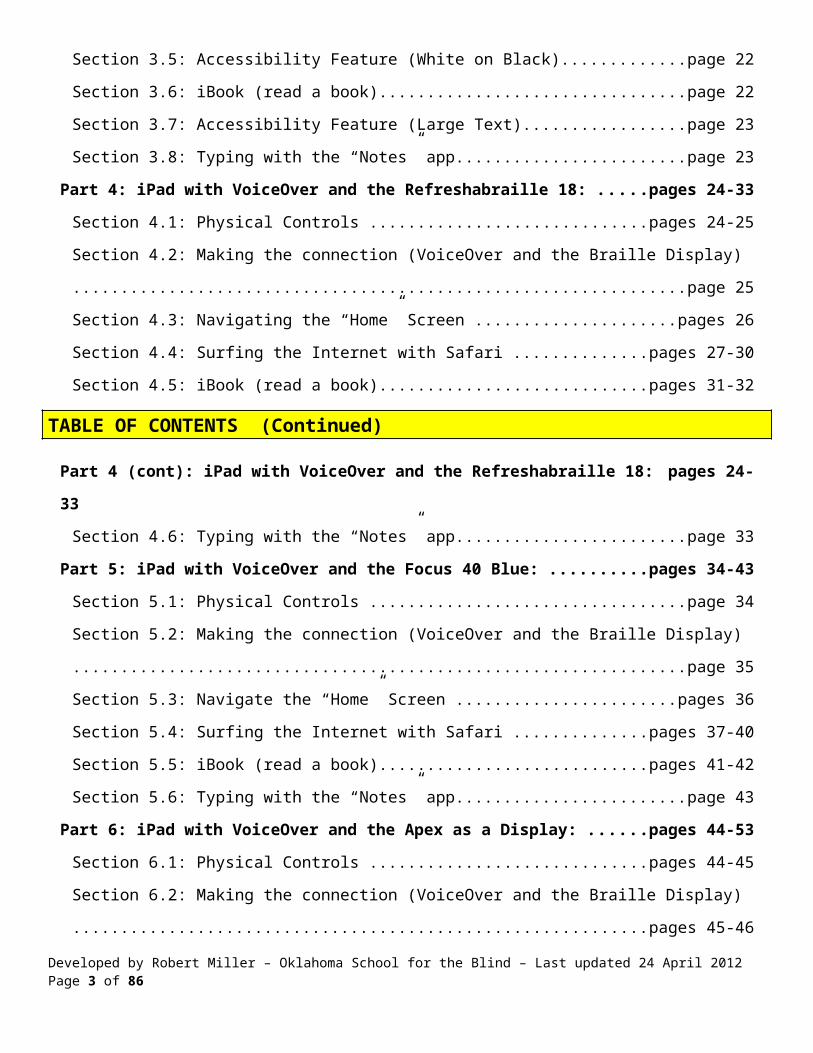
TABLE OF CONTENTS (Continued)
Part 4 (cont): iPad with VoiceOver and the Refreshabraille 18: .............................pages 24-33Section 4.6: Typing with the “Notes” app............................................................................page 33
Part 5: iPad with VoiceOver and the Focus 40 Blue: ...............................................pages 34-43Section 5.1: Physical Controls ...........................................................................................page 34
Section 5.2: Making the connection (VoiceOver and the Braille Display)...........................page 35
Section 5.3: Navigate the “Home” Screen ........................................................................pages 36
Section 5.4: Surfing the Internet with Safari ................................................................pages 37-40
Section 5.5: iBook (read a book)..................................................................................pages 41-42
Section 5.6: Typing with the “Notes” app............................................................................page 43
Part 6: iPad with VoiceOver and the Apex as a Display: .........................................pages 44-53Section 6.1: Physical Controls ....................................................................................pages 44-45
Section 6.2: Making the connection (VoiceOver and the Braille Display)....................pages 45-46
Section 6.3: Navigating the “Home” Screen ................................................................pages 46-47
Section 6.4: Surfing the Internet with Safari ................................................................pages 48-50
Section 6.5: iBook (read a book)..................................................................................pages 51-52
Section 6.6: Typing with the “Notes” app..........................................................................pages 53
Appendix A (Quick Commands List): ........................................................................pages 54-58VoiceOver Commands.................................................................................................pages 54-55
Braille Displays’ Common Commands (all our Bluetooth displays).............................pages 56-57
Refreshabraille 18 Display..................................................................................................page 57
Focus 40 Blue Display........................................................................................................page 58
Apex as a Display...............................................................................................................page 58
Developed by Robert Miller – Oklahoma School for the Blind – Last updated 24 April 2012 Page 3 of 58
Overview
What is the iPad?1. It’s a tablet computer designed, developed and marketed by Apple. 2. It serves primarily as a platform for audio-visual media including books, periodicals, movies,
music, games, presentations and web content.3. It’s available in black or white. 4. The iPad 2 has a lithium-ion polymer battery that lasts up to 10 hours.
How do you navigate the iPad?1. Whether you are blind, have low vision, or are fully sighted, you will use what Apple calls,
gestures to navigate the iPad (iPhone & iPod Touch). 2. Gestures are ways to touch the iPad to get it to do something, similar to using a mouse on a
PC.
How do the blind and visually impaired access the iPad?1. There are 3 main accessibility features that give access to those with visual impairments.
a. VoiceOver, Zoom, and VoiceOver with a braille display.
i. VoiceOver: If you are blind or have very limited vision you will want to use VoiceOver, which is the screen reader all the iDevices have.
ii. Zoom: If you have low vision you may want to use Zoom, which is the screen magnifier that is on all iDevices.
iii. VoiceOver with a Bluetooth Braille Display: If you are a braille user you can connect a refreshable braille display via a Bluetooth connection. Now you have speech and braille access.
Presentation/workshop: 1. This document is divided into 6 parts:2. Each part will demonstrate how to navigate Safari (web browser), read a book in iBooks, and
type using “Notes” with the on-screen keyboard.
Part 1: iPad & Mainstream Access
Part 2: iPad & VoiceOver Access
Part 3: iPad & Zoom Access
Part 4: iPad & Access with Bluetooth Refreshable Braille Displays
Part 5: iPad & Access with Bluetooth Focus 40 Blue Braille Display
Part 6: iPad & Access with Braille Note Apex as a Braille Display
Developed by Robert Miller – Oklahoma School for the Blind – Last updated 24 April 2012 Page 4 of 58
Home Button
“Power”Sleep/Wake
Button Volume
Silent/Rotation Lock
Head Phone Jack
Front Camera
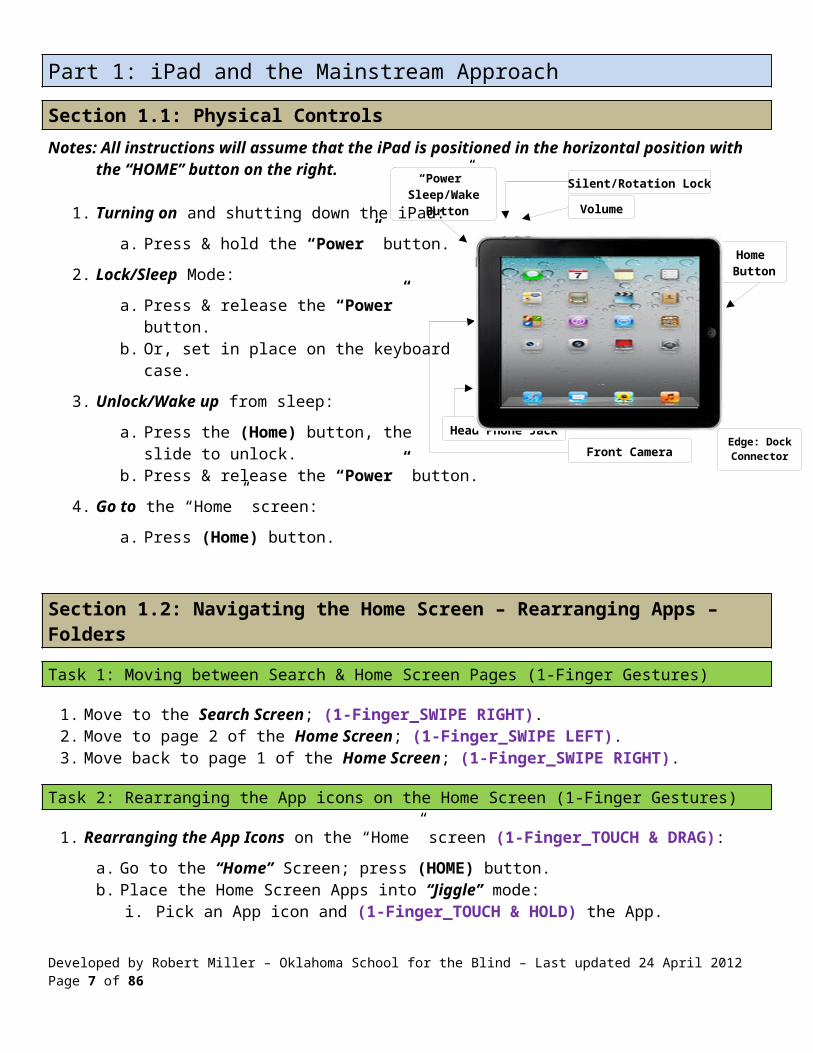
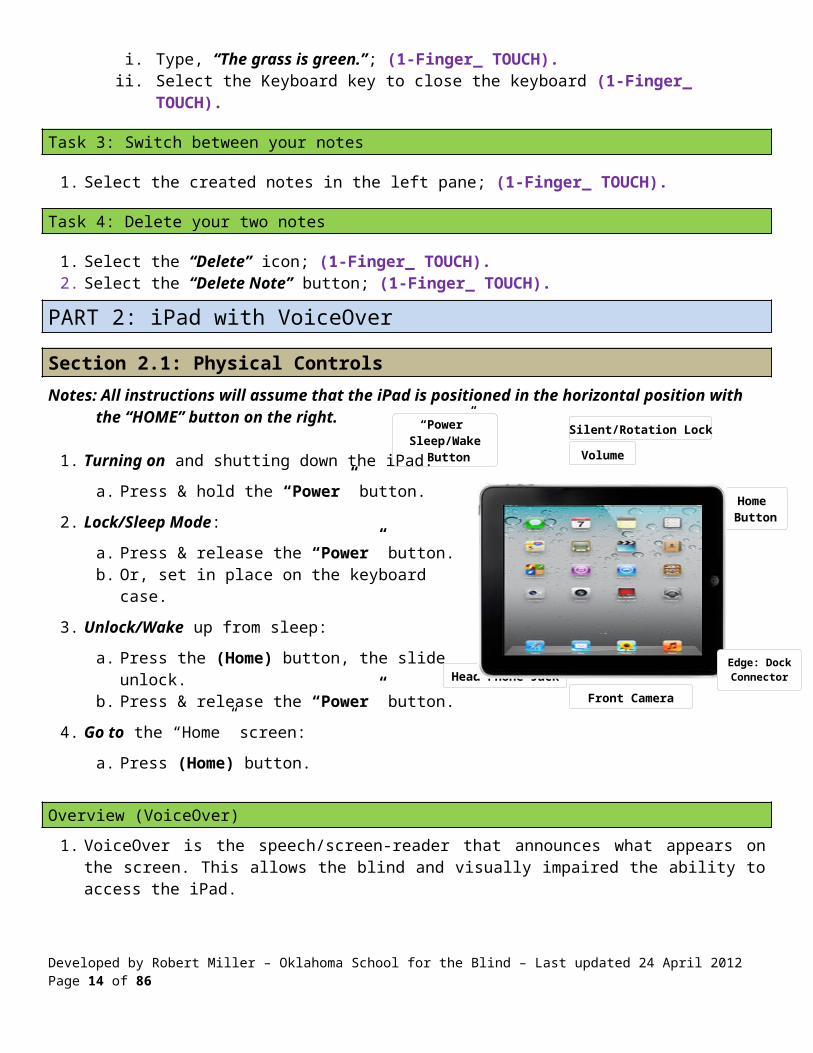
Part 1: iPad and the Mainstream ApproachSection 1.1: Physical ControlsNotes: All instructions will assume that the iPad is positioned in the horizontal position with
the “HOME” button on the right.
1. Turning on and shutting down the iPad:
a. Press & hold the “Power” button.
2. Lock/Sleep Mode:
a. Press & release the “Power” button.b. Or, set in place on the keyboard case.
3. Unlock/Wake up from sleep:
a. Press the (Home) button, the slide to unlock.b. Press & release the “Power” button.
4. Go to the “Home” screen:
a. Press (Home) button.
Section 1.2: Navigating the Home Screen – Rearranging Apps – Folders
Task 1: Moving between Search & Home Screen Pages (1-Finger Gestures)
1. Move to the Search Screen; (1-Finger_SWIPE RIGHT).2. Move to page 2 of the Home Screen; (1-Finger_SWIPE LEFT).3. Move back to page 1 of the Home Screen; (1-Finger_SWIPE RIGHT).
Task 2: Rearranging the App icons on the Home Screen (1-Finger Gestures)
1. Rearranging the App Icons on the “Home” screen (1-Finger_TOUCH & DRAG):a. Go to the “Home” Screen; press (HOME) button.b. Place the Home Screen Apps into “Jiggle” mode:
i. Pick an App icon and (1-Finger_TOUCH & HOLD) the App.c. Drag the “iTunes” app up to be the first icon; (1-Finger_TOUCH & DRAG).d. Disable “Jiggle” mode; press the (HOME) button.
Task 3: Creating Folders (1-Finger Gestures)
1. Creating folders on the “Home” screen (1-Finger_TOUCH & DRAG):a. Go to the “Home” Screen; press (HOME) button.b. Place the Home Screen Apps into “Jiggle” mode:
i. Decide on an App icon and (1-Finger_TOUCH & HOLD) the App.c. Drag one app onto another app and lift finger; (1-Finger_TOUCH & DRAG).d. Keep the folder name or rename it.e. Disable “Jiggle” mode; press the (HOME) button.
Developed by Robert Miller – Oklahoma School for the Blind – Last updated 24 April 2012 Page 5 of 58
Edge: Dock Connector

Section 1.3: Surfing the Internet with Safari (1-Finger Gestures)Note: During this section you will learn how to use several (1-Finger) gestures to open
the web browser, Safari, go to a website, navigate web pages, zoom in & out.
Task 1: Launch Safari
1. Selecting an Item (1-Finger_TOUCH):a. On the Home Screen, find the “Safari” app and launch it; (1-Finger_TOUCH).
Task 2: Launch the website, “www.animalfactguide.com” & web page, “Animal Facts”
1. Launch “www.animalfactguide.com”: (Note: typing www or .com not necessary)
a. Move to “Address Bar” (1-Finger_TOUCH).b. Select the “Clear Text” button (1-Finger_TOUCH). c. Touch letter keys for “animalfactguide”; (1-Finger_TOUCH).d. Select the “Go” button; (1-Finger_TOUCH).
2. Select the “Animal Facts” link; (1-Finger_TOUCH).
Task 3: Scrolling the web page
1. Scrolling (1-Finger_SWIPE):a. Scroll down the page to find the different animals; (1 Finger_SWIPE UP).b. Scroll up the page to find “Atlantic Puffin”; (1-Finger_SWIPE DOWN).c. Select the “Back” button; (1-Finger_TOUCH).d. Now find and select the “Bald Eagle” link; (1-Finger_ TOUCH).
Task 4: Accessing web page menus
1. Accessing Menus (1-Finger_ TAP & HOLD):a. Open the “African Elephant” web page in a New Tab:
i. (1-Finger_TOUCH & HOLD) the African Elephant link & open “Menu”.ii. Open the web page in a New Tab; (1-Finger_TOUCH). iii. Switch between the 2 Tabs; (1-Finger_TOUCH).
b. Define a word:
i. On the “Animal Facts” web page, (1-Finger_TOUCH & HOLD) the word, “Facts”, then lift finger.
ii. Select “Define”; (1-Finger_TOUCH).iii. Scroll down the pop up window; (1-Finger_SWIPE UP).iv. Close the “Pop Up”; (1-Finger_TOUCH) outside the “Pop Up”.
Developed by Robert Miller – Oklahoma School for the Blind – Last updated 24 April 2012 Page 6 of 58
Task 5: Mainstream Zooming in & out (2-Finger_Pinch)
Note: During this task you will use the “Pinch” gesture to zoom in & out. This gesture works with pictures, web pages, mail & maps. This doesn’t replace the Zoom accessibility feature.
1. Zoom IN on the web page; (2-Finger_PINCH):a. Place your thumb and index finger together on the screen and then slide them apart.
2. Zoom OUT on the web page; (2-Finger_PINCH):a. Place your thumb and index finger apart on the screen and then slide them together.
Section 1.4: MAPS App (1-Finger, 2-Fingers, 2-Finger_PINCH Gestures)Note: During this task you will learn how to use 1-Finger & 2-Finger
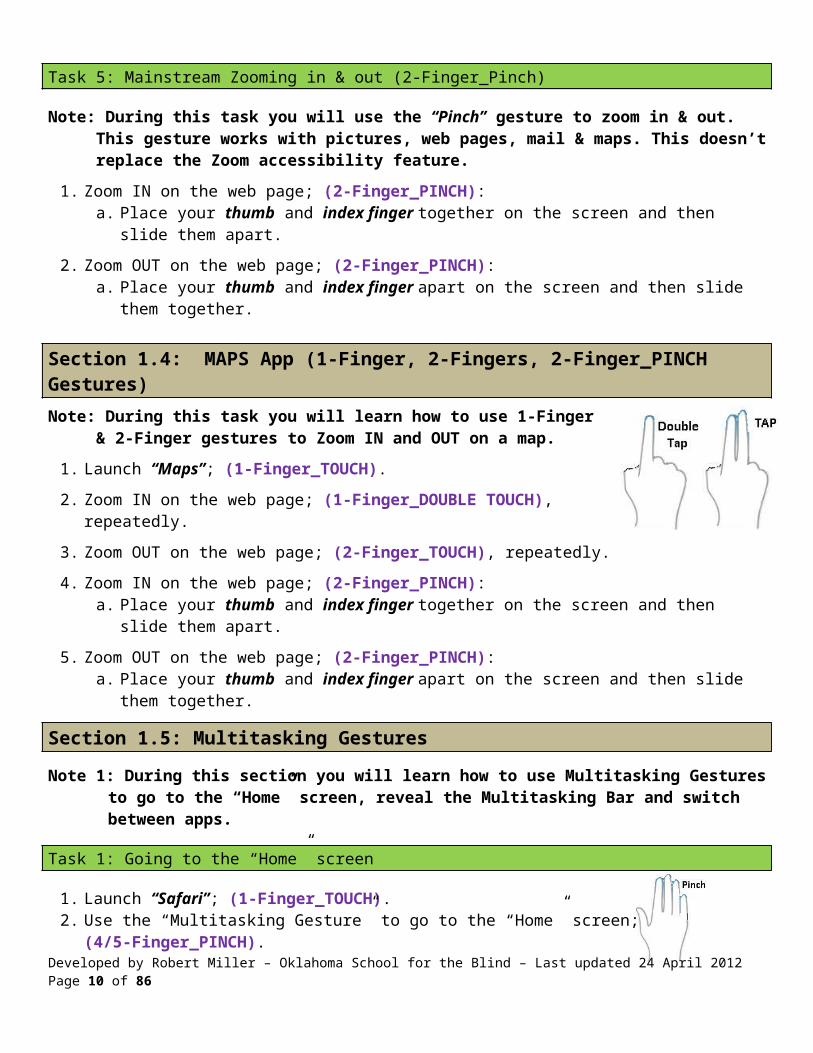
gestures to Zoom IN and OUT on a map. 1. Launch “Maps”; (1-Finger_TOUCH).2. Zoom IN on the web page; (1-Finger_DOUBLE TOUCH), repeatedly.
3. Zoom OUT on the web page; (2-Finger_TOUCH), repeatedly.
4. Zoom IN on the web page; (2-Finger_PINCH):a. Place your thumb and index finger together on the screen and then slide them apart.
5. Zoom OUT on the web page; (2-Finger_PINCH):a. Place your thumb and index finger apart on the screen and then slide them together.
Section 1.5: Multitasking GesturesNote 1: During this section you will learn how to use Multitasking Gestures to go to the
“Home” screen, reveal the Multitasking Bar and switch between apps.
Task 1: Going to the “Home” screen
1. Launch “Safari”; (1-Finger_TOUCH).2. Use the “Multitasking Gesture” to go to the “Home” screen;
(4/5-Finger_PINCH).
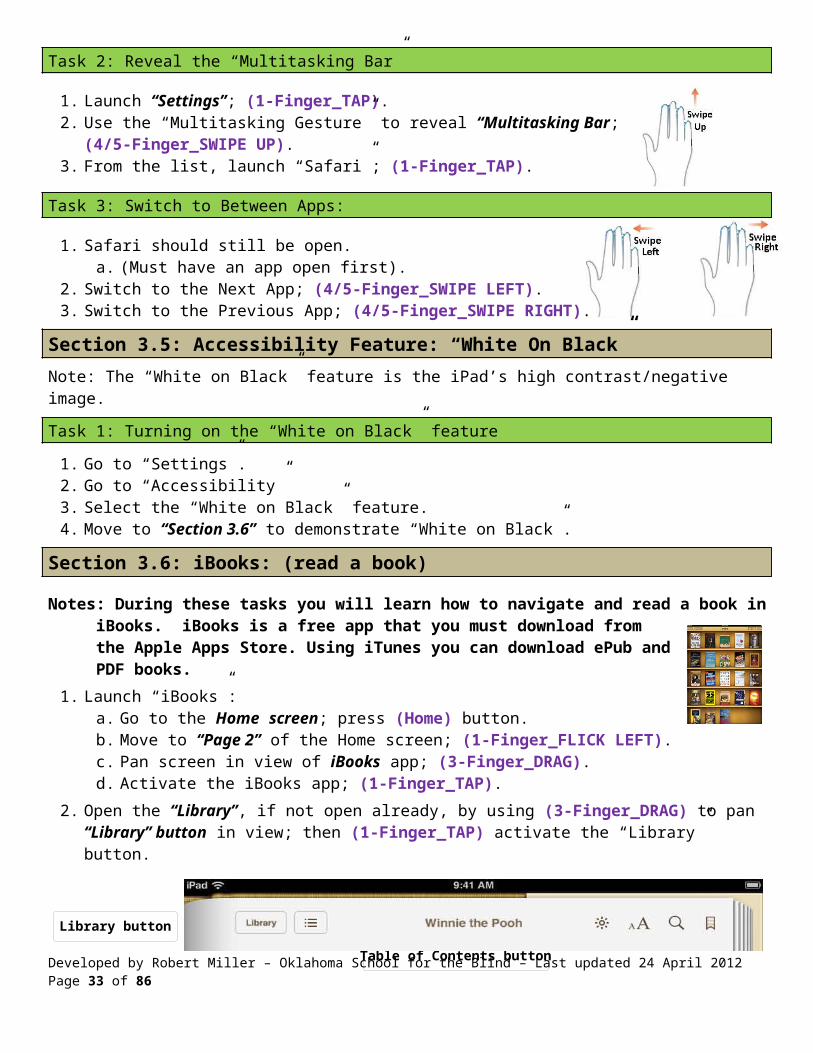
Task 2: Reveal the “Multitasking Bar”
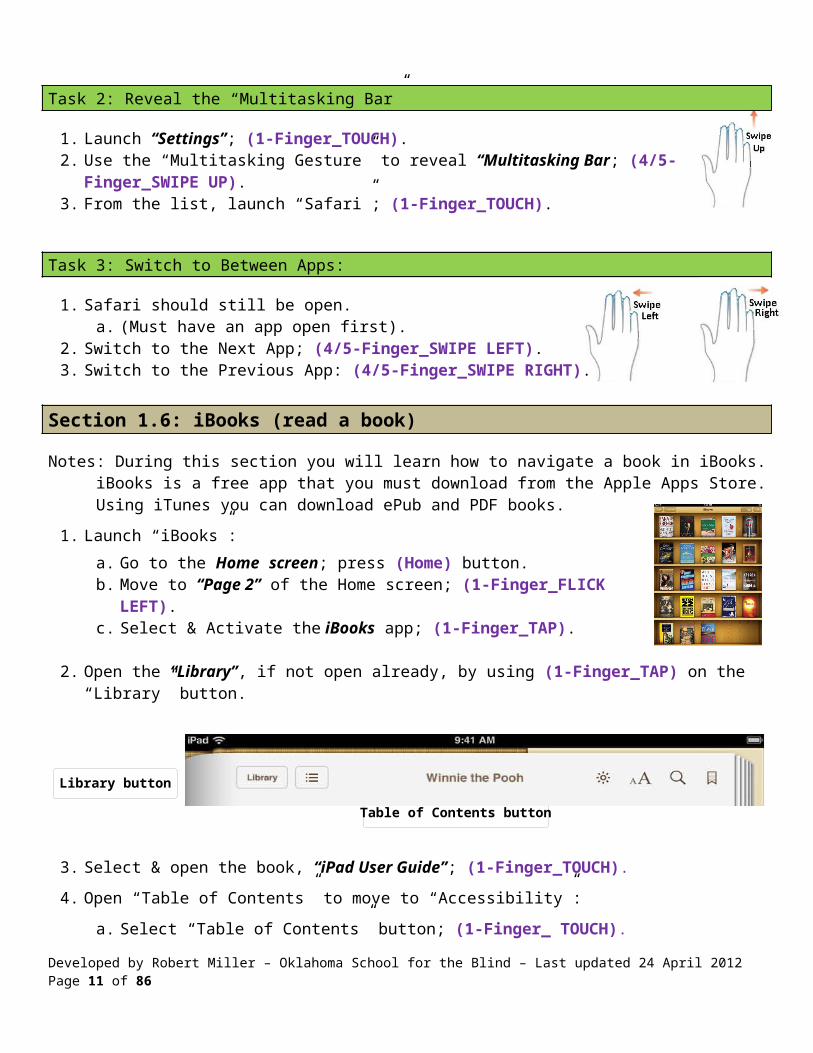
1. Launch “Settings”; (1-Finger_TOUCH).2. Use the “Multitasking Gesture” to reveal “Multitasking Bar; (4/5-Finger_SWIPE UP).3. From the list, launch “Safari”; (1-Finger_TOUCH).
Task 3: Switch to Between Apps:
1. Safari should still be open.a. (Must have an app open first).
2. Switch to the Next App; (4/5-Finger_SWIPE LEFT).3. Switch to the Previous App: (4/5-Finger_SWIPE RIGHT).
Developed by Robert Miller – Oklahoma School for the Blind – Last updated 24 April 2012 Page 7 of 58
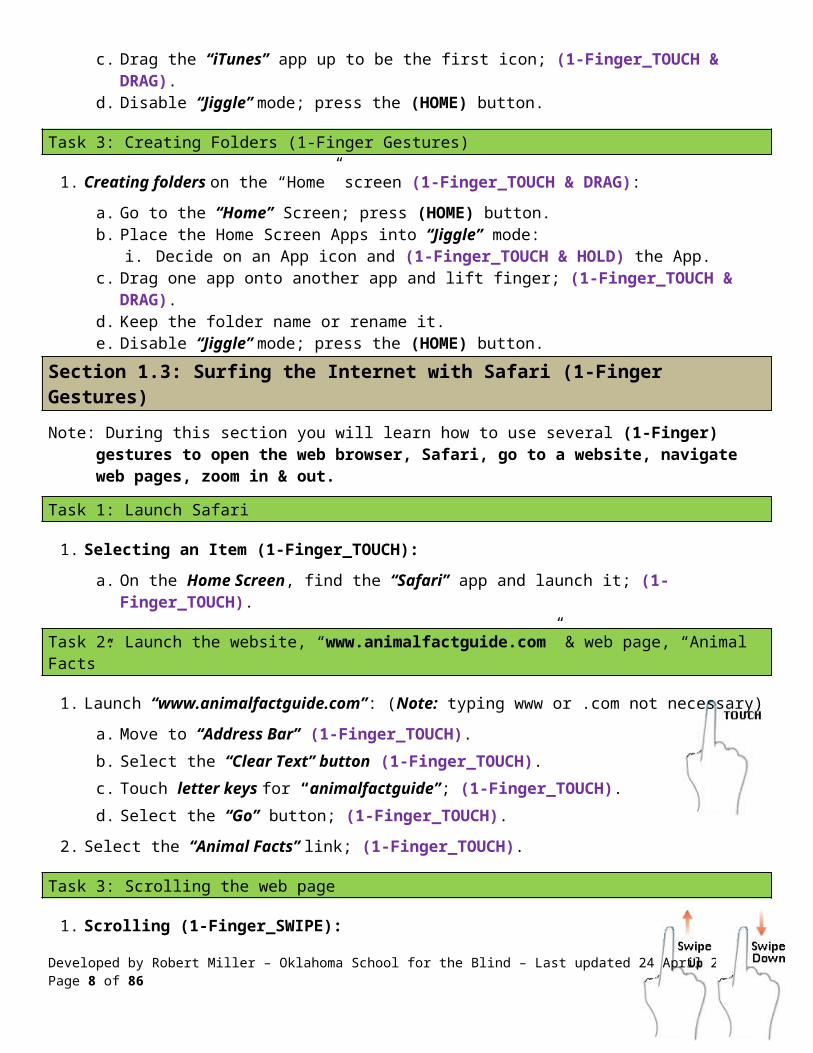
Table of Contents button
Library button
Section 1.6: iBooks (read a book)
Notes: During this section you will learn how to navigate a book in iBooks. iBooks is a free app that you must download from the Apple Apps Store. Using iTunes you can download ePub and PDF books.
1. Launch “iBooks”:a. Go to the Home screen; press (Home) button.b. Move to “Page 2” of the Home screen; (1-Finger_FLICK LEFT).c. Select & Activate the iBooks app; (1-Finger_TAP).
2. Open the “Library”, if not open already, by using (1-Finger_TAP) on the “Library” button.
3. Select & open the book, “iPad User Guide”; (1-Finger_TOUCH).4. Open “Table of Contents” to move to “Accessibility”:
a. Select “Table of Contents” button; (1-Finger_ TOUCH).b. Scroll down the table; (1-Finger_SWIPE UP).c. Select “Accessibility”; (1-Finger_ TOUCH).
5. Turn Pages Slowly:
a. Turn to the next page; on page’s right edge (1-Finger_ TOUCH & DRAG LEFT).b. Turn to the previous page; on page’s left edge: (1-Finger_ TOUCH & DRAG RIGHT).
6. Turn Pages Quickly:
a. Turn to the next page; on center to right edge (1-Finger_ TOUCH & FLICK LEFT).b. Turn to the previous page; on center to left edge (1-Finger_ TOUCH & FLICK RIGHT).
7. Bookmarks:
Notes: You don’t have to set a bookmark when you close the book; iBooks will remember your page and return you to it when you open the book again.
a. Add a Bookmark; (1-Finger_ TOUCH) on the Ribbon, top-right corner.b. Remove a Bookmark; (1-Finger_ TOUCH) on the Ribbon, top-right corner.
Developed by Robert Miller – Oklahoma School for the Blind – Last updated 24 April 2012 Page 8 of 58

Section 1.7: Typing with the “Notes” App
1. The Notes app allows you to take notes using the on-screen keyboard. It is easy to refer back to your notes or delete unwanted notes.
2. With an iCloud account you can sync your notes with your other iDevices and computer. 3. Notes can be email as well.
Task 1: Launch “Notes”
1. Launch the “Notes” app:
a. Go to the Home screen; press (Home) button.b. Select & Activate the Notes app; (1-Finger_ TOUCH).
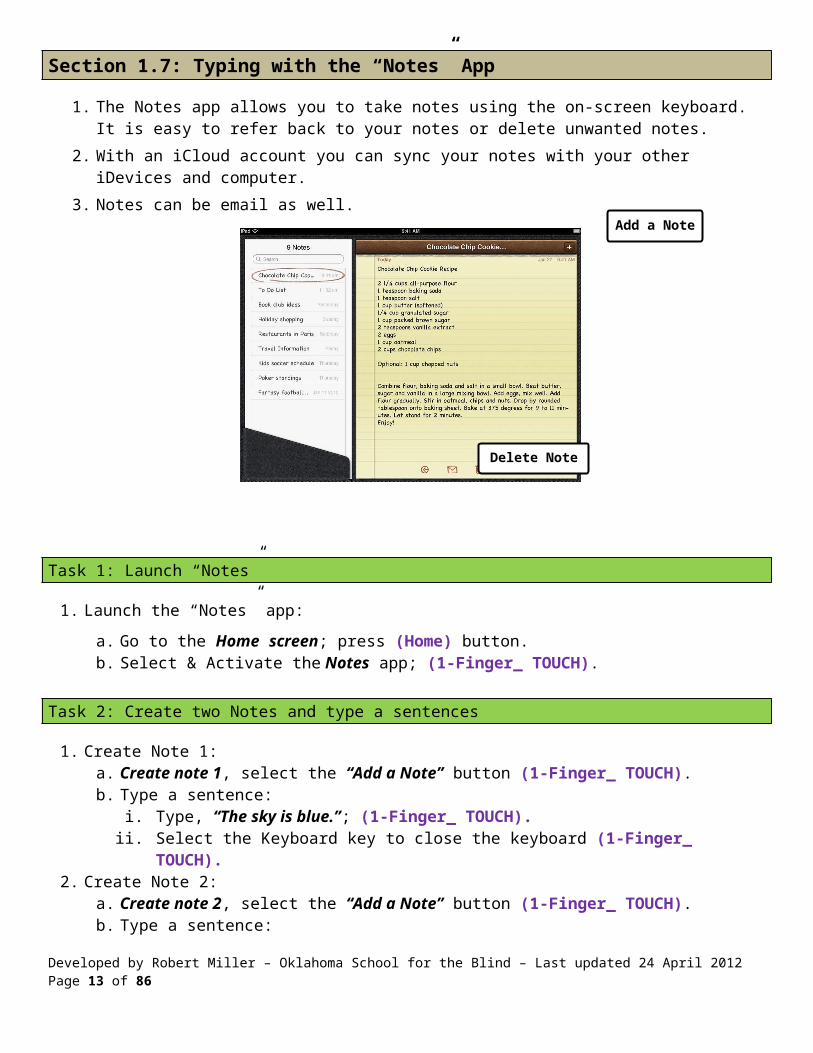
Task 2: Create two Notes and type a sentences
1. Create Note 1:a. Create note 1, select the “Add a Note” button (1-Finger_ TOUCH).b. Type a sentence:
i. Type, “The sky is blue.”; (1-Finger_ TOUCH).ii. Select the Keyboard key to close the keyboard (1-Finger_ TOUCH).
2. Create Note 2:a. Create note 2, select the “Add a Note” button (1-Finger_ TOUCH).b. Type a sentence:
i. Type, “The grass is green.”; (1-Finger_ TOUCH).ii. Select the Keyboard key to close the keyboard (1-Finger_ TOUCH).
Task 3: Switch between your notes
1. Select the created notes in the left pane; (1-Finger_ TOUCH).
Task 4: Delete your two notes
1. Select the “Delete” icon; (1-Finger_ TOUCH).2. Select the “Delete Note” button; (1-Finger_ TOUCH).
Developed by Robert Miller – Oklahoma School for the Blind – Last updated 24 April 2012 Page 9 of 58
Add a Note
Delete Note
Home Button
“Power”Sleep/Wake
Button Volume
Silent/Rotation Lock
Head Phone Jack
Front Camera
PART 2: iPad with VoiceOver Section 2.1: Physical Controls Notes: All instructions will assume that the iPad is positioned in the horizontal position with
the “HOME” button on the right.
1. Turning on and shutting down the iPad:
a. Press & hold the “Power” button.
2. Lock/Sleep Mode:
a. Press & release the “Power” button.b. Or, set in place on the keyboard case.
3. Unlock/Wake up from sleep:
a. Press the (Home) button, the slide to unlock.b. Press & release the “Power” button.
4. Go to the “Home” screen:
a. Press (Home) button.
Overview (VoiceOver) 1. VoiceOver is the speech/screen-reader that announces what appears on the screen. This allows
the blind and visually impaired the ability to access the iPad. 2. When you select an element/item on the iPad, a “Black Rectangle” which is called the
“VoiceOver Cursor” encloses it and VoiceOver speaks the name or describes the item.
Section 2.2: Home Screen Navigation – Rearranging Apps – Folders – Speech
Task 1: Turning ON & OFF the unit1. Power ON; press & Hold the (Power) button.2. Unlock the iPad:
a. Method 1: (TAP)i. Slide your finger to select the “Slide to Unlock” button; (1-Finger_TAP).ii. Activate button to unlock; (1-Finger_DOUBLE TAP).
b. Method 2: (FLICK)i. Select the “Slide to Unlock” button; (1-Finger_FLICK) right or left.ii. Activate “Slide to Unlock” button to unlock; (1-Finger_DOUBLE TAP).
Task 2: Speech Options 1. Change the Speech Rate:
a. Change “Rotor” to “Speech Rate”; (2-Finger_ROTATE) [Rotor will be discussed later].b. Increase or Decrease “Speech Rate”; (1-Finger_SWIPE UP/DOWN).
2. Change the Volume:a. Change “Rotor” to “Volume”; (2-Finger_ROTATE) [Rotor will be discussed later].b. Increase or Decrease “Volume”; (1-Finger_SWIPE UP/DOWN).
3. Turn Speech ON & OFF; (3-Finger_DOUBLE TAP).4. Turn VoiceOver OFF & ON; press “HOME” button 3 times, quickly (toggle).
Developed by Robert Miller – Oklahoma School for the Blind – Last updated 24 April 2012 Page 10 of 58
Edge: Dock Connector
Task 3: Two Methods of Navigating the App icons 1. Go to the “Home Screen”; press the (HOME) button.
2. Method 1: (1-Finger_FLICK):a. Move forward one app at a time to “YouTube”; (1-Finger_FLICK RIGHT).b. Move backwards one app at a time to “Settings”; (1-Finger_FLICK LEFT).
3. Method 2: (1-Finger_SLIDE):a. Slide 1 finger back and forth on the screen in a grid pattern; (1-Finger_SLIDE).
Task 4: Moving between Search & Home Screen Pages (3-Finger_SWIPE):1. Move to the Search Screen; (3-Finger_SWIPE RIGHT).2. Move back to Page 1 of the Home Screen; (3-Finger_SWIPE LEFT).3. Move to Page 2 of the Home Screen; (3-Finger_SWIPE LEFT).4. Move back to Page 1 of the Home Screen; (3-Finger_SWIPE RIGHT).
Task 5: Rearrange App Icons & Create Folders on Home Screen1. Select an app icon; (1-Finger_TAP).2. Place apps in “Jiggle” mode; (1-Finger_DOUBLE TAP & HOLD).3. Select the desired app icon; (1-Finger_TAP), then (1-Finger_DOUBLE TAP & HOLD). Then
drag the app to the desired location.4. Create a Folder: Repeat step 3 and drag the app on top of another app to create a folder.
Section 2.3: Surfing the Internet with SafariTask 1: Launch “Safari”
Note: During this task you will learn how to use several gestures to open the web browser, Safari, go to a websites, select links, etc.
1. Method 1: (1-Finger_SLIDE)a. Slide your finger across the screen to select the “Safari” app icon; (1-Finger_TAP). b. Activate and launch “Safari”; (1-Finger_DOUBLE TAP).
2. Method 2: (1-Finger_FLICK)c. Flick one finger to the right or left to select “Safari”; (1-Finger_FLICK) right or left.d. Activate and launch “Safari”; (1-Finger_DOUBLE TAP).
Task 2: Launch the website, “www.animalfactguide.com” & web page, “Animal Facts”
1. Move to “Address Bar”:a. Move left to the Address Bar; (1-Finger_FLICK LEFT), repeatedly.b. Note: the Address Bar is at the top, 5th item to the right.
2. Enter the “Address Bar”; (1-Finger_DOUBLE TAP). 3. Move right to the “Clear Text” button; (1-Finger_ FLICK RIGHT). 4. Activate the “Clear Text” button; (1-Finger_DOUBLE TAP).
Note: There are 2 typing modes: Standard & Touch Typing. We will use Standard Typing. Developed by Robert Miller – Oklahoma School for the Blind – Last updated 24 April 2012 Page 11 of 58
5. Type the Web Address, “animalfactguide”:a. Select the first character of the address; (1-Finger_FLICK R/L) or (1-Finger_TAP).b. Type the character; (1-Finger_DOUBLE TAP).c. Select the next character of the address; (1-Finger_FLICK R/L) or (1-Finger_TAP).d. Type the character; (1-Finger_DOUBLE TAP).e. Repeat the steps until the address is typed.
6. Select the “Animal Facts” link:a. Move to “Animal Facts” link; (1-Finger_FLICK RIGHT).b. Activate link & launch web page; (1-Finger_DOUBLE TAP).
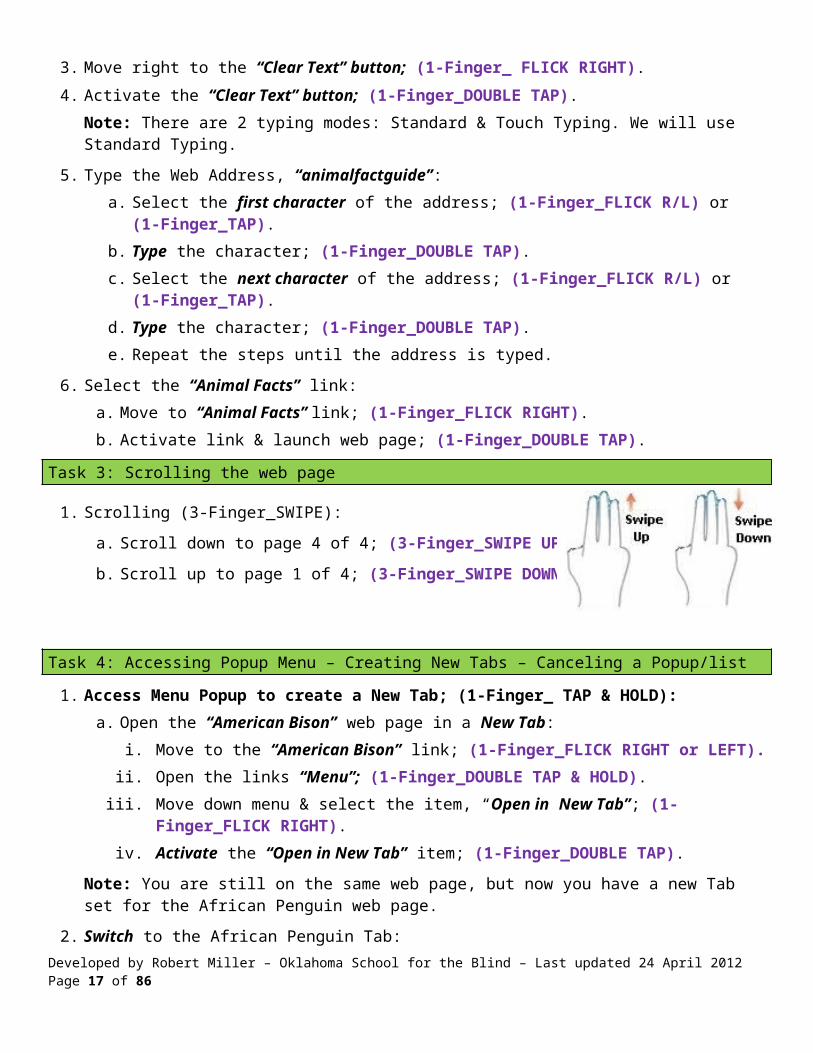
Task 3: Scrolling the web page
1. Scrolling (3-Finger_SWIPE):
a. Scroll down to page 4 of 4; (3-Finger_SWIPE UP).b. Scroll up to page 1 of 4; (3-Finger_SWIPE DOWN).
Task 4: Accessing Popup Menu – Creating New Tabs – Canceling a Popup/list1. Access Menu Popup to create a New Tab; (1-Finger_ TAP & HOLD):
a. Open the “American Bison” web page in a New Tab:i. Move to the “American Bison” link; (1-Finger_FLICK RIGHT or LEFT).ii. Open the links “Menu”; (1-Finger_DOUBLE TAP & HOLD).iii. Move down menu & select the item, “Open in New Tab”; (1-Finger_FLICK RIGHT).iv. Activate the “Open in New Tab” item; (1-Finger_DOUBLE TAP).
Note: You are still on the same web page, but now you have a new Tab set for the African Penguin web page.
2. Switch to the African Penguin Tab:a. Move to your new “American Bison” Tab; (1-Finger_FLICK LEFT). b. Activate the Tab to go to the “American Bison” web page; (1-Finger_DOUBLE TAP).
3. Switch back to the Animals Facts Tab web page:a. Move to your new “Animals Facts” Tab; (1-Finger_FLICK LEFT). b. Activate the Tab to go to the “American Bison” web page; (1-Finger_DOUBLE TAP).
4. Cancel a Popup or list:a. Move to the “Fun Stuff” link; (1-Finger_FLICK RIGHT or LEFT).b. Open the link’s “Menu”; (1-Finger_DOUBLE TAP & HOLD).c. Cancel the menu “Popup”; (2-Finger_SCRUB, LEFT & RIGHT).
5. Delete the “American Bison” Tab:a. Move to your new “American Bison” Tab; (1-Finger_FLICK LEFT). b. Activate the Tab to go to the “American Bison” web page; (1-Finger_DOUBLE TAP).c. Move to the “Close Button” for the “American Bison” Tab; (1-Finger_FLICK LEFT). d. Activate the “Close Button” to the “American Bison” Tab; (1-Finger_DOUBLE TAP).
Developed by Robert Miller – Oklahoma School for the Blind – Last updated 24 April 2012 Page 12 of 58
Task 5: Use the “Rotor” to move by “Headings” – Read (Pause & Resume Speech)Notes: On web pages there are different types of elements, such as text, links, headings, form
controls, etc. Choosing the most efficient element to navigate by will help you find what you are looking for quicker. The “Rotor” is a virtual dial that makes it possible to choose which element to navigate.
1. Change the “Rotor” to “Headings”:
a. Use your Thumb and Index finger to change the “Rotor” to “Headings” and listen to the number of “Headings” given; (2-Finger_ROTATE RIGHT) repeatedly.
2. Now move down the page by “Headings” to “Cougar”; (1-Finger_FLICK DOWN).3. Now move back the page by “Headings” to “Atlantic Puffin” (1-Finger_FLICK UP).4. Activate Heading/Link and load web page, “Atlantic Puffin”; (1-Finger_DOUBLE TAP).5. Move down by “Headings” until you get to “Atlantic Puffin”; (1-Finger_FLICK DOWN).6. Move to read 1st paragraph; (1-Finger_FLICK RIGHT), repeatedly.7. Pause speech; (2-Finger_TAP).8. Resume speech; (2-Finger_TAP) and pause speech again; (2-Finger_TAP).
Task 6: Use the “Rotor” to move by “Form Controls”:
Note: During this Task you will navigate by “Form Controls”. Form Controls are elements such as Edit boxes, Combo/Popup Boxes, Checkboxes, Buttons, etc.
1. Change “Rotor” to “Form Controls”; (2-Finger_ROTATE RIGHT) repeatedly.
2. Move down the web page by “Form Controls”; (1-Finger_FLICK DOWN).3. Move back up the web page by “Form Controls”; (1-Finger_FLICK UP).
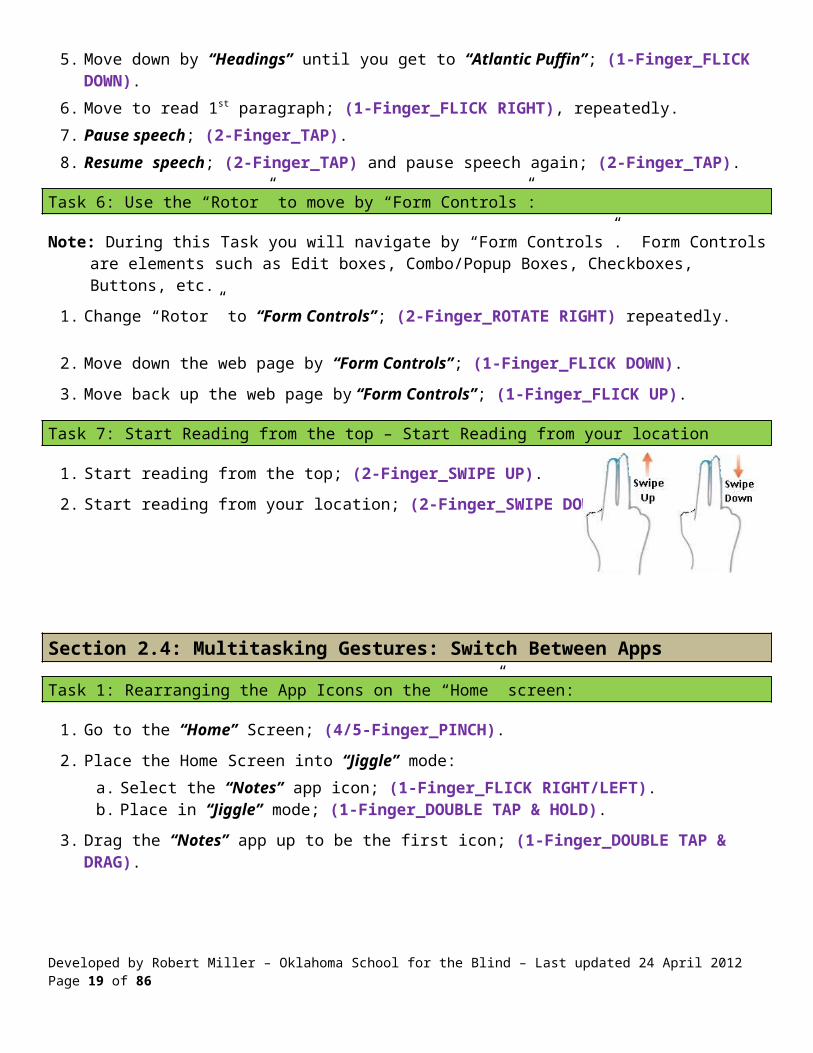
Task 7: Start Reading from the top – Start Reading from your location
1. Start reading from the top; (2-Finger_SWIPE UP).2. Start reading from your location; (2-Finger_SWIPE DOWN).
Section 2.4: Multitasking Gestures: Switch Between Apps
Task 1: Rearranging the App Icons on the “Home” screen:
1. Go to the “Home” Screen; (4/5-Finger_PINCH).2. Place the Home Screen into “Jiggle” mode:
a. Select the “Notes” app icon; (1-Finger_FLICK RIGHT/LEFT).b. Place in “Jiggle” mode; (1-Finger_DOUBLE TAP & HOLD).
3. Drag the “Notes” app up to be the first icon; (1-Finger_DOUBLE TAP & DRAG).
Developed by Robert Miller – Oklahoma School for the Blind – Last updated 24 April 2012 Page 13 of 58
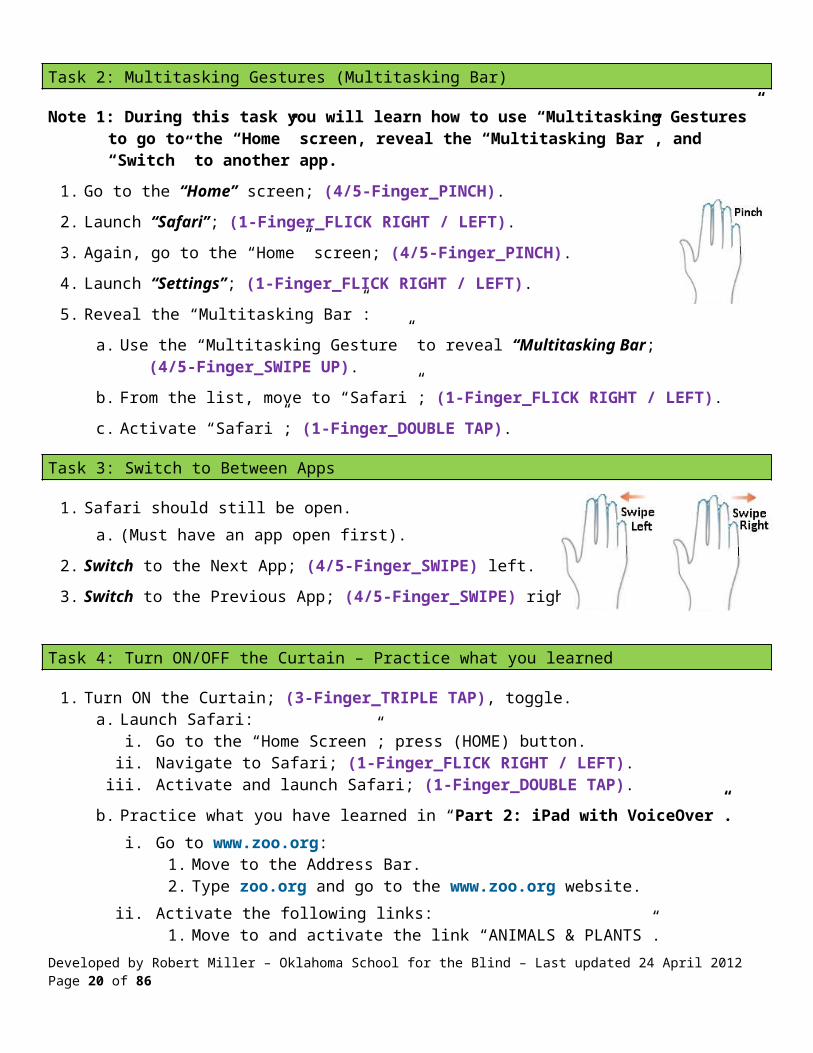
Task 2: Multitasking Gestures (Multitasking Bar)
Note 1: During this task you will learn how to use “Multitasking Gestures” to go to the “Home” screen, reveal the “Multitasking Bar”, and “Switch” to another app.
1. Go to the “Home” screen; (4/5-Finger_PINCH).2. Launch “Safari”; (1-Finger_FLICK RIGHT / LEFT).3. Again, go to the “Home” screen; (4/5-Finger_PINCH).4. Launch “Settings”; (1-Finger_FLICK RIGHT / LEFT).5. Reveal the “Multitasking Bar”:
a. Use the “Multitasking Gesture” to reveal “Multitasking Bar; (4/5-Finger_SWIPE UP).
b. From the list, move to “Safari”; (1-Finger_FLICK RIGHT / LEFT).c. Activate “Safari”; (1-Finger_DOUBLE TAP).
Task 3: Switch to Between Apps
1. Safari should still be open.a. (Must have an app open first).
2. Switch to the Next App; (4/5-Finger_SWIPE) left.
3. Switch to the Previous App; (4/5-Finger_SWIPE) right.
Task 4: Turn ON/OFF the Curtain – Practice what you learned
1. Turn ON the Curtain; (3-Finger_TRIPLE TAP), toggle.a. Launch Safari:
i. Go to the “Home Screen”; press (HOME) button.ii. Navigate to Safari; (1-Finger_FLICK RIGHT / LEFT).iii. Activate and launch Safari; (1-Finger_DOUBLE TAP).
b. Practice what you have learned in “Part 2: iPad with VoiceOver”.i. Go to www.zoo.org:
1. Move to the Address Bar.2. Type zoo.org and go to the www.zoo.org website.
ii. Activate the following links:1. Move to and activate the link “ANIMALS & PLANTS”.2. Then move to and activate the link “MAMMALS”.
iii. Change the “Rotor” to “Form Controls”1. Move to the Animal Fact Sheets “Combo/Popup” box and select an animal. 2. Move back to the same “Combo/Popup” box and move to and select the “GO”
button next to the box. iv. Change the “Rotor” to “Headings”
1. Move to each “Heading” and read its paragraphs. 2. Turn OFF the Curtain; (3-Finger_TRIPLE TAP), toggle.
Developed by Robert Miller – Oklahoma School for the Blind – Last updated 24 April 2012 Page 14 of 58
Table of Contents button
Library button
Section 2.5: iBooks: (reading a book)Notes: During these tasks you will learn how to navigate and read a book in iBooks. iBooks is an
app that comes with the iPad that allows you to read books. iBooks is accessible to the Blind and visually impaired through the VoiceOver, ZOOM, or VoiceOver with a braille display.
Task 1: Launch “iBooks”
1. Go to the Home screen; press (Home) button.2. Move to “Page 2” of the Home screen; (3-Finger_FLICK LEFT).3. Select the iBooks app; (1-Finger_FLICK RIGHT / LEFT).4. Activate the iBooks app; (1-Finger_DOUBLE TAP).
Task 2: Open the “Library” &“Book”
1. Select the “Library” button; (1-Finger_FLICK RIGHT / LEFT).2. Activate the “Library” button; (1-Finger_DOUBLE TAP).3. Open the book, “iPad User Guide”:
a. Select the book, “iPad User Guide”; (1-Finger_FLICK RIGHT / LEFT).b. Activate the book, “iPad User Guide”; (1-Finger_DOUBLE TAP).
Task 3: Navigate the book's “Table of Contents”
1. Select the book, “Table of Contents” button; (1-Finger_FLICK RIGHT / LEFT).2. Activate the book, “Table of Contents” button; (1-Finger_DOUBLE TAP).
a. Move down the table to “Accessibility”; (1-Finger_FLICK RIGHT).b. Activate “Accessibility”; (1-Finger_DOUBLE TAP).
Task 4: Turning the Pages “3-Finger Swiping” – “Page Chooser”
1. 3-Finger_Flicking Method:a. Move into the text on the page; (1-Finger_FLICK RIGHT) or (1-Finger_TAP). b. Turn to the next page; on page’s right edge; (3-Finger_SWIPE LEFT).c. Turn to the previous page; on page’s left edge; (3-Finger_SWIPE RIGHT).
2. Page Chooser Method:a. Move to “Page Chooser”; (1-Finger_FLICK RIGHT) or (1-Finger_TAP).b. Method 1: Turning pages; (1-Finger_SWIPE DOWN or UP).c. Method 2: Turning pages; (1-Finger_DOUBLE TAP & HOLD, DRAG LEFT OR RIGHT).
Developed by Robert Miller – Oklahoma School for the Blind – Last updated 24 April 2012 Page 15 of 58

Task 5: Reading the pages
1. Method 1: Reading from the top: a. Jump to the top & start reading; (2-Finger_SWIPE UP).
i. Note: Will start reading from the top of page and will keep reading.b. Pause the reading; (2-Finger_TAP) toggle.c. Resume & Pause again the reading; (2-Finger_TAP) toggle.
2. Method 2: Reading from your location:a. Start reading from your focused location; (2-Finger_SWIPE DOWN).
3. Method 3: Read one screen at a time. a. Jump to the top & start reading; (2-Finger_SWIPE UP).b. Move to the “Text Box” just after the “Add Bookmark” button; (2-Finger_FLICK RIGHT).
4. Method 4: Line by Linea. Read line by line; (1-Finger_TAP) on each line of text.
Task 6: Bookmarks
Notes: You don’t have to set a bookmark when you close the book; iBooks will remember your page and return you to it when you open the book again.
1. Add A Bookmark:a. Jump to the top & start reading; (2-Finger_SWIPE UP).b. Move to the “Add a Bookmark” button; (2-Finger_FLICK RIGHT).c. Activate the “Add a Bookmark” button; (1-Finger_DOUBLE TAP).
2. Remove A Bookmark:a. Jump to the top & start reading; (2-Finger_SWIPE UP).b. Move to the “Remove Bookmark” button; (2-Finger_FLICK RIGHT).c. Activate the “Remove Bookmark” button; (1-Finger_DOUBLE TAP).
Section 2.6: Typing with the “Notes” App1. The Notes app allows you to take notes using the on-screen keyboard. It is easy to refer back to
your notes or delete unwanted notes.2. Using the on-screen keyboard with VoiceOver is slow at first, but with time, gets easier.3. With an iCloud account you can sync your notes with your other iDevices and computer. 4. Notes can also be sent as emails.
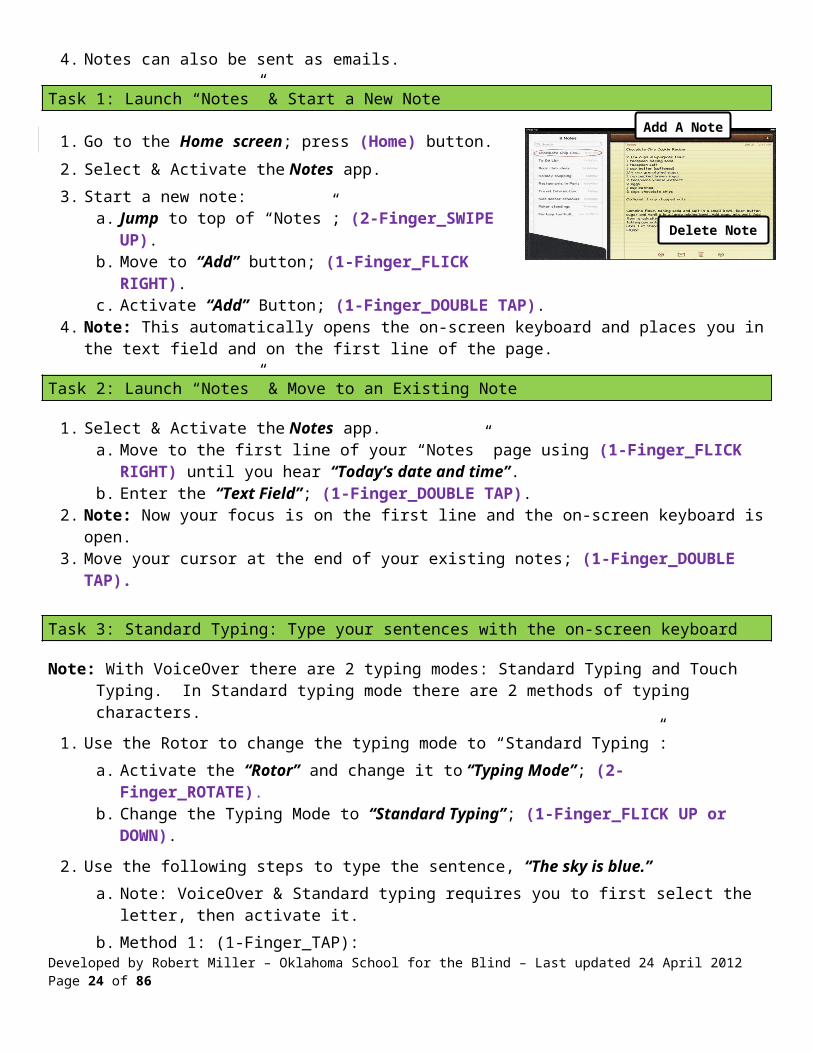
Task 1: Launch “Notes” & Start a New Note
1. Go to the Home screen; press (Home) button.2. Select & Activate the Notes app.3. Start a new note:
a. Jump to top of “Notes”; (2-Finger_SWIPE UP).b. Move to “Add” button; (1-Finger_FLICK RIGHT).c. Activate “Add” Button; (1-Finger_DOUBLE TAP).
4. Note: This automatically opens the on-screen keyboard and places you in the text field and on the first line of the page.
Developed by Robert Miller – Oklahoma School for the Blind – Last updated 24 April 2012 Page 16 of 58
Add A Note
Delete Note
Task 2: Launch “Notes” & Move to an Existing Note
1. Select & Activate the Notes app.a. Move to the first line of your “Notes” page using (1-Finger_FLICK RIGHT) until you hear
“Today’s date and time”.b. Enter the “Text Field”; (1-Finger_DOUBLE TAP).
2. Note: Now your focus is on the first line and the on-screen keyboard is open. 3. Move your cursor at the end of your existing notes; (1-Finger_DOUBLE TAP).
Task 3: Standard Typing: Type your sentences with the on-screen keyboard
Note: With VoiceOver there are 2 typing modes: Standard Typing and Touch Typing. In Standard typing mode there are 2 methods of typing characters.
1. Use the Rotor to change the typing mode to “Standard Typing”:a. Activate the “Rotor” and change it to “Typing Mode”; (2-Finger_ROTATE).b. Change the Typing Mode to “Standard Typing”; (1-Finger_FLICK UP or DOWN).
2. Use the following steps to type the sentence, “The sky is blue.”a. Note: VoiceOver & Standard typing requires you to first select the letter, then activate it.b. Method 1: (1-Finger_TAP):
i. Using (1-Finger_TAP) slide you finger over the keys until you find the letter, “T” announced, then use (1-Finger_DOUBLE TAP) to type the letter. Repeat the process to type “…he sky…”.
c. Method 2: (1-Finger_FLICK)i. Using (1-Finger_FLICK RIGHT/LEFT) select the letters to the words, “…is blue.”
After selecting each key use (1-Finger_DOUBLE TAP) to type.
Task 4: Touch Typing: Type your sentences with the on-screen keyboard
Note: With VoiceOver there are 2 typing modes: Standard Typing and Touch Typing.
1. Use the Rotor to change the typing mode to “Touch Typing”:a. Change the Typing Mode to “Touch Typing”; (1-Finger_FLICK UP or DOWN).
2. Use the following steps to type the sentence, “The grass is green”:a. Slide (1-Finger) back and forth across the keyboard until you hear the letter “T” and then
lift your finger off the screen, the letter will be typed.b. Repeat the process until the sentence is typed.
Task 5: Delete a note
1. Move to the “Delete” icon; (1-Finger_FLICK).2. Activate the “Delete Note” button; (1-Finger_DOUBLE TAP).
Developed by Robert Miller – Oklahoma School for the Blind – Last updated 24 April 2012 Page 17 of 58
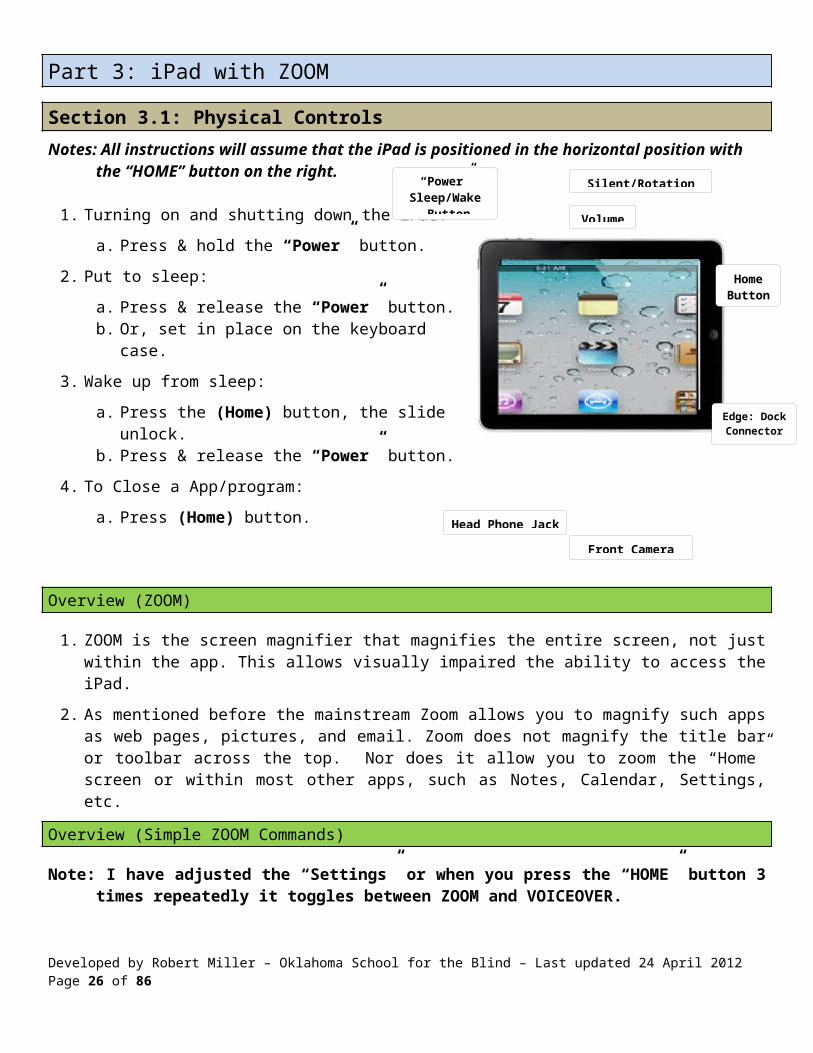
Part 3: iPad with ZOOMSection 3.1: Physical ControlsNotes: All instructions will assume that the iPad is positioned in the horizontal position with
the “HOME” button on the right.
1. Turning on and shutting down the iPad:
a. Press & hold the “Power” button.
2. Put to sleep:
a. Press & release the “Power” button.b. Or, set in place on the keyboard case.
3. Wake up from sleep:
a. Press the (Home) button, the slide to unlock.b. Press & release the “Power” button.
4. To Close a App/program:
a. Press (Home) button.
Overview (ZOOM)
1. ZOOM is the screen magnifier that magnifies the entire screen, not just within the app. This allows visually impaired the ability to access the iPad.
2. As mentioned before the mainstream Zoom allows you to magnify such apps as web pages, pictures, and email. Zoom does not magnify the title bar or toolbar across the top. Nor does it allow you to zoom the “Home” screen or within most other apps, such as Notes, Calendar, Settings, etc.
Overview (Simple ZOOM Commands)
Note: I have adjusted the “Settings” or when you press the “HOME” button 3 times repeatedly it toggles between ZOOM and VOICEOVER.
1. Switch ON the ZOOM feature; press “HOME” button 3 times. VoiceOver will announce, “VoiceOver OFF”.
2. To enable or disable the ZOOM magnification; (3-Finger_DOUBLE TAP).a. Toggles zoom in & out to from your last zoom setting.
3. To move around the screen; (3-Finger_DRAG).a. Keep your 3 fingers on the screen as you drag them around.
4. To change the zoom magnification; (3-Finger_DOUBLE TAP & SWIPE UP / DOWN).5. MOST of the “Mainstream” gestures can be used to navigate.
Developed by Robert Miller – Oklahoma School for the Blind – Last updated 24 April 2012 Page 18 of 58
Edge: Dock Connector
Home Button
“Power”Sleep/Wake
Button Volume
Silent/Rotation Lock
Head Phone Jack
Front Camera
Section 3.2: Surfing the Internet with Safari
Task 1: Turning ON & OFF the unit & Switching between ZOOM & VoiceOver
Note: During this task you will learn how to Power OFF & ON, Lock & Unlock, and switch between VoiceOver and ZOOM.
1. Power ON:
a. Press & Hold the (Power) button (Make sure ZOOM is turned ON first).b. I couldn’t get ZOOM to stay on when the iPad was Powered OFF.
2. Unlock the iPad:
a. Slide your finger to select the “Slide to Unlock” button; (1-Finger_TAP & SLIDE RIGHT).3. Enable & Disable ZOOM:
a. Enable ZOOM; (3-Finger_DOUBLE TAP) Toggle.b. Disable ZOOM; (3-Finger_DOUBLE TAP)Toggle.c. Enable ZOOM again; (3-Finger_DOUBLE TAP) Toggle.
4. Switch between ZOOM & VoiceOver:
a. Press “HOME” button 3 times, quickly (toggle).
Task 2: Turning ON & OFF the unit & ZOOM Feature
Note: During this task you will learn how to use both the Mainstream & ZOOM gestures to open the web browser, Safari & go to a website where you will select links & rearrange icons on Home Screen.
1. Turn on iPad, Unlock, Adjust ZOOM magnification:a. Power ON:
i. Press & Hold the (Power) button.
b. Unlock the iPad:
i. Touch, Hold & Slide right “Slide to Unlock” button; (1-Finger_TAP, HOLD & SLIDE). c. Enable ZOOM; (3-Finger_DOUBLE TAP).d. Adjust ZOOM magnification; (3-Finger_TAP & DRAG UP or DOWN).
2. Launch “Safari”:a. Move “Home” screen around to locate “Safari” app icon; (3-Finger_DRAG or SWIPE).b. Launch “Safari”; (1-Finger_TAP).
3. Launch “Oaklandzoo.org” website:a. Move to “Address Bar”; (1-Finger_TAP).b. Select the “Clear Text” button; (1-Finger_TAP). c. Press the letter keys for “oaklandzoo.org”; (1-Finger_TAP).
Developed by Robert Miller – Oklahoma School for the Blind – Last updated 24 April 2012 Page 19 of 58
4. Activate Links needed to launch “Yellow Anaconda” web page:a. Select the “Animals” link; (1-Finger_TAP).b. Select the “Mammals” link; (1-Finger_TAP).c. Select the “Back” button; (1-Finger_TAP).d. Select the “Reptiles” link; (1-Finger_TAP).e. Now find & select the “African Spurred Tortoise”;
i. Move magnified web page in view; (3-Finger_TAP & DRAG).ii. Scroll down the web page; (1-Finger_SWIPE UP).iii. Select the link, “Yellow Anaconda”; (1-Finger_TAP).
5. Navigate the “Yellow Anaconda” web page:a. Scroll down the web page to “DESCRIPTION” Heading;
(1-Finger_SWIPE UP).b. Pan Right and Left to read paragraph; (3-Finger_TAP & DRAG).c. Scroll down the web page to “Status In The Wild” Heading;
(1-Finger_SWIPE UP).d. Demonstrate how Panning & Scrolling works as I move back up the web page to “Main
Links”; i. Scrolling; (1-Finger_SWIPE).ii. Panning; (3-Finger_TAP & DRAG).
6. Open a “Menu” on the web page:
a. Open the Animal “Menu”; (1-Finger_TAP & HOLD).b. Open link as a New Tab, select “Open in New Tab”; (1-Finger_TAP). c. Switch between the 2 Tabs; (1-Finger_TAP).
7. Define a word:a. On the “Animals” web page, define a word such as, “birds”
(1-Finger_TAP & HOLD).b. Select “Define”; (1-Finger_TAP).c. Pan up to the Popup window; (3-Finger_DRAG) up.d. Read the definition.
Task 3: Rearranging the App Icons on the “Home” screen
1. Go to the “Home” Screen; press (HOME) button.2. Place the Home Screen into “Jiggle” mode; (1-Finger_TAP & HOLD).3. Drag the “iTunes” app up to be the first icon; (1-Finger_TAP & DRAG).
Developed by Robert Miller – Oklahoma School for the Blind – Last updated 24 April 2012 Page 20 of 58

Section 3.3: Accessing Maps (Accessibility ZOOM vs. Mainstream Zoom) Note: During these tasks you will learn the difference between mainstream Zoom and
accessibility ZOOM on a map. You will use the TAP and PINCH methods.
Task 1: Enable & Adjust ZOOM Magnification & Launch "Maps" App1. Enable and adjust ZOOM magnification; (3-Finger_TAB & DRAG).2. Launch “Maps”; (1-Finger_TAP).
Task 2: Mainstream Zoom1. Method 1: Zoom In & Out using TAPS
a. Zoom IN on the web page; (1-Finger_DOUBLE TAP), repeatedly.b. Zoom OUT on the web page; (2-Finger_TAP), repeatedly.
2. Method 2: Zoom in & Out using Pincha. Zoom IN on the web page; (2-Finger_PINCH).
i. Place your thumb and index finger together on the screen and then slide them apart.b. Zoom OUT on the web page; (2-Finger_PINCH).
i. Place your thumb and index finger apart on the screen and then slide them together.
Task 3: Accessibility ZOOM1. Zoom IN; (3-Finger_TAP & DRAG UP).2. Zoom OUT; (3-Finger_TAP & DRAG DOWN).
Section 3.4: Multitasking GesturesNote 1: During these tasks you will learn how to use “Multitasking Gestures” to go to the
“Home” screen, reveal the “Multitasking Bar”, and “Switch” to another app.Task 1: Going to the “Home” screen
1. Launch “Safari”; (1-Finger_TAP).2. Use the “Multitasking Gesture” to go to the “Home” screen;
(4/5-Finger_PINCH).
Task 2: Reveal the “Multitasking Bar”
1. Launch “Settings”; (1-Finger_TAP).2. Use the “Multitasking Gesture” to reveal “Multitasking Bar;
(4/5-Finger_SWIPE UP).3. From the list, launch “Safari”; (1-Finger_TAP).
Task 3: Switch to Between Apps:
1. Safari should still be open.a. (Must have an app open first).
2. Switch to the Next App; (4/5-Finger_SWIPE LEFT).3. Switch to the Previous App; (4/5-Finger_SWIPE RIGHT).
Developed by Robert Miller – Oklahoma School for the Blind – Last updated 24 April 2012 Page 21 of 58
Table of Contents button
Library button
Section 3.5: Accessibility Feature: “White On Black”Note: The “White on Black” feature is the iPad’s high contrast/negative image.
Task 1: Turning on the “White on Black” feature1. Go to “Settings”.2. Go to “Accessibility” 3. Select the “White on Black” feature.4. Move to “Section 3.6” to demonstrate “White on Black”.
Section 3.6: iBooks: (read a book)
Notes: During these tasks you will learn how to navigate and read a book in iBooks. iBooks is a free app that you must download from the Apple Apps Store. Using iTunes you can download ePub and PDF books.
1. Launch “iBooks”:a. Go to the Home screen; press (Home) button.b. Move to “Page 2” of the Home screen; (1-Finger_FLICK LEFT).c. Pan screen in view of iBooks app; (3-Finger_DRAG).d. Activate the iBooks app; (1-Finger_TAP).
2. Open the “Library”, if not open already, by using (3-Finger_DRAG) to pan “Library” button in view; then (1-Finger_TAP) activate the “Library” button.
3. Select & open the book, “The Ugly Duckling”; (3-Finger_DRAG) & (1-Finger_TAP).4. Open “Table of Contents” to move to “The Ugly Duckling…page 3” by using the
(3-Finger_DRAG) & (1-Finger_TAP) method.
5. Turn Pages Slowly: (Use 3-Finger_DRAG when needed):a. Turn to the next page; on page’s right edge; (1-Finger_TAP & DRAG LEFT).b. Turn to the previous page; on page’s left edge; (1-Finger_TAP & DRAG RIGHT).
6. Turn Pages Quickly:
a. Turn to the next page; on center to right edge; (1-Finger_TAP & FLICK LEFT).b. Turn to the previous page; on center to left edge; (1-Finger_TAP & FLICK RIGHT).
7. Bookmarks:Notes: You don’t have to set a bookmark when you close the book; iBooks will remember your page and return you to it when you open the book again.
a. Add a Bookmark; (1-Finger_TAP) on the Ribbon, top-right corner.b. Remove a Bookmark; (1-Finger_TAP) on the Ribbon, top-right corner.
Developed by Robert Miller – Oklahoma School for the Blind – Last updated 24 April 2012 Page 22 of 58
Add A Note
Delete Note
Section 3.7: Accessibility Feature: “Large Text” Note: the “Large Text” feature will allow you to increase the font size up to 56-point text in alerts,
Calendar, Contacts, Mail, Messages, and Notes.
Task 1: Turning on the “Large Text” feature
1. Go to “Settings”.2. Go to “Accessibility”. 3. Select “56 pt text” in the “Large Text” feature.4. Move on to Section 3.8 to demonstrate the “Large Text” feature in “Notes”.
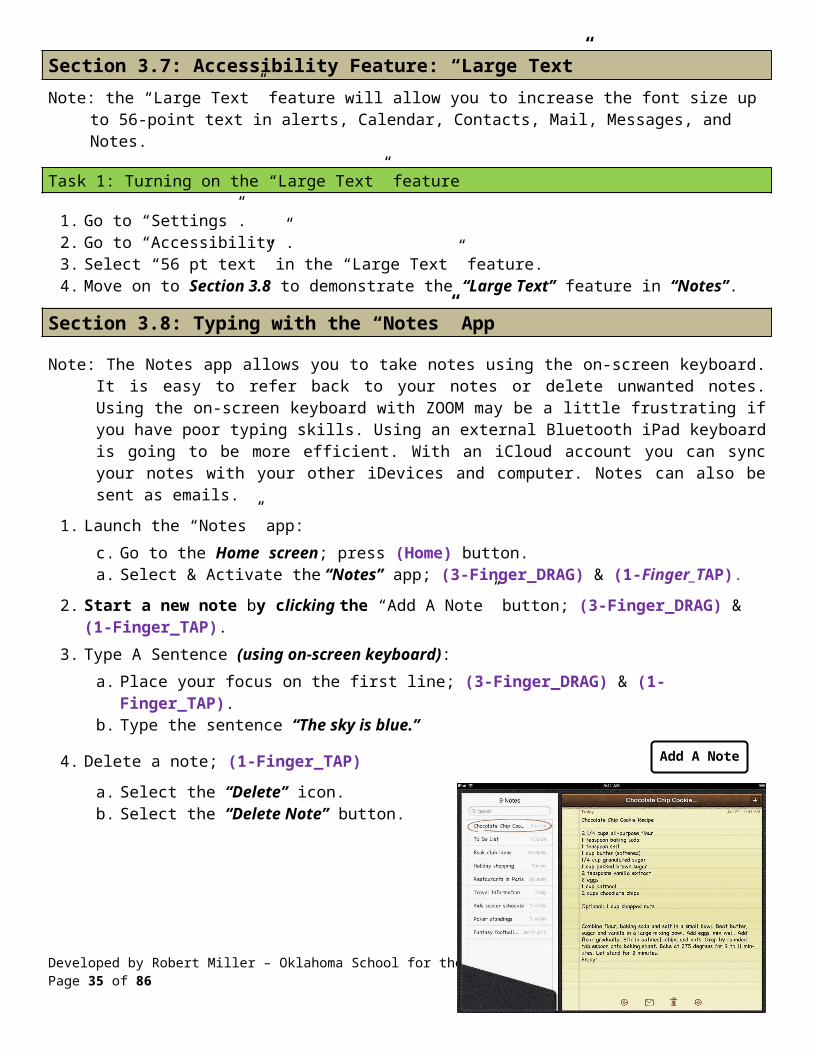
Section 3.8: Typing with the “Notes” App
Note: The Notes app allows you to take notes using the on-screen keyboard. It is easy to refer back to your notes or delete unwanted notes. Using the on-screen keyboard with ZOOM may be a little frustrating if you have poor typing skills. Using an external Bluetooth iPad keyboard is going to be more efficient. With an iCloud account you can sync your notes with your other iDevices and computer. Notes can also be sent as emails.
1. Launch the “Notes” app:c. Go to the Home screen; press (Home) button.a. Select & Activate the “Notes” app; (3-Finger_DRAG) & (1-Finger_TAP).
2. Start a new note by clicking the “Add A Note” button; (3-Finger_DRAG) & (1-Finger_TAP).3. Type A Sentence (using on-screen keyboard):
a. Place your focus on the first line; (3-Finger_DRAG) & (1-Finger_TAP).b. Type the sentence “The sky is blue.”
4. Delete a note; (1-Finger_TAP)a. Select the “Delete” icon.b. Select the “Delete Note” button.
Developed by Robert Miller – Oklahoma School for the Blind – Last updated 24 April 2012 Page 23 of 58
Front Camera
Home Button
“Power”Sleep/Wake
Button Volume
Silent/Rotation Lock
Head Phone Jack
Aux Space18 Cells
Power
Joystick
Pan Left Pan Right
Cursor Routing
PART 4: iPad with VoiceOver and the Refreshabraille 18`
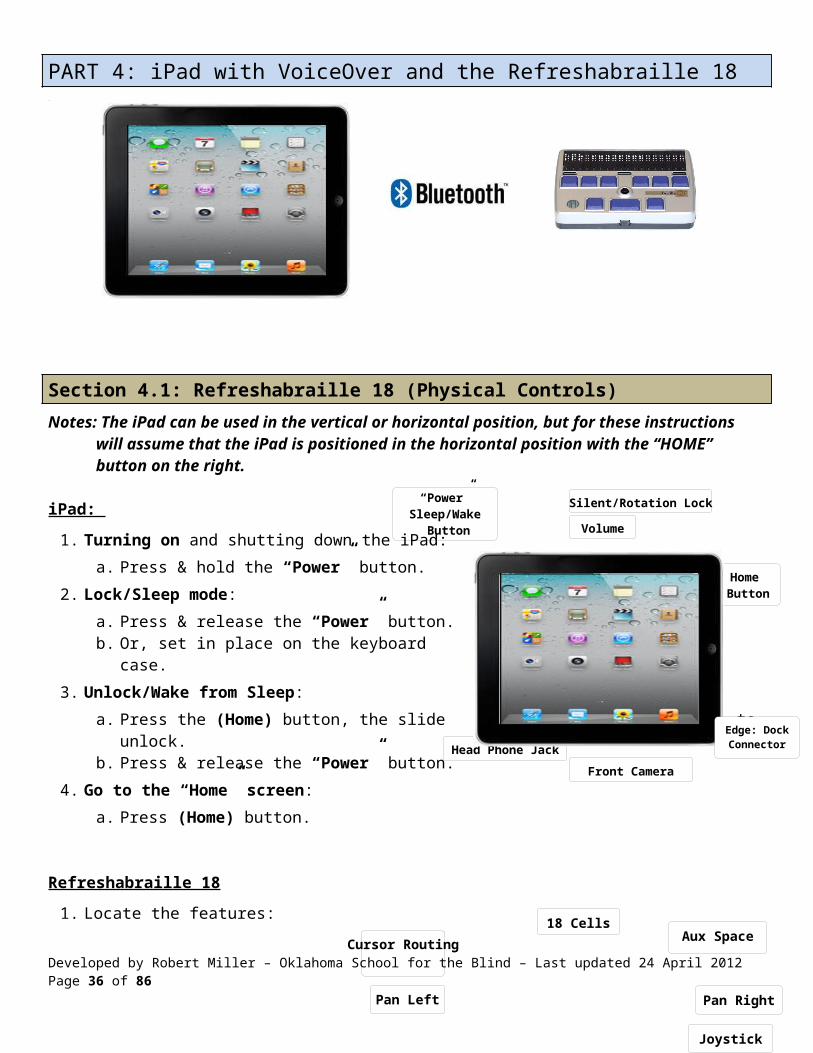
Section 4.1: Refreshabraille 18 (Physical Controls)Notes: The iPad can be used in the vertical or horizontal position, but for these instructions
will assume that the iPad is positioned in the horizontal position with the “HOME” button on the right.
iPad: 1. Turning on and shutting down the iPad:
a. Press & hold the “Power” button.2. Lock/Sleep mode:
a. Press & release the “Power” button.b. Or, set in place on the keyboard case.
3. Unlock/Wake from Sleep:a. Press the (Home) button, the slide to unlock.b. Press & release the “Power” button.
4. Go to the “Home” screen:a. Press (Home) button.
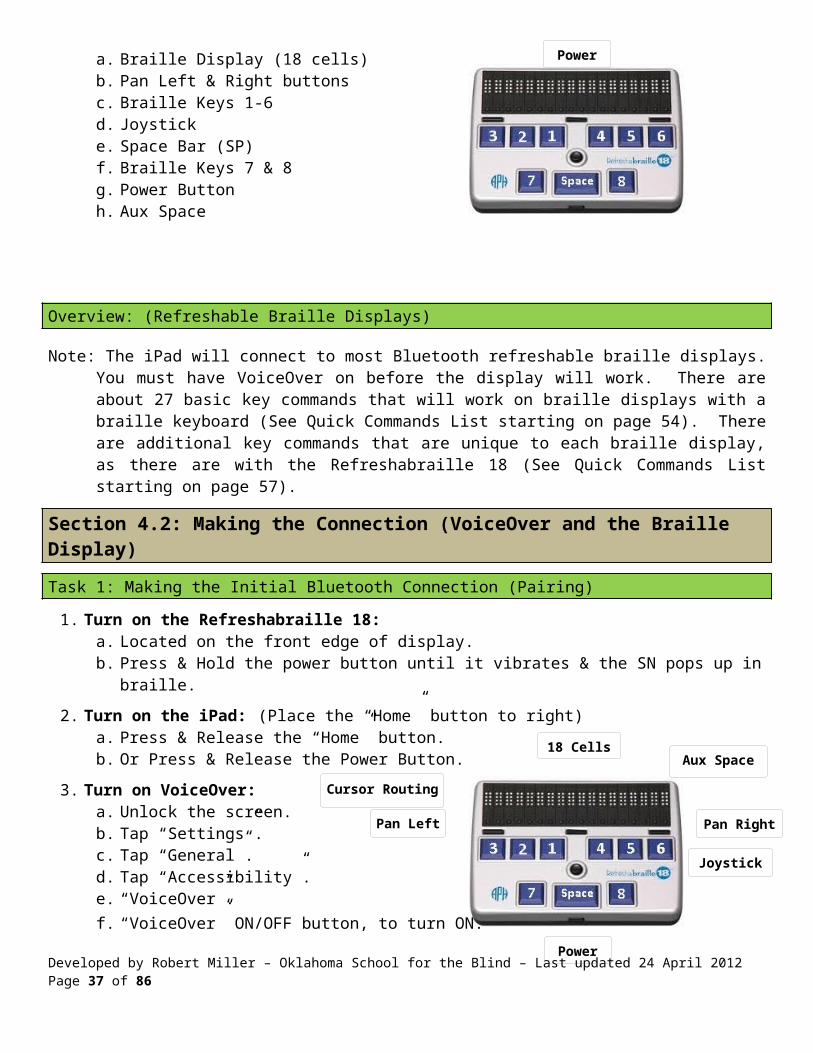
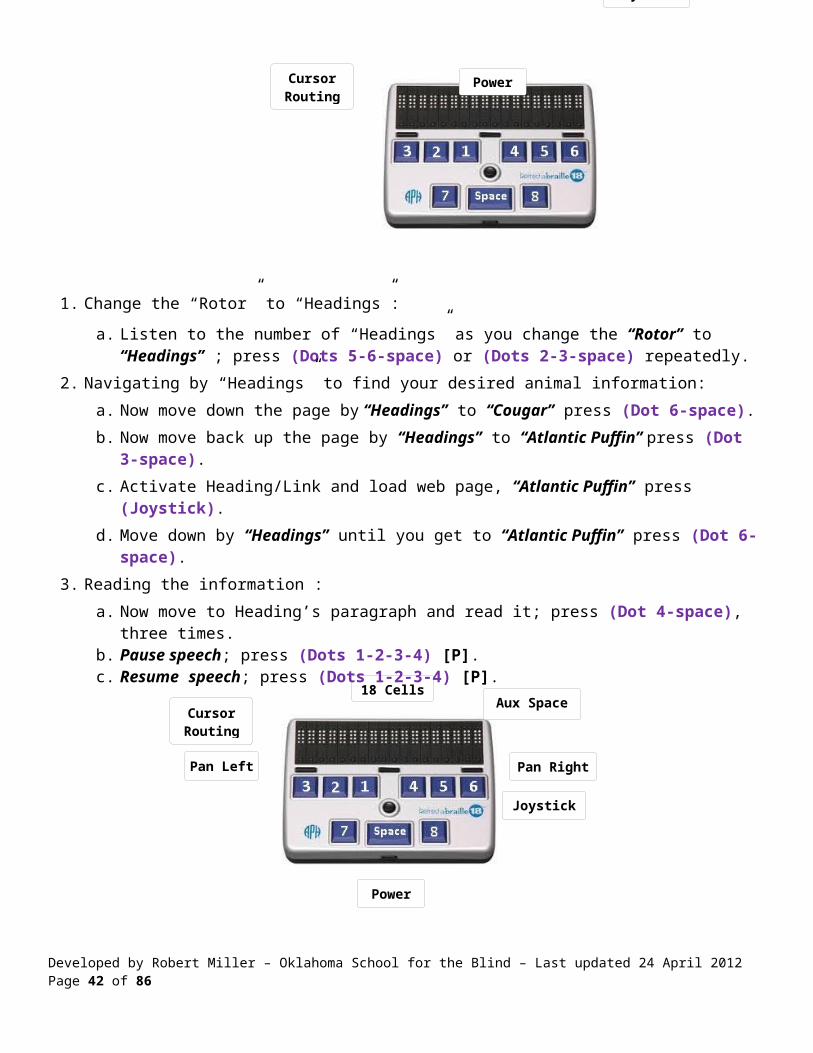
Refreshabraille 181. Locate the features:
a. Braille Display (18 cells)b. Pan Left & Right buttonsc. Braille Keys 1-6d. Joysticke. Space Bar (SP)f. Braille Keys 7 & 8g. Power Buttonh. Aux Space
Developed by Robert Miller – Oklahoma School for the Blind – Last updated 24 April 2012 Page 24 of 58
Edge: Dock Connector
Aux Space18 Cells
Power
Joystick
Pan Left Pan Right
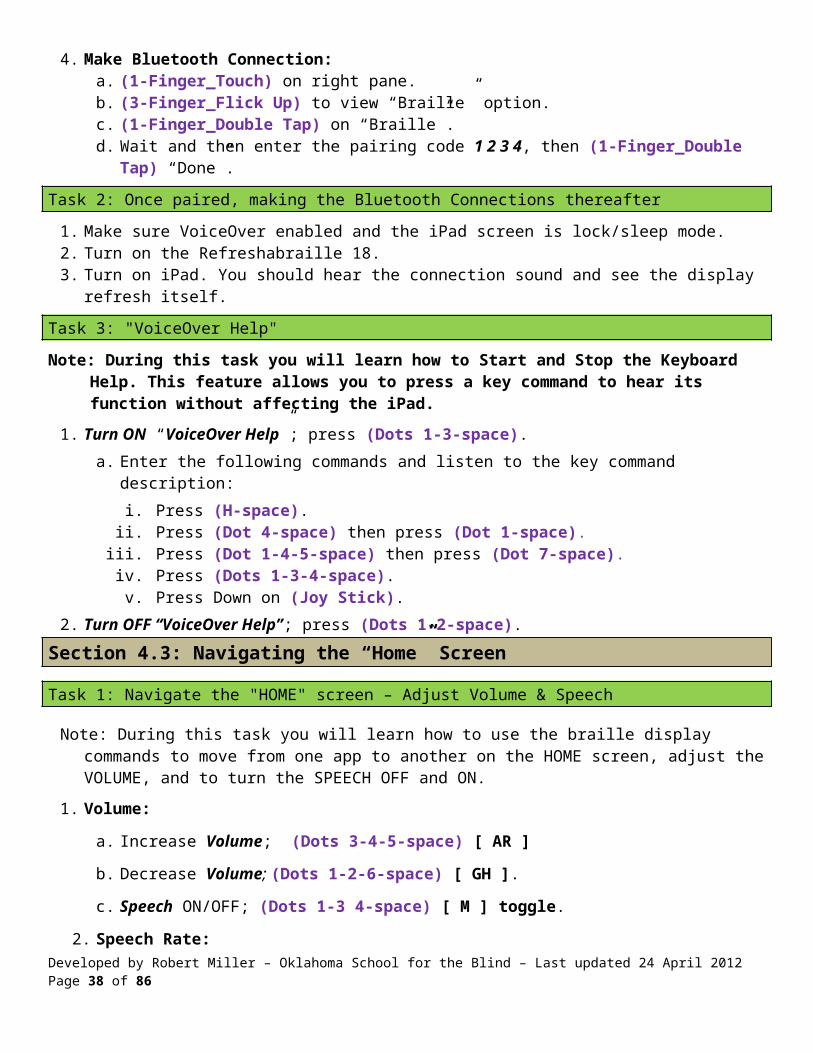
Overview: (Refreshable Braille Displays)
Note: The iPad will connect to most Bluetooth refreshable braille displays. You must have VoiceOver on before the display will work. There are about 27 basic key commands that will work on braille displays with a braille keyboard (See Quick Commands List starting on page 54). There are additional key commands that are unique to each braille display, as there are with the Refreshabraille 18 (See Quick Commands List starting on page 57).
Section 4.2: Making the Connection (VoiceOver and the Braille Display)Task 1: Making the Initial Bluetooth Connection (Pairing)
1. Turn on the Refreshabraille 18:a. Located on the front edge of display.b. Press & Hold the power button until it vibrates & the SN pops up in braille.
2. Turn on the iPad: (Place the “Home” button to right)a. Press & Release the “Home” button.b. Or Press & Release the Power Button.
3. Turn on VoiceOver:a. Unlock the screen.b. Tap “Settings”.c. Tap “General”.d. Tap “Accessibility”.e. “VoiceOver”.f. “VoiceOver” ON/OFF button, to turn ON.
4. Make Bluetooth Connection:a. (1-Finger_Touch) on right pane.b. (3-Finger_Flick Up) to view “Braille” option.c. (1-Finger_Double Tap) on “Braille”.d. Wait and then enter the pairing code 1 2 3 4, then (1-Finger_Double Tap) “Done”.
Task 2: Once paired, making the Bluetooth Connections thereafter1. Make sure VoiceOver enabled and the iPad screen is lock/sleep mode.2. Turn on the Refreshabraille 18.3. Turn on iPad. You should hear the connection sound and see the display refresh itself.
Task 3: "VoiceOver Help"Note: During this task you will learn how to Start and Stop the Keyboard Help. This feature
allows you to press a key command to hear its function without affecting the iPad. 1. Turn ON “VoiceOver Help”; press (Dots 1-3-space).
a. Enter the following commands and listen to the key command description:i. Press (H-space).ii. Press (Dot 4-space) then press (Dot 1-space).iii. Press (Dot 1-4-5-space) then press (Dot 7-space).iv. Press (Dots 1-3-4-space).v. Press Down on (Joy Stick).
2. Turn OFF “VoiceOver Help”; press (Dots 1-2-space).
Developed by Robert Miller – Oklahoma School for the Blind – Last updated 24 April 2012 Page 25 of 58
Cursor Routing
Aux Space18 Cells
Power
Joystick
Pan Left Pan Right
Section 4.3: Navigating the “Home” Screen
Task 1: Navigate the "HOME" screen – Adjust Volume & Speech
Note: During this task you will learn how to use the braille display commands to move from one app to another on the HOME screen, adjust the VOLUME, and to turn the SPEECH OFF and ON.
1. Volume: a. Increase Volume; (Dots 3-4-5-space) [ AR ] b. Decrease Volume; (Dots 1-2-6-space) [ GH ].c. Speech ON/OFF; (Dots 1-3 4-space) [ M ] toggle.
2. Speech Rate:a. Set the “Rotor” to “Speech Rate”; (Dots 5-6-space) or (Dots 2-3-space).b. Increase Speech Rate; (Dot 3-space).c. Decrease Speech Rate; (Dot 6-space).
3. Navigate “Home” Screen Pages: a. Go to “Home” Screen; (H-Space).b. Move to the “Search” Page; (Dots 2-4-6-space).c. Move to Pages 1 & 2 of the Home Screen; (Dots 1-3-5-space).d. Move to back to Page 1 of the Home Screen; (Dots 2-4-6-space).
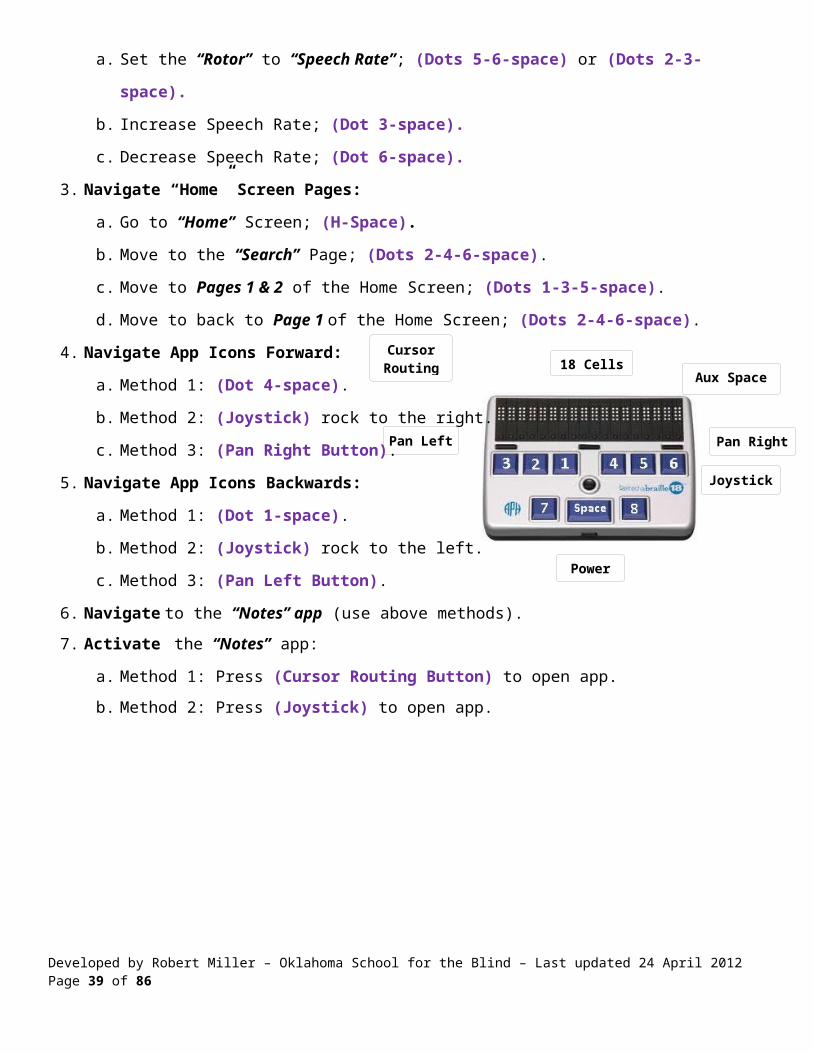
4. Navigate App Icons Forward:a. Method 1: (Dot 4-space).b. Method 2: (Joystick) rock to the right.
c. Method 3: (Pan Right Button).5. Navigate App Icons Backwards:
a. Method 1: (Dot 1-space).b. Method 2: (Joystick) rock to the left.
c. Method 3: (Pan Left Button).6. Navigate to the “Notes” app (use above methods).
7. Activate the “Notes” app:
a. Method 1: Press (Cursor Routing Button) to open app.
b. Method 2: Press (Joystick) to open app.
Developed by Robert Miller – Oklahoma School for the Blind – Last updated 24 April 2012 Page 26 of 58
Cursor Routing
Aux Space18 Cells
Power
Joystick
Pan Left Pan Right
Section 4.4: Surfing the Internet with Safari
Task 1: Launch "Safari" from the HOME screen
1. Go to “Home” screen; press (H-space).2. Navigate to and open the “Safari” app:
a. Select “Safari” app; (Dot 4-space) or (Dot 1-space).b. Activate and open “Safari” app; press (Joystick) or (Cursor Routing Button).
Task 2: Enter web address and launch “www.animalfactguide.com”
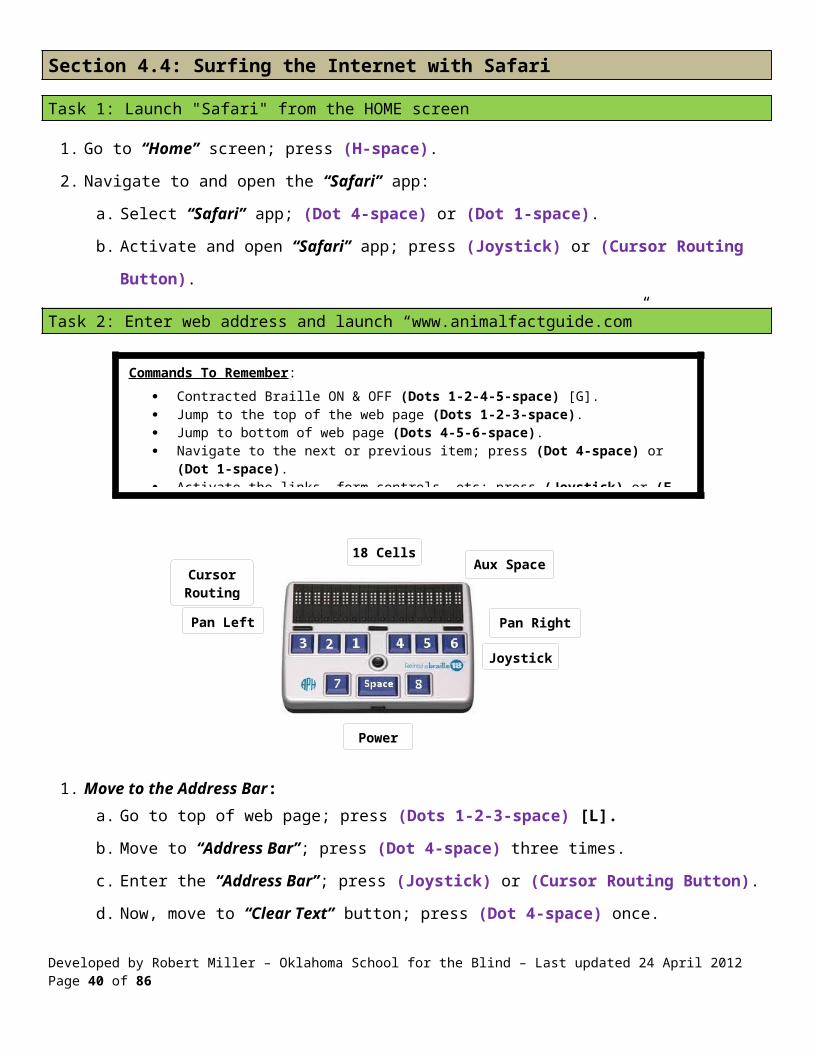
1. Move to the Address Bar:a. Go to top of web page; press (Dots 1-2-3-space) [L].b. Move to “Address Bar”; press (Dot 4-space) three times.
c. Enter the “Address Bar”; press (Joystick) or (Cursor Routing Button).d. Now, move to “Clear Text” button; press (Dot 4-space) once.
e. Then activate the button; press (Joystick) or (Cursor Routing Button).2. Type Web Address:
a. Turn OFF Contracted Braille; press (Dots 1-2-4-5-space) [G]b. Braille the letter “a”, then “b”, then “c”. c. Delete the “b” & “c”; press (Dots 1-4-5-space) [D]. d. Now, finish brailling the web address “n I m a l f a c t g u I d e”.
3. Launch website; press the (Dots 1-5-space) [E].4. Turn ON Contracted Braille; press (Dots 1-2-4-5-space) [G].
Developed by Robert Miller – Oklahoma School for the Blind – Last updated 24 April 2012 Page 27 of 58
Commands To Remember: Contracted Braille ON & OFF (Dots 1-2-4-5-space) [G]. Jump to the top of the web page (Dots 1-2-3-space). Jump to bottom of web page (Dots 4-5-6-space). Navigate to the next or previous item; press (Dot 4-space) or (Dot 1-space). Activate the links, form controls, etc; press (Joystick) or (E-space). Delete; press (D-space). Back; press (B-space) or (Power Button).
SIDE BAR NOTE: Contracted braille can be turned
on, but with it off you don’t get the auto inserting of contractions.
Cursor Routing
Aux Space18 Cells
Power
Joystick
Pan Left Pan Right
Task 3: Load web page, "Animal Facts"1. Move to “Animal Facts” link; press (Dot 4-space) or rock right on (Joystick) repeatedly.2. Activate the “Animal Facts” link; press (Joystick) or (Cursor Routing Button).
Task 4: Use the “Rotor” to move by “Headings” – Read (Pause & Resume Speech)Notes: On web pages there are different types of elements, such as text, links, headings, form
controls, etc. Choosing the most efficient elements to navigate by will help you find what you are looking for quicker. The “Rotor Control” makes it possible to choose which element to navigate.
1. Change the “Rotor” to “Headings”:
a. Listen to the number of “Headings” as you change the “Rotor” to “Headings” ; press (Dots 5-6-space) or (Dots 2-3-space) repeatedly.
2. Navigating by “Headings” to find your desired animal information:a. Now move down the page by “Headings” to “Cougar” press (Dot 6-space).b. Now move back up the page by “Headings” to “Atlantic Puffin” press (Dot 3-space).c. Activate Heading/Link and load web page, “Atlantic Puffin” press (Joystick).d. Move down by “Headings” until you get to “Atlantic Puffin” press (Dot 6-space).
3. Reading the information :a. Now move to Heading’s paragraph and read it; press (Dot 4-space), three times.b. Pause speech; press (Dots 1-2-3-4) [P].c. Resume speech; press (Dots 1-2-3-4) [P].
Developed by Robert Miller – Oklahoma School for the Blind – Last updated 24 April 2012 Page 28 of 58
Commands To Remember: Change “Rotor” selection; press (Dots 5-6-space) or (Dots 2-3-space). Navigate to different “Rotor” items on web page; press (Dot 6-space) or (Dot 3-
space). Activate the links, form controls, etc; press (Joystick). Navigate to the next or previous item; press (Dot 4-space) or (Dot 1-space). Pause & Resume “Speech Reading”; press (P-space) toggle. Start Reading from top op web page; press (W-space). Start Reading from current location; press (R-space). Jump to bottom of web page; press (Dots 4-5-6-space). Jump to the top of the web page; press (Dots 1-2-3-space). Pan braille forward; press (Right Panning Button). Pan braille back; press (Left Panning Button). Activate the “Home” button; press (H-space).
Cursor Routing
Aux Space18 Cells
Power
Joystick
Pan Left Pan Right
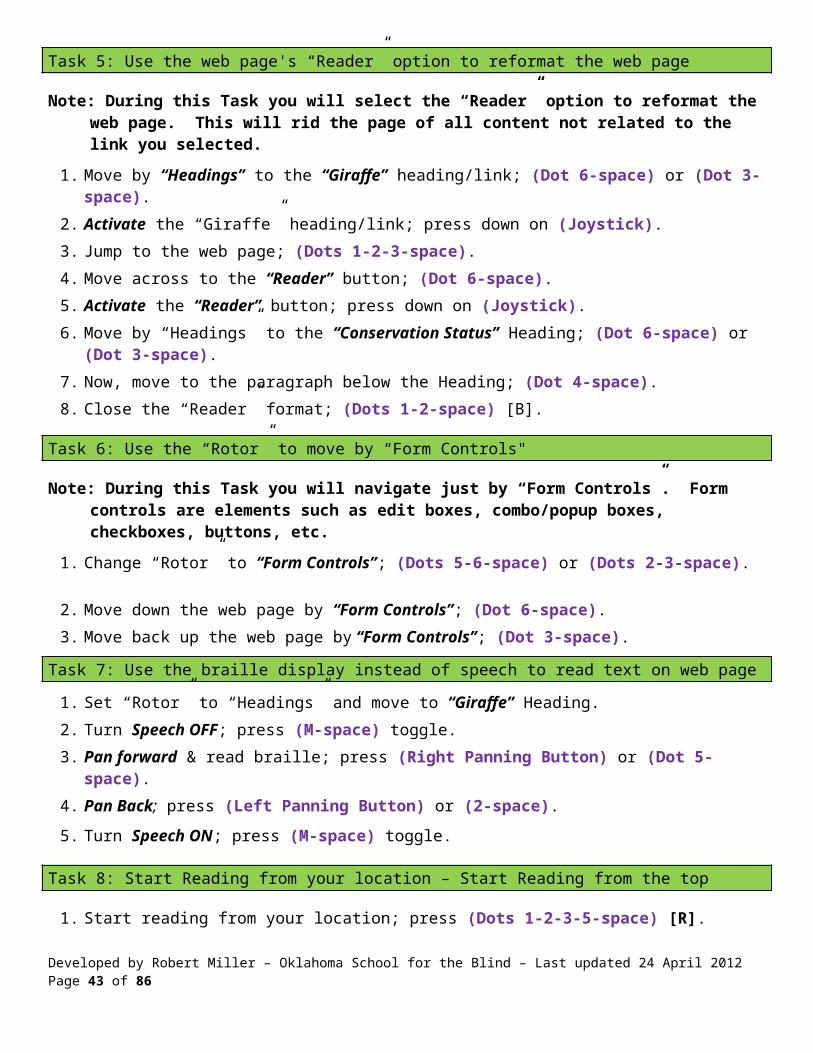
Task 5: Use the web page's “Reader” option to reformat the web page
Note: During this Task you will select the “Reader” option to reformat the web page. This will rid the page of all content not related to the link you selected.
1. Move by “Headings” to the “Giraffe” heading/link; (Dot 6-space) or (Dot 3-space).2. Activate the “Giraffe” heading/link; press down on (Joystick).3. Jump to the web page; (Dots 1-2-3-space).4. Move across to the “Reader” button; (Dot 6-space).5. Activate the “Reader” button; press down on (Joystick).6. Move by “Headings” to the “Conservation Status” Heading; (Dot 6-space) or (Dot 3-space).7. Now, move to the paragraph below the Heading; (Dot 4-space).8. Close the “Reader” format; (Dots 1-2-space) [B].
Task 6: Use the “Rotor” to move by “Form Controls"
Note: During this Task you will navigate just by “Form Controls”. Form controls are elements such as edit boxes, combo/popup boxes, checkboxes, buttons, etc.
1. Change “Rotor” to “Form Controls”; (Dots 5-6-space) or (Dots 2-3-space).
2. Move down the web page by “Form Controls”; (Dot 6-space).3. Move back up the web page by “Form Controls”; (Dot 3-space).
Task 7: Use the braille display instead of speech to read text on web page1. Set “Rotor” to “Headings” and move to “Giraffe” Heading.2. Turn Speech OFF; press (M-space) toggle.3. Pan forward & read braille; press (Right Panning Button) or (Dot 5-space).4. Pan Back; press (Left Panning Button) or (2-space).5. Turn Speech ON; press (M-space) toggle.
Task 8: Start Reading from your location – Start Reading from the top
1. Start reading from your location; press (Dots 1-2-3-5-space) [R].2. Start reading from the top; press (Dots 2-4-5-6--space) [W].
Developed by Robert Miller – Oklahoma School for the Blind – Last updated 24 April 2012 Page 29 of 58
Cursor Routing
Task 9: Close the Curtain
1. Move to the “Home Screen”; press (Dots 1-2-5-space) [H].2. Close the Curtain; press (Dots 1-2-3-4-5-6-space).
a. You can now work without anyone seeing what’s on the screen.b. Try it out! Use the commands just learned. Go to the Safari app on the “Home Screen”
and launch it. Navigate by Headings, then move to the text of the Heading.
3. Open the Curtain; press (Dots 1-2-3-4-5-6-space).
Developed by Robert Miller – Oklahoma School for the Blind – Last updated 24 April 2012 Page 30 of 58

Table of Contents button
Library button
Section 4.5: iBooks: Reading a BookNotes: During these tasks you will learn how to navigate and read a book in iBooks. iBooks
is a free app that you can download from the Apple Apps Store. Using iTunes you can download ePub and PDF books. iBooks is accessible to blind and visually impaired readers using VoiceOver, ZOOM, or VoiceOver with a braille display.
Task 1: Launch “iBooks”
1. Go to the Home screen; press (H-space) button.
2. Move to “Page 2” of the Home screen; (Dots 1-3-5-space).3. Select the iBooks app:
a. Jump to top of screen; press (Dots 1-2-3-space).b. Move to “iBooks” app; (Dot 4-space) repeatedly.c. Activate the iBooks app; press (Joystick).
Task 2: Open the “Library” &“Book”
1. Move to “Library” button; (Dot 4-space) repeatedly.2. Activate the “Library” button; press (Cursor Routing Button).3. Open the book, “The Ugly Duckling”:
a. Move to “The Ugly Duckling” button; rock right on (Joystick) repeatedly.b. Activate the “The Ugly Duckling; press (Joystick).
Task 3: Navigate the book's “Table of Contents”
1. Select the book’s “Table of Contents” button; (Dot 4-space).2. Activate the “Table of Contents” button; press (Joystick).3. Move down table to “The Ugly Duckling, page 3”; (Dot 4-space)/ rock right on (Joystick).4. Activate TOC item, “The Ugly Duckling, page 3”; (Joystick) or (Cursor Routing Button).
Task 4: Turning & Reading the pages with SPEECH
1. Turn & Read the Next Page:a. Move into text then turn to the next pages; (Dots 1-3-5-space) [O] several times.b. Pause the reading; press (1-2-3-4-space) [P].
2. Turn to the previous page; press (Dots 2-4-6-space).a. Pause the reading; press (1-2-3-4-space) [P].
3. Page Chooser:a. Move to the Page Chooser; press (Dots 4-space).b. Move forward or backwards; press (Dots 6-space) or (Dots 3-space).
Developed by Robert Miller – Oklahoma School for the Blind – Last updated 24 April 2012 Page 31 of 58
Aux Space18 Cells
Power
Joystick
Pan Left Pan Right
Task 5: Turning Pages using "Page Chooser"
1. Jump to the end of the page; (Dots 1-2-3-space).2. Move to the “Page Chooser”; (Dot 1-space), repeatedly.[3.] Turn the pages forwards; (Dots 6-space), repeatedly. 3.[4.] Turn the pages backwards; (Dots 3-space), repeatedly.
Task 6: Turning & Reading the pages with Brialle Display (NO SPEECH)
1. Turn OFF Speech; (Dots 1-3-4-space) [M] toggle.2. Read the page with the braille display;
a. Method 1: Panning Buttons i. Read forwards: (Right Panning Button) repeatedly.ii. Read backwards: (Left Panning Button) repeatedly.
b. Method 2: Braille Dot keys i. Read forwards: (Dot 5-space) repeatedly.ii. Read backwards: (Dot 2-space) repeatedly.
3. Turn ON Speech: (Dots 1-3-4-space) [M] toggle.
Task 7: Bookmarks
Notes: You don’t have to set a bookmark when you close the book; iBooks will remember your page and return you to it when you open the book again.
1. Add A Bookmark:a. Jump to the top; (Dots 1-2-3-space).b. Move to the “Add a Bookmark” button; (Dots 4-space).c. Activate the “Add a Bookmark” button; press (Joystick) or (Cursor Routing Button).
2. Remove A Bookmark:a. Jump to the top; (Dots 1-2-3-space).b. Move to the “Add a Bookmark” button; (Dots 4-space).c. Activate “Remove Bookmark” button; press (Joystick) or (Cursor Routing Button).
Developed by Robert Miller – Oklahoma School for the Blind – Last updated 24 April 2012 Page 32 of 58
Cursor Routing
Cursor Routing Aux Space18 Cells
Power
Joystick
Pan Left Pan Right
Section 4.6: Typing with the “Notes” App
1. The Notes app allows you to take notes using the on-screen keyboard. It is easy to refer back to your notes or delete unwanted notes.
2. Using VoiceOver with a braille display is a lot easier to enter text then just using VoiceOver.
3. With an iCloud account you can sync your notes with your other iDevices and computer. Notes can also be sent as email.
Task 1: Launch “Notes” & Start a New Note
1. Go to the Home screen; press (Home) button.2. Select & Activate the Notes app.
a. Move to the “Notes” app; (Dots 4-space).b. Activate the “Notes” app; press (Joystick).
3. Start a new note:a. Move to the “Add” button; (Dots 4-space).b. Activate the “Add” button; press (Joystick).
Task 2: Writing contracted & uncontracted sentences with the Braille DisplayNote: Contracted braille is inserted after you press the space or ending punctuation.
1. Set display to uncontracted braille; (Dots 1-2-4-5-space). Type the sentence with contracted braille “The iPad is very cool.”
2. Move to a New Line; (Dots 1-5-space) [E].3. Now set the display to contracted braille; (Dots 1-2-4-5-space). Type the sentence with
contracted braille “VoiceOver makes the iPad easy to use.”4. Delete “use.”; (Dots 1-4-5-space) [D]repeatedly.5. Now type “have fun.”6. Delete a note:
a. Move to the “Delete” icon; (Dot 4-space).b. Activate the first “Delete” button; (Joystick). c. Now activate second “Delete” Button; (Joystick).
Developed by Robert Miller – Oklahoma School for the Blind – Last updated 24 April 2012 Page 33 of 58
Add A Note
Delete
SIDE BAR NOTE: We also have “Pages”, the word
processor for the iDevices VoiceOver and Refreshabraille 18
works with Pages as well.
Power Button
Left Whiz Wheel
Right Whiz Wheel
Hotkeys
Cursor Routing
L-Panning Button
RockerBar
RockerBar
R-Panning Button
SelectorButton
SelectorButton
Shift keys
Part 5: iPad with VoiceOver and the Focus 40 BlueSection 5.1: Physical Controls (Focus 40 Blue)
Notes: All instructions will assume that the iPad is positioned in the horizontal position with the “HOME” button on the right.
1. Locate the iPad’s physical controls:a. Power button:
i. Press & Hold to power up & down.ii. Press & Release to lock/put to sleep.
b. Silent/Rotation Lock slider.c. Volume button.d. Home button:
i. Press & Release:1. To wake up.2. Go to the Home Screen.
e. Front Camera.
2. Locate the Focus 40 Blue’s physical controls:a. Power buttonb. Braille keysc. 40 braille cellsd. Cursor Routing buttonse. Left/Right Whiz Wheelsf. Row of 40 Hotkeysg. Left/Right Panning buttonsh. Left/Right Rocker Barsi. Left/Right Selector buttonsj. Space & 2 Shift buttons
Overview: (Refreshable Braille Displays)
1. The iPad will connect to most Bluetooth refreshable braille displays.2. You must have VoiceOver on before the display will work. 3. There are about 27 basic key commands that will work on braille displays with a braille keyboard
(See Quick Commands List starting on page 54). 4. There are additional key commands that are unique to each braille display, as there are with the
Focus 40 Blue (See Quick Commands List starting on page 56).
Developed by Robert Miller – Oklahoma School for the Blind – Last updated 24 April 2012 Page 34 of 58
Home Button
“Power”(Sleep/Wake)
Button Volume
Silent/Rotation Lock
Front Camera Edge: Dock Connector
Head Phone Jack
Section 5.2: Making the Connection (VoiceOver and the Braille Display)Task 1: Making the Initial Bluetooth Connection (Pairing)
1. Turn on the Focus 40 Blue:a. Press & Hold the power button.b. Located on the left side.
2. Turn on the iPad: (Place the “Home” button to right)a. Press & release the “Home” button.b. Or press & release the “Power” Button.
3. Turn on VoiceOver:a. Unlock the screen.b. Tap “Settings”.c. Tap “General”.d. Tap “Accessibility”.e. Tap “VoiceOver”.f. Tap “VoiceOver” ON/OFF button, to turn ON.
4. iPad (Make initial Bluetooth Pairing):a. (1-Finger_Touch) on right pane.b. (3-Finger_Flick Up) to view “Braille” option.c. (1-Finger_Double Tap) on “Braille”.d. Wait and then enter the pairing code 0000, then (1-Finger_Double Tap) “Done”.
Task 2: Once paired, making the Bluetooth Connections thereafter
1. Make sure VoiceOver enabled and the iPad is off or in sleep mode.2. Turn on the Focus 40 Blue.3. Turn on iPad. You should hear the connection sound and see the display refresh itself.
Task 3: "VoiceOver Help"
Note: During this task you will Start and Stop the Keyboard Help. This feature allows you to press a key command to hear its function without affecting the iPad.
1. Turn ON “VoiceOver Help”; press (Dots 1-3-space).a. Enter the following commands and listen to the key command description:
i. Press (H-space).ii. Press (Dot 4-space).iii. Press (Dot 1-space).iv. Press (Dots 1-3-4-space).v. Press (Dot 1-4-5-space).vi. Press (Dot 7-space).vii. Press (Right Selector).viii. Press (Left Selector).ix. Press down (Right Rocker).
2. Exit “VoiceOver Help”; (Dots 1-2-space).
Developed by Robert Miller – Oklahoma School for the Blind – Last updated 24 April 2012 Page 35 of 58
Section 5.3: Navigating the “Home” Screen
Task 1: Navigate the "HOME" screen – Adjust Volume & Speech
Note: During this task you will learn how to use the braille display commands to move from one app to another on the HOME screen, adjust the VOLUME, and to turn the SPEECH OFF and ON.
1. Volume:a. Increase Volume; (Dots 3-4-5-space) [ AR ].b. Decrease Volume; (Dots 1-2-6-space) [ GH ].c. Speech ON/OFF; (Dots 1-3 4-space) [ M ] toggle.
2. Speech Rate:a. Set the “Rotor” to “Speech Rate”; (Dots 5-6-space) or (Dots 2-3-space).b. Increase Speech Rate; (Dot 3-space).c. Decrease Speech Rate; (Dot 6-space).
3. Navigate “Home” Screen Pages:a. Go to “Home” Screen; (H-Space).b. Move to the “Search” page; (Dots 2-4-6-space).c. Move to Pages 1 & 2 of “Home” screen; (Dots 1-3-5-space).d. Move back to Page 1 of “Home” screen; (Dots 2-4-6-space).
4. Navigate App Icons Forward:a. Method 1: (Dot 4-space).b. Method 2: (Whiz Wheels) roll toward your body.
c. Method 3: (Rocker Bars) rock down.
d. Method 4: (Right Panning Button).5. Navigate App Icons backwards:
a. Method 1: (Dot 1-space).b. Method 2: (Whiz Wheels) roll away from your body.
c. Method 3: (Rocker Bars) rock up.
d. Method 4: (Left Panning Button).6. Now, navigate to the “Calendar” app icon (use above methods).
7. Activate the “Calendar” app:
a. Method 1: (Cursor Routing Buttons) to open app.
b. Method 2: (Whiz Wheels) down like a button.
c. Method 3: (Selector Buttons).
Developed by Robert Miller – Oklahoma School for the Blind – Last updated 24 April 2012 Page 36 of 58
Section 5.4: Surfing the Internet with Safari
Task 1: Launch "Safari" from the "HOME" screen
1. Go to “Home” screen; press (H-space).2. Navigate to and open the “Safari” app:
a. Select “Safari” app; (Dot 4-space) or (Dot 1-space).b. Activate and open “Safari” app; press down (Whiz Wheel) or (Cursor Routing Button).
Task 2: Enter web address and launch “www.animalfactguide.com”
1. Move to the Address Bar:a. Go to top of web page; press (Dots 1-2-3-space) [L].b. Move to “Address Bar”; press (Dot 4-space) three times.c. Enter “Address Bar”; press (Selector Button) or (Cursor Routing) or (WhizWheels).d. In the “Address Bar” move to “Clear Text” button; press (Dot 4-space) once.e. Then activate the button; (Selector Button) or (Cursor Routing Button) or
(WhizWheels).2. Type Web Address:
a. Turn OFF Contracted Braille; press (Dots 1-2-4-5-space) [G]b. Braille the letter “a”, then “b”, then “c”.c. Delete the “b” & “c”; press (Dots 1-4-5-space) [D]. d. Now, finish brailling the web address “n i m a l f a c t g u i d e”.
3. Launch website:a. Press the (Selector Button) or (Dots 1-5-space) [E] to launch web page.
Developed by Robert Miller – Oklahoma School for the Blind – Last updated 24 April 2012 Page 37 of 58
Commands To Remember: Contracted Braille ON & OFF (Dots 1-2-4-5-space) [G]. Jump to the top of the web page (Dots 1-2-3-space). Jump to bottom of web page (Dots 4-5-6-space). Navigate to the next or previous item; press (Dot 4-space) or (Dot 1-space). Activate the links, form controls, etc; press (Cursor Routing) or (E-space) or
(WhizWheel). Delete; press (D-space).
SIDE BAR NOTE: Contracted braille can be turned
on, but with it off you don’t get the auto inserting of contractions.
Task 3: Navigate the Elements: Load the web page, "Animal Facts"
1. Move to “Animal Facts” link; press (Dot 4-space) or press down (Whiz Wheel).2. Activate the “Animal Facts” link; press (Selector Button) or (Cursor Routing Button).
Task 4: Use the “Rotor” to move by “Headings” – Read (Pause & Resume Speech)Notes: On web pages there are different types of elements, such as text, links, headings, Form
Controls, etc. Choosing more efficient elements to navigate by will help you find what you are looking for quicker. The “Rotor Control” makes it possible to choose which element to navigate.
1. Change the “Rotor” to “Headings”:a. Listen to the number of “Headings” as you change the “Rotor” to “Headings”; press
(Dots 5-6-space) or (Dots 2-3-space) repeatedly.
2. Navigating by “Headings” to find a desired animal:a. Jump to the top of the web page; press (Dots 1-2-3-space).b. Move down the page by “Headings” to “Cougar”; press (Dot 6-space).c. Now move back up the page by “Headings” to “Bonobo”; press (Dot 3-space).d. Activate the Heading/Link and load the web page “Bonobo”; (Whiz Wheel).e. Move down the page by “Headings” until you get to “Bonobo”; (Dot 6-space).
Developed by Robert Miller – Oklahoma School for the Blind – Last updated 24 April 2012 Page 38 of 58
Commands To Remember: Change “Rotor” selection; press (Dots 5-6-space) or (Dots 2-3-space). Navigate to different “Rotor” items on web page; press (Dot 6-space) or (Dot 3-
space). Activate links, form controls, etc; press (Selector) or (WhizWheel) or (Cursor
Routing) Navigate to the next or previous item; press (Dot 4-space) or (Dot 1-space). Pause & Resume “Speech Reading”; press (P-space) toggle. Start Reading from top op web page; press (W-space). Start Reading from current location; press (R-space). Jump to bottom of web page; press (Dots 4-5-6-space). Jump to the top of the web page; press (Dots 1-2-3-space). Pan braille forward; press (Right Panning Button) or rotate (Whiz Wheel) toward
you.
3. Reading the information:a. Now move to Heading’s paragraph and read it; press (Dot 4-space) twice.b. Pause the reading; press (P-space). c. Resume reading; press (P-space).d. Start reading from your current position; press (R-space).e. Jump to the top of web page and start speech reading; press (W-space).
Task 5: Use the web page's “Reader” option to reformat the web page
Note: During this Task you will select the “Reader” option to reformat the web page. This will rid the page of all content not related to the link you selected.
1. Move by “Headings” to the “Bald Eagle” heading/link; (Dots 6-space) or (Dots 3-space).2. Activate the “Bald Eagle” heading/link; press down on (Whiz Wheel).3. Jump to the web page; (Dots 1-2-3-space).4. Move across to the “Reader” button; rotate the (Whiz Wheel) toward your body.5. Activate the “Reader” button; press down on (Whiz Wheel).6. Move forward by “Headings” until you get to “What You Can Do to Help”; (Dots 6-space).7. Move to the paragraph below the “Heading”; (Dot 4-space).8. Close the “Reader” format; (Dots 1-2-space) [B].
Task 6: Use the “Rotor” to move by “Form Controls”:
Note: During this Task you will navigate just by “Form Controls”. Form controls are elements such as edit boxes, combo/popup boxes, checkboxes, buttons, etc.
1. Change “Rotor” to “Form Controls”; (Dots 5-6-space) or (Dots 2-3-space).
2. Move down the web page by “Form Controls”; (Dot 6-space).a. Move back up the web page by “Form Controls”; (Dot 3-space).
Task 7: Use the braille display instead of speech to read text on web page
1. Set “Rotor” to “Headings” and move to “Bald Eagle” Heading.
2. Turn Speech OFF; press (M-space) toggle.
3. Pan forward & read braille; press (Right Panning Button) or (Dot 5-space).4. Pan Back; press (Left Panning Button) or (2-space).5. Turn Speech ON; press (M-space) toggle.
Task 8: Start Reading from your location – Start Reading from the top
1. Start reading from your location; press (Dots 1-2-3-5-space) [R].2. Start reading from the top; press (Dots 2-4-5-6--space) [W].
Developed by Robert Miller – Oklahoma School for the Blind – Last updated 24 April 2012 Page 39 of 58
Task 9: Close the Curtain:
1. Move to the “Home Screen”; press (Dots 1-2-5-space) [H].2. Close the Curtain; press (Dots 1-2-3-4-5-6-space).
a. You can now work without anyone seeing what’s on the screen.b. Try it out! Use the commands just learned. Go to the Safari app on the “Home Screen” and
launch it. Navigate by Headings and then move to the text of the Heading.
3. Open the Curtain; press (Dots 1-2-3-4-5-6-space).
NOTES:
Developed by Robert Miller – Oklahoma School for the Blind – Last updated 24 April 2012 Page 40 of 58
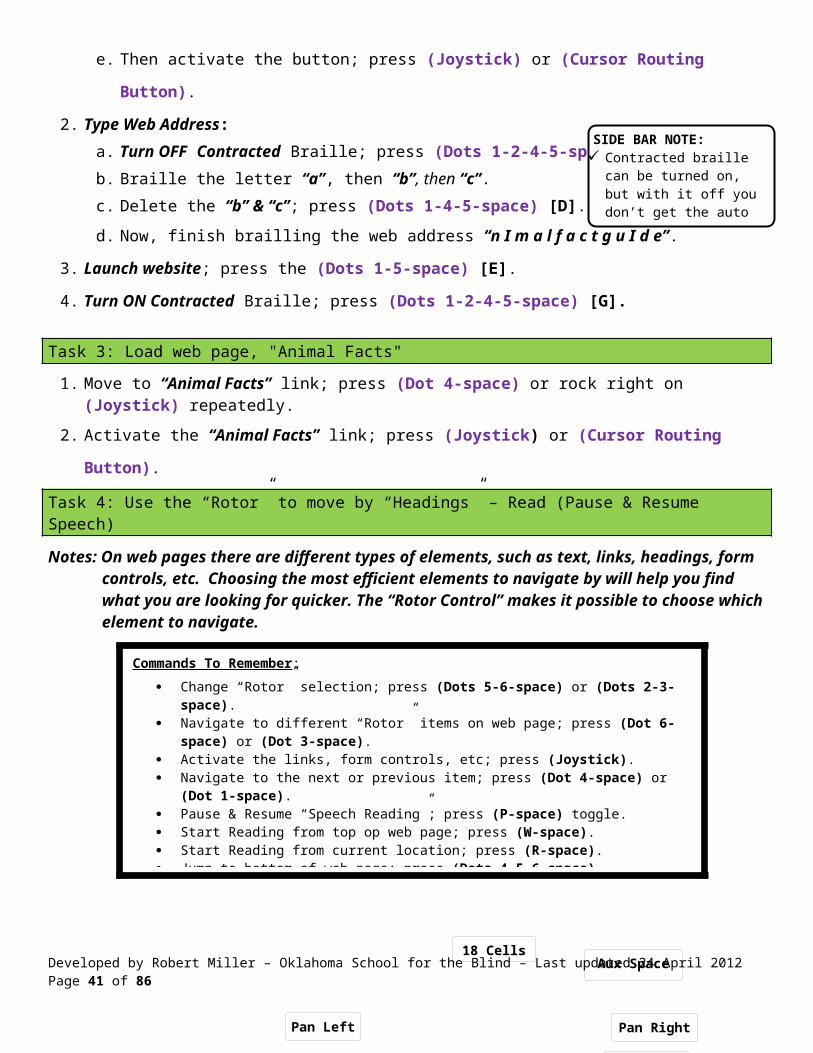
Table of Contents buttonLibrary button
Section 5.5: iBooks: (reading a book)Notes: During these tasks you will learn how to navigate and read a book in iBooks.
iBooks is a free app that you can download from the Apple Apps Store. iBooks is accessible to the Blind and visually impaired through the VoiceOver, ZOOM, or VoiceOver with a braille display.
Task 1: Launch “iBooks”
1. Go to the Home screen; press (H-space) button.
2. Move to “Page 2” of the Home screen; (Dots 1-3-5-space).3. Select the iBooks app:
a. Jump to top of screen; press (Dots 1-2-3-space).b. Move to “iBooks” app; (Dot 4-space) repeatedly.c. Activate the iBooks app; press (Selector Button)
or (Cursor Routing Button) or press (WhizWheel).
Task 2: Open the “Library” &“Book”
1. Move to “Library” button; (Dot 4-space) repeatedly.2. Activate the “Library” button; press (Cursor Routing Button).3. Open the book, “The Ugly Duckling”:
a. Move to “The Ugly Duckling” button; rotate (WhizWheel) repeatedly.b. Activate the “The Ugly Duckling; press (WhizWheel).
Task 3: Navigate the book's “Table of Contents”
1. Select the book’s “Table of Contents” button; (Dot 4-space).2. Activate the “Table of Contents” button; press (Selector Button).3. Move down table to “The Ugly Duckling, page 3”; (Dot 4-space)/Rotate (WhizWheel).4. Activate TOC item, “The Ugly Duckling, page 3”; press (WhizWheel) / (Cursor Routing).
Task 4: Turning & Reading the pages with SPEECH
1. Turn & Read the Next Page:a. Turn to the next page; (Dots 1-3-5-space).b. Listen to VoiceOver read the text on the screen.
i. Note: if book displays 2 pages, it reads both pages on screen.c. Turn to the next page again; (Dots 1-3-5-space).d. Pause the reading; press (P-space).
2. Turn to the previous page; (Dots 2-4-6-space).a. Pause the reading; press (P-space).
Developed by Robert Miller – Oklahoma School for the Blind – Last updated 24 April 2012 Page 41 of 58
Task 5: Turning Pages using "Page Chooser"
1. Jump to the end of the page; (Dots 1-2-3-space).2. Move to the “Page Chooser”; (Dot 1-space), repeatedly.3. Turn the pages forwards; (Dots 6-space), repeatedly.4. Turn the pages backwards; (Dots 3-space), repeatedly.
Task 6: Turning & Reading the pages with Brialle Display (NO SPEECH)
1. Turn OFF Speech; (M-space). toggle2. Read the page with the braille display;
a. Method 1: Panning Buttons i. Read forwards; (Right Panning Button) repeatedly.ii. Read backwards; (Left Panning Button) repeatedly.
b. Method 2: Braille Dot keys i. Read forwards; (Dot 5-space) repeatedly.ii. Read backwards; (Dot 2-space) repeatedly.
3. Turn ON Speech; (M-space) toggle.
Task 7: Bookmarks
Notes: You don’t have to set a bookmark when you close the book; iBooks will remember your page and return you to it when you open the book again.
1. Add A Bookmark:a. Jump to the top; (Dots 1-2-3-space).b. Move to the “Add a Bookmark” button; (Dots 4-space) or Rotate (WhizWheel).c. Activate “Add a Bookmark” button; press (WhizWheel) or (Cursor Routing Button).
2. Remove A Bookmark:a. Jump to the top; (Dots 1-2-3-space).b. Move to the “Add a Bookmark” button; (Dots 4-space) or Rotate (WhizWheel).c. Activate “Remove Bookmark” button; press (WhizWheel) or (Cursor Routing).
Developed by Robert Miller – Oklahoma School for the Blind – Last updated 24 April 2012 Page 42 of 58
Section 5.6: Typing with the “Notes” App
1. The Notes app allows you to take notes using the on-screen keyboard. It is easy to refer back to your notes or delete unwanted notes.
2. Using VoiceOver with a braille display is a lot easier to enter text then just using VoiceOver.
3. With an iCloud account you can sync your notes with your other iDevices and computer. Notes can also be sent as emails.
Task 1: Launch “Notes” & Start a New Note 1. Go to the Home screen; press (Home) button.2. Select & Activate the Notes app.
a. Move to the “Notes” app; rotate (WhizWheel).b. Activate the “Notes” app; press (WhizWheel).
3. Start a new note:a. Jump to the top of the screen; (Dots 1-2-3-space).b. Move to the “Add” button; (Dot 4-space).c. Activate the “Add” button; press (Selector).
Task 2: Type your Sentences with the Braille DisplayNote: Contracted braille is inserted after you press the space or ending punctuation.
1. Set display to uncontracted braille; (Dots 1-2-4-5-space). Type the sentence with contracted braille, “The Focus 40 Blue is great.”
2. Move to a New Line; (E-space).3. Now set the display to contracted braille; (Dots 1-2-4-5-space). Type the sentence with
contracted braille “The Focus 40 Blue makes the iPad easy to use.”4. Delete “use.” (D-space) repeatedly.5. Now type “have fun.”6. Delete a note:
a. Move to the “Delete” icon (Dot 4-space).b. Activate the first “Delete” button (Cursor Routing Button). c. Now activate second “Delete” Button (Selector Button).
Developed by Robert Miller – Oklahoma School for the Blind – Last updated 24 April 2012 Page 43 of 58
Add A Note
Delete
SIDE BAR NOTE: We also have “Pages”, the word
processor for the iDevices VoiceOver and Focus 40 Blue works
with Pages as well.
Home Button
“Power”Sleep/Wake
Button Volume
Silent/Rotation Lock
Head Phone Jack
Front Camera
Scroll Wheel
Cursor Routing Buttons 18 / 32 Braille Cells
ON/OFF (left side)
Part 6: iPad with VoiceOver and Apex as a Braille Display
Section 6.1: Physical Controls (Apex as a Braille Display)Notes: All instructions will assume that the iPad is positioned in the horizontal position with
the “HOME” button on the right.iPad:
1. Turning on and shutting down the iPad:a. Press & hold the “Power” button.
2. Lock/Sleep Mode:a. Press & release the “Power” button.b. Or, set in place on the keyboard case.
3. Unlock/Wake from Sleep:a. Press the (Home) button, the slide to unlock.b. Press & release the “Power” button.
4. Go to the “Home” screen:a. Press (Home) button.
Apex:Find the following features:
1. Braille Dot Keys 1-62. Space 3. Cursor Routing Buttons4. Braille Cells5. Thumb keys 1-46. ON / OFF button7. Scroll Wheel8. Dot 7 (backspace)9. Dot 8 (Enter)
Developed by Robert Miller – Oklahoma School for the Blind – Last updated 24 April 2012 Page 44 of 58
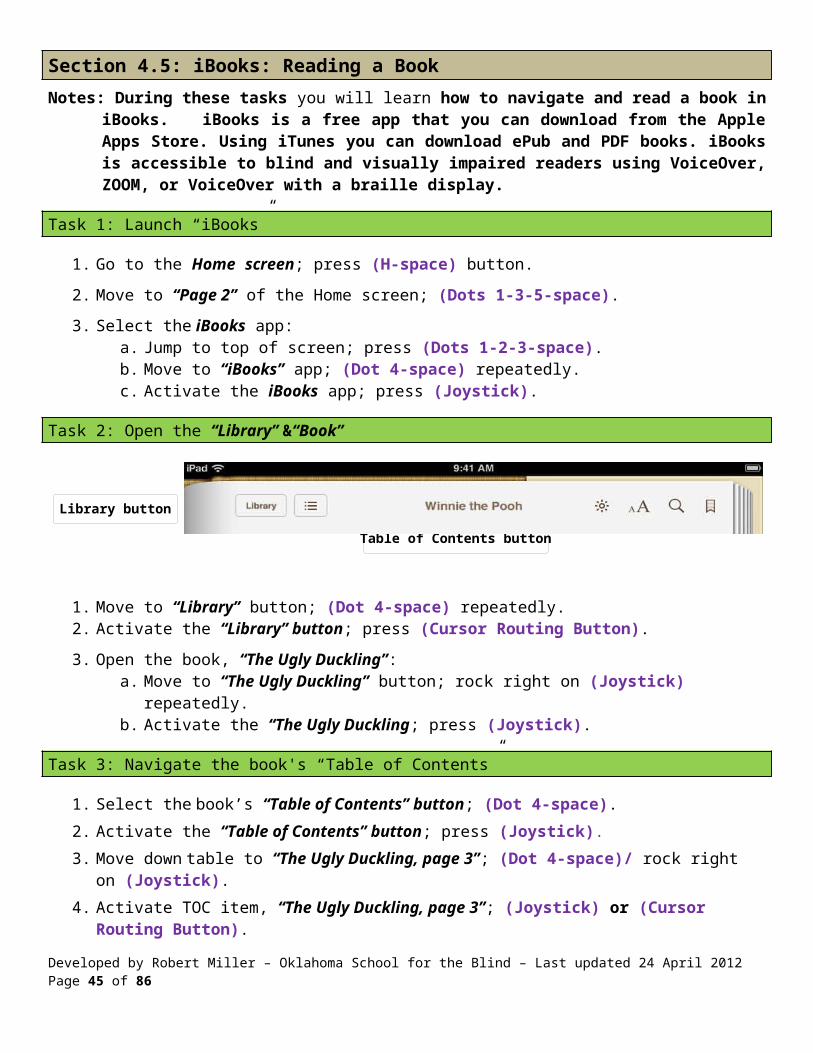
Overview: (Refreshable Braille Displays)
1. The iPad will connect to most Bluetooth refreshable braille displays.2. You must have VoiceOver on before the display will work. 3. There are about 27 basic key commands that will work on braille displays with a braille keyboard
(See Quick Commands starting on page 54). 4. There are additional key commands that are unique to each braille display, as there are with the
Braille Note Apex (See Quick Commands starting on page 57).
Section 6.2: Making the Connection (VoiceOver and the Braille Display)
Task 1: Making the Initial Bluetooth Connection (Pairing)1. Turn on the Braille Note Apex’s Bluetooth, and place in “Braille Terminal” mode:
a. Options; press (O-space).b. Connections; press (C), then turn on Bluetooth; press (B).c. Turn on “Braille Terminal” port; press (T), then (Enter).
2. Turn on the iPad: a. Press & Release the “Home” button.b. Or Press & Release the “Power” Button.
3. Turn on VoiceOver:a. Unlock the screen.b. Tap “Settings”.c. Tap “General”.d. Tap “Accessibility”.e. “VoiceOver”.f. “VoiceOver” ON/OFF button, to turn ON.
4. iPad (Make the initial Bluetooth Pairing):a. (1-Finger_Tap) on right pane.b. (3-Finger_Flick Up) to view “Braille” option.c. (1-Finger_Double Tap) on “Braille”.d. Wait and then enter the pairing code 0000, then (1-Finger_Double Tap) “Done”.
Task 2: Once paired, making the Bluetooth Connections thereafter
1. Make sure VoiceOver enabled and the iPad is off or in sleep mode.2. Turn on the Apex and make sure its Bluetooth is turned on.3. Place in Braille Terminal mode:
a. Main Menu; (Dots 1-2-3-4-5-6-space).b. Turn on Braille Terminal Mode; (T), then (Enter).
4. Turn on iPad. You should hear the connection sound and see the display refresh itself.
Developed by Robert Miller – Oklahoma School for the Blind – Last updated 24 April 2012 Page 45 of 58
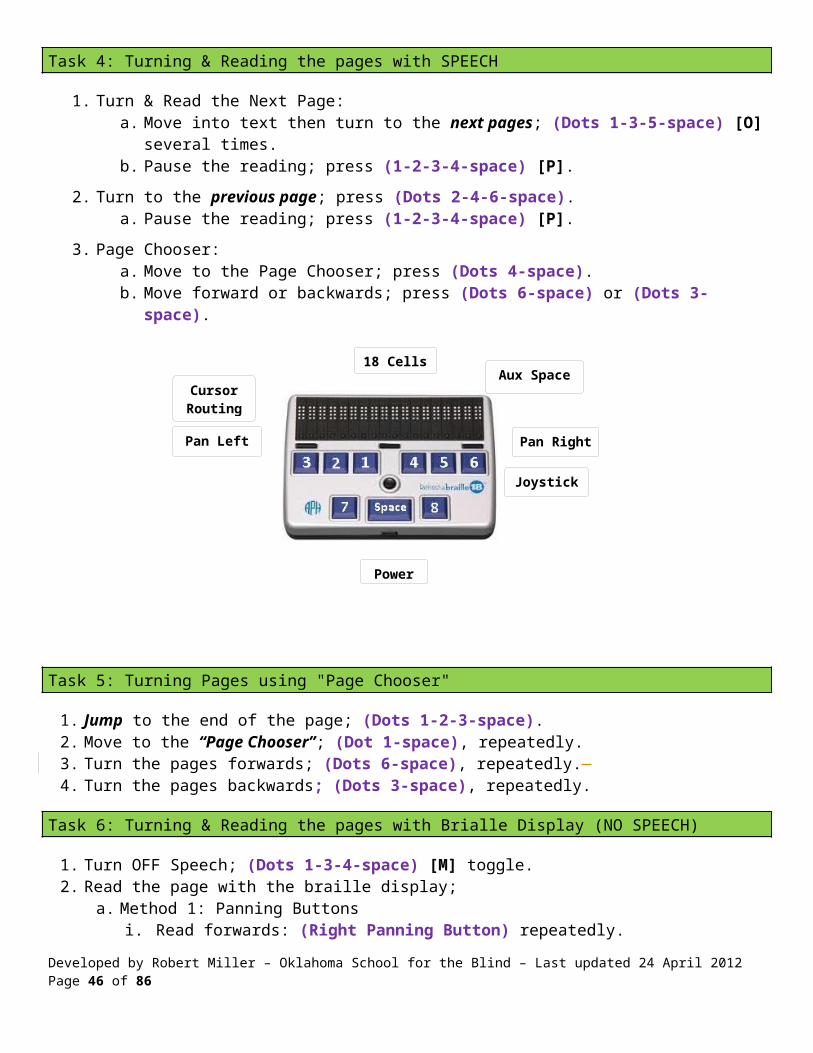
Scroll Wheel
Cursor Routing Buttons 18 / 32 Braille Cells
ON/OFF (left side)
Task 3: “VoiceOver Help”
Note: During this task you will Start and Stop the Keyboard Help. This feature allows you to press a key command to hear its function without affecting the iPad.
1. Turn ON “VoiceOver Help”; press (Dots 1-3-space).a. Important: Use Bypass Command (Dots 4-5-6-8-space) prior to the following:
i. Activate “Home” key function: Bypass (Dots 4-5-6-8-space) then (H-space).ii. Enter function; Bypass (Dots 4-5-6-8-space) then (Dots 1-5-space) [E].
b. Enter the following commands and listen to the key command description:i. Press (Dots 4-5-6-8-space) then (Dots 1-2-5-space) [H].ii. Press (Dot 4-space) then press (Dot 1-space).iii. Press (Dot 1-4-5-space) [D].iv. Press (Dots 1-3-4-space) [M].v. Press Down (Cursor Router button).vi. Your Choice
2. Turn OFF “VoiceOver Help”; press (Dots 1-2-space).
Section 6.3: Navigating the “Home” Screen
Task 1: Navigate the "HOME" screen – Adjust Volume & SpeechNote: During this task you will learn how to use the braille display commands to move
from one app to another on the HOME screen, adjust the VOLUME, and to turn the SPEECH OFF and ON.
1. Volume: a. Increase Volume; (Dots 3-4-5-space) [ AR ].b. Decrease Volume; (Dots 1-2-6-space) [ GH ].c. Speech ON/OFF; press (Dots 1-3 4-space) [ M ] toggle.
2. Speech Rate:a. Set the “Rotor” to “Speech Rate”; (Dots 5-6-space) or (Dots 2-3-space).b. Increase Speech Rate; (Dot 3-space).c. Decrease Speech Rate; (Dot 6-space).
3. Navigate “Home” Screen Pages:a. Go to “Home” Screen; (Dots 4-5-6-8-space) then (Dots 1-2-5-Space) [H].b. Move to the “Search” page; (Dots 2-4-6-space).c. Move to Pages 1 & 2 on Home screen; (Dots 4-5-6-8-space) then (Dots 1-3-5-space) [O].d. Move back to Page 1 of “Home” screen; (Dots 2-4-6-space) [OW].
Developed by Robert Miller – Oklahoma School for the Blind – Last updated 24 April 2012 Page 46 of 58
4. Navigate App Icons Forwards:a. Method 1: (Dot 4-space).b. Method 2: (Thumb 3).
5. Navigate App Icons Backwards:a. Method 1: (Dot 1-space).b. Method 2: (Thumb 2).
6. Move to the “Notes” app icon.
7. Activate the “Notes” app:a. Method 1: Press (Cursor Routing Button) to open app.
NOTES:
Developed by Robert Miller – Oklahoma School for the Blind – Last updated 24 April 2012 Page 47 of 58
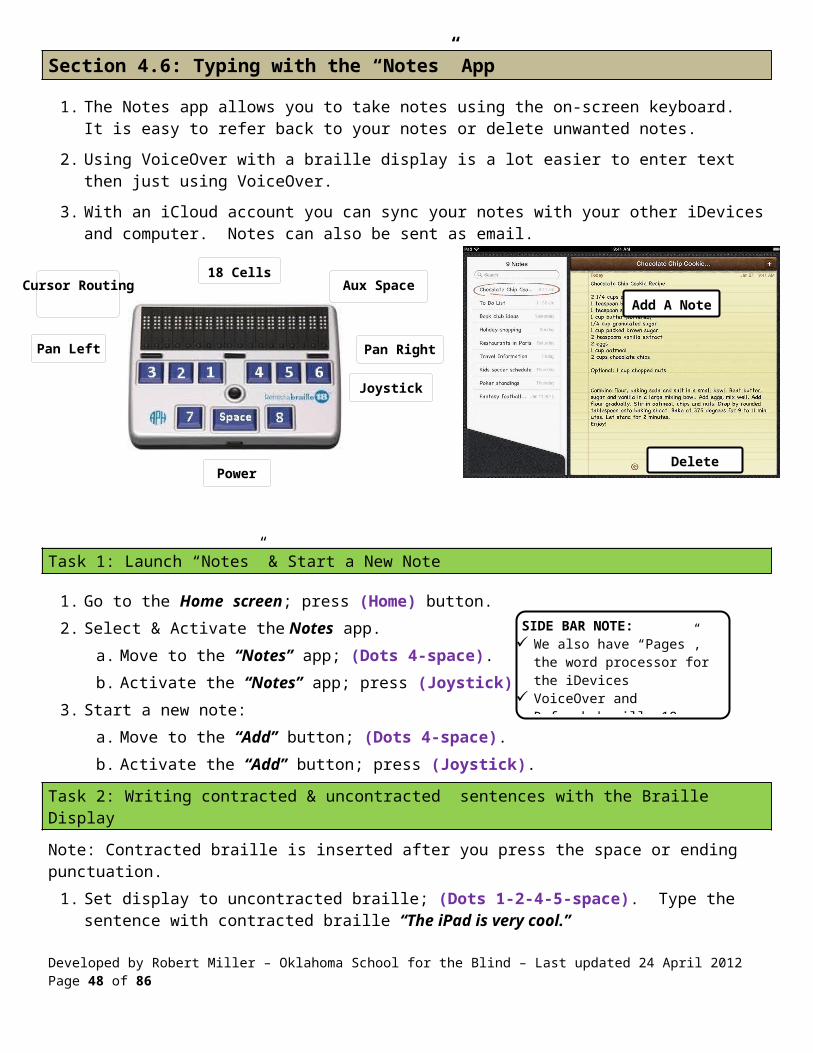
Scroll Wheel
Cursor Routing Buttons 18 / 32 Braille Cells
ON/OFF (left side)
Section 6.4: Surfing the Internet with Safari
Task 1: Launch "Safari" from the HOME screen1. Go to “Home” screen; press “bypass” (Dots 4-5-6-8-space) then (H-Space).2. Navigate to and open the “Safari” app:
a. Select “Safari” app; (Dot 4-space) or (Dot 1-space).b. Activate and open “Safari” app; press (Cursor Routing Button).
Task 2: Enter web address and launch “www.animalfactguide.com”
1. Move to the Address Bar:a. Go to top of web page; press (Dots 1-2-3-space) [L].b. Move to “Address Bar”; press (Dot 4-space) three times.c. Enter the “Address Bar”; press (Cursor Routing Button).d. In the “Address Bar” move to “Clear Text” button; press (Dot 4-space) once; then press
(Cursor Routing Button) to activate.
2. Type Web Address:a. Turn OFF Contracted Braille; press (Dots 1-2-4-5-space) [G]b. Braille the letter “a”, then “b”, then “c”.c. Delete the “b” & “c”; press (Dots 1-4-5-space) [D] twice.d. Now, finish brailling the web address “n i m a l f a c t g u i d e”.
3. Launch website:a. Press (Dots 4-5-6-8-space) then (Dots 1-5-space) [E] to launch web page.
Developed by Robert Miller – Oklahoma School for the Blind – Last updated 24 April 2012 Page 48 of 58
Commands To Remember: Bypass (Dots 4-5-6-8-space). Jump to the top of the web page (Dots 1-2-3-space). Jump to bottom of web page (Dots 4-5-6-space). Navigate to the next or previous item; press (Dot 4-space) or (Dot 1-space). Activate the links, form controls, etc; press (Cursor Routing Button). Enter; press (Dots 4-5-6-8-space) then (E-space). Delete; press (D-space). Back; press (B-space).
SIDE BAR NOTE: Contracted braille can be turned
on, but with it off you don’t get the auto inserting of contractions.
Task 3: Navigate the Elements: Load the web page, "Animal Facts"
1. Move to “Animal Facts” link; (Dot 4-space) or press (Thumb 4).2. Activate the “Animal Facts” link; (Cursor Routing Button).
Task 4: Use the “Rotor” to move by “Headings” – Read (Pause & Resume Speech)
Notes: On the web page there are different types of elements, such as text, links, headings, Form Controls, etc. Choosing efficient elements to navigate by will help you find what you are looking for quicker. The “Rotor Control” makes it possible to choose which element to navigate.
1. Change the “Rotor” to “Headings”:a. Listen to the number of “Headings” as you change the “Rotor” to “Headings”; press
(Dots 5-6-space) or (Dots 2-3-space) repeatedly.
2. Navigating by “Headings” to find a desired animal:a. Jump to the top of the web page; press (Dots 1-2-3-space).b. Move down the page by “Headings” to “Cougar”; press (Dot 6-space).c. Now move back up the page by “Headings” to “American Bison”; press (Dot 3-space).d. Activate the Heading/Link and load the web page “American Bison”; (Cursor Routing).e. Move down the page by “Headings” until you get to “American Bison”; (Dot 6-space).
3. Reading the information:a. Now move to Heading’s paragraph and read it; press (Dot 4-space) twice.b. Pause the reading; press (P-space). c. Resume reading; press (P-space).d. Start reading from your current position; press (R-space).e. Jump to the top of web page and start speech reading; press (W-space).
Developed by Robert Miller – Oklahoma School for the Blind – Last updated 24 April 2012 Page 49 of 58
Commands To Remember: Change “Rotor” selection; press (Dots 5-6-space) or (Dots 2-3-space). Navigate to different “Rotor” items on web page; press (Dot 6-space) or (Dot 3-
space). Activate the links, form controls, etc; press (Joystick). Navigate to the next or previous item; press (Dot 4-space) or (Dot 1-space). Pause “Speech Reading”; press (P-space). Resume “Speech Reading”; press (P-space). Start Reading from top op web page; press (W-space). Start Reading from current location; press (R-space). Jump to bottom of web page; press (Dots 4-5-6-space). Jump to the top of the web page; press (Dots 1-2-3-space). Pan braille forward; press (Thumb 3). Pan braille back; press (Thumb 2). Activate the “Home” button; press (Dots 4-5-6-8-space) then (H-space).
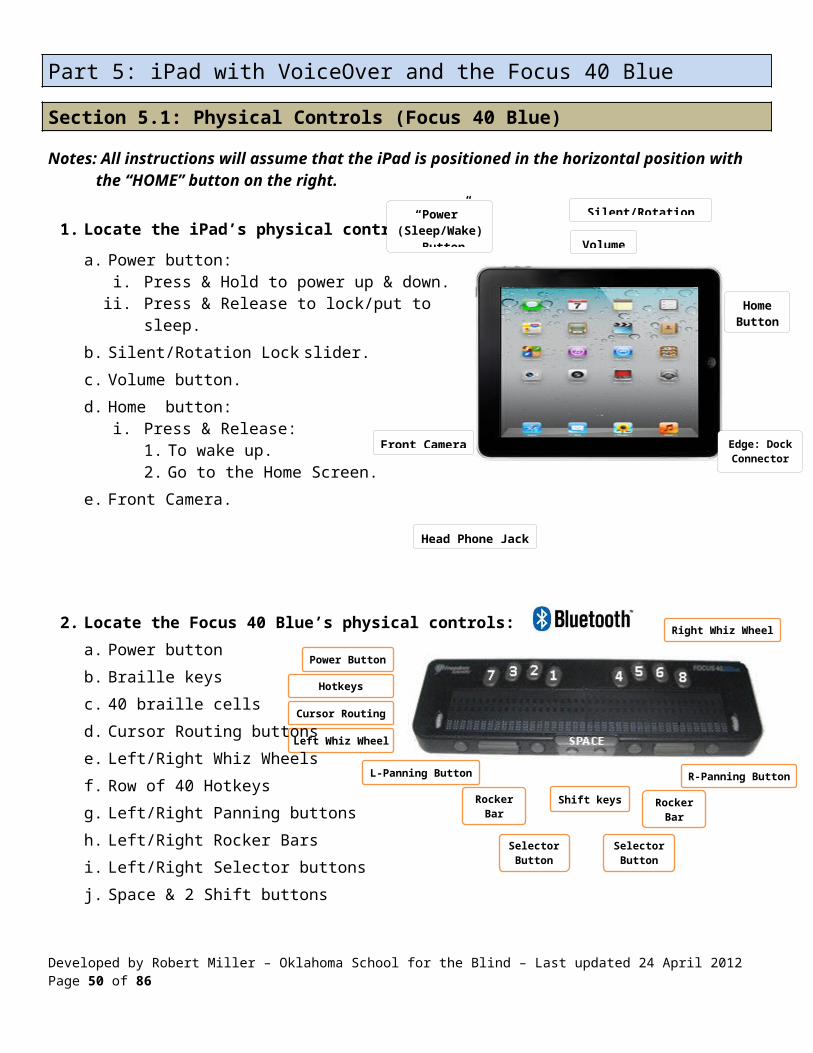
Task 5: Use the web page's “Reader” option to reformat the web page
Note: During this Task you will select the “Reader” option to reformat the web page. This will rid the page of all content not related to the link you selected.
1. Move by “Headings” to the “Bald Eagle” heading/link; (Dots 6-space) or (Dots 3-space).2. Activate the “Bald Eagle” heading/link; press down on (Cursor Routing).3. Jump to the web page; (Dots 1-2-3-space).4. Move across to the “Reader” button; rotate the (Dot 4-space) or (Thumb 4).5. Activate the “Reader” button; press down on (Cursor Routing).6. Move forward by “Headings” until you get to “What You Can Do to Help”; (Dots 6-space).7. Move to the paragraph below the “Heading”; (Dot 4-space).8. Close the “Reader” format; (Dots 1-2-space) [B].
Task 6: Use the “Rotor” to move by “Form Controls”:Note: During this Task you will navigate just by “Form Controls”. Form controls are elements
such as edit boxes, combo/popup boxes, checkboxes, buttons, etc.1. Change “Rotor” to “Form Controls”; (Dots 5-6-space) or (Dots 2-3-space).
2. Move down the web page by “Form Controls”; (Dot 6-space).a. Move back up the web page by “Form Controls”; (Dot 3-space).
Task 7: Use the braille display instead of speech to read text on web page1. Set “Rotor” to “Headings” and move to “Bald Eagle” Heading.2. Turn Speech OFF; press (M-space) toggle.3. Pan forward & read braille; press (Thumb 3) or (Dot 5-space).4. Pan Back; press (Thumb 2) or (2-space).5. Turn Speech ON; press (M-space) toggle.
Task 8: Start Reading from your location – Start Reading from the top
1. Start reading from your location; press (Dots 1-2-3-5-space) [R].2. Start reading from the top; press (Dots 2-4-5-6--space) [W].
Task 9: Close the Curtain
1. Close the Curtain; press (Dots 4-5-6-8-space) then (Dots 1-2-3-4-5-6-space) toggle.a. You can now work without anyone seeing what’s on the screen.
2. Open the Curtain; press (Dots 4-5-6-8-space) then (Dots 1-2-3-4-5-6-space) toggle.
Developed by Robert Miller – Oklahoma School for the Blind – Last updated 24 April 2012 Page 50 of 58

Table of Contents button
Library button
Section 6.5: iBooks: (reading a book)Notes: During these tasks you will learn how to navigate and read a book in iBooks.
iBooks is a free app that you can download from the Apple Apps Store. iBooks is accessible to the Blind and visually impaired through the VoiceOver, ZOOM, or VoiceOver with a braille display.
Task 1: Launch “iBooks”1. Go to the Home screen; press (Dots 4-5-6-8-space) then (H-space) button.
2. Move to “Page 2” of the Home screen; press (Dots 4-5-6-8-space) then (Dots 1-3-5-space).3. Select the iBooks app:
a. Jump to top of screen; press (Dots 1-2-3-space).b. Move to “iBooks” app; (Dot 4-space) repeatedly.c. Activate the iBooks app; press (Cursor Routing Button).
Task 2: Open the “Library” &“Book”
1. Move to “Library” button; (Dot 4-space) repeatedly.2. Activate the “Library” button; press (Cursor Routing Button).3. Open the book, “The Ugly Duckling”:
a. Move to “The Ugly Duckling” button; (Dot 4-space) repeatedly.b. Activate the “The Ugly Duckling; press (Cursor Routing Button).
Task 3: Navigate the book's “Table of Contents”
1. Select the book’s “Table of Contents” button; (Dot 4-space).2. Activate the “Table of Contents” button; press (Cursor Routing Button).3. Move down table to “The Ugly Duckling, page 3”; (Dot 4-space).4. Activate TOC item, “The Ugly Duckling, page 3”; (Cursor Routing Button).
Task 4: Turning & Reading the pages with SPEECH
1. Turn & Read the Next Page:a. Turn to the next page; (Dots 4-5-6-8-space) then (Dots 1-3-5-space).b. Move to text (Dots 4-space) repeatedly. Listen to VoiceOver read text on the screen.
i. Note: if book displays 2 pages, it reads both pages on screen.c. Turn to the next page again; (Dots 4-5-6-8-space) then (Dots 1-3-5-space).d. Move to text (Dots 4-space) repeatedly. Listen to VoiceOver read text on the screen.e. Pause the reading; press (P-space).
2. Turn to the previous page; press (Dots 4-5-6-8-space) then (Dots 2-4-6-space).a. Move to text (Dots 4-space) repeatedly. Listen to VoiceOver read text on the screen.b. Pause the reading; press (P-space).
Developed by Robert Miller – Oklahoma School for the Blind – Last updated 24 April 2012 Page 51 of 58

Task 5: Turning Pages using "Page Chooser"
1. Jump to the end of the page; (Dots 4-5-6-space).2. Move to the “Page Chooser”; (Dot 1-space), repeatedly.3. Turn the pages forwards; (Dots 6-space), repeatedly.4. Turn the pages backwards; (Dots 3-space), repeatedly.
Task 6: Turning & Reading the pages with Brialle Display (NO SPEECH)
1. Turn OFF Speech; (M-space). toggle2. Read the page with the braille display;
a. Method 1: Panning Buttons i. Read forwards: (Thumb 3) repeatedly.ii. Read backwards: (Thumb 2) repeatedly.
b. Method 2: Braille Dot keys i. Read forwards: (Dot 5-space) repeatedly.ii. Read backwards: (Dot 2-space) repeatedly.
3. Turn ON Speech: (M-space). toggle
Task 7: Bookmarks
Notes: You don’t have to set a bookmark when you close the book; iBooks will remember your page and return you to it when you open the book again.
1. Add A Bookmark:a. Jump to the top; (Dots 1-2-3-space).b. Move to the “Add a Bookmark” button; (Dots 4-space).c. Activate the “Add a Bookmark” button; (Cursor Routing Button).
2. Remove A Bookmark:a. Jump to the top; (Dots 1-2-3-space).b. Move to the “Add a Bookmark” button; (Dots 4-space).c. Activate “Remove Bookmark” button; press (Cursor Routing Button).
Developed by Robert Miller – Oklahoma School for the Blind – Last updated 24 April 2012 Page 52 of 58
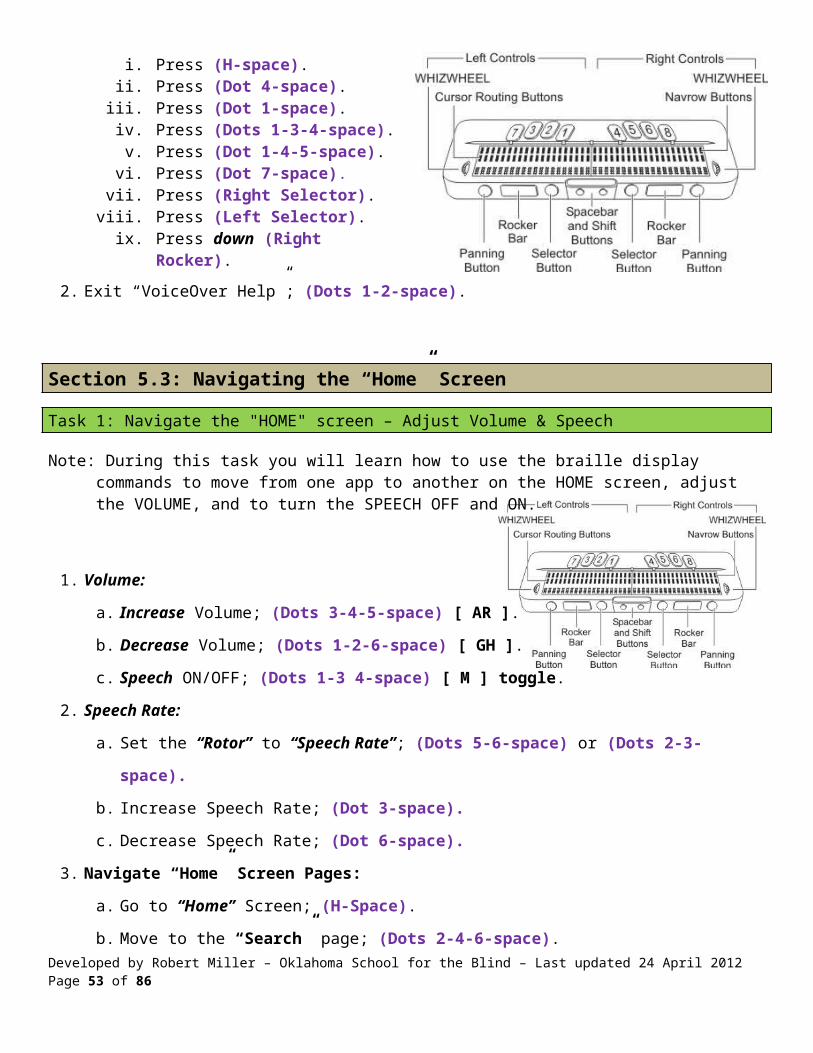
Add A Note
Delete
Add A Note
Delete
Section 6.6: Typing with the “Notes” App
1. The Notes app allows you to take notes using the on-screen keyboard. It is easy to refer back to your notes or delete unwanted notes.
2. Using VoiceOver with a braille display is a lot easier to enter text then just using VoiceOver.
Task 1: Launch “Notes” & Start a New Note
1. Go to the Home screen; press (Home) button.a. Press (Dots 4-5-6-8-space) then (H-space).
2. Move back to Page 1 of “Home” Screen.a. Press (Dots 2-4-6-space)
3. Select & Activate the Notes app.a. Move to the “Notes” app; (Dots 4-space).b. Activate the “Notes” app; press (Cursor Routing).
4. Start a new note:a. Move to the top of screen; (Dots 1-2-3-space).b. Move to the “Add” button; (Dots 4-space).c. Activate the “Add” button; press (Cursor Routing).
Task 2: Type your Sentences with the Braille Display
1. Type the sentence with contracted braille “The iPad is very cool.”a. Note: Contracted braille is inserted after you press the space or ending punctuation.
2. Move to a New Line; (Dots 4-5-6-8-space) then (E-space).3. Type the sentence with contracted braille “VoiceOver makes the iPad easy to use.”4. Delete “use.”; press (Dots 1-4-5-space) [D] repeatedly.
5. Now, type “have fun.”6. Delete your note:
a. Move to the top of screen; (Dots 1-2-3-space).b. Move to & select your note in list; (Dot 4-space) repeatedly, then (Cursor Routing).c. Move to the “Delete” icon (Dot 4-space) repeatedly.d. Activate the first “Delete” button (Cursor Routing Button) and wait a second.e. Now activate “Delete” Button again (Cursor Routing Button).
Developed by Robert Miller – Oklahoma School for the Blind – Last updated 24 April 2012 Page 53 of 58
SIDE BAR NOTE: We also have “Pages”, the word
processor for the iDevices VoiceOver and Apex as a display
works with Pages as well.
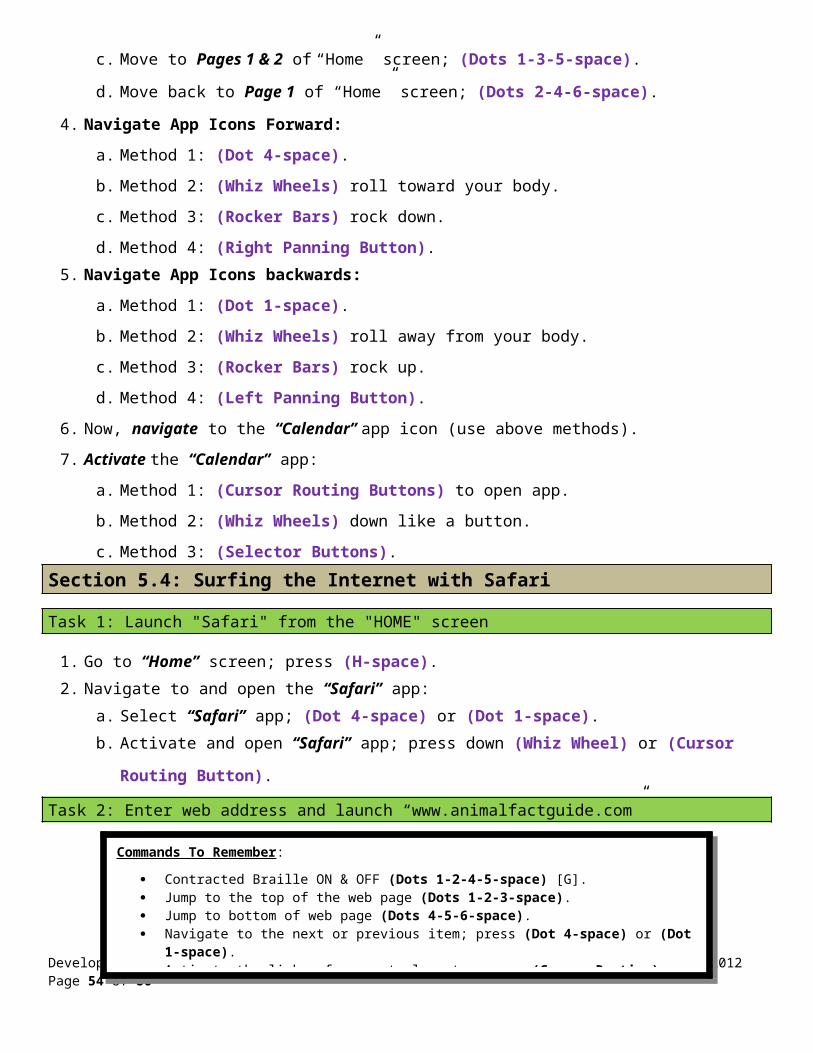
Quick Commands List
VoiceOver
Speech1. Speech ON/OFF
a. (3-Finger_Double Tap).2. Speak an item:
a. (1-Finger_Touch).3. Adjust Speech Rate:
a. Access “Rotor”; (Thumb & Index Finger_Rotate) to select “Speech Rate”.b. Increase Speech Rate: (1-Finger_Flick Up).c. Decrease Speech Rate: (1-Finger_Flick Down).
4. Stop Speaking:a. (2-Finger_Tap).
5. Read All from the Top of Screen:a. (2-Finger_Flick Up).
6. Read All from Current Position:a. (2-Finger_Flick Down).
Navigation1. To Select an Item:
a. (1- Finger_Touch). 2. To Activate the selected Item:
a. 1-Finger_Double Tap).i. Note: Once the desired item is selected, double tap anywhere.
3. To Scroll a item list: a. Scroll Up: (3-Finger_Flick Up).b. Scroll Down: (3-Finger_Flick Down).
4. Go to Next or Previous page:a. Next Page: (3-Finger_Flick Right).b. Previous Page: (3-Finger_Flick Left).
Advance Gestures1-FINGER
1. Activating Drag Mode & Dragging:a. Select desired icon; (1-Finger_Touch).b. (1-Finger_Double Tab & Hold) and then drag finger and icon around Home screen.
VoiceOver will announce your location.c. Lift finger when you have your desired location.
Developed by Robert Miller – Oklahoma School for the Blind – Last updated 24 April 2012 Page 54 of 58
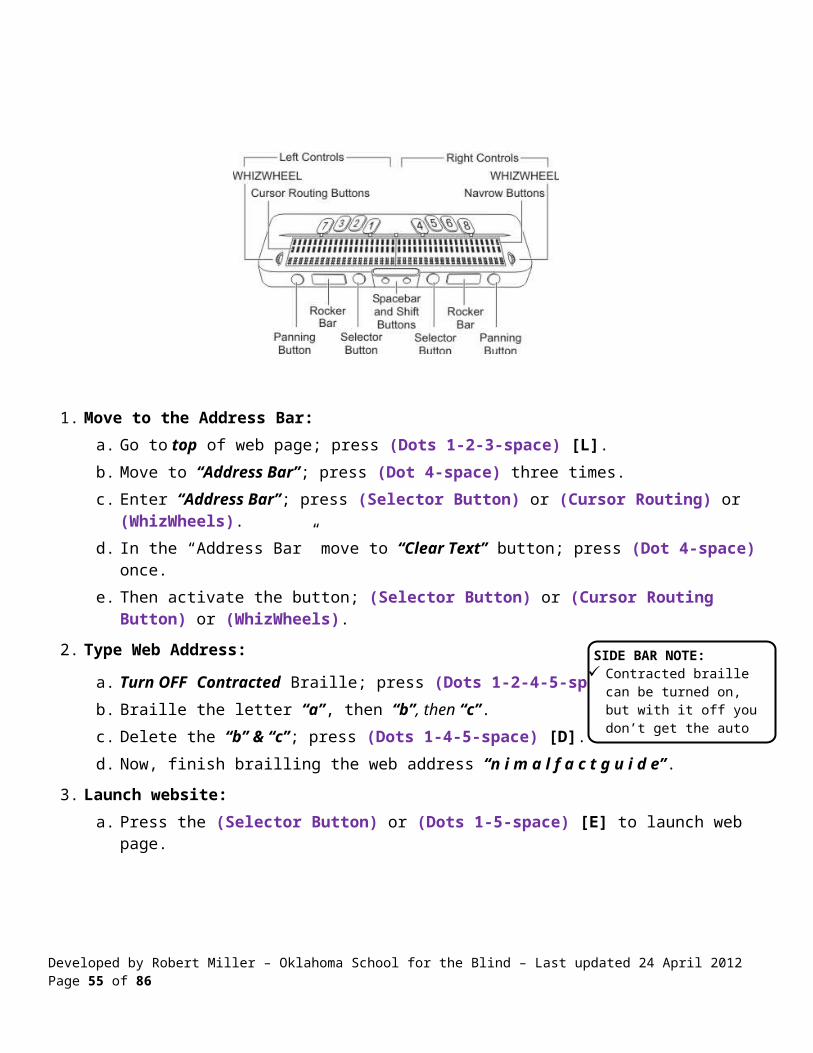
2-FINGERS1. Split-Tapping; (1-Finger_Touch & Hold) with one & (1-Finger_Tap) with another
finger.
2. Add a label to a selected item; (2-Finger_Double Tab & Hold). Example adding a description tag to a webpage picture.
3. Cancel any pop-ups, lists, or activate “Back” button; (2-Finger_Scrub, Back & forth).4. To Select or Unselect text:
Step 1. First set Rotor settings to characters, words, or lines.Step 2. (Touch thumb & Index fingers) & “Pinch Out” to select; “Pinch In” to unselect.
5. Access the Rotor settings: (2-Finger_Dial Rotate) Right or Left to cycle through items.
6. Open the “Item Chooser”; (2-Finger_Triple Tap).Step 1. Type a name to search or (1-Finger_Flick Right or Left) to move through list, Step 2. Then (1-Finger_Double Tap) to activate and move to that item on page.
3-FINGERS1. Screen Curtain ON/OFF; press (3-Finger_Triple Tab).
4-5-FINGERS1. Multitasking Gestures: Use 4 or 5 fingers to:
(4/5-Finger_Pinch) to the Home Screen. (4/5-Finger_Flick Up) to reveal Multitasking Bar (4/5-Finger_Flick Left or Right) between open Apps.
Developed by Robert Miller – Oklahoma School for the Blind – Last updated 24 April 2012 Page 55 of 58

Braille Displays’ Common Commands (ALL braille displays with braille dot keys)
Activate “VoiceOver Help”
1. Enter “VoiceOver Help”; press (Dots 1-3-space).2. Exit “VoiceOver Help”; press (Dots 1-2-space).
Speech & Screen Curtain Commands
1. Speech ON/OFFa. Press (M-space).
2. Speech Volume:a. Increase Volume; press (Dots 3-4-5-space) [ AR ].b. Decrease Volume; press (Dots 1-2-6-space) [ GH ].
3. Adjust Speech Rate:a. Access “Rotor”; press (Dots 5-6-space) to select “Speech Rate”.b. Increase Speech Rate; press (Dot 3-space).c. Decrease Speech Rate; press (Dot 6-space).
4. Pause & Resume Speaking; press (Dots 1-2-3-4-space). [P]5. Read All from the Top of Screen; press (Dots 2-4-5-6-space) [W]6. Read All from Current Position; press (Dots 1-2-3-5-space) [R].7. Screen Curtain ON/OFF; press (Dots 1-2-3-4-5-6-space).
Navigation Commands
1. Top of page/first element: press (Dots 1-2-3-space) [L].
2. Bottom of page/last element: press (Dots 4-5-6-space).3. Move to next item; press (Dot 4-space).4. Move to previous item; press (Dot 1-space).5. Pan Braille Right; press (Dot 5-space).6. Pan Braille Left; press (Dot 2-space).7. Scroll Right 1 Page; press (Dots 1-3-5-space) [O].
8. Scroll Left 1 Page; press (Dots 2-4-6-space). [OW].
9. Move to Status Bar; press (Dots 2-3-4).10. Rotor Settings: next item; press (Dots 5-6-space).11. Rotor Settings: previous item; press (Dots 2-3-space).12. Rotor: next item; press (Dot 6-space).13. Rotor: previous item; press (Dot 3-space).14. Launch App Switcher; press (Dots 1-2-5-space) twice quickly.
15.Delete; press (Dots 1-4-5-space) [D].
16.Enter; press (Dots 1-5-space) [E].
17.Go to the “Home” screen; press (Dots 1-2-5-space) [H].
Developed by Robert Miller – Oklahoma School for the Blind – Last updated 24 April 2012 Page 56 of 58

Cursor Routing Buttons Aux Space18 Cells
Power
Joystick
Pan Left Pan Right
General Commands
1. Activates “Home” button; press (Dots 1-2-5-space) [H].
2. Access “App Switcher” [“Home” button twice quickly]; press (Dots 1-2-5-space) [H].
3. Screen Curtain; press (Dots 1-2-3-4-5-6-space).4. “Delete”; press (Dots 1-4-5-space) [D].
5. “Delete”; press (Dot 7-space).6. “Enter”; press (Dots 1-5-space) [E].
7. “Tab” [text field]; press (Dots 2-3-4-5-space).8. Select text; press (Dots 2-5-6-space).9. Unselect text; press (Dots 2-3-5-space).10.Contracted braille ON/OFF; press (Dots 1-2-4-5-space) [G].
Refreshabraille 18 Commands
1. Double-tap the selected item; press (Cursor Routing Button).2. Move to previous item; press (Joystick Left).3. Move to next item; press (Joystick Right).4. Move to previous “Rotor” item; press (Joystick Up).5. Move to next “Rotor” item; press (Joystick Down).6. Select item; press (Joystick Press).7. Pan Braille to the left; press (Left Panning Button).8. Pan Braille to the right; press (Right Panning Button).9. “Back” button if present; press (Power Button).
Developed by Robert Miller – Oklahoma School for the Blind – Last updated 24 April 2012 Page 57 of 58
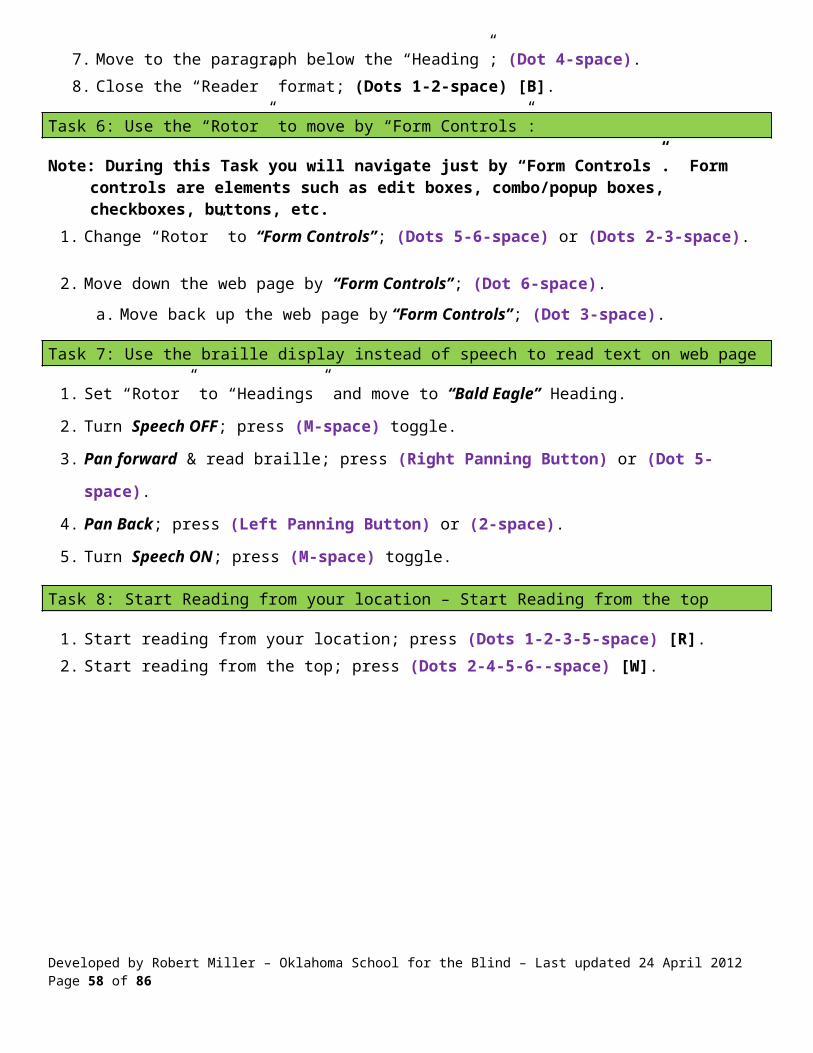
Scroll Wheel
Cursor Routing Buttons 18 / 32 Braille Cells
ON/OFF (left side)
Focus 40 Blue Commands (ONLY)
1. Double-tap the selected item; press (Router Row 1) or (Router Row 2).2. Double-tap the selected item [method 2]; press (Router Row 2).3. Pan Braille to the right [method 1] ; press (Left or Right Whiz Wheel, Down).4. Pan Braille to the right [method 2] ; press (Right Panning Button).5. Pan Braille to the left [method 2] ; press (Left or Right Whiz Wheel, Up).6. Pan Braille to the left; press (Left Panning Button).7. Select item [method 1]; press (Left or Right Whiz Wheel, Press).8. Select item [method 2]; press (Left or Right Selector Button).9. Move to next item [method 1]; press (Left or Right Rocker Bar, Down).10.Move to next item [method 2]; press (Left or Right Whiz Wheel, Rotate Down).11.Move to previous item [method 1]; press (Left or Right Rocker Bar, Up).12.Move to previous item [method 2]; press (Left or Right Whiz Wheel, Rotate Up).
Apex as a Braille Display Commands
1. Bypass Function; press (Dots 4-5-6-8-space).a. Use Bypass (Dots 4-5-6-8-space) command prior to:
o Activate Home button (H-space).o Next pages, Home screen or pages of a book (O-space).o Enter function; press (E-space).o Screen Curtain ON/OFF; press (Dots 1-2-3-4-5-6-space).
2. Double-tap the selected item; press (Cursor Routing Button).3. Pan Braille to the left; press (Thumb Key 2).4. Pan Braille to the right; press (Thumb Key 3).
Developed by Robert Miller – Oklahoma School for the Blind – Last updated 24 April 2012 Page 58 of 58