Embed Size (px)
Citation preview

iOS test application installation guide Follow below steps to install the test application.
1. Open Safari browser in your phone and enter the following URL in address bar:
https://unwire-development.s3-eu-west-1.amazonaws.com/iOS-
Builds/dk.unwire.NMSDKTestApp/1.1.21Verifone/netsInternal/index.html
2. You will be redirected to the following page. And then tap Install NMSDKTest 1.1.21Verifone for
installation.

3. For installation, tap Install and then press Home button on your device. You will then see the
application is being installed.
4. After installation, if the application isn’t trusted you will see a pop-up message as shown in below image. Press Cancel and start next steps for trusting the application.
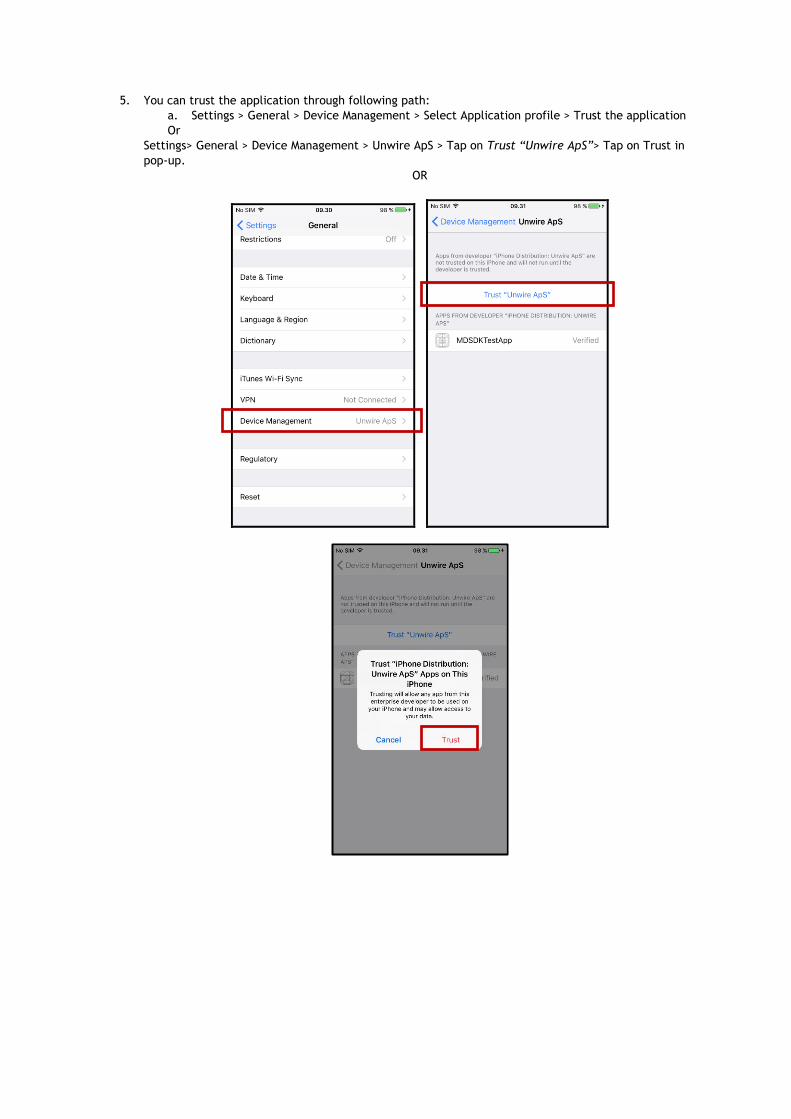
5. You can trust the application through following path:
a. Settings > General > Device Management > Select Application profile > Trust the application
Or
Settings> General > Device Management > Unwire ApS > Tap on Trust “Unwire ApS”> Tap on Trust in
pop-up.
OR
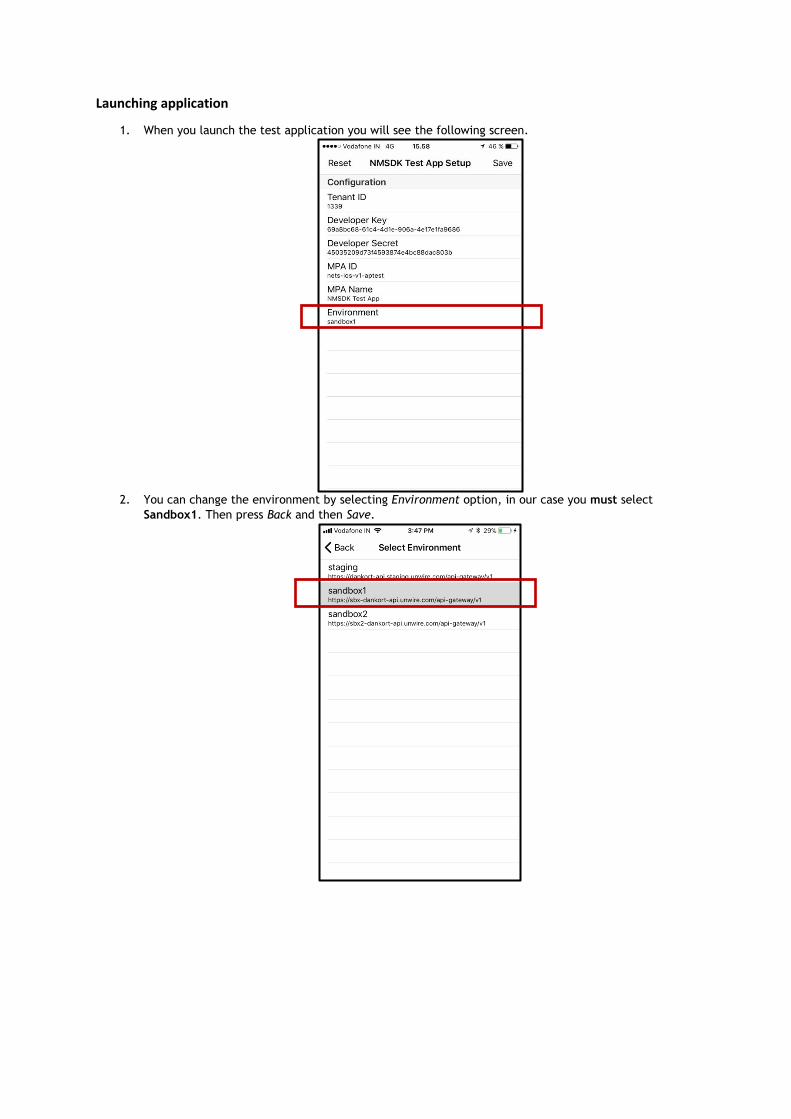
Launching application
1. When you launch the test application you will see the following screen.
2. You can change the environment by selecting Environment option, in our case you must select
Sandbox1. Then press Back and then Save.
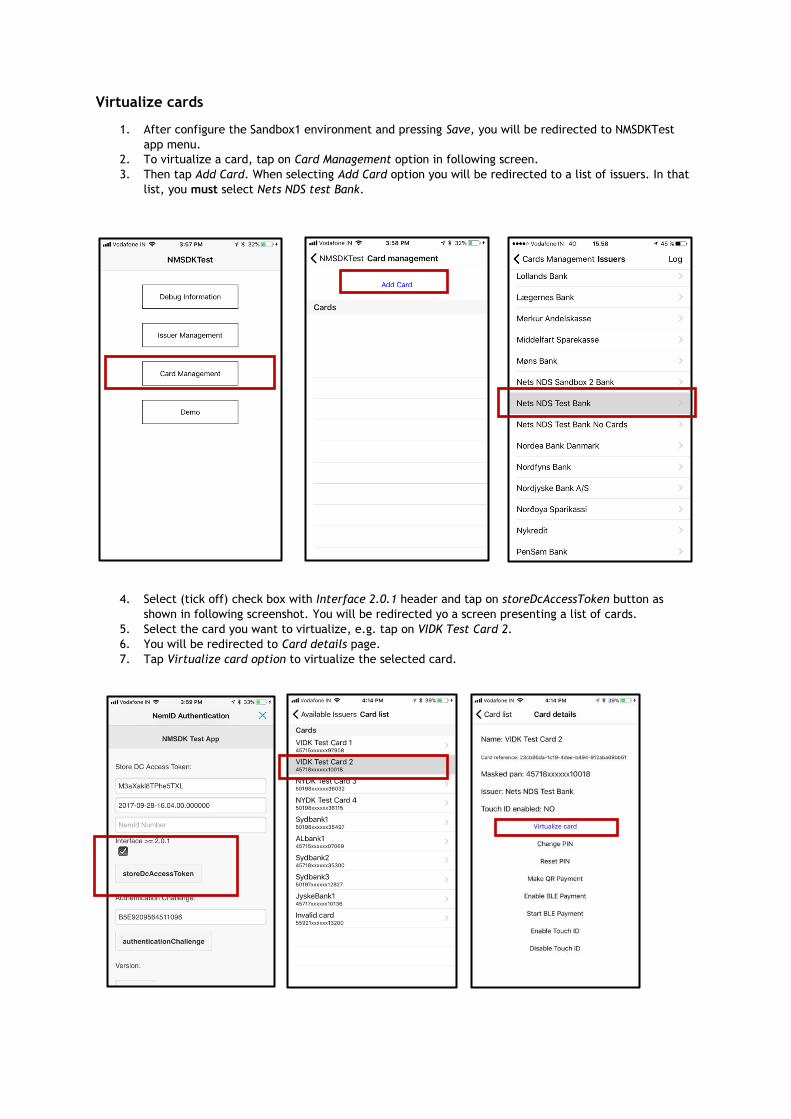
Virtualize cards
1. After configure the Sandbox1 environment and pressing Save, you will be redirected to NMSDKTest
app menu.
2. To virtualize a card, tap on Card Management option in following screen.
3. Then tap Add Card. When selecting Add Card option you will be redirected to a list of issuers. In that
list, you must select Nets NDS test Bank.
4. Select (tick off) check box with Interface 2.0.1 header and tap on storeDcAccessToken button as
shown in following screenshot. You will be redirected yo a screen presenting a list of cards.
5. Select the card you want to virtualize, e.g. tap on VIDK Test Card 2.
6. You will be redirected to Card details page.
7. Tap Virtualize card option to virtualize the selected card.
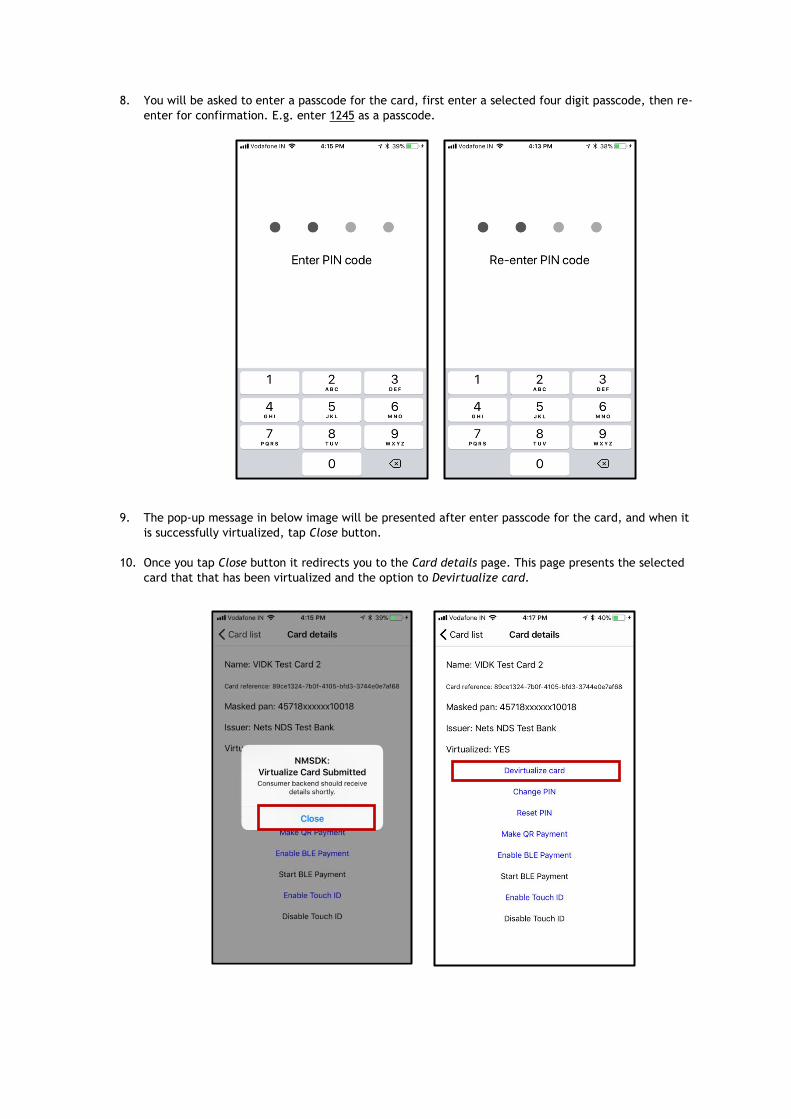
8. You will be asked to enter a passcode for the card, first enter a selected four digit passcode, then re-
enter for confirmation. E.g. enter 1245 as a passcode.
9. The pop-up message in below image will be presented after enter passcode for the card, and when it
is successfully virtualized, tap Close button.
10. Once you tap Close button it redirects you to the Card details page. This page presents the selected
card that that has been virtualized and the option to Devirtualize card.
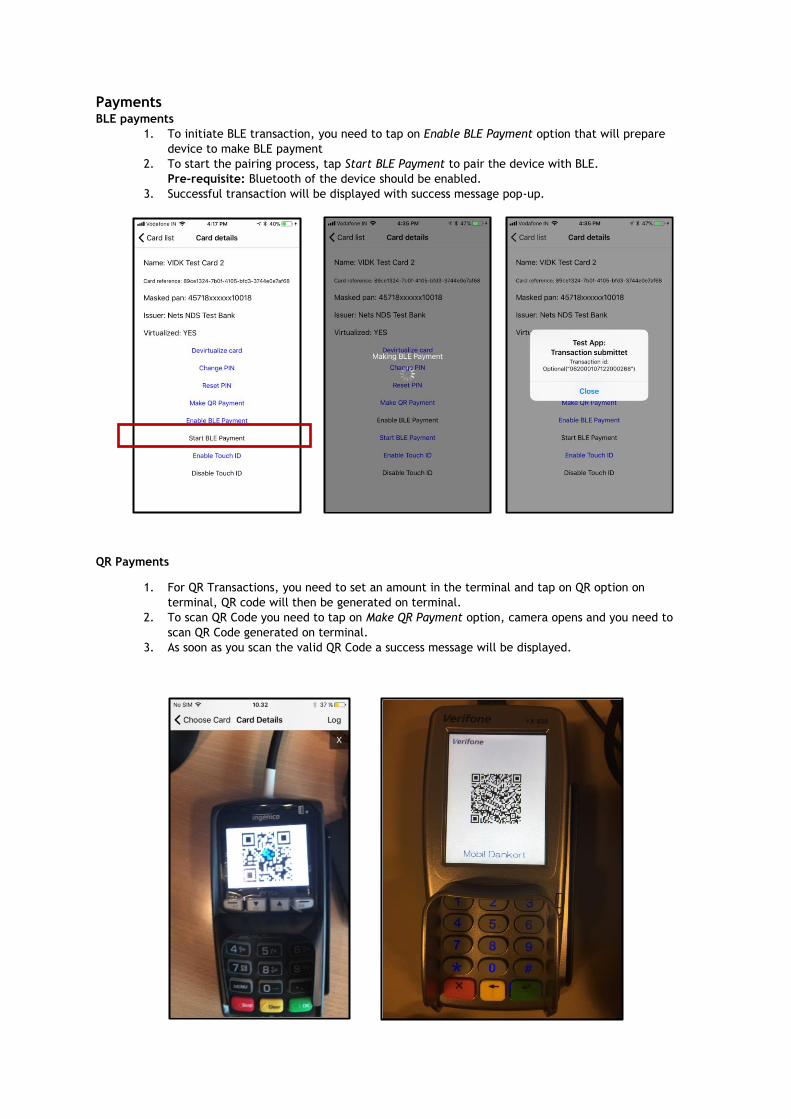
Payments BLE payments
1. To initiate BLE transaction, you need to tap on Enable BLE Payment option that will prepare
device to make BLE payment
2. To start the pairing process, tap Start BLE Payment to pair the device with BLE.
Pre-requisite: Bluetooth of the device should be enabled.
3. Successful transaction will be displayed with success message pop-up.
QR Payments
1. For QR Transactions, you need to set an amount in the terminal and tap on QR option on
terminal, QR code will then be generated on terminal.
2. To scan QR Code you need to tap on Make QR Payment option, camera opens and you need to
scan QR Code generated on terminal.
3. As soon as you scan the valid QR Code a success message will be displayed.
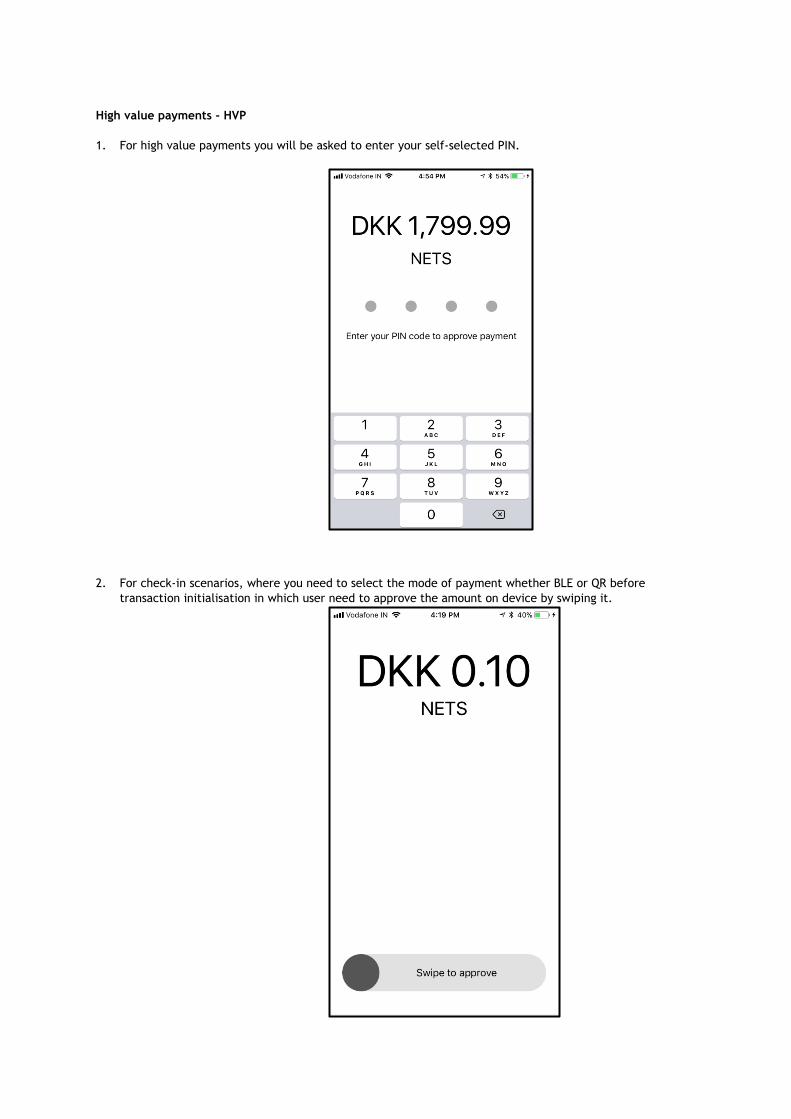
High value payments - HVP
1. For high value payments you will be asked to enter your self-selected PIN.
2. For check-in scenarios, where you need to select the mode of payment whether BLE or QR before
transaction initialisation in which user need to approve the amount on device by swiping it.
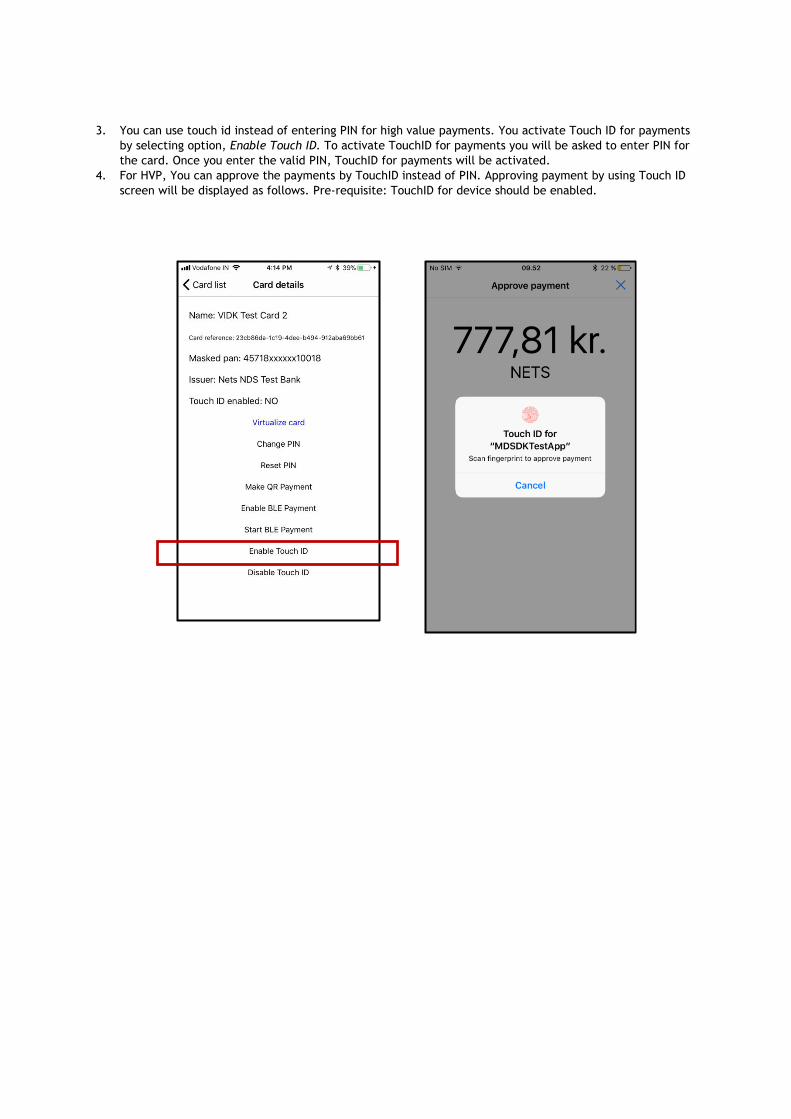
3. You can use touch id instead of entering PIN for high value payments. You activate Touch ID for payments
by selecting option, Enable Touch ID. To activate TouchID for payments you will be asked to enter PIN for
the card. Once you enter the valid PIN, TouchID for payments will be activated.
4. For HVP, You can approve the payments by TouchID instead of PIN. Approving payment by using Touch ID
screen will be displayed as follows. Pre-requisite: TouchID for device should be enabled.