Embed Size (px)
Citation preview
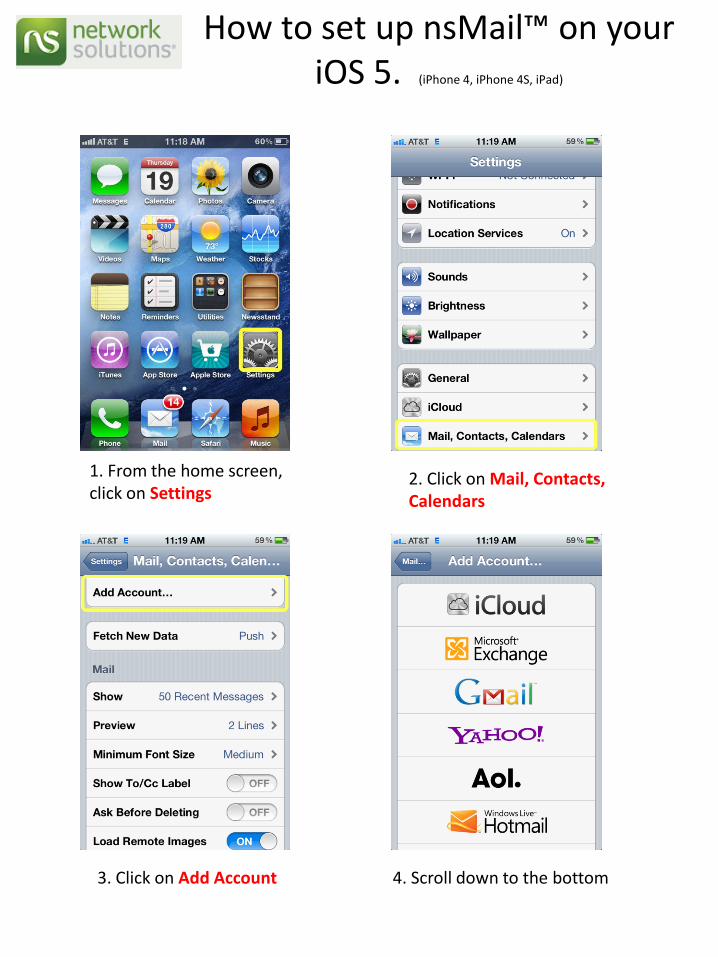
How to set up nsMail™ on your iOS 5. (iPhone 4, iPhone 4S, iPad)
1. From the home screen, click on Settings
2. Click on Mail, Contacts, Calendars
3. Click on Add Account 4. Scroll down to the bottom
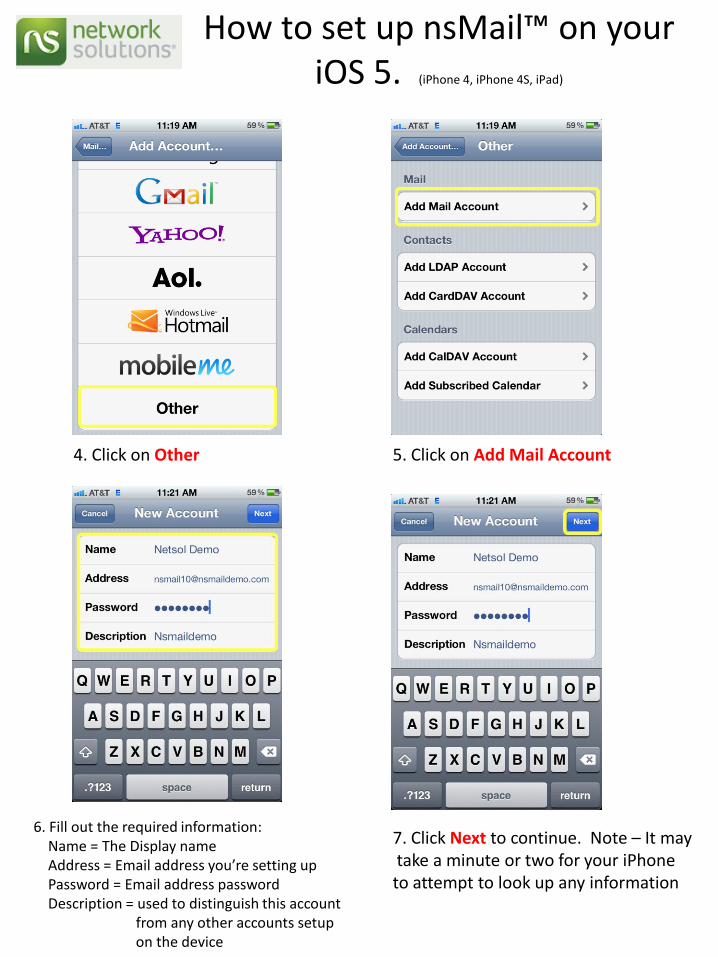
4. Click on Other 5. Click on Add Mail Account
6. Fill out the required information:Name = The Display nameAddress = Email address you’re setting upPassword = Email address passwordDescription = used to distinguish this account
from any other accounts setup on the device
7. Click Next to continue. Note – It maytake a minute or two for your iPhoneto attempt to look up any information
How to set up nsMail™ on your iOS 5. (iPhone 4, iPhone 4S, iPad)
How to set up nsMail™ on your iOS 5. (iPhone 4, iPhone 4S, iPad)
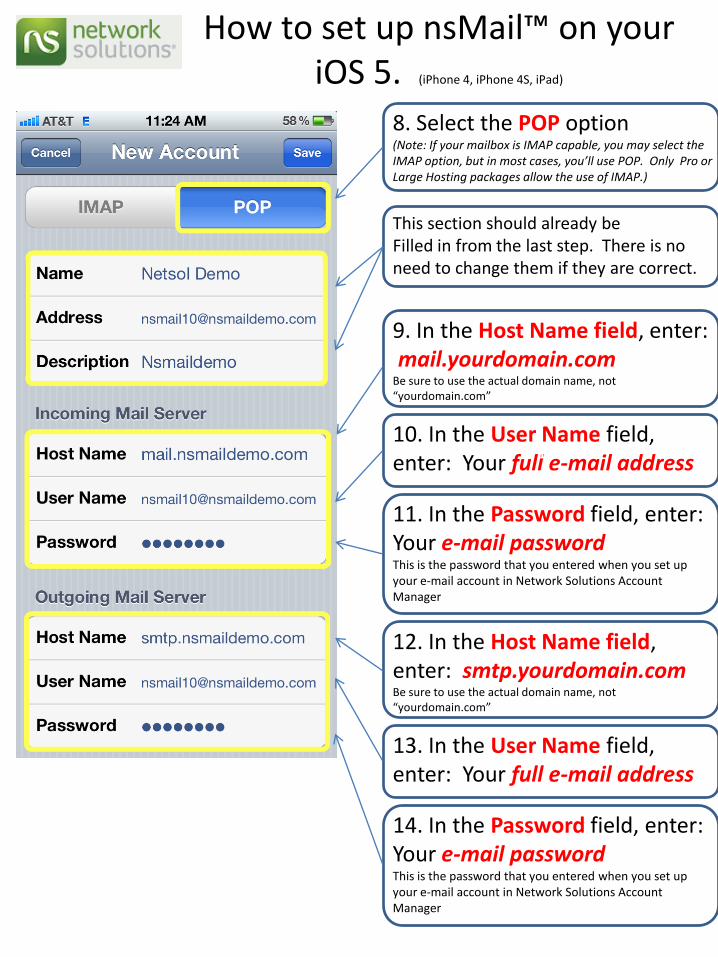
8. Select the POP option(Note: If your mailbox is IMAP capable, you may select the IMAP option, but in most cases, you’ll use POP. Only Pro orLarge Hosting packages allow the use of IMAP.)
This section should already beFilled in from the last step. There is no need to change them if they are correct.
9. In the Host Name field, enter:mail.yourdomain.com
Be sure to use the actual domain name, not “yourdomain.com”
10. In the User Name field, enter: Your full e-mail address
11. In the Password field, enter:Your e-mail passwordThis is the password that you entered when you set up your e-mail account in Network Solutions Account Manager
10,
12. In the Host Name field, enter: smtp.yourdomain.comBe sure to use the actual domain name, not “yourdomain.com”
13. In the User Name field, enter: Your full e-mail address
14. In the Password field, enter:Your e-mail passwordThis is the password that you entered when you set up your e-mail account in Network Solutions Account Manager
1
How to set up nsMail™ on your iOS 5. (iPhone 4, iPhone 4S, iPad)
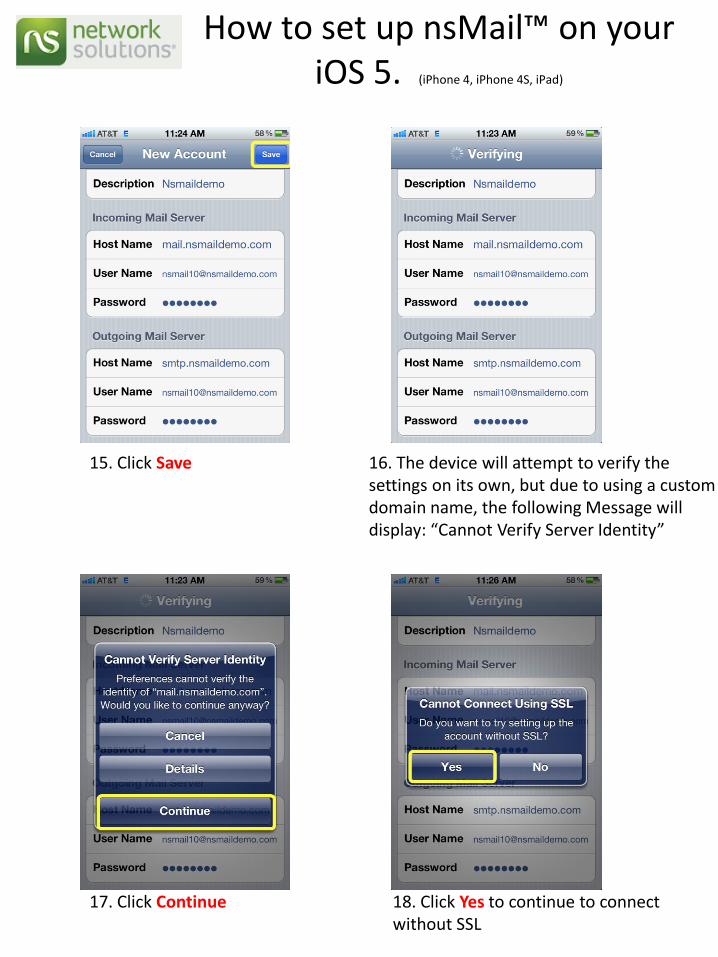
15. Click Save 16. The device will attempt to verify the settings on its own, but due to using a custom domain name, the following Message will display: “Cannot Verify Server Identity”
17. Click Continue 18. Click Yes to continue to connect without SSL
How to set up nsMail™ on your iOS 5. (iPhone 4, iPhone 4S, iPad)
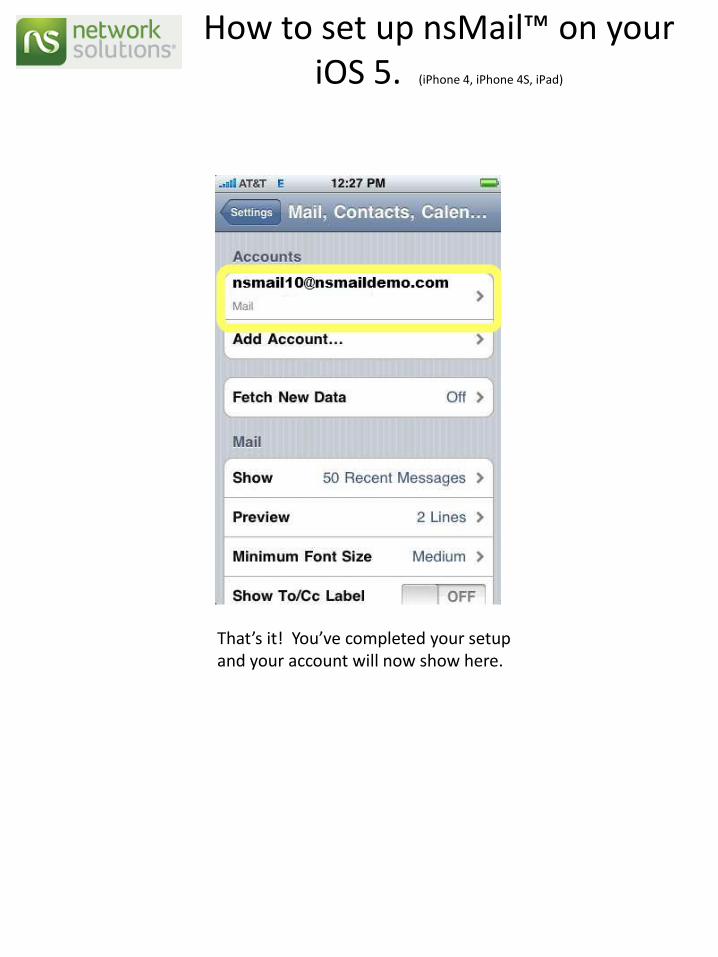
That’s it! You’ve completed your setup and your account will now show here.