Embed Size (px)
Citation preview
Inventor’s House (Alternate Version)
Detailed Building Instructions
Model Designed by Dave Graffam
Model Built and Instructions Provided by Jerry Jensen
For more of Dave’s Models please visit www.davesgames.net
Inventor’s House (Alternate Version) Detailed Building Instructions
2
Pre stage Modeling Tips
If you are printing the model on regular paper,
consider the following suggestions:
Use a spray glue to carefully apply each printed sheet
to a piece of card stock. To do this, you will want to
work in a well ventilated area. Cover the area you will
work at with newspaper (enough for about 4 sheets
of card stock). Place up to 4 sheets of card stock on
the newspaper and spray an even coat of spray glue.
Move a sprayed sheet to a clean surface and carefully
apply the printed copy. Continue the process for all
the pages of the model. Allow roughly 10 min to dry.
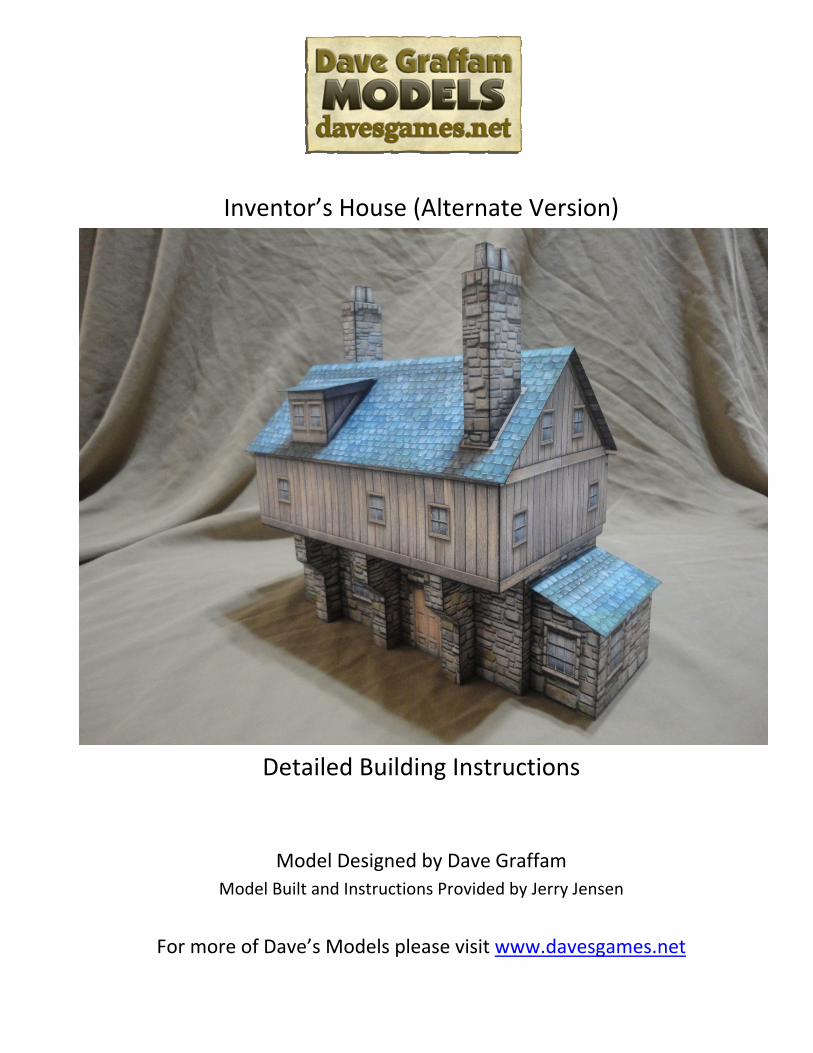
Lower Walls
Score the fold lines and cut out each of the lower
walls as shown. Fold the glue tabs as necessary.
Using a black Sharpie (or equivalent marker) edge
the sides of the walls. Start with one corner of the
building and apply glue to the glue tab; align the wall
section and glue the two wall sections together.
Modeling Tip
For stronger reinforced walls, use a smaller second
piece of card stock to glue to the back of each wall
section. The combination of spray glue and card stock
will give the model a thicker and more durable feel.
Continue gluing each wall section.
Inventor’s House (Alternate Version) Detailed Building Instructions
3
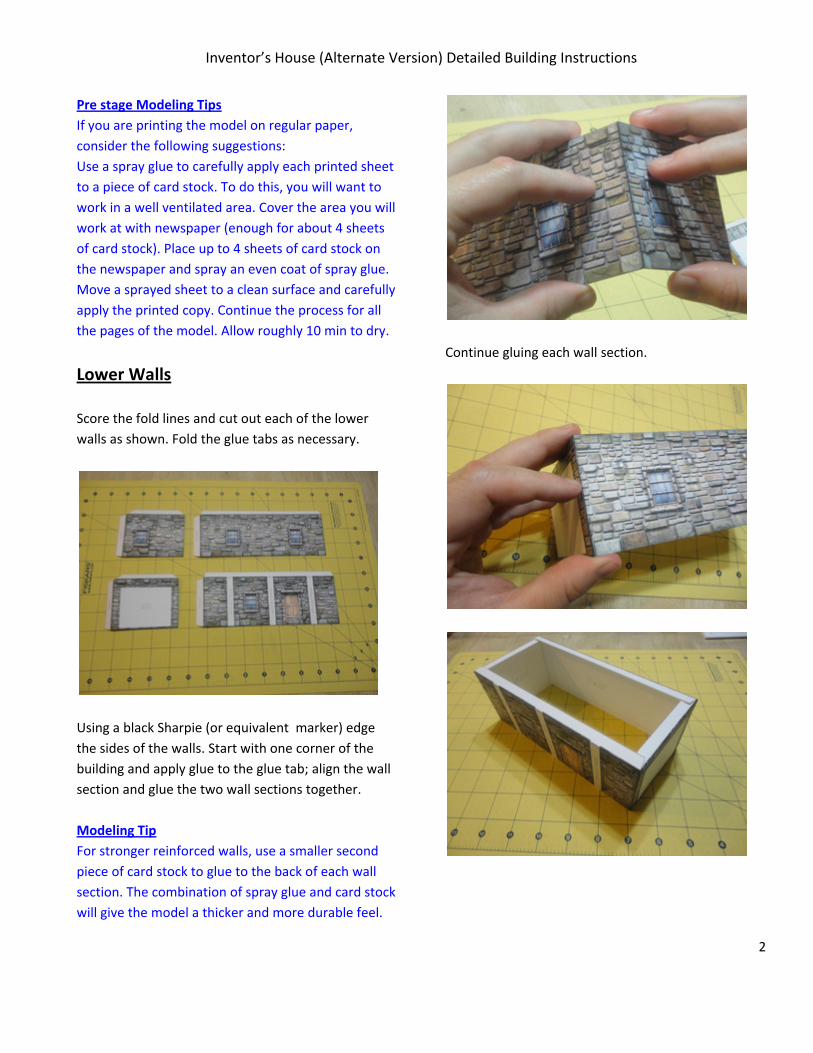
Buttresses
Score and cut out each of the buttresses as shown.
Fold each of the sections.
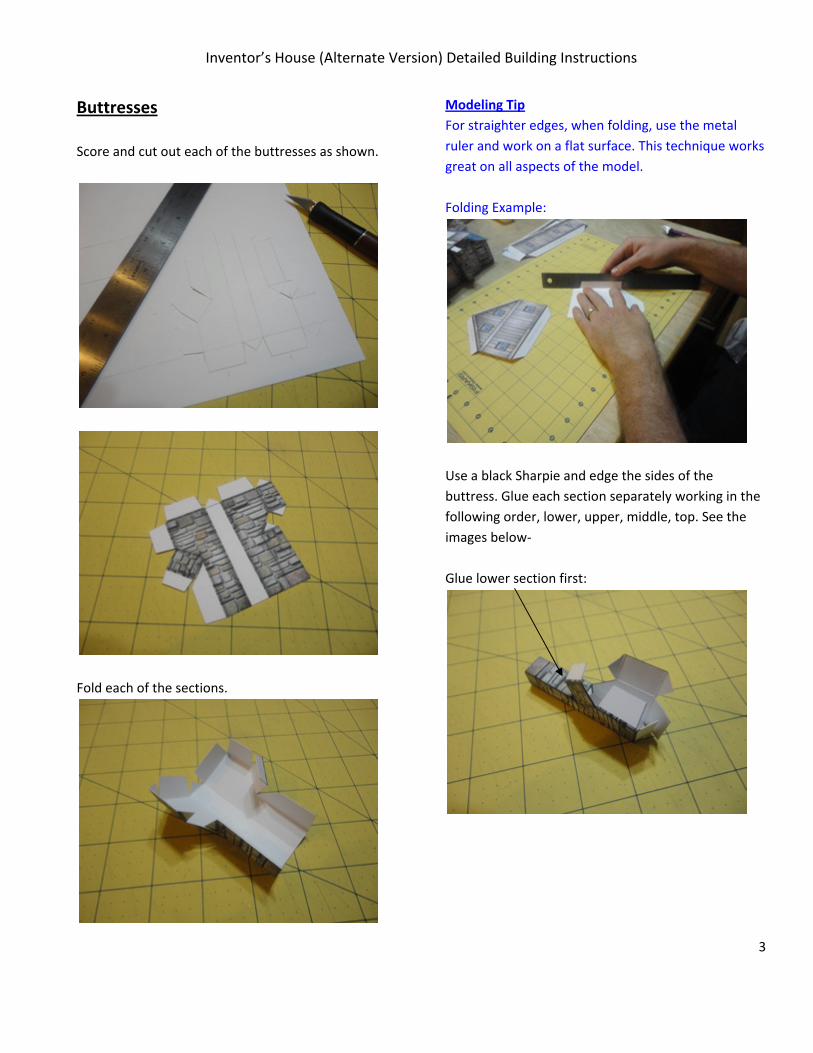
Modeling Tip
For straighter edges, when folding, use the metal
ruler and work on a flat surface. This technique works
great on all aspects of the model.
Folding Example:
Use a black Sharpie and edge the sides of the
buttress. Glue each section separately working in the
following order, lower, upper, middle, top. See the
images below‐
Glue lower section first:
Inventor’s House (Alternate Version) Detailed Building Instructions
4
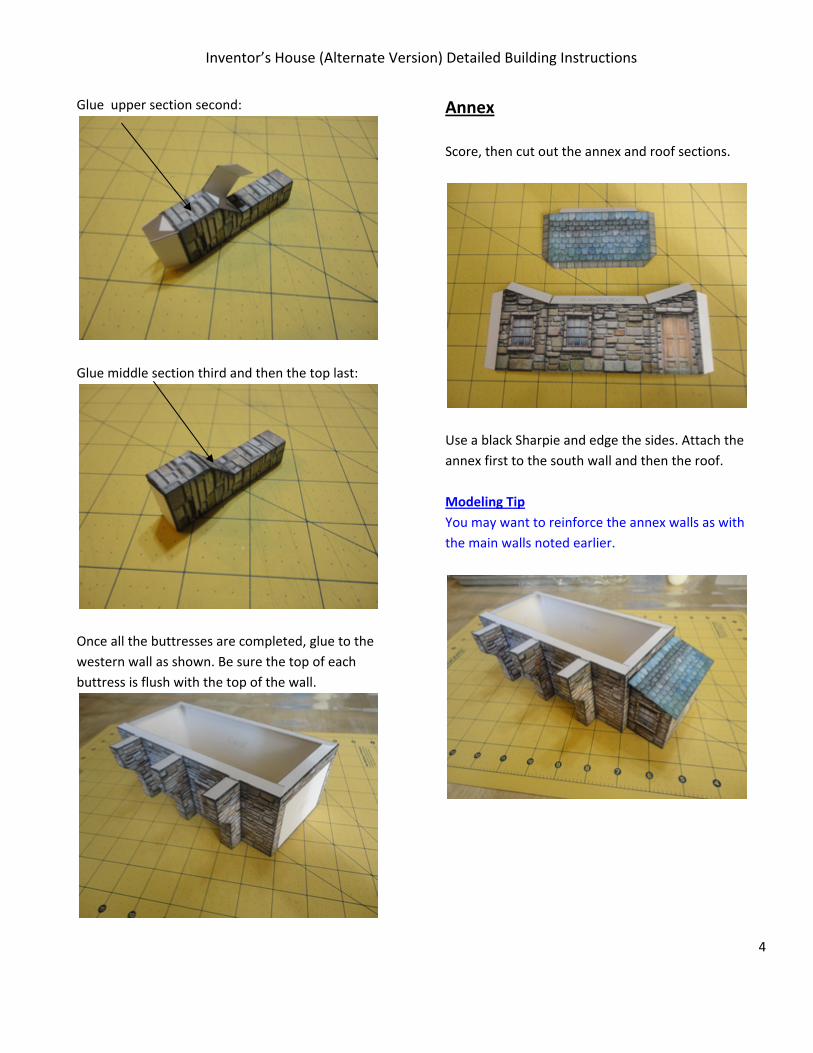
Glue upper section second:
Glue middle section third and then the top last:
Once all the buttresses are completed, glue to the
western wall as shown. Be sure the top of each
buttress is flush with the top of the wall.
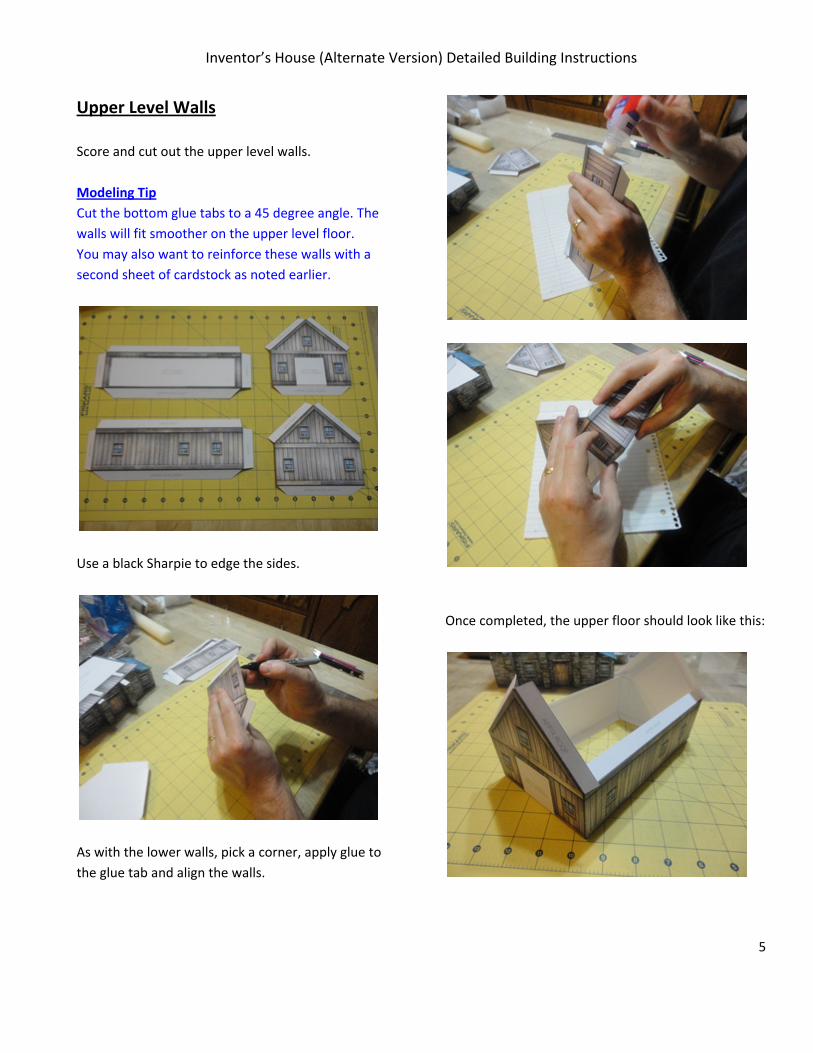
Annex
Score, then cut out the annex and roof sections.
Use a black Sharpie and edge the sides. Attach the
annex first to the south wall and then the roof.
Modeling Tip
You may want to reinforce the annex walls as with
the main walls noted earlier.
Inventor’s House (Alternate Version) Detailed Building Instructions
5
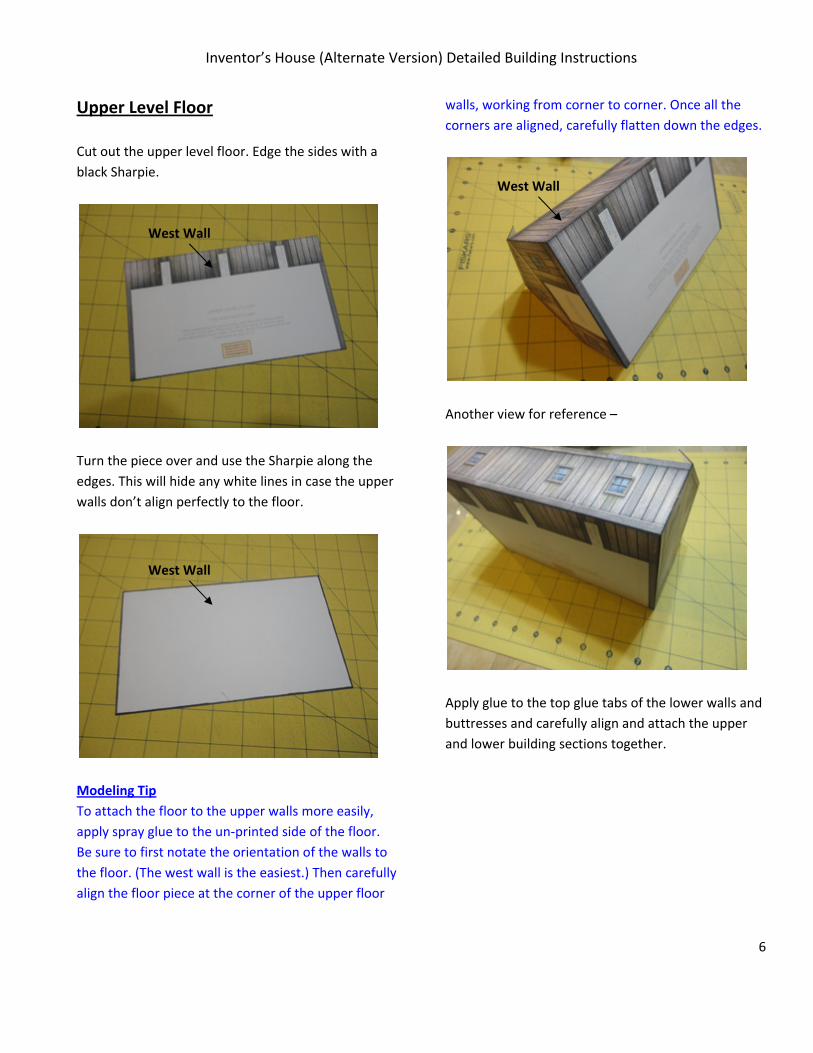
Upper Level Walls
Score and cut out the upper level walls.
Modeling Tip
Cut the bottom glue tabs to a 45 degree angle. The
walls will fit smoother on the upper level floor.
You may also want to reinforce these walls with a
second sheet of cardstock as noted earlier.
Use a black Sharpie to edge the sides.
As with the lower walls, pick a corner, apply glue to
the glue tab and align the walls.
Once completed, the upper floor should look like this:
Inventor’s House (Alternate Version) Detailed Building Instructions
6
Upper Level Floor
Cut out the upper level floor. Edge the sides with a
black Sharpie.
Turn the piece over and use the Sharpie along the
edges. This will hide any white lines in case the upper
walls don’t align perfectly to the floor.
Modeling Tip
To attach the floor to the upper walls more easily,
apply spray glue to the un‐printed side of the floor.
Be sure to first notate the orientation of the walls to
the floor. (The west wall is the easiest.) Then carefully
align the floor piece at the corner of the upper floor
walls, working from corner to corner. Once all the
corners are aligned, carefully flatten down the edges.
Another view for reference –
Apply glue to the top glue tabs of the lower walls and
buttresses and carefully align and attach the upper
and lower building sections together.
West Wall
West Wall
West Wall
Inventor’s House (Alternate Version) Detailed Building Instructions
7
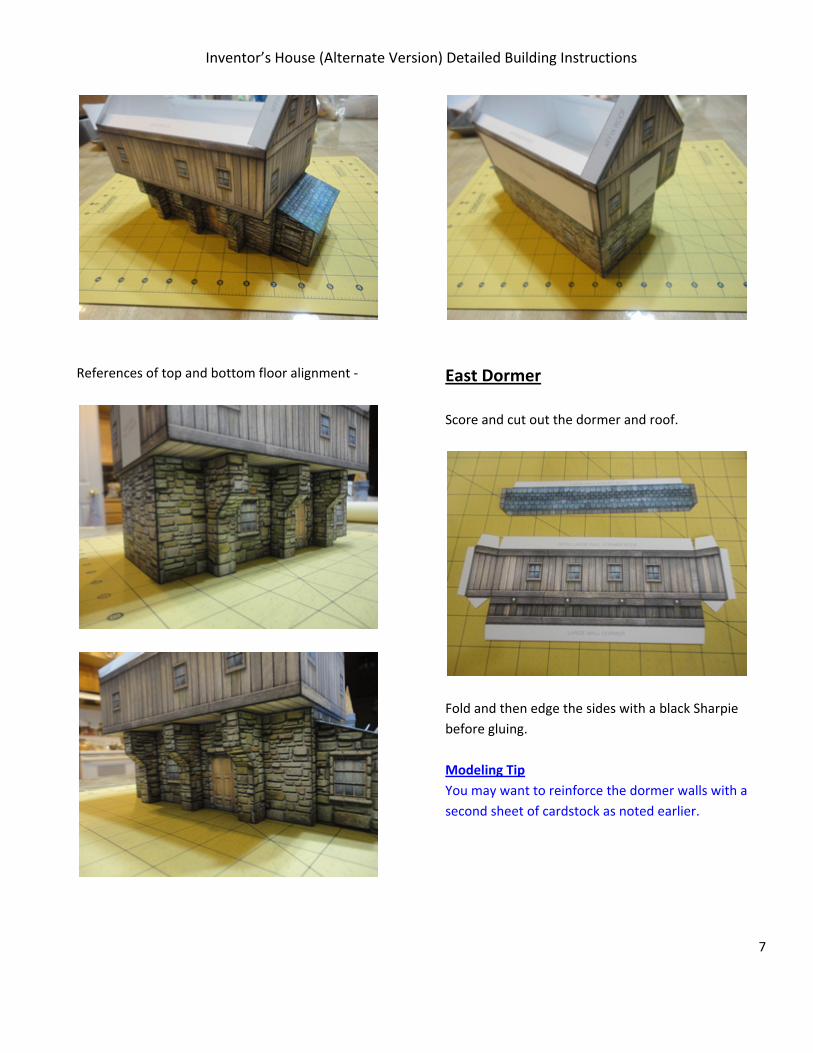
References of top and bottom floor alignment ‐
East Dormer
Score and cut out the dormer and roof.
Fold and then edge the sides with a black Sharpie
before gluing.
Modeling Tip
You may want to reinforce the dormer walls with a
second sheet of cardstock as noted earlier.
Inventor’s House (Alternate Version) Detailed Building Instructions
8
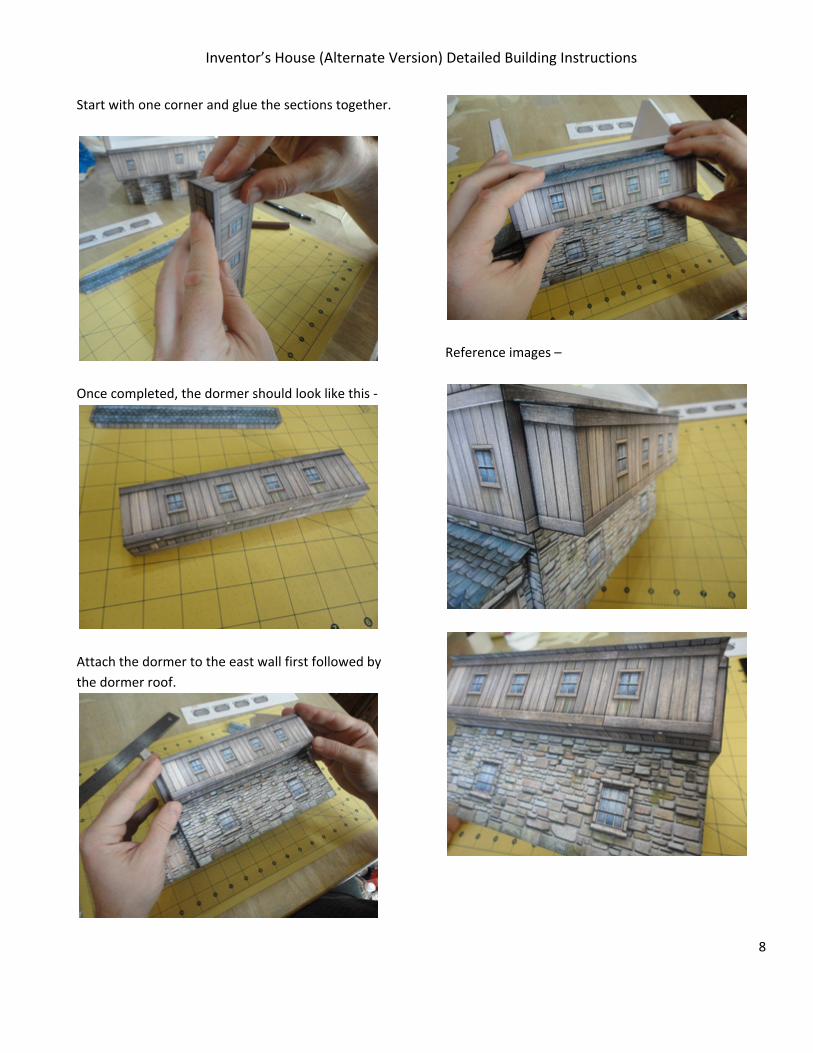
Start with one corner and glue the sections together.
Once completed, the dormer should look like this ‐
Attach the dormer to the east wall first followed by
the dormer roof.
Reference images –
Inventor’s House (Alternate Version) Detailed Building Instructions
9
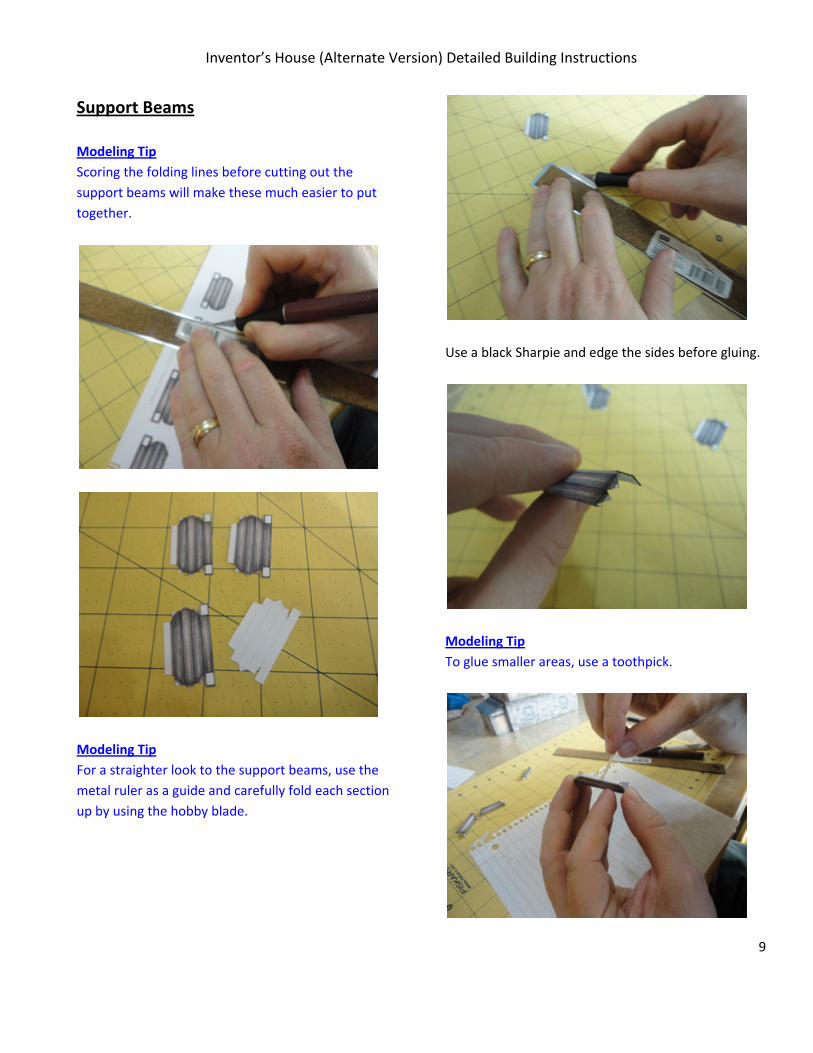
Support Beams
Modeling Tip
Scoring the folding lines before cutting out the
support beams will make these much easier to put
together.
Modeling Tip
For a straighter look to the support beams, use the
metal ruler as a guide and carefully fold each section
up by using the hobby blade.
Use a black Sharpie and edge the sides before gluing.
Modeling Tip
To glue smaller areas, use a toothpick.
Inventor’s House (Alternate Version) Detailed Building Instructions
10
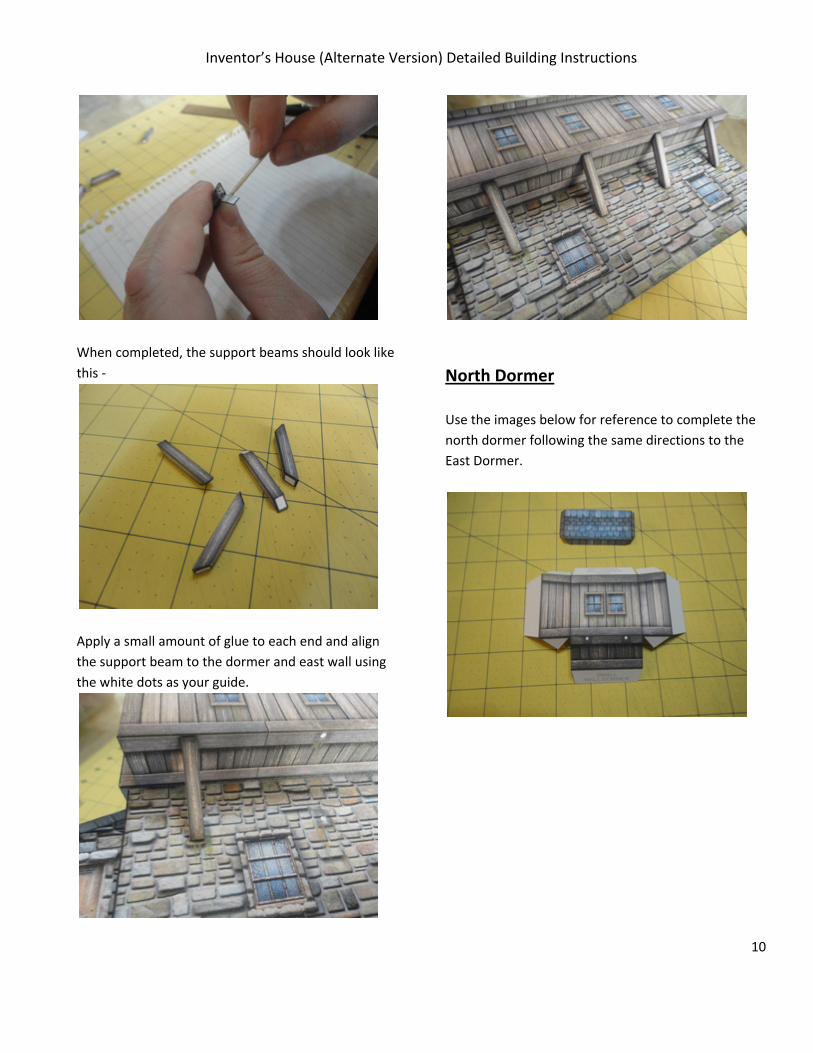
When completed, the support beams should look like
this ‐
Apply a small amount of glue to each end and align
the support beam to the dormer and east wall using
the white dots as your guide.
North Dormer
Use the images below for reference to complete the
north dormer following the same directions to the
East Dormer.
Inventor’s House (Alternate Version) Detailed Building Instructions
11
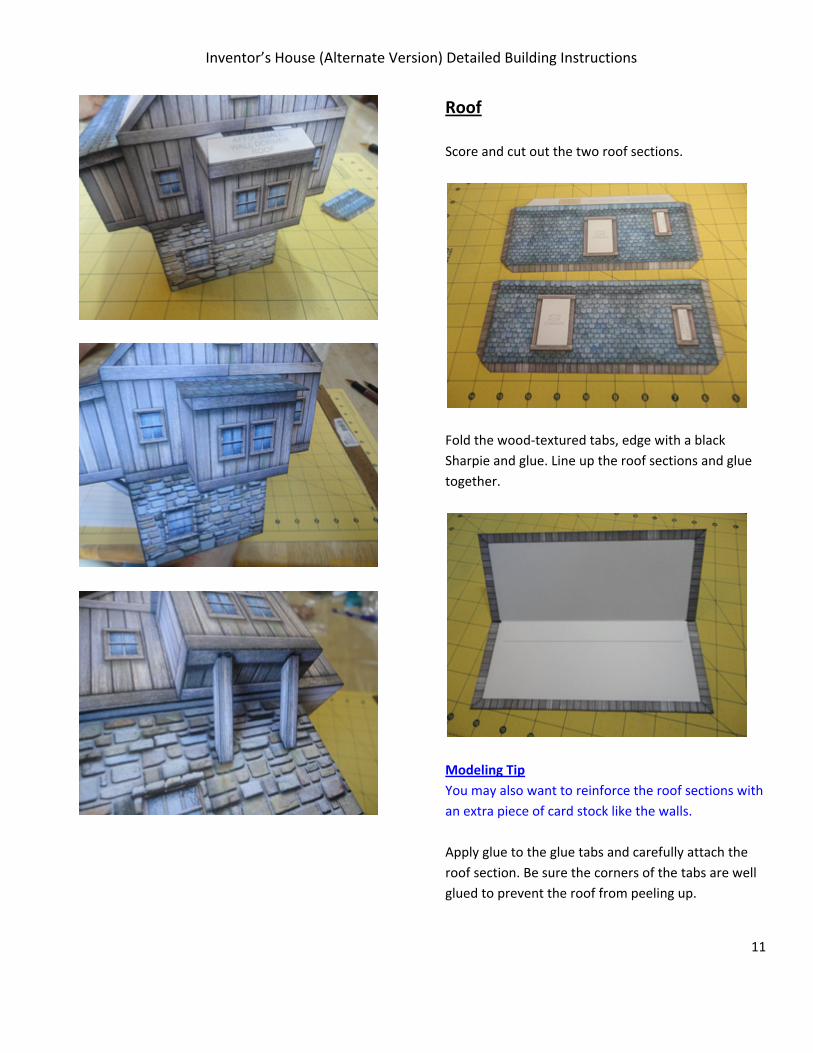
Roof
Score and cut out the two roof sections.
Fold the wood‐textured tabs, edge with a black
Sharpie and glue. Line up the roof sections and glue
together.
Modeling Tip
You may also want to reinforce the roof sections with
an extra piece of card stock like the walls.
Apply glue to the glue tabs and carefully attach the
roof section. Be sure the corners of the tabs are well
glued to prevent the roof from peeling up.
Inventor’s House (Alternate Version) Detailed Building Instructions
12
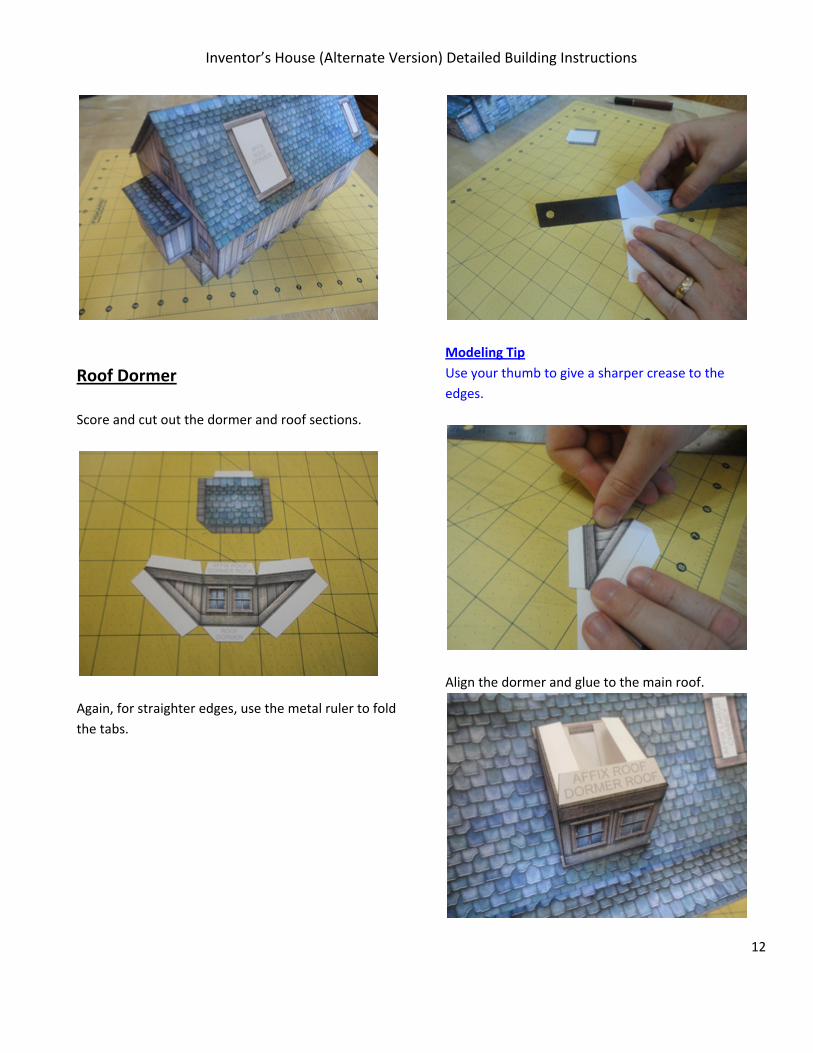
Roof Dormer
Score and cut out the dormer and roof sections.
Again, for straighter edges, use the metal ruler to fold
the tabs.
Modeling Tip
Use your thumb to give a sharper crease to the
edges.
Align the dormer and glue to the main roof.
Inventor’s House (Alternate Version) Detailed Building Instructions
13
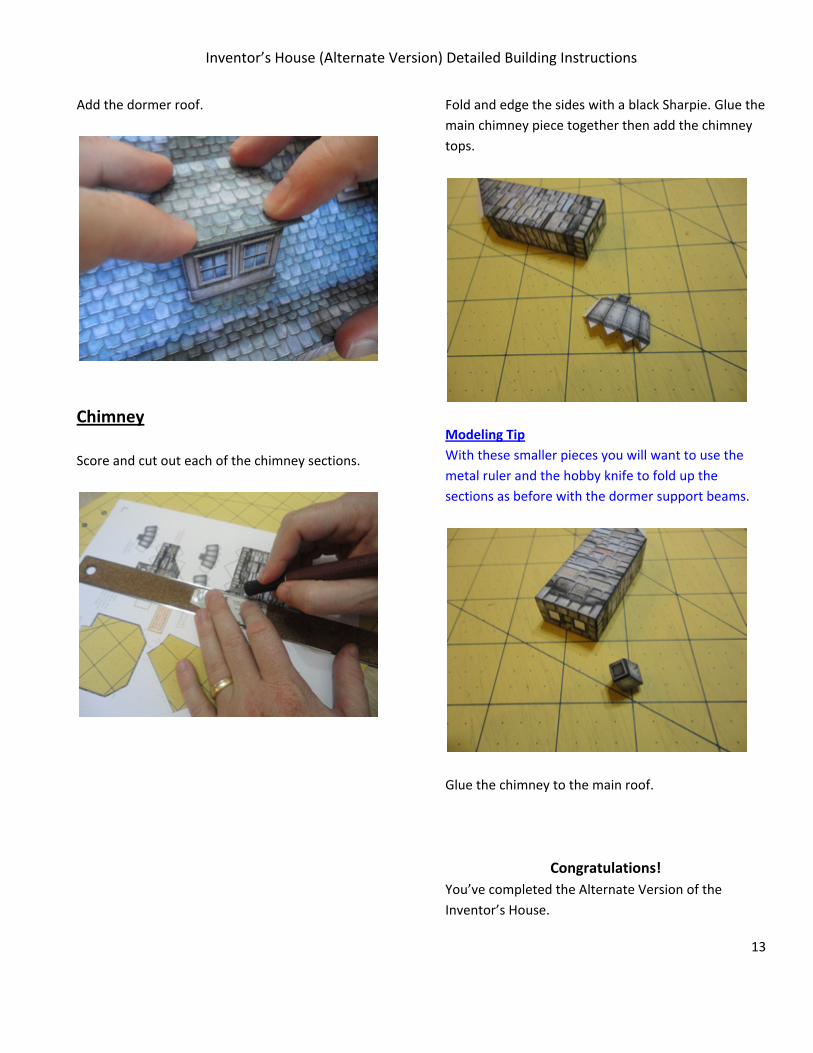
Add the dormer roof.
Chimney
Score and cut out each of the chimney sections.
Fold and edge the sides with a black Sharpie. Glue the
main chimney piece together then add the chimney
tops.
Modeling Tip
With these smaller pieces you will want to use the
metal ruler and the hobby knife to fold up the
sections as before with the dormer support beams.
Glue the chimney to the main roof.
Congratulations!
You’ve completed the Alternate Version of the
Inventor’s House.
Inventor’s House (Alternate Version) Detailed Building Instructions
14
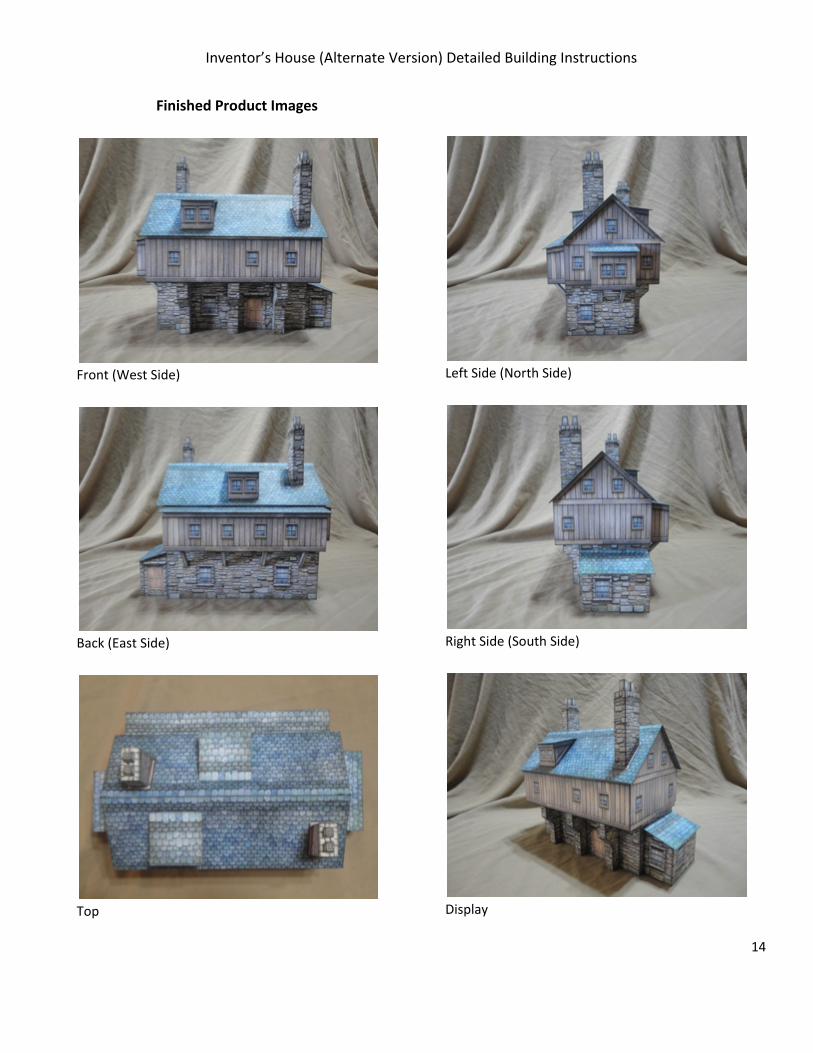
Finished Product Images
Front (West Side)
Back (East Side)
Top
Left Side (North Side)
Right Side (South Side)
Display