Embed Size (px)
Citation preview
WRITING A LINQPAD DATA CONTEXT DRIVERJoseph AlbahariLast updated 2019-8-1
Please visit https://www.linqpad.net/Extensibility.aspx to download the sample project and LINQPad template script to create a driver project.
Contents
Introduction....................................................................................................................................................................2Who Is This Guide For?..........................................................................................................................................2Why Write a Data Context Driver?........................................................................................................................3How Does it Work, From the User’s Perspective?.................................................................................................4Is Writing a Driver Difficult?.................................................................................................................................5What Framework Versions are Supported?............................................................................................................5Does it all work with the free edition?....................................................................................................................5I’ve already written a LINQPad 5 driver. How do I upgrade it for LINQPad 6?...................................................5What’s new in the LINQPad 6 driver model?........................................................................................................6
Concepts.........................................................................................................................................................................6Terminology............................................................................................................................................................6Static vs Dynamic Drivers......................................................................................................................................7How LINQPad Queries Work.................................................................................................................................7
What is a driver and where does it live?........................................................................................................................8File-based Installation.............................................................................................................................................8Package-based Installation (LINQPad 6+ only).....................................................................................................8
Setting up a Project........................................................................................................................................................9How did LINQPad just find your new driver?......................................................................................................10Debugging your Driver.........................................................................................................................................10
Writing a Driver...........................................................................................................................................................11Writing a Static Driver..........................................................................................................................................12Writing a Dynamic Driver....................................................................................................................................12
Processes and Isolation................................................................................................................................................13
Assembly Resolution...................................................................................................................................................14Handling conflicts.................................................................................................................................................14Should I use NuGet references or assembly references?......................................................................................15How do I load an assembly at runtime?................................................................................................................15
File Resolution.............................................................................................................................................................16
Deploying.....................................................................................................................................................................16Versioning.............................................................................................................................................................18Including Samples.................................................................................................................................................18
Fine-Tuning..................................................................................................................................................................19Passing Arguments into a Data Context’s Constructor.........................................................................................19Working with Databases and Connection Strings................................................................................................19
Performing Additional Initialization / Teardown on the Data Context................................................................20Populating the SQL Translation Tab....................................................................................................................20Importing Additional Assemblies and Namespaces.............................................................................................21Overriding AreRepositoriesEquivalent.................................................................................................................22Overriding GetLastSchemaUpdate (dynamic drivers)..........................................................................................22Supporting SQL Queries.......................................................................................................................................22Clearing Connection Pools...................................................................................................................................23Application Configuration Files...........................................................................................................................24Customizing the Icon............................................................................................................................................24Custom Features....................................................................................................................................................24
Customizing Output.....................................................................................................................................................24Overriding PreprocessObjectToWrite..................................................................................................................25Implementing ICustomMemberProvider..............................................................................................................25Customizing Output to Data Grids.......................................................................................................................27
API Reference..............................................................................................................................................................28IConnectionInfo....................................................................................................................................................28IDatabaseInfo........................................................................................................................................................29ICustomTypeInfo..................................................................................................................................................30ExplorerItem.........................................................................................................................................................30ExplorerItemKind.................................................................................................................................................31ExplorerIcon.........................................................................................................................................................32
Introduction
Who Is This Guide For?
This guide is for programmers interested in extending LINQPad to support other data sources. In other words, this guide describes how to add new drivers to the following dialog:
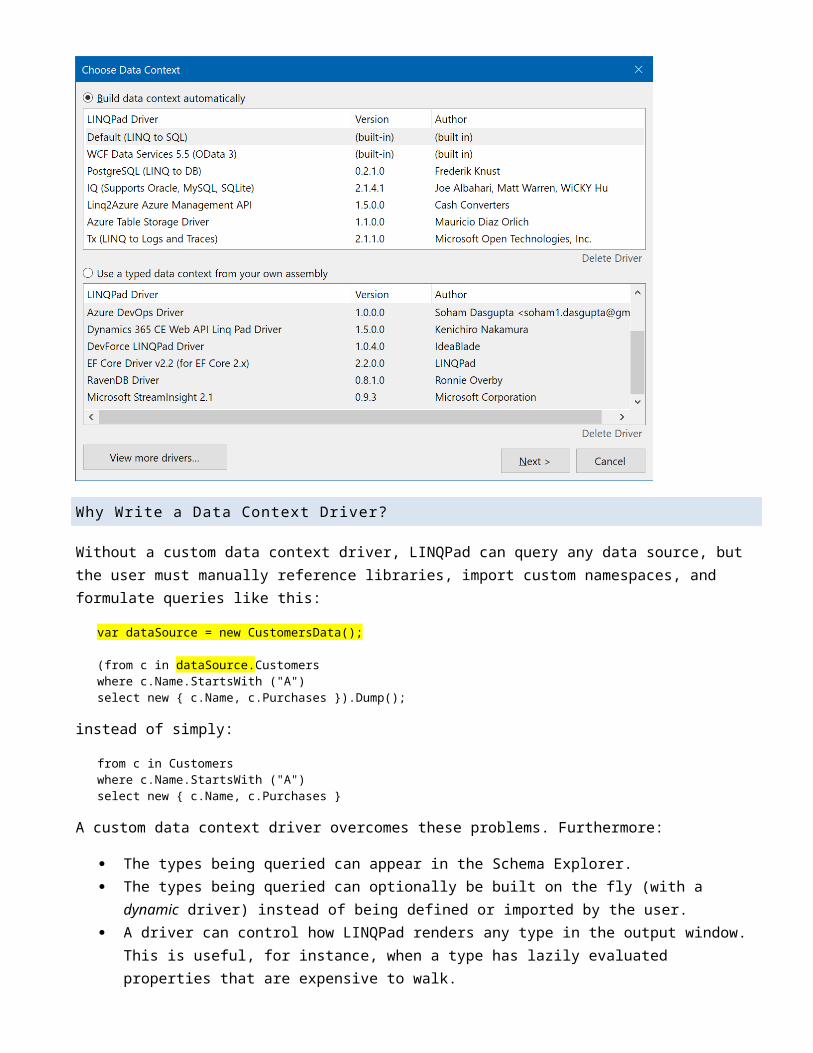
Why Write a Data Context Driver?
Without a custom data context driver, LINQPad can query any data source, but the user must manually reference libraries, import custom namespaces, and formulate queries like this:
var dataSource = new CustomersData();
(from c in dataSource.Customers where c.Name.StartsWith ("A") select new { c.Name, c.Purchases }).Dump();
instead of simply:
from c in Customers where c.Name.StartsWith ("A") select new { c.Name, c.Purchases }
A custom data context driver overcomes these problems. Furthermore:
The types being queried can appear in the Schema Explorer. The types being queried can optionally be built on the fly (with a dynamic driver) instead of being defined
or imported by the user. A driver can control how LINQPad renders any type in the output window. This is useful, for instance,
when a type has lazily evaluated properties that are expensive to walk. A driver can populate the SQL translation tab in the output pane, and make numerous additional tweaks to
optimize the querying experience. Publishing your driver for LINQPad 6 is as simple as uploading a NuGet package with a special tag. No
further work is required!
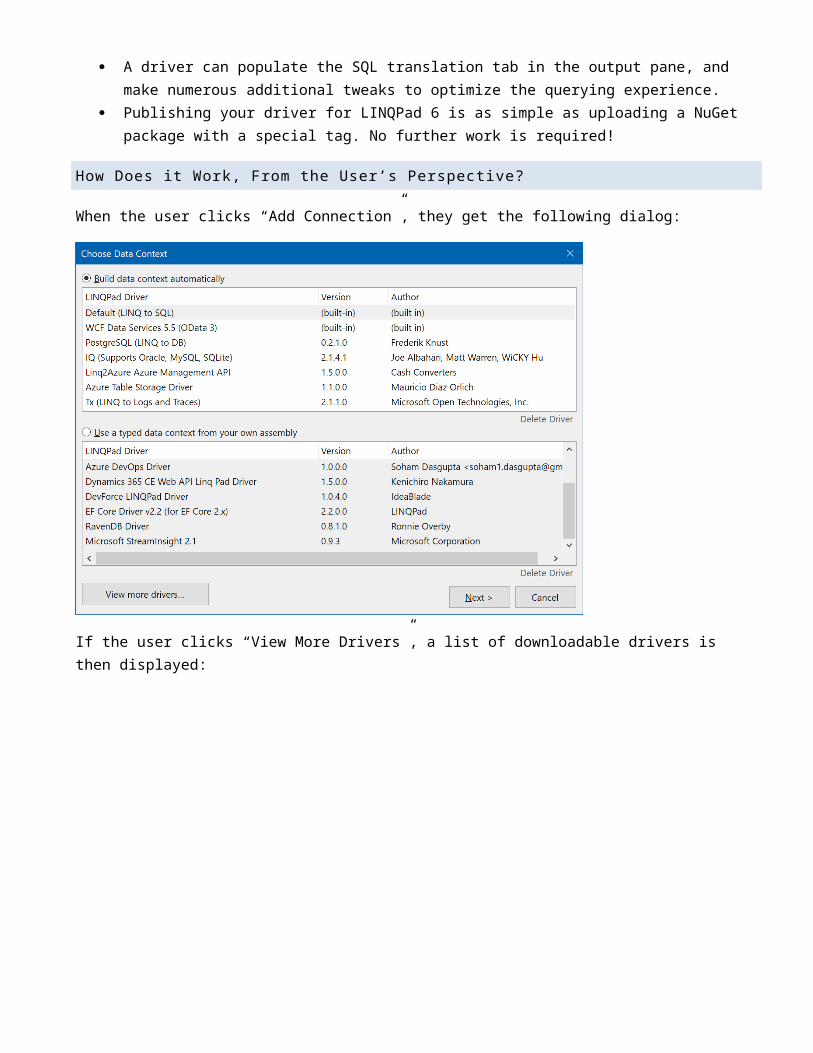
How Does it Work, From the User’s Perspective?
When the user clicks “Add Connection”, they get the following dialog:
If the user clicks “View More Drivers”, a list of downloadable drivers is then displayed:
In LINQPad 6, the list of online drivers comes from the public NuGet feed (or a private feed if configured in “Settings”). Any package with the “linqpad-driver” tag is displayed, and installed with a single click. You can also click the button on the bottom to install a driver from a .LPX6 file (which is basically a zip file that contains the driver plus its dependencies).
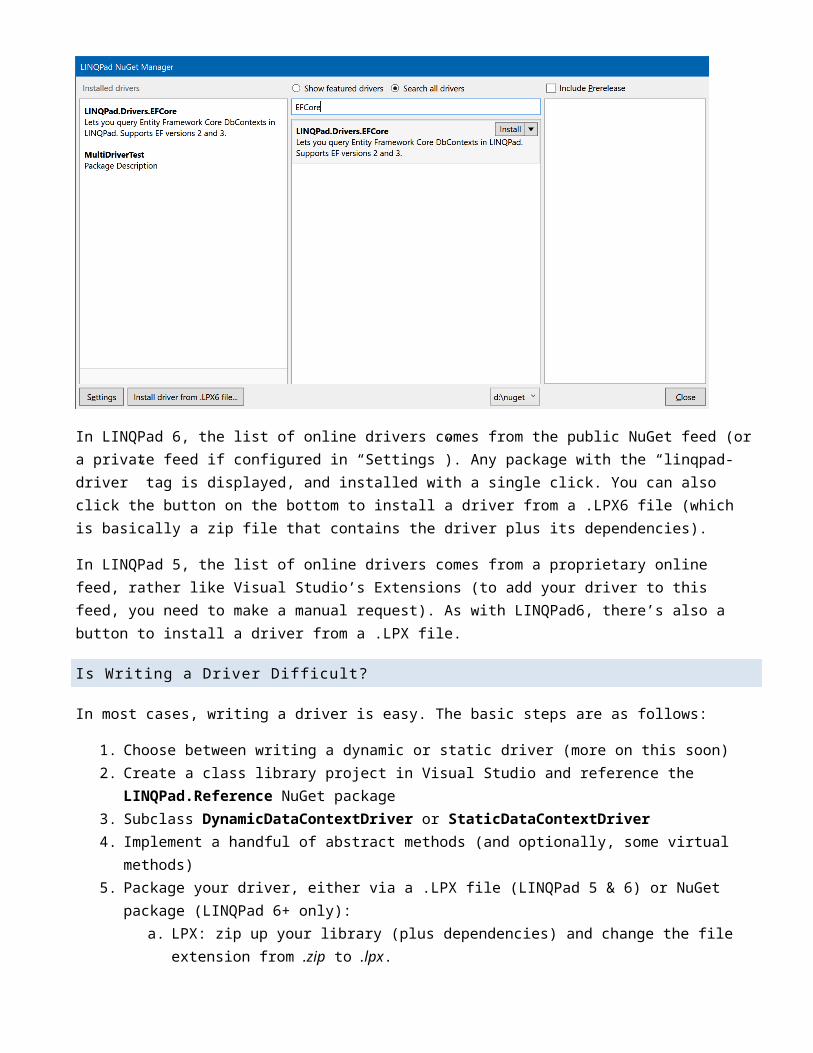
In LINQPad 5, the list of online drivers comes from a proprietary online feed, rather like Visual Studio’s Extensions (to add your driver to this feed, you need to make a manual request). As with LINQPad6, there’s also a button to install a driver from a .LPX file.
Is Writing a Driver Difficult?
In most cases, writing a driver is easy. The basic steps are as follows:
1. Choose between writing a dynamic or static driver (more on this soon)2. Create a class library project in Visual Studio and reference the LINQPad.Reference NuGet package3. Subclass DynamicDataContextDriver or StaticDataContextDriver4. Implement a handful of abstract methods (and optionally, some virtual methods)5. Package your driver, either via a .LPX file (LINQPad 5 & 6) or NuGet package (LINQPad 6+ only):
a. LPX: zip up your library (plus dependencies) and change the file extension from .zip to .lpx.b. NuGet: tick the ‘Generate NuGet package on build’ option in Visual Studio
6. (Optionally) publish your driver. If it’s a NuGet package, simply add the linqpad-driver tag to your package and upload!
To make it even easier, there’s a LINQPad script to create a driver project from a template. There’s also a demo project at the download page (https://www.linqpad.net/Extensibility.aspx) that illustrates how to write a basic static and dynamic driver.
The types comprising the extensibility model in LINQPad are not obfuscated. You are encouraged to use ILSpy if you want to look deeper into these types, and you do this right from LINQPad if you have a paid edition: Just press F12 on any type or symbol in the editor.
What Framework Versions are Supported?
LINQPad 6 supports .NET Core 3 (Desktop, for Windows).
LINQPad 5 supports .NET Framework 4.6/4.7/4.8.
A single driver DLL cannot do both, however it’s easy to create a dual-targeting Visual Studio project that generates drivers for both LINQPad 5 and 6 at the same time.
Does it all work with the free edition?
Yes, everything described here works with the free edition of LINQPad, including the ability to download drivers from NuGet sources.
I’ve already written a LINQPad 5 driver. How do I upgrade it for LINQPad 6?
1. Create a new Visual Studio project using the LINQPad script provided at the download page (https://www.linqpad.net/Extensibility.aspx)
2. Add any dependencies via NuGet packages3. Copy over the source files from your old project.
There are almost no breaking changes, so it should all compile and run. However, you may wish to take advantage of some new of the new features (below). You have choice as to whether your new project targets just LINQPad 6, or both LINQPad 5 and LINQPad 6.
If your driver references other libraries, you’ll need to make sure they’re compatible with .NET Core or .NET Standard. To publish your new driver, simply create and publish a NuGet package.
If your driver is a static driver for an object-relational mapper, been there’s a change to assembly selection algorithm that you should be aware of (described later). The upshot is that your driver should now reference the oldest version of the ORM that it’s able to support.
What’s new in the LINQPad 6 driver model?
The option of simpler NuGet-based deployment LPX files no longer require a header.xml file No strong-name requirement for your driver LINQPad 6 never locks your driver files, so you can rebuild your driver without restarting LINQPad New helper methods on DataContextDriver:
o CompileSource and GetCoreFxReferenceAssemblies – to help you compile code in .NET Coreo SaveNewPassword – for handling password expiry promptso RunInNewProcess – lets you run a method in a temporary isolated process and get data back
(Advanced, and not yet documented): A bunch of new virtual methods that you can override:o IsParent, GetChildren, GetChildNodeName, MergeConnections (for implementing a “Display all
databases in TreeView”-style connection) o CreateSaveChangesAdapater – so the user can edit data in the grid and save it backo OpenConnection – you can override this to handle specialized scenarios like AD authentication
(You can see examples on how to use these by decompiling the built-in LINQ-to-SQL driver, which is extracted to %localappdata%\LINQPad\<version>\L2S.)
Concepts
Terminology
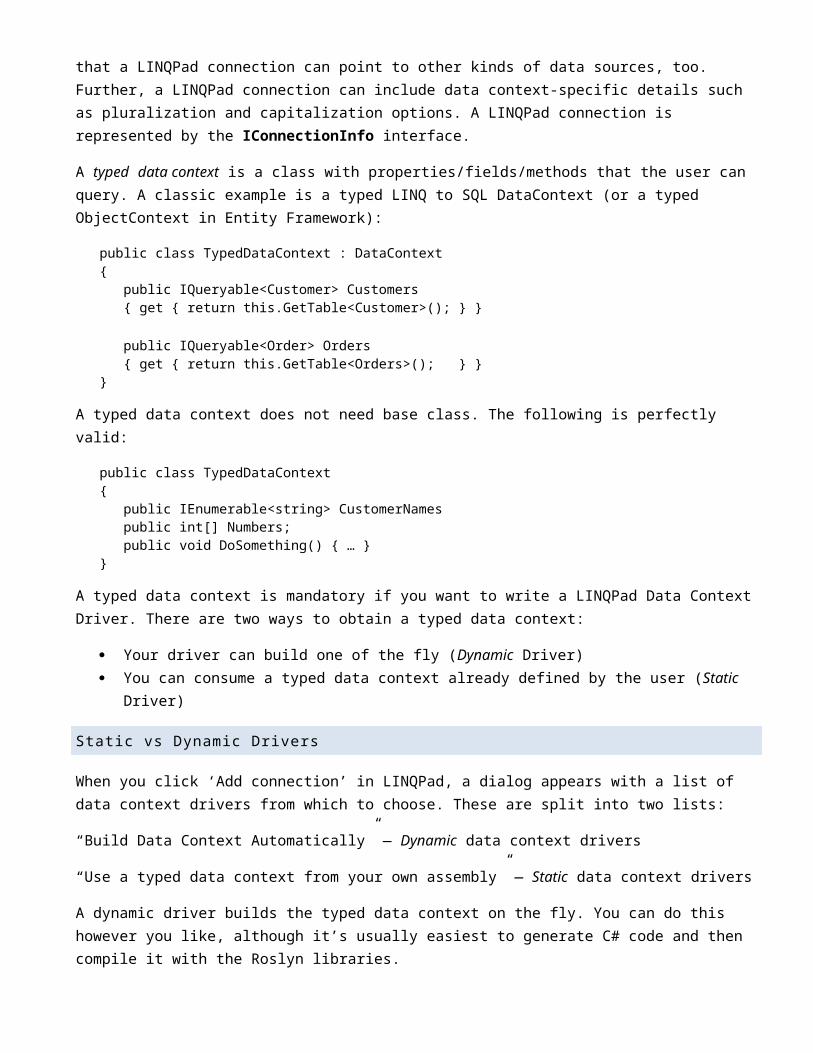
A connection corresponds to what the user enters when they click ‘Add Connection’. This is broader than the concept of a database connection in that a LINQPad connection can point to other kinds of data sources, too. Further, a LINQPad connection can include data context-specific details such as pluralization and capitalization options. A LINQPad connection is represented by the IConnectionInfo interface.
A typed data context is a class with properties/fields/methods that the user can query. A classic example is a typed LINQ to SQL DataContext (or a typed ObjectContext in Entity Framework):
public class TypedDataContext : DataContext { public IQueryable<Customer> Customers { get { return this.GetTable<Customer>(); } }
public IQueryable<Order> Orders { get { return this.GetTable<Orders>(); } } }
A typed data context does not need base class. The following is perfectly valid:
public class TypedDataContext {
public IEnumerable<string> CustomerNames public int[] Numbers; public void DoSomething() { … } }
A typed data context is mandatory if you want to write a LINQPad Data Context Driver. There are two ways to obtain a typed data context:
Your driver can build one of the fly (Dynamic Driver) You can consume a typed data context already defined by the user (Static Driver)
Static vs Dynamic Drivers
When you click ‘Add connection’ in LINQPad, a dialog appears with a list of data context drivers from which to choose. These are split into two lists:
“Build Data Context Automatically” — Dynamic data context drivers
“Use a typed data context from your own assembly” — Static data context drivers
A dynamic driver builds the typed data context on the fly. You can do this however you like, although it’s usually easiest to generate C# code and then compile it with the Roslyn libraries.
A static driver requires that the user supply the typed data context. The connection dialog that you write will prompt the user for the path to a custom assembly containing the typed data context, and the name of the type.
The advantage of a dynamic driver is that it allows the end user to query without having to first write classes in a Visual Studio project. The advantage of a static driver is that it gives compatibility with typed data contexts in projects that they’ve already written.
You can implement both kinds of driver in the same assembly.
How LINQPad Queries Work
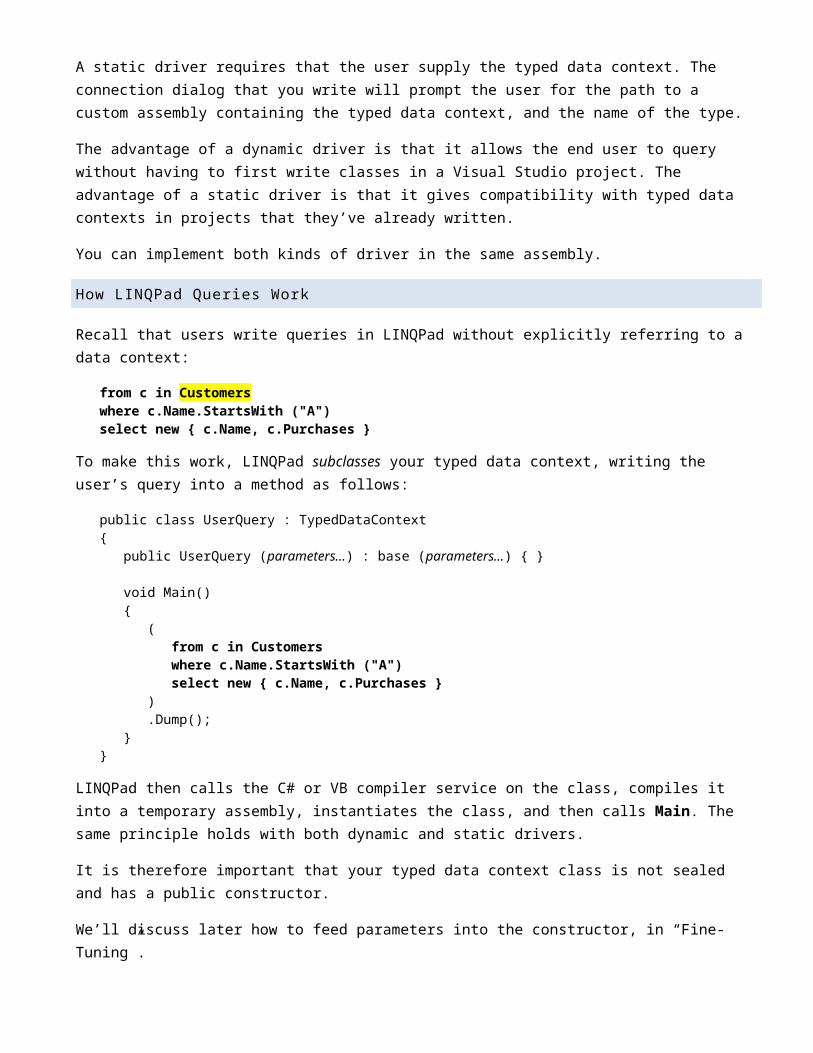
Recall that users write queries in LINQPad without explicitly referring to a data context:
from c in Customers where c.Name.StartsWith ("A") select new { c.Name, c.Purchases }
To make this work, LINQPad subclasses your typed data context, writing the user’s query into a method as follows:
public class UserQuery : TypedDataContext { public UserQuery (parameters...) : base (parameters...) { }
void Main() { ( from c in Customers where c.Name.StartsWith ("A") select new { c.Name, c.Purchases }
) .Dump(); } }
LINQPad then calls the C# or VB compiler service on the class, compiles it into a temporary assembly, instantiates the class, and then calls Main. The same principle holds with both dynamic and static drivers.
It is therefore important that your typed data context class is not sealed and has a public constructor.
We’ll discuss later how to feed parameters into the constructor, in “Fine-Tuning”.
What is a driver and where does it live?
A LINQPad driver comprises a main assembly (the “driver assembly”) plus dependencies.
There are three places that a driver can be installed:
1. In the %LocalAppData% folder, under %localappdata%\LINQPad\Drivers\DataContext\...2. (For portable deployments), under drivers\DataContext\...3. (For LINQPad 6+ only), as a NuGet package.
The first two are very similar, and are referred to as file-based installations.
The third is somewhat different, and is referred to as a package-based installation.
File-based Installation
With file-based installations, the driver folder contains everything that would normally appear in the output folder of your Visual Studio driver project. This includes the driver assembly plus any referenced assemblies, plus any non-binary resources that you need. If it’s .NET Core project, it can also include a .deps.json file which lists its NuGet dependencies. LINQPad 6 will automatically detect and parse the .deps.json files, and import all the required NuGet packages. (And if they’re not present on the machine, LINQPad 6 has a full package-restore facility, so it will ask the user if they want to restore them.)
There are two ways to create a file-based installation:
Create the folder yourself and copy the files in (great while developing). From LINQPad’s UI: click ‘Add Connection’, ‘View more drivers’, and browse to a .LPX or .LPX6 file,
(which is a renamed .zip file). LINQPad will extract all its files into to the right folder (great for the end-user).
Here’s the full path for local file-based installations, in LINQPad 6:
%localappdata%\LINQPad\Drivers\DataContext\NetCore\DriverName
And for LINQPad 5:
%localappdata%\LINQPad\Drivers\DataContext\4.6\DriverName (no-strong-name)
(Notice that the LINQPad 5 folder is suffixed with a space followed by the literal (no-strong-name).)
For portable installations, it’s the same folder relative to LINQPad6.exe, instead of %localappdata%\LINQPad.
Package-based Installation (LINQPad 6+ only)
LINQPad 6 also lets you publish a driver by uploading a NuGet package with the linqpad-driver tag. The end-user just clicks on the package to install it and it’s done.
When you install a package-based driver, LINQPad first downloads the driver package plus all of its dependencies (to the same local package cache that Visual Studio uses). Note that it doesn’t need a .deps.json file to be present, because the dependencies are stored in the NuGet package itself. It then writes a small amount of data to a special folder (in %LocalAppData%\LINQPad\NuGet.Drivers) to indicate that the package was successfully downloaded, (and to avoid a costly package-walk every time it needs to load the driver, and to allow for automatic package restoration should the main cache be cleared).
With package-based installations, the NuGet package ID must match the driver assembly name.
If the same driver has also been installed in a file-based installation, the package installation will take precedence.
You can delete a package-based driver either via the user interface in LINQPad, or by locating its folder in %LocalAppData%\LINQPad\NuGet.Drivers and deleting it.
If your driver relies on native DLLs, first create and publish a NuGet package that includes the native DLLs. Then reference that package from your driver. Everything should then work.
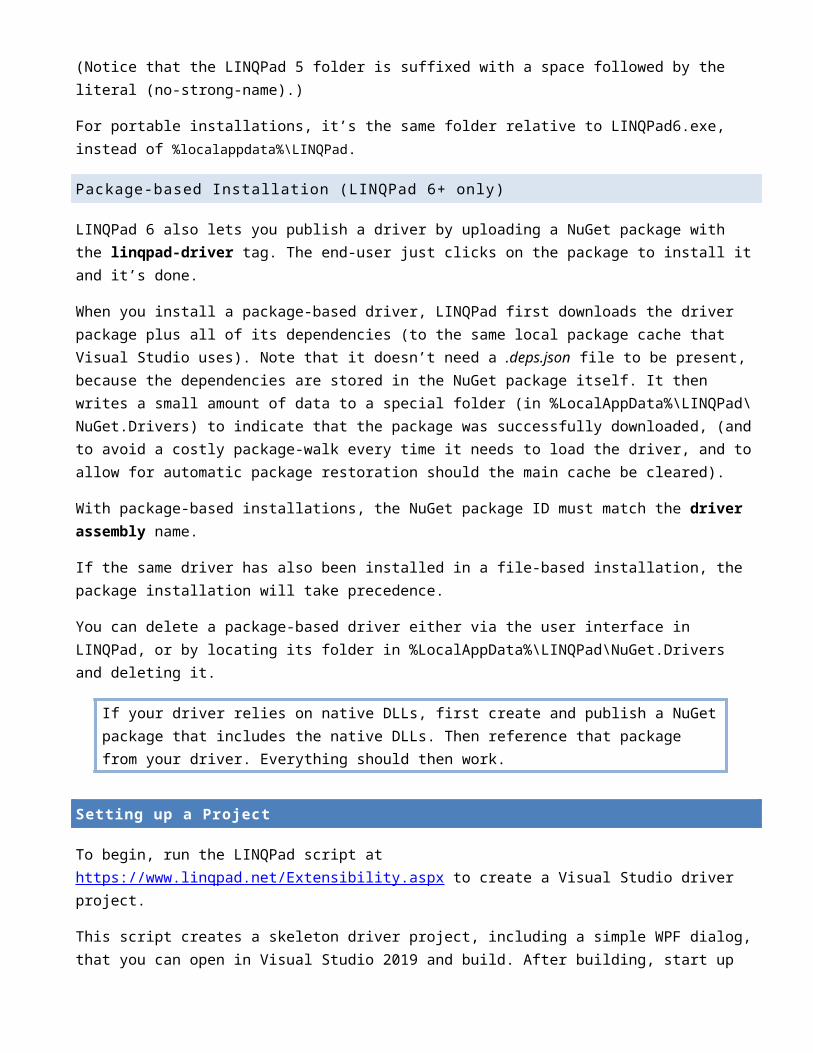
Setting up a Project
To begin, run the LINQPad script at https://www.linqpad.net/Extensibility.aspx to create a Visual Studio driver project.
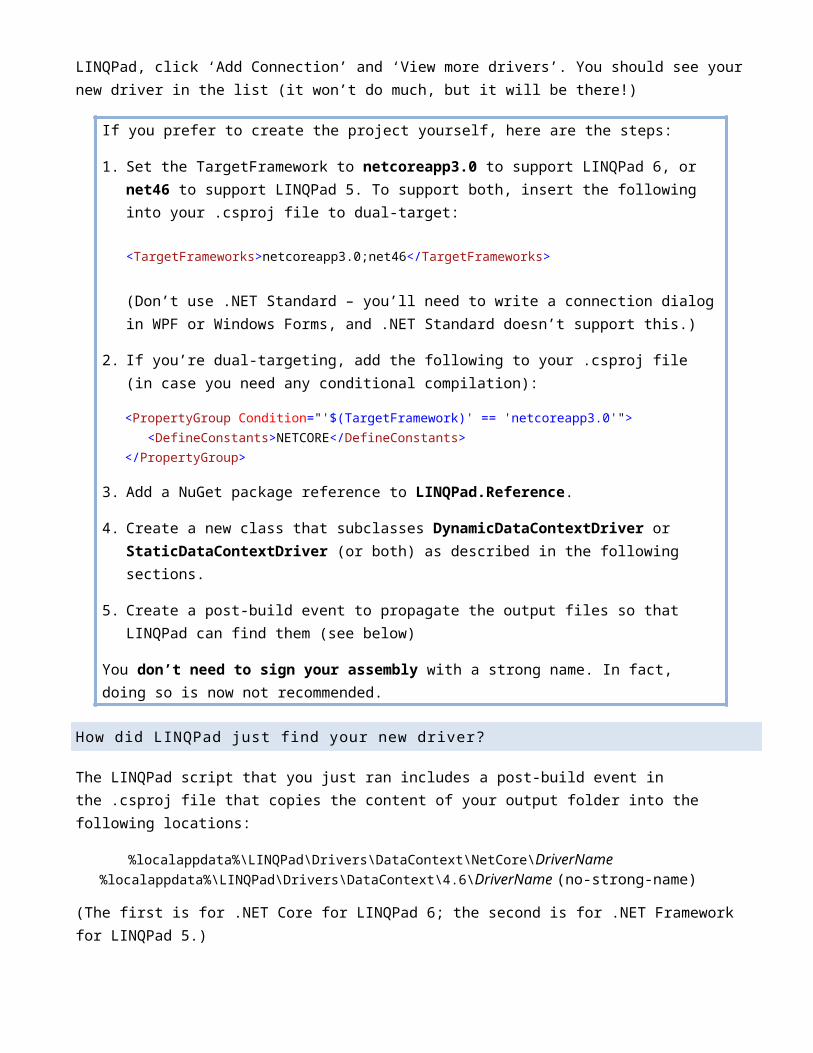
This script creates a skeleton driver project, including a simple WPF dialog, that you can open in Visual Studio 2019 and build. After building, start up LINQPad, click ‘Add Connection’ and ‘View more drivers’. You should see your new driver in the list (it won’t do much, but it will be there!)
If you prefer to create the project yourself, here are the steps:
1. Set the TargetFramework to netcoreapp3.0 to support LINQPad 6, or net46 to support LINQPad 5. To support both, insert the following into your .csproj file to dual-target:
<TargetFrameworks>netcoreapp3.0;net46</TargetFrameworks>
(Don’t use .NET Standard – you’ll need to write a connection dialog in WPF or Windows Forms, and .NET Standard doesn’t support this.)
2. If you’re dual-targeting, add the following to your .csproj file (in case you need any conditional compilation):
<PropertyGroup Condition="'$(TargetFramework)' == 'netcoreapp3.0'"> <DefineConstants>NETCORE</DefineConstants> </PropertyGroup>
3. Add a NuGet package reference to LINQPad.Reference.
4. Create a new class that subclasses DynamicDataContextDriver or StaticDataContextDriver (or both) as described in the following sections.
5. Create a post-build event to propagate the output files so that LINQPad can find them (see below)
You don’t need to sign your assembly with a strong name. In fact, doing so is now not recommended.

How did LINQPad just find your new driver?
The LINQPad script that you just ran includes a post-build event in the .csproj file that copies the content of your output folder into the following locations:
%localappdata%\LINQPad\Drivers\DataContext\NetCore\DriverName %localappdata%\LINQPad\Drivers\DataContext\4.6\DriverName (no-strong-name)
(The first is for .NET Core for LINQPad 6; the second is for .NET Framework for LINQPad 5.)
Creating and populating these folders automatically “installs” the drivers into LINQPad (see “File-based Installation” in the preceding section).
Debugging your Driver
If you’re targeting both LINQPad 5 (.NET Framework) and LINQPad 6 (.NET Core 3), it’s easier to do most of your testing and debugging in LINQPad 6, because it has a nice new feature: LINQPad 6 never locks your driver assembly files, so you can rebuild whenever you want and the post-build event will always succeed. In other words, you never need to close down and restart LINQPad. It also automatically detects changes to your driver and re-loads it on the fly so you can quickly test new functionality.
To test this, try rebuilding your project while the connection dialog is open. Watch what happens.
If you need to attach a debugger, insert the following into your code where you want to set a breakpoint:
Debugger.Launch(); // Debugger is in the System.Diagnostics namespace
Then choose your Visual Studio instance when the dialog pops up and you’ll be able to debug.
There’s another nice trick: if put the following code into a static constructor in your driver class, the debugging dialog will appear whenever your driver throws an exception:
AppDomain.CurrentDomain.FirstChanceException += (sender, args) =>{
if (args.Exception.StackTrace.Contains (typeof (DynamicDemoDriver).Namespace))Debugger.Launch ();
};
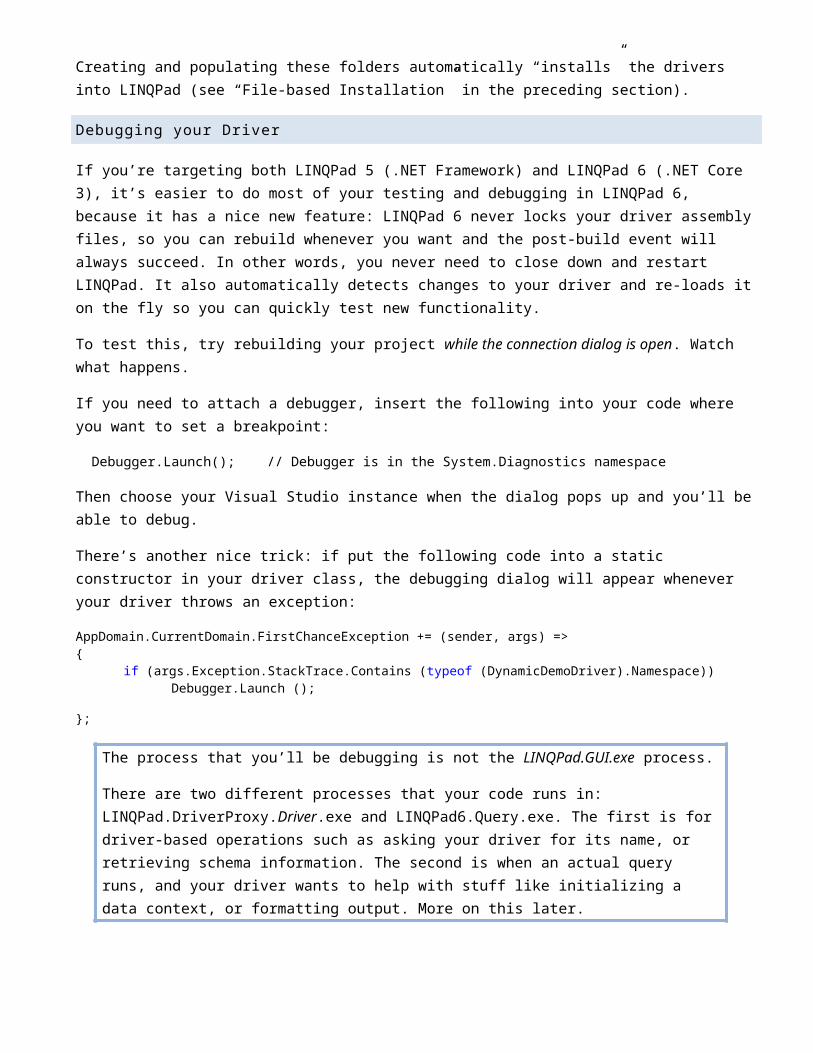
The process that you’ll be debugging is not the LINQPad.GUI.exe process.
There are two different processes that your code runs in: LINQPad.DriverProxy.Driver.exe and LINQPad6.Query.exe. The first is for driver-based operations such as asking your driver for its name, or retrieving schema information. The second is when an actual query runs, and your driver wants to help with stuff like initializing a data context, or formatting output. More on this later.
From Visual Studio, you can also choose the “Attach to process” debugger option, but this won’t work for operations that run in transient processes, such as generating/fetching schema. Debugger.Launch is the best option.
If your driver throws an exception and it’s not caught, LINQPad writes the exception details and stack trace to its log file at %localappdata%\linqpad\logs.LINQPad6\. You can also write your own exceptions by calling the static Log method on DataContextDriver.
Writing a Driver
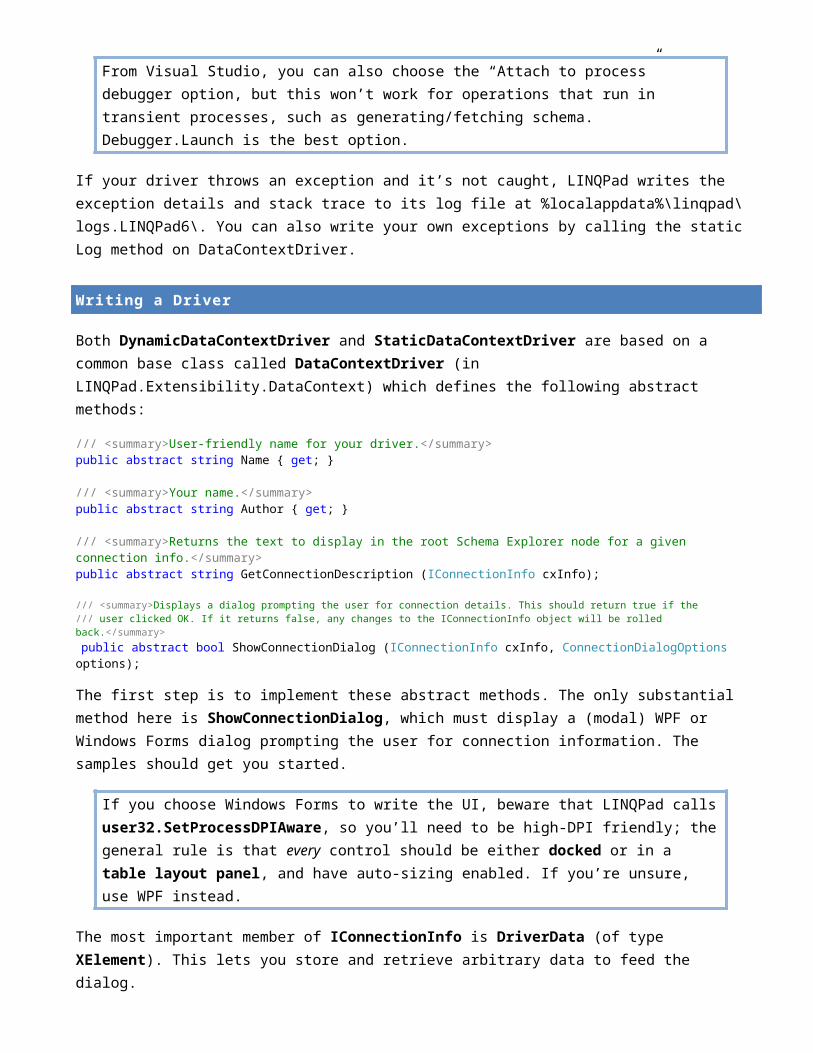
Both DynamicDataContextDriver and StaticDataContextDriver are based on a common base class called DataContextDriver (in LINQPad.Extensibility.DataContext) which defines the following abstract methods:
/// <summary>User-friendly name for your driver.</summary>public abstract string Name { get; }
/// <summary>Your name.</summary>public abstract string Author { get; }
/// <summary>Returns the text to display in the root Schema Explorer node for a givenconnection info.</summary>public abstract string GetConnectionDescription (IConnectionInfo cxInfo);
/// <summary>Displays a dialog prompting the user for connection details. This should return true if the/// user clicked OK. If it returns false, any changes to the IConnectionInfo object will be rolled back.</summary> public abstract bool ShowConnectionDialog (IConnectionInfo cxInfo, ConnectionDialogOptions options);
The first step is to implement these abstract methods. The only substantial method here is ShowConnectionDialog, which must display a (modal) WPF or Windows Forms dialog prompting the user for connection information. The samples should get you started.
If you choose Windows Forms to write the UI, beware that LINQPad calls user32.SetProcessDPIAware, so you’ll need to be high-DPI friendly; the general rule is that every control should be either docked or in a table layout panel, and have auto-sizing enabled. If you’re unsure, use WPF instead.
The most important member of IConnectionInfo is DriverData (of type XElement). This lets you store and retrieve arbitrary data to feed the dialog.
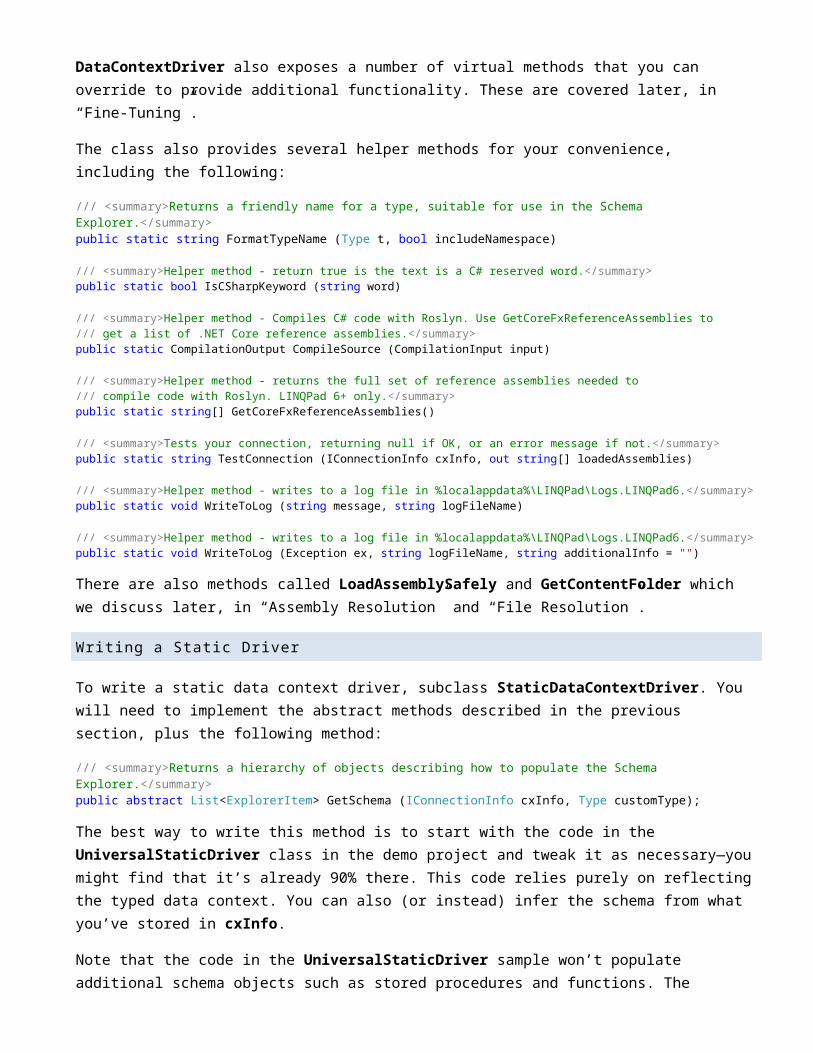
DataContextDriver also exposes a number of virtual methods that you can override to provide additional functionality. These are covered later, in “Fine-Tuning”.
The class also provides several helper methods for your convenience, including the following:
/// <summary>Returns a friendly name for a type, suitable for use in the Schema Explorer.</summary>public static string FormatTypeName (Type t, bool includeNamespace)
/// <summary>Helper method - return true is the text is a C# reserved word.</summary>public static bool IsCSharpKeyword (string word)
/// <summary>Helper method - Compiles C# code with Roslyn. Use GetCoreFxReferenceAssemblies to /// get a list of .NET Core reference assemblies.</summary>public static CompilationOutput CompileSource (CompilationInput input)
/// <summary>Helper method - returns the full set of reference assemblies needed to/// compile code with Roslyn. LINQPad 6+ only.</summary>public static string[] GetCoreFxReferenceAssemblies()
/// <summary>Tests your connection, returning null if OK, or an error message if not.</summary>public static string TestConnection (IConnectionInfo cxInfo, out string[] loadedAssemblies)
/// <summary>Helper method - writes to a log file in %localappdata%\LINQPad\Logs.LINQPad6.</summary>public static void WriteToLog (string message, string logFileName)
/// <summary>Helper method - writes to a log file in %localappdata%\LINQPad\Logs.LINQPad6.</summary>public static void WriteToLog (Exception ex, string logFileName, string additionalInfo = "")
There are also methods called LoadAssemblySafely and GetContentFolder which we discuss later, in “Assembly Resolution” and “File Resolution”.
Writing a Static Driver
To write a static data context driver, subclass StaticDataContextDriver. You will need to implement the abstract methods described in the previous section, plus the following method:
/// <summary>Returns a hierarchy of objects describing how to populate the Schema Explorer.</summary>public abstract List<ExplorerItem> GetSchema (IConnectionInfo cxInfo, Type customType);
The best way to write this method is to start with the code in the UniversalStaticDriver class in the demo project and tweak it as necessary—you might find that it’s already 90% there. This code relies purely on reflecting the typed data context. You can also (or instead) infer the schema from what you’ve stored in cxInfo.
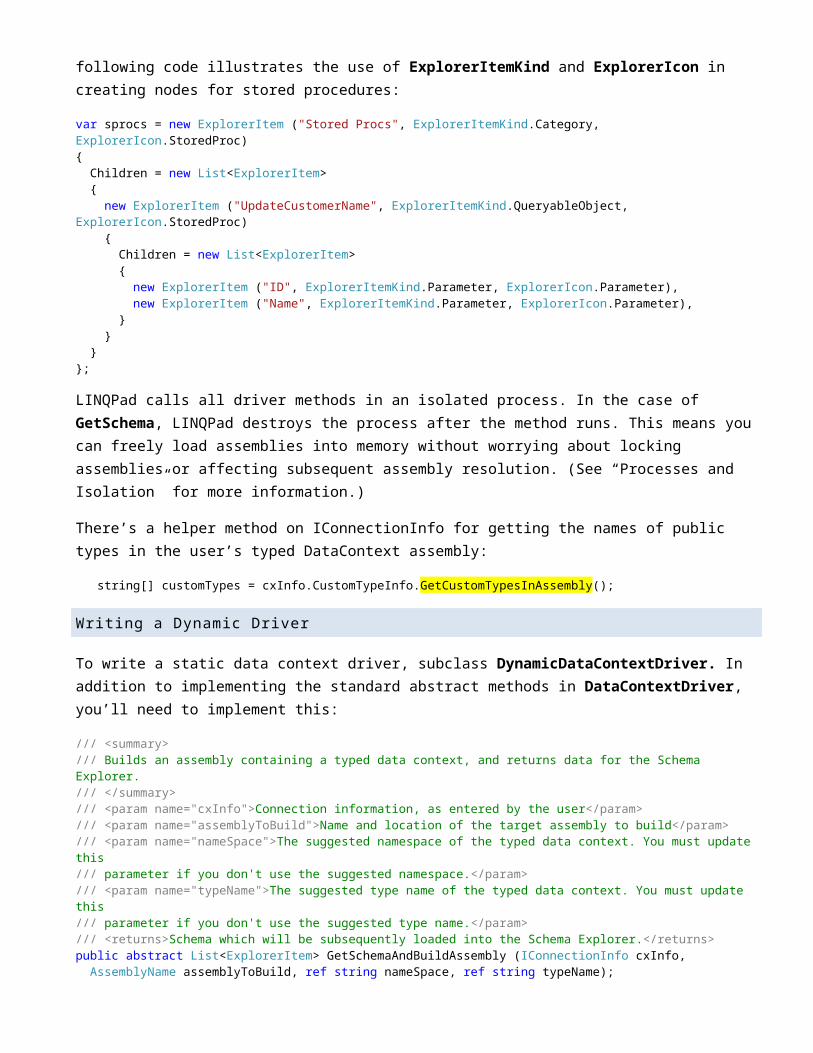
Note that the code in the UniversalStaticDriver sample won’t populate additional schema objects such as stored procedures and functions. The following code illustrates the use of ExplorerItemKind and ExplorerIcon in creating nodes for stored procedures:
var sprocs = new ExplorerItem ("Stored Procs", ExplorerItemKind.Category, ExplorerIcon.StoredProc){ Children = new List<ExplorerItem> { new ExplorerItem ("UpdateCustomerName", ExplorerItemKind.QueryableObject, ExplorerIcon.StoredProc) { Children = new List<ExplorerItem> { new ExplorerItem ("ID", ExplorerItemKind.Parameter, ExplorerIcon.Parameter), new ExplorerItem ("Name", ExplorerItemKind.Parameter, ExplorerIcon.Parameter), } } }};
LINQPad calls all driver methods in an isolated process. In the case of GetSchema, LINQPad destroys the process after the method runs. This means you can freely load assemblies into memory without worrying about locking assemblies or affecting subsequent assembly resolution. (See “Processes and Isolation” for more information.)
There’s a helper method on IConnectionInfo for getting the names of public types in the user’s typed DataContext assembly:
string[] customTypes = cxInfo.CustomTypeInfo.GetCustomTypesInAssembly();
Writing a Dynamic Driver
To write a static data context driver, subclass DynamicDataContextDriver. In addition to implementing the standard abstract methods in DataContextDriver, you’ll need to implement this:
/// <summary>/// Builds an assembly containing a typed data context, and returns data for the Schema Explorer./// </summary>/// <param name="cxInfo">Connection information, as entered by the user</param>/// <param name="assemblyToBuild">Name and location of the target assembly to build</param>/// <param name="nameSpace">The suggested namespace of the typed data context. You must update this
/// parameter if you don't use the suggested namespace.</param>/// <param name="typeName">The suggested type name of the typed data context. You must update this/// parameter if you don't use the suggested type name.</param>/// <returns>Schema which will be subsequently loaded into the Schema Explorer.</returns>public abstract List<ExplorerItem> GetSchemaAndBuildAssembly (IConnectionInfo cxInfo, AssemblyName assemblyToBuild, ref string nameSpace, ref string typeName);
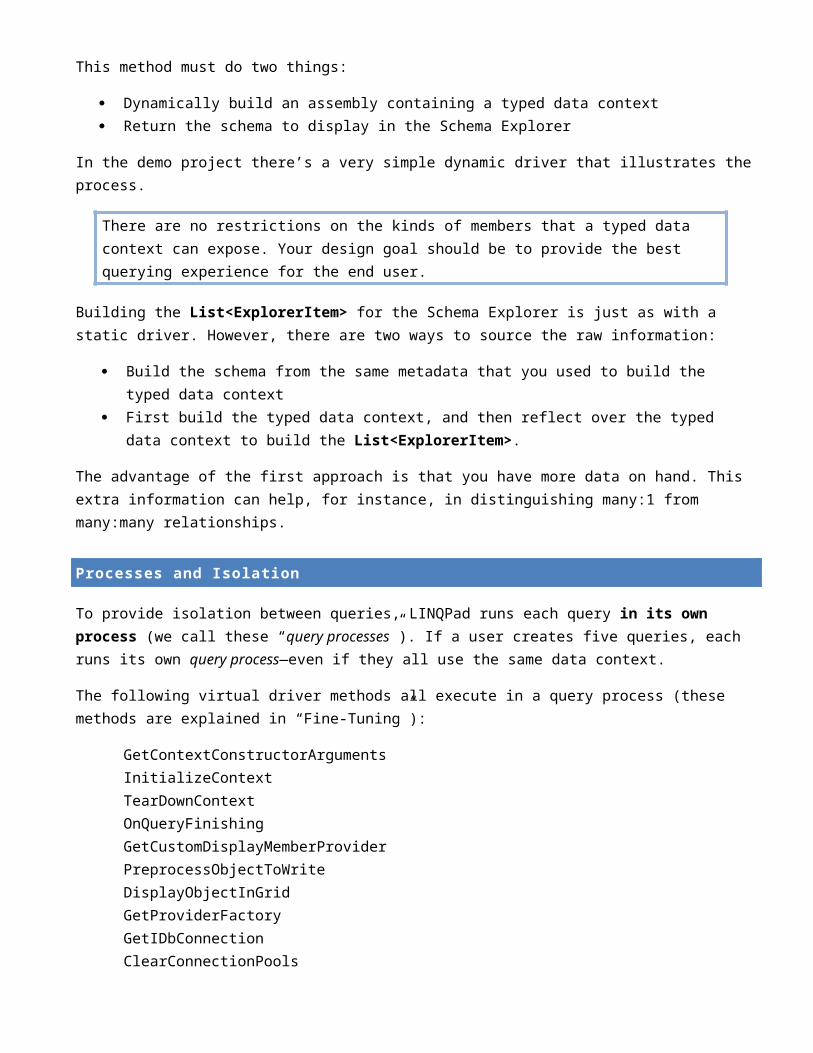
This method must do two things:
Dynamically build an assembly containing a typed data context Return the schema to display in the Schema Explorer
In the demo project there’s a very simple dynamic driver that illustrates the process.
There are no restrictions on the kinds of members that a typed data context can expose. Your design goal should be to provide the best querying experience for the end user.
Building the List<ExplorerItem> for the Schema Explorer is just as with a static driver. However, there are two ways to source the raw information:
Build the schema from the same metadata that you used to build the typed data context First build the typed data context, and then reflect over the typed data context to build the
List<ExplorerItem>.
The advantage of the first approach is that you have more data on hand. This extra information can help, for instance, in distinguishing many:1 from many:many relationships.
Processes and Isolation
To provide isolation between queries, LINQPad runs each query in its own process (we call these “query processes”). If a user creates five queries, each runs its own query process—even if they all use the same data context.
The following virtual driver methods all execute in a query process (these methods are explained in “Fine-Tuning”):
GetContextConstructorArgumentsInitializeContextTearDownContextOnQueryFinishingGetCustomDisplayMemberProviderPreprocessObjectToWriteDisplayObjectInGridGetProviderFactoryGetIDbConnectionClearConnectionPools
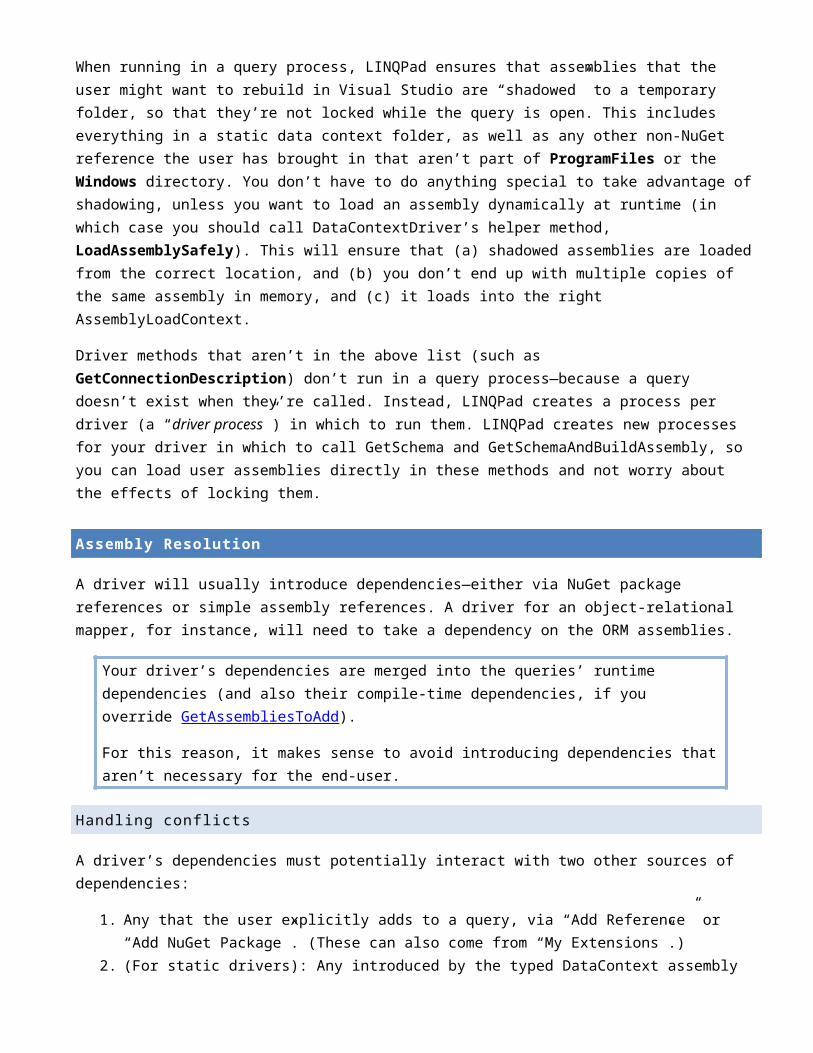
When running in a query process, LINQPad ensures that assemblies that the user might want to rebuild in Visual Studio are “shadowed” to a temporary folder, so that they’re not locked while the query is open. This includes everything in a static data context folder, as well as any other non-NuGet reference the user has brought in that aren’t part of ProgramFiles or the Windows directory. You don’t have to do anything special to take advantage of shadowing, unless you want to load an assembly dynamically at runtime (in which case you should call DataContextDriver’s helper method, LoadAssemblySafely). This will ensure that (a) shadowed assemblies are
loaded from the correct location, and (b) you don’t end up with multiple copies of the same assembly in memory, and (c) it loads into the right AssemblyLoadContext.
Driver methods that aren’t in the above list (such as GetConnectionDescription) don’t run in a query process—because a query doesn’t exist when they’re called. Instead, LINQPad creates a process per driver (a “driver process”) in which to run them. LINQPad creates new processes for your driver in which to call GetSchema and GetSchemaAndBuildAssembly, so you can load user assemblies directly in these methods and not worry about the effects of locking them.
Assembly Resolution
A driver will usually introduce dependencies—either via NuGet package references or simple assembly references. A driver for an object-relational mapper, for instance, will need to take a dependency on the ORM assemblies.
Your driver’s dependencies are merged into the queries’ runtime dependencies (and also their compile-time dependencies, if you override GetAssembliesToAdd).
For this reason, it makes sense to avoid introducing dependencies that aren’t necessary for the end-user.
Handling conflicts
A driver’s dependencies must potentially interact with two other sources of dependencies:
1. Any that the user explicitly adds to a query, via “Add Reference” or “Add NuGet Package”. (These can also come from “My Extensions”.)
2. (For static drivers): Any introduced by the typed DataContext assembly
If there are conflicts, LINQPad favors the highest-versioned packages or assemblies across all sources.
This can mean that your driver can end up running with a newer version of an assembly than it was built with. (This scenario is not unusual: it happens commonly when referencing NuGet packages with differently versioned dependencies.)
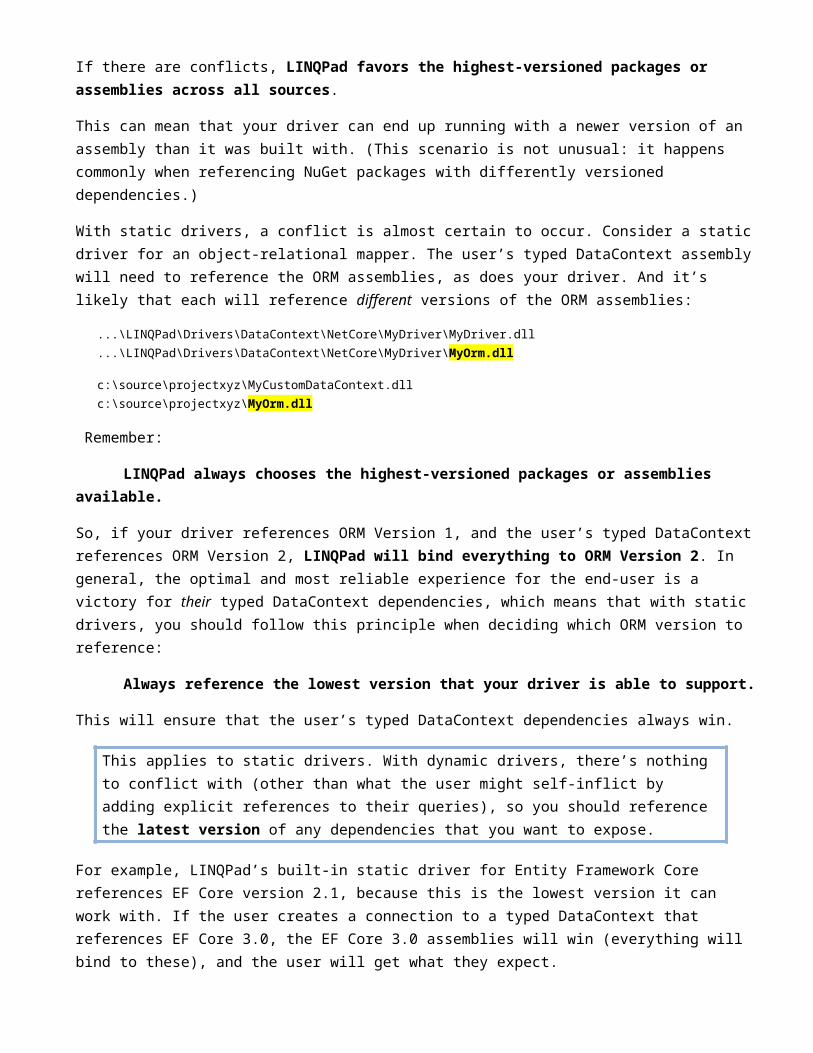
With static drivers, a conflict is almost certain to occur. Consider a static driver for an object-relational mapper. The user’s typed DataContext assembly will need to reference the ORM assemblies, as does your driver. And it’s likely that each will reference different versions of the ORM assemblies:
...\LINQPad\Drivers\DataContext\NetCore\MyDriver\MyDriver.dll ...\LINQPad\Drivers\DataContext\NetCore\MyDriver\MyOrm.dll
c:\source\projectxyz\MyCustomDataContext.dll c:\source\projectxyz\MyOrm.dll
Remember:
LINQPad always chooses the highest-versioned packages or assemblies available.
So, if your driver references ORM Version 1, and the user’s typed DataContext references ORM Version 2, LINQPad will bind everything to ORM Version 2. In general, the optimal and most reliable experience for the end-user is a victory for their typed DataContext dependencies, which means that with static drivers, you should follow this principle when deciding which ORM version to reference:
Always reference the lowest version that your driver is able to support.
This will ensure that the user’s typed DataContext dependencies always win.
This applies to static drivers. With dynamic drivers, there’s nothing to conflict with (other than what the user might self-inflict by adding explicit references to their queries), so you should reference the latest version of any dependencies that you want to expose.
For example, LINQPad’s built-in static driver for Entity Framework Core references EF Core version 2.1, because this is the lowest version it can work with. If the user creates a connection to a typed DataContext that references EF Core 3.0, the EF Core 3.0 assemblies will win (everything will bind to these), and the user will get what they expect.
LINQPad 5 is slightly different in that it always favors the user’s typed DataContext dependencies over your driver’s. This had to be changed in LINQPad 6, because of subtleties introduced by a heavier reliance on NuGet.
Should I use NuGet references or assembly references?
NuGet references are usually better, particularly if you planning to deploy you driver as a NuGet package (recommended). With NuGet references, you don’t have to fight Visual Studio, and nuances such as locating native DLLs or reference assemblies are handled automatically.
With NuGet references, everything works by default. LINQPad 6 will find all the dependent assemblies – by parsing the .deps.json file (for file-based installations) – or from the package metadata (for package-based installations).
With assembly references, Visual Studio copies the DLLs to your output folder by default (unless you uncheck the “Copy Local” option for that file), which is perfect for file-based installations. But if you deploy your driver as a NuGet package, there’s a trap in Visual Studio that has nothing to do with LINQPad. That is, Visual Studio does not include assembly references in packages that it generates. So, you must either manually create the package, or avoid assembly references altogether in favor of package references.
If you’re deploying via NuGet, you can include just your driver DLL in the NuGet package.
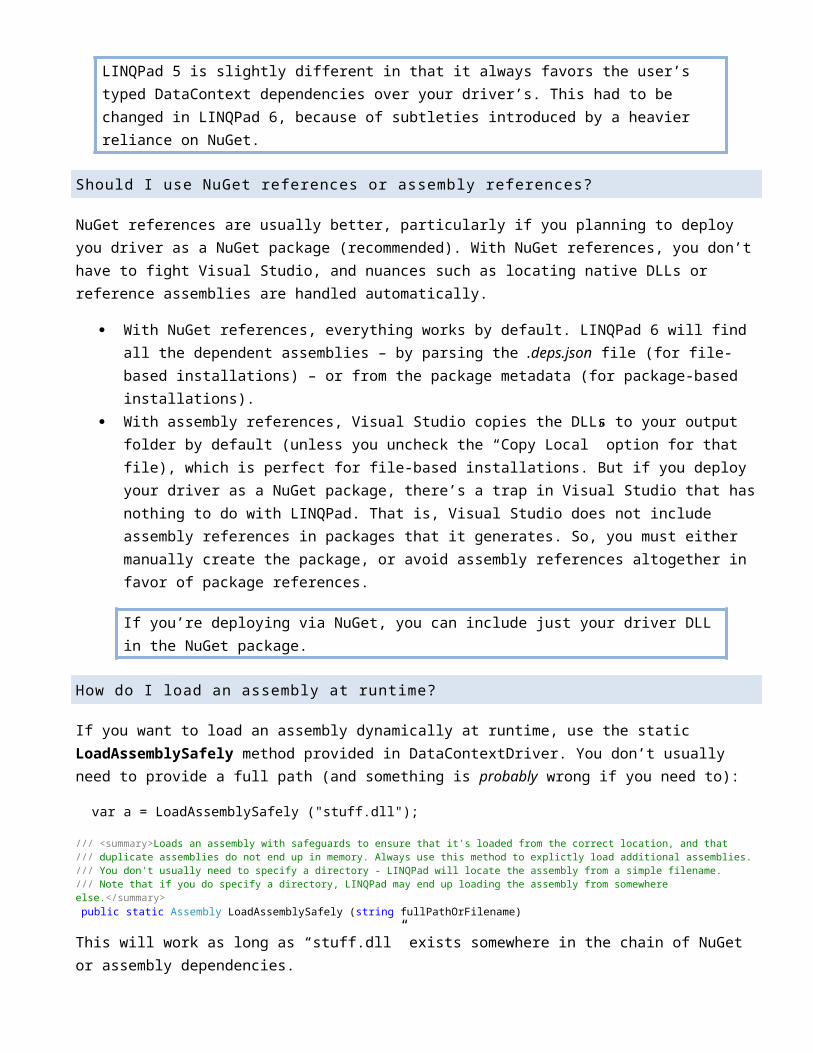
How do I load an assembly at runtime?
If you want to load an assembly dynamically at runtime, use the static LoadAssemblySafely method provided in DataContextDriver. You don’t usually need to provide a full path (and something is probably wrong if you need to):
var a = LoadAssemblySafely ("stuff.dll");
/// <summary>Loads an assembly with safeguards to ensure that it's loaded from the correct location, and that/// duplicate assemblies do not end up in memory. Always use this method to explictly load additional assemblies./// You don't usually need to specify a directory - LINQPad will locate the assembly from a simple filename./// Note that if you do specify a directory, LINQPad may end up loading the assembly from somewhere else.</summary> public static Assembly LoadAssemblySafely (string fullPathOrFilename)
This will work as long as “stuff.dll” exists somewhere in the chain of NuGet or assembly dependencies.
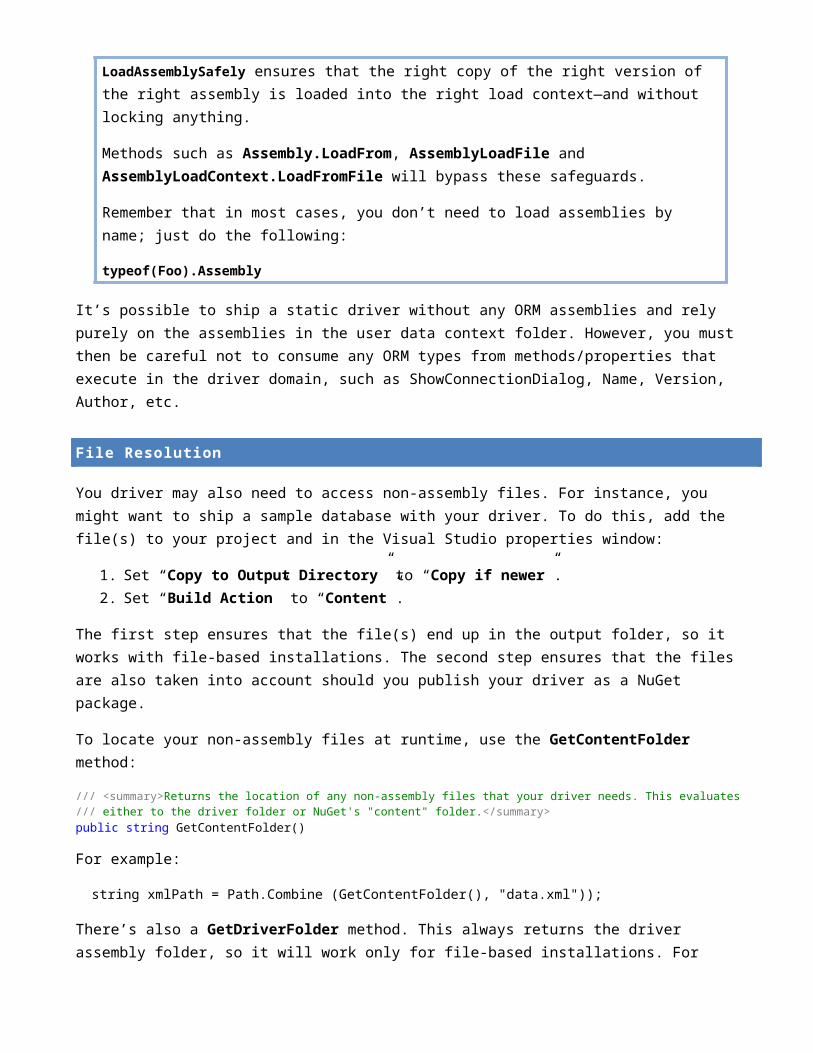
LoadAssemblySafely ensures that the right copy of the right version of the right assembly is loaded into the right load context—and without locking anything.
Methods such as Assembly.LoadFrom, AssemblyLoadFile and AssemblyLoadContext.LoadFromFile will bypass these safeguards.
Remember that in most cases, you don’t need to load assemblies by name; just do the following:
typeof(Foo).Assembly
It’s possible to ship a static driver without any ORM assemblies and rely purely on the assemblies in the user data context folder. However, you must then be careful not to consume any ORM types from methods/properties that execute in the driver domain, such as ShowConnectionDialog, Name, Version, Author, etc.
File Resolution
You driver may also need to access non-assembly files. For instance, you might want to ship a sample database with your driver. To do this, add the file(s) to your project and in the Visual Studio properties window:
1. Set “Copy to Output Directory” to “Copy if newer”.2. Set “Build Action” to “Content”.
The first step ensures that the file(s) end up in the output folder, so it works with file-based installations. The second step ensures that the files are also taken into account should you publish your driver as a NuGet package.
To locate your non-assembly files at runtime, use the GetContentFolder method:
/// <summary>Returns the location of any non-assembly files that your driver needs. This evaluates/// either to the driver folder or NuGet's "content" folder.</summary>public string GetContentFolder()
For example:
string xmlPath = Path.Combine (GetContentFolder(), "data.xml"));
There’s also a GetDriverFolder method. This always returns the driver assembly folder, so it will work only for file-based installations. For package-based installations, it will fail if you’re looking for content because NuGet likes to keep content files in a separate folder to lib files.
Deploying
To create a package-based deployment, tick the “Generate NuGet package on build” option in Visual Studio’s project properties dialog, and ensure that the Tags box contains the text linqpad-driver. Visual Studio will then create a .nupkg package in the bin\debug or bin\release folder on build. The easiest way to test your package is to create a local package source right where your .nupkg file is: click the Settings button on the bottom left of LINQPad’s NuGet drivers dialog:
Then click Add to create a new source and enter the folder where your .nupkg lives:
Click Save and Move Up. Now you’ll be able to see your package in the previous dialog.
If you subsequently make changes to your package in Visual Studio and re-build it, be sure to increment the Package Version before re-installing. Simply deleting the old package is not enough, unless you also delete it from NuGet’s caches in %userprofile%\.nuget\packages\ and %localappdata%\NuGet\v3-cache.
Creating a file-based deployment is also fairly easy: zip up all the files in the output folder and change the .zip file’s extension to .LPX6 (for LINQPad 6) or .LPX (for LINQPad 5). The zip file must be given the same name as your driver assembly.
LINQPad 5 requires an extra step: you must add a file to the zip called header.xml with the following content:
<?xml version="1.0" encoding="utf-8" ?> <DataContextDriver> <MainAssembly>YourAssembly.dll</MainAssembly> <SupportUri>http://mysite.com</SupportUri> </DataContextDriver>
YourAssembly.dll should be name of the assembly containing the drivers.
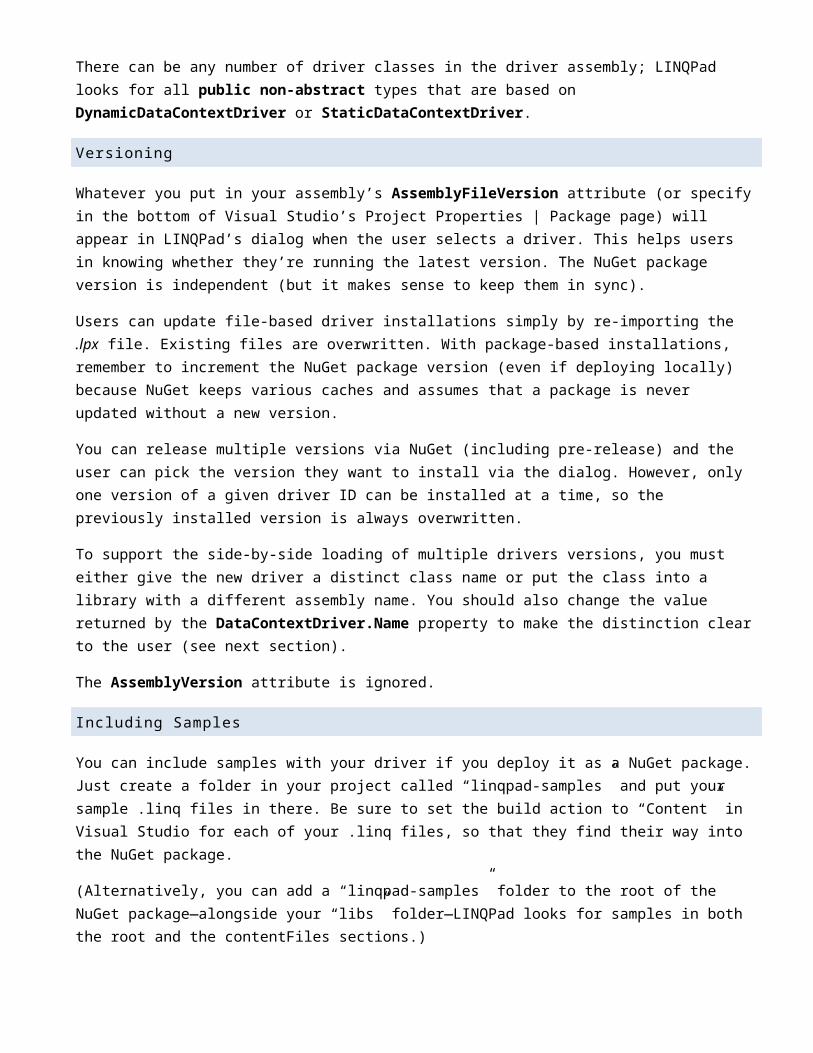
There can be any number of driver classes in the driver assembly; LINQPad looks for all public non-abstract types that are based on DynamicDataContextDriver or StaticDataContextDriver.
Versioning
Whatever you put in your assembly’s AssemblyFileVersion attribute (or specify in the bottom of Visual Studio’s Project Properties | Package page) will appear in LINQPad’s dialog when the user selects a driver. This helps users in knowing whether they’re running the latest version. The NuGet package version is independent (but it makes sense to keep them in sync).
Users can update file-based driver installations simply by re-importing the .lpx file. Existing files are overwritten. With package-based installations, remember to increment the NuGet package version (even if deploying locally) because NuGet keeps various caches and assumes that a package is never updated without a new version.
You can release multiple versions via NuGet (including pre-release) and the user can pick the version they want to install via the dialog. However, only one version of a given driver ID can be installed at a time, so the previously installed version is always overwritten.
To support the side-by-side loading of multiple drivers versions, you must either give the new driver a distinct class name or put the class into a library with a different assembly name. You should also change the value returned by the DataContextDriver.Name property to make the distinction clear to the user (see next section).
The AssemblyVersion attribute is ignored.
Including Samples
You can include samples with your driver if you deploy it as a NuGet package. Just create a folder in your project called “linqpad-samples” and put your sample .linq files in there. Be sure to set the build action to “Content” in Visual Studio for each of your .linq files, so that they find their way into the NuGet package.
(Alternatively, you can add a “linqpad-samples” folder to the root of the NuGet package—alongside your “libs” folder—LINQPad looks for samples in both the root and the contentFiles sections.)
Your samples will then appear in the samples tab, in the ‘NuGet’ node when installed.
Fine-Tuning
Passing Arguments into a Data Context’s Constructor
To pass arguments into a data context class constructor, override the following two methods:
/// <summary>Returns the names & types of the parameter(s) that should be passed into your data/// context's constructor. Typically this is a connection string or a DbConnection. The number/// of parameters and their types need not be fixed - they may depend on custom flags in the/// connection's DriverData. The default is no parameters.</summary>public virtual ParameterDescriptor[] GetContextConstructorParameters (IConnectionInfo cxInfo)
/// <summary>Returns the argument values to pass into your data context's constructor, based on/// a given IConnectionInfo. This must be consistent with GetContextConstructorParameters.</summary>public virtual object[] GetContextConstructorArguments (IConnectionInfo cxInfo)
A typical scenario is passing a connection string or IDbConnection object to a data context’s constructor. This avoids the need to hard-code the connection string into the typed data context, and avoids the need for application configuration files:
public override ParameterDescriptor[] GetContextConstructorParameters (IConnectionInfo cxInfo) => new[] { new ParameterDescriptor ("connectionString", "System.String") };
public override object[] GetContextConstructorArguments (IConnectionInfo cxInfo) => new object[] { cxInfo.DatabaseInfo.GetCxString() };
Asdf
(If you do want to rely on application configuration files supplied by the user, refer to the UniversalStaticDriver example).
Working with Databases and Connection Strings
As just described, feeding a connection string to the data context’s constructor is a common scenario. If you do this, you’ll need to prompt the user for that connection string in the dialog. There are two ways to proceed:
(Less work) Provide a multiline text box for entering the connection string. Save the connection string to cxInfo.DatabaseInfo.CustomCxString.
(More work) Write a friendly connection dialog that prompts the user for the server, database, authentication details, etc. If you’re supporting only SQL Server and SQL CE, you’ll find numerous properties on cxInfo.DatabaseInfo to store your data; if you populate these correctly you can call GetCxString / GetConnection to get a valid connection string / IDbConnection.
If you want to support other databases, however, you’ll need to save the details to custom elements in cxInfo.DriverData. You should then build the connection string yourself and write it to cxInfo.DatabaseInfo.CustomCxString (if you fail to take this step, LINQ queries will work but users
won’t be able to write old-fashioned SQL queries, unless you override GetIDbConnection—see “Supporting SQL Queries”).
Performing Additional Initialization / Teardown on the Data Context
You might want to assign properties on a newly created data context—or call methods to perform further initialization. To do so, override InitializeContext. You can also perform teardown by overriding TearDownContext:
/// <summary>This virtual method is called after a data context object has been instantiated, in/// preparation for a query. You can use this hook to perform additional initialization work.</summary>public virtual void InitializeContext (IConnectionInfo cxInfo, object context, QueryExecutionManager executionManager) { }
/// <summary>This virtual method is called after a query has completed. You can use this hook to/// perform cleanup activities such as disposing of the context or other objects.</summary>public virtual void TearDownContext (IConnectionInfo cxInfo, object context, QueryExecutionManager executionManager, object[] constructorArguments) { }
TearDownContext does not run if the user calls the Cache extension method or the Util.Cache method to preserve results between query runs.
A useful application of overriding InitializeContext is to set up population of the SQL translation tab.
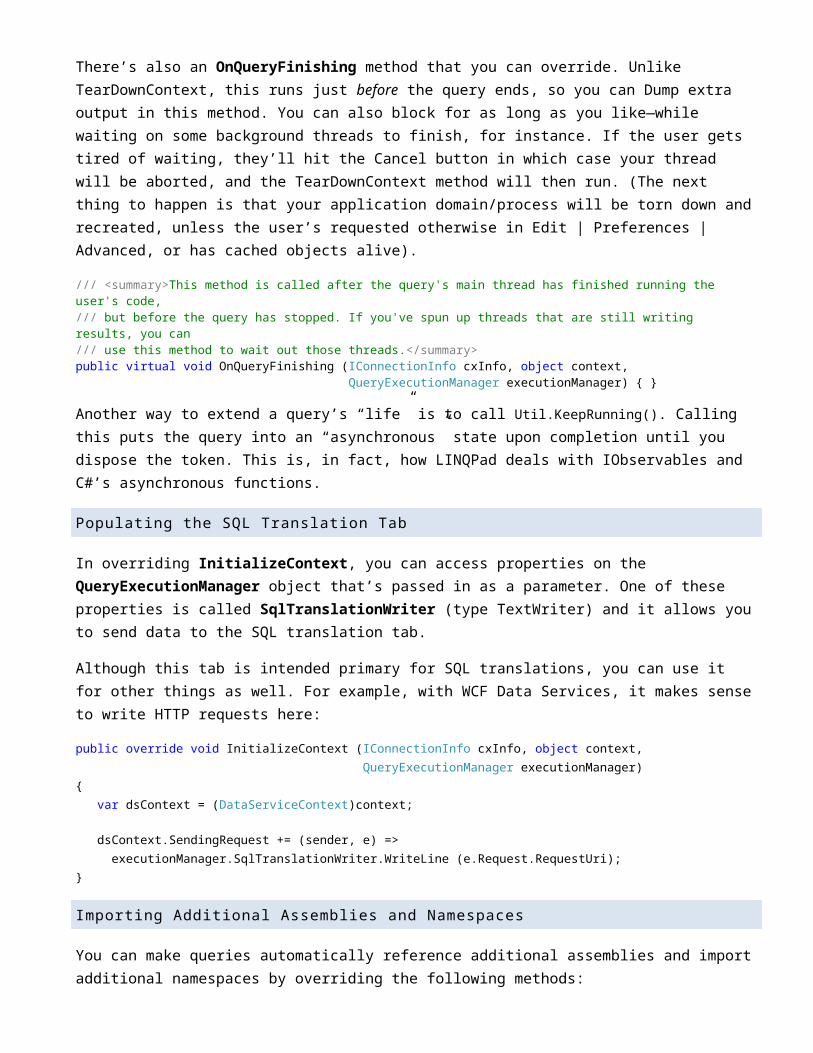
There’s also an OnQueryFinishing method that you can override. Unlike TearDownContext, this runs just before the query ends, so you can Dump extra output in this method. You can also block for as long as you like—while waiting on some background threads to finish, for instance. If the user gets tired of waiting, they’ll hit the Cancel button in which case your thread will be aborted, and the TearDownContext method will then run. (The next thing to happen is that your application domain/process will be torn down and recreated, unless the user’s requested otherwise in Edit | Preferences | Advanced, or has cached objects alive).
/// <summary>This method is called after the query's main thread has finished running the user's code,/// but before the query has stopped. If you've spun up threads that are still writing results, you can /// use this method to wait out those threads.</summary>public virtual void OnQueryFinishing (IConnectionInfo cxInfo, object context, QueryExecutionManager executionManager) { }
Another way to extend a query’s “life” is to call Util.KeepRunning(). Calling this puts the query into an “asynchronous” state upon completion until you dispose the token. This is, in fact, how LINQPad deals with IObservables and C#’s asynchronous functions.
Populating the SQL Translation Tab
In overriding InitializeContext, you can access properties on the QueryExecutionManager object that’s passed in as a parameter. One of these properties is called SqlTranslationWriter (type TextWriter) and it allows you to send data to the SQL translation tab.
Although this tab is intended primary for SQL translations, you can use it for other things as well. For example, with WCF Data Services, it makes sense to write HTTP requests here:
public override void InitializeContext (IConnectionInfo cxInfo, object context, QueryExecutionManager executionManager){ var dsContext = (DataServiceContext)context;
dsContext.SendingRequest += (sender, e) => executionManager.SqlTranslationWriter.WriteLine (e.Request.RequestUri);}
Importing Additional Assemblies and Namespaces
You can make queries automatically reference additional assemblies and import additional namespaces by overriding the following methods:
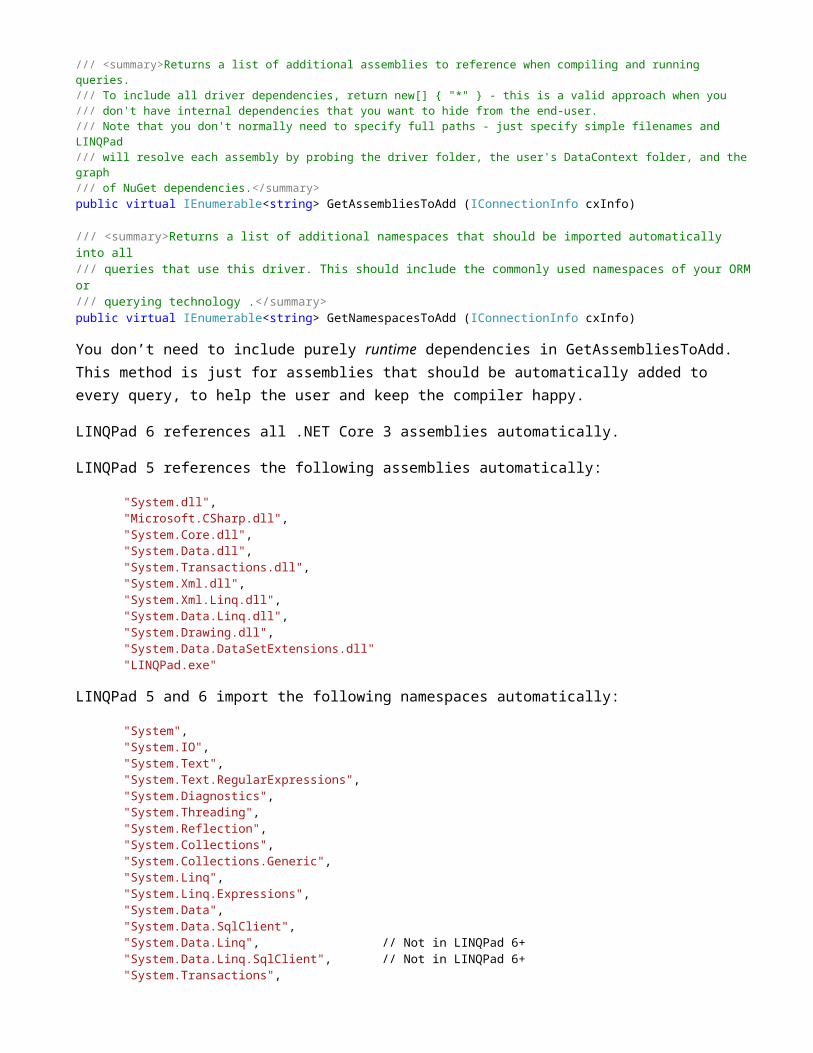
/// <summary>Returns a list of additional assemblies to reference when compiling and running queries./// To include all driver dependencies, return new[] { "*" } - this is a valid approach when you/// don't have internal dependencies that you want to hide from the end-user./// Note that you don't normally need to specify full paths - just specify simple filenames and LINQPad/// will resolve each assembly by probing the driver folder, the user's DataContext folder, and the graph/// of NuGet dependencies.</summary>public virtual IEnumerable<string> GetAssembliesToAdd (IConnectionInfo cxInfo)
/// <summary>Returns a list of additional namespaces that should be imported automatically into all /// queries that use this driver. This should include the commonly used namespaces of your ORM or/// querying technology .</summary>public virtual IEnumerable<string> GetNamespacesToAdd (IConnectionInfo cxInfo)
You don’t need to include purely runtime dependencies in GetAssembliesToAdd. This method is just for assemblies that should be automatically added to every query, to help the user and keep the compiler happy.
LINQPad 6 references all .NET Core 3 assemblies automatically.
LINQPad 5 references the following assemblies automatically:
"System.dll","Microsoft.CSharp.dll","System.Core.dll","System.Data.dll","System.Transactions.dll","System.Xml.dll","System.Xml.Linq.dll","System.Data.Linq.dll","System.Drawing.dll","System.Data.DataSetExtensions.dll""LINQPad.exe"
LINQPad 5 and 6 import the following namespaces automatically:
"System","System.IO","System.Text","System.Text.RegularExpressions","System.Diagnostics","System.Threading","System.Reflection","System.Collections","System.Collections.Generic","System.Linq",

"System.Linq.Expressions","System.Data","System.Data.SqlClient","System.Data.Linq", // Not in LINQPad 6+"System.Data.Linq.SqlClient", // Not in LINQPad 6+"System.Transactions","System.Xml","System.Xml.Linq","System.Xml.XPath","LINQPad"
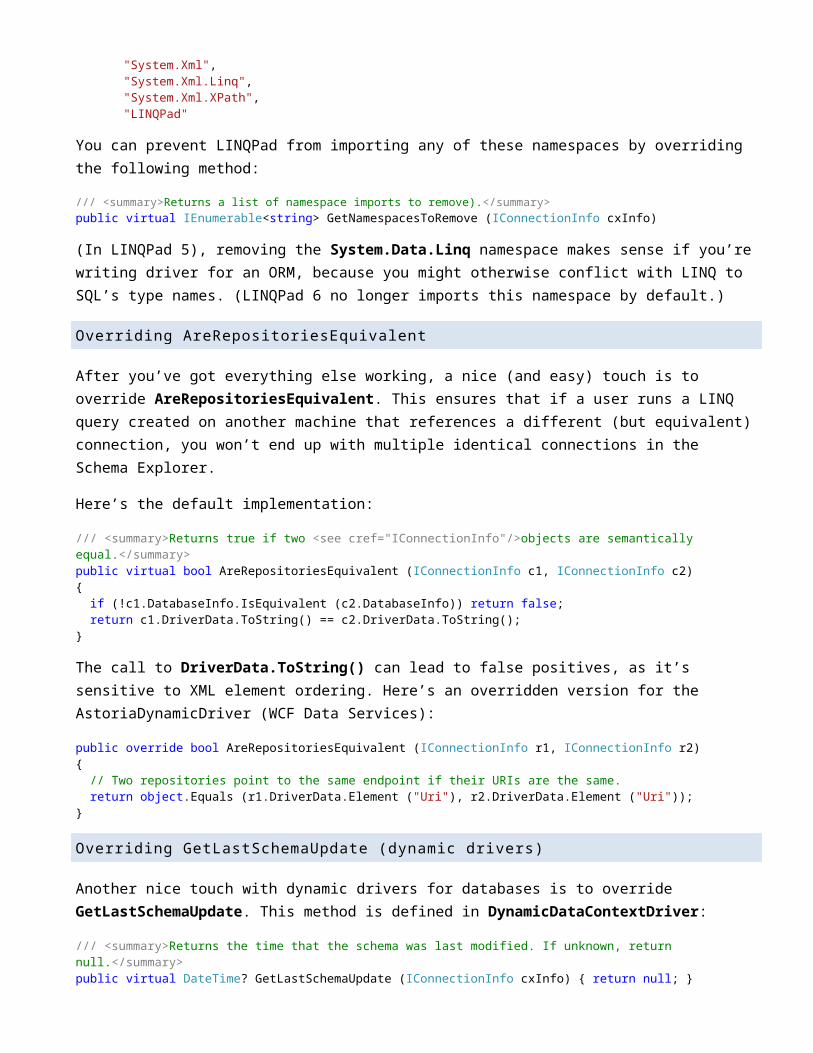
You can prevent LINQPad from importing any of these namespaces by overriding the following method:
/// <summary>Returns a list of namespace imports to remove).</summary>public virtual IEnumerable<string> GetNamespacesToRemove (IConnectionInfo cxInfo)
(In LINQPad 5), removing the System.Data.Linq namespace makes sense if you’re writing driver for an ORM, because you might otherwise conflict with LINQ to SQL’s type names. (LINQPad 6 no longer imports this namespace by default.)
Overriding AreRepositoriesEquivalent
After you’ve got everything else working, a nice (and easy) touch is to override AreRepositoriesEquivalent. This ensures that if a user runs a LINQ query created on another machine that references a different (but equivalent) connection, you won’t end up with multiple identical connections in the Schema Explorer.
Here’s the default implementation:
/// <summary>Returns true if two <see cref="IConnectionInfo"/>objects are semantically equal.</summary>public virtual bool AreRepositoriesEquivalent (IConnectionInfo c1, IConnectionInfo c2){ if (!c1.DatabaseInfo.IsEquivalent (c2.DatabaseInfo)) return false; return c1.DriverData.ToString() == c2.DriverData.ToString();}
The call to DriverData.ToString() can lead to false positives, as it’s sensitive to XML element ordering. Here’s an overridden version for the AstoriaDynamicDriver (WCF Data Services):
public override bool AreRepositoriesEquivalent (IConnectionInfo r1, IConnectionInfo r2){ // Two repositories point to the same endpoint if their URIs are the same. return object.Equals (r1.DriverData.Element ("Uri"), r2.DriverData.Element ("Uri"));}
Overriding GetLastSchemaUpdate (dynamic drivers)
Another nice touch with dynamic drivers for databases is to override GetLastSchemaUpdate. This method is defined in DynamicDataContextDriver:
/// <summary>Returns the time that the schema was last modified. If unknown, return null.</summary>public virtual DateTime? GetLastSchemaUpdate (IConnectionInfo cxInfo) { return null; }
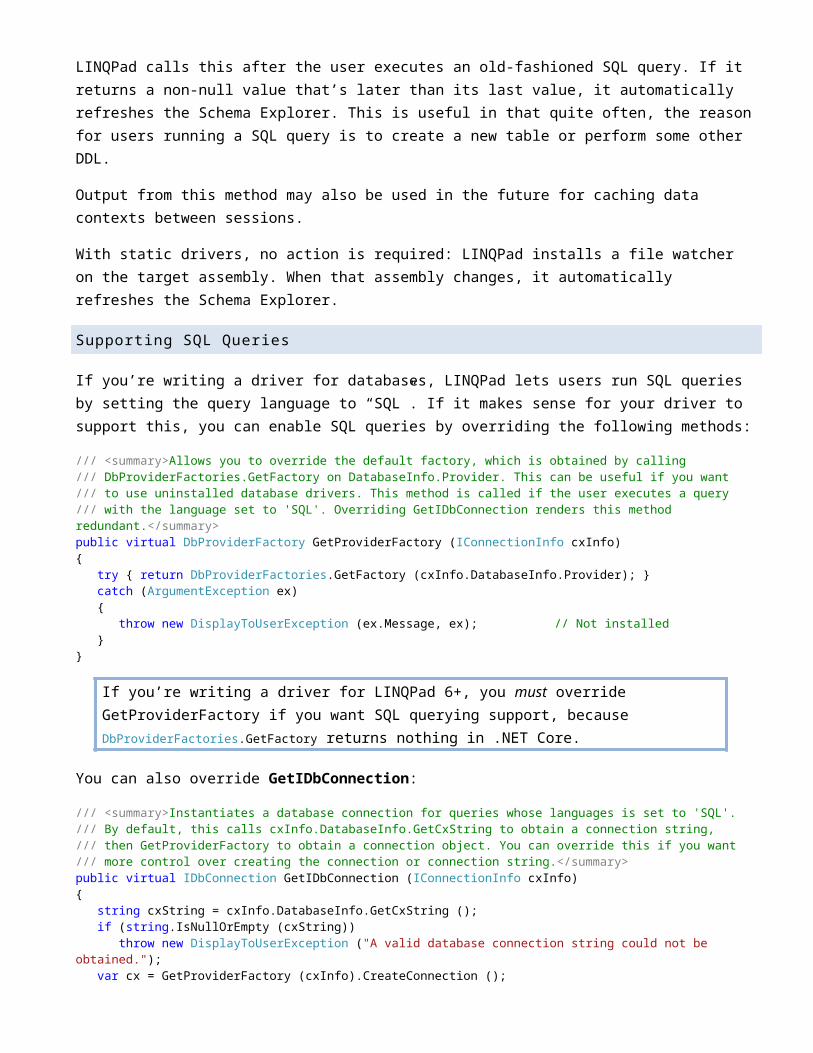
LINQPad calls this after the user executes an old-fashioned SQL query. If it returns a non-null value that’s later than its last value, it automatically refreshes the Schema Explorer. This is useful in that quite often, the reason for users running a SQL query is to create a new table or perform some other DDL.
Output from this method may also be used in the future for caching data contexts between sessions.

With static drivers, no action is required: LINQPad installs a file watcher on the target assembly. When that assembly changes, it automatically refreshes the Schema Explorer.
Supporting SQL Queries
If you’re writing a driver for databases, LINQPad lets users run SQL queries by setting the query language to “SQL”. If it makes sense for your driver to support this, you can enable SQL queries by overriding the following methods:
/// <summary>Allows you to override the default factory, which is obtained by calling /// DbProviderFactories.GetFactory on DatabaseInfo.Provider. This can be useful if you want/// to use uninstalled database drivers. This method is called if the user executes a query/// with the language set to 'SQL'. Overriding GetIDbConnection renders this method redundant.</summary>public virtual DbProviderFactory GetProviderFactory (IConnectionInfo cxInfo){ try { return DbProviderFactories.GetFactory (cxInfo.DatabaseInfo.Provider); } catch (ArgumentException ex) { throw new DisplayToUserException (ex.Message, ex); // Not installed }}
If you’re writing a driver for LINQPad 6+, you must override GetProviderFactory if you want SQL querying support, because DbProviderFactories.GetFactory returns nothing in .NET Core.
You can also override GetIDbConnection:
/// <summary>Instantiates a database connection for queries whose languages is set to 'SQL'./// By default, this calls cxInfo.DatabaseInfo.GetCxString to obtain a connection string, /// then GetProviderFactory to obtain a connection object. You can override this if you want /// more control over creating the connection or connection string.</summary>public virtual IDbConnection GetIDbConnection (IConnectionInfo cxInfo){ string cxString = cxInfo.DatabaseInfo.GetCxString (); if (string.IsNullOrEmpty (cxString)) throw new DisplayToUserException ("A valid database connection string could not be obtained."); var cx = GetProviderFactory (cxInfo).CreateConnection (); cx.ConnectionString = cxInfo.DatabaseInfo.GetCxString (); return cx;}
Overriding GetIDbConnection means you don’t have to populate the connection string in DatabaseInfo. There’s also a method that you can override to support “ESQL” queries (LINQPad 5 only), although this is really only relevant to Entity Framework 6:
public virtual void ExecuteESqlQuery (IConnectionInfo cxInfo, string query){ throw new Exception ("ESQL queries are not supported for this type of connection");}
Occasionally, you might also want to override OpenConnection. The default implementation does exactly what you would expect:
public virtual IDbConnection OpenConnection (IDbConnection connection, IConnectionInfo cxInfo){ connection.Open (); return connection;}
The reason for overriding it is to trap an expired password warning, then give the user a prompt to allow them to change the password. If you do this, first check the static property DataContextDriver.IsAutomated – if this returns true, you’re running from the command-line (lprun) and should not pop up dialogs. If all is OK, you can save the new password back to the connection with the DataContextDriver.SaveNewPassword method.
Clearing Connection Pools
If your driver creates database connections, you can override the following method, which is called when the user right-clicks a connection and chooses “Clear all connections”.
public virtual void ClearConnectionPools (IConnectionInfo cxInfo){}
Application Configuration Files
With static data context drivers, a user’s assembly may rely on an application configuration file. In .NET Framework, this is an app.config file; in .NET Core, it’s usually an appsettings.json file (but any filename will work). You can specify its location either by writing it to IConnectionInfo.AppConfigPath, or by overriding the following driver method:
public virtual string GetAppConfigPath (IConnectionInfo cxInfo){ return cxInfo.AppConfigPath;}
Customizing the Icon
You can provide a custom 16x16 icon for your data contexts. Just include two files in your driver folder: Connection.png and FailedConnection.png (the latter is applied when a connection is in error). These are fed into a 16x16 ImageList and are upscaled in high-DPI scenarios.
In your Visual Studio project, click the Properties window and set “Copy to Output Folder” to true, and “Build Action” to “Content” for these files. The latter ensures that it ends up in the package if you deploy via NuGet.
Custom Features
The follow methods currently do nothing. They are to support specialized options in the future without breaking driver compatibility:
public object InvokeCustomOption (string optionName, params object [] data){ return null;}
public virtual object OnCustomEvent (string eventName, params object [] data){ return null;}

Customizing Output
LINQPad’s output window works by walking object graphs that you Dump, emitting XHTML which it then displays in an embedded web browser. This is the normal “Rich Text” output mode (LINQPad also lets you display results to data grids; we cover this later).
There are three reasons for wanting to customize LINQPad’s output.
If your objects expose lazily evaluated navigation properties, LINQPad will (in standard output mode) walk them eagerly in rendering the output, resulting in additional queries. (And if those entities themselves contain lazily evaluated properties, it can go exponential!)
You might want to hide fields and properties in your entities that are uninteresting and create clutter. You might want to transform properties or create new ones, or replace the entire HTML rendering for an
object to improve the output.
There are two ways to control output formatting. The first is to override PreprocessObjectToWrite: the idea here is that you simply replace the object in question with another one that has the members that you want to render (or else, simply, the desired HTML). This behaves like the ToDump method introduced in LINQPad 5.09 (click here for details). If you want to build the return object dynamically, return a System.Dynamic.ExpandoObject (click here for details).
Overriding PreprocessObjectToWrite
/// <summary>This lets you replace any non-primitively-typed object with another object for/// display. The replacement object can be a System.Dynamic.ExpandoObject.</summary>public virtual void PreprocessObjectToWrite (ref object objectToWrite, ObjectGraphInfo info) { }
LINQPad calls PreprocessObjectToWrite before writing all non-primitive types, including enumerables and other objects. You can replace objectToWrite with anything you like; it can be an object specially designed for output formatting (effectively a proxy), or even a System.Dynamic.ExpandoObject. For columns that are expensive to evaluate, or that cause server round-tripping, you can return a Lazy<T>, which renders in LINQPad as a hyperlink that evaluates when the user clicks on it.
With Util.RawHtml, you can even output HTML directly:
if (objectToWrite is MySpecialEntity) objectToWrite = Util.RawHtml ("<h1>foo</h1>");
(In the following section, there’s a more elaborate example on how to detect entities and entity collections.)
To “swallow” the object entirely so that nothing is written, setting objectToWrite to null might seem reasonable, but it won’t work because ‘null’ will be then written in green. Instead, do this:
objectToWrite = info.DisplayNothingToken;
Implementing ICustomMemberProvider
Most of the what you can do with ICustomMemberProvider you can do more easily with PreprocessObjectToWrite (see preceding two sections).
Another way to control output formatting is to override the following driver method:
/// <summary>Allows you to change how types are displayed in the output window - in particular, this

/// lets you prevent LINQPad from endlessly enumerating lazily evaluated properties. Overriding this /// method is an alternative to implementing ICustomMemberProvider in the target types. See/// http://www.linqpad.net/FAQ.aspx#extensibility for more info.</summary>public virtual ICustomMemberProvider GetCustomDisplayMemberProvider (object objectToWrite){ return null;}
If objectToWrite is not an entity whose output you want to customize, return null. Otherwise, return an object that implements ICustomMemberProvider:
public interface ICustomMemberProvider { // Each of these methods must return a sequence // with the same number of elements: IEnumerable<string> GetNames(); IEnumerable<Type> GetTypes(); IEnumerable<object> GetValues(); }
Here’s an example of implementing ICustomMemberProvider:
public class Foo : ICustomMemberProvider{
public string FirstName, LastName, Junk;
IEnumerable<string> ICustomMemberProvider.GetNames() => new string[] { "FirstName", "LastName" };
IEnumerable<Type> ICustomMemberProvider.GetTypes ()=> new Type[] { typeof(string), typeof(string) };
IEnumerable<object> ICustomMemberProvider.GetValues () => new object[] { FirstName, LastName };
}
An alternative to overriding GetCustomDisplayMemberProvider is to implement ICustomMemberProvider in your entity type itself; this ensures that your custom output formatting takes effect whether or not your driver is in use. This can be done without taking a dependency on LINQPad.exe, as described in the link.
If you’re implementing ICustomMemberProvider in the type itself, you might want to substitute objectToWrite with another object (in other words, you might want the same functionality as PreprocessObjectToWrite). The good news is that you can do this with ICustomMemberProvider—in a slightly roundabout way. To give an example, let’s suppose you want the object to be rendered as a simple string. Here’s the solution:
public class Foo : ICustomMemberProvider{
public string FirstName, LastName, Junk;
IEnumerable<string> ICustomMemberProvider.GetNames()=> new string[] { "" };
IEnumerable<Type> ICustomMemberProvider.GetTypes ()=> new Type[] { typeof(string) };
IEnumerable<object> ICustomMemberProvider.GetValues () => new object[] { FirstName + " " + LastName };
}
(Notice that GetNames returns an empty string. This tells LINQPad to “collapse” the containing object.)
If you’re writing a driver for an ORM, and have generic types such as MyEntity<T>, you can identify what are your entities by looking for the base type. For instance, suppose all entities are based on Entity<T>, and entity collections are of some type which implements IEnumerable<T>, where T is an entity:
/// <summary>Ensure that the output window ignores nested entities and entity collections.</summary>public override LINQPad.ICustomMemberProvider GetCustomDisplayMemberProvider (object objectToWrite){ if (objectToWrite != null && EntityMemberProvider.IsEntity (objectToWrite.GetType ())) return new EntityMemberProvider (objectToWrite);
return null;}
class EntityMemberProvider : LINQPad.ICustomMemberProvider{ public static bool IsEntity (Type t) { while (t != null) { if (t.IsGenericType && t.GetGenericTypeDefinition () == typeof (Entity<>)) return true; t = t.BaseType; } return false; }
public static bool IsEntityOrEntities (Type t) { // For entity collections, switch to the element type: if (t.IsGenericType) { Type iEnumerableOfT = t.GetInterface ("System.Collections.Generic.IEnumerable`1"); if (iEnumerableOfT != null) t = iEnumerableOfT.GetGenericArguments () [0]; } return IsEntity (t); }
object _objectToWrite; PropertyInfo [] _propsToWrite;
public EntityMemberProvider (object objectToWrite) { _objectToWrite = objectToWrite; _propsToWrite = objectToWrite.GetType ().GetProperties () .Where (p => p.GetIndexParameters ().Length == 0 && !IsEntityOrEntities (p.PropertyType)) .ToArray (); }
public IEnumerable<string> GetNames () { return _propsToWrite.Select (p => p.Name); }
public IEnumerable<Type> GetTypes () { return _propsToWrite.Select (p => p.PropertyType); }
public IEnumerable<object> GetValues () { return _propsToWrite.Select (p => p.GetValue (_objectToWrite, null));
}}
Note the following predicate in EntityMemberProvider’s constructor:
p => p.GetIndexParameters ().Length == 0
This is important in that we don’t want to enumerate indexers.
Customizing Output to Data Grids
If the user chooses “Results to Data Grids”, the output customizations in the above sections (PreprocessObjectToWrite and GetCustomDisplayMemberProvider) do not apply. To customize data grid display, you instead override the following driver method:
public virtual void DisplayObjectInGrid (object objectToDisplay, GridOptions options)
Here’s GridOptions:
public class GridOptions { public string PanelTitle { get; set; } public string[] MembersToExclude { get; set; } }
In general, you don’t need to exclude (or make lazy) properties that are expensive to evaluate or that cause round-tripping. This is because LINQPad works differently when rendering grids: unlike with HTML formatting, it does not eagerly walk object graphs (it doesn’t need to in order to display data in a flat grid). Instead, upon encountering a non-primitive object, it displays a hyperlink in the grid and evaluates that object only when the user clicks the link. Hence you can (and will want to) expose all lazily evaluated properties.
You might still want to remove extraneous members from the output, though, or perhaps take over the rendering entirely with your own UI control. Both are possible (and easy) by overriding
Here’s how to tell LINQPad to remove the fields/properties named “_context”, “ChangeTracker” and “EntityState”:
public override void DisplayObjectInGrid (object objectToDisplay, GridOptions options) { if (IsEntityOrEntities (objectToDisplay.GetType())) options.MembersToExclude = "_context ChangeTracker EntityState".Split ();
base.DisplayObjectInGrid (objectToDisplay, options); }
(The IsEntityOrEntities method comes from the example in the preceding section.)
You can swap out the object to render simply by calling base.DisplayObjectInGrid with a different object. You can use the trick of returning a System.Dynamic.ExpandoObject to create columns on the fly (see here).
You can also tell LINQPad to display your own control in place of its DataGrid, simply by not calling the base method at all and instead dumping a WPF or Windows Forms control:
public override void DisplayObjectInGrid (object objectToDisplay, GridOptions options) { if (IsEntityOrEntities (objectToDisplay.GetType())) new System.Windows.Forms.DataGrid { DataSource = objectToDisplay }.Dump (options.PanelTitle); else base.DisplayObjectInGrid (objectToDisplay, options);
}
(You can gain more control over how LINQPad displays a Windows Forms control or WPF element by using the methods on LINQPad’s static PanelManager class instead of dumping the control.)
API Reference
DynamicDataContextDriver and StaticDataContextDriver are covered in previous sections. Following are some notes on the other types in the extensibility model.
IConnectionInfo
/// <summary>/// Describes a connection to a queryable data source. This corresponds to what/// the user sees when they click 'Add Connection'./// </summary>public interface IConnectionInfo{ /// <summary>Details of a database connection, if connecting to a database. This currently /// supports only SQL Server, SQL Azure and SQL CE. If you want to support other databases, /// use DriverData to supplement its properties.</summary> IDatabaseInfo DatabaseInfo { get; }
/// <summary>Details of the custom type supplied by the user that contains the typed /// data context to query. This is relevant if you subclass StaticDataContextDriver /// rather than DynamicDataContextDriver.</summary> ICustomTypeInfo CustomTypeInfo { get; }
/// <summary>Standard options for dynamic schema generation. Use <see cref="DriverData"/> /// for any additional options that you wish to support.</summary> IDynamicSchemaOptions DynamicSchemaOptions { get; }
/// <summary>Full path to custom application configuration file. Prompting the user for /// this is necessary if you're using, for instance, an ORM that obtains connection /// strings from the app.config or appsettings.json file.</summary> string AppConfigPath { get; set; }
/// <summary>Whether or not to save the connection details for next time LINQPad is /// started. Default is true.</summary> bool Persist { get; set; }
/// <summary>Whether or not queries should display with an orange 'Production' flag.</summary> bool IsProduction { get; set; }
/// <summary>For parent connections, whether to populate the children on startup. LINQPad 6+</summary> bool PopulateChildrenOnStartup { get; set; }
/// <summary>Custom data. You can store anything you want here and it will be /// saved and restored. </summary> XElement DriverData { get; set; }
// Helper methods
/// <summary>Encrypts a string using Windows DPAPI. A null or empty string returns /// an empty string. This method should be used for storing passwords.</summary> string Encrypt (string data);
/// <summary>Decrypts a string using Windows DPAPI. A null or empty string returns /// an empty string.</summary> string Decrypt (string data);
// Advanced – for supporting linked databases and multi-database queries:
/// <summary>Creates a copy of the connection. The copy will be orphaned and have a /// new identity. LINQPad 6+ only.</summary> IConnectionInfo CreateCopy ();
/// <summary>For parent connections, this creates a child with the same properties /// that you can then modify. LINQPad 6+ only.</summary> IConnectionInfo CreateChild ();}
IDatabaseInfo
public interface IDatabaseInfo{ /// <summary>The invariant provider name, as returned by /// System.Data.Common.DbProviderFactories.GetFactoryClasses().</summary> string Provider { get; set; }
/// <summary>If this is populated, it overrides everything else except Provider.</summary> string CustomCxString { get; set; }
string Server { get; set; } string Database { get; set; } bool AttachFile { get; set; } string AttachFileName { get; set; } bool UserInstance { get; set; }
bool SqlSecurity { get; set; } string UserName { get; set; } string Password { get; set; }
/// <summary>For SQL CE</summary> int MaxDatabaseSize { get; set; }
// Helper methods:
bool IsSqlServer { get; } bool IsSqlCE { get; }
System.Data.Common.DbProviderFactory GetProviderFactory (); string GetCxString (); IDbConnection GetConnection (); string GetDatabaseDescription ();
/// <summary>Returns true if another IDatabaseInfo refers to the same database. /// This ignores Password, for instance.</summary> bool IsEquivalent (IDatabaseInfo other);}
ICustomTypeInfo
public interface ICustomTypeInfo{ /// <summary>Full path to assembly containing custom schema.</summary> string CustomAssemblyPath { get; set; }
/// <summary>Full type name (namespace + name) of custom type to query.</summary> string CustomTypeName { get; set; }
/// <summary>Metadata path. This is intended mainly for Entity Framework.</summary> string CustomMetadataPath { get; set; }
// Helper methods
string GetCustomTypeDescription ();

bool IsEquivalent (ICustomTypeInfo other);
/// <summary>Returns an array of all public types in the custom assembly, without loading /// those types into the process. Call this form the connection dialog.</summary> string [] GetCustomTypesInAssembly ();
/// <summary>Returns an array of all public types in the custom assembly, without loading /// those types into the process. Call this form the connection dialog.</summary> string [] GetCustomTypesInAssembly (string baseTypeName);
// LINQPad 6+:
/// <summary>Returns information about the custom assembly, including its framework target, /// and the assemblies that it references.</summary> AssemblyInfo GetAssemblyInfo ();}
ExplorerItem
[Serializable]public class ExplorerItem{ public ExplorerItem (string text, ExplorerItemKind kind, ExplorerIcon icon) { Text = text; Kind = kind; Icon = icon; }
public ExplorerItemKind Kind { get; set; }
public string Text { get; set; } public string ToolTipText { get; set; }
/// <summary>The text that appears when the item is dragged to the code editor.</summary> public string DragText { get; set; }
public ExplorerIcon Icon { get; set; }
/// <summary>If populated, this creates a hyperlink to another ExplorerItem. This is intended /// for association properties.</summary> public ExplorerItem HyperlinkTarget { get; set; }
public List<ExplorerItem> Children { get; set; }
/// <summary>Set to true to get the context menu to appear with query snippets such as /// Customers.Take(100). In general, this should be set to true with all items of kind /// QueryableObject except scalar functions.</summary> public bool IsEnumerable { get; set; }
/// <summary>You can use this to store temporary data to help in constructing the object /// graph. The content of this field is not sent back to the host domain.</summary> [NonSerialized] public object Tag;
/// <summary>For drivers that support SQL queries, this indicates the name of the underlying database object. This is shown when the user changes the query language to SQL.</summary> public string SqlName { get; set; }
/// <summary>For drivers that support SQL queries, this indicates the type of the underlying database object (applicable to columns). This is shown when the user changes the query language to SQL.</summary>
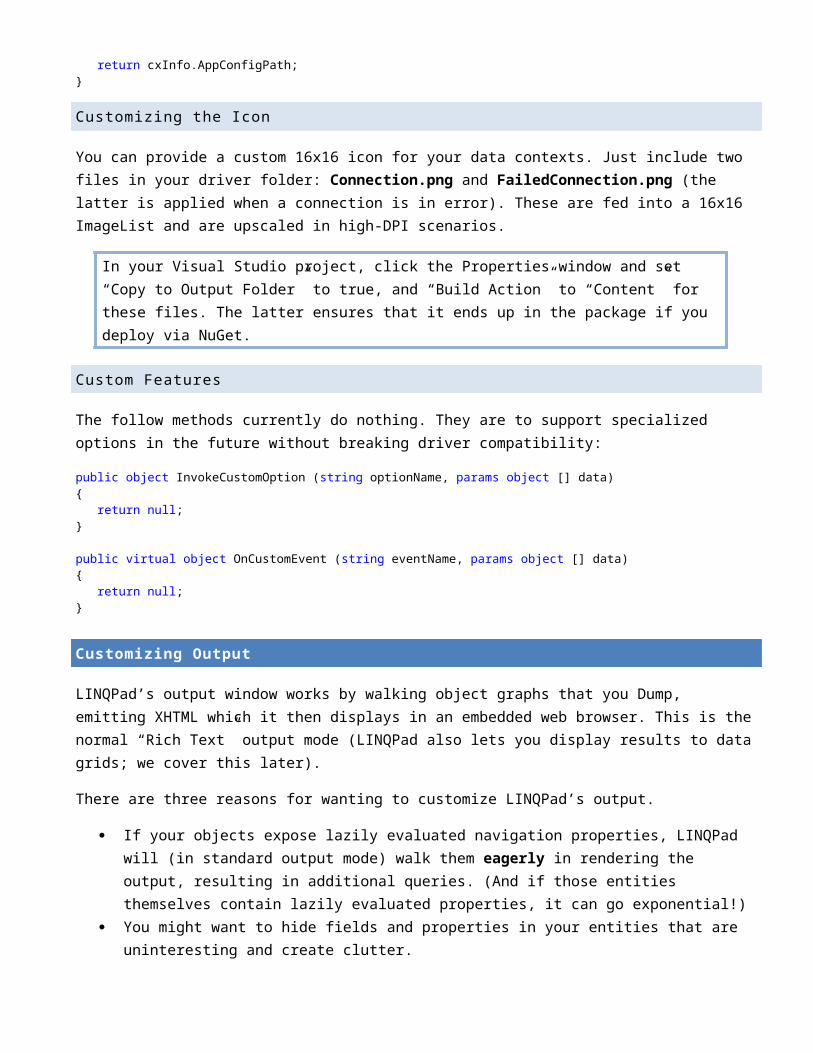
public string SqlTypeDeclaration { get; set; }}
ExplorerItemKind
ExplorerItemKind determines how an ExplorerItem will appear (and to some extent, behave) in the Schema Explorer treeview:
public enum ExplorerItemKind { QueryableObject, Category, Schema, Parameter, Property, ReferenceLink, CollectionLink}
QueryableObject is for objects that the user might want to query. Right now, this is the only member of the enum that has special behavior, which is to display a context menu with query snippets such as Customers.Take(100) when the user right-clicks on it. Note that you must also set the ExplorerItem’s IsEnumerable property set to true, otherwise the context menu won’t appear.
Category is for organizing groups of items, such as “Stored Procedures” or “Views”. See “Writing a Static Driver” for an example. Schema is for grouping into multiple schemas.
Parameter is for method/function parameters and Property is for simple objects or colums.
ReferenceLink displays the item underlined in blue. Use it for hyperlinked objects that point to a non-enumerable object (e.g., many:one associations). Use CollectionLink for a hyperlinked object that points to a collection, and for one:many and many:many relationships. The ExplorerItem’s HyperlinkTarget property indicates where to go when the user clicks on the link.
ExplorerIcon
This determines an ExplorerItem’s icon in the Schema Explorer. It has no other functional significance.