Embed Size (px)
Citation preview
How to build a social media-sharing site in SharePoint 2013Vidya Srinivasan
Microsoft Corporation
February 2013Applies to: SharePoint 2013Summary: This white paper addresses how to build a social media-sharing site on SharePoint 2013 by using the out-of-the-box video, and web content management feature sets.
©2013 Microsoft Corporation. All rights reserved.This document is provided "as-is." Information and views expressed in this document, including URL and other Internet website references, may change without notice. You bear the risk of using it. Some examples are for illustration only and are fictitious. No real association is intended or inferred. This document does not provide you with any legal rights to any intellectual property in any Microsoft product. You may copy and use this document for your internal, reference purposes. You may modify this document for your internal, reference purposes.

How to build a social media-sharing site in SharePoint 2013 February 2013
ContentsIntroduction............................................................................................................................. 3
Note about host-ability 3
Target Audience 3
Project overview..................................................................................................................... 4Permission-level 5
Setting up the Content Structure 6
Lists and Library 6
Project #1. Creating master page and page layout for the home page............7Step #1: Creating and customizing the master page 7
Step #2: Creating the Page Layout 8
Project #2. Linking videos and channels: how tagging works.........................11
Project #3. Customizing the home page....................................................................13Step #1: Adding the Media Web Part 13
Step #2: Adding and configuring the Content Search Web Part 14
Project #4. Customizing the channels page..............................................................19Creating a page layout 19
Configuring the Content Search Web Part 19
Project # 5. Customizing the video player page.....................................................21Configuring the Recommendations Web Part 21
Conclusion.............................................................................................................................. 23
Acknowledgements............................................................................................................ 23

How to build a social media-sharing site in SharePoint 2013 February 2013
IntroductionSocial media for the enterprise has become quite a hot topic among many organizations. The benefits of sharing videos in this world of social media are well-known. Videos are revolutionizing the way teams and organizations communicate with each other because it’s the fastest way to convey information. This white paper addresses how to build a social media-sharing site on Microsoft SharePoint 2013 (aka ContosoTube) using the out-of-the-box video, and web content management (WCM) feature sets. The video experience in SharePoint 2013 helps users create, upload, discover, view, share, and find videos easily. ContosoTube leverages all the great features SharePoint 2013 offers, and uses additional features such as the Content Search Web Part, Managed Metadata, Display Templates, Designer, and other WCM features to provide a complete enterprise video portal experience. ContosoTube can be used by everyone to share videos across the entire organization- be it training, knowledge transfer, or just fun morale event videos. Please note that this white paper is NOT intended as a comprehensive introduction to the various features involved – it is assumed that intro topics will be coming for other sources. Additionally, this white paper will NOT cover non-functional visual customization (e.g., Master Pages, Style sheets, etc.).The final site design included in the screenshots is a result of CSS customizations. This paper does NOT include the CSS used to build the site. This paper is organized into different projects, which are essentially the various steps to build the site.
Note about host-ability
Many features of the social media-sharing site (ContosoTube) that we build in this white paper rely heavily on the Content Search Web Part, which is not yet available on SharePoint Online. As of today, the guidance included in this white paper is applicable to on-premises deployments.
Target Audience
The target audience for this white paper is a SharePoint “expert” with a working knowledge of each of the following areas:
Basic HTML knowledge Basic CSS knowledge Basic JavaScript programming
© 2013 Microsoft Corporation. All rights reserved. Page 3 of 23To comment on this paper or request more documentation about these features, contact the Microsoft Office and Servers Team at [email protected].
How to build a social media-sharing site in SharePoint 2013 February 2013
Project overviewThis section will briefly describe the key components of ContosoTube so that there is enough context when we get to the next sections.
Home Pageo Contains a featured video and display templates that display videos according to specific
criteria (such as Most Popular, Most Recent, etc.).o Users can perform actions such as creating channels, uploading videos, browsing videos, and
navigating to the about/help page.o Users can also search for videos using the search bar from the home page.o Navigation displays video channels that contain videos from that channel.
Video Channelso Channels are publishing pages with friendly URLs. Each page is associated with a Managed
Metadata term that can then be used to tag videos that are part of that channel. Video Player Page
o Uses the out-of-the-box video player page on SharePoint 2013.o Recommendations are built using the Content Search Web Part, and customizing the query.
© 2013 Microsoft Corporation. All rights reserved. Page 4 of 23To comment on this paper or request more documentation about these features, contact the Microsoft Office and Servers Team at [email protected].
How to build a social media-sharing site in SharePoint 2013 February 2013
Figure 1. ContosoTube Home Page
Permission-level
Permission-level required: Site collection administrator
© 2013 Microsoft Corporation. All rights reserved. Page 5 of 23To comment on this paper or request more documentation about these features, contact the Microsoft Office and Servers Team at [email protected].

How to build a social media-sharing site in SharePoint 2013 February 2013
Setting up the Content Structure
All of the guidance covered in this white paper presumes the following content structure, which can be created trivially using either SharePoint Designer or the SharePoint browser user interface.
Site TemplateThe recommended site template to use for creating the Social Media site is the publishing site template. Using this template will automatically activate the features listed below. If you choose to use a different template, then you may need to manually activate the following features.
Features Activated1. Site Collection features
o SharePoint Server Publishing Infrastructureo Ratings
2. Site featureso SharePoint Server Publishing
3. Video and rich media
Lists and Library
The videos that we use in the site are stored in a library called Videos. Videos can be uploaded to any library, but you can get the most out of SharePoint 2013 if you upload videos to a library that has the video content type enabled. The Asset Library is customized for storing digital assets and is recommended to be used. If you do not use an Asset Library, the video content type needs to be manually added.
How to configure an asset library1. Navigate to the Site Contents2. Select Add an app3. Select Asset Library from the list of apps4. Give your library a unique name (Videos will be the name used in this paper)
Note: It is recommended to upload videos to the library after configuring the channel column in project #2.
Project #1. Creating master page and page layout for the home pageThe Design Manager helps you create your own site design in SharePoint 2013. The first page that we need to create is the master page. The master page defines common elements across all the pages of your site.© 2013 Microsoft Corporation. All rights reserved. Page 6 of 23To comment on this paper or request more documentation about these features, contact the Microsoft Office and Servers Team at [email protected].
How to build a social media-sharing site in SharePoint 2013 February 2013
Step #1: Creating and customizing the master page
The first step is to create a minimal master page which can be customized later according to the site design. Navigate to the Design Manager under the site settings and map your network drive to edit your master pages using any HTML editor. Create a minimal master page and preview it. Next, add the required snippets to the master page from the snippet gallery. The location to paste these snippets depends on where you want them to appear in your master page.
Adding the search box snippetA search box on the home page helps users find videos on the site. Insert a search box snippet from the snippet gallery after configuring the search settings. Navigate to the search settings from the Design Manager, and add the search center URL. Update the search snippet and copy the HTML snippet to paste it inside <div id="s4-bodyContainer"> in the MasterPage.HTML file. Use CSS to position the search box.
Adding the vertical navigationThe vertical navigation is required to navigate between different channels from the pages on the site.
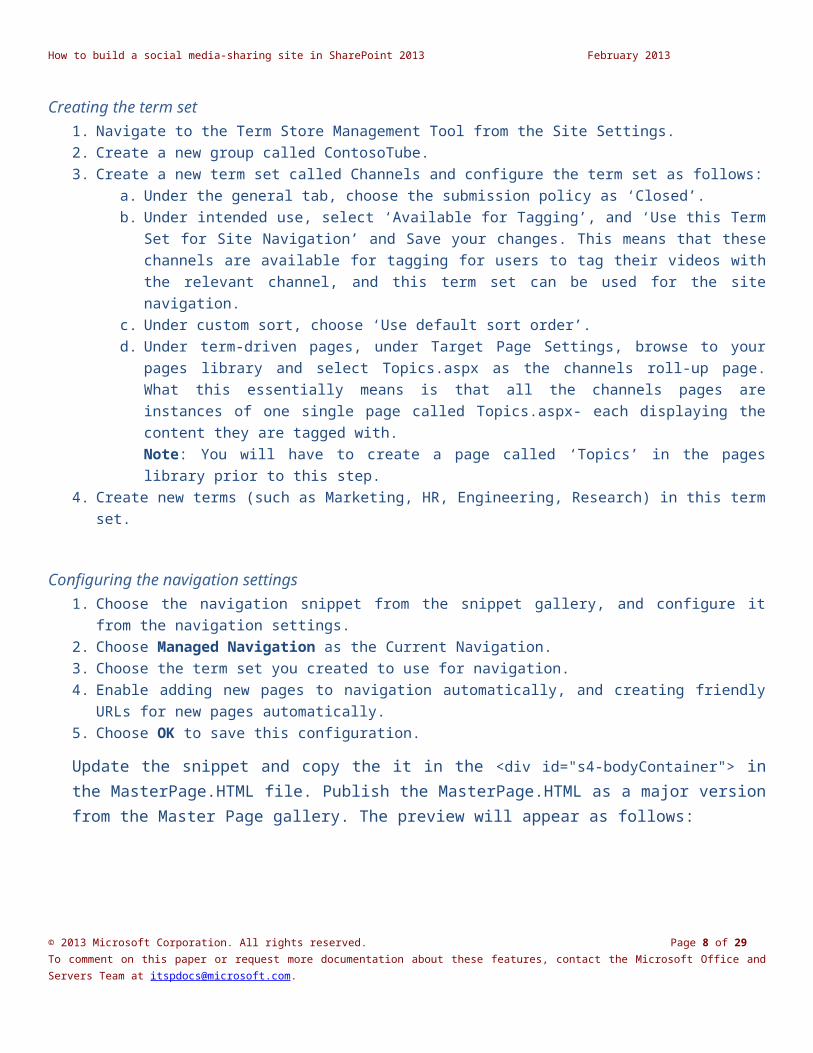
Creating the term set1. Navigate to the Term Store Management Tool from the Site Settings.2. Create a new group called ContosoTube.3. Create a new term set called Channels and configure the term set as follows:
a. Under the general tab, choose the submission policy as ‘Closed’.b. Under intended use, select ‘Available for Tagging’, and ‘Use this Term Set for Site Navigation’ and Save
your changes. This means that these channels are available for tagging for users to tag their videos with the relevant channel, and this term set can be used for the site navigation.
c. Under custom sort, choose ‘Use default sort order’.d. Under term-driven pages, under Target Page Settings, browse to your pages library and select
Topics.aspx as the channels roll-up page. What this essentially means is that all the channels pages are instances of one single page called Topics.aspx- each displaying the content they are tagged with. Note: You will have to create a page called ‘Topics’ in the pages library prior to this step.
4. Create new terms (such as Marketing, HR, Engineering, Research) in this term set.
Configuring the navigation settings1. Choose the navigation snippet from the snippet gallery, and configure it from the navigation settings.2. Choose Managed Navigation as the Current Navigation.3. Choose the term set you created to use for navigation.4. Enable adding new pages to navigation automatically, and creating friendly URLs for new pages automatically.5. Choose OK to save this configuration.
© 2013 Microsoft Corporation. All rights reserved. Page 7 of 23To comment on this paper or request more documentation about these features, contact the Microsoft Office and Servers Team at [email protected].
How to build a social media-sharing site in SharePoint 2013 February 2013
Update the snippet and copy the it in the <div id="s4-bodyContainer"> in the MasterPage.HTML file. Publish the MasterPage.HTML as a major version from the Master Page gallery. The preview will appear as follows:
Figure 2. Master Page Preview from the Design Manager
Step #2: Creating the Page Layout
Page layouts define the look and feel of a set of pages by styling page fields and Web Part zones within the common elements of a master page. The network drive mapped earlier can be used to edit the page layouts using any HTML editor. Create a page layout that the home page of the site will use. Note that the default page layout that you create will contain certain snippets that are not required. You may keep or remove them according to your site design.
Adding Web Part zone snippet for the media Web PartThe home page of ContosoTube contains a media Web Part and three Content Search Web Parts. The Web Part zone snippets create a placeholder for these Web Parts to be positioned correctly in the home page. Choose a Web Part zone snippet from the snippet gallery and copy the HTML snippet and paste it inside the PlaceHolderMain. The snippet code will look as follows:
<!--CS: Start Web Part Zone Snippet--><!--SPM:<%@Register Tagprefix="WebPartPages" Namespace="Microsoft.SharePoint.WebPartPages" Assembly="Microsoft.SharePoint, Version=15.0.0.0, Culture=neutral, PublicKeyToken=71e9bce111e9429c"%>--> <div xmlns:ie="ie"><!--MS:<WebPartPages:WebPartZone runat="server" AllowPersonalization="false" ID="x337a5a8d939248d49e9c39d87693bef0" FrameType="TitleBarOnly" Orientation="Vertical">--> <!--MS:<ZoneTemplate>-->© 2013 Microsoft Corporation. All rights reserved. Page 8 of 23To comment on this paper or request more documentation about these features, contact the Microsoft Office and Servers Team at [email protected].
How to build a social media-sharing site in SharePoint 2013 February 2013
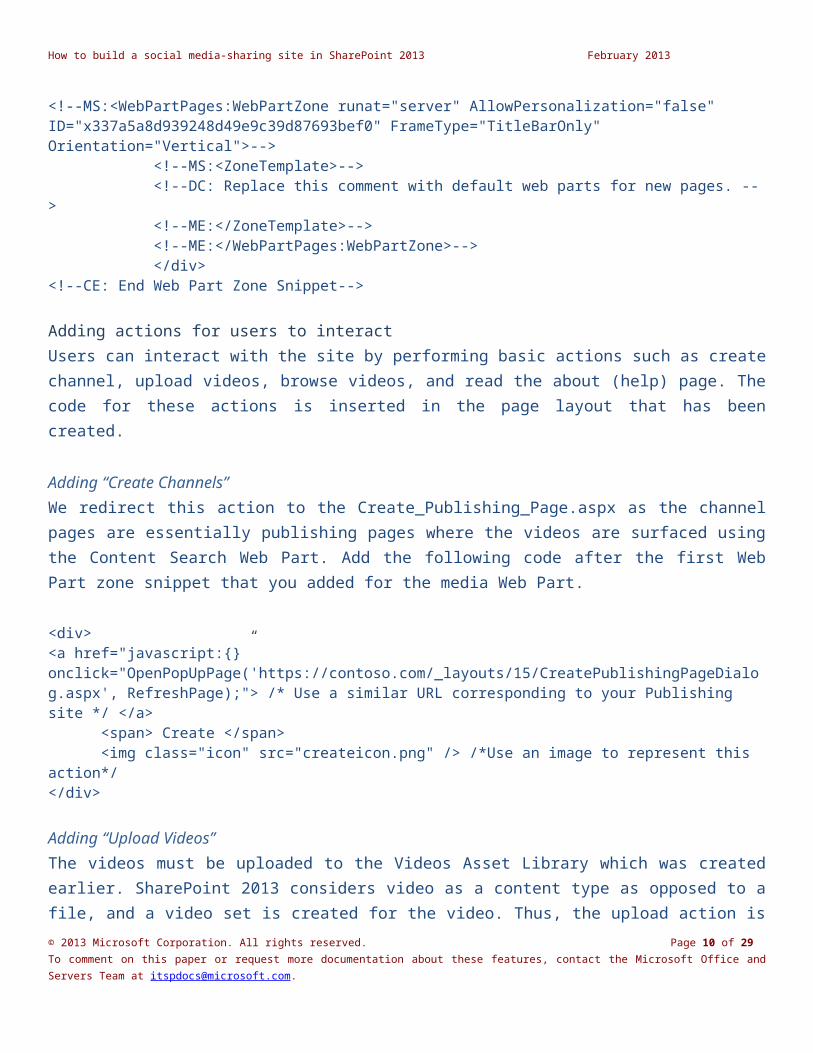
<!--DC: Replace this comment with default web parts for new pages. --> <!--ME:</ZoneTemplate>--> <!--ME:</WebPartPages:WebPartZone>--> </div><!--CE: End Web Part Zone Snippet-->
Adding actions for users to interactUsers can interact with the site by performing basic actions such as create channel, upload videos, browse videos, and read the about (help) page. The code for these actions is inserted in the page layout that has been created.
Adding “Create Channels”We redirect this action to the Create_Publishing_Page.aspx as the channel pages are essentially publishing pages where the videos are surfaced using the Content Search Web Part. Add the following code after the first Web Part zone snippet that you added for the media Web Part.
<div><a href="javascript:{}” onclick="OpenPopUpPage('https://contoso.com/_layouts/15/CreatePublishingPageDialog.aspx', RefreshPage);"> /* Use a similar URL corresponding to your Publishing site */ </a> <span> Create </span> <img class="icon" src="createicon.png" /> /*Use an image to represent this action*/</div>
Adding “Upload Videos”The videos must be uploaded to the Videos Asset Library which was created earlier. SharePoint 2013 considers video as a content type as opposed to a file, and a video set is created for the video. Thus, the upload action is redirected to the NewVideoSet.aspx page, which is the upload dialog that you get while uploading a video from the ribbon in the asset library.
<div><a href="https://contoso.com/_layouts/15/NewVideoSet.aspx> /* Use the URL of the upload dialog from the ribbon for your videos asset library */ </a> <span> Upload </span> <img class="icon" src="upload.png"/> /* Use an image to represent this action */</div>
© 2013 Microsoft Corporation. All rights reserved. Page 9 of 23To comment on this paper or request more documentation about these features, contact the Microsoft Office and Servers Team at [email protected].

How to build a social media-sharing site in SharePoint 2013 February 2013
Adding “Browse Videos”The browse action lets users browse all the videos from the video asset library. Thus, this action directs the users to the location of the asset library.
<div><a href="https://contoso.com/videos"> /* Use the URL of the videos asset library */ </a>
<span> Browse </span> <img class="icon" src="browse.png" /> /* Use an image to represent this action */</div>
Adding “About”The About page is a help page giving users information about what ContosoTube is, and other FAQs. It is always a good practice to have an FAQs page for your site. Create a page in the pages library in this publishing site, and redirect the About action to the URL of that page.
<div><a href="https://contoso.com/Pages/About.aspx"> /* Use the URL of the page from pages library */ </a> <span> About </span> <img class="icon" src="about.png" /> /* Use an image to represent this action */</div>
Adding Web Part zone snippets for the Content Search Web Part:The next step in customizing our page layout is to add another Web Part zone snippet which is a placeholder for the Content Search Web Part on the home page. Choose a Web Part zone snippet from the snippets gallery and paste it after the code for the actions. Publish the page layout as a major version from the page layouts gallery in the Design Manager. The page layout preview will look as follows:
© 2013 Microsoft Corporation. All rights reserved. Page 10 of 23To comment on this paper or request more documentation about these features, contact the Microsoft Office and Servers Team at [email protected].
How to build a social media-sharing site in SharePoint 2013 February 2013
Figure 3. Page Layout preview from the Design Manager
Project #2. Linking videos and channels: how tagging worksThere needs to be some property that links videos in the videos asset library to the terms (or user-created-channels) in the term store manager. Channels are essentially publishing pages with friendly URLs. Each page is associated with a Managed Metadata term (which is the user-given-name of that channel) that can then be used to tag videos that are part of that channel. To enable this, a new column needs to be created from the library setting. To create a new column:
1. Navigate to videos asset library.2. Choose library settings from the ribbon.3. Choose Create Column under columns, and fill in the following metadata for this column.
Name and Type: a. Column Name: Channels (Users see in the video edit property dialog).b. Type: Managed Metadata (as this needs to be linked to the term set created in the term store management
tool).
Additional Column Settings:c. Description: Choose the channel under which you want your video to be displayed.d. Require that this column contains information: Yes (so that we have enough data to display under each
channel).Note: If the value is set to ‘Yes’ after videos have been uploaded to the library, then this value must be set to ‘No’ until this column information is filled out for existing videos.
e. Enforce Unique Values: No (A video can be displayed in more than one channel).f. Add to all content types: Enable
© 2013 Microsoft Corporation. All rights reserved. Page 11 of 23To comment on this paper or request more documentation about these features, contact the Microsoft Office and Servers Team at [email protected].

How to build a social media-sharing site in SharePoint 2013 February 2013
g. Add to default view : Enable
Multiple Value Field:h. Allow multiple values: Enable
Display Value Field:i. Choose Display term label in the field.
Term Set Settings:j. Choose Use a managed term set.
Find the term set ‘Channels’ that we created in project #1, step #1.
Allow Fill-in: No
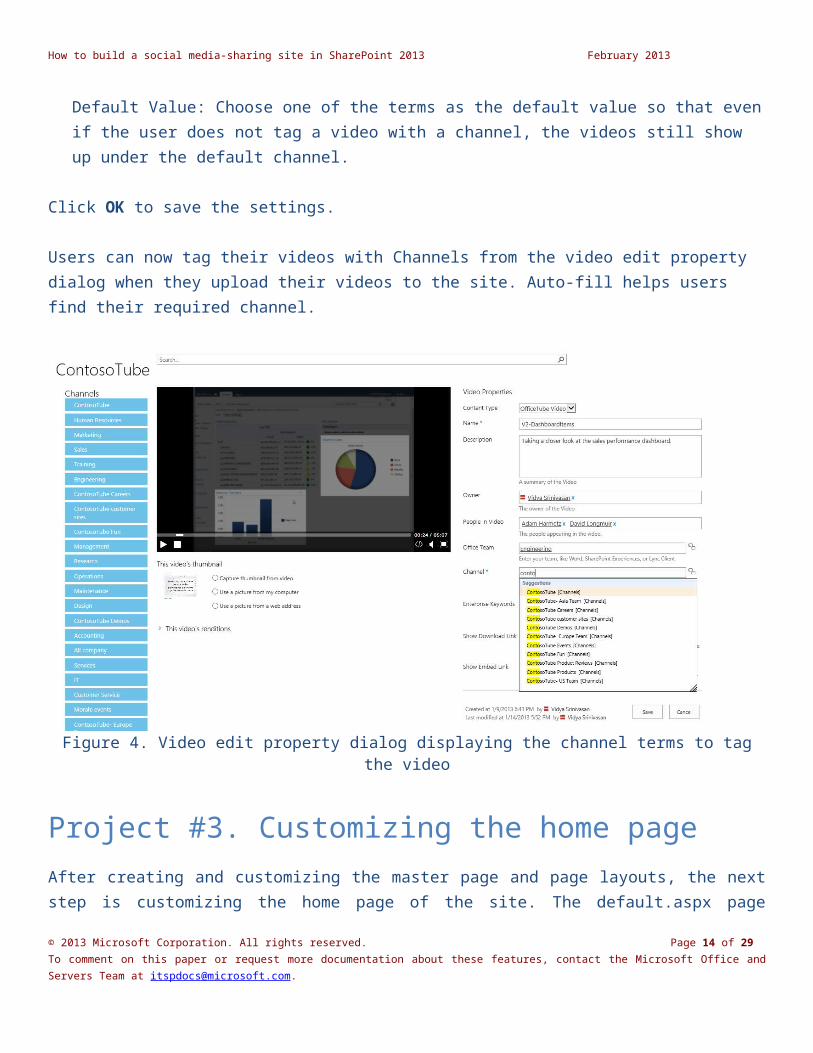
Default Value: Choose one of the terms as the default value so that even if the user does not tag a video with a channel, the videos still show up under the default channel.
Click OK to save the settings.
Users can now tag their videos with Channels from the video edit property dialog when they upload their videos to the site. Auto-fill helps users find their required channel.
© 2013 Microsoft Corporation. All rights reserved. Page 12 of 23To comment on this paper or request more documentation about these features, contact the Microsoft Office and Servers Team at [email protected].

How to build a social media-sharing site in SharePoint 2013 February 2013
Figure 4. Video edit property dialog displaying the channel terms to tag the video
Project #3. Customizing the home pageAfter creating and customizing the master page and page layouts, the next step is customizing the home page of the site. The default.aspx page present in your pages library is used as the home page of ContosoTube. The home page contains the featured video (which can be chosen based on several criteria such as most popular video, most viewed video, etc.), three Content Search Web Parts displaying the most popular videos, most recent videos, and my uploads (specific to every user). These are included as Web Parts in the Home Page. Edit the default.aspx page and apply the page layout that was created earlier for this page.
Step #1: Adding the Media Web Part
Insert a Media Web Part from the Media and Content drop drown in the ribbon. The Media Web Part is positioned correctly as a placeholder area was already provisioned earlier in the page layout.
Setting a featured videoThe featured video can be set based on a variety of criteria. For ContosoTube, we use the Most Popular video as the featured video.
© 2013 Microsoft Corporation. All rights reserved. Page 13 of 23To comment on this paper or request more documentation about these features, contact the Microsoft Office and Servers Team at [email protected].
How to build a social media-sharing site in SharePoint 2013 February 2013
1. Choose Edit Page from the ribbon.2. Click on the Media Web Part that is inserted and choose Edit Web Part.3. Select the Media tab from the ribbon.4. Select the featured video from the videos asset library.5. A different preview image for the featured video can be added from the Change Image option.
Figure 5. Home Page with the Media Web Part
Step #2: Adding and configuring the Content Search Web Part
The next step is to include three content search snippets to roll up videos from the Most Popular, Most Recent and My Uploads category. Insert the Content Search Web Part from the Dynamic Content drop-drown from the ribbon. The three Content Search snippets can be added in the same zone so that they appear one after the other.
Building your own display templates:SharePoint 2013 offers a set of out-of-the-box display templates that can be used to display the Content Search results. However, custom display templates would be built and configured in this project.
1. Create a new Control Display Template in the Display Templates folder -> Content Web Parts folder in the Master Page gallery. You can do so by copying an existing out-of-the-box display template and editing the HTML file. Please note that SharePoint automatically generates a .js file for every display template.
2. Include the title in the <head>.
<html xmlns:mso="urn:schemas-microsoft-com:office:office" xmlns:msdt="uuid:C2F41010-65B3-11d1-A29F-00AA00C14882"> <head><title>Contoso Popular</title>© 2013 Microsoft Corporation. All rights reserved. Page 14 of 23To comment on this paper or request more documentation about these features, contact the Microsoft Office and Servers Team at [email protected].
How to build a social media-sharing site in SharePoint 2013 February 2013
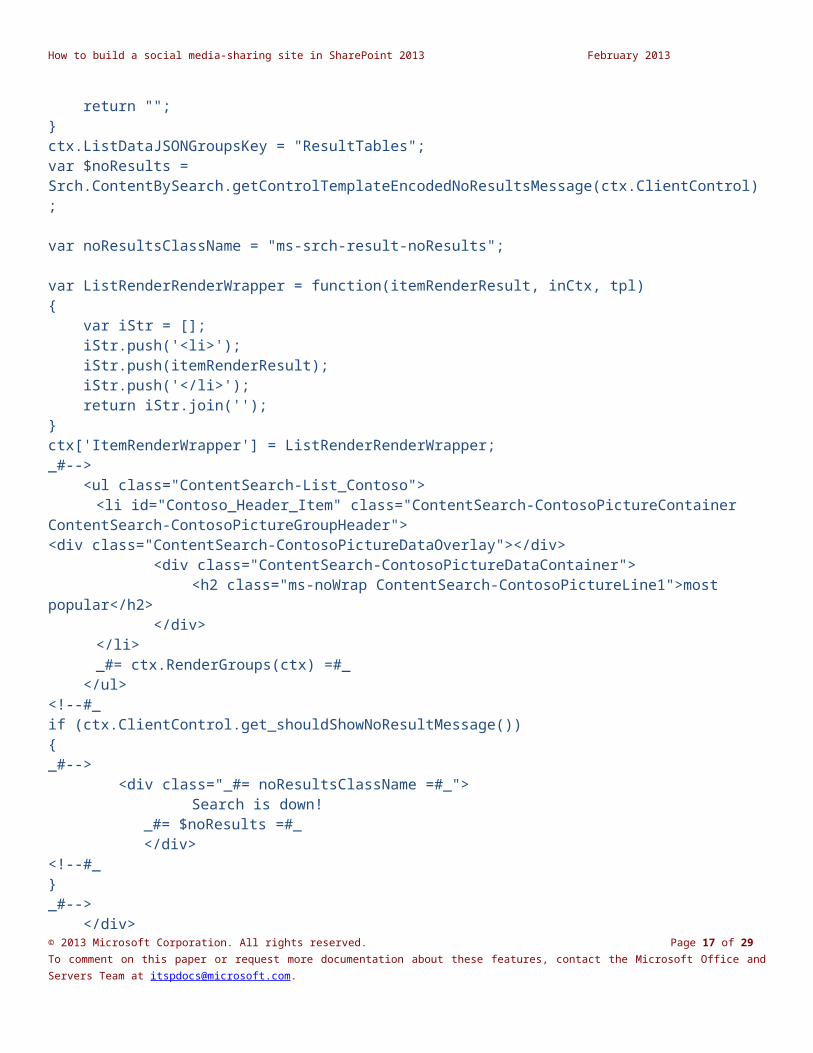
</head>3. Create a <div> in the <body> and include the following code:
<div id="Control_List_Contoso"><!--#_ if (!$isNull(ctx.ClientControl) && !$isNull(ctx.ClientControl.shouldRenderControl) && !ctx.ClientControl.shouldRenderControl()){ return "";}ctx.ListDataJSONGroupsKey = "ResultTables";var $noResults = Srch.ContentBySearch.getControlTemplateEncodedNoResultsMessage(ctx.ClientControl);
var noResultsClassName = "ms-srch-result-noResults";
var ListRenderRenderWrapper = function(itemRenderResult, inCtx, tpl){ var iStr = []; iStr.push('<li>'); iStr.push(itemRenderResult); iStr.push('</li>'); return iStr.join('');}ctx['ItemRenderWrapper'] = ListRenderRenderWrapper;_#--> <ul class="ContentSearch-List_Contoso"> <li id="Contoso_Header_Item" class="ContentSearch-ContosoPictureContainer ContentSearch-ContosoPictureGroupHeader"><div class="ContentSearch-ContosoPictureDataOverlay"></div> <div class="ContentSearch-ContosoPictureDataContainer"> <h2 class="ms-noWrap ContentSearch-ContosoPictureLine1">most popular</h2> </div> </li> _#= ctx.RenderGroups(ctx) =#_ </ul><!--#_if (ctx.ClientControl.get_shouldShowNoResultMessage()){_#--> <div class="_#= noResultsClassName =#_">
Search is down!_#= $noResults =#_</div>
<!--#_}_#--> </div>© 2013 Microsoft Corporation. All rights reserved. Page 15 of 23To comment on this paper or request more documentation about these features, contact the Microsoft Office and Servers Team at [email protected].

How to build a social media-sharing site in SharePoint 2013 February 2013
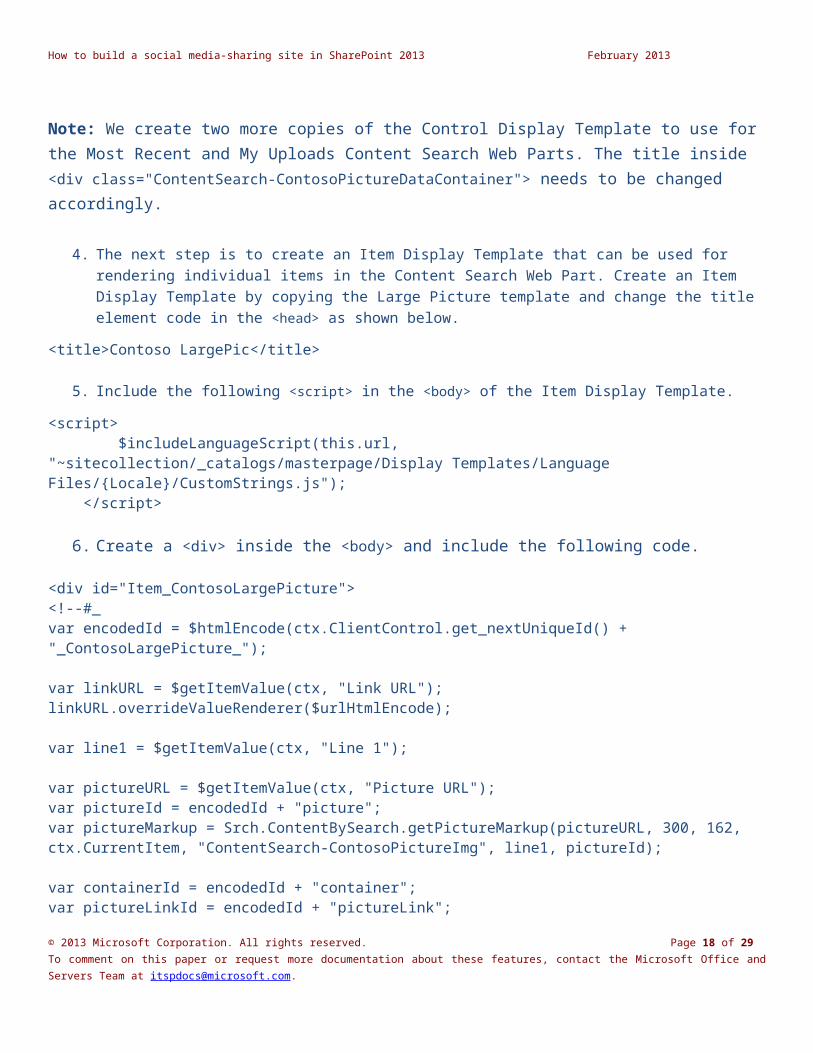
Note: We create two more copies of the Control Display Template to use for the Most Recent and My Uploads Content Search Web Parts. The title inside <div class="ContentSearch-ContosoPictureDataContainer"> needs to be changed accordingly.
4. The next step is to create an Item Display Template that can be used for rendering individual items in the Content Search Web Part. Create an Item Display Template by copying the Large Picture template and change the title element code in the <head> as shown below.
<title>Contoso LargePic</title>
5. Include the following <script> in the <body> of the Item Display Template.
<script> $includeLanguageScript(this.url, "~sitecollection/_catalogs/masterpage/Display Templates/Language Files/{Locale}/CustomStrings.js"); </script>
6. Create a <div> inside the <body> and include the following code.
<div id="Item_ContosoLargePicture"><!--#_var encodedId = $htmlEncode(ctx.ClientControl.get_nextUniqueId() + "_ContosoLargePicture_");
var linkURL = $getItemValue(ctx, "Link URL");linkURL.overrideValueRenderer($urlHtmlEncode);
var line1 = $getItemValue(ctx, "Line 1");
var pictureURL = $getItemValue(ctx, "Picture URL");var pictureId = encodedId + "picture";var pictureMarkup = Srch.ContentBySearch.getPictureMarkup(pictureURL, 300, 162, ctx.CurrentItem, "ContentSearch-ContosoPictureImg", line1, pictureId);
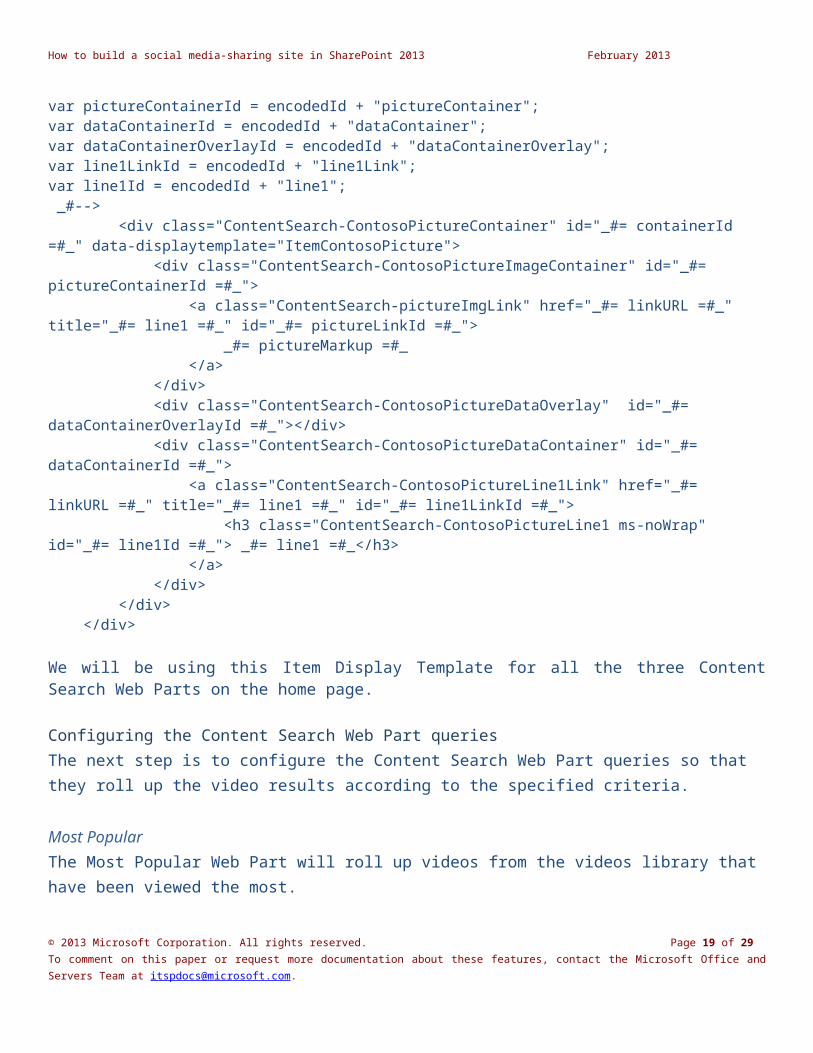
var containerId = encodedId + "container";var pictureLinkId = encodedId + "pictureLink";var pictureContainerId = encodedId + "pictureContainer";var dataContainerId = encodedId + "dataContainer";var dataContainerOverlayId = encodedId + "dataContainerOverlay";var line1LinkId = encodedId + "line1Link";var line1Id = encodedId + "line1"; _#--> <div class="ContentSearch-ContosoPictureContainer" id="_#= containerId =#_" data-displaytemplate="ItemContosoPicture"> <div class="ContentSearch-ContosoPictureImageContainer" id="_#= pictureContainerId =#_">
© 2013 Microsoft Corporation. All rights reserved. Page 16 of 23To comment on this paper or request more documentation about these features, contact the Microsoft Office and Servers Team at [email protected].
How to build a social media-sharing site in SharePoint 2013 February 2013
<a class="ContentSearch-pictureImgLink" href="_#= linkURL =#_" title="_#= line1 =#_" id="_#= pictureLinkId =#_"> _#= pictureMarkup =#_ </a> </div> <div class="ContentSearch-ContosoPictureDataOverlay" id="_#= dataContainerOverlayId =#_"></div> <div class="ContentSearch-ContosoPictureDataContainer" id="_#= dataContainerId =#_"> <a class="ContentSearch-ContosoPictureLine1Link" href="_#= linkURL =#_" title="_#= line1 =#_" id="_#= line1LinkId =#_"> <h3 class="ContentSearch-ContosoPictureLine1 ms-noWrap" id="_#= line1Id =#_"> _#= line1 =#_</h3> </a> </div> </div> </div>
We will be using this Item Display Template for all the three Content Search Web Parts on the home page.
Configuring the Content Search Web Part queriesThe next step is to configure the Content Search Web Part queries so that they roll up the video results according to the specified criteria.
Most PopularThe Most Popular Web Part will roll up videos from the videos library that have been viewed the most.
1. Click change query in the Content Search dialog box. This opens the query builder.
2. Switch to advanced mode and insert the following query in the query text. The query selects videos based on the ContentTypeId and the SecondaryFIleExtension from the path specified. You should specify the path to your videos asset library, and the video content type ID corresponding to your site.
(path:https://contoso.com/videos) (ContentTypeId:0x0120D520A808* OR (SecondaryFileExtension=wmv OR SecondaryFileExtension=avi OR SecondaryFileExtension=mpg OR SecondaryFileExtension=asf OR SecondaryFileExtension=mp4 OR SecondaryFileExtension=ogg OR SecondaryFileExtension=ogv OR SecondaryFileExtension=webm))
3. Now, for the Most Popular Web Part, we need to display results that have been viewed the most. Switch to the Sorting tab in the query builder, and choose:Sort By: Views RecentDescendingYou can add additional sorting conditions if needed.
4. The next step is to configure the appearance and other properties in the Edit Web Part dialog.
© 2013 Microsoft Corporation. All rights reserved. Page 17 of 23To comment on this paper or request more documentation about these features, contact the Microsoft Office and Servers Team at [email protected].
How to build a social media-sharing site in SharePoint 2013 February 2013
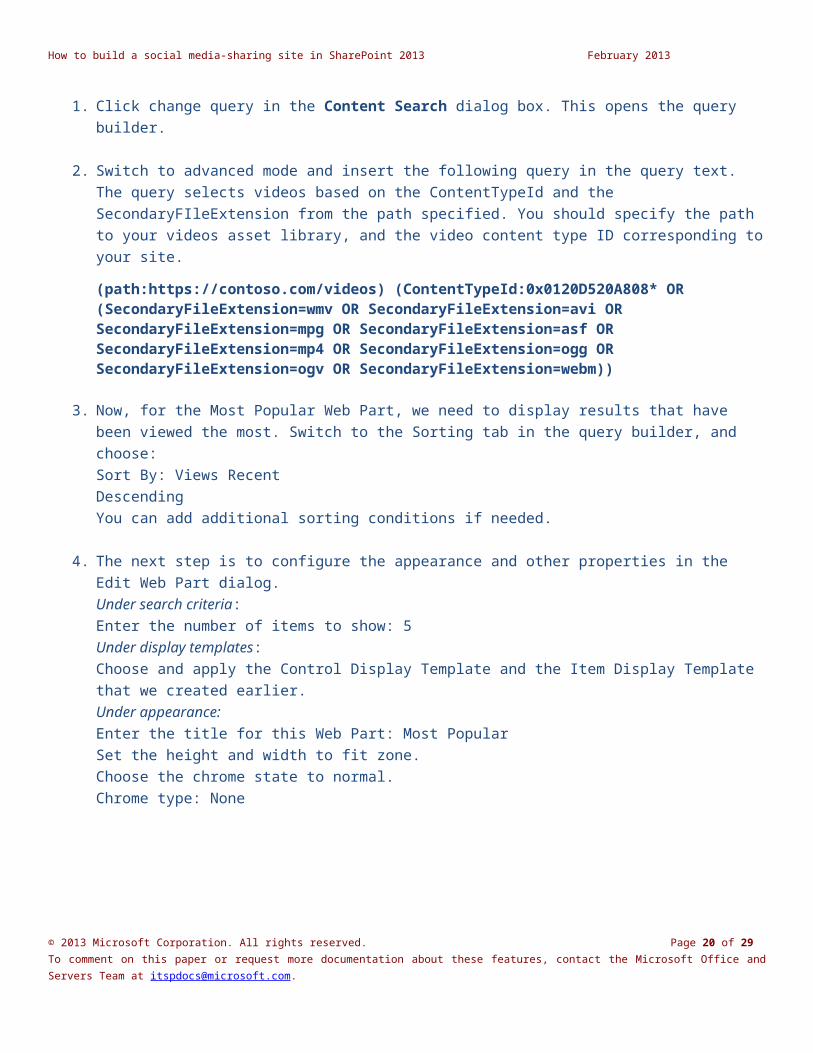
Under search criteria: Enter the number of items to show: 5Under display templates:Choose and apply the Control Display Template and the Item Display Template that we created earlier. Under appearance:Enter the title for this Web Part: Most PopularSet the height and width to fit zone. Choose the chrome state to normal.Chrome type: None
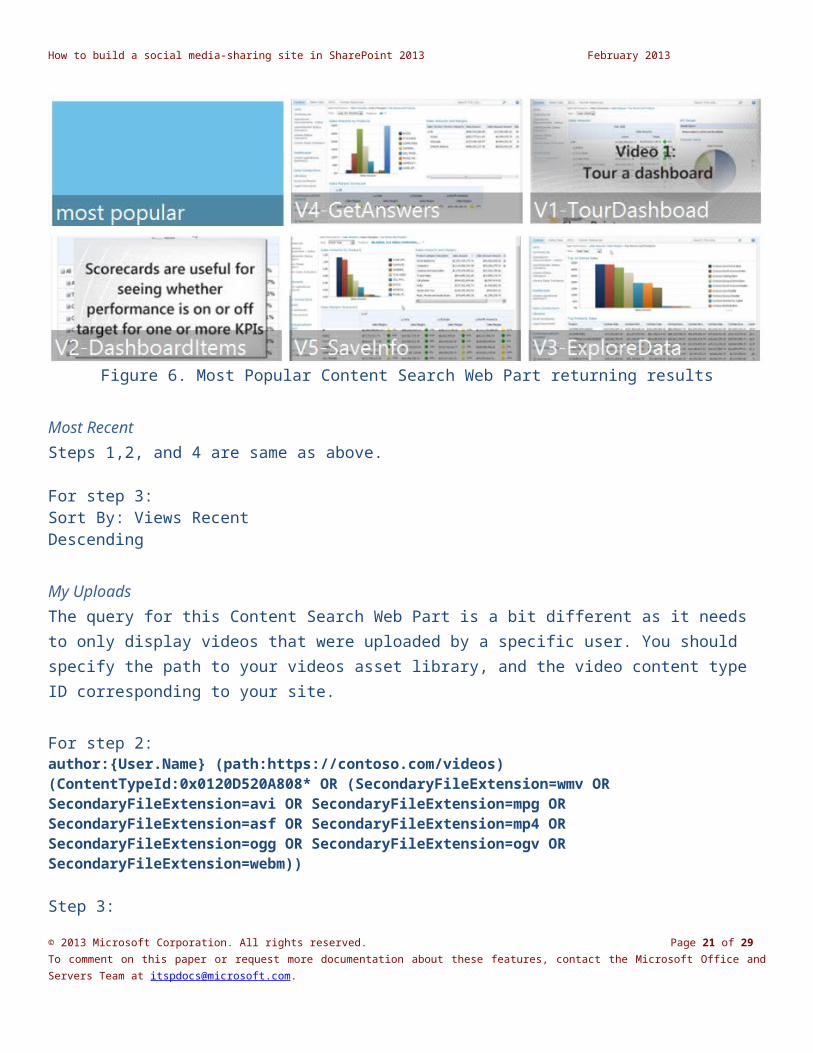
Figure 6. Most Popular Content Search Web Part returning results
Most RecentSteps 1,2, and 4 are same as above.
For step 3:Sort By: Views RecentDescending
My UploadsThe query for this Content Search Web Part is a bit different as it needs to only display videos that were uploaded by a specific user. You should specify the path to your videos asset library, and the video content type ID corresponding to your site.
For step 2:author:{User.Name} (path:https://contoso.com/videos) (ContentTypeId:0x0120D520A808* OR (SecondaryFileExtension=wmv OR SecondaryFileExtension=avi OR SecondaryFileExtension=mpg OR
© 2013 Microsoft Corporation. All rights reserved. Page 18 of 23To comment on this paper or request more documentation about these features, contact the Microsoft Office and Servers Team at [email protected].
How to build a social media-sharing site in SharePoint 2013 February 2013
SecondaryFileExtension=asf OR SecondaryFileExtension=mp4 OR SecondaryFileExtension=ogg OR SecondaryFileExtension=ogv OR SecondaryFileExtension=webm))
Step 3:Sort By: Last Modified TimeDescending
Project #4. Customizing the channels pageAs channels are publishing pages, the videos tagged with a specific channel term are surfaced using a Content Search Web Part. The Content Search Web Part queries the video library to roll up video results that match the name of the channel. This configuration needs to apply to all the channels pages, meaning it needs to apply dynamically to the new channel pages that ContosoTube users create. If you recall, channel pages are all instances of one page (topics.aspx) that was created in the pages library. Hence, we create a new page layout that can be applied to topics.aspx.
Creating a page layout
Insert a Web Part Zone snippet from the snippets gallery in the page layout similar to Project #1, step #2. Publish the page layout as a major version in the Design Manager and apply this as the page layout for topics.aspx. The Web Part Zone snippet acts the placeholder for the Content Search Web Part.
Configuring the Content Search Web Part
Edit topics.aspx and insert a Content Search Web Part from the Dynamic Content drop drown from the ribbon. The Content Search Web Part can be configured as follows:
1. Click change query in the Content Search dialog box. This opens the query builder.2. In Quick Mode, configure the query as follows:
a. Select a query: Local Video Results (System)b. Restrict by app: Current site collection (or you can also specify a URL to the videos library)c. Restrict by tag: Restrict by navigation term of current page
The query will look similar to the following in the advanced mode:
path:"https://contoso.com/videos" owstaxIdMetadataAllTagsInfo:{Term} (ContentTypeId:0x0120D520A808* OR (SecondaryFileExtension=wmv OR SecondaryFileExtension=avi OR SecondaryFileExtension=mpg OR
© 2013 Microsoft Corporation. All rights reserved. Page 19 of 23To comment on this paper or request more documentation about these features, contact the Microsoft Office and Servers Team at [email protected].
How to build a social media-sharing site in SharePoint 2013 February 2013
SecondaryFileExtension=asf OR SecondaryFileExtension=mp4 OR SecondaryFileExtension=ogg OR SecondaryFileExtension=ogv OR SecondaryFileExtension=webm))
To display the most recent videos on the first page of the channel, switch to the Sorting tab in the query builder, and choose:Sort By: Last Modified TimeDescending
d. The next step is to configure the appearance and other properties in the edit Web Part dialog.Under search criteria: Enter the number of items to show: 20
Under display templates:Control: List with paging (this is an out-of-the-box control display template)Item: Choose the one created earlier in Project #1.
Under Settings:Result Table: Relevant Results
Under appearance:Enter the title for this Web Part: Videos in this channelSet the height and width to fit zone. Choose the chrome state to normal.Chrome type: None
Once search finishes crawling all the videos in the videos library, the channel pages will display videos that have been tagged with that channel name.
© 2013 Microsoft Corporation. All rights reserved. Page 20 of 23To comment on this paper or request more documentation about these features, contact the Microsoft Office and Servers Team at [email protected].
How to build a social media-sharing site in SharePoint 2013 February 2013
Figure 7. Engineering channel page displaying videos tagged with the term ‘engineering’
Project # 5. Customizing the video player pageSharePoint 2013 has an individual video player page for every video in the asset library. ContosoTube uses all the out-of-the-box features in the video player page such as related items, tagging people, ratings, etc. One additional customization we add to the video player page is the Recommendations Web Part. Recommendations are a great way to increase usage, and suggest new content to your users.
Configuring the Recommendations Web Part
No custom code is required to configure recommendations for ContosoTube. Insert the Recommendations Web Part as follows: Edit video player page -> Insert -> Web Part -> Search-Driven-Content -> Recommended Items.
© 2013 Microsoft Corporation. All rights reserved. Page 21 of 23To comment on this paper or request more documentation about these features, contact the Microsoft Office and Servers Team at [email protected].
How to build a social media-sharing site in SharePoint 2013 February 2013
In general, the Recommendations Web Part issues a query on the recommendedfor managed property that looks like this: Recommendedfor:<URL to item I want recommendations for> and renders the results, and this URL is configurable.
On ContosoTube, the URL we want recommendations for is an argument of the URL to the video player page, and this is configured as follows in the query builder. For example, consider the following URL to a video player page on ContosoTube, https://contoso.com/Videos/Forms/Contoso%20Video/videoplayerpage.aspx?ID=4926&FolderCTID=0x0120D520A8080081BC7E163CE0BF4D98666E07E097BBEE001BB4D0DB47C68C41800B28E2FF105C35&List=45b4a213-012e-43da-b3d6-adc85a977241&RootFolder=%2Fsites%2Fcontoso%2FVideos%2FSeagull%20visit%2020120521%2FAdditional%20Content&RecSrc=%2Fsites%2Fcontoso%2FVideos%2FSeagull%20visit%2020120521
< RecSrc=%2Fsites%2Fcontoso%2FVideos%2FSeagull%20visit%2020120521> is the URL to the item we need recommendations for.
To configure the recommendations:1. Edit the Recommendations Web Part.2. Open the query builder by selecting Change query.3. Choose Specify a URL under Get recommended items for.4. Specify the URL as https://contoso.com{\QueryString.RecSrc} where the {\QueryString.RecSrc} means that the
RecSrc argument should be fetched from the URL of the page. Hence, the query is built dynamically for the page the Web Part is on. It is prefixed with https://contoso.com to build a full URL because the RecSrc argument does not contain the full URL on ContosoTube. The URL can be passed in other ways as well.
5. Restrict by app: current site
The results users see are “People who looked at this video, also looked at the following videos.”
© 2013 Microsoft Corporation. All rights reserved. Page 22 of 23To comment on this paper or request more documentation about these features, contact the Microsoft Office and Servers Team at [email protected].
How to build a social media-sharing site in SharePoint 2013 February 2013
Figure 8. Video player page displaying recommended videos
ConclusionYou can now leverage the benefits of the Video and Web Content Management features to build a social media-sharing site on Microsoft SharePoint 2013. The out-of-the-box features can be used to build a complete end-to-end portal. CSS can be used to further brand and customize your site. The possibilities for designing your site are limited only by your creativity!
AcknowledgementsMany thanks to Jeremy Kelly, Anton Labunets, and Kai-Marius Pedersen for providing help with the display templates and recommendations code.
© 2013 Microsoft Corporation. All rights reserved. Page 23 of 23To comment on this paper or request more documentation about these features, contact the Microsoft Office and Servers Team at [email protected].


![SORTING - cs.cornell.edu · Insertion Sort Present algorithm like this. Insertion Sort 10 // sort b[], an array of int ... Selection Sort !(#%) !(1) No Merge Sort Quick Sort. SelectionSort](https://img.pdfslide.us/doc/110x75/5b4fab477f8b9a2f6e8cd7c9/sorting-cs-insertion-sort-present-algorithm-like-this-insertion-sort-10.jpg)