Embed Size (px)
Citation preview

Introduction to media production
Assignment D
Chapter 10
Besa Sheqiri
http://www.student.bth.se/~besa11/
Repetition and Cloning
The original photo (1)
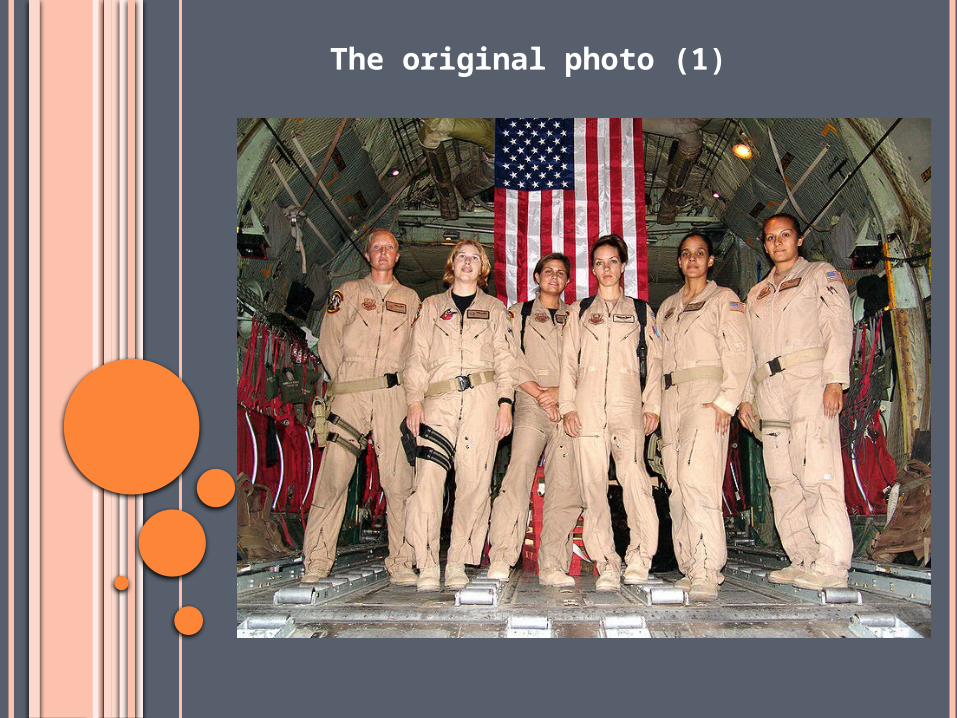
The original photo (2)
Exercise 01For this assignment I will work with a lot of different techniques such as copy, paste, mask and clone.The first thing I did on this exercise was downloading the materials that I need for this chapter from the wiki. I will be using two US government images from the public domain. The first one is a group photograph of the first all-female crew of an Air Force C-130 Hercules on a combat mission. The other one is a cropped photograph of Amelia Earhart from NASA.
I opened the first image (group image of the all-female crew) in Photoshop and I used the Zoom tool to zoom in on the central figure of the crew. Afterwards I created a rectangular selection around her head. I did this with the Rectangular Marquee tool because I wanted to replace her head with sample of the flag. I drug the selection marquee above the figure's head so that the part of the flag was selected and so I only moved the selection and no other part of the image.
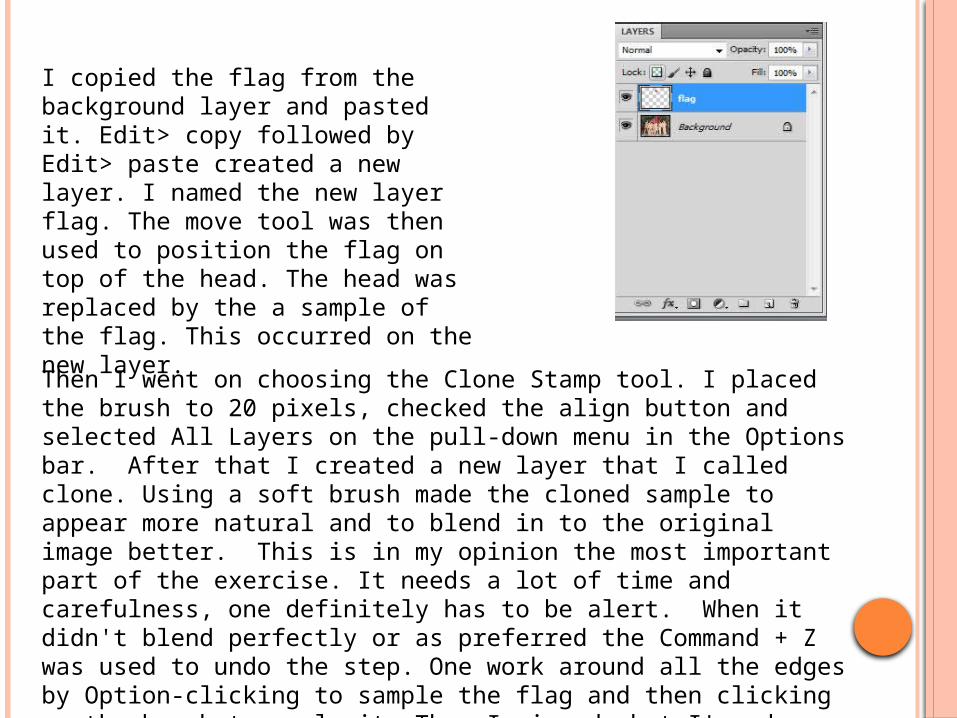
I copied the flag from the background layer and pasted it. Edit> copy followed by Edit> paste created a new layer. I named the new layer flag. The move tool was then used to position the flag on top of the head. The head was replaced by the a sample of the flag. This occurred on the new layer.
Then I went on choosing the Clone Stamp tool. I placed the brush to 20 pixels, checked the align button and selected All Layers on the pull-down menu in the Options bar. After that I created a new layer that I called clone. Using a soft brush made the cloned sample to appear more natural and to blend in to the original image better. This is in my opinion the most important part of the exercise. It needs a lot of time and carefulness, one definitely has to be alert. When it didn't blend perfectly or as preferred the Command + Z was used to undo the step. One work around all the edges by Option-clicking to sample the flag and then clicking on the brush to apply it. Then I viewed what I've done. To view the clone layer I turned the eyeball icons off on all the other layers. Doing this I only saw some random shapes.
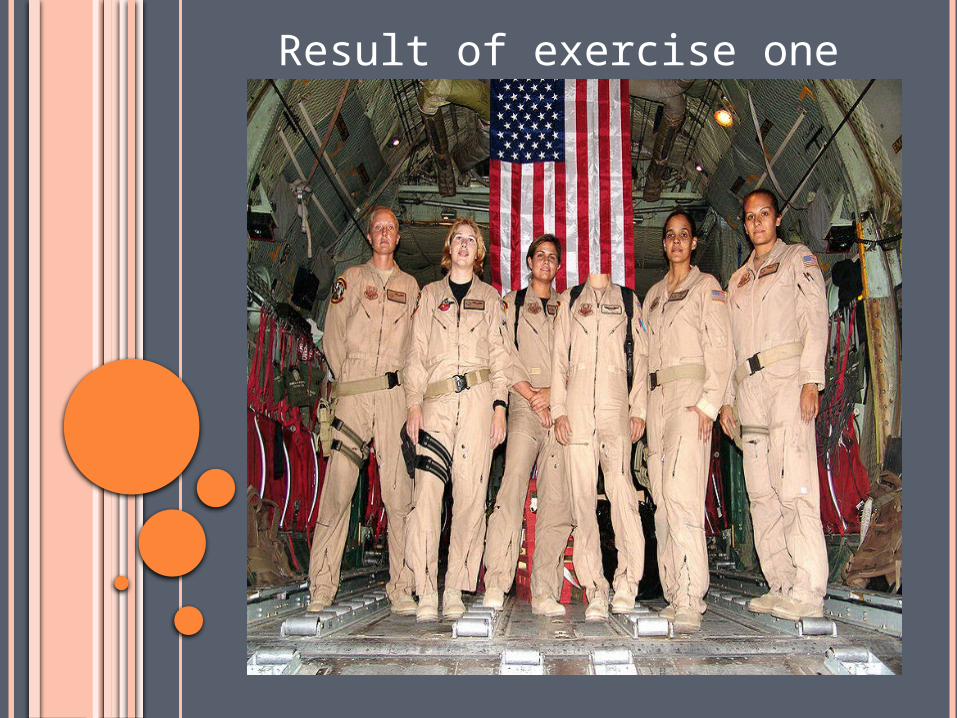
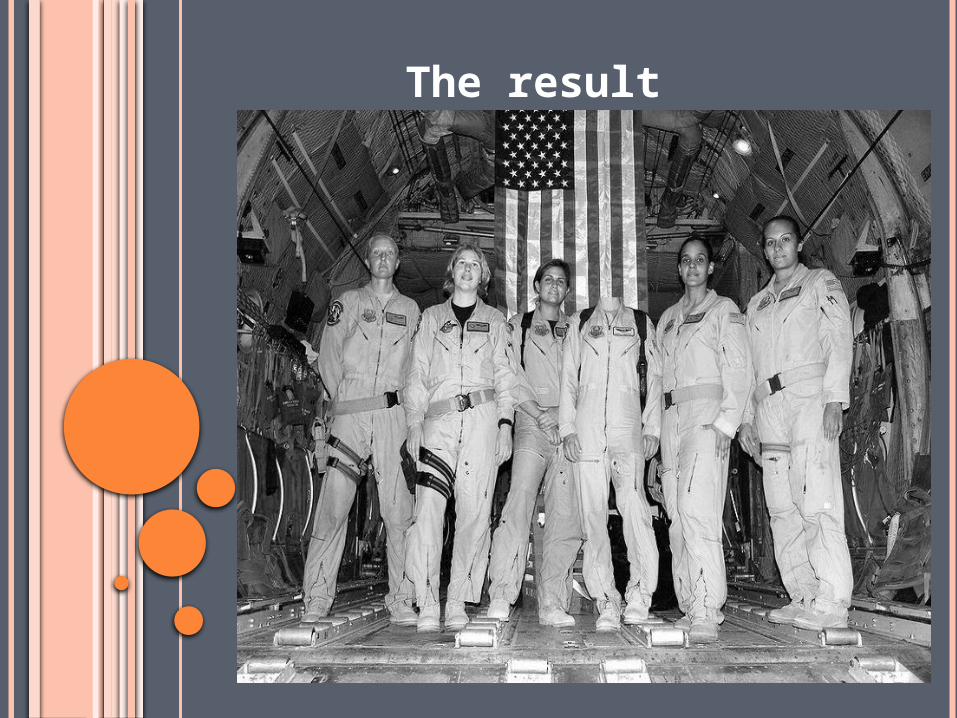
Result of exercise one
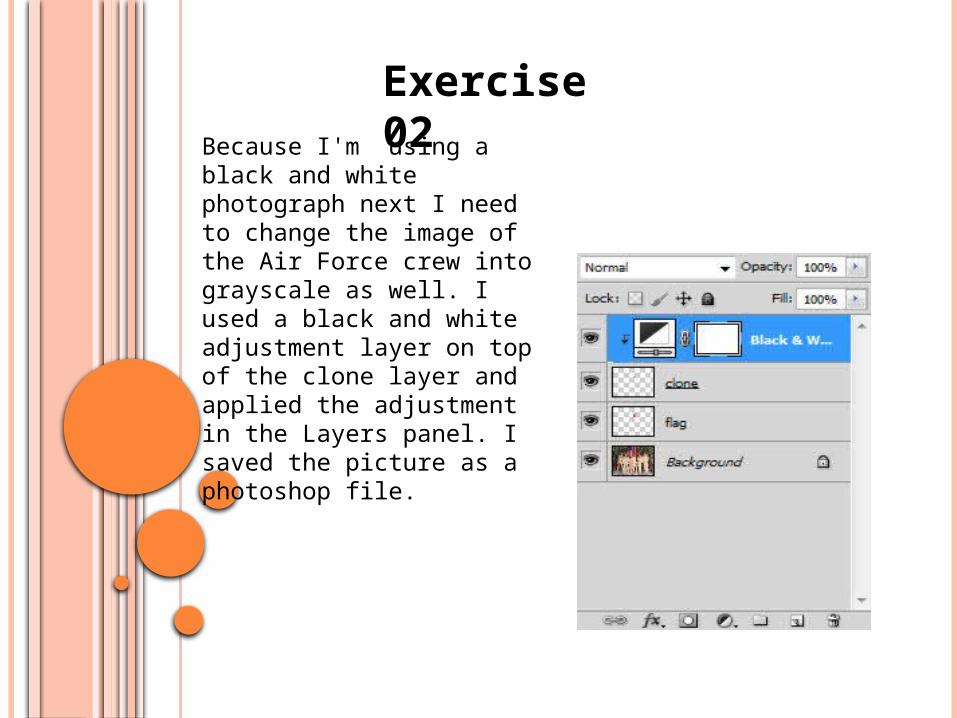
Exercise 02Because I'm using a black and white photograph next I need to change the image of the Air Force crew into grayscale as well. I used a black and white adjustment layer on top of the clone layer and applied the adjustment in the Layers panel. I saved the picture as a photoshop file.
Exercise 03
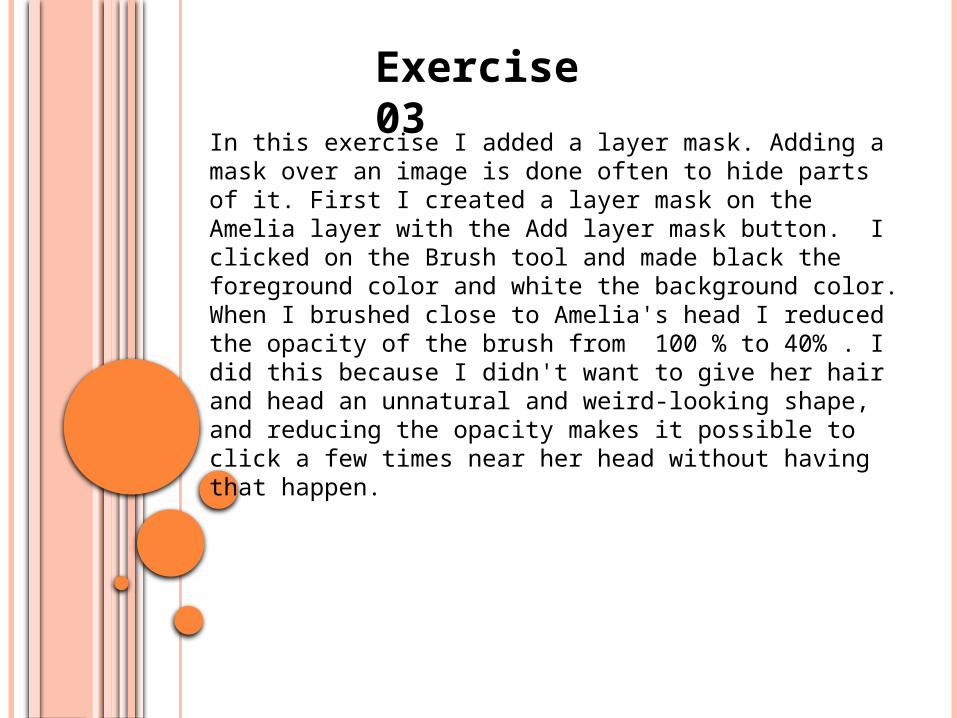
In this exercise I added a layer mask. Adding a mask over an image is done often to hide parts of it. First I created a layer mask on the Amelia layer with the Add layer mask button. I clicked on the Brush tool and made black the foreground color and white the background color. When I brushed close to Amelia's head I reduced the opacity of the brush from 100 % to 40% . I did this because I didn't want to give her hair and head an unnatural and weird-looking shape, and reducing the opacity makes it possible to click a few times near her head without having that happen.
The result
I opened the second image ( the one of Amelia Earhart from NASA) and selected ther head and neck. I did this by using the Rectangular Marquee tool again. I copied and toggled back to the Photoshop document to paste it. Then I pressed the Free Transform which one can use by pressing Command + T on the keyboard. This gives the ability to proportion and place Amelia Earhart's head with the body in the group image. After this I named the new layer created “ Amelia” .
Exercise 04The last exercise of this chapter is mostly about using the Burn tool. Because of the obvious and unavoidable fact that Amelia's photograph was taken outdoors, while the other photograph was taken indoors, there were noticeably different lights on Amelia's face that I had to adjust in order to make the collage more realistic. I did this with the Burn tool. Burning and dodging are photographic manipulations. Before one can use this tool you have to leave the mask of the layer. For this image I used the Burn tool with a soft brush and changed the exposure to 10 %. I clicked the mouse some few times and this made the tones darker I followed this by repeating the step I just did but changing options set at midtones and highlights.
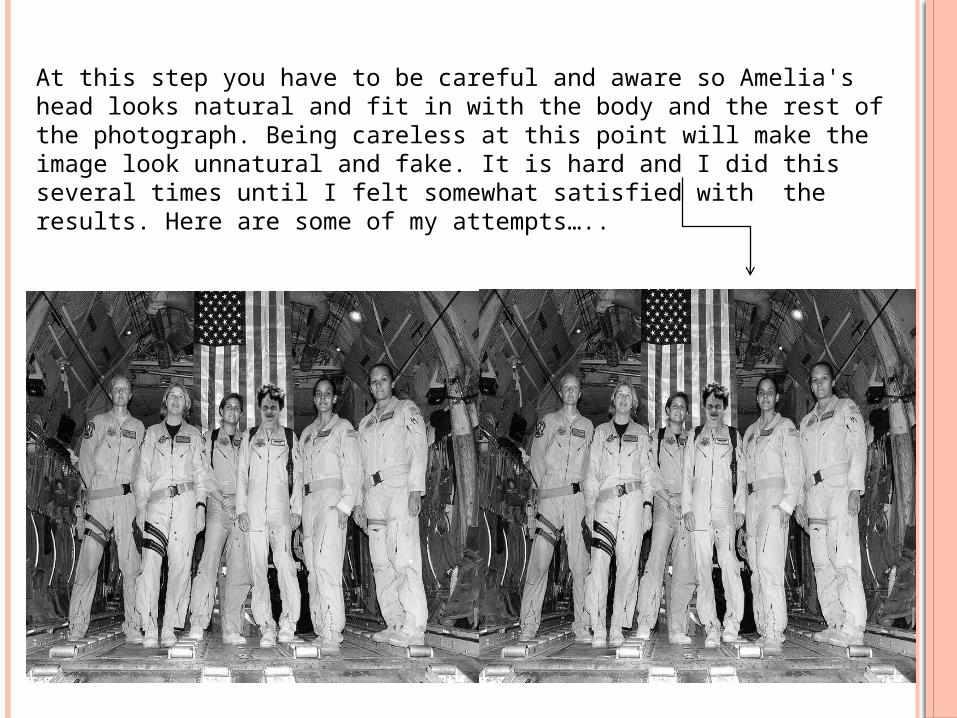
At this step you have to be careful and aware so Amelia's head looks natural and fit in with the body and the rest of the photograph. Being careless at this point will make the image look unnatural and fake. It is hard and I did this several times until I felt somewhat satisfied with the results. Here are some of my attempts…..
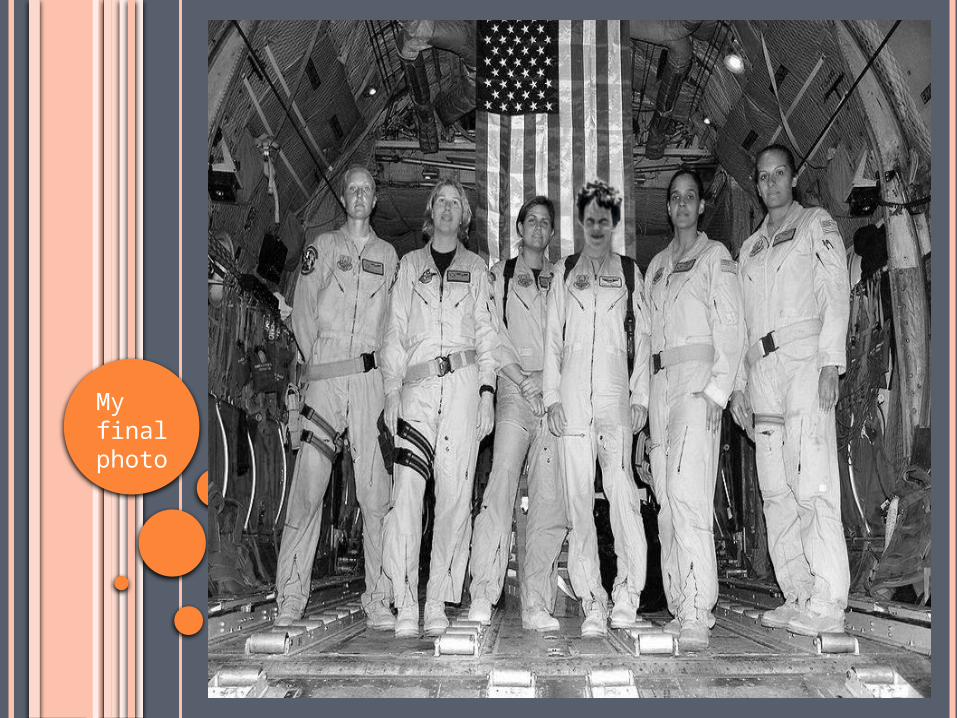
My final photo
Besa Sheqiri
http://www.student.bth.se/~besa11/