Embed Size (px)
Citation preview
Introduction to HTML and CSSLesson 1: Int ro duct io n
The CodeRunner Screen
Working in CodeRunner
Using the CodeRunner® Editor and Saving Your PageSaving and Retrieving Your PageMaking the Page More ExcitingYou're Ready to Go!
Lesson 2: T he BasicsThe Head
The Body
Lists
CSS
Colors
Attributes
Void and Empty Elements
Comments
Lesson 3: Synt ax and Semant icsSyntax
Tell the Browser You're Writing HTML with DoctypeUse the Meta TagClose Your Elements with Closing Tags and Quote Your AttributesDon't Use Deprecated Elements
SemanticsStructure ElementsFlow ElementsBlock and Inline DisplayUsing <div> to Structure Your PageAdd Meaning to <div> with the Id AttributeStyling with Id's
Use the Right Element fo r the Job
Lesson 4: LinksWhat is a Link?
Relative Links
Abso lute Links
Link Attributes
Using the ID Attribute to Link within a Document
Styling Links
Lesson 5: ImagesPutting an Image on a Page
What Kind o f Image Should You Use?
Uploading Images to Your OST Account
Styling Images
The alt Attribute
Using Images as Links
Putting an Image in the Background
Lesson 6 : Cascading St yle Sheet s: Int ro duct io nCSS Properties
Styling with Classes
Styling with ids
When to Use a Class and When to Use an ID
Linking to CSS in an External File
Using the Style Attribute
Lesson 7: Cascading St yle Sheet s: T he Bo x Mo delPadding, Margins, and Border fo r Your Content
Having Fun with Padding, Margins and Border
Padding, Margins, and Borders on Inline Elements
Lesson 8 : Cascading St yle Sheet s: Inherit anceCSS Inheritance
CSS Descendant Selectors
Combining Descendant Selectors with IDs and Classes
Lesson 9 : Cascading St yle Sheet s: Layo ut and Po sit io ning
CSS Positioning
Lesson 10: HT ML and CSS: Fo rmsBasic Input and Attributes
Placeho lder AttributeRequired Attribute
Other Kinds o f InputsCheckboxes and Radio ButtonsTextareaDates
Styling Forms with CSS
Where Do We Go from Here?
Lesson 11: HT ML and CSS: T ablesCreating a Table
Table Headers
Captions
Spanning Multiple Co lumns
Styling Tables
Tables and Forms
Lesson 12: HT ML and CSS: St andards and Validat io nValidating Your Pages
All About Standards
Accessibility standardsAccess Keys
Create a Great Web Site and Keep It Current
Just a Few Loose EndsFaviconsMore <meta> Tags
Lesson 13: HT ML and CSS: Final Pro jectFinal Pro ject
Copyright © 1998-2014 O'Reilly Media, Inc.
This work is licensed under a Creative Commons Attribution-ShareAlike 3.0 Unported License.See http://creativecommons.org/licenses/by-sa/3.0/legalcode for more information.

Introduction
Welcome to the O'Reilly School o f Technology (OST) course on HTML and CSS! In this course, you will learn to create anattractive and organized website using basic and intermediate HTML and CSS.
Course ObjectivesWhen you complete this course, you will be able to :
create basic HTML elements such as hyperlinks, images, tables, and forms.structure a web page effectively.contro l the look and placement o f HTML elements using Cascading Style Sheets.demonstrate knowledge o f box properties and external style sheets.create HTML source code that is both readable and upho lds HTML5 standards.develop a full-fledged website using HTML5 and CSS.
From beginning to end, you'll learn by do ing your own HTML and CSS based pro jects. These pro jects, as well as the finalpro ject, will add to your portfo lio and provide needed experience. Besides a browser and internet connection, all so ftware isprovided online by the O'Reilly School o f Technology.
Learning with O'Reilly School of Technology CoursesAs with every O'Reilly School o f Technology course, we'll take a user-active approach to learning. This means that you(the user) will be active! You'll learn by do ing, building live programs, testing them and experimenting with them—hands-on!
To learn a new skill o r techno logy, you have to experiment. The more you experiment, the more you learn. Our systemis designed to maximize experimentation and help you learn to learn a new skill.
We'll program as much as possible to be sure that the principles sink in and stay with you.
Each time we discuss a new concept, you'll put it into code and see what YOU can do with it. On occasion we'll evengive you code that doesn't work, so you can see common mistakes and how to recover from them. Making mistakesis actually another good way to learn.
Above all, we want to help you to learn to learn. We give you the too ls to take contro l o f your own learning experience.
When you complete an OST course, you know the subject matter, and you know how to expand your knowledge, soyou can handle changes like software and operating system updates.
Here are some tips for using O'Reilly School o f Technology courses effectively:
T ype t he co de. Resist the temptation to cut and paste the example code we give you. Typing the codeactually gives you a feel fo r the programming task. Then play around with the examples to find out what elseyou can make them do, and to check your understanding. It's highly unlikely you'll break anything byexperimentation. If you do break something, that's an indication to us that we need to improve our system!T ake yo ur t ime. Learning takes time. Rushing can have negative effects on your progress. Slow down andlet your brain absorb the new information thoroughly. Taking your time helps to maintain a relaxed, positiveapproach. It also gives you the chance to try new things and learn more than you o therwise would if youblew through all o f the coursework too quickly.Experiment . Wander from the path o ften and explore the possibilities. We can't anticipate all o f yourquestions and ideas, so it's up to you to experiment and create on your own. Your instructor will help if yougo completely o ff the rails.Accept guidance, but do n't depend o n it . Try to so lve problems on your own. Going frommisunderstanding to understanding is the best way to acquire a new skill. Part o f what you're learning isproblem so lving. Of course, you can always contact your instructor fo r hints when you need them.Use all available reso urces! In real- life problem-so lving, you aren't bound by false limitations; in OSTcourses, you are free to use any resources at your disposal to so lve problems you encounter: the Internet,reference books, and online help are all fair game.Have f un! Relax, keep practicing, and don't be afraid to make mistakes! Your instructor will keep you at ituntil you've mastered the skill. We want you to get that satisfied, "I'm so coo l! I did it!" feeling. And you'll havesome pro jects to show off when you're done.
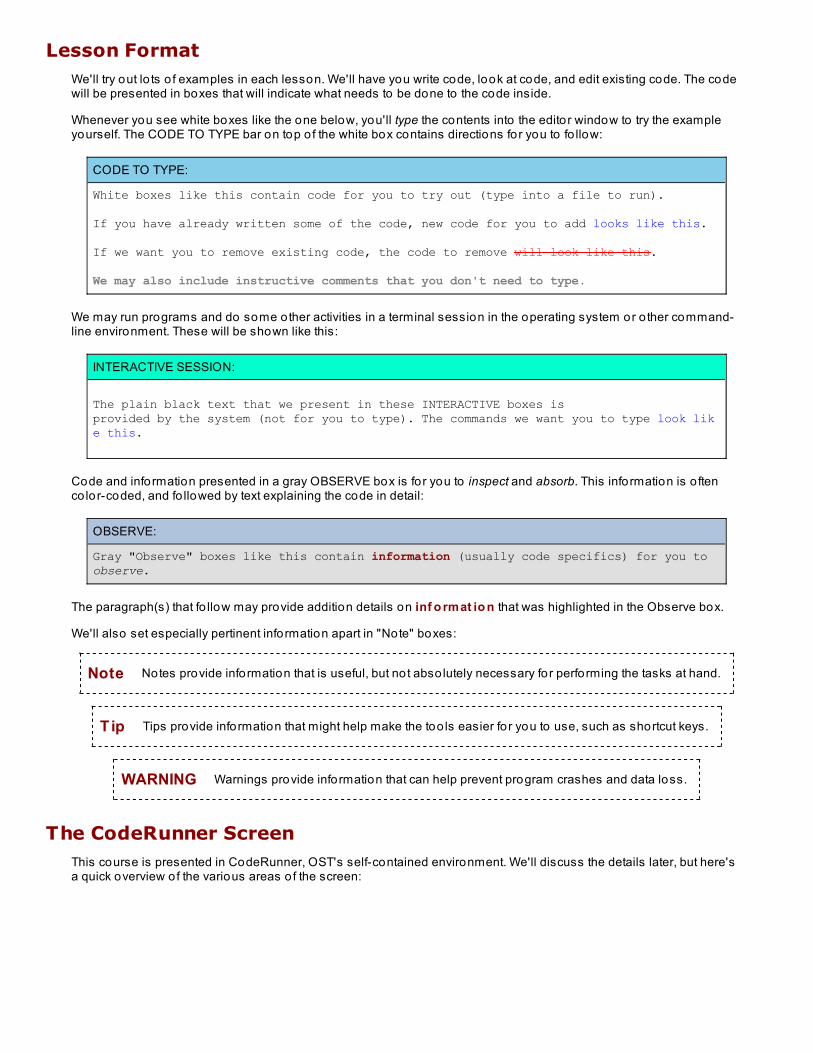
Lesson FormatWe'll try out lo ts o f examples in each lesson. We'll have you write code, look at code, and edit existing code. The codewill be presented in boxes that will indicate what needs to be done to the code inside.
Whenever you see white boxes like the one below, you'll type the contents into the editor window to try the exampleyourself. The CODE TO TYPE bar on top o f the white box contains directions for you to fo llow:
CODE TO TYPE:
White boxes like this contain code for you to try out (type into a file to run).
If you have already written some of the code, new code for you to add looks like this. If we want you to remove existing code, the code to remove will look like this. We may also include instructive comments that you don't need to type.
We may run programs and do some other activities in a terminal session in the operating system or o ther command-line environment. These will be shown like this:
INTERACTIVE SESSION:
The plain black text that we present in these INTERACTIVE boxes is provided by the system (not for you to type). The commands we want you to type look like this.
Code and information presented in a gray OBSERVE box is fo r you to inspect and absorb. This information is o ftenco lor-coded, and fo llowed by text explaining the code in detail:
OBSERVE:
Gray "Observe" boxes like this contain information (usually code specifics) for you to observe.
The paragraph(s) that fo llow may provide addition details on inf o rmat io n that was highlighted in the Observe box.
We'll also set especially pertinent information apart in "Note" boxes:
Note Notes provide information that is useful, but not abso lutely necessary for performing the tasks at hand.
Tip Tips provide information that might help make the too ls easier fo r you to use, such as shortcut keys.
WARNING Warnings provide information that can help prevent program crashes and data loss.
The CodeRunner ScreenThis course is presented in CodeRunner, OST's self-contained environment. We'll discuss the details later, but here'sa quick overview of the various areas o f the screen:
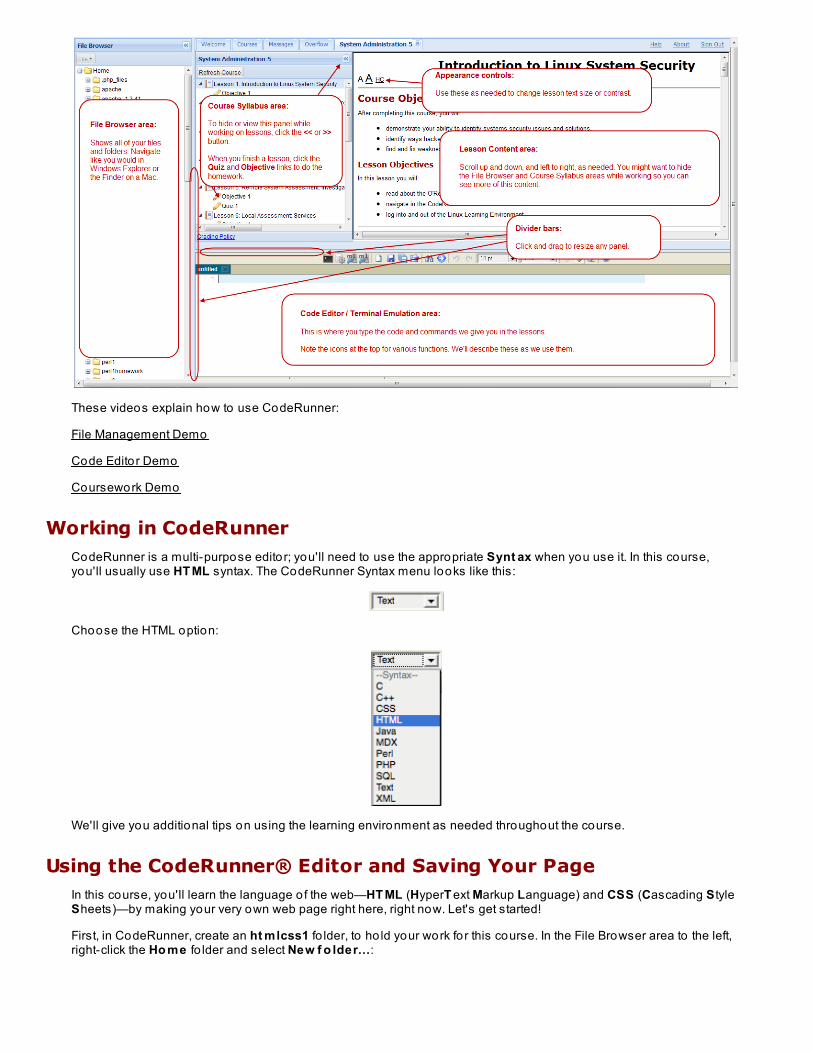
These videos explain how to use CodeRunner:
File Management Demo
Code Editor Demo
Coursework Demo
Working in CodeRunnerCodeRunner is a multi-purpose editor; you'll need to use the appropriate Synt ax when you use it. In this course,you'll usually use HT ML syntax. The CodeRunner Syntax menu looks like this:
Choose the HTML option:
We'll give you additional tips on using the learning environment as needed throughout the course.
Using the CodeRunner® Editor and Saving Your PageIn this course, you'll learn the language o f the web—HT ML (HyperT ext Markup Language) and CSS (Cascading S tyleSheets)—by making your very own web page right here, right now. Let's get started!
First, in CodeRunner, create an ht mlcss1 fo lder, to ho ld your work for this course. In the File Browser area to the left,right-click the Ho me fo lder and select New f o lder...:
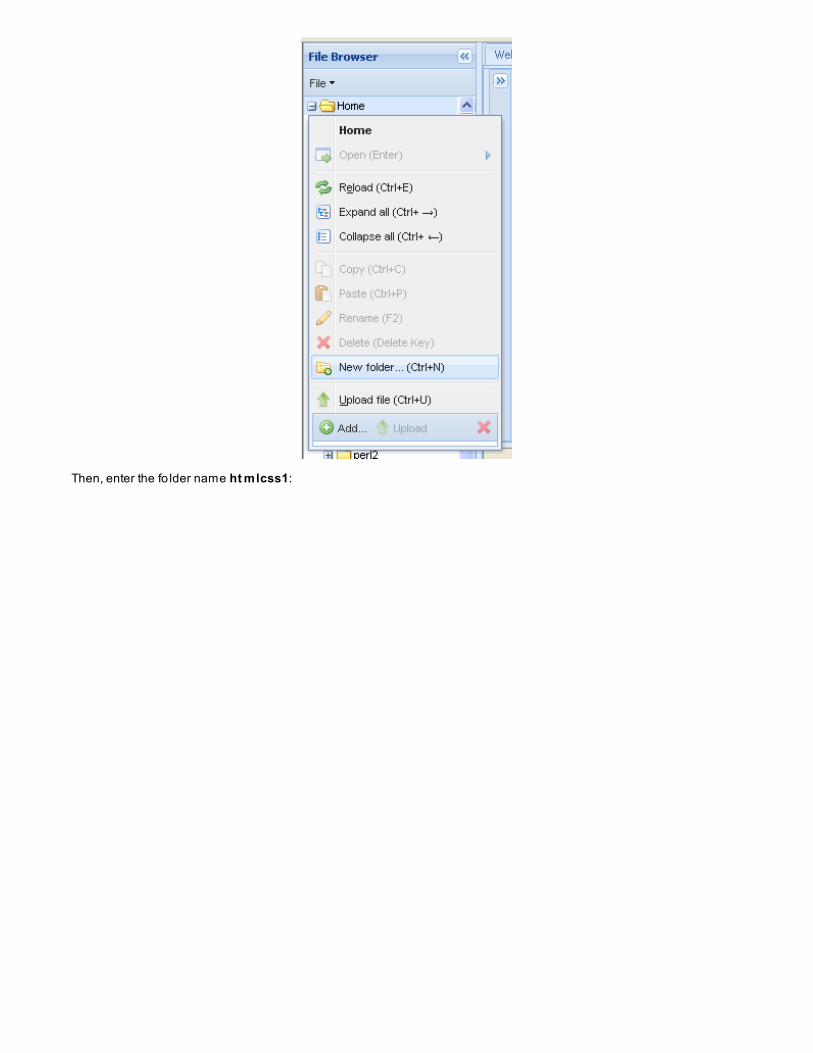
Then, enter the fo lder name ht mlcss1:
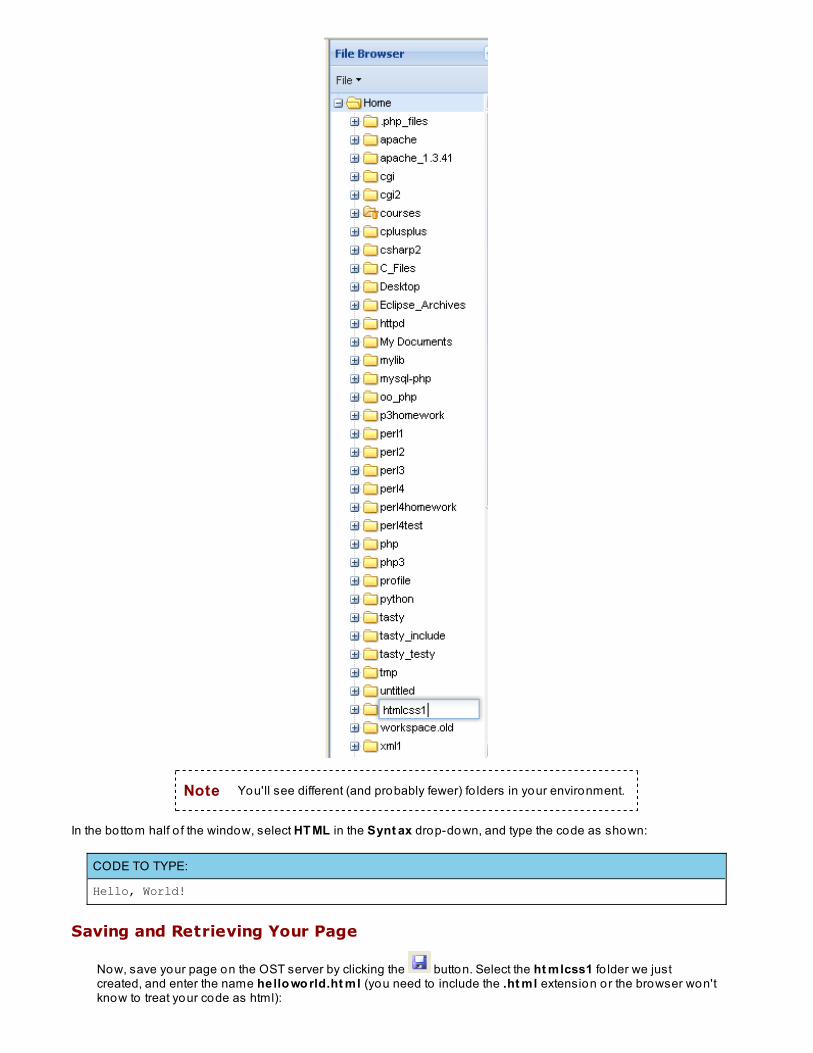
Note You'll see different (and probably fewer) fo lders in your environment.
In the bottom half o f the window, select HT ML in the Synt ax drop-down, and type the code as shown:
CODE TO TYPE:
Hello, World!
Saving and Retrieving Your Page
Now, save your page on the OST server by clicking the button. Select the ht mlcss1 fo lder we justcreated, and enter the name hello wo rld.ht ml (you need to include the .ht ml extension or the browser won'tknow to treat your code as html):
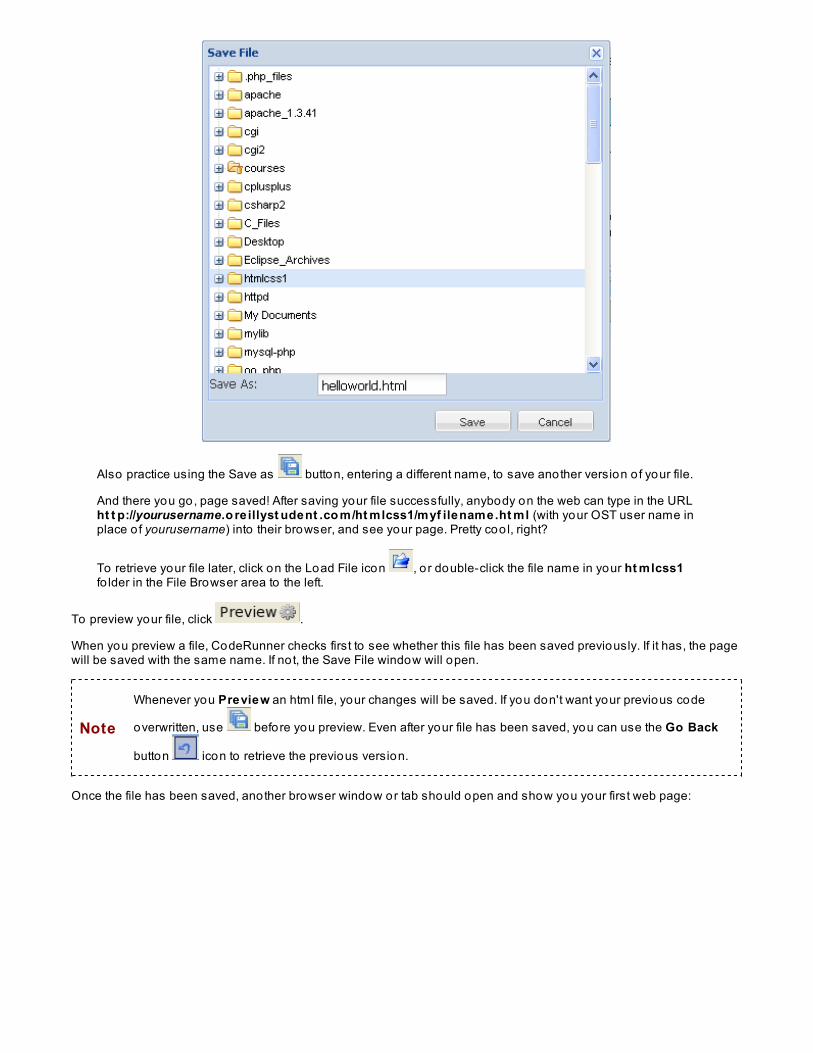
Also practice using the Save as button, entering a different name, to save another version o f your file.
And there you go, page saved! After saving your file successfully, anybody on the web can type in the URLht t p://yourusername.o re illyst udent .co m/ht mlcss1/myf ilename.ht ml (with your OST user name inplace o f yourusername) into their browser, and see your page. Pretty coo l, right?
To retrieve your file later, click on the Load File icon , o r double-click the file name in your ht mlcss1fo lder in the File Browser area to the left.
To preview your file, click .
When you preview a file, CodeRunner checks first to see whether this file has been saved previously. If it has, the pagewill be saved with the same name. If no t, the Save File window will open.
Note
Whenever you Preview an html file, your changes will be saved. If you don't want your previous code
overwritten, use before you preview. Even after your file has been saved, you can use the Go Back
button icon to retrieve the previous version.
Once the file has been saved, another browser window or tab should open and show you your first web page:
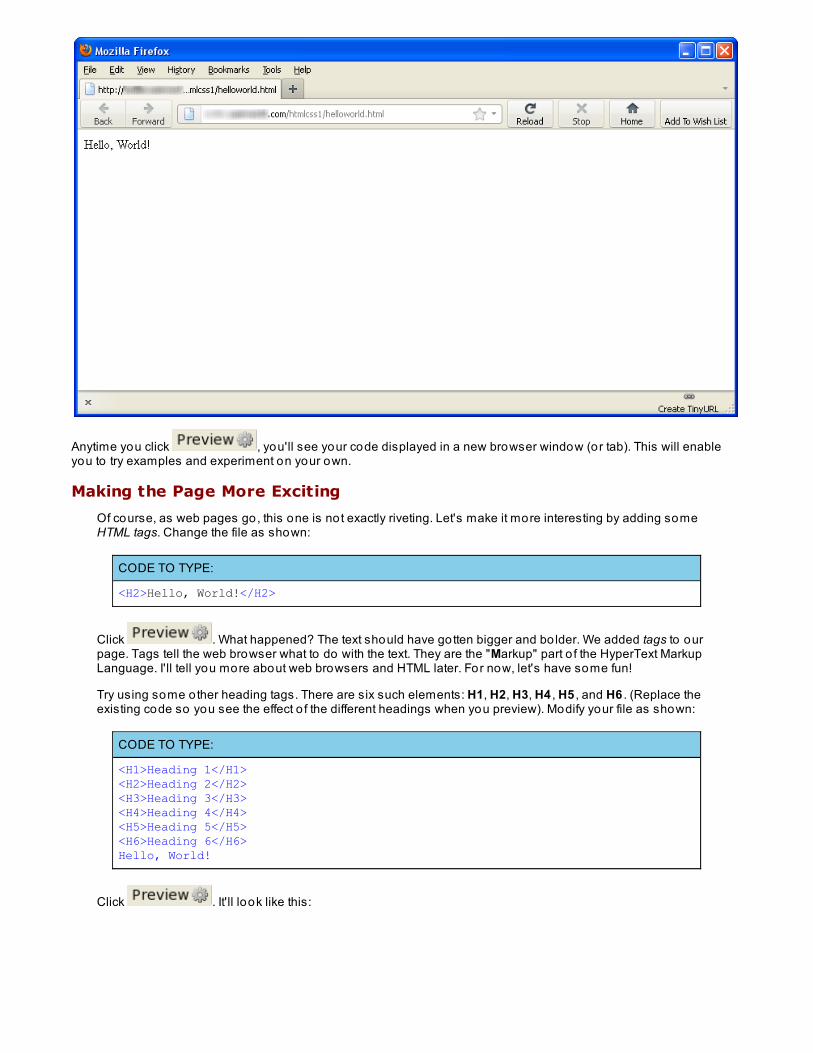
Anytime you click , you'll see your code displayed in a new browser window (or tab). This will enableyou to try examples and experiment on your own.
Making the Page More Exciting
Of course, as web pages go, this one is not exactly riveting. Let's make it more interesting by adding someHTML tags. Change the file as shown:
CODE TO TYPE:
<H2>Hello, World!</H2>
Click . What happened? The text should have gotten bigger and bo lder. We added tags to ourpage. Tags tell the web browser what to do with the text. They are the "Markup" part o f the HyperText MarkupLanguage. I'll tell you more about web browsers and HTML later. For now, let's have some fun!
Try using some other heading tags. There are six such elements: H1, H2, H3, H4 , H5 , and H6 . (Replace theexisting code so you see the effect o f the different headings when you preview). Modify your file as shown:
CODE TO TYPE:
<H1>Heading 1</H1><H2>Heading 2</H2><H3>Heading 3</H3><H4>Heading 4</H4><H5>Heading 5</H5><H6>Heading 6</H6>Hello, World!
Click . It'll look like this:
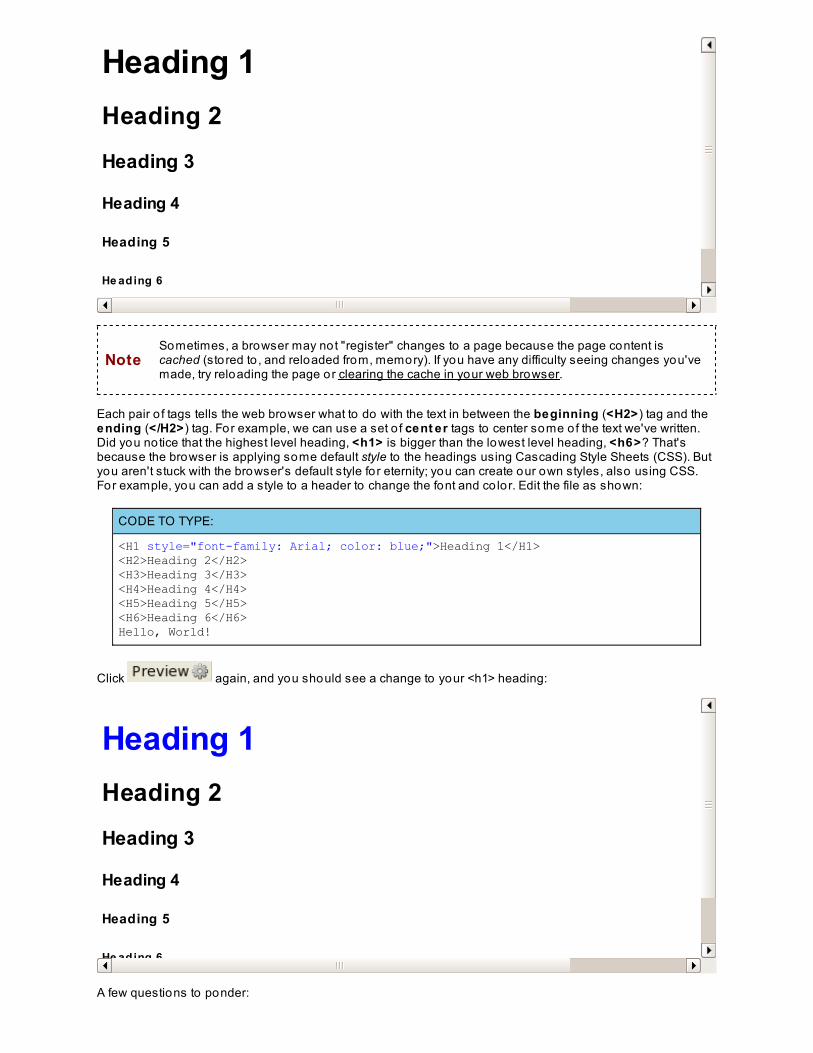
Heading 1Heading 2
Heading 3
Heading 4
Heading 5
He ading 6
NoteSometimes, a browser may not "register" changes to a page because the page content iscached (stored to , and reloaded from, memory). If you have any difficulty seeing changes you'vemade, try reloading the page or clearing the cache in your web browser.
Each pair o f tags tells the web browser what to do with the text in between the beginning (<H2>) tag and theending (</H2>) tag. For example, we can use a set o f cent er tags to center some of the text we've written.Did you notice that the highest level heading, <h1> is bigger than the lowest level heading, <h6>? That'sbecause the browser is applying some default style to the headings using Cascading Style Sheets (CSS). Butyou aren't stuck with the browser's default style fo r eternity; you can create our own styles, also using CSS.For example, you can add a style to a header to change the font and co lor. Edit the file as shown:
CODE TO TYPE:
<H1 style="font-family: Arial; color: blue;">Heading 1</H1><H2>Heading 2</H2><H3>Heading 3</H3><H4>Heading 4</H4><H5>Heading 5</H5><H6>Heading 6</H6>Hello, World!
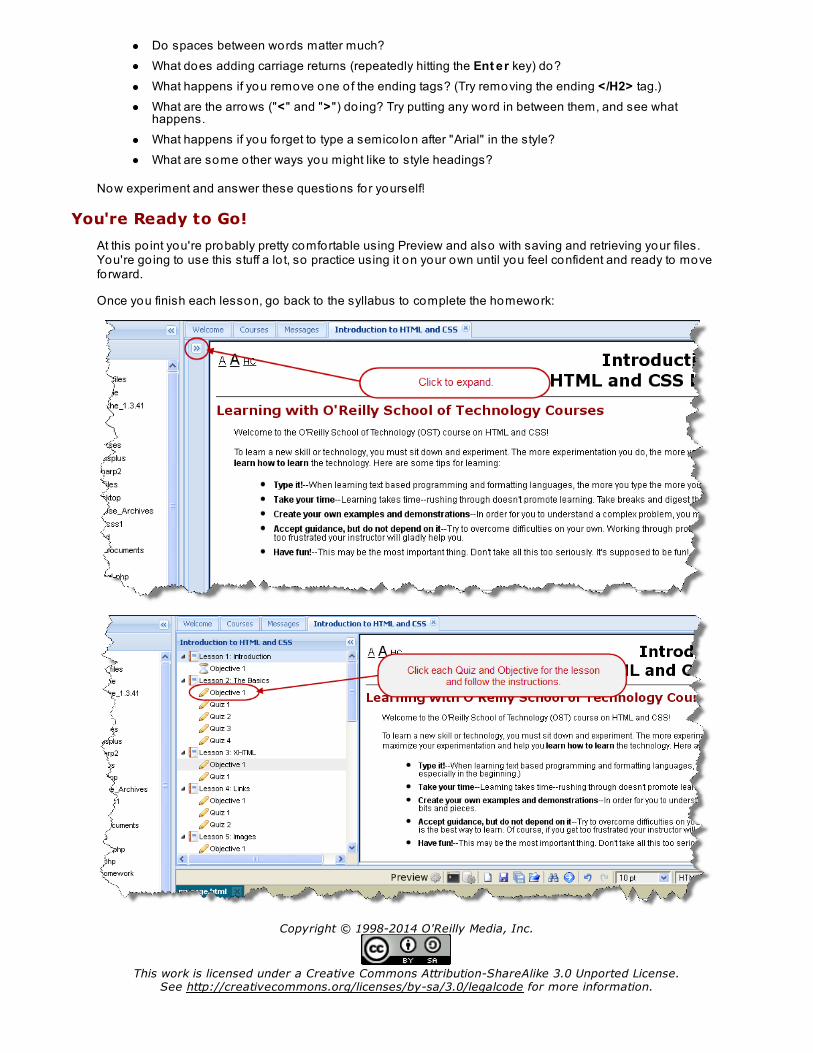
Click again, and you should see a change to your <h1> heading:
Heading 1Heading 2
Heading 3
Heading 4
Heading 5
He ading 6
A few questions to ponder:
Do spaces between words matter much?What does adding carriage returns (repeatedly hitting the Ent er key) do?What happens if you remove one o f the ending tags? (Try removing the ending </H2> tag.)What are the arrows ("<" and ">") do ing? Try putting any word in between them, and see whathappens.What happens if you forget to type a semico lon after "Arial" in the style?What are some other ways you might like to style headings?
Now experiment and answer these questions for yourself!
You're Ready to Go!
At this po int you're probably pretty comfortable using Preview and also with saving and retrieving your files.You're go ing to use this stuff a lo t, so practice using it on your own until you feel confident and ready to moveforward.
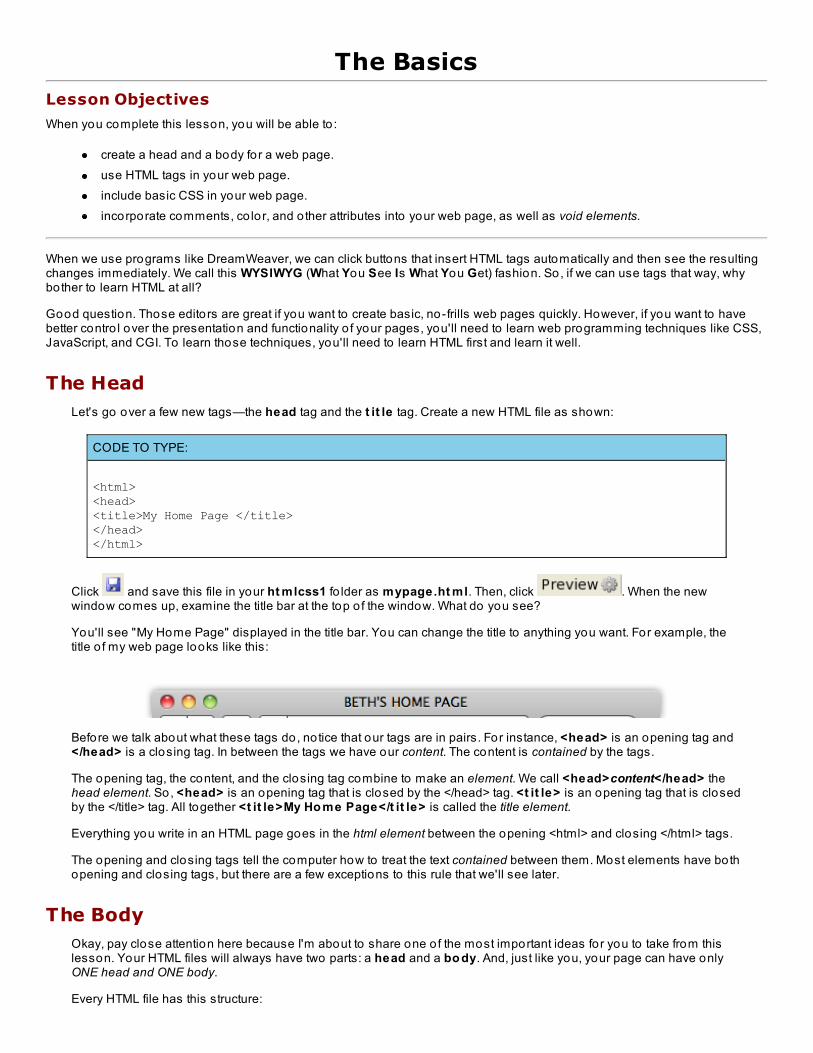
Once you finish each lesson, go back to the syllabus to complete the homework:
Copyright © 1998-2014 O'Reilly Media, Inc.
This work is licensed under a Creative Commons Attribution-ShareAlike 3.0 Unported License.See http://creativecommons.org/licenses/by-sa/3.0/legalcode for more information.
The BasicsLesson Objectives
When you complete this lesson, you will be able to :
create a head and a body for a web page.use HTML tags in your web page.include basic CSS in your web page.incorporate comments, co lor, and o ther attributes into your web page, as well as void elements.
When we use programs like DreamWeaver, we can click buttons that insert HTML tags automatically and then see the resultingchanges immediately. We call this WYSIWYG (What You See Is What You Get) fashion. So, if we can use tags that way, whybother to learn HTML at all?
Good question. Those editors are great if you want to create basic, no-frills web pages quickly. However, if you want to havebetter contro l over the presentation and functionality o f your pages, you'll need to learn web programming techniques like CSS,JavaScript, and CGI. To learn those techniques, you'll need to learn HTML first and learn it well.
The HeadLet's go over a few new tags—the head tag and the t it le tag. Create a new HTML file as shown:
CODE TO TYPE:
<html><head><title>My Home Page </title></head></html>
Click and save this file in your ht mlcss1 fo lder as mypage.ht ml. Then, click . When the newwindow comes up, examine the title bar at the top o f the window. What do you see?
You'll see "My Home Page" displayed in the title bar. You can change the title to anything you want. For example, thetitle o f my web page looks like this:
Before we talk about what these tags do, notice that our tags are in pairs. For instance, <head> is an opening tag and</head> is a closing tag. In between the tags we have our content. The content is contained by the tags.
The opening tag, the content, and the closing tag combine to make an element. We call <head>content</head> thehead element. So, <head> is an opening tag that is closed by the </head> tag. <t it le> is an opening tag that is closedby the </title> tag. All together <t it le>My Ho me Page</t it le> is called the title element.
Everything you write in an HTML page goes in the html element between the opening <html> and closing </html> tags.
The opening and closing tags tell the computer how to treat the text contained between them. Most elements have bothopening and closing tags, but there are a few exceptions to this rule that we'll see later.
The BodyOkay, pay close attention here because I'm about to share one o f the most important ideas for you to take from thislesson. Your HTML files will always have two parts: a head and a bo dy. And, just like you, your page can have onlyONE head and ONE body.
Every HTML file has this structure:
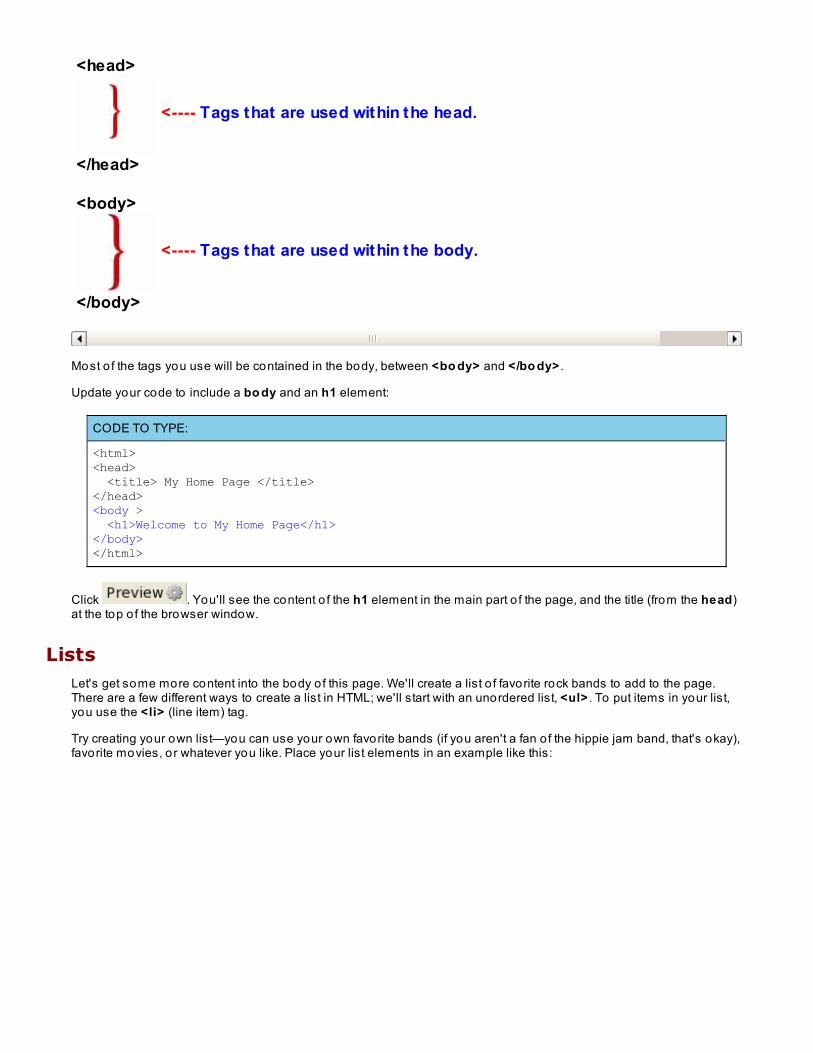
<head>
<---- Tags that are used within the head.
</head>
<body>
<---- Tags that are used within the body.
</body>
Most o f the tags you use will be contained in the body, between <bo dy> and </bo dy> .
Update your code to include a bo dy and an h1 element:
CODE TO TYPE:
<html><head> <title> My Home Page </title></head><body > <h1>Welcome to My Home Page</h1></body></html>
Click . You'll see the content o f the h1 element in the main part o f the page, and the title (from the head)at the top o f the browser window.
ListsLet's get some more content into the body o f this page. We'll create a list o f favorite rock bands to add to the page.There are a few different ways to create a list in HTML; we'll start with an unordered list, <ul> . To put items in your list,you use the <li> (line item) tag.
Try creating your own list—you can use your own favorite bands (if you aren't a fan o f the hippie jam band, that's okay),favorite movies, or whatever you like. Place your list elements in an example like this:
CODE TO TYPE:
<html><head> <title> My Home Page </title></head><body > <h1>Welcome to My Home Page</h1> <p> My favorite live rock bands: </p> <ul> <li>Phish</li> <li>Blues Traveler</li> <li>Widespread Panic</li> <li>Pink Floyd</li> <li>Rolling Stones</li> </ul></body></html>
Click . The ul element contains many li elements, and is closed with a </ul> tag that comes after all o fthe li elements. Each o f the li elements is closed with a </li> tag.
So, what happens if you change ul to o l?:
CODE TO TYPE:
<html><head> <title> My Home Page </title></head><body > <h1>Welcome to My Home Page</h1> <p> My favorite live rock bands: </p> <ol> <li>Phish</li> <li>Blues Traveler</li> <li>Widespread Panic</li> <li>Pink Floyd</li> <li>Rolling Stones</li> </ol></body></html>
Click . The o l tag specifies an ordered list, so instead o f bullets in front o f the list items, you getnumbers.
CSSSo far, so good! You've got a web page with some content. But what if you want to change the way your content looks?For instance, you might want to change the font o f the text on the page, or add a background co lor, o r even change theway the list items are displayed.
That's when we want to use Cascading Style Sheets (CSS). CSS is how you style your pages. Let's try some CSS now.We'll start by changing the background co lor o f the page:
CODE TO TYPE:
<html><head> <title> My Home Page </title><style> body { background-color: #d9d9d9; }</style></head><body > <h1>Welcome to My Home Page</h1> <p> My favorite live rock bands: </p> <ol> <li>Phish</li> <li>Blues Traveler</li> <li>Widespread Panic</li> <li>Pink Floyd</li> <li>Rolling Stones</li> </ol></body></html>
Click . Your page should have a light grey background now.
You're probably thinking that CSS looks a whole lo t different from HTML. That's because it's a whole differentlanguage! But don't worry, I have every confidence that you'll be able to learn it. We'll go into a lo t more detail aboutCSS later, but fo r now, keep these facts in mind:
Within the <st yle> element, bo dy is the selector. It "selects" the element in your page to be styled. In this case, weselected the body to style, so the background o f the entire page changed co lor.
backgro und-co lo r is the property name. This is the style property you're specifying. There are lo ts o f properties youcan use to style your elements.
#d9d9d9 is the property value. This value changes the style o f your element. In this case, the property value is a co lor.I know—it doesn't look like a co lor, but it is. (More on that subject in a minute).
The property name and property value are separated by a co lon (:). At the end o f the line is a semico lon (;). Don't fo rgetthe semico lon (;)! It's a common mistake and if you make it, your CSS won't work. If you run into problems, check tomake sure your semico lons are in order.
All o f the CSS is contained in the <st yle> element. This is typically where you'll put your style, but you can also addstyle directly to an element, o r put all your style into a separate file altogether. (You'll see how to do this later too.)
So, how do you think you'd set the background co lor o f the o l element? Here's a hint: the co lor code for white is: #ffffff.
ColorsThe six characters fo llowing the # are the hexadecimal representation o f the co lors red, green, and blue. To get o therco lors, all you have to do is change each character to one o f sixteen values: 0 , 1, 2, 3, 4 , 5 , 6 , 7 , 8, 9 , A, B, C, D, E, F.Try changing these characters and see what kind o f co lors you can make. The first two characters determine how muchred is used. If you do not want any red in the co lor, set the value o f the first two characters to 00. If you want toincorporate just a little red, then the value to use would be 01. A little more? Use 02! You get the idea.
The second two characters determine how much green will be used, and the last two characters determine how muchblue will be used.
If you want a bright red co lor, you would want to use the most red possible (and the least amounts o f blue and green),so you would use #f f 0000 .
If you want less red, you might use #770000 .
Now that you know more about co lors, let's experiment a bit. Try setting the background co lor o f the page to o ther
co lors. Try setting the background co lor o f the list to a different co lor.
What if you want to set the background co lor o f an individual list item? Can you think o f how you might do this?
AttributesTo set the background co lor o f an individual list item (or to style it in any way) we need a way o f selecting that item. Ifwe used li as the selector, we'd wind up selecting all o f the list items, rather than just one o f them.
To determine how you'd style an individual list item (for example, if you wanted to set the background co lor o f "PinkFloyd" to pink), you first need to know about attributes.
What's an attribute? It's an extra bit o f information added to an element in the element's opening tag. class is anattribute you'll use o ften. Let's try adding a class to a list item and see how you can use that to style the list item.
CODE TO TYPE:
<html><head> <title> My Home Page </title> <style> body { background-color: #d9d9d9; } .pink { background-color: #ffcccc; } </style></head><body > <h1>Welcome to My Home Page</h1> <p> My favorite live rock bands: </p> <ol> <li>Phish</li> <li>Blues Traveler</li> <li>Widespread Panic</li> <li class="pink">Pink Floyd</li> <li>Rolling Stones</li> </ol></body></html>
In this example, you'll no tice that we added an attribute named class with the value "pink" to the list item with thecontent "Pink Floyd" by typing:
<li class="pink">
The value o f an attribute is always enclosed in quotation marks. In the CSS, we added a class selector by typing:
.pink { background-co lor: #ffcccc;}
Because we are using a class to select the element to be styled, rather than using the element's name, we need to puta . ( period) in front o f the class name in the CSS. That's how CSS knows it's a class and not an element.
Click to see the pink background on the Pink Floyd list item. Why do you think the pink backgroundextends all the way across the screen?
Experiment! What happens if you leave out the period? Try changing the background co lor o f each o f the items in thelist using a class. What happens if you use the pink class on more than one list item?
Let's try one more style. Change the type o f the list items using the CSS property list -st yle-t ype like this:
CODE TO TYPE:
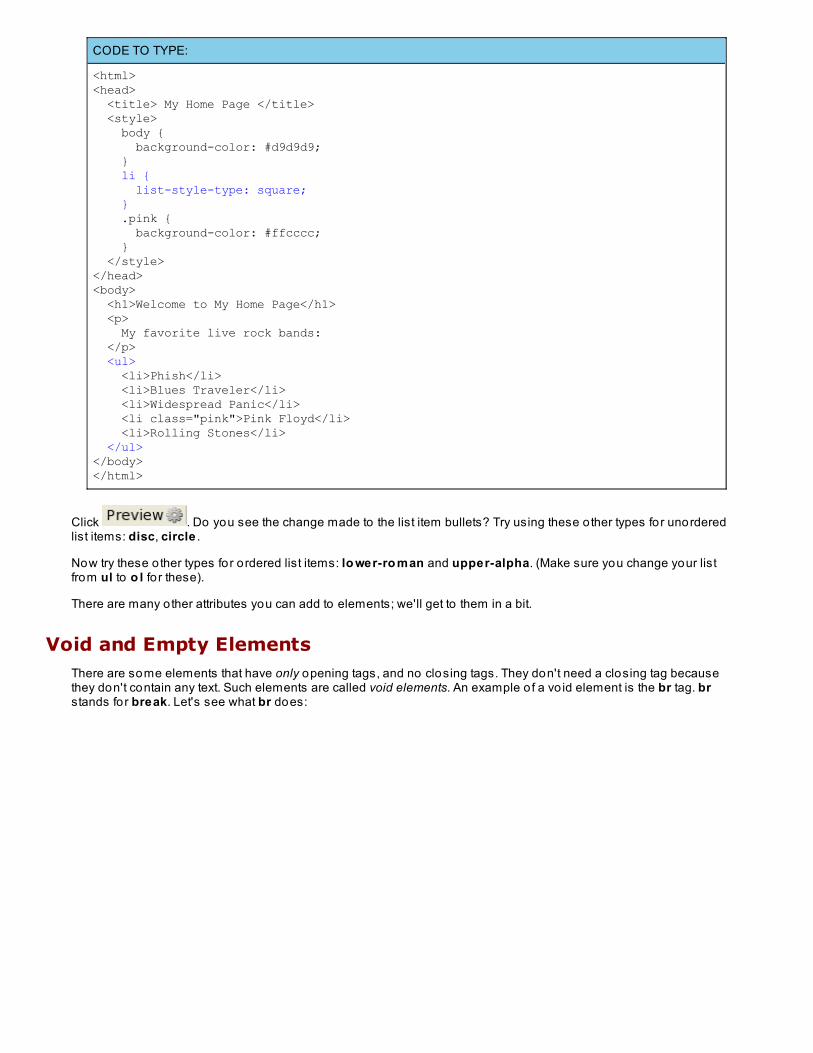
<html><head> <title> My Home Page </title> <style> body { background-color: #d9d9d9; } li { list-style-type: square; } .pink { background-color: #ffcccc; } </style></head><body> <h1>Welcome to My Home Page</h1> <p> My favorite live rock bands: </p> <ul> <li>Phish</li> <li>Blues Traveler</li> <li>Widespread Panic</li> <li class="pink">Pink Floyd</li> <li>Rolling Stones</li> </ul></body></html>
Click . Do you see the change made to the list item bullets? Try using these o ther types for unorderedlist items: disc, circle .
Now try these o ther types for ordered list items: lo wer-ro man and upper-alpha. (Make sure you change your listfrom ul to o l fo r these).
There are many o ther attributes you can add to elements; we'll get to them in a bit.
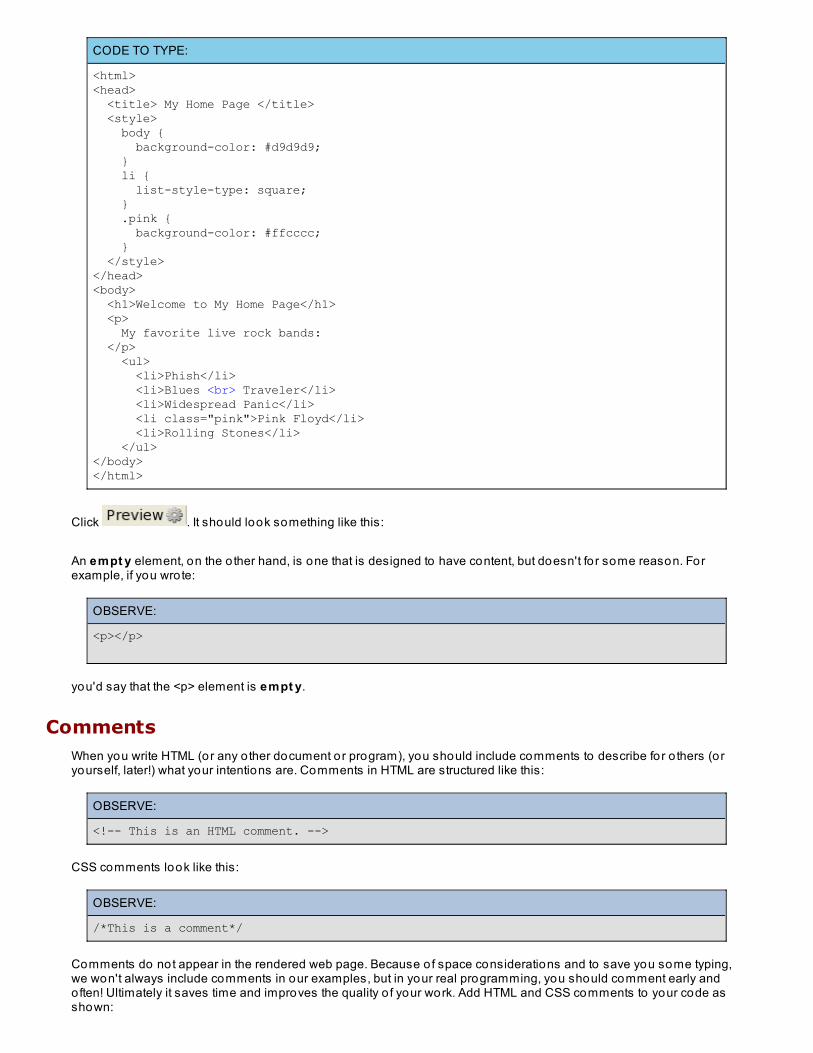
Void and Empty ElementsThere are some elements that have only opening tags, and no closing tags. They don't need a closing tag becausethey don't contain any text. Such elements are called void elements. An example o f a vo id element is the br tag. brstands for break. Let's see what br does:
CODE TO TYPE:
<html><head> <title> My Home Page </title> <style> body { background-color: #d9d9d9; } li { list-style-type: square; } .pink { background-color: #ffcccc; } </style></head><body> <h1>Welcome to My Home Page</h1> <p> My favorite live rock bands: </p> <ul> <li>Phish</li> <li>Blues <br> Traveler</li> <li>Widespread Panic</li> <li class="pink">Pink Floyd</li> <li>Rolling Stones</li> </ul></body></html>
Click . It should look something like this:
An empt y element, on the o ther hand, is one that is designed to have content, but doesn't fo r some reason. Forexample, if you wrote:
OBSERVE:
<p></p>
you'd say that the <p> element is empt y.
CommentsWhen you write HTML (or any o ther document or program), you should include comments to describe for o thers (oryourself, later!) what your intentions are. Comments in HTML are structured like this:
OBSERVE:
<!-- This is an HTML comment. -->
CSS comments look like this:
OBSERVE:
/*This is a comment*/
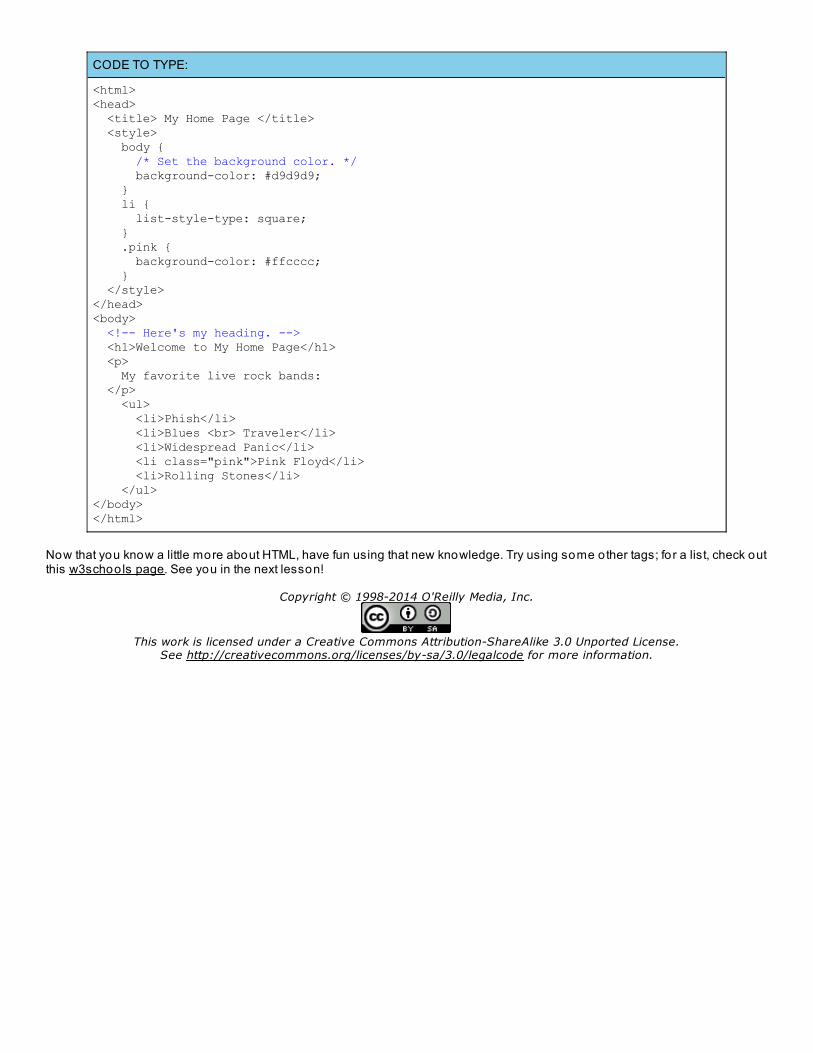
Comments do not appear in the rendered web page. Because o f space considerations and to save you some typing,we won't always include comments in our examples, but in your real programming, you should comment early andoften! Ultimately it saves time and improves the quality o f your work. Add HTML and CSS comments to your code asshown:
CODE TO TYPE:
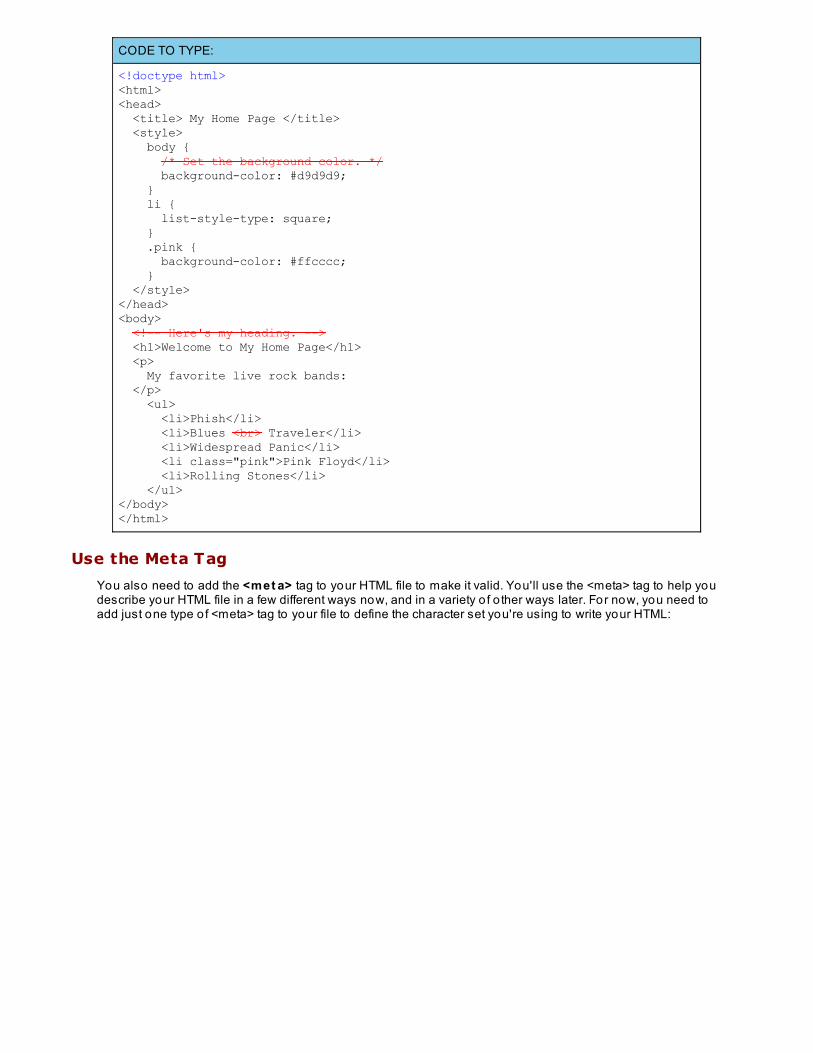
<html><head> <title> My Home Page </title> <style> body { /* Set the background color. */ background-color: #d9d9d9; } li { list-style-type: square; } .pink { background-color: #ffcccc; } </style></head><body> <!-- Here's my heading. --> <h1>Welcome to My Home Page</h1> <p> My favorite live rock bands: </p> <ul> <li>Phish</li> <li>Blues <br> Traveler</li> <li>Widespread Panic</li> <li class="pink">Pink Floyd</li> <li>Rolling Stones</li> </ul></body></html>
Now that you know a little more about HTML, have fun using that new knowledge. Try using some other tags; fo r a list, check outthis w3schools page. See you in the next lesson!
Copyright © 1998-2014 O'Reilly Media, Inc.
This work is licensed under a Creative Commons Attribution-ShareAlike 3.0 Unported License.See http://creativecommons.org/licenses/by-sa/3.0/legalcode for more information.
Syntax and SemanticsLesson Objectives
When you complete this lesson, you will be able to :
tell the browser you're writing HTML with doctype.use the meta tag.close your elements with closing tags and quote your attributes.structure elements.use semantics in HTML.
Now that you know the basics o f HTML and CSS, you're ready to learn a more about the requirements for creating a valid HTMLdocument, and to experiment with more o f the elements you'll use to create structure and semantics in your HTML document.
SyntaxHTML has some rules that a document must fo llow in order to be valid. Valid according to whom, you might ask? YourHTML document must be valid according to the Wo rld Wide Web Co nso rt ium , o r the W3C, the governing body thatcreates and manages the HTML and CSS standards that browser-makers implement. As you may know, the mostrecent version o f HTML is HTML5, a standard that's currently still in development, but already implemented by most o fthe major browsers (Chrome, Firefox, Safari, Internet Explorer, and Opera). You can validate an HTML document at theW3C Markup Validation Service (we'll talk more about validation later in this course).
NoteAnother version o f HTML, XHTML 1.1, is also a current standard that is implemented by some browsers.XHTML, unlike HTML, is based on XML, which has very strict syntax rules. We're go ing to touch onXHTML at the end o f this course, but we'll focus on HTML5 for most o f our lessons.
Tell the Browser You're Writing HTML with Doctype
So, the first type o f syntax we need to add to an HTML document to make it valid is a doctype declaration(DTD) to the top o f our file. A doctype declaration tells the browser which type o f HTML to expect in your webpages and which set o f W3C standards you are adhering to in your files. For HTML5, it's really straightforward,because HTML5 is the default version o f HTML which modern browsers use, and because HTML is backwardcompatible, o lder versions o f HTML will still work in browsers that support newer versions like HTML5.
To inform your browser that you're writing HTML, you'll need to add one short line to the top o f yourdocument. If it's not already open, go ahead and open your mypage.ht ml file, and modify it as shown:
CODE TO TYPE:
<!doctype html><html><head> <title> My Home Page </title> <style> body { /* Set the background color. */ background-color: #d9d9d9; } li { list-style-type: square; } .pink { background-color: #ffcccc; } </style></head><body> <!-- Here's my heading. --> <h1>Welcome to My Home Page</h1> <p> My favorite live rock bands: </p> <ul> <li>Phish</li> <li>Blues <br> Traveler</li> <li>Widespread Panic</li> <li class="pink">Pink Floyd</li> <li>Rolling Stones</li> </ul></body></html>
Use the Meta Tag
You also need to add the <met a> tag to your HTML file to make it valid. You'll use the <meta> tag to help youdescribe your HTML file in a few different ways now, and in a variety o f o ther ways later. For now, you need toadd just one type o f <meta> tag to your file to define the character set you're using to write your HTML:
CODE TO TYPE:
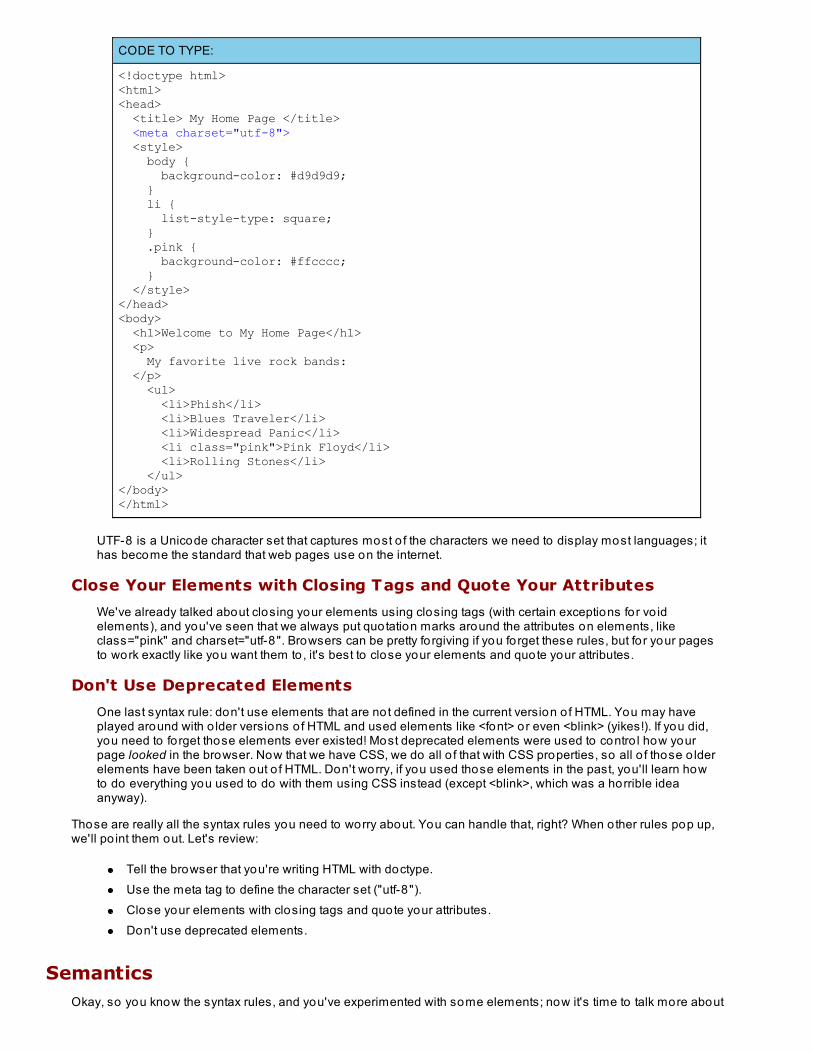
<!doctype html><html><head> <title> My Home Page </title> <meta charset="utf-8"> <style> body { background-color: #d9d9d9; } li { list-style-type: square; } .pink { background-color: #ffcccc; } </style></head><body> <h1>Welcome to My Home Page</h1> <p> My favorite live rock bands: </p> <ul> <li>Phish</li> <li>Blues Traveler</li> <li>Widespread Panic</li> <li class="pink">Pink Floyd</li> <li>Rolling Stones</li> </ul></body></html>
UTF-8 is a Unicode character set that captures most o f the characters we need to display most languages; ithas become the standard that web pages use on the internet.
Close Your Elements with Closing Tags and Quote Your Attributes
We've already talked about closing your elements using closing tags (with certain exceptions for vo idelements), and you've seen that we always put quotation marks around the attributes on elements, likeclass="pink" and charset="utf-8". Browsers can be pretty fo rgiving if you forget these rules, but fo r your pagesto work exactly like you want them to , it's best to close your elements and quote your attributes.
Don't Use Deprecated Elements
One last syntax rule: don't use elements that are not defined in the current version o f HTML. You may haveplayed around with o lder versions o f HTML and used elements like <font> or even <blink> (yikes!). If you did,you need to forget those elements ever existed! Most deprecated elements were used to contro l how yourpage looked in the browser. Now that we have CSS, we do all o f that with CSS properties, so all o f those o lderelements have been taken out o f HTML. Don't worry, if you used those elements in the past, you'll learn howto do everything you used to do with them using CSS instead (except <blink>, which was a horrible ideaanyway).
Those are really all the syntax rules you need to worry about. You can handle that, right? When o ther rules pop up,we'll po int them out. Let's review:
Tell the browser that you're writing HTML with doctype.Use the meta tag to define the character set ("utf-8").Close your elements with closing tags and quote your attributes.Don't use deprecated elements.
SemanticsOkay, so you know the syntax rules, and you've experimented with some elements; now it's time to talk more about
the meaning o f HTML. You understand that the <h1> element refers to a top level heading, and that the <ul> and <o l>elements refer to an unordered list and an ordered list, respectively. And you've probably guessed that the <p> elementindicates a paragraph o f text.
The meaning associated with different elements in HTML is called semantics. By marking up your content withelements, you're telling the browser, "hey, this is a heading," or "this is a paragraph," or even "this is an emphasizedword" (the <em> element), o r "this is an address" (the <address> element).
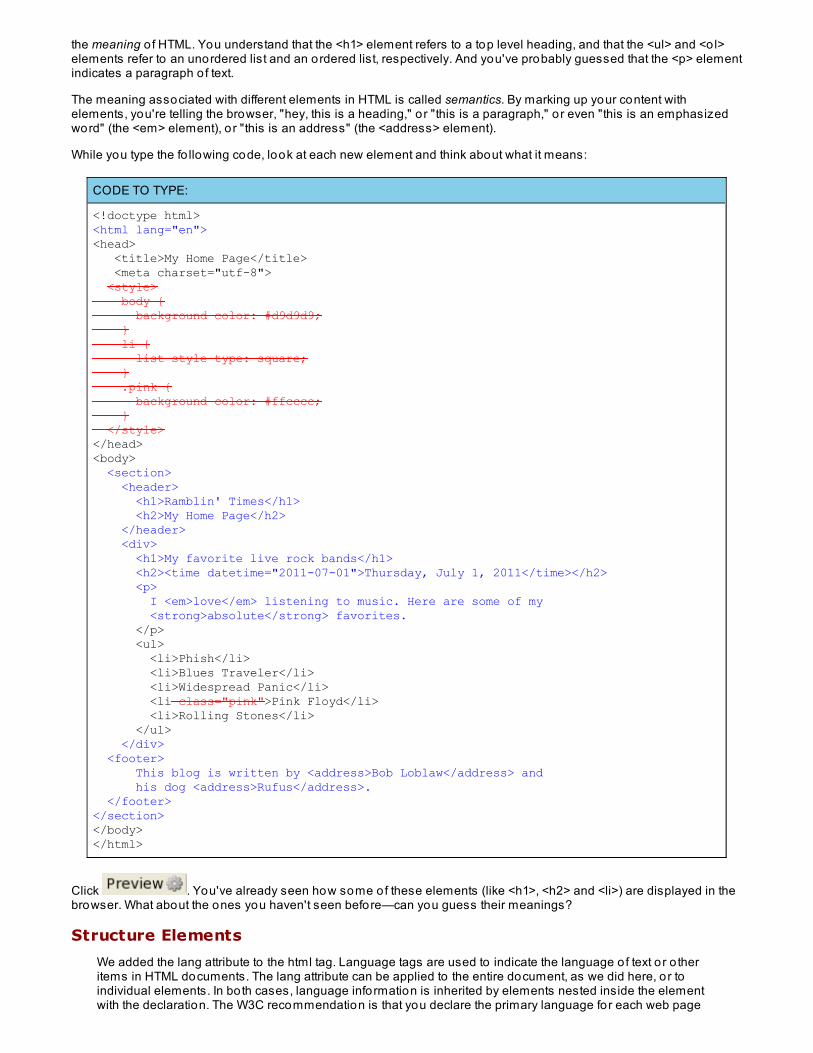
While you type the fo llowing code, look at each new element and think about what it means:
CODE TO TYPE:
<!doctype html><html lang="en"><head> <title>My Home Page</title> <meta charset="utf-8"> <style> body { background-color: #d9d9d9; } li { list-style-type: square; } .pink { background-color: #ffcccc; } </style></head><body> <section> <header> <h1>Ramblin' Times</h1> <h2>My Home Page</h2> </header> <div> <h1>My favorite live rock bands</h1> <h2><time datetime="2011-07-01">Thursday, July 1, 2011</time></h2> <p> I <em>love</em> listening to music. Here are some of my <strong>absolute</strong> favorites. </p> <ul> <li>Phish</li> <li>Blues Traveler</li> <li>Widespread Panic</li> <li class="pink">Pink Floyd</li> <li>Rolling Stones</li> </ul> </div> <footer> This blog is written by <address>Bob Loblaw</address> and his dog <address>Rufus</address>. </footer></section></body></html>
Click . You've already seen how some of these elements (like <h1>, <h2> and <li>) are displayed in thebrowser. What about the ones you haven't seen before—can you guess their meanings?
Structure Elements
We added the lang attribute to the html tag. Language tags are used to indicate the language o f text or o theritems in HTML documents. The lang attribute can be applied to the entire document, as we did here, or toindividual elements. In both cases, language information is inherited by elements nested inside the elementwith the declaration. The W3C recommendation is that you declare the primary language for each web page
with the lang attribute inside the html tag. This is meant to assist search engines and browsers.
Many o f the elements used in the code you just typed are concerned with creating structure, as well asmeaning, in your page. For instance, <section> is present to create a section o f content. In this case, we haveonly one major area o f content, so the section is also most o f the content in the page. <h1> and <h2> areused to create headings, and you may have guessed that the <header> element is used to define the headerof a page. You can have a header fo r your whole page, or if you have more than one section, you can haveone header per section. The same applies to <footer>, which is used to present information like the author o fthe content it's related to , or links to related documents, and so on. Again, you can have a single footer persection or fo r the entire page.
So, about this <div> element. <div> has been around a long time (much longer than <section>, <header>, and<footer>, which are all new in HTML5) and it's really a generic element that divides up your page into logicalgroups o f content. Even though elements like <section>, <header>, and <footer> do a lo t o f the work that<div> used to do, we still use <div> sometimes, fo r instance, when we want to group content together fo rstyling and layout purposes.
Note
Unfortunately, as o f this writing, the HTML5 structure elements <section>, <header>, <footer>(and a few others) are not well supported in all browsers yet, particularly in o lder versions o fInternet Explorer (fo r example, IE 6 , 7, and 8 , which a lo t o f users are still using). We advise youto use <div> in place o f these elements if you know your audience may be using one o f thosebrowsers. We'll show you how to do this in just a moment.
Flow Elements
Other elements, like <em>, <strong>, <time>, and <address> are less about structure and more aboutmeaning. They are typically found within blocks o f text, like a paragraph (<p>). They tell your browser that, fo rexample, Thursday, July 1, 2011 is a time, the word "love" is emphasized, and the word "abso lute" isimportant.
The browser displays content in the <em> element in italic style, and the content in the <strong> in bo ld style.This is the default style that the browser uses for these elements, but you can change that using CSS if youlike. Just don't use the <em> and <strong> elements because o f the look they give the content; use theseelements only fo r the meaning they give the content within them. You can make the content look any way youwant it to with CSS!
Block and Inline Display
<address> is a little different from the o ther flow elements. (Take a look at the page again here.) Mostbrowsers add a line break before and after <address> text.
By default, elements are displayed either as a block, meaning that they take up the entire width o f the page, orinline, meaning that they flow in with the rest o f the content on the line. Each block element takes up arectangular space that fills the width o f the page, like this:
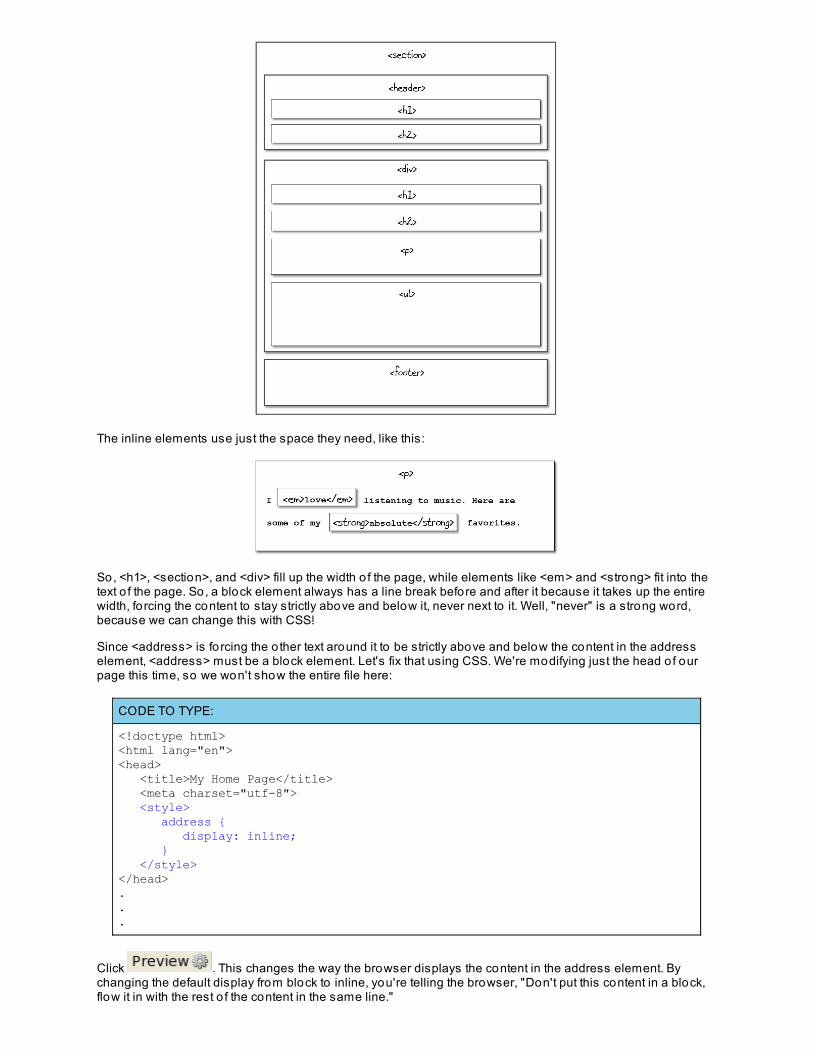
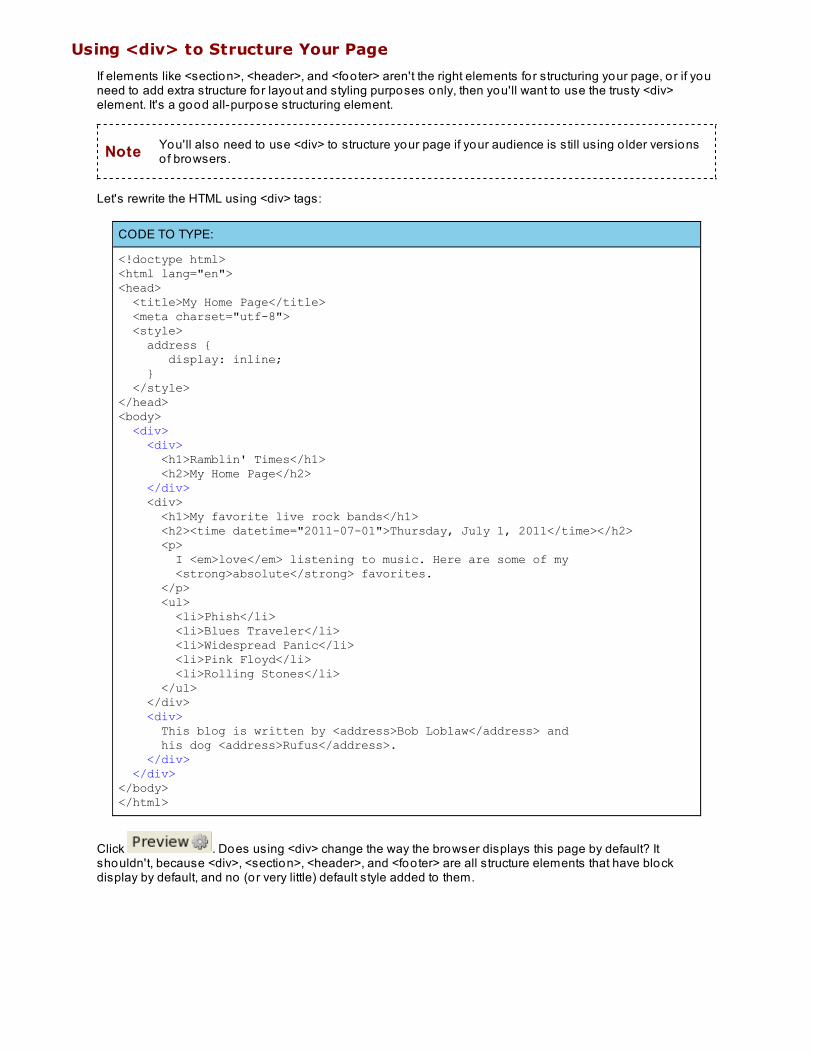
The inline elements use just the space they need, like this:
So, <h1>, <section>, and <div> fill up the width o f the page, while elements like <em> and <strong> fit into thetext o f the page. So, a block element always has a line break before and after it because it takes up the entirewidth, fo rcing the content to stay strictly above and below it, never next to it. Well, "never" is a strong word,because we can change this with CSS!
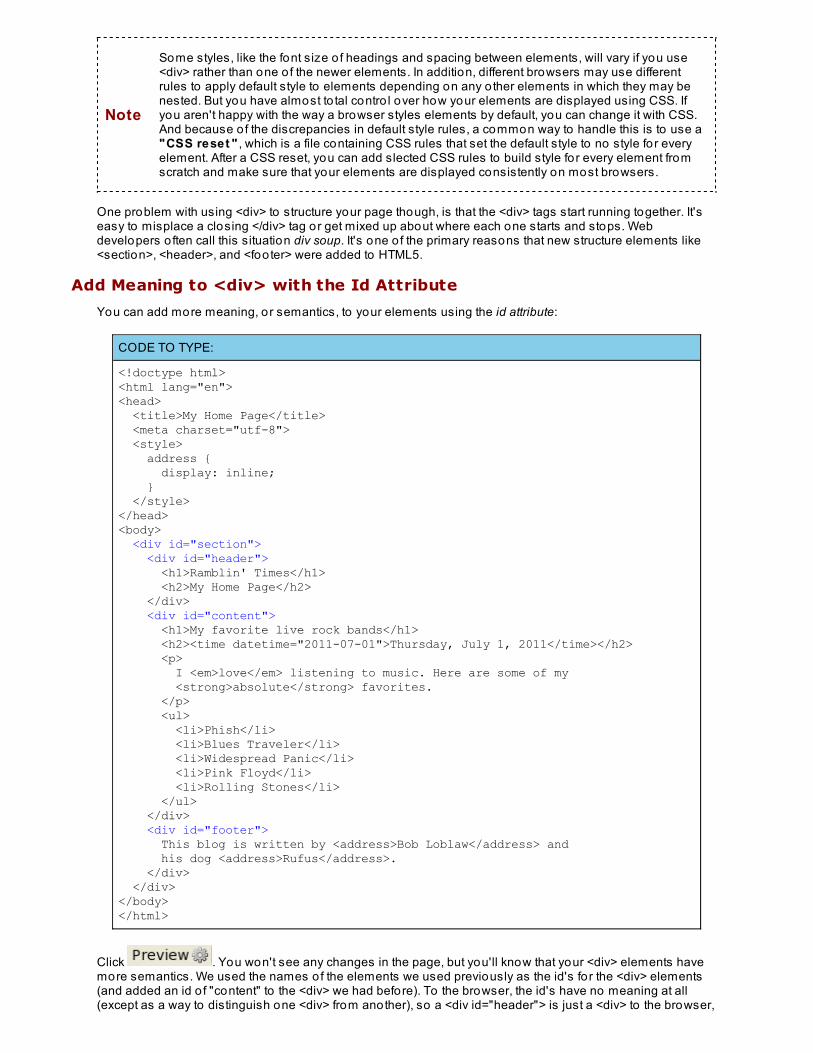
Since <address> is fo rcing the o ther text around it to be strictly above and below the content in the addresselement, <address> must be a block element. Let's fix that using CSS. We're modifying just the head o f ourpage this time, so we won't show the entire file here:
CODE TO TYPE:
<!doctype html><html lang="en"><head> <title>My Home Page</title> <meta charset="utf-8"> <style> address { display: inline; } </style></head>...
Click . This changes the way the browser displays the content in the address element. Bychanging the default display from block to inline, you're telling the browser, "Don't put this content in a block,flow it in with the rest o f the content in the same line."
Using <div> to Structure Your Page
If elements like <section>, <header>, and <footer> aren't the right elements for structuring your page, or if youneed to add extra structure for layout and styling purposes only, then you'll want to use the trusty <div>element. It's a good all-purpose structuring element.
Note You'll also need to use <div> to structure your page if your audience is still using o lder versionsof browsers.
Let's rewrite the HTML using <div> tags:
CODE TO TYPE:
<!doctype html><html lang="en"><head> <title>My Home Page</title> <meta charset="utf-8"> <style> address { display: inline; } </style></head><body> <div> <div> <h1>Ramblin' Times</h1> <h2>My Home Page</h2> </div> <div> <h1>My favorite live rock bands</h1> <h2><time datetime="2011-07-01">Thursday, July 1, 2011</time></h2> <p> I <em>love</em> listening to music. Here are some of my <strong>absolute</strong> favorites. </p> <ul> <li>Phish</li> <li>Blues Traveler</li> <li>Widespread Panic</li> <li>Pink Floyd</li> <li>Rolling Stones</li> </ul> </div> <div> This blog is written by <address>Bob Loblaw</address> and his dog <address>Rufus</address>. </div> </div></body></html>
Click . Does using <div> change the way the browser displays this page by default? Itshouldn't, because <div>, <section>, <header>, and <footer> are all structure elements that have blockdisplay by default, and no (or very little) default style added to them.
Note
Some styles, like the font size o f headings and spacing between elements, will vary if you use<div> rather than one o f the newer elements. In addition, different browsers may use differentrules to apply default style to elements depending on any o ther elements in which they may benested. But you have almost to tal contro l over how your elements are displayed using CSS. Ifyou aren't happy with the way a browser styles elements by default, you can change it with CSS.And because o f the discrepancies in default style rules, a common way to handle this is to use a"CSS reset " , which is a file containing CSS rules that set the default style to no style fo r everyelement. After a CSS reset, you can add slected CSS rules to build style fo r every element fromscratch and make sure that your elements are displayed consistently on most browsers.
One problem with using <div> to structure your page though, is that the <div> tags start running together. It'seasy to misplace a closing </div> tag or get mixed up about where each one starts and stops. Webdevelopers o ften call this situation div soup. It's one o f the primary reasons that new structure elements like<section>, <header>, and <footer> were added to HTML5.
Add Meaning to <div> with the Id Attribute
You can add more meaning, or semantics, to your elements using the id attribute:
CODE TO TYPE:
<!doctype html><html lang="en"><head> <title>My Home Page</title> <meta charset="utf-8"> <style> address { display: inline; } </style></head><body> <div id="section"> <div id="header"> <h1>Ramblin' Times</h1> <h2>My Home Page</h2> </div> <div id="content"> <h1>My favorite live rock bands</h1> <h2><time datetime="2011-07-01">Thursday, July 1, 2011</time></h2> <p> I <em>love</em> listening to music. Here are some of my <strong>absolute</strong> favorites. </p> <ul> <li>Phish</li> <li>Blues Traveler</li> <li>Widespread Panic</li> <li>Pink Floyd</li> <li>Rolling Stones</li> </ul> </div> <div id="footer"> This blog is written by <address>Bob Loblaw</address> and his dog <address>Rufus</address>. </div> </div></body></html>
Click . You won't see any changes in the page, but you'll know that your <div> elements havemore semantics. We used the names o f the elements we used previously as the id's fo r the <div> elements(and added an id o f "content" to the <div> we had before). To the browser, the id's have no meaning at all(except as a way to distinguish one <div> from another), so a <div id="header"> is just a <div> to the browser,
unlike a <header>, which does have special meaning (another advantage o f having these new elements)—itmeans "this is a header." Even though the id's have no meaning to the browser, they'll make your page a lo teasier fo r you to understand. (Also note that the indentation we use helps to clarify which <div> tags go withwhich </div> tags.)
Styling with Id's
You already know how to select elements for styling with CSS using the element tag name, or with a classname using the class attribute on an element (earlier we used a class name of "pink" to give one o f the listitems a pink background co lor).
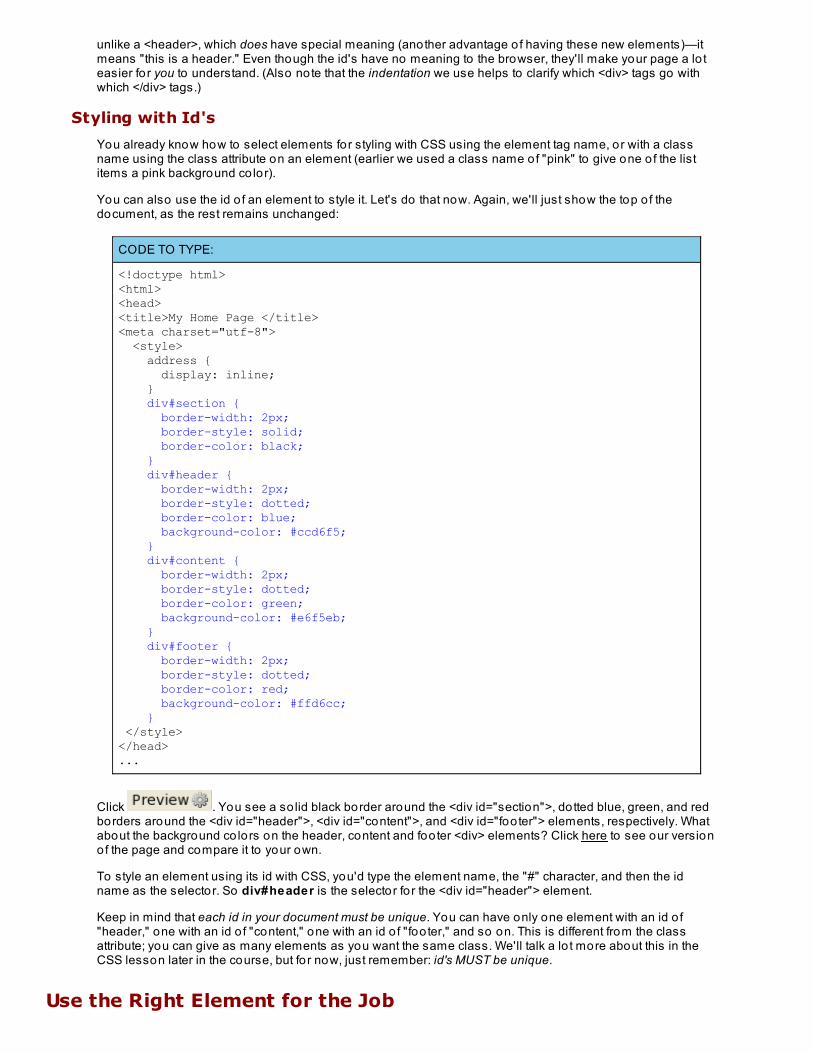
You can also use the id o f an element to style it. Let's do that now. Again, we'll just show the top o f thedocument, as the rest remains unchanged:
CODE TO TYPE:
<!doctype html><html><head><title>My Home Page </title><meta charset="utf-8"> <style> address { display: inline; } div#section { border-width: 2px; border-style: solid; border-color: black; } div#header { border-width: 2px; border-style: dotted; border-color: blue; background-color: #ccd6f5; } div#content { border-width: 2px; border-style: dotted; border-color: green; background-color: #e6f5eb; } div#footer { border-width: 2px; border-style: dotted; border-color: red; background-color: #ffd6cc; } </style></head>...
Click . You see a so lid black border around the <div id="section">, dotted blue, green, and redborders around the <div id="header">, <div id="content">, and <div id="footer"> elements, respectively. Whatabout the background co lors on the header, content and footer <div> elements? Click here to see our versionof the page and compare it to your own.
To style an element using its id with CSS, you'd type the element name, the "#" character, and then the idname as the selector. So div#header is the selector fo r the <div id="header"> element.
Keep in mind that each id in your document must be unique. You can have only one element with an id o f"header," one with an id o f "content," one with an id o f "footer," and so on. This is different from the classattribute; you can give as many elements as you want the same class. We'll talk a lo t more about this in theCSS lesson later in the course, but fo r now, just remember: id's MUST be unique.
Use the Right Element for the Job
You've learned a lo t in this lesson about syntax, page structure, and semantics—the meanings—of elements. Thereare lo ts o f elements in HTML and the designers o f the HTML standard have specific uses in mind for each one.
You've also learned that it's important to use elements for their meaning, not fo r how they make the content look onthe page. Using CSS, we can manipulate the look o f content however we want. This concept is called the separation ofpresentation and content. HTML is about marking up your content to add meaning; CSS is about adding style to yourcontent fo r a particular look and feel.
Over time you'll become familiar with most o f the elements in HTML, so you can use the right element fo r the job.Choose the most appropriate elements so they make sense to the browser and to you. When you go back to edit ano ld web page, you'll be glad you structured it well and used proper syntax and semantics.
Specs are never fun to read, but ultimately, the HTML specification contains the best information about the language.You can read the HT ML5 Specif icat io n: Edit io n f o r Web Aut ho rs at http://dev.w3.org/html5/spec-author-view/Overview.html.
So far, so good. See you in the next lesson!
Copyright © 1998-2014 O'Reilly Media, Inc.
This work is licensed under a Creative Commons Attribution-ShareAlike 3.0 Unported License.See http://creativecommons.org/licenses/by-sa/3.0/legalcode for more information.
LinksLesson Objectives
When you complete this lesson, you will be able to :
use relative links in HTML.use abso lute links in HTML.incorporate some link attributes.use styling links in your web page.
What is a Link?In this lesson, we'll learn one o f the most important features o f HTML—how to link documents together. The links inweb pages allow us to surf the internet. When you're reading a document, and you click on text (o ften displayed in adifferent co lor and/or underlined) and it takes you to another document, that's a link.
Links are the "HT" in HTML. HTML is HyperT ext Markup Language. Hypertext is text that can be read non-linearly. Youuse the links in the text to jump around between pages which lets you read web content in a non-linear way.
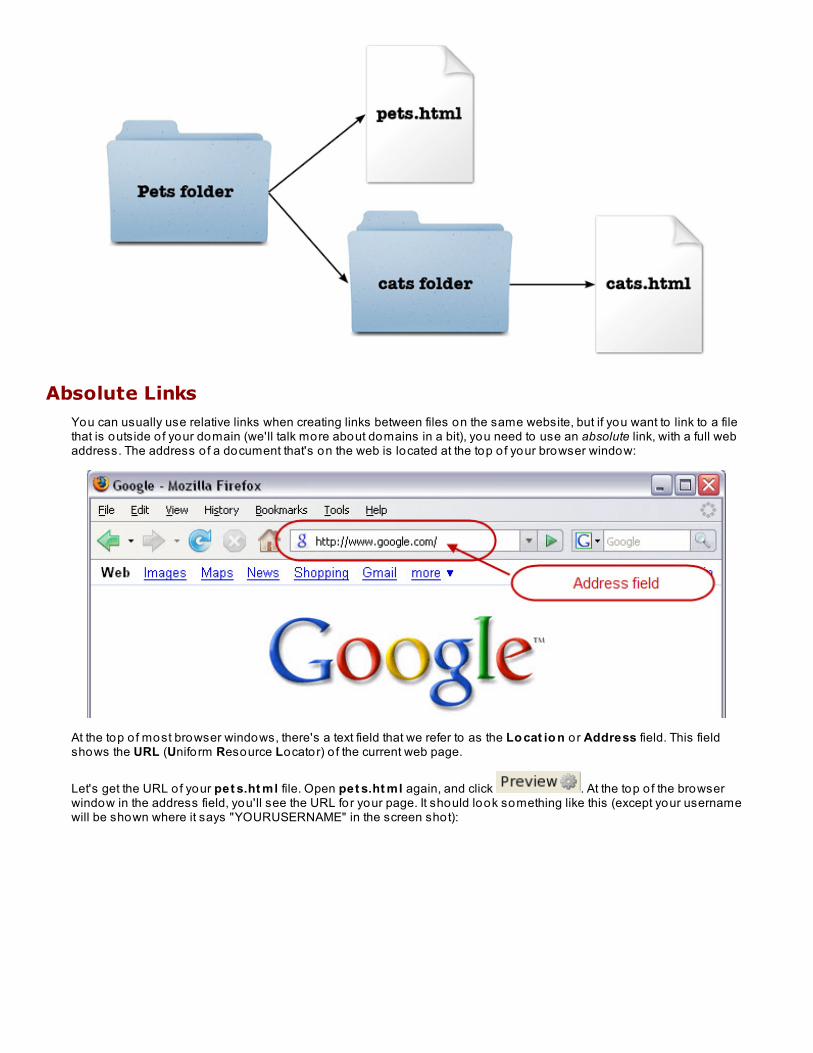
Relative LinksLet's create some links. In order to do that, you'll need a file to link from and a file to link to , so we'll create two files.The first file will be called pet s.ht ml and the second, t illa.ht ml.
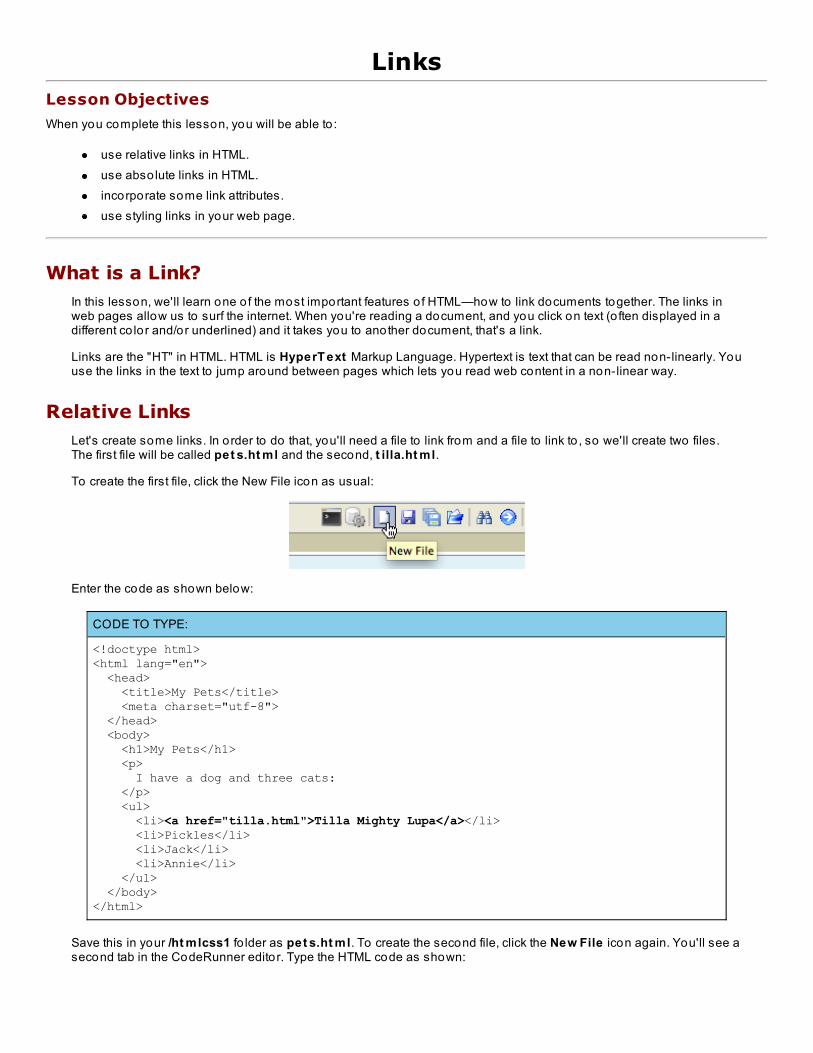
To create the first file, click the New File icon as usual:
Enter the code as shown below:
CODE TO TYPE:
<!doctype html><html lang="en"> <head> <title>My Pets</title> <meta charset="utf-8"> </head> <body> <h1>My Pets</h1> <p> I have a dog and three cats: </p> <ul> <li><a href="tilla.html">Tilla Mighty Lupa</a></li> <li>Pickles</li> <li>Jack</li> <li>Annie</li> </ul> </body></html>
Save this in your /ht mlcss1 fo lder as pet s.ht ml. To create the second file, click the New File icon again. You'll see asecond tab in the CodeRunner editor. Type the HTML code as shown:
CODE TO TYPE:
<!doctype html><html lang="en"> <head> <title>My Pets: Tilla</title> <meta charset="utf-8"> </head> <body> <h1>Tilla</h1> <p> Tilla is my dog. She is a rescue dog, so I don't know what kind of mix she is, but she's extremely cute and very loving and sweet. </p> <p> And she can run like the wind! </p> </body></html>
Save this in your /ht mlcss1 fo lder as t illa.ht ml. You can switch between the two files by clicking on the tabs. Justmake sure you know which file you're in when you're making changes to the HTML code!
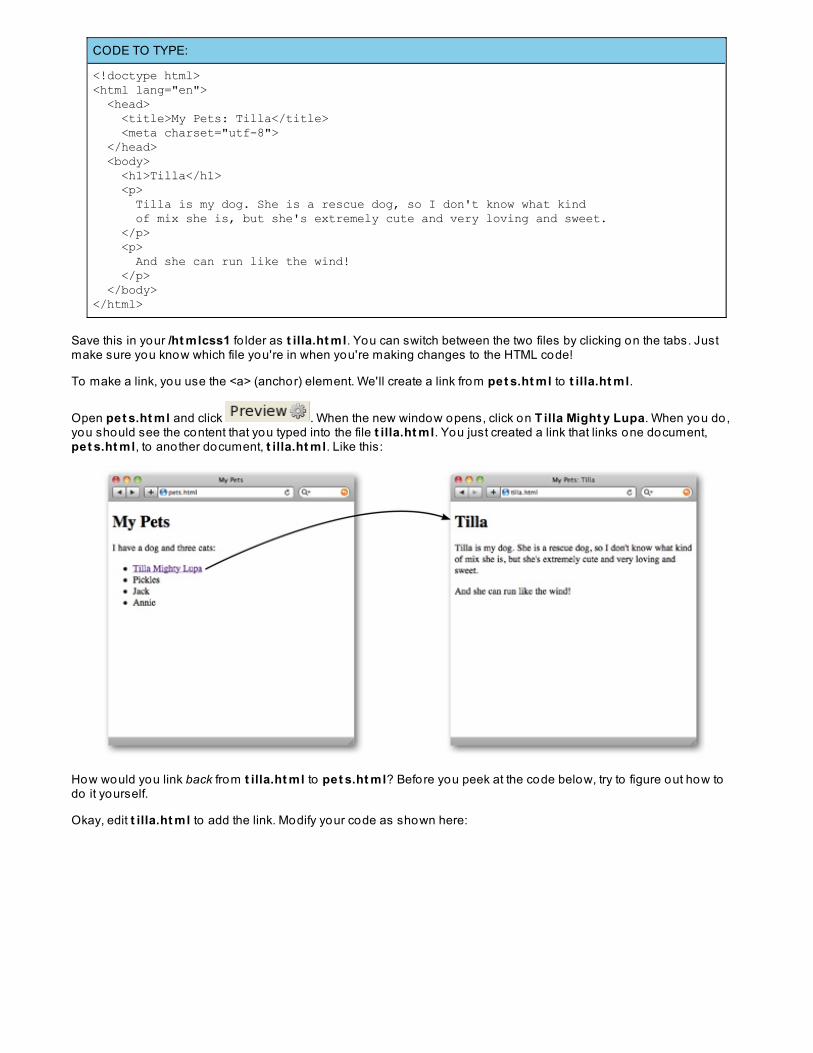
To make a link, you use the <a> (anchor) element. We'll create a link from pet s.ht ml to t illa.ht ml.
Open pet s.ht ml and click . When the new window opens, click on T illa Might y Lupa. When you do,you should see the content that you typed into the file t illa.ht ml. You just created a link that links one document,pet s.ht ml, to another document, t illa.ht ml. Like this:
How would you link back from t illa.ht ml to pet s.ht ml? Before you peek at the code below, try to figure out how todo it yourself.
Okay, edit t illa.ht ml to add the link. Modify your code as shown here:
CODE TO TYPE:
<!doctype html><html lang="en"> <head> <title>My Pets: Tilla</title> <meta charset="utf-8"> </head> <body> <h1>Tilla</h1> <p> Tilla is my dog. She is a rescue dog, so I don't know what kind of mix she is, but she's extremely cute and very loving and sweet. </p> <p> And she can run like the wind! </p> <p> Click <a href="pets.html">here</a> to go back. </p> </body></html>
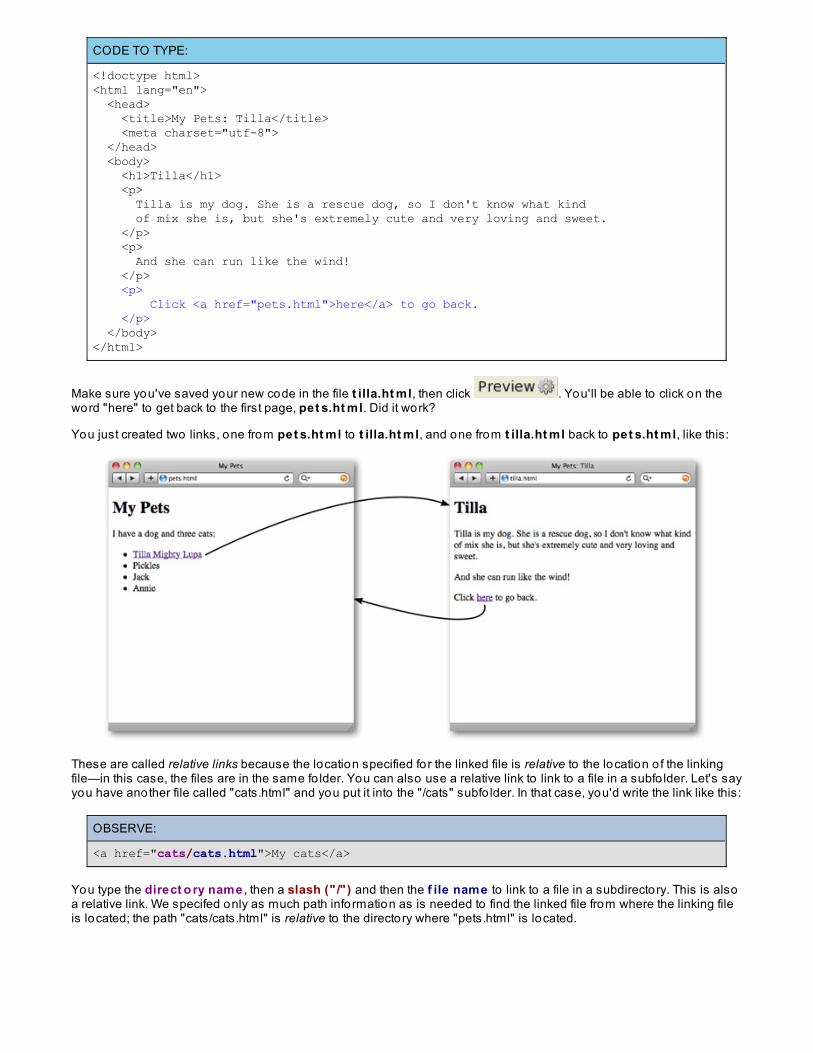
Make sure you've saved your new code in the file t illa.ht ml, then click . You'll be able to click on theword "here" to get back to the first page, pet s.ht ml. Did it work?
You just created two links, one from pet s.ht ml to t illa.ht ml, and one from t illa.ht ml back to pet s.ht ml, like this:
These are called relative links because the location specified for the linked file is relative to the location o f the linkingfile—in this case, the files are in the same fo lder. You can also use a relative link to link to a file in a subfo lder. Let's sayyou have another file called "cats.html" and you put it into the "/cats" subfo lder. In that case, you'd write the link like this:
OBSERVE:
<a href="cats/cats.html">My cats</a>
You type the direct o ry name , then a slash (" /" ) and then the f ile name to link to a file in a subdirectory. This is alsoa relative link. We specifed only as much path information as is needed to find the linked file from where the linking fileis located; the path "cats/cats.html" is relative to the directory where "pets.html" is located.
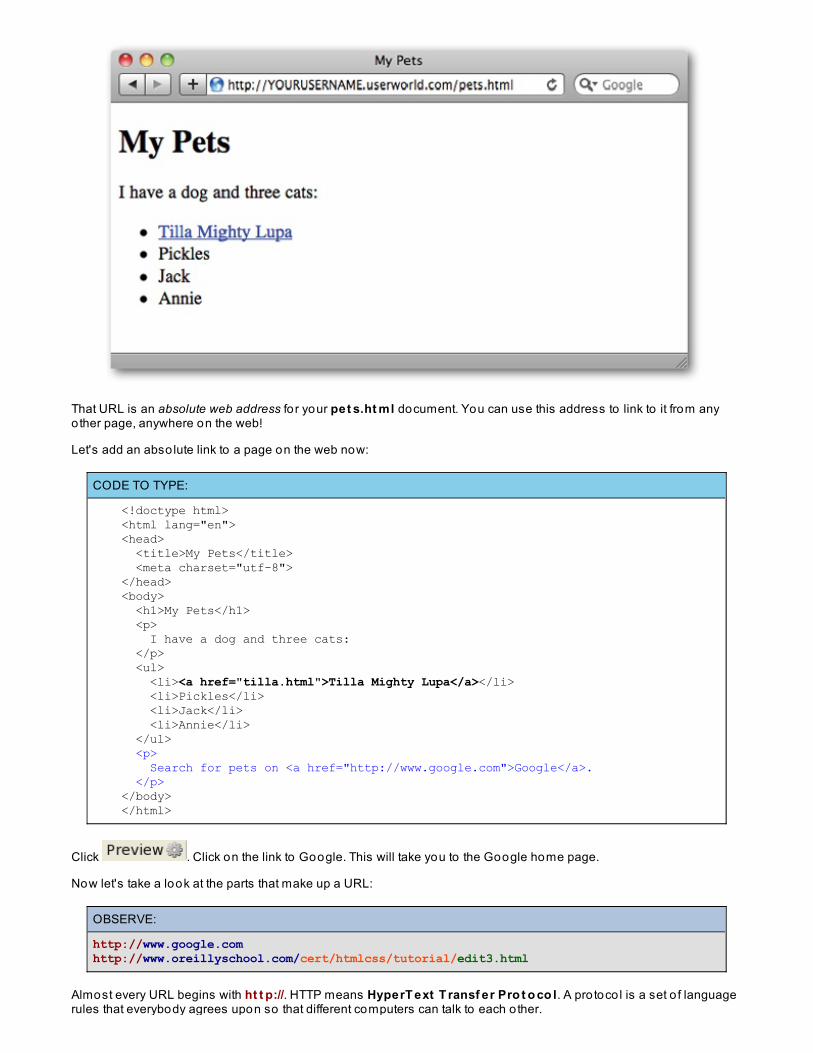
Absolute LinksYou can usually use relative links when creating links between files on the same website, but if you want to link to a filethat is outside o f your domain (we'll talk more about domains in a bit), you need to use an absolute link, with a full webaddress. The address o f a document that's on the web is located at the top o f your browser window:
At the top o f most browser windows, there's a text field that we refer to as the Lo cat io n o r Address field. This fieldshows the URL (Uniform Resource Locator) o f the current web page.
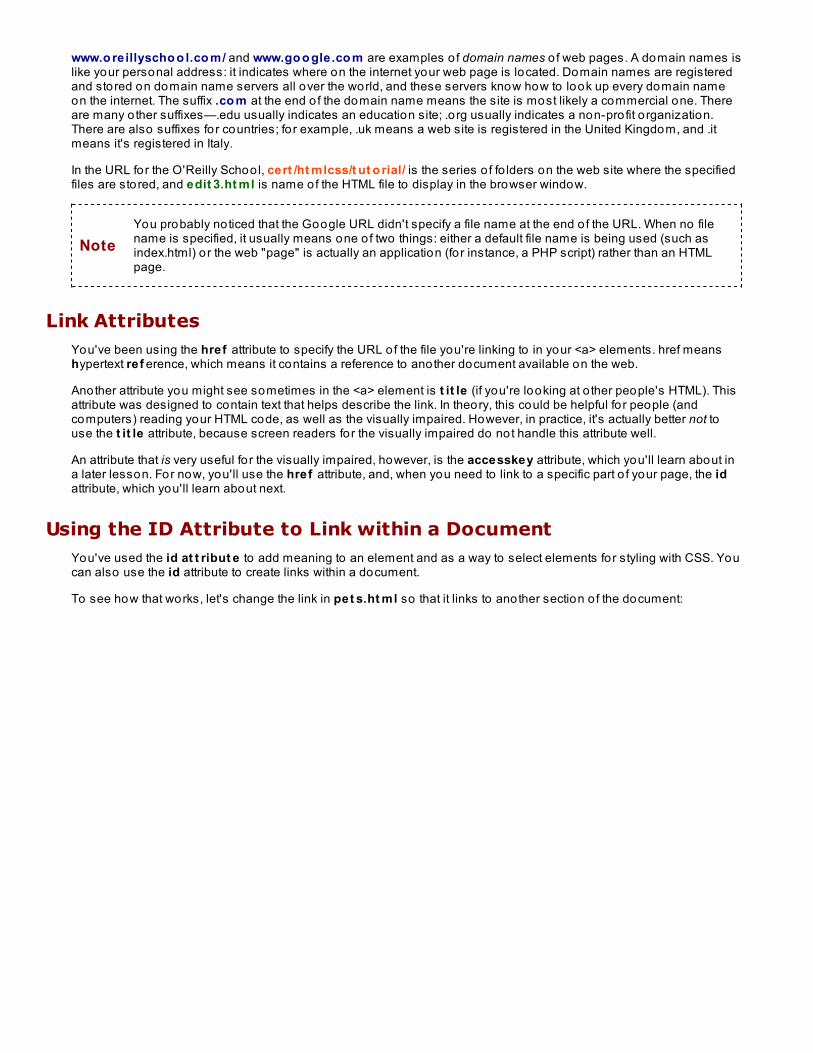
Let's get the URL of your pet s.ht ml file. Open pet s.ht ml again, and click . At the top o f the browserwindow in the address field, you'll see the URL for your page. It should look something like this (except your usernamewill be shown where it says "YOURUSERNAME" in the screen shot):
That URL is an absolute web address fo r your pet s.ht ml document. You can use this address to link to it from anyother page, anywhere on the web!
Let's add an abso lute link to a page on the web now:
CODE TO TYPE:
<!doctype html> <html lang="en"> <head> <title>My Pets</title> <meta charset="utf-8"> </head> <body> <h1>My Pets</h1> <p> I have a dog and three cats: </p> <ul> <li><a href="tilla.html">Tilla Mighty Lupa</a></li> <li>Pickles</li> <li>Jack</li> <li>Annie</li> </ul> <p> Search for pets on <a href="http://www.google.com">Google</a>. </p> </body> </html>
Click . Click on the link to Google. This will take you to the Google home page.
Now let's take a look at the parts that make up a URL:
OBSERVE:
http://www.google.comhttp://www.oreillyschool.com/cert/htmlcss/tutorial/edit3.html
Almost every URL begins with ht t p://. HTTP means HyperT ext T ransf er Pro t o co l. A pro toco l is a set o f languagerules that everybody agrees upon so that different computers can talk to each o ther.
www.o reillyscho o l.co m/ and www.go o gle.co m are examples o f domain names o f web pages. A domain names islike your personal address: it indicates where on the internet your web page is located. Domain names are registeredand stored on domain name servers all over the world, and these servers know how to look up every domain nameon the internet. The suffix .co m at the end o f the domain name means the site is most likely a commercial one. Thereare many o ther suffixes—.edu usually indicates an education site; .o rg usually indicates a non-pro fit o rganization.There are also suffixes for countries; fo r example, .uk means a web site is registered in the United Kingdom, and .itmeans it's registered in Italy.
In the URL for the O'Reilly School, cert /ht mlcss/t ut o rial/ is the series o f fo lders on the web site where the specifiedfiles are stored, and edit 3.ht ml is name of the HTML file to display in the browser window.
NoteYou probably noticed that the Google URL didn't specify a file name at the end o f the URL. When no filename is specified, it usually means one o f two things: either a default file name is being used (such asindex.html) or the web "page" is actually an application (fo r instance, a PHP script) rather than an HTMLpage.
Link AttributesYou've been using the href attribute to specify the URL of the file you're linking to in your <a> elements. href meanshypertext ref erence, which means it contains a reference to another document available on the web.
Another attribute you might see sometimes in the <a> element is t it le (if you're looking at o ther people's HTML). Thisattribute was designed to contain text that helps describe the link. In theory, this could be helpful fo r people (andcomputers) reading your HTML code, as well as the visually impaired. However, in practice, it's actually better not touse the t it le attribute, because screen readers for the visually impaired do not handle this attribute well.
An attribute that is very useful fo r the visually impaired, however, is the accesskey attribute, which you'll learn about ina later lesson. For now, you'll use the href attribute, and, when you need to link to a specific part o f your page, the idattribute, which you'll learn about next.
Using the ID Attribute to Link within a DocumentYou've used the id at t ribut e to add meaning to an element and as a way to select elements for styling with CSS. Youcan also use the id attribute to create links within a document.
To see how that works, let's change the link in pet s.ht ml so that it links to another section o f the document:
CODE TO TYPE:
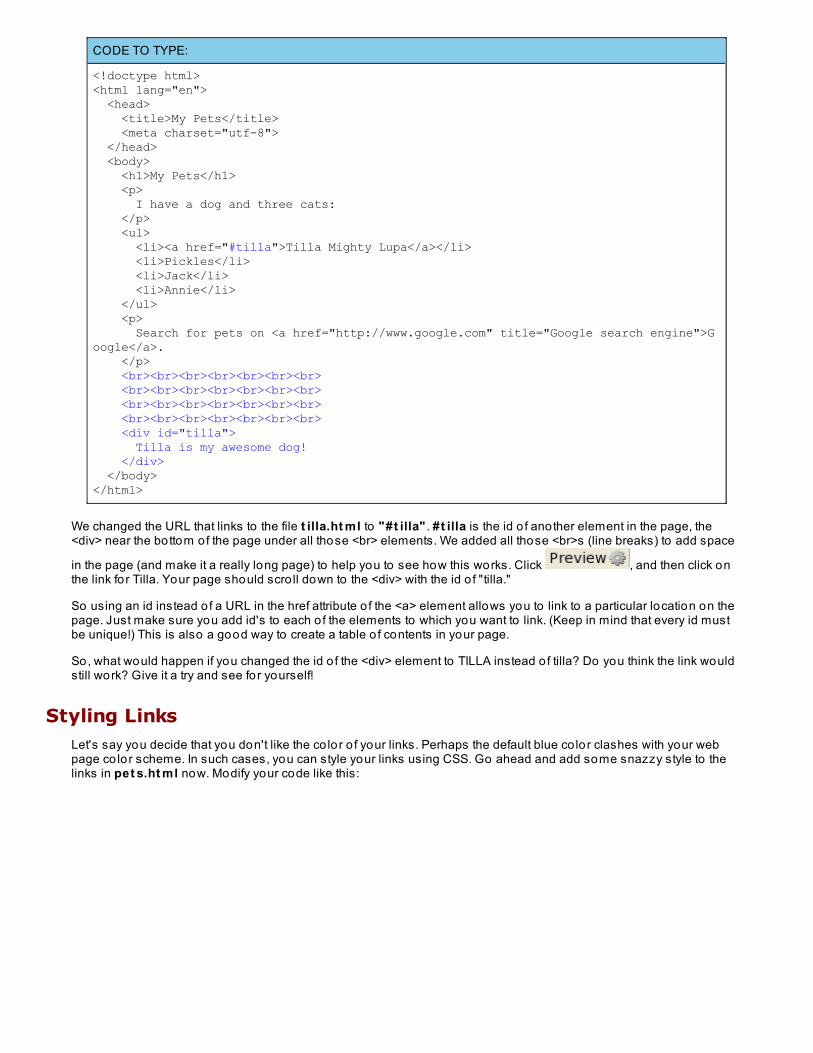
<!doctype html><html lang="en"> <head> <title>My Pets</title> <meta charset="utf-8"> </head> <body> <h1>My Pets</h1> <p> I have a dog and three cats: </p> <ul> <li><a href="#tilla">Tilla Mighty Lupa</a></li> <li>Pickles</li> <li>Jack</li> <li>Annie</li> </ul> <p> Search for pets on <a href="http://www.google.com" title="Google search engine">Google</a>. </p> <br><br><br><br><br><br><br> <br><br><br><br><br><br><br> <br><br><br><br><br><br><br> <br><br><br><br><br><br><br> <div id="tilla"> Tilla is my awesome dog! </div> </body></html>
We changed the URL that links to the file t illa.ht ml to "#t illa" . #t illa is the id o f another element in the page, the<div> near the bottom of the page under all those <br> elements. We added all those <br>s (line breaks) to add space
in the page (and make it a really long page) to help you to see how this works. Click , and then click onthe link for Tilla. Your page should scro ll down to the <div> with the id o f "tilla."
So using an id instead o f a URL in the href attribute o f the <a> element allows you to link to a particular location on thepage. Just make sure you add id's to each o f the elements to which you want to link. (Keep in mind that every id mustbe unique!) This is also a good way to create a table o f contents in your page.
So, what would happen if you changed the id o f the <div> element to TILLA instead o f tilla? Do you think the link wouldstill work? Give it a try and see for yourself!
Styling LinksLet's say you decide that you don't like the co lor o f your links. Perhaps the default blue co lor clashes with your webpage co lor scheme. In such cases, you can style your links using CSS. Go ahead and add some snazzy style to thelinks in pet s.ht ml now. Modify your code like this:
CODE TO TYPE:
<!doctype html><html lang="en"><head> <title>My Pets</title> <meta charset="utf-8"> <style> a { color: #990000; } </style></head><body> <h1>My Pets</h1> <p> I have a dog and three cats: </p> <ul> <li><a href="#tilla">Tilla Mighty Lupa</a></li> <li>Pickles</li> <li>Jack</li> <li>Annie</li> </ul> <p> Search for pets on <a href="http://www.google.com">Google</a>. </p> <br><br><br><br><br><br><br> <br><br><br><br><br><br><br> <br><br><br><br><br><br><br> <br><br><br><br><br><br><br> <div id="tilla"> Tilla is my awesome dog! </div></body></html>
Click . Did your links change co lor? Here, we set the co lor o f the text fo r all the <a> elements in the pageto a darkish-red.
In the default co lor scheme, a link changes co lor from blue to purple after you click on it. When we set the co lor fo r the<a> elements above, we set the co lor fo r links you haven't clicked on yet, as well as those you have. We can changethe co lor o f links you've clicked on using CSS as well. Change your code as shown:
CODE TO TYPE:
<style> a { color: #990000; } a:visited { color: #000099; } </style>
Here we just showed the style block; nothing else changes. Click again. Since you've clicked on all thelinks in the page recently, both o f the links in our example should turn darkish-blue (the co lor identified by thehexadecimal 000099).
Now, you might be wondering about the a:visit ed selector we used in the CSS above. This is called a pseudo-class. Apseudo-class gives you access to part o f an element based on a characteristic o f that element—in this case, it's basedon whether the <a> element has been visited recently.
There is another pseudo-class you can use with the <a> element that's kind o f fun; the a:ho ver pseudo class. Give it atry. Add the code below to your style and see if you can guess what it means:
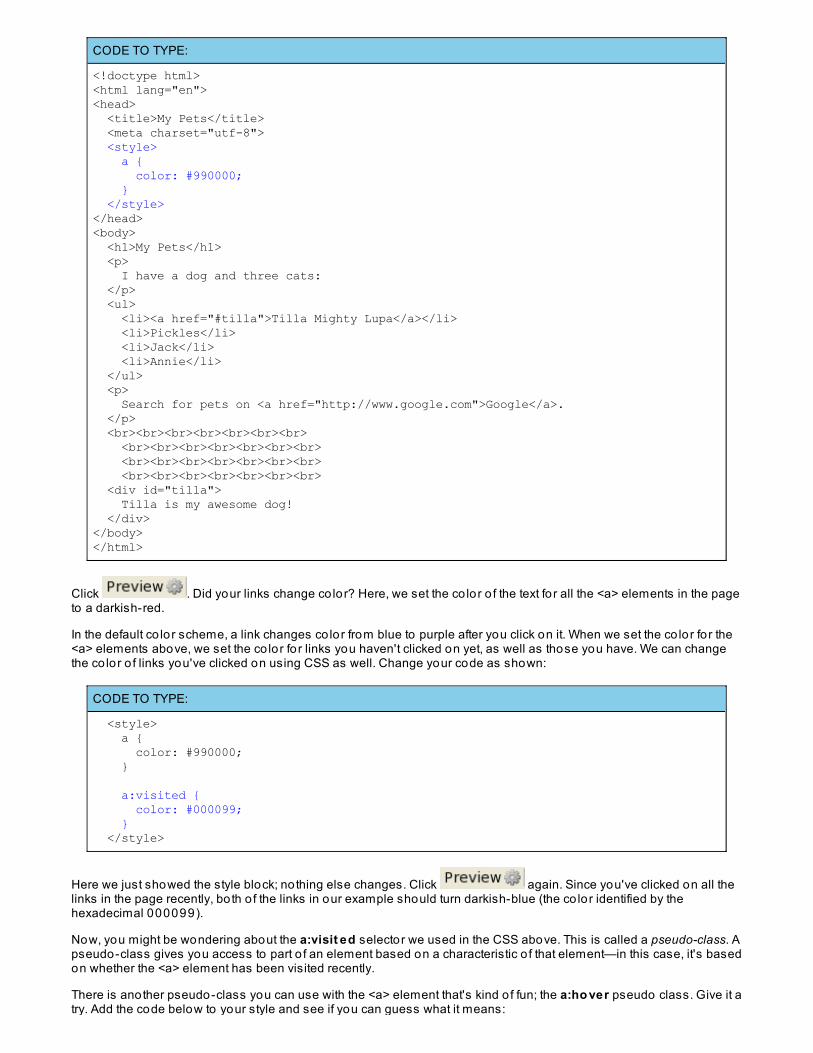
CODE TO TYPE:
<style> a { color: #990000; } a:visited { color: #000099; } a:hover { background-color: #ffff66; } </style>
Click again. Try moving your cursor over the links in the page. Do you see a yellow background whenyour mouse po inter is ho vering over the link? The a:ho ver psudeo-class sets the style o f the link when your hoverover it.
You have lo ts o f different styling properties at your disposal in the pseudo-classes for the <a> element. Experimentwith some of your own ideas too! If you need a few suggestions, see the w3schools page on pseudo-classes.
You're do ing really well so far. Keep it up and I'll see you in the next lesson!
Copyright © 1998-2014 O'Reilly Media, Inc.
This work is licensed under a Creative Commons Attribution-ShareAlike 3.0 Unported License.See http://creativecommons.org/licenses/by-sa/3.0/legalcode for more information.
ImagesLesson Objectives
When you complete this lesson, you will be able to :
uplosd images to your OST account.style your images.use images as links.
The internet is a vibrant and diverse place where you can find random funny cats, compromising celebrity photos, stunningviews from space, and billions o f o ther captivating visuals, thanks to our ability to display images on web pages.
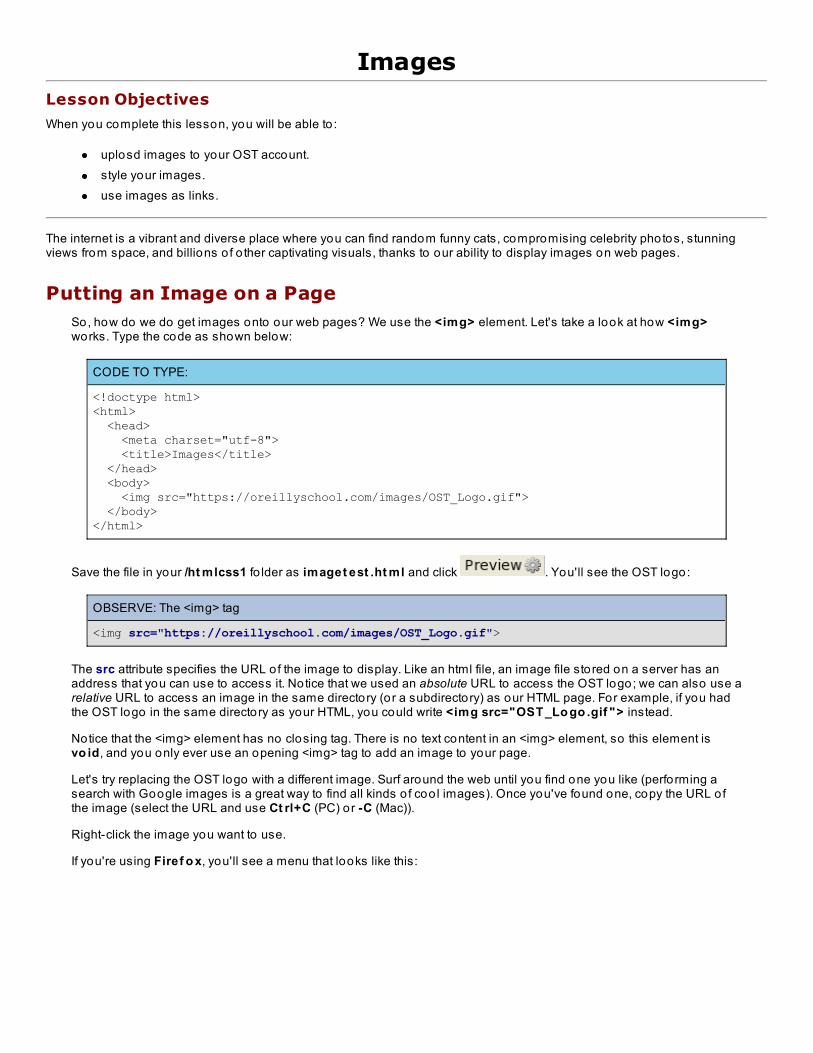
Putting an Image on a PageSo, how do we do get images onto our web pages? We use the <img> element. Let's take a look at how <img>works. Type the code as shown below:
CODE TO TYPE:
<!doctype html><html> <head> <meta charset="utf-8"> <title>Images</title> </head> <body> <img src="https://oreillyschool.com/images/OST_Logo.gif"> </body></html>
Save the file in your /ht mlcss1 fo lder as imaget est .ht ml and click . You'll see the OST logo:
OBSERVE: The <img> tag
<img src="https://oreillyschool.com/images/OST_Logo.gif">
The src attribute specifies the URL of the image to display. Like an html file, an image file stored on a server has anaddress that you can use to access it. Notice that we used an absolute URL to access the OST logo; we can also use arelative URL to access an image in the same directory (or a subdirectory) as our HTML page. For example, if you hadthe OST logo in the same directory as your HTML, you could write <img src="OST _Lo go .gif "> instead.
Notice that the <img> element has no closing tag. There is no text content in an <img> element, so this element isvo id, and you only ever use an opening <img> tag to add an image to your page.
Let's try replacing the OST logo with a different image. Surf around the web until you find one you like (performing asearch with Google images is a great way to find all kinds o f coo l images). Once you've found one, copy the URL ofthe image (select the URL and use Ct rl+C (PC) or -C (Mac)).
Right-click the image you want to use.
If you're using Firef o x, you'll see a menu that looks like this:

If you're using Int ernet Explo rer, you'll see a menu that looks like this:
Select Pro pert ies and then copy the address o f the image from the window that pops up. When you're finished, comeback to the CodeRunner® Editor and replace ht t ps://o re illyscho o l.co m/images/OST _Lo go .gif with the imageaddress you just copied. (Paste it using Ct rl+V (PC) or Co mmand+V (Mac).)
You can practice using this image:
Keep in mind that .gif, .jpg, and .png images are the only types that can be displayed on all browsers. If you want todisplay an image o f another type (like .bmp, fo r instance), you'll need to convert the image to a valid type usingsoftware like Adobe Photoshop or Paint Shop Pro.
What Kind of Image Should You Use?GIF works best fo r images with just a few so lid co lors and line drawings, like logos, clip art, and small text in images.One really nice feature o f GIF images is that they support transparency, so the background co lor will show through andyou can place the image over another element in your page for interesting effects. GIF images can be compressed, but

they are a lossless fo rmat, meaning no information is thrown away in compression.
JPEG (o r JPG) images work best fo r photos—images with a lo t o f different co lors and no text. JPEG images canrepresent a lo t more co lors than GIF (16 million instead o f 256), so you'll get richer co lor. JPEG is a lossy fo rmat,meaning that when you compress images, you lose some information. However, fo r the web, it's unlikely anyone willno tice unless they're viewing your images at very high reso lution, which isn't advised anyway because the imageswould be so large. JPEG does not support transparency, so you aren't able to use them like GIFs to create effectswhere you see the background behind the image.
PNG is an image format that was designed to be a better version o f GIF. The format is best used where you'd use aGIF—it supports transparency and represents lines and text well—but also can represent a lo t more co lors than GIF.Be careful when using PNG though, because PNG images tend to be large as a result o f their greater depth o f co lor(you may want to stick with JPEG for photos).
When you save an image for the web, it's a good idea to save the image in the size you plan to use on the page. So,for example, don't save an image at 800 pixels wide by 600 pixels high if you know you'll only need a 200x150 imageon the web page. You can reduce the file size o f an image by reducing its width and height. This reduction is size alsomeans your images will load faster!
Uploading Images to Your OST Account
NoteAs you work through the next section, if you decide to use an image o ther than the one we've provided,be sure to choose an image that does not vio late copyright laws. A quick search for public do mainimages o r creat ive co mmo ns images should do the trick!
You can display images from other locations on your own page by linking to them using abso lute URLs. You can alsoupload images (or any o ther file that is saved on your computer) to your OST account, and link to them using relativeURLs instead.
Let's save an image that we can then upload to your account. Right-click on the image o f the dog (Tilla) below andyou'll see the same menu from before. Select Save Image As/Save Pict ure As and save the image to yourcomputer (make a note o f the location where you save it).
Next, select your /ht mlcss1 fo lder and click File | Add in the CodeRunner® File Bro wser window on the left:
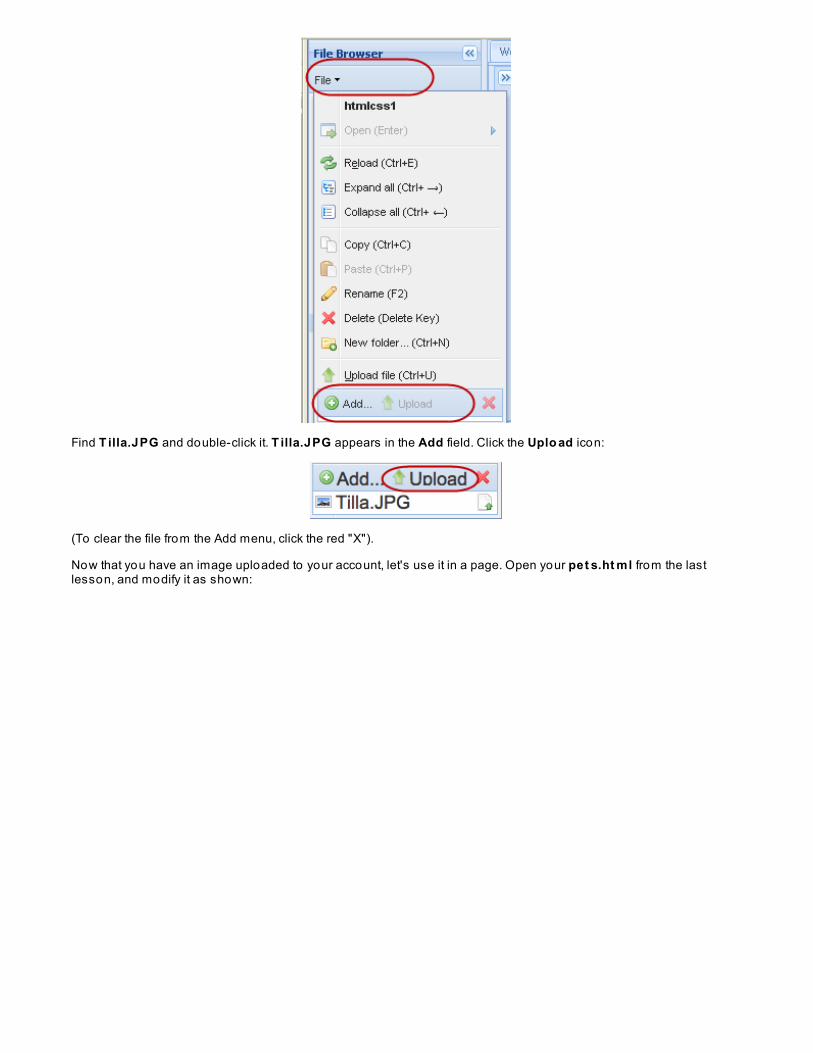
Find T illa.JPG and double-click it. T illa.JPG appears in the Add field. Click the Uplo ad icon:
(To clear the file from the Add menu, click the red "X").
Now that you have an image uploaded to your account, let's use it in a page. Open your pet s.ht ml from the lastlesson, and modify it as shown:
CODE TO TYPE:
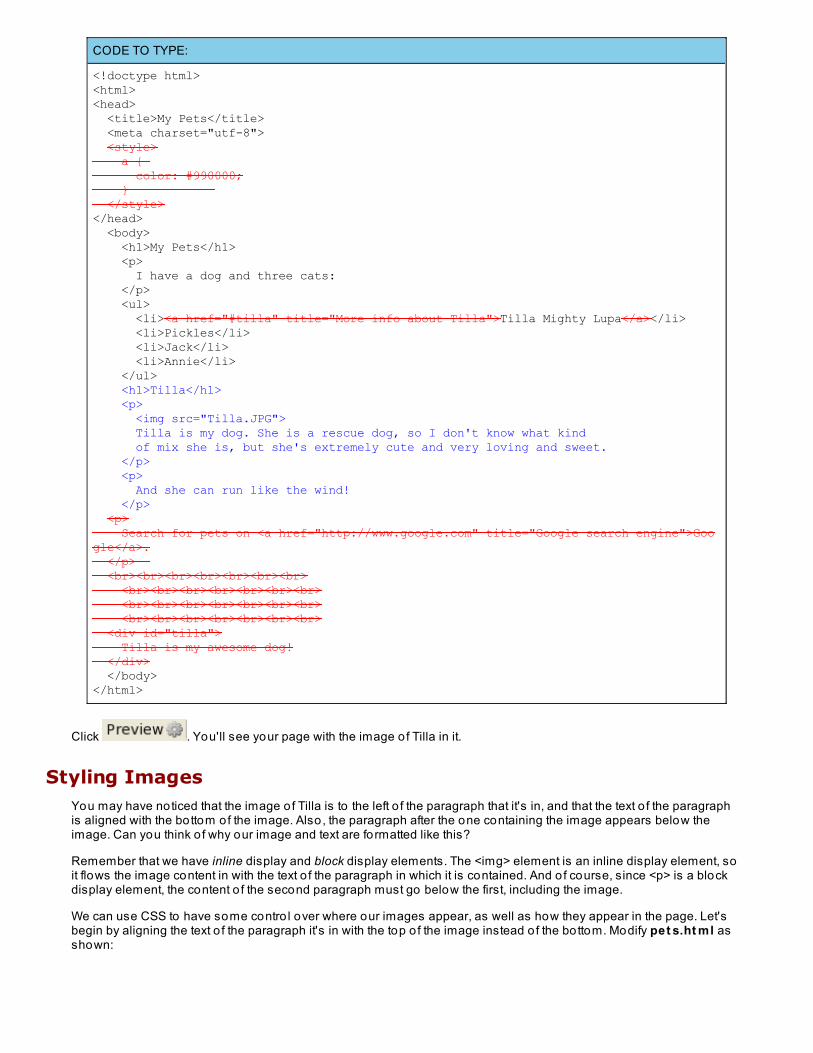
<!doctype html><html><head> <title>My Pets</title> <meta charset="utf-8"> <style> a { color: #990000; } </style></head> <body> <h1>My Pets</h1> <p> I have a dog and three cats: </p> <ul> <li><a href="#tilla" title="More info about Tilla">Tilla Mighty Lupa</a></li> <li>Pickles</li> <li>Jack</li> <li>Annie</li> </ul> <h1>Tilla</h1> <p> <img src="Tilla.JPG"> Tilla is my dog. She is a rescue dog, so I don't know what kind of mix she is, but she's extremely cute and very loving and sweet. </p> <p> And she can run like the wind! </p> <p> Search for pets on <a href="http://www.google.com" title="Google search engine">Google</a>. </p> <br><br><br><br><br><br><br> <br><br><br><br><br><br><br> <br><br><br><br><br><br><br> <br><br><br><br><br><br><br> <div id="tilla"> Tilla is my awesome dog! </div> </body></html>
Click . You'll see your page with the image o f Tilla in it.
Styling ImagesYou may have noticed that the image o f Tilla is to the left o f the paragraph that it's in, and that the text o f the paragraphis aligned with the bottom of the image. Also, the paragraph after the one containing the image appears below theimage. Can you think o f why our image and text are formatted like this?
Remember that we have inline display and block display elements. The <img> element is an inline display element, soit flows the image content in with the text o f the paragraph in which it is contained. And o f course, since <p> is a blockdisplay element, the content o f the second paragraph must go below the first, including the image.
We can use CSS to have some contro l over where our images appear, as well as how they appear in the page. Let'sbegin by aligning the text o f the paragraph it's in with the top o f the image instead o f the bottom. Modify pet s.ht ml asshown:
CODE TO TYPE:
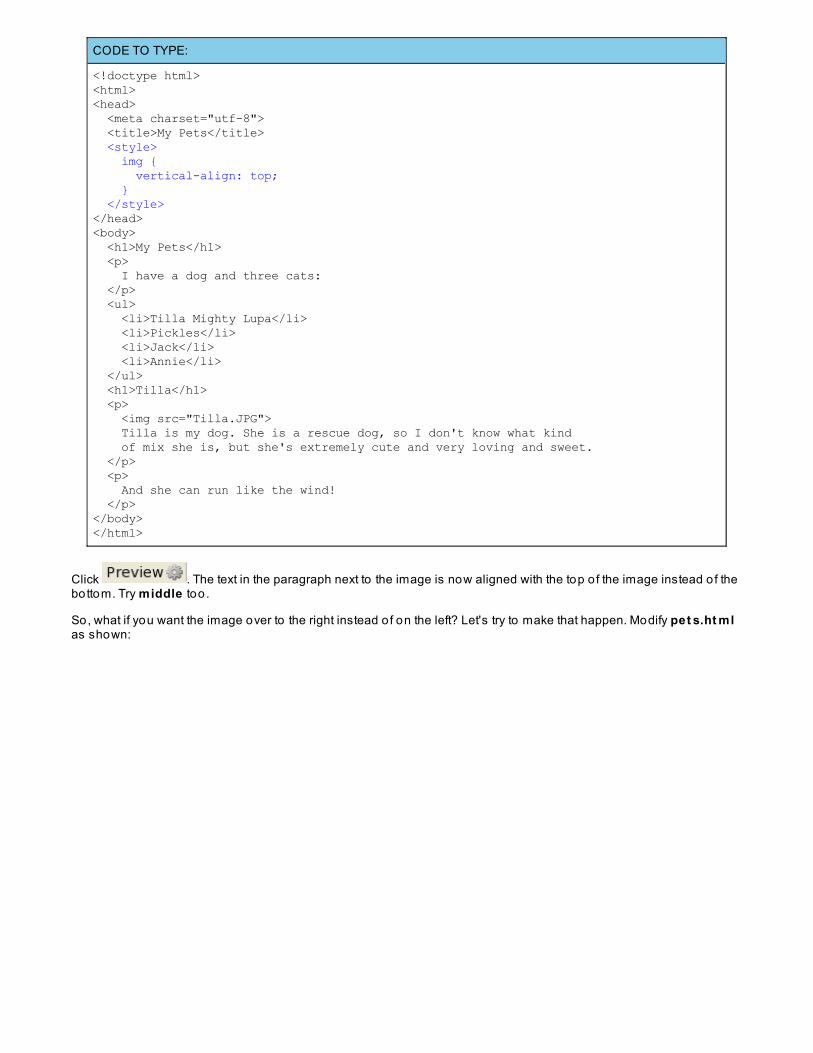
<!doctype html><html><head> <meta charset="utf-8"> <title>My Pets</title> <style> img { vertical-align: top; } </style></head><body> <h1>My Pets</h1> <p> I have a dog and three cats: </p> <ul> <li>Tilla Mighty Lupa</li> <li>Pickles</li> <li>Jack</li> <li>Annie</li> </ul> <h1>Tilla</h1> <p> <img src="Tilla.JPG"> Tilla is my dog. She is a rescue dog, so I don't know what kind of mix she is, but she's extremely cute and very loving and sweet. </p> <p> And she can run like the wind! </p> </body></html>
Click . The text in the paragraph next to the image is now aligned with the top o f the image instead o f thebottom. Try middle too .
So, what if you want the image over to the right instead o f on the left? Let's try to make that happen. Modify pet s.ht mlas shown:
CODE TO TYPE:
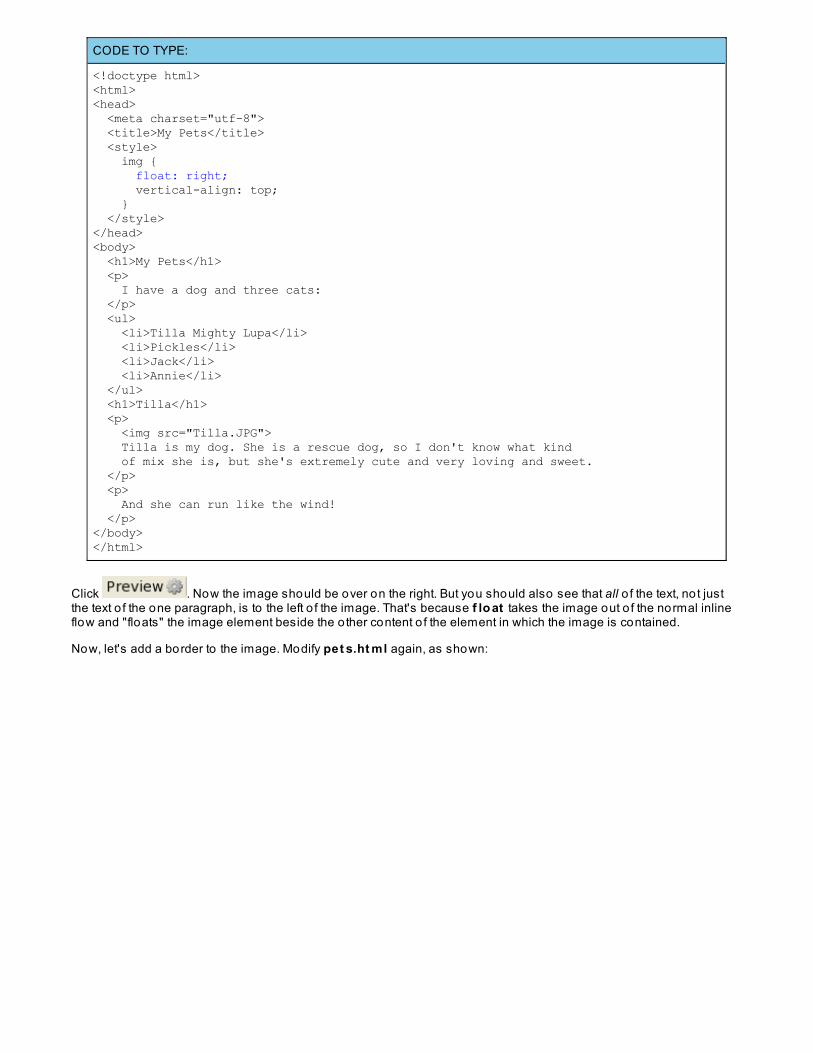
<!doctype html><html><head> <meta charset="utf-8"> <title>My Pets</title> <style> img { float: right; vertical-align: top; } </style></head><body> <h1>My Pets</h1> <p> I have a dog and three cats: </p> <ul> <li>Tilla Mighty Lupa</li> <li>Pickles</li> <li>Jack</li> <li>Annie</li> </ul> <h1>Tilla</h1> <p> <img src="Tilla.JPG"> Tilla is my dog. She is a rescue dog, so I don't know what kind of mix she is, but she's extremely cute and very loving and sweet. </p> <p> And she can run like the wind! </p> </body></html>
Click . Now the image should be over on the right. But you should also see that all o f the text, not justthe text o f the one paragraph, is to the left o f the image. That's because f lo at takes the image out o f the normal inlineflow and "floats" the image element beside the o ther content o f the element in which the image is contained.
Now, let's add a border to the image. Modify pet s.ht ml again, as shown:
CODE TO TYPE:
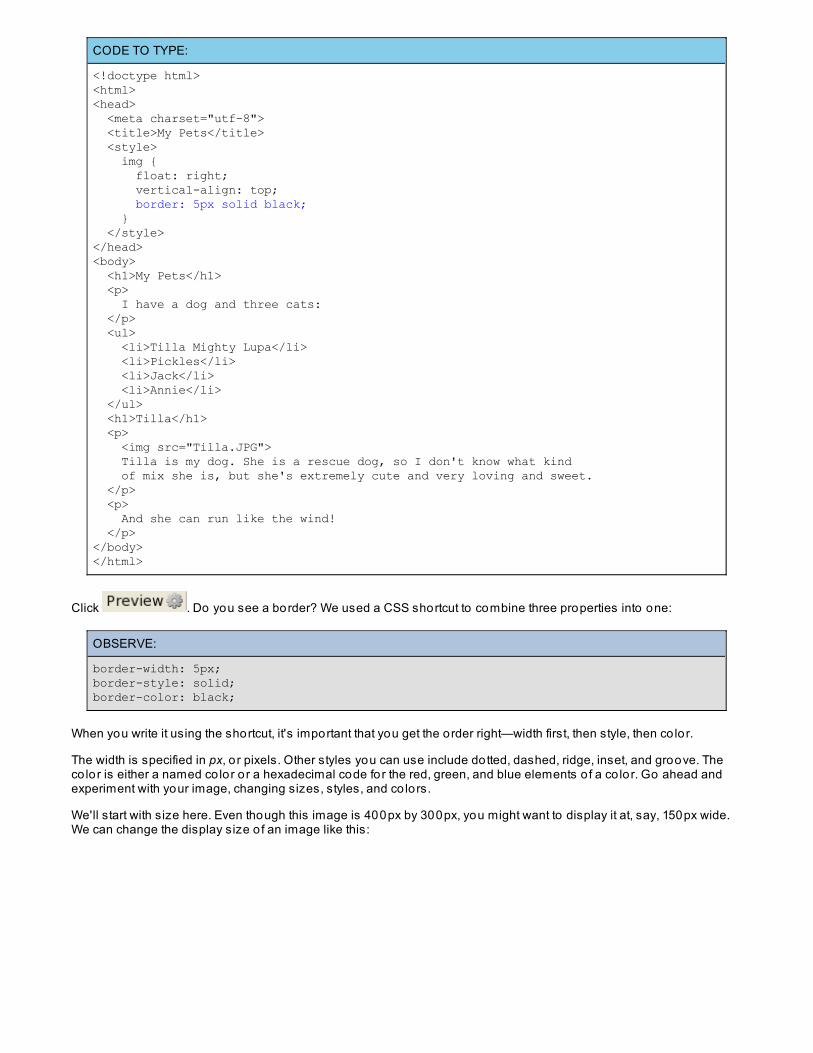
<!doctype html><html><head> <meta charset="utf-8"> <title>My Pets</title> <style> img { float: right; vertical-align: top; border: 5px solid black; } </style></head><body> <h1>My Pets</h1> <p> I have a dog and three cats: </p> <ul> <li>Tilla Mighty Lupa</li> <li>Pickles</li> <li>Jack</li> <li>Annie</li> </ul> <h1>Tilla</h1> <p> <img src="Tilla.JPG"> Tilla is my dog. She is a rescue dog, so I don't know what kind of mix she is, but she's extremely cute and very loving and sweet. </p> <p> And she can run like the wind! </p> </body></html>
Click . Do you see a border? We used a CSS shortcut to combine three properties into one:
OBSERVE:
border-width: 5px;border-style: solid;border-color: black;
When you write it using the shortcut, it's important that you get the order right—width first, then style, then co lor.
The width is specified in px, o r pixels. Other styles you can use include dotted, dashed, ridge, inset, and groove. Theco lor is either a named co lor or a hexadecimal code for the red, green, and blue elements o f a co lor. Go ahead andexperiment with your image, changing sizes, styles, and co lors.
We'll start with size here. Even though this image is 400px by 300px, you might want to display it at, say, 150px wide.We can change the display size o f an image like this:
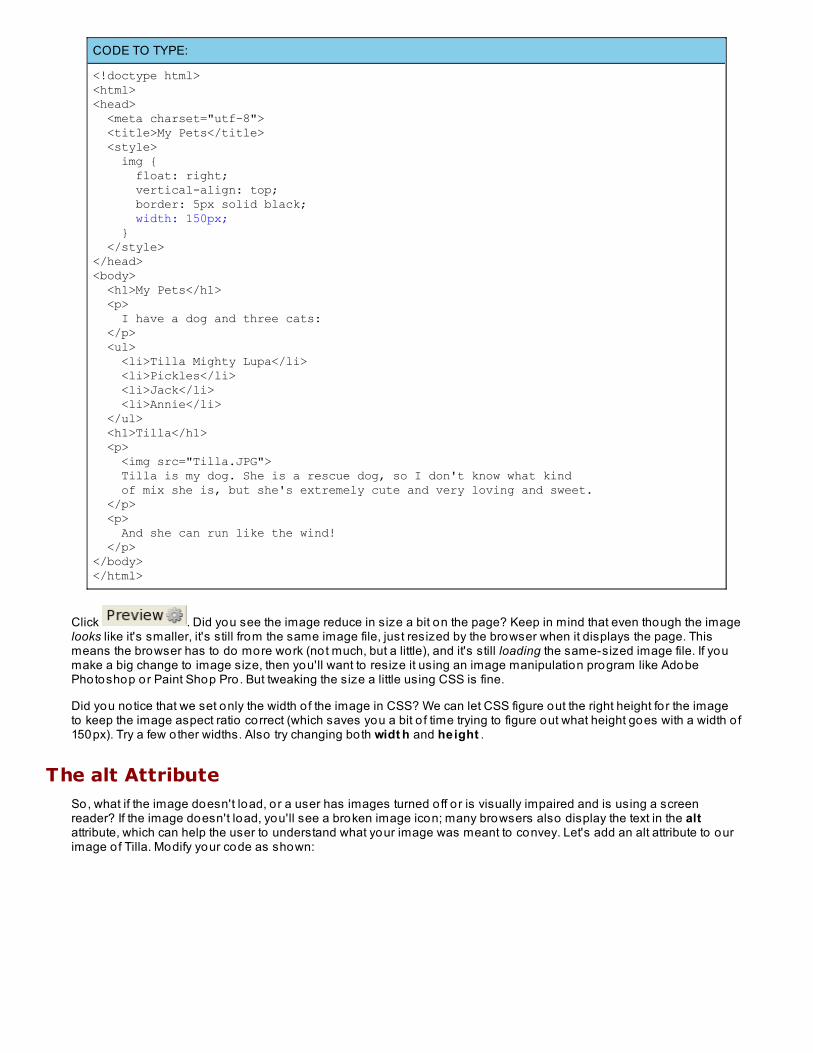
CODE TO TYPE:
<!doctype html><html><head> <meta charset="utf-8"> <title>My Pets</title> <style> img { float: right; vertical-align: top; border: 5px solid black; width: 150px; } </style></head><body> <h1>My Pets</h1> <p> I have a dog and three cats: </p> <ul> <li>Tilla Mighty Lupa</li> <li>Pickles</li> <li>Jack</li> <li>Annie</li> </ul> <h1>Tilla</h1> <p> <img src="Tilla.JPG"> Tilla is my dog. She is a rescue dog, so I don't know what kind of mix she is, but she's extremely cute and very loving and sweet. </p> <p> And she can run like the wind! </p> </body></html>
Click . Did you see the image reduce in size a bit on the page? Keep in mind that even though the imagelooks like it's smaller, it's still from the same image file, just resized by the browser when it displays the page. Thismeans the browser has to do more work (not much, but a little), and it's still loading the same-sized image file. If youmake a big change to image size, then you'll want to resize it using an image manipulation program like AdobePhotoshop or Paint Shop Pro. But tweaking the size a little using CSS is fine.
Did you notice that we set only the width o f the image in CSS? We can let CSS figure out the right height fo r the imageto keep the image aspect ratio correct (which saves you a bit o f time trying to figure out what height goes with a width o f150px). Try a few other widths. Also try changing both widt h and height .
The alt AttributeSo, what if the image doesn't load, or a user has images turned o ff o r is visually impaired and is using a screenreader? If the image doesn't load, you'll see a broken image icon; many browsers also display the text in the altattribute, which can help the user to understand what your image was meant to convey. Let's add an alt attribute to ourimage o f Tilla. Modify your code as shown:

CODE TO TYPE:
<!doctype html><html> <head> <meta charset="utf-8"> <title>My Pets</title> <style> img { float: right; vertical-align: top; border: 5px solid black; width: 150px; } </style> </head> <body> <h1>My Pets</h1> <p> I have a dog and three cats: </p> <ul> <li>Tilla Mighty Lupa</li> <li>Pickles</li> <li>Jack</li> <li>Annie</li> </ul> <h1>Tilla</h1> <p> <img src="Tilla.jpg" alt="Tilla, the awesome dog!"> Tilla is my dog. She is a rescue dog, so I don't know what kind of mix she is, but she's extremely cute and very loving and sweet. </p> <p> And she can run like the wind! </p> </body></html>
Click . Because we changed the JPG extension to be lowercase, the browser can't find the image o fTilla and displays the alt text.
Using Images as LinksOn occasion, you may want to use an image in a link. To do that, you'll use the <a> element and then use the image asthe content o f the element (that is, put the image between the opening <a> tag and closing </a> tag). Let's add a link toa Google search for "dogs," so that when you click on the image o f Tilla, you get taken to Google. Modify your code asshown:
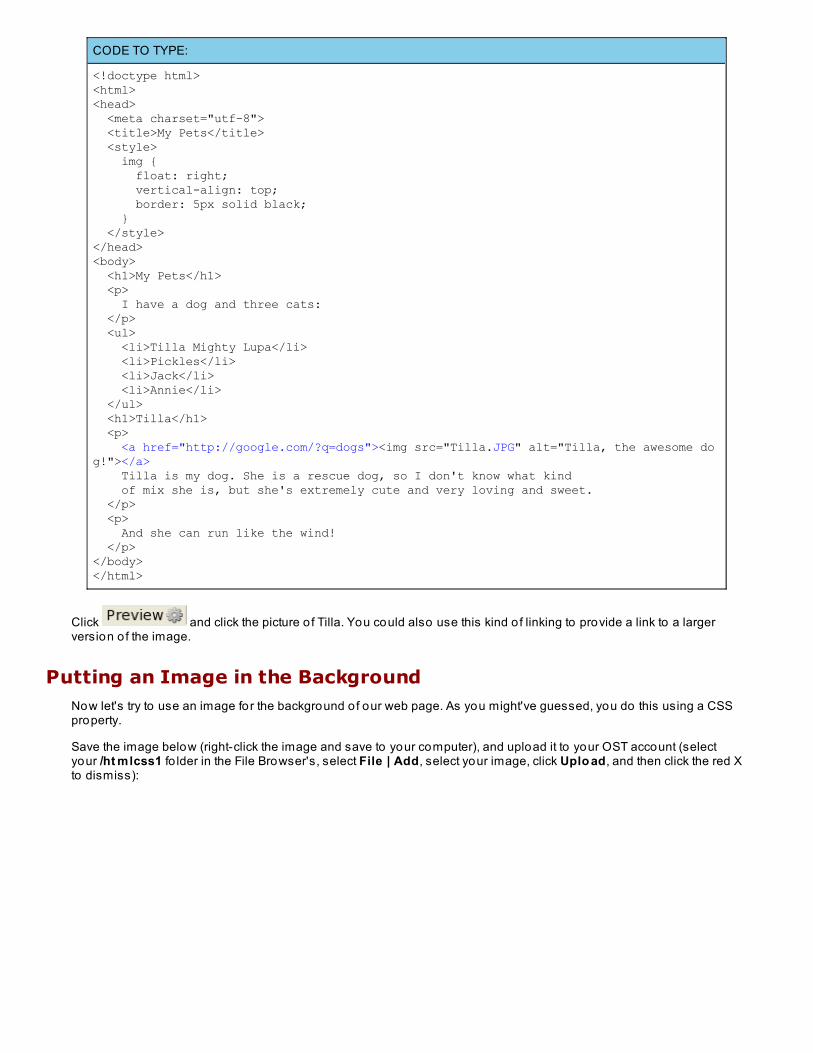
CODE TO TYPE:
<!doctype html><html><head> <meta charset="utf-8"> <title>My Pets</title> <style> img { float: right; vertical-align: top; border: 5px solid black; } </style></head><body> <h1>My Pets</h1> <p> I have a dog and three cats: </p> <ul> <li>Tilla Mighty Lupa</li> <li>Pickles</li> <li>Jack</li> <li>Annie</li> </ul> <h1>Tilla</h1> <p> <a href="http://google.com/?q=dogs"><img src="Tilla.JPG" alt="Tilla, the awesome dog!"></a> Tilla is my dog. She is a rescue dog, so I don't know what kind of mix she is, but she's extremely cute and very loving and sweet. </p> <p> And she can run like the wind! </p></body></html>
Click and click the picture o f Tilla. You could also use this kind o f linking to provide a link to a largerversion o f the image.
Putting an Image in the BackgroundNow let's try to use an image for the background o f our web page. As you might've guessed, you do this using a CSSproperty.
Save the image below (right-click the image and save to your computer), and upload it to your OST account (selectyour /ht mlcss1 fo lder in the File Browser's, select File | Add, select your image, click Uplo ad, and then click the red Xto dismiss):
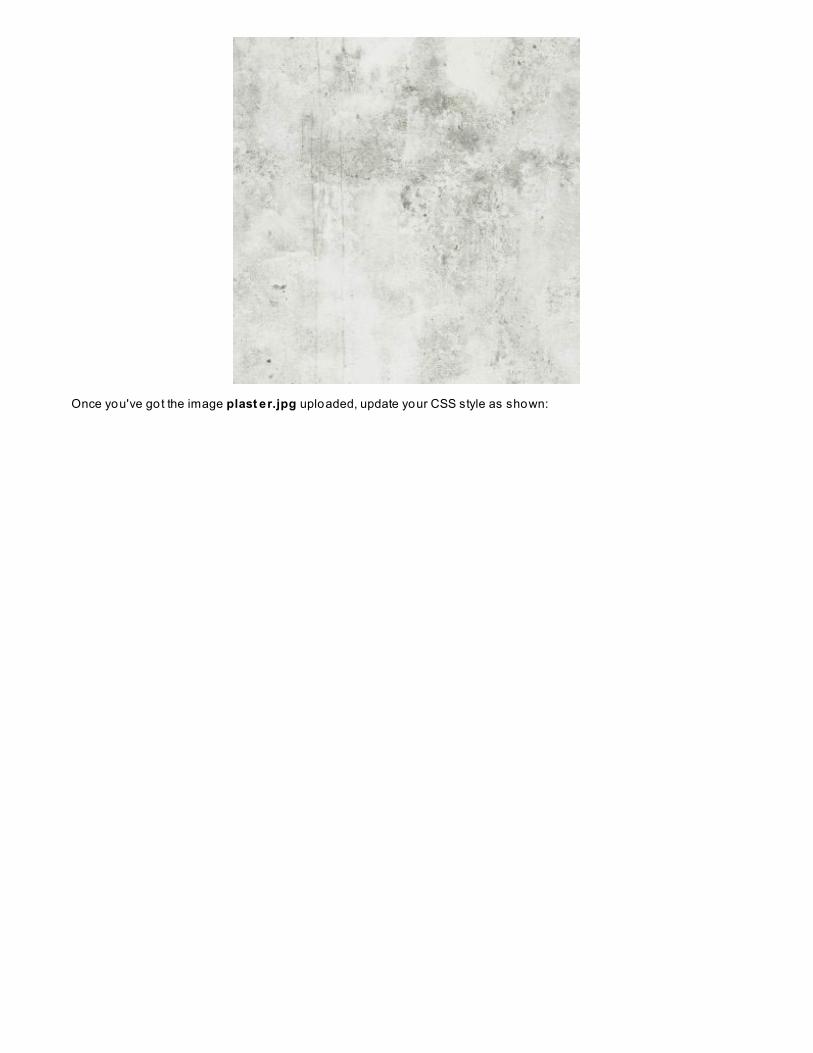
Once you've got the image plast er.jpg uploaded, update your CSS style as shown:
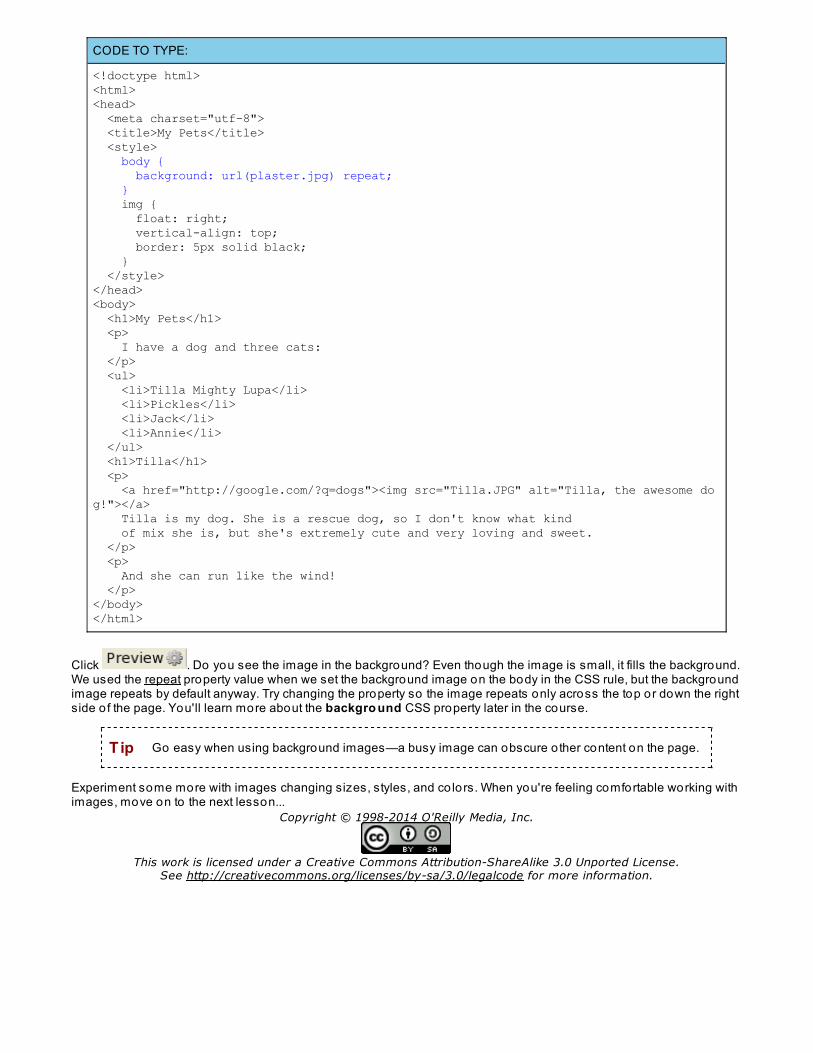
CODE TO TYPE:
<!doctype html><html><head> <meta charset="utf-8"> <title>My Pets</title> <style> body { background: url(plaster.jpg) repeat; } img { float: right; vertical-align: top; border: 5px solid black; } </style></head><body> <h1>My Pets</h1> <p> I have a dog and three cats: </p> <ul> <li>Tilla Mighty Lupa</li> <li>Pickles</li> <li>Jack</li> <li>Annie</li> </ul> <h1>Tilla</h1> <p> <a href="http://google.com/?q=dogs"><img src="Tilla.JPG" alt="Tilla, the awesome dog!"></a> Tilla is my dog. She is a rescue dog, so I don't know what kind of mix she is, but she's extremely cute and very loving and sweet. </p> <p> And she can run like the wind! </p></body></html>
Click . Do you see the image in the background? Even though the image is small, it fills the background.We used the repeat property value when we set the background image on the body in the CSS rule, but the backgroundimage repeats by default anyway. Try changing the property so the image repeats only across the top or down the rightside o f the page. You'll learn more about the backgro und CSS property later in the course.
Tip Go easy when using background images—a busy image can obscure o ther content on the page.
Experiment some more with images changing sizes, styles, and co lors. When you're feeling comfortable working withimages, move on to the next lesson...
Copyright © 1998-2014 O'Reilly Media, Inc.
This work is licensed under a Creative Commons Attribution-ShareAlike 3.0 Unported License.See http://creativecommons.org/licenses/by-sa/3.0/legalcode for more information.
Cascading Style Sheets: IntroductionLesson Objectives
When you complete this lesson, you will be able to :
use CSS to style your web page.style your page using classes when appropriate.style your page using ids when appropriate.link to CSS in an external file.use the style attribute.
We've already used a bit o f CSS in this course, but we haven't explored exactly what it is and how it works. We're ready to digdeeper now to find out what CSS is really all about!
CSS stands for "Cascading S tyle Sheets." We use CSS language to describe the style o f our pages. So, content is describedusing HTML elements to "mark up" your pages, while style is described by CSS properties that tell the browser how to displaythe content within those elements. Using HTML and CSS, we separate content from presentation.
CSS PropertiesLet's take a closer look at CSS using one o f our existing examples. (Just this once, I'll look the o ther way if you cut andpaste the code):
CODE TO TYPE:
<!doctype html><html lang="en"><head> <title> My Home Page </title> <meta charset="utf-8"> <style> body { background-color: #d9d9d9; } </style></head><body > <h1>Welcome to My Home Page</h1> <p> My favorite live rock bands: </p> <ul> <li>Phish</li> <li>Blues Traveler</li> <li>Widespread Panic</li> <li>Pink Floyd</li> <li>Rolling Stones</li> </ul></body></html>
Save it in your /ht mlcss1 fo lder as mybands.ht ml, and then click . You may recall that we used CSShere to set the background co lor o f the page to a light grey.
Now let's check out a CSS rule. A rule consists o f a selector and one or more properties:
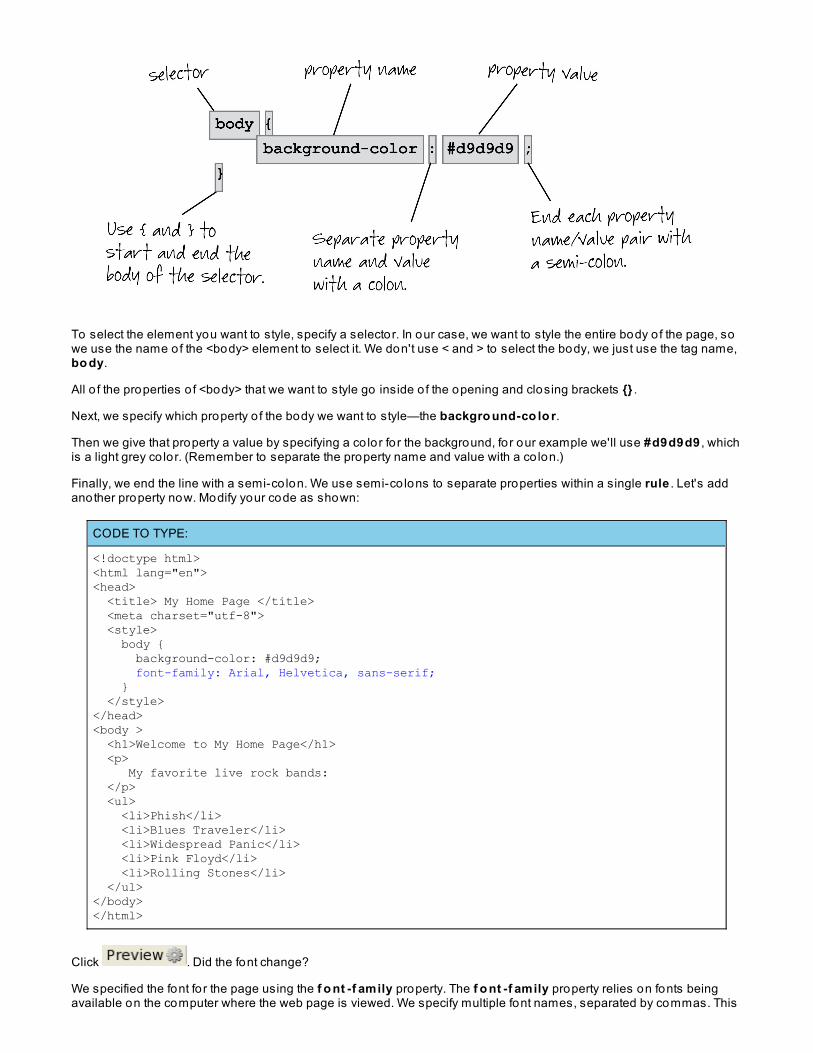
To select the element you want to style, specify a selector. In our case, we want to style the entire body o f the page, sowe use the name of the <body> element to select it. We don't use < and > to select the body, we just use the tag name,bo dy.
All o f the properties o f <body> that we want to style go inside o f the opening and closing brackets {} .
Next, we specify which property o f the body we want to style—the backgro und-co lo r.
Then we give that property a value by specifying a co lor fo r the background, fo r our example we'll use #d9d9d9 , whichis a light grey co lor. (Remember to separate the property name and value with a co lon.)
Finally, we end the line with a semi-co lon. We use semi-co lons to separate properties within a single rule . Let's addanother property now. Modify your code as shown:
CODE TO TYPE:
<!doctype html><html lang="en"><head> <title> My Home Page </title> <meta charset="utf-8"> <style> body { background-color: #d9d9d9; font-family: Arial, Helvetica, sans-serif; } </style></head><body > <h1>Welcome to My Home Page</h1> <p> My favorite live rock bands: </p> <ul> <li>Phish</li> <li>Blues Traveler</li> <li>Widespread Panic</li> <li>Pink Floyd</li> <li>Rolling Stones</li> </ul> </body></html>
Click . Did the font change?
We specified the font fo r the page using the f o nt -f amily property. The f o nt -f amily property relies on fonts beingavailable on the computer where the web page is viewed. We specify multiple font names, separated by commas. This
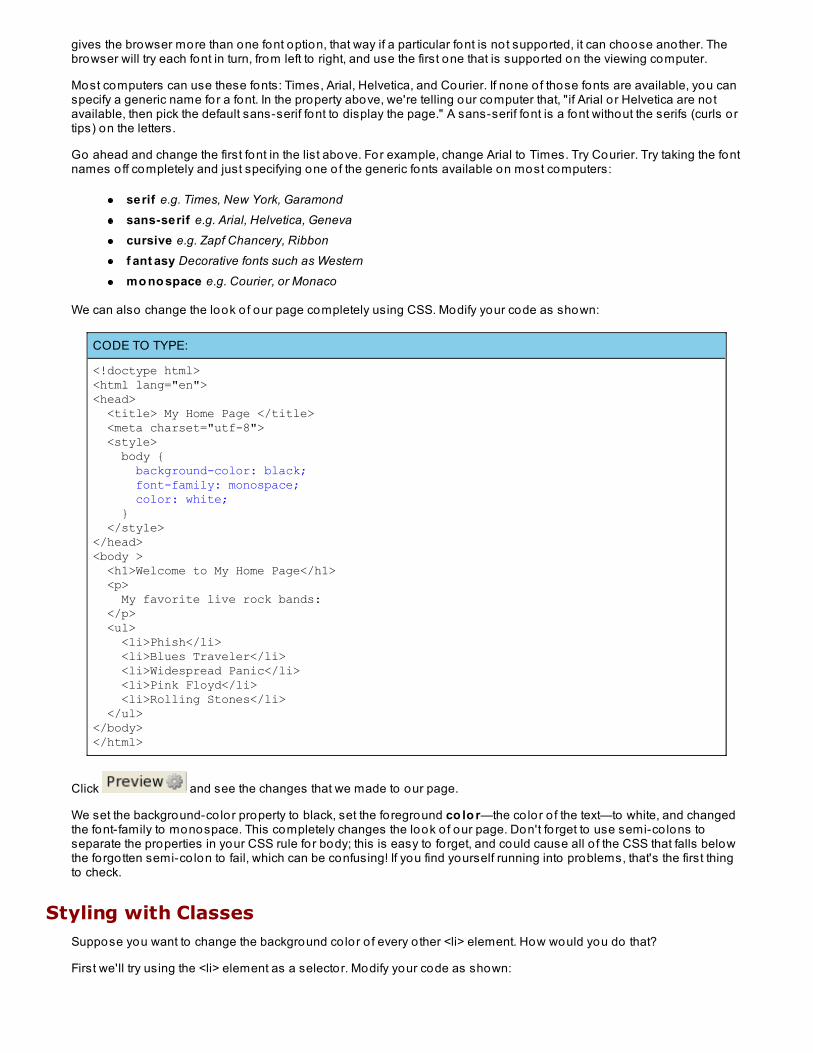
gives the browser more than one font option, that way if a particular font is not supported, it can choose another. Thebrowser will try each font in turn, from left to right, and use the first one that is supported on the viewing computer.
Most computers can use these fonts: Times, Arial, Helvetica, and Courier. If none o f those fonts are available, you canspecify a generic name for a font. In the property above, we're telling our computer that, "if Arial o r Helvetica are notavailable, then pick the default sans-serif font to display the page." A sans-serif font is a font without the serifs (curls ortips) on the letters.
Go ahead and change the first font in the list above. For example, change Arial to Times. Try Courier. Try taking the fontnames o ff completely and just specifying one o f the generic fonts available on most computers:
serif e.g. Times, New York, Garamondsans-serif e.g. Arial, Helvetica, Genevacursive e.g. Zapf Chancery, Ribbonf ant asy Decorative fonts such as Westernmo no space e.g. Courier, or Monaco
We can also change the look o f our page completely using CSS. Modify your code as shown:
CODE TO TYPE:
<!doctype html><html lang="en"><head> <title> My Home Page </title> <meta charset="utf-8"> <style> body { background-color: black; font-family: monospace; color: white; } </style></head><body > <h1>Welcome to My Home Page</h1> <p> My favorite live rock bands: </p> <ul> <li>Phish</li> <li>Blues Traveler</li> <li>Widespread Panic</li> <li>Pink Floyd</li> <li>Rolling Stones</li> </ul> </body></html>
Click and see the changes that we made to our page.
We set the background-co lor property to black, set the foreground co lo r—the co lor o f the text—to white, and changedthe font-family to monospace. This completely changes the look o f our page. Don't fo rget to use semi-co lons toseparate the properties in your CSS rule for body; this is easy to forget, and could cause all o f the CSS that falls belowthe forgotten semi-co lon to fail, which can be confusing! If you find yourself running into problems, that's the first thingto check.
Styling with ClassesSuppose you want to change the background co lor o f every o ther <li> element. How would you do that?
First we'll try using the <li> element as a selector. Modify your code as shown:
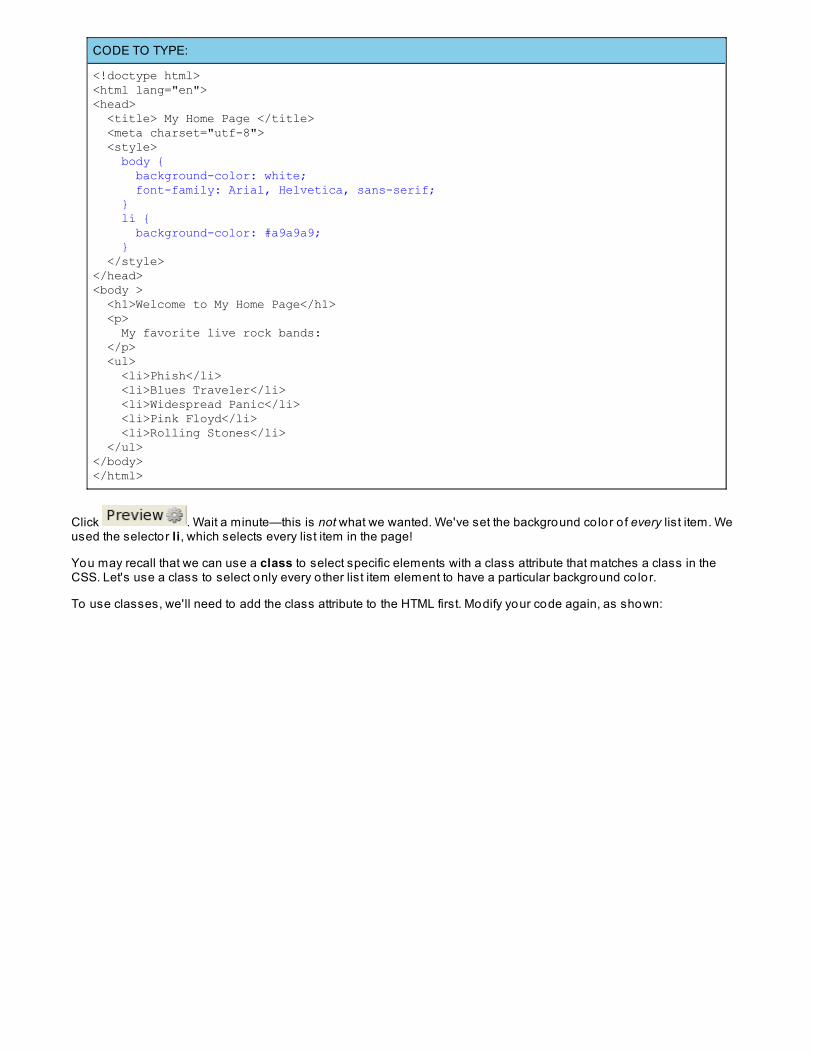
CODE TO TYPE:
<!doctype html><html lang="en"><head> <title> My Home Page </title> <meta charset="utf-8"> <style> body { background-color: white; font-family: Arial, Helvetica, sans-serif; } li { background-color: #a9a9a9; } </style></head><body > <h1>Welcome to My Home Page</h1> <p> My favorite live rock bands: </p> <ul> <li>Phish</li> <li>Blues Traveler</li> <li>Widespread Panic</li> <li>Pink Floyd</li> <li>Rolling Stones</li> </ul> </body></html>
Click . Wait a minute—this is not what we wanted. We've set the background co lor o f every list item. Weused the selector li, which selects every list item in the page!
You may recall that we can use a class to select specific elements with a class attribute that matches a class in theCSS. Let's use a class to select only every o ther list item element to have a particular background co lor.
To use classes, we'll need to add the class attribute to the HTML first. Modify your code again, as shown:
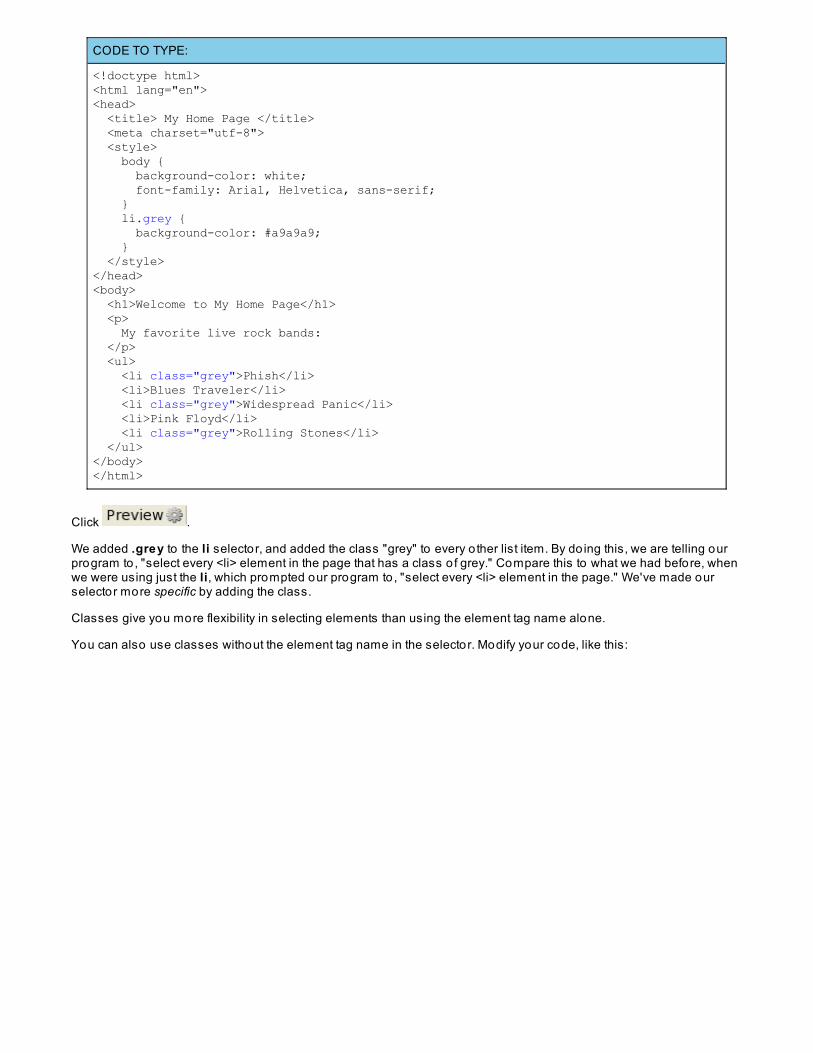
CODE TO TYPE:
<!doctype html><html lang="en"><head> <title> My Home Page </title> <meta charset="utf-8"> <style> body { background-color: white; font-family: Arial, Helvetica, sans-serif; } li.grey { background-color: #a9a9a9; } </style></head><body> <h1>Welcome to My Home Page</h1> <p> My favorite live rock bands: </p> <ul> <li class="grey">Phish</li> <li>Blues Traveler</li> <li class="grey">Widespread Panic</li> <li>Pink Floyd</li> <li class="grey">Rolling Stones</li> </ul></body></html>
Click .
We added .grey to the li selector, and added the class "grey" to every o ther list item. By do ing this, we are telling ourprogram to , "select every <li> element in the page that has a class o f grey." Compare this to what we had before, whenwe were using just the li, which prompted our program to , "select every <li> element in the page." We've made ourselector more specific by adding the class.
Classes give you more flexibility in selecting elements than using the element tag name alone.
You can also use classes without the element tag name in the selector. Modify your code, like this:
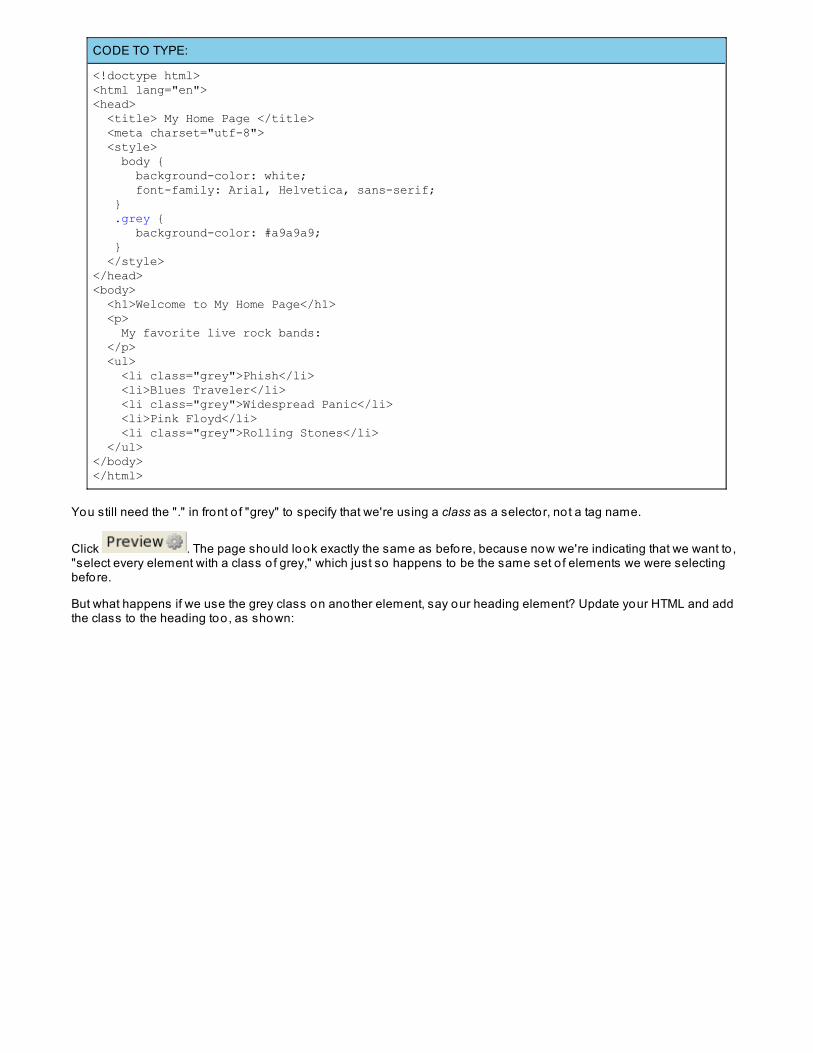
CODE TO TYPE:
<!doctype html><html lang="en"><head> <title> My Home Page </title> <meta charset="utf-8"> <style> body { background-color: white; font-family: Arial, Helvetica, sans-serif; } .grey { background-color: #a9a9a9; } </style></head><body> <h1>Welcome to My Home Page</h1> <p> My favorite live rock bands: </p> <ul> <li class="grey">Phish</li> <li>Blues Traveler</li> <li class="grey">Widespread Panic</li> <li>Pink Floyd</li> <li class="grey">Rolling Stones</li> </ul></body></html>
You still need the "." in front o f "grey" to specify that we're using a class as a selector, not a tag name.
Click . The page should look exactly the same as before, because now we're indicating that we want to ,"select every element with a class o f grey," which just so happens to be the same set o f elements we were selectingbefore.
But what happens if we use the grey class on another element, say our heading element? Update your HTML and addthe class to the heading too, as shown:

CODE TO TYPE:
<!doctype html><html lang="en"><head> <title> My Home Page </title> <meta charset="utf-8"> <style> body { background-color: white; font-family: Arial, Helvetica, sans-serif; } .grey { background-color: #a9a9a9; } </style></head><body > <h1 class="grey">Welcome to My Home Page</h1> <p> My favorite live rock bands: </p> <ul> <li class="grey">Phish</li> <li>Blues Traveler</li> <li class="grey">Widespread Panic</li> <li>Pink Floyd</li> <li class="grey">Rolling Stones</li> </ul></body></html>
Click . The heading at the top o f your page now has a grey background. You can mix and match usingclass selectors with element selectors to be as general o r specific as you want to be when selecting which elements tostyle. You'll see lo ts more examples o f how we do this throughout the course.
So, how would you add a grey background to the paragraph?
Styling with idsLet's add a little more structure to our HTML by adding a couple o f <div> elements, and update our header. We'll alsouse the id attribute and give each <div> element a unique id. Go ahead and remove all o f the class attributes from theHTML elements while you're at it. Modify your code as shown:
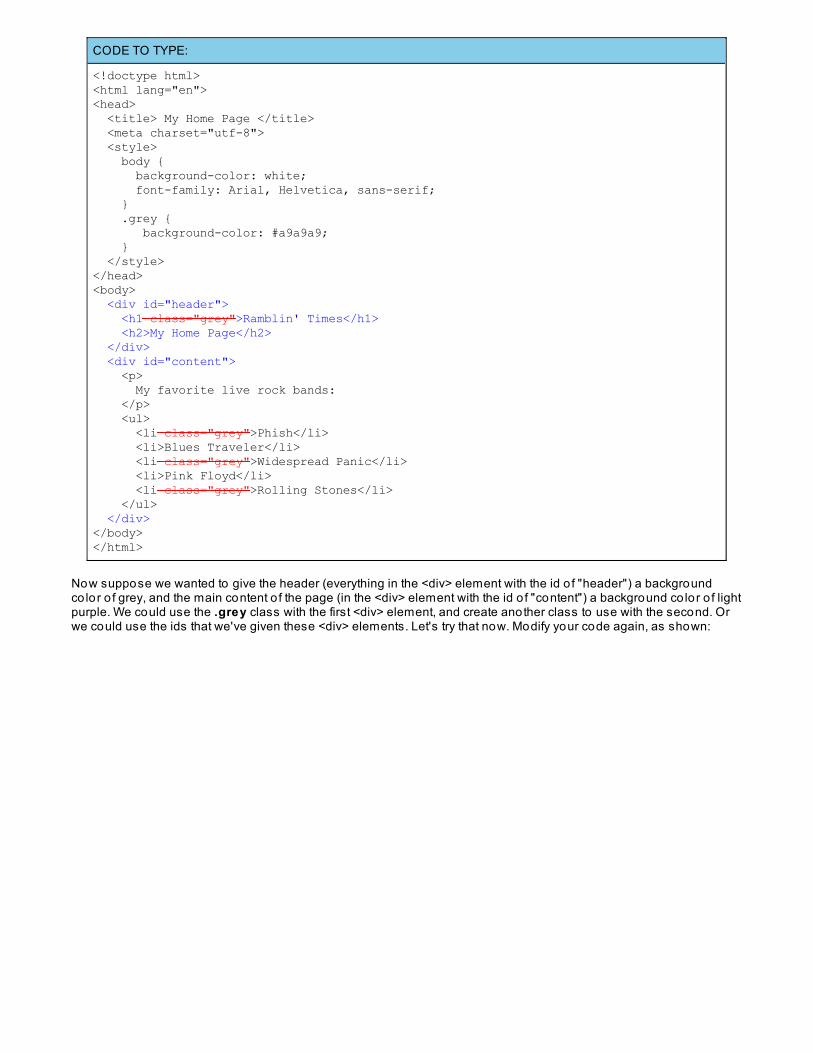
CODE TO TYPE:
<!doctype html><html lang="en"><head> <title> My Home Page </title> <meta charset="utf-8"> <style> body { background-color: white; font-family: Arial, Helvetica, sans-serif; } .grey { background-color: #a9a9a9; } </style></head><body> <div id="header"> <h1 class="grey">Ramblin' Times</h1> <h2>My Home Page</h2> </div> <div id="content"> <p> My favorite live rock bands: </p> <ul> <li class="grey">Phish</li> <li>Blues Traveler</li> <li class="grey">Widespread Panic</li> <li>Pink Floyd</li> <li class="grey">Rolling Stones</li> </ul> </div></body></html>
Now suppose we wanted to give the header (everything in the <div> element with the id o f "header") a backgroundco lor o f grey, and the main content o f the page (in the <div> element with the id o f "content") a background co lor o f lightpurple. We could use the .grey class with the first <div> element, and create another class to use with the second. Orwe could use the ids that we've given these <div> elements. Let's try that now. Modify your code again, as shown:
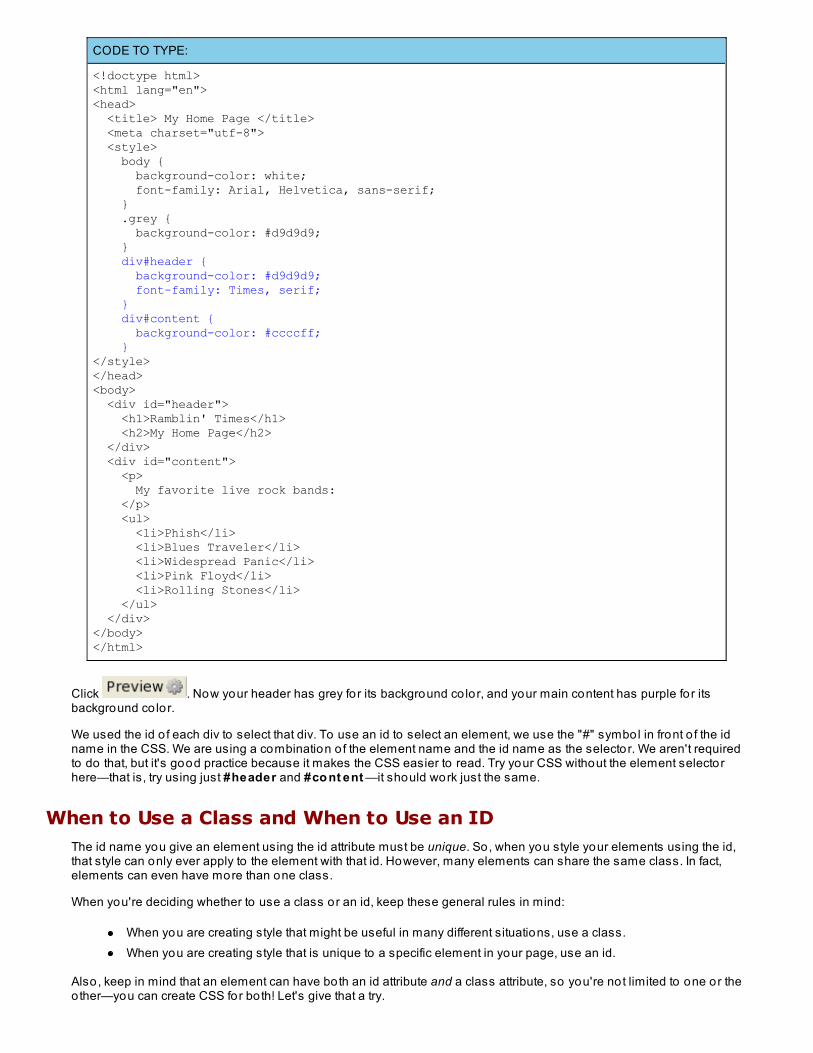
CODE TO TYPE:
<!doctype html><html lang="en"><head> <title> My Home Page </title> <meta charset="utf-8"> <style> body { background-color: white; font-family: Arial, Helvetica, sans-serif; } .grey { background-color: #d9d9d9; } div#header { background-color: #d9d9d9; font-family: Times, serif; } div#content { background-color: #ccccff; }</style></head><body> <div id="header"> <h1>Ramblin' Times</h1> <h2>My Home Page</h2> </div> <div id="content"> <p> My favorite live rock bands: </p> <ul> <li>Phish</li> <li>Blues Traveler</li> <li>Widespread Panic</li> <li>Pink Floyd</li> <li>Rolling Stones</li> </ul> </div></body></html>
Click . Now your header has grey for its background co lor, and your main content has purple for itsbackground co lor.
We used the id o f each div to select that div. To use an id to select an element, we use the "#" symbol in front o f the idname in the CSS. We are using a combination o f the element name and the id name as the selector. We aren't requiredto do that, but it's good practice because it makes the CSS easier to read. Try your CSS without the element selectorhere—that is, try using just #header and #co nt ent —it should work just the same.
When to Use a Class and When to Use an IDThe id name you give an element using the id attribute must be unique. So, when you style your elements using the id,that style can only ever apply to the element with that id. However, many elements can share the same class. In fact,elements can even have more than one class.
When you're deciding whether to use a class or an id, keep these general rules in mind:
When you are creating style that might be useful in many different situations, use a class.When you are creating style that is unique to a specific element in your page, use an id.
Also, keep in mind that an element can have both an id attribute and a class attribute, so you're not limited to one or theother—you can create CSS for both! Let's give that a try.
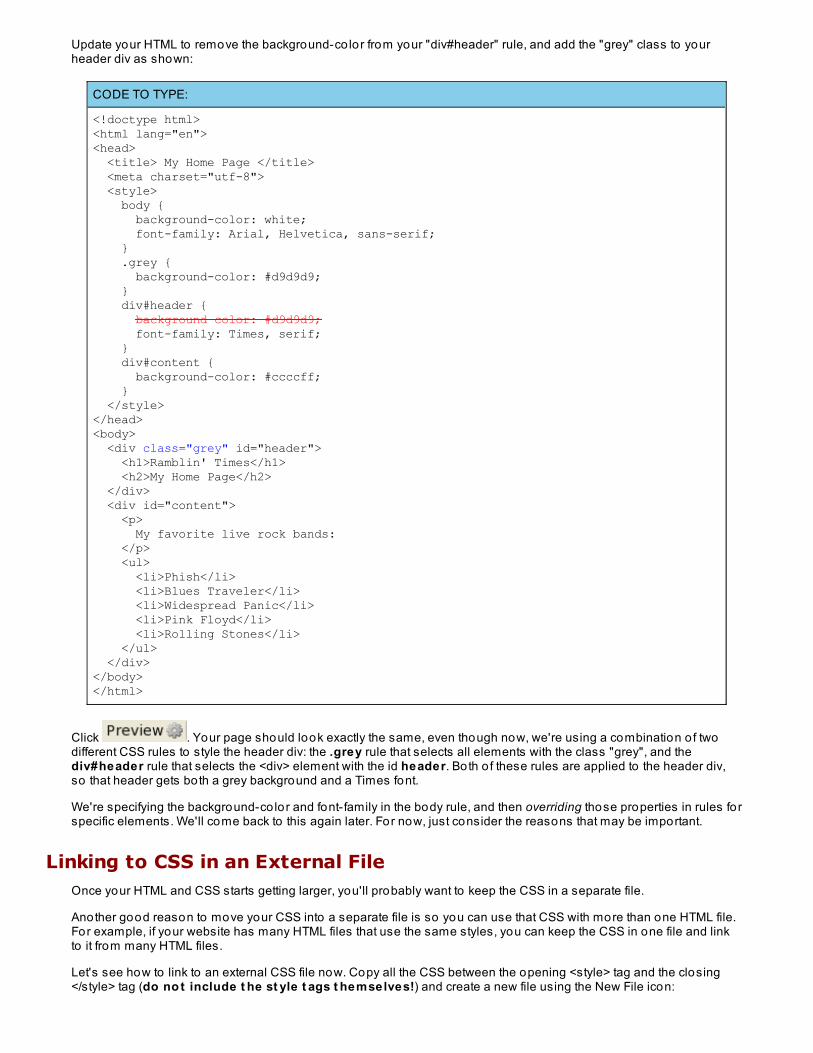
Update your HTML to remove the background-co lor from your "div#header" rule, and add the "grey" class to yourheader div as shown:
CODE TO TYPE:
<!doctype html><html lang="en"><head> <title> My Home Page </title> <meta charset="utf-8"> <style> body { background-color: white; font-family: Arial, Helvetica, sans-serif; } .grey { background-color: #d9d9d9; } div#header { background-color: #d9d9d9; font-family: Times, serif; } div#content { background-color: #ccccff; } </style></head><body> <div class="grey" id="header"> <h1>Ramblin' Times</h1> <h2>My Home Page</h2> </div> <div id="content"> <p> My favorite live rock bands: </p> <ul> <li>Phish</li> <li>Blues Traveler</li> <li>Widespread Panic</li> <li>Pink Floyd</li> <li>Rolling Stones</li> </ul> </div></body></html>
Click . Your page should look exactly the same, even though now, we're using a combination o f twodifferent CSS rules to style the header div: the .grey rule that selects all elements with the class "grey", and thediv#header rule that selects the <div> element with the id header. Both o f these rules are applied to the header div,so that header gets both a grey background and a Times font.
We're specifying the background-co lor and font-family in the body rule, and then overriding those properties in rules forspecific elements. We'll come back to this again later. For now, just consider the reasons that may be important.
Linking to CSS in an External FileOnce your HTML and CSS starts getting larger, you'll probably want to keep the CSS in a separate file.
Another good reason to move your CSS into a separate file is so you can use that CSS with more than one HTML file.For example, if your website has many HTML files that use the same styles, you can keep the CSS in one file and linkto it from many HTML files.
Let's see how to link to an external CSS file now. Copy all the CSS between the opening <style> tag and the closing</style> tag (do no t include t he st yle t ags t hemselves!) and create a new file using the New File icon:
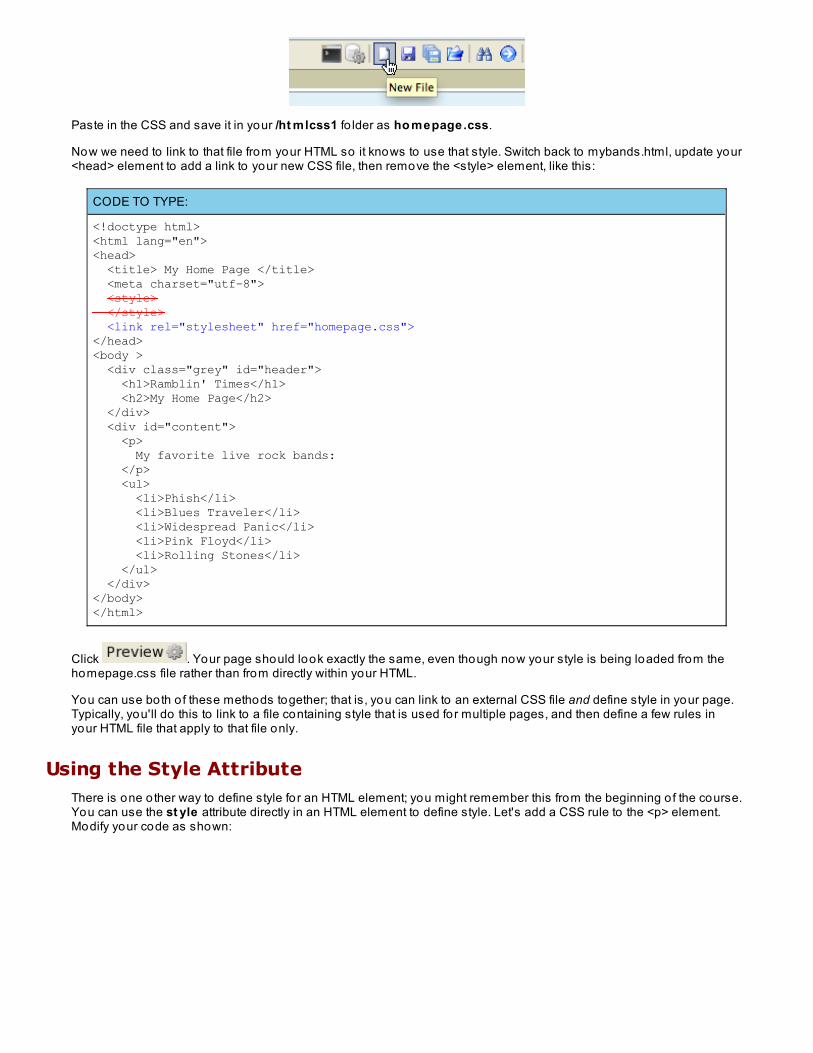
Paste in the CSS and save it in your /ht mlcss1 fo lder as ho mepage.css.
Now we need to link to that file from your HTML so it knows to use that style. Switch back to mybands.html, update your<head> element to add a link to your new CSS file, then remove the <style> element, like this:
CODE TO TYPE:
<!doctype html><html lang="en"><head> <title> My Home Page </title> <meta charset="utf-8"> <style> </style> <link rel="stylesheet" href="homepage.css"></head><body > <div class="grey" id="header"> <h1>Ramblin' Times</h1> <h2>My Home Page</h2> </div> <div id="content"> <p> My favorite live rock bands: </p> <ul> <li>Phish</li> <li>Blues Traveler</li> <li>Widespread Panic</li> <li>Pink Floyd</li> <li>Rolling Stones</li> </ul> </div></body></html>
Click . Your page should look exactly the same, even though now your style is being loaded from thehomepage.css file rather than from directly within your HTML.
You can use both o f these methods together; that is, you can link to an external CSS file and define style in your page.Typically, you'll do this to link to a file containing style that is used for multiple pages, and then define a few rules inyour HTML file that apply to that file only.
Using the Style AttributeThere is one o ther way to define style fo r an HTML element; you might remember this from the beginning o f the course.You can use the st yle attribute directly in an HTML element to define style. Let's add a CSS rule to the <p> element.Modify your code as shown:
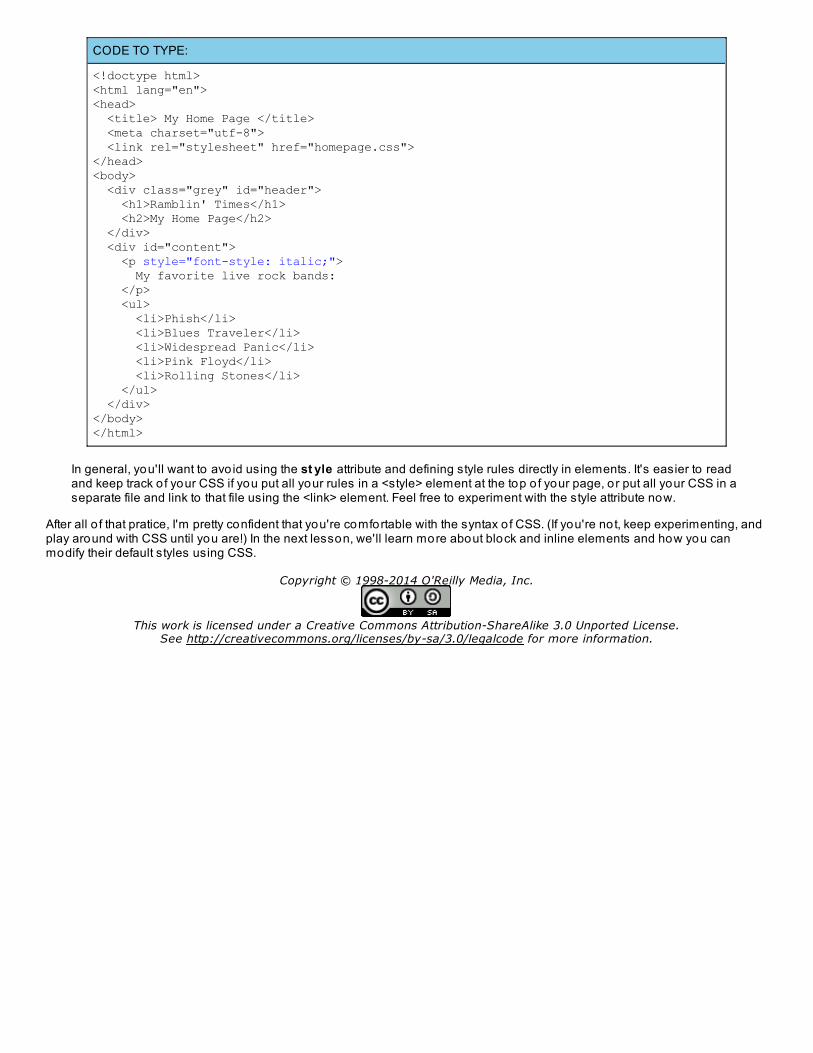
CODE TO TYPE:
<!doctype html><html lang="en"><head> <title> My Home Page </title> <meta charset="utf-8"> <link rel="stylesheet" href="homepage.css"></head><body> <div class="grey" id="header"> <h1>Ramblin' Times</h1> <h2>My Home Page</h2> </div> <div id="content"> <p style="font-style: italic;"> My favorite live rock bands: </p> <ul> <li>Phish</li> <li>Blues Traveler</li> <li>Widespread Panic</li> <li>Pink Floyd</li> <li>Rolling Stones</li> </ul> </div></body></html>
In general, you'll want to avo id using the st yle attribute and defining style rules directly in elements. It's easier to readand keep track o f your CSS if you put all your rules in a <style> element at the top o f your page, or put all your CSS in aseparate file and link to that file using the <link> element. Feel free to experiment with the style attribute now.
After all o f that pratice, I'm pretty confident that you're comfortable with the syntax o f CSS. (If you're not, keep experimenting, andplay around with CSS until you are!) In the next lesson, we'll learn more about block and inline elements and how you canmodify their default styles using CSS.
Copyright © 1998-2014 O'Reilly Media, Inc.
This work is licensed under a Creative Commons Attribution-ShareAlike 3.0 Unported License.See http://creativecommons.org/licenses/by-sa/3.0/legalcode for more information.
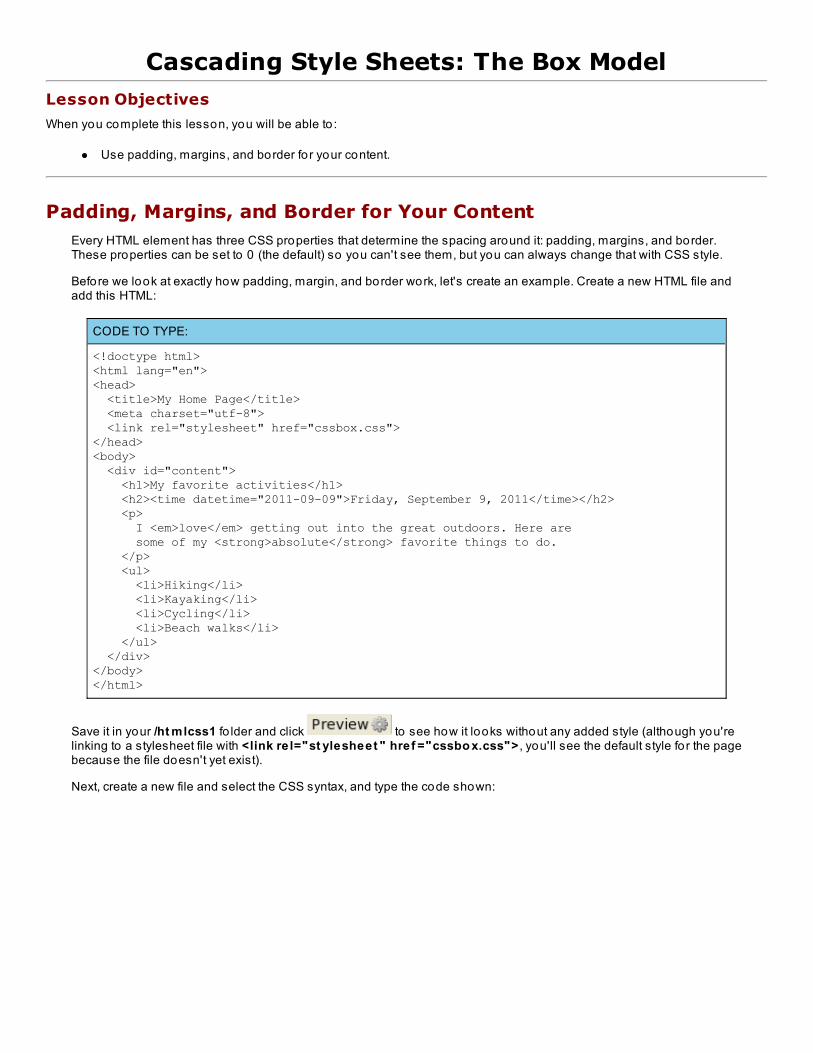
Cascading Style Sheets: The Box ModelLesson Objectives
When you complete this lesson, you will be able to :
Use padding, margins, and border fo r your content.
Padding, Margins, and Border for Your ContentEvery HTML element has three CSS properties that determine the spacing around it: padding, margins, and border.These properties can be set to 0 (the default) so you can't see them, but you can always change that with CSS style.
Before we look at exactly how padding, margin, and border work, let's create an example. Create a new HTML file andadd this HTML:
CODE TO TYPE:
<!doctype html><html lang="en"><head> <title>My Home Page</title> <meta charset="utf-8"> <link rel="stylesheet" href="cssbox.css"></head><body> <div id="content"> <h1>My favorite activities</h1> <h2><time datetime="2011-09-09">Friday, September 9, 2011</time></h2> <p> I <em>love</em> getting out into the great outdoors. Here are some of my <strong>absolute</strong> favorite things to do. </p> <ul> <li>Hiking</li> <li>Kayaking</li> <li>Cycling</li> <li>Beach walks</li> </ul> </div></body></html>
Save it in your /ht mlcss1 fo lder and click to see how it looks without any added style (although you'relinking to a stylesheet file with <link re l="st ylesheet " href ="cssbo x.css"> , you'll see the default style fo r the pagebecause the file doesn't yet exist).
Next, create a new file and select the CSS syntax, and type the code shown:
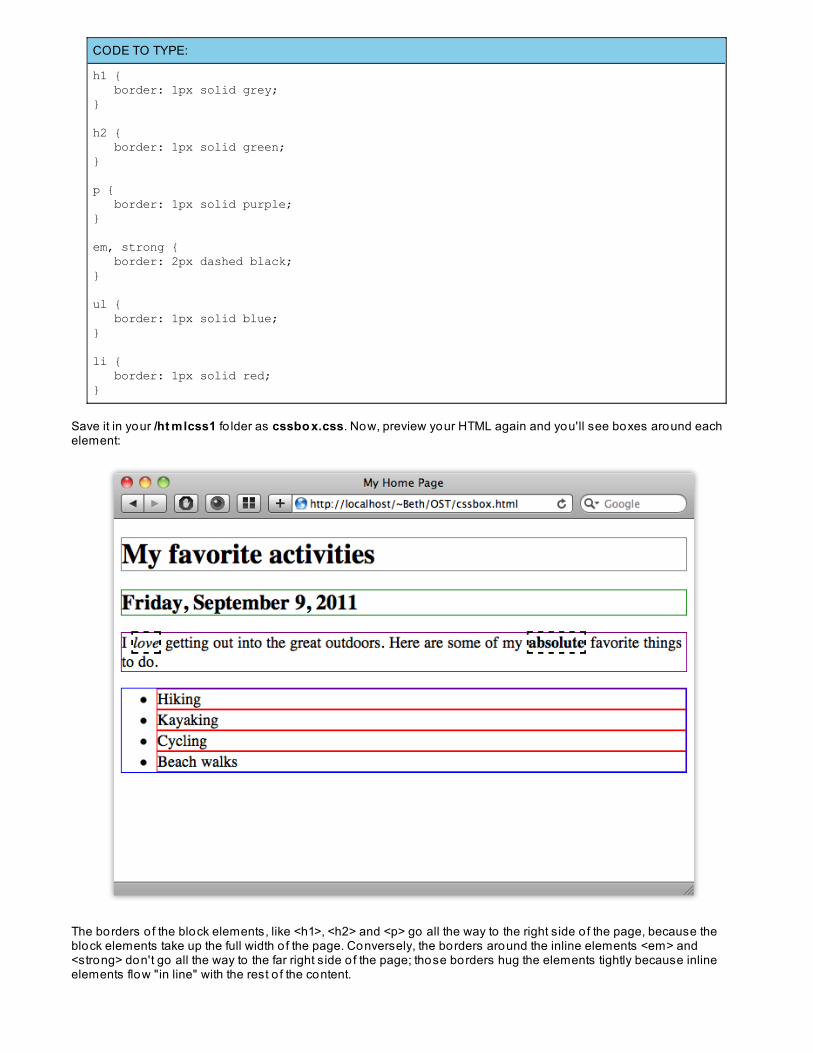
CODE TO TYPE:
h1 { border: 1px solid grey;}
h2 { border: 1px solid green;}
p { border: 1px solid purple;}
em, strong { border: 2px dashed black;}
ul { border: 1px solid blue;}
li { border: 1px solid red;}
Save it in your /ht mlcss1 fo lder as cssbo x.css. Now, preview your HTML again and you'll see boxes around eachelement:
The borders o f the block elements, like <h1>, <h2> and <p> go all the way to the right side o f the page, because theblock elements take up the full width o f the page. Conversely, the borders around the inline elements <em> and<strong> don't go all the way to the far right side o f the page; those borders hug the elements tightly because inlineelements flow "in line" with the rest o f the content.
NoteWe combined the rules for two elements, <em> and <strong> into one rule by separating the selectors(tag names) with a comma. If you're using the same rule for two or more elements, you can combinethem like that.
Now take a look at the spacing inside and outside o f the borders. The <ul> element (in blue) has some space betweenthe bullets and the left side o f the element where you see the border, but the <h1> and <h2> elements don't.
Okay, now you're ready to take on padding and margins. Update your CSS to add some padding to the <h1> element:
CODE TO TYPE:
h1 { border: 1px solid grey; padding: 10px;}
h2 { border: 1px solid green;}p { border: 1px solid purple;}em, strong { border: 2px dashed black;}ul { border: 1px solid blue;}li { border: 1px solid red;}
Click . You should now see extra space on the left, top, and bottom of the element between the elementcontent and the border. Try resizing your browser window so it's smaller than the width o f the heading. The 10 pixels o fpadding is applied all around the heading; you'll see it on the right side too. Try adding padding to the <p> element too:
CODE TO TYPE:
h1 { border: 1px solid grey; padding: 10px;}h2 { border: 1px solid green;}
p { border: 1px solid purple; padding: 10px;}
em, strong { border: 2px dashed black;}ul { border: 1px solid blue;}li { border: 1px solid red;}
Click . You'll see space added to the <p> element.
We've used "px" a few times so far. "px" stands for pixels and is one o f several different ways you can specify sizes in
CSS. Computer monitors can range from 800 pixels wide by 600 pixels high, up to thousands o f pixels in height andwidth. A pixel is one small do t o f co lor on the monitor; they allow you have fine-grained contro l over the appearance o fyour elements.
Before we take a closer look at how padding, margins, and border work more precisely, let's add a margin to your listitem elements:
CODE TO TYPE:
h1 { border: 1px solid grey; padding: 10px;}h2 { border: 1px solid green;} p { border: 1px solid purple; padding: 10px;}em, strong { border: 2px dashed black;}ul { border: 1px solid blue;}
li { border: 1px solid red; margin-top: 20px;}
Click . Do you see additional space above each list item? Notice that the space is outside the border,not inside, like it was when we added padding?
Okay, enough playing. What are padding, margins, and border really? The CSS Box Model determines the spacingaround elements, and it is defined by padding, margins, and border, like this:
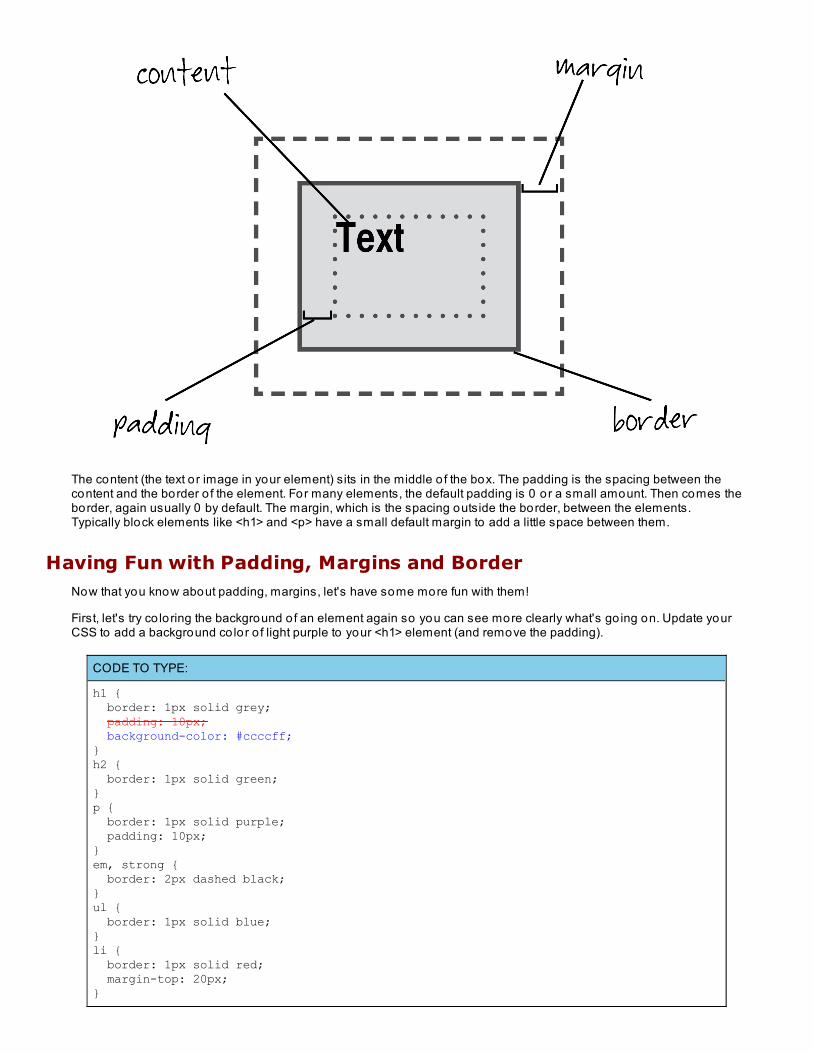
The content (the text or image in your element) sits in the middle o f the box. The padding is the spacing between thecontent and the border o f the element. For many elements, the default padding is 0 or a small amount. Then comes theborder, again usually 0 by default. The margin, which is the spacing outside the border, between the elements.Typically block elements like <h1> and <p> have a small default margin to add a little space between them.
Having Fun with Padding, Margins and BorderNow that you know about padding, margins, let's have some more fun with them!
First, let's try co loring the background o f an element again so you can see more clearly what's go ing on. Update yourCSS to add a background co lor o f light purple to your <h1> element (and remove the padding).
CODE TO TYPE:
h1 { border: 1px solid grey; padding: 10px; background-color: #ccccff;}h2 { border: 1px solid green;} p { border: 1px solid purple; padding: 10px;}em, strong { border: 2px dashed black;}ul { border: 1px solid blue;}li { border: 1px solid red; margin-top: 20px;}
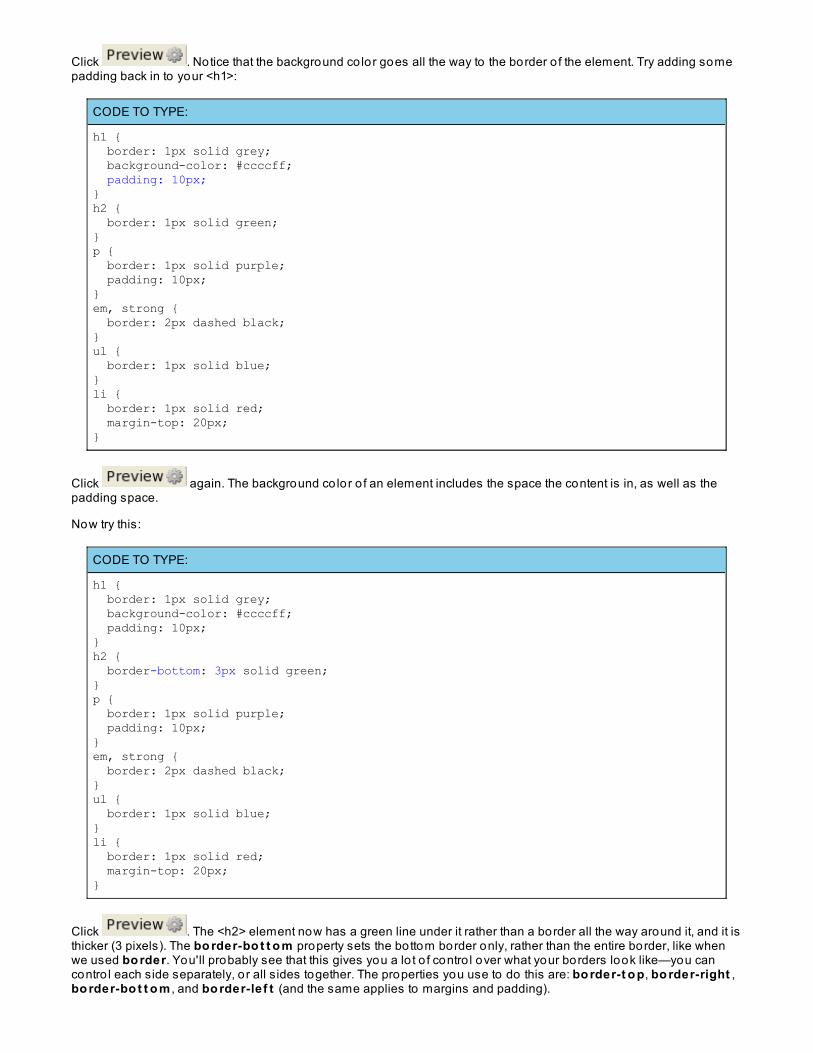
Click . Notice that the background co lor goes all the way to the border o f the element. Try adding somepadding back in to your <h1>:
CODE TO TYPE:
h1 { border: 1px solid grey; background-color: #ccccff; padding: 10px;}h2 { border: 1px solid green;} p { border: 1px solid purple; padding: 10px;}em, strong { border: 2px dashed black;}ul { border: 1px solid blue;}li { border: 1px solid red; margin-top: 20px;}
Click again. The background co lor o f an element includes the space the content is in, as well as thepadding space.
Now try this:
CODE TO TYPE:
h1 { border: 1px solid grey; background-color: #ccccff; padding: 10px;}h2 { border-bottom: 3px solid green;} p { border: 1px solid purple; padding: 10px;}em, strong { border: 2px dashed black;}ul { border: 1px solid blue;}li { border: 1px solid red; margin-top: 20px;}
Click . The <h2> element now has a green line under it rather than a border all the way around it, and it isthicker (3 pixels). The bo rder-bo t t o m property sets the bottom border only, rather than the entire border, like whenwe used bo rder. You'll probably see that this gives you a lo t o f contro l over what your borders look like—you cancontro l each side separately, o r all sides together. The properties you use to do this are: bo rder-t o p, bo rder-right ,bo rder-bo t t o m , and bo rder-lef t (and the same applies to margins and padding).
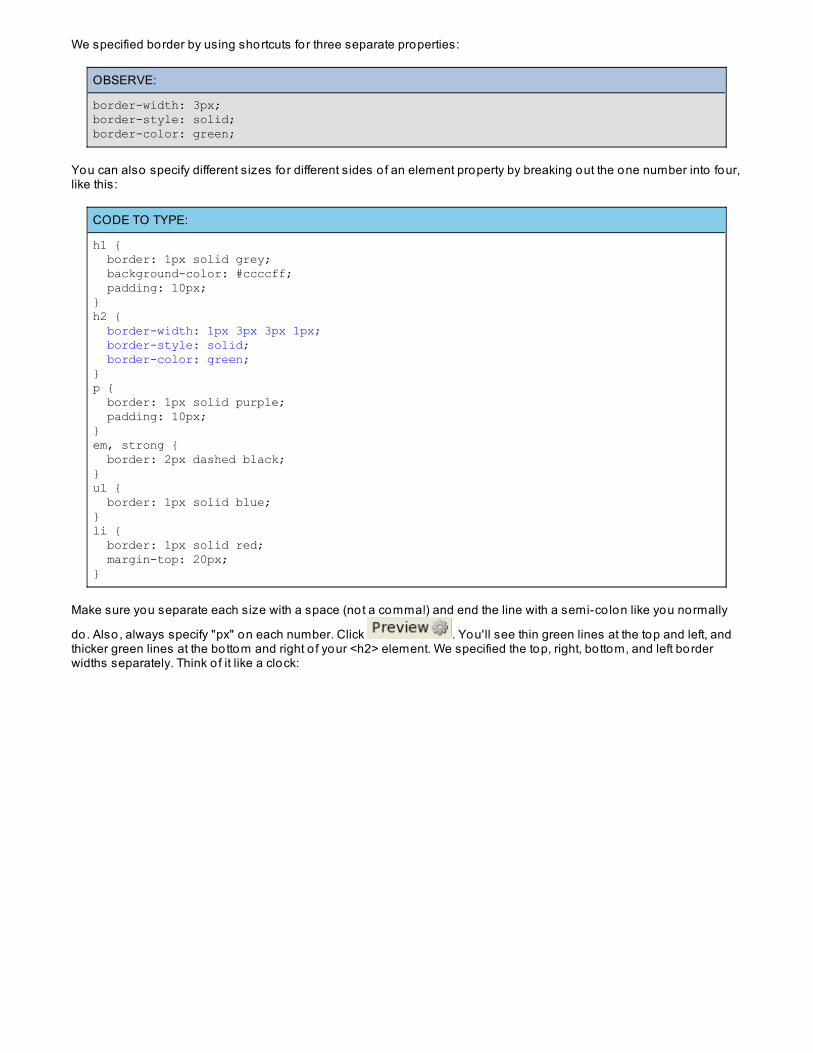
We specified border by using shortcuts fo r three separate properties:
OBSERVE:
border-width: 3px; border-style: solid;border-color: green;
You can also specify different sizes for different sides o f an element property by breaking out the one number into four,like this:
CODE TO TYPE:
h1 { border: 1px solid grey; background-color: #ccccff; padding: 10px;}h2 { border-width: 1px 3px 3px 1px; border-style: solid; border-color: green;}p { border: 1px solid purple; padding: 10px;}em, strong { border: 2px dashed black;}ul { border: 1px solid blue;}li { border: 1px solid red; margin-top: 20px;}
Make sure you separate each size with a space (not a comma!) and end the line with a semi-co lon like you normally
do. Also, always specify "px" on each number. Click . You'll see thin green lines at the top and left, andthicker green lines at the bottom and right o f your <h2> element. We specified the top, right, bottom, and left borderwidths separately. Think o f it like a clock:
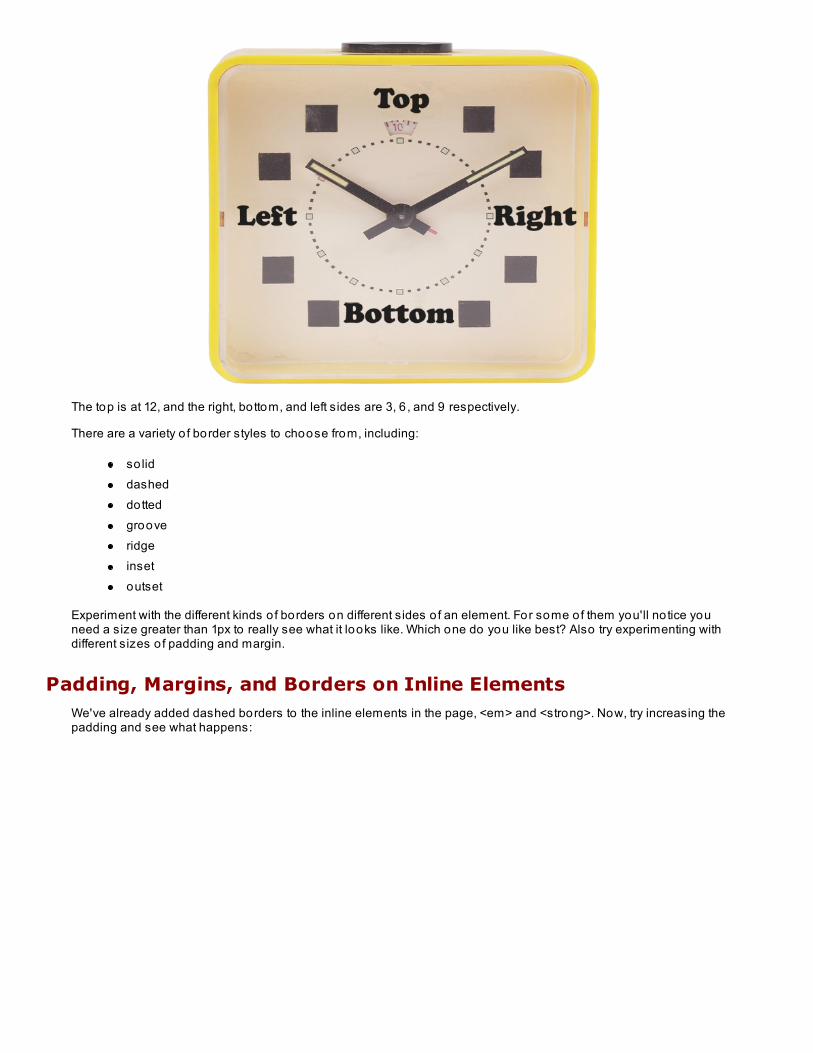
The top is at 12, and the right, bottom, and left sides are 3, 6 , and 9 respectively.
There are a variety o f border styles to choose from, including:
so liddasheddottedgrooveridgeinsetoutset
Experiment with the different kinds o f borders on different sides o f an element. For some of them you'll no tice youneed a size greater than 1px to really see what it looks like. Which one do you like best? Also try experimenting withdifferent sizes o f padding and margin.
Padding, Margins, and Borders on Inline ElementsWe've already added dashed borders to the inline elements in the page, <em> and <strong>. Now, try increasing thepadding and see what happens:
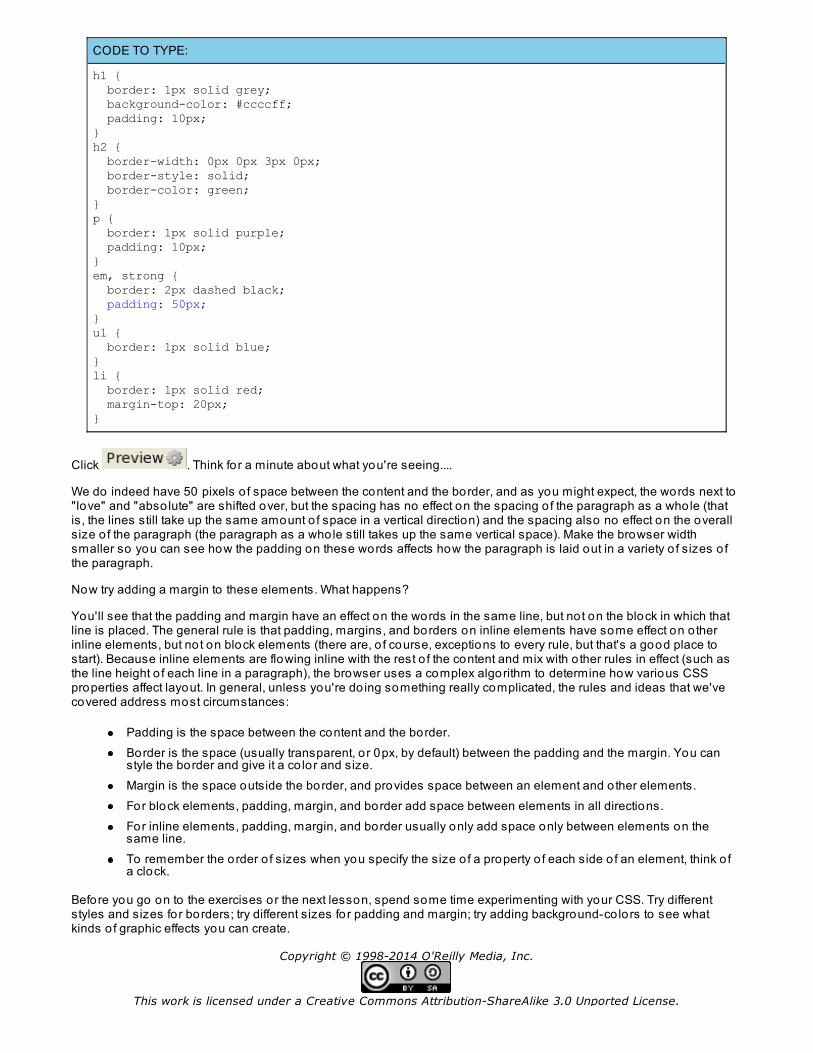
CODE TO TYPE:
h1 { border: 1px solid grey; background-color: #ccccff; padding: 10px;}h2 { border-width: 0px 0px 3px 0px; border-style: solid; border-color: green;}p { border: 1px solid purple; padding: 10px;}em, strong { border: 2px dashed black; padding: 50px;}ul { border: 1px solid blue;}li { border: 1px solid red; margin-top: 20px;}
Click . Think for a minute about what you're seeing....
We do indeed have 50 pixels o f space between the content and the border, and as you might expect, the words next to"love" and "abso lute" are shifted over, but the spacing has no effect on the spacing o f the paragraph as a whole (thatis, the lines still take up the same amount o f space in a vertical direction) and the spacing also no effect on the overallsize o f the paragraph (the paragraph as a whole still takes up the same vertical space). Make the browser widthsmaller so you can see how the padding on these words affects how the paragraph is laid out in a variety o f sizes o fthe paragraph.
Now try adding a margin to these elements. What happens?
You'll see that the padding and margin have an effect on the words in the same line, but not on the block in which thatline is placed. The general rule is that padding, margins, and borders on inline elements have some effect on o therinline elements, but not on block elements (there are, o f course, exceptions to every rule, but that's a good place tostart). Because inline elements are flowing inline with the rest o f the content and mix with o ther rules in effect (such asthe line height o f each line in a paragraph), the browser uses a complex algorithm to determine how various CSSproperties affect layout. In general, unless you're do ing something really complicated, the rules and ideas that we'vecovered address most circumstances:
Padding is the space between the content and the border.Border is the space (usually transparent, o r 0px, by default) between the padding and the margin. You canstyle the border and give it a co lor and size.Margin is the space outside the border, and provides space between an element and o ther elements.For block elements, padding, margin, and border add space between elements in all directions.For inline elements, padding, margin, and border usually only add space only between elements on thesame line.To remember the order o f sizes when you specify the size o f a property o f each side o f an element, think o fa clock.
Before you go on to the exercises or the next lesson, spend some time experimenting with your CSS. Try differentstyles and sizes for borders; try different sizes for padding and margin; try adding background-co lors to see whatkinds o f graphic effects you can create.
Copyright © 1998-2014 O'Reilly Media, Inc.
This work is licensed under a Creative Commons Attribution-ShareAlike 3.0 Unported License.

This work is licensed under a Creative Commons Attribution-ShareAlike 3.0 Unported License.See http://creativecommons.org/licenses/by-sa/3.0/legalcode for more information.
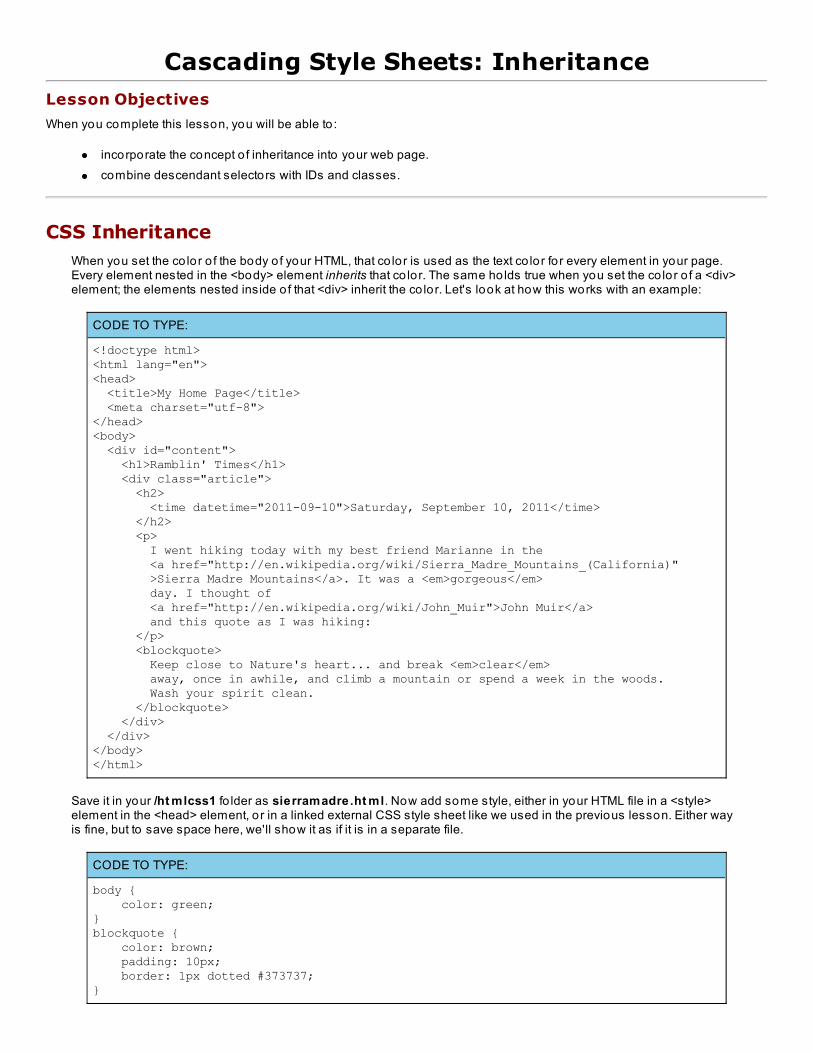
Cascading Style Sheets: InheritanceLesson Objectives
When you complete this lesson, you will be able to :
incorporate the concept o f inheritance into your web page.combine descendant selectors with IDs and classes.
CSS InheritanceWhen you set the co lor o f the body o f your HTML, that co lor is used as the text co lor fo r every element in your page.Every element nested in the <body> element inherits that co lor. The same ho lds true when you set the co lor o f a <div>element; the elements nested inside o f that <div> inherit the co lor. Let's look at how this works with an example:
CODE TO TYPE:
<!doctype html><html lang="en"><head> <title>My Home Page</title> <meta charset="utf-8"></head><body> <div id="content"> <h1>Ramblin' Times</h1> <div class="article"> <h2> <time datetime="2011-09-10">Saturday, September 10, 2011</time> </h2> <p> I went hiking today with my best friend Marianne in the <a href="http://en.wikipedia.org/wiki/Sierra_Madre_Mountains_(California)" >Sierra Madre Mountains</a>. It was a <em>gorgeous</em> day. I thought of <a href="http://en.wikipedia.org/wiki/John_Muir">John Muir</a> and this quote as I was hiking: </p> <blockquote> Keep close to Nature's heart... and break <em>clear</em> away, once in awhile, and climb a mountain or spend a week in the woods. Wash your spirit clean. </blockquote> </div> </div></body></html>
Save it in your /ht mlcss1 fo lder as sierramadre.ht ml. Now add some style, either in your HTML file in a <style>element in the <head> element, o r in a linked external CSS style sheet like we used in the previous lesson. Either wayis fine, but to save space here, we'll show it as if it is in a separate file.
CODE TO TYPE:
body { color: green;}blockquote { color: brown; padding: 10px; border: 1px dotted #373737;}
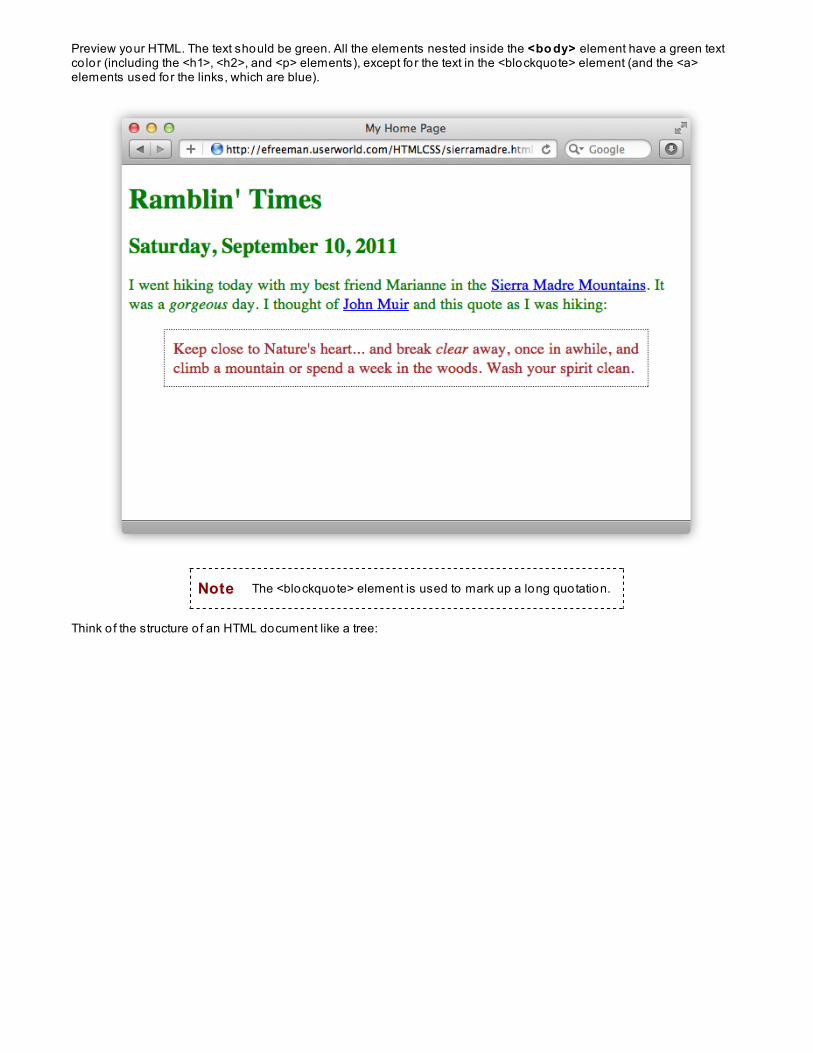
Preview your HTML. The text should be green. All the elements nested inside the <bo dy> element have a green textco lor (including the <h1>, <h2>, and <p> elements), except fo r the text in the <blockquote> element (and the <a>elements used for the links, which are blue).
Note The <blockquote> element is used to mark up a long quotation.
Think o f the structure o f an HTML document like a tree:
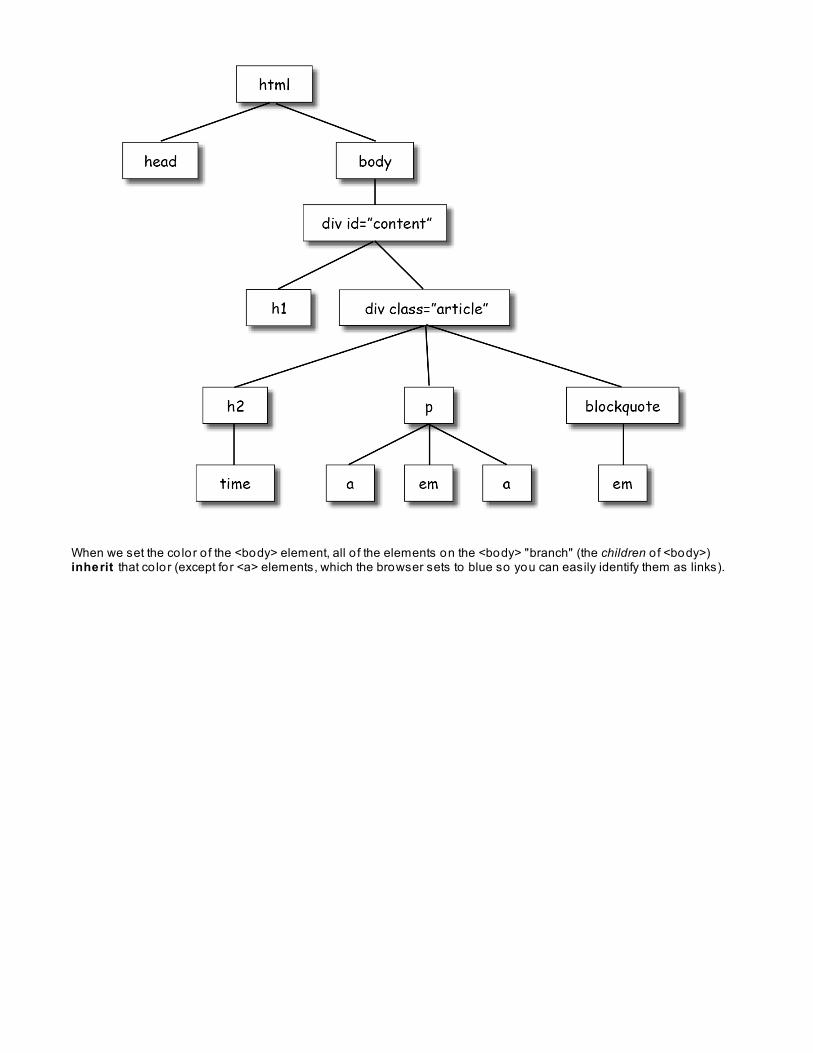
When we set the co lor o f the <body> element, all o f the elements on the <body> "branch" (the children o f <body>)inherit that co lor (except fo r <a> elements, which the browser sets to blue so you can easily identify them as links).
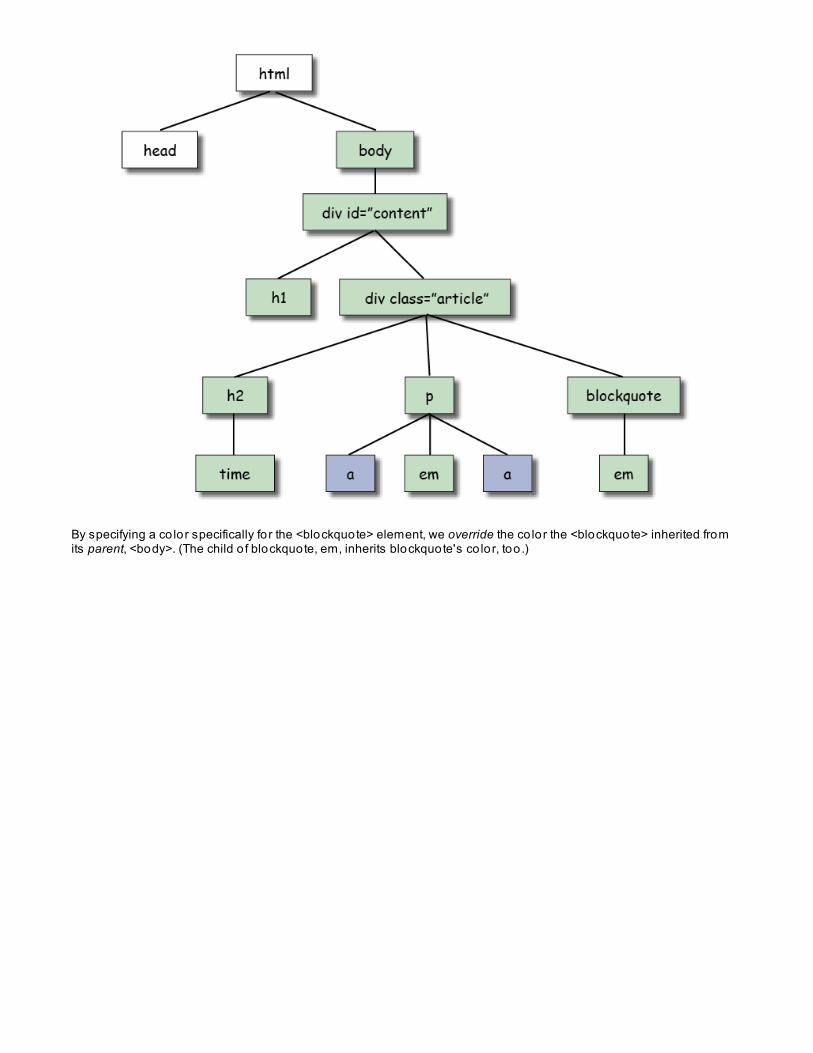
By specifying a co lor specifically fo r the <blockquote> element, we override the co lor the <blockquote> inherited fromits parent, <body>. (The child o f blockquote, em, inherits blockquote's co lor, too .)
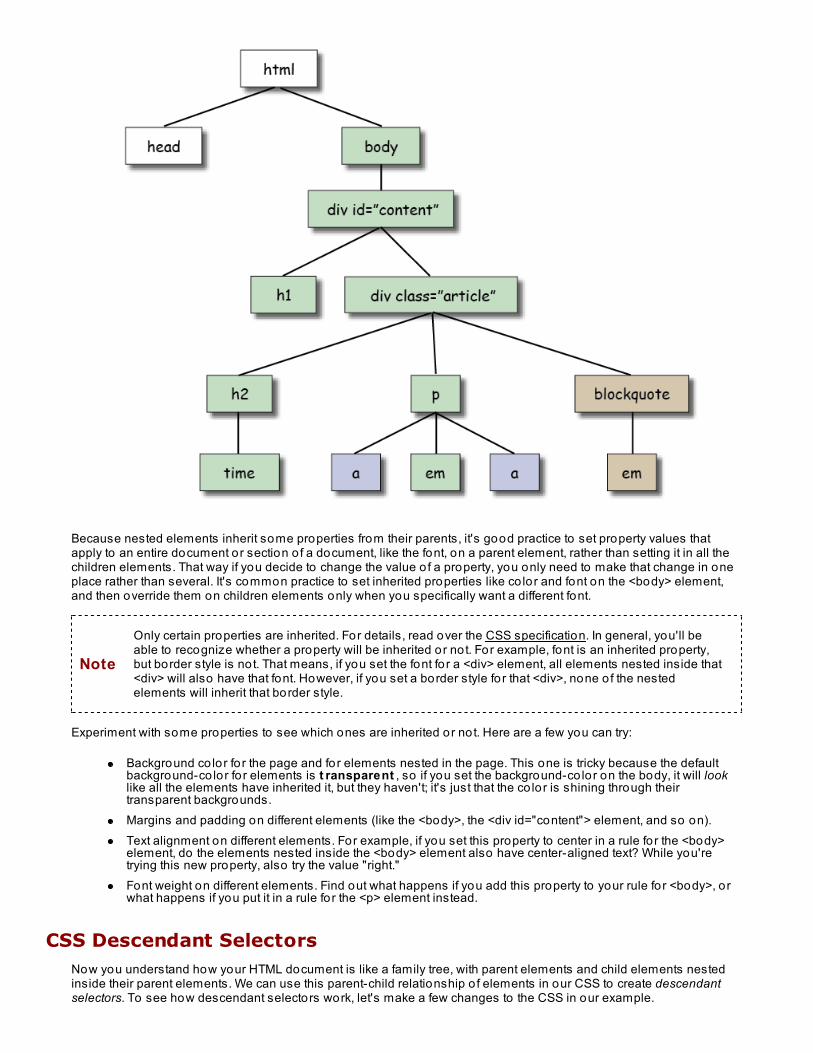
Because nested elements inherit some properties from their parents, it's good practice to set property values thatapply to an entire document or section o f a document, like the font, on a parent element, rather than setting it in all thechildren elements. That way if you decide to change the value o f a property, you only need to make that change in oneplace rather than several. It's common practice to set inherited properties like co lor and font on the <body> element,and then override them on children elements only when you specifically want a different font.
Note
Only certain properties are inherited. For details, read over the CSS specification. In general, you'll beable to recognize whether a property will be inherited or not. For example, font is an inherited property,but border style is not. That means, if you set the font fo r a <div> element, all elements nested inside that<div> will also have that font. However, if you set a border style fo r that <div>, none o f the nestedelements will inherit that border style.
Experiment with some properties to see which ones are inherited or not. Here are a few you can try:
Background co lor fo r the page and for elements nested in the page. This one is tricky because the defaultbackground-co lor fo r elements is t ransparent , so if you set the background-co lor on the body, it will looklike all the elements have inherited it, but they haven't; it's just that the co lor is shining through theirtransparent backgrounds.Margins and padding on different elements (like the <body>, the <div id="content"> element, and so on).Text alignment on different elements. For example, if you set this property to center in a rule for the <body>element, do the elements nested inside the <body> element also have center-aligned text? While you'retrying this new property, also try the value "right."Font weight on different elements. Find out what happens if you add this property to your rule for <body>, orwhat happens if you put it in a rule for the <p> element instead.
CSS Descendant SelectorsNow you understand how your HTML document is like a family tree, with parent elements and child elements nestedinside their parent elements. We can use this parent-child relationship o f elements in our CSS to create descendantselectors. To see how descendant selectors work, let's make a few changes to the CSS in our example.
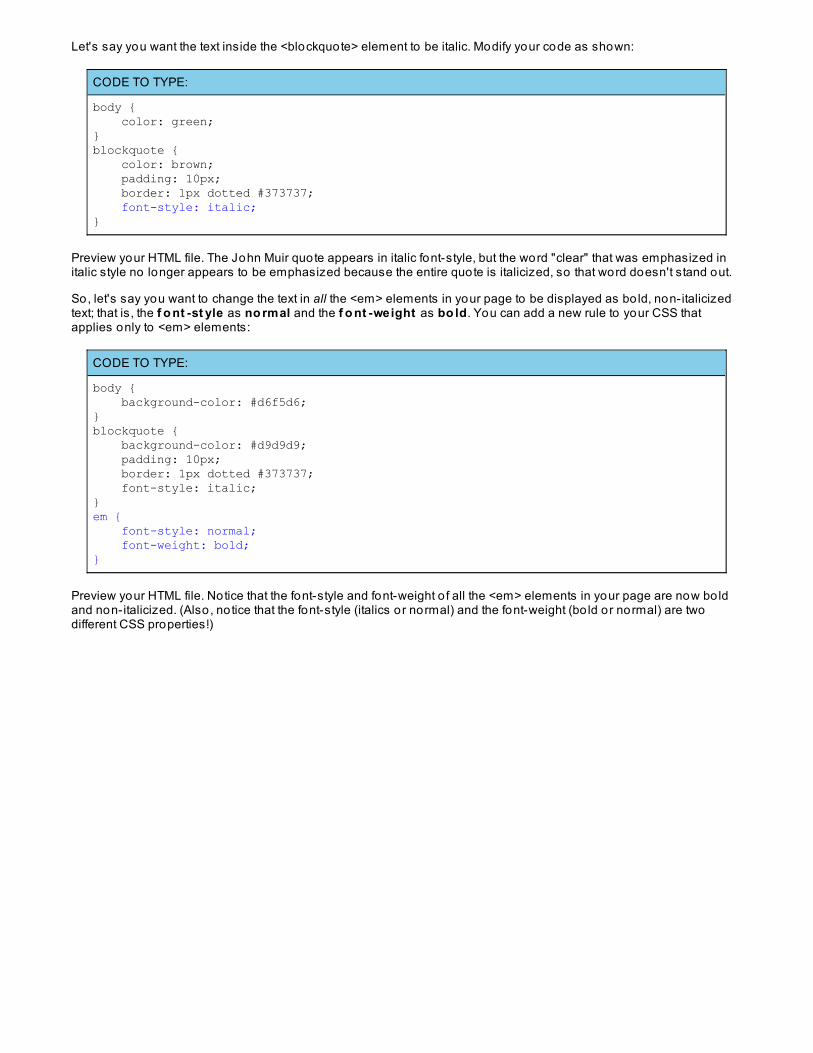
Let's say you want the text inside the <blockquote> element to be italic. Modify your code as shown:
CODE TO TYPE:
body { color: green;}blockquote { color: brown; padding: 10px; border: 1px dotted #373737; font-style: italic;}
Preview your HTML file. The John Muir quote appears in italic font-style, but the word "clear" that was emphasized initalic style no longer appears to be emphasized because the entire quote is italicized, so that word doesn't stand out.
So, let's say you want to change the text in all the <em> elements in your page to be displayed as bo ld, non-italicizedtext; that is, the f o nt -st yle as no rmal and the f o nt -weight as bo ld. You can add a new rule to your CSS thatapplies only to <em> elements:
CODE TO TYPE:
body { background-color: #d6f5d6;}blockquote { background-color: #d9d9d9; padding: 10px; border: 1px dotted #373737; font-style: italic;}em { font-style: normal; font-weight: bold;}
Preview your HTML file. Notice that the font-style and font-weight o f all the <em> elements in your page are now bo ldand non-italicized. (Also, notice that the font-style (italics or normal) and the font-weight (bo ld or normal) are twodifferent CSS properties!)
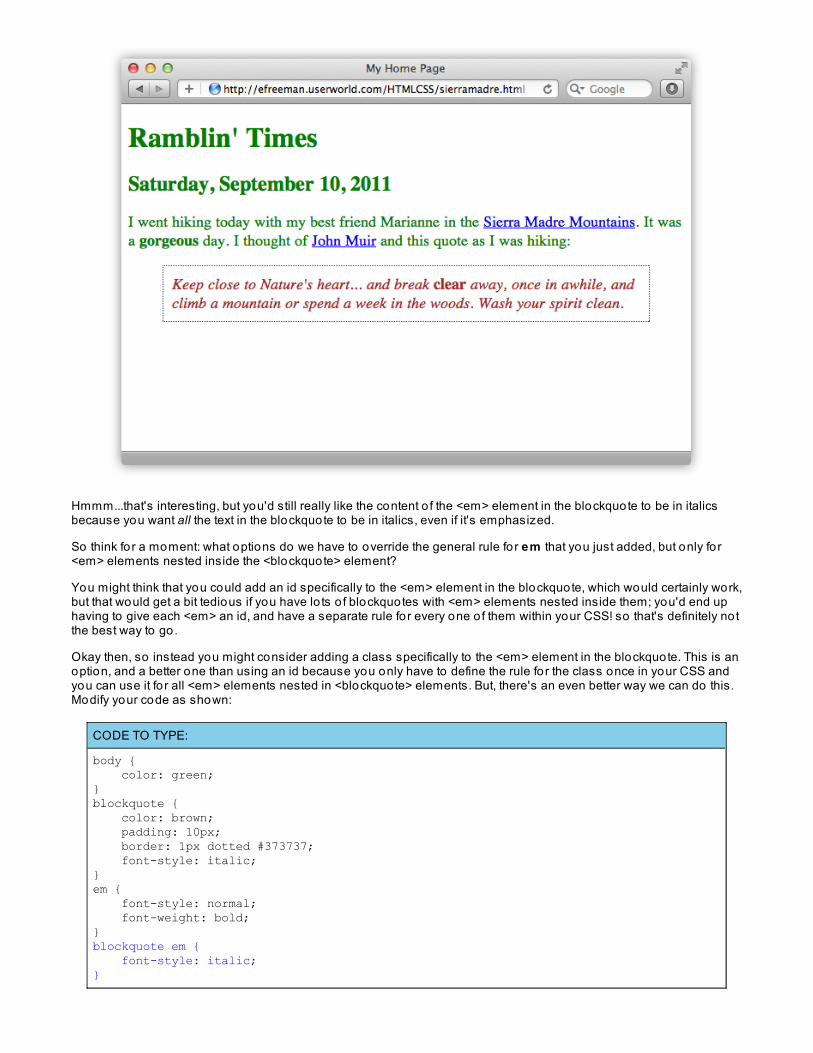
Hmmm...that's interesting, but you'd still really like the content o f the <em> element in the blockquote to be in italicsbecause you want all the text in the blockquote to be in italics, even if it's emphasized.
So think for a moment: what options do we have to override the general rule for em that you just added, but only fo r<em> elements nested inside the <blockquote> element?
You might think that you could add an id specifically to the <em> element in the blockquote, which would certainly work,but that would get a bit tedious if you have lo ts o f blockquotes with <em> elements nested inside them; you'd end uphaving to give each <em> an id, and have a separate rule for every one o f them within your CSS! so that's definitely notthe best way to go.
Okay then, so instead you might consider adding a class specifically to the <em> element in the blockquote. This is anoption, and a better one than using an id because you only have to define the rule for the class once in your CSS andyou can use it fo r all <em> elements nested in <blockquote> elements. But, there's an even better way we can do this.Modify your code as shown:
CODE TO TYPE:
body { color: green;}blockquote { color: brown; padding: 10px; border: 1px dotted #373737; font-style: italic;}em { font-style: normal; font-weight: bold;}blockquote em { font-style: italic;}
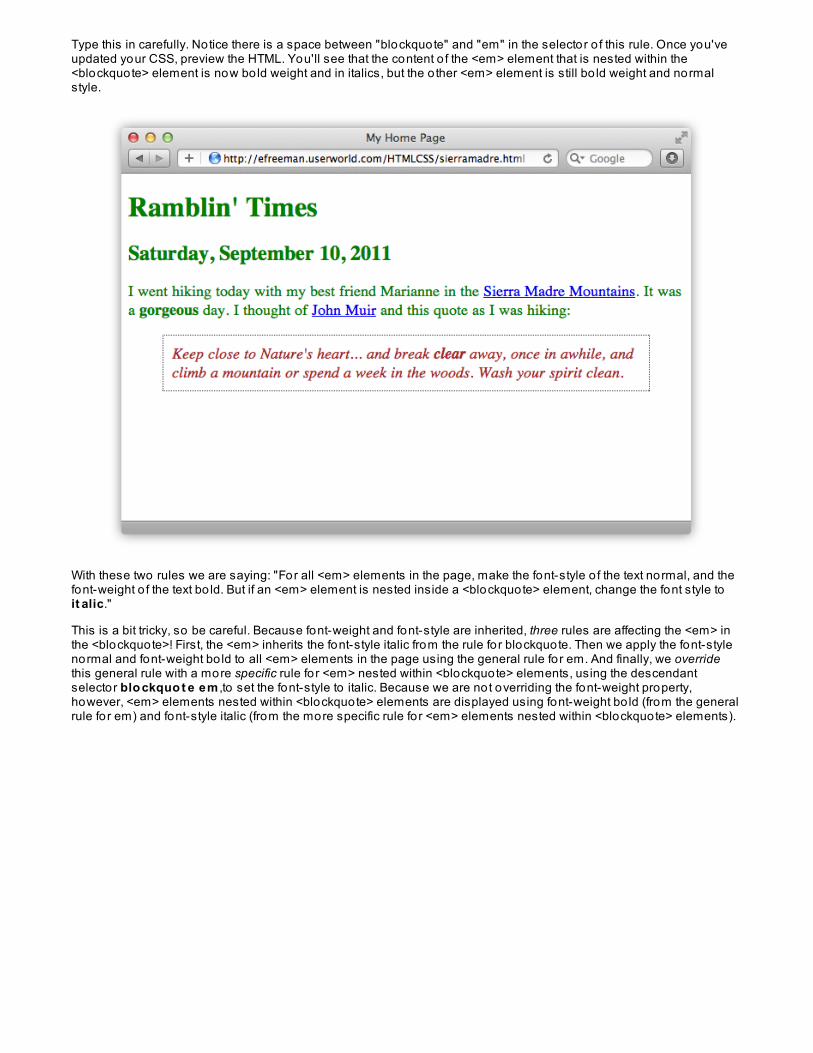
Type this in carefully. Notice there is a space between "blockquote" and "em" in the selector o f this rule. Once you'veupdated your CSS, preview the HTML. You'll see that the content o f the <em> element that is nested within the<blockquote> element is now bo ld weight and in italics, but the o ther <em> element is still bo ld weight and normalstyle.
With these two rules we are saying: "For all <em> elements in the page, make the font-style o f the text normal, and thefont-weight o f the text bo ld. But if an <em> element is nested inside a <blockquote> element, change the font style toit alic."
This is a bit tricky, so be careful. Because font-weight and font-style are inherited, three rules are affecting the <em> inthe <blockquote>! First, the <em> inherits the font-style italic from the rule for blockquote. Then we apply the font-stylenormal and font-weight bo ld to all <em> elements in the page using the general rule for em. And finally, we overridethis general rule with a more specific rule fo r <em> nested within <blockquote> elements, using the descendantselector blo ckquo t e em ,to set the font-style to italic. Because we are not overriding the font-weight property,however, <em> elements nested within <blockquote> elements are displayed using font-weight bo ld (from the generalrule for em) and font-style italic (from the more specific rule for <em> elements nested within <blockquote> elements).
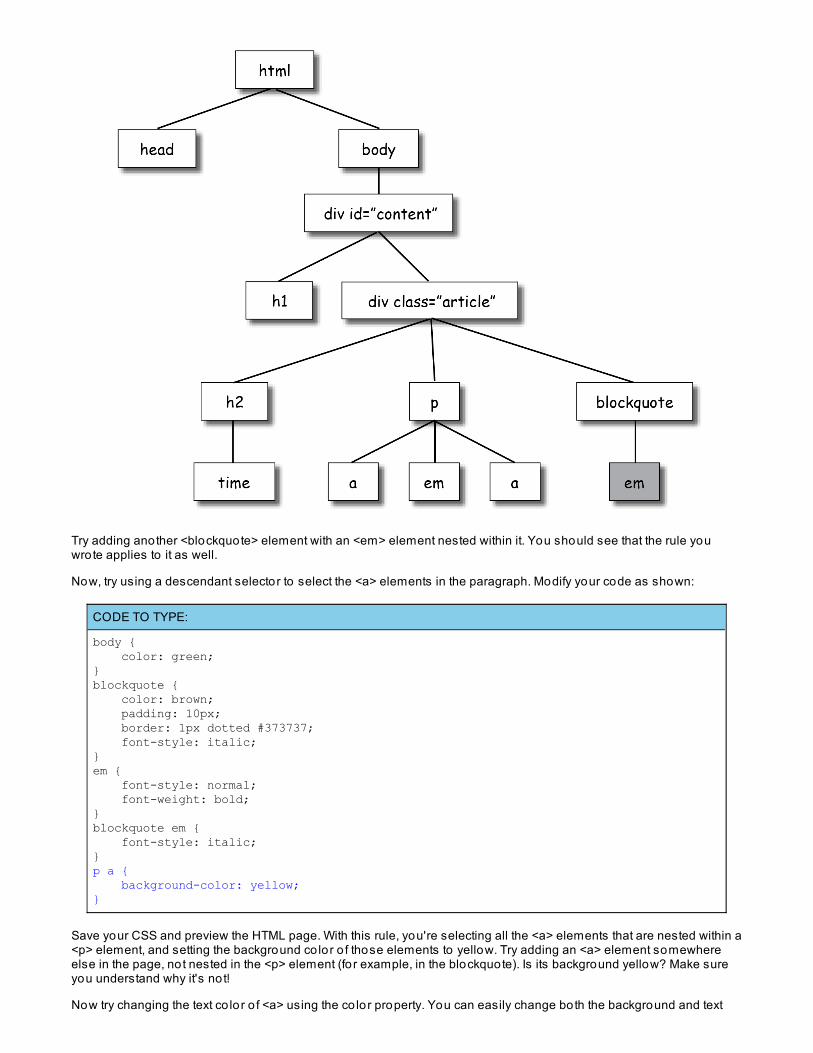
Try adding another <blockquote> element with an <em> element nested within it. You should see that the rule youwrote applies to it as well.
Now, try using a descendant selector to select the <a> elements in the paragraph. Modify your code as shown:
CODE TO TYPE:
body { color: green;}blockquote { color: brown; padding: 10px; border: 1px dotted #373737; font-style: italic;}em { font-style: normal; font-weight: bold;}blockquote em { font-style: italic;}p a { background-color: yellow;}
Save your CSS and preview the HTML page. With this rule, you're selecting all the <a> elements that are nested within a<p> element, and setting the background co lor o f those elements to yellow. Try adding an <a> element somewhereelse in the page, not nested in the <p> element (fo r example, in the blockquote). Is its background yellow? Make sureyou understand why it's not!
Now try changing the text co lor o f <a> using the co lor property. You can easily change both the background and text
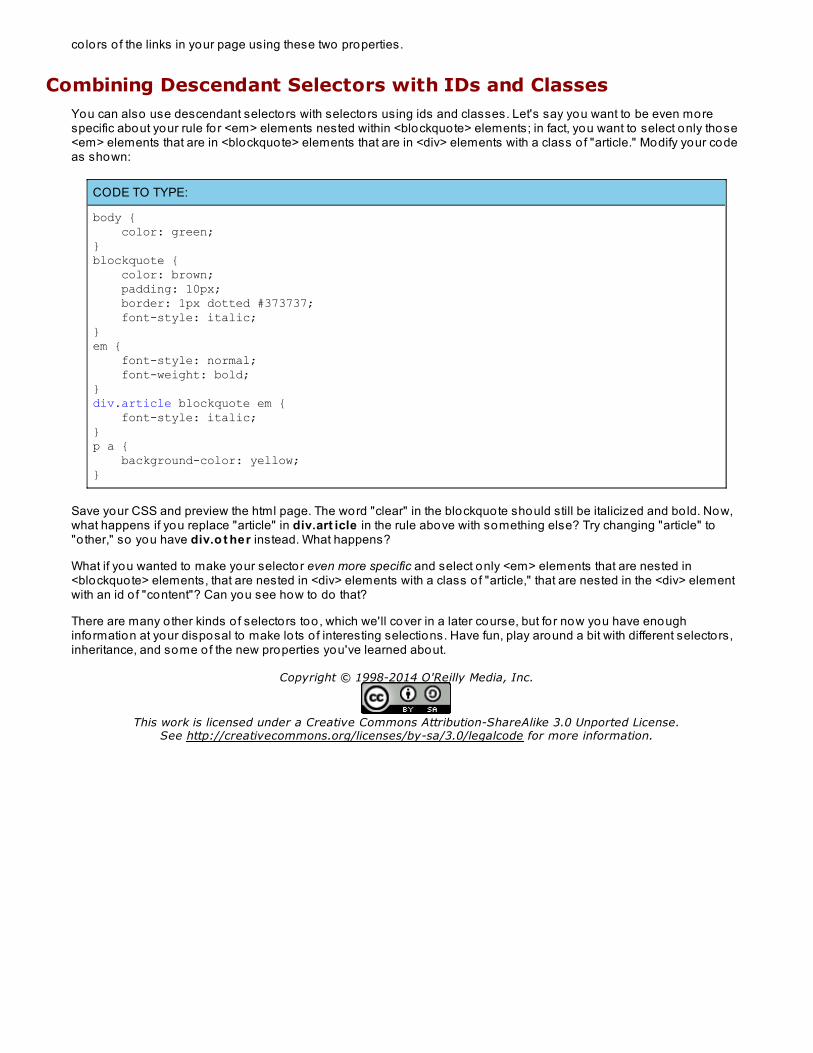
co lors o f the links in your page using these two properties.
Combining Descendant Selectors with IDs and ClassesYou can also use descendant selectors with selectors using ids and classes. Let's say you want to be even morespecific about your rule for <em> elements nested within <blockquote> elements; in fact, you want to select only those<em> elements that are in <blockquote> elements that are in <div> elements with a class o f "article." Modify your codeas shown:
CODE TO TYPE:
body { color: green;}blockquote { color: brown; padding: 10px; border: 1px dotted #373737; font-style: italic;}em { font-style: normal; font-weight: bold;}div.article blockquote em { font-style: italic;}p a { background-color: yellow;}
Save your CSS and preview the html page. The word "clear" in the blockquote should still be italicized and bo ld. Now,what happens if you replace "article" in div.art icle in the rule above with something else? Try changing "article" to"o ther," so you have div.o t her instead. What happens?
What if you wanted to make your selector even more specific and select only <em> elements that are nested in<blockquote> elements, that are nested in <div> elements with a class o f "article," that are nested in the <div> elementwith an id o f "content"? Can you see how to do that?
There are many o ther kinds o f selectors too, which we'll cover in a later course, but fo r now you have enoughinformation at your disposal to make lo ts o f interesting selections. Have fun, play around a bit with different selectors,inheritance, and some of the new properties you've learned about.
Copyright © 1998-2014 O'Reilly Media, Inc.
This work is licensed under a Creative Commons Attribution-ShareAlike 3.0 Unported License.See http://creativecommons.org/licenses/by-sa/3.0/legalcode for more information.
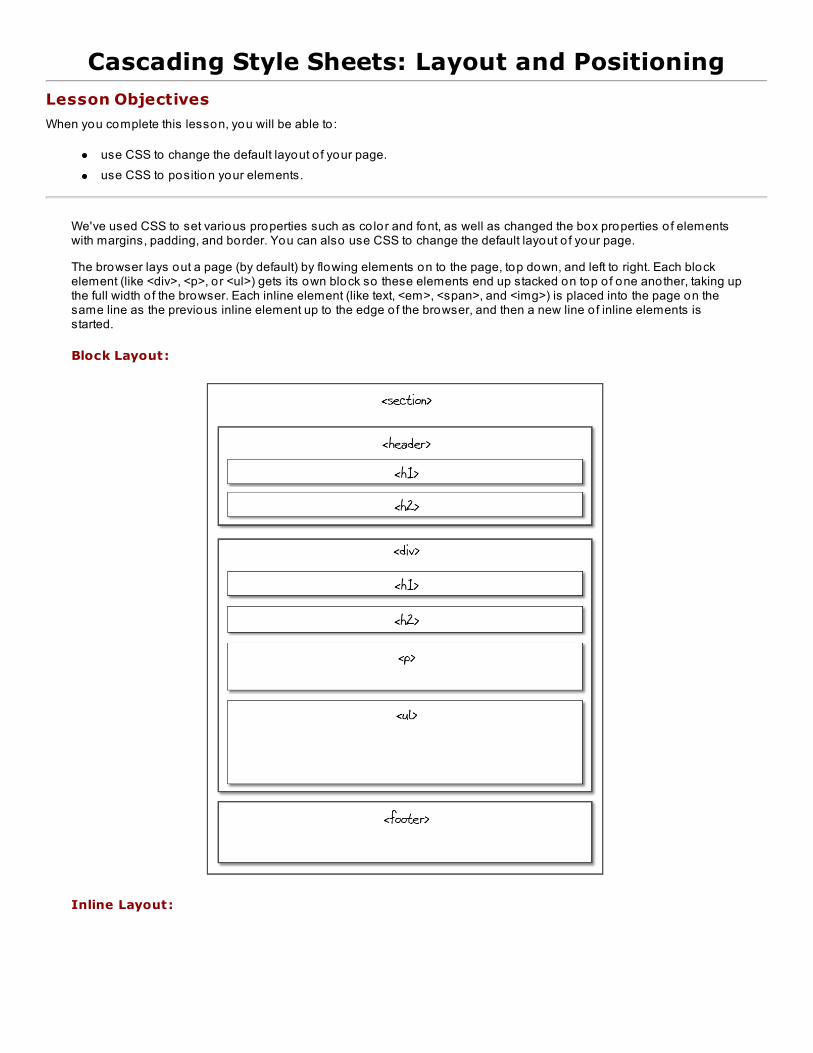
Cascading Style Sheets: Layout and PositioningLesson Objectives
When you complete this lesson, you will be able to :
use CSS to change the default layout o f your page.use CSS to position your elements.
We've used CSS to set various properties such as co lor and font, as well as changed the box properties o f elementswith margins, padding, and border. You can also use CSS to change the default layout o f your page.
The browser lays out a page (by default) by flowing elements on to the page, top down, and left to right. Each blockelement (like <div>, <p>, or <ul>) gets its own block so these elements end up stacked on top o f one another, taking upthe full width o f the browser. Each inline element (like text, <em>, <span>, and <img>) is placed into the page on thesame line as the previous inline element up to the edge o f the browser, and then a new line o f inline elements isstarted.
Block Layout:
Inline Layout:
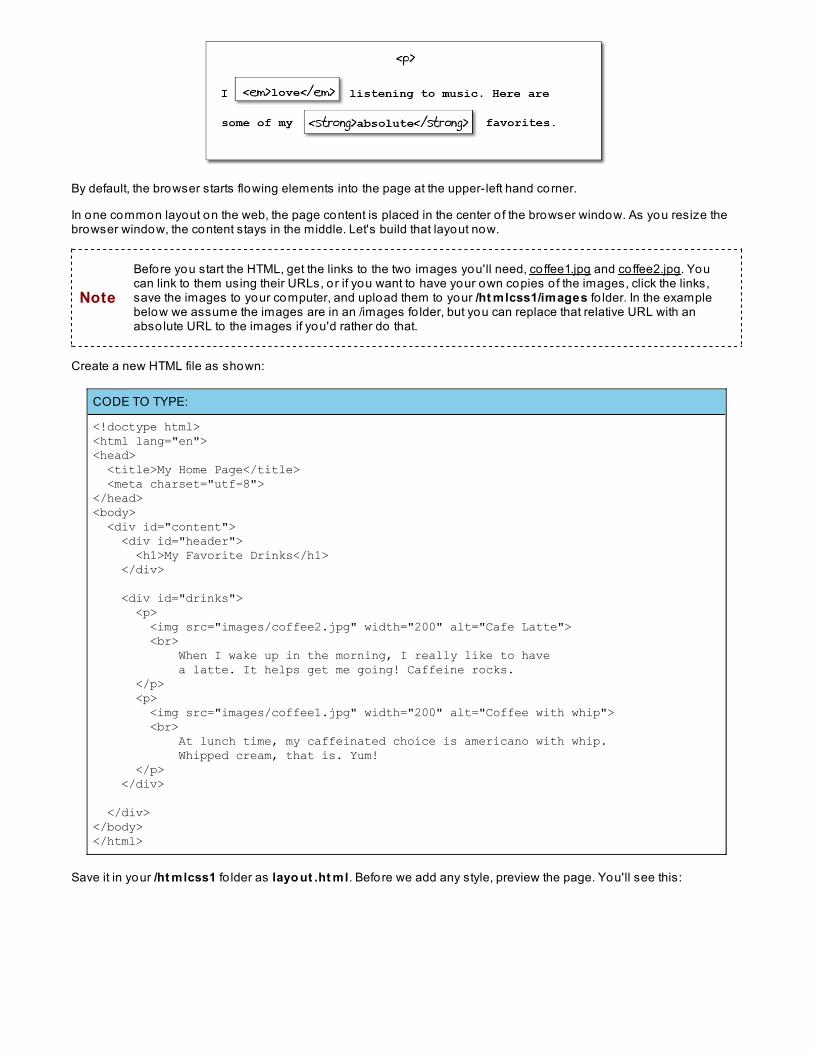
By default, the browser starts flowing elements into the page at the upper-left hand corner.
In one common layout on the web, the page content is placed in the center o f the browser window. As you resize thebrowser window, the content stays in the middle. Let's build that layout now.
Note
Before you start the HTML, get the links to the two images you'll need, co ffee1.jpg and coffee2.jpg. Youcan link to them using their URLs, or if you want to have your own copies o f the images, click the links,save the images to your computer, and upload them to your /ht mlcss1/images fo lder. In the examplebelow we assume the images are in an /images fo lder, but you can replace that relative URL with anabso lute URL to the images if you'd rather do that.
Create a new HTML file as shown:
CODE TO TYPE:
<!doctype html><html lang="en"><head> <title>My Home Page</title> <meta charset="utf-8"></head><body> <div id="content"> <div id="header"> <h1>My Favorite Drinks</h1> </div>
<div id="drinks"> <p> <img src="images/coffee2.jpg" width="200" alt="Cafe Latte"> <br> When I wake up in the morning, I really like to have a latte. It helps get me going! Caffeine rocks. </p> <p> <img src="images/coffee1.jpg" width="200" alt="Coffee with whip"> <br> At lunch time, my caffeinated choice is americano with whip. Whipped cream, that is. Yum! </p> </div>
</div></body></html>
Save it in your /ht mlcss1 fo lder as layo ut .ht ml. Before we add any style, preview the page. You'll see this:

Now we'll use CSS to make the page look like this instead:
Now let's add some style. You can either add this to your HTML file in a <style> element in the <head> element, o r youcan link to an external CSS style sheet like we did earlier. Either way is fine. Again, we'll present it as though it's in a
can link to an external CSS style sheet like we did earlier. Either way is fine. Again, we'll present it as though it's in aseparate CSS file. Modify your code as shown:
CODE TO TYPE:
p { text-align: center; width: 400px;}
First, we style the <p> element so that the text is aligned to be centered and the widt h o f the element is 400px.
The widt h property sets the width o f block elements to a certain size. Even if you decrease the width o f the elementrelative to the current size o f the browser window, the elements that fo llow that block element will still be located on thenext line.
The t ext -align property affects the <img> element as well as the text because the <img> element is an inline element;text-align (despite its name) actually affects the alignment o f any inline element, as well as text that is nested in theelement to which it is applied. (This comes in pretty handy sometimes.)
Preview your HTML page. It's looking more like we want it to , but all o f the content is still over on the left side o f thepage. Let's move it to where we want it, in the center o f the page. Modify your code as shown:
CODE TO TYPE:
p { text-align: center; width: 400px;}div#content { width: 400px; margin: auto; padding-top: 20px;}
Preview the HTML page. Everything has magically moved to the center o f the browser! Try resizing your browserwindow. You'll see that whether you make your browser window narrow or wide, the content stays in the center. Let'strace how this works.
We style the <div> element with the id "content." To get a centered layout like this, we need a <div> element thatcontains all o f our content, because we want to center all o f our content by setting a margin between that <div> and the<body>. Remember that a margin is the space between elements, so by setting a margin on this <div> we're addingspace between the edge o f the body (which contains the <div>) and the edge o f the <div>.
We could have set the left margin to a fixed size, like 200px, and if the browser is open to 800px wide, then the contentwould be located exactly in the center (200px margin + 400px wide content + 200px space on the right places yourcontent in the middle). We don't do that though because we have no idea how wide the user's browser is go ing to be.
Using margin: aut o ; we instruct the browser to set the margin itself automatically. And it turns out that almost allmajor browsers set it automatically so that the left and right margins are equal in size. This is a useful trick you can useto get content into the middle o f your page.
Note You might see different results with some browsers; most will center the content page as described.
We set the width o f the <div> to the same as that o f the <p> so that the content will be centered exactly on the page (ifwe made the <div> wider than the <p> we'd have to add some margin to the <p> to make sure it remains centered).
We also added some padding to the top to give the content a little breathing room at the top o f the page.
Did you notice that the content o f the heading is not centered? You can fix that. Just add the text-align property to a rulefor the <h1> element too. Modify your code as shown:
CODE TO TYPE:
p { text-align: center; width: 400px;}div#content { width: 400px; margin: auto; padding-top: 20px;}h1 { text-align: center;}
Preview your HTML page. Ta-da! We have created the page layout we wanted, using CSS.
Now, knowing what you know about CSS inheritance, could we have achieved the same effect if we'd set t ext -align:cent er in the rule for the "content" <div> element instead? Try it! Add t ext -align: cent er to the div#co nt ent ruleand remove it from the h1 and p rules as shown:
CODE TO TYPE:
p { text-align: center; width: 400px;}div#content { width: 400px; margin: auto; padding-top: 20px; text-align: center;}h1 { text-align: center;}
Does it work?
CSS PositioningLet's make things a tad more complicated and create a layout where the two drinks are side-by-side instead o f oneabove the o ther, like this:
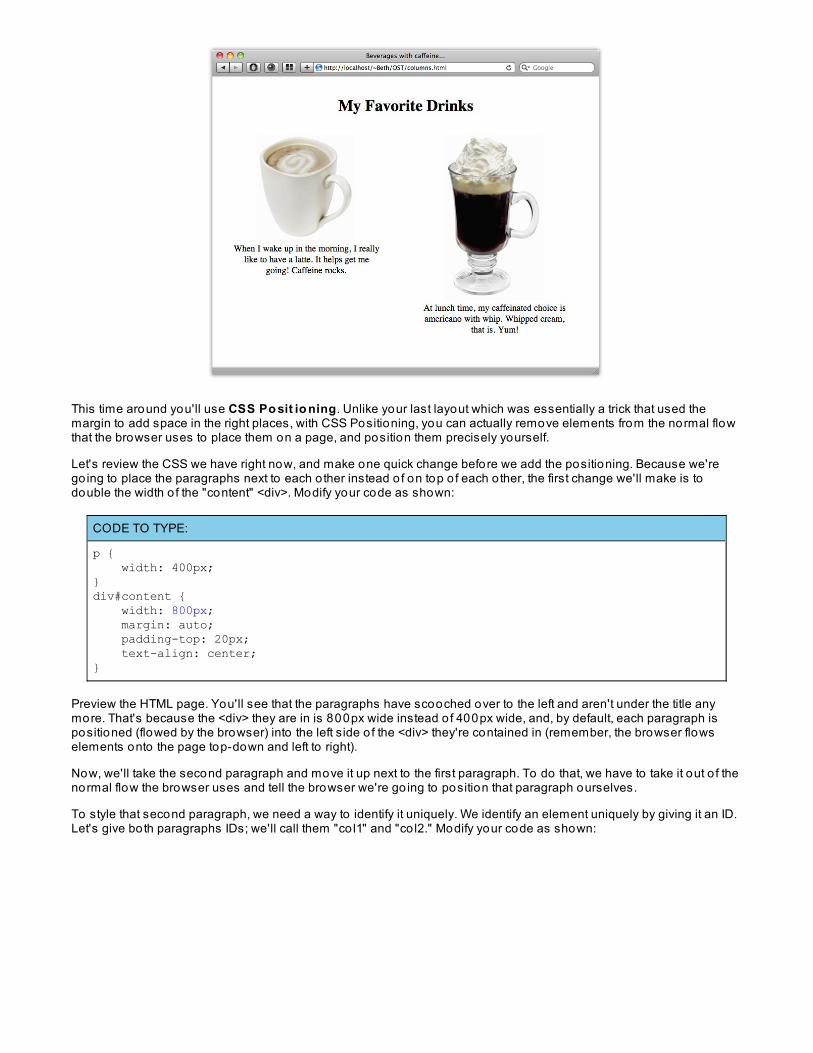
This time around you'll use CSS Po sit io ning. Unlike your last layout which was essentially a trick that used themargin to add space in the right places, with CSS Positioning, you can actually remove elements from the normal flowthat the browser uses to place them on a page, and position them precisely yourself.
Let's review the CSS we have right now, and make one quick change before we add the positioning. Because we'rego ing to place the paragraphs next to each o ther instead o f on top o f each o ther, the first change we'll make is todouble the width o f the "content" <div>. Modify your code as shown:
CODE TO TYPE:
p { width: 400px;}div#content { width: 800px; margin: auto; padding-top: 20px; text-align: center;}
Preview the HTML page. You'll see that the paragraphs have scooched over to the left and aren't under the title anymore. That's because the <div> they are in is 800px wide instead o f 400px wide, and, by default, each paragraph ispositioned (flowed by the browser) into the left side o f the <div> they're contained in (remember, the browser flowselements onto the page top-down and left to right).
Now, we'll take the second paragraph and move it up next to the first paragraph. To do that, we have to take it out o f thenormal flow the browser uses and tell the browser we're go ing to position that paragraph ourselves.
To style that second paragraph, we need a way to identify it uniquely. We identify an element uniquely by giving it an ID.Let's give both paragraphs IDs; we'll call them "co l1" and "co l2." Modify your code as shown:
CODE TO TYPE:
<!doctype html><html lang="en"><head> <title>My Home Page</title> <meta charset="utf-8"> <link rel="stylesheet" href="csslayout.css"></head><body> <div id="content"> <div id="header"> <h1>My Favorite Drinks</h1> </div>
<div id="drinks"> <p id="col1"> <img src="images/coffee2.jpg" width="200" alt="Cafe Latte"> <br> When I wake up in the morning, I really like to have a latte. It helps get me going! Caffeine rocks. </p> <p id="col2"> <img src="images/coffee1.jpg" width="200" alt="Coffee with whip"> <br> At lunch time, my caffeinated choice is americano with whip. Whipped cream, that is. Yum! </p> </div>
</div></body></html>
Now that we have a way to identify the paragraph we want to move ("co l2"), let's update the CSS to move it over.Modify your code once more as shown:
CODE TO TYPE:
div#content { width: 800px; margin: auto; padding-top: 20px; text-align: center;} p { width: 400px;}p#col2 { position: absolute; top: 0px; left: 0px; }
po sit io n: abso lut e means that the t o p and le f t coordinates o f an element are defined relative to the upper-leftcorner o f the web page, rather than according to the natural flow o f elements onto the page (which the browser usuallyhandles for you). By adding po sit io n: abso lut e to the rule for p#co l2 in the CSS above, we're telling the browser thatwe're go ing to position the <p> element, so the browser should not flow it into the page.
By default, the position o f an abso lutely positioned element is measured relative to the upper left-hand corner o f theweb page. Think o f this as 0 , 0 in a coordinate system. We've specified a top position o f 0px and a left position o f 0px,so the "co l2" <p> will appear at the upper left-hand corner o f the browser window.
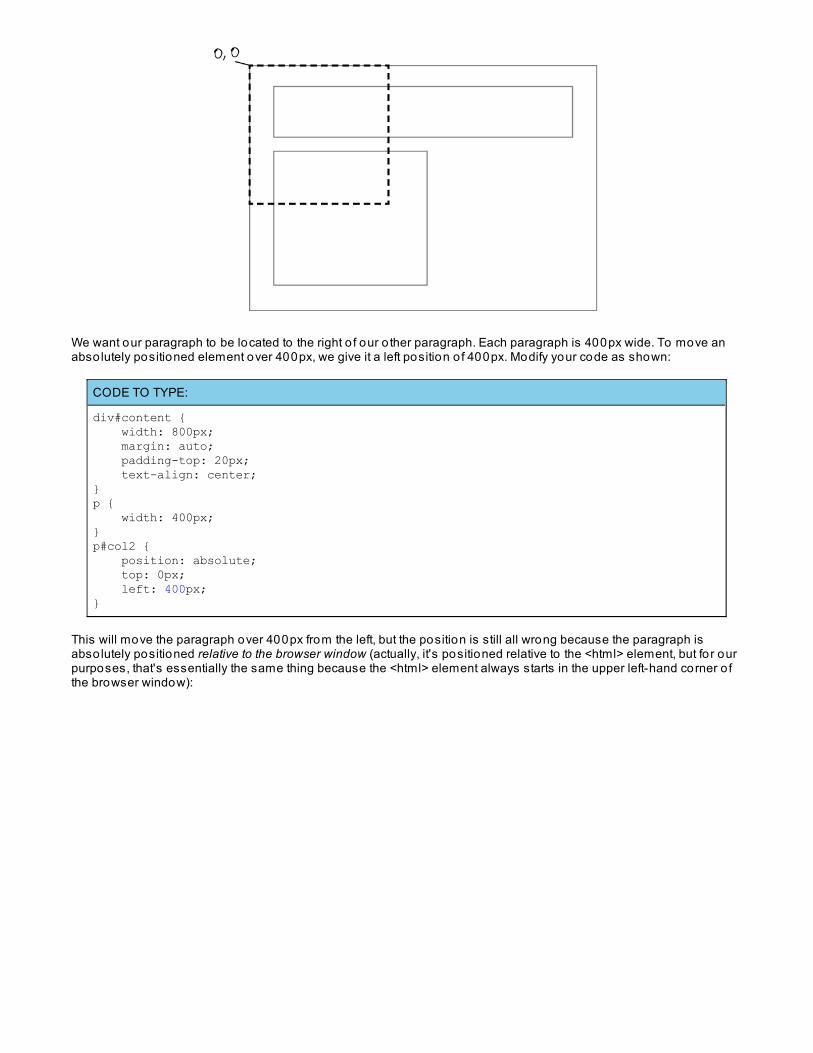
We want our paragraph to be located to the right o f our o ther paragraph. Each paragraph is 400px wide. To move anabso lutely positioned element over 400px, we give it a left position o f 400px. Modify your code as shown:
CODE TO TYPE:
div#content { width: 800px; margin: auto; padding-top: 20px; text-align: center;} p { width: 400px;}p#col2 { position: absolute; top: 0px; left: 400px; }
This will move the paragraph over 400px from the left, but the position is still all wrong because the paragraph isabso lutely positioned relative to the browser window (actually, it's positioned relative to the <html> element, but fo r ourpurposes, that's essentially the same thing because the <html> element always starts in the upper left-hand corner o fthe browser window):

We really want our paragraph to be positioned relative to the "drinks" <div>. This <div> contains only the two <p>elements. (We put the "drinks" <div> there intentionally, knowing we'd need it to position our <p> elements properly.)
So how do we tell the browser to position our two paragraph elements relative to the "drinks" <div>, with the "co l2" <p>element 400px over from the left?
Here's the trick: if you have an abso lutely positioned element that is nested inside another positioned element, thenthe abso lutely positioned element will treat the corner o f its parent element as the starting po int instead o f the upper-left corner o f the web page.
That means if we position the "drinks" <div>, then we can position the two <p> elements inside it based on the upper-left corner o f the "drinks" <div> instead o f the browser window.
But we don't want to position the "drinks" <div> abso lutely. Why? Because we don't know where it should go. We don'tknow exactly how high the heading will be, nor exactly (in pixels) how far from the left o r top the "drinks" <div> shouldgo to keep it in the center o f the browser window. In fact, we want the "drinks" <div> to go exactly where it wouldnormally go if we just let the browser flow it onto the page.
The so lution is to use relative position. po sit io n: re lat ive means that the element will be positioned relative to whereit would normally be located in the flow o f the HTML. Then if you specify a top and left position for that element, it will bemoved relative to its normal position in the flow. Let's position the "drinks" <div>. Modify your code again, as shown:
CODE TO TYPE:
div#content { width: 800px; margin: auto; padding-top: 20px; text-align: center;} div#drinks { position: relative;} p { width: 400px;}p#col2 { position: absolute; top: 0px; left: 400px; }
Now, if you wanted to , you could move the "drinks" <div> around by including a top position and a left position. But fo rthis example, we want the "drinks" <div> to stay exactly where it is—where it is placed into the normal flow o f the page
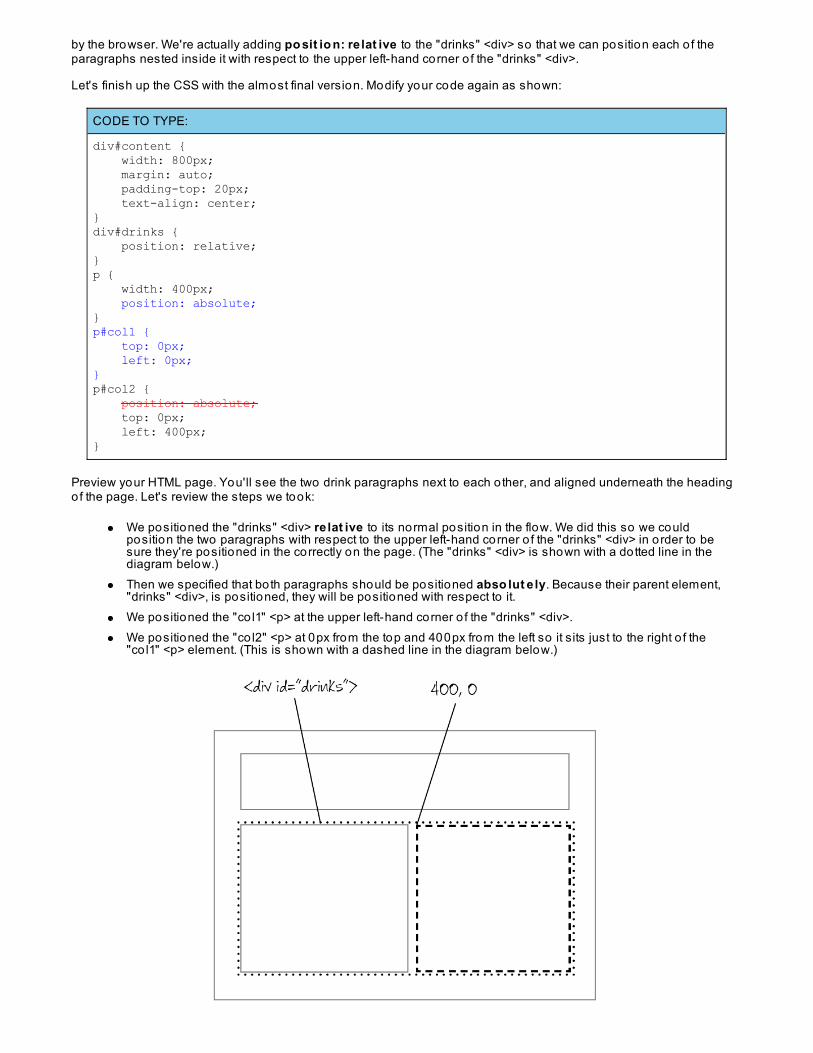
by the browser. We're actually adding po sit io n: re lat ive to the "drinks" <div> so that we can position each o f theparagraphs nested inside it with respect to the upper left-hand corner o f the "drinks" <div>.
Let's finish up the CSS with the almost final version. Modify your code again as shown:
CODE TO TYPE:
div#content { width: 800px; margin: auto; padding-top: 20px; text-align: center;}div#drinks { position: relative;}p { width: 400px; position: absolute;}p#col1 { top: 0px; left: 0px;}p#col2 { position: absolute; top: 0px; left: 400px;}
Preview your HTML page. You'll see the two drink paragraphs next to each o ther, and aligned underneath the headingof the page. Let's review the steps we took:
We positioned the "drinks" <div> re lat ive to its normal position in the flow. We did this so we couldposition the two paragraphs with respect to the upper left-hand corner o f the "drinks" <div> in order to besure they're positioned in the correctly on the page. (The "drinks" <div> is shown with a dotted line in thediagram below.)Then we specified that both paragraphs should be positioned abso lut e ly. Because their parent element,"drinks" <div>, is positioned, they will be positioned with respect to it.We positioned the "co l1" <p> at the upper left-hand corner o f the "drinks" <div>.We positioned the "co l2" <p> at 0px from the top and 400px from the left so it sits just to the right o f the"co l1" <p> element. (This is shown with a dashed line in the diagram below.)
We can simplify this CSS a little bit by removing the positions that specify 0px, because those are set to 0 by default.Modify your code as shown:
CODE TO TYPE:
div#content { width: 800px; margin: auto; padding-top: 20px; text-align: center;}div#drinks { position: relative;}p { width: 400px; position: absolute;}p#col1 { top: 0px; left: 0px;}p#col2 { top: 0px; left: 400px;}
When we do that, we're left with this final CSS:
CODE TO TYPE:
div#content { width: 800px; margin: auto; padding-top: 20px; text-align: center;}div#drinks { position: relative;}p { width: 400px; position: absolute;}p#col2 { left: 400px;}
Click preview one more time on your HTML file to see the final result.
Go ahead and experiment with positioning your elements. Try negative numbers as well as positive ones. Positioningis a fairly complex topic, but you've learned enough to create some interesting layouts.
Copyright © 1998-2014 O'Reilly Media, Inc.
This work is licensed under a Creative Commons Attribution-ShareAlike 3.0 Unported License.See http://creativecommons.org/licenses/by-sa/3.0/legalcode for more information.
HTML and CSS: FormsLesson Objectives
When you complete this lesson, you will be able to :
use forms to receive input from a user through our web pages.use the placeho lder attribute.use the new HTML required attribute.use various o ther attributes such as, check boxes, texarea, and dates.style fo rms with CSS.
Basic Input and AttributesSo far in this course, we've had a one-way conversation with the user: your content is displayed in a page for the userto read.
But we can also receive input from a user through our web pages. In order to do that we use a form. Typically, a userenters information into a form, that information is sent to a program running on a server, the program processes theform, pulls out the information, and then does something with it.
For example, you've probably used Google's fo rm to submit a search term. Google's server takes your search term,looks in its database for web pages that match that term, and then sends you back a web page with those searchresults.
Let's create our own form now. Type in the code below as shown:
CODE TO TYPE:
<!doctype html><html lang="en"><head> <title>Forms</title> <meta charset="utf-8"></head><body> <form method="get" action="https://students.oreillyschool.com/coderunner/formtester.php"> <label for="color">What is your favorite color?</label> <input type="text" name="color" id="color"> <input type="submit" value="Submit"> </form> </body></html>
Save it in your /ht mlcss1 fo lder as f o rms.ht ml and click . You'll see an input box in the web pagewhere you can type your favorite co lor, and a button that you can click to submit the form. The browser submits theform to the URL that's in the act io n attribute o f the form element. As we said before, this is typically the URL of a scriptprogram that takes the values you type into a form and processes them in some way.
Note
We've created a basic server script that only displays the data you entered in the form. There's plenty o ffun to be had with forms without complicated server scripts. They'll let you get the hang o f writing formsand a feel fo r what to expect if and when you do get to hook them up to a real server script. For the rest o fthis lesson, you can continue to use this basic server script, o r just leave the action attribute empty soyou can focus on building the forms themselves.
The met ho d attribute is used to specify one o f two methods for submitting a form: get o r po st . You'll need to know alo t more about these methods once you start submitting forms to real server scripts, but fo r now just think o f them as
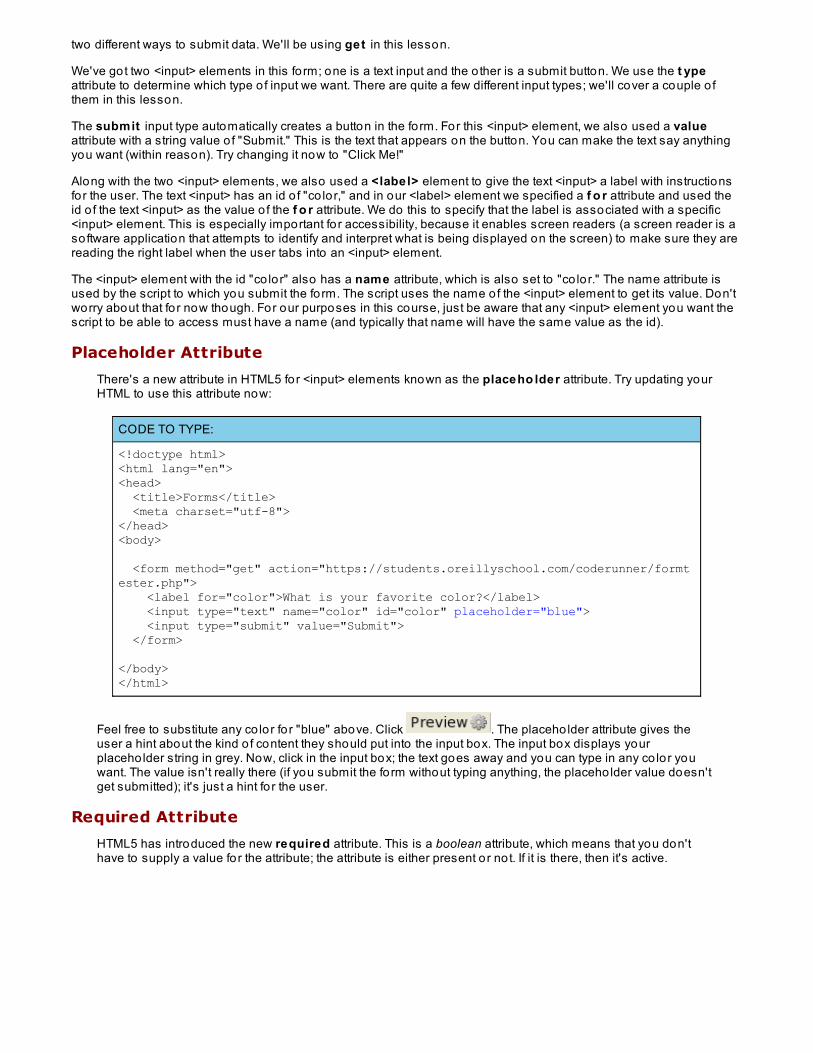
two different ways to submit data. We'll be using get in this lesson.
We've got two <input> elements in this fo rm; one is a text input and the o ther is a submit button. We use the t ypeattribute to determine which type o f input we want. There are quite a few different input types; we'll cover a couple o fthem in this lesson.
The submit input type automatically creates a button in the form. For this <input> element, we also used a valueattribute with a string value o f "Submit." This is the text that appears on the button. You can make the text say anythingyou want (within reason). Try changing it now to "Click Me!"
Along with the two <input> elements, we also used a <label> element to give the text <input> a label with instructionsfor the user. The text <input> has an id o f "co lor," and in our <label> element we specified a f o r attribute and used theid o f the text <input> as the value o f the f o r attribute. We do this to specify that the label is associated with a specific<input> element. This is especially important fo r accessibility, because it enables screen readers (a screen reader is asoftware application that attempts to identify and interpret what is being displayed on the screen) to make sure they arereading the right label when the user tabs into an <input> element.
The <input> element with the id "co lor" also has a name attribute, which is also set to "co lor." The name attribute isused by the script to which you submit the form. The script uses the name of the <input> element to get its value. Don'tworry about that fo r now though. For our purposes in this course, just be aware that any <input> element you want thescript to be able to access must have a name (and typically that name will have the same value as the id).
Placeholder Attribute
There's a new attribute in HTML5 for <input> elements known as the placeho lder attribute. Try updating yourHTML to use this attribute now:
CODE TO TYPE:
<!doctype html><html lang="en"><head> <title>Forms</title> <meta charset="utf-8"></head><body>
<form method="get" action="https://students.oreillyschool.com/coderunner/formtester.php"> <label for="color">What is your favorite color?</label> <input type="text" name="color" id="color" placeholder="blue"> <input type="submit" value="Submit"> </form>
</body></html>
Feel free to substitute any co lor fo r "blue" above. Click . The placeho lder attribute gives theuser a hint about the kind o f content they should put into the input box. The input box displays yourplaceho lder string in grey. Now, click in the input box; the text goes away and you can type in any co lor youwant. The value isn't really there (if you submit the form without typing anything, the placeho lder value doesn'tget submitted); it's just a hint fo r the user.
Required Attribute
HTML5 has introduced the new required attribute. This is a boolean attribute, which means that you don'thave to supply a value for the attribute; the attribute is either present or not. If it is there, then it's active.

CODE TO TYPE:
<!doctype html><html lang="en"><head> <title>Forms</title> <meta charset="utf-8"></head><body>
<form method="get" action="https://students.oreillyschool.com/coderunner/formtester.php"> <label for="color">What is your favorite color?</label> <input type="text" name="color" id="color" placeholder="blue" required> <input type="submit" value="Submit"> </form>
</body></html>
Click and then click Submit without entering a co lor. By adding required to this <input>element, we're saying that the user must enter a value for this fo rm element before submitting the form.Depending on your browser, you'll see different behavior, but you might see a little popup that indicates thatyou need to complete that field before submitting the form. If a browser does not support the requiredattribute, the form will be submitted as usual.
Note
Not all browsers have implemented the placeho lder and required attributes yet. If you're usingthe most recent versions o f Safari, Chrome, Firefox, or Opera, the placeho lder attribute shouldwork. If you're using Chrome, Firefox, or Opera, the required attribute should work. Morebrowsers will support more features in the future, so keep trying, and be aware that not all userswill have access to these new features if you use them to create a web page.
Other Kinds of InputsAside from basic text input, there are several o ther types o f inputs you can use.
Checkboxes and Radio Buttons
The input type checkbo x creates a checkbox item in the form to allow the user to select an item from a list.

CODE TO TYPE:
<!doctype html><html lang="en"><head> <title>Forms</title> <meta charset="utf-8"></head><body> <form method="get" action="https://students.oreillyschool.com/coderunner/formtester.php"> <label for="color">What is your favorite color?</label> <input type="text" name="color" id="color" placeholder="blue" required>
<p>Are you...</p> <input type="checkbox" id="funny" name="personality" value="funny"> <label for="funny">funny</label> <input type="checkbox" id="smart" name="personality" value="smart"> <label for="smart">smart</label> <input type="checkbox" id="shy" name="personality" value="shy"> <label for="shy">shy</label> <input type="checkbox" id="outgoing" name="personality" value="outgoing"> <label for="outgoing">outgoing</label> <br> <input type="submit" value="Submit"> </form>
</body></html>
Click . You see a list o f items, each with a checkbox to its left. Click an item's checkbox and acheck mark will appear. Try clicking on more than one item; you can select multiple checkboxes, as you mightexpect.
Let's go over a few things about the form. This time, we put the labels after the inputs so that the checkboxeswould appear to the left o f each label. How you design your fo rm is up to you, but make sure you consider theusability o f your design and what users will expect in different situations; make sure it's clear which checkboxgoes with which item.
Also, notice that each input has both an id at t ribut e and a name at t ribut e . Why both? Well, we need the idattribute so we can associate each label with an input (remember, each label goes with only one form contro l,and ids must be unique). We need the name attribute so that we can indicate that all the checkboxes belongtogether. This is important on the server side when processing a form: if the checkbox inputs that are groupedtogether have the same name , then the server script knows that all the cho ices are, in this case, related topersonality. If you have multiple groups o f checkboxes or o ther contro ls in your fo rm, this will become reallyimportant.
Finally, each checkbox has a different value in the value at t ribut e . This is how you allow the user to selectdifferent items. Each value in a group o f checkboxes should be different, so that in the server script, you candistinguish between responses.
Note
We are using a basic PHP program to process the form submission, so if you select more thanone check box and Submit, only the last box checked will be returned. If you want to see multipleresults, you have to name the field as an array in the PHP script and change the HTML code toreflect that, using perso nalit y[] as the name of each o f the checkboxes instead, like this:<input t ype="checkbo x" id="f unny" name="perso nalit y[]" value="f unny"> .
Now, try changing "checkbox" to "radio" as the input type o f the form contro ls. Try selecting different items.With type checkbo x, you can select any or all o f the items; with type radio , you can only select one at a time.
Just like with checkboxes, it's important to give every radio button in a group the same name .
Textarea
Textarea is another useful fo rm contro l. You can use a <textarea> element within a form whenever you needto allow multiple lines o f input:
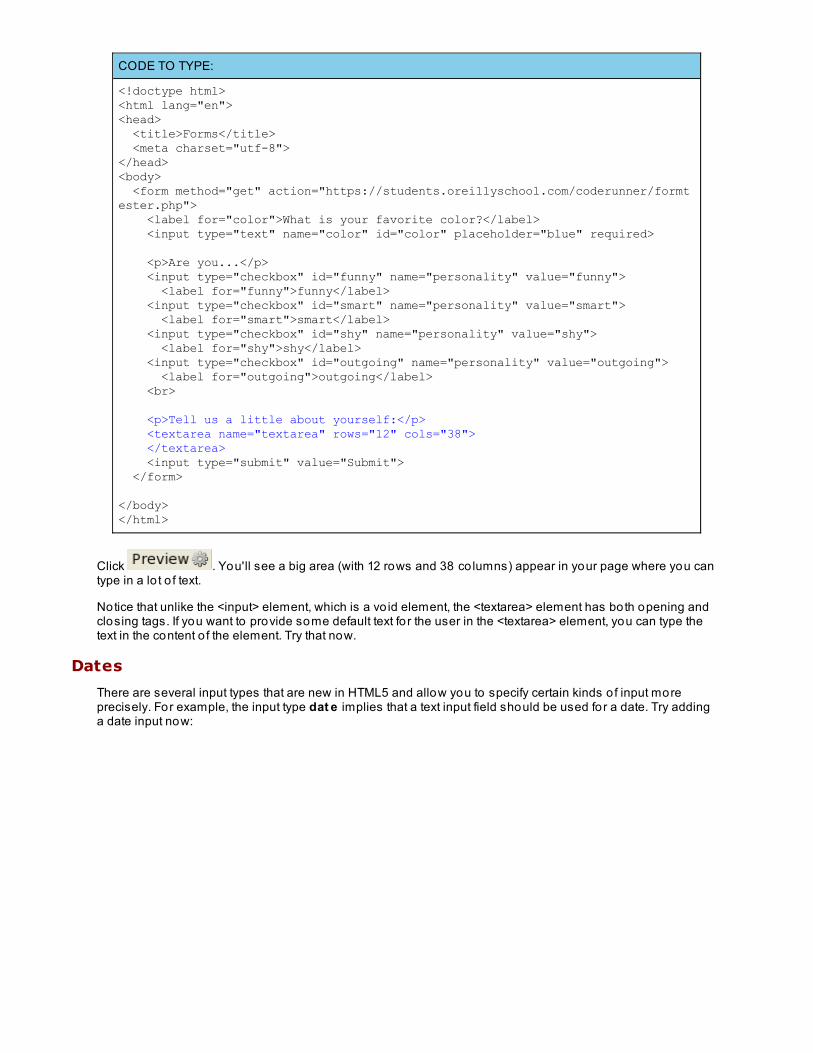
CODE TO TYPE:
<!doctype html><html lang="en"><head> <title>Forms</title> <meta charset="utf-8"></head><body> <form method="get" action="https://students.oreillyschool.com/coderunner/formtester.php"> <label for="color">What is your favorite color?</label> <input type="text" name="color" id="color" placeholder="blue" required>
<p>Are you...</p> <input type="checkbox" id="funny" name="personality" value="funny"> <label for="funny">funny</label> <input type="checkbox" id="smart" name="personality" value="smart"> <label for="smart">smart</label> <input type="checkbox" id="shy" name="personality" value="shy"> <label for="shy">shy</label> <input type="checkbox" id="outgoing" name="personality" value="outgoing"> <label for="outgoing">outgoing</label> <br>
<p>Tell us a little about yourself:</p> <textarea name="textarea" rows="12" cols="38"> </textarea> <input type="submit" value="Submit"> </form>
</body></html>
Click . You'll see a big area (with 12 rows and 38 co lumns) appear in your page where you cantype in a lo t o f text.
Notice that unlike the <input> element, which is a vo id element, the <textarea> element has both opening andclosing tags. If you want to provide some default text fo r the user in the <textarea> element, you can type thetext in the content o f the element. Try that now.
Dates
There are several input types that are new in HTML5 and allow you to specify certain kinds o f input moreprecisely. For example, the input type dat e implies that a text input field should be used for a date. Try addinga date input now:
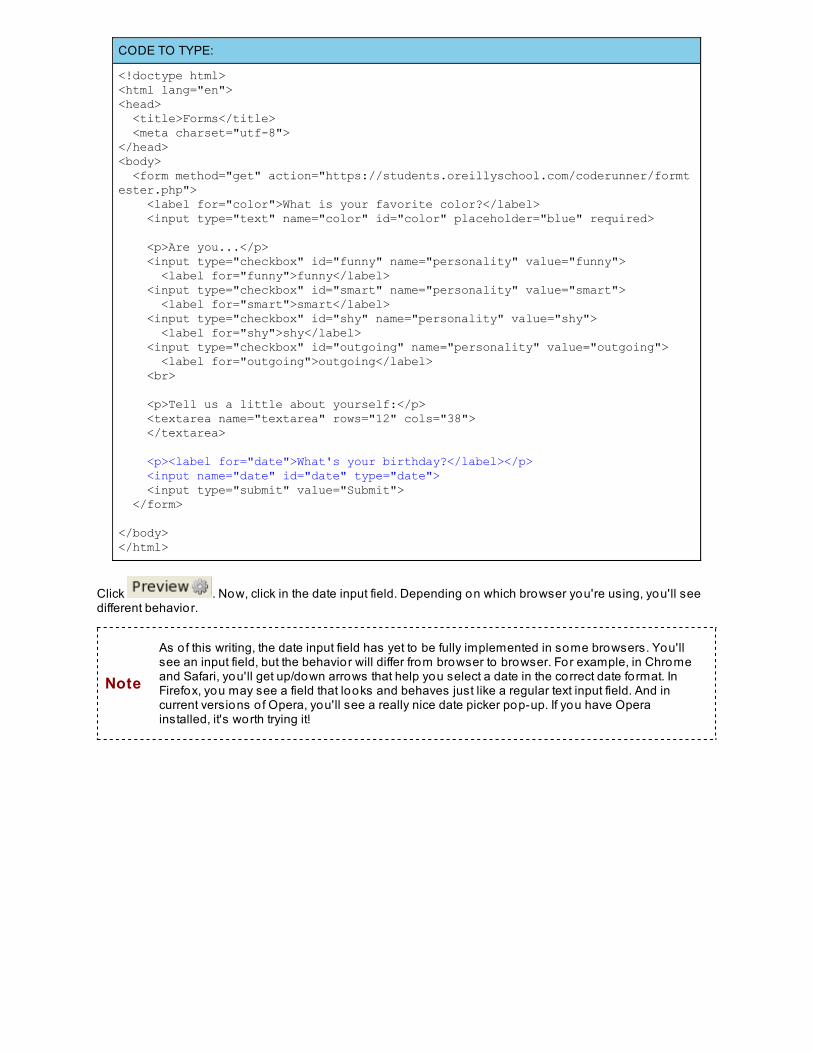
CODE TO TYPE:
<!doctype html><html lang="en"><head> <title>Forms</title> <meta charset="utf-8"></head><body> <form method="get" action="https://students.oreillyschool.com/coderunner/formtester.php"> <label for="color">What is your favorite color?</label> <input type="text" name="color" id="color" placeholder="blue" required>
<p>Are you...</p> <input type="checkbox" id="funny" name="personality" value="funny"> <label for="funny">funny</label> <input type="checkbox" id="smart" name="personality" value="smart"> <label for="smart">smart</label> <input type="checkbox" id="shy" name="personality" value="shy"> <label for="shy">shy</label> <input type="checkbox" id="outgoing" name="personality" value="outgoing"> <label for="outgoing">outgoing</label> <br>
<p>Tell us a little about yourself:</p> <textarea name="textarea" rows="12" cols="38"> </textarea>
<p><label for="date">What's your birthday?</label></p> <input name="date" id="date" type="date"> <input type="submit" value="Submit"> </form>
</body></html>
Click . Now, click in the date input field. Depending on which browser you're using, you'll seedifferent behavior.
Note
As of this writing, the date input field has yet to be fully implemented in some browsers. You'llsee an input field, but the behavior will differ from browser to browser. For example, in Chromeand Safari, you'll get up/down arrows that help you select a date in the correct date format. InFirefox, you may see a field that looks and behaves just like a regular text input field. And incurrent versions o f Opera, you'll see a really nice date picker pop-up. If you have Operainstalled, it's worth trying it!
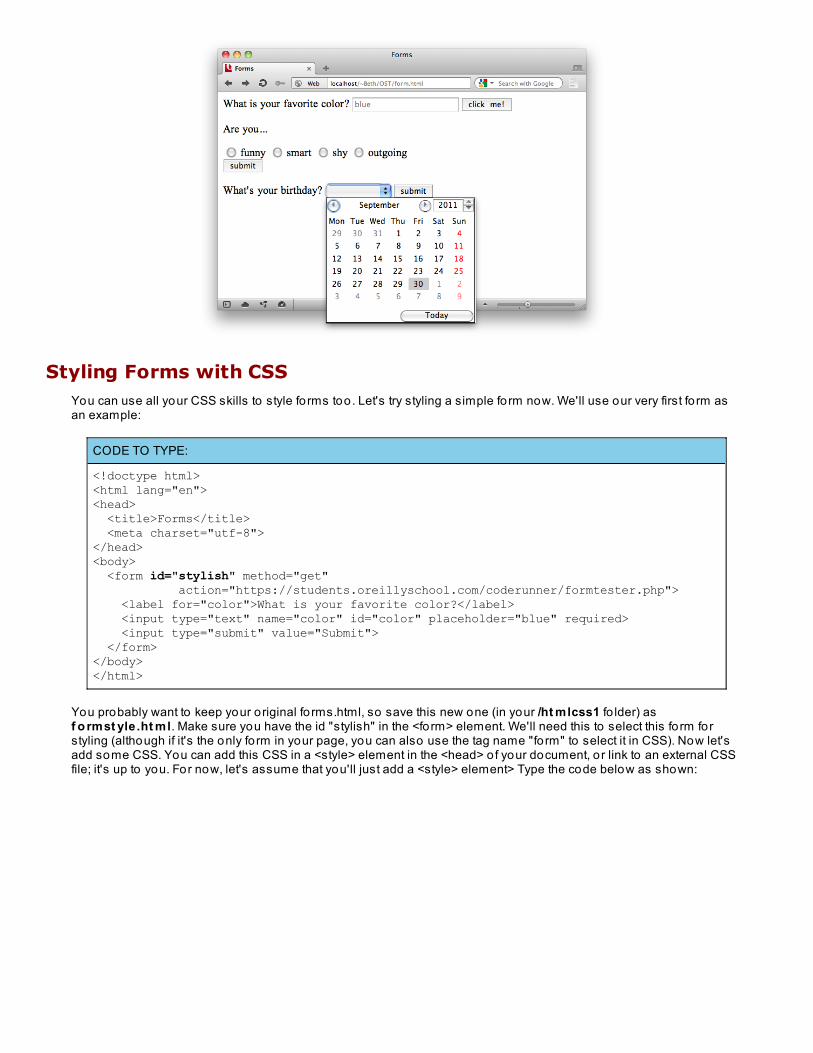
Styling Forms with CSSYou can use all your CSS skills to style fo rms too. Let's try styling a simple form now. We'll use our very first fo rm asan example:
CODE TO TYPE:
<!doctype html><html lang="en"><head> <title>Forms</title> <meta charset="utf-8"></head><body> <form id="stylish" method="get" action="https://students.oreillyschool.com/coderunner/formtester.php"> <label for="color">What is your favorite color?</label> <input type="text" name="color" id="color" placeholder="blue" required> <input type="submit" value="Submit"> </form></body></html>
You probably want to keep your original fo rms.html, so save this new one (in your /ht mlcss1 fo lder) asf o rmst yle .ht ml. Make sure you have the id "stylish" in the <form> element. We'll need this to select this fo rm forstyling (although if it's the only fo rm in your page, you can also use the tag name "form" to select it in CSS). Now let'sadd some CSS. You can add this CSS in a <style> element in the <head> o f your document, o r link to an external CSSfile; it's up to you. For now, let's assume that you'll just add a <style> element> Type the code below as shown:
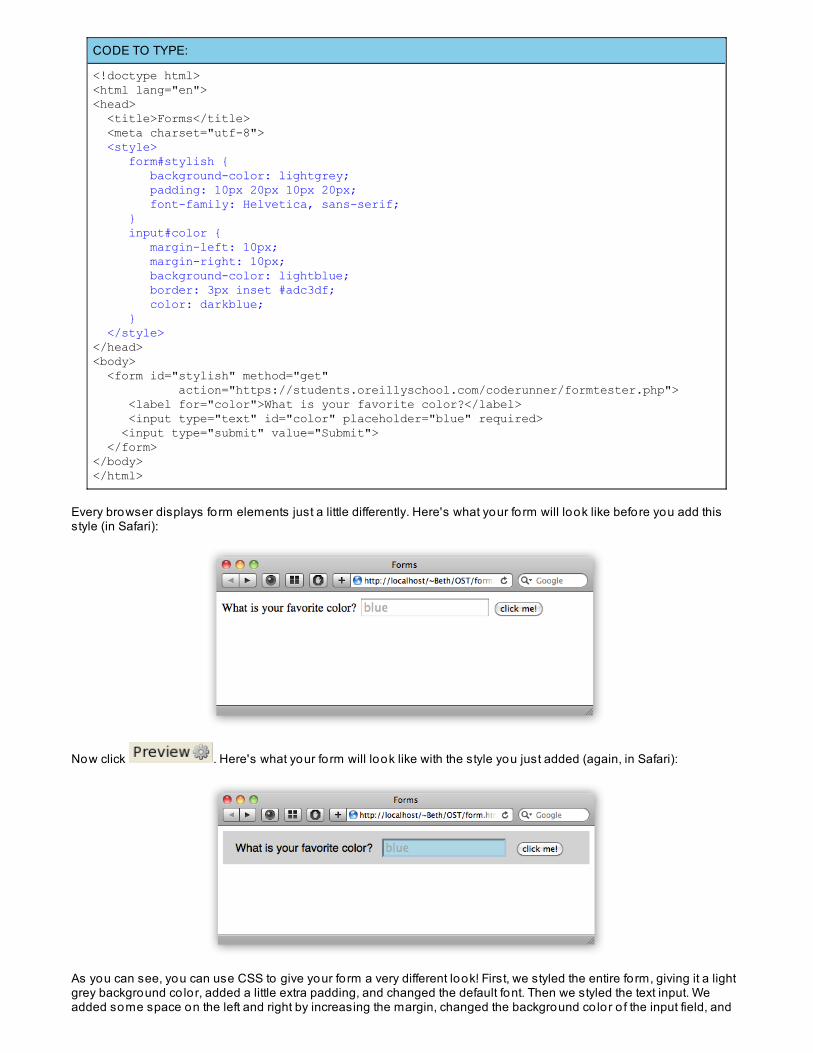
CODE TO TYPE:
<!doctype html><html lang="en"><head> <title>Forms</title> <meta charset="utf-8"> <style> form#stylish { background-color: lightgrey; padding: 10px 20px 10px 20px; font-family: Helvetica, sans-serif; } input#color { margin-left: 10px; margin-right: 10px; background-color: lightblue; border: 3px inset #adc3df; color: darkblue; } </style></head><body> <form id="stylish" method="get" action="https://students.oreillyschool.com/coderunner/formtester.php"> <label for="color">What is your favorite color?</label> <input type="text" id="color" placeholder="blue" required> <input type="submit" value="Submit"> </form></body></html>
Every browser displays form elements just a little differently. Here's what your fo rm will look like before you add thisstyle (in Safari):
Now click . Here's what your fo rm will look like with the style you just added (again, in Safari):
As you can see, you can use CSS to give your fo rm a very different look! First, we styled the entire fo rm, giving it a lightgrey background co lor, added a little extra padding, and changed the default font. Then we styled the text input. Weadded some space on the left and right by increasing the margin, changed the background co lor o f the input field, and
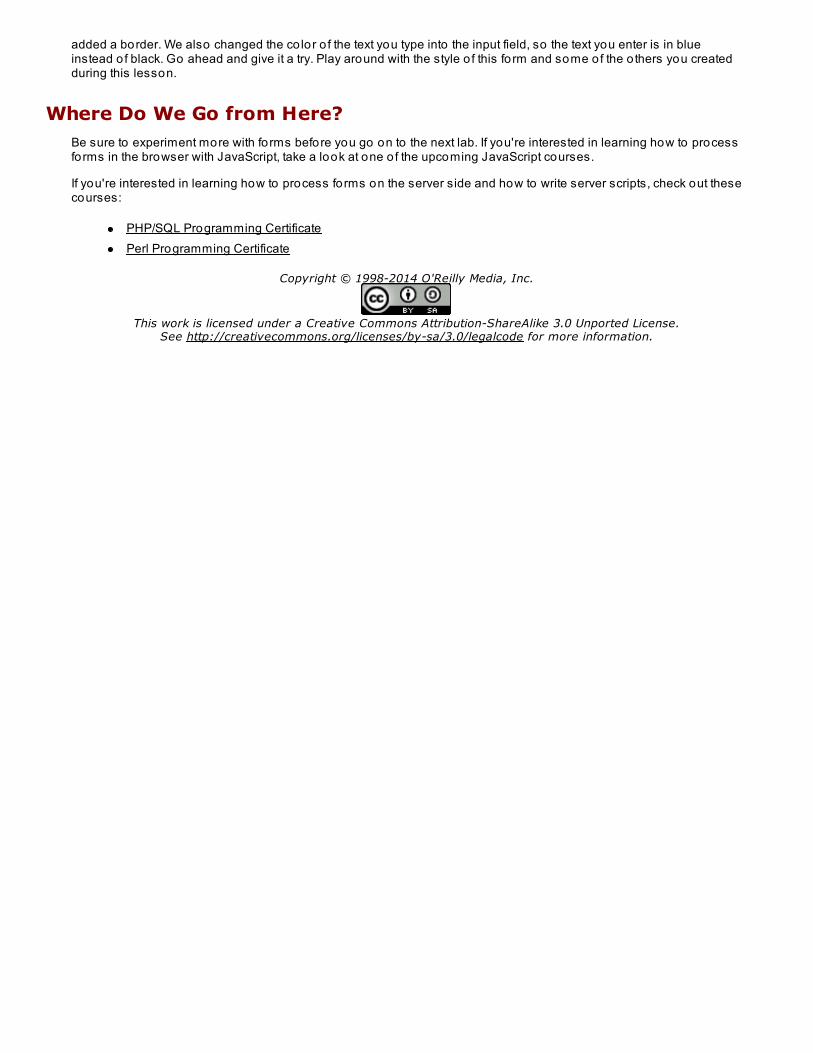
added a border. We also changed the co lor o f the text you type into the input field, so the text you enter is in blueinstead o f black. Go ahead and give it a try. Play around with the style o f this fo rm and some of the o thers you createdduring this lesson.
Where Do We Go from Here?Be sure to experiment more with forms before you go on to the next lab. If you're interested in learning how to processforms in the browser with JavaScript, take a look at one o f the upcoming JavaScript courses.
If you're interested in learning how to process forms on the server side and how to write server scripts, check out thesecourses:
PHP/SQL Programming CertificatePerl Programming Certificate
Copyright © 1998-2014 O'Reilly Media, Inc.
This work is licensed under a Creative Commons Attribution-ShareAlike 3.0 Unported License.See http://creativecommons.org/licenses/by-sa/3.0/legalcode for more information.
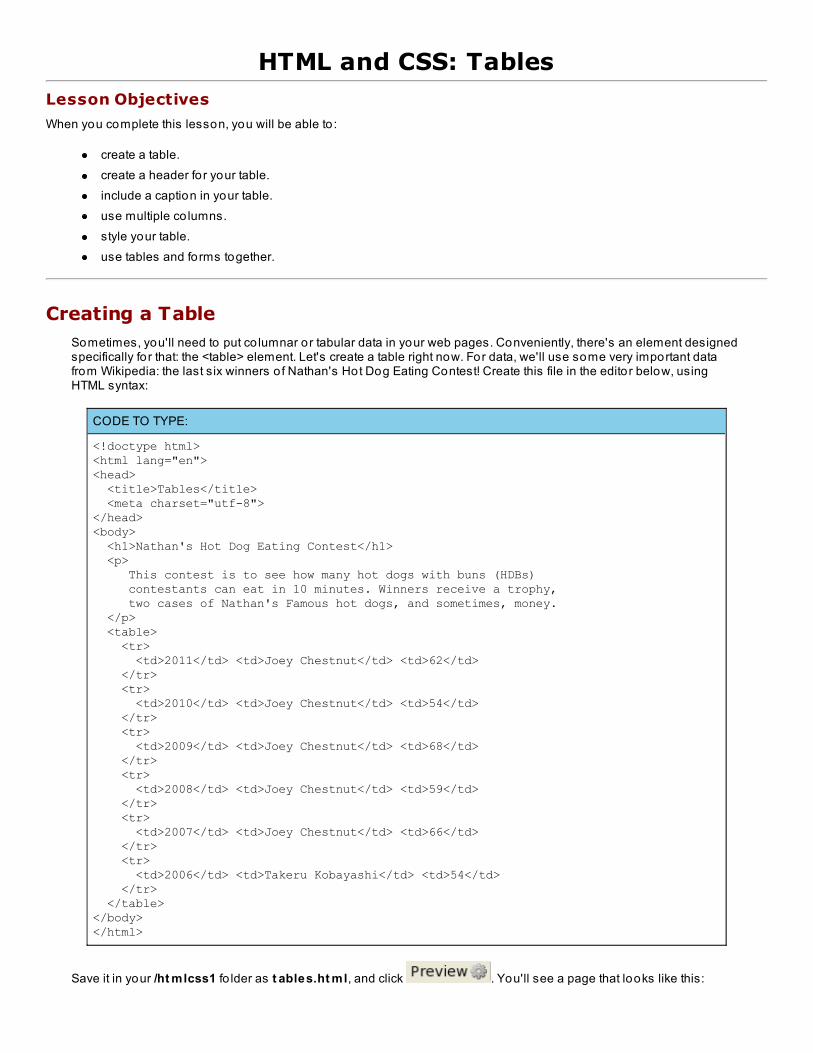
HTML and CSS: TablesLesson Objectives
When you complete this lesson, you will be able to :
create a table.create a header fo r your table.include a caption in your table.use multiple co lumns.style your table.use tables and forms together.
Creating a TableSometimes, you'll need to put co lumnar or tabular data in your web pages. Conveniently, there's an element designedspecifically fo r that: the <table> element. Let's create a table right now. For data, we'll use some very important datafrom Wikipedia: the last six winners o f Nathan's Hot Dog Eating Contest! Create this file in the editor below, usingHTML syntax:
CODE TO TYPE:
<!doctype html><html lang="en"><head> <title>Tables</title> <meta charset="utf-8"></head><body> <h1>Nathan's Hot Dog Eating Contest</h1> <p> This contest is to see how many hot dogs with buns (HDBs) contestants can eat in 10 minutes. Winners receive a trophy, two cases of Nathan's Famous hot dogs, and sometimes, money. </p> <table> <tr> <td>2011</td> <td>Joey Chestnut</td> <td>62</td> </tr> <tr> <td>2010</td> <td>Joey Chestnut</td> <td>54</td> </tr> <tr> <td>2009</td> <td>Joey Chestnut</td> <td>68</td> </tr> <tr> <td>2008</td> <td>Joey Chestnut</td> <td>59</td> </tr> <tr> <td>2007</td> <td>Joey Chestnut</td> <td>66</td> </tr> <tr> <td>2006</td> <td>Takeru Kobayashi</td> <td>54</td> </tr> </table></body></html>
Save it in your /ht mlcss1 fo lder as t ables.ht ml, and click . You'll see a page that looks like this:
To create the table, we start with the <table> element. Then, fo r each row of data, we use a <tr> element (t able row).Nested within each row are the co lumns. Each co lumn is specified with a <td> element (t able data). Each row has thesame number o f <td> elements in it; this is important fo r keeping the table consistent. The table will have as manyco lumns as the row with the most co lumns, and will display empty co lumns for the rows that have fewer <td>elements, but it's easier to read (and troubleshoot later) if you use <td></td> to indicate which co lumns you intend toleave empty.
Make sure you close each <tr> element after you've specified each row of data, and close the table as well by inserting</table> at the end.
We put all o f the co lumns in one line (that is, we put all the <td> elements on the same line in the HTML), but you don'thave to do this; in fact, it's sometimes easier to make sure you've closed all your elements properly if you split each<td> element out into a separate line. It doesn't make any difference to the display or function o f the table if you usemultiple lines in the code. Try this by changing one row of your table (we'll just show the <table> section o f the code fornow; it's the only part we'll be changing for a while):
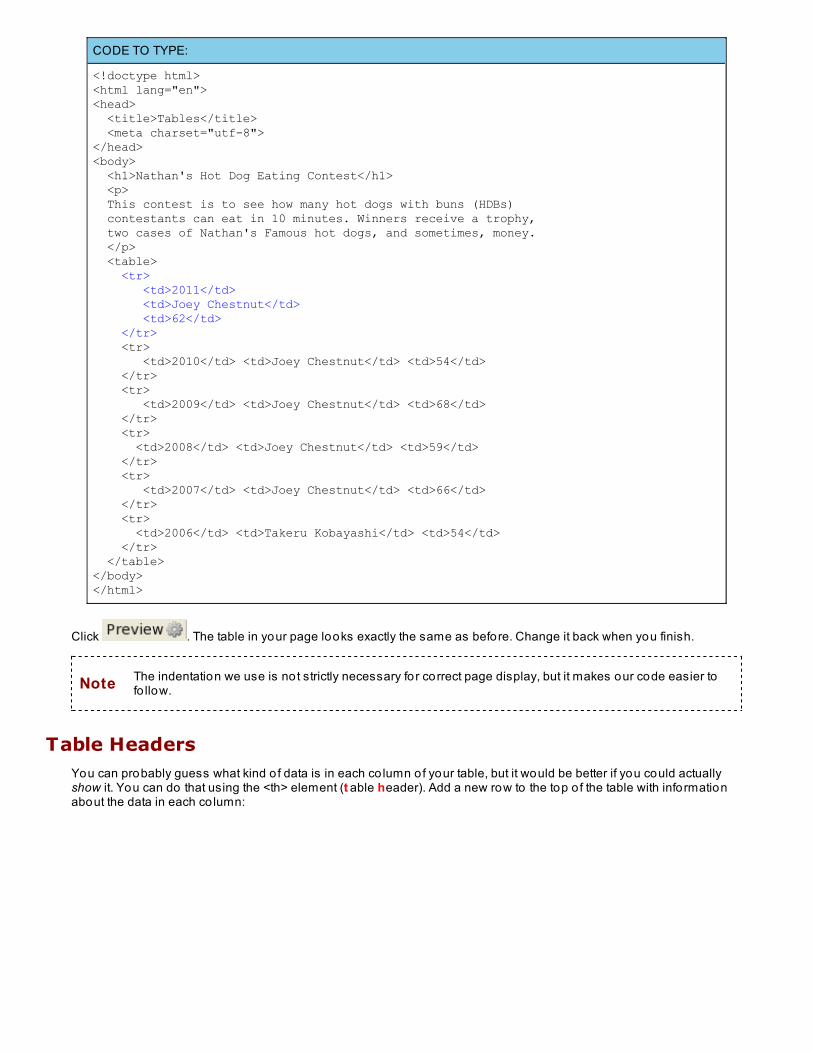
CODE TO TYPE:
<!doctype html><html lang="en"><head> <title>Tables</title> <meta charset="utf-8"></head><body> <h1>Nathan's Hot Dog Eating Contest</h1> <p> This contest is to see how many hot dogs with buns (HDBs) contestants can eat in 10 minutes. Winners receive a trophy, two cases of Nathan's Famous hot dogs, and sometimes, money. </p> <table> <tr> <td>2011</td> <td>Joey Chestnut</td> <td>62</td> </tr> <tr> <td>2010</td> <td>Joey Chestnut</td> <td>54</td> </tr> <tr> <td>2009</td> <td>Joey Chestnut</td> <td>68</td> </tr> <tr> <td>2008</td> <td>Joey Chestnut</td> <td>59</td> </tr> <tr> <td>2007</td> <td>Joey Chestnut</td> <td>66</td> </tr> <tr> <td>2006</td> <td>Takeru Kobayashi</td> <td>54</td> </tr> </table></body></html>
Click . The table in your page looks exactly the same as before. Change it back when you finish.
Note The indentation we use is not strictly necessary for correct page display, but it makes our code easier tofo llow.
Table HeadersYou can probably guess what kind o f data is in each co lumn of your table, but it would be better if you could actuallyshow it. You can do that using the <th> element (t able header). Add a new row to the top o f the table with informationabout the data in each co lumn:
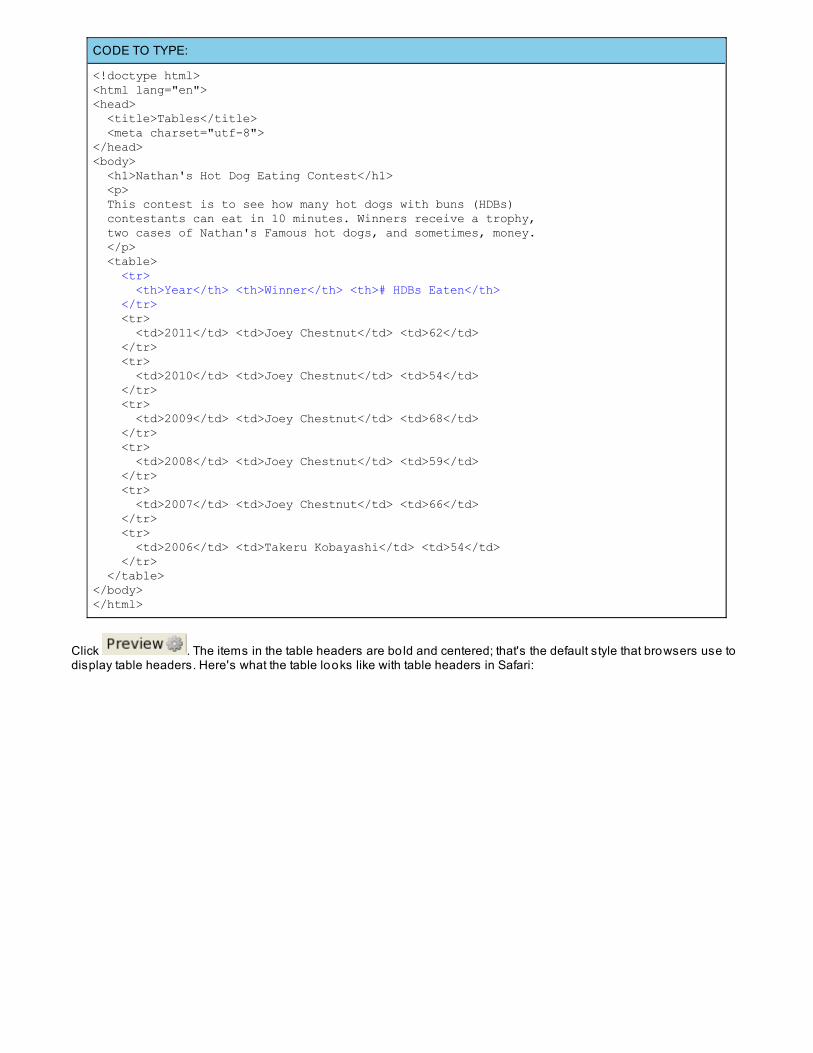
CODE TO TYPE:
<!doctype html><html lang="en"><head> <title>Tables</title> <meta charset="utf-8"></head><body> <h1>Nathan's Hot Dog Eating Contest</h1> <p> This contest is to see how many hot dogs with buns (HDBs) contestants can eat in 10 minutes. Winners receive a trophy, two cases of Nathan's Famous hot dogs, and sometimes, money. </p> <table> <tr> <th>Year</th> <th>Winner</th> <th># HDBs Eaten</th> </tr> <tr> <td>2011</td> <td>Joey Chestnut</td> <td>62</td> </tr> <tr> <td>2010</td> <td>Joey Chestnut</td> <td>54</td> </tr> <tr> <td>2009</td> <td>Joey Chestnut</td> <td>68</td> </tr> <tr> <td>2008</td> <td>Joey Chestnut</td> <td>59</td> </tr> <tr> <td>2007</td> <td>Joey Chestnut</td> <td>66</td> </tr> <tr> <td>2006</td> <td>Takeru Kobayashi</td> <td>54</td> </tr> </table></body></html>
Click . The items in the table headers are bo ld and centered; that's the default style that browsers use todisplay table headers. Here's what the table looks like with table headers in Safari:
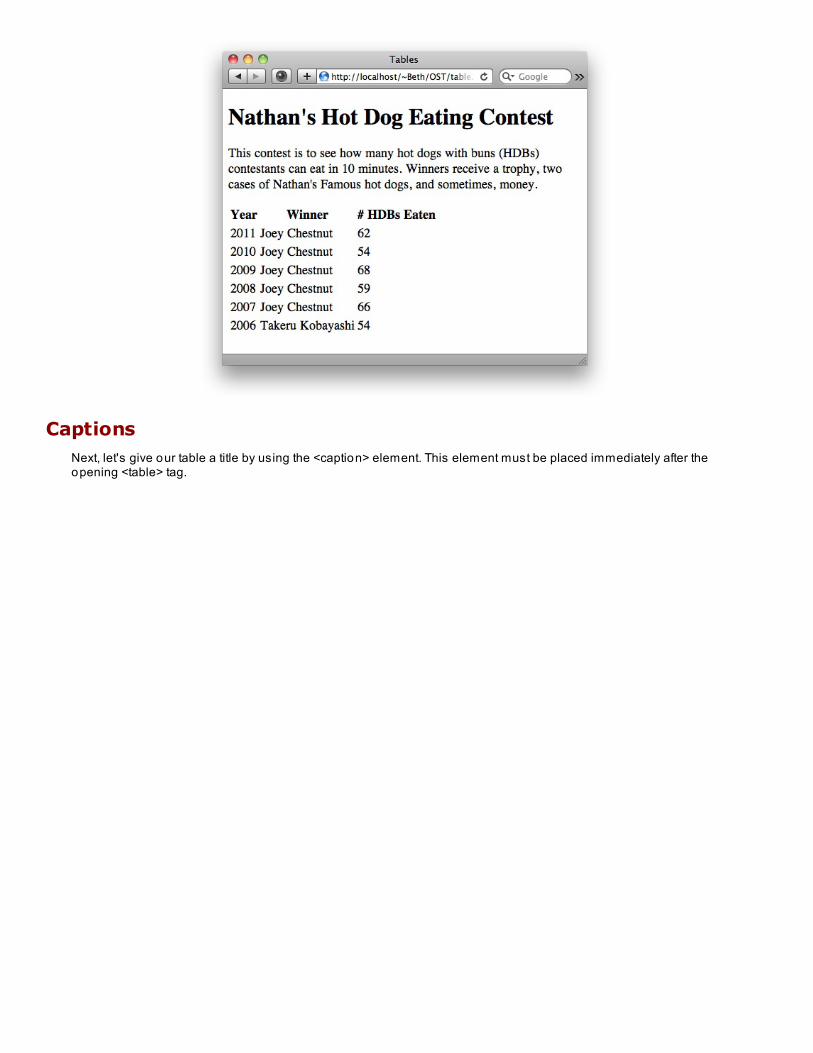
CaptionsNext, let's give our table a title by using the <caption> element. This element must be placed immediately after theopening <table> tag.

CODE TO TYPE:
<!doctype html><html lang="en"><head> <title>Tables</title> <meta charset="utf-8"></head><body> <h1>Nathan's Hot Dog Eating Contest</h1> <p> This contest is to see how many hot dogs with buns (HDBs) contestants can eat in 10 minutes. Winners receive a trophy, two cases of Nathan's Famous hot dogs, and sometimes, money. </p> <table> <caption>Winners, 2006-2011</caption> <tr> <th>Year</th> <th>Winner</th> <th># HDBs Eaten</th> </tr> <tr> <td>2011</td> <td>Joey Chestnut</td> <td>62</td> </tr> <tr> <td>2010</td> <td>Joey Chestnut</td> <td>54</td> </tr> <tr> <td>2009</td> <td>Joey Chestnut</td> <td>68</td> </tr> <tr> <td>2008</td> <td>Joey Chestnut</td> <td>59</td> </tr> <tr> <td>2007</td> <td>Joey Chestnut</td> <td>66</td> </tr> <tr> <td>2006</td> <td>Takeru Kobayashi</td> <td>54</td> </tr> </table> </body> </html>
Click . Your caption will be centered at the top o f the table. (Don't worry, we'll style the caption and thetable shortly to make this all look better.)
Spanning Multiple ColumnsIt's good practice to identify where your data is sourced (and use only public data unless you have specificpermission!). In our case, the table data is from Wikipedia, so let's add a row at the bottom of the table to give thisinformation and provide a link to the Wikipedia page:
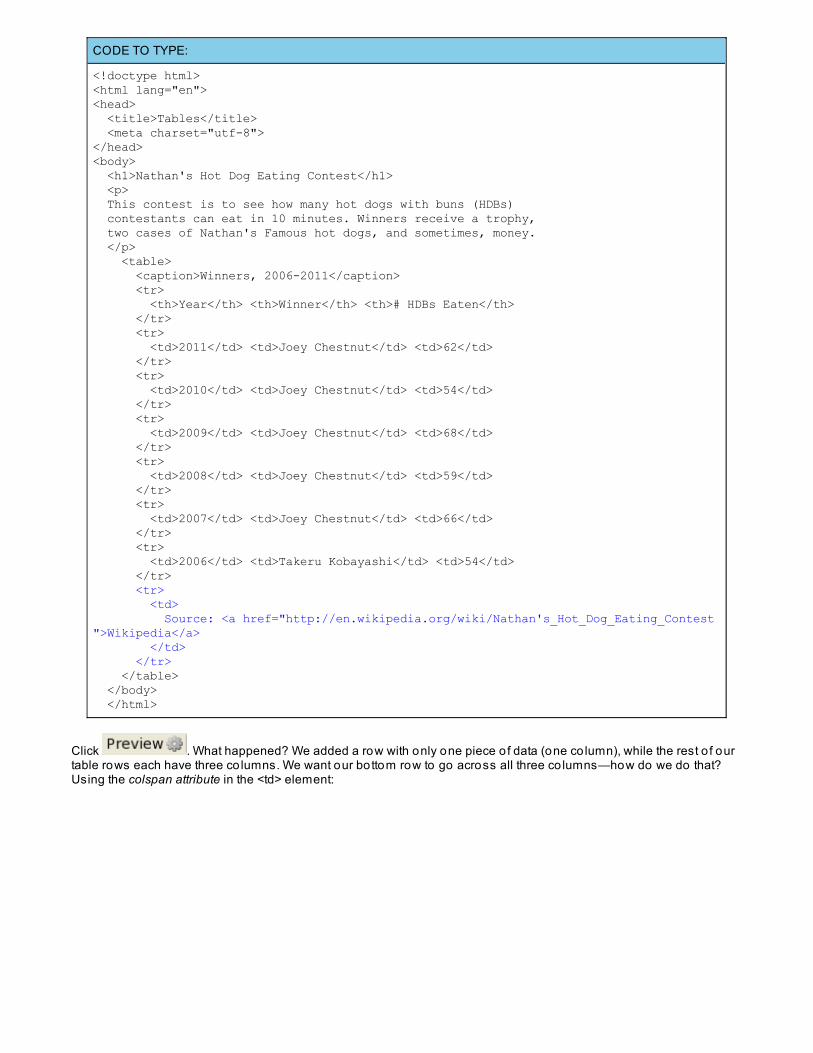
CODE TO TYPE:
<!doctype html><html lang="en"><head> <title>Tables</title> <meta charset="utf-8"></head><body> <h1>Nathan's Hot Dog Eating Contest</h1> <p> This contest is to see how many hot dogs with buns (HDBs) contestants can eat in 10 minutes. Winners receive a trophy, two cases of Nathan's Famous hot dogs, and sometimes, money. </p> <table> <caption>Winners, 2006-2011</caption> <tr> <th>Year</th> <th>Winner</th> <th># HDBs Eaten</th> </tr> <tr> <td>2011</td> <td>Joey Chestnut</td> <td>62</td> </tr> <tr> <td>2010</td> <td>Joey Chestnut</td> <td>54</td> </tr> <tr> <td>2009</td> <td>Joey Chestnut</td> <td>68</td> </tr> <tr> <td>2008</td> <td>Joey Chestnut</td> <td>59</td> </tr> <tr> <td>2007</td> <td>Joey Chestnut</td> <td>66</td> </tr> <tr> <td>2006</td> <td>Takeru Kobayashi</td> <td>54</td> </tr> <tr> <td> Source: <a href="http://en.wikipedia.org/wiki/Nathan's_Hot_Dog_Eating_Contest">Wikipedia</a> </td> </tr> </table> </body> </html>
Click . What happened? We added a row with only one piece o f data (one co lumn), while the rest o f ourtable rows each have three co lumns. We want our bottom row to go across all three co lumns—how do we do that?Using the colspan attribute in the <td> element:
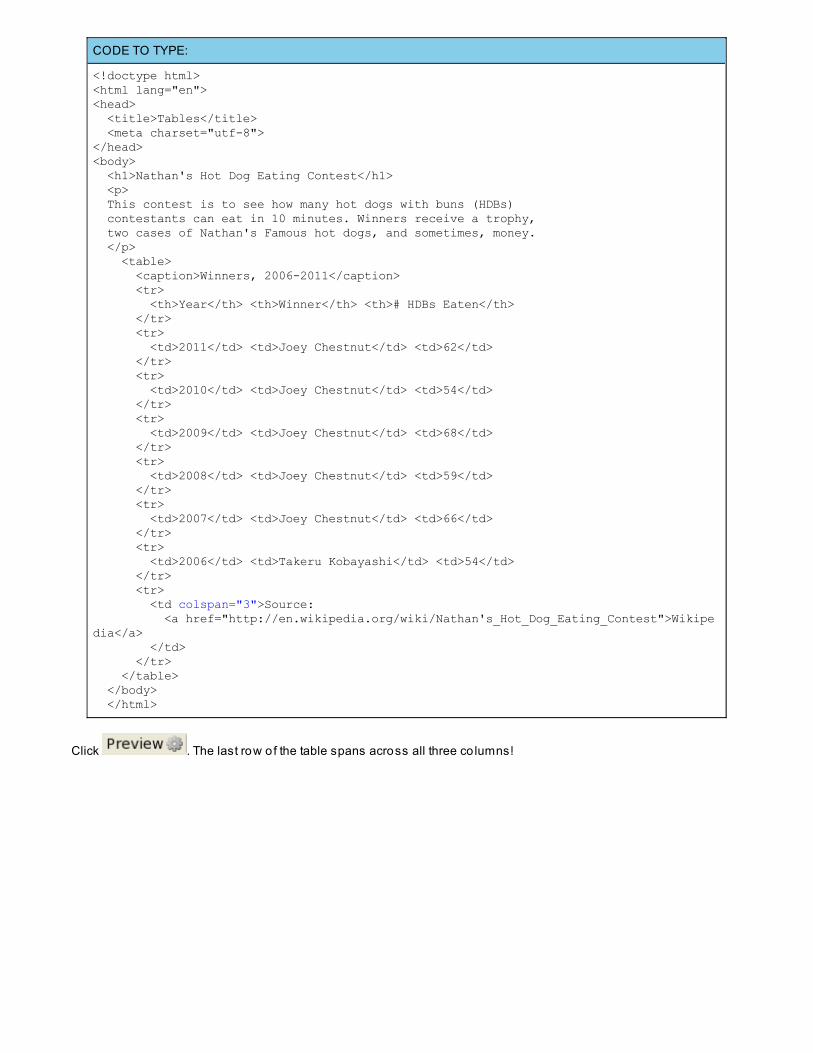
CODE TO TYPE:
<!doctype html><html lang="en"><head> <title>Tables</title> <meta charset="utf-8"></head><body> <h1>Nathan's Hot Dog Eating Contest</h1> <p> This contest is to see how many hot dogs with buns (HDBs) contestants can eat in 10 minutes. Winners receive a trophy, two cases of Nathan's Famous hot dogs, and sometimes, money. </p> <table> <caption>Winners, 2006-2011</caption> <tr> <th>Year</th> <th>Winner</th> <th># HDBs Eaten</th> </tr> <tr> <td>2011</td> <td>Joey Chestnut</td> <td>62</td> </tr> <tr> <td>2010</td> <td>Joey Chestnut</td> <td>54</td> </tr> <tr> <td>2009</td> <td>Joey Chestnut</td> <td>68</td> </tr> <tr> <td>2008</td> <td>Joey Chestnut</td> <td>59</td> </tr> <tr> <td>2007</td> <td>Joey Chestnut</td> <td>66</td> </tr> <tr> <td>2006</td> <td>Takeru Kobayashi</td> <td>54</td> </tr> <tr> <td colspan="3">Source: <a href="http://en.wikipedia.org/wiki/Nathan's_Hot_Dog_Eating_Contest">Wikipedia</a> </td> </tr> </table> </body> </html>
Click . The last row of the table spans across all three co lumns!
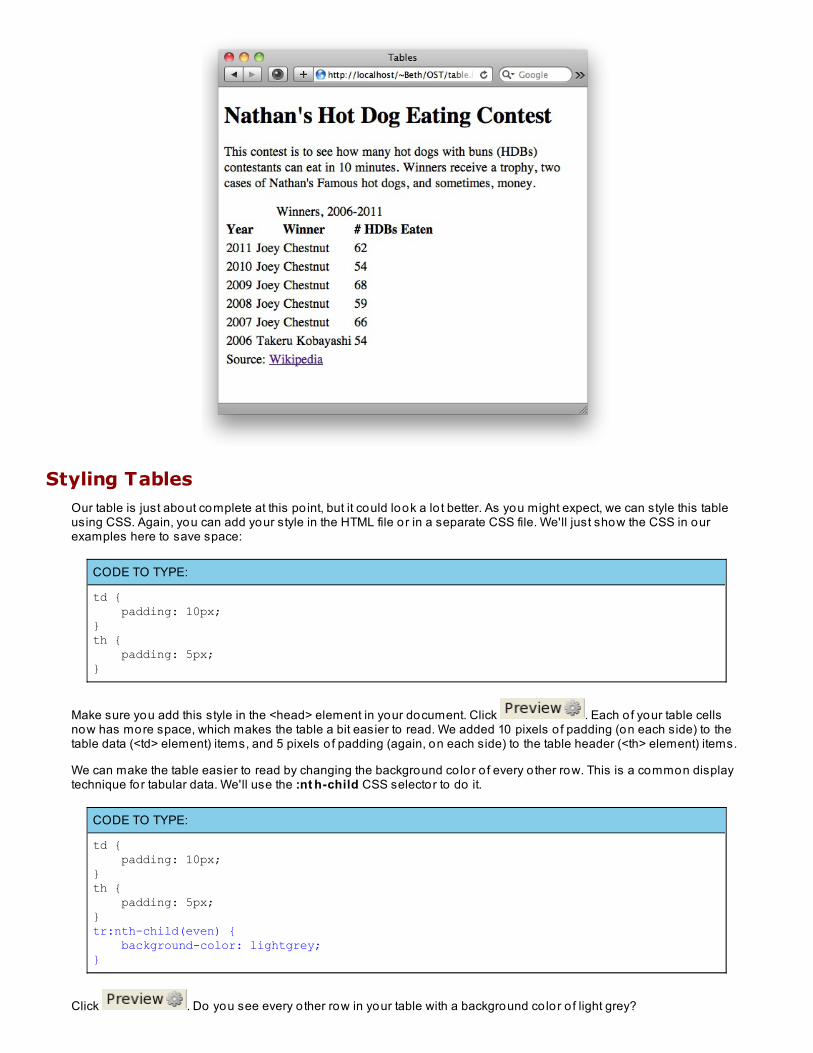
Styling TablesOur table is just about complete at this po int, but it could look a lo t better. As you might expect, we can style this tableusing CSS. Again, you can add your style in the HTML file or in a separate CSS file. We'll just show the CSS in ourexamples here to save space:
CODE TO TYPE:
td { padding: 10px;}th { padding: 5px;}
Make sure you add this style in the <head> element in your document. Click . Each o f your table cellsnow has more space, which makes the table a bit easier to read. We added 10 pixels o f padding (on each side) to thetable data (<td> element) items, and 5 pixels o f padding (again, on each side) to the table header (<th> element) items.
We can make the table easier to read by changing the background co lor o f every o ther row. This is a common displaytechnique for tabular data. We'll use the :nt h-child CSS selector to do it.
CODE TO TYPE:
td { padding: 10px;}th { padding: 5px;}tr:nth-child(even) { background-color: lightgrey;}
Click . Do you see every o ther row in your table with a background co lor o f light grey?
The :nt h-child selector might look a little weird to you. It begins with a co lon and has parentheses, which is kind o fodd, right? The :nt h-child is used to modify another selector, in our case, the t r selector. What it means is that fo r allthe <tr> elements in the table, our program will select the even ones. So if there are six <tr> elements in the table, thet r:nt h-child(even) selector will select the second, fourth, and sixth <tr> elements.
Of course, you can select the odd items instead, using :nt h-child(o dd) . Try it, and you'll see why we used "even" inthis example (it's because we wanted our table headers to have a white background). If we use (odd) instead o f (even),it doesn't work because the table headers aren't data.
Note The :nt h-child selector is only supported in Internet Explorer 9 and later, so if you're using an earlierversion o f Internet Explorer, try another browser.
The :nth-child selector is also very handy with lists! Try it the next time you create a list by using the selector li:nt h-child(even) in your CSS. You'll see how this is much easier than adding a class to every o ther list item like we didearlier!
Our table is starting to look a whole lo t better, don't you think? Let's style the caption next. We'll turn it into somethingthat looks more like a title fo r the table:
CODE TO TYPE:
td { padding: 10px;}th { padding: 5px;}tr:nth-child(even) { background-color: lightgrey;}caption { font-weight: bold; font-size: 130%; border-bottom: 1px solid black;}
Click . You'll see that the caption is now bo ld, in a bigger font, and has a black line under it. Experiment abit with the CSS for the caption if you like!
Lastly, let's style the last row of the table where we've added the source we used for the table data. To select the lastrow, we'll add a class to that particular <tr> element, and use that class to select the row for styling.
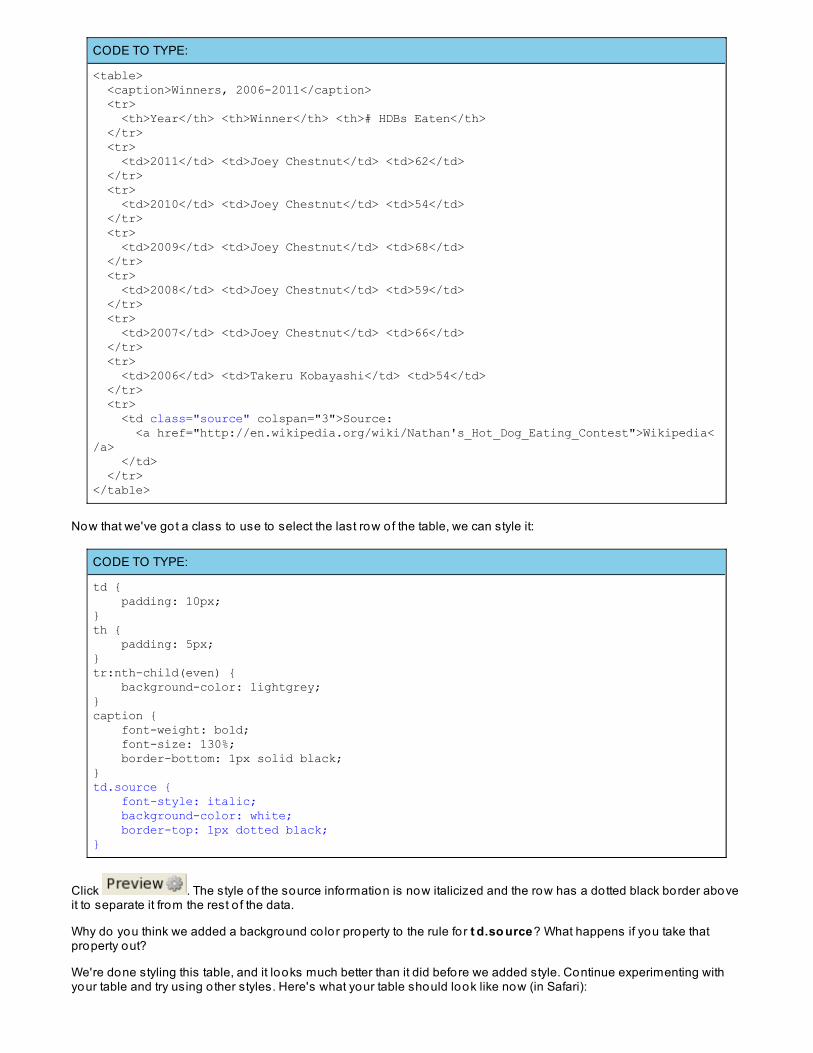
CODE TO TYPE:
<table> <caption>Winners, 2006-2011</caption> <tr> <th>Year</th> <th>Winner</th> <th># HDBs Eaten</th> </tr> <tr> <td>2011</td> <td>Joey Chestnut</td> <td>62</td> </tr> <tr> <td>2010</td> <td>Joey Chestnut</td> <td>54</td> </tr> <tr> <td>2009</td> <td>Joey Chestnut</td> <td>68</td> </tr> <tr> <td>2008</td> <td>Joey Chestnut</td> <td>59</td> </tr> <tr> <td>2007</td> <td>Joey Chestnut</td> <td>66</td> </tr> <tr> <td>2006</td> <td>Takeru Kobayashi</td> <td>54</td> </tr> <tr> <td class="source" colspan="3">Source: <a href="http://en.wikipedia.org/wiki/Nathan's_Hot_Dog_Eating_Contest">Wikipedia</a> </td> </tr></table>
Now that we've got a class to use to select the last row of the table, we can style it:
CODE TO TYPE:
td { padding: 10px;}th { padding: 5px;}tr:nth-child(even) { background-color: lightgrey;}caption { font-weight: bold; font-size: 130%; border-bottom: 1px solid black;}td.source { font-style: italic; background-color: white; border-top: 1px dotted black;}
Click . The style o f the source information is now italicized and the row has a dotted black border aboveit to separate it from the rest o f the data.
Why do you think we added a background co lor property to the rule for t d.so urce? What happens if you take thatproperty out?
We're done styling this table, and it looks much better than it did before we added style. Continue experimenting withyour table and try using o ther styles. Here's what your table should look like now (in Safari):
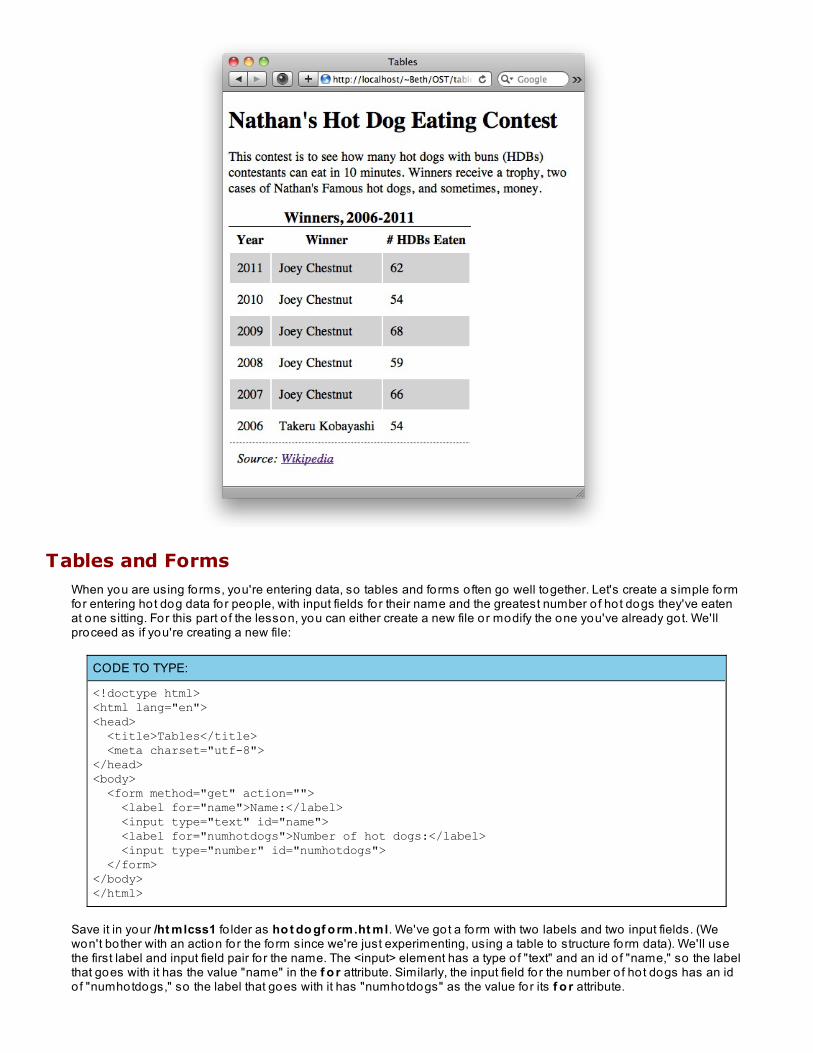
Tables and FormsWhen you are using forms, you're entering data, so tables and forms o ften go well together. Let's create a simple formfor entering hot dog data for people, with input fields for their name and the greatest number o f hot dogs they've eatenat one sitting. For this part o f the lesson, you can either create a new file or modify the one you've already got. We'llproceed as if you're creating a new file:
CODE TO TYPE:
<!doctype html><html lang="en"><head> <title>Tables</title> <meta charset="utf-8"></head><body> <form method="get" action=""> <label for="name">Name:</label> <input type="text" id="name"> <label for="numhotdogs">Number of hot dogs:</label> <input type="number" id="numhotdogs"> </form></body></html>
Save it in your /ht mlcss1 fo lder as ho t do gf o rm.ht ml. We've got a form with two labels and two input fields. (Wewon't bother with an action for the form since we're just experimenting, using a table to structure form data). We'll usethe first label and input field pair fo r the name. The <input> element has a type o f "text" and an id o f "name," so the labelthat goes with it has the value "name" in the f o r attribute. Similarly, the input field fo r the number o f hot dogs has an idof "numhotdogs," so the label that goes with it has "numhotdogs" as the value for its f o r attribute.
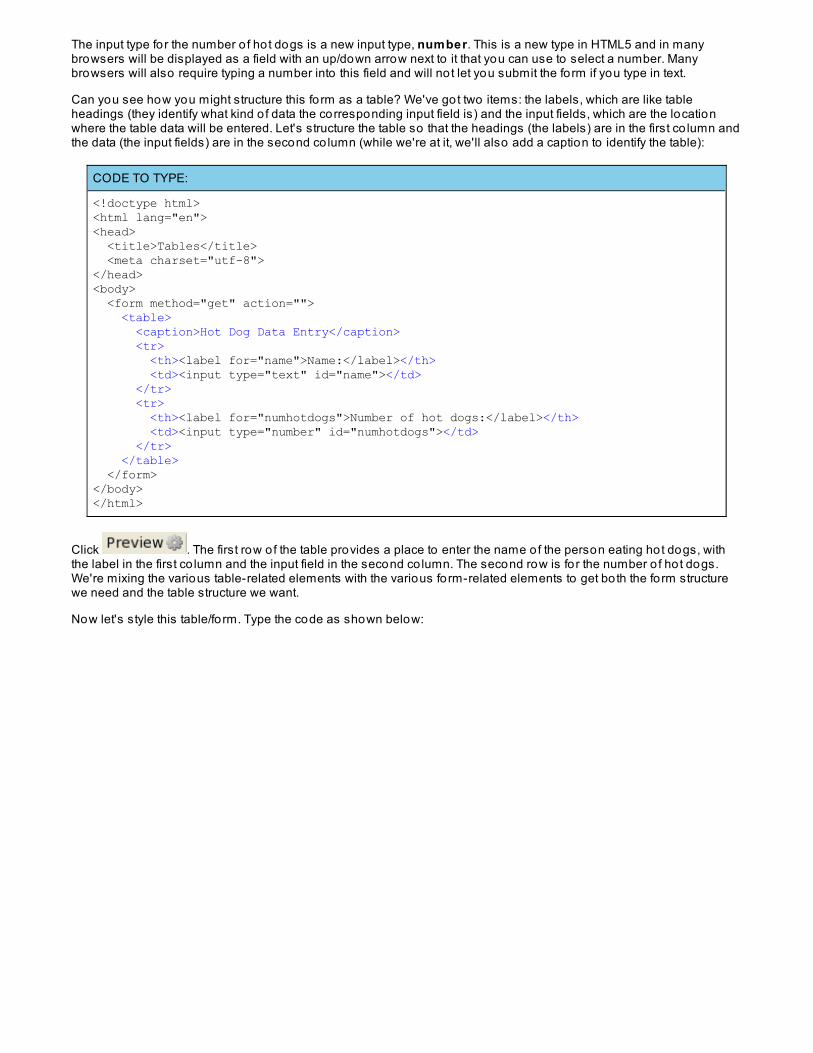
The input type for the number o f hot dogs is a new input type, number. This is a new type in HTML5 and in manybrowsers will be displayed as a field with an up/down arrow next to it that you can use to select a number. Manybrowsers will also require typing a number into this field and will no t let you submit the form if you type in text.
Can you see how you might structure this fo rm as a table? We've got two items: the labels, which are like tableheadings (they identify what kind o f data the corresponding input field is) and the input fields, which are the locationwhere the table data will be entered. Let's structure the table so that the headings (the labels) are in the first co lumn andthe data (the input fields) are in the second co lumn (while we're at it, we'll also add a caption to identify the table):
CODE TO TYPE:
<!doctype html><html lang="en"><head> <title>Tables</title> <meta charset="utf-8"></head><body> <form method="get" action=""> <table> <caption>Hot Dog Data Entry</caption> <tr> <th><label for="name">Name:</label></th> <td><input type="text" id="name"></td> </tr> <tr> <th><label for="numhotdogs">Number of hot dogs:</label></th> <td><input type="number" id="numhotdogs"></td> </tr> </table> </form></body></html>
Click . The first row of the table provides a place to enter the name of the person eating hot dogs, withthe label in the first co lumn and the input field in the second co lumn. The second row is fo r the number o f hot dogs.We're mixing the various table-related elements with the various form-related elements to get both the form structurewe need and the table structure we want.
Now let's style this table/form. Type the code as shown below:
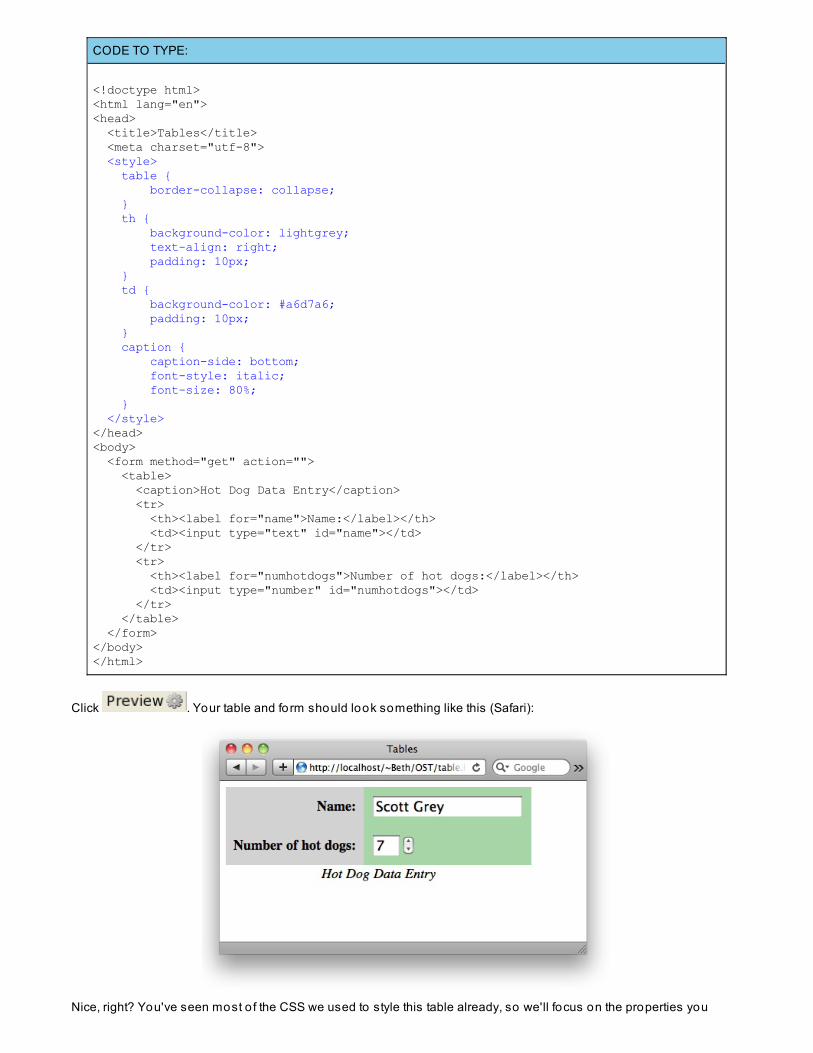
CODE TO TYPE:
<!doctype html><html lang="en"><head> <title>Tables</title> <meta charset="utf-8"> <style> table { border-collapse: collapse; } th { background-color: lightgrey; text-align: right; padding: 10px; } td { background-color: #a6d7a6; padding: 10px; } caption { caption-side: bottom; font-style: italic; font-size: 80%; } </style></head><body> <form method="get" action=""> <table> <caption>Hot Dog Data Entry</caption> <tr> <th><label for="name">Name:</label></th> <td><input type="text" id="name"></td> </tr> <tr> <th><label for="numhotdogs">Number of hot dogs:</label></th> <td><input type="number" id="numhotdogs"></td> </tr> </table> </form></body></html>
Click . Your table and form should look something like this (Safari):
Nice, right? You've seen most o f the CSS we used to style this table already, so we'll focus on the properties you
haven't used before.
OBSERVE:
table { border-collapse: collapse;}th { background-color: lightgrey; text-align: right; padding: 10px;}td { background-color: #a6d7a6; padding: 10px;}caption { caption-side: bottom; font-style: italic; font-size: 80%;}
The bo rder-co llapse property is used to remove the default space that the browser adds between the cells o f a table(this is the border o f each <td> or <th> element, and you can style it using the border property). By removing the bordercompletely, the cells are positioned right next to one another with no space in between them. To see the difference thisproperty makes, try taking out the border-co llapse property from the table rule and see what happens. Which look doyou like better? There is no right or wrong answer, it's all about what works best fo r your table.
The capt io n-side property gives you contro l over where the table caption is positioned with respect to the table. In theprevious example, we used the caption like a table title by keeping it in the default position above the table and styling itto look like a heading. But sometimes you'll want the caption beneath the table; this is typically how table captionsappear in articles or books. To position the caption beneath the table, simply set the capt io n-side to "bottom" as wedid here. We also reduced the font size a little and used italic style to make it look a bit more like a caption.
Wow, we've covered a lo t o f ground with forms and tables so far! Take a break (and maybe even have some tea) before movingon to the last lesson in the course! You're do ing great! Hang in there for one more lesson before the final pro ject.
Copyright © 1998-2014 O'Reilly Media, Inc.
This work is licensed under a Creative Commons Attribution-ShareAlike 3.0 Unported License.See http://creativecommons.org/licenses/by-sa/3.0/legalcode for more information.
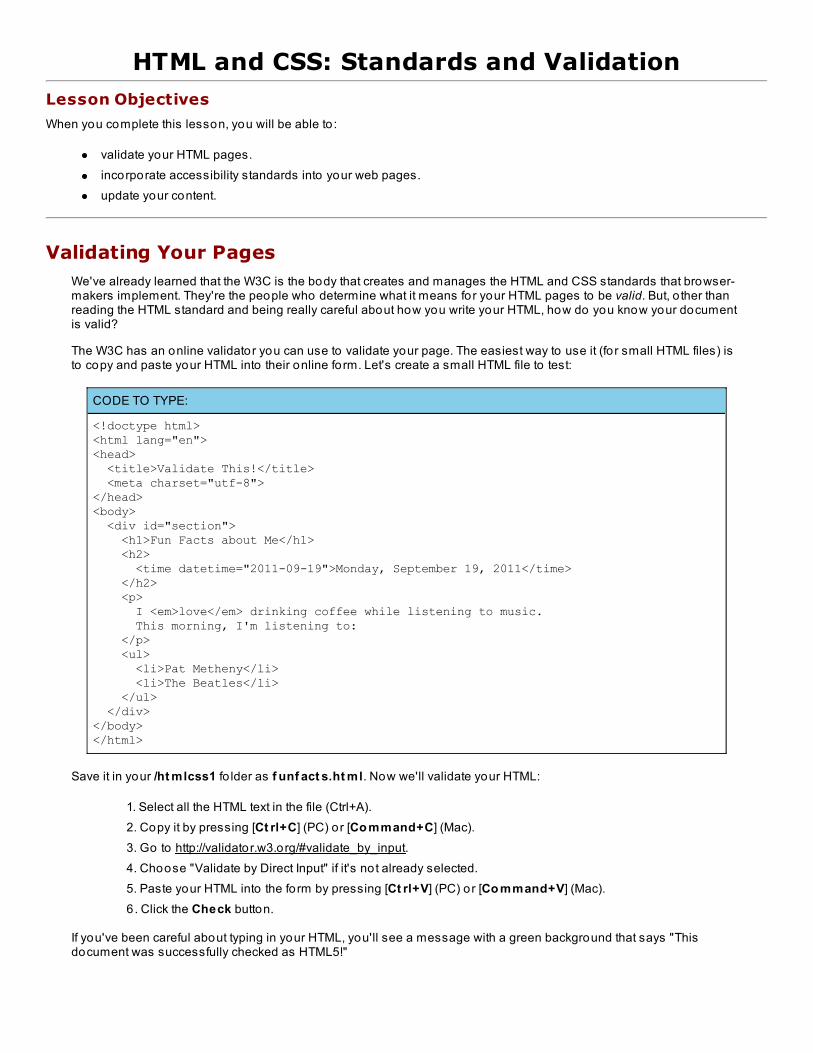
HTML and CSS: Standards and ValidationLesson Objectives
When you complete this lesson, you will be able to :
validate your HTML pages.incorporate accessibility standards into your web pages.update your content.
Validating Your PagesWe've already learned that the W3C is the body that creates and manages the HTML and CSS standards that browser-makers implement. They're the people who determine what it means for your HTML pages to be valid. But, o ther thanreading the HTML standard and being really careful about how you write your HTML, how do you know your documentis valid?
The W3C has an online validator you can use to validate your page. The easiest way to use it (fo r small HTML files) isto copy and paste your HTML into their online form. Let's create a small HTML file to test:
CODE TO TYPE:
<!doctype html><html lang="en"><head> <title>Validate This!</title> <meta charset="utf-8"></head><body> <div id="section"> <h1>Fun Facts about Me</h1> <h2> <time datetime="2011-09-19">Monday, September 19, 2011</time> </h2> <p> I <em>love</em> drinking coffee while listening to music. This morning, I'm listening to: </p> <ul> <li>Pat Metheny</li> <li>The Beatles</li> </ul> </div></body></html>
Save it in your /ht mlcss1 fo lder as f unf act s.ht ml. Now we'll validate your HTML:
1. Select all the HTML text in the file (Ctrl+A).2. Copy it by pressing [Ct rl+C] (PC) or [Co mmand+C] (Mac).3. Go to http://validator.w3.org/#validate_by_input.4. Choose "Validate by Direct Input" if it's not already selected.5. Paste your HTML into the form by pressing [Ct rl+V] (PC) or [Co mmand+V] (Mac).6 . Click the Check button.
If you've been careful about typing in your HTML, you'll see a message with a green background that says "Thisdocument was successfully checked as HTML5!"
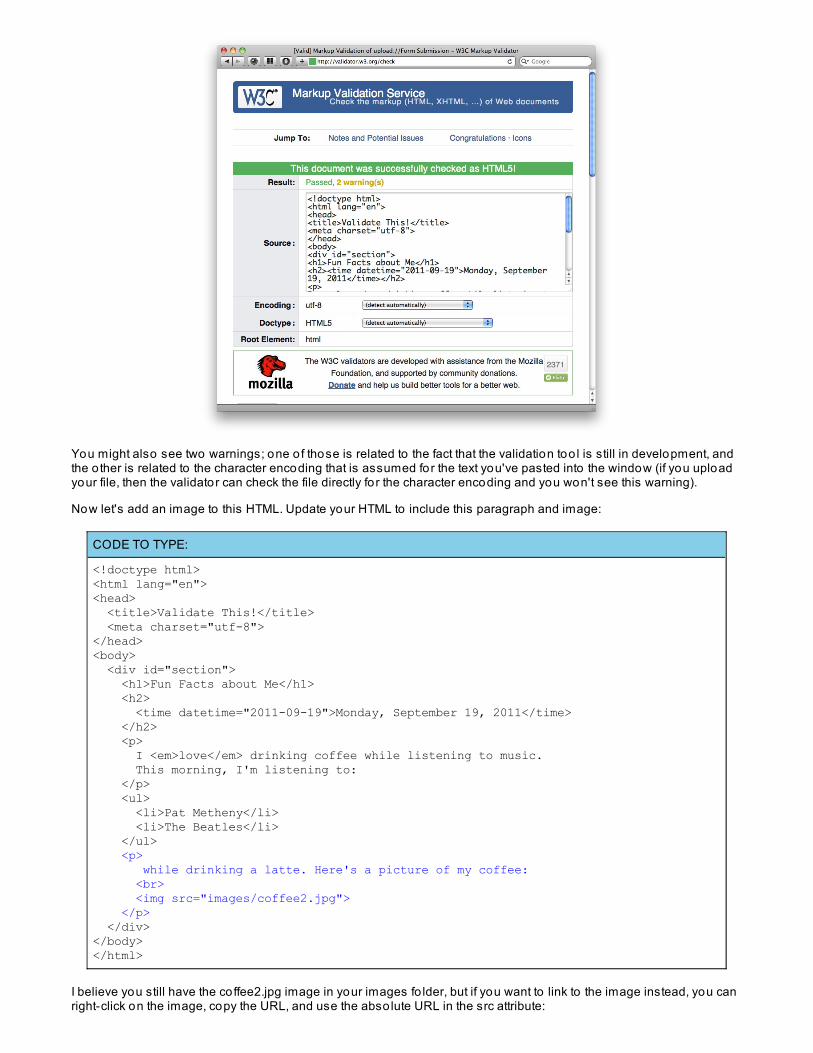
You might also see two warnings; one o f those is related to the fact that the validation too l is still in development, andthe o ther is related to the character encoding that is assumed for the text you've pasted into the window (if you uploadyour file, then the validator can check the file directly fo r the character encoding and you won't see this warning).
Now let's add an image to this HTML. Update your HTML to include this paragraph and image:
CODE TO TYPE:
<!doctype html><html lang="en"><head> <title>Validate This!</title> <meta charset="utf-8"></head><body> <div id="section"> <h1>Fun Facts about Me</h1> <h2> <time datetime="2011-09-19">Monday, September 19, 2011</time> </h2> <p> I <em>love</em> drinking coffee while listening to music. This morning, I'm listening to: </p> <ul> <li>Pat Metheny</li> <li>The Beatles</li> </ul> <p> while drinking a latte. Here's a picture of my coffee: <br> <img src="images/coffee2.jpg"> </p> </div></body></html>
I believe you still have the coffee2.jpg image in your images fo lder, but if you want to link to the image instead, you canright-click on the image, copy the URL, and use the abso lute URL in the src attribute:
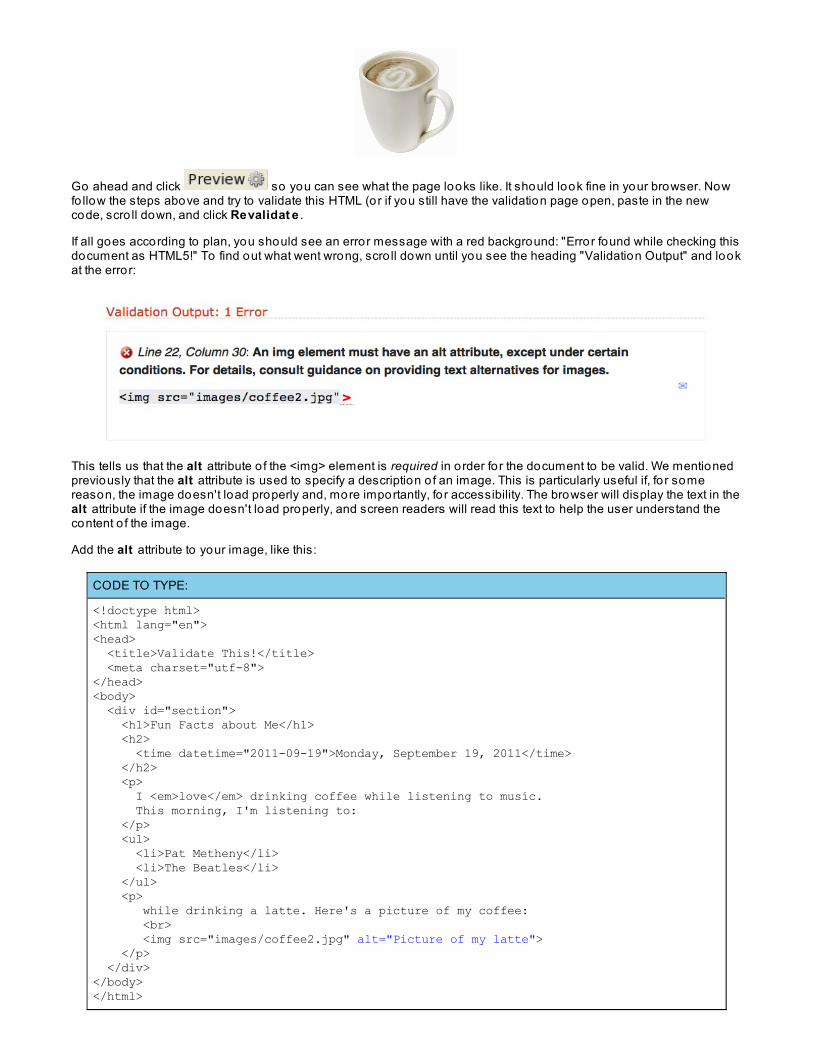
Go ahead and click so you can see what the page looks like. It should look fine in your browser. Nowfo llow the steps above and try to validate this HTML (or if you still have the validation page open, paste in the newcode, scro ll down, and click Revalidat e .
If all goes according to plan, you should see an error message with a red background: "Error found while checking thisdocument as HTML5!" To find out what went wrong, scro ll down until you see the heading "Validation Output" and lookat the error:
This tells us that the alt attribute o f the <img> element is required in order fo r the document to be valid. We mentionedpreviously that the alt attribute is used to specify a description o f an image. This is particularly useful if, fo r somereason, the image doesn't load properly and, more importantly, fo r accessibility. The browser will display the text in thealt attribute if the image doesn't load properly, and screen readers will read this text to help the user understand thecontent o f the image.
Add the alt attribute to your image, like this:
CODE TO TYPE:
<!doctype html><html lang="en"><head> <title>Validate This!</title> <meta charset="utf-8"></head><body> <div id="section"> <h1>Fun Facts about Me</h1> <h2> <time datetime="2011-09-19">Monday, September 19, 2011</time> </h2> <p> I <em>love</em> drinking coffee while listening to music. This morning, I'm listening to: </p> <ul> <li>Pat Metheny</li> <li>The Beatles</li> </ul> <p> while drinking a latte. Here's a picture of my coffee: <br> <img src="images/coffee2.jpg" alt="Picture of my latte"> </p> </div></body></html>

Revalidate the page. Is it fixed?
Experiment with your HTML. Try "breaking" things and see what the validator thinks is valid and not valid. You'll find thatyou can make a lo t o f mistakes in your HTML and still get a valid document. For instance, you can leave o ff a closingtag (go ahead and remove one o f the </li> tags) and your HTML will still validate. Does it validate if you remove theopening <li> tag instead?
All About StandardsHTML5 is designed to be forgiving. Prio r to HTML5, HTML was heading in a much more rigorous direction. You mayhave heard about HTML 4.01 "strict" and XHTML. These standards required you to write your page very carefully and, inorder to validate your page, fo llow the rules precisely.
At this po int, you might be asking yourself several questions:
If HTML5 doesn't care so much about the rules, why should I care?How do browsers render (display) my page correctly if I don't fo llow the rules?Is validation important?What is XHTML?
These are all great questions! Let's start by considering where we are now with HTML5 compared to where we werejust a short while ago with HTML 4.01 strict and XHTML.
Prior to HTML5, the standard for HTML was heading towards XML in the form of XHTML. XML is a strict language, andfor good reason: XML is used to create documents that are processed by computer (to exchange files on everythingfrom library books to national security information!) and, as you probably know, computers are extremely precise.They don't to lerate mistakes well. XML files are usually validated against a grammar or "schema" that specifies rulesfor how the elements are used in the document, so the authors o f those XML files know they are exactly correct.
Browsers have similar rule checkers built into them so they can parse your HTML to figure out how to display yourdocument. Traditionally people have not been careful about how they write their HTML, so browsers have alwaysincluded and allowed lo ts o f fudging o f the rules in order to display our pages, even if they weren't written correctly.
So, given that browsers know how to fudge the rules, why should you care about the rules? Well, the main reason isthis: if you write your pages correctly, every time, then you'll know the browser is go ing to display the page correctly fo rall (o r at least, most) o f the people viewing your pages.
That's why we've been fo llowing slightly stricter rules than the current standard for HTML5. We're fo llowing rules fromHTML 4.01 strict and XHTML, to get into good habits from the beginning.
Now, what is XHTML? XHTML is a version o f HTML written in XML. Because HTML is very similar to XML, thedifferences between HTML and XHTML aren't that great; the main difference is that if you write XHTML, you must fo llowthe rules for writing documents in order fo r your document to be valid XML.
One advantage to XHTML is that because you're actually writing XML, you can create documents that can be used withsystems that know how to handle XML documents. Depending on what kind o f business you are in, this can be useful.
For the most part, web developers and web content creators aren't creating "documents." They're creatinginformational pages or even web applications like games, utilities, or social media. Think o f the web sites you useevery day; most o f them (except perhaps news sites) don't have much to do with traditional "documents."
So, what does this all mean for you? What we recommend is that you use the standard that is most appropriate for thepro ject you're working on; HTML5 for most uses, and XHTML 1.1 for specific uses when you need to be able to validateyour documents for some reason. If you go with HTML5, then you can get away with being a bit sloppy, but if you arecareful about how you write your HTML, then you will have a greater chance o f your web page working as you'd expectit to , especially when you start using CSS and JavaScript more. If you go with XHTML 1.1 or XHTML5 (a hybrid o fHTML5 and XHTML) then you need to learn a bit more about XML and how it works. In this course, we focus onHTML5, but keep using the good habits we're learning and adhere to HTML 4.01 and XHTML standards.
To learn more about XHTML, read the W3C XHTML 1.1 standard document.
To learn more about XHTML5, read this blog post about it.
Accessibility standardsYour content should be accessible to a wide audience regardless o f physical abilities. The W3C has specific

guidelines for making your pages accessible to users with disabilities.
People may be visually, hearing, or physically impaired, or techno logically limited, but still want to access your content.There are quite a few things you can do to help with that. And, many o f the things you can do to make your web pagemore accessible will also help users on mobile devices too.
To help you get a feel fo r how your site might appear to someone using assistive devices like a screen reader or azoom aid, try using your computer and/or browser's built- in Univeral Access functions.
For example, if you use Safari, you can enable a screen reader using the Edit | Speech | St art Speaking menuoption. The screen reader will start reading the current web page. You can also see how your web page will look topeople who use increased font sizes by default, by go ing to the Saf ari Pref erences | Advanced panel andincreasing the minimum font size.
In Firefox, you can set the font size using the Pref erences | Co nt ent panel, and set accessibility features in thePref erences | Advanced panel.
Also, check your computer's Universal Access System Preferences; there are o ften too ls there to help users withdisabilities.
Some other ways you can make your site more accessible:
Always provide text alternatives for images. Be sure the text describes both the graphic and its purpose.If your image is a link, include a description/purpose o f the link destination.Use relative font sizes. Screen enlargers will display the page more accurately. To specify relative font sizesin your CSS, you write properties like f o nt -size: 120%; rather than as an abso lute size (like f o nt -size:12px;).Write hyperlink text that makes sense when read out o f context.Don't use an element because o f the look it gives your page—you can always change that with CSS—usethe element that has the right meaning for the purpose. In particular, you'll want to use headings properly(<h1>, <h2> and so on), because people using screen readers will o ften jump between headings as a wayto find specific content quickly.Use labels with your fo rm contro ls. If you use labels correctly, it can really help people in understanding andcorrectly filling out fo rms.Use access keys in your links.Use co lor with care, not only fo r the visually impaired, and co lor blind.
There are many o ther ways you can help people with disabilities use your pages; search the web for "tips for makingyour web site more accessible" and you'll find a wealth o f information beyond the W3C guidelines.
Access Keys
For users with limited mobility, using a mouse to click through your site can be difficult. Access keys aresimilar to the keyboard shortcuts we're all familiar with (fo r example, copying and pasting), except they are tiedto your navigation menu. You can set these keys using the accesskey attribute in the anchor tag.
OBSERVE:
<a href="http://www.oreillyschool.com" accesskey="h">Home</a>
Access keys on a Windows-based machine using IE, Safari, Konqueror, o r Chrome are activated by pressingAlt +Accesskey.
Windows: Internet Explorer users may also need to press Ent er to activate a link.Windows: Firefox, press Shif t +Alt +Accesskey.Mac: Firefox 14, press Ct rl+Alt +Accesskey.Mac: Firefox, press Ct rl+Accesskey.Mac: Safari, press Ct rl+Opt io n+Accesskey.
Think about how you might inform users about your access keys. You could list them on your page, provide alink to a separate page where they are listed, or using CSS styles to style the access key letter.
Create a Great Web Site and Keep It Current
You now have many o f the basic skills you need to go out and create a great web site. Even if all you do is put up apersonal web page, it's worth keeping it up to date by using the latest standards, making sure that all your links work,and updating the content regularly.
If you link to an external site and they change their pages, you'll end up with a broken link. To avo id that, be sure tocheck your external links o ften. You can do that manually or run your pages through W3C's link checker.
Just a Few Loose Ends
Favicons
Have you ever wondered about that little icon that's in the title bar fo r some websites? That's called a favicon.It's a 16 x 16 pixel image associated with a website. Maybe you'd like to include one for your site. Here's how:
First create and upload an .ico image. Then add this code to the head o f your web pages:
<link rel="icon" type="image/ico" href="http://location/favicon_name.ico">
Replace the value o f the href attribute, http://location/favicon_name.ico, with the location and name of yourfavicon file. The favicon won't show in the Preview window, so be sure to save your file and view it from yourcomputer or online.
More <meta> Tags
Aside from the <meta> tag that's required for creating a valid HTML5 document, and the <meta charset="utf-8"> tag that specifies the character set, there are several o ther <meta> tags that you might find useful. Hereare a few of the most common ones:
The name <meta> can be used to specify a description, keywords, and author fo r your page. Forexample:<met a name="descript io n" co nt ent ="O'Reilly Scho o l HT ML and CSS co urse"><met a name="keywo rds" co nt ent ="HT ML, CSS"><met a name="aut ho r" co nt ent ="Elisabet h Ro bso n">The ht t p-equiv <meta> can be used to refresh a page regularly. For example:<met a ht t p-equiv="ref resh" co nt ent ="300">tells the browser to refresh the web page every 5 minutes. Keep in mind that ref resh is NOTsomething you'll want to use regularly if you want your web page to be accessible, because it takescontro l o f the page refresh away from the user. Use this <meta> tag carefully and with good reason.ht t p-equiv can also specify a redirect lo cat io n, which can be useful if you need to direct usersfrom an o ld web site to a new one. For example: <met a ht t p-equiv="lo cat io n" co nt ent ="URL=ht t p://o re illyscho o l.co m">
Alright then. You're almost done with the course! Coming up next: your final pro ject. Have fun with it, and good luck!
Copyright © 1998-2014 O'Reilly Media, Inc.
This work is licensed under a Creative Commons Attribution-ShareAlike 3.0 Unported License.See http://creativecommons.org/licenses/by-sa/3.0/legalcode for more information.
HTML and CSS: Final ProjectLesson Objectives
When you complete this lesson, you will be able to :
create a website that include elements and properties discussed in both the HTML and CSS portions o f this course.
Final ProjectThis lesson is your final pro ject fo r the course. The goal o f this pro ject is to create an entire website. You can make thiswebsite fo r any subject you wish. If you are having trouble coming up with an idea, you might consider creating anonline portfo lio and resume. Such a website might include:
A main page with general information about youLinks to pages with the fo llowing information about you:
work experienceeducationinterestspast and current websites—you can include the pages you created throughout this courselinks to your favorite websites
For the sake o f evaluation, your website must include elements and properties discussed in both the HTML and CSSportions o f this course. You should use an external CSS file fo r use in all the pages in your site. You are encouragedto create files that observe good programming practices and your pages should validate using the W3C onlinevalidator. In addition, you should use good names for ids and classes, and use indentation to make your code asreadable as possible.
The website should be well-o rganized, pro fessional, easy to navigate, and aesthetically pleasing, with no typos orsyntax errors. The site should also work consistently in the fo llowing browsers:
Internet Explorer on WindowsFirefox on WindowsSafari on MacChrome on Mac
NoteNO WYSIWYG EDITORS. This means no Microsoft Expression Web, MSWord, or Dreamweaver. If youcannot use CodeRunner, you must use a plain text edito r (like WordPad, NotePad or TextPad) to createyour pages.
Be creative and have fun! You want to present yourself in a pro fessional yet friendly way, so feel free to expressyourself!
Copyright © 1998-2014 O'Reilly Media, Inc.
This work is licensed under a Creative Commons Attribution-ShareAlike 3.0 Unported License.See http://creativecommons.org/licenses/by-sa/3.0/legalcode for more information.