Embed Size (px)
Citation preview
1
Product Manual
Intova Duo
2
IInnttrroodduuccttiioonn
Thank you for purchasing an Intova Duo. Your Duo is a tough and robust Sports Camera with a wide range of
features. Please read this manual carefully for usage instructions and care tips.
.
ENJOY!!!
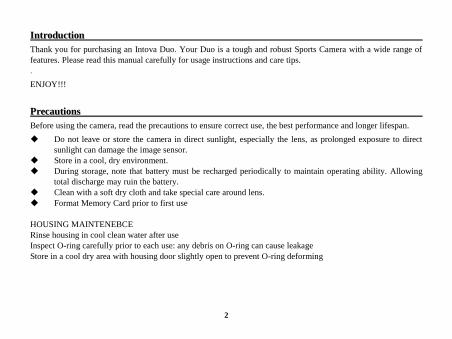
PPrreeccaauuttiioonnss
Before using the camera, read the precautions to ensure correct use, the best performance and longer lifespan.
Do not leave or store the camera in direct sunlight, especially the lens, as prolonged exposure to direct
sunlight can damage the image sensor. Store in a cool, dry environment.
During storage, note that battery must be recharged periodically to maintain operating ability. Allowing
total discharge may ruin the battery.
Clean with a soft dry cloth and take special care around lens.
Format Memory Card prior to first use
HOUSING MAINTENEBCE
Rinse housing in cool clean water after use
Inspect O-ring carefully prior to each use: any debris on O-ring can cause leakage
Store in a cool dry area with housing door slightly open to prevent O-ring deforming
3
.
SSyysstteemm RReeqquuiirreemmeennttss
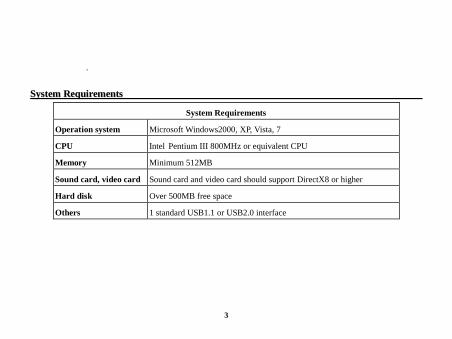
System Requirements
Operation system Microsoft Windows2000, XP, Vista, 7
CPU Intel Pentium III 800MHz or equivalent CPU
Memory Minimum 512MB
Sound card, video card Sound card and video card should support DirectX8 or higher
Hard disk Over 500MB free space
Others 1 standard USB1.1 or USB2.0 interface
4
AAppppeeaarraannccee aanndd kkeeyy iinnttrroodduuccttiioonn
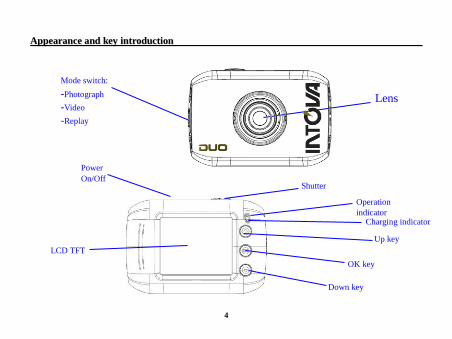
Mode switch:
-Photograph
-Video
-Replay
Lens
Operation
indicator
Power
On/Off Shutter
Charging indicator
LCD TFT
Up key
OK key
Down key
5
Key/Indicator Function
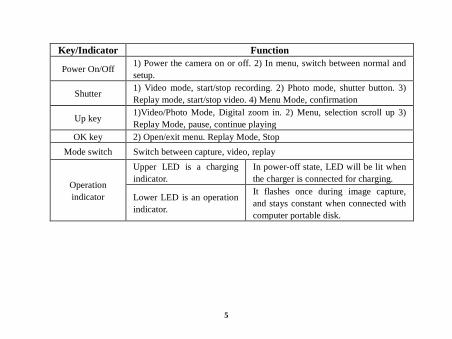
Power On/Off 1) Power the camera on or off. 2) In menu, switch between normal and
setup.
Shutter 1) Video mode, start/stop recording. 2) Photo mode, shutter button. 3)
Replay mode, start/stop video. 4) Menu Mode, confirmation
Up key 1)Video/Photo Mode, Digital zoom in. 2) Menu, selection scroll up 3)
Replay Mode, pause, continue playing
OK key 2) Open/exit menu. Replay Mode, Stop
Mode switch Switch between capture, video, replay
Operation
indicator
Upper LED is a charging
indicator.
In power-off state, LED will be lit when
the charger is connected for charging.
Lower LED is an operation
indicator.
It flashes once during image capture,
and stays constant when connected with
computer portable disk.
6
SSttaarrtt UUssee ______________
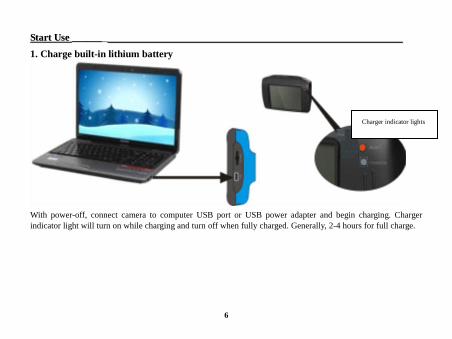
1. Charge built-in lithium battery
With power-off, connect camera to computer USB port or USB power adapter and begin charging. Charger
indicator light will turn on while charging and turn off when fully charged. Generally, 2-4 hours for full charge.
USB 线
Charger indicator lights
7
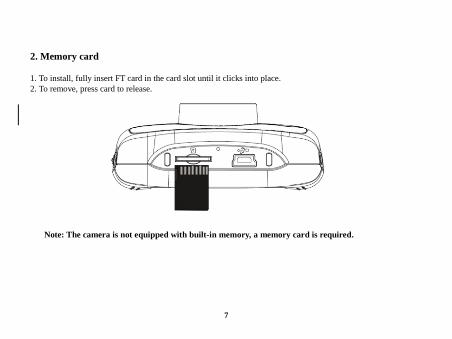
2. Memory card 1. To install, fully insert FT card in the card slot until it clicks into place. 2. To remove, press card to release.
Note: The camera is not equipped with built-in memory, a memory card is required.
8
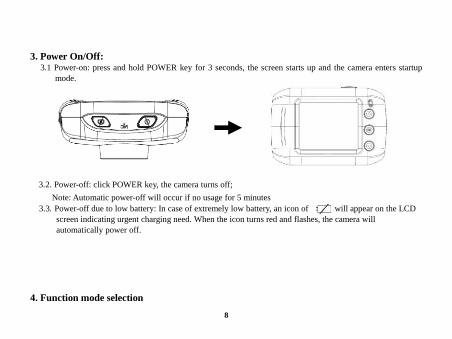
3. Power On/Off: 3.1 Power-on: press and hold POWER key for 3 seconds, the screen starts up and the camera enters startup
mode.
3.2. Power-off: click POWER key, the camera turns off;
Note: Automatic power-off will occur if no usage for 5 minutes
3.3. Power-off due to low battery: In case of extremely low battery, an icon of will appear on the LCD
screen indicating urgent charging need. When the icon turns red and flashes, the camera will
automatically power off.
4. Function mode selection
9
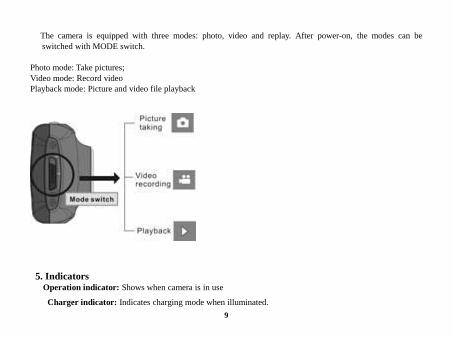
The camera is equipped with three modes: photo, video and replay. After power-on, the modes can be
switched with MODE switch. Photo mode: Take pictures;
Video mode: Record video Playback mode: Picture and video file playback
5. Indicators Operation indicator: Shows when camera is in use
Charger indicator: Indicates charging mode when illuminated.
10
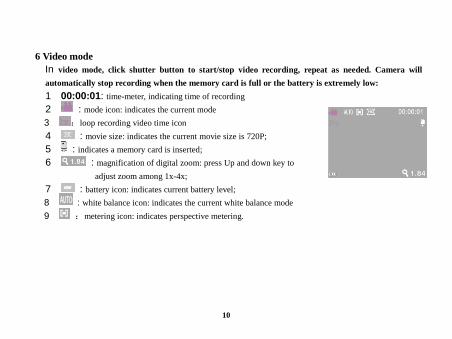
6 Video mode
In video mode, click shutter button to start/stop video recording, repeat as needed. Camera will
automatically stop recording when the memory card is full or the battery is extremely low:
1 00:00:01: time-meter, indicating time of recording
2 : mode icon: indicates the current mode
3 :loop recording video time icon
4 : movie size: indicates the current movie size is 720P;
5 : indicates a memory card is inserted;
6 : magnification of digital zoom: press Up and down key to
adjust zoom among 1x-4x;
7 : battery icon: indicates current battery level;
8 : white balance icon: indicates the current white balance mode
9 :metering icon: indicates perspective metering.
11
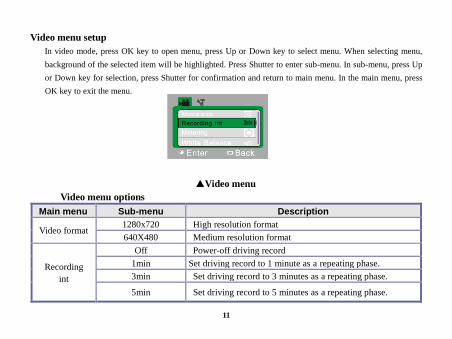
Video menu setup
In video mode, press OK key to open menu, press Up or Down key to select menu. When selecting menu,
background of the selected item will be highlighted. Press Shutter to enter sub-menu. In sub-menu, press Up
or Down key for selection, press Shutter for confirmation and return to main menu. In the main menu, press
OK key to exit the menu.
▲Video menu
Video menu options
Main menu Sub-menu Description
Video format 1280x720 High resolution format
640X480 Medium resolution format
Recording
int
Off Power-off driving record
1min Set driving record to 1 minute as a repeating phase.
3min Set driving record to 3 minutes as a repeating phase.
5min Set driving record to 5 minutes as a repeating phase.
12
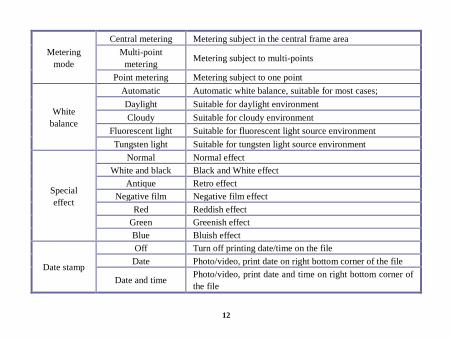
Metering
mode
Central metering Metering subject in the central frame area
Multi-point
metering Metering subject to multi-points
Point metering Metering subject to one point
White
balance
Automatic Automatic white balance, suitable for most cases;
Daylight Suitable for daylight environment
Cloudy Suitable for cloudy environment
Fluorescent light Suitable for fluorescent light source environment
Tungsten light Suitable for tungsten light source environment
Special
effect
Normal Normal effect
White and black Black and White effect
Antique Retro effect
Negative film Negative film effect
Red Reddish effect
Green Greenish effect
Blue Bluish effect
Date stamp
Off Turn off printing date/time on the file
Date Photo/video, print date on right bottom corner of the file
Date and time Photo/video, print date and time on right bottom corner of
the file
13
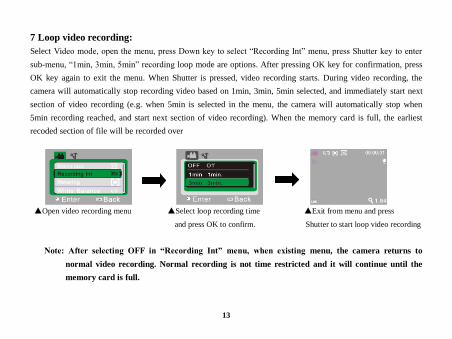
7 Loop video recording:
Select Video mode, open the menu, press Down key to select “Recording Int” menu, press Shutter key to enter
sub-menu, “1min, 3min, 5min” recording loop mode are options. After pressing OK key for confirmation, press
OK key again to exit the menu. When Shutter is pressed, video recording starts. During video recording, the
camera will automatically stop recording video based on 1min, 3min, 5min selected, and immediately start next
section of video recording (e.g. when 5min is selected in the menu, the camera will automatically stop when
5min recording reached, and start next section of video recording). When the memory card is full, the earliest
recoded section of file will be recorded over
▲Open video recording menu ▲Select loop recording time ▲Exit from menu and press
and press OK to confirm. Shutter to start loop video recording
Note: After selecting OFF in “Recording Int” menu, when existing menu, the camera returns to
normal video recording. Normal recording is not time restricted and it will continue until the
memory card is full.
14
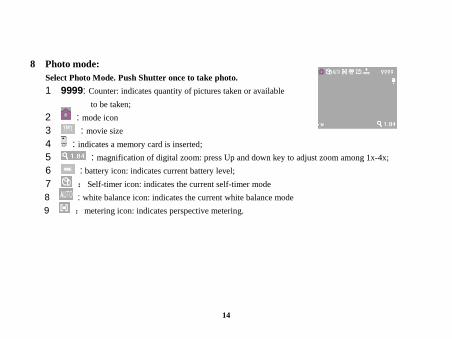
8 Photo mode:
Select Photo Mode. Push Shutter once to take photo.
1 9999: Counter: indicates quantity of pictures taken or available
to be taken;
2 : mode icon
3 : movie size
4 : indicates a memory card is inserted;
5 : magnification of digital zoom: press Up and down key to adjust zoom among 1x-4x;
6 : battery icon: indicates current battery level;
7 :Self-timer icon: indicates the current self-timer mode
8 : white balance icon: indicates the current white balance mode
9 :metering icon: indicates perspective metering.
15
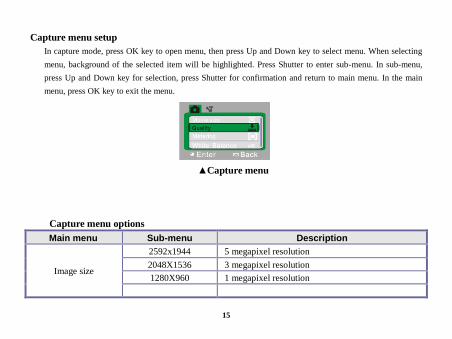
Capture menu setup
In capture mode, press OK key to open menu, then press Up and Down key to select menu. When selecting
menu, background of the selected item will be highlighted. Press Shutter to enter sub-menu. In sub-menu,
press Up and Down key for selection, press Shutter for confirmation and return to main menu. In the main
menu, press OK key to exit the menu.
▲Capture menu
Capture menu options
Main menu Sub-menu Description
Image size
2592x1944 5 megapixel resolution
2048X1536 3 megapixel resolution
1280X960 1 megapixel resolution
16
Image quality
Excellent Best quality image
Good Good image quality
Normal General quality image
Metering mode
Central metering Metering in central frame area
megapixel resolution Metering multi-point
Point metering Metering one point
White balance
Automatic Automatic white balance, suitable for most cases
Daylight Suitable for daylight environment
Cloudy Suitable for cloudy environment
Fluorescent light Suitable for fluorescent light source environment
Tungsten light Suitable for tungsten light source environment
Exposure / Use Left and Right key to adjust exposure
compensation
Capture mode
Off Use general single shot mode
2s Use 2sec. delay self-timer mode
10s Use 10sec. delay self-timer mode
Continuous shooting` Use continuous shooting
Special effect Normal Normal effect
White and black Black and White effect
17
Antique Retro effect
Negative film Negative film effect
Red Reddish effect
Green Greenish effect
Blue Bluish effect
Date stamp
Off Turn off printing date/time on the file
Date During capturing/recording video, print date on
right bottom corner of the file
Date and time During capturing/recording video, print date and
time on right bottom corner of the file
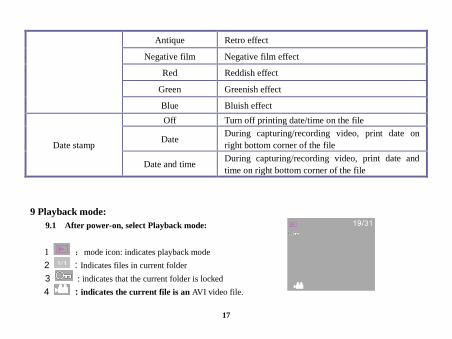
9 Playback mode:
9.1 After power-on, select Playback mode:
1 :mode icon: indicates playback mode
2 : Indicates files in current folder
3 : indicates that the current folder is locked
4 : indicates the current file is an AVI video file.
18
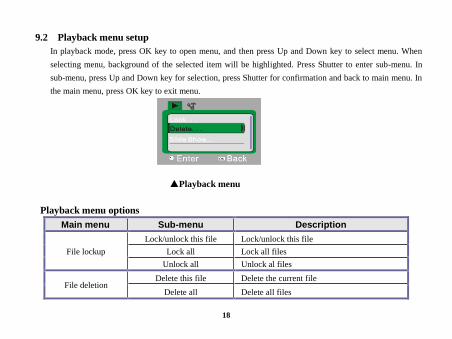
9.2 Playback menu setup
In playback mode, press OK key to open menu, and then press Up and Down key to select menu. When
selecting menu, background of the selected item will be highlighted. Press Shutter to enter sub-menu. In
sub-menu, press Up and Down key for selection, press Shutter for confirmation and back to main menu. In
the main menu, press OK key to exit menu.
▲Playback menu
Playback menu options
Main menu Sub-menu Description
File lockup
Lock/unlock this file Lock/unlock this file
Lock all Lock all files
Unlock all Unlock al files
File deletion Delete this file Delete the current file
Delete all Delete all files
19
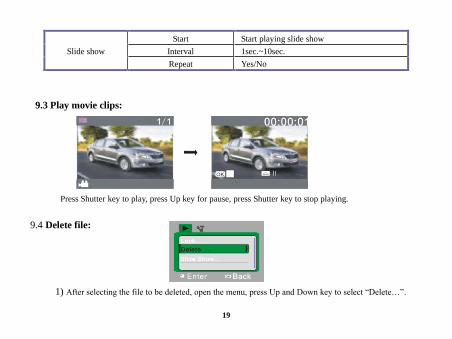
Slide show
Start Start playing slide show
Interval 1sec.~10sec.
Repeat Yes/No
9.3 Play movie clips:
Press Shutter key to play, press Up key for pause, press Shutter key to stop playing.
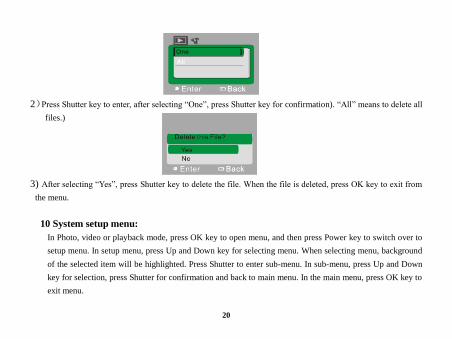
9.4 Delete file:
1) After selecting the file to be deleted, open the menu, press Up and Down key to select “Delete…”.
20
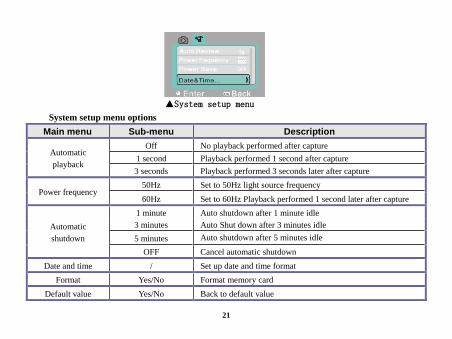
2)Press Shutter key to enter, after selecting “One”, press Shutter key for confirmation). “All” means to delete all
files.)
3) After selecting “Yes”, press Shutter key to delete the file. When the file is deleted, press OK key to exit from
the menu.
10 System setup menu:
In Photo, video or playback mode, press OK key to open menu, and then press Power key to switch over to
setup menu. In setup menu, press Up and Down key for selecting menu. When selecting menu, background
of the selected item will be highlighted. Press Shutter to enter sub-menu. In sub-menu, press Up and Down
key for selection, press Shutter for confirmation and back to main menu. In the main menu, press OK key to
exit menu.
21
▲System setup menu
System setup menu options
Main menu Sub-menu Description
Automatic
playback
Off No playback performed after capture
1 second Playback performed 1 second after capture
3 seconds Playback performed 3 seconds later after capture
Power frequency 50Hz Set to 50Hz light source frequency
60Hz Set to 60Hz Playback performed 1 second later after capture
Automatic
shutdown
1 minute Auto shutdown after 1 minute idle
3 minutes Auto Shut down after 3 minutes idle
5 minutes Auto shutdown after 5 minutes idle
OFF Cancel automatic shutdown
Date and time / Set up date and time format
Format Yes/No Format memory card
Default value Yes/No Back to default value

22
Setting date and time:
Press OK key to open the menu, and then press Power key to enter setup menu. Press Down key to select
“Date&Time” item, and press Shutter key to enter setup window.
In setup window, press Power key to elect the item to be adjusted (Date, time). The selected item will be
highlighted in yellow. Then press Up key or Down key for adjustment. At completion of adjustment, press
Shutter key to confirm the adjustment, or press OK key to cancel the setup and return. Finally press PK key to
exit setup mode.
PPCC ______________
1. Connect with PC
The camera is plug and play. In power-on state, after connecting device to computer with USB cable,
portable hard disk icon will be shown in the window of “My Computer”. Images/video shot by you are
stored in portable hard disk folder I:\DCIM\100MEDIA (“I” indicates equipment portable hard disk)
23
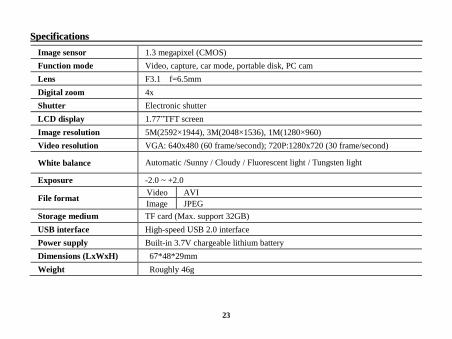
SSppeecciiffiiccaattiioonnss
Image sensor 1.3 megapixel (CMOS)
Function mode Video, capture, car mode, portable disk, PC cam
Lens F3.1 f=6.5mm
Digital zoom 4x
Shutter Electronic shutter
LCD display 1.77”TFT screen
Image resolution 5M(2592×1944), 3M(2048×1536), 1M(1280×960)
Video resolution VGA: 640x480 (60 frame/second); 720P:1280x720 (30 frame/second)
White balance Automatic /Sunny / Cloudy / Fluorescent light / Tungsten light
Exposure -2.0 ~ +2.0
File format Video AVI
Image JPEG
Storage medium TF card (Max. support 32GB)
USB interface High-speed USB 2.0 interface
Power supply Built-in 3.7V chargeable lithium battery
Dimensions (LxWxH) 67*48*29mm
Weight Roughly 46g
24
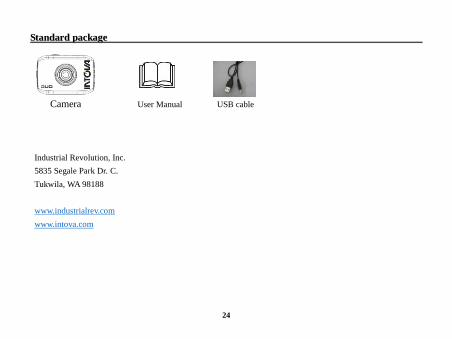
SSttaannddaarrdd ppaacckkaaggee
Camera User Manual USB cable
Industrial Revolution, Inc.
5835 Segale Park Dr. C.
Tukwila, WA 98188
www.industrialrev.com
www.intova.com