Embed Size (px)
Citation preview
Interactive WhiteBoard V4.31
Software User Manual
Whiteboard_V4.31 Installation
and Software Calibration
1 Software Installation no driver
1.1 Software Installation
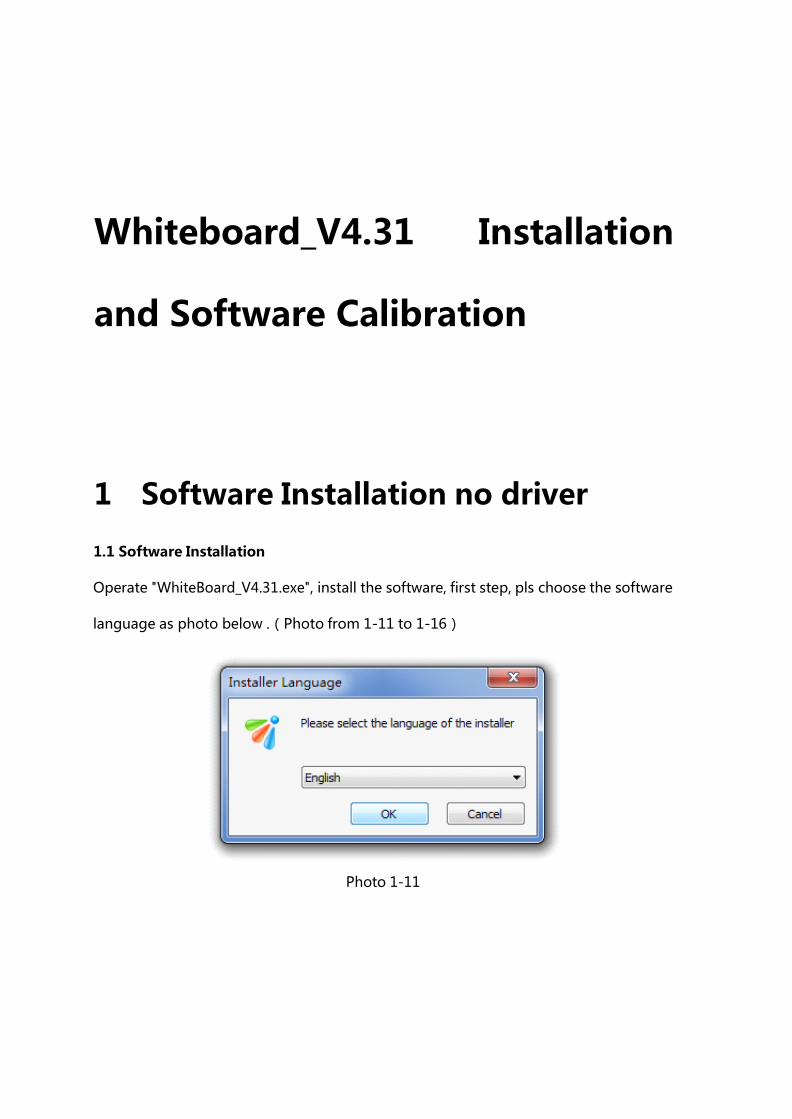
Operate "WhiteBoard_V4.31.exe", install the software, first step, pls choose the software
language as photo below .(Photo from 1-11 to 1-16)
Photo 1-11

Photo 1-12

Photo 1-13
Photo 1-14
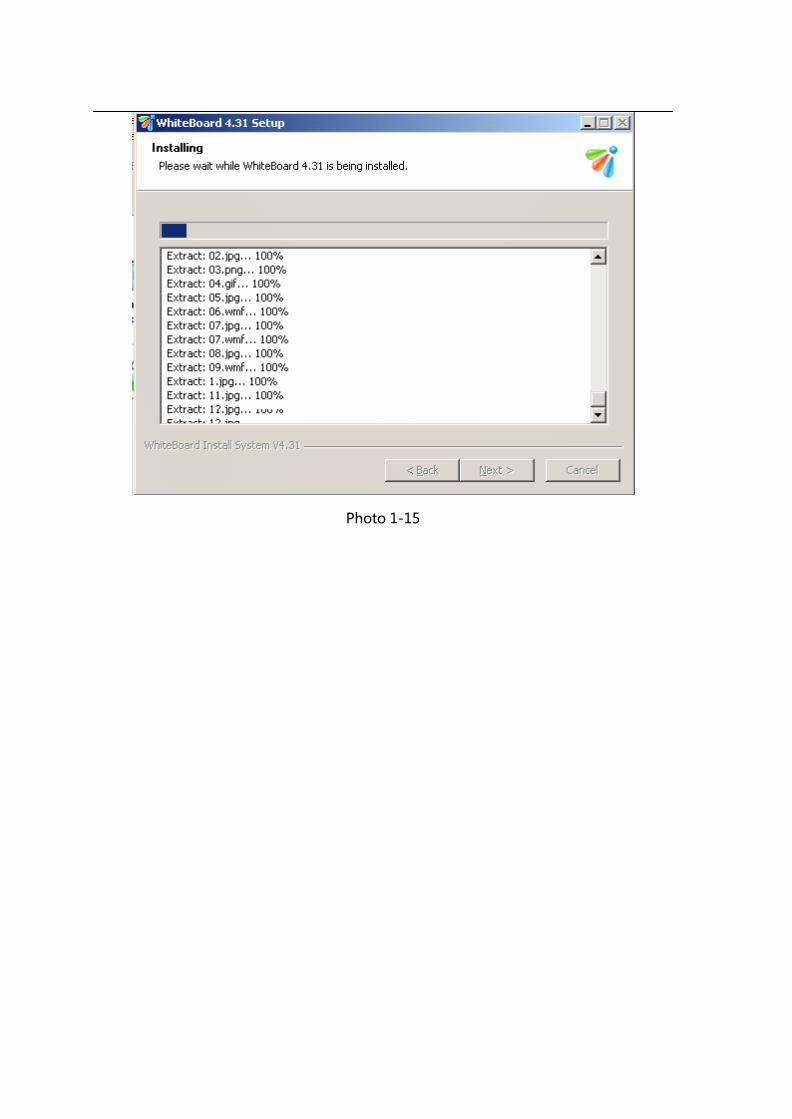
Photo 1-15

Photo 1-16
2 Software Calibration
2.1 Special support software for calibration: "opppoint.exe"
1. Operate the "opppoint.exe" from the CD, then double click; then you will see the
white calibration point(Photo 2-1), and use the finger or other pen to touch the center
of the point, then step by step from the right corner to left corner (Photo 2-2. 2-3. 2-4).

Photo 2-1
Photo 2-2
Photo 2-3
Photo 2-4

2.2 Use the support tablet PC adjustment from Win 7 computer system:
1. Control Panel---TABLET PC---choose "adjust", then you will have 16 points
calibration the same way as above, then save your adjustment---Finish calibration.
Remark:
1. If your pen or finger is not at the center of the point or click wrong, pls click ESC
to quit and then make the calibration again;
2. Calibration, the pen or finger must be straight on the surface of the board;
3. When change the projector or reinstall the software, pls make the calibration
again;
Mouse right function: Click the board and stop for 2 seconds, then you will see
right mouse function;

Software Application Instruction
1. WhiteBoard_4.31 Instruction
WhiteBoard_4.31 software can be used in education and business. It is designed to be
an interactive user friendly tool easy use as a powerful tool for education and business,
where the classroom will be more productive and active, and business is more practical
and functional using our up to date WhiteBoard_V4.31.
In replace of the mouse, users can achieve the functions such as mobile, click, double
click, drag, right key so as to control PC with fingers (or any non-translucent objects)
and make use of supporting software to achieve writing, erasure, label, drag,
magnifying, screen shade, spotlights, print Screen, screen conservation, screen
recording and playback, handwriting recognition, keyboard input, text input, links from
web to video and sound, insert and control. With the help of the third-party remote
collaboration software, not only achieve the functions of long-distance education and
meetings which are powerful Interactive teaching and learning and demonstration, but

also create multimedia courseware for the classroom and the meetings.
This manual which apply to the installation of all types of the GK-XXX series, is the
Installation manual of interactive Whiteboard You can see the software's help files or
the software manual” Board series interactive Whiteboard – V4.31 software
instruction manual ”for the use of supporting software.
1. Software interface:

2. WhiteBoard_4.31 main functions
Page
functions
including:- page color and condition: such as color (white, green
and black) pages, and pages conditions, such as: (image screen and
transparent) pages ,,, etc.
Pen functions
including: Pencil, Soft Pen, Highlight Pen, Texture Pen, Brush Pen,
Intelligent Pen, Object Pen
Figure
functions
including Line, Triangle, Rectangular Triangle, Ellipse, Round,
Pentagon, Five-pointed Star, Six-angular, Rhombus, Arrows, Double
Arrow, Angle, Cube, Cylinder, Cone, Rounded Rectangle, Arc, Sector,
Parallelogram
Eraser
functions
including Object Eraser, Bitmap Eraser(Small), Bitmap
Eraser(Medium), Bitmap Eraser(Big), Cover Eraser
Insert object
functions
including Insert Image, Insert Text, Insert Video, Insert Flash, Insert
Office File, Insert Cover, Insert Gif image.. etc.
Recorder
functions
including Record, Play, Pause, Stop, Save, Open function.
Page
Operation
including Zoom In, Zoom Out, Free Move, Move Back, Undo, Redo,
Page Up, Page Down, Select, Clear Page, Delete Page, Screen or Soft
functions
Page.
Auxiliary
Tools
including Searchlight, Curtain, Magnifying Glass, Screen Camera,
Ruler, Protractor, Compasses, Triangle Ruler, Record Tools, Video
Camera, Fill Color, Dice, Math Tools, Handwriting
Word、 Excel
notes
Annotate the opening MS-Word or MS-Excel.
Resource
function
including page Resource preview, web resource, Image Resource,
Text Resource, Discipline Resource, Custom Resource, Custom
Tools, Add Resource etc.
Color setting
setting the color of pens and background.
Line width
setting
setting the width of lines and objects.
Arrow Line
setting
setting the Arrow line, shape and direction.
Transparency
setting
setting transparency of objects.
Other
functions
including select, screen or soft page, undo, redo, read the word,
write board etc.

Main menu
functions
including New File, Open File, Import File, Save Page, Save File, Save
as, Print this Page, Print all Pages, Send Email, Language, Setting,
Help, About, Exit.
Right menu
functions
including
copy,cut,Copy,Paste,Clone,Lock,Delete,Rotate,Rotate45,Rotate90,R
otate180,Rotate270,Combine,Cancel Combine, Layer Sequence, On
Top, On Bottom, Move Up, Move Down, Add to Gallery, Mirror,
Horizontal, Vertical, Flip, Horizontal, Vertical, Drag Copy, Hyperlink,
Animation.
3. Page function
There are six pages setting as default, including white page, green page, black page,
image page, screen page, transparent page.
Page interface:
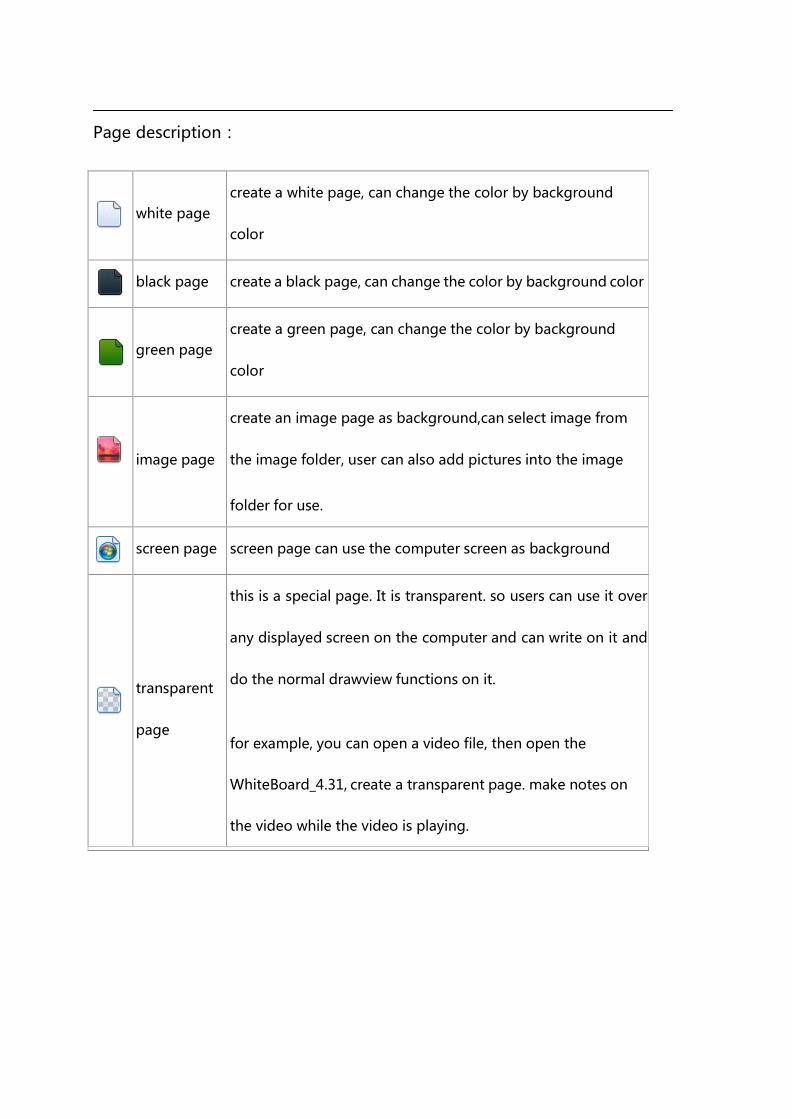
Page description:
white page
create a white page, can change the color by background
color
black page
create a black page, can change the color by background color
green page
create a green page, can change the color by background
color
image page
create an image page as background,can select image from
the image folder, user can also add pictures into the image
folder for use.
screen page
screen page can use the computer screen as background
transparent
page
this is a special page. It is transparent. so users can use it over
any displayed screen on the computer and can write on it and
do the normal drawview functions on it.
for example, you can open a video file, then open the
WhiteBoard_4.31, create a transparent page. make notes on
the video while the video is playing.
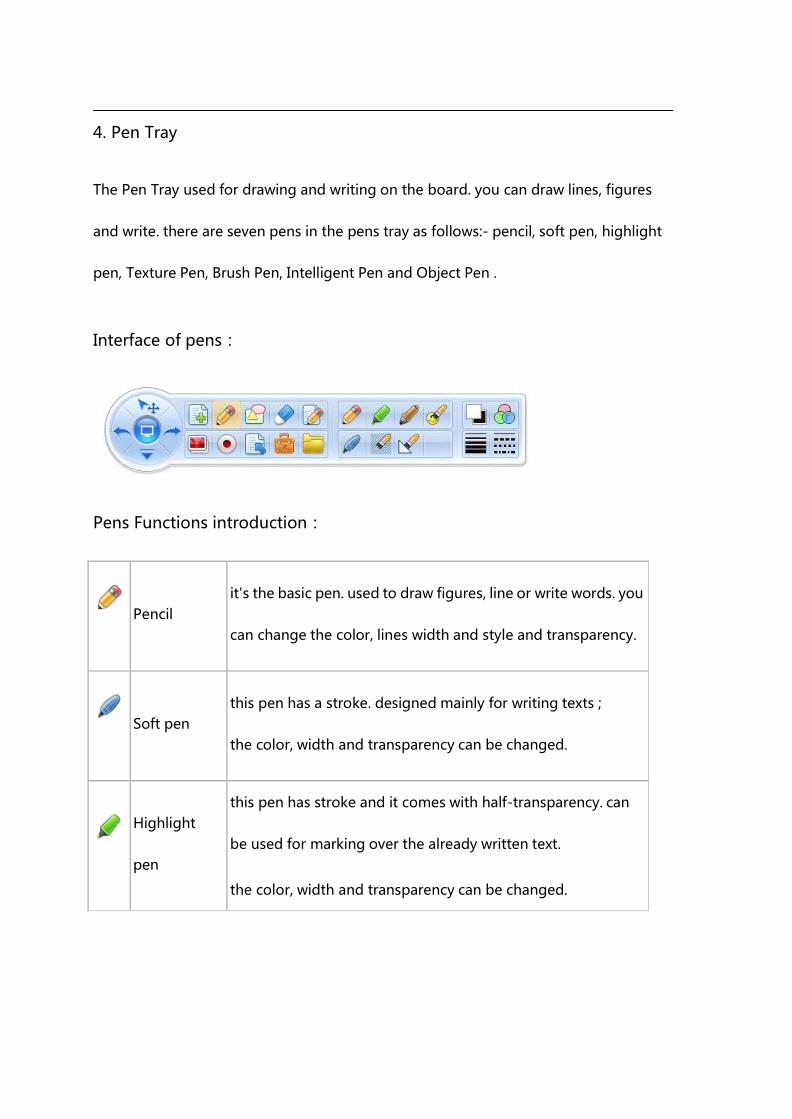
4. Pen Tray
The Pen Tray used for drawing and writing on the board. you can draw lines, figures
and write. there are seven pens in the pens tray as follows:- pencil, soft pen, highlight
pen, Texture Pen, Brush Pen, Intelligent Pen and Object Pen .
Interface of pens:
Pens Functions introduction:
Pencil
it's the basic pen. used to draw figures, line or write words. you
can change the color, lines width and style and transparency.
Soft pen
this pen has a stroke. designed mainly for writing texts ;
the color, width and transparency can be changed.
Highlight
pen
this pen has stroke and it comes with half-transparency. can
be used for marking over the already written text.
the color, width and transparency can be changed.
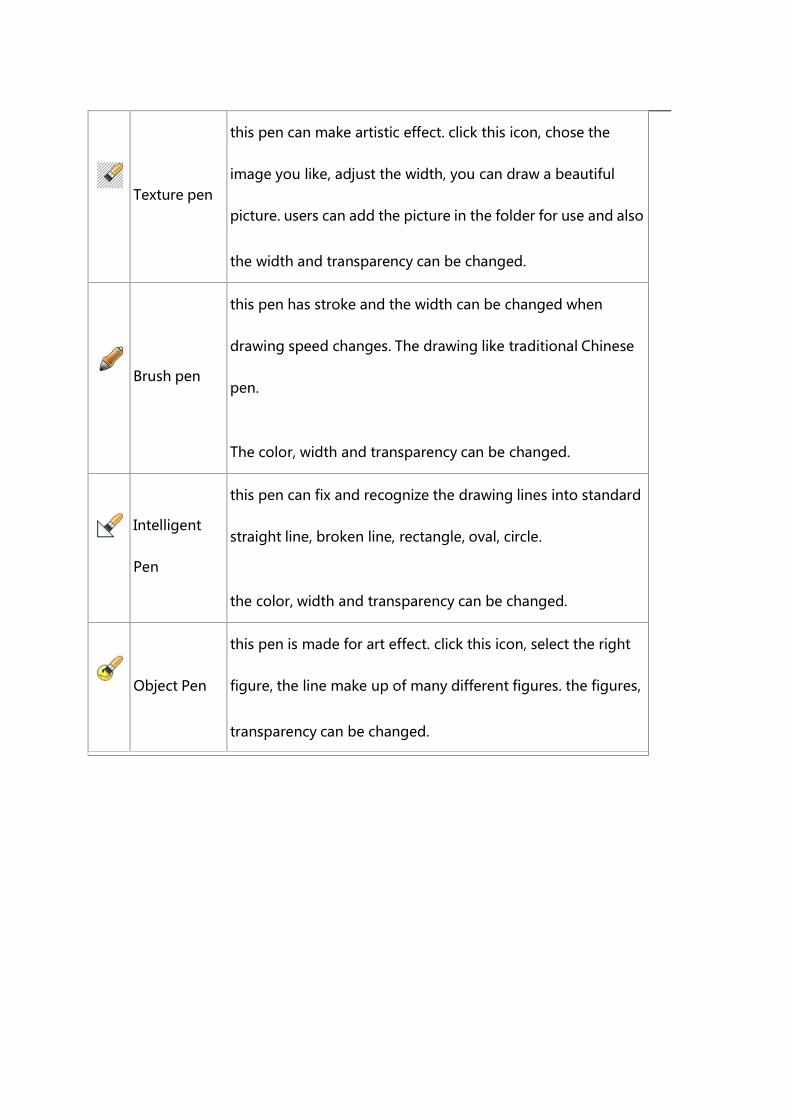
Texture pen
this pen can make artistic effect. click this icon, chose the
image you like, adjust the width, you can draw a beautiful
picture. users can add the picture in the folder for use and also
the width and transparency can be changed.
Brush pen
this pen has stroke and the width can be changed when
drawing speed changes. The drawing like traditional Chinese
pen.
The color, width and transparency can be changed.
Intelligent
Pen
this pen can fix and recognize the drawing lines into standard
straight line, broken line, rectangle, oval, circle.
the color, width and transparency can be changed.
Object Pen
this pen is made for art effect. click this icon, select the right
figure, the line make up of many different figures. the figures,
transparency can be changed.

5.Introduction to figure tools
Figure tools are a drawing tools designed to help the user to choose a ready
made shapes and display them drawing standard figures on the board
directly, which including: including Line, Triangle, Rectangular Triangle,
Ellipse, Round, Pentagon, Five-pointed Star, Sixth angled shapes, Rhombus,
Arrows, Double Arrow, Angle, Cube, Cylinder, Cone, Rounded Rectangle, Arc,
Sector, Parallelogram tools.
Interface of figure tools:
There are two kind of figure tools, one is line figures 2D, the other is three Dimension
3D figures.

2D figures are made up by lines. The 3D figures are 3D shapes both can be edited,
when moved the figures data will change accordingly, that's includes line dimensions,
angles , there are also arcs in the figure. Note that figures can not be edited, it can only
be moved, zoom in or zoom out and refigures.
6. Introduction to erasers
Erasers can erase the object drawing in the software, it includes Object Eraser, bitmap
eraser and cover eraser etc.
Interface of erasers:
About different eraser tools:
Object Eraser
tool
is designed to erase any thing you are drawing or writing or
drawing while using the WhiteBoard 4.31 software
Bitmap eraser
tool
this eraser tool can be used with whatever pen you use from
the WhiteBoard 4.31 software and you have deferent types
of erasers to suit your need.
Scratch
function
with scratch you can be able to scratch the card on an
screen.
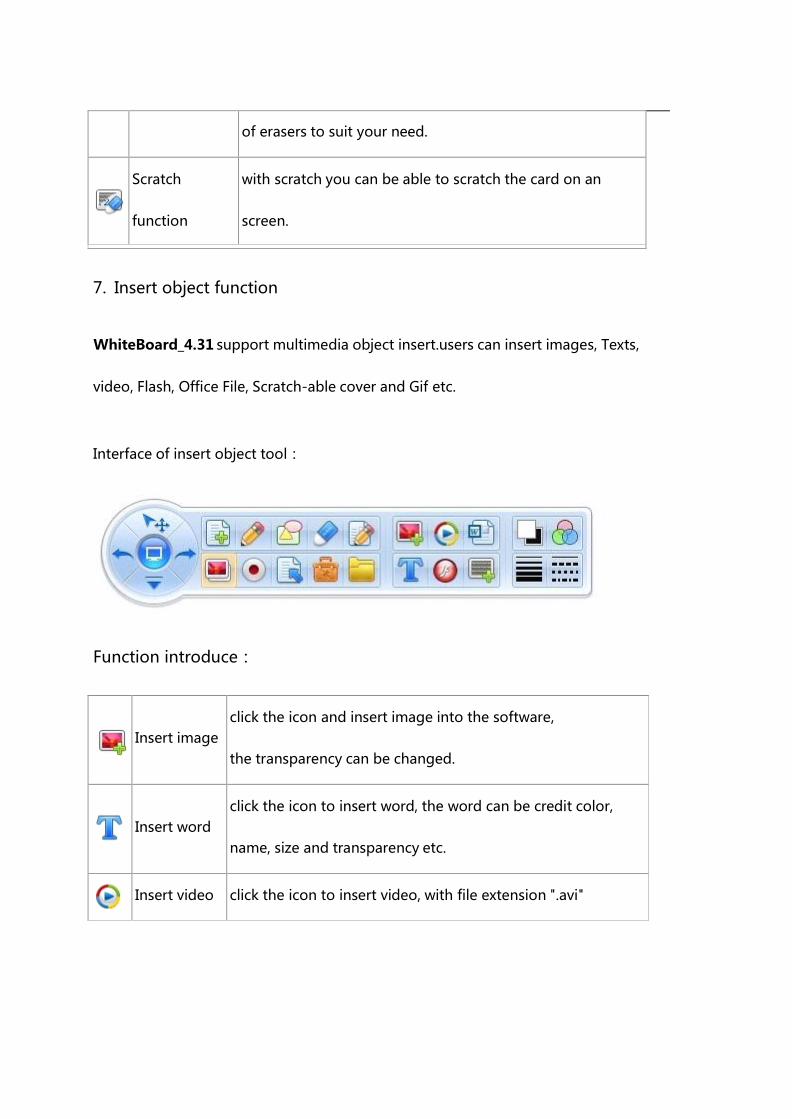
7. Insert object function
WhiteBoard_4.31 support multimedia object insert.users can insert images, Texts,
video, Flash, Office File, Scratch-able cover and Gif etc.
Interface of insert object tool:
Function introduce:
Insert image
click the icon and insert image into the software,
the transparency can be changed.
Insert word
click the icon to insert word, the word can be credit color,
name, size and transparency etc.
Insert video
click the icon to insert video, with file extension ".avi"

Insert Flash
click the icon to insert flash
Insert office
file
click the icon to insert office file and PDF file.
Insert cover
click the icon to insert a scratch and cover a content material.
user can erase the scratch by scratch eraser.
8.Recorder
Record function allows you to record anything you do on the board to view later
anytime you like, and it includes record, Play, pause, stop, save and open video.
Interface of recorder:
Function introduction:
Record
record the action you do with WhiteBoard_V4.31
Play
play the record
Pause
pause the playing
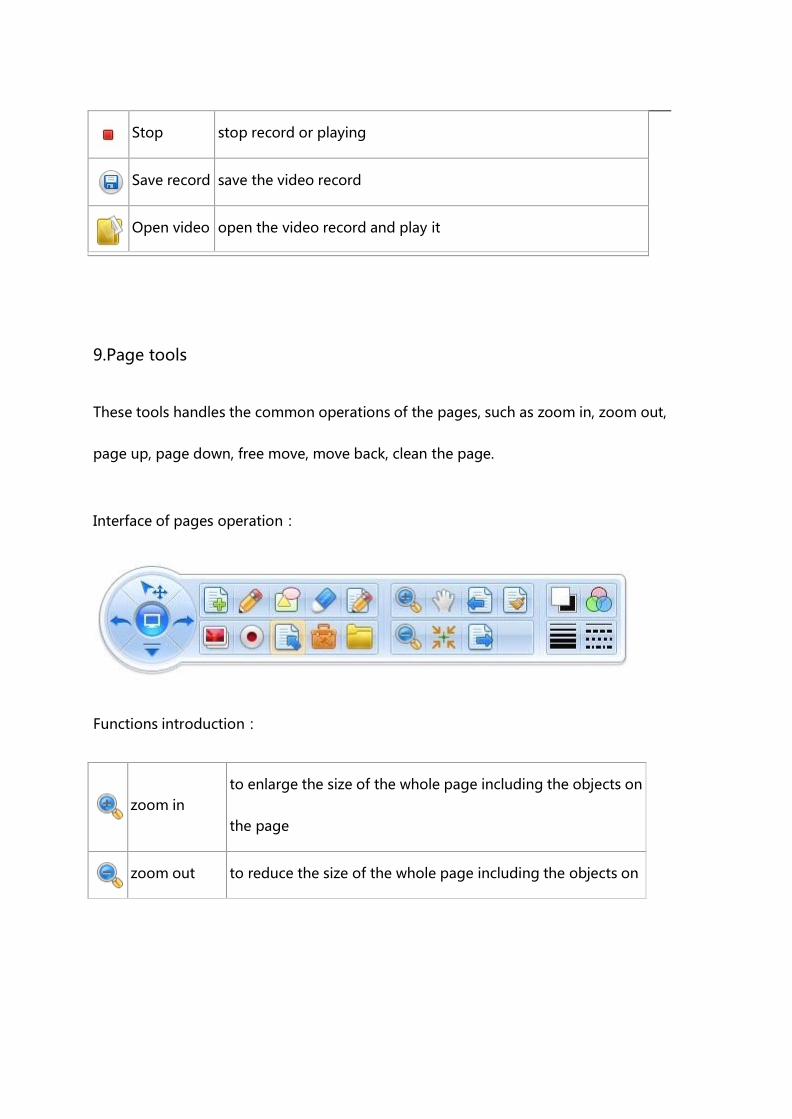
Stop
stop record or playing
Save record
save the video record
Open video
open the video record and play it
9.Page tools
These tools handles the common operations of the pages, such as zoom in, zoom out,
page up, page down, free move, move back, clean the page.
Interface of pages operation:
Functions introduction:
zoom in
to enlarge the size of the whole page including the objects on
the page
zoom out
to reduce the size of the whole page including the objects on

the page
page before
display previous page
page after
display next page
free move
you can browse within the current page
move back
to return to the center of the page
clear page
delete all the page content
10.User Tools
There are some educational and show tools in the software which including Searchlight,
Curtain, Magnifying Glass, Screen Camera, Ruler, Protractor, Compasses, Triangle Ruler,
Record Tools, Video Camera, Fill Color, Dice, Math Tools.
Interface for auxiliary tools:
Function introduction:

Search light
used to make the audience focus on a certain part of the board,
so they can see part of the screen while the rest of the screen is
covered. the cover's color and image can be changed. the
shape can be changed into diamond, rectangle, oval, triangle
and double diamond.
Curtain
can be used to cover the content user do not want show at
temporary. the color, image and size can be changed.
Magnifying
Glass
magnify the image of screen, can show a magnified area. can be
magnified to different sizes.
Screen
Camera
takes a screen shot, its saved and then you can display it on a
new page
ruler
used to measure the length of object or draw a line. user can
use it measure length, and draw a line by the e side of the ruler.
Protractor
used to measure angle, drawing angle, arc and sector.
Triangle
Ruler
used to measure length
Compasses
used to draw arc or circle
record
used to record the action of software after clicking this icon, file

can be saved as .avi or flash.
Video
Camera
use the computer camera to catch image or make video.
Fill Color
click this icon can fill color to the same color area, and the
colored area will be a picture area.
dice
Random number generator, used to make random number
Math
Tools
used to make math formula and function, it can calculate by
itself, when you click the "?" icon, it will display the result. and
this tool can drawing curve as the function shows.

Introduction to main menu
11. Introduction to main menu
Main menu includes: New File, Open File, Import File, Save Page, Save File, Save as, Print
this Page, Print all Pages, Send Email, Language, Setting, Help, About and Exit ... etc.
Interface of main menu:
Main menu functions:
New page
Create a new page.
Open file
Open the file with ".draw" file extinsion
Import file
import other files as background. this function supports the files with
the following file extensions: bmp, jpg, gif, emf, png, wmf, ppt, pptx
and "*.*".
all the files can be imported directly except *.*., which need to install
virtual printer first and set it as default printer.
Save page
click the save icon. the page style can be saved as: bmp, jpg, gif, tif,
emf, png, wmf... etc
Save file
save all the pages and objects as (.draw)file
Save as
click the icon save as, to specify one of the following extensions that
you wish to save the page under it, file extensions are: bmp, jpg, gif, tif,
png, pdf, ppt, pptx, doc, docx.
Print this
page
click the icon print the current page. note: need to install your printer
driver and connect the printer first.
Print all
click the icon print all the pages in the software. note: need to install

pages
your printer driver and connect the printer first.
Language
setting the software operating language. the languages are are
displayed in the installation catalog with the file ext.(*.lng)
kindly contact us so we can give you the detailed instruction on how to
translate to your local language.
Setting
setting the basic parameters of operations, including open page
setting, mouse setting, finger gesture setting, recorder setting, save
automatically setting etc.
interface of setting

Help
open help file, find help information
About
display the software version information
Exit
exit the software
12.Right Menu
It includes: Copy, Cut, Paste, Clone, Lock, Delete, Rotate, Combine, Cancel Combine,
Layer Sequence, Add to Gallery, Mirror, Flip, Drag Copy, Hyperlink, Animation.
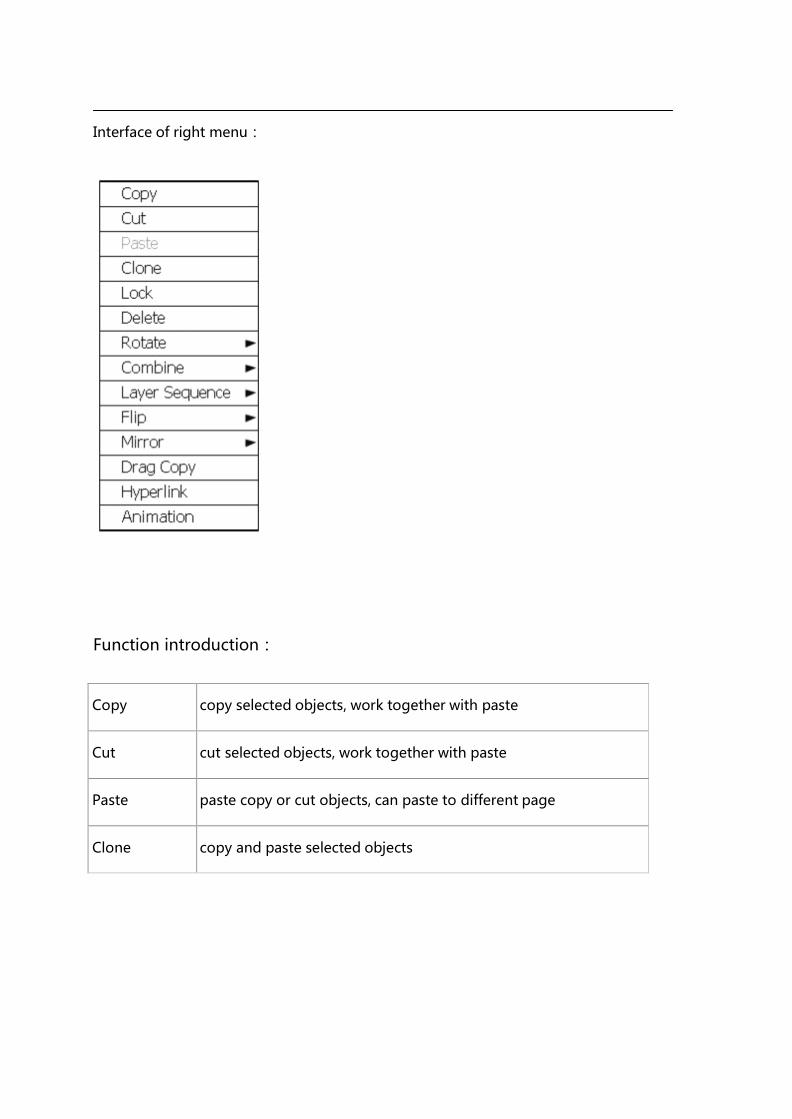
Interface of right menu:
Function introduction:
Copy
copy selected objects, work together with paste
Cut
cut selected objects, work together with paste
Paste
paste copy or cut objects, can paste to different page
Clone
copy and paste selected objects

Lock
lock selected objects, object which is locked can not be
moved,zoom in or out,remote or delete
Delete
delete selected objects
Rotate
Rotate45,Rotate90,Rotate180,Rotate270,
Combine
combine all the objects selected. you can also cancel the combine.
Layer order
setting the order of layers, setting the display order of object.
Flip
Flip the objects, including level Flip and vertically Flip.
Mirror
create mirror image for select objects, including level image and
vertical image.
Drag Copy
click this icon, drag an object on the page, will copy a new one in
the place you release the object. it's quick copy way.
Hyperlink
link pages or objects.
interface for links:

as the below picture, there will be a music icon on the northeast
corner on the page; for link figures, there will be a music icon on
the upper right corner of your screen.click the music icon can open
the link file.
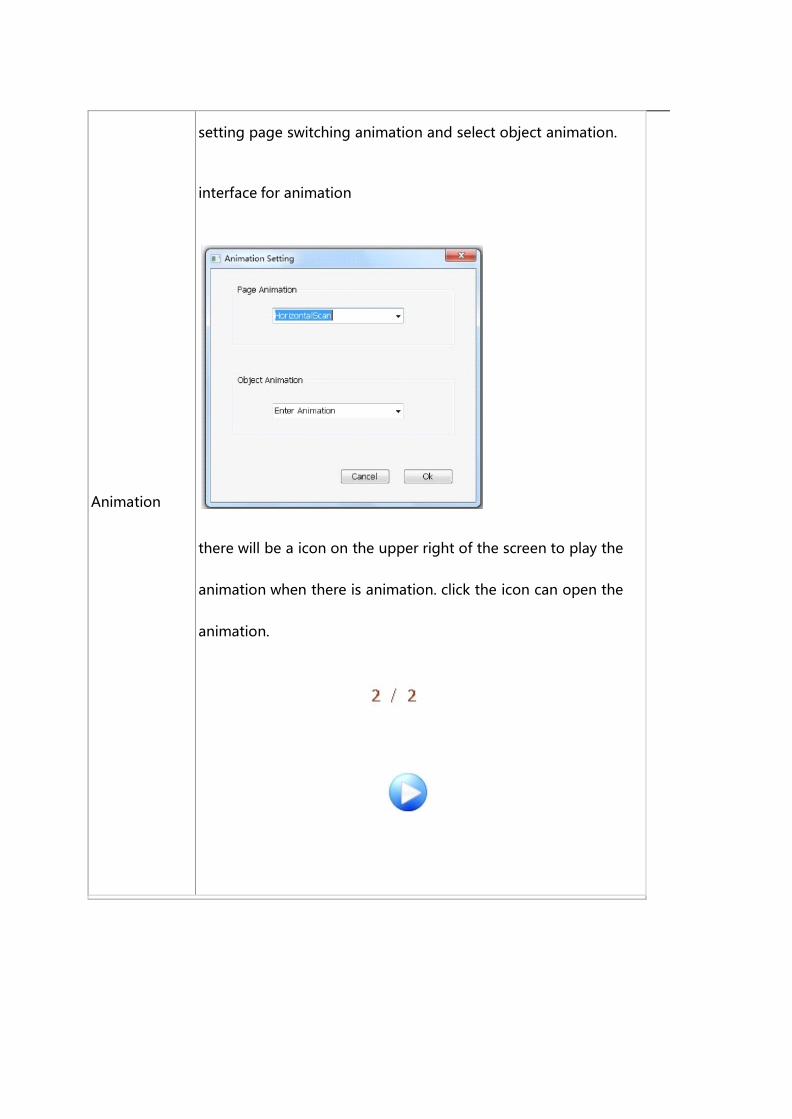
Animation
setting page switching animation and select object animation.
interface for animation
there will be a icon on the upper right of the screen to play the
animation when there is animation. click the icon can open the
animation.
13. Format and Styles
The format and styles including color setting, transparency setting, width setting, style
and cap setting.
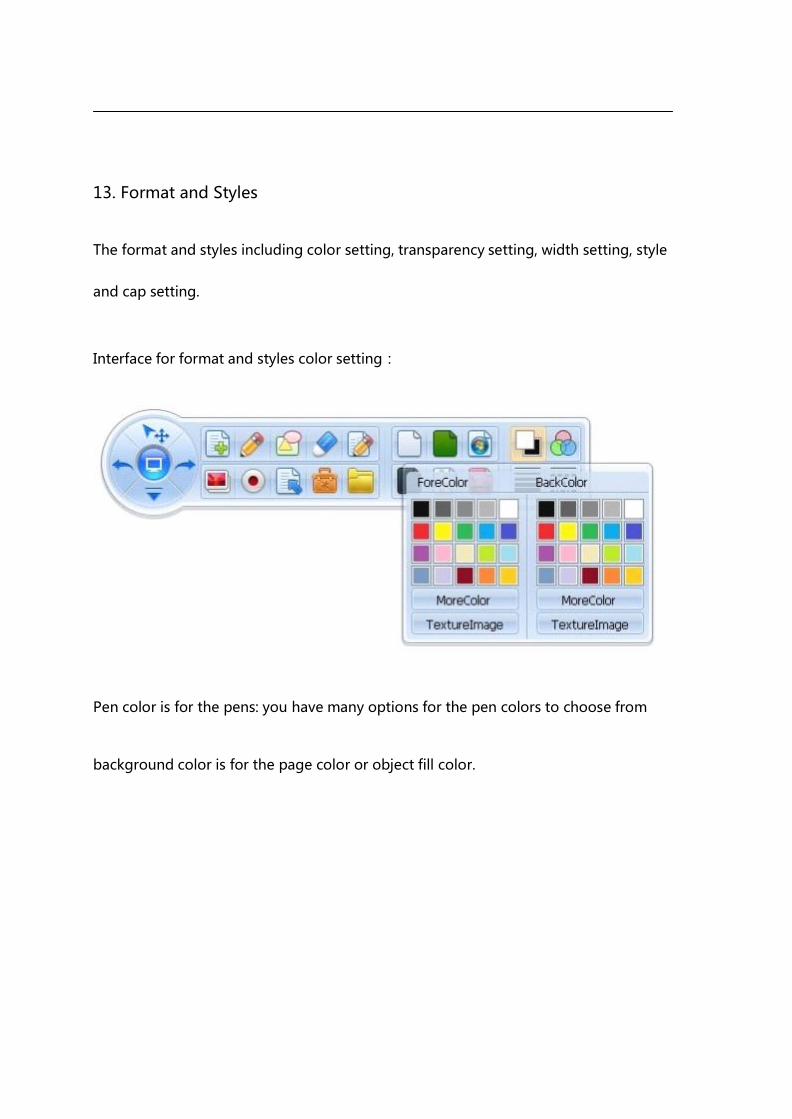
Interface for format and styles color setting:
Pen color is for the pens: you have many options for the pen colors to choose from
background color is for the page color or object fill color.
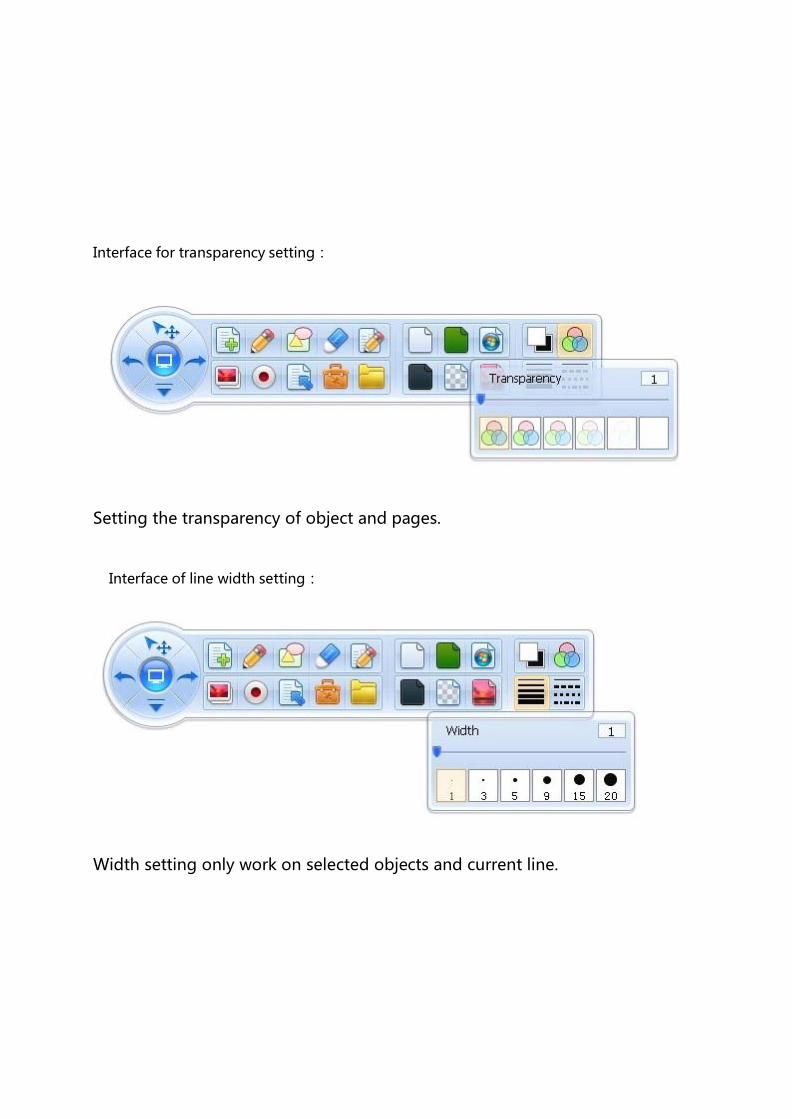
Interface for transparency setting:
Setting the transparency of object and pages.
Interface of line width setting:
Width setting only work on selected objects and current line.

Interface for lines style setting:
This function only work on pencil and straight line. when there is no other
select object, it works on the current line.
14. Resources list
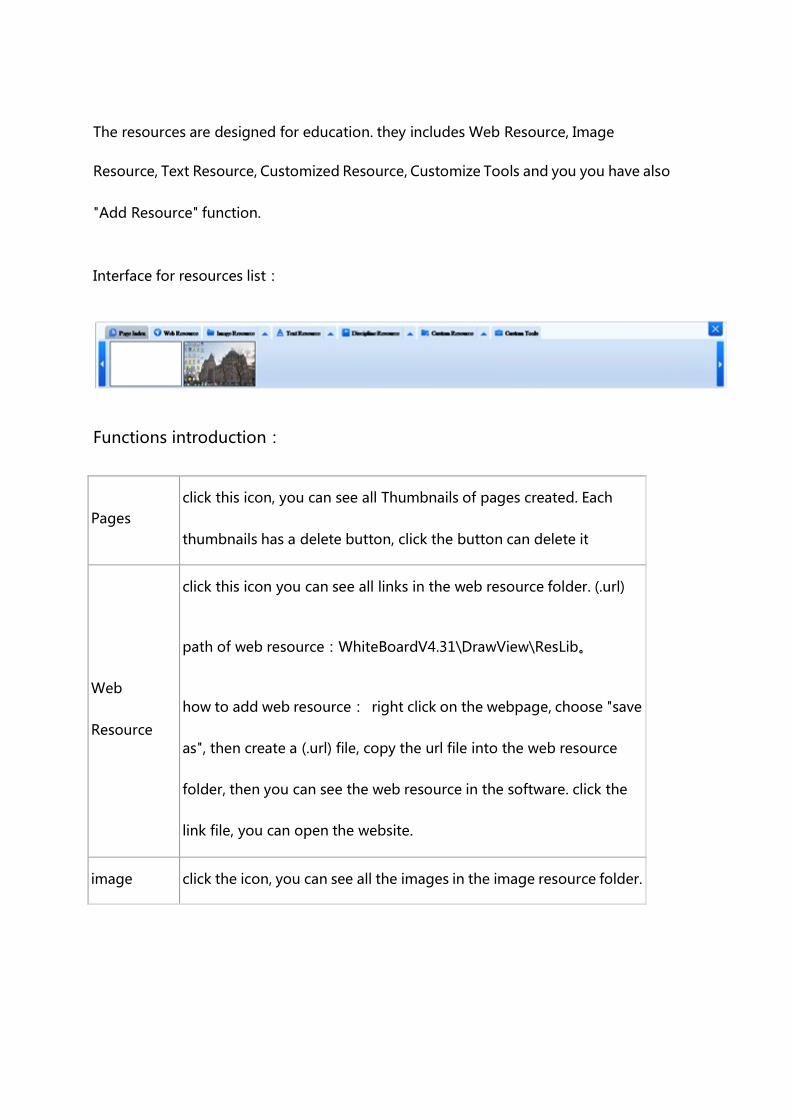
The resources are designed for education. they includes Web Resource, Image
Resource, Text Resource, Customized Resource, Customize Tools and you you have also
"Add Resource" function.
Interface for resources list:
Functions introduction:
Pages
click this icon, you can see all Thumbnails of pages created. Each
thumbnails has a delete button, click the button can delete it
Web
Resource
click this icon you can see all links in the web resource folder. (.url)
path of web resource:WhiteBoardV4.31\DrawView\ResLib。
how to add web resource: right click on the webpage, choose "save
as", then create a (.url) file, copy the url file into the web resource
folder, then you can see the web resource in the software. click the
link file, you can open the website.
image
click the icon, you can see all the images in the image resource folder.

resource
path of image resource folder: installation catalog\ResLib\PicLib。
how to add image resource: create a new folder under the image
resource folder, copy the image resource in the new folder. open the
image resource, click the triangle to sort the resource you add. the
catalog name is the new folder name.
Text
Resource
click this icon, it includes all the (.txt)files in the text folder.
path of text resource: installation catalog\ResLib\TextRes。
how to add text resource: create a new folder under the text
resource folder, copy the text resource in the new folder. open the
text resource, click the triangle to sort the resource you add the
catalog name is the new folder name.
Discipline
Resource
click this icon, it has the common figures of different subjects.
path of discipline resource: installation
catalog\ResLib\VirtualClassRes。
how to add discipline resource: create a (.dat) file under the
discipline resource folder.
how to open the discipline resource: click the icon, there is a triangle
for sorting of the discipline. select the sort you want, it will show the
figures it has. click the figure on the software page and drag it into
the resource panel, it will be saved.
Custom
Resource
click this icon, it includes resources that user add.
path of custom resource: installation catalog\ResLib\CustomRes。
how to add discipline resource: create a (.dat) file under the custom
resource folder.
how to open the custom resource: click the icon, there is a triangle for
sorting of the custom. select the sort you want, it will show the
figures it has. click the figure on the software page and drag it into
the resource panel, it will be saved.
。
Custom
Tools
click this icon, it includes all application resource in the folder.
path of custom tools: installation catalog\ResLib\AuxiliaryToolsRes
how to add custom tools: copy the tool into the custom resource
folder. the style of file should be (.exe)or hotkey (.lnk)。
15.Word and Excel notes
Word and Excel notes function can allow you to make notes in word or excel files and
save the file with the notes as images. by using the following writing tools: the pencil,
the soft pen and highlight pen tools to make note in office files.
To make a note: open an MSOffice file first, create a screen page or transparent page
using WhiteBoard_V4.31, then click pencil or soft pen or highlight pen tool to make
note for the file. When finish making the note, click "save as", there will be a save box,
click yes, then save the note to word or excel.
See the picture as follows:

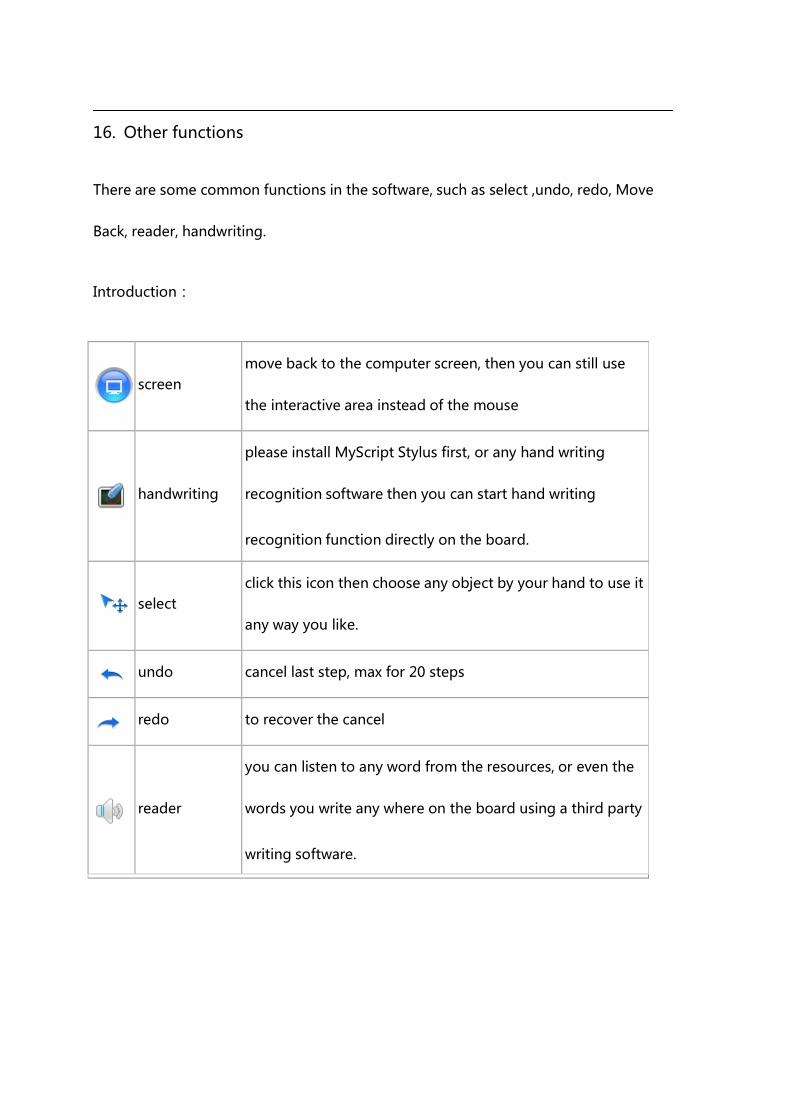
16. Other functions
There are some common functions in the software, such as select ,undo, redo, Move
Back, reader, handwriting.
Introduction:
screen
move back to the computer screen, then you can still use
the interactive area instead of the mouse
handwriting
please install MyScript Stylus first, or any hand writing
recognition software then you can start hand writing
recognition function directly on the board.
select
click this icon then choose any object by your hand to use it
any way you like.
undo
cancel last step, max for 20 steps
redo
to recover the cancel
reader
you can listen to any word from the resources, or even the
words you write any where on the board using a third party
writing software.
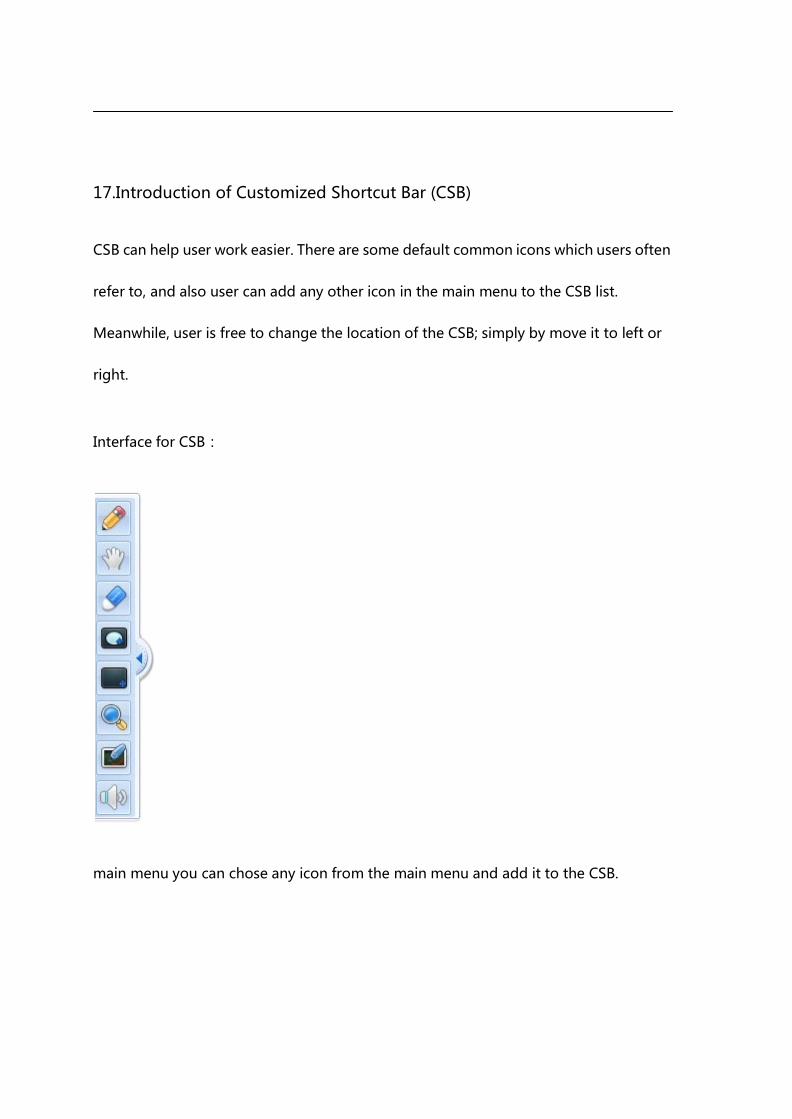
17.Introduction of Customized Shortcut Bar (CSB)
CSB can help user work easier. There are some default common icons which users often
refer to, and also user can add any other icon in the main menu to the CSB list.
Meanwhile, user is free to change the location of the CSB; simply by move it to left or
right.
Interface for CSB:
main menu you can chose any icon from the main menu and add it to the CSB.

You can also remove any icon from the CSB.
1. Adding an icon
To add an icon, simply drag the icon from the main menu to the CSB

2. Deleting an icon
To delete an icon, simply drag away the icon from the CSB
Mathematical Resources:
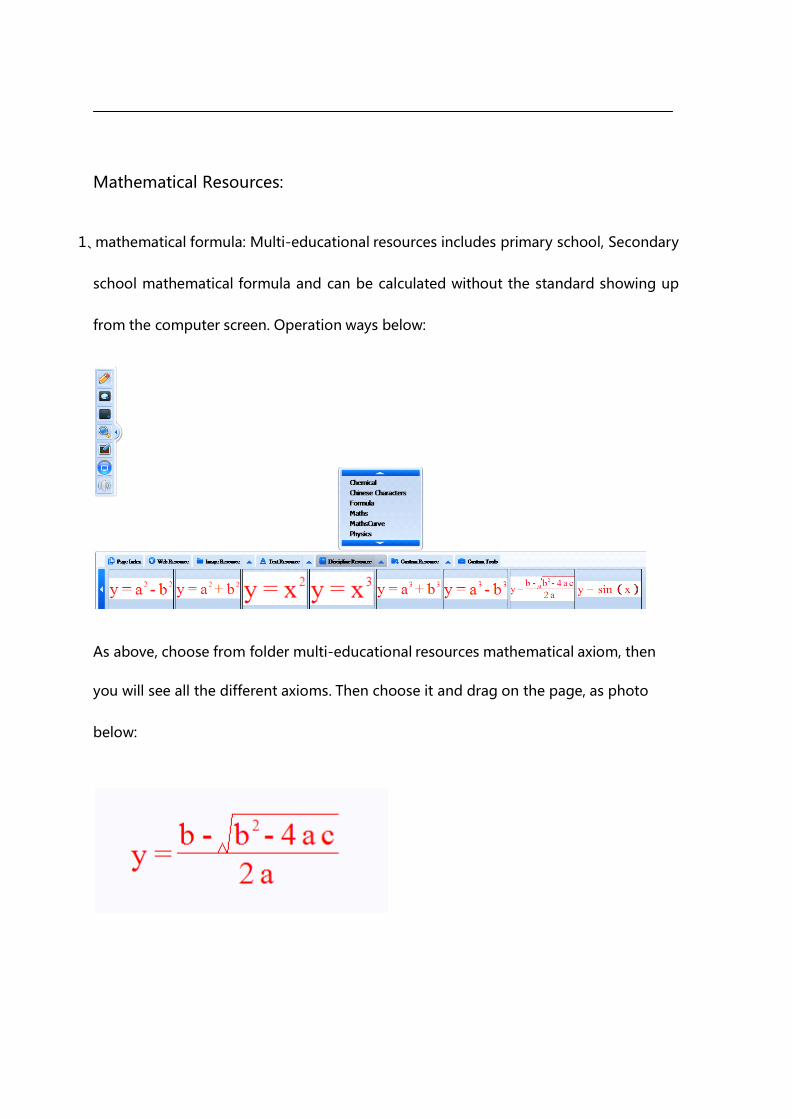
1、mathematical formula: Multi-educational resources includes primary school, Secondary
school mathematical formula and can be calculated without the standard showing up
from the computer screen. Operation ways below:
As above, choose from folder multi-educational resources mathematical axiom, then
you will see all the different axioms. Then choose it and drag on the page, as photo
below:

The objects can be calculated from your typing data. Such as below:
Type Numbers:
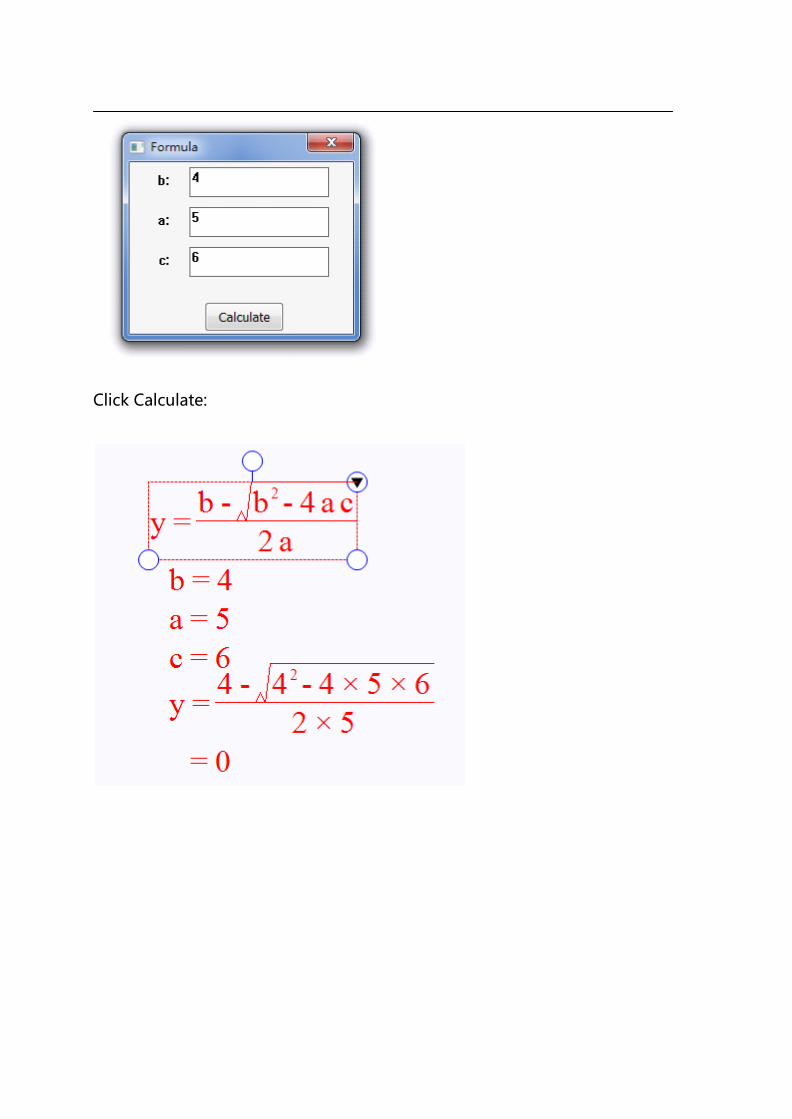
Click Calculate:

2、Math figures, you can find some basical math figures such as two
dimension coordinate,three-dimensional coordinate,sine curve, cosine curve,
etc. Operation way is
below:
As above, choose the figure from the resources and drag on the page and
edit it.

3、Math Function figures:
As above, choose the figure from the resources and drag on the page and
edit it.

Right mouse function to edit :
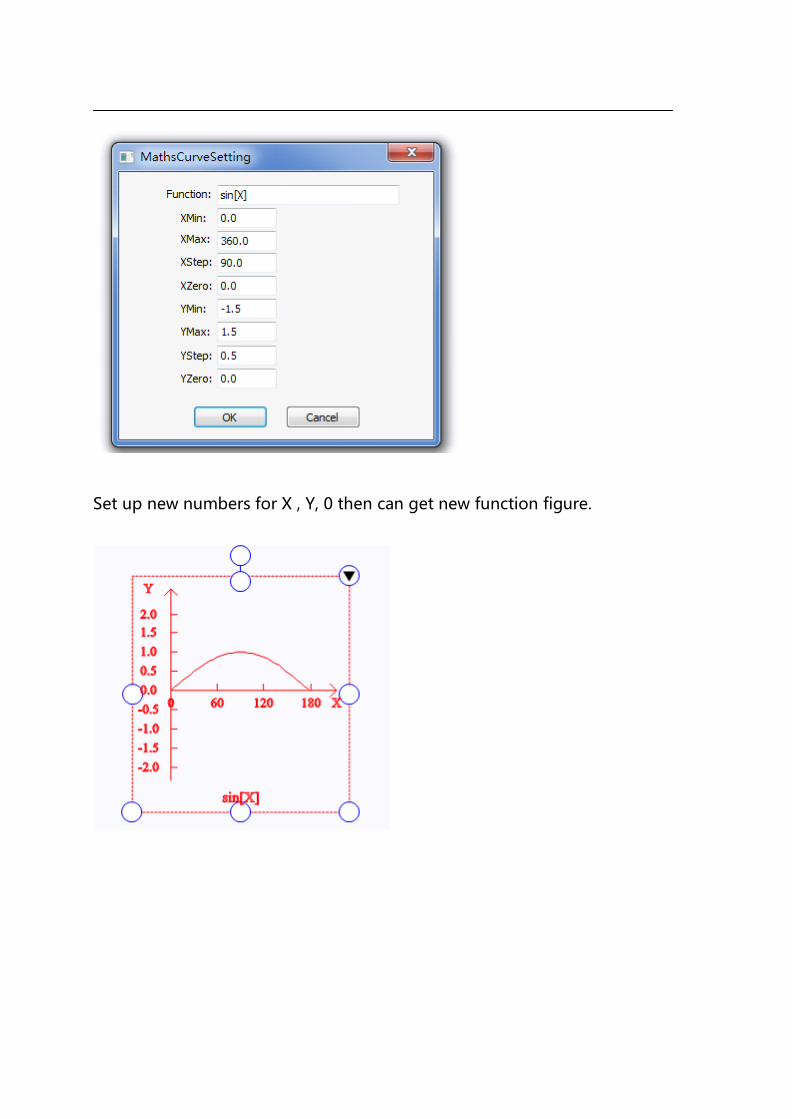
Set up new numbers for X , Y, 0 then can get new function figure.
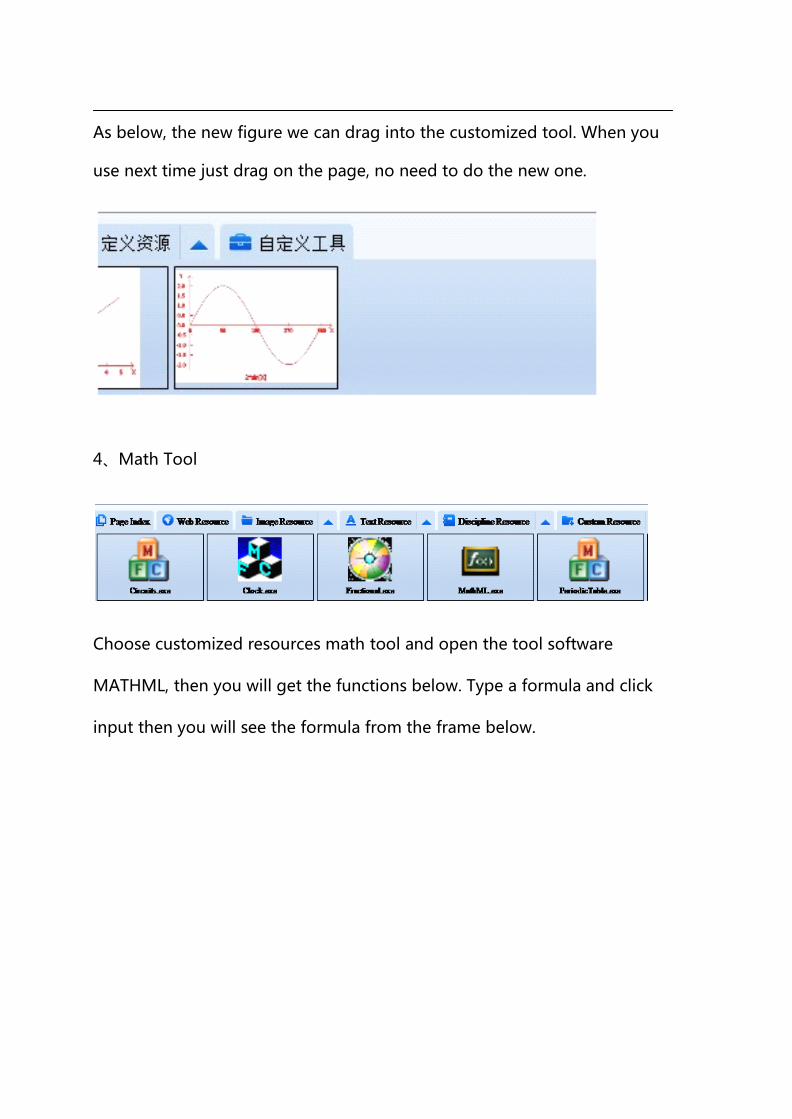
As below, the new figure we can drag into the customized tool. When you
use next time just drag on the page, no need to do the new one.
4、Math Tool
Choose customized resources math tool and open the tool software
MATHML, then you will get the functions below. Type a formula and click
input then you will see the formula from the frame below.
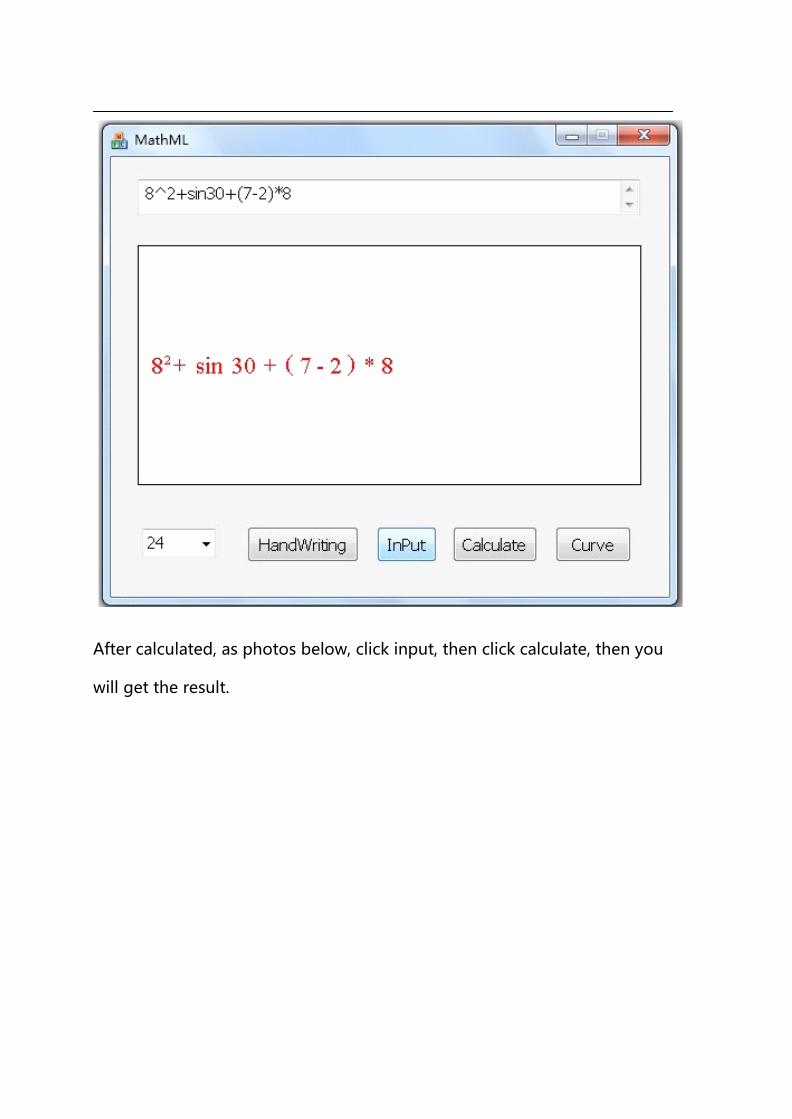
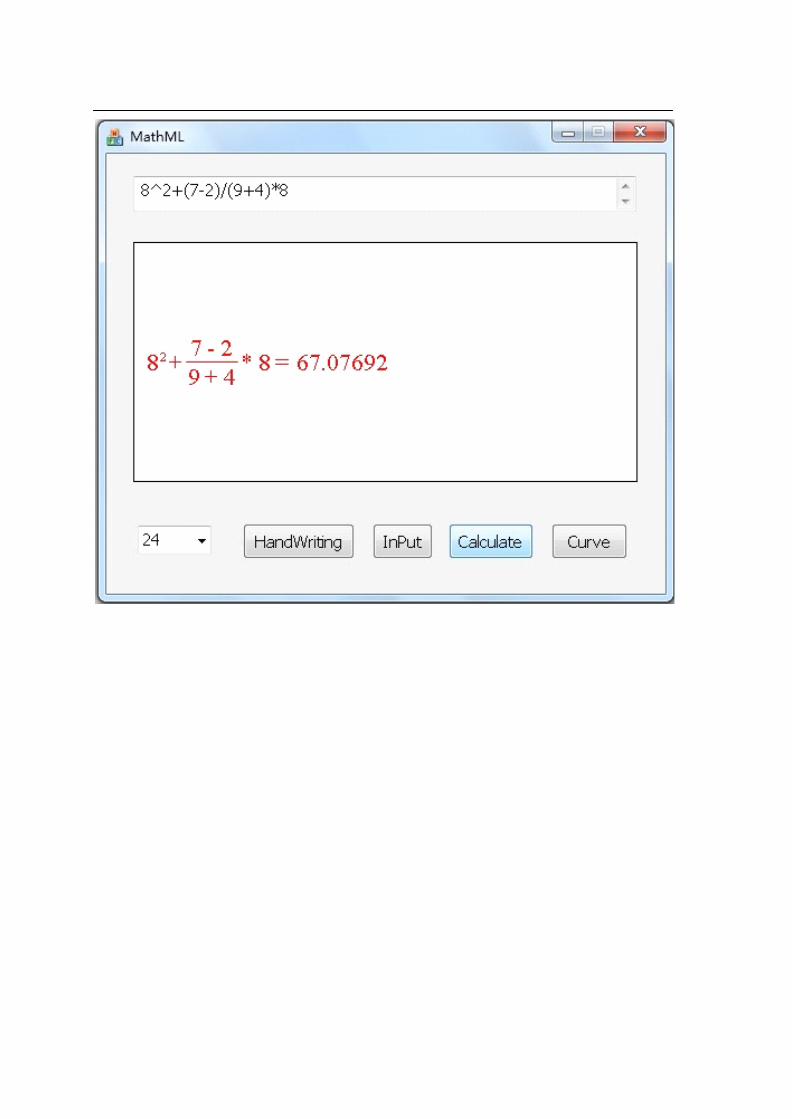
After calculated, as photos below, click input, then click calculate, then you
will get the result.


Function figure displayed function:

Type function figure and click input, then click curve then you will see the
figure desktop.
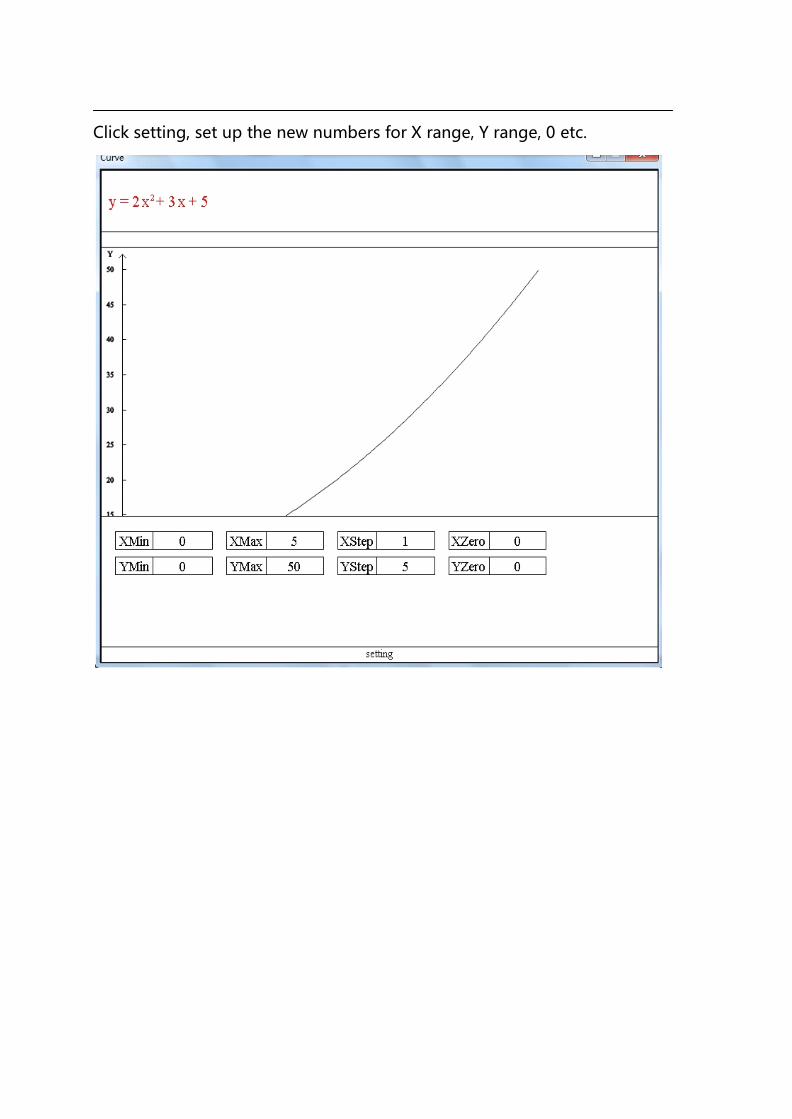
Click setting, set up the new numbers for X range, Y range, 0 etc.
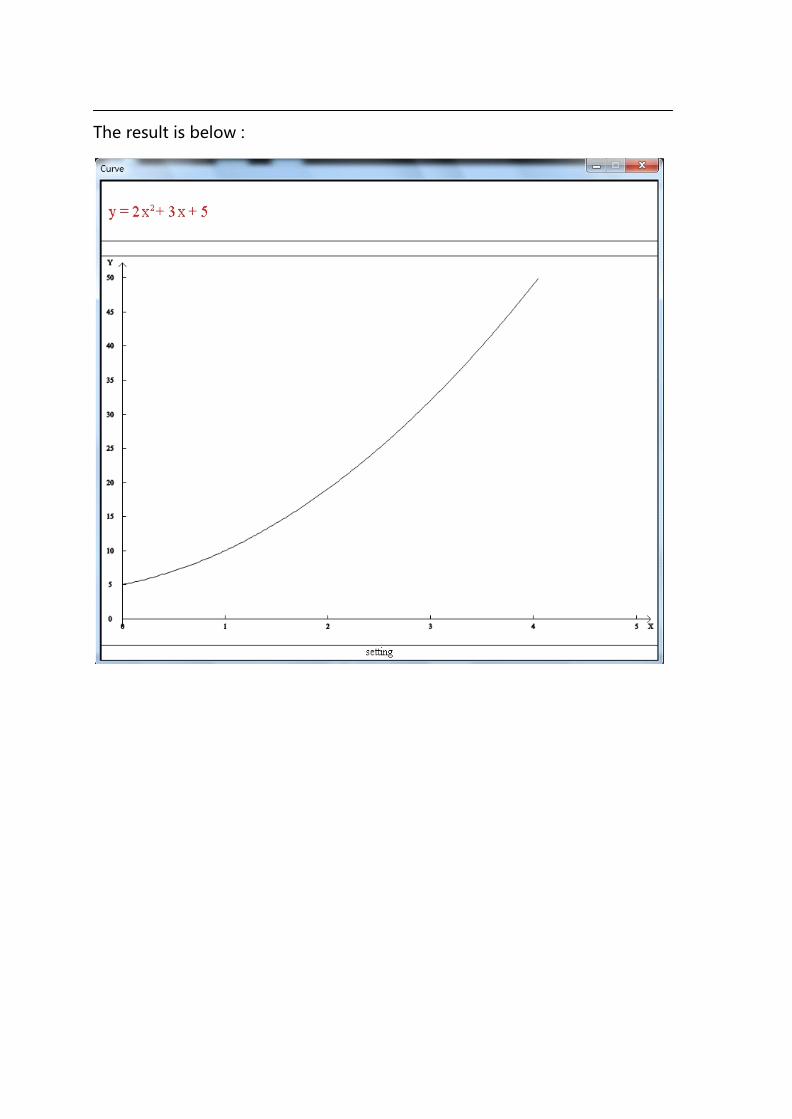
The result is below :

Chemical Resources:
1、We put some chemical tool and instruments in this folder. Operations are below:
As above, choose chemical then you will get the resources and drag on the
page to edit.
You can set up any height for this tool.
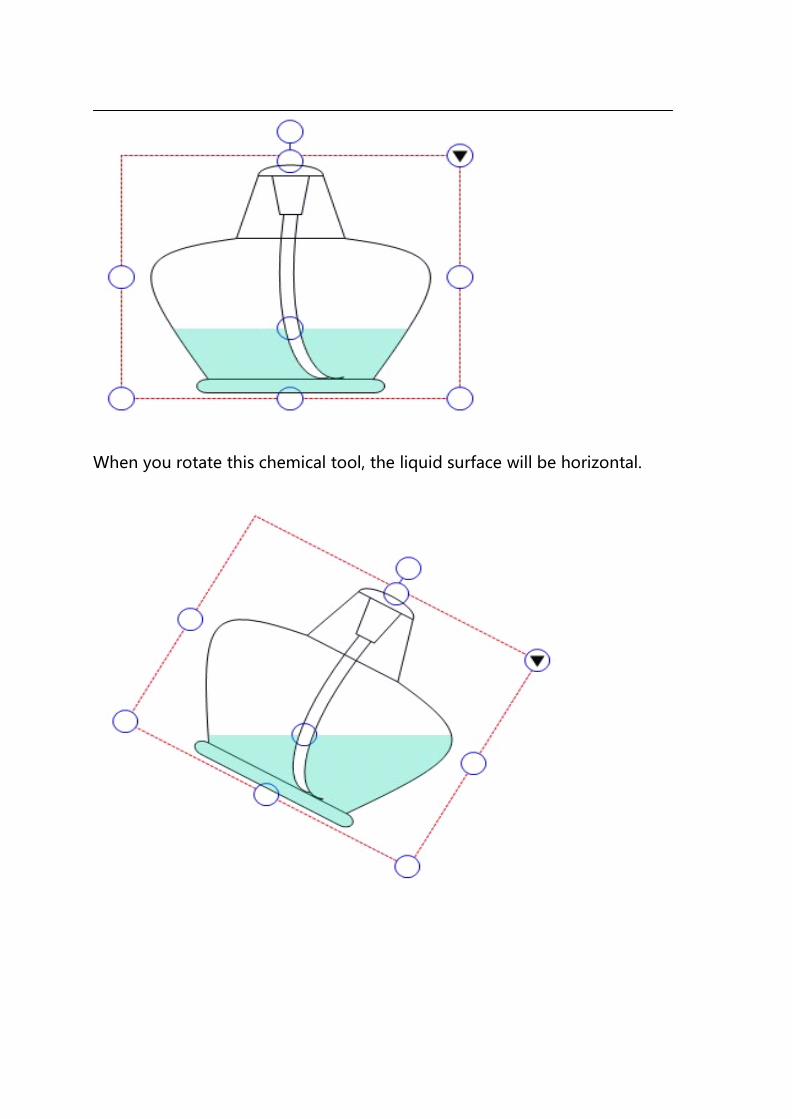
When you rotate this chemical tool, the liquid surface will be horizontal.
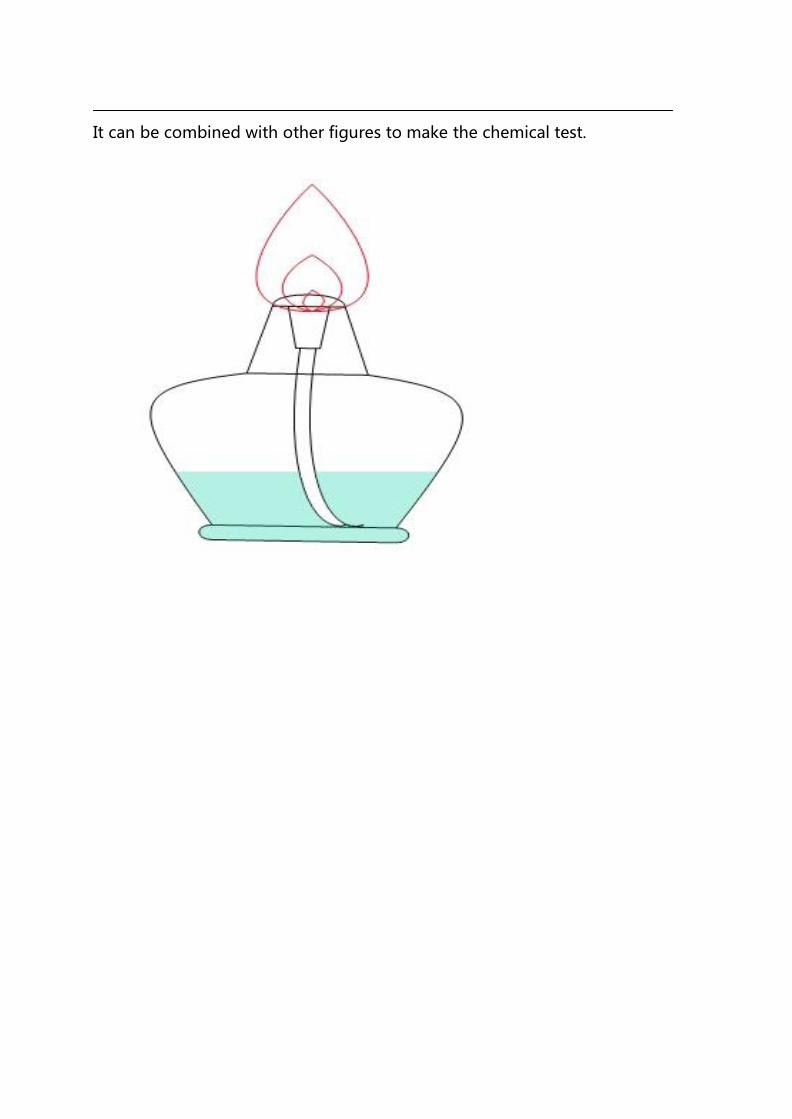
It can be combined with other figures to make the chemical test.

2、Chemical equation for Secondary and Senior Schools .
As above photo, choose different chemical equation, and right mouse to
choose Phoneticize and you will get below:
3、periodic table of elements

Choose it and click it .
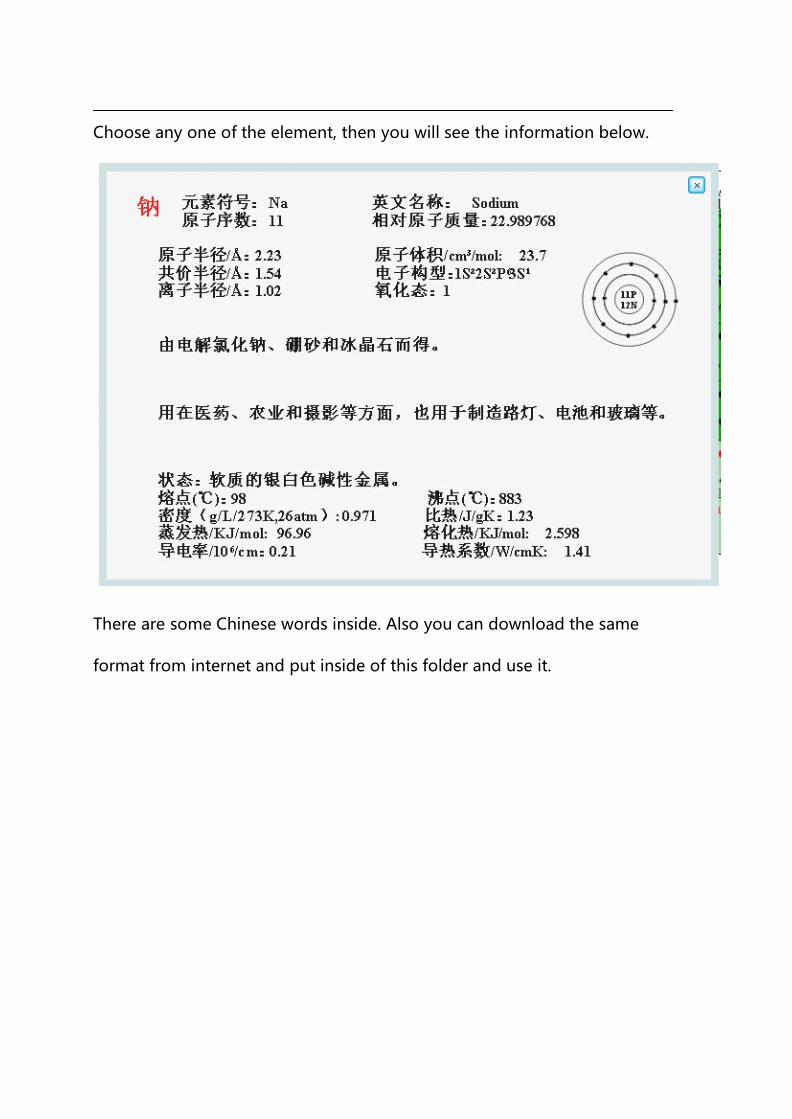
Choose any one of the element, then you will see the information below.
There are some Chinese words inside. Also you can download the same
format from internet and put inside of this folder and use it.
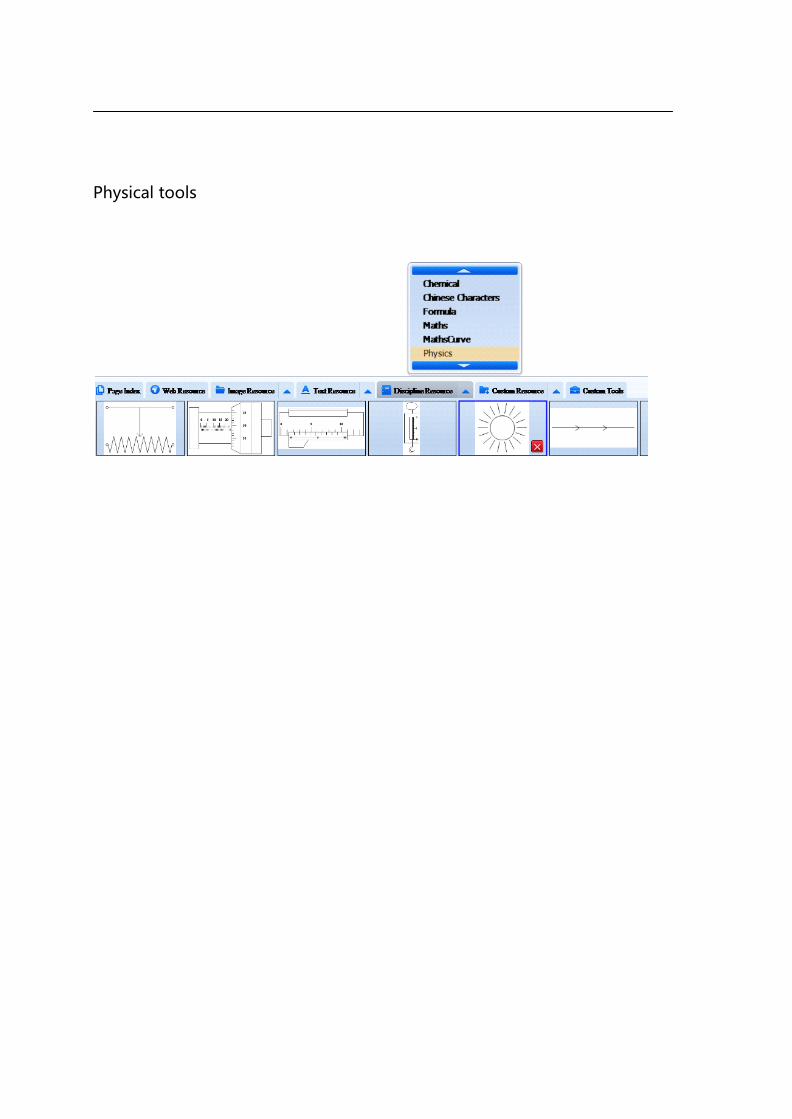
Physical tools
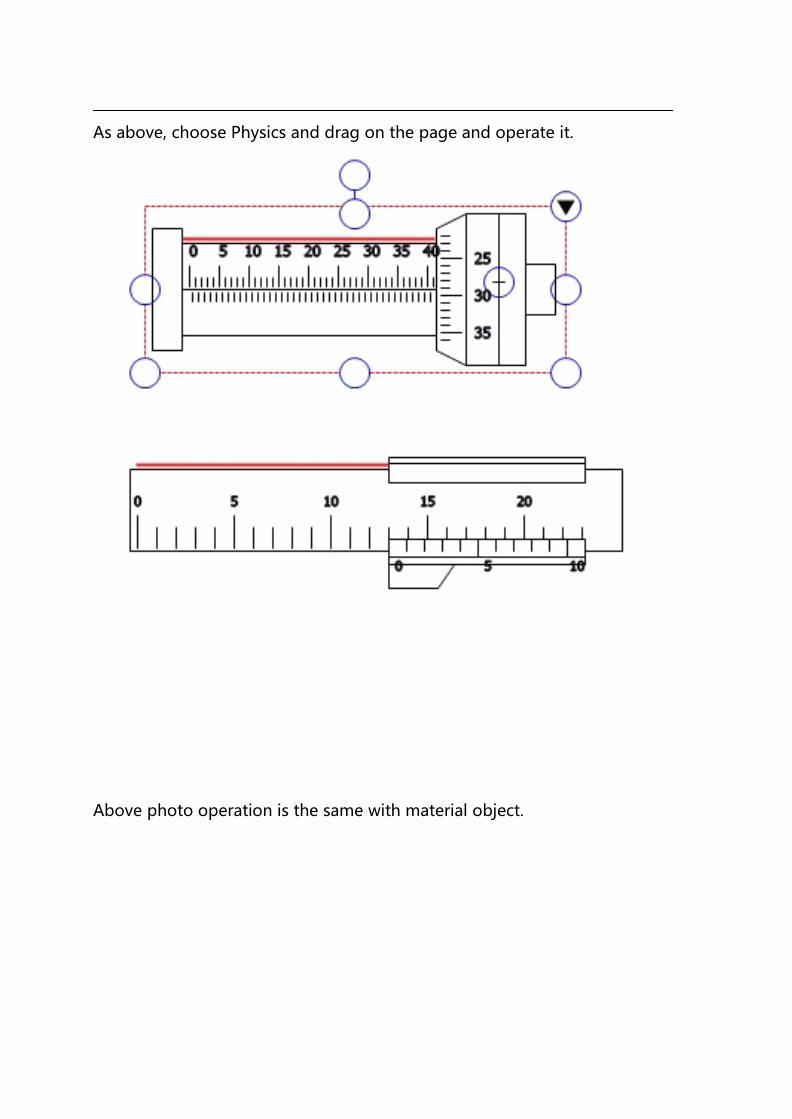
As above, choose Physics and drag on the page and operate it.
Above photo operation is the same with material object.
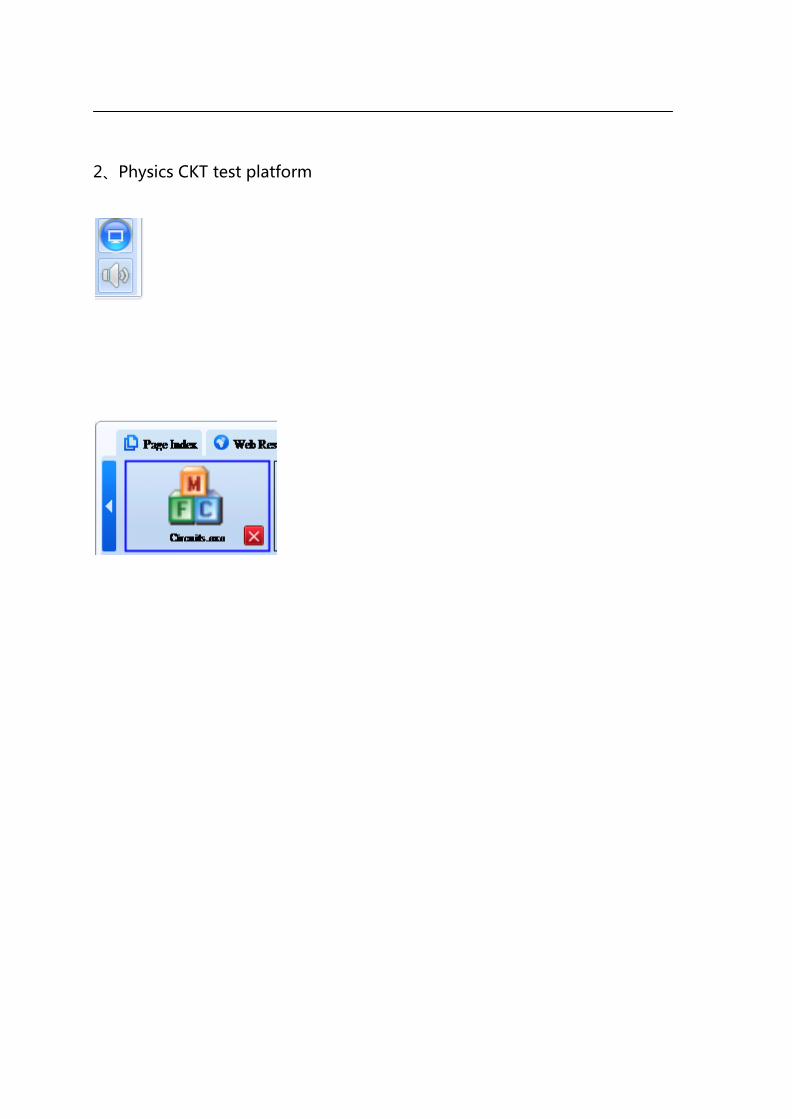
2、Physics CKT test platform

As above photo to choose CKT test, this software is to imitate CKT test
software, open it and you will see below:

To choose circuit element and make a complete CKT diagram
Connect the power,then voltmeter and ammeter can show the numbers after circuit
element test. When you choose right mouse function and choose "on" can make the
light on as photo below.


Chinese Resources
1、Strokes of a Chinese character
Choose one object and then drag on the page.
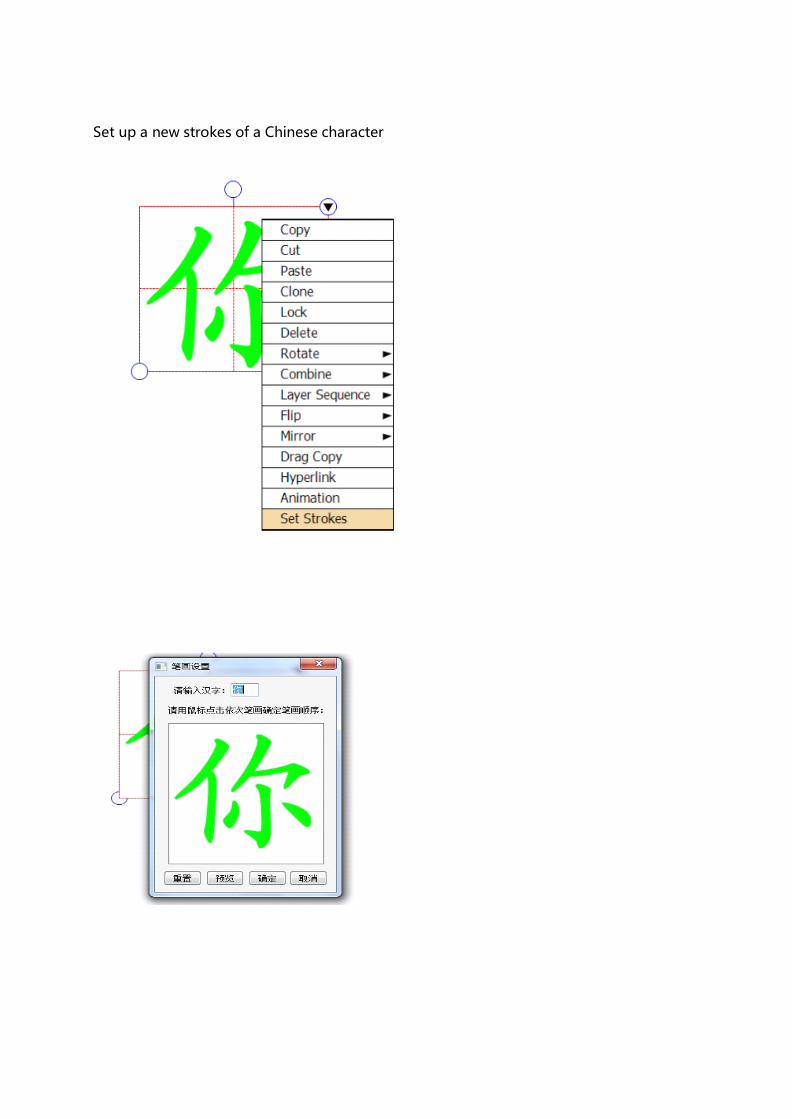
Set up a new strokes of a Chinese character
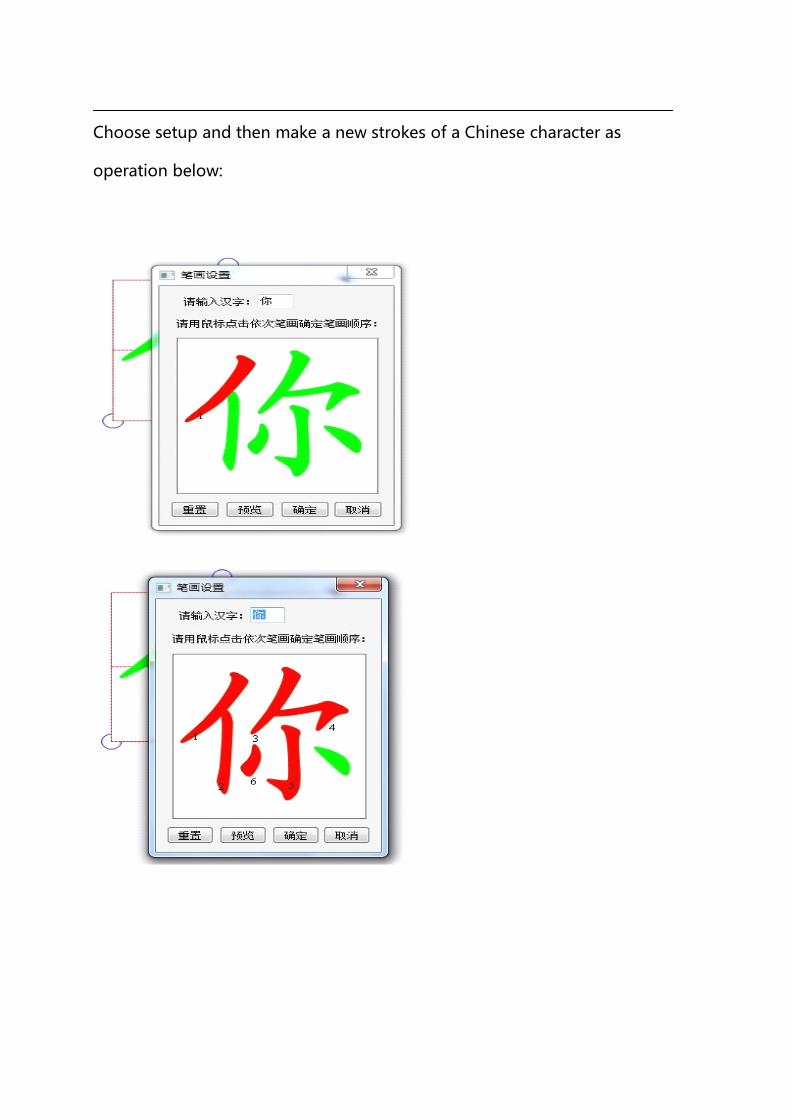
Choose setup and then make a new strokes of a Chinese character as
operation below:
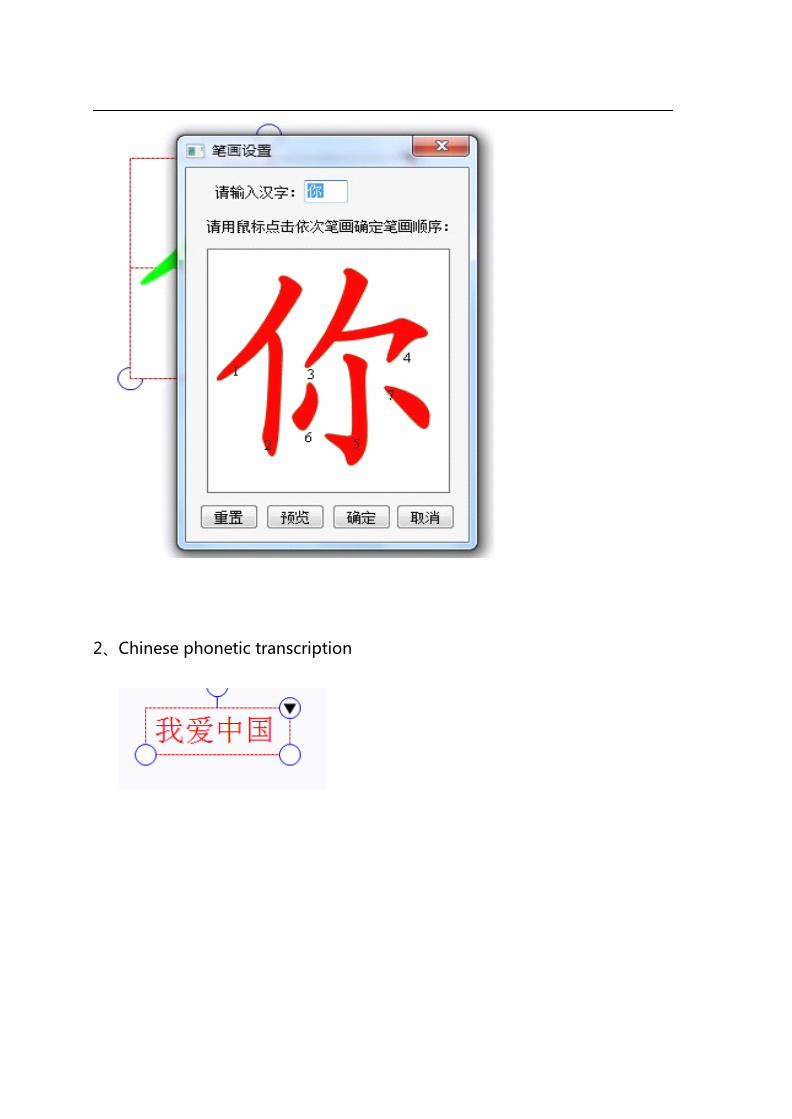
2、Chinese phonetic transcription
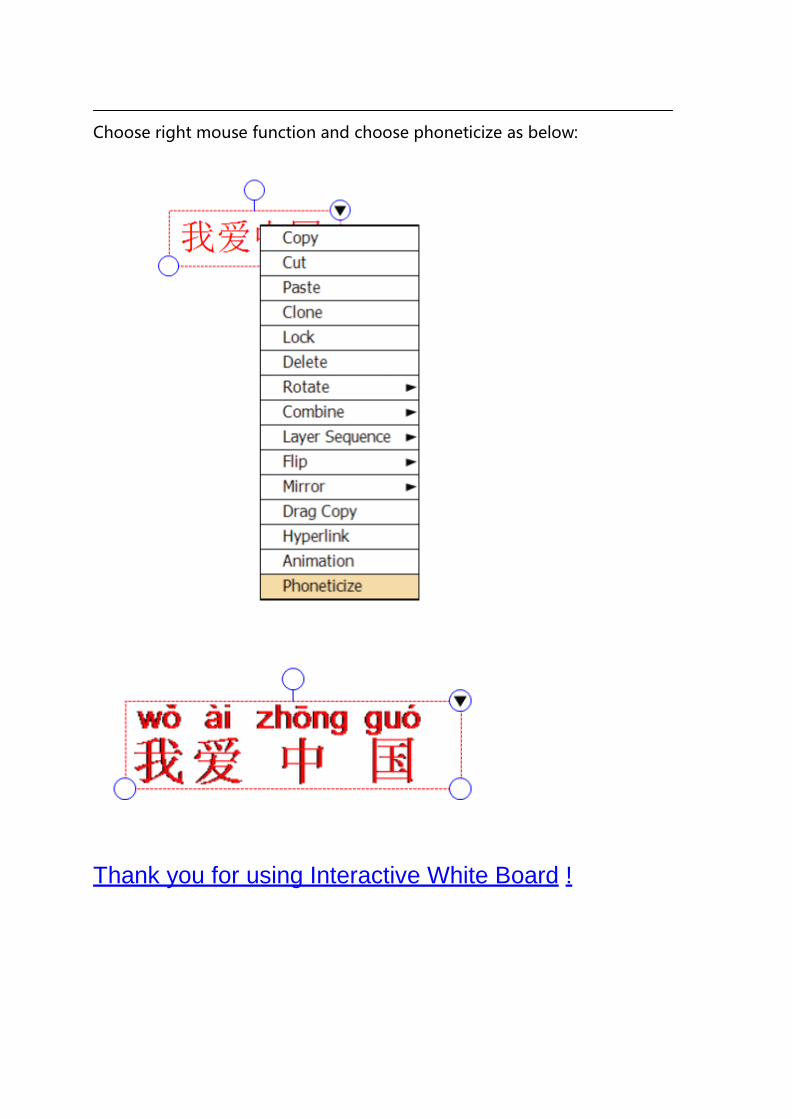
Choose right mouse function and choose phoneticize as below:
Thank you for using Interactive White Board !