Embed Size (px)
Citation preview

INSTRUCTIONS FOR CENTER LINE AND DTM EXPORTS FROM INROADS TO TSC2 OR TSC3 USING UPLOAD TRIMBLE ADD-IN TRANSLATOR
Note: Open Microstation DGN file and Inroads. Open ALG and DTM files.
Before the Translator can run an Application Add-In has to be activated from the Inroads Tool.
The Application Add-in should be 3rd or 4th from the bottom of the list. Select OK
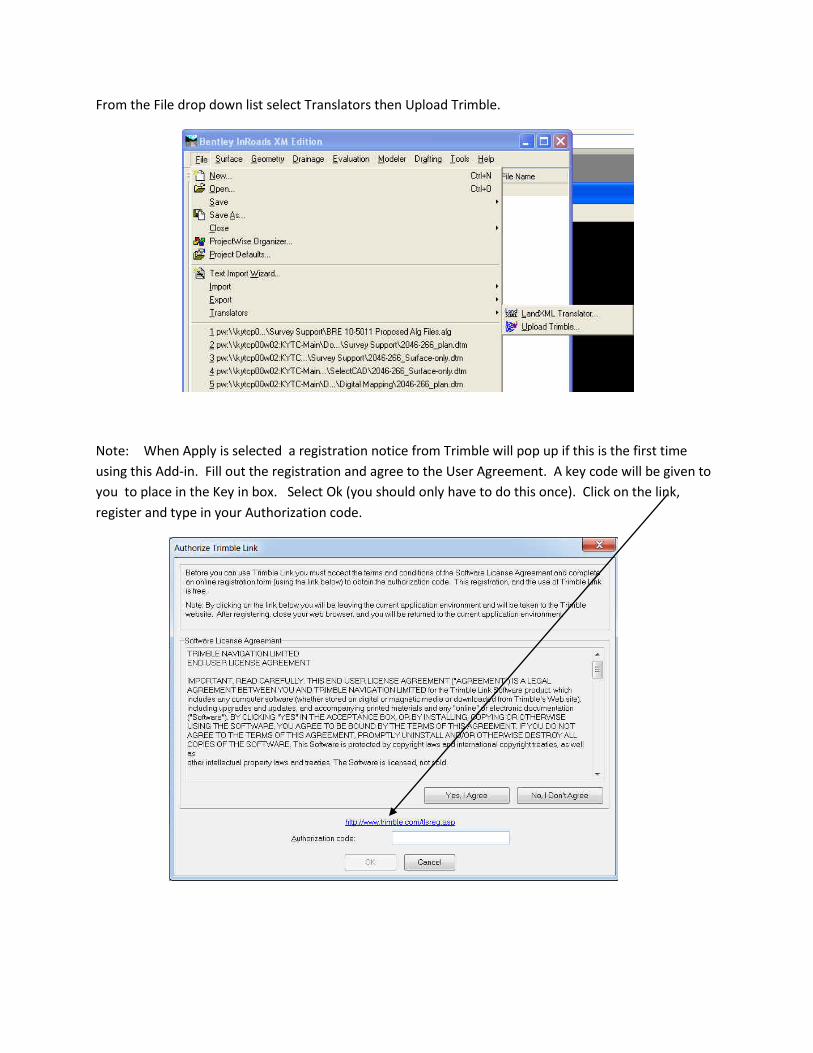
From the File drop down list select Translators then Upload Trimble.
Note: When Apply is selected a registration notice from Trimble will pop up if this is the first time using this Add-in. Fill out the registration and agree to the User Agreement. A key code will be given to you to place in the Key in box. Select Ok (you should only have to do this once). Click on the link, register and type in your Authorization code.
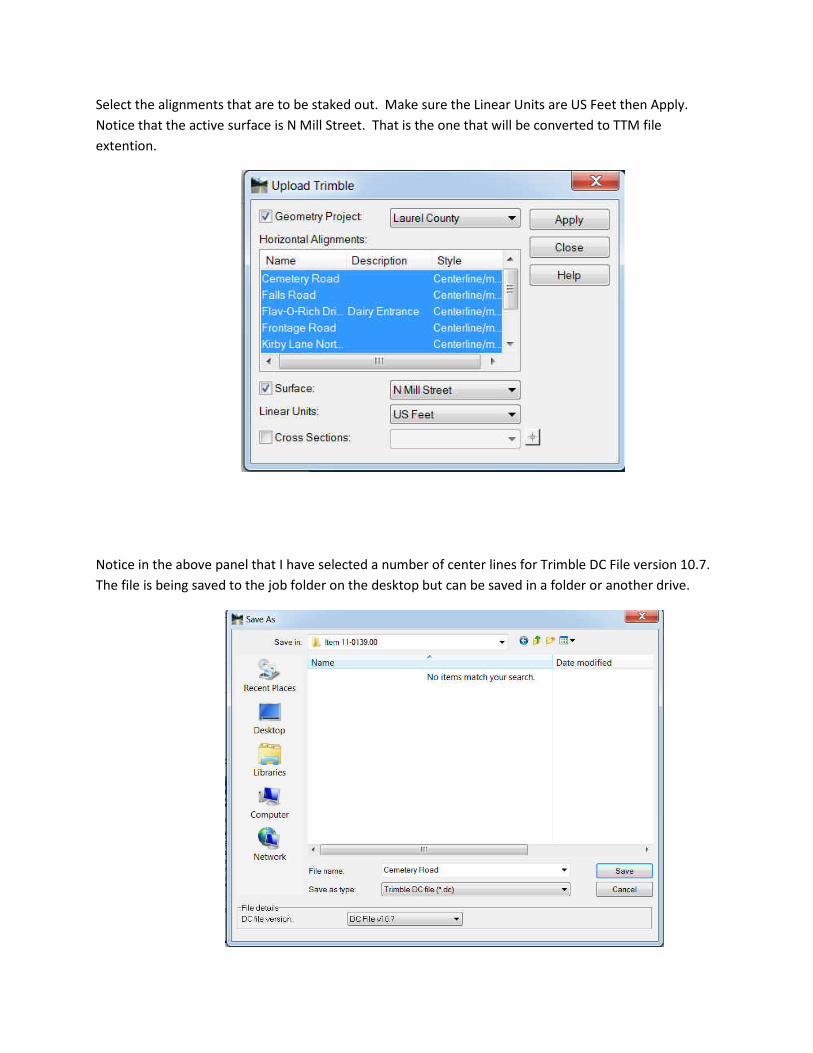
Select the alignments that are to be staked out. Make sure the Linear Units are US Feet then Apply. Notice that the active surface is N Mill Street. That is the one that will be converted to TTM file extention.
Notice in the above panel that I have selected a number of center lines for Trimble DC File version 10.7. The file is being saved to the job folder on the desktop but can be saved in a folder or another drive.
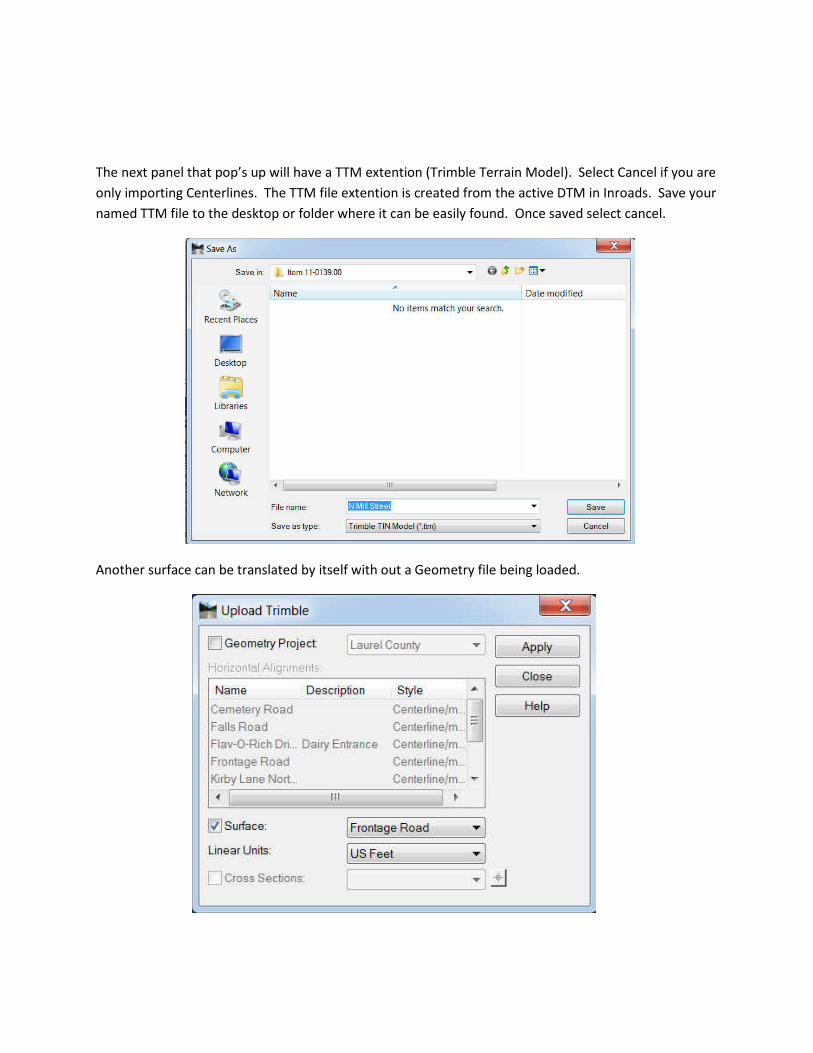
The next panel that pop’s up will have a TTM extention (Trimble Terrain Model). Select Cancel if you are only importing Centerlines. The TTM file extention is created from the active DTM in Inroads. Save your named TTM file to the desktop or folder where it can be easily found. Once saved select cancel.
Another surface can be translated by itself with out a Geometry file being loaded.
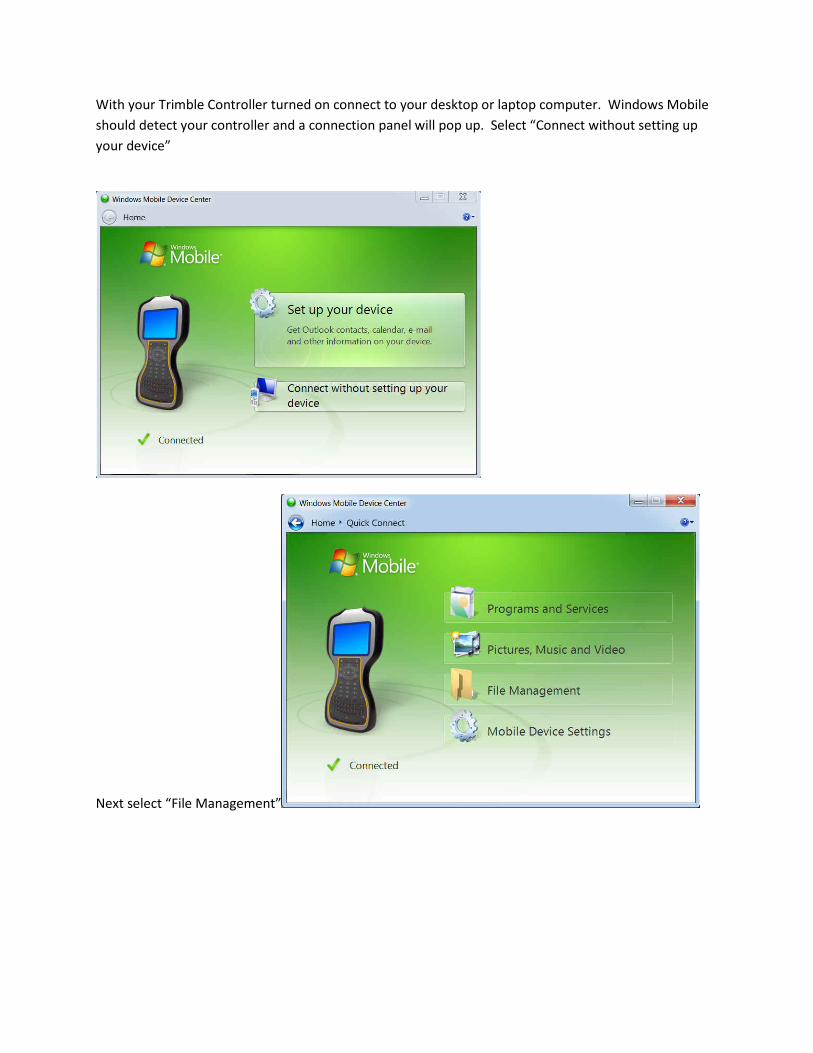
With your Trimble Controller turned on connect to your desktop or laptop computer. Windows Mobile should detect your controller and a connection panel will pop up. Select “Connect without setting up your device”
Next select “File Management”

Next navigate to the “Trimble Data” folder.
Navigate to KYTC folder

Navigate to the job folder that was created by you under “KYTC”.
Drag and drop the created DC and TTM files from the file folder created on the desktop earlier into the job folder in the controller. Close the window and go back to the Controller.
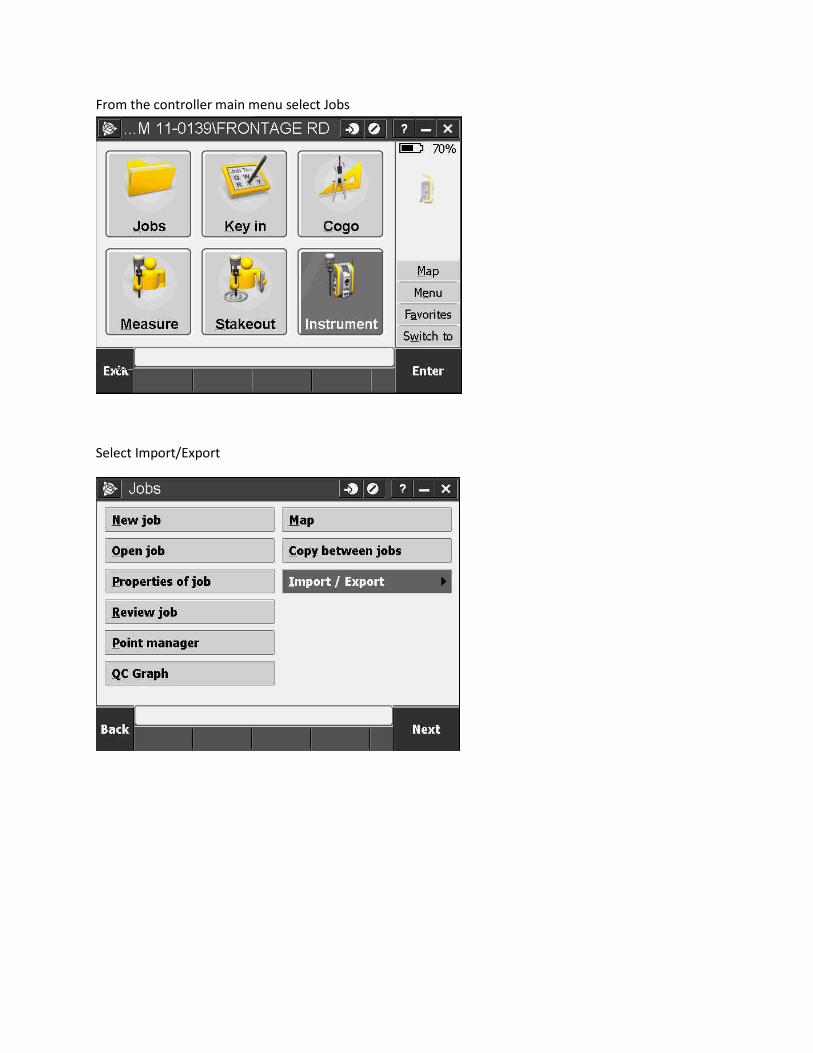
From the controller main menu select Jobs
Select Import/Export
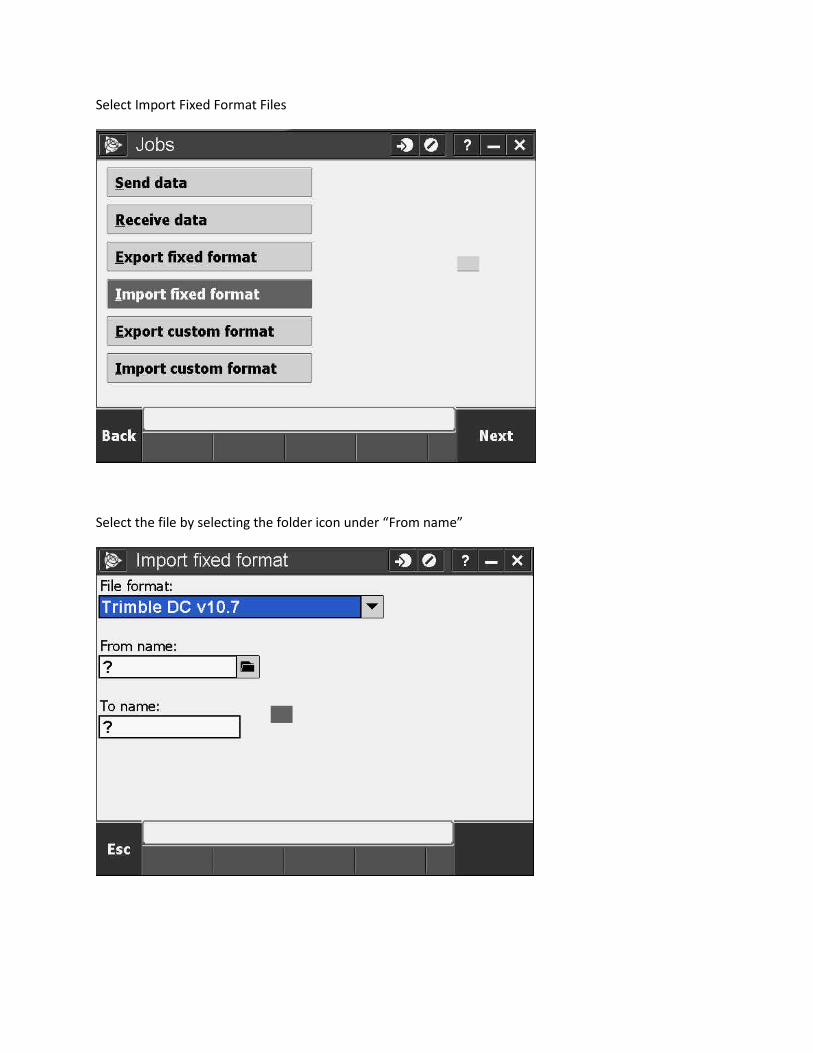
Select Import Fixed Format Files
Select the file by selecting the folder icon under “From name”
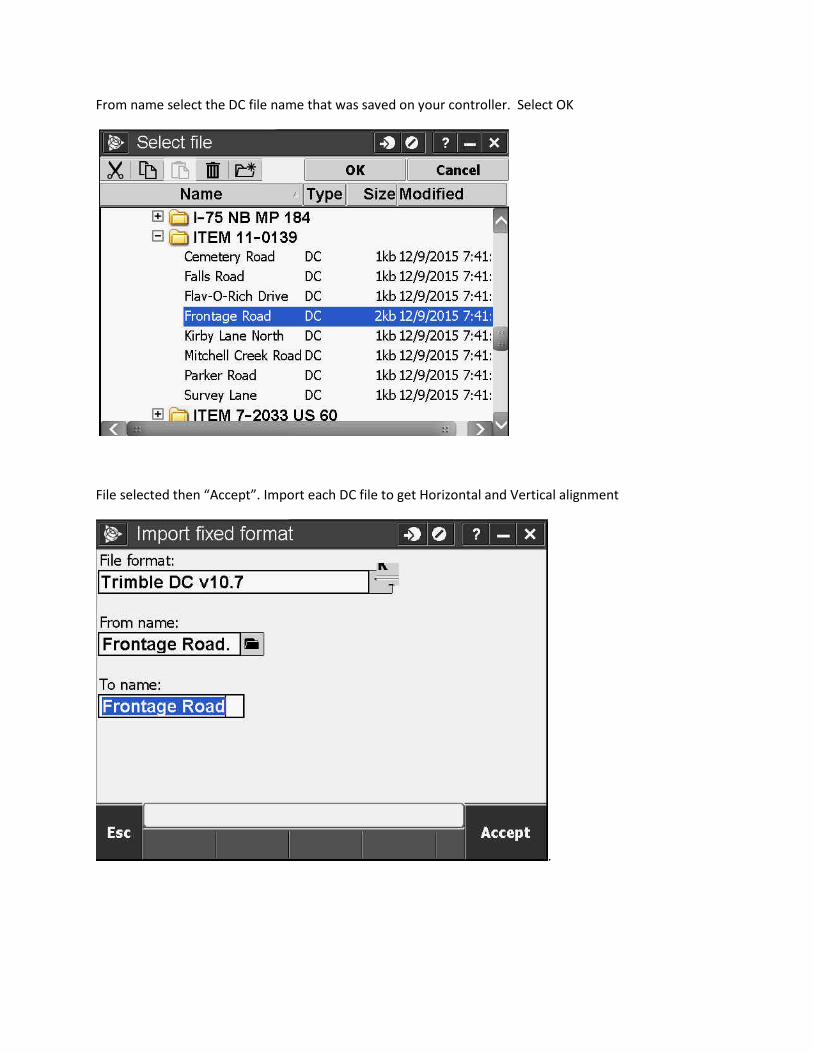
From name select the DC file name that was saved on your controller. Select OK
File selected then “Accept”. Import each DC file to get Horizontal and Vertical alignment
.
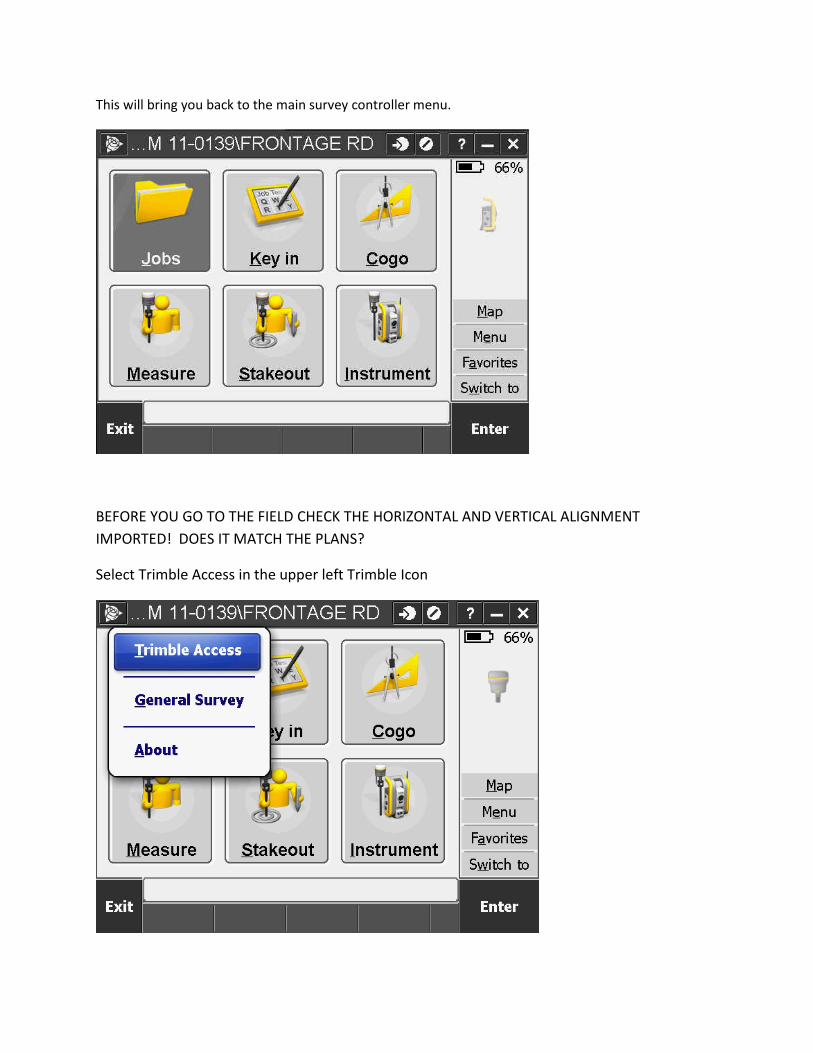
This will bring you back to the main survey controller menu.
BEFORE YOU GO TO THE FIELD CHECK THE HORIZONTAL AND VERTICAL ALIGNMENT IMPORTED! DOES IT MATCH THE PLANS?
Select Trimble Access in the upper left Trimble Icon

Select Roads Select “Define”
Select Edit to view Horizontal Alignment points. Tap Edit
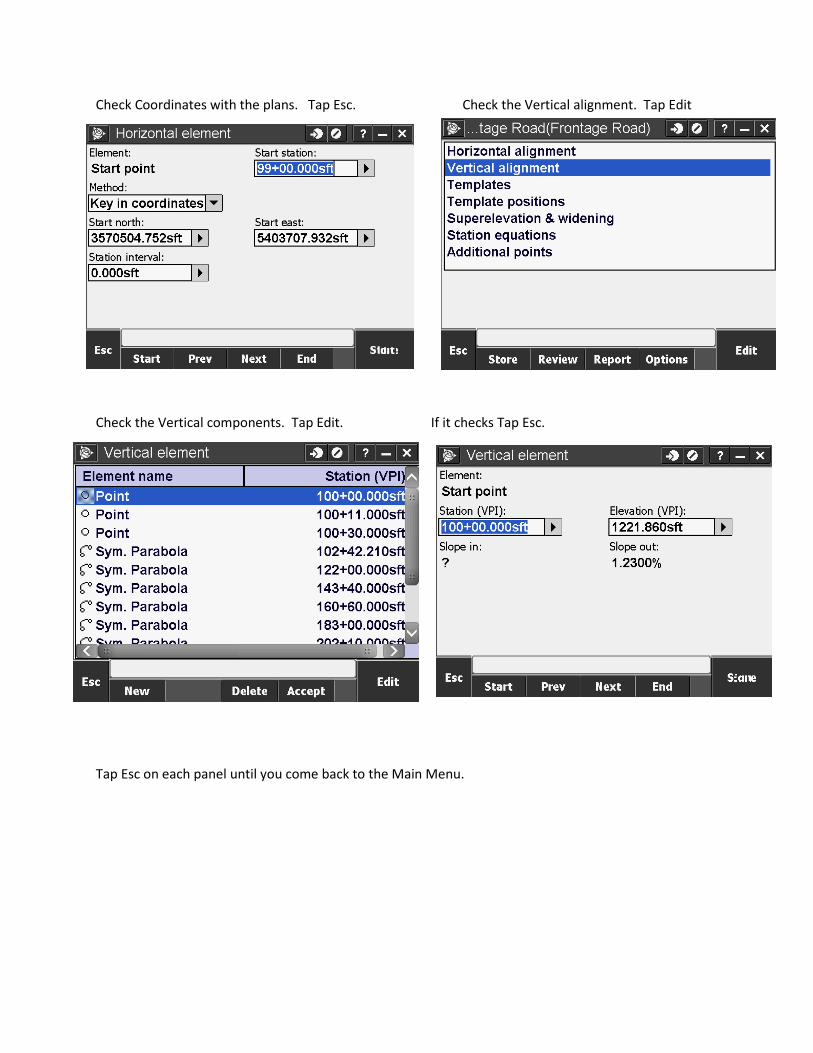
Check Coordinates with the plans. Tap Esc. Check the Vertical alignment. Tap Edit
Check the Vertical components. Tap Edit. If it checks Tap Esc.
Tap Esc on each panel until you come back to the Main Menu.


![Overview and Scutiny Power BI slides.pptx [Read-Only]€¦ · Dtm 4 Consultant Pod g Dtm I Dtm 8 7 Dtm 3 8 7 Dtm 6 Dtm Pod 4 8 Dtm Pod 4 5 Dtm 2 8 Dtm Pod 8 Dtm I 7 Dtm 4 Dtm Pod](https://img.pdfslide.us/doc/110x75/5fb41d34b5c9a8274925974c/overview-and-scutiny-power-bi-read-only-dtm-4-consultant-pod-g-dtm-i-dtm-8-7-dtm.jpg)