Embed Size (px)
Citation preview
INSTRUCTIONS FOR APPLYING GATOR GUARD II
BGG2 Instructions_3_2005
Dominion Sure Seal Gator Guard II, is a viscous two component epoxy compound that when mixed together can be applied to metal, wood, concrete and fiberglass. Gator Guard II provides superior resistance to abrasion, scraping damage and reduces static electricity.
Surface Preparation
• Gator Guard II and the surface it is being applied to must be at a minimum of 70
degrees F. (21 degrees c). • Surface NOT to be coated should be masked to avoid any over spray. • Surfaces should be free from all grease, oil and silicone. Clean with a fast flashing
solvent (DSS – Sure-Solv, stock BSS) • Lightly scuff or abrade surfaces before application (On used vehicles - use 80 to 120
grit sand paper. On new vehicles use a heavy duty or a red scuff pad. 80 to 120 grit sand paper may also be used on new vehicles)
Mixing instructions for Brushing, Rolling and Spraying
• Mix part A and part B together thoroughly in a large container. • Stir by hand for 10 minutes or drill and paddle (power-mixer) for 6 to 8 min. (do not
place on a paint shaker) be sure to scrape the sides and bottom while mixing. • Let the mixed product stand for an additional 10 minutes after mixing (over 95
degrees F this step is not necessary) • DO NOT USE AN ELECTRIC DRILL. USE ONLY AN AIR DRILL AS THE
ELECTICAL CURRENT COULD CAUSE PRODUCT TO FLASH.
If Brushing or Rolling
• Apply to surface. See Application by Brush or Roller. • Note: the can and mixed material will become hot after 30-60 minutes depending on
temperature
If Spraying • Rinse the 850 ml empty part B container with Dominion Sure Seal Sure Solv (BSS) • Pour the mixture back into the 850 ml part B container (schutz can) and use a
Dominion Sure Seal, schutz type gun (stock BUPA). • See Application by Spraying instructions • The mixed product has a useable pot life of approximately 45 minutes to 1 hour at 72
degrees f. (22 degrees c.) • Note: the can and mixed material will become hot after 30-60 minutes depending on
temperature
Application by Brush or Roller
• Brush or roll mixed material at a 5-10 mil thickness (one coat)
INSTRUCTIONS FOR APPLYING GATOR GUARD II
BGG2 Instructions_3_2005
• Clean brush or roller with common cleaning solvents immediately after use
Application by Spraying
• An air compressor is required for spraying • 1 sprayed coat is usually sufficient • Use a Dominion Sure Seal schutz type gun (stock BUPA) • Gun is not included in the kit • Apply a medium-wet coating to completely cover surface. Product should be applied
at a thickness of 10-15 mils • Spray at approximately 35-60 PSI depending on desired texture • Clean application equipment with common cleaning solvents immedia tely after use
Cure time at 72 degrees F. (21 degrees C.)
• Surface will be dry to touch after 4 hours and there will be no product transfer • After 24 hours the product is ready for transport • After 48 hours the product will be ready for general use • Do not wash the surface with soap, water or any other solvents for a minimum of 48
to 72 hours from application. • Do not expose the surface to moisture for a minimum of 24 hours at 72 degrees f. • If the product is applied thicker than 10-15 mils the above times will be extended • If the product is applied thicker than 10-15 mils you may loose some of the flexibility
of the product which may result in chipping if a hard impact occurs. Thicker is NOT better.
Colors
Gator Guard II is available in two colors White and Black. White is NOT a Bright White. White Gator Guard II is a Yellow White when cured. White Gator Guard II can be tinted a maximum of 10% with a universal colorant. If you tint Gator Guard II Dominion Sure Seal is not responsible for your results. You are relying on the UV Stability of your tint to maintain the color and gloss. Depending on Colorant used your results may vary. (Universal Colorant – is a colorant that will air dry and does NOT need or use a Hardener/Catalyst/Activator to cure the product. The Universal Colorant must also compatible with enamels, lacquers, epoxies and other types of paints.)
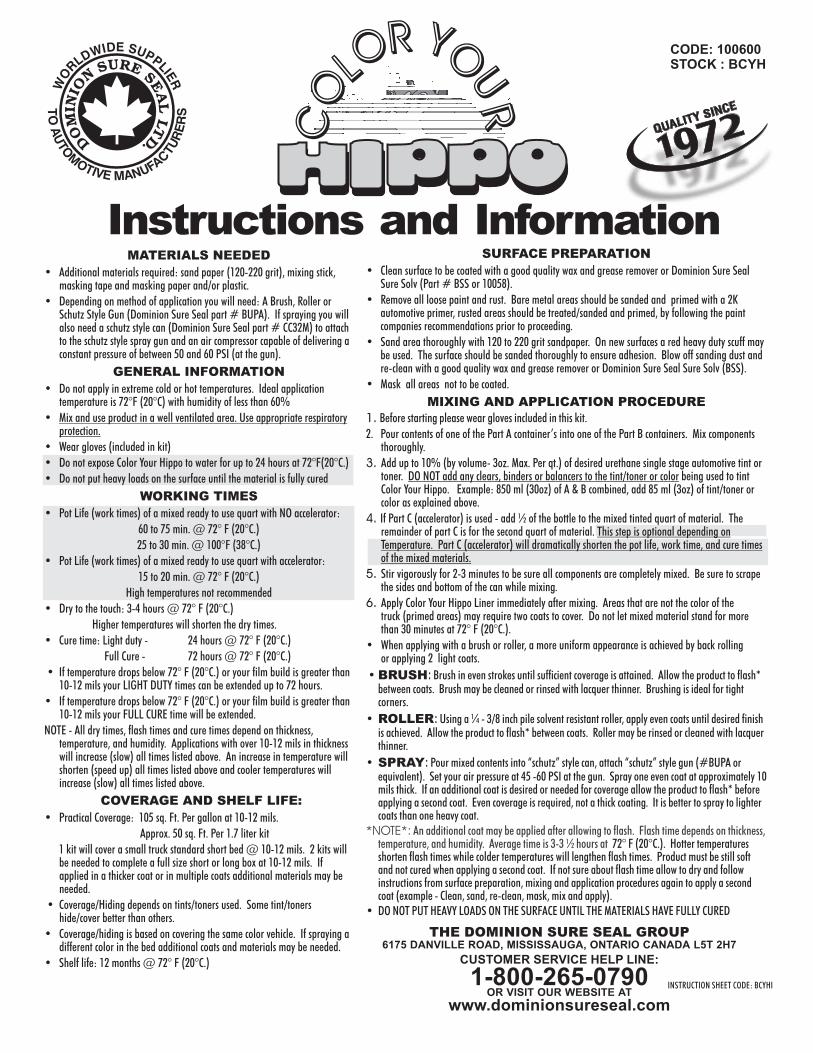
CODE: 100600
STOCK : BCYH
CO
LOR YO
UR
CO
LOR YO
UR
CO
LOR YO
UR
CO
LOR YO
UR
SURFACE PREPARATION
MIXING AND APPLICATION PROCEDURE
BRUSH
ROLLER
SPRAY
• Clean surface to be coated with a good quality wax and grease remover or Dominion Sure SealSure Solv (Part # BSS or 10058).
• Remove all loose paint and rust. Bare metal areas should be sanded and primed with a 2Kautomotive primer, rusted areas should be treated/sanded and primed, by following the paintcompanies recommendations prior to proceeding.
• Sand area thoroughly with 120 to 220 grit sandpaper. On new surfaces a red heavy duty scuff maybe used. The surface should be sanded thoroughly to ensure adhesion. Blow off sanding dust andre-clean with a good quality wax and grease remover or Dominion Sure Seal Sure Solv (BSS).
• Mask all areas not to be coated.
Before starting please wear gloves included in this kit.
2. Pour contents of one of the Part A container’s into one of the Part B containers. Mix componentsthoroughly.
Add up to 10% (by volume- 3oz. Max. Per qt.) of desired urethane single stage automotive tint ortoner. being used to tintColor Your Hippo. Example: 850 ml (30oz) of A & B combined, add 85 ml (3oz) of tint/toner orcolor as explained above.
If Part C (accelerator) is used - add ½ of the bottle to the mixed tinted quart of material. Theremainder of part C is for the second quart of material.
Stir vigorously for 2-3 minutes to be sure all components are completely mixed. Be sure to scrapethe sides and bottom of the can while mixing.
Apply Color Your Hippo Liner immediately after mixing. Areas that are not the color of thetruck (primed areas) may require two coats to cover. Do not let mixed material stand for morethan 30 minutes at 72° F (20°C.).
• When applying with a brush or roller, a more uniform appearance is achieved by back rollingor applying 2 light coats.
• Brush in even strokes until sufficient coverage is attained. Allow the product to flash*between coats. Brush may be cleaned or rinsed with lacquer thinner. Brushing is ideal for tightcorners.
• Using a ¼ - 3/8 inch pile solvent resistant roller, apply even coats until desired finishis achieved. Allow the product to flash* between coats. Roller may be rinsed or cleaned with lacquerthinner.
• Pour mixed contents into “schutz” style can, attach “schutz” style gun (#BUPA orequivalent). Set your air pressure at 45 -60 PSI at the gun. Spray one even coat at approximately 10mils thick. If an additional coat is desired or needed for coverage allow the product to flash* beforeapplying a second coat. Even coverage is required, not a thick coating. It is better to spray to lightercoats than one heavy coat.
72° F (20°C.). Hotter temperaturesshorten flash times while colder temperatures will lengthen flash times. Product must be still softand not cured when applying a second coat. If not sure about flash time allow to dry and followinstructions from surface preparation, mixing and application procedures again to apply a secondcoat (example - Clean, sand, re-clean, mask, mix and apply).
• DO NOT PUT HEAVY LOADS ON THE SURFACE UNTIL THE MATERIALS HAVE FULLY CURED
1.
3.
4.
5.
6.
:
:
:
DO NOT add any clears, binders or balancers to the tint/toner or color
This step is optional depending onTemperature. Part C (accelerator) will dramatically shorten the pot life, work time, and cure timesof the mixed materials.
*NOTE*: An additional coat may be applied after allowing to flash. Flash time depends on thickness,temperature, and humidity. Average time is 3-3 ½ hours at
Instructions and Information
THE DOMINION SURE SEAL GROUP6175 DANVILLE ROAD, MISSISSAUGA, ONTARIO CANADA L5T 2H7
OR VISIT OUR WEBSITE AT
CUSTOMER SERVICE HELP LINE:
1-800-265-0790www.dominionsureseal.com
INSTRUCTION SHEET CODE: BCYHI
MATERIALS NEEDED
GENERAL INFORMATION
WORKING TIMES
COVERAGE AND SHELF LIFE:
• Additional materials required: sand paper (120-220 grit), mixing stick,masking tape and masking paper and/or plastic.
• Depending on method of application you will need: A Brush, Roller orSchutz Style Gun (Dominion Sure Seal part # BUPA). If spraying you willalso need a schutz style can (Dominion Sure Seal part # CC32M) to attachto the schutz style spray gun and an air compressor capable of delivering aconstant pressure of between 50 and 60 PSI (at the gun).
• Do not apply in extreme cold or hot temperatures. Ideal applicationtemperature is 72°F (20°C) with humidity of less than 60%
•
• Wear gloves (included in kit)
• Do not expose Color Your Hippo to water for up to 24 hours at 72°F(20°C.)
• Do not put heavy loads on the surface until the material is fully cured
• Pot Life (work times) of a mixed ready to use quart with NO accelerator:
60 to 75 min. @ 72° F (20°C.)
25 to 30 min. @ 100°F (38°C.)
• Pot Life (work times) of a mixed ready to use quart with accelerator:
15 to 20 min. @ 72° F (20°C.)
High temperatures not recommended
• Dry to the touch: 3-4 hours @ 72° F (20°C.)
Higher temperatures will shorten the dry times.
• Cure time: Light duty - 24 hours @ 72° F (20°C.)
Full Cure - 72 hours @ 72° F (20°C.)
• If temperature drops below 72° F (20°C.) or your film build is greater than10-12 mils your LIGHT DUTY times can be extended up to 72 hours.
• If temperature drops below 72° F (20°C.) or your film build is greater than10-12 mils your FULL CURE time will be extended.
NOTE - All dry times, flash times and cure times depend on thickness,temperature, and humidity. Applications with over 10-12 mils in thicknesswill increase (slow) all times listed above. An increase in temperature willshorten (speed up) all times listed above and cooler temperatures willincrease (slow) all times listed above.
• Practical Coverage: 105 sq. Ft. Per gallon at 10-12 mils.
Approx. 50 sq. Ft. Per 1.7 liter kit
1 kit will cover a small truck standard short bed @ 10-12 mils. 2 kits willbe needed to complete a full size short or long box at 10-12 mils. Ifapplied in a thicker coat or in multiple coats additional materials may beneeded.
• Coverage/Hiding depends on tints/toners used. Some tint/tonershide/cover better than others.
• Coverage/hiding is based on covering the same color vehicle. If spraying adifferent color in the bed additional coats and materials may be needed.
• Shelf life: 12 months @ 72° F (20°C.)
Mix and use product in a well ventilated area. Use appropriate respiratoryprotection.
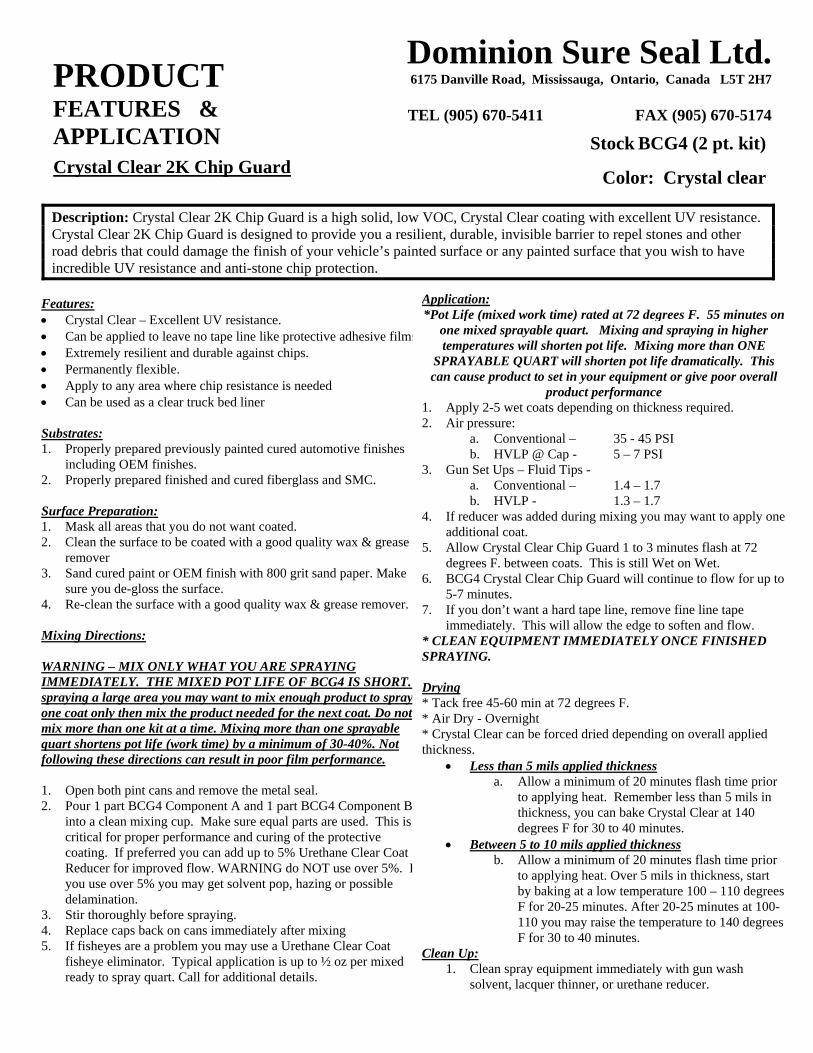
Dominion Sure Seal Ltd. 6175 Danville Road, Mississauga, Ontario, Canada L5T 2H7
TEL (905) 670-5411 FAX (905) 670-5174
PRODUCT FEATURES & APPLICATION
Description: Crystal Clear 2K Chip Guard is a high solid, low VOC, Crystal Clear coating with excellent UV resistance. Crystal Clear 2K Chip Guard is designed to provide you a resilient, durable, invisible barrier to repel stones and other r ad debris that could damage the finish of your vehicle’s painted surface or any painted surface that you wish to have oincredible UV resistance and anti-stone chip protection.
Application:
Crystal Clear 2K Chip Guard
Stock BCG4 (2 pt. kit)
Color: Crystal clear
Features: • Crystal Clear – Excellent UV resistance. • Can be applied to leave no tape line like protective adhesive films. • Extremely resilient and durable against chips. • Permanently flexible. • Apply to any area where chip resistance is needed • Can be used as a clear truck bed liner Substrates:1. Properly prepared previously painted cured automotive finishes
including OEM finishes. 2. Properly prepared finished and cured fiberglass and SMC. Surface Preparation: 1. Mask all areas that you do not want coated. 2. Clean the surface to be coated with a good quality wax & grease
remover 3. Sand cured paint or OEM finish with 800 grit sand paper. Make
sure you de-gloss the surface. 4. Re-clean the surface with a good quality wax & grease remover. Mixing Directions: WARNING – MIX ONLY WHAT YOU ARE SPRAYING IMMEDIATELY. THE MIXED POT LIFE OF BCG4 IS SHORT. If spraying a large area you may want to mix enough product to spray one coat only then mix the product needed for the next coat. Do not mix more than one kit at a time. Mixing more than one sprayable quart shortens pot life (work time) by a minimum of 30-40%. Not following these directions can result in poor film performance. 1. Open both pint cans and remove the metal seal. 2. Pour 1 part BCG4 Component A and 1 part BCG4 Component B
into a clean mixing cup. Make sure equal parts are used. This is critical for proper performance and curing of the protective coating. If preferred you can add up to 5% Urethane Clear Coat Reducer for improved flow. WARNING do NOT use over 5%. If you use over 5% you may get solvent pop, hazing or possible delamination.
3. Stir thoroughly before spraying. 4. Replace caps back on cans immediately after mixing
Application: *Pot Life (mixed work time) rated at 72 degrees F. 55 minutes on
one mixed sprayable quart. Mixing and spraying in higher temperatures will shorten pot life. Mixing more than ONE
SPRAYABLE QUART will shorten pot life dramatically. This can cause product to set in your equipment or give poor overall
product performance 1. Apply 2-5 wet coats depending on thickness required. 2. Air pressure:
a. Conventional – 35 - 45 PSI b. HVLP @ Cap - 5 – 7 PSI
3. Gun Set Ups – Fluid Tips - a. Conventional – 1.4 – 1.7 b. HVLP - 1.3 – 1.7
4. If reducer was added during mixing you may want to apply one additional coat.
5. Allow Crystal Clear Chip Guard 1 to 3 minutes flash at 72 degrees F. between coats. This is still Wet on Wet.
6. BCG4 Crystal Clear Chip Guard will continue to flow for up to 5-7 minutes.
7. If you don’t want a hard tape line, remove fine line tape immediately. This will allow the edge to soften and flow.
* CLEAN EQUIPMENT IMMEDIATELY ONCE FINISHED SPRAYING. Drying * Tack free 45-60 min at 72 degrees F. * Air Dry - Overnight * Crystal Clear can be forced dried depending on overall applied thickness.
• Less than 5 mils applied thickness a. Allow a minimum of 20 minutes flash time prior
to applying heat. Remember less than 5 mils in thickness, you can bake Crystal Clear at 140 degrees F for 30 to 40 minutes.
• Between 5 to 10 mils applied thickness b. Allow a minimum of 20 minutes flash time prior
to applying heat. Over 5 mils in thickness, start by baking at a low temperature 100 – 110 degrees F for 20-25 minutes. After 20-25 minutes at 100-110 you may raise the temperature to 140 degrees F for 30 to 40 minutes.
Clean Up: 1. Clean spray equipment immediately with gun wash
solvent, lacquer thinner, or urethane reducer.
5. If fisheyes are a problem you may use a Urethane Clear Coat fisheye eliminator. Typical application is up to ½ oz per mixed ready to spray quart. Call for additional details.
PRODUCT FEATURES & APPLICATION
Dominion Sure Seal Ltd. 6175 Danville Road, Mississauga, Ontario, Canada L5T 2H7
TEL (905) 670-5411 FAX (905) 670-5174
Stock BCG4 (2 pt. kit)
Color: Crystal clear
Crystal Clear 2K Chip Guard Page 2 continued:
Re-Coat: 1. If surface has minor imperfections, allow the coating to sit
overnight or force dry and allow to cool. 2. Sand Crystal Clear 2K Chip Guard with 400-600 grit sand
paper to remove imperfections. 3. Mask all areas not to be coated 4. Follow standard mixing directions. 5. For Re-Coat application ONLY you may add up to 20-25%
high quality Urethane Grade Clear Coat Reducer. Mix thoroughly and apply 1 COAT ONLY.
6. Allow to dry and deliver 7. If you do not want a tape line unmask the fine line tape
immediately so your edge will soften Masking Help:1. Mask all areas up to the area to be coated. 2. Apply fine line around area to be coated. If a soft edge is
desired you will be removing the fine line immediately after spraying to allow the edge to soften and flow.
3. Outline area to be sprayed using fine line masking tape. Preferred ¼” or larger. If all you have is ¼” then use two pieces to allow plenty of area for Crystal Clear 2K Chip Guard to flow. Flow area depends on thickness you apply.
Coverage: 1. One kit (1 pint part A and 1 pint part B) covers approximately2. 80 Sq/Ft (7.4 Sq/Meters) @ 5 mils thick VOC:2.72 Lbs/Gl.
BSM_2_2002
Dominion Sure Seal Ltd. 6175 Danville Road, Mississauga, Ontario, Canada L5T 2H7
TEL (905) 670-5411 FAX (905) 670-5174
PRODUCT FEATURES & APPLICATION
Note: Avoid applying any materials on or near catalytic converters, mufflers due to extreme heat. In the event the MSDS (Material Safety Data Sheet) on this product is not in your files, you can request one from Dominion Sure Seal Regulatory
Compliance at 1800 265-0790, ext. MSDS.
Features: • Easy to use • Safe • Economical • Reduces time • No odour • Biodegradable
Application Instructions: 1. Some reverse masking will be required with
procedure. 2. Using paper or plastic sheeting and tape, first mask
around area to be painted (about 12-18 inches beyond painting area.
3. Tape the adjacent edges of the painting area, but leave outer edge of sheeting untaped.
4. Now fold the untaped sheeting over the area to be painted.
5. Make certain the area to be “Sure Masked” is dry. 6. Apply Sure Mask to the rest of the vehicle in two
coats, waiting 2 minutes between coats. 7. Next unfold sheeting from area to be painted, back
to surrounding area. 8. Carefully clean off this area with soap and water,
and other products according to paint manufacturer recommendation,
9. Apply primer and colour and allow to cure. 10. Remove sheeting from border area. 11. Wash off Sure Mask with pressure hose and
water.
SURE MASK Stock BSM Part 124000 Gallons Stock BSM5 Part 124100 Fives Stock BSM55 Part 124200 Drums
Description: Sure Mask is an easy to apply sprayable paint masking system that dramatically reduces overspray experienced with traditional masking techniques such as paper and plastic sheeting and masking tape. Sure Mask reduces the time required to sufficiently mask a vehicle prior to painting, along with post painting removal of the masking products, saving up to 30 minutes of labour each paint job.
Call 1-800-265-0790 or visit us on the web www.dominionsureseal.com
SEP_2_2002
Dominion Sure Seal Ltd. 6175 Danville Road, Mississauga, Ontario, Canada L5T 2H7
TEL (905) 670-5411 FAX (905) 670-5174
PRODUCT FEATURES & APPLICATION
ONE STEP – SELF ETCHING PRIMER Stock SEP Part 24008 340 g / 16 0z. Aerosol
Description: One Step is unique and convenient to use ‘etch type’ primer that provides excellent adhesion for additional top coats, primers, and sealers to metals. This product is compatible with all primer surfacers for spot repair and refinishing. Apply to steel, aluminum, and most metals.
Features: • Fast drying. • Excellent sanding, if necessary. • Strong adhesion to metals, and other substrates. • Superior adhesion of primer surfacers and other
topcoats to product. • Good filling characteristics. Touch Dry and Paintable 10 – 20 minutes Full Cure 30 min – 1 Hour
Application Instructions: 1. Surface should be free of rust and scale. 2. Clean area to be primed with Sure Solve (BSS) or
Future Clean (BFC) removing all wax, grease, silicones, and contaminates.
3. Feather edge (sand) original finish. Do not use over fresh paint.
4. Vigorously shake can for 1 minute agitating material.
5. Apply 2-3 even coats holding can 10 - 15 inches from surface.
6. Material can be topcoated and/or sanded within 2 hours. This is important for maximum adhesion of primer to substrate.
Note: Avoid applying any materials on or near catalytic converters, mufflers due to extreme heat.
In the event the MSDS (Material Safety Data Sheet) on this product is not in your files, you can request one from Dominion Sure Seal Regulatory Compliance at 1800 265-0790, ext. MSDS.
Call 1-800-265-0790 or visit us on the web www.dominionsureseal.com
XSM11002 8_2005
Dominion Sure Seal Ltd. 6175 Danville Road, Mississauga, Ontario, Canada L5T 2H7
TEL (905) 670-5411 FAX (905) 670-5174
PRODUCT FEATURES & APPLICATION
Description: XSM11002 – 2 Part Epoxy Small Panel Adhesive is a multi usage repair & bonding epoxy paste. XSM11002 is designed for use as a small panel bonding adhesive. XSM 11002 provides incredible strength with good sandability. XSM11002 is suitable for all Non- Structural Panel-Bonding applications of Metal, Fiberglass and SMC. Some areas of use include: Cab Corners, Door Skins, Small Panels, Small Quarter Panels, and Rust Panels. This is one of the highest strength Small Panel Repair Adhesives available in the market today. * Dominion Sure Seal Ltd utilizes OEM recommendations for panel bonding and roof replacements, in conjunction with welding.
XSM 11002 – 2 Part Epoxy Small Panel Adhesive Stock: XSM11002 (207 ML) Part # 11002 Color: Black
Technical Properties: Lap Shear Strength 3000+ psi Tensile Strength 2542 psi after 72 hours Elongation 10-15 % Shore Hardness D 60 Properties listed below are at 70° F. (20° C.) using a 1/4” extruded bead. Work time 15-18 minutes Set /Unclamp 60-90 minutes Full Cure @ 75° F. (22° C.) 24-48 hours Clamps may be removed from the panel in 60 to 90 min at 75° F. (22° C.), however if the temperature is lower than 75° F. or there is any tension on the part additional cure time is required. Cure time may be accelerated with heat. Allow a min.of 12 hours before returning the car back to the customer.
Bonding instructions (panels): 1) Remove all paint and rust from surface to be bonded
using 36 to 80 grit sand paper. 2) Straighten all metal and “pre fit” the replacement part. 3) Clean area to be bonded with Sure Solv (BSS/SUS). If
applying to SMC/Fiberglass go to step #5. 4) Metal – treat all bare metal with XSM 7000-1 prior to
applying adhesive. Let sit for 10 min. With a wet rag wipe of any residue left from the XSM7000-1. (If the residue is NOT removed – the panel may fail. • If this step is not desired – spread adhesive over the
entire bare metal bond line area on the car and replacement part to ensure corrosion protection within the bond area. This is to be done during the application of adhesive step #7.
5) Place cartridge into T202 dispensing gun, purge cartridge, attach mixer
6) Purge a minimum of 1 mixer length to assure an even mix and discard.
7) Apply approx. a 3/16-1/4 inch bead of adhesive to the area to be bonded. On metal - If the XSM7000-1 is not used spread the adhesive over the entire bare metal bond line area on both the car and the replacement part.
8) Clamp panel into position and tool any adhesive squeeze out to provide a sealed seam along outside edge of bonded panel.
9) If bonding metal - Weld appropriate areas while the adhesive is still wet
10) Let cure. Cure times can be accelerated with heat. While curing reapply anti corrosion material (ASS512C).
* Please See “Instructions for Panel Bonding” for more detailed
Features: • Can be used on Plastic, Metal, SMC, Fiberglass, Wood
and most other substrates • High strength • Fast Unclamp times • Bonds and seals seams simultaneously • Reduces conventional welding, and related hazards • Saves shop labor costs • Can be accelerated with heat
XSM7002 8_2006
Features: • High strength • Optimal work time (75-90 min. 75° F.)(22° C.) • Easy Sanding • Bonds and seals seams simultaneously • Build in Spacer to assist in obtaining the proper bond line
thickness • Multi purpose - Can be used on Metal, SMC and
Fiberglass. • Weld Thru when wet • Reduces conventional welding, and related hazards • Saves shop labor costs • Can be accelerated with heat
Dominion Sure Seal Ltd. 6175 Danville Road, Mississauga, Ontario, Canada L5T 2H7
TEL (905) 670-5411 FAX (905) 670-5174
PRODUCT FEATURES & APPLICATION
Description: XSM7002 Large Panel Adhesive is a strong multi usage, glass sphere filled epoxy adhesive that provides a superior bond and also seals the panel your bonding. XSM7002 is suitable for all Non-Structural Panel Bonding applications of Metal, Fiberglass and SMC. Some areas of use include: Door Skins, Roof Skins, Fenders, Quarter Panels, Cab Corners, Medium and Large sized panels. XSM7002 can be used to bond all Non-Structural Panels that you will need an adhesive with an optimal work time of 75-90 min. at 75° F. (22° C.) The special glass spheres in XSM7002 assist you in obtaining the proper bond line thickness providing you excellent results every time. * Dominion Sure Seal Ltd utilizes OEM recommendations for panel bonding and roof replacements, in conjunction with welding.
XSM 7002 - 2 Part Epoxy Large Panel Adhesive Stock: XSM7002 (207 ML) Color: Med Gray/White
Technical Properties: Lap Shear Strength Steel: 2350 psi Shore Hardness D 78 Elongation 10-15% Properties listed below are at 75° F. (22° C.) using a 1/4” extruded bead. Work time 60 - 75 minutes Set Unclamp 5 - 6 hours Hard 6-8 hours Full Cure @ 75° F. (22° C.) 36 - 48 hours All times listed may be accelerated with heat. Clamps may be removed from the panel in 5 hours at 75° F. (22° C.), however if the temperature is lower than 75° F. or there is any tension on the part additional cure time is required. Cure time may be accelerated with heat. Allow a min. of 30 hours before returning the car back to the customer.
Bonding instructions (panels): 1) Remove all paint and rust from surface to be bonded
using 36 to 80 grit sand paper. 2) Straighten all metal and “pre fit” the replacement part. 3) Clean area to be bonded with Sure Solv (BSS/SUS). If
working on SMC/Fiberglass go to step #5. 4) Place cartridge into T202 dispensing gun, purge cartridge,
attach mixer 5) Purge a minimum of 1 mixer length to assure an even mix
and discard. 6) Apply approx. a 3/16-1/4 inch bead of adhesive to the area
to be bonded. On metal – apply the adhesive to both the replacement part and on the vehicles bond line area. Spread the adhesive over the entire bare metal bond line area on both the car and the replacement part. This is to ensure corrosion protection within the bond line area. Clamp panel into position and tool any adhesive squeeze out to provide a sealed seam along outside edge of bonded panel.
7) If bonding Metal - Weld appropriate areas while the adhesive is still wet
8) Let cure. Cure times can be accelerated with heat. While curing reapply anti corrosion material (ASS512C).
* Please See “Instructions for Panel Bonding” for more detailed instructions.
Revised August 28 2006
XSM6002_3_2003
Features: • Fast Set (1-2 min. work time) • Fast Sanding • Unique Formulation – Compatible with All
Automotive Plastics • Multi Purpose – Bonds/Repairs/Fills • Can be used on Metal, Automotive Plastic,
SMC/Fiberglass
Cartridge Preparation: This step is to be done right before the material is to be used. The dewel time of the adhesive in the mixer is approx. 1-2 min. @ 72° F (22° C)
1. Insert the XSM6002 cartridge into the dispensing gun. Remove any cap or plug. Purge a small amount of material to equalize the cartridge. Attach the mixer and tighten. Proceed to extrude 1 mixer length of material and dispose, to ensure a proper mix.
Plastic instructions – Surface Preparation: 1) Wash the repair area with soap and water. Allow to dry. 2) Clean repair area with SPD (Citrus Base Panel Prep) by applying
the cleaner to a rag and wiping the surface thoroughly. Allow to dry.
3) Sand the back side of the area to be repaired with 80 grit sandpaper. Sand the front of the repair with 80 grit sandpaper feathering the paint surrounding the repair area. Bevel (v-groove) the damaged repair line on the front side of the plastic to be repaired. On Bumpers - Adhesive Weld (XPSA) can be used to re-bond the repair line before V-grooving.
4) Blow off the sanding residue and re-clean using SPD (Citrus Base Panel Prep) (See #2). Allow to dry.
Repair of Flexible and Semi-Rigid Plastic Bumpers: 1. Apply Adhesion Aid SXPP or XPPP to the bare prepped plastic on
both the front and backside of the repair area. Allow to dry for a minimum of 10-15 min at 75 degrees (22 C). Do not use this step on Fiberglass/SMC
2. Reinforce the backside of damage with Reinforcing Tape (XWT). • If reconstructing a tab – use XWT where adhesive is to be
applied. • If reconstructing a missing part – use XWT for reinforcement
in the reconstruction of the part
Dominion Sure Seal Ltd. 6175 Danville Road, Mississauga, Ontario, Canada L5T 2H7
TEL (905) 670-5411 FAX (905) 670-5174
PRODUCT FEATURES & APPLICATION
XSM6002 – All Purpose Urethane Adhesive Stock: XSM6002 (200 ML Cartridge) Color: Black
Description: XSM6002 – All Purpose Urethane Adhesive is designed for fast repairs where a work time of 1- 2 minutes is desired. XSM6002 can be used as a fast set general bonder or a fast set repair material (work time 1-2 min.) on metal, automotive plastic and SMC/fiberglass. This specially formulated product works on all automotive plastics including the “tough to bond” plastics TPO, PP and PE. This product compatability makes this product a perfect choice for use as a reinforcement material on all automotive plastics. We have now taken the guess work out of plastic repairs. Some areas of use on plastics include: bonding/repair of bumper tabs, bonding of bumper brackets, reinforcement of the back side of a plastic repair, bonding of SMC/Fiberglass backer panels, bonding or reinforcing broken SMC/Fiberglass pieces, bonding cracked head light buckets, repairing of grills, and general quick repairs to most broken plastic pieces. Some areas of use as a general bonder include: bonding of emblems, body side moldings, belt moldings (usually in place of a broken clip), bonding of an exterior side mirror glass to the plastic housing, bonding of decorative plastic pieces, ground effects, and the repair of stripped out threads. XSM6002 is a 100% solids Urethane, has excellent bonding strength, and excellent featheredging characteristics with no pinholing. XSM6002 is also compatible with Dominion Sure Seal epoxy repair materials and all automotive primers.
Technical Properties: (Based on a ¼” bead at 72° F (22 C) Work Time: 1-2 Min. Sand Time: 8 -10 Min. Full Cure Strength: 1 Hours Elongation: 50% Shore Hardness D 85 Lap Shear (after 48 hours cure @ 72 F (22 C) *Plastic primed with SXPP (Adhesion Aid) *TPUR 420 psi substrate failure *PUR 730 psi substrate failure *RIM 775 psi substrate failure *TPO 390 psi substrate failure *ABS 753 psi substrate failure *Xenoy 801 psi substrate failure SMC 380 psi substrate failure FRP 740 psi substrate failure Steal 1850 psi Torsional Impact Resistance TPUR 55 in lbs + PUR 70 in lbs RIM 103 in lbs TPO 55 in lbs ABS 70 in lbs Xenoy 101 in lbs
XSM6002_3_2003
3. Cartridge Preparation – See Above. 4. Apply XSM6002 to the back side of the repair
Spread evenly over the repair area. Allow to dry before sanding, if needed. • Ιf reconstructing a tab, you can use the inside of
the XSM6002 bag as a contouring sheet. Apply the XSM6002 to the tab area and contour using the inside of the XSM6002 bag while the material is wet. Hold in place and allow the product to cool. After the product has cooled you can remove the bag and finish the reconstruction of the tab. On the front side of the tab sand thoroughly to prepare for finishing material. Example (epoxy skim coat)
• If reconstructing a part, use the inside of the XSM6002 bag as a contouring sheet to help to mold the new piece while the adhesive is wet. Allow the adhesive to cool and remove the bag and continue to contour the new piece. If reconstructing a part, allow to cure. If sanding is necessary start with 80 grit followed by 180/220 grit sandpaper.
4. After spreading the appropriate material on the back side, go to the front side of the repair area and make sure your repair materials do not sit higher than the surrounding plastic. If so, while the material is wet, spread into the repair area.
5. If the material on the back side is allowed to cure you will need to scuff the material showing through on the front side for adhesion. If you scuff or clean the bare plastic, you will need to re-clean and re-apply the Adhesion Aid before proceeding.
6. Apply the proper repair material to the front side of the repair thoroughly covering the damaged area.
• If using cartridge material (XSM10000, XSME, XSM12000, or XSM13000) - Insert the material into the dispensing gun. Remove any cap or plug. Purge a small amount of material to equalize the cartridge. Attach the mixer and tighten. Proceed to extrude 1 mixer length of material and dispose, to ensure a proper mix. Apply the material to the front side of the repair thoroughly covering the damaged area allow to dry. .
• If using squeeze tube material (XPST, XPSAP, XRF) squeeze equal parts of Part A and Part B onto a mixing board. Mix thoroughly. Avoid whipping materials during mixing. This can cause you to whip air into the materials. After mixing the materials thoroughly, spread over the front side of the repair
Page 2 Cont. XSM6002 – All Purpose Urethane Adhesive Stock: XSM6002 (200 ML Cartridge) Color: Black 7. Sand to contour using 80 to 180 grit sandpaper.
8. If additional filling material is needed follow step #4 under surface preparation (re-clean –SPD), #1 under Repair (Apply Adhesion Aid – apply on all bare plastic – front side.), # 6 Repair (Apply appropriate repair materials) and step #7 (Contour)
8. Finish sand with 180 to 220 grit sandpaper. 9. Blow off sanding residue and re-clean with SPD
(Citrus Based Panel Prep) Allow to dry. If any bare plastic is present apply a medium coat of SXPP (Adhesion Aid) and allow to dry for 10-15 min.
10. Prime surface with the appropriate Dominion Sure Seal primer, sand and Paint.
SMC/Fiberglass: 1. If repairing Fiberglass or SMC follow all the
above steps except step 1 (Apply Adhesion Aid) under Repair of Flexible and Semi Rigid Plastic Bumpers
Bonding: (Works for small Patch/backer Panels, SMC/Fiberglass Panels, and general quick bonding.)
1. Remove all loose paint, sand area (80 grit paper) on both surfaces to be bonded, Clean both surfaces with Dominion Sure Seal Sure Solv. (BSS)
2. Pre-fit part to be bonded 3. Purge and apply adhesive. (Cartridge
Preparation) 4. Clamp to let cure. 5. See “Instructions for Panel Bonding” for more
details *Call your local Dominon Sure Seal Jobber for more details.
XSM5002_8_2006
Features: • High strength • Optimal work time (45-55 min. 75° F.)(22° C.) • Easy Sanding • Bonds and seals seams simultaneously • Build in Spacer to assist in obtaining the proper bond line
thickness • Multi purpose - Can be used on Metal, SMC and
Fiberglass. • Weld Thru when wet • Reduces conventional welding, and related hazards • Saves shop labor costs • Can be accelerated with heat
Dominion Sure Seal Ltd. 6175 Danville Road, Mississauga, Ontario, Canada L5T 2H7
TEL (905) 670-5411 FAX (905) 670-5174
PRODUCT FEATURES & APPLICATION
Description: XSM5002 Medium Panel Adhesive is a strong multi usage, glass sphere filled epoxy adhesive that provides a superior bond and also seals the panel your bonding. XSM5002 is suitable for all Non-Structural Panel Bonding applications of Metal, Fiberglass and SMC. Some areas of use include: Door Skins, Fenders, Quarter Panels, Cab Corners, Small and Medium Sized Panels. XSM5002 can be used to bond all Non-Structural Panels that you will need an adhesive with an optimal work time of 45-55 min. at 75° F. (22° C.) The special glass spheres in XSM5002 assist you in obtaining the proper bond line thickness providing you excellent results every time. * Dominion Sure Seal Ltd utilizes OEM recommendations for panel bonding and roof replacements, in conjunction with welding.
XSM 5002 - 2 Part Epoxy Medium Panel Adhesive Stock: XSM5002 (200 ML Cartridge) Color: Gray/White
Technical Properties: Lap Shear Strength Steal: 2153 psi Shore Hardness D 80 Elongation 10-15% Properties listed below are at 75° F. (22° C.) using a 1/4” extruded bead. Work time 45 - 55 minutes Set 4 hours Hard 5 – 6 hours Paint 1 Hour Full Cure @ 75° F. (22° C.) 36 - 48 hours All times listed may be accelerated with heat. Clamps may be removed from the panel in 3-4 hours at 75° F. (22° C.), however if the temperature is lower than 75° F. or there is any tension on the part additional cure time is required. Cure time may be accelerated with heat. Allow a min. of 24 hours before returning the car back to the customer.
Bonding instructions (panels): 1) Remove all paint and rust from surface to be bonded
using 36 to 80 grit sand paper. 2) Straighten all metal and “pre fit” the replacement part. 3) Clean area to be bonded with Sure Solv (BSS/SUS). 4) Place cartridge into T202 dispensing gun, purge cartridge,
attach mixer 5) Purge a minimum of 1 mixer length to assure an even mix
and discard. 6) Apply approx. a 3/16-1/4 inch bead of adhesive to the area
to be bonded. On metal – apply the adhesive to both the replacement part and on the vehicles bond line area. Spread the adhesive over the entire bare metal bond line area on both the car and the replacement part. This is to ensure corrosion protection within the bond line area.
7) Clamp panel into position and tool any adhesive squeeze out to provide a sealed seam along outside edge of bonded panel.
8) If bonding Metal - Weld appropriate areas while the adhesive is still wet
9) Let cure. Cure times can be accelerated with heat. While curing reapply anti corrosion material (ASS512C).
* Please See “Instructions for Panel Bonding” for more detailed instructions.
Revised August 28 2006
BHBL 3_2005
Dominion Sure Seal Ltd. 6175 Danville Road, Mississauga, Ontario, Canada L5T 2H7
TEL (905) 670-5411 FAX (905) 670-5174
PRODUCT FEATURES & APPLICATION
Description: Dominion Sure Seal’s latest innovation with this revolutionary new Urethane “paste” based protective coating. Ideally suited for applications to Truck Beds (replaces drop-in plastic liners), Trailers, Hoppers, Boats, Off-Road Vehicles, RV’s and almost anything that requires space-age durability at a Down-to-Earth price. This rugged coating not only looks good but it protects surfaces against a wide range of extreme conditions and extends truck-box longevity.
Features:
• Easily applied by brush, roller or standard “undercoat” style pneumatic applicator.
• Low aromatic solvents mean low vapour odour when applying.
• Ultra chemical resistant. • Excellent adhesion to metals, wood, fiberglass,
concrete and plastic. • Remains permanently flexible. • Seals surfaces against moisture and corrosion. • Greatly increases resale value of vehicles • Incredible wear & tear resistance. • Easily mixed by hand or machine. • Superior High-Gloss finish. • Variable film build for many different applications.
WARNING: DO NOT SPRAY (rolling,
brushing is ok) IF HUMIDITY EXCEEDS 60% Surface Preparation:
1. Surface to be coated must be cleaned with silicone & grease remover
2. Loose paint / rust should be removed and affected areas primed
3. Scuff / Sand area with 80-120 grit sandpaper, blow off and wipe clean
4. Mask all area surrounding application area.**complete application instructions printed on packaging.
Typical Properties Of Hippo Liner Dry Time: 3 hours @ 70 F Cure Time: 24 hours @ 70 F = light duty 72 hours @ 70 F = full cure Additional Information For Hippo Liner Shelf Life: 12 months at 20 C / 72 F Practical Coverage: 75 sq. ft. per gallon at 10ml 40 - 50 sq. ft. per 1.7 litre kit. Normal operating temperature: -20° to 150° F.
Note: Avoid applying any materials on or near catalytic converters, mufflers due to extreme heat. In the event the MSDS (Material Safety Data Sheet) on this product is not in your files, you can request one from Dominion Sure Seal Regulatory
Compliance at 1800 265-0790, ext. MSDS.
Hippo Liner Truck Bedliner
Stock BHBL, Part 100000 - 1.7 litre (0.45 gal)
Color: Black
Application:
*limit mixed material to ONE mixed Quart which can be applied within 30 minutes from mixing
1. Pour ½ contents of Parts A & B into mixing container 2. Mix vigorously for 2 – 3 minutes. 3. Immediately after mixing, apply: A) -with a natural or synthetic brush in even strokes until sufficient coverage is attained. B) -using a 3/8 – ½ inch pile synthetic roller sleeve. Apply even coats until desired finish is achieved. C) -pour mixed contents into “shutz” style can , attach pneumatic applicator Stock BUPA (or equivalent) and @ +-50 PSI spray light coats until coverage is uniform.
** Repeat steps 1 – 3 until surface is completely covered. Allow sufficient flash-off times between
coats** Recommended thickness is 10-12 mils in one coat. If applied to thick in one coat solvent pop or blistering can occur.