Embed Size (px)
Citation preview

CR-224Explorer I
I n s t r u c t i o n M a n u a l


External AM Antenna

WelcomeThank you for purchasing the Crosley Radio CR224 Explorer I.Before operating this unit, please read this manual thoroughly and retain itfor future reference.
FeaturesXM ReadyXM offers 160 digital radio channels of commercial-free music andpremier news, sports, talk, and traffic and weather in 21 metro markets.XM's on-air hosts broadcast live from studios in Washington, D.C., New York City and Nashville. XM is broadcast via satellite to subscribersfrom coast to coast. Subscribers listen to XM on a variety of award-win-ning satellite radios for the vehicle, home, and portable use.
AroundSound™ - Your Crosley Explorer I features our exclusiveAroundSoundtm design. Using a fully adjustable custom designed driver, theExplorer I simulates surround sound, via its three distinct channels, creating awarm balanced tone, regardless of where you may be located with regards tothe radio.
Portable Audio Ready™ - Your Explorer I also comes ready to play portableaudio products, including MP3 players, gaming devices, CD players,oranything with a headphone or auxiliary output jack.
About This ManualInstructions in this manual describe the controls and functions of the CR224Explorer I.
Included in this package:(1) Explorer I Radio(1) External FM antenna(1) External AM antenna(1) Remote Control(1) AC/DC adaptor(1) Portable Audio Ready cable
2

Getting Started
Getting StartedUnpacking1. Remove packing material from the unit.
Note: Save all packing materials. 2. Remove radio and all accessories. 4. Remove the protective plastic covering the radio and all accessories.
Set Up1. Unwind the AC/DC power adaptor.2. Plug AC end into appropriate outlet.3. Plug the small end of the adaptor into the 12v Jack on the back of the unit. 4. Connect the FM antenna to the FM antenna jack on the back of the unit.5. Connect the AM antenna to the External AM quick connectors. 6. Remove protective battery tab from remote control.
Getting StartedUnpacking . . . . . . . . . . . . . . . . . .3Set Up . . . . . . . . . . . . . . . . . . . . . .3Control Locators . . . . . . . . . . . .4-5Display . . . . . . . . . . . . . . . . . . . . .6Connector Locators . . . . . . . . . . .7
Basic OperationUnit Controls . . . . . . . . . . . . . . .8-9Clock Setup . . . . . . . . . . . . . . . . .9Audio Setup . . . . . . . . . . . . . . . .10Contrast . . . . . . . . . . . . . . . . . . .10Factory Restore . . . . . . . . . . . . .10
Radio OperationXM RadioXM setup . . . . . . . . . . . . . . . . . .11Listening to XM Radio . . . . . . . .11
AM/FM RadioListening to AM/FM Radio . . . . .11
Station PresetsProgramming Stations intoMemory . . . . . . . . . . . . . . . . . . . .11
AlarmAlarm Setup . . . . . . . . . . . . . . . .12Sleep and Snooze Setup . . . . .13Battery Back-Up . . . . . . . . . . . . .13
Portable Audio ReadyAuxiliary Input . . . . . . . . . . . . . . .14Auxiliary Output . . . . . . . . . . . . .14
GeneralTroubleshooting Guide . . . . . . .15Warranty Information . . . . . . . . .17
Table of Contents
3

Getting Started
Control Locators1. Power2. Tuning / Enter3. Volume4. Menu
5. Preset6. Audio7. Mode8. Snooze / Mute
123
45 6
8
7
4

Getting Started
5
1716 1918
514
15
126 7
914
Remote Locators9. Mute
10. Volume Up11. Volume Down12. Memory13. Tuning Down
14. Tuning Up15. Numeric keys16. Snooze17. Sleep18. Alarm 119. Alarm 2
11
1013

Getting Started
6
Display Locators1. Time2. Mode3. XM Antenna Signal4. Station Information5. Artist / Song TItle
1
23
5
4

Connector Locators1. FM Antenna2. External AM Antenna3. XM Antenna Jack4. Auxillary In5. Headphone Jack
6. Line Out7. 12v Jack8. AroundSound™ Control9. Remote Holder
10. Battery Back-up Cover
765431 2 8
910
Getting Started
7

Basic Operation
Unit Controls1. Power Button – This button turns the main power on/off. When in the offposition, the time and date will be displayed.2. Tuning Knob – The Tuning Knob is used to change AM/FM/XM stations.Pressing the Tuning Knob enters the selected station during tuning, and alsoselected menu options. 3. Volume Knob – Rotate to adjust volume to desired listening level.4. Menu – The Menu Button is used to access all menu items. After pressingthe menu button, rotate the Tuning Knob to browse through the menu selec-tions. Push the Tuning Knob to select a menu function. The menu functionsare as follows: XM SETUP – AUDIO SETUP – CLOCK SETUP – ALARMSETUP –SLEEP AND SNOOZE SETUP – CONTRAST SETUP – FACTORYRESTORE – SOFTWARE VERSION. 5. Preset Button – Pressing the Preset Button takes you through stationssaved into memory. 6. Audio Button – This button takes you directly into the Audio Setup sectionof the menu. Here, you can select and adjust Bass, Treble, and Balance. Usethe Tuning Button to select which to adjust.7. Mode Button – Pressing the Mode Button toggles between the modes AM– FM – XM – AUX.8. Snooze Button – The Snooze Button has three different functions.
1. Pressing the Snooze Button once the Alarm has been activatedputs the unit into Snooze mode.
2. Pressing the Snooze Button during normal operation mutes the volume.3. When the units power is turned off, pressing the Snooze Button will
temporarily light the display so the time and date can be seen.
Remote Control9. Mute Button – Pressing this button mutes the volume.10. MEM. Button – Memory Button, used to program presets.11. Tune - – Changes stations in descending order.12. Tune + – Changes stations in ascending order. 13. Volume Up – Increases volume level.14. Volume Down – Decreases volume level.
8
Basic Operation
9
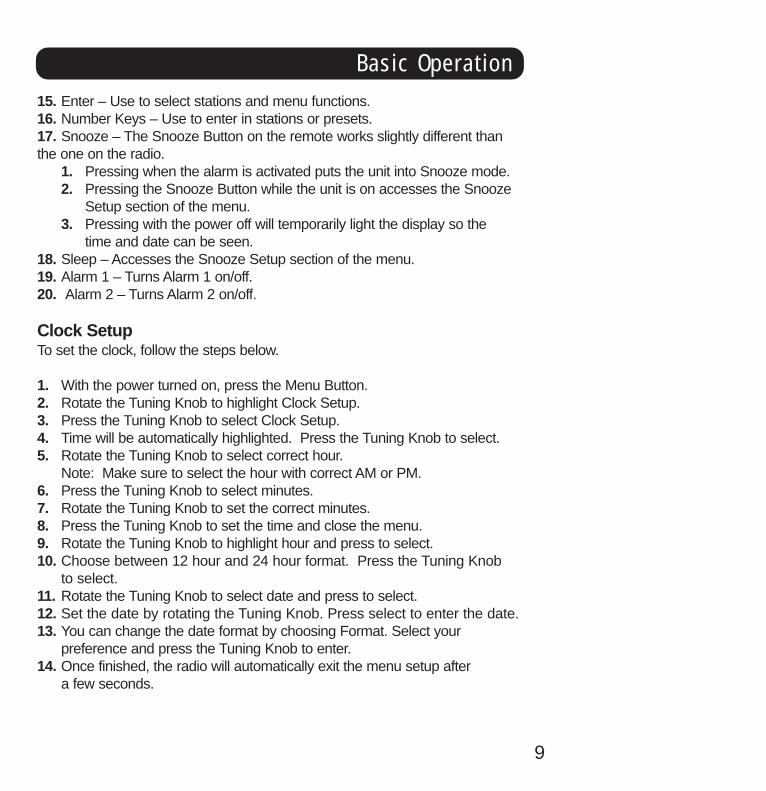
15. Enter – Use to select stations and menu functions.16. Number Keys – Use to enter in stations or presets.17. Snooze – The Snooze Button on the remote works slightly different thanthe one on the radio.
1. Pressing when the alarm is activated puts the unit into Snooze mode.2. Pressing the Snooze Button while the unit is on accesses the Snooze
Setup section of the menu.3. Pressing with the power off will temporarily light the display so the
time and date can be seen.18. Sleep – Accesses the Snooze Setup section of the menu.19. Alarm 1 – Turns Alarm 1 on/off.20. Alarm 2 – Turns Alarm 2 on/off.
Clock SetupTo set the clock, follow the steps below.
1. With the power turned on, press the Menu Button.2. Rotate the Tuning Knob to highlight Clock Setup. 3. Press the Tuning Knob to select Clock Setup.4. Time will be automatically highlighted. Press the Tuning Knob to select. 5. Rotate the Tuning Knob to select correct hour.
Note: Make sure to select the hour with correct AM or PM.6. Press the Tuning Knob to select minutes.7. Rotate the Tuning Knob to set the correct minutes.8. Press the Tuning Knob to set the time and close the menu. 9. Rotate the Tuning Knob to highlight hour and press to select.10. Choose between 12 hour and 24 hour format. Press the Tuning Knob
to select. 11. Rotate the Tuning Knob to select date and press to select. 12. Set the date by rotating the Tuning Knob. Press select to enter the date.13. You can change the date format by choosing Format. Select your
preference and press the Tuning Knob to enter. 14. Once finished, the radio will automatically exit the menu setup after
a few seconds.

Basic Operation
Audio SetupUse this feature to customize your sound by adjusting bass, treble and balancesettings.
1. Press the Menu Button.2. Rotate the Tuning Knob to highlight Audio and press to select. 3. Choose which audio feature you want to adjust and press the
Tuning Knob to select. 4. Rotate the Tuning Knob to select the desired value (- 5 to+5)
and press to select.
Contrast SetupUsing this feature, you can change the contrast of the LCD to your desiredlevel. Follow the instructions below to adjust the contrast.
1. Press the Menu Button.2. Rotate the Tuning Knob to select Contrast Setup and press to enter.3. Rotate the Tuning Knob to select the desired appearance and press again
to select.
Factory RestoreUsing the Factory Restore feature will restore the unit to its default settings. Allpresets including clock and alarm times will need be reset if this feature is used.In the event you need to reset the unit, follow these instructions.
1. Press the Menu button. 2. Rotate the Tuning Knob to select Factory Restore and press to enter.3. Rotate the Tuning Knob to select Yes and press to enter. 4. The unit will now be reset. Allow time for the unit to reset and restart.
10
Radio Operation
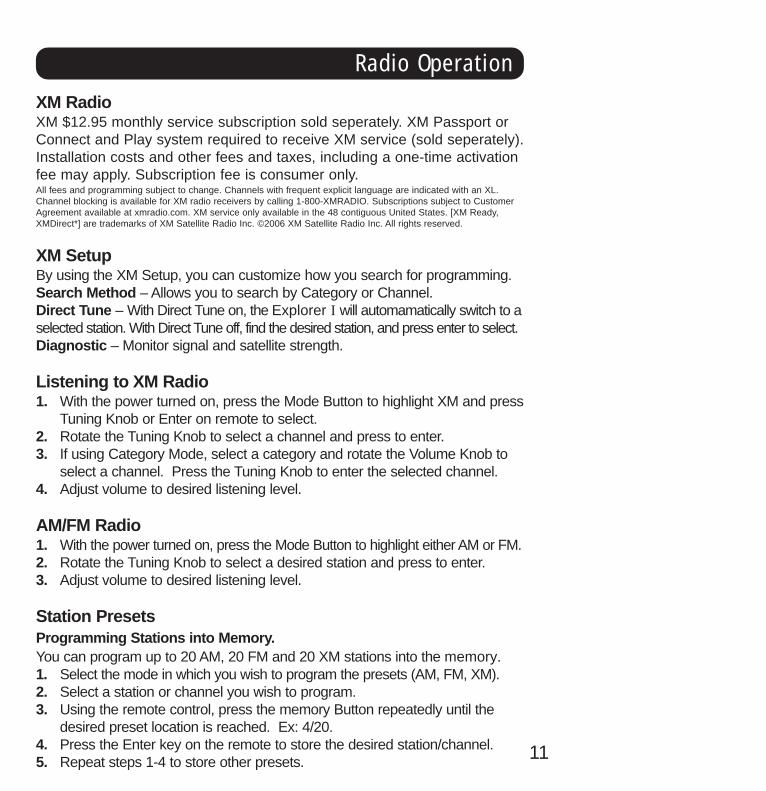
XM RadioXM $12.95 monthly service subscription sold seperately. XM Passport orConnect and Play system required to receive XM service (sold seperately).Installation costs and other fees and taxes, including a one-time activationfee may apply. Subscription fee is consumer only.All fees and programming subject to change. Channels with frequent explicit language are indicated with an XL.Channel blocking is available for XM radio receivers by calling 1-800-XMRADIO. Subscriptions subject to CustomerAgreement available at xmradio.com. XM service only available in the 48 contiguous United States. [XM Ready,XMDirect*] are trademarks of XM Satellite Radio Inc. ©2006 XM Satellite Radio Inc. All rights reserved.
XM SetupBy using the XM Setup, you can customize how you search for programming. Search Method – Allows you to search by Category or Channel. Direct Tune – With Direct Tune on, the Explorer I will automamatically switch to aselected station. With Direct Tune off, find the desired station, and press enter to select.Diagnostic – Monitor signal and satellite strength.
Listening to XM Radio1. With the power turned on, press the Mode Button to highlight XM and press
Tuning Knob or Enter on remote to select. 2. Rotate the Tuning Knob to select a channel and press to enter. 3. If using Category Mode, select a category and rotate the Volume Knob to
select a channel. Press the Tuning Knob to enter the selected channel.4. Adjust volume to desired listening level.
AM/FM Radio1. With the power turned on, press the Mode Button to highlight either AM or FM. 2. Rotate the Tuning Knob to select a desired station and press to enter.3. Adjust volume to desired listening level.
Station PresetsProgramming Stations into Memory.You can program up to 20 AM, 20 FM and 20 XM stations into the memory.1. Select the mode in which you wish to program the presets (AM, FM, XM).2. Select a station or channel you wish to program.3. Using the remote control, press the memory Button repeatedly until the
desired preset location is reached. Ex: 4/20.4. Press the Enter key on the remote to store the desired station/channel. 5. Repeat steps 1-4 to store other presets. 11

Alarm
AlarmAlarm SetupThis unit is equipped with dual alarms. The alarms can be set independently ofeach other. You can also choose to wake to AM, FM, XM or the buzzer. To setAlarm 1, follow the steps below.
1. With the power turned on, press the Menu Button.2. Rotate the Tuning Knob to select Alarm Setup and press to enter.3. Select Alarm 1 and press the Tuning Knob to enter. 4. Press the Tuning Knob to turn the selected alarm on or off.5. Rotate the Tuning Knob to select Time and press to enter.6. Set the Alarm time by rotating the Tuning Knob to select the correct hour. 7. Once the hour is set, press the Tuning Knob to select the minutes and
rotate to set. Once set, press the Tuning Knob again to enter. 8. Rotate the Tuning Knob to select Source and press enter. 9. Rotate the Tuning Knob to select AM, FM, XM or Buzzer and press to enter.10. Rotate the Tuning Knob to choose a preset to wake to and press to enter. 11. If you choose to wake to AM, FM or XM, rotate the Tuning Knob to select
Volume and press to enter. 12. Rotate the Tuning Knob to select the desired volume level and press to enter. 13. To set Alarm 2, select Alarm 2 in step 3. Repeat steps 4-12
Note: Make sure the clock is set to the correct time.
Using Remote to turn Alarms ON/OFFOnce the alarms are set, you can use the remote control to turn thealarms on and off.
1. With the power turned on, press Alarm 1 on the Remote. 2. The alarm settings for Alarm 1 will be shown.3. Press the Alarm 1 Button again to turn the alarm on/off. 4. Pressing Alarm 2 will show the settings for Alarm 25. Press Alarm 2 Button again to turn the alarm on/off.
Note: To change alarm time, source, or volume level, you must use theAlarm Setup function of the menu.
12

Alarm
Sleep and Snooze SetupThese features allow you to customize sleep and snooze settings. Sleep set-tings can be adjusted from 10-90 minutes. Snooze can be adjusted from 5-30minutes. Follow the instructions below to set each.
Sleep Setup1. With the power turned on, press the Menu Button.2. Rotate the Tuning Knob to select Sleep and Snooze Setup and press to enter.3. Rotate the Tuning Knob to select Sleep Setup and press to enter.4. Press Tuning Knob to turn Sleep on/off.
Note: You can also turn Sleep on/off by pressing Sleep on the remote.5. Rotate Tuning Knob to select time and press enter.6. Rotate again to select desired sleep time and press to enter.
Snooze Setup1. With the power turned on, press the Menu Button.2. Rotate the Tuning Knob to select Sleep and Snooze Setup and press to enter.3. Rotate the Tuning Knob to select Snooze Setup and press to enter.4. Rotate Tuning Knob to select desired snooze time and push to select.
Note: You can also set the Snooze time by pressing Snooze on theRemote and using Tune- and Tune+ to set the amount of snooze time.
Battery Back-UpYour Explorer I includes a battery back-up circuit. The battery will maintain theclock and alarm settings in the event of a power failure. The battery back-uprequires two AAA batteries (not included). The battery compartment is located onthe back of the radio. To install/replace the battery, follow the instructions below.1. Remove the Battery Back-Up Cover. 2. Remove old batteries if present.3. Install two new AAA batteries.4. Replace Battery Back-Up Cover. If the power is interrupted, the clock and alarm times will remain stored but thedisplay will be blank to conserve power. The display will come back on andshow the correct time once power has been restored.Note: In the event of a power failure, the alarm will default to buzzer mode until poweris restored. It is recommended to check/replace the batteries every 9-12 months.
13

Portable Audio Ready
Portable Audio ReadyAuxiliary OutputThis unit comes ready for portable audio. Using the supplied mini pincable, hooking up portable audio is a snap. Follow the instruction below to hookup your portable audio player.
1. Using the supplied mini pin cable, connect one end to the Aux In jack onthe back of the unit.
2. Connect the other end into the output jack or the headphone jack of yourexternal device.
3. Turn on your portable audio device and set the volume to approximately10% of full volume.
4. Press the Mode Button on your Explorer I to select Aux. 5. Begin playback of your portable audio device. 6. Adjust the volume of the Explorer I to your desired listening level.
For more volume, increase the setting on your portable device.
Auxiliary OutputThe Auxiliary Output feature is designed to let you use your Explorer I as anaudio source for other components. Follow the instructions below to hook upthe Auxiliary Output.
1. Using the supplied Mini Pin Cable, connect one end to the Line Out Jack(auxiliary output) on the back of your Explorer.
2. Plug the other end into an auxiliary input jack on the desired component.Note: If the desired component does not have a mini pin input jack,a separate cable will be needed (not included).
3. For information on using the auxiliary input feature of a specific component,refer to the auxiliary input section in the instruction manual of thedesired component.
4. Press the Mode Button on your Explorer I to select the desired output;AM, FM, XM or Aux. Note: You can still listen to your Explorer I while using theAux Out feature.
14

General
General Troubleshooting GuideThere is no power.1. Make sure AC to DC power cord is plugged in at the wall and at the back
of the unit.2. Check that the Function Knob is not in the OFF position.
There is no sound.1. Make sure the Function switch is not in the AUX position.2. Make sure the mute feature is not on.
The sound is distorted.1. Adjust the tuner and/or antenna to improve the signal strength. Under
certain circumstances, the reception may be improved by relocating the unit.2. When using the “Aux in” plug, turn off any EQ settings on the
portable device.3. Check the volume level of external device if listening to auxiliary input.
It should be set as low as possible.
XM Radio will not work.1. Check the antenna for signal and location.
15

ED WARRANTY
Crosley Radio Products are warranted against defects in material andworkmanship for a period of 1 Year beginning from the date of sale tothe original purchaser.
Should the unit fail under normal usage during the 1 Year warrantyperiod, a request for RETURN AUTHORIZATION (R.A.) must be madeby the original customer before returning the unit. Call Crosley Radiocustomer service for Return Authorization at (502) 583-4246 from 9AM to 5 PM (EST) Monday to Friday.
Upon receiving the RETURN AUTHORIZATION number from theCustomer Service Department, properly pack your unit in its originalpackaging. Include any adapters, parts, & accessories which wereoriginally provided with the product, along with a check or moneyorder for $19.95 made out to Crosley Radio to cover the handling andreturn postage. Display the R.A. # on the outside of the carton andship PREPAID via standard UPS or its equivalent.
ATTN: RETURNING DEPT2001 PRODUCTION DRIVE
BAY 2 & 3LOUISVILLE, KY 40299
CROSLEY RADIO assumes no responsibility for units sent without prior Return Authorization. The purchaser’s bill of sale is the only proof of warranty entitlement and must accompany the unit.
The warranty does not cover damage due to acts of nature, accident, misuse, abuse, negligence, com-mercial use or modification of, or to any part of the product. This warranty does not cover damage dueto improper operation or maintenance, connection to improper voltage supply, or attempted repair by any-one other than a facility authorized by Crosley Radio to service the product. This warranty does notcover products sold AS IS or consumables (such as fuses or batteries). This warranty is valid only in theUnited States.
This warranty gives the purchaser specified legal rights in addition to any rights which may vary from state to state.
In accordance with the "Moss-Magnuson Warranty Act" of July 10, 1975, this is termed a "limited war-ranty" which in no way compromises Crosley Music Wurks‚ high standards of Quality and Workmanship.
Warranty
16

Notes

1220 East Oak StreetLouisville, Kentucky 40204