Embed Size (px)
Citation preview
Instruction Manual
DVD-V5500
www.samsung.com
ENG-2
SA F E T Y IN S T R U C T I O N S
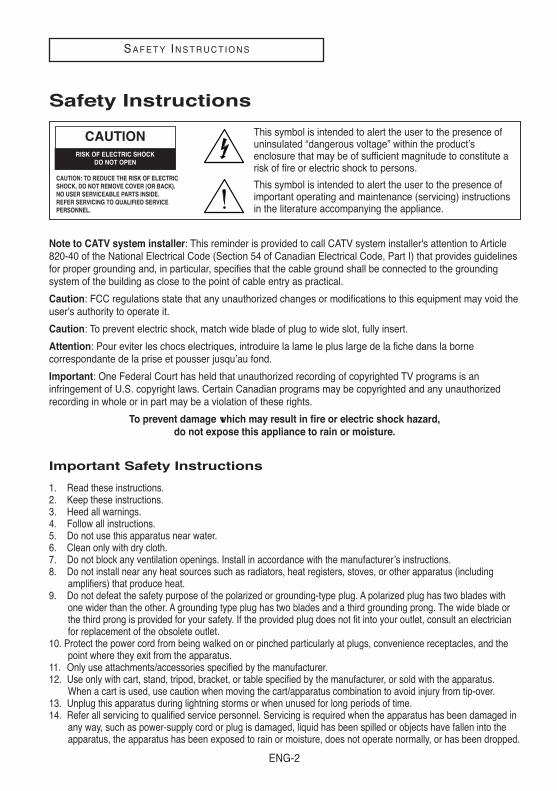
Safety Instructions
Note to CATV system installer: This reminder is provided to call CATV system installer's attention to Article820-40 of the National Electrical Code (Section 54 of Canadian Electrical Code, Part I) that provides guidelinesfor proper grounding and, in particular, specifies that the cable ground shall be connected to the groundingsystem of the building as close to the point of cable entry as practical.
Caution: FCC regulations state that any unauthorized changes or modifications to this equipment may void theuser's authority to operate it.
Caution: To prevent electric shock, match wide blade of plug to wide slot, fully insert.
Attention: Pour eviter les chocs electriques, introduire la lame le plus large de la fiche dans la bornecorrespondante de la prise et pousser jusqu’au fond.
Important: One Federal Court has held that unauthorized recording of copyrighted TV programs is aninfringement of U.S. copyright laws. Certain Canadian programs may be copyrighted and any unauthorizedrecording in whole or in part may be a violation of these rights.
To prevent damage which may result in fire or electric shock hazard, do not expose this appliance to rain or moisture.
Important Safety Instructions
1. Read these instructions.2. Keep these instructions.3. Heed all warnings.4. Follow all instructions.5. Do not use this apparatus near water.6. Clean only with dry cloth.7. Do not block any ventilation openings. Install in accordance with the manufacturer’s instructions.8. Do not install near any heat sources such as radiators, heat registers, stoves, or other apparatus (including
amplifiers) that produce heat.9. Do not defeat the safety purpose of the polarized or grounding-type plug. A polarized plug has two blades with
one wider than the other. A grounding type plug has two blades and a third grounding prong. The wide blade orthe third prong is provided for your safety. If the provided plug does not fit into your outlet, consult an electricianfor replacement of the obsolete outlet.
10. Protect the power cord from being walked on or pinched particularly at plugs, convenience receptacles, and thepoint where they exit from the apparatus.
11. Only use attachments/accessories specified by the manufacturer.12. Use only with cart, stand, tripod, bracket, or table specified by the manufacturer, or sold with the apparatus.
When a cart is used, use caution when moving the cart/apparatus combination to avoid injury from tip-over.13. Unplug this apparatus during lightning storms or when unused for long periods of time.14. Refer all servicing to qualified service personnel. Servicing is required when the apparatus has been damaged in
any way, such as power-supply cord or plug is damaged, liquid has been spilled or objects have fallen into theapparatus, the apparatus has been exposed to rain or moisture, does not operate normally, or has been dropped.
CAUTION: TO REDUCE THE RISK OF ELECTRICSHOCK, DO NOT REMOVE COVER (OR BACK). NO USER SERVICEABLE PARTS INSIDE. REFER SERVICING TO QUALIFIED SERVICEPERSONNEL.
This symbol is intended to alert the user to the presence ofuninsulated “dangerous voltage” within the product’senclosure that may be of sufficient magnitude to constitute arisk of fire or electric shock to persons.
This symbol is intended to alert the user to the presence ofimportant operating and maintenance (servicing) instructionsin the literature accompanying the appliance.
CAUTIONRISK OF ELECTRIC SHOCK
DO NOT OPEN
ENG-3
BE F O R E Y O U S TA RT
Before you start
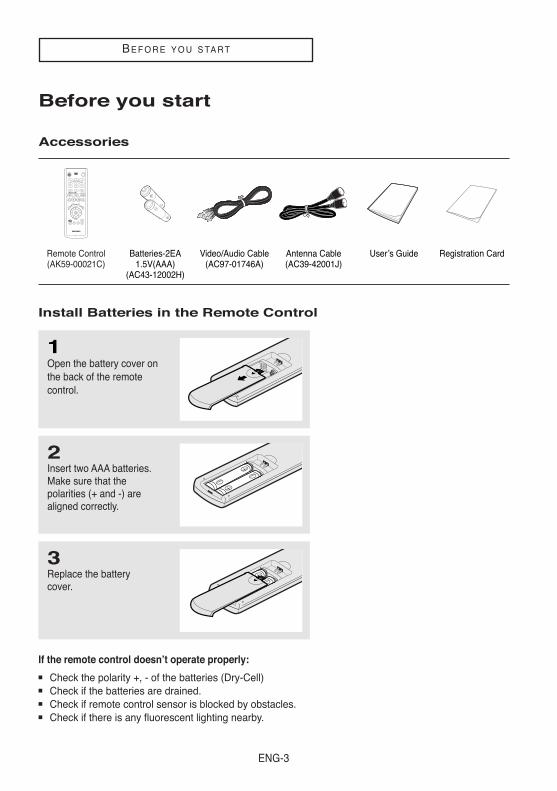
Accessories
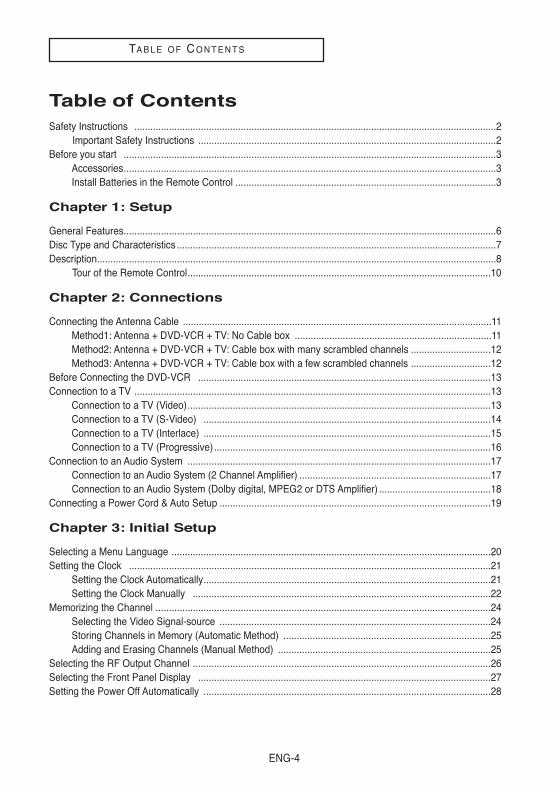
Install Batteries in the Remote Control
1Open the battery cover onthe back of the remotecontrol.
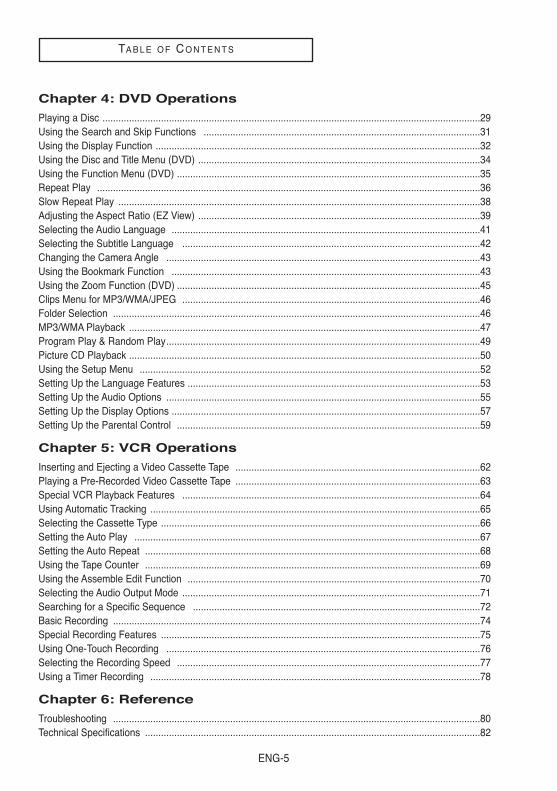
2Insert two AAA batteries. Make sure that thepolarities (+ and -) arealigned correctly.
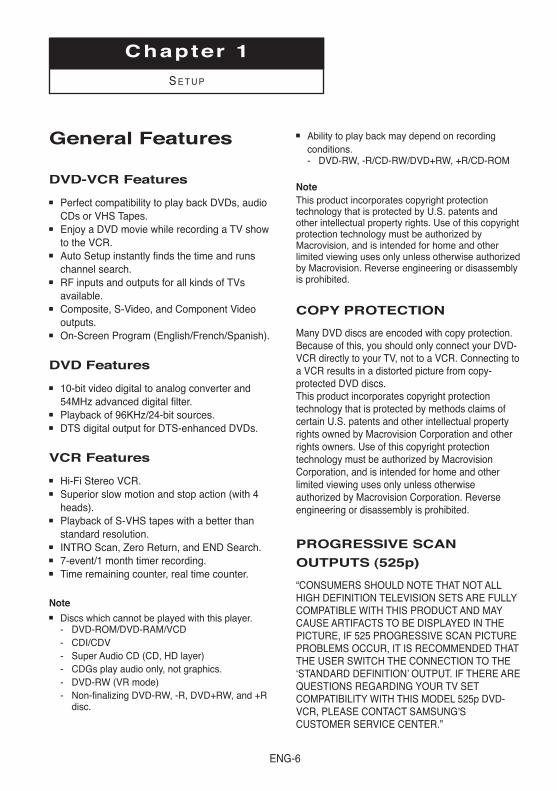
3Replace the batterycover.
If the remote control doesn’t operate properly:
Check the polarity +, - of the batteries (Dry-Cell) Check if the batteries are drained. Check if remote control sensor is blocked by obstacles. Check if there is any fluorescent lighting nearby.
Remote Control(AK59-00021C)
Batteries-2EA1.5V(AAA)
(AC43-12002H)
Video/Audio Cable(AC97-01746A)
Antenna Cable(AC39-42001J)
User’s Guide Registration Card
ENG-4
TA B L E O F CO N T E N T S
Table of ContentsSafety Instructions ........................................................................................................................................2
Important Safety Instructions ................................................................................................................2Before you start ............................................................................................................................................3
Accessories............................................................................................................................................3Install Batteries in the Remote Control ..................................................................................................3
Chapter 1: Setup
General Features............................................................................................................................................6Disc Type and Characteristics ........................................................................................................................7Description......................................................................................................................................................8
Tour of the Remote Control..................................................................................................................10
Chapter 2: Connections
Connecting the Antenna Cable ....................................................................................................................11Method1: Antenna + DVD-VCR + TV: No Cable box ..........................................................................11Method2: Antenna + DVD-VCR + TV: Cable box with many scrambled channels ..............................12Method3: Antenna + DVD-VCR + TV: Cable box with a few scrambled channels ..............................12
Before Connecting the DVD-VCR ..............................................................................................................13Connection to a TV ......................................................................................................................................13
Connection to a TV (Video)..................................................................................................................13Connection to a TV (S-Video) ............................................................................................................14Connection to a TV (Interlace) ............................................................................................................15Connection to a TV (Progressive) ........................................................................................................16
Connection to an Audio System ..................................................................................................................17Connection to an Audio System (2 Channel Amplifier) ........................................................................17Connection to an Audio System (Dolby digital, MPEG2 or DTS Amplifier) ..........................................18
Connecting a Power Cord & Auto Setup ......................................................................................................19
Chapter 3: Initial Setup
Selecting a Menu Language ........................................................................................................................20Setting the Clock ........................................................................................................................................21
Setting the Clock Automatically............................................................................................................21Setting the Clock Manually ................................................................................................................22
Memorizing the Channel ..............................................................................................................................24Selecting the Video Signal-source ......................................................................................................24Storing Channels in Memory (Automatic Method) ..............................................................................25Adding and Erasing Channels (Manual Method) ................................................................................25
Selecting the RF Output Channel ................................................................................................................26Selecting the Front Panel Display ..............................................................................................................27Setting the Power Off Automatically ............................................................................................................28
ENG-5
TA B L E O F CO N T E N T S
Chapter 4: DVD Operations
Playing a Disc ..............................................................................................................................................29Using the Search and Skip Functions ........................................................................................................31Using the Display Function ..........................................................................................................................32Using the Disc and Title Menu (DVD) ..........................................................................................................34Using the Function Menu (DVD) ..................................................................................................................35Repeat Play ................................................................................................................................................36Slow Repeat Play ........................................................................................................................................38Adjusting the Aspect Ratio (EZ View) ..........................................................................................................39Selecting the Audio Language ....................................................................................................................41Selecting the Subtitle Language ................................................................................................................42Changing the Camera Angle ......................................................................................................................43Using the Bookmark Function ....................................................................................................................43Using the Zoom Function (DVD) ..................................................................................................................45Clips Menu for MP3/WMA/JPEG ................................................................................................................46Folder Selection ..........................................................................................................................................46MP3/WMA Playback ....................................................................................................................................47Program Play & Random Play......................................................................................................................49Picture CD Playback ....................................................................................................................................50Using the Setup Menu ................................................................................................................................52Setting Up the Language Features ..............................................................................................................53Setting Up the Audio Options ......................................................................................................................55Setting Up the Display Options ....................................................................................................................57Setting Up the Parental Control ..................................................................................................................59
Chapter 5: VCR Operations
Inserting and Ejecting a Video Cassette Tape ............................................................................................62Playing a Pre-Recorded Video Cassette Tape ............................................................................................63Special VCR Playback Features ................................................................................................................64Using Automatic Tracking ............................................................................................................................65Selecting the Cassette Type ........................................................................................................................66Setting the Auto Play ..................................................................................................................................67Setting the Auto Repeat ..............................................................................................................................68Using the Tape Counter ..............................................................................................................................69Using the Assemble Edit Function ..............................................................................................................70Selecting the Audio Output Mode ................................................................................................................71Searching for a Specific Sequence ............................................................................................................72Basic Recording ..........................................................................................................................................74Special Recording Features ........................................................................................................................75Using One-Touch Recording ......................................................................................................................76Selecting the Recording Speed ..................................................................................................................77Using a Timer Recording ............................................................................................................................78
Chapter 6: Reference
Troubleshooting ..........................................................................................................................................80Technical Specifications ..............................................................................................................................82
ENG-6
Chapter 1
SE T U P
General Features
DVD-VCR Features
Perfect compatibility to play back DVDs, audioCDs or VHS Tapes.
Enjoy a DVD movie while recording a TV showto the VCR.
Auto Setup instantly finds the time and runschannel search.
RF inputs and outputs for all kinds of TVsavailable.
Composite, S-Video, and Component Videooutputs.
On-Screen Program (English/French/Spanish).
DVD Features
10-bit video digital to analog converter and54MHz advanced digital filter.
Playback of 96KHz/24-bit sources. DTS digital output for DTS-enhanced DVDs.
VCR Features
Hi-Fi Stereo VCR. Superior slow motion and stop action (with 4
heads). Playback of S-VHS tapes with a better than
standard resolution. INTRO Scan, Zero Return, and END Search. 7-event/1 month timer recording. Time remaining counter, real time counter.
Note Discs which cannot be played with this player.
- DVD-ROM/DVD-RAM/VCD- CDI/CDV- Super Audio CD (CD, HD layer)- CDGs play audio only, not graphics.- DVD-RW (VR mode) - Non-finalizing DVD-RW, -R, DVD+RW, and +R
disc.
Ability to play back may depend on recordingconditions.- DVD-RW, -R/CD-RW/DVD+RW, +R/CD-ROM
NoteThis product incorporates copyright protectiontechnology that is protected by U.S. patents andother intellectual property rights. Use of this copyrightprotection technology must be authorized byMacrovision, and is intended for home and otherlimited viewing uses only unless otherwise authorizedby Macrovision. Reverse engineering or disassemblyis prohibited.
COPY PROTECTION
Many DVD discs are encoded with copy protection.Because of this, you should only connect your DVD-VCR directly to your TV, not to a VCR. Connecting toa VCR results in a distorted picture from copy-protected DVD discs.This product incorporates copyright protectiontechnology that is protected by methods claims ofcertain U.S. patents and other intellectual propertyrights owned by Macrovision Corporation and otherrights owners. Use of this copyright protectiontechnology must be authorized by MacrovisionCorporation, and is intended for home and otherlimited viewing uses only unless otherwiseauthorized by Macrovision Corporation. Reverseengineering or disassembly is prohibited.
PROGRESSIVE SCAN
OUTPUTS (525p)
“CONSUMERS SHOULD NOTE THAT NOT ALLHIGH DEFINITION TELEVISION SETS ARE FULLYCOMPATIBLE WITH THIS PRODUCT AND MAYCAUSE ARTIFACTS TO BE DISPLAYED IN THEPICTURE, IF 525 PROGRESSIVE SCAN PICTUREPROBLEMS OCCUR, IT IS RECOMMENDED THATTHE USER SWITCH THE CONNECTION TO THE‘STANDARD DEFINITION’ OUTPUT. IF THERE AREQUESTIONS REGARDING YOUR TV SETCOMPATIBILITY WITH THIS MODEL 525p DVD-VCR, PLEASE CONTACT SAMSUNG'SCUSTOMER SERVICE CENTER.”

ENG-7
SE T U P
Disc Type and CharacteristicsThis DVD-VCR is capable of playing the following types of discs with the corresponding logos:
12 Cm
8 Cm
Single-sided 240 min.Double-sided 480 min.
Single-sided 80 min.Double-sided 160 min.
Audio+
Video
- DVD contains excellent soundand video due to Dolby Digitaland MPEG-2 system.
- Various screen and audiofunctions can be easily selectedthrough the on-screen menu.
Disc Types (Logos) Recording Types Disc Size Max. Playing Time Characteristics
DVD
12 Cm
8 Cm
74 min.
20 min.
Audio
- CD is recorded as a DigitalSignal with better audio quality,less distortion and lessdeterioration of audio qualityover time.
AUDIO-CD
CD-R,CD-RW and DVD-RW, -R, DVD+RW, +R discs may not be playable in all cases due to the disctype or condition of the recording.
Disc Markings Region Number
Both the DVD-VCR and the discs arecoded by region. These regional codesmust match in order for the disc to play.If the codes do not match, the disc willnot play.
The Region Number for this player isdescribed on the rear panel of the player.
NTSC
~
DIGITALSOUND
STEREO
Play Region Number
NTSC broadcast system in U.S.A, Canada, Korea,Japan, etc.
Dolby Digital disc
Stereo disc
Digital Audio disc
DTS disc
MP3 disc
You must only insert one DVD disc at a time. Inserting twoor more discs will not allow playback and may causedamage to the DVD-VCR.
ENG-8
SE T U P
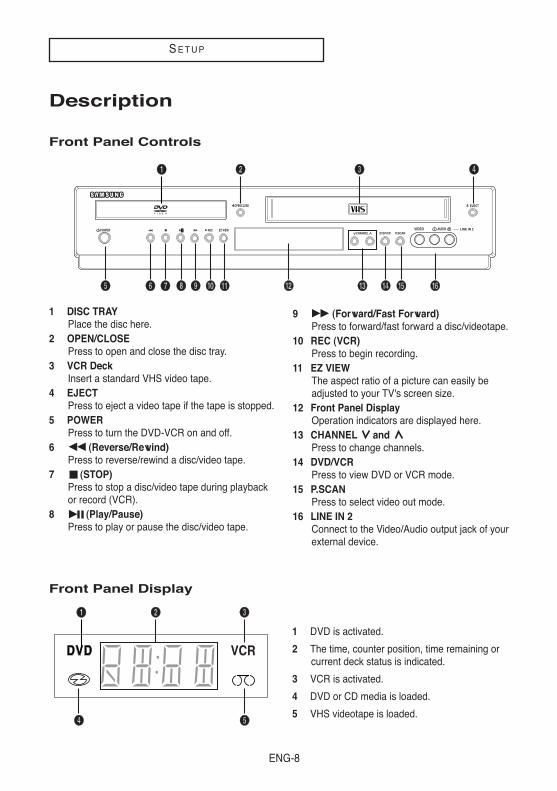
1 DISC TRAYPlace the disc here.
2 OPEN/CLOSEPress to open and close the disc tray.
3 VCR DeckInsert a standard VHS video tape.
4 EJECTPress to eject a video tape if the tape is stopped.
5 POWERPress to turn the DVD-VCR on and off.
6 (Reverse/Rewind)Press to reverse/rewind a disc/video tape.
7 (STOP)Press to stop a disc/video tape during playbackor record (VCR).
8 (Play/Pause)Press to play or pause the disc/video tape.
9 (Forward/Fast Forward)Press to forward/fast forward a disc/videotape.
10 REC (VCR)Press to begin recording.
11 EZ VIEWThe aspect ratio of a picture can easily beadjusted to your TV's screen size.
12 Front Panel DisplayOperation indicators are displayed here.
13 CHANNEL and Press to change channels.
14 DVD/VCRPress to view DVD or VCR mode.
15 P.SCANPress to select video out mode.
16 LINE IN 2Connect to the Video/Audio output jack of yourexternal device.
Description
Front Panel Controls
ŒŒ
ˆ ØØ ∏∏ ”” ’’ ˝ ÔÔ ÚÚ ÆÆ ııÒÒ
´ ˇ ¨
1 DVD is activated.
2 The time, counter position, time remaining orcurrent deck status is indicated.
3 VCR is activated.
4 DVD or CD media is loaded.
5 VHS videotape is loaded.
Front Panel Display
ŒŒ ´ ˇ
¨ ˆ
ENG-9
SE T U P
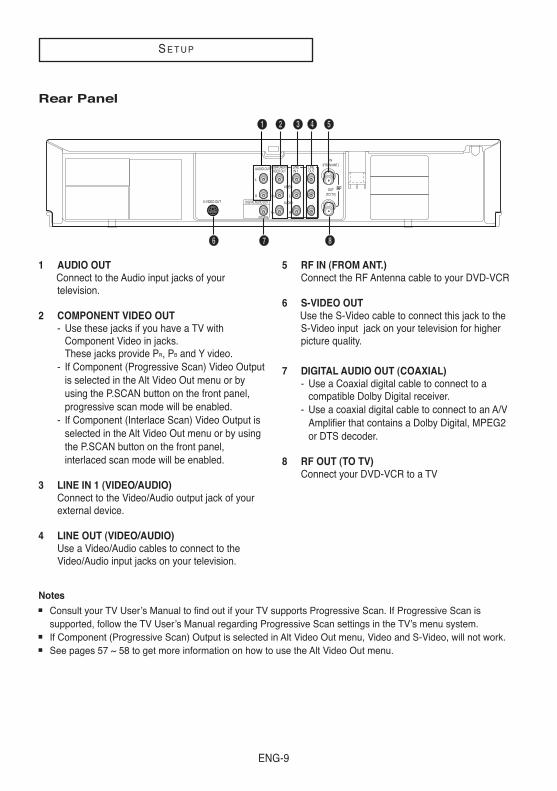
1 AUDIO OUT Connect to the Audio input jacks of yourtelevision.
2 COMPONENT VIDEO OUT- Use these jacks if you have a TV with
Component Video in jacks. These jacks provide PR, PB and Y video.
- If Component (Progressive Scan) Video Outputis selected in the Alt Video Out menu or byusing the P.SCAN button on the front panel,progressive scan mode will be enabled.
- If Component (Interlace Scan) Video Output isselected in the Alt Video Out menu or by usingthe P.SCAN button on the front panel,interlaced scan mode will be enabled.
3 LINE IN 1 (VIDEO/AUDIO)Connect to the Video/Audio output jack of yourexternal device.
4 LINE OUT (VIDEO/AUDIO)Use a Video/Audio cables to connect to theVideo/Audio input jacks on your television.
5 RF IN (FROM ANT.)Connect the RF Antenna cable to your DVD-VCR
6 S-VIDEO OUTUse the S-Video cable to connect this jack to theS-Video input jack on your television for higherpicture quality.
7 DIGITAL AUDIO OUT (COAXIAL)- Use a Coaxial digital cable to connect to a
compatible Dolby Digital receiver.- Use a coaxial digital cable to connect to an A/V
Amplifier that contains a Dolby Digital, MPEG2or DTS decoder.
8 RF OUT (TO TV)Connect your DVD-VCR to a TV
Notes Consult your TV User’s Manual to find out if your TV supports Progressive Scan. If Progressive Scan is
supported, follow the TV User’s Manual regarding Progressive Scan settings in the TV’s menu system. If Component (Progressive Scan) Output is selected in Alt Video Out menu, Video and S-Video, will not work. See pages 57 ~ 58 to get more information on how to use the Alt Video Out menu.
ŒŒ ´ ˇ ¨ ˆ
ØØ ∏∏ ””
Rear Panel
ENG-10
SE T U P
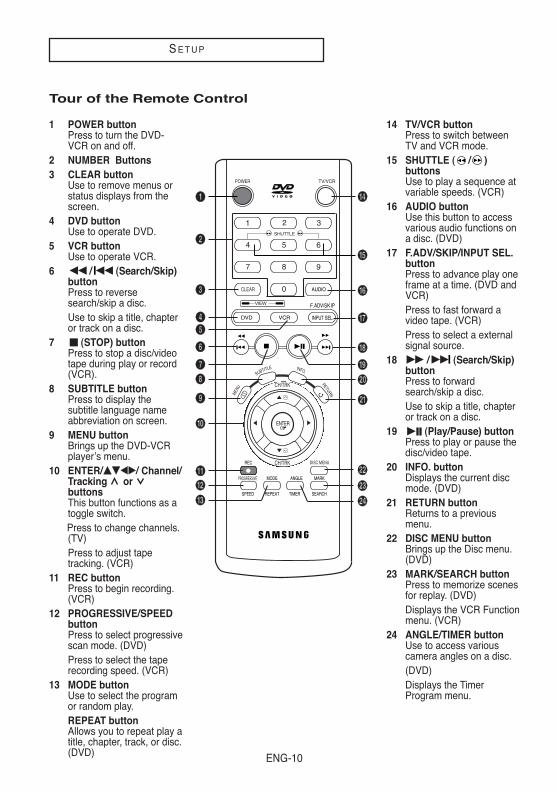
1 POWER buttonPress to turn the DVD-VCR on and off.
2 NUMBER Buttons3 CLEAR button
Use to remove menus orstatus displays from thescreen.
4 DVD buttonUse to operate DVD.
5 VCR buttonUse to operate VCR.
6 / (Search/Skip)buttonPress to reversesearch/skip a disc.Use to skip a title, chapteror track on a disc.
7 (STOP) buttonPress to stop a disc/videotape during play or record(VCR).
8 SUBTITLE buttonPress to display thesubtitle language nameabbreviation on screen.
9 MENU buttonBrings up the DVD-VCRplayer’s menu.
10 ENTER/……††œœ√√/ Channel/Tracking or buttonsThis button functions as atoggle switch.Press to change channels.(TV)Press to adjust tapetracking. (VCR)
11 REC buttonPress to begin recording.(VCR)
12 PROGRESSIVE/SPEEDbuttonPress to select progressivescan mode. (DVD)Press to select the taperecording speed. (VCR)
13 MODE buttonUse to select the programor random play.REPEAT buttonAllows you to repeat play atitle, chapter, track, or disc.(DVD)
ŒŒ ÚÚ
ÆÆ
ıı
˜
¯
¿¿
¸
˛
◊◊
˘
±±
´
ˇ
¨
ØØ
””
’’
˝
ÔÔ
ˆ
∏∏
ÒÒ
Tour of the Remote Control
14 TV/VCR buttonPress to switch betweenTV and VCR mode.
15 SHUTTLE ( / )buttonsUse to play a sequence atvariable speeds. (VCR)
16 AUDIO buttonUse this button to accessvarious audio functions ona disc. (DVD)
17 F.ADV/SKIP/INPUT SEL.buttonPress to advance play oneframe at a time. (DVD andVCR)Press to fast forward avideo tape. (VCR)Press to select a externalsignal source.
18 / (Search/Skip)buttonPress to forwardsearch/skip a disc.Use to skip a title, chapteror track on a disc.
19 (Play/Pause) buttonPress to play or pause thedisc/video tape.
20 INFO. buttonDisplays the current discmode. (DVD)
21 RETURN buttonReturns to a previousmenu.
22 DISC MENU buttonBrings up the Disc menu.(DVD)
23 MARK/SEARCH buttonPress to memorize scenesfor replay. (DVD)Displays the VCR Functionmenu. (VCR)
24 ANGLE/TIMER buttonUse to access variouscamera angles on a disc.(DVD)Displays the TimerProgram menu.
ENG-11
Chapter 2
CO N N E C T I O N S
Connecting the Antenna CableThere are several ways to connect your DVD-VCR. Select one of the following antenna connections that bestsuits you below. Method 1: Antenna + DVD-VCR + TV: No Cable box Method 2: Antenna +Cable box + DVD-VCR + TV: Cable box with many scrambled channels Method 3: Antenna + DVD-VCR + Cable box +TV: Cable box with a few scrambled channels
- If you are using an off-air antenna that has 300-ohm twin flat leads, use an externalantenna connector (300-75 ohm adaptor: not supplied) to connect the antenna to theDVD-VCR.
- If you have two separate antennas (one VHF and the other UHF), use a UHF/VHFcombiner-adaptor (available at most electronics shops) to connect the antenna to theDVD-VCR.
- The RF OUT(TO TV) jack of this product sends signals received through the antennaand output Audio/Video signals.
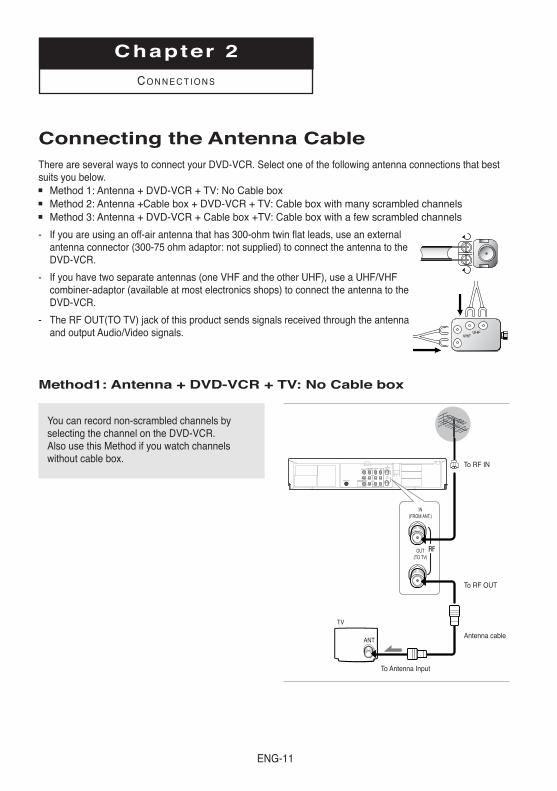
Method1: Antenna + DVD-VCR + TV: No Cable box
You can record non-scrambled channels byselecting the channel on the DVD-VCR. Also use this Method if you watch channelswithout cable box.
To RF IN
To RF OUT
Antenna cable
To Antenna Input
ENG-12
CO N N E C T I O N S
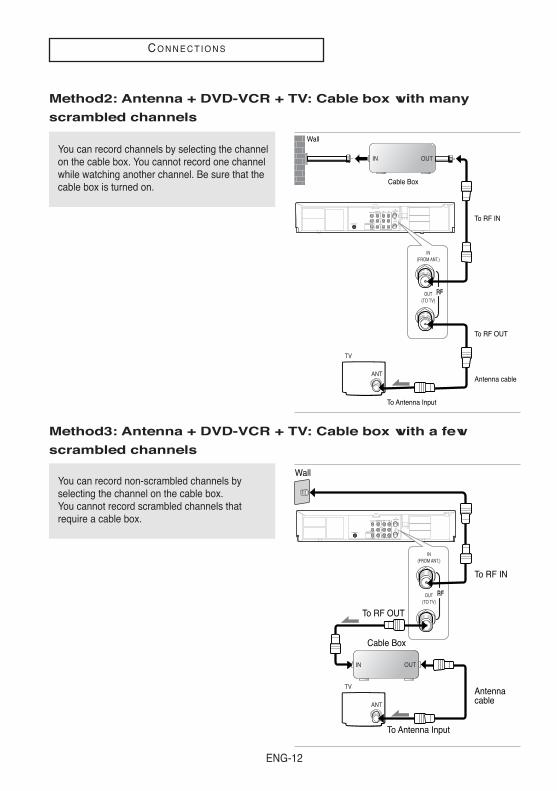
Method2: Antenna + DVD-VCR + TV: Cable box with many
scrambled channels
You can record channels by selecting the channelon the cable box. You cannot record one channelwhile watching another channel. Be sure that thecable box is turned on.
Method3: Antenna + DVD-VCR + TV: Cable box with a few
scrambled channels
You can record non-scrambled channels byselecting the channel on the cable box. You cannot record scrambled channels thatrequire a cable box.
To RF IN
Cable Box
Wall
To RF OUT
Antenna cable
To Antenna Input
To RF IN
Cable Box
Wall
To RF OUT
Antennacable
To Antenna Input
ENG-13
CO N N E C T I O N S
Before Connecting the DVD-VCR- Always turn off the DVD-VCR, TV, and other components before you connect or disconnect any cables.
- Refer to the user’s manual of the additional components (such as a TV) you are connecting for moreinformation on those particular components.
Connection to a TVThe following shows examples of connections commonly used to connect the DVD-VCR with a TV and othercomponents.
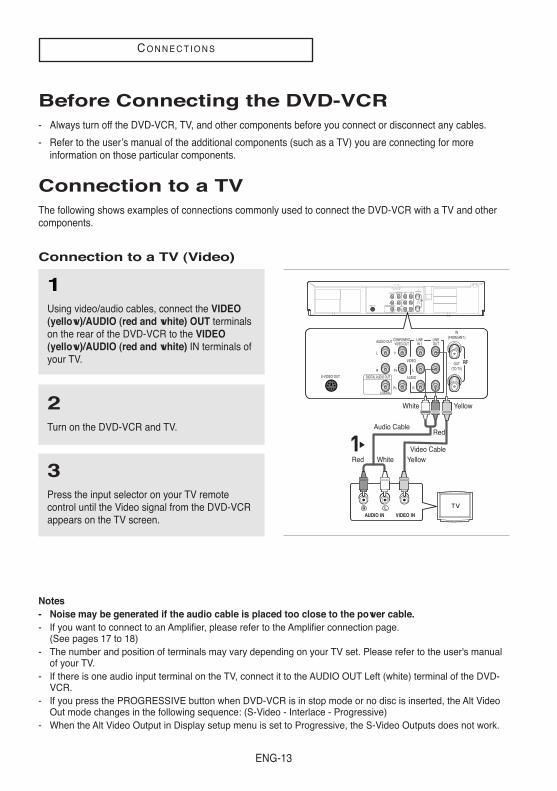
Connection to a TV (Video)
1Using video/audio cables, connect the VIDEO(yellow)/AUDIO (red and white) OUT terminalson the rear of the DVD-VCR to the VIDEO(yellow)/AUDIO (red and white) IN terminals ofyour TV.
2Turn on the DVD-VCR and TV.
3Press the input selector on your TV remotecontrol until the Video signal from the DVD-VCRappears on the TV screen.
Notes- Noise may be generated if the audio cable is placed too close to the power cable. - If you want to connect to an Amplifier, please refer to the Amplifier connection page.
(See pages 17 to 18)- The number and position of terminals may vary depending on your TV set. Please refer to the user's manual
of your TV.- If there is one audio input terminal on the TV, connect it to the AUDIO OUT Left (white) terminal of the DVD-
VCR.- If you press the PROGRESSIVE button when DVD-VCR is in stop mode or no disc is inserted, the Alt Video
Out mode changes in the following sequence: (S-Video - Interlace - Progressive)- When the Alt Video Output in Display setup menu is set to Progressive, the S-Video Outputs does not work.
White
White YellowRed
Audio Cable
Video Cable
Red
Yellow

ENG-14
CO N N E C T I O N S
Connection to a TV (S-Video)
- Connecting to your TV using an S-Video cable.- You will enjoy high quality images. S-Video separates the picture element into black and white(Y) and
color(C) signals to present clearer images than regular video input mode. (Audio signals aredelivered through the audio output.)
1Using an S-Video cable (not included), connectthe S-VIDEO OUT terminal on the rear of theDVD-VCR to the S-VIDEO IN terminal of your TV.
2Using the audio cables, connect the AUDIO (redand white) OUT terminals on the rear of theDVD-VCR to the AUDIO (red and white) INterminals of your TV.
Turn on the DVD-VCR and TV.
3With the unit in stop mode, set the Alt videooutput to S-Video in the Display Setup menu (seepages 57~58) or press the PROGRESSIVEbutton on the remote control until S-Video isoutput.
Notes- If you want to connect to an Amplifier, please refer to the Amplifier connection page. (See pages 17 to 18)- The number and position of terminals may vary depending on the TV set.
Please refer to the user's manual of your TV.
White
Audio CableS-Video Cable(not included)
Red
Red White
4Press the input selector on your TV remotecontrol until the S-Video signal from the DVD-VCR appears on your TV screen.
ENG-15
CO N N E C T I O N S
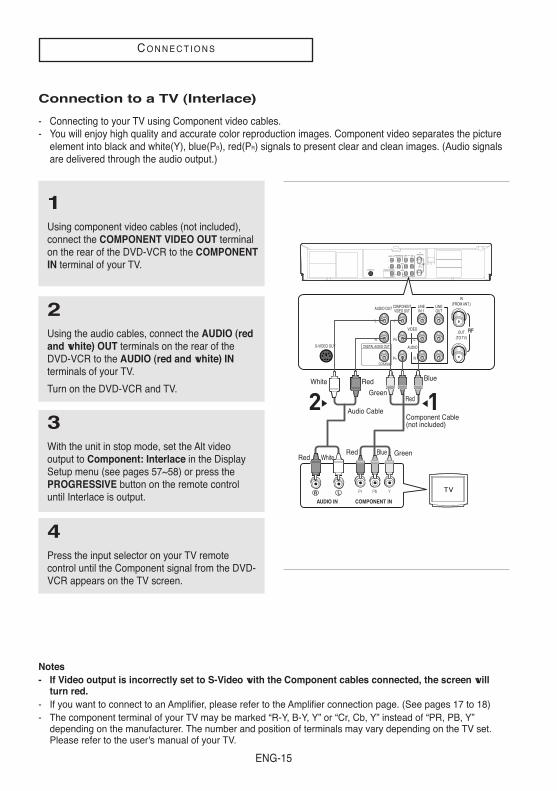
Connection to a TV (Interlace)
- Connecting to your TV using Component video cables.- You will enjoy high quality and accurate color reproduction images. Component video separates the picture
element into black and white(Y), blue(PB), red(PR) signals to present clear and clean images. (Audio signalsare delivered through the audio output.)
1Using component video cables (not included),connect the COMPONENT VIDEO OUT terminalon the rear of the DVD-VCR to the COMPONENTIN terminal of your TV.
2Using the audio cables, connect the AUDIO (redand white) OUT terminals on the rear of theDVD-VCR to the AUDIO (red and white) INterminals of your TV.
Turn on the DVD-VCR and TV.
4Press the input selector on your TV remotecontrol until the Component signal from the DVD-VCR appears on the TV screen.
3With the unit in stop mode, set the Alt videooutput to Component: Interlace in the DisplaySetup menu (see pages 57~58) or press thePROGRESSIVE button on the remote controluntil Interlace is output.
Notes- If Video output is incorrectly set to S-Video with the Component cables connected, the screen will
turn red.- If you want to connect to an Amplifier, please refer to the Amplifier connection page. (See pages 17 to 18)- The component terminal of your TV may be marked “R-Y, B-Y, Y” or “Cr, Cb, Y” instead of “PR, PB, Y”
depending on the manufacturer. The number and position of terminals may vary depending on the TV set.Please refer to the user's manual of your TV.
White
Audio CableComponent Cable(not included)
Red
Red White
Green
Blue
BlueRed
Red
Green
ENG-16
CO N N E C T I O N S
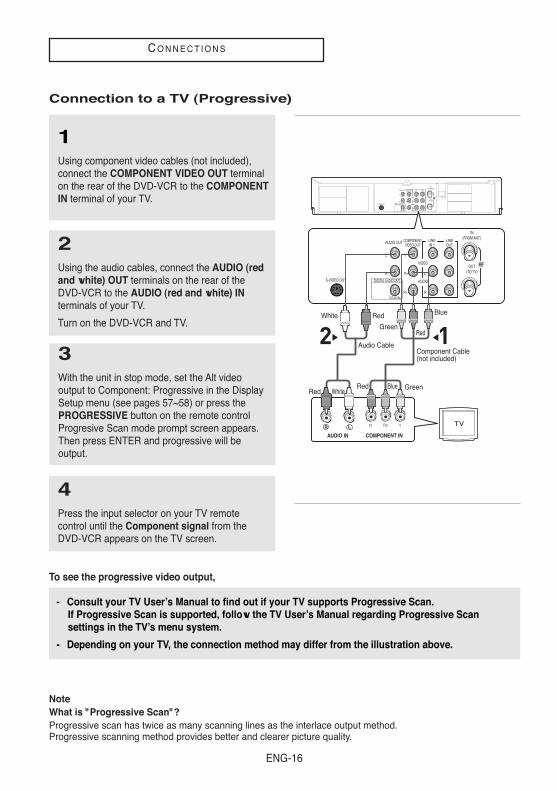
Connection to a TV (Progressive)
1Using component video cables (not included),connect the COMPONENT VIDEO OUT terminalon the rear of the DVD-VCR to the COMPONENTIN terminal of your TV.
2Using the audio cables, connect the AUDIO (redand white) OUT terminals on the rear of theDVD-VCR to the AUDIO (red and white) INterminals of your TV.
Turn on the DVD-VCR and TV.
4Press the input selector on your TV remotecontrol until the Component signal from theDVD-VCR appears on the TV screen.
3With the unit in stop mode, set the Alt videooutput to Component: Progressive in the DisplaySetup menu (see pages 57~58) or press thePROGRESSIVE button on the remote controlProgresive Scan mode prompt screen appears.Then press ENTER and progressive will beoutput.
NoteWhat is "Progressive Scan"?Progressive scan has twice as many scanning lines as the interlace output method. Progressive scanning method provides better and clearer picture quality.
To see the progressive video output,
- Consult your TV User’s Manual to find out if your TV supports Progressive Scan. If Progressive Scan is supported, follow the TV User’s Manual regarding Progressive Scansettings in the TV’s menu system.
- Depending on your TV, the connection method may differ from the illustration above.
White
Audio CableComponent Cable(not included)
Red
Red White
Green
Blue
BlueRed
Red
Green
ENG-17
CO N N E C T I O N S
Connection to an Audio System
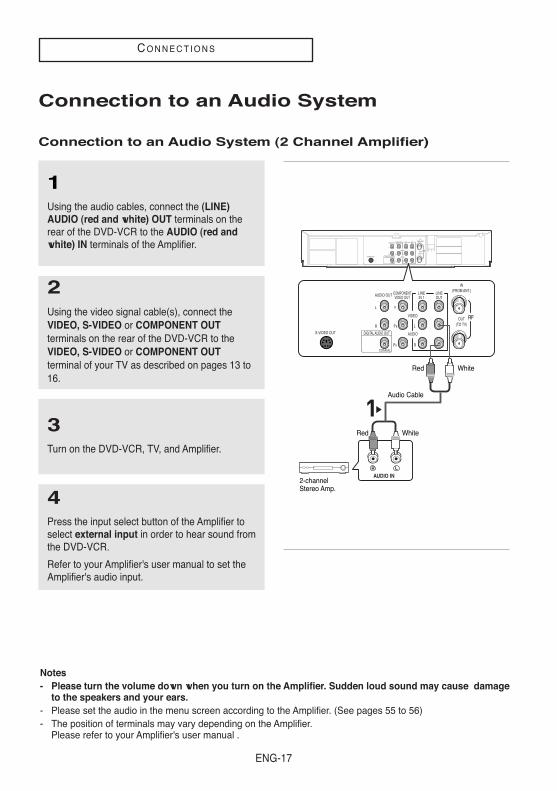
Connection to an Audio System (2 Channel Amplifier)
1Using the audio cables, connect the (LINE)AUDIO (red and white) OUT terminals on therear of the DVD-VCR to the AUDIO (red andwhite) IN terminals of the Amplifier.
2Using the video signal cable(s), connect theVIDEO, S-VIDEO or COMPONENT OUTterminals on the rear of the DVD-VCR to theVIDEO, S-VIDEO or COMPONENT OUTterminal of your TV as described on pages 13 to16.
3Turn on the DVD-VCR, TV, and Amplifier.
4Press the input select button of the Amplifier toselect external input in order to hear sound fromthe DVD-VCR.
Refer to your Amplifier's user manual to set theAmplifier's audio input.
Notes- Please turn the volume down when you turn on the Amplifier. Sudden loud sound may cause damage
to the speakers and your ears.- Please set the audio in the menu screen according to the Amplifier. (See pages 55 to 56)- The position of terminals may vary depending on the Amplifier.
Please refer to your Amplifier's user manual .
Red
Audio Cable
White
Red
2-channelStereo Amp.
White

ENG-18
CO N N E C T I O N S
Connection to an Audio System (Dolby digital, MPEG2 or DTS
Amplifier)
1Using a coaxial cable (not included), connect theDIGITAL AUDIO OUT (COAXIAL) terminal onthe rear of the DVD-VCR to the DIGITAL AUDIOIN (COAXIAL) terminal of the Amplifier.
3Turn on the DVD-VCR, TV, and Amplifier.
4Press the input select button of the Amplifier toselect external input in order to hear sound fromthe DVD-VCR.
Refer to your Amplifier's user manual to set theAmplifier's audio input.
Notes- When you connect the DVD-VCR to DTS Amplifier and play a DTS disc, set the DTS to On in Audio
Setup menu. If it is set to Off, sound will not be heard, or there will be a loud sound.- Please turn the volume down when you turn on the Amplifier. Sudden loud sound may cause damage
to the speakers and your ears.- Please set the audio in the menu screen according to the Amplifier. (See pages 55 to 56)- The position of terminals may vary depending on the Amplifier.
Please refer to the user's manual of the Amplifier.
2Using the video signal cable(s), connect the S-VIDEO or COMPONENT OUT terminals on therear of the DVD-VCR to the S-VIDEO orCOMPONENT OUT terminal of your TV asdescribed on pages 14 to 16.
Dolby digital orDTS Amp.
Coaxial Cable(not included)
ENG-19
CO N N E C T I O N S
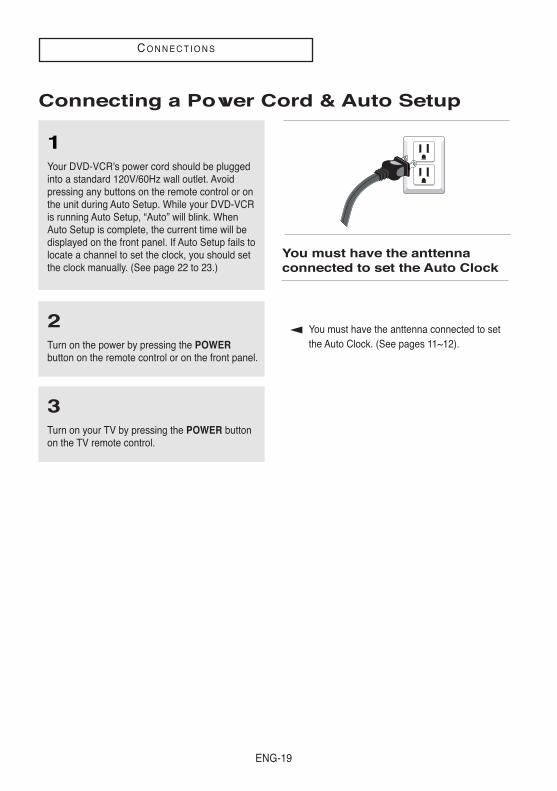
You must have the anttennaconnected to set the Auto Clock
Connecting a Power Cord & Auto Setup
1Your DVD-VCR's power cord should be pluggedinto a standard 120V/60Hz wall outlet. Avoidpressing any buttons on the remote control or onthe unit during Auto Setup. While your DVD-VCRis running Auto Setup, “Auto” will blink. WhenAuto Setup is complete, the current time will bedisplayed on the front panel. If Auto Setup fails tolocate a channel to set the clock, you should setthe clock manually. (See page 22 to 23.)
2Turn on the power by pressing the POWERbutton on the remote control or on the front panel.
3Turn on your TV by pressing the POWER buttonon the TV remote control.
You must have the anttenna connected to setthe Auto Clock. (See pages 11~12).

ENG-20
Chapter 3
IN I T I A L SE T U P
Selecting a Menu LanguageTo change the on-screen MENU language to English, French or Spanish, follow these steps.
1Press the MENU button.
2Press the …/† buttons toselect Setup, then press the √or ENTER button.
5Press the MENU button to exit.
3Press the …/† buttons toselect Language, then pressthe √ or ENTER button.
4Press the …/† buttons toselect the appropriatelanguage : English, Françaisor Español.
Press the ENTER button.
ENG-21
IN I T I A L SE T U P
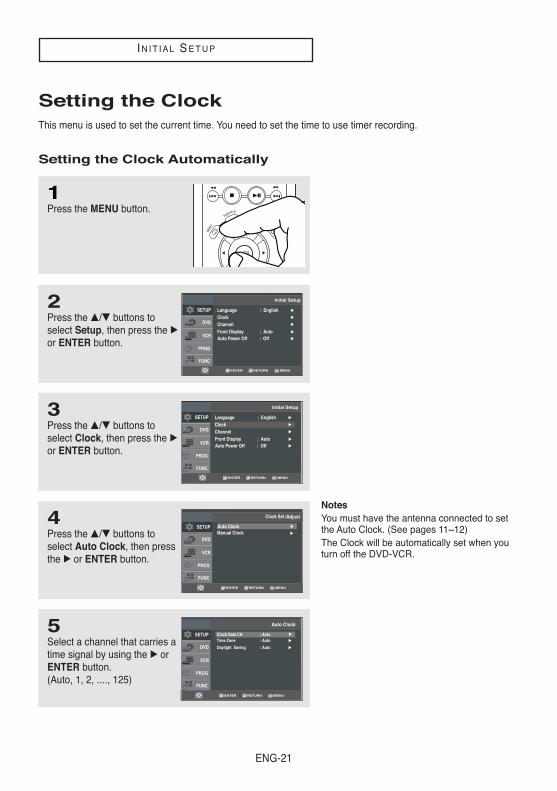
Setting the ClockThis menu is used to set the current time. You need to set the time to use timer recording.
Setting the Clock Automatically
1Press the MENU button.
2Press the …/† buttons toselect Setup, then press the √or ENTER button.
3Press the …/† buttons toselect Clock, then press the √or ENTER button.
4Press the …/† buttons toselect Auto Clock, then pressthe √ or ENTER button.
5Select a channel that carries atime signal by using the √ orENTER button.(Auto, 1, 2, ...., 125)
NotesYou must have the antenna connected to setthe Auto Clock. (See pages 11~12) The Clock will be automatically set when youturn off the DVD-VCR.
ENG-22
IN I T I A L SE T U P
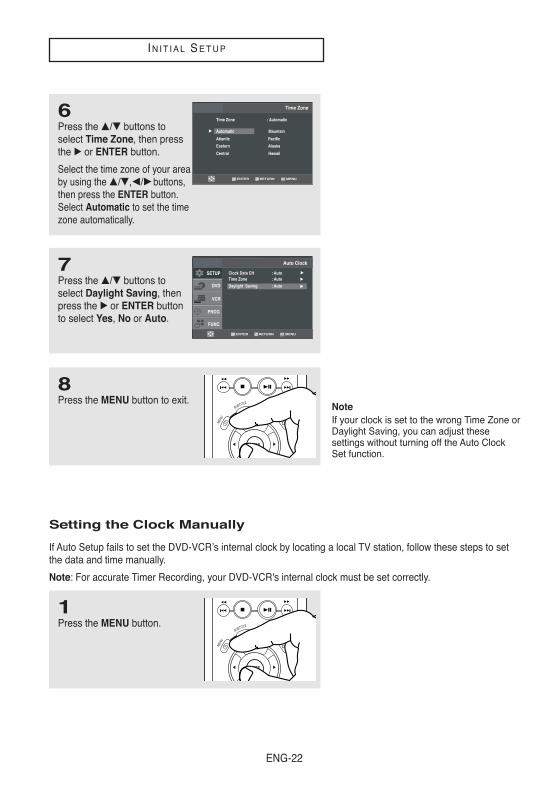
6Press the …/† buttons toselect Time Zone, then pressthe √ or ENTER button.
Select the time zone of your areaby using the …/†,œ/√ buttons,then press the ENTER button.Select Automatic to set the timezone automatically.
8Press the MENU button to exit.
7Press the …/† buttons toselect Daylight Saving, thenpress the √ or ENTER buttonto select Yes, No or Auto.
Setting the Clock Manually
If Auto Setup fails to set the DVD-VCR’s internal clock by locating a local TV station, follow these steps to setthe data and time manually.
Note: For accurate Timer Recording, your DVD-VCR's internal clock must be set correctly.
1Press the MENU button.
NoteIf your clock is set to the wrong Time Zone orDaylight Saving, you can adjust thesesettings without turning off the Auto ClockSet function.
ENG-23
IN I T I A L SE T U P
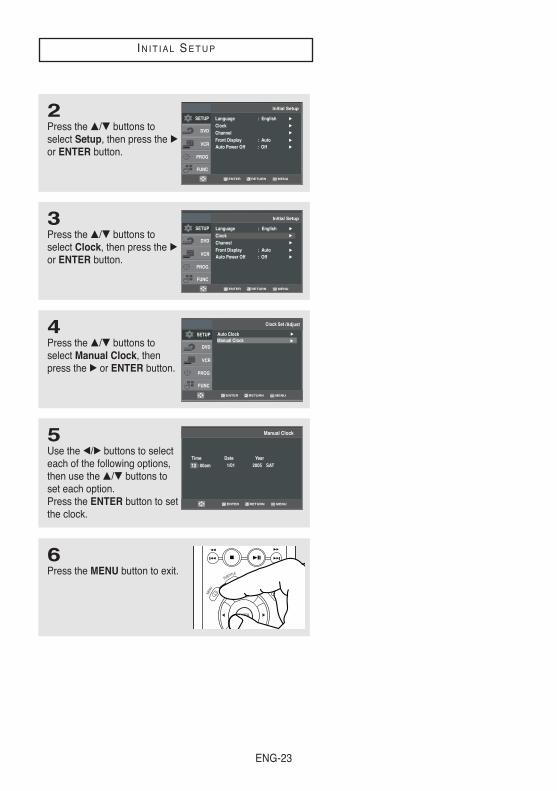
6Press the MENU button to exit.
2Press the …/† buttons toselect Setup, then press the √or ENTER button.
3Press the …/† buttons toselect Clock, then press the √or ENTER button.
4Press the …/† buttons toselect Manual Clock, thenpress the √ or ENTER button.
5Use the œ/√ buttons to selecteach of the following options,then use the …/† buttons toset each option. Press the ENTER button to setthe clock.
Manual Clock
2005 SATTime Date Year
1/0112 : 00am
ENG-24
IN I T I A L SE T U P
Memorizing the Channels
Selecting the Video Signal-source
This feature allows you to manually set the DVD-VCR’s tuner band to Antenna or Cable, whichever youconnected to the Antenna In jack during initial setup.
Use this setting only if Auto Setup detected the incorrect tuner band, i.e. channels are coming in on the wrongchannel numbers.
1Press the MENU button.
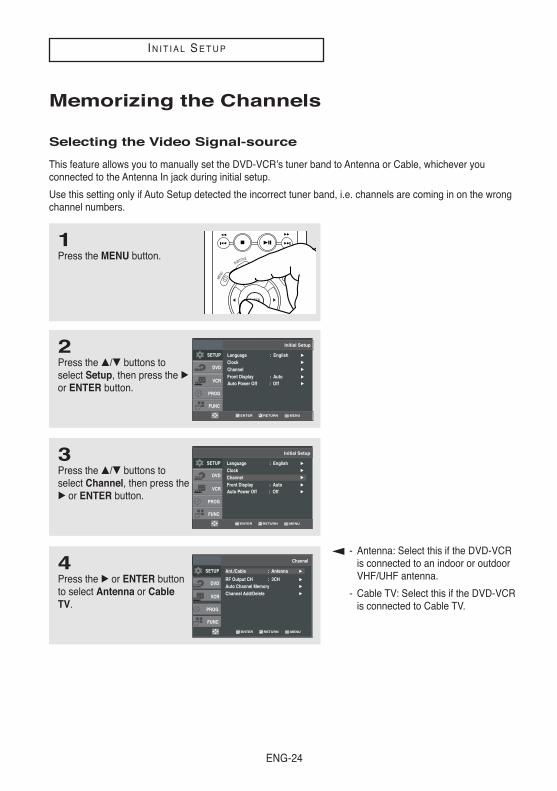
2Press the …/† buttons toselect Setup, then press the √or ENTER button.
3Press the …/† buttons toselect Channel, then press the√ or ENTER button.
4Press the √ or ENTER buttonto select Antenna or CableTV.
- Antenna: Select this if the DVD-VCRis connected to an indoor or outdoorVHF/UHF antenna.
- Cable TV: Select this if the DVD-VCRis connected to Cable TV.
ENG-25
IN I T I A L SE T U P
Storing Channels in Memory (Automatic Method)
Auto Channel Memory will automatically seek and store all active channels in your area.
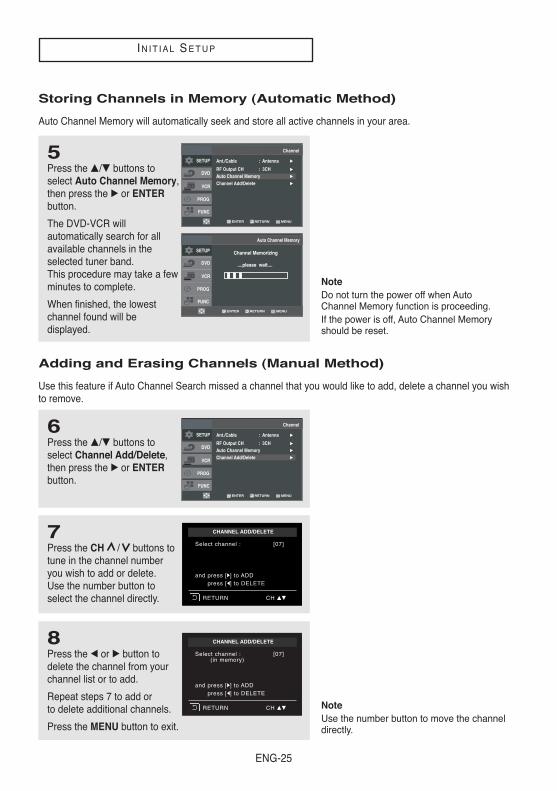
5Press the …/† buttons toselect Auto Channel Memory,then press the √ or ENTERbutton.
The DVD-VCR willautomatically search for all available channels in theselected tuner band. This procedure may take a fewminutes to complete.
When finished, the lowestchannel found will bedisplayed.
NoteDo not turn the power off when AutoChannel Memory function is proceeding.If the power is off, Auto Channel Memoryshould be reset.
NoteUse the number button to move the channeldirectly.
Adding and Erasing Channels (Manual Method)
Use this feature if Auto Channel Search missed a channel that you would like to add, delete a channel you wishto remove.
6Press the …/† buttons toselect Channel Add/Delete,then press the √ or ENTERbutton.
7Press the CH / buttons totune in the channel numberyou wish to add or delete. Use the number button toselect the channel directly.
CHANNEL ADD/DELETE
Select channel : [07]
and press [√] to ADDpress [œ] to DELETE
RETURN CH …†
8Press the œ or √ button todelete the channel from yourchannel list or to add.
Repeat steps 7 to add orto delete additional channels.
Press the MENU button to exit.
CHANNEL ADD/DELETE
Select channel : [07](in memory)
and press [√] to ADDpress [œ] to DELETE
RETURN CH …†
ENG-26
IN I T I A L SE T U P
Selecting the RF Output ChannelUse this feature if DVD-VCR is connected to TV using RF antenna cable.
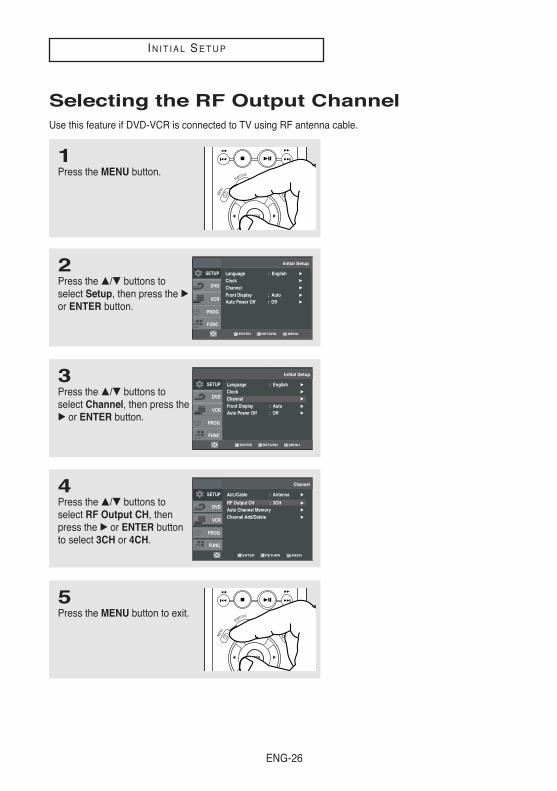
4Press the …/† buttons toselect RF Output CH, thenpress the √ or ENTER buttonto select 3CH or 4CH.
1Press the MENU button.
2Press the …/† buttons toselect Setup, then press the √or ENTER button.
3Press the …/† buttons toselect Channel, then press the√ or ENTER button.
5Press the MENU button to exit.
ENG-27
IN I T I A L SE T U P
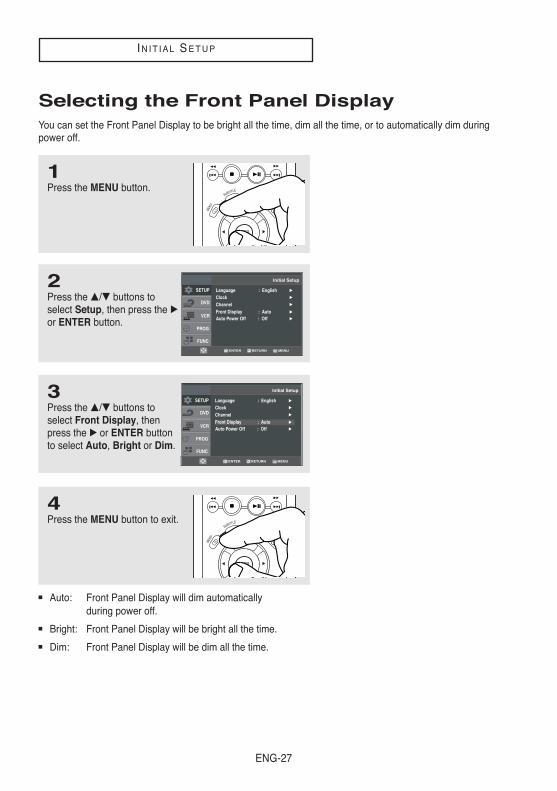
Selecting the Front Panel DisplayYou can set the Front Panel Display to be bright all the time, dim all the time, or to automatically dim duringpower off.
1Press the MENU button.
2Press the …/† buttons toselect Setup, then press the √or ENTER button.
3Press the …/† buttons toselect Front Display, thenpress the √ or ENTER buttonto select Auto, Bright or Dim.
4Press the MENU button to exit.
Auto: Front Panel Display will dim automatically during power off.
Bright: Front Panel Display will be bright all the time.
Dim: Front Panel Display will be dim all the time.
ENG-28
IN I T I A L SE T U P
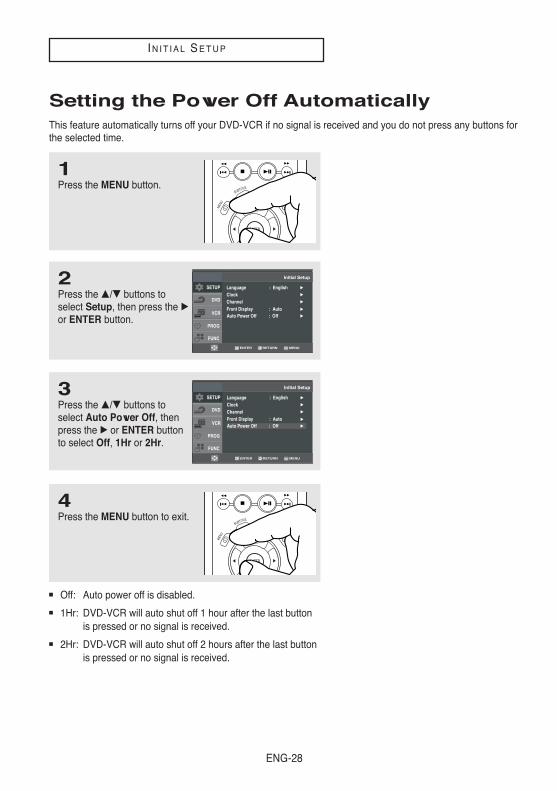
1Press the MENU button.
2Press the …/† buttons toselect Setup, then press the √or ENTER button.
3Press the …/† buttons toselect Auto Power Off, thenpress the √ or ENTER buttonto select Off, 1Hr or 2Hr.
4Press the MENU button to exit.
Off: Auto power off is disabled.
1Hr: DVD-VCR will auto shut off 1 hour after the last button is pressed or no signal is received.
2Hr: DVD-VCR will auto shut off 2 hours after the last button is pressed or no signal is received.
Setting the Power Off AutomaticallyThis feature automatically turns off your DVD-VCR if no signal is received and you do not press any buttons forthe selected time.
ENG-29
Chapter 4
DVD OP E R AT I O N S
Playing a Disc
Before Play
- Turn on your TV and set it to the correct Video Input on your TV's remote control.- If you connected an external Audio System, turn on your Audio System and set it to the correct Audio Input.
Playback
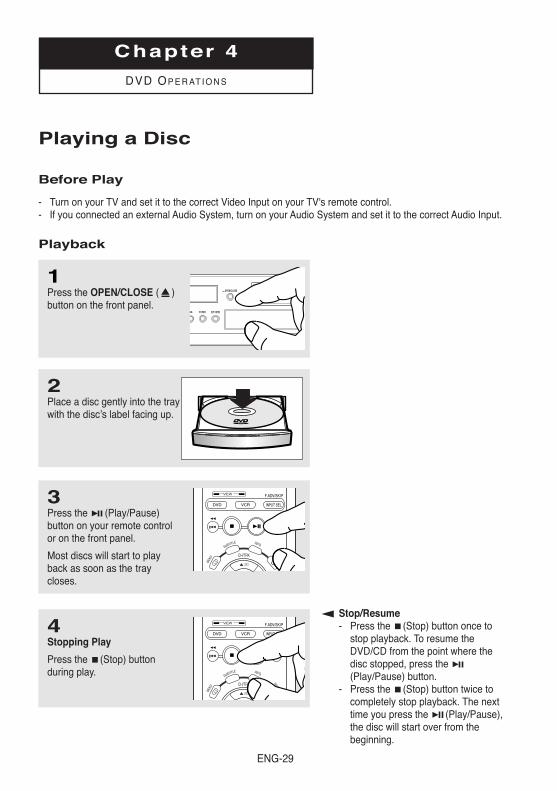
1Press the OPEN/CLOSE ( )button on the front panel.
3Press the (Play/Pause)button on your remote controlor on the front panel.
Most discs will start to playback as soon as the traycloses.
2Place a disc gently into the traywith the disc’s label facing up.
4Stopping Play
Press the (Stop) buttonduring play.
Stop/Resume- Press the (Stop) button once to
stop playback. To resume theDVD/CD from the point where thedisc stopped, press the (Play/Pause) button.
- Press the (Stop) button twice tocompletely stop playback. The nexttime you press the (Play/Pause),the disc will start over from thebeginning.
ENG-30
DVD OP E R AT I O N S
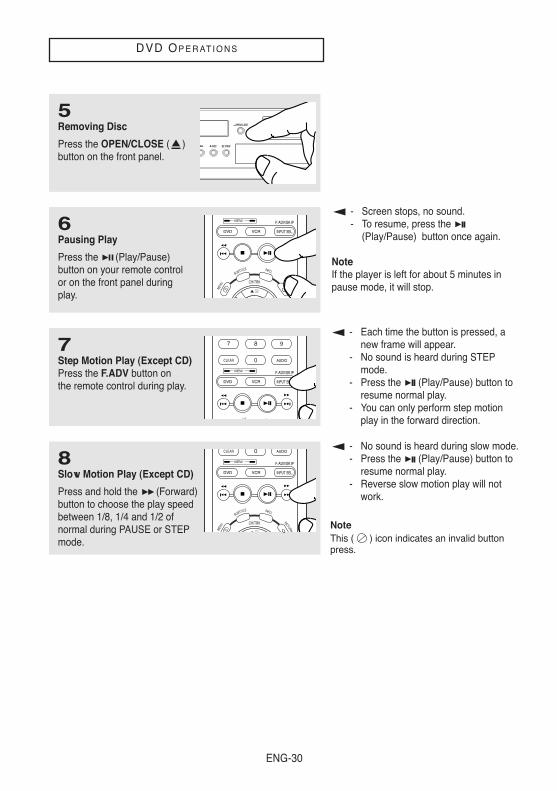
- Screen stops, no sound.- To resume, press the
(Play/Pause) button once again.
NoteIf the player is left for about 5 minutes inpause mode, it will stop.
- Each time the button is pressed, anew frame will appear.
- No sound is heard during STEPmode.
- Press the (Play/Pause) button toresume normal play.
- You can only perform step motionplay in the forward direction.
- No sound is heard during slow mode.- Press the (Play/Pause) button to
resume normal play.- Reverse slow motion play will not
work.
5Removing Disc
Press the OPEN/CLOSE ( )button on the front panel.
6Pausing Play
Press the (Play/Pause)button on your remote controlor on the front panel duringplay.
7Step Motion Play (Except CD)Press the F.ADV button onthe remote control during play.
8Slow Motion Play (Except CD)
Press and hold the (Forward)button to choose the play speedbetween 1/8, 1/4 and 1/2 ofnormal during PAUSE or STEPmode.
NoteThis ( ) icon indicates an invalid buttonpress.
ENG-31
DVD OP E R AT I O N S
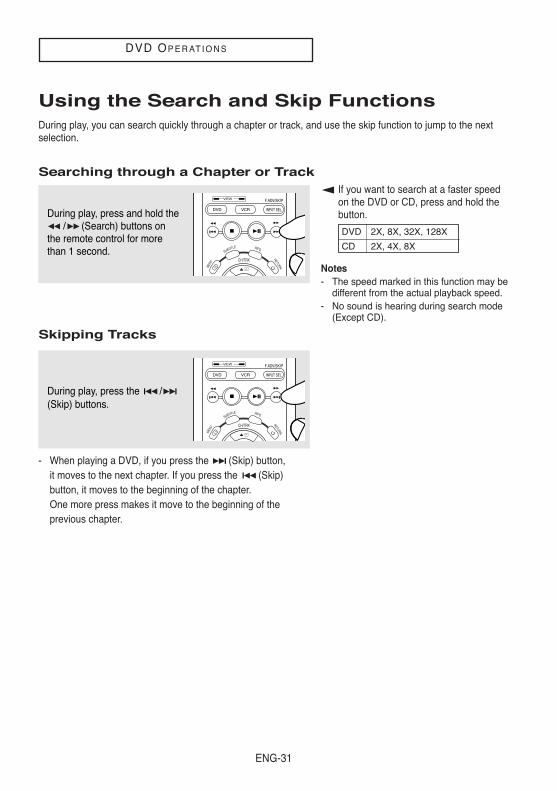
Using the Search and Skip FunctionsDuring play, you can search quickly through a chapter or track, and use the skip function to jump to the nextselection.
Searching through a Chapter or Track
Notes- The speed marked in this function may be
different from the actual playback speed.- No sound is hearing during search mode
(Except CD).
Skipping Tracks
- When playing a DVD, if you press the (Skip) button,it moves to the next chapter. If you press the (Skip)button, it moves to the beginning of the chapter.One more press makes it move to the beginning of theprevious chapter.
During play, press and hold the/ (Search) buttons on
the remote control for morethan 1 second.
During play, press the /(Skip) buttons.
If you want to search at a faster speed on the DVD or CD, press and hold the button.
DVD
CD
2X, 8X, 32X, 128X
2X, 4X, 8X
ENG-32
DVD OP E R AT I O N S
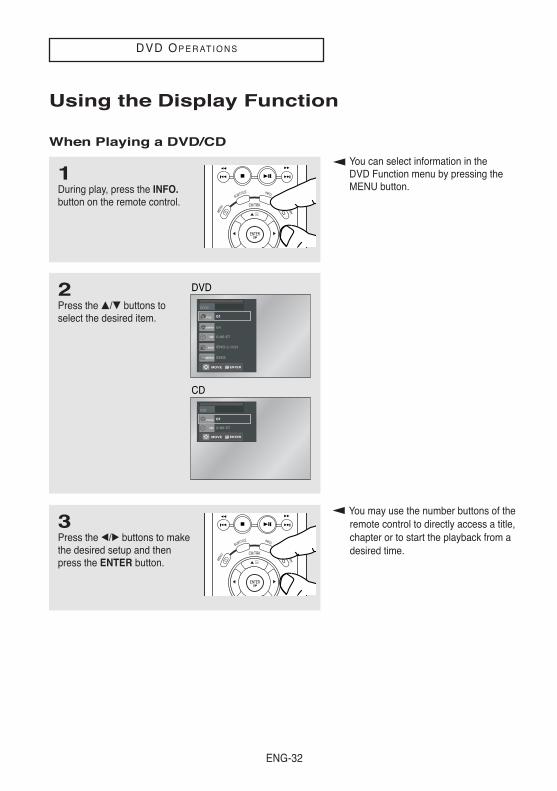
Using the Display Function
When Playing a DVD/CD
You may use the number buttons of theremote control to directly access a title,chapter or to start the playback from adesired time.
1During play, press the INFO.button on the remote control.
3Press the œ/√ buttons to makethe desired setup and thenpress the ENTER button.
2Press the …/† buttons toselect the desired item.
ENG
ENG
MOVE
DVD
CD
CD
You can select information in the DVD Function menu by pressing the MENU button.
ENG-33
DVD OP E R AT I O N S
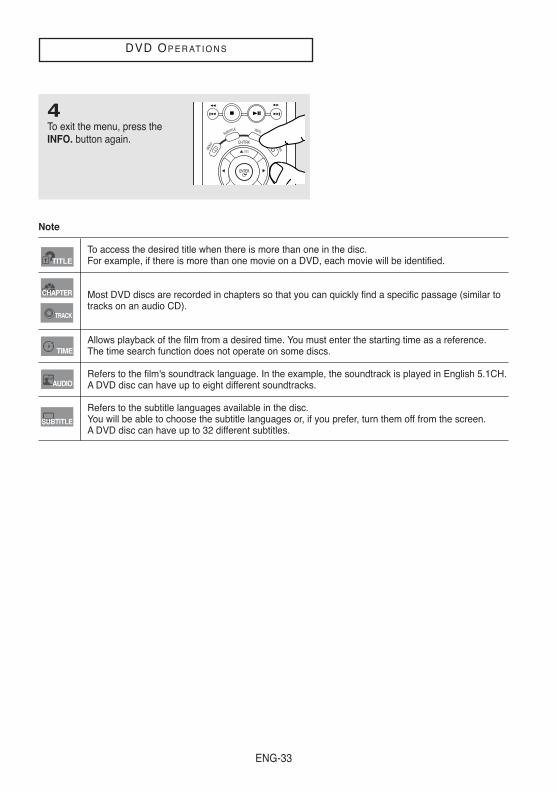
Note
To access the desired title when there is more than one in the disc.For example, if there is more than one movie on a DVD, each movie will be identified.
Most DVD discs are recorded in chapters so that you can quickly find a specific passage (similar totracks on an audio CD).
Allows playback of the film from a desired time. You must enter the starting time as a reference.The time search function does not operate on some discs.
Refers to the film's soundtrack language. In the example, the soundtrack is played in English 5.1CH.A DVD disc can have up to eight different soundtracks.
Refers to the subtitle languages available in the disc.You will be able to choose the subtitle languages or, if you prefer, turn them off from the screen.A DVD disc can have up to 32 different subtitles.
TITLE
CHAPTER
TRACK
TIME
AUDIO
SUBTITLE
4To exit the menu, press theINFO. button again.

ENG-34
DVD OP E R AT I O N S
Using the Disc and Title Menu (DVD)
Notes- Depending on the disc, the Disc Menu or
Title Menu may not work.- You can also use the Disc Menu by using
the DISC MENU button on the remotecontrol.
- Title Menu will only be displayed if thereare at least two titles in the disc.
2Press the …/† buttons toselect Function, then pressthe √ or ENTER button.
3Press the …/† buttons toselect DVD Function, thenpress the √ or ENTER button.
4Press the …/† buttons toselect Title Menu or DiscMenu then press the √ orENTER button.
1During playback of a DVD disc,press the MENU button on theremote control.
MENU button can be used to accessDisc and title menus on a DVD duringplayback.
ENG-35
DVD OP E R AT I O N S
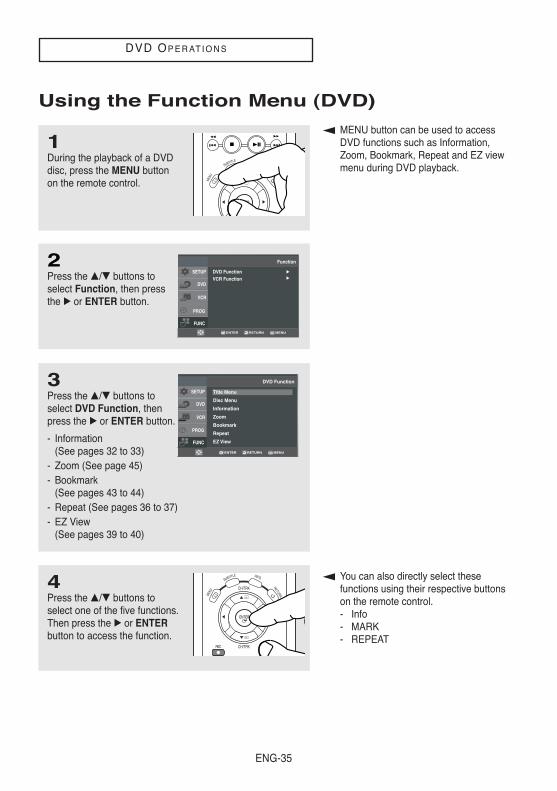
Using the Function Menu (DVD)
2Press the …/† buttons toselect Function, then pressthe √ or ENTER button.
3Press the …/† buttons toselect DVD Function, thenpress the √ or ENTER button.
- Information(See pages 32 to 33)
- Zoom (See page 45)- Bookmark
(See pages 43 to 44)- Repeat (See pages 36 to 37)- EZ View
(See pages 39 to 40)
1During the playback of a DVDdisc, press the MENU buttonon the remote control.
4Press the …/† buttons toselect one of the five functions.Then press the √ or ENTERbutton to access the function.
MENU button can be used to accessDVD functions such as Information,Zoom, Bookmark, Repeat and EZ viewmenu during DVD playback.
You can also directly select thesefunctions using their respective buttonson the remote control.- Info- MARK- REPEAT
ENG-36
DVD OP E R AT I O N S
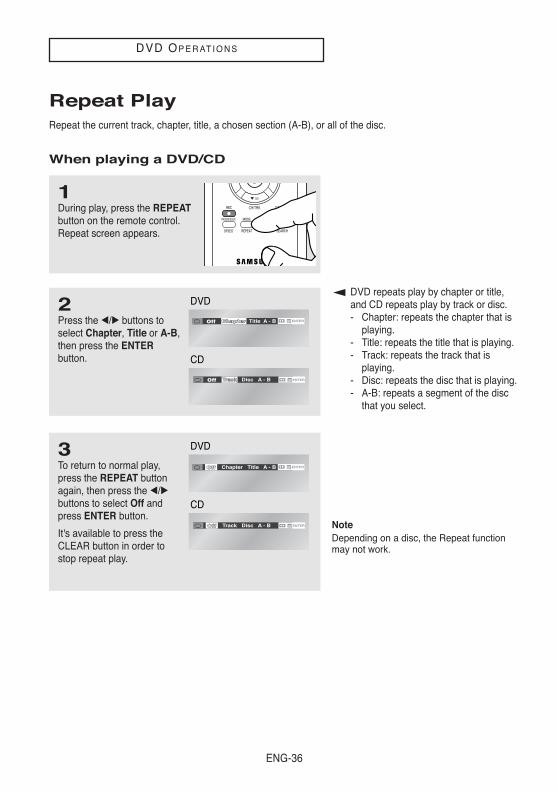
Repeat PlayRepeat the current track, chapter, title, a chosen section (A-B), or all of the disc.
When playing a DVD/CD
DVD repeats play by chapter or title,and CD repeats play by track or disc.- Chapter: repeats the chapter that is
playing.- Title: repeats the title that is playing.- Track: repeats the track that is
playing.- Disc: repeats the disc that is playing.- A-B: repeats a segment of the disc
that you select.
NoteDepending on a disc, the Repeat functionmay not work.
1During play, press the REPEATbutton on the remote control.Repeat screen appears.
2Press the œ/√ buttons toselect Chapter, Title or A-B,then press the ENTERbutton.
Off
Off Chapter Title A - B
A -
B
DVD
Off
Off Track Disc A - B
A -
B
CD
3To return to normal play,press the REPEAT buttonagain, then press the œ/√buttons to select Off andpress ENTER button.
It's available to press theCLEAR button in order tostop repeat play.
Off Chapter Title A - B
Chapter
A -
B
DVD
Off Track Disc A - B
Track
A -
B
CD
ENG-37
DVD OP E R AT I O N S
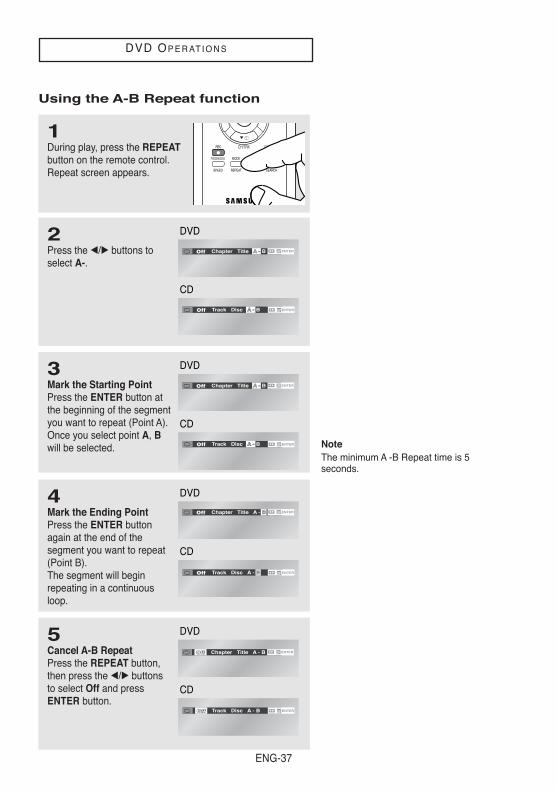
Using the A-B Repeat function
NoteThe minimum A -B Repeat time is 5seconds.
1During play, press the REPEATbutton on the remote control.Repeat screen appears.
2Press the œ/√ buttons toselect A-.
Off
Chapter
Off Chapter Title AA - B
B
DVD
Off
Track
Off Track Disc AA - B
B
CD
3Mark the Starting PointPress the ENTER button atthe beginning of the segmentyou want to repeat (Point A).Once you select point A, Bwill be selected.
Off
Chapter
Off Chapter Title AA - B
B
DVD
Off
Track
Off Track Disc AA - B
B
CD
4Mark the Ending PointPress the ENTER buttonagain at the end of the segment you want to repeat(Point B).The segment will beginrepeating in a continuous loop.
Off
Chapter
A -
Off Chapter Title A - BB
DVD
Off
Track
A -
Off Track Disc A - BB
CD
5Cancel A-B RepeatPress the REPEAT button,then press the œ/√ buttonsto select Off and pressENTER button.
Off Chapter Title A - B
Chapter
A -
B
DVD
Off Track Disc A - B
Track
A -
B
CD

ENG-38
DVD OP E R AT I O N S
Slow Repeat PlayThis feature allows you to slowly to repeat scenes containing sports, dancing, musical instruments beingplayed etc., so you can study them more closely.
When playing a DVD
1During play, press the
(Play/Pause) button.
2Press and hold the (Forward) button to choose theplay speed between 1/8, 1/4and 1/2 of normal duringPAUSE or STEP mode.
3Press the REPEAT button onthe remote control.Press the œ/√ buttons toselect A-.
Off
Chapter
Off Chapter Title AA - B
B
4Press the ENTER button atthe point where you wantrepeat play to start (A). B is automatically selected.Press the ENTER button atthe point where you wantthe repeat play to stop (B).
Off
Chapter
A -
Off Chapter Title A - BB
To set A-B repeat, set (A) first,then set (B) after the following slow playtime has elapsed:1/8x: wait 40 seconds, then press B1/4x: wait 20 seconds, then press B1/2x: wait 10 seconds, then press B
The disc will play from A to B repeatedlyat the speed you chose.
5To return to normal play,press the REPEAT button,then press the œ/√ buttonsto select Off and pressENTER button.
Off Chapter Title A - B
Chapter
A -
B
ENG-39
DVD OP E R AT I O N S
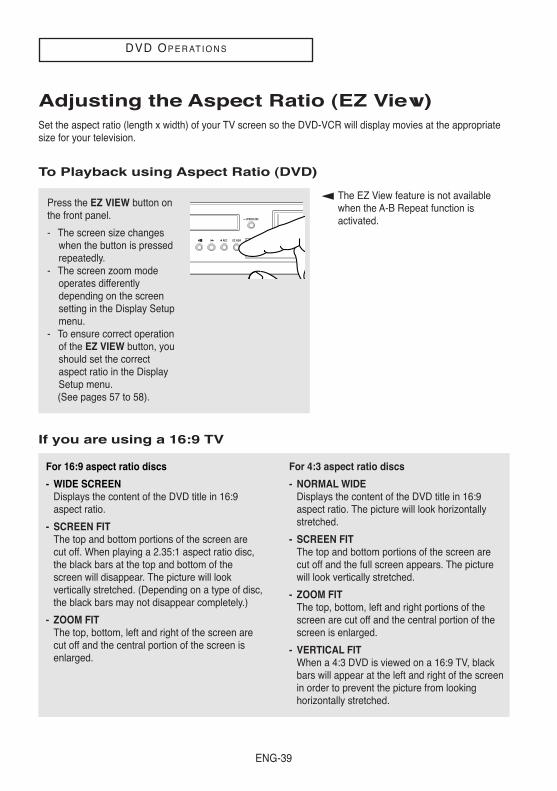
Adjusting the Aspect Ratio (EZ View)Set the aspect ratio (length x width) of your TV screen so the DVD-VCR will display movies at the appropriatesize for your television.
To Playback using Aspect Ratio (DVD)
Press the EZ VIEW button onthe front panel.
- The screen size changeswhen the button is pressedrepeatedly.
- The screen zoom modeoperates differentlydepending on the screensetting in the Display Setupmenu.
- To ensure correct operationof the EZ VIEW button, youshould set the correctaspect ratio in the DisplaySetup menu. (See pages 57 to 58).
If you are using a 16:9 TV
For 16:9 aspect ratio discs
- WIDE SCREENDisplays the content of the DVD title in 16:9aspect ratio.
- SCREEN FITThe top and bottom portions of the screen arecut off. When playing a 2.35:1 aspect ratio disc,the black bars at the top and bottom of thescreen will disappear. The picture will lookvertically stretched. (Depending on a type of disc,the black bars may not disappear completely.)
- ZOOM FITThe top, bottom, left and right of the screen arecut off and the central portion of the screen isenlarged.
For 4:3 aspect ratio discs
- NORMAL WIDEDisplays the content of the DVD title in 16:9aspect ratio. The picture will look horizontallystretched.
- SCREEN FITThe top and bottom portions of the screen arecut off and the full screen appears. The picturewill look vertically stretched.
- ZOOM FITThe top, bottom, left and right portions of thescreen are cut off and the central portion of thescreen is enlarged.
- VERTICAL FITWhen a 4:3 DVD is viewed on a 16:9 TV, blackbars will appear at the left and right of the screenin order to prevent the picture from lookinghorizontally stretched.
The EZ View feature is not available when the A-B Repeat function is activated.
ENG-40
DVD OP E R AT I O N S
If you are using a 4:3 TV
For 16:9 aspect ratio discs
- 4:3 Letter BoxDisplays the content of the DVD title in 16:9aspect ratio. The black bars will appear at the topand bottom of the screen.
- 4:3 Pan ScanThe left and right portions of the screen are cutoff and the central portion of the 16:9 screen isdisplayed.
- SCREEN FITThe top and bottom portions of the screen arecut off and a full screen appears. The picture willlook vertically stretched.
- ZOOM FITThe top, bottom, left and right of the screen arecut off and the central portion of the screen isenlarged.
For 4:3 aspect ratio discs
- NORMAL SCREENDisplays the content of the DVD title in 4:3aspect ratio.
- SCREEN FITThe top and bottom portions of the screen arecut off and the full screen appears. The picturewill look vertically stretched.
- ZOOM FITThe top, bottom, left and right portions of thescreen are cut off and the central portion of thescreen is enlarged.
NoteThis function may behave differently depending on the type of disc.
ENG-41
DVD OP E R AT I O N S
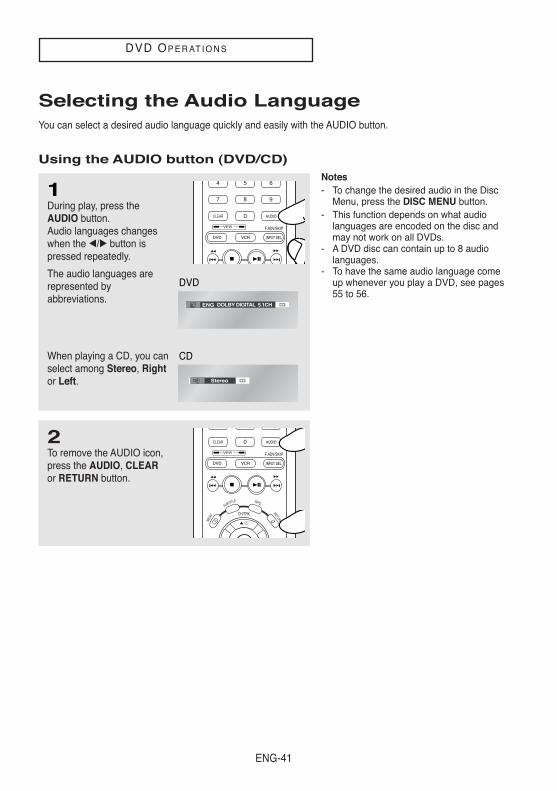
Selecting the Audio LanguageYou can select a desired audio language quickly and easily with the AUDIO button.
Using the AUDIO button (DVD/CD)
1During play, press theAUDIO button. Audio languages changeswhen the œ/√ button ispressed repeatedly.
The audio languages arerepresented byabbreviations.
When playing a CD, you canselect among Stereo, Rightor Left.
ENG DOLBY DIGITAL 5.1CH
DVD
Stereo
CD
2To remove the AUDIO icon,press the AUDIO, CLEARor RETURN button.
Notes- To change the desired audio in the Disc
Menu, press the DISC MENU button.- This function depends on what audio
languages are encoded on the disc andmay not work on all DVDs.
- A DVD disc can contain up to 8 audio languages.
- To have the same audio language comeup whenever you play a DVD, see pages55 to 56.

ENG-42
DVD OP E R AT I O N S
Selecting the Subtitle Language You can select a desired subtitle quickly and easily with the SUBTITLE button.
Using the SUBTITLE button (DVD)
1During play, press theSUBTITLE button.
The subtitle changes whenthe œ/√ button is pressedrepeatedly.
The subtitle languages arerepresented by abbreviations.
ENG On
2To remove the SUBTITLEicon, press the SUBTITLE,CLEAR or RETURN button.
Notes- To change the desired subtitle in the Disc
Menu, press the DISC MENU button.- This function depends on what subtitles
are encoded on the disc and may notwork on all DVDs.
- A DVD disc can contain up to 32 subtitlelanguages.
- To have the same subtitle language comeup whenever you play a DVD,see pages 53 to 54.
ENG-43
DVD OP E R AT I O N S
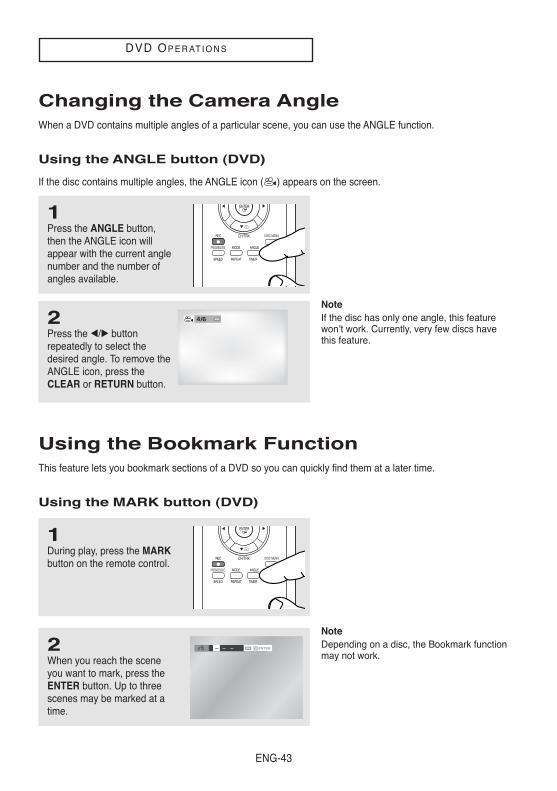
1Press the ANGLE button,then the ANGLE icon willappear with the current anglenumber and the number ofangles available.
2Press the œ/√ buttonrepeatedly to select thedesired angle. To remove theANGLE icon, press theCLEAR or RETURN button.
NoteDepending on a disc, the Bookmark functionmay not work.
Changing the Camera AngleWhen a DVD contains multiple angles of a particular scene, you can use the ANGLE function.
Using the ANGLE button (DVD)
If the disc contains multiple angles, the ANGLE icon ( ) appears on the screen.
1During play, press the MARKbutton on the remote control.
2When you reach the sceneyou want to mark, press theENTER button. Up to threescenes may be marked at atime.
Using the Bookmark Function This feature lets you bookmark sections of a DVD so you can quickly find them at a later time.
Using the MARK button (DVD)
NoteIf the disc has only one angle, this featurewon’t work. Currently, very few discs havethis feature.
ENG-44
DVD OP E R AT I O N S
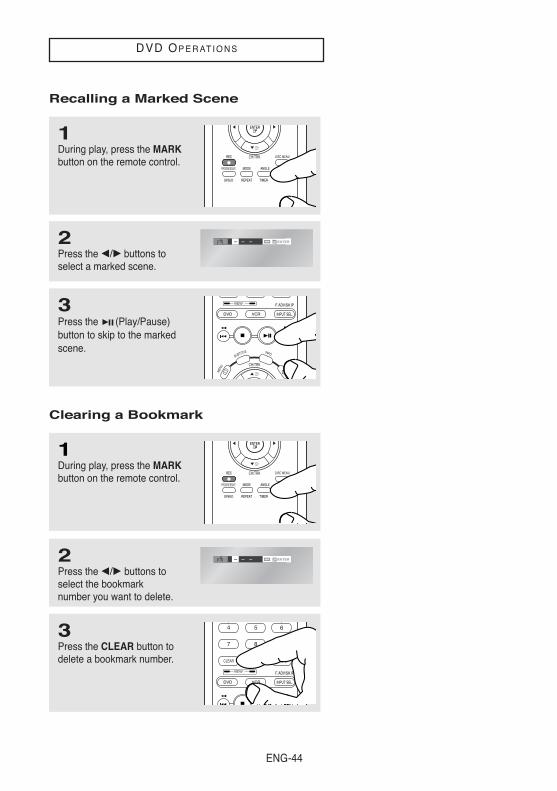
1During play, press the MARKbutton on the remote control.
3Press the (Play/Pause)button to skip to the markedscene.
2Press the œ/√ buttons toselect a marked scene.
Recalling a Marked Scene
1During play, press the MARKbutton on the remote control.
3Press the CLEAR button todelete a bookmark number.
2Press the œ/√ buttons toselect the bookmark number you want to delete.
Clearing a Bookmark
ENG-45
DVD OP E R AT I O N S
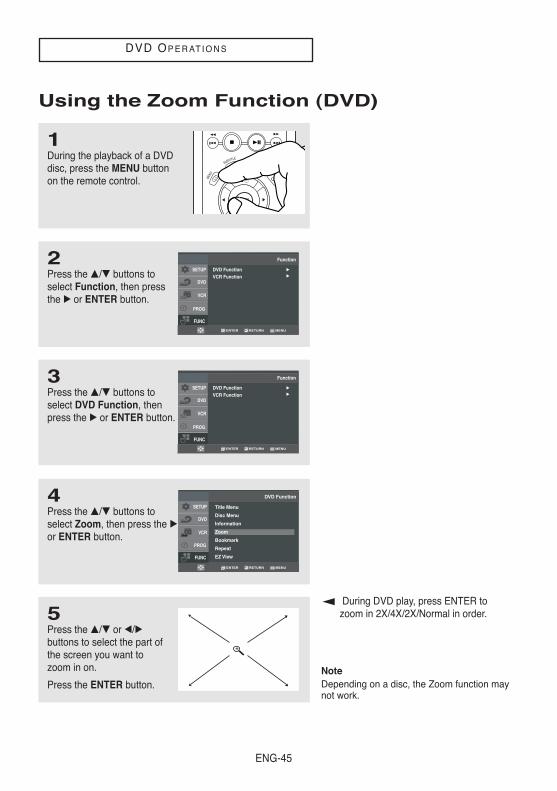
Using the Zoom Function (DVD)
During DVD play, press ENTER tozoom in 2X/4X/2X/Normal in order.
NoteDepending on a disc, the Zoom function maynot work.
2Press the …/† buttons toselect Function, then pressthe √ or ENTER button.
3Press the …/† buttons toselect DVD Function, thenpress the √ or ENTER button.
4Press the …/† buttons toselect Zoom, then press the √or ENTER button.
5Press the …/† or œ/√buttons to select the part ofthe screen you want tozoom in on.
Press the ENTER button.
1During the playback of a DVDdisc, press the MENU buttonon the remote control.
ENG-46
DVD OP E R AT I O N S
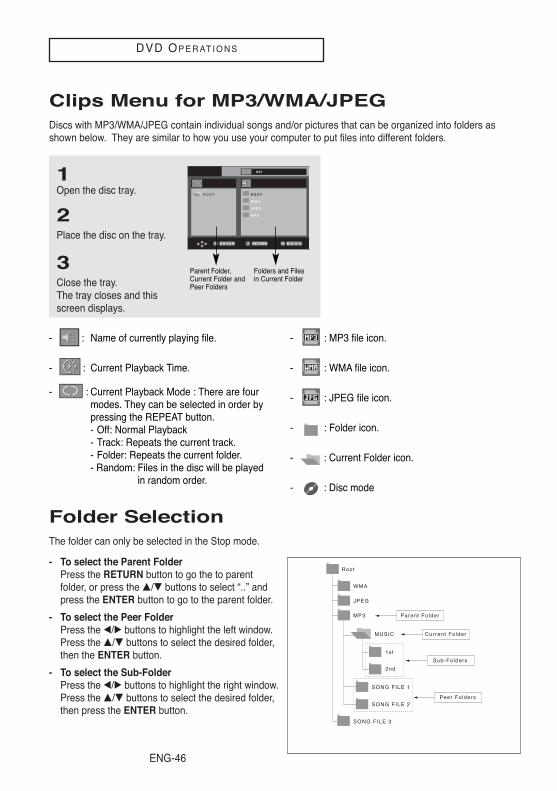
Clips Menu for MP3/WMA/JPEGDiscs with MP3/WMA/JPEG contain individual songs and/or pictures that can be organized into folders asshown below. They are similar to how you use your computer to put files into different folders.
1Open the disc tray.
2Place the disc on the tray.
3Close the tray.The tray closes and thisscreen displays.
O f f
R O O T
W M A
J P E G
M P 3
R O O T
Parent Folder,Current Folder andPeer Folders
Folders and Filesin Current Folder
- : Name of currently playing file.
- : Current Playback Time.
- : Current Playback Mode : There are four modes. They can be selected in order by pressing the REPEAT button.- Off: Normal Playback- Track: Repeats the current track.- Folder: Repeats the current folder.- Random: Files in the disc will be played
in random order.
- : MP3 file icon.
- : WMA file icon.
- : JPEG file icon.
- : Folder icon.
- : Current Folder icon.
- : Disc mode
- To select the Parent FolderPress the RETURN button to go the to parentfolder, or press the …/† buttons to select “..” and press the ENTER button to go to the parent folder.
- To select the Peer FolderPress the œ/√ buttons to highlight the left window. Press the …/† buttons to select the desired folder, then the ENTER button.
- To select the Sub-FolderPress the œ/√ buttons to highlight the right window.Press the …/† buttons to select the desired folder,then press the ENTER button.
Folder SelectionThe folder can only be selected in the Stop mode.
Root
WMA
JPEG
MP3
SONG FILE 3
MUSIC
SONG FILE 1
SONG FILE 2
1st
2nd
Parent Folder
Current Folder
Sub-Folders
Peer Folders
ENG-47
DVD OP E R AT I O N S
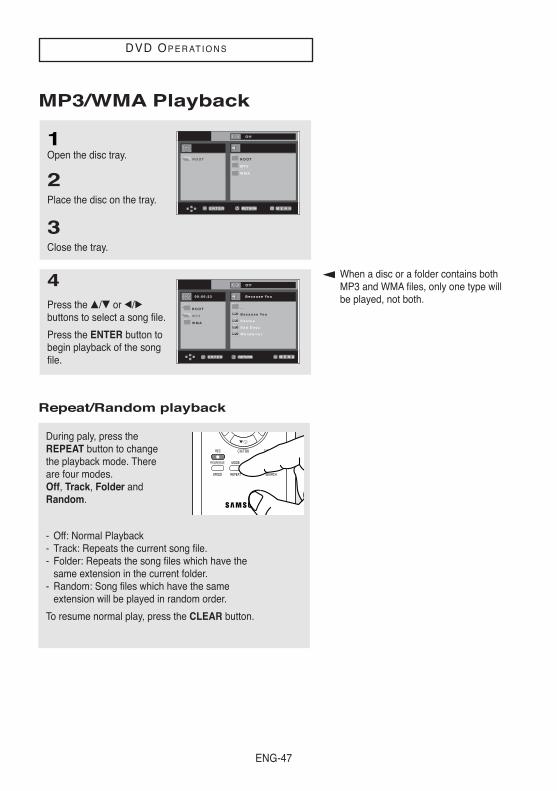
MP3/WMA Playback
1Open the disc tray.
2Place the disc on the tray.
3Close the tray.
When a disc or a folder contains bothMP3 and WMA files, only one type willbe played, not both.
4Press the …/† or œ/√buttons to select a song file.
Press the ENTER button tobegin playback of the songfile.
0 0 : 0 0 : 2 3 1 _ m p 3
O f f
B e c a u s e Yo u
C a c t u s
S a d D a y
W o n d e r f u l
Repeat/Random playback
During paly, press theREPEAT button to changethe playback mode. Thereare four modes. Off, Track, Folder andRandom.
- Off: Normal Playback- Track: Repeats the current song file.- Folder: Repeats the song files which have the
same extension in the current folder.- Random: Song files which have the same
extension will be played in random order.
To resume normal play, press the CLEAR button.
0 0 : 0 0 : 2 3 B e c a u s e Yo u
O f f
. .
B e c a u s e Yo u
C a c t u s
S a d D a y u
Wo n d e r f u l
R O O T
M P 3
W M A
0 0 : 0 0 : 2 3 1 _ m p 3
O f f
B e c a u s e Yo u
C a c t u s
S a d D a y
W o n d e r f u l
O f f
R O O T
M P 3
W M A
R O O T

ENG-48
DVD OP E R AT I O N S
CD-R MP3/WMA file
When you record MP3 or WMA files on CD-R,please refer to the following.
- Your MP3 or WMA files should be ISO 9660 orJOLIET format.
ISO 9660 format and Joliet MP3 or WMA files arecompatible with Microsoft's DOS and Windows,
and with Apple's Mac. This format is the mostwidely used.
- When naming your MP3 or WMA files, do notexceed 8 characters, and enter “.mp3, .wma”as the file extension.
General name format : Title.mp3. or Title.wma.When composing your title, make sure that youuse 8 characters or less, have no spaces in thename, and avoid the use of special charactersincluding: (.,/,\,=,+).
- Use a decompression transfer rate of at least128 Kbps when recording MP3 files.
Sound quality with MP3 files basically dependson the rate of compression/decompression youchoose. Getting CD audio sound requires ananalog/digital sampling rate, that is conversion toMP3 format, of at least 128 Kbps and up to 160Kbps. However, choosing higher rates, like 192
Kbps or more, only rarely give better soundquality. Conversely, files with decompressionrates below 128 Kbps will not be played properly.
- Use a decompression transfer rate of at least64Kbps when recording WMA files.
Sound quality with WMA files basically dependson the rate of compression/decompression youchoose.
Getting CD audio sound requires ananalog/digital sampling rate, that is conversion toWMA format, of at least 64Kbps and up to192Kbps.
Conversely, files with decompression rates below64Kbps or over 192Kbps will not be playedproperly.
- Do not try recording copyright protected MP3files.
Certain "secured" files are encrypted and codeprotected to prevent illegal copying. These filesare of the following types: Windows MediaTM(registered trade mark of Microsoft Inc) andSDMITM (registered trade mark of The SDMIFoundation). You cannot copy such files.
- Important:
The above recommendations cannot be taken asa guarantee that the DVD-VCR will play MP3recordings, or as an assurance of sound quality.You should note that certain technologies andmethods for MP3 file recording on CD-Rsprevent optimal playback of these files on yourDVD-VCR (degraded sound quality and in somecases, inability of the player to read the files).
- This unit can play a maximum of 3000 files and300 folders per disc.
ENG-49
DVD OP E R AT I O N S
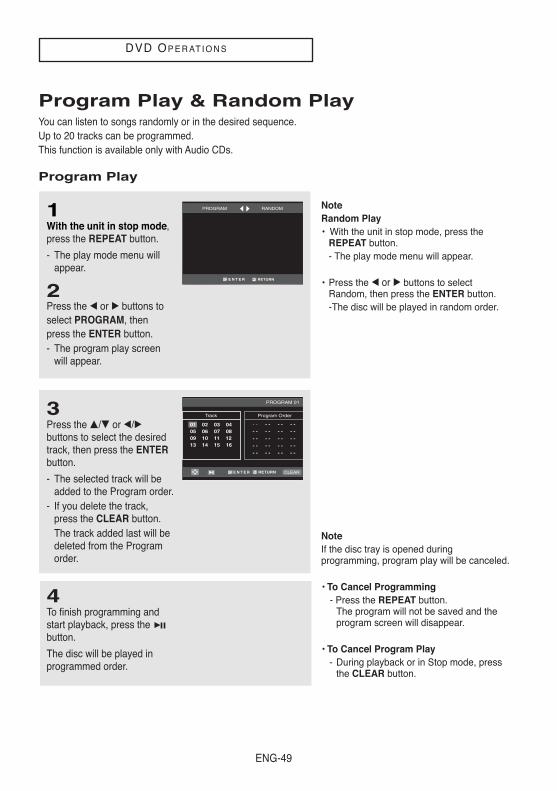
Program Play & Random PlayYou can listen to songs randomly or in the desired sequence.Up to 20 tracks can be programmed.This function is available only with Audio CDs.
Program Play
1With the unit in stop mode,press the REPEAT button.
- The play mode menu willappear.
2Press the œ or √ buttons to select PROGRAM, then press the ENTER button.- The program play screen
will appear.
3Press the …/† or œ/√buttons to select the desiredtrack, then press the ENTERbutton.
- The selected track will beadded to the Program order.
- If you delete the track,press the CLEAR button. The track added last will bedeleted from the Programorder.
4To finish programming andstart playback, press the button.
The disc will be played inprogrammed order.
NoteIf the disc tray is opened duringprogramming, program play will be canceled.
• To Cancel Programming- Press the REPEAT button.
The program will not be saved and the program screen will disappear.
• To Cancel Program Play- During playback or in Stop mode, press
the CLEAR button.
NoteRandom Play• With the unit in stop mode, press the
REPEAT button.- The play mode menu will appear.
• Press the œ or √ buttons to select Random, then press the ENTER button.-The disc will be played in random order.
ENG-50
DVD OP E R AT I O N S
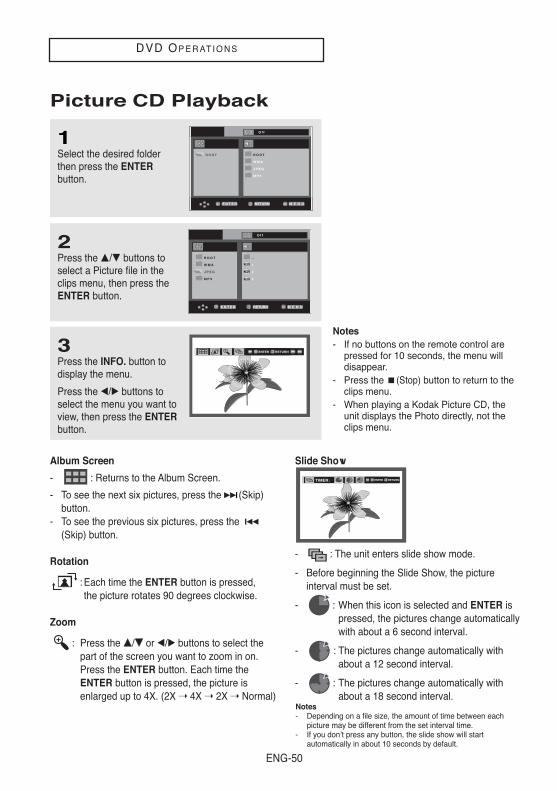
Picture CD Playback
1Select the desired folderthen press the ENTERbutton.
Notes- If no buttons on the remote control are
pressed for 10 seconds, the menu willdisappear.
- Press the (Stop) button to return to theclips menu.
- When playing a Kodak Picture CD, theunit displays the Photo directly, not theclips menu.
2Press the …/† buttons toselect a Picture file in theclips menu, then press theENTER button.
3Press the INFO. button todisplay the menu.
Press the œ/√ buttons toselect the menu you want toview, then press the ENTERbutton.
Album Screen
- : Returns to the Album Screen.
- To see the next six pictures, press the (Skip)button.
- To see the previous six pictures, press the(Skip) button.
Rotation
: Each time the ENTER button is pressed, the picture rotates 90 degrees clockwise.
Zoom
: Press the ……/†† or œ/√ buttons to select the part of the screen you want to zoom in on.Press the ENTER button. Each time theENTER button is pressed, the picture isenlarged up to 4X. (2X 4X 2X Normal)
Slide Show
- : The unit enters slide show mode.
- Before beginning the Slide Show, the pictureinterval must be set.
- : When this icon is selected and ENTER is pressed, the pictures change automaticallywith about a 6 second interval.
- : The pictures change automatically with about a 12 second interval.
- : The pictures change automatically with about a 18 second interval.
TIMER:
Notes- Depending on a file size, the amount of time between each
picture may be different from the set interval time.- If you don’t press any button, the slide show will start
automatically in about 10 seconds by default.
O f f
R O O T
W M A
J P E G
M P 3
R O O T
O f f
. .
1
2
3
R O O T
W M A
J P E G
M P 3
ENG-51
DVD OP E R AT I O N S
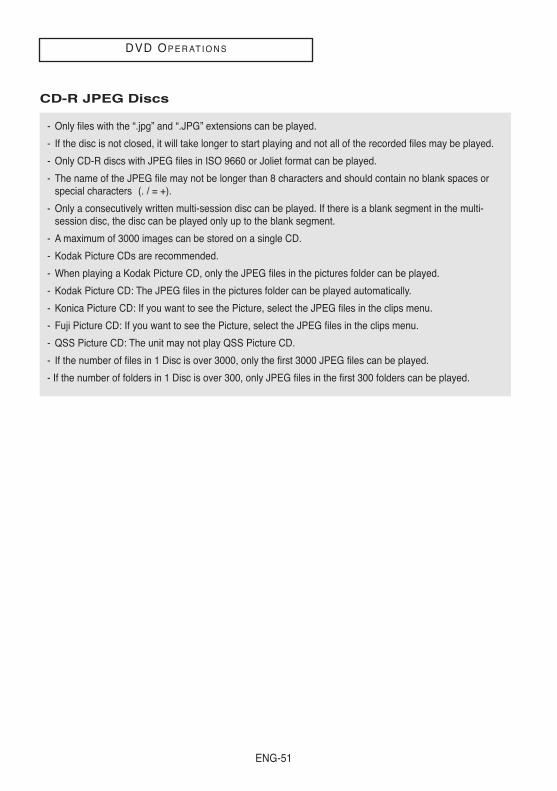
CD-R JPEG Discs
- Only files with the “.jpg” and “.JPG” extensions can be played.
- If the disc is not closed, it will take longer to start playing and not all of the recorded files may be played.
- Only CD-R discs with JPEG files in ISO 9660 or Joliet format can be played.
- The name of the JPEG file may not be longer than 8 characters and should contain no blank spaces orspecial characters (. / = +).
- Only a consecutively written multi-session disc can be played. If there is a blank segment in the multi-session disc, the disc can be played only up to the blank segment.
- A maximum of 3000 images can be stored on a single CD.
- Kodak Picture CDs are recommended.
- When playing a Kodak Picture CD, only the JPEG files in the pictures folder can be played.
- Kodak Picture CD: The JPEG files in the pictures folder can be played automatically.
- Konica Picture CD: If you want to see the Picture, select the JPEG files in the clips menu.
- Fuji Picture CD: If you want to see the Picture, select the JPEG files in the clips menu.
- QSS Picture CD: The unit may not play QSS Picture CD.
- If the number of files in 1 Disc is over 3000, only the first 3000 JPEG files can be played.
- If the number of folders in 1 Disc is over 300, only JPEG files in the first 300 folders can be played.
ENG-52
DVD OP E R AT I O N S
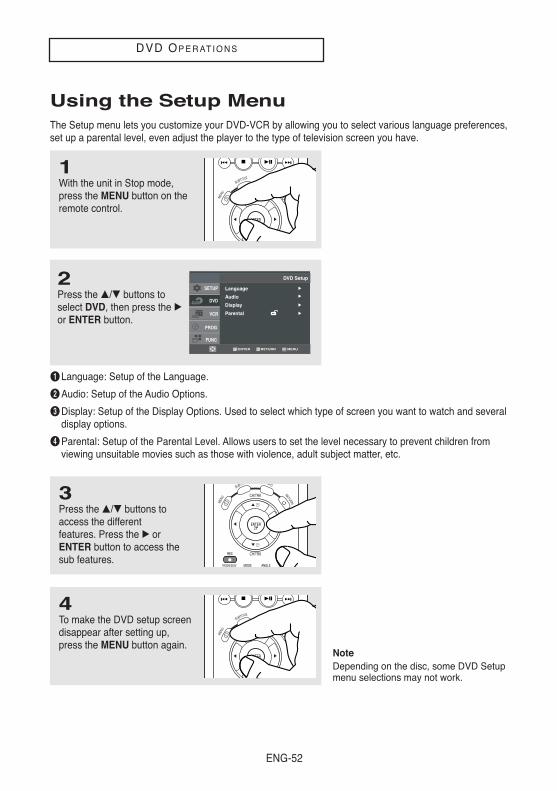
Using the Setup MenuThe Setup menu lets you customize your DVD-VCR by allowing you to select various language preferences,set up a parental level, even adjust the player to the type of television screen you have.
ŒLanguage: Setup of the Language.
´Audio: Setup of the Audio Options.
ˇDisplay: Setup of the Display Options. Used to select which type of screen you want to watch and severaldisplay options.
¨Parental: Setup of the Parental Level. Allows users to set the level necessary to prevent children fromviewing unsuitable movies such as those with violence, adult subject matter, etc.
NoteDepending on the disc, some DVD Setupmenu selections may not work.
2Press the …/† buttons toselect DVD, then press the √or ENTER button.
3Press the …/† buttons toaccess the different features. Press the √ orENTER button to access thesub features.
4To make the DVD setup screendisappear after setting up,press the MENU button again.
1With the unit in Stop mode,press the MENU button on theremote control.
ENG-53
DVD OP E R AT I O N S
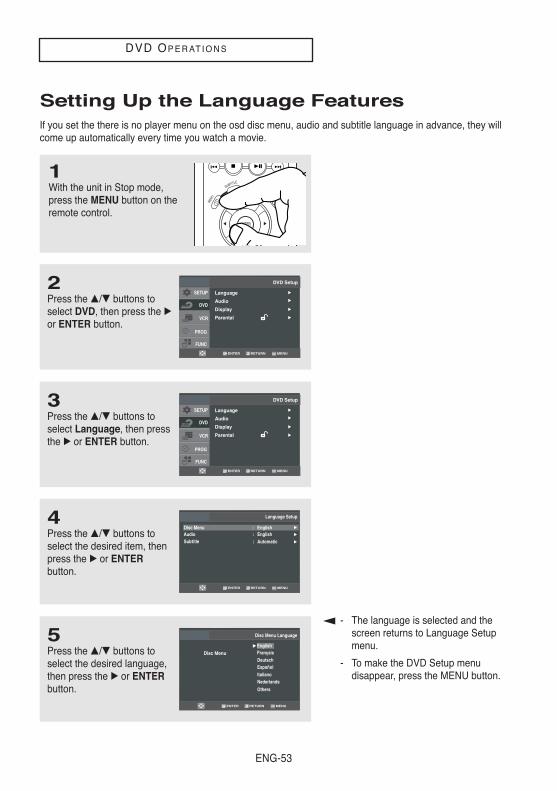
Setting Up the Language FeaturesIf you set the there is no player menu on the osd disc menu, audio and subtitle language in advance, they willcome up automatically every time you watch a movie.
- The language is selected and thescreen returns to Language Setupmenu.
- To make the DVD Setup menudisappear, press the MENU button.
2Press the …/† buttons toselect DVD, then press the √or ENTER button.
3Press the …/† buttons toselect Language, then pressthe √ or ENTER button.
4Press the …/† buttons toselect the desired item, thenpress the √ or ENTERbutton.
5Press the …/† buttons toselect the desired language,then press the √ or ENTERbutton.
1With the unit in Stop mode,press the MENU button on theremote control.
ENG-54
DVD OP E R AT I O N S
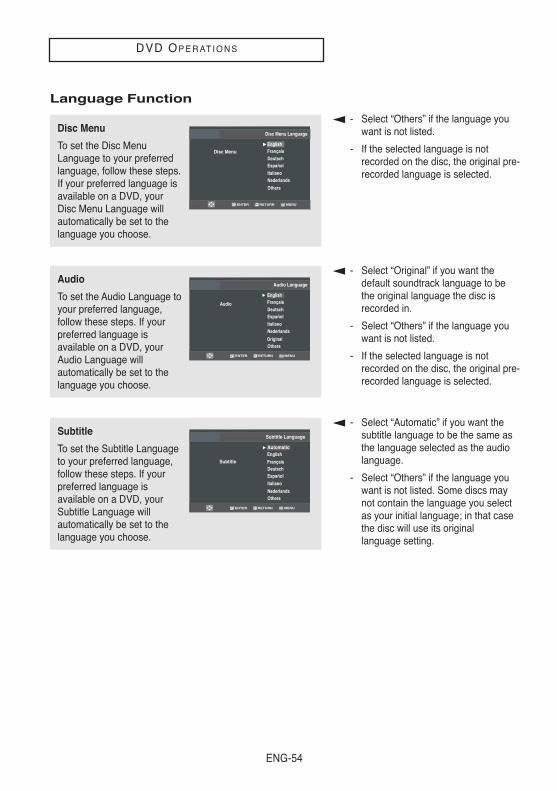
Language Function
- Select “Others” if the language youwant is not listed.
- If the selected language is notrecorded on the disc, the original pre-recorded language is selected.
- Select “Original” if you want thedefault soundtrack language to bethe original language the disc isrecorded in.
- Select “Others” if the language youwant is not listed.
- If the selected language is notrecorded on the disc, the original pre-recorded language is selected.
- Select “Automatic” if you want thesubtitle language to be the same asthe language selected as the audiolanguage.
- Select “Others” if the language youwant is not listed. Some discs maynot contain the language you selectas your initial language; in that casethe disc will use its original language setting.
Disc Menu
To set the Disc MenuLanguage to your preferredlanguage, follow these steps.If your preferred language isavailable on a DVD, yourDisc Menu Language willautomatically be set to thelanguage you choose.
Audio
To set the Audio Language toyour preferred language,follow these steps. If yourpreferred language isavailable on a DVD, yourAudio Language willautomatically be set to thelanguage you choose.
Subtitle
To set the Subtitle Languageto your preferred language,follow these steps. If yourpreferred language isavailable on a DVD, yourSubtitle Language willautomatically be set to thelanguage you choose.
Subtitle
Subtitle Language
Automatic

ENG-55
DVD OP E R AT I O N S
Setting Up the Audio OptionsAudio Options allows you to set up sound for use with your external audio system.
2Press the …/† buttons toselect DVD, then press the √or ENTER button.
3Press the …/† buttons toselect Audio, then press the√ or ENTER button.
4Press the …/† buttons toselect the desired item, thenpress the √ or ENTERbutton.
PCM Down Sampling : On
1With the DVD in Stop mode,press the MENU button on theremote control.
- To make the DVD Setup menudisappear, press the MENU button.
ENG-56
DVD OP E R AT I O N S
Audio Options
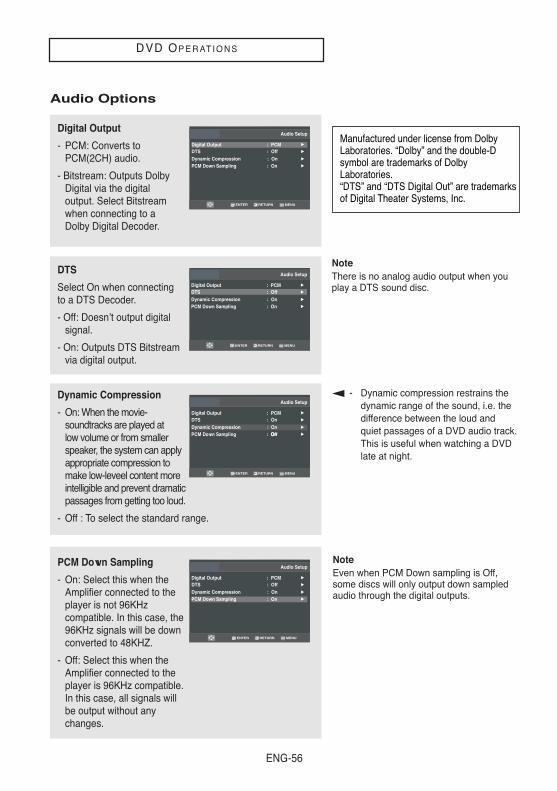
NoteThere is no analog audio output when youplay a DTS sound disc.
NoteEven when PCM Down sampling is Off,some discs will only output down sampledaudio through the digital outputs.
Digital Output
- PCM: Converts toPCM(2CH) audio.
- Bitstream: Outputs DolbyDigital via the digitaloutput. Select Bitstreamwhen connecting to aDolby Digital Decoder.
PCM Down Sampling : On
DTS
Select On when connectingto a DTS Decoder.
- Off: Doesn’t output digitalsignal.
- On: Outputs DTS Bitstreamvia digital output.
PCM Down Sampling : On
Dynamic Compression
- On: When the movie-soundtracks are played at low volume or from smallerspeaker, the system can applyappropriate compression tomake low-leveel content moreintelligible and prevent dramaticpassages from getting too loud.
- Off : To select the standard range.
PCM Down Sampling : OnOffOnOn
PCM Down Sampling
- On: Select this when theAmplifier connected to theplayer is not 96KHzcompatible. In this case, the96KHz signals will be downconverted to 48KHZ.
- Off: Select this when theAmplifier connected to theplayer is 96KHz compatible.In this case, all signals willbe output without anychanges.
PCM Down Sampling : On
Manufactured under license from DolbyLaboratories. “Dolby” and the double-Dsymbol are trademarks of DolbyLaboratories.“DTS” and “DTS Digital Out” are trademarksof Digital Theater Systems, Inc.
- Dynamic compression restrains thedynamic range of the sound, i.e. thedifference between the loud andquiet passages of a DVD audio track.This is useful when watching a DVDlate at night.
ENG-57
DVD OP E R AT I O N S
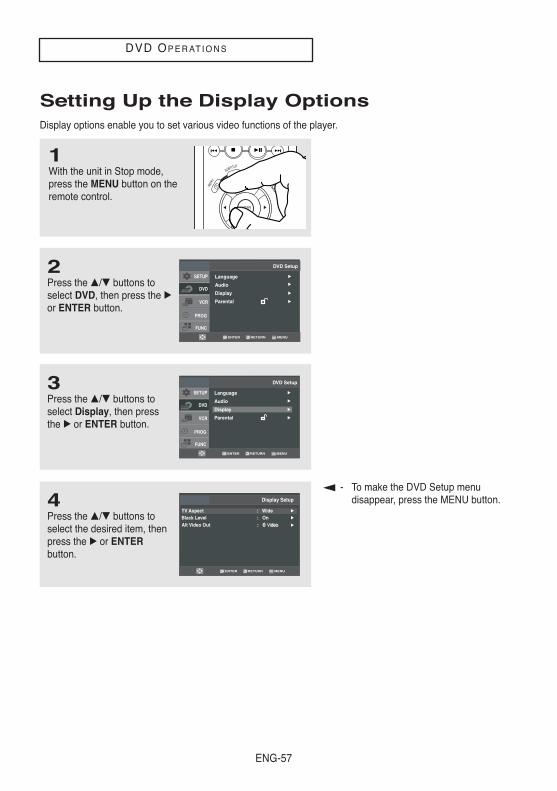
Setting Up the Display OptionsDisplay options enable you to set various video functions of the player.
2Press the …/† buttons toselect DVD, then press the √or ENTER button.
3Press the …/† buttons toselect Display, then pressthe √ or ENTER button.
4Press the …/† buttons toselect the desired item, thenpress the √ or ENTERbutton.
1With the unit in Stop mode,press the MENU button on theremote control.
- To make the DVD Setup menudisappear, press the MENU button.

ENG-58
DVD OP E R AT I O N S
- See your TV owner’s manual todetermine what type of TV you have.
- Interlace: Interlaced Scan mode willwork.
- Progressive: Progressive Scan modewill work, and Video and S-Video willnot work.
- Press the PROGRESSIVE button onthe front panel or remote control instop mode. Be sure to set the correct Videooutput for the proper picture.
Display Options
NoteIt cannot be adjusted when Alt Video Out isset to Progressive.
TV Aspect
Depending on the type oftelevision you have, you maywant to adjust the screensetting (aspect ratio).
- 4:3 Letter Box: Select when you want to see the total 16:9ratio screen DVD supplies, even though you have a TV witha 4:3 ratio screen. Black bars will appear at the top andbottom of the screen.
- 4:3 Pan Scan: Select this for conventional size TVs whenyou want to see the central portion of the 16:9 screen.(Extreme left and right side of movie picture will be cut off.)
- 16:9 Wide: You can view the full 16:9 picture on your widescreen TV.
Black Level
The Black Level featureadjusts black reference levelin the video signal to one oftwo choices:
- On: This will enhance theBlack Level for increasedbrightness/contrast when viewing DVDs.
- Off: This is the Standard NTSC reference Black Level for consistent brightness/contrast across all sources.
On
Alt Video Out
The “Alt Video Out” optionmust be set in the on-screenmenu if you have connectedyour DVD-VCR to a TV usingthe S-VIDEO OUT orCOMPONENT VIDEO OUTjacks.- S-Video: Select when you want to use S-Video
output.
- Component: Select when you want to use Component interlace(525i) Out or Progressive(525p) Out.
ENG-59
DVD OP E R AT I O N S
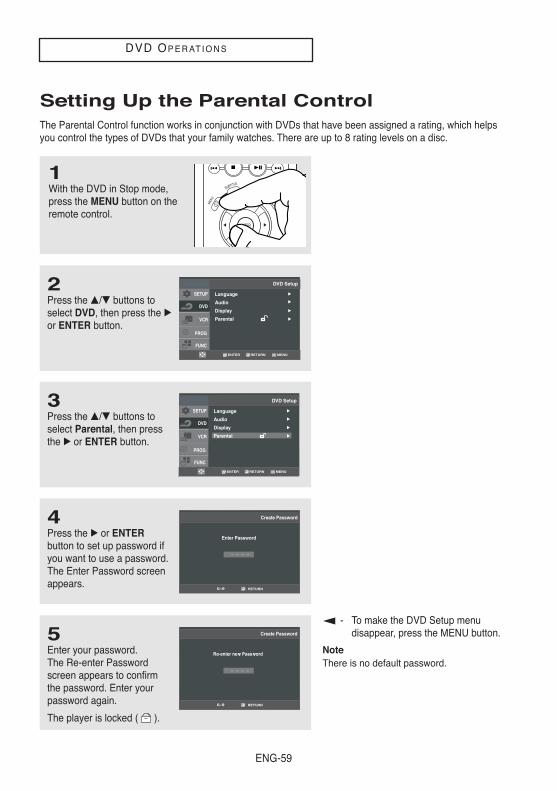
Setting Up the Parental ControlThe Parental Control function works in conjunction with DVDs that have been assigned a rating, which helpsyou control the types of DVDs that your family watches. There are up to 8 rating levels on a disc.
2Press the …/† buttons toselect DVD, then press the √or ENTER button.
3Press the …/† buttons toselect Parental, then pressthe √ or ENTER button.
4Press the √ or ENTERbutton to set up password ifyou want to use a password. The Enter Password screenappears.
0~9
5Enter your password. The Re-enter Passwordscreen appears to confirmthe password. Enter yourpassword again.
The player is locked ( ).
0~9
Re-enter new Password
1With the DVD in Stop mode,press the MENU button on theremote control.
- To make the DVD Setup menudisappear, press the MENU button.
NoteThere is no default password.
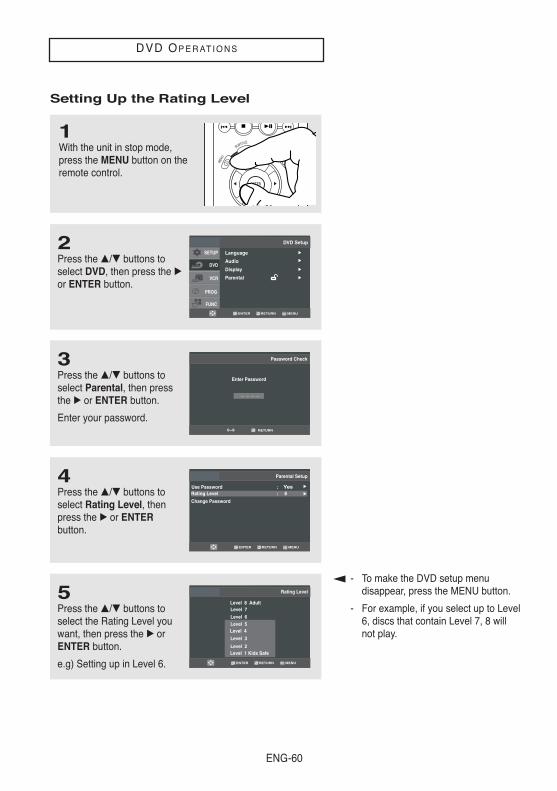
ENG-60
DVD OP E R AT I O N S
2Press the …/† buttons toselect DVD, then press the √or ENTER button.
3Press the …/† buttons toselect Parental, then pressthe √ or ENTER button.
Enter your password.0~9
4Press the …/† buttons toselect Rating Level, thenpress the √ or ENTERbutton.
Yes
5Press the …/† buttons toselect the Rating Level youwant, then press the √ orENTER button.
e.g) Setting up in Level 6.
1With the unit in stop mode,press the MENU button on theremote control.
- To make the DVD setup menudisappear, press the MENU button.
- For example, if you select up to Level6, discs that contain Level 7, 8 willnot play.
Setting Up the Rating Level
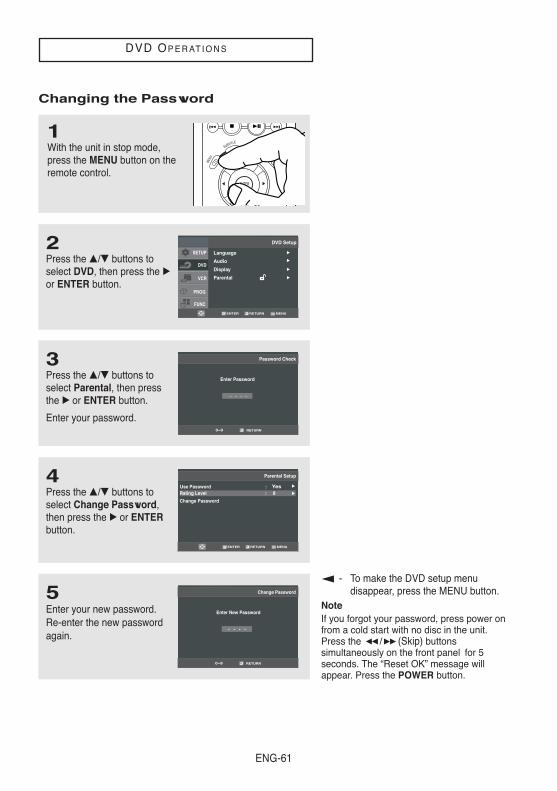
ENG-61
DVD OP E R AT I O N S
2Press the …/† buttons toselect DVD, then press the √or ENTER button.
3Press the …/† buttons toselect Parental, then pressthe √ or ENTER button.
Enter your password.0~9
4Press the …/† buttons toselect Change Password,then press the √ or ENTERbutton.
Yes
5Enter your new password.Re-enter the new passwordagain.
0~9
1With the unit in stop mode,press the MENU button on theremote control.
- To make the DVD setup menudisappear, press the MENU button.
Changing the Password
NoteIf you forgot your password, press power onfrom a cold start with no disc in the unit.Press the / (Skip) buttonssimultaneously on the front panel for 5seconds. The “Reset OK” message willappear. Press the POWER button.
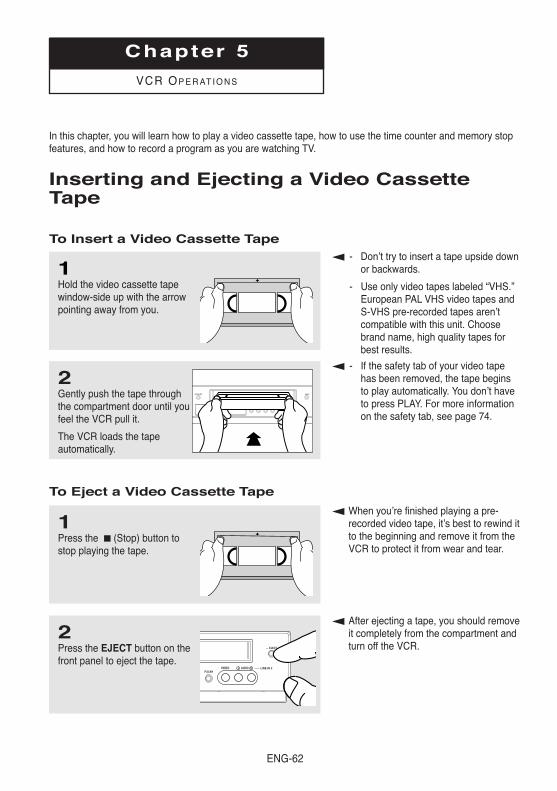
ENG-62
Chapter 5
VCR OP E R AT I O N S
In this chapter, you will learn how to play a video cassette tape, how to use the time counter and memory stopfeatures, and how to record a program as you are watching TV.
Inserting and Ejecting a Video CassetteTape
To Insert a Video Cassette Tape
To Eject a Video Cassette Tape
1Hold the video cassette tapewindow-side up with the arrowpointing away from you.
2Gently push the tape throughthe compartment door until youfeel the VCR pull it.
The VCR loads the tapeautomatically.
1Press the (Stop) button tostop playing the tape.
- Don’t try to insert a tape upside downor backwards.
- Use only video tapes labeled “VHS.”European PAL VHS video tapes andS-VHS pre-recorded tapes aren’tcompatible with this unit. Choosebrand name, high quality tapes forbest results.
- If the safety tab of your video tapehas been removed, the tape beginsto play automatically. You don’t haveto press PLAY. For more informationon the safety tab, see page 74.
When you’re finished playing a pre-recorded video tape, it’s best to rewind itto the beginning and remove it from the VCR to protect it from wear and tear.
After ejecting a tape, you should removeit completely from the compartment and turn off the VCR.
2Press the EJECT button on thefront panel to eject the tape.
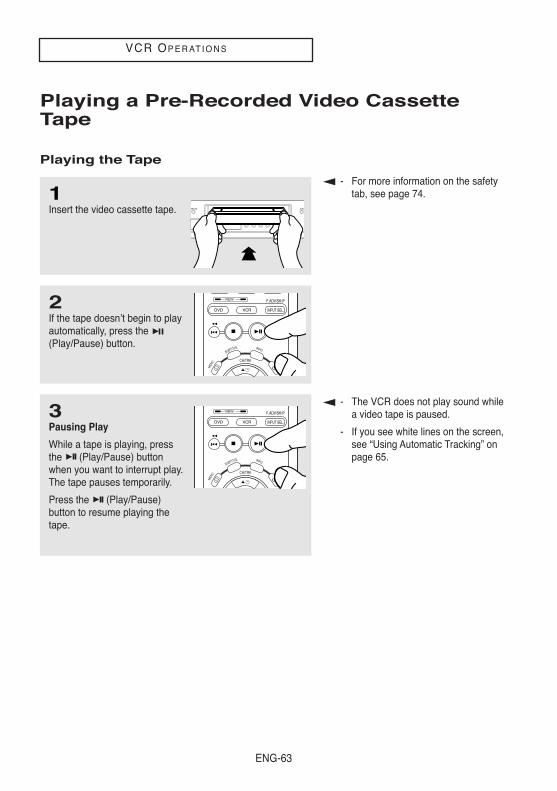
ENG-63
VCR OP E R AT I O N S
Playing a Pre-Recorded Video CassetteTape
Playing the Tape
1Insert the video cassette tape.
- For more information on the safetytab, see page 74.
2If the tape doesn’t begin to playautomatically, press the (Play/Pause) button.
3Pausing Play
While a tape is playing, pressthe (Play/Pause) buttonwhen you want to interrupt play.The tape pauses temporarily.
Press the (Play/Pause)button to resume playing thetape.
- The VCR does not play sound whilea video tape is paused.
- If you see white lines on the screen,see “Using Automatic Tracking” onpage 65.

ENG-64
VCR OP E R AT I O N S
Special VCR Playback FeaturesWhile a videotape is playing, you can enjoy a variety of special playback features, including Still, FrameAdvance, Skip, Repeat, and more. Press the Play/Pause button again to resume normal playback.
Frame Advance
In the pause mode, pressF.ADV to advance to the nextframe.
Fps/Rps Review
In Play mode, press the(Forward) or (Rewind) toreview at two speeds:
- Picture Search: Press andrelease to advance the tapeforward or backward at 5times normal speed.
- Jet Search: Press and holddown the SEARCH button,then release it to play back atthe normal speed.
Skip
In Play mode, press the SKIPbutton to move ahead exactly30 seconds. Press the SKIPbutton repeatedly up to 4 timesto move ahead 2 minutes.
Repeat
- In Play mode, press theREPEAT button to review thelast 5 seconds of tape (SPmode).
- In Play mode, press theREPEAT button to review thelast 15 seconds of tape (SLPmode).
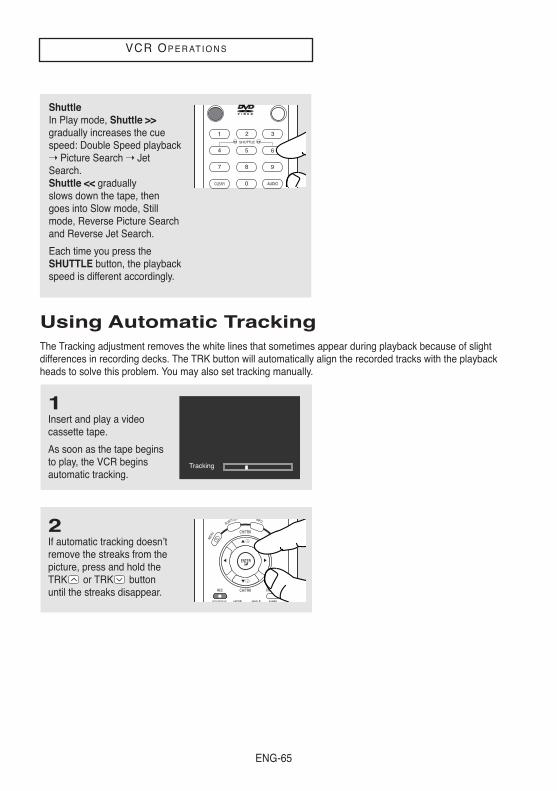
ENG-65
VCR OP E R AT I O N S
ShuttleIn Play mode, Shuttle >>gradually increases the cuespeed: Double Speed playback Picture Search JetSearch. Shuttle << gradually slows down the tape, thengoes into Slow mode, Stillmode, Reverse Picture Searchand Reverse Jet Search.
Each time you press theSHUTTLE button, the playbackspeed is different accordingly.
1Insert and play a videocassette tape.
As soon as the tape beginsto play, the VCR beginsautomatic tracking.
2If automatic tracking doesn’tremove the streaks from thepicture, press and hold theTRK or TRK buttonuntil the streaks disappear.
Using Automatic TrackingThe Tracking adjustment removes the white lines that sometimes appear during playback because of slightdifferences in recording decks. The TRK button will automatically align the recorded tracks with the playbackheads to solve this problem. You may also set tracking manually.
Tracking
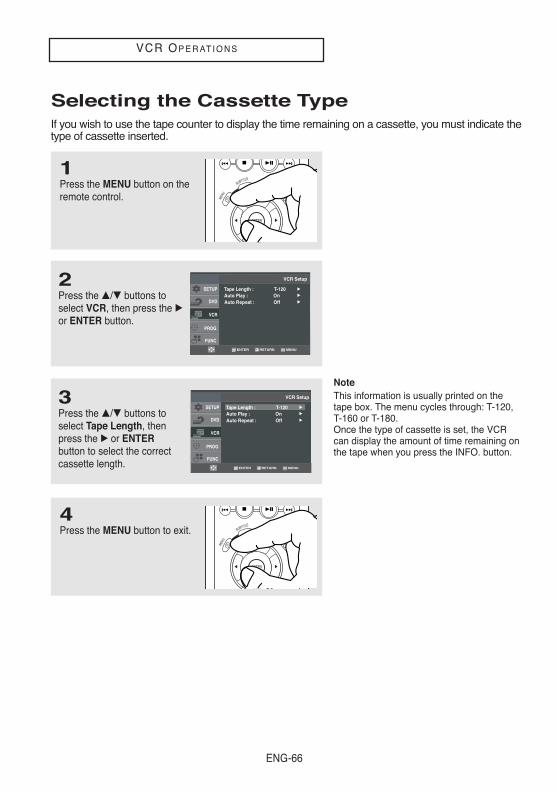
ENG-66
VCR OP E R AT I O N S
2Press the …/† buttons toselect VCR, then press the √or ENTER button.
n
3Press the …/† buttons toselect Tape Length, thenpress the √ or ENTERbutton to select the correctcassette length.
n
1Press the MENU button on theremote control.
4Press the MENU button to exit.
Selecting the Cassette TypeIf you wish to use the tape counter to display the time remaining on a cassette, you must indicate thetype of cassette inserted.
NoteThis information is usually printed on thetape box. The menu cycles through: T-120,T-160 or T-180. Once the type of cassette is set, the VCRcan display the amount of time remaining onthe tape when you press the INFO. button.
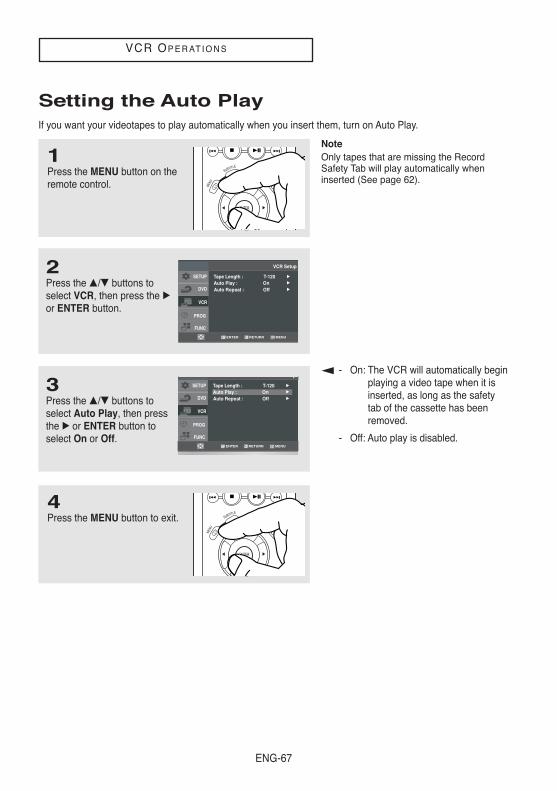
ENG-67
VCR OP E R AT I O N S
2Press the …/† buttons toselect VCR, then press the √or ENTER button.
n
3Press the …/† buttons toselect Auto Play, then pressthe √ or ENTER button toselect On or Off.
n
1Press the MENU button on theremote control.
4Press the MENU button to exit.
Setting the Auto PlayIf you want your videotapes to play automatically when you insert them, turn on Auto Play.
- On: The VCR will automatically beginplaying a video tape when it is inserted, as long as the safety tab of the cassette has been removed.
- Off: Auto play is disabled.
NoteOnly tapes that are missing the RecordSafety Tab will play automatically wheninserted (See page 62).
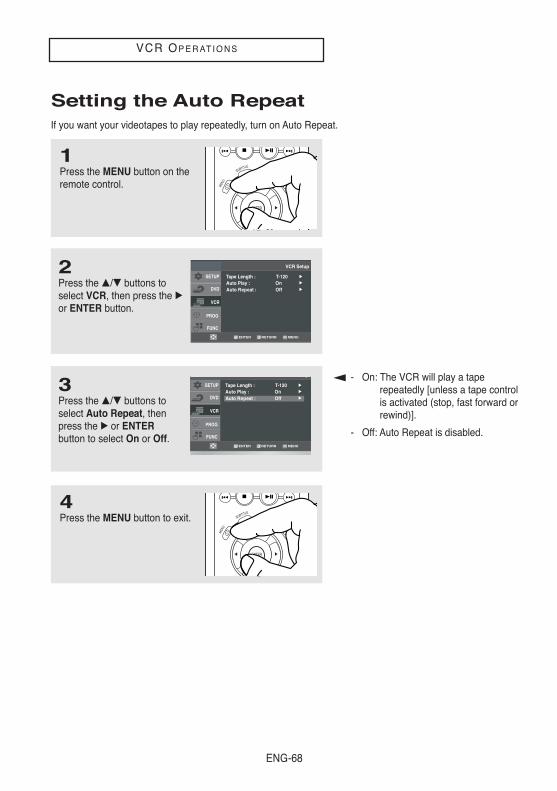
ENG-68
VCR OP E R AT I O N S
2Press the …/† buttons toselect VCR, then press the √or ENTER button.
n
3Press the …/† buttons toselect Auto Repeat, thenpress the √ or ENTERbutton to select On or Off.
n
1Press the MENU button on theremote control.
4Press the MENU button to exit.
Setting the Auto RepeatIf you want your videotapes to play repeatedly, turn on Auto Repeat.
- On: The VCR will play a tape repeatedly [unless a tape control is activated (stop, fast forward or rewind)].
- Off: Auto Repeat is disabled.
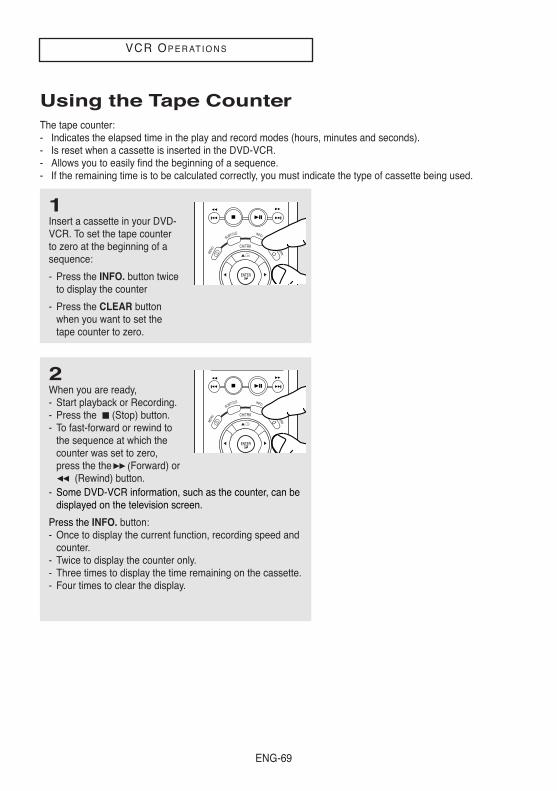
ENG-69
VCR OP E R AT I O N S
Using the Tape CounterThe tape counter:- Indicates the elapsed time in the play and record modes (hours, minutes and seconds).- Is reset when a cassette is inserted in the DVD-VCR.- Allows you to easily find the beginning of a sequence.- If the remaining time is to be calculated correctly, you must indicate the type of cassette being used.
1Insert a cassette in your DVD-VCR. To set the tape counterto zero at the beginning of asequence:
- Press the INFO. button twiceto display the counter
- Press the CLEAR buttonwhen you want to set thetape counter to zero.
2When you are ready,- Start playback or Recording.- Press the (Stop) button.- To fast-forward or rewind to
the sequence at which thecounter was set to zero,press the the (Forward) or
(Rewind) button.- Some DVD-VCR information, such as the counter, can be
displayed on the television screen.
Press the INFO. button:- Once to display the current function, recording speed and
counter.- Twice to display the counter only.- Three times to display the time remaining on the cassette.- Four times to clear the display.

ENG-70
VCR OP E R AT I O N S
5While the DVD-VCR is inpause mode, press the RECbutton. The pause mode isdisplayed on the screen.
Using the Assemble Edit FunctionThis function allows you to start a new recording at a specific position on the cassette while maintaining a verysmooth scene change.
2Press the (Play/Pause)button to start playback.
3When you reach the positionfrom which you wish to startthe new recording, press the
(Play/Pause) button.
4Press the F.ADV button asoften as necessary to advanceframe by frame, until the exactrecording position is located.
1Insert the cassette to be editedin your DVD-VCR.
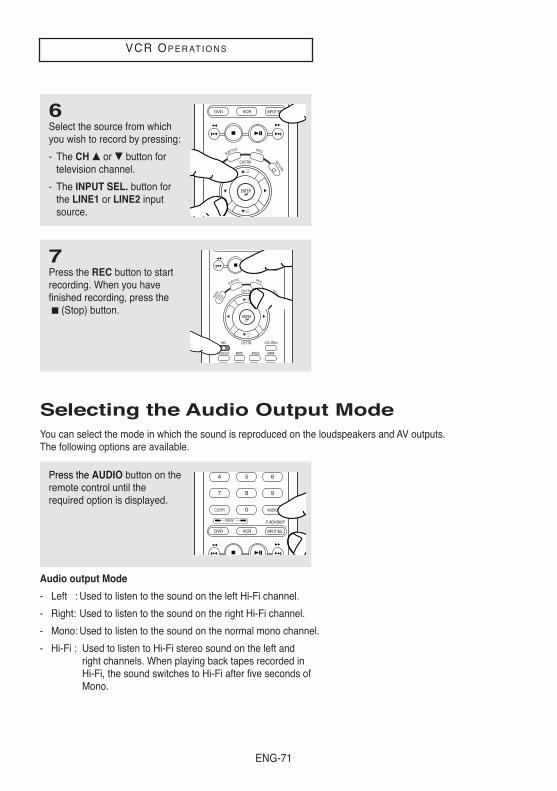
ENG-71
VCR OP E R AT I O N S
6Select the source from whichyou wish to record by pressing:
- The CH … or † button fortelevision channel.
- The INPUT SEL. button forthe LINE1 or LINE2 inputsource.
7Press the REC button to startrecording. When you havefinished recording, press the
(Stop) button.
Selecting the Audio Output ModeYou can select the mode in which the sound is reproduced on the loudspeakers and AV outputs.The following options are available.
Audio output Mode
- Left : Used to listen to the sound on the left Hi-Fi channel.
- Right: Used to listen to the sound on the right Hi-Fi channel.
- Mono: Used to listen to the sound on the normal mono channel.
- Hi-Fi : Used to listen to Hi-Fi stereo sound on the left and right channels. When playing back tapes recorded in Hi-Fi, the sound switches to Hi-Fi after five seconds of Mono.
Press the AUDIO button on theremote control until therequired option is displayed.
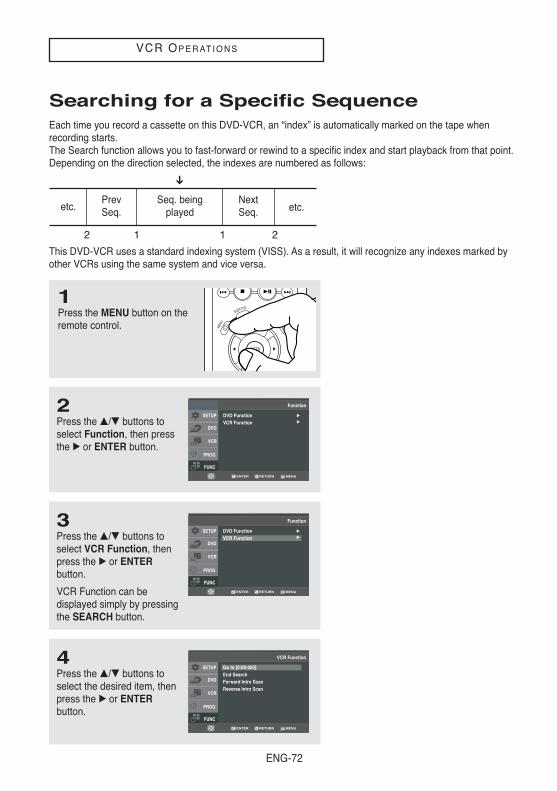
ENG-72
VCR OP E R AT I O N S
2Press the …/† buttons toselect Function, then pressthe √ or ENTER button.
3Press the …/† buttons toselect VCR Function, thenpress the √ or ENTERbutton.
VCR Function can bedisplayed simply by pressingthe SEARCH button.
DVD FunctionVCR Function
1Press the MENU button on theremote control.
Searching for a Specific SequenceEach time you record a cassette on this DVD-VCR, an “index” is automatically marked on the tape whenrecording starts.The Search function allows you to fast-forward or rewind to a specific index and start playback from that point.Depending on the direction selected, the indexes are numbered as follows:
This DVD-VCR uses a standard indexing system (VISS). As a result, it will recognize any indexes marked byother VCRs using the same system and vice versa.
etc.
2 1 1 2
etc.PrevSeq.
Seq. beingplayed
NextSeq.
4Press the …/† buttons toselect the desired item, thenpress the √ or ENTERbutton.
Go to [0:00:000]End SearchForward Intro ScanReverse Intro Scan
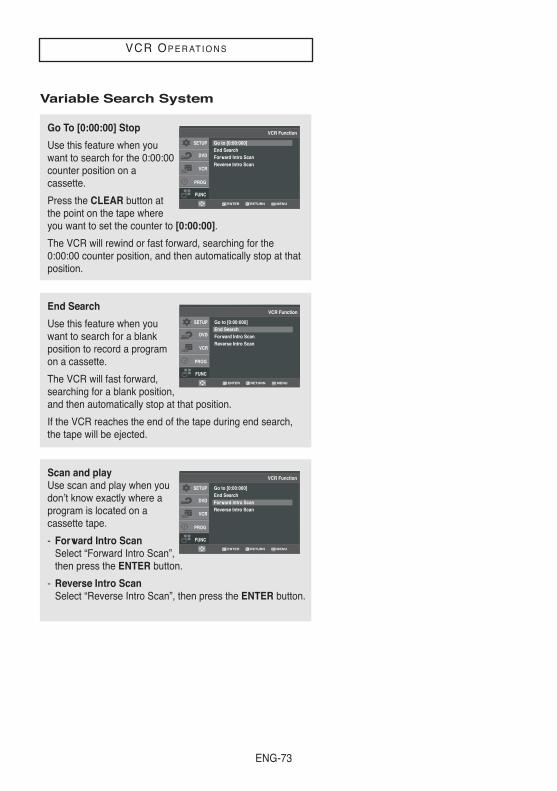
ENG-73
VCR OP E R AT I O N S
Go To [0:00:00] Stop
Use this feature when youwant to search for the 0:00:00counter position on acassette.
Press the CLEAR button atthe point on the tape whereyou want to set the counter to [0:00:00].
The VCR will rewind or fast forward, searching for the0:00:00 counter position, and then automatically stop at thatposition.
Go to [0:00:000]End SearchForward Intro ScanReverse Intro Scan
End Search
Use this feature when youwant to search for a blankposition to record a programon a cassette.
The VCR will fast forward,searching for a blank position,and then automatically stop at that position.
If the VCR reaches the end of the tape during end search,the tape will be ejected.
Go to [0:00:000]End SearchForward Intro ScanReverse Intro Scan
Scan and playUse scan and play when youdon’t know exactly where aprogram is located on acassette tape.
- Forward Intro ScanSelect “Forward Intro Scan”,then press the ENTER button.
- Reverse Intro ScanSelect “Reverse Intro Scan”, then press the ENTER button.
Go to [0:00:000]End SearchForward Intro ScanReverse Intro Scan
Variable Search System
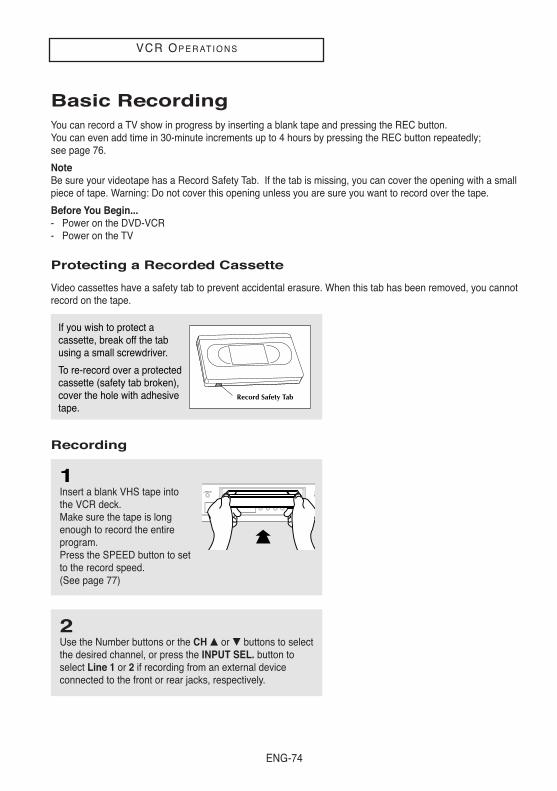
ENG-74
VCR OP E R AT I O N S
If you wish to protect acassette, break off the tabusing a small screwdriver.
To re-record over a protectedcassette (safety tab broken),cover the hole with adhesivetape.
Basic RecordingYou can record a TV show in progress by inserting a blank tape and pressing the REC button. You can even add time in 30-minute increments up to 4 hours by pressing the REC button repeatedly;see page 76.
NoteBe sure your videotape has a Record Safety Tab. If the tab is missing, you can cover the opening with a smallpiece of tape. Warning: Do not cover this opening unless you are sure you want to record over the tape.
Before You Begin...- Power on the DVD-VCR- Power on the TV
Protecting a Recorded Cassette
Video cassettes have a safety tab to prevent accidental erasure. When this tab has been removed, you cannotrecord on the tape.
Recording
1Insert a blank VHS tape intothe VCR deck.Make sure the tape is longenough to record the entireprogram.Press the SPEED button to setto the record speed. (See page 77)
2Use the Number buttons or the CH … or † buttons to selectthe desired channel, or press the INPUT SEL. button toselect Line 1 or 2 if recording from an external deviceconnected to the front or rear jacks, respectively.
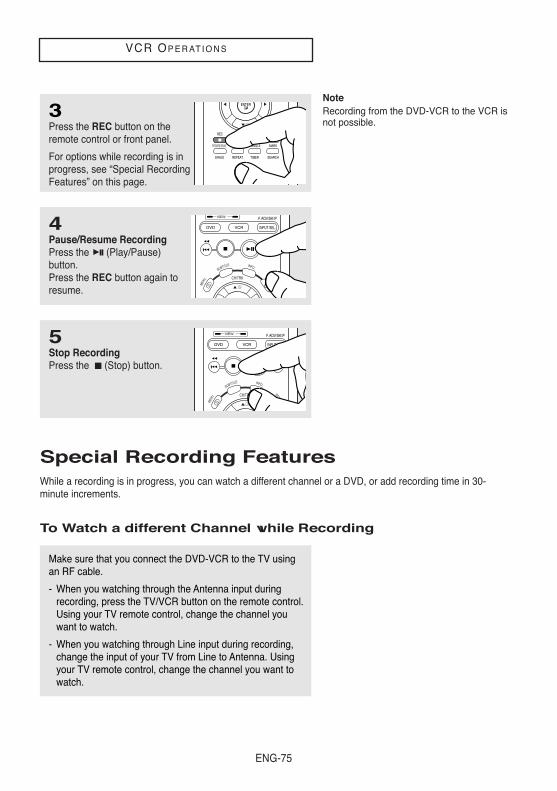
ENG-75
VCR OP E R AT I O N S
Special Recording FeaturesWhile a recording is in progress, you can watch a different channel or a DVD, or add recording time in 30-minute increments.
To Watch a different Channel while Recording
3Press the REC button on theremote control or front panel.
For options while recording is inprogress, see “Special RecordingFeatures” on this page.
4Pause/Resume RecordingPress the (Play/Pause)button.Press the REC button again toresume.
5Stop RecordingPress the (Stop) button.
Make sure that you connect the DVD-VCR to the TV usingan RF cable.
- When you watching through the Antenna input duringrecording, press the TV/VCR button on the remote control.Using your TV remote control, change the channel youwant to watch.
- When you watching through Line input during recording,change the input of your TV from Line to Antenna. Usingyour TV remote control, change the channel you want towatch.
NoteRecording from the DVD-VCR to the VCR isnot possible.
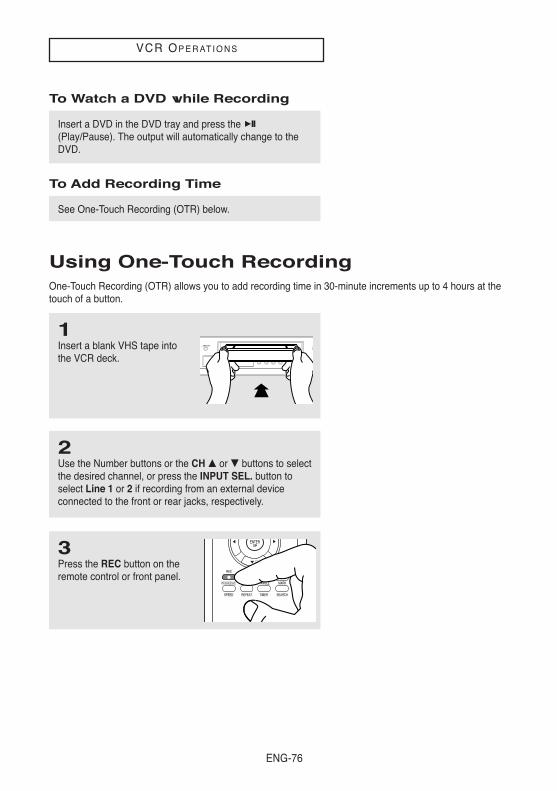
ENG-76
VCR OP E R AT I O N S
To Watch a DVD while Recording
Insert a DVD in the DVD tray and press the (Play/Pause). The output will automatically change to theDVD.
To Add Recording Time
See One-Touch Recording (OTR) below.
Using One-Touch RecordingOne-Touch Recording (OTR) allows you to add recording time in 30-minute increments up to 4 hours at thetouch of a button.
1Insert a blank VHS tape intothe VCR deck.
2Use the Number buttons or the CH … or † buttons to selectthe desired channel, or press the INPUT SEL. button toselect Line 1 or 2 if recording from an external deviceconnected to the front or rear jacks, respectively.
3Press the REC button on theremote control or front panel.
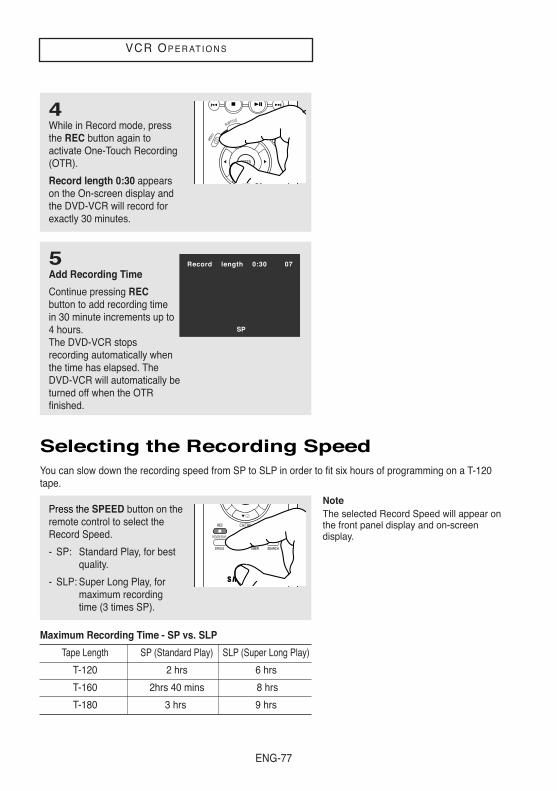
ENG-77
VCR OP E R AT I O N S
4While in Record mode, pressthe REC button again toactivate One-Touch Recording(OTR).
Record length 0:30 appearson the On-screen display andthe DVD-VCR will record forexactly 30 minutes.
Press the SPEED button on theremote control to select theRecord Speed.
- SP: Standard Play, for best quality.
- SLP: Super Long Play, for maximum recording time (3 times SP).
5Add Recording Time
Continue pressing RECbutton to add recording timein 30 minute increments up to4 hours.The DVD-VCR stopsrecording automatically whenthe time has elapsed. TheDVD-VCR will automatically beturned off when the OTRfinished.
SP
Record length 0:30 07
Selecting the Recording SpeedYou can slow down the recording speed from SP to SLP in order to fit six hours of programming on a T-120tape.
NoteThe selected Record Speed will appear onthe front panel display and on-screendisplay.
Maximum Recording Time - SP vs. SLP
Tape Length SP (Standard Play) SLP (Super Long Play)
T-120 2 hrs 6 hrs
T-160 2hrs 40 mins 8 hrs
T-180 3 hrs 9 hrs
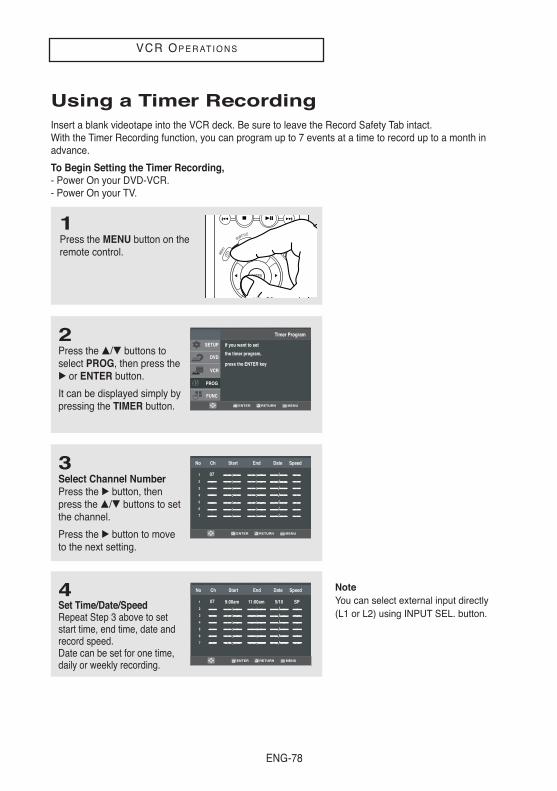
ENG-78
VCR OP E R AT I O N S
Using a Timer RecordingInsert a blank videotape into the VCR deck. Be sure to leave the Record Safety Tab intact.With the Timer Recording function, you can program up to 7 events at a time to record up to a month inadvance.
To Begin Setting the Timer Recording,- Power On your DVD-VCR.- Power On your TV.
2Press the …/† buttons toselect PROG, then press the√ or ENTER button.
It can be displayed simply bypressing the TIMER button.
3Select Channel NumberPress the √ button, thenpress the …/† buttons to setthe channel.
Press the √ button to moveto the next setting.
No Ch Start End Date Speed
: :: :: :: :: :: :: :
///////
1
2
3
4
5
6
7
07
4Set Time/Date/SpeedRepeat Step 3 above to setstart time, end time, date andrecord speed. Date can be set for one time,daily or weekly recording.
No Ch Start End Date Speed
9:00am 11:00am: :: :: :: :: :: :
5/10 SP//////
1
2
3
4
5
6
7
07
1Press the MENU button on theremote control.
NoteYou can select external input directly (L1 or L2) using INPUT SEL. button.
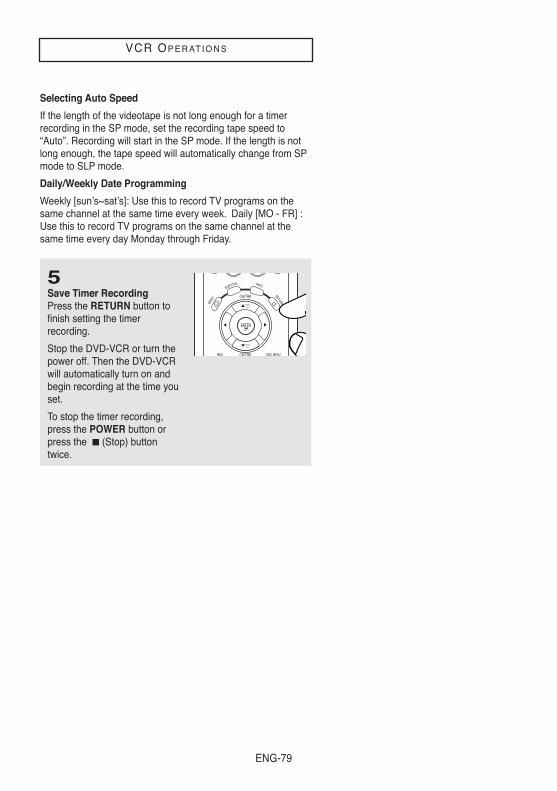
ENG-79
VCR OP E R AT I O N S
5Save Timer RecordingPress the RETURN button tofinish setting the timer recording.
Stop the DVD-VCR or turn thepower off. Then the DVD-VCRwill automatically turn on andbegin recording at the time youset.
To stop the timer recording,press the POWER button orpress the (Stop) buttontwice.
Selecting Auto Speed
If the length of the videotape is not long enough for a timerrecording in the SP mode, set the recording tape speed to“Auto”. Recording will start in the SP mode. If the length is notlong enough, the tape speed will automatically change from SPmode to SLP mode.
Daily/Weekly Date Programming
Weekly [sun’s~sat’s]: Use this to record TV programs on thesame channel at the same time every week. Daily [MO - FR] :Use this to record TV programs on the same channel at thesame time every day Monday through Friday.
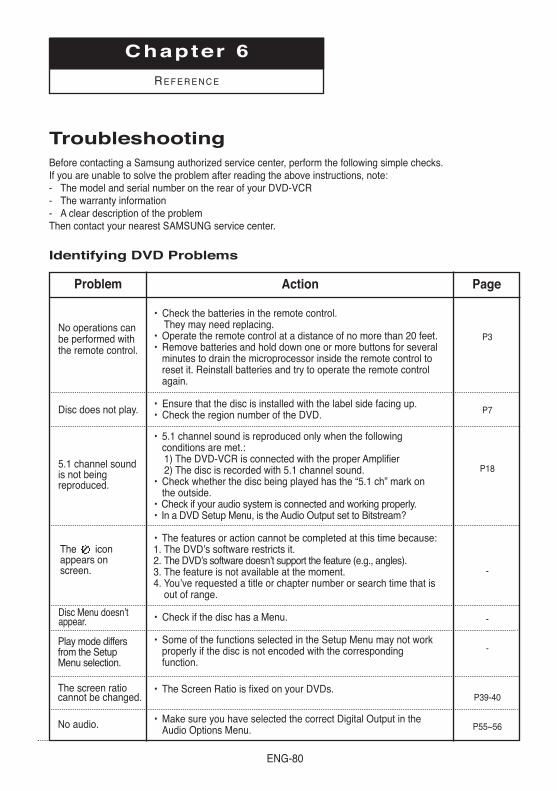
ENG-80
Chapter 6
RE F E R E N C E
TroubleshootingBefore contacting a Samsung authorized service center, perform the following simple checks.If you are unable to solve the problem after reading the above instructions, note:- The model and serial number on the rear of your DVD-VCR- The warranty information- A clear description of the problemThen contact your nearest SAMSUNG service center.
Identifying DVD Problems
No operations canbe performed withthe remote control.
The screen ratio cannot be changed.
No audio.
Play mode differsfrom the SetupMenu selection.
Disc Menu doesn’tappear.
The iconappears onscreen.
5.1 channel soundis not beingreproduced.
Disc does not play.
• Check the batteries in the remote control. They may need replacing.
• Operate the remote control at a distance of no more than 20 feet.• Remove batteries and hold down one or more buttons for several
minutes to drain the microprocessor inside the remote control toreset it. Reinstall batteries and try to operate the remote controlagain.
• Ensure that the disc is installed with the label side facing up.• Check the region number of the DVD.
• 5.1 channel sound is reproduced only when the followingconditions are met.: 1) The DVD-VCR is connected with the proper Amplifier2) The disc is recorded with 5.1 channel sound.
• Check whether the disc being played has the “5.1 ch” mark onthe outside.
• Check if your audio system is connected and working properly.• In a DVD Setup Menu, is the Audio Output set to Bitstream?
• The features or action cannot be completed at this time because:1. The DVD’s software restricts it.2. The DVD’s software doesn’t support the feature (e.g., angles).3. The feature is not available at the moment.4. You’ve requested a title or chapter number or search time that is
out of range.
• Check if the disc has a Menu.
• Some of the functions selected in the Setup Menu may not workproperly if the disc is not encoded with the correspondingfunction.
• The Screen Ratio is fixed on your DVDs.
• Make sure you have selected the correct Digital Output in theAudio Options Menu.
ActionProblem Page
P3
P7
P18
-
-
-
P39-40
P55~56
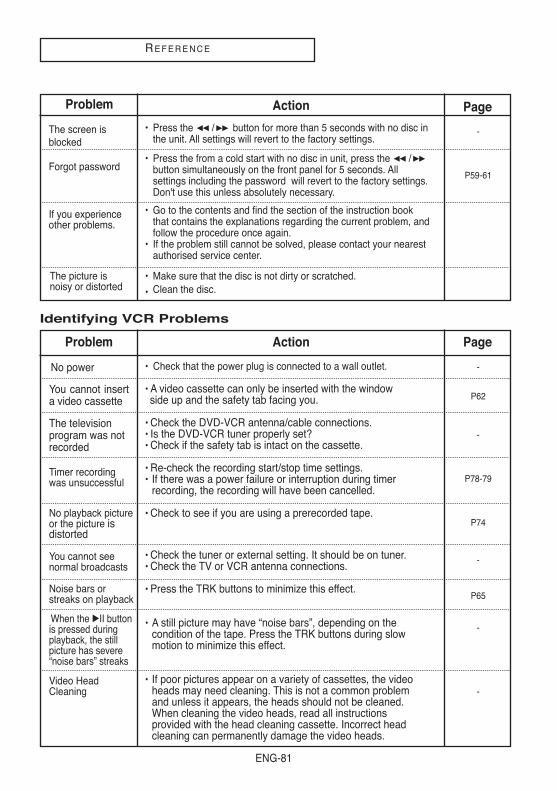
ENG-81
RE F E R E N C E
Forgot password
The screen isblocked
If you experienceother problems.
• Press the / button for more than 5 seconds with no disc inthe unit. All settings will revert to the factory settings.
• Press the from a cold start with no disc in unit, press the /button simultaneously on the front panel for 5 seconds. Allsettings including the password will revert to the factory settings.Don't use this unless absolutely necessary.
• Go to the contents and find the section of the instruction bookthat contains the explanations regarding the current problem, andfollow the procedure once again.
• If the problem still cannot be solved, please contact your nearestauthorised service center.
• Make sure that the disc is not dirty or scratched.
• Clean the disc.
ActionProblem Page
The picture isnoisy or distorted
-
P59-61
Identifying VCR Problems
No power
You cannot inserta video cassette
The televisionprogram was notrecorded
Timer recordingwas unsuccessful
No playback pictureor the picture isdistorted
You cannot seenormal broadcasts
Noise bars orstreaks on playback
When the √II buttonis pressed duringplayback, the stillpicture has severe“noise bars” streaks
Video HeadCleaning
• Check that the power plug is connected to a wall outlet.
• A video cassette can only be inserted with the window side up and the safety tab facing you.
• Check the DVD-VCR antenna/cable connections.• Is the DVD-VCR tuner properly set?• Check if the safety tab is intact on the cassette.
• Re-check the recording start/stop time settings.• If there was a power failure or interruption during timer
recording, the recording will have been cancelled.
• Check to see if you are using a prerecorded tape.
• Check the tuner or external setting. It should be on tuner.• Check the TV or VCR antenna connections.
• Press the TRK buttons to minimize this effect.
• A still picture may have “noise bars”, depending on thecondition of the tape. Press the TRK buttons during slowmotion to minimize this effect.
• If poor pictures appear on a variety of cassettes, the videoheads may need cleaning. This is not a common problemand unless it appears, the heads should not be cleaned.When cleaning the video heads, read all instructionsprovided with the head cleaning cassette. Incorrect headcleaning can permanently damage the video heads.
ActionProblem Page
-
P62
-
P78-79
P74
-
P65
-
-
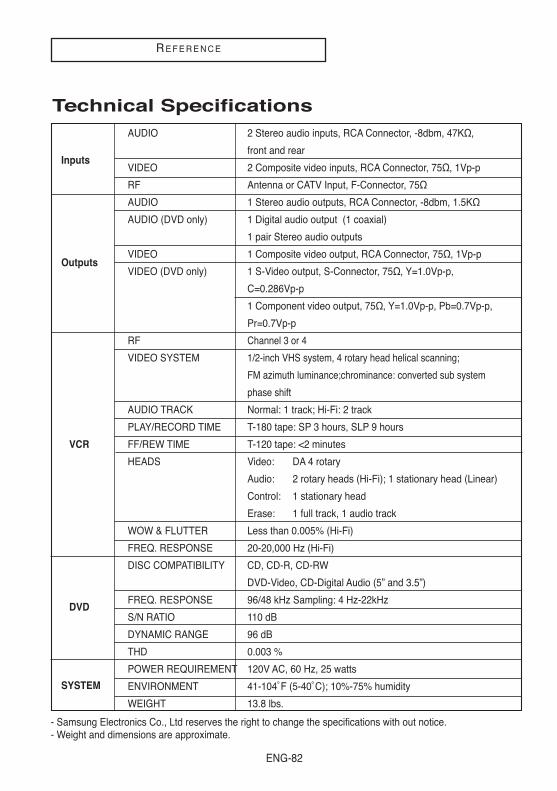
ENG-82
RE F E R E N C E
- Samsung Electronics Co., Ltd reserves the right to change the specifications with out notice.- Weight and dimensions are approximate.
Technical SpecificationsAUDIO 2 Stereo audio inputs, RCA Connector, -8dbm, 47KΩ,
front and rearInputs
VIDEO 2 Composite video inputs, RCA Connector, 75Ω, 1Vp-p
RF Antenna or CATV Input, F-Connector, 75Ω
AUDIO 1 Stereo audio outputs, RCA Connector, -8dbm, 1.5KΩ
AUDIO (DVD only) 1 Digital audio output (1 coaxial)
1 pair Stereo audio outputs
VIDEO 1 Composite video output, RCA Connector, 75Ω, 1Vp-pOutputs
VIDEO (DVD only) 1 S-Video output, S-Connector, 75Ω, Y=1.0Vp-p,
C=0.286Vp-p
1 Component video output, 75Ω, Y=1.0Vp-p, Pb=0.7Vp-p,
Pr=0.7Vp-p
RF Channel 3 or 4
VIDEO SYSTEM 1/2-inch VHS system, 4 rotary head helical scanning;
FM azimuth luminance;chrominance: converted sub system
phase shift
AUDIO TRACK Normal: 1 track; Hi-Fi: 2 track
PLAY/RECORD TIME T-180 tape: SP 3 hours, SLP 9 hours
VCR FF/REW TIME T-120 tape: <2 minutes
HEADS Video: DA 4 rotary
Audio: 2 rotary heads (Hi-Fi); 1 stationary head (Linear)
Control: 1 stationary head
Erase: 1 full track, 1 audio track
WOW & FLUTTER Less than 0.005% (Hi-Fi)
FREQ. RESPONSE 20-20,000 Hz (Hi-Fi)
DISC COMPATIBILITY CD, CD-R, CD-RW
DVD-Video, CD-Digital Audio (5” and 3.5”)
DVDFREQ. RESPONSE 96/48 kHz Sampling: 4 Hz-22kHz
S/N RATIO 110 dB
DYNAMIC RANGE 96 dB
THD 0.003 %
POWER REQUIREMENT 120V AC, 60 Hz, 25 watts
SYSTEM ENVIRONMENT 41-104˚F (5-40˚C); 10%-75% humidity
WEIGHT 13.8 lbs.

RE F E R E N C E

Warranty
LIMITED WARRANTY TO ORIGINAL PURCHASER
THIS SAMSUNG BRAND PRODUCT, AS SUPPLIED AND DISTRIBUTED BY SAMSUNG ELECTRONICSAMERICA, INC. (SAMSUNG) AND DELIVERED NEW, IN THE ORIGINAL CARTON TO THE ORIGINALCONSUMER PURCHASER, IS WARRANTED BY SAMSUNG AGAINST MANUFACTURING DEFECTS INMATERIALS AND WORKMANSHIP FOR THE FOLLOWING LIMITED WARRANTY PERIOD:
One (1) Year Parts / Ninety (90) days LaborThis limited warranty begins on the original date of purchase, and is valid only on products purchased andused in the United States, and does not include transportation, installation, removal or reinstallation. WARRANTY REPAIRS MUST BE PERFORMED BY SAMSUNG’S AUTHORIZED SERVICE CENTER. TO RECEIVE WARRANTY SERVICE, THE ORIGINAL DATED BILL OF SALE MUST BE PRESENTED UPONREQUEST AS PROOF OF PURCHASE TO SAMSUNG OR SAMSUNG’S AUTHORIZED SERVICE CENTER.TRANSPORTATION TO AND FROM THE SERVICE CENTER IS THE RESPONSIBILITY OF THE PURCHASER.
SAMSUNG WILL REPAIR OR REPLACE THIS PRODUCT, AT OUR OPTION AND AT NO CHARGE WITHNEW OR RECONDITIONED PARTS, IF FOUND TO BE DEFECTIVE DURING THE LIMITED WARRANTYPERIOD SPECIFIED ABOVE. The product must be returned during the warranty period with transportationcharges prepaid to SAMSUNG’s designated service center. Prior to returning any product for warrantyservice, the purchaser must contact SAMSUNG for problem determination and service procedures.SAMSUNG DOES NOT WARRANT UNINTERRUPTED OR ERROR-FREE OPERATION OF THE PRODUCT.All replaced parts and products become the property of SAMSUNG and must be returned to SAMSUNG.Replacement parts and products assume the remaining original warranty, or ninety (90) days, whichever islonger.
This limited warranty covers manufacturing defects in materials and workmanship encountered in normal, noncommercial use of this product and shall not apply to the following, including, but not limited to: damagewhich occurs in shipment; applications and uses for which this product was not intended; failures or problemswhich are caused by products or equipment not supplied by SAMSUNG; accidents, misuse, abuse, neglect, misapplication, fire, water, lightning or other acts of nature; incorrect electrical line voltage, fluctuations orsurges; damage caused by improper or faulty installation; improper connection with any peripheral; product alteration or modification; improper or unauthorized repair; cosmetic damage or exterior finish; product withaltered serial numbers; failure to follow operating instructions, customer adjustments, maintenance and environmental instructions that are covered and prescribed in the instruction book; use of non-SAMSUNG orunauthorized parts, supplies, accessories or equipment which damage this product or result in serviceproblems; failures or problems due to incompatibility with other equipment.
HEADQUARTERS105 Challenger Road
Ridgefield Park, NJ 07660-0511TEL: 1-800-SAMSUNG
SERVICE DIVISION400 Valley Road, Suite 201Mount Arlington, NJ 07856
1-800-SAMSUNG (1-800-726-7864)www.samsung.com
AK68-00593A-00