Embed Size (px)
Citation preview

Instruction for improvement of Enginer BMS
1、、、、 Improvement of Enginer PHEV BMS
1、、、、 The difference between new version and old version
Old version:
One single BMS can only detect voltage value of 8 batteries
Equilibrium current is 300MA; high-voltage battery discharges out-oriented
It alerms when the voltage of one single cell is too high or too low
New version:
One single BMS can only detect voltage value of 16 batteries
Equilibrium current is 1A; high-voltage battery transfers current to low-voltage battery;
save energe greatly
BMS stops charging if the voltage of one single battery is over 3.8V
BMS stops recharging if the voltage of one single battery is below 2.5V
BMS goes into dormant automatically and prevents batteries if one single battery is
below 2V
2、、、、Manual for new BMS
Monitor:
Page 1 displays input/output voltage and current of the primary battery in automobile
charged by Enginer PHEV
Page 2 displays voltage from No. 1 to No. 4 cells of Enginer PHEV Li-Ion battery
Page 3 displays voltage from No. 5 to No. 8 cells of Enginer PHEV Li-Ion battery
Page 4 displays voltage from No. 9 to No. 12 cells of Enginer PHEV Li-Ion battery
Page 5 displays voltage from No. 13 to No. 16 cells of Enginer PHEV Li-Ion battery
Button:
Use for turn over pages on monitor
“》” meas page down
“《” meas page up
Back to Page 1 in 30 seconds automatically
LED:
4 groups of lights correponds with 4 groups of batteries: W1 P1 (battery No.1-No. 4);
W2 P2 (battery No.5-No.8); W3 P3 (battery No.9-No.12); W4 P4 (battery No.13-
No.16)
W red LED flashing indicates at least one of four batteries is low-voltage (<2.5V)
W red LED lighting constantly indicates
Attention: Disconnect BMS to batteries if not uesd for over 10 days to avoid battery
failure.
2、、、、 Improvement for Enginer PHEV Installation Structure
1、、、、Battery connection method updating
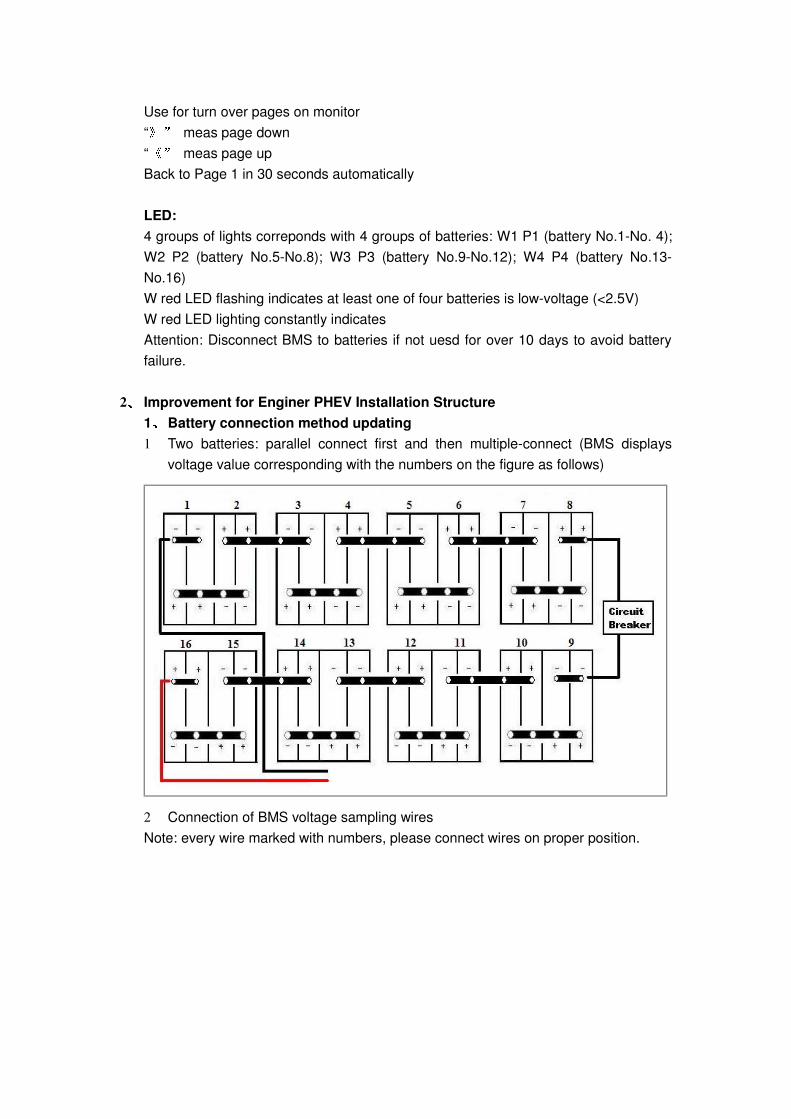
1 Two batteries: parallel connect first and then multiple-connect (BMS displays
voltage value corresponding with the numbers on the figure as follows)
2 Connection of BMS voltage sampling wires
Note: every wire marked with numbers, please connect wires on proper position.
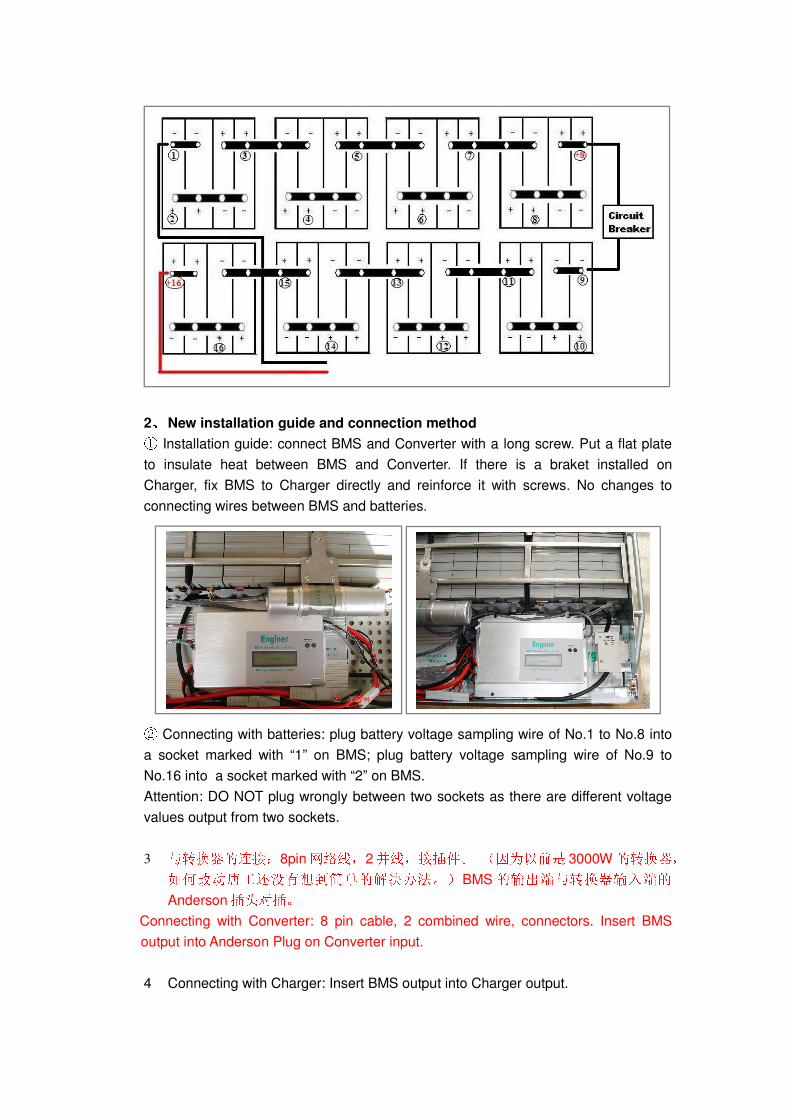
2、、、、New installation guide and connection method① Installation guide: connect BMS and Converter with a long screw. Put a flat plate
to insulate heat between BMS and Converter. If there is a braket installed on
Charger, fix BMS to Charger directly and reinforce it with screws. No changes to
connecting wires between BMS and batteries.
② Connecting with batteries: plug battery voltage sampling wire of No.1 to No.8 into
a socket marked with “1” on BMS; plug battery voltage sampling wire of No.9 to
No.16 into a socket marked with “2” on BMS.
Attention: DO NOT plug wrongly between two sockets as there are different voltage
values output from two sockets.
3 与转换器的连接:8pin网络线,2 并线,接插件。 (因为以前是 3000W 的转换器,如何改动唐工还没有想到简单的解决办法。)BMS 的输出端与转换器输入端的Anderson插头对插。
Connecting with Converter: 8 pin cable, 2 combined wire, connectors. Insert BMS
output into Anderson Plug on Converter input.
4 Connecting with Charger: Insert BMS output into Charger output.
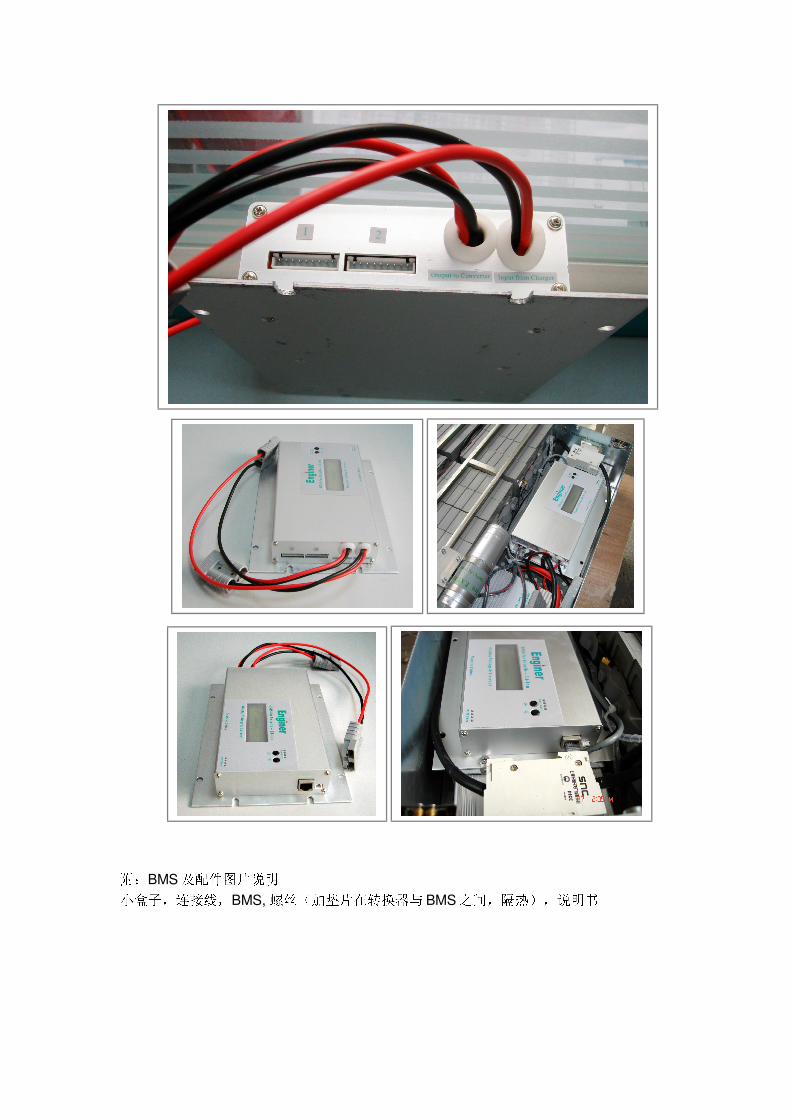
附:BMS 及配件图片说明小盒子,连接线,BMS, 螺丝(加垫片在转换器与BMS 之间,隔热),说明书