Embed Size (px)
Citation preview
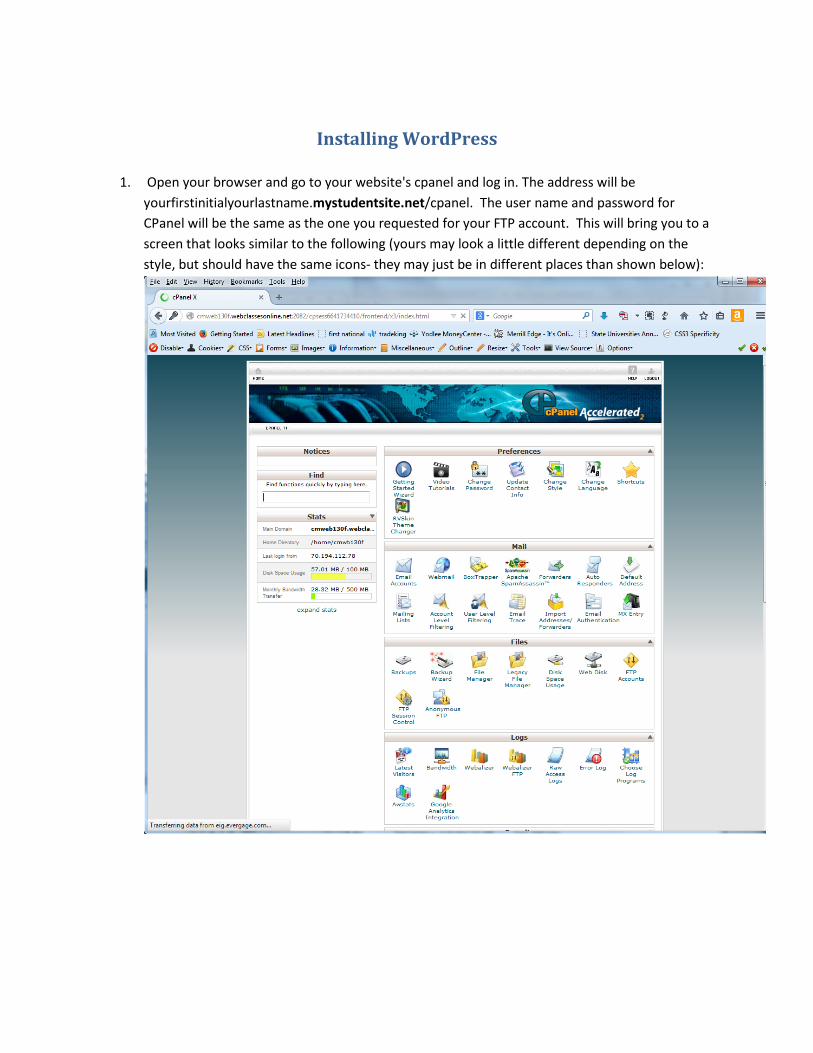
Installing WordPress
1. Open your browser and go to your website's cpanel and log in. The address will be yourfirstinitialyourlastname.mystudentsite.net/cpanel. The user name and password for CPanel will be the same as the one you requested for your FTP account. This will bring you to a screen that looks similar to the following (yours may look a little different depending on the style, but should have the same icons- they may just be in different places than shown below):
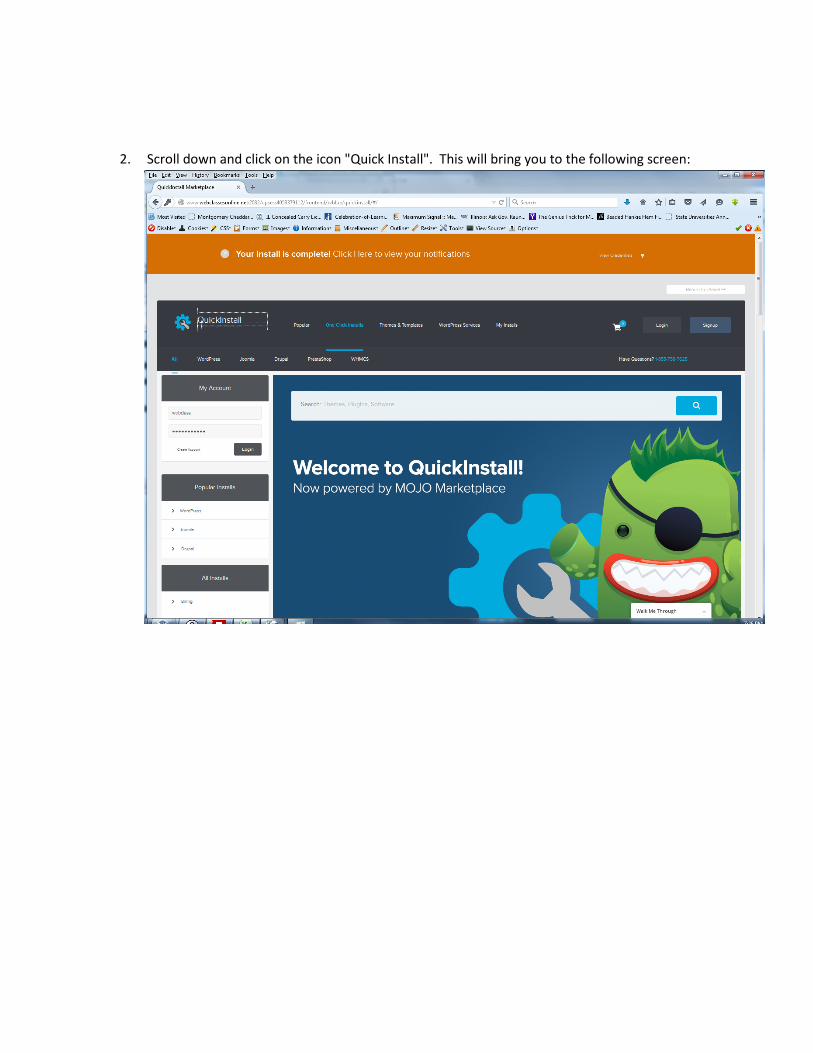
2. Scroll down and click on the icon "Quick Install". This will bring you to the following screen:
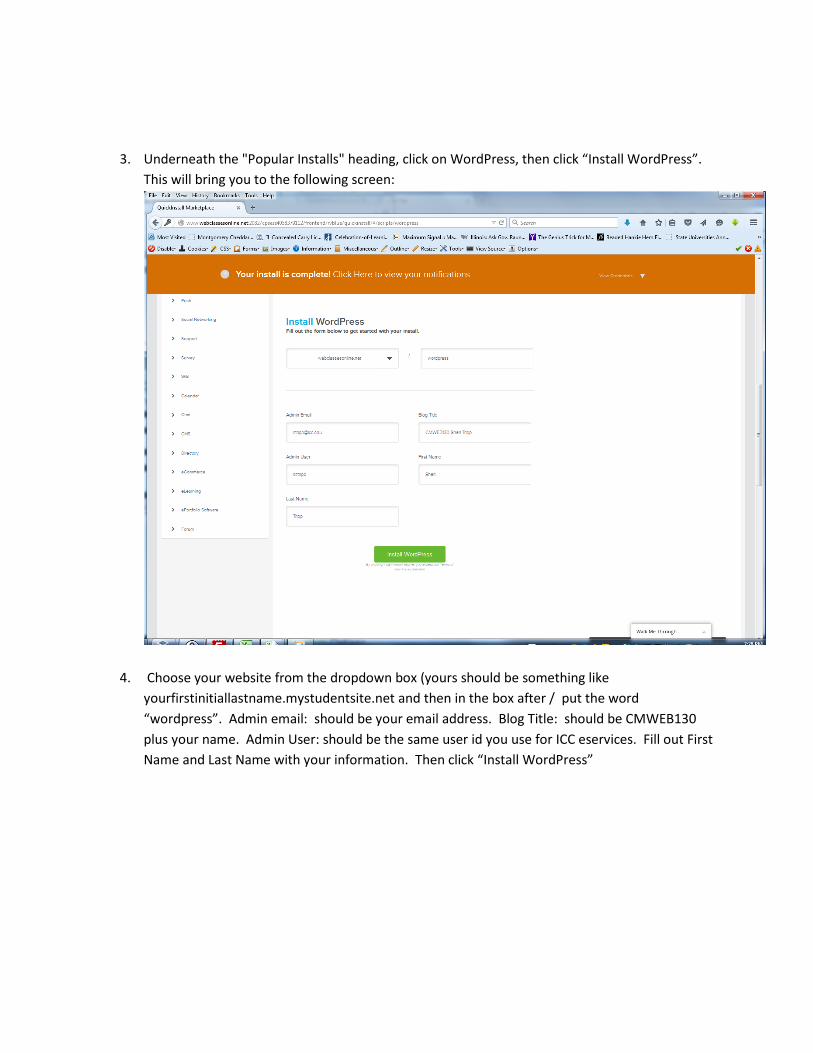
3. Underneath the "Popular Installs" heading, click on WordPress, then click “Install WordPress”.
This will bring you to the following screen:
4. Choose your website from the dropdown box (yours should be something like yourfirstinitiallastname.mystudentsite.net and then in the box after / put the word “wordpress”. Admin email: should be your email address. Blog Title: should be CMWEB130 plus your name. Admin User: should be the same user id you use for ICC eservices. Fill out First Name and Last Name with your information. Then click “Install WordPress”
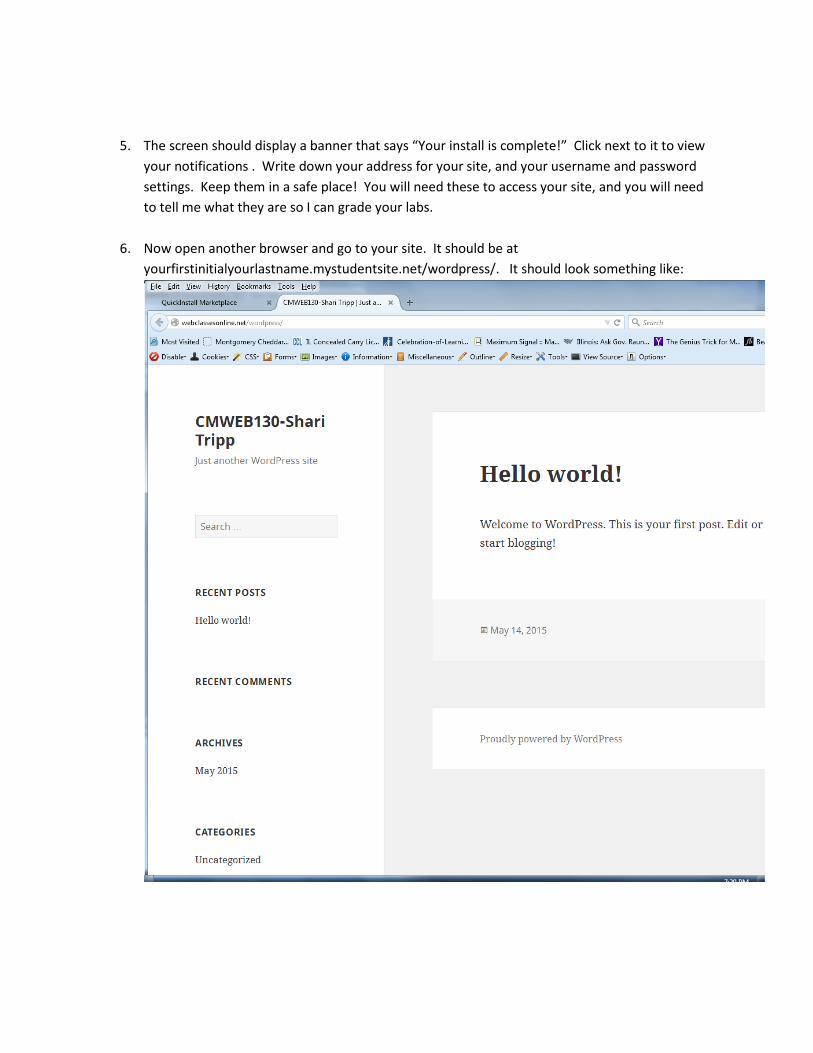
5. The screen should display a banner that says “Your install is complete!” Click next to it to view your notifications . Write down your address for your site, and your username and password settings. Keep them in a safe place! You will need these to access your site, and you will need to tell me what they are so I can grade your labs.
6. Now open another browser and go to your site. It should be at yourfirstinitialyourlastname.mystudentsite.net/wordpress/. It should look something like:
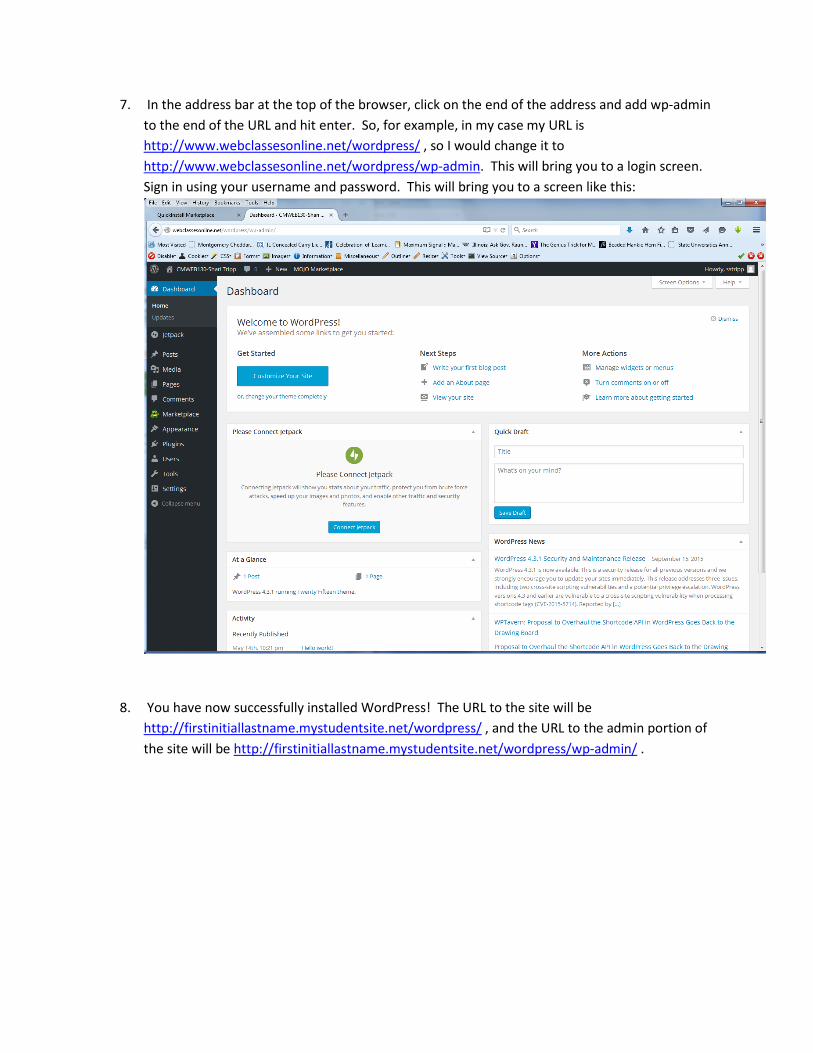
7. In the address bar at the top of the browser, click on the end of the address and add wp-admin to the end of the URL and hit enter. So, for example, in my case my URL is http://www.webclassesonline.net/wordpress/ , so I would change it to http://www.webclassesonline.net/wordpress/wp-admin. This will bring you to a login screen. Sign in using your username and password. This will bring you to a screen like this:
8. You have now successfully installed WordPress! The URL to the site will be http://firstinitiallastname.mystudentsite.net/wordpress/ , and the URL to the admin portion of the site will be http://firstinitiallastname.mystudentsite.net/wordpress/wp-admin/ .