Embed Size (px)
Citation preview
Cisco BOL-11618-18
A
P P E N D I X D Installing Solaris 10 Version 0708-V02 on Sun Netra T5220Revised: March 10, 2011, OL-11618-18
OverviewThis section provides information about the procedures that you must complete in order to perform the following tasks:
• Enable RAID 0 on a Sun Netra T5220 platform.
• Install the Solaris 10 (0708) image on the Sun Netra T5220 platform on which you intend to install the Cisco BAMS 3.30 software.
Note If you wish to run the Cisco Media Gateway Controller (MGC) Node Manager to recognize the traps sent from a Cisco BAMS, you must install Cisco BAMS 3.30 Patch 308 with the Solaris 10 (Version 0708-V02) operating system on the Sun Netra T5220 server.
Note If you configure RAID, you can enhance the performance of Cisco BAMS. However, RAID 0 is optional. If you wish to configure RAID 0, you must configure it before you install the Solaris 10 Jumpstart image.
Caution When you install Cisco BAMS 3.30, you must also install the most recent patch of the software. If you fail to install the patch, the software might experience a COR failure.
After you successfully install the Solaris 10 image on the Netra T5220 host machine, you can proceed to install the Solaris 10 Environment patches, the Cisco BAMS 3.30 Base Build, and the latest Cisco BAMS 3.30 patch.
This document does not cover installation of Solaris 10 Environment patches, the Cisco BAMS 3.30 Base Build, nor Cisco BAMS 3.30 patches. See the following documents for installation instructions:
• Solaris 10 Environment Patch—Cisco Media Gateway Controller Software Installation and Configuration (Release 9.7), Chapter 2, Installing the Sun Solaris 10 Operating System (Loading the Sun Solaris 10 Operating Environment)
D-1illing and Measurements Server User Guide
Appendix D Installing Solaris 10 Version 0708-V02 on Sun Netra T5220Overview
Note If you enable RAID 0 on the Sun Netra T5220 platform, do not install the Sun environment patch CSCOh027.
• BAMS 3.30 Base Build installation—Chapter 2, “Setup and Installation.”
• BAMS 3.30 Patches download—http://www.cisco.com/pcgi-bin/swsrch/SWSearch.cgi
Hardware CompatibilityThe Sun Solaris 10 operating system (Version 0708-V02) referred to in this appendix should be run on a Sun Netra T5220 platform.
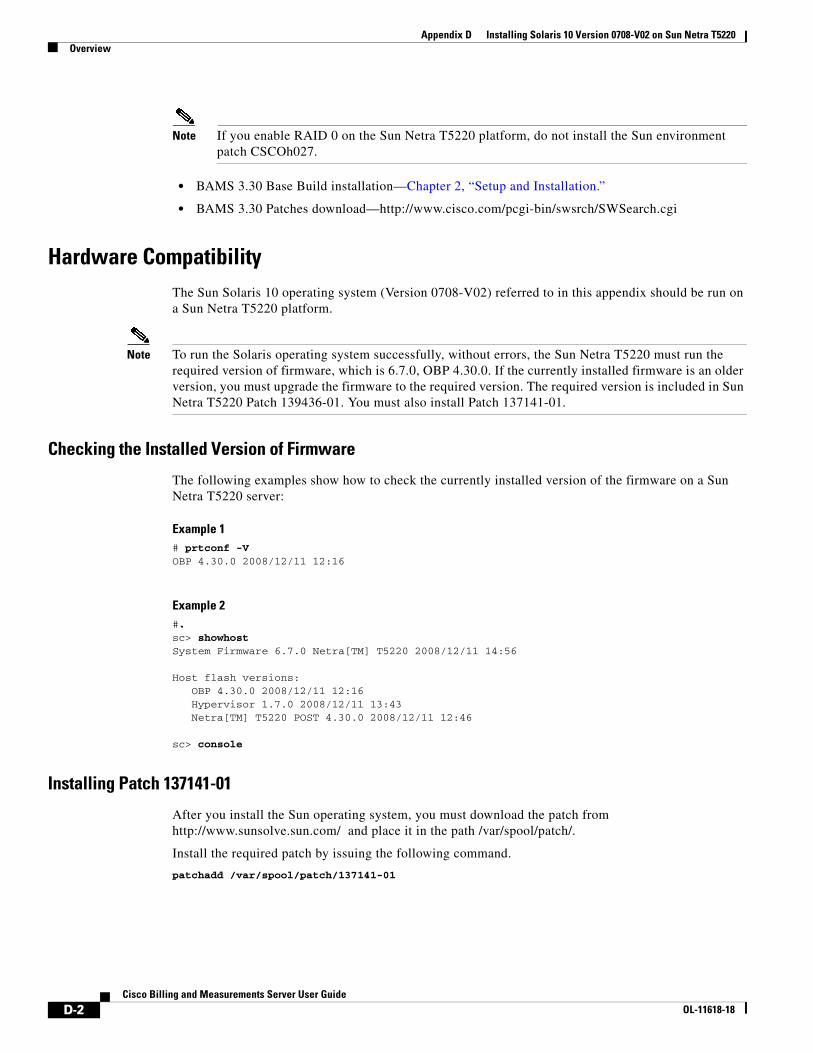
Note To run the Solaris operating system successfully, without errors, the Sun Netra T5220 must run the required version of firmware, which is 6.7.0, OBP 4.30.0. If the currently installed firmware is an older version, you must upgrade the firmware to the required version. The required version is included in Sun Netra T5220 Patch 139436-01. You must also install Patch 137141-01.
Checking the Installed Version of Firmware
The following examples show how to check the currently installed version of the firmware on a Sun Netra T5220 server:
Example 1# prtconf -VOBP 4.30.0 2008/12/11 12:16
Example 2#.sc> showhostSystem Firmware 6.7.0 Netra[TM] T5220 2008/12/11 14:56
Host flash versions: OBP 4.30.0 2008/12/11 12:16 Hypervisor 1.7.0 2008/12/11 13:43 Netra[TM] T5220 POST 4.30.0 2008/12/11 12:46
sc> console
Installing Patch 137141-01
After you install the Sun operating system, you must download the patch from http://www.sunsolve.sun.com/ and place it in the path /var/spool/patch/.
Install the required patch by issuing the following command.
patchadd /var/spool/patch/137141-01
D-2Cisco Billing and Measurements Server User Guide
OL-11618-18
Appendix D Installing Solaris 10 Version 0708-V02 on Sun Netra T5220Precautions
PrecautionsThis section presents precautions you should consider before you perform any of the following installation procedures. When you begin to perform one of the installation procedures, you cannot back out.
• Upgrading an existing Cisco BAMS 3.30 installation to a new Sun Netra T5220 host machine:
– See the Cisco BAMS 3.30 upgrade procedure in Appendix B, “Upgrading to BAMS Release 3.30,” Cisco Billing and Measurements Server User Guide, Release 3.30
– Cisco recommends that you perform a full backup before you perform an upgrade procedure. See Appendix B, “Upgrading to BAMS Release 3.30,” Cisco Billing and Measurements Server User Guide, Release 3.30
Caution Do not perform the installation procedures provided in this appendix while the host machine is processing live traffic. If you attempt to install a new operating system, you will delete all existing software and data from the machine. If you have questions, contact Cisco TAC.
• New Solaris jumpstart installation—If you are performing a new installation, you need not complete a backup of an operating system installation. You can proceed to configure RAID 0 and then the operating system installation.
Note To perform the procedures in this appendix, you should be experienced in basic UNIX commands.
Prerequisite ChecklistBefore you start the procedures in this appendix, complete the tasks listed in the following checklist.
1. Ensure that the Cisco BAMS 3.30 hardware components are installed according to the manufacturer’s recommendations.
2. Verify that you have the correct CD.
3. If required, perform a data backup if the machine was running the Cisco BAMS 3.30 software prior to this operating system installation/upgrade.
4. Complete the following tasks for a new operating system installation only (that is, not for an operating system upgrade):
a. Ensure that you have a Network Installation Data Sheet (NIDS) provided by Cisco. This will contain the following information necessary to place the jumpstarted Cisco BAMS on the network after the CD installation.
– nodename
– hosts
– netmasks
– hostname.<primary interface>
– Default Gateway IP address
5. Set up a console port through which you can perform the jumpstart/upgrade procedure.
D-3Cisco Billing and Measurements Server User Guide
OL-11618-18
Appendix D Installing Solaris 10 Version 0708-V02 on Sun Netra T5220RAID 0 Setup (Optional)
RAID 0 Setup (Optional)RAID 0 enables you to construct a logical volume made up of two or more physical disks, to increase the performance of Cisco BAMS. The Sun Netra T5220 server on-board disk controller supports both RAID 0 and RAID 1 volumes.
Configure a RAID 0 volume on Netra T5220 by initializing the volume across two or four physical disks. This means that the Cisco BAMS billing, measurements, and intermediate files data is written across each physical disk in turn or striping the files across the disks. Configuring a RAID 0 volume improves the performance of Cisco BAMS but it does not provide redundancy. Therefore, you incur an increased risk of data loss. If a single disk fails, the entire volume fails and you must delete the volume and reconstruct it.
Caution To minimize data loss, if you enable RAID 0, you must configure Cisco BAMS in redundant mode.
Cisco recommends enabling RAID 0 only when the Cisco BAMS is connected to a Cisco PGW2200 Softswitch that is running a high volume of calls per second, which requires improved performance.
All disks in a RAID 0 volume must be the same size.
For a Cisco BAMS that is in service and running on a Sun Netra T5220 without RAID, if you reinstall the server with RAID 0, all the data and the operating system will be deleted. Therefore, before you attempt to reinstall the server with RAID 0, back up all the data and transfer the files to another server.
Setting Up a RAID 0 VolumeTo set up RAID 0, complete the following steps.
Step 1 Connect to the Cisco BAMS through a console port.
Step 2 Load the appropriate version of the CD-ROM labeled Cisco Solaris 10 Operating Software Startup Disk for Sparc-based Platforms into the CD-ROM drive.
Step 3 If the system is currently running, log in as root.
Step 4 Use the halt command or init 0 command to instruct Netra T5220 to return the OK prompt:
# halt
Oct 28 00:13:40 sh-netra-T5220 halt: halted by rootOct 28 00:13:41 sh-netra-T5220 syslogd: going down on signal 15SNMP Research DR-Web EMANATE Agent Version 16.1.0.44Copyright 1989-2005 SNMP Research, Inc.syncing file systems... doneProgram terminated
Step 5 At the OK prompt, boot to the single-user mode with the Solaris 10 jumpstart image CD inserted in the disk drive:
ok boot cdrom -s
Text similar to the following is displayed.
SC Alert: Host System has Reset
SC Alert: CRITICAL ALARM is set
D-4Cisco Billing and Measurements Server User Guide
OL-11618-18
Appendix D Installing Solaris 10 Version 0708-V02 on Sun Netra T5220RAID 0 Setup (Optional)
|
Netra T5220, No KeyboardCopyright 2008 Sun Microsystems, Inc. All rights reserved.OpenBoot 4.28.6, 16256 MB memory available, Serial #76865034.Ethernet address 0:14:4f:94:de:a, Host ID: 8494de0a.
Boot device: /pci@7c0/pci@0/pci@1/pci@0/ide@8/cdrom@0,0:f File and args: -sSunOS Release 5.10 Version Generic_120011-14 64-bitCopyright 1983-2007 Sun Microsystems, Inc. All rights reserved.Use is subject to license terms.Booting to milestone "milestone/single-user:default".Configuring devices.Using RPC Bootparams for network configuration information.Attempting to configure interface e1000g3...Skipped interface e1000g3Attempting to configure interface e1000g2...Skipped interface e1000g2Attempting to configure interface e1000g1...Skipped interface e1000g1Attempting to configure interface e1000g0...Configured interface e1000g0Requesting System Maintenance ModeSINGLE USER MODE#
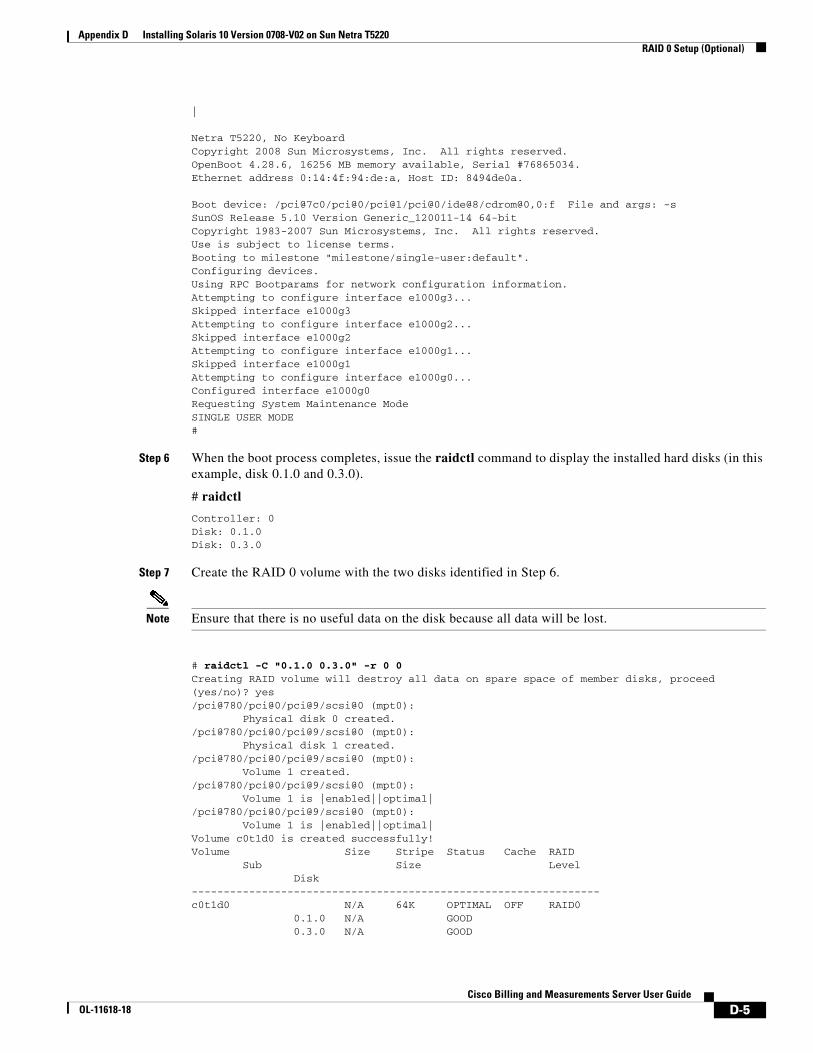
Step 6 When the boot process completes, issue the raidctl command to display the installed hard disks (in this example, disk 0.1.0 and 0.3.0).
# raidctl
Controller: 0Disk: 0.1.0Disk: 0.3.0
Step 7 Create the RAID 0 volume with the two disks identified in Step 6.
Note Ensure that there is no useful data on the disk because all data will be lost.
# raidctl -C "0.1.0 0.3.0" -r 0 0 Creating RAID volume will destroy all data on spare space of member disks, proceed (yes/no)? yes/pci@780/pci@0/pci@9/scsi@0 (mpt0): Physical disk 0 created./pci@780/pci@0/pci@9/scsi@0 (mpt0): Physical disk 1 created./pci@780/pci@0/pci@9/scsi@0 (mpt0): Volume 1 created./pci@780/pci@0/pci@9/scsi@0 (mpt0): Volume 1 is |enabled||optimal|/pci@780/pci@0/pci@9/scsi@0 (mpt0): Volume 1 is |enabled||optimal|Volume c0t1d0 is created successfully!Volume Size Stripe Status Cache RAID Sub Size Level Disk ----------------------------------------------------------------c0t1d0 N/A 64K OPTIMAL OFF RAID0 0.1.0 N/A GOOD 0.3.0 N/A GOOD
D-5Cisco Billing and Measurements Server User Guide
OL-11618-18
Appendix D Installing Solaris 10 Version 0708-V02 on Sun Netra T5220RAID 0 Setup (Optional)
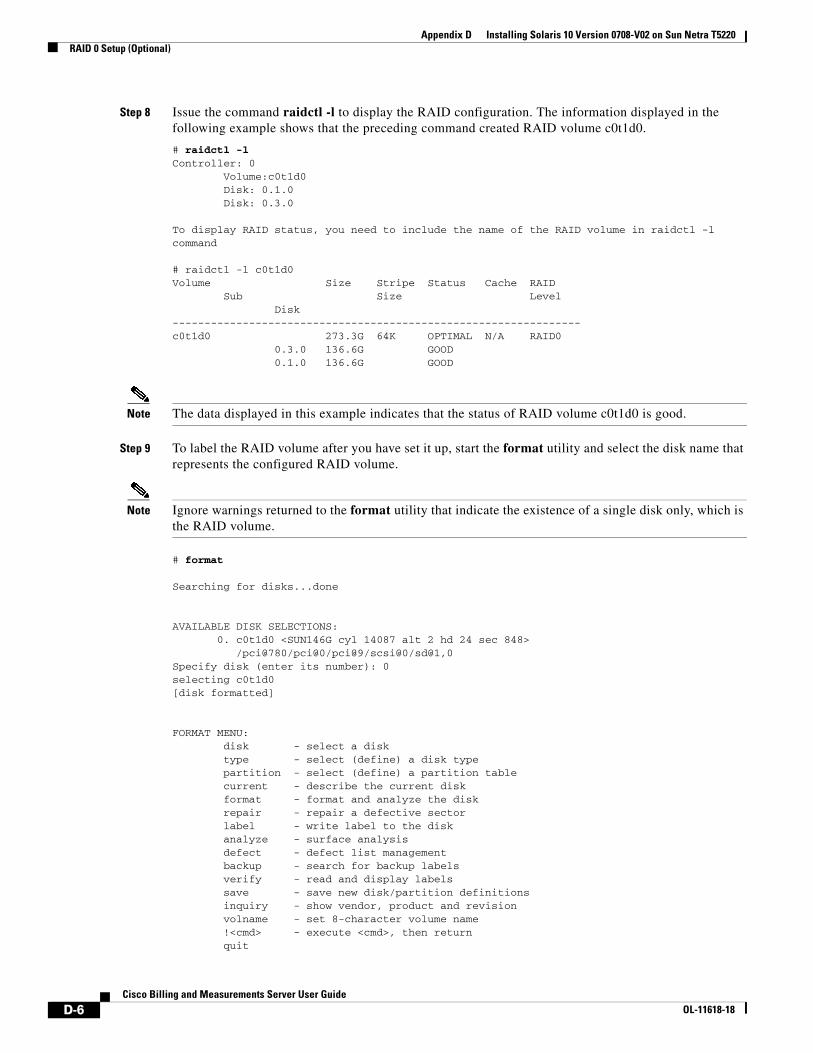
Step 8 Issue the command raidctl -l to display the RAID configuration. The information displayed in the following example shows that the preceding command created RAID volume c0t1d0.
# raidctl -l Controller: 0 Volume:c0t1d0 Disk: 0.1.0 Disk: 0.3.0
To display RAID status, you need to include the name of the RAID volume in raidctl -l command
# raidctl -l c0t1d0Volume Size Stripe Status Cache RAID Sub Size Level Disk ----------------------------------------------------------------c0t1d0 273.3G 64K OPTIMAL N/A RAID0 0.3.0 136.6G GOOD 0.1.0 136.6G GOOD
Note The data displayed in this example indicates that the status of RAID volume c0t1d0 is good.
Step 9 To label the RAID volume after you have set it up, start the format utility and select the disk name that represents the configured RAID volume.
Note Ignore warnings returned to the format utility that indicate the existence of a single disk only, which is the RAID volume.
# format
Searching for disks...done
AVAILABLE DISK SELECTIONS: 0. c0t1d0 <SUN146G cyl 14087 alt 2 hd 24 sec 848> /pci@780/pci@0/pci@9/scsi@0/sd@1,0Specify disk (enter its number): 0selecting c0t1d0[disk formatted]
FORMAT MENU: disk - select a disk type - select (define) a disk type partition - select (define) a partition table current - describe the current disk format - format and analyze the disk repair - repair a defective sector label - write label to the disk analyze - surface analysis defect - defect list management backup - search for backup labels verify - read and display labels save - save new disk/partition definitions inquiry - show vendor, product and revision volname - set 8-character volume name !<cmd> - execute <cmd>, then return quit
D-6Cisco Billing and Measurements Server User Guide
OL-11618-18
Appendix D Installing Solaris 10 Version 0708-V02 on Sun Netra T5220RAID 0 Setup (Optional)
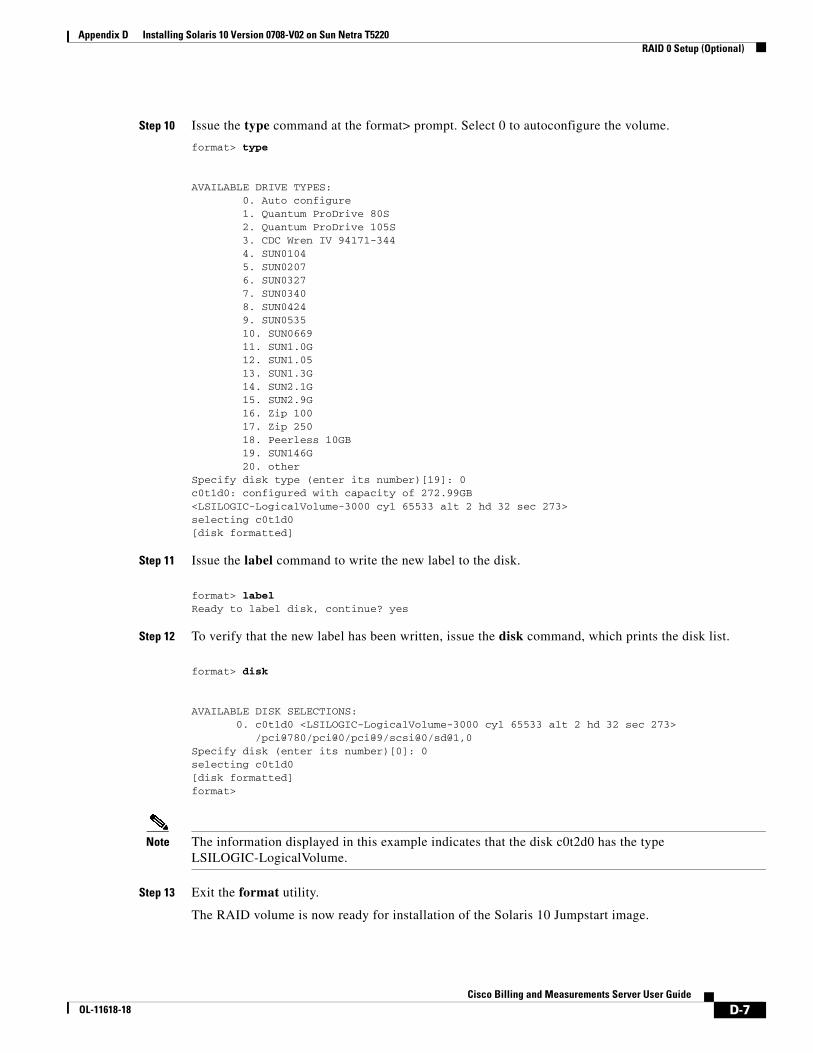
Step 10 Issue the type command at the format> prompt. Select 0 to autoconfigure the volume.
format> type
AVAILABLE DRIVE TYPES: 0. Auto configure 1. Quantum ProDrive 80S 2. Quantum ProDrive 105S 3. CDC Wren IV 94171-344 4. SUN0104 5. SUN0207 6. SUN0327 7. SUN0340 8. SUN0424 9. SUN0535 10. SUN0669 11. SUN1.0G 12. SUN1.05 13. SUN1.3G 14. SUN2.1G 15. SUN2.9G 16. Zip 100 17. Zip 250 18. Peerless 10GB 19. SUN146G 20. otherSpecify disk type (enter its number)[19]: 0c0t1d0: configured with capacity of 272.99GB<LSILOGIC-LogicalVolume-3000 cyl 65533 alt 2 hd 32 sec 273>selecting c0t1d0[disk formatted]
Step 11 Issue the label command to write the new label to the disk.
format> labelReady to label disk, continue? yes
Step 12 To verify that the new label has been written, issue the disk command, which prints the disk list.
format> disk
AVAILABLE DISK SELECTIONS: 0. c0t1d0 <LSILOGIC-LogicalVolume-3000 cyl 65533 alt 2 hd 32 sec 273> /pci@780/pci@0/pci@9/scsi@0/sd@1,0Specify disk (enter its number)[0]: 0selecting c0t1d0[disk formatted]format>
Note The information displayed in this example indicates that the disk c0t2d0 has the type LSILOGIC-LogicalVolume.
Step 13 Exit the format utility.
The RAID volume is now ready for installation of the Solaris 10 Jumpstart image.
D-7Cisco Billing and Measurements Server User Guide
OL-11618-18
Appendix D Installing Solaris 10 Version 0708-V02 on Sun Netra T5220RAID 0 Setup (Optional)
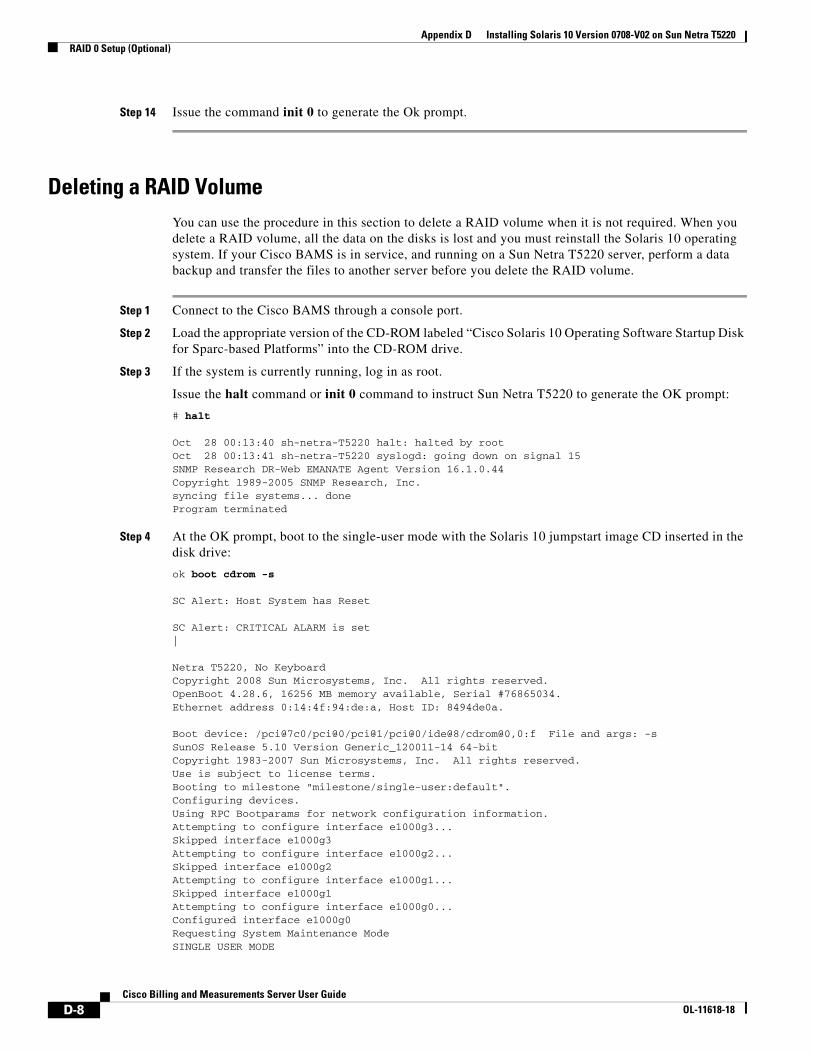
Step 14 Issue the command init 0 to generate the Ok prompt.
Deleting a RAID VolumeYou can use the procedure in this section to delete a RAID volume when it is not required. When you delete a RAID volume, all the data on the disks is lost and you must reinstall the Solaris 10 operating system. If your Cisco BAMS is in service, and running on a Sun Netra T5220 server, perform a data backup and transfer the files to another server before you delete the RAID volume.
Step 1 Connect to the Cisco BAMS through a console port.
Step 2 Load the appropriate version of the CD-ROM labeled “Cisco Solaris 10 Operating Software Startup Disk for Sparc-based Platforms” into the CD-ROM drive.
Step 3 If the system is currently running, log in as root.
Issue the halt command or init 0 command to instruct Sun Netra T5220 to generate the OK prompt:
# halt
Oct 28 00:13:40 sh-netra-T5220 halt: halted by rootOct 28 00:13:41 sh-netra-T5220 syslogd: going down on signal 15SNMP Research DR-Web EMANATE Agent Version 16.1.0.44Copyright 1989-2005 SNMP Research, Inc.syncing file systems... doneProgram terminated
Step 4 At the OK prompt, boot to the single-user mode with the Solaris 10 jumpstart image CD inserted in the disk drive:
ok boot cdrom -s
SC Alert: Host System has Reset
SC Alert: CRITICAL ALARM is set|
Netra T5220, No KeyboardCopyright 2008 Sun Microsystems, Inc. All rights reserved.OpenBoot 4.28.6, 16256 MB memory available, Serial #76865034.Ethernet address 0:14:4f:94:de:a, Host ID: 8494de0a.
Boot device: /pci@7c0/pci@0/pci@1/pci@0/ide@8/cdrom@0,0:f File and args: -sSunOS Release 5.10 Version Generic_120011-14 64-bitCopyright 1983-2007 Sun Microsystems, Inc. All rights reserved.Use is subject to license terms.Booting to milestone "milestone/single-user:default".Configuring devices.Using RPC Bootparams for network configuration information.Attempting to configure interface e1000g3...Skipped interface e1000g3Attempting to configure interface e1000g2...Skipped interface e1000g2Attempting to configure interface e1000g1...Skipped interface e1000g1Attempting to configure interface e1000g0...Configured interface e1000g0Requesting System Maintenance ModeSINGLE USER MODE
D-8Cisco Billing and Measurements Server User Guide
OL-11618-18
Appendix D Installing Solaris 10 Version 0708-V02 on Sun Netra T5220New Solaris 10 Installation
#
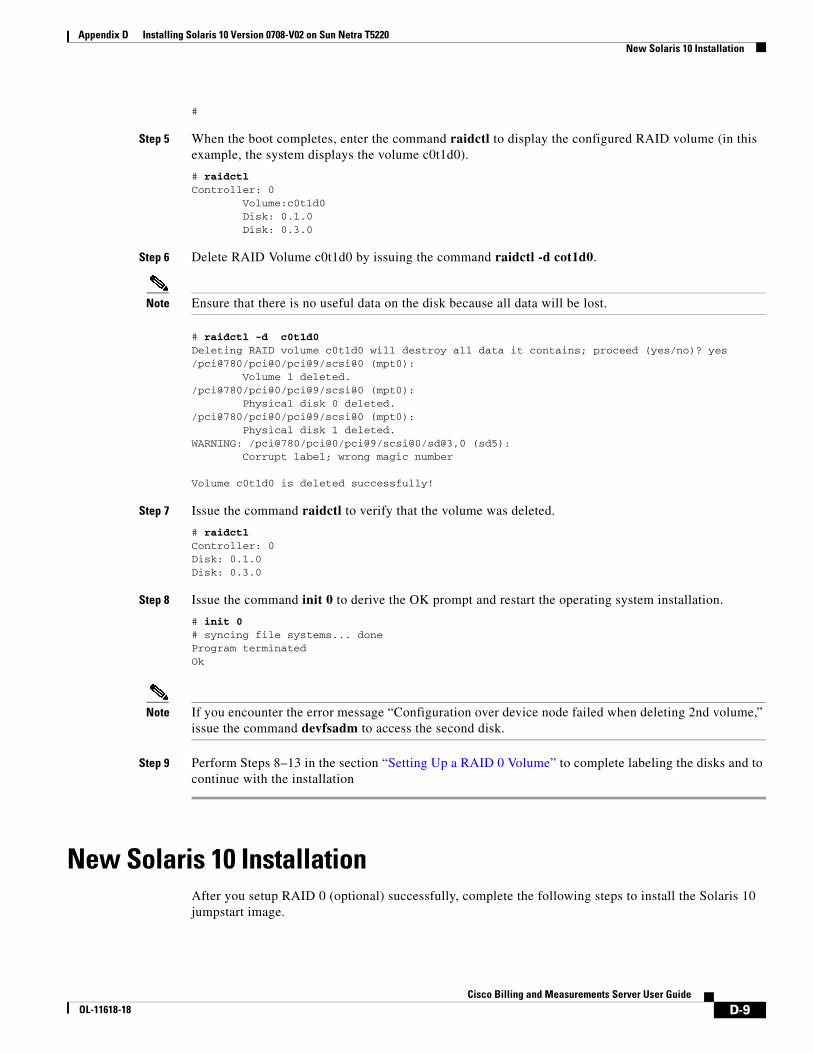
Step 5 When the boot completes, enter the command raidctl to display the configured RAID volume (in this example, the system displays the volume c0t1d0).
# raidctlController: 0 Volume:c0t1d0 Disk: 0.1.0 Disk: 0.3.0
Step 6 Delete RAID Volume c0t1d0 by issuing the command raidctl -d cot1d0.
Note Ensure that there is no useful data on the disk because all data will be lost.
# raidctl -d c0t1d0Deleting RAID volume c0t1d0 will destroy all data it contains; proceed (yes/no)? yes/pci@780/pci@0/pci@9/scsi@0 (mpt0): Volume 1 deleted./pci@780/pci@0/pci@9/scsi@0 (mpt0): Physical disk 0 deleted./pci@780/pci@0/pci@9/scsi@0 (mpt0): Physical disk 1 deleted.WARNING: /pci@780/pci@0/pci@9/scsi@0/sd@3,0 (sd5): Corrupt label; wrong magic number
Volume c0t1d0 is deleted successfully!
Step 7 Issue the command raidctl to verify that the volume was deleted.
# raidctlController: 0Disk: 0.1.0Disk: 0.3.0
Step 8 Issue the command init 0 to derive the OK prompt and restart the operating system installation.
# init 0# syncing file systems... doneProgram terminatedOk
Note If you encounter the error message “Configuration over device node failed when deleting 2nd volume,” issue the command devfsadm to access the second disk.
Step 9 Perform Steps 8–13 in the section “Setting Up a RAID 0 Volume” to complete labeling the disks and to continue with the installation
New Solaris 10 InstallationAfter you setup RAID 0 (optional) successfully, complete the following steps to install the Solaris 10 jumpstart image.
D-9Cisco Billing and Measurements Server User Guide
OL-11618-18
Appendix D Installing Solaris 10 Version 0708-V02 on Sun Netra T5220New Solaris 10 Installation
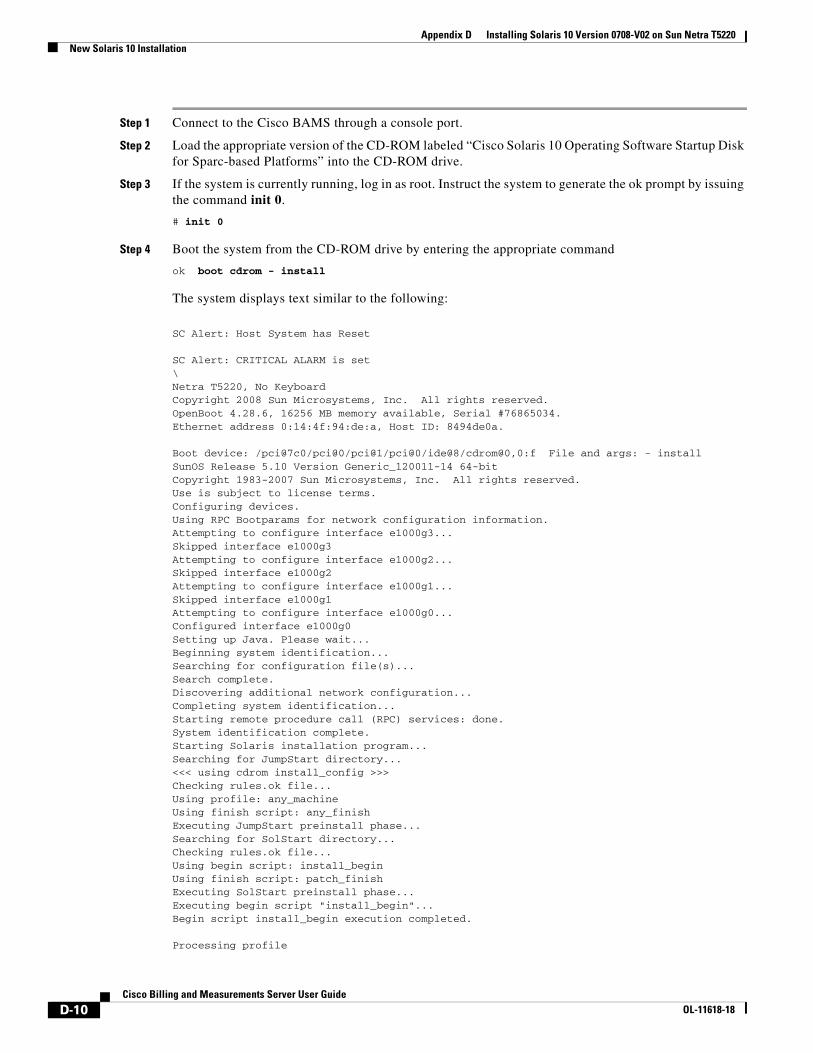
Step 1 Connect to the Cisco BAMS through a console port.
Step 2 Load the appropriate version of the CD-ROM labeled “Cisco Solaris 10 Operating Software Startup Disk for Sparc-based Platforms” into the CD-ROM drive.
Step 3 If the system is currently running, log in as root. Instruct the system to generate the ok prompt by issuing the command init 0.
# init 0
Step 4 Boot the system from the CD-ROM drive by entering the appropriate command
ok boot cdrom - install
The system displays text similar to the following:
SC Alert: Host System has Reset
SC Alert: CRITICAL ALARM is set\Netra T5220, No KeyboardCopyright 2008 Sun Microsystems, Inc. All rights reserved.OpenBoot 4.28.6, 16256 MB memory available, Serial #76865034.Ethernet address 0:14:4f:94:de:a, Host ID: 8494de0a.
Boot device: /pci@7c0/pci@0/pci@1/pci@0/ide@8/cdrom@0,0:f File and args: - installSunOS Release 5.10 Version Generic_120011-14 64-bitCopyright 1983-2007 Sun Microsystems, Inc. All rights reserved.Use is subject to license terms.Configuring devices.Using RPC Bootparams for network configuration information.Attempting to configure interface e1000g3...Skipped interface e1000g3Attempting to configure interface e1000g2...Skipped interface e1000g2Attempting to configure interface e1000g1...Skipped interface e1000g1Attempting to configure interface e1000g0...Configured interface e1000g0Setting up Java. Please wait...Beginning system identification...Searching for configuration file(s)...Search complete.Discovering additional network configuration...Completing system identification...Starting remote procedure call (RPC) services: done.System identification complete.Starting Solaris installation program...Searching for JumpStart directory...<<< using cdrom install_config >>>Checking rules.ok file...Using profile: any_machineUsing finish script: any_finishExecuting JumpStart preinstall phase...Searching for SolStart directory...Checking rules.ok file...Using begin script: install_beginUsing finish script: patch_finishExecuting SolStart preinstall phase...Executing begin script "install_begin"...Begin script install_begin execution completed.
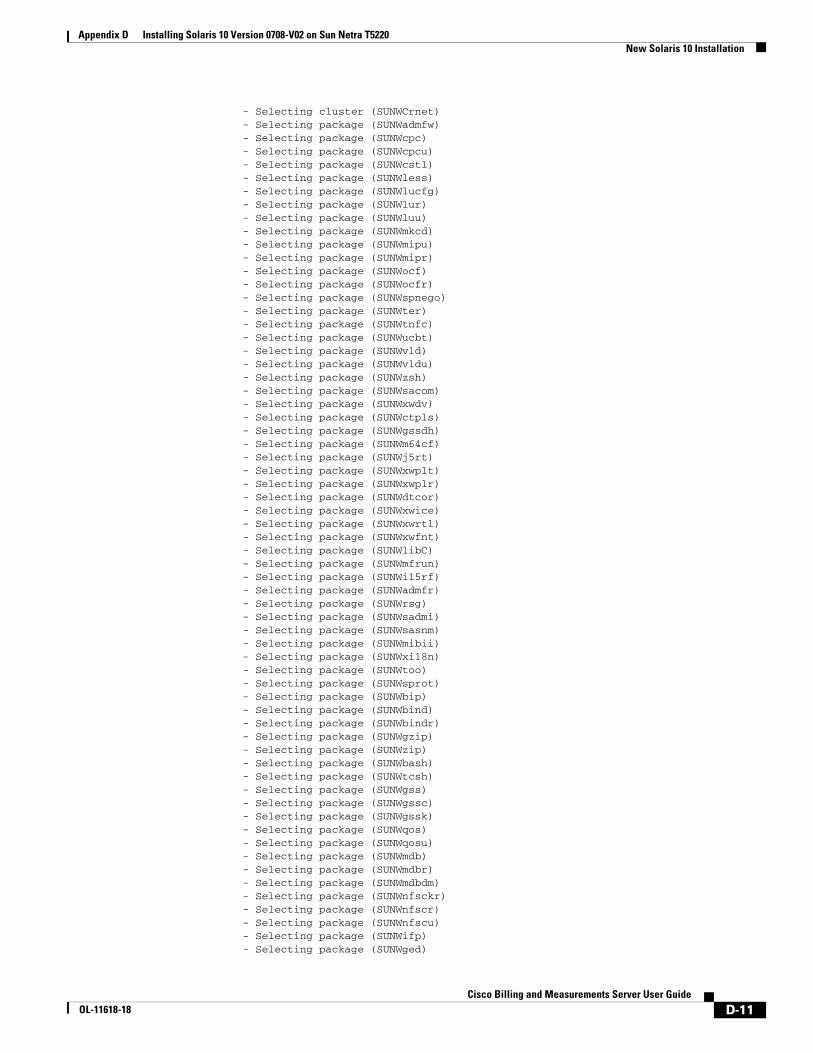
Processing profile
D-10Cisco Billing and Measurements Server User Guide
OL-11618-18
Appendix D Installing Solaris 10 Version 0708-V02 on Sun Netra T5220New Solaris 10 Installation
- Selecting cluster (SUNWCrnet) - Selecting package (SUNWadmfw) - Selecting package (SUNWcpc) - Selecting package (SUNWcpcu) - Selecting package (SUNWcstl) - Selecting package (SUNWless) - Selecting package (SUNWlucfg) - Selecting package (SUNWlur) - Selecting package (SUNWluu) - Selecting package (SUNWmkcd) - Selecting package (SUNWmipu) - Selecting package (SUNWmipr) - Selecting package (SUNWocf) - Selecting package (SUNWocfr) - Selecting package (SUNWspnego) - Selecting package (SUNWter) - Selecting package (SUNWtnfc) - Selecting package (SUNWucbt) - Selecting package (SUNWvld) - Selecting package (SUNWvldu) - Selecting package (SUNWzsh) - Selecting package (SUNWsacom) - Selecting package (SUNWxwdv) - Selecting package (SUNWctpls) - Selecting package (SUNWgssdh) - Selecting package (SUNWm64cf) - Selecting package (SUNWj5rt) - Selecting package (SUNWxwplt) - Selecting package (SUNWxwplr) - Selecting package (SUNWdtcor) - Selecting package (SUNWxwice) - Selecting package (SUNWxwrtl) - Selecting package (SUNWxwfnt) - Selecting package (SUNWlibC) - Selecting package (SUNWmfrun) - Selecting package (SUNWi15rf) - Selecting package (SUNWadmfr) - Selecting package (SUNWrsg) - Selecting package (SUNWsadmi) - Selecting package (SUNWsasnm) - Selecting package (SUNWmibii) - Selecting package (SUNWxi18n) - Selecting package (SUNWtoo) - Selecting package (SUNWsprot) - Selecting package (SUNWbip) - Selecting package (SUNWbind) - Selecting package (SUNWbindr) - Selecting package (SUNWgzip) - Selecting package (SUNWzip) - Selecting package (SUNWbash) - Selecting package (SUNWtcsh) - Selecting package (SUNWgss) - Selecting package (SUNWgssc) - Selecting package (SUNWgssk) - Selecting package (SUNWqos) - Selecting package (SUNWqosu) - Selecting package (SUNWmdb) - Selecting package (SUNWmdbr) - Selecting package (SUNWmdbdm) - Selecting package (SUNWnfsckr) - Selecting package (SUNWnfscr) - Selecting package (SUNWnfscu) - Selecting package (SUNWifp) - Selecting package (SUNWged)
D-11Cisco Billing and Measurements Server User Guide
OL-11618-18
Appendix D Installing Solaris 10 Version 0708-V02 on Sun Netra T5220New Solaris 10 Installation
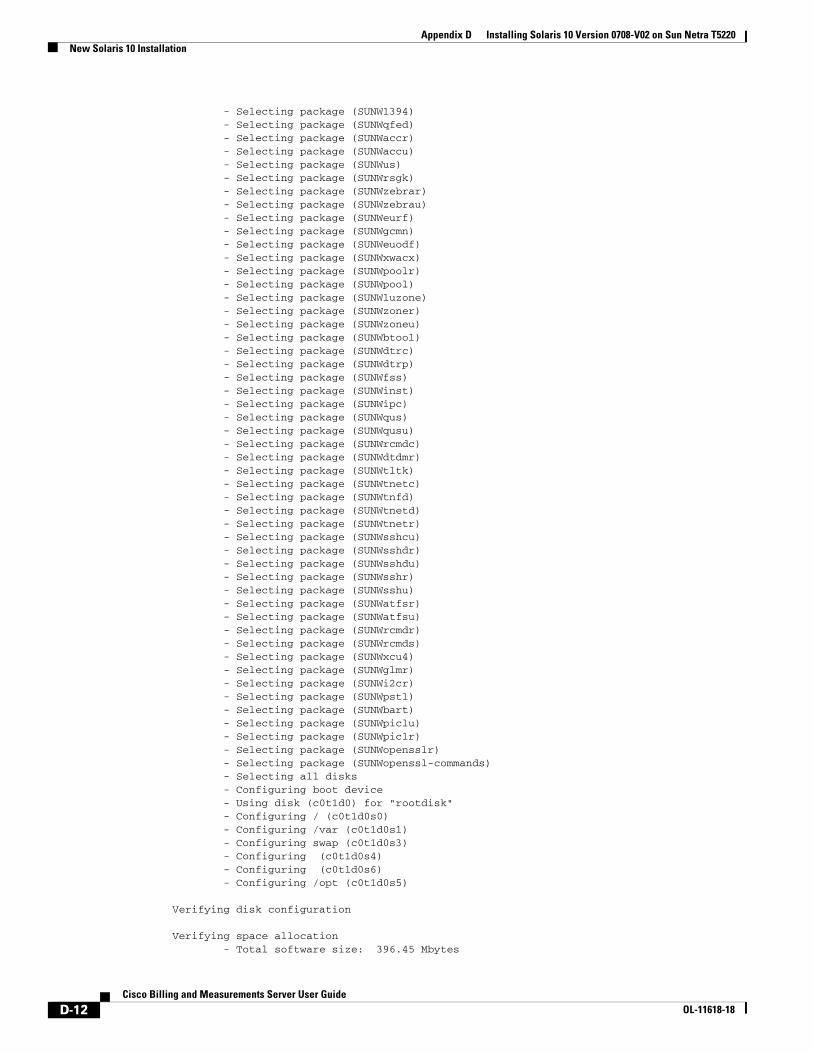
- Selecting package (SUNW1394) - Selecting package (SUNWqfed) - Selecting package (SUNWaccr) - Selecting package (SUNWaccu) - Selecting package (SUNWus) - Selecting package (SUNWrsgk) - Selecting package (SUNWzebrar) - Selecting package (SUNWzebrau) - Selecting package (SUNWeurf) - Selecting package (SUNWgcmn) - Selecting package (SUNWeuodf) - Selecting package (SUNWxwacx) - Selecting package (SUNWpoolr) - Selecting package (SUNWpool) - Selecting package (SUNWluzone) - Selecting package (SUNWzoner) - Selecting package (SUNWzoneu) - Selecting package (SUNWbtool) - Selecting package (SUNWdtrc) - Selecting package (SUNWdtrp) - Selecting package (SUNWfss) - Selecting package (SUNWinst) - Selecting package (SUNWipc) - Selecting package (SUNWqus) - Selecting package (SUNWqusu) - Selecting package (SUNWrcmdc) - Selecting package (SUNWdtdmr) - Selecting package (SUNWtltk) - Selecting package (SUNWtnetc) - Selecting package (SUNWtnfd) - Selecting package (SUNWtnetd) - Selecting package (SUNWtnetr) - Selecting package (SUNWsshcu) - Selecting package (SUNWsshdr) - Selecting package (SUNWsshdu) - Selecting package (SUNWsshr) - Selecting package (SUNWsshu) - Selecting package (SUNWatfsr) - Selecting package (SUNWatfsu) - Selecting package (SUNWrcmdr) - Selecting package (SUNWrcmds) - Selecting package (SUNWxcu4) - Selecting package (SUNWglmr) - Selecting package (SUNWi2cr) - Selecting package (SUNWpstl) - Selecting package (SUNWbart) - Selecting package (SUNWpiclu) - Selecting package (SUNWpiclr) - Selecting package (SUNWopensslr) - Selecting package (SUNWopenssl-commands) - Selecting all disks - Configuring boot device - Using disk (c0t1d0) for "rootdisk" - Configuring / (c0t1d0s0) - Configuring /var (c0t1d0s1) - Configuring swap (c0t1d0s3) - Configuring (c0t1d0s4) - Configuring (c0t1d0s6) - Configuring /opt (c0t1d0s5)
Verifying disk configuration
Verifying space allocation - Total software size: 396.45 Mbytes
D-12Cisco Billing and Measurements Server User Guide
OL-11618-18
Appendix D Installing Solaris 10 Version 0708-V02 on Sun Netra T5220New Solaris 10 Installation
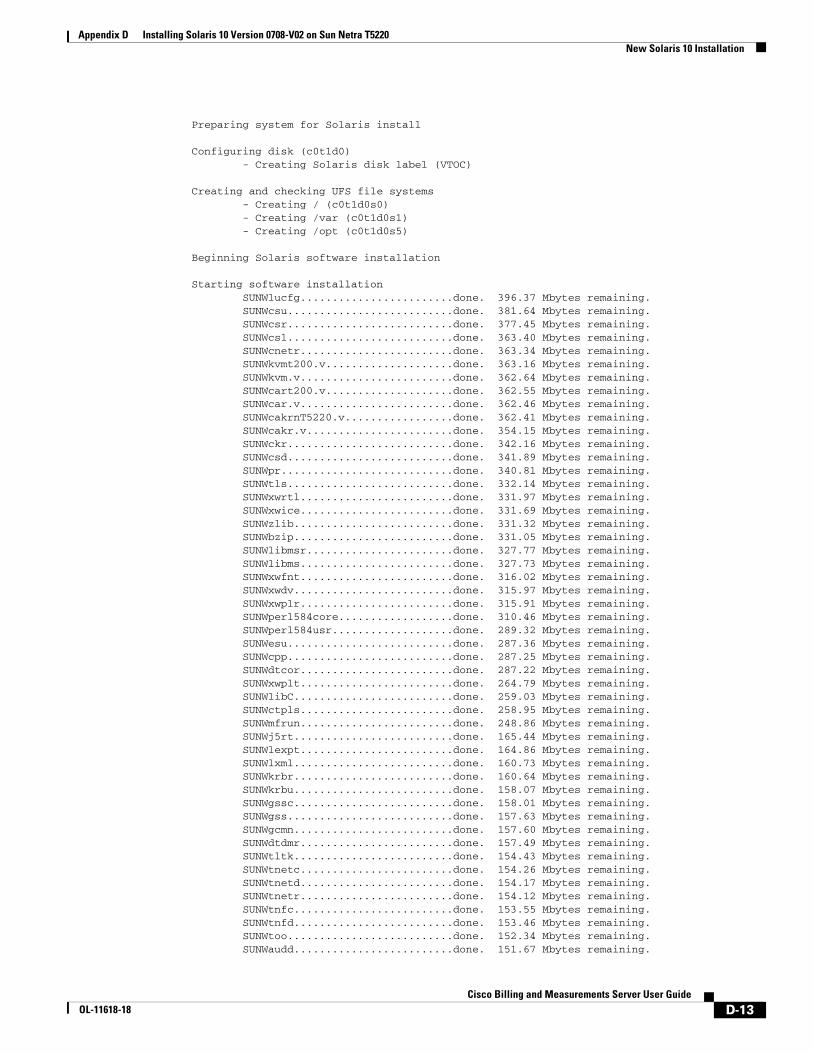
Preparing system for Solaris install
Configuring disk (c0t1d0) - Creating Solaris disk label (VTOC)
Creating and checking UFS file systems - Creating / (c0t1d0s0) - Creating /var (c0t1d0s1) - Creating /opt (c0t1d0s5)
Beginning Solaris software installation
Starting software installation SUNWlucfg........................done. 396.37 Mbytes remaining. SUNWcsu..........................done. 381.64 Mbytes remaining. SUNWcsr..........................done. 377.45 Mbytes remaining. SUNWcsl..........................done. 363.40 Mbytes remaining. SUNWcnetr........................done. 363.34 Mbytes remaining. SUNWkvmt200.v....................done. 363.16 Mbytes remaining. SUNWkvm.v........................done. 362.64 Mbytes remaining. SUNWcart200.v....................done. 362.55 Mbytes remaining. SUNWcar.v........................done. 362.46 Mbytes remaining. SUNWcakrnT5220.v.................done. 362.41 Mbytes remaining. SUNWcakr.v.......................done. 354.15 Mbytes remaining. SUNWckr..........................done. 342.16 Mbytes remaining. SUNWcsd..........................done. 341.89 Mbytes remaining. SUNWpr...........................done. 340.81 Mbytes remaining. SUNWtls..........................done. 332.14 Mbytes remaining. SUNWxwrtl........................done. 331.97 Mbytes remaining. SUNWxwice........................done. 331.69 Mbytes remaining. SUNWzlib.........................done. 331.32 Mbytes remaining. SUNWbzip.........................done. 331.05 Mbytes remaining. SUNWlibmsr.......................done. 327.77 Mbytes remaining. SUNWlibms........................done. 327.73 Mbytes remaining. SUNWxwfnt........................done. 316.02 Mbytes remaining. SUNWxwdv.........................done. 315.97 Mbytes remaining. SUNWxwplr........................done. 315.91 Mbytes remaining. SUNWperl584core..................done. 310.46 Mbytes remaining. SUNWperl584usr...................done. 289.32 Mbytes remaining. SUNWesu..........................done. 287.36 Mbytes remaining. SUNWcpp..........................done. 287.25 Mbytes remaining. SUNWdtcor........................done. 287.22 Mbytes remaining. SUNWxwplt........................done. 264.79 Mbytes remaining. SUNWlibC.........................done. 259.03 Mbytes remaining. SUNWctpls........................done. 258.95 Mbytes remaining. SUNWmfrun........................done. 248.86 Mbytes remaining. SUNWj5rt.........................done. 165.44 Mbytes remaining. SUNWlexpt........................done. 164.86 Mbytes remaining. SUNWlxml.........................done. 160.73 Mbytes remaining. SUNWkrbr.........................done. 160.64 Mbytes remaining. SUNWkrbu.........................done. 158.07 Mbytes remaining. SUNWgssc.........................done. 158.01 Mbytes remaining. SUNWgss..........................done. 157.63 Mbytes remaining. SUNWgcmn.........................done. 157.60 Mbytes remaining. SUNWdtdmr........................done. 157.49 Mbytes remaining. SUNWtltk.........................done. 154.43 Mbytes remaining. SUNWtnetc........................done. 154.26 Mbytes remaining. SUNWtnetd........................done. 154.17 Mbytes remaining. SUNWtnetr........................done. 154.12 Mbytes remaining. SUNWtnfc.........................done. 153.55 Mbytes remaining. SUNWtnfd.........................done. 153.46 Mbytes remaining. SUNWtoo..........................done. 152.34 Mbytes remaining. SUNWaudd.........................done. 151.67 Mbytes remaining.
D-13Cisco Billing and Measurements Server User Guide
OL-11618-18

Appendix D Installing Solaris 10 Version 0708-V02 on Sun Netra T5220New Solaris 10 Installation
SUNWusb..........................done. 150.19 Mbytes remaining. SUNWusbs.........................done. 150.10 Mbytes remaining. SUNWuacm.........................done. 150.03 Mbytes remaining. SUNWucbt.........................done. 150.00 Mbytes remaining. SUNWudaplr.......................done. 149.98 Mbytes remaining. SUNWudaplu.......................done. 149.72 Mbytes remaining. SUNWib...........................done. 148.00 Mbytes remaining. SUNWipoib........................done. 147.86 Mbytes remaining. SUNWtavor........................done. 147.06 Mbytes remaining. SUNWudapltu......................done. 146.59 Mbytes remaining. SUNWudapltr......................done. 146.34 Mbytes remaining. SUNWuedg.........................done. 146.16 Mbytes remaining. SUNWugen.........................done. 146.09 Mbytes remaining. SUNWuksp.........................done. 145.99 Mbytes remaining. SUNWukspfw.......................done. 145.94 Mbytes remaining. SUNWopenssl-libraries............done. 138.92 Mbytes remaining. SUNWwbsup........................done. 138.56 Mbytes remaining. SUNWinstall-patch-utils-root.....done. 138.52 Mbytes remaining. SUNWpkgcmdsr.....................done. 138.48 Mbytes remaining. SUNWproduct-registry-root........done. 138.46 Mbytes remaining. SUNWwsr2.........................done. 138.12 Mbytes remaining. SUNWpkgcmdsu.....................done. 135.12 Mbytes remaining. SUNWswmt.........................done. 134.35 Mbytes remaining. SUNWuprl.........................done. 134.26 Mbytes remaining. SUNWgzip.........................done. 134.16 Mbytes remaining. SUNWocfr.........................done. 134.09 Mbytes remaining. SUNWocf..........................done. 133.51 Mbytes remaining. SUNWxi18n........................done. 132.51 Mbytes remaining. SUNWvld..........................done. 132.46 Mbytes remaining. SUNWxge..........................done. 131.87 Mbytes remaining. SUNWvldu.........................done. 131.81 Mbytes remaining. SUNWnfsckr.......................done. 130.38 Mbytes remaining. SUNWgssk.........................done. 130.13 Mbytes remaining. SUNWrsgk.........................done. 130.05 Mbytes remaining. SUNWnfscr........................done. 129.90 Mbytes remaining. SUNWnfscu........................done. 129.33 Mbytes remaining. SUNWeurf.........................done. 125.03 Mbytes remaining. SUNWi15rf........................done. 124.89 Mbytes remaining. SUNWmdr..........................done. 122.44 Mbytes remaining. SUNWmdu..........................done. 121.72 Mbytes remaining. SUNWadmc.........................done. 119.58 Mbytes remaining. SUNWadmfr........................done. 119.56 Mbytes remaining. SUNWadmfw........................done. 118.85 Mbytes remaining. SUNWadmlib-sysid.................done. 118.59 Mbytes remaining. SUNWadmr.........................done. 118.50 Mbytes remaining. SUNWadmap........................done. 117.57 Mbytes remaining. SUNWlur..........................done. 116.24 Mbytes remaining. SUNWluu..........................done. 115.00 Mbytes remaining. SUNWbip..........................done. 114.82 Mbytes remaining. SUNWrcmdc........................done. 113.92 Mbytes remaining. SUNWrcmds........................done. 113.62 Mbytes remaining. SUNWxwacx........................done. 113.44 Mbytes remaining. SUNWzfskr........................done. 112.51 Mbytes remaining. SUNWzfsr.........................done. 111.30 Mbytes remaining. SUNWsmapi........................done. 110.62 Mbytes remaining. SUNWzfsu.........................done. 108.96 Mbytes remaining. SUNWxcu4.........................done. 107.74 Mbytes remaining. SUNWsprot........................done. 106.22 Mbytes remaining. SUNWcslr.........................done. 89.74 Mbytes remaining. SUNWrsg..........................done. 89.61 Mbytes remaining. SUNWgssdh........................done. 89.29 Mbytes remaining. SUNWidnl.........................done. 88.73 Mbytes remaining. SUNWluxop........................done. 87.97 Mbytes remaining. SUNWses..........................done. 87.87 Mbytes remaining.
D-14Cisco Billing and Measurements Server User Guide
OL-11618-18
Appendix D Installing Solaris 10 Version 0708-V02 on Sun Netra T5220New Solaris 10 Installation
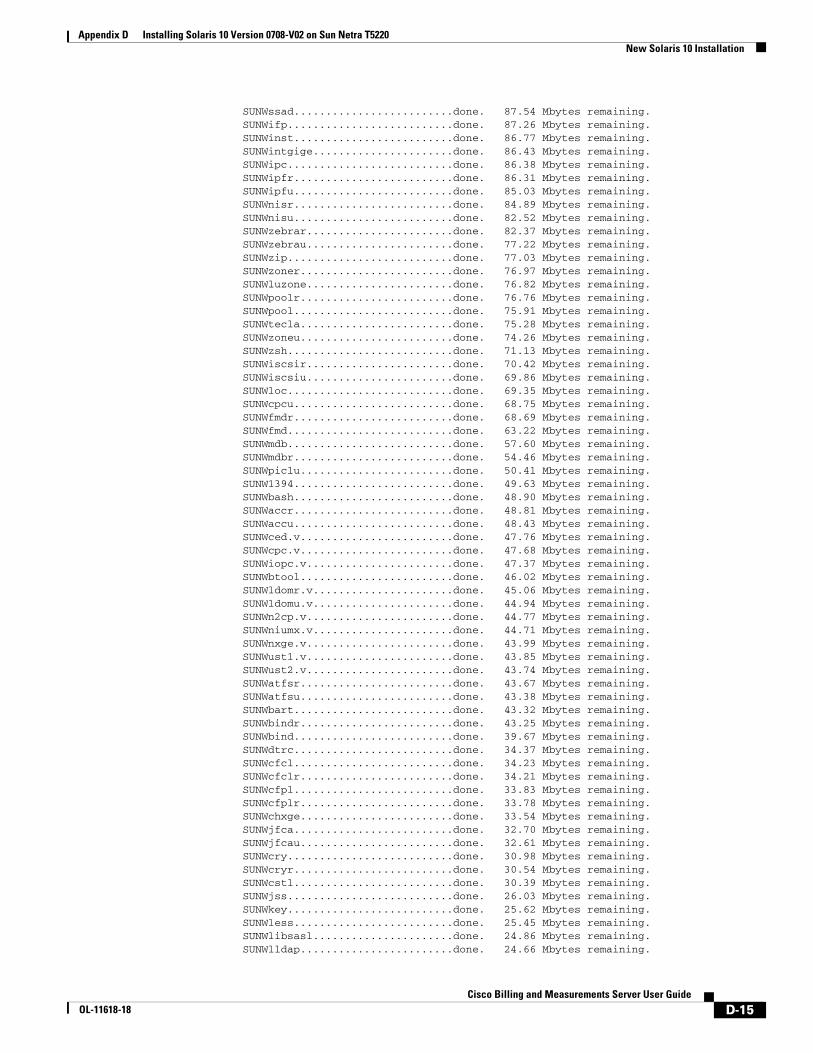
SUNWssad.........................done. 87.54 Mbytes remaining. SUNWifp..........................done. 87.26 Mbytes remaining. SUNWinst.........................done. 86.77 Mbytes remaining. SUNWintgige......................done. 86.43 Mbytes remaining. SUNWipc..........................done. 86.38 Mbytes remaining. SUNWipfr.........................done. 86.31 Mbytes remaining. SUNWipfu.........................done. 85.03 Mbytes remaining. SUNWnisr.........................done. 84.89 Mbytes remaining. SUNWnisu.........................done. 82.52 Mbytes remaining. SUNWzebrar.......................done. 82.37 Mbytes remaining. SUNWzebrau.......................done. 77.22 Mbytes remaining. SUNWzip..........................done. 77.03 Mbytes remaining. SUNWzoner........................done. 76.97 Mbytes remaining. SUNWluzone.......................done. 76.82 Mbytes remaining. SUNWpoolr........................done. 76.76 Mbytes remaining. SUNWpool.........................done. 75.91 Mbytes remaining. SUNWtecla........................done. 75.28 Mbytes remaining. SUNWzoneu........................done. 74.26 Mbytes remaining. SUNWzsh..........................done. 71.13 Mbytes remaining. SUNWiscsir.......................done. 70.42 Mbytes remaining. SUNWiscsiu.......................done. 69.86 Mbytes remaining. SUNWloc..........................done. 69.35 Mbytes remaining. SUNWcpcu.........................done. 68.75 Mbytes remaining. SUNWfmdr.........................done. 68.69 Mbytes remaining. SUNWfmd..........................done. 63.22 Mbytes remaining. SUNWmdb..........................done. 57.60 Mbytes remaining. SUNWmdbr.........................done. 54.46 Mbytes remaining. SUNWpiclu........................done. 50.41 Mbytes remaining. SUNW1394.........................done. 49.63 Mbytes remaining. SUNWbash.........................done. 48.90 Mbytes remaining. SUNWaccr.........................done. 48.81 Mbytes remaining. SUNWaccu.........................done. 48.43 Mbytes remaining. SUNWced.v........................done. 47.76 Mbytes remaining. SUNWcpc.v........................done. 47.68 Mbytes remaining. SUNWiopc.v.......................done. 47.37 Mbytes remaining. SUNWbtool........................done. 46.02 Mbytes remaining. SUNWldomr.v......................done. 45.06 Mbytes remaining. SUNWldomu.v......................done. 44.94 Mbytes remaining. SUNWn2cp.v.......................done. 44.77 Mbytes remaining. SUNWniumx.v......................done. 44.71 Mbytes remaining. SUNWnxge.v.......................done. 43.99 Mbytes remaining. SUNWust1.v.......................done. 43.85 Mbytes remaining. SUNWust2.v.......................done. 43.74 Mbytes remaining. SUNWatfsr........................done. 43.67 Mbytes remaining. SUNWatfsu........................done. 43.38 Mbytes remaining. SUNWbart.........................done. 43.32 Mbytes remaining. SUNWbindr........................done. 43.25 Mbytes remaining. SUNWbind.........................done. 39.67 Mbytes remaining. SUNWdtrc.........................done. 34.37 Mbytes remaining. SUNWcfcl.........................done. 34.23 Mbytes remaining. SUNWcfclr........................done. 34.21 Mbytes remaining. SUNWcfpl.........................done. 33.83 Mbytes remaining. SUNWcfplr........................done. 33.78 Mbytes remaining. SUNWchxge........................done. 33.54 Mbytes remaining. SUNWjfca.........................done. 32.70 Mbytes remaining. SUNWjfcau........................done. 32.61 Mbytes remaining. SUNWcry..........................done. 30.98 Mbytes remaining. SUNWcryr.........................done. 30.54 Mbytes remaining. SUNWcstl.........................done. 30.39 Mbytes remaining. SUNWjss..........................done. 26.03 Mbytes remaining. SUNWkey..........................done. 25.62 Mbytes remaining. SUNWless.........................done. 25.45 Mbytes remaining. SUNWlibsasl......................done. 24.86 Mbytes remaining. SUNWlldap........................done. 24.66 Mbytes remaining.
D-15Cisco Billing and Measurements Server User Guide
OL-11618-18
Appendix D Installing Solaris 10 Version 0708-V02 on Sun Netra T5220New Solaris 10 Installation
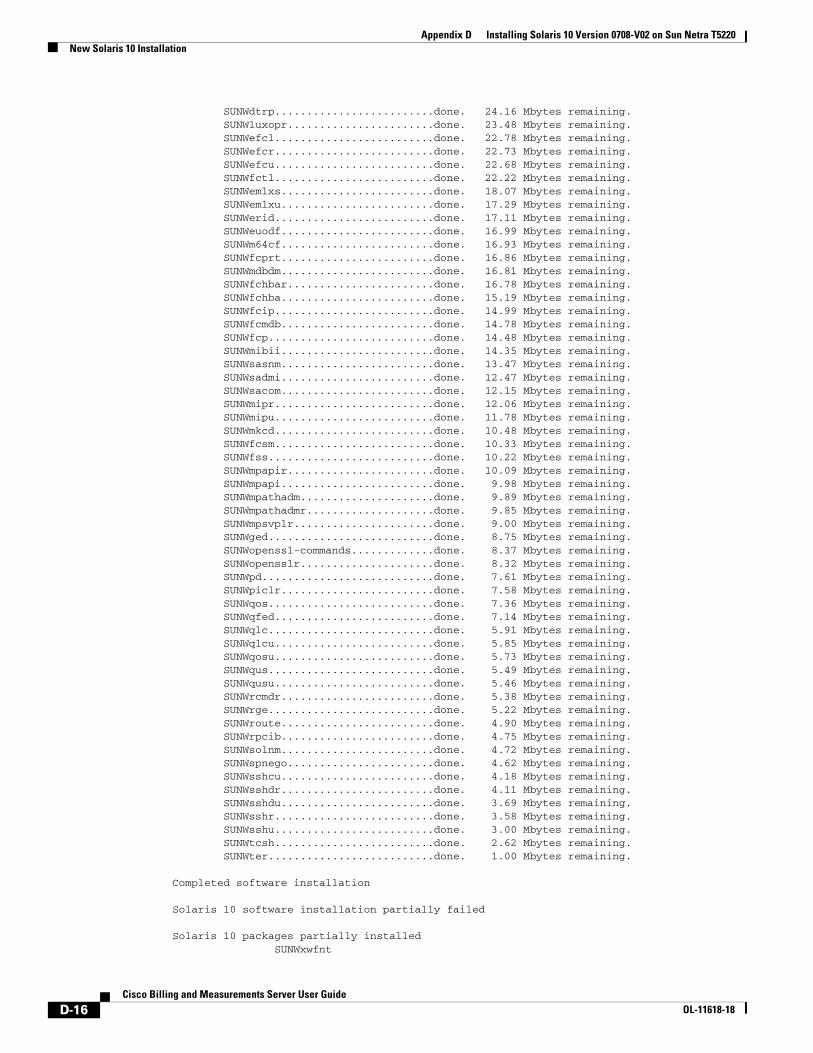
SUNWdtrp.........................done. 24.16 Mbytes remaining. SUNWluxopr.......................done. 23.48 Mbytes remaining. SUNWefcl.........................done. 22.78 Mbytes remaining. SUNWefcr.........................done. 22.73 Mbytes remaining. SUNWefcu.........................done. 22.68 Mbytes remaining. SUNWfctl.........................done. 22.22 Mbytes remaining. SUNWemlxs........................done. 18.07 Mbytes remaining. SUNWemlxu........................done. 17.29 Mbytes remaining. SUNWerid.........................done. 17.11 Mbytes remaining. SUNWeuodf........................done. 16.99 Mbytes remaining. SUNWm64cf........................done. 16.93 Mbytes remaining. SUNWfcprt........................done. 16.86 Mbytes remaining. SUNWmdbdm........................done. 16.81 Mbytes remaining. SUNWfchbar.......................done. 16.78 Mbytes remaining. SUNWfchba........................done. 15.19 Mbytes remaining. SUNWfcip.........................done. 14.99 Mbytes remaining. SUNWfcmdb........................done. 14.78 Mbytes remaining. SUNWfcp..........................done. 14.48 Mbytes remaining. SUNWmibii........................done. 14.35 Mbytes remaining. SUNWsasnm........................done. 13.47 Mbytes remaining. SUNWsadmi........................done. 12.47 Mbytes remaining. SUNWsacom........................done. 12.15 Mbytes remaining. SUNWmipr.........................done. 12.06 Mbytes remaining. SUNWmipu.........................done. 11.78 Mbytes remaining. SUNWmkcd.........................done. 10.48 Mbytes remaining. SUNWfcsm.........................done. 10.33 Mbytes remaining. SUNWfss..........................done. 10.22 Mbytes remaining. SUNWmpapir.......................done. 10.09 Mbytes remaining. SUNWmpapi........................done. 9.98 Mbytes remaining. SUNWmpathadm.....................done. 9.89 Mbytes remaining. SUNWmpathadmr....................done. 9.85 Mbytes remaining. SUNWmpsvplr......................done. 9.00 Mbytes remaining. SUNWged..........................done. 8.75 Mbytes remaining. SUNWopenssl-commands.............done. 8.37 Mbytes remaining. SUNWopensslr.....................done. 8.32 Mbytes remaining. SUNWpd...........................done. 7.61 Mbytes remaining. SUNWpiclr........................done. 7.58 Mbytes remaining. SUNWqos..........................done. 7.36 Mbytes remaining. SUNWqfed.........................done. 7.14 Mbytes remaining. SUNWqlc..........................done. 5.91 Mbytes remaining. SUNWqlcu.........................done. 5.85 Mbytes remaining. SUNWqosu.........................done. 5.73 Mbytes remaining. SUNWqus..........................done. 5.49 Mbytes remaining. SUNWqusu.........................done. 5.46 Mbytes remaining. SUNWrcmdr........................done. 5.38 Mbytes remaining. SUNWrge..........................done. 5.22 Mbytes remaining. SUNWroute........................done. 4.90 Mbytes remaining. SUNWrpcib........................done. 4.75 Mbytes remaining. SUNWsolnm........................done. 4.72 Mbytes remaining. SUNWspnego.......................done. 4.62 Mbytes remaining. SUNWsshcu........................done. 4.18 Mbytes remaining. SUNWsshdr........................done. 4.11 Mbytes remaining. SUNWsshdu........................done. 3.69 Mbytes remaining. SUNWsshr.........................done. 3.58 Mbytes remaining. SUNWsshu.........................done. 3.00 Mbytes remaining. SUNWtcsh.........................done. 2.62 Mbytes remaining. SUNWter..........................done. 1.00 Mbytes remaining.
Completed software installation
Solaris 10 software installation partially failed
Solaris 10 packages partially installed SUNWxwfnt
D-16Cisco Billing and Measurements Server User Guide
OL-11618-18

Appendix D Installing Solaris 10 Version 0708-V02 on Sun Netra T5220New Solaris 10 Installation
Customizing system files - Mount points table (/etc/vfstab) - Network host addresses (/etc/hosts) - Environment variables (/etc/default/init)
Cleaning devices
Customizing system devices - Physical devices (/devices) - Logical devices (/dev)
Installing boot information - Installing boot blocks (c0t1d0s0) - Installing boot blocks (/dev/rdsk/c0t1d0s0)
Installation log location - /a/var/sadm/system/logs/install_log (before reboot) - /var/sadm/system/logs/install_log (after reboot)
Installation completeExecuting SolStart postinstall phase...Executing finish script "patch_finish"...
Finish script patch_finish execution completed.Executing JumpStart postinstall phase...Executing finish script "any_finish"...
any_finish started with SI_CONFIG_DIR = /tmp/install_configany_finish completed
Finish script any_finish execution completed.
The begin script log 'begin.log'is located in /var/sadm/system/logs after reboot.
The finish script log 'finish.log'is located in /var/sadm/system/logs after reboot.
syncing file systems... donerebooting...
SC Alert: Host System has Reset
SC Alert: CRITICAL ALARM is set\
Netra T5220, No Keyboard
Copyright 2008 Sun Microsystems, Inc. All rights reserved.OpenBoot 4.28.6, 16256 MB memory available, Serial #76865034.Ethernet address 0:14:4f:94:de:a, Host ID: 8494de0a.
Boot device: /pci@780/pci@0/pci@9/scsi@0/disk@1,0:a File and args: SunOS Release 5.10 Version Generic_120011-14 64-bitCopyright 1983-2007 Sun Microsystems, Inc. All rights reserved.Use is subject to license terms.Hostname: vtghostConfiguring devices.Loading smf(5) service descriptions: 40/108108/108/dev/rdsk/c0t1d0s5 is cleanCreating new rsa public/private host key pair
D-17Cisco Billing and Measurements Server User Guide
OL-11618-18
Appendix D Installing Solaris 10 Version 0708-V02 on Sun Netra T5220New Solaris 10 Installation
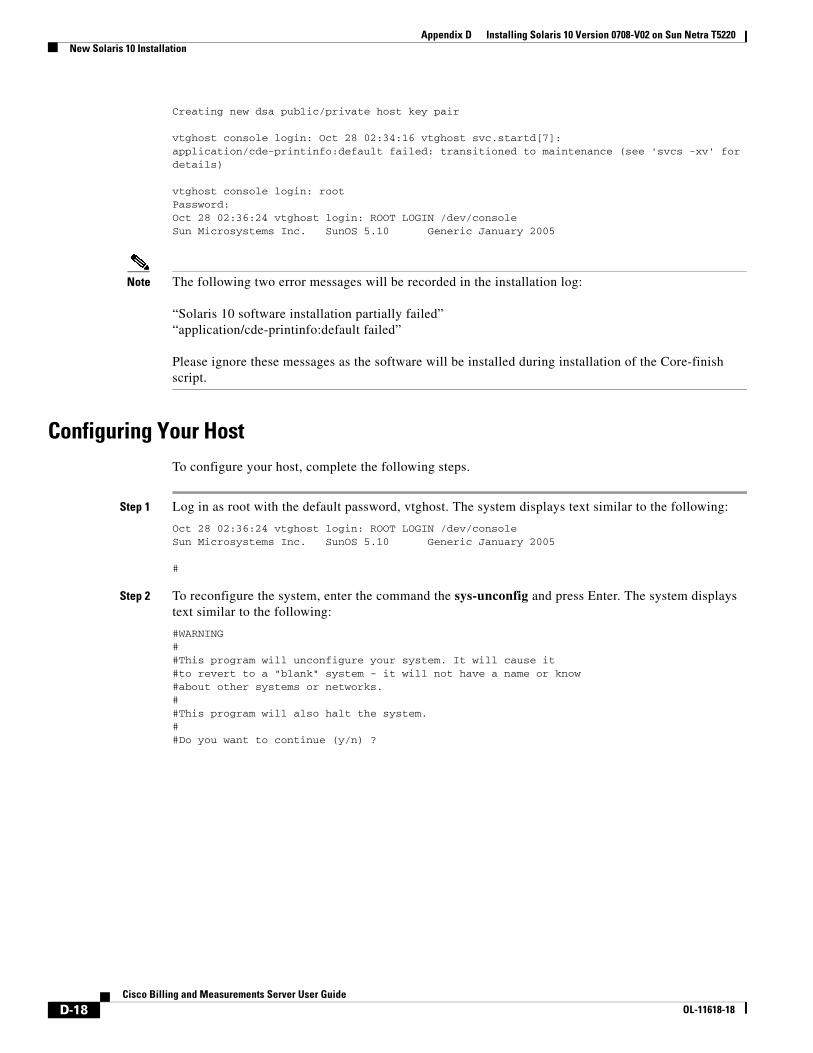
Creating new dsa public/private host key pair
vtghost console login: Oct 28 02:34:16 vtghost svc.startd[7]: application/cde-printinfo:default failed: transitioned to maintenance (see 'svcs -xv' for details)
vtghost console login: rootPassword: Oct 28 02:36:24 vtghost login: ROOT LOGIN /dev/consoleSun Microsystems Inc. SunOS 5.10 Generic January 2005
Note The following two error messages will be recorded in the installation log:
“Solaris 10 software installation partially failed” “application/cde-printinfo:default failed”
Please ignore these messages as the software will be installed during installation of the Core-finish script.
Configuring Your HostTo configure your host, complete the following steps.
Step 1 Log in as root with the default password, vtghost. The system displays text similar to the following:
Oct 28 02:36:24 vtghost login: ROOT LOGIN /dev/consoleSun Microsystems Inc. SunOS 5.10 Generic January 2005
#
Step 2 To reconfigure the system, enter the command the sys-unconfig and press Enter. The system displays text similar to the following:
#WARNING##This program will unconfigure your system. It will cause it#to revert to a "blank" system - it will not have a name or know#about other systems or networks.##This program will also halt the system.##Do you want to continue (y/n) ?
D-18Cisco Billing and Measurements Server User Guide
OL-11618-18
Appendix D Installing Solaris 10 Version 0708-V02 on Sun Netra T5220New Solaris 10 Installation
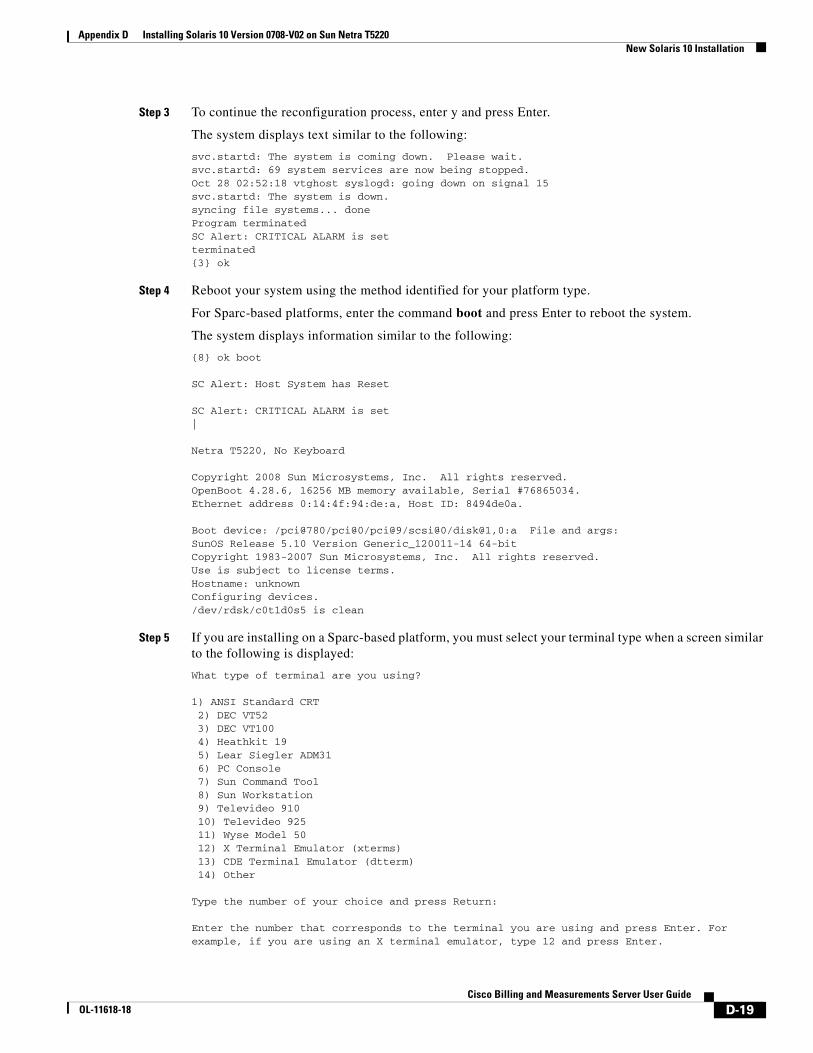
Step 3 To continue the reconfiguration process, enter y and press Enter.
The system displays text similar to the following:
svc.startd: The system is coming down. Please wait.svc.startd: 69 system services are now being stopped.Oct 28 02:52:18 vtghost syslogd: going down on signal 15svc.startd: The system is down.syncing file systems... doneProgram terminatedSC Alert: CRITICAL ALARM is setterminated{3} ok
Step 4 Reboot your system using the method identified for your platform type.
For Sparc-based platforms, enter the command boot and press Enter to reboot the system.
The system displays information similar to the following:
{8} ok boot
SC Alert: Host System has Reset
SC Alert: CRITICAL ALARM is set|
Netra T5220, No Keyboard
Copyright 2008 Sun Microsystems, Inc. All rights reserved.OpenBoot 4.28.6, 16256 MB memory available, Serial #76865034.Ethernet address 0:14:4f:94:de:a, Host ID: 8494de0a.
Boot device: /pci@780/pci@0/pci@9/scsi@0/disk@1,0:a File and args: SunOS Release 5.10 Version Generic_120011-14 64-bitCopyright 1983-2007 Sun Microsystems, Inc. All rights reserved.Use is subject to license terms.Hostname: unknownConfiguring devices./dev/rdsk/c0t1d0s5 is clean
Step 5 If you are installing on a Sparc-based platform, you must select your terminal type when a screen similar to the following is displayed:
What type of terminal are you using?
1) ANSI Standard CRT 2) DEC VT52 3) DEC VT100 4) Heathkit 19 5) Lear Siegler ADM31 6) PC Console 7) Sun Command Tool 8) Sun Workstation 9) Televideo 910 10) Televideo 925 11) Wyse Model 50 12) X Terminal Emulator (xterms) 13) CDE Terminal Emulator (dtterm) 14) Other
Type the number of your choice and press Return:
Enter the number that corresponds to the terminal you are using and press Enter. For example, if you are using an X terminal emulator, type 12 and press Enter.
D-19Cisco Billing and Measurements Server User Guide
OL-11618-18
Appendix D Installing Solaris 10 Version 0708-V02 on Sun Netra T5220New Solaris 10 Installation
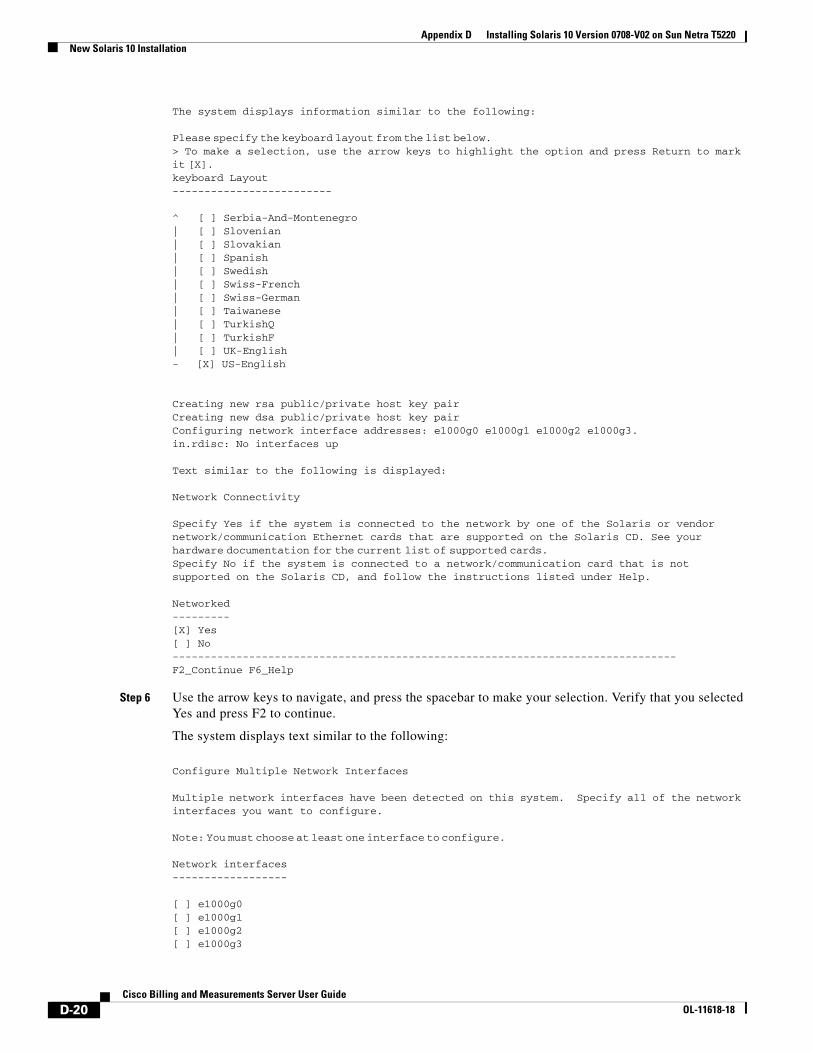
The system displays information similar to the following:
Please specify the keyboard layout from the list below. > To make a selection, use the arrow keys to highlight the option and press Return to mark it [X]. keyboard Layout ------------------------- ^ [ ] Serbia-And-Montenegro | [ ] Slovenian | [ ] Slovakian | [ ] Spanish | [ ] Swedish | [ ] Swiss-French | [ ] Swiss-German | [ ] Taiwanese | [ ] TurkishQ | [ ] TurkishF | [ ] UK-English - [X] US-English
Creating new rsa public/private host key pairCreating new dsa public/private host key pairConfiguring network interface addresses: e1000g0 e1000g1 e1000g2 e1000g3.in.rdisc: No interfaces up
Text similar to the following is displayed:
Network Connectivity Specify Yes if the system is connected to the network by one of the Solaris or vendor network/communication Ethernet cards that are supported on the Solaris CD. See your hardware documentation for the current list of supported cards. Specify No if the system is connected to a network/communication card that is not supported on the Solaris CD, and follow the instructions listed under Help.
Networked---------[X] Yes[ ] No-------------------------------------------------------------------------------F2_Continue F6_Help
Step 6 Use the arrow keys to navigate, and press the spacebar to make your selection. Verify that you selected Yes and press F2 to continue.
The system displays text similar to the following:
Configure Multiple Network Interfaces Multiple network interfaces have been detected on this system. Specify all of the network interfaces you want to configure. Note: You must choose at least one interface to configure.
Network interfaces ------------------ [ ] e1000g0 [ ] e1000g1 [ ] e1000g2 [ ] e1000g3
D-20Cisco Billing and Measurements Server User Guide
OL-11618-18
Appendix D Installing Solaris 10 Version 0708-V02 on Sun Netra T5220New Solaris 10 Installation
-------------------------------------------------------------------------------F2_Continue F6_Help
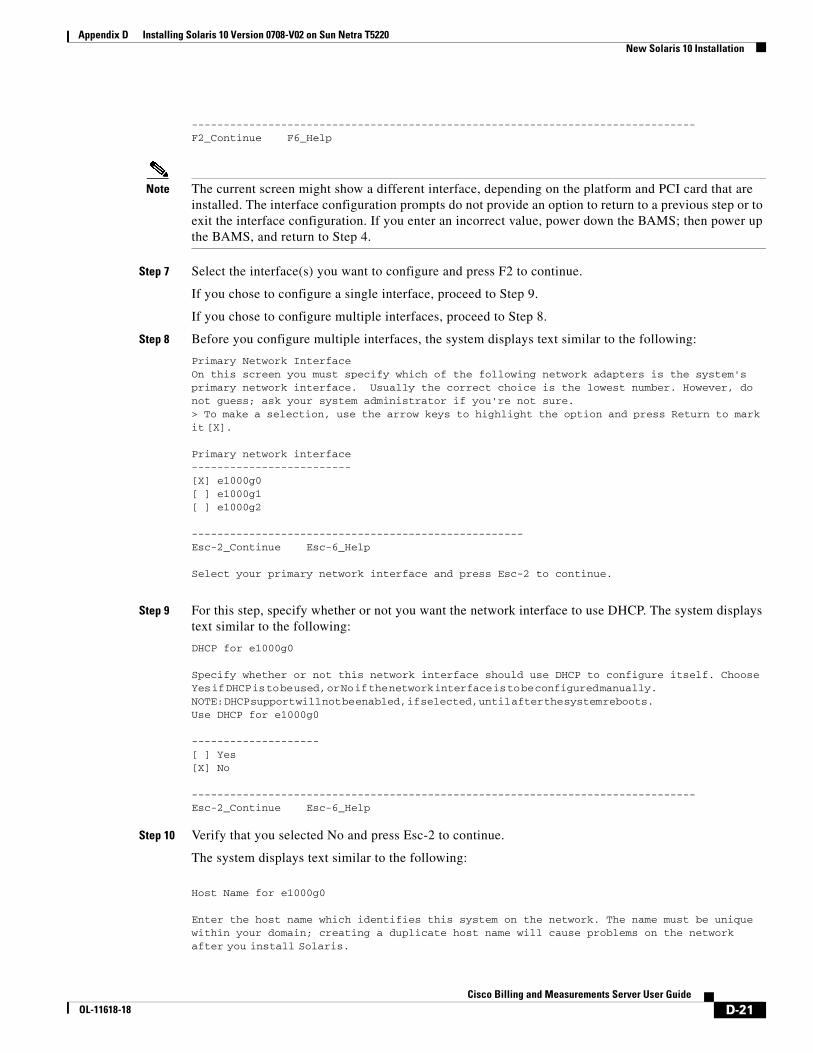
Note The current screen might show a different interface, depending on the platform and PCI card that are installed. The interface configuration prompts do not provide an option to return to a previous step or to exit the interface configuration. If you enter an incorrect value, power down the BAMS; then power up the BAMS, and return to Step 4.
Step 7 Select the interface(s) you want to configure and press F2 to continue.
If you chose to configure a single interface, proceed to Step 9.
If you chose to configure multiple interfaces, proceed to Step 8.
Step 8 Before you configure multiple interfaces, the system displays text similar to the following:
Primary Network InterfaceOn this screen you must specify which of the following network adapters is the system's primary network interface. Usually the correct choice is the lowest number. However, do not guess; ask your system administrator if you're not sure. > To make a selection, use the arrow keys to highlight the option and press Return to mark it [X].
Primary network interface ------------------------- [X] e1000g0 [ ] e1000g1 [ ] e1000g2
----------------------------------------------------Esc-2_Continue Esc-6_Help
Select your primary network interface and press Esc-2 to continue.
Step 9 For this step, specify whether or not you want the network interface to use DHCP. The system displays text similar to the following:
DHCP for e1000g0 Specify whether or not this network interface should use DHCP to configure itself. Choose Yes if DHCP is to be used, or No if the network interface is to be configured manually. NOTE: DHCP support will not be enabled, if selected, until after the system reboots. Use DHCP for e1000g0
-------------------- [ ] Yes [X] No
-------------------------------------------------------------------------------Esc-2_Continue Esc-6_Help
Step 10 Verify that you selected No and press Esc-2 to continue.
The system displays text similar to the following:
Host Name for e1000g0
Enter the host name which identifies this system on the network. The name must be unique within your domain; creating a duplicate host name will cause problems on the network after you install Solaris.
D-21Cisco Billing and Measurements Server User Guide
OL-11618-18
Appendix D Installing Solaris 10 Version 0708-V02 on Sun Netra T5220New Solaris 10 Installation
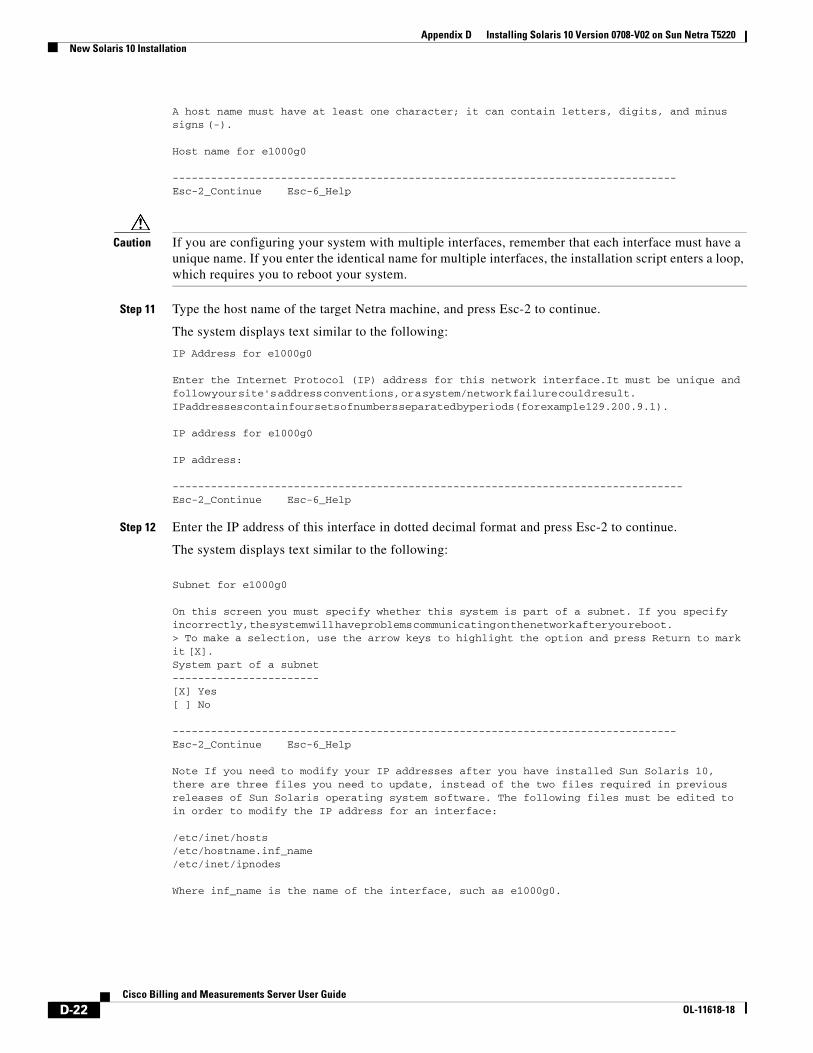
A host name must have at least one character; it can contain letters, digits, and minus signs (-).
Host name for e1000g0
-------------------------------------------------------------------------------Esc-2_Continue Esc-6_Help
Caution If you are configuring your system with multiple interfaces, remember that each interface must have a unique name. If you enter the identical name for multiple interfaces, the installation script enters a loop, which requires you to reboot your system.
Step 11 Type the host name of the target Netra machine, and press Esc-2 to continue.
The system displays text similar to the following:
IP Address for e1000g0
Enter the Internet Protocol (IP) address for this network interface.It must be unique and follow your site's address conventions, or a system/network failure could result. IP addresses contain four sets of numbers separated by periods (for example 129.200.9.1).
IP address for e1000g0
IP address:
--------------------------------------------------------------------------------Esc-2_Continue Esc-6_Help
Step 12 Enter the IP address of this interface in dotted decimal format and press Esc-2 to continue.
The system displays text similar to the following:
Subnet for e1000g0
On this screen you must specify whether this system is part of a subnet. If you specify incorrectly, the system will have problems communicating on the network after you reboot. > To make a selection, use the arrow keys to highlight the option and press Return to mark it [X]. System part of a subnet ----------------------- [X] Yes [ ] No
-------------------------------------------------------------------------------Esc-2_Continue Esc-6_Help Note If you need to modify your IP addresses after you have installed Sun Solaris 10, there are three files you need to update, instead of the two files required in previous releases of Sun Solaris operating system software. The following files must be edited to in order to modify the IP address for an interface:
/etc/inet/hosts/etc/hostname.inf_name/etc/inet/ipnodes
Where inf_name is the name of the interface, such as e1000g0.
D-22Cisco Billing and Measurements Server User Guide
OL-11618-18
Appendix D Installing Solaris 10 Version 0708-V02 on Sun Netra T5220New Solaris 10 Installation
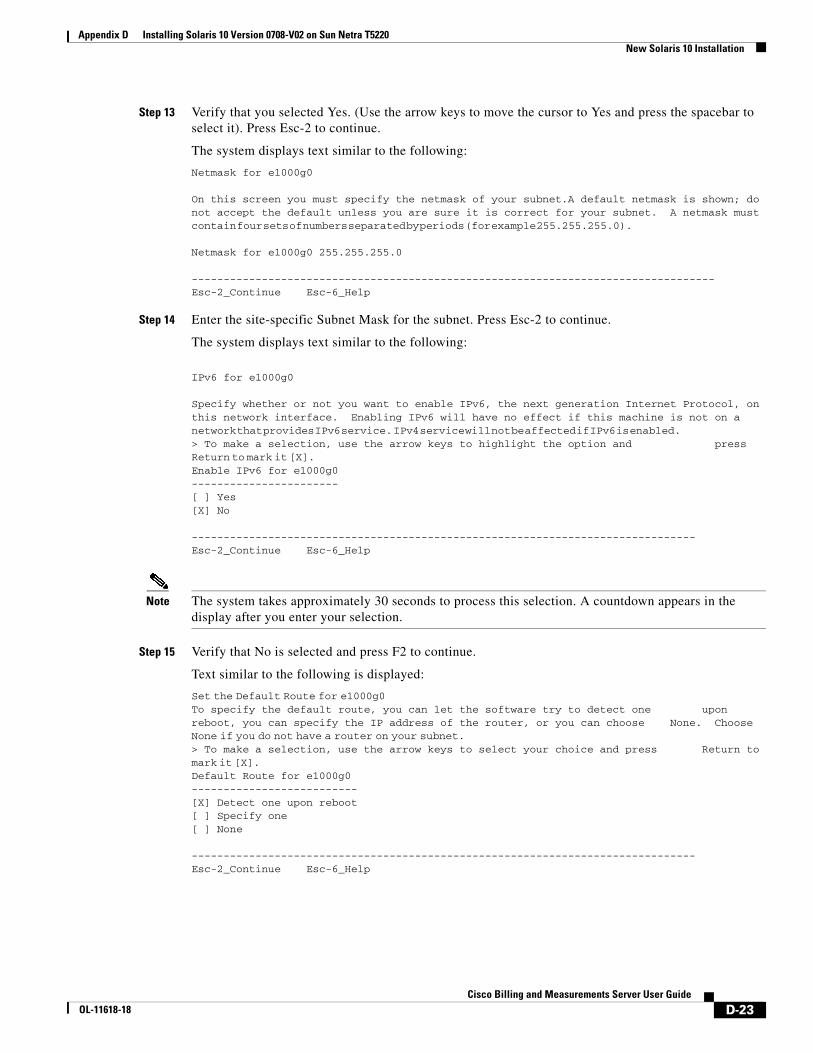
Step 13 Verify that you selected Yes. (Use the arrow keys to move the cursor to Yes and press the spacebar to select it). Press Esc-2 to continue.
The system displays text similar to the following:
Netmask for e1000g0
On this screen you must specify the netmask of your subnet.A default netmask is shown; do not accept the default unless you are sure it is correct for your subnet. A netmask must contain four sets of numbers separated by periods (for example 255.255.255.0).
Netmask for e1000g0 255.255.255.0
----------------------------------------------------------------------------------Esc-2_Continue Esc-6_Help
Step 14 Enter the site-specific Subnet Mask for the subnet. Press Esc-2 to continue.
The system displays text similar to the following:
IPv6 for e1000g0 Specify whether or not you want to enable IPv6, the next generation Internet Protocol, on this network interface. Enabling IPv6 will have no effect if this machine is not on a network that provides IPv6 service. IPv4 service will not be affected if IPv6 is enabled. > To make a selection, use the arrow keys to highlight the option and press Return to mark it [X]. Enable IPv6 for e1000g0 ----------------------- [ ] Yes [X] No
-------------------------------------------------------------------------------Esc-2_Continue Esc-6_Help
Note The system takes approximately 30 seconds to process this selection. A countdown appears in the display after you enter your selection.
Step 15 Verify that No is selected and press F2 to continue.
Text similar to the following is displayed:
Set the Default Route for e1000g0 To specify the default route, you can let the software try to detect one upon reboot, you can specify the IP address of the router, or you can choose None. Choose None if you do not have a router on your subnet. > To make a selection, use the arrow keys to select your choice and press Return to mark it [X]. Default Route for e1000g0 -------------------------- [X] Detect one upon reboot [ ] Specify one [ ] None -------------------------------------------------------------------------------Esc-2_Continue Esc-6_Help
D-23Cisco Billing and Measurements Server User Guide
OL-11618-18
Appendix D Installing Solaris 10 Version 0708-V02 on Sun Netra T5220New Solaris 10 Installation
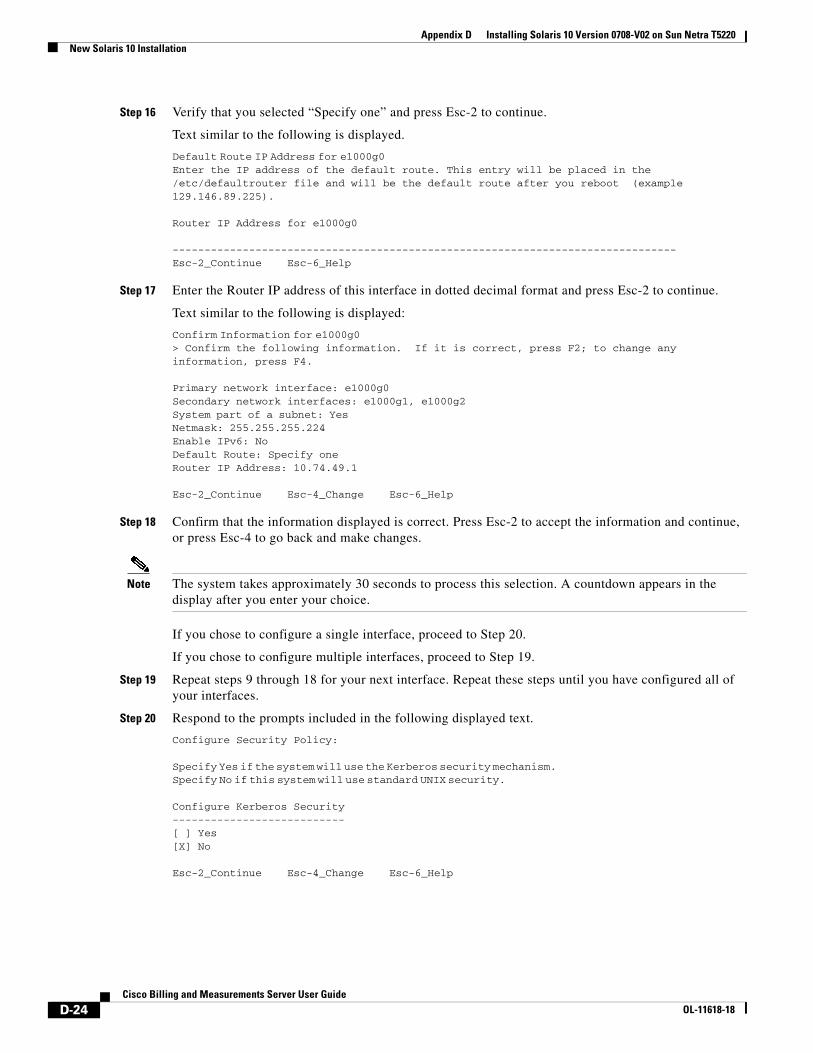
Step 16 Verify that you selected “Specify one” and press Esc-2 to continue.
Text similar to the following is displayed.
Default Route IP Address for e1000g0 Enter the IP address of the default route. This entry will be placed in the /etc/defaultrouter file and will be the default route after you reboot (example 129.146.89.225).
Router IP Address for e1000g0
-------------------------------------------------------------------------------Esc-2_Continue Esc-6_Help
Step 17 Enter the Router IP address of this interface in dotted decimal format and press Esc-2 to continue.
Text similar to the following is displayed:
Confirm Information for e1000g0 > Confirm the following information. If it is correct, press F2; to change any information, press F4. Primary network interface: e1000g0 Secondary network interfaces: e1000g1, e1000g2 System part of a subnet: Yes Netmask: 255.255.255.224 Enable IPv6: No Default Route: Specify one Router IP Address: 10.74.49.1 Esc-2_Continue Esc-4_Change Esc-6_Help
Step 18 Confirm that the information displayed is correct. Press Esc-2 to accept the information and continue, or press Esc-4 to go back and make changes.
Note The system takes approximately 30 seconds to process this selection. A countdown appears in the display after you enter your choice.
If you chose to configure a single interface, proceed to Step 20.
If you chose to configure multiple interfaces, proceed to Step 19.
Step 19 Repeat steps 9 through 18 for your next interface. Repeat these steps until you have configured all of your interfaces.
Step 20 Respond to the prompts included in the following displayed text.
Configure Security Policy:
Specify Yes if the system will use the Kerberos security mechanism. Specify No if this system will use standard UNIX security.
Configure Kerberos Security --------------------------- [ ] Yes [X] No
Esc-2_Continue Esc-4_Change Esc-6_Help
D-24Cisco Billing and Measurements Server User Guide
OL-11618-18
Appendix D Installing Solaris 10 Version 0708-V02 on Sun Netra T5220New Solaris 10 Installation
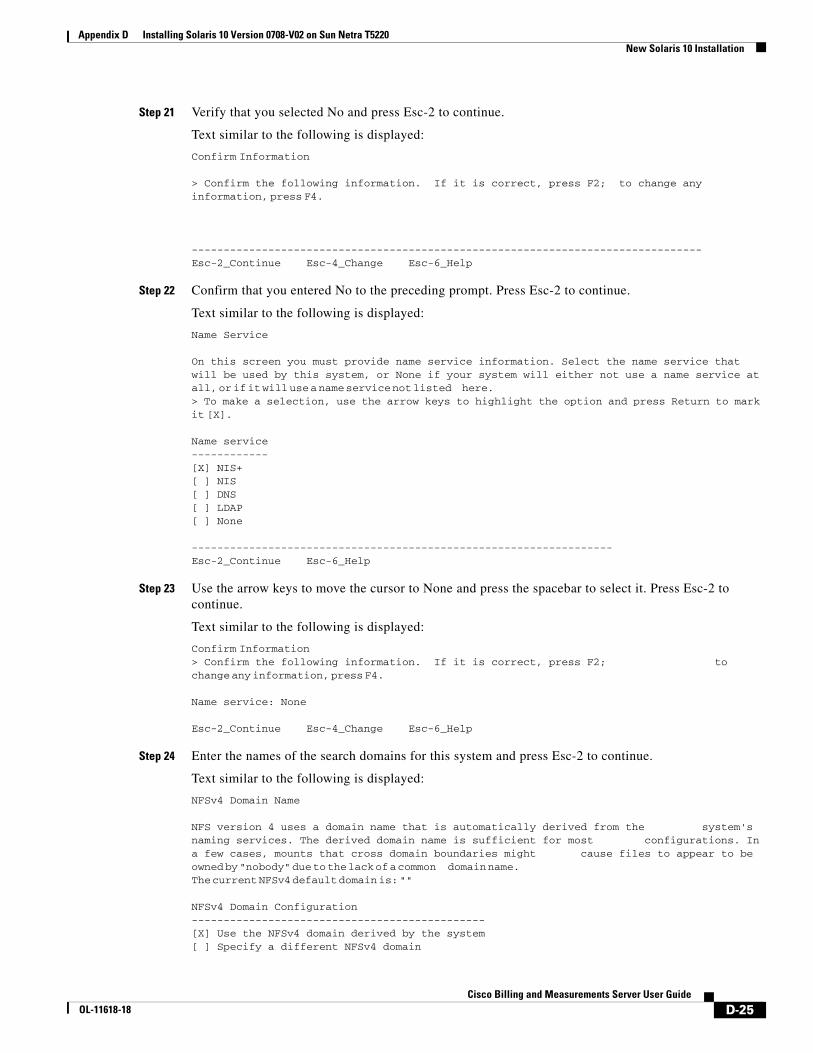
Step 21 Verify that you selected No and press Esc-2 to continue.
Text similar to the following is displayed:
Confirm Information
> Confirm the following information. If it is correct, press F2; to change any information, press F4.
--------------------------------------------------------------------------------Esc-2_Continue Esc-4_Change Esc-6_Help
Step 22 Confirm that you entered No to the preceding prompt. Press Esc-2 to continue.
Text similar to the following is displayed:
Name Service
On this screen you must provide name service information. Select the name service that will be used by this system, or None if your system will either not use a name service at all, or if it will use a name service not listed here. > To make a selection, use the arrow keys to highlight the option and press Return to mark it [X].
Name service ------------ [X] NIS+ [ ] NIS [ ] DNS [ ] LDAP [ ] None
------------------------------------------------------------------ Esc-2_Continue Esc-6_Help
Step 23 Use the arrow keys to move the cursor to None and press the spacebar to select it. Press Esc-2 to continue.
Text similar to the following is displayed:
Confirm Information > Confirm the following information. If it is correct, press F2; to change any information, press F4.
Name service: None Esc-2_Continue Esc-4_Change Esc-6_Help
Step 24 Enter the names of the search domains for this system and press Esc-2 to continue.
Text similar to the following is displayed:
NFSv4 Domain Name NFS version 4 uses a domain name that is automatically derived from the system's naming services. The derived domain name is sufficient for most configurations. In a few cases, mounts that cross domain boundaries might cause files to appear to be owned by "nobody" due to the lack of a common domain name. The current NFSv4 default domain is: ""
NFSv4 Domain Configuration ---------------------------------------------- [X] Use the NFSv4 domain derived by the system [ ] Specify a different NFSv4 domain
D-25Cisco Billing and Measurements Server User Guide
OL-11618-18
Appendix D Installing Solaris 10 Version 0708-V02 on Sun Netra T5220New Solaris 10 Installation
Esc-2_Continue Esc-6_Help
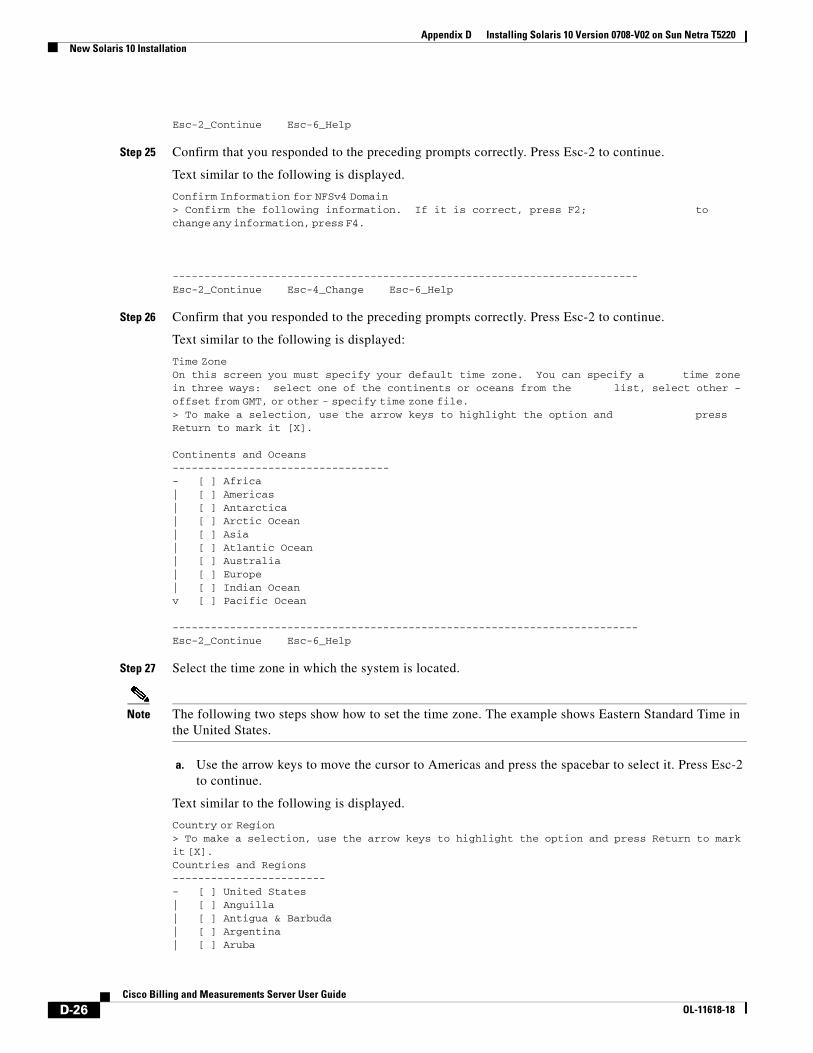
Step 25 Confirm that you responded to the preceding prompts correctly. Press Esc-2 to continue.
Text similar to the following is displayed.
Confirm Information for NFSv4 Domain > Confirm the following information. If it is correct, press F2; to change any information, press F4.
-------------------------------------------------------------------------Esc-2_Continue Esc-4_Change Esc-6_Help
Step 26 Confirm that you responded to the preceding prompts correctly. Press Esc-2 to continue.
Text similar to the following is displayed:
Time Zone On this screen you must specify your default time zone. You can specify a time zone in three ways: select one of the continents or oceans from the list, select other - offset from GMT, or other - specify time zone file. > To make a selection, use the arrow keys to highlight the option and press Return to mark it [X]. Continents and Oceans ---------------------------------- - [ ] Africa | [ ] Americas | [ ] Antarctica | [ ] Arctic Ocean | [ ] Asia | [ ] Atlantic Ocean | [ ] Australia | [ ] Europe | [ ] Indian Ocean v [ ] Pacific Ocean ------------------------------------------------------------------------- Esc-2_Continue Esc-6_Help
Step 27 Select the time zone in which the system is located.
Note The following two steps show how to set the time zone. The example shows Eastern Standard Time in the United States.
a. Use the arrow keys to move the cursor to Americas and press the spacebar to select it. Press Esc-2 to continue.
Text similar to the following is displayed.
Country or Region > To make a selection, use the arrow keys to highlight the option and press Return to mark it [X]. Countries and Regions ------------------------ - [ ] United States | [ ] Anguilla | [ ] Antigua & Barbuda | [ ] Argentina | [ ] Aruba
D-26Cisco Billing and Measurements Server User Guide
OL-11618-18
Appendix D Installing Solaris 10 Version 0708-V02 on Sun Netra T5220New Solaris 10 Installation
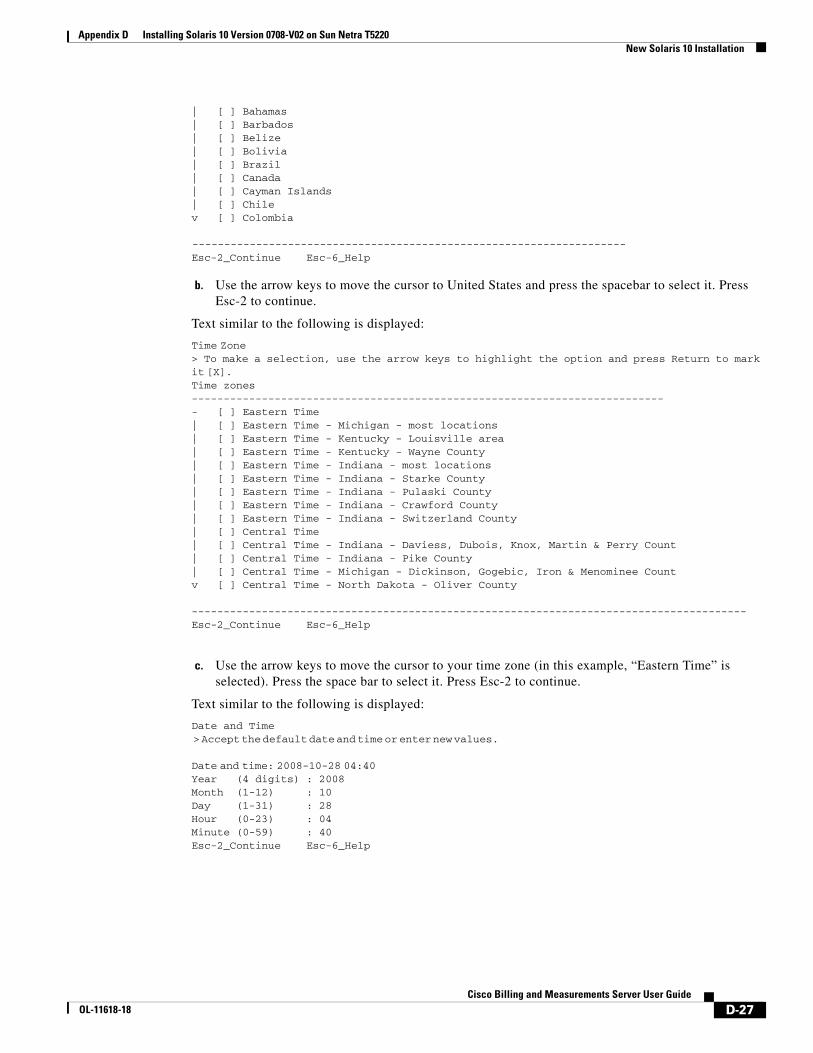
| [ ] Bahamas | [ ] Barbados | [ ] Belize | [ ] Bolivia | [ ] Brazil | [ ] Canada | [ ] Cayman Islands | [ ] Chile v [ ] Colombia
-------------------------------------------------------------------- Esc-2_Continue Esc-6_Help
b. Use the arrow keys to move the cursor to United States and press the spacebar to select it. Press Esc-2 to continue.
Text similar to the following is displayed:
Time Zone > To make a selection, use the arrow keys to highlight the option and press Return to mark it [X]. Time zones -------------------------------------------------------------------------- - [ ] Eastern Time | [ ] Eastern Time - Michigan - most locations | [ ] Eastern Time - Kentucky - Louisville area | [ ] Eastern Time - Kentucky - Wayne County | [ ] Eastern Time - Indiana - most locations | [ ] Eastern Time - Indiana - Starke County | [ ] Eastern Time - Indiana - Pulaski County | [ ] Eastern Time - Indiana - Crawford County | [ ] Eastern Time - Indiana - Switzerland County | [ ] Central Time | [ ] Central Time - Indiana - Daviess, Dubois, Knox, Martin & Perry Count | [ ] Central Time - Indiana - Pike County | [ ] Central Time - Michigan - Dickinson, Gogebic, Iron & Menominee Count v [ ] Central Time - North Dakota - Oliver County --------------------------------------------------------------------------------------- Esc-2_Continue Esc-6_Help
c. Use the arrow keys to move the cursor to your time zone (in this example, “Eastern Time” is selected). Press the space bar to select it. Press Esc-2 to continue.
Text similar to the following is displayed:
Date and Time > Accept the default date and time or enter new values.
Date and time: 2008-10-28 04:40 Year (4 digits) : 2008 Month (1-12) : 10 Day (1-31) : 28 Hour (0-23) : 04 Minute (0-59) : 40 Esc-2_Continue Esc-6_Help
D-27Cisco Billing and Measurements Server User Guide
OL-11618-18
Appendix D Installing Solaris 10 Version 0708-V02 on Sun Netra T5220New Solaris 10 Installation
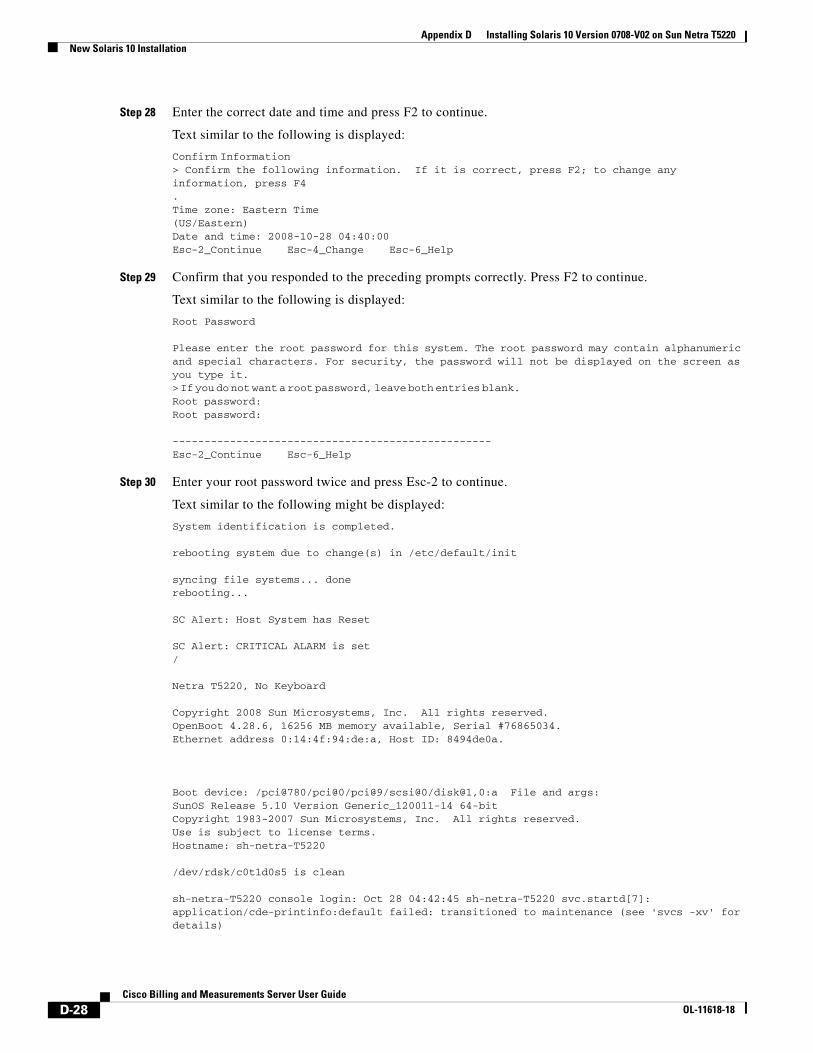
Step 28 Enter the correct date and time and press F2 to continue.
Text similar to the following is displayed:
Confirm Information > Confirm the following information. If it is correct, press F2; to change any information, press F4. Time zone: Eastern Time (US/Eastern) Date and time: 2008-10-28 04:40:00 Esc-2_Continue Esc-4_Change Esc-6_Help
Step 29 Confirm that you responded to the preceding prompts correctly. Press F2 to continue.
Text similar to the following is displayed:
Root Password
Please enter the root password for this system. The root password may contain alphanumeric and special characters. For security, the password will not be displayed on the screen as you type it. > If you do not want a root password, leave both entries blank. Root password: Root password:
--------------------------------------------------Esc-2_Continue Esc-6_Help
Step 30 Enter your root password twice and press Esc-2 to continue.
Text similar to the following might be displayed:
System identification is completed.
rebooting system due to change(s) in /etc/default/init
syncing file systems... donerebooting...
SC Alert: Host System has Reset
SC Alert: CRITICAL ALARM is set/
Netra T5220, No Keyboard
Copyright 2008 Sun Microsystems, Inc. All rights reserved.OpenBoot 4.28.6, 16256 MB memory available, Serial #76865034.Ethernet address 0:14:4f:94:de:a, Host ID: 8494de0a.
Boot device: /pci@780/pci@0/pci@9/scsi@0/disk@1,0:a File and args: SunOS Release 5.10 Version Generic_120011-14 64-bitCopyright 1983-2007 Sun Microsystems, Inc. All rights reserved.Use is subject to license terms.Hostname: sh-netra-T5220
/dev/rdsk/c0t1d0s5 is clean
sh-netra-T5220 console login: Oct 28 04:42:45 sh-netra-T5220 svc.startd[7]: application/cde-printinfo:default failed: transitioned to maintenance (see 'svcs -xv' for details)
D-28Cisco Billing and Measurements Server User Guide
OL-11618-18
Appendix D Installing Solaris 10 Version 0708-V02 on Sun Netra T5220New Solaris 10 Installation
sh-netra-T5220 console login:
Step 31 If you want to enable root access to the Cisco BAMS, complete the following steps:
a. Edit the /etc/default/login file, and make the following changes:
– Comment out the line starting with “CONSOLE=” by inserting a “#” in front of this line.
– Add the line “svcadm enable telnet” if you want to enable telnet.
– Add the line “svcadm enable rlogin” if you want to enable remote login.
b. Save your changes to this file.
Caution Step 31 is optional. Telnet and rlogin might expose your platform to security risk. Turn them on only if required.
Platform-Specific Installation ProcedureComplete the following steps to install files specific to your Cisco platform:
Step 1 Log in as root with the default password, vtghost.
Step 2 Reinsert the CD into the CD-ROM drive.
Step 3 Mount the CD-ROM in the cdrom directory by entering the following command:
mount -F hsfs -o ro /dev/dsk/devname /cdrom For example mount -F hsfs -o ro /dev/dsk/c1t0d0s0 /cdrom
Note The devname is the device name for the primary CD-ROM drive. The device name might vary depending on your hardware platform. To verify the device name on your Netra T5220, issue the Solaris command iostat -En.
Step 4 Run the script core_finish by entering the appropriate command.
For Sparc-based platforms:
./cdrom/core_finish/core_finish.sh
Step 5 The script prompts you to enter the name of your host twice. Enter the name of your host and press Enter each time.
Note When you enter the name of your host at this time you do not set the UNIX host name value. The value you enter is used to set up the crash directory /var/hostname/crash. The system returns a response similar to the following:
sh-netra-T5220 is the hostname of this box; enter hostname that applies to your specific
case
Text similar to the following is displayed:
CORE CD installation finishing procedure started
D-29Cisco Billing and Measurements Server User Guide
OL-11618-18
Appendix D Installing Solaris 10 Version 0708-V02 on Sun Netra T5220New Solaris 10 Installation
Please enter this host node name: sh-netra-T5220Re-enter this host node name:sh-netra-T5220Using 'sh-netra-T5220' for this hostStart installation of core extra packages
Processing package instance <SUNWxwfnt> from </cdrom/Solaris_10/Product>
X Window System platform required fonts(sparc) 6.6.2.7400,REV=0.2004.12.15
This appears to be an attempt to install the same architecture andversion of a package which is already installed. This installationwill attempt to overwrite this package.
Copyright 2005 Sun Microsystems, Inc. All rights reserved.Use is subject to license terms.Using </usr> as the package base directory.## Processing package information.## Processing system information. 366 package pathnames are already properly installed.
Installing X Window System platform required fonts as <SUNWxwfnt>
## Installing part 1 of 1.[ verifying class <fontsdir> ][ verifying class <fontsalias> ][ verifying class <encodingsdir> ][ verifying class <ttmapsdir> ]
Installation of <SUNWxwfnt> was successful.Adding <SUNWvts>
Processing package instance <SUNWvts> from </opt/xtrapkgs>
SunVTS Framework(sparc) 7.0,REV=2007.11.22.17.02## Executing checkinstall script.Copyright 2007 Sun Microsystems, Inc. All rights reserved.Use is subject to license terms.Using </usr> as the package base directory.## Processing package information.## Processing system information.
Installing SunVTS Framework as <SUNWvts>
## Installing part 1 of 1.11804 blocks
Installation of <SUNWvts> was successful.Adding <SUNWvtsr>
Processing package instance <SUNWvtsr> from </opt/xtrapkgs>
SunVTS Framework (Root)(sparc) 7.0,REV=2007.11.22.17.02Using </> as the package base directory.## Processing package information.## Processing system information. 1 package pathname is already properly installed.
Installing SunVTS Framework (Root) as <SUNWvtsr>
## Installing part 1 of 1.Copyright 2007 Sun Microsystems, Inc. All rights reserved.
D-30Cisco Billing and Measurements Server User Guide
OL-11618-18
Appendix D Installing Solaris 10 Version 0708-V02 on Sun Netra T5220New Solaris 10 Installation
Use is subject to license terms.6 blocks
Installation of <SUNWvtsr> was successful.Adding <SUNWvtsts>
Processing package instance <SUNWvtsts> from </opt/xtrapkgs>
SunVTS Core Installation Tests(sparc) 7.0,REV=2007.11.22.17.02## Executing checkinstall script.Copyright 2007 Sun Microsystems, Inc. All rights reserved.Use is subject to license terms.Using </usr> as the package base directory.## Processing package information.## Processing system information. 11 package pathnames are already properly installed.
Installing SunVTS Core Installation Tests as <SUNWvtsts>
## Installing part 1 of 1.97583 blocks
Installation of <SUNWvtsts> was successful.Adding <SUNWexplo>
Processing package instance <SUNWexplo> from </opt/xtrapkgs>
Sun(TM) Explorer Data Collector(all) 5.10,REV=2007.09.20.19.12## Executing checkinstall script.Copyright 1996-2007 Sun Microsystems, Inc.All rights reserved.Using </opt> as the package base directory.## Processing package information.## Processing system information.
Installing Sun(TM) Explorer Data Collector as <SUNWexplo>
## Executing preinstall script.## Installing part 1 of 1./opt/SUNWexplo/LICENSEREADME/LICENSE.txt/opt/SUNWexplo/LICENSEREADME/THIRDPARTYLICENSEREADME.txt/opt/SUNWexplo/bin/capture.sparc/opt/SUNWexplo/bin/core_check.sh/opt/SUNWexplo/bin/curl.i386/opt/SUNWexplo/bin/curl.sparc/opt/SUNWexplo/bin/diskinfo.i386/opt/SUNWexplo/bin/diskinfo.sparc/opt/SUNWexplo/bin/exp_defaults/opt/SUNWexplo/bin/explorer/opt/SUNWexplo/bin/explorer_notify_update/opt/SUNWexplo/bin/instinfo_config/opt/SUNWexplo/bin/j2se_config/opt/SUNWexplo/bin/mktime.i386/opt/SUNWexplo/bin/mktime.sparc/opt/SUNWexplo/bin/rprtfru.sparc/opt/SUNWexplo/bin/se3kxtr.ksh/opt/SUNWexplo/bin/snapshot/opt/SUNWexplo/bin/st_diag.i386/opt/SUNWexplo/bin/st_diag.sparc/opt/SUNWexplo/bin/sunone_config/opt/SUNWexplo/bin/sunone_ps/opt/SUNWexplo/doc/CHANGES/opt/SUNWexplo/doc/README/opt/SUNWexplo/doc/README.j2se_config
D-31Cisco Billing and Measurements Server User Guide
OL-11618-18

Appendix D Installing Solaris 10 Version 0708-V02 on Sun Netra T5220New Solaris 10 Installation
/opt/SUNWexplo/doc/README.man/opt/SUNWexplo/doc/README.sunone_config/opt/SUNWexplo/java/fruid-scappclient.jar/opt/SUNWexplo/java/libfru.jar/opt/SUNWexplo/lib/AMERICAS_countries.1/opt/SUNWexplo/lib/AMERICAS_countries.2/opt/SUNWexplo/lib/AMERICAS_countries.3/opt/SUNWexplo/lib/AMERICAS_countries_codes/opt/SUNWexplo/lib/APAC_countries.1/opt/SUNWexplo/lib/APAC_countries.2/opt/SUNWexplo/lib/APAC_countries.3/opt/SUNWexplo/lib/APAC_countries.4/opt/SUNWexplo/lib/APAC_countries_codes/opt/SUNWexplo/lib/EMEA_countries.1/opt/SUNWexplo/lib/EMEA_countries.2/opt/SUNWexplo/lib/EMEA_countries.3/opt/SUNWexplo/lib/EMEA_countries.4/opt/SUNWexplo/lib/EMEA_countries.5/opt/SUNWexplo/lib/EMEA_countries.6/opt/SUNWexplo/lib/EMEA_countries.7/opt/SUNWexplo/lib/EMEA_countries.8/opt/SUNWexplo/lib/EMEA_countries_codes/opt/SUNWexplo/lib/ca-bundle.crt/opt/SUNWexplo/lib/crontab.txt/opt/SUNWexplo/lib/exp_check/opt/SUNWexplo/lib/exp_common/opt/SUNWexplo/lib/exp_file/opt/SUNWexplo/lib/exp_ftp/opt/SUNWexplo/lib/exp_https/opt/SUNWexplo/lib/exp_j2se/opt/SUNWexplo/lib/exp_mail/opt/SUNWexplo/lib/exp_main/opt/SUNWexplo/lib/exp_postproc/opt/SUNWexplo/lib/exp_sunone/opt/SUNWexplo/lib/exp_tools/opt/SUNWexplo/lib/exp_transport/opt/SUNWexplo/lib/libfru.so <symbolic link>/opt/SUNWexplo/lib/libfru.so.1/opt/SUNWexplo/lib/libfrujni.so <symbolic link>/opt/SUNWexplo/lib/libfrujni.so.1/opt/SUNWexplo/lib/libfrureg.so <symbolic link>/opt/SUNWexplo/lib/libfrureg.so.1/opt/SUNWexplo/lib/libfrurmi.so <symbolic link>/opt/SUNWexplo/lib/libfrurmi.so.1/opt/SUNWexplo/lib/libfruutils.so <symbolic link>/opt/SUNWexplo/lib/libfruutils.so.1/opt/SUNWexplo/lib/locale/C/LC_MESSAGES/explorer.mo/opt/SUNWexplo/lib/locale/C/LC_MESSAGES/explorer.po/opt/SUNWexplo/lib/snapshot.conf/opt/SUNWexplo/lib/uu2b64/opt/SUNWexplo/man/man1m/explorer.1m/opt/SUNWexplo/man/man4/explorer.4/opt/SUNWexplo/man/man5/explorer.5/opt/SUNWexplo/tools/1280extended/opt/SUNWexplo/tools/Tx000/opt/SUNWexplo/tools/alomextended/opt/SUNWexplo/tools/b1600extended/opt/SUNWexplo/tools/b1600switch/opt/SUNWexplo/tools/cluster/opt/SUNWexplo/tools/cmdline/opt/SUNWexplo/tools/crypto/opt/SUNWexplo/tools/cst/opt/SUNWexplo/tools/disks/opt/SUNWexplo/tools/emc
D-32Cisco Billing and Measurements Server User Guide
OL-11618-18
Appendix D Installing Solaris 10 Version 0708-V02 on Sun Netra T5220New Solaris 10 Installation
/opt/SUNWexplo/tools/etc/opt/SUNWexplo/tools/fcal/opt/SUNWexplo/tools/firelink/opt/SUNWexplo/tools/fma/opt/SUNWexplo/tools/fru/opt/SUNWexplo/tools/hds/opt/SUNWexplo/tools/ilomextended/opt/SUNWexplo/tools/indy/opt/SUNWexplo/tools/init/opt/SUNWexplo/tools/instinfo/opt/SUNWexplo/tools/iplanet <symbolic link>/opt/SUNWexplo/tools/ipmi/opt/SUNWexplo/tools/ipmiextended/opt/SUNWexplo/tools/j2se/opt/SUNWexplo/tools/ldap/opt/SUNWexplo/tools/lic/opt/SUNWexplo/tools/lp/opt/SUNWexplo/tools/lvm/opt/SUNWexplo/tools/messages/opt/SUNWexplo/tools/nbu/opt/SUNWexplo/tools/nbu_extended/opt/SUNWexplo/tools/ndd/opt/SUNWexplo/tools/netconnect/opt/SUNWexplo/tools/netinfo/opt/SUNWexplo/tools/nhas/opt/SUNWexplo/tools/patch/opt/SUNWexplo/tools/pci/opt/SUNWexplo/tools/photon/opt/SUNWexplo/tools/pkg/opt/SUNWexplo/tools/proc/opt/SUNWexplo/tools/quorumserv/opt/SUNWexplo/tools/samfs/opt/SUNWexplo/tools/sanextended/opt/SUNWexplo/tools/sap/opt/SUNWexplo/tools/sbu/opt/SUNWexplo/tools/scextended/opt/SUNWexplo/tools/se3k/opt/SUNWexplo/tools/se3kextended/opt/SUNWexplo/tools/se61xx/opt/SUNWexplo/tools/se6320/opt/SUNWexplo/tools/se6920/opt/SUNWexplo/tools/sf15k_ndd/opt/SUNWexplo/tools/sf15k_sc/opt/SUNWexplo/tools/smfextended/opt/SUNWexplo/tools/sonoma/opt/SUNWexplo/tools/srscextended/opt/SUNWexplo/tools/ssa/opt/SUNWexplo/tools/ssp/opt/SUNWexplo/tools/st25xx/opt/SUNWexplo/tools/storade/opt/SUNWexplo/tools/storedge/opt/SUNWexplo/tools/stortools/opt/SUNWexplo/tools/sunjes/opt/SUNWexplo/tools/sunone/opt/SUNWexplo/tools/sunray/opt/SUNWexplo/tools/sysconfig/opt/SUNWexplo/tools/syslogs/opt/SUNWexplo/tools/t3/opt/SUNWexplo/tools/t3extended/opt/SUNWexplo/tools/tape/opt/SUNWexplo/tools/test/opt/SUNWexplo/tools/u4ft/opt/SUNWexplo/tools/ufsextended/opt/SUNWexplo/tools/var
D-33Cisco Billing and Measurements Server User Guide
OL-11618-18
Appendix D Installing Solaris 10 Version 0708-V02 on Sun Netra T5220New Solaris 10 Installation
/opt/SUNWexplo/tools/vtsst/opt/SUNWexplo/tools/vxfs/opt/SUNWexplo/tools/vxvm/opt/SUNWexplo/tools/xscfextended[ verifying class <none> ]## Executing postinstall script./usr/bin/catman is not available for usePlease run: catman -w -M /opt/SUNWexplo/man manually
Installation of <SUNWexplo> was successful.Adding <SUNWexplu>
Processing package instance <SUNWexplu> from </opt/xtrapkgs>
Sun(TM) Explorer Data Collector Config Files(all) 5.10,REV=2007.09.20.19.12## Executing checkinstall script.Copyright 1996-2007 Sun Microsystems, Inc.All rights reserved.Using </> as the package base directory.## Processing package information.## Processing system information. 2 package pathnames are already properly installed.
Installing Sun(TM) Explorer Data Collector Config Files as <SUNWexplu>
## Installing part 1 of 1./etc/opt/SUNWexplo/LICENSEREADME/LICENSE.txt/etc/opt/SUNWexplo/t3files.txt[ verifying class <none> ]Modifying /etc/opt/SUNWexplo/1280input.txtModifying /etc/opt/SUNWexplo/alominput.txtModifying /etc/opt/SUNWexplo/b1600input.txtModifying /etc/opt/SUNWexplo/b1600switchinput.txtModifying /etc/opt/SUNWexplo/ilominput.txtModifying /etc/opt/SUNWexplo/indyinput.txtModifying /etc/opt/SUNWexplo/ipmiinput.txtModifying /etc/opt/SUNWexplo/saninput.txtModifying /etc/opt/SUNWexplo/scinput.txtModifying /etc/opt/SUNWexplo/se3kinput.txtModifying /etc/opt/SUNWexplo/se6320input.txtModifying /etc/opt/SUNWexplo/se6920input.txtModifying /etc/opt/SUNWexplo/srscinput.txtModifying /etc/opt/SUNWexplo/t3input.txtModifying /etc/opt/SUNWexplo/tapeinput.txtModifying /etc/opt/SUNWexplo/xscfinput.txt[ verifying class <build> ]## Executing postinstall script.
Installation of <SUNWexplu> was successful.Adding <SUNWpsr>
Processing package instance <SUNWpsr> from </opt/xtrapkgs>
Solaris Print - LP Server, (root)(sparc) 13.1,REV=2005.01.21.15.53Using </> as the package base directory.## Processing package information.## Processing system information. 11 package pathnames are already properly installed.
Installing Solaris Print - LP Server, (root) as <SUNWpsr>
## Executing preinstall script.Copyright 2007 Sun Microsystems, Inc. All rights reserved.Use is subject to license terms.
D-34Cisco Billing and Measurements Server User Guide
OL-11618-18
Appendix D Installing Solaris 10 Version 0708-V02 on Sun Netra T5220New Solaris 10 Installation
## Installing part 1 of 1.19 blocks[ verifying class <renameold> ][ verifying class <preserve> ][ verifying class <manifest> ]## Executing postinstall script.
Installation of <SUNWpsr> was successful.Adding <SUNWpcr>
Processing package instance <SUNWpcr> from </opt/xtrapkgs>
Solaris Print - Client, (root)(sparc) 13.1,REV=2005.01.21.15.53Using </> as the package base directory.## Processing package information.## Processing system information. 10 package pathnames are already properly installed.
Installing Solaris Print - Client, (root) as <SUNWpcr>
## Installing part 1 of 1.Copyright 2007 Sun Microsystems, Inc. All rights reserved.Use is subject to license terms.2 blocks[ verifying class <preserve> ][ verifying class <manifest> ]## Executing postinstall script.
Installation of <SUNWpcr> was successful.Adding <SUNWpcu>
Processing package instance <SUNWpcu> from </opt/xtrapkgs>
Solaris Print - Client, (usr)(sparc) 13.1,REV=2005.01.21.15.53Using </> as the package base directory.## Processing package information.## Processing system information. 4 package pathnames are already properly installed.
Installing Solaris Print - Client, (usr) as <SUNWpcu>
## Installing part 1 of 1.Copyright 2007 Sun Microsystems, Inc. All rights reserved.Use is subject to license terms.545 blocks
Installation of <SUNWpcu> was successful.Adding <SUNWpsu>
Processing package instance <SUNWpsu> from </opt/xtrapkgs>
Solaris Print - LP Server, (usr)(sparc) 13.1,REV=2005.01.21.15.53Using </> as the package base directory.## Processing package information.## Processing system information. 12 package pathnames are already properly installed.
Installing Solaris Print - LP Server, (usr) as <SUNWpsu>
## Installing part 1 of 1.Copyright 2007 Sun Microsystems, Inc. All rights reserved.Use is subject to license terms.3157 blocks
D-35Cisco Billing and Measurements Server User Guide
OL-11618-18
Appendix D Installing Solaris 10 Version 0708-V02 on Sun Netra T5220New Solaris 10 Installation
Installation of <SUNWpsu> was successful.Adding <SMCsudo>
Processing package instance <SMCsudo> from </opt/xtrapkgs>
sudo(sparc) 1.6.9p12Todd Miller et alUsing </usr/local> as the package base directory.## Processing package information.## Processing system information. 2 package pathnames are already properly installed.
Installing sudo as <SMCsudo>
## Installing part 1 of 1./usr/local/bin/sudo/usr/local/bin/sudoedit/usr/local/doc/sudo/BUGS/usr/local/doc/sudo/CHANGES/usr/local/doc/sudo/HISTORY/usr/local/doc/sudo/INSTALL/usr/local/doc/sudo/INSTALL.configure/usr/local/doc/sudo/LICENSE/usr/local/doc/sudo/PORTING/usr/local/doc/sudo/README/usr/local/doc/sudo/README.LDAP/usr/local/doc/sudo/TROUBLESHOOTING/usr/local/doc/sudo/UPGRADE/usr/local/etc/sudoers/usr/local/libexec/sudo_noexec.la/usr/local/libexec/sudo_noexec.so/usr/local/man/man1m/sudo.1m/usr/local/man/man1m/sudoedit.1m/usr/local/man/man1m/visudo.1m/usr/local/man/man4/sudoers.4/usr/local/sbin/visudo[ verifying class <none> ]
Installation of <SMCsudo> was successful.Adding <SMClsof>
Processing package instance <SMClsof> from </opt/xtrapkgs>
lsof(sparc) 4.77Vic AbellUsing </usr/local> as the package base directory.## Processing package information.## Processing system information. 3 package pathnames are already properly installed.
Installing lsof as <SMClsof>
## Installing part 1 of 1./usr/local/bin/lsof/usr/local/bin/sparcv7/lsof/usr/local/bin/sparcv9/lsof/usr/local/doc/lsof/00.README.FIRST <attribute change only>/usr/local/doc/lsof/00CREDITS/usr/local/doc/lsof/00DCACHE/usr/local/doc/lsof/00DIALECTS/usr/local/doc/lsof/00DIST/usr/local/doc/lsof/00FAQ/usr/local/doc/lsof/00LSOF-L/usr/local/doc/lsof/00MANIFEST
D-36Cisco Billing and Measurements Server User Guide
OL-11618-18
Appendix D Installing Solaris 10 Version 0708-V02 on Sun Netra T5220New Solaris 10 Installation
/usr/local/doc/lsof/00PORTING/usr/local/doc/lsof/00QUICKSTART/usr/local/doc/lsof/00README/usr/local/doc/lsof/00TEST/usr/local/doc/lsof/00XCONFIG/usr/local/doc/lsof/lsof.man/usr/local/man/man8/lsof.8[ verifying class <none> ]
Installation of <SMClsof> was successful.SUNW,Netra-T5220
SUNW,Netra-T5220 needs LOM packagesspawn pkgadd -d . SUNWlomr
Processing package instance <SUNWlomr> from </opt/lompkgs>
LOMlite driver (root)(sparc) 2.0,REV=2000.08.22.14.14Copyright 2000 Sun Microsystems, Inc. All rights reserved.## Executing checkinstall script.Using </> as the package base directory.## Processing package information.## Processing system information. 7 package pathnames are already properly installed.## Verifying package dependencies.## Verifying disk space requirements.## Checking for conflicts with packages already installed.## Checking for setuid/setgid programs.
This package contains scripts which will be executed with super-userpermission during the process of installing this package.
Do you want to continue with the installation of <SUNWlomr> [y,n,?] y
Installing LOMlite driver (root) as <SUNWlomr>
## Installing part 1 of 1.20 blocksi.drivers (INFO): Startingi.drivers (INFO): Installing /opt/lompkgs/SUNWlomr/reloc/platform/sun4u/kernel/drv/lomi.drivers (INFO): Installing /opt/lompkgs/SUNWlomr/reloc/platform/sun4u/kernel/drv/lompi.drivers (INFO): Installing /opt/lompkgs/SUNWlomr/reloc/platform/sun4u/kernel/drv/sparcv9/lomi.drivers (INFO): Installing /opt/lompkgs/SUNWlomr/reloc/platform/sun4u/kernel/drv/sparcv9/lompi.drivers (INFO): Installing /opt/lompkgs/SUNWlomr/reloc/platform/sun4u/kernel/drv/sparcv9/lomv
i.drivers (INFO): Identified drivers 'lom lomp lomv'i.drivers (INFO): Cleaning up old driver 'lom'...i.drivers (INFO): Cleaning up old driver 'lomp'...i.drivers (INFO): Cleaning up old driver 'lomv'...i.drivers (INFO): Cleaning up old driver 'lomh'...
i.drivers (INFO): Adding driver 'lomp'... driver = 'lomp' aliases = '' link = 'lomp' spec = 'lomp'
Adding devlink entry 'type=ddi_pseudo;name=lomp lomp'adding driver with aliases '' perm '* 0644 root sys'Cannot find module (lomp).i.drivers (ERROR): Failed to add driver, status 1
D-37Cisco Billing and Measurements Server User Guide
OL-11618-18
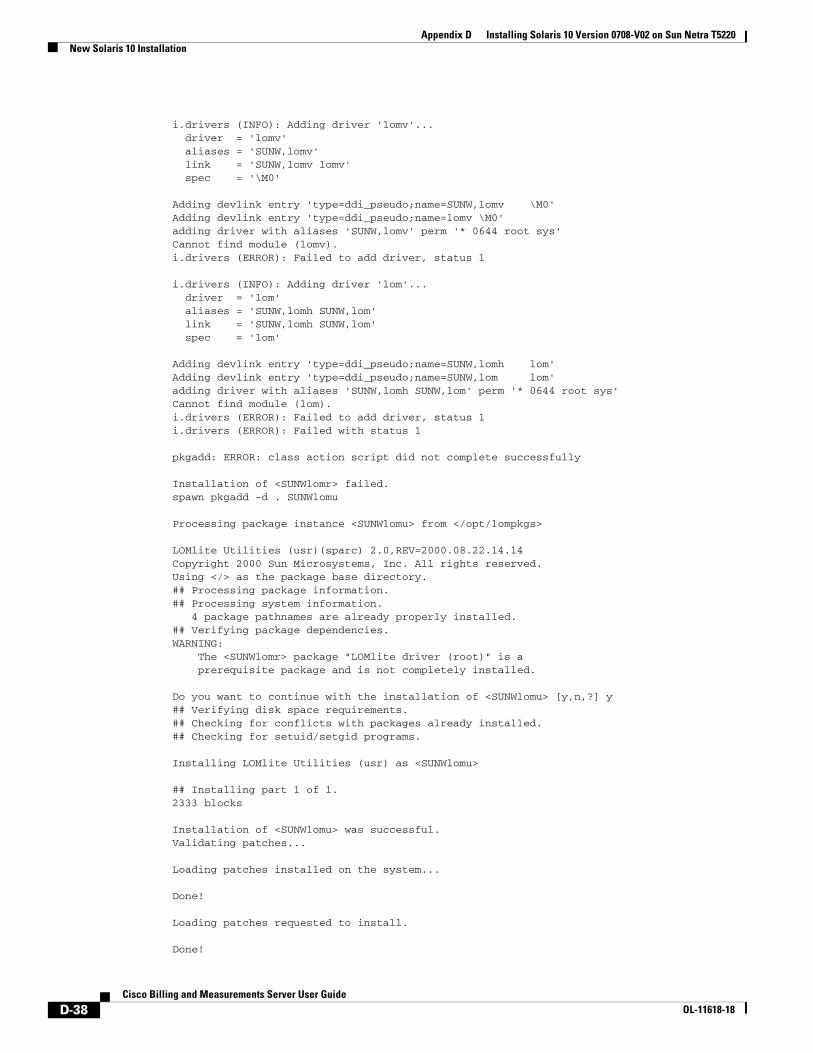
Appendix D Installing Solaris 10 Version 0708-V02 on Sun Netra T5220New Solaris 10 Installation
i.drivers (INFO): Adding driver 'lomv'... driver = 'lomv' aliases = 'SUNW,lomv' link = 'SUNW,lomv lomv' spec = '\M0'
Adding devlink entry 'type=ddi_pseudo;name=SUNW,lomv \M0'Adding devlink entry 'type=ddi_pseudo;name=lomv \M0'adding driver with aliases 'SUNW,lomv' perm '* 0644 root sys'Cannot find module (lomv).i.drivers (ERROR): Failed to add driver, status 1
i.drivers (INFO): Adding driver 'lom'... driver = 'lom' aliases = 'SUNW,lomh SUNW,lom' link = 'SUNW,lomh SUNW,lom' spec = 'lom'
Adding devlink entry 'type=ddi_pseudo;name=SUNW,lomh lom'Adding devlink entry 'type=ddi_pseudo;name=SUNW,lom lom'adding driver with aliases 'SUNW,lomh SUNW,lom' perm '* 0644 root sys'Cannot find module (lom).i.drivers (ERROR): Failed to add driver, status 1i.drivers (ERROR): Failed with status 1
pkgadd: ERROR: class action script did not complete successfully
Installation of <SUNWlomr> failed.spawn pkgadd -d . SUNWlomu
Processing package instance <SUNWlomu> from </opt/lompkgs>
LOMlite Utilities (usr)(sparc) 2.0,REV=2000.08.22.14.14Copyright 2000 Sun Microsystems, Inc. All rights reserved.Using </> as the package base directory.## Processing package information.## Processing system information. 4 package pathnames are already properly installed.## Verifying package dependencies.WARNING: The <SUNWlomr> package "LOMlite driver (root)" is a prerequisite package and is not completely installed.
Do you want to continue with the installation of <SUNWlomu> [y,n,?] y## Verifying disk space requirements.## Checking for conflicts with packages already installed.## Checking for setuid/setgid programs.
Installing LOMlite Utilities (usr) as <SUNWlomu>
## Installing part 1 of 1.2333 blocks
Installation of <SUNWlomu> was successful.Validating patches...
Loading patches installed on the system...
Done!
Loading patches requested to install.
Done!
D-38Cisco Billing and Measurements Server User Guide
OL-11618-18

Appendix D Installing Solaris 10 Version 0708-V02 on Sun Netra T5220New Solaris 10 Installation
The following requested patches have packages not installed on the systemPackage SUNWlomm from directory SUNWlomm in patch 110208-22 is not installed on the system. Changes for package SUNWlomm will not be applied to the system.Package SUNWclomu from directory SUNWclomu in patch 110208-22 is not installed on the system. Changes for package SUNWclomu will not be applied to the system.Package SUNWdlomu from directory SUNWdlomu in patch 110208-22 is not installed on the system. Changes for package SUNWdlomu will not be applied to the system.Package SUNWelomu from directory SUNWelomu in patch 110208-22 is not installed on the system. Changes for package SUNWelomu will not be applied to the system.Package SUNWflomu from directory SUNWflomu in patch 110208-22 is not installed on the system. Changes for package SUNWflomu will not be applied to the system.Package SUNWhlomu from directory SUNWhlomu in patch 110208-22 is not installed on the system. Changes for package SUNWhlomu will not be applied to the system.Package SUNWilomu from directory SUNWilomu in patch 110208-22 is not installed on the system. Changes for package SUNWilomu will not be applied to the system.Package SUNWjlomu from directory SUNWjlomu in patch 110208-22 is not installed on the system. Changes for package SUNWjlomu will not be applied to the system.Package SUNWklomu from directory SUNWklomu in patch 110208-22 is not installed on the system. Changes for package SUNWklomu will not be applied to the system.Package SUNWslomu from directory SUNWslomu in patch 110208-22 is not installed on the system. Changes for package SUNWslomu will not be applied to the system.
Checking patches that you specified for installation.
Done!
Approved patches will be installed in this order:
110208-22
Checking installed patches...Verifying sufficient filesystem capacity (dry run method)...Installing patch packages...
Patch 110208-22 has been successfully installed.See /var/sadm/patch/110208-22/log for detailsExecuting postpatch script...postpatch (INFO): Starting
postpatch (INFO): Identified drivers 'lom lomp lomv'postpatch (INFO): Cleaning up old driver 'lom'...Cleaning up old devlink entry 'type=ddi_pseudo;name=SUNW,lom lom'postpatch (INFO): Cleaning up old driver 'lomp'...Cleaning up old devlink entry 'type=ddi_pseudo;name=lomp lomp'postpatch (INFO): Cleaning up old driver 'lomv'...Cleaning up old devlink entry 'type=ddi_pseudo;name=SUNW,lomv \M0type=ddi_pseudo;name=lomv \M0'postpatch (INFO): Cleaning up old driver 'lomh'...Cleaning up old devlink entry 'type=ddi_pseudo;name=SUNW,lomh lom'
postpatch (INFO): Adding driver 'lomp'... driver = 'lomp' aliases = '' link = 'lomp' spec = 'lomp'
Adding devlink entry 'type=ddi_pseudo;name=lomp lomp'adding driver with aliases '' perm '* 0644 root sys'Cannot find module (lomp).postpatch (ERROR): Failed to add driver, status 1
D-39Cisco Billing and Measurements Server User Guide
OL-11618-18
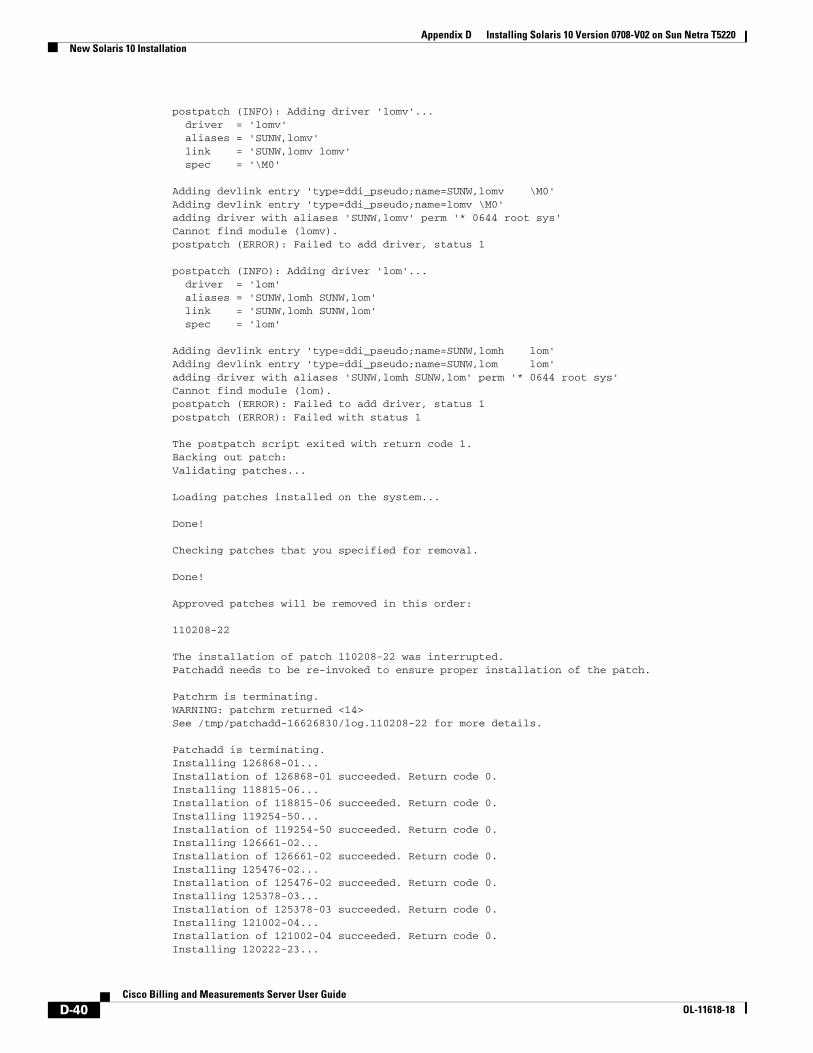
Appendix D Installing Solaris 10 Version 0708-V02 on Sun Netra T5220New Solaris 10 Installation
postpatch (INFO): Adding driver 'lomv'... driver = 'lomv' aliases = 'SUNW,lomv' link = 'SUNW,lomv lomv' spec = '\M0'
Adding devlink entry 'type=ddi_pseudo;name=SUNW,lomv \M0'Adding devlink entry 'type=ddi_pseudo;name=lomv \M0'adding driver with aliases 'SUNW,lomv' perm '* 0644 root sys'Cannot find module (lomv).postpatch (ERROR): Failed to add driver, status 1
postpatch (INFO): Adding driver 'lom'... driver = 'lom' aliases = 'SUNW,lomh SUNW,lom' link = 'SUNW,lomh SUNW,lom' spec = 'lom'
Adding devlink entry 'type=ddi_pseudo;name=SUNW,lomh lom'Adding devlink entry 'type=ddi_pseudo;name=SUNW,lom lom'adding driver with aliases 'SUNW,lomh SUNW,lom' perm '* 0644 root sys'Cannot find module (lom).postpatch (ERROR): Failed to add driver, status 1postpatch (ERROR): Failed with status 1
The postpatch script exited with return code 1.Backing out patch:Validating patches...
Loading patches installed on the system...
Done!
Checking patches that you specified for removal.
Done!
Approved patches will be removed in this order:
110208-22
The installation of patch 110208-22 was interrupted.Patchadd needs to be re-invoked to ensure proper installation of the patch.
Patchrm is terminating.WARNING: patchrm returned <14>See /tmp/patchadd-16626830/log.110208-22 for more details.
Patchadd is terminating.Installing 126868-01...Installation of 126868-01 succeeded. Return code 0.Installing 118815-06...Installation of 118815-06 succeeded. Return code 0.Installing 119254-50...Installation of 119254-50 succeeded. Return code 0.Installing 126661-02...Installation of 126661-02 succeeded. Return code 0.Installing 125476-02...Installation of 125476-02 succeeded. Return code 0.Installing 125378-03...Installation of 125378-03 succeeded. Return code 0.Installing 121002-04...Installation of 121002-04 succeeded. Return code 0.Installing 120222-23...
D-40Cisco Billing and Measurements Server User Guide
OL-11618-18
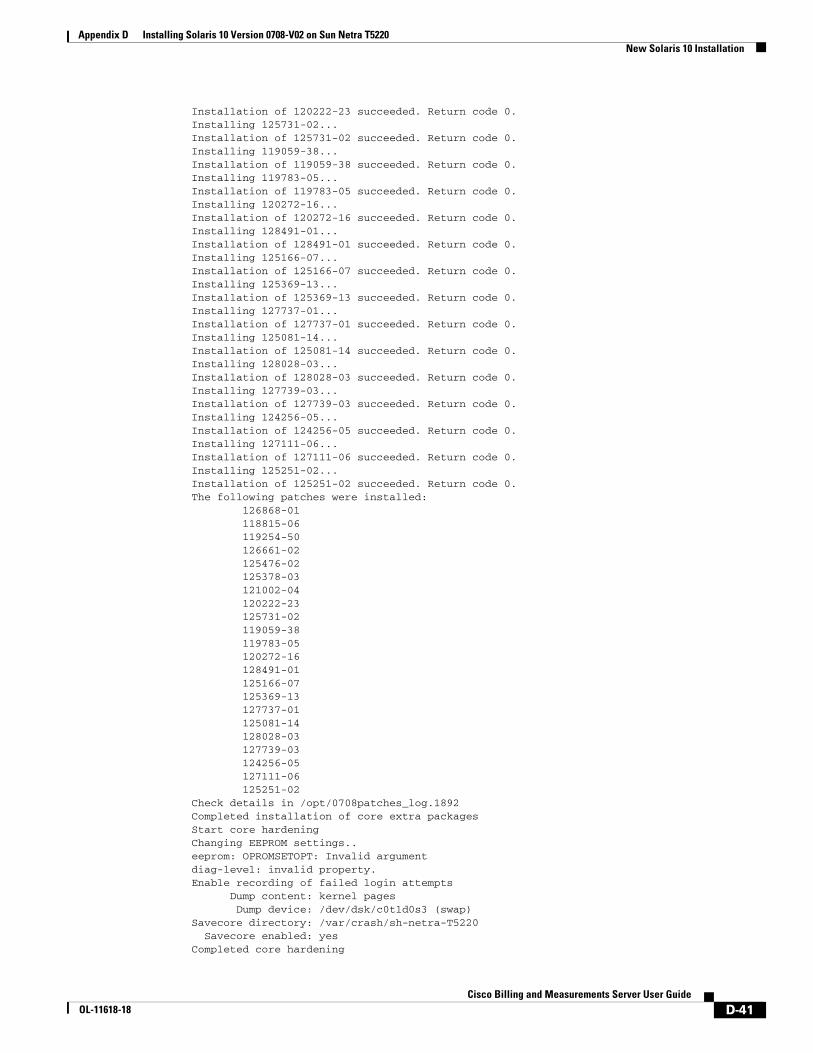
Appendix D Installing Solaris 10 Version 0708-V02 on Sun Netra T5220New Solaris 10 Installation
Installation of 120222-23 succeeded. Return code 0.Installing 125731-02...Installation of 125731-02 succeeded. Return code 0.Installing 119059-38...Installation of 119059-38 succeeded. Return code 0.Installing 119783-05...Installation of 119783-05 succeeded. Return code 0.Installing 120272-16...Installation of 120272-16 succeeded. Return code 0.Installing 128491-01...Installation of 128491-01 succeeded. Return code 0.Installing 125166-07...Installation of 125166-07 succeeded. Return code 0.Installing 125369-13...Installation of 125369-13 succeeded. Return code 0.Installing 127737-01...Installation of 127737-01 succeeded. Return code 0.Installing 125081-14...Installation of 125081-14 succeeded. Return code 0.Installing 128028-03...Installation of 128028-03 succeeded. Return code 0.Installing 127739-03...Installation of 127739-03 succeeded. Return code 0.Installing 124256-05...Installation of 124256-05 succeeded. Return code 0.Installing 127111-06...Installation of 127111-06 succeeded. Return code 0.Installing 125251-02...Installation of 125251-02 succeeded. Return code 0.The following patches were installed: 126868-01 118815-06 119254-50 126661-02 125476-02 125378-03 121002-04 120222-23 125731-02 119059-38 119783-05 120272-16 128491-01 125166-07 125369-13 127737-01 125081-14 128028-03 127739-03 124256-05 127111-06 125251-02Check details in /opt/0708patches_log.1892Completed installation of core extra packagesStart core hardeningChanging EEPROM settings..eeprom: OPROMSETOPT: Invalid argumentdiag-level: invalid property.Enable recording of failed login attempts Dump content: kernel pages Dump device: /dev/dsk/c0t1d0s3 (swap)Savecore directory: /var/crash/sh-netra-T5220 Savecore enabled: yesCompleted core hardening
D-41Cisco Billing and Measurements Server User Guide
OL-11618-18
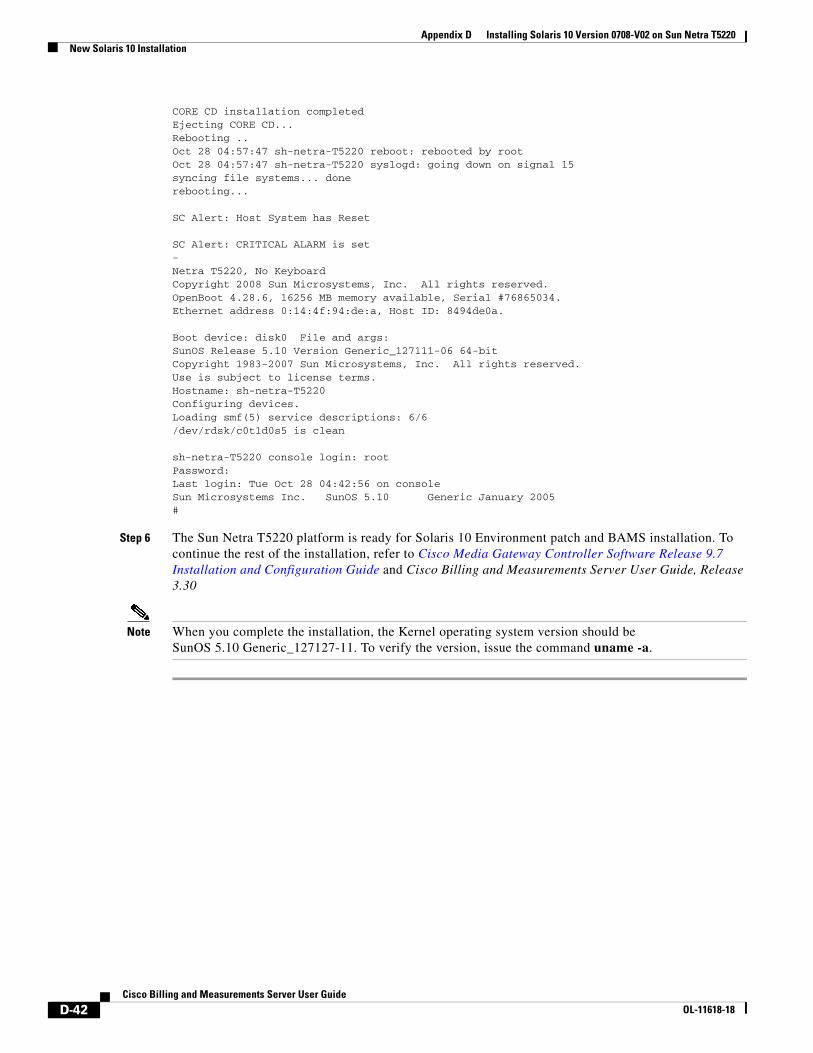
Appendix D Installing Solaris 10 Version 0708-V02 on Sun Netra T5220New Solaris 10 Installation
CORE CD installation completedEjecting CORE CD...Rebooting ..Oct 28 04:57:47 sh-netra-T5220 reboot: rebooted by rootOct 28 04:57:47 sh-netra-T5220 syslogd: going down on signal 15syncing file systems... donerebooting...
SC Alert: Host System has Reset
SC Alert: CRITICAL ALARM is set-Netra T5220, No KeyboardCopyright 2008 Sun Microsystems, Inc. All rights reserved.OpenBoot 4.28.6, 16256 MB memory available, Serial #76865034.Ethernet address 0:14:4f:94:de:a, Host ID: 8494de0a.
Boot device: disk0 File and args: SunOS Release 5.10 Version Generic_127111-06 64-bitCopyright 1983-2007 Sun Microsystems, Inc. All rights reserved.Use is subject to license terms.Hostname: sh-netra-T5220Configuring devices.Loading smf(5) service descriptions: 6/6/dev/rdsk/c0t1d0s5 is clean
sh-netra-T5220 console login: rootPassword: Last login: Tue Oct 28 04:42:56 on consoleSun Microsystems Inc. SunOS 5.10 Generic January 2005#
Step 6 The Sun Netra T5220 platform is ready for Solaris 10 Environment patch and BAMS installation. To continue the rest of the installation, refer to Cisco Media Gateway Controller Software Release 9.7 Installation and Configuration Guide and Cisco Billing and Measurements Server User Guide, Release 3.30
Note When you complete the installation, the Kernel operating system version should beSunOS 5.10 Generic_127127-11. To verify the version, issue the command uname -a.
D-42Cisco Billing and Measurements Server User Guide
OL-11618-18