Embed Size (px)
Citation preview
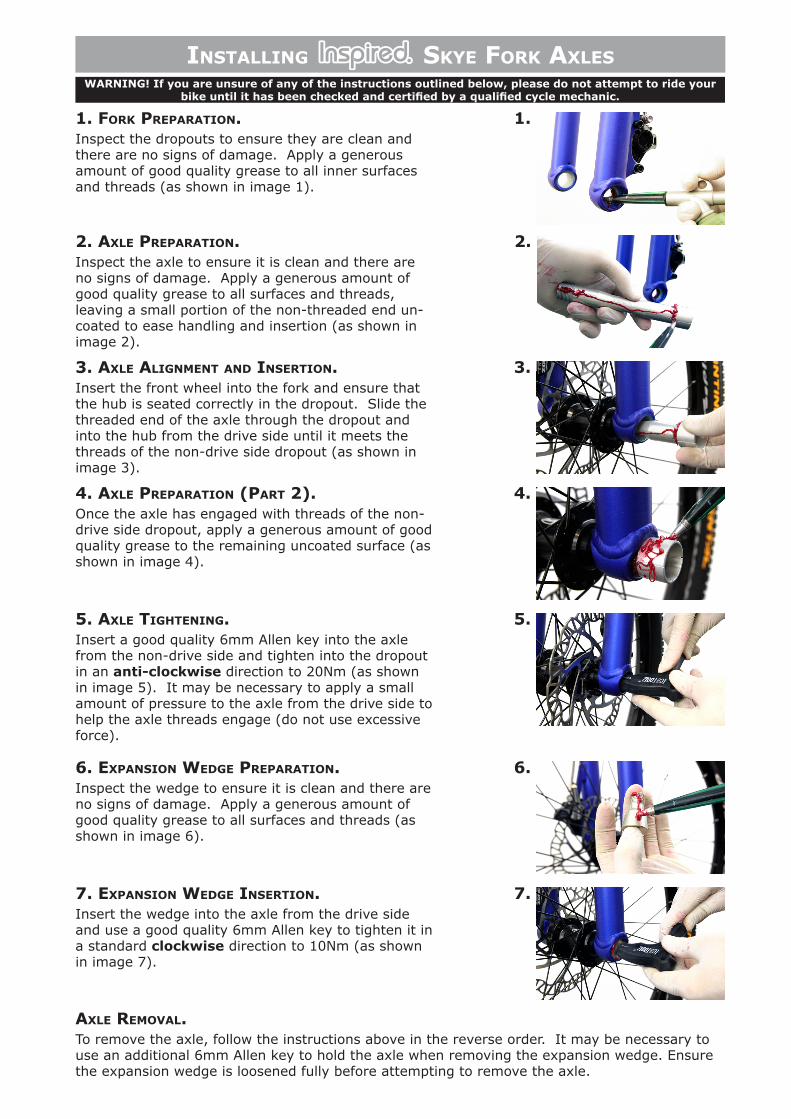
1. Fork PreParation. Inspect the dropouts to ensure they are clean and there are no signs of damage. Apply a generous amount of good quality grease to all inner surfaces and threads (as shown in image 1).
2. axle PreParation. Inspect the axle to ensure it is clean and there are no signs of damage. Apply a generous amount of good quality grease to all surfaces and threads, leaving a small portion of the non-threaded end un-coated to ease handling and insertion (as shown in image 2).
3. axle alignment and insertion. Insert the front wheel into the fork and ensure that the hub is seated correctly in the dropout. Slide the threaded end of the axle through the dropout and into the hub from the drive side until it meets the threads of the non-drive side dropout (as shown in image 3).
4. axle PreParation (Part 2). Once the axle has engaged with threads of the non-drive side dropout, apply a generous amount of good quality grease to the remaining uncoated surface (as shown in image 4).
5. axle tightening. Insert a good quality 6mm Allen key into the axle from the non-drive side and tighten into the dropout in an anti-clockwise direction to 20Nm (as shown in image 5). It may be necessary to apply a small amount of pressure to the axle from the drive side to help the axle threads engage (do not use excessive force).
6. exPansion Wedge PreParation. Inspect the wedge to ensure it is clean and there are no signs of damage. Apply a generous amount of good quality grease to all surfaces and threads (as shown in image 6).
7. exPansion Wedge insertion. Insert the wedge into the axle from the drive side and use a good quality 6mm Allen key to tighten it in a standard clockwise direction to 10Nm (as shown in image 7).
axle removal. To remove the axle, follow the instructions above in the reverse order. It may be necessary to use an additional 6mm Allen key to hold the axle when removing the expansion wedge. Ensure the expansion wedge is loosened fully before attempting to remove the axle.
installing skye Fork axlesWARNING! If you are unsure of any of the instructions outlined below, please do not attempt to ride your
bike until it has been checked and certified by a qualified cycle mechanic.
1.
2.
3.
4.
5.
6.
7.
WARNING! If you are unsure of any of the instructions outlined below, please do not attempt to ride your bike until it has been checked and certified by a qualified cycle mechanic.
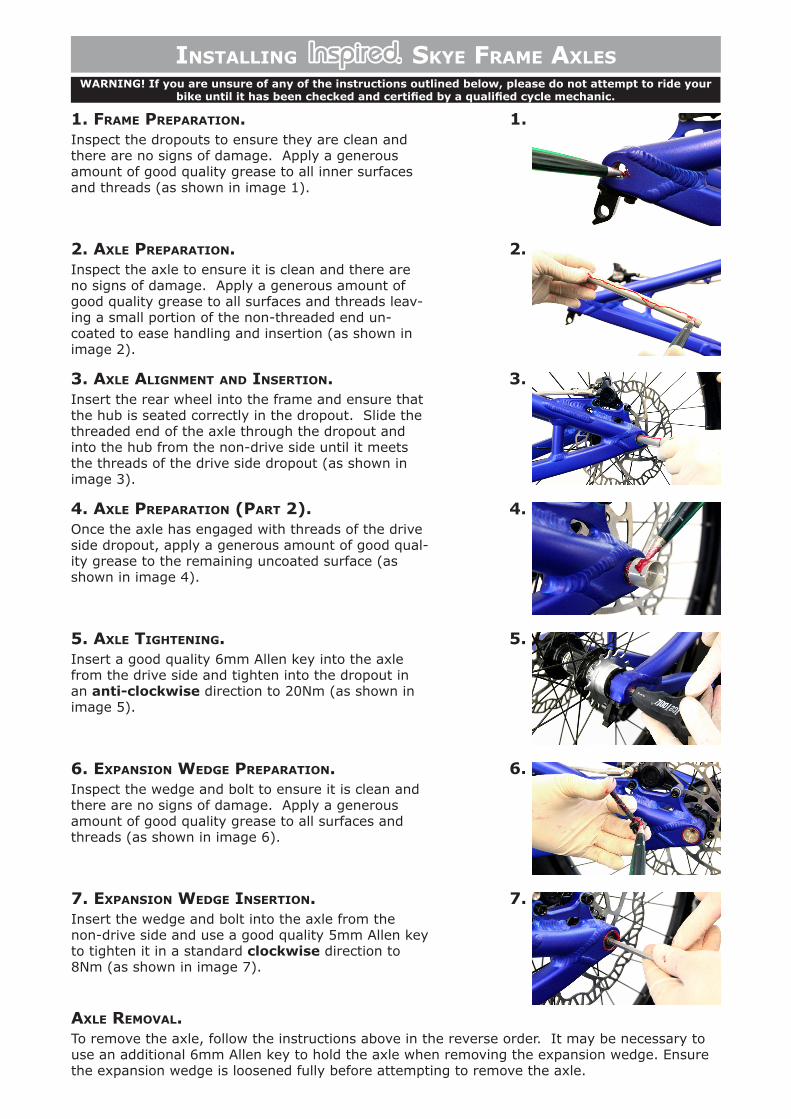
1. Frame PreParation. Inspect the dropouts to ensure they are clean and there are no signs of damage. Apply a generous amount of good quality grease to all inner surfaces and threads (as shown in image 1).
1.
2. axle PreParation. Inspect the axle to ensure it is clean and there are no signs of damage. Apply a generous amount of good quality grease to all surfaces and threads leav-ing a small portion of the non-threaded end un-coated to ease handling and insertion (as shown in image 2).
2.
3. axle alignment and insertion. Insert the rear wheel into the frame and ensure that the hub is seated correctly in the dropout. Slide the threaded end of the axle through the dropout and into the hub from the non-drive side until it meets the threads of the drive side dropout (as shown in image 3).
3.
4. axle PreParation (Part 2). Once the axle has engaged with threads of the drive side dropout, apply a generous amount of good qual-ity grease to the remaining uncoated surface (as shown in image 4).
4.
5. axle tightening. Insert a good quality 6mm Allen key into the axle from the drive side and tighten into the dropout in an anti-clockwise direction to 20Nm (as shown in image 5).
5.
6. exPansion Wedge PreParation. Inspect the wedge and bolt to ensure it is clean and there are no signs of damage. Apply a generous amount of good quality grease to all surfaces and threads (as shown in image 6).
6.
installing skye Frame axles
axle removal. To remove the axle, follow the instructions above in the reverse order. It may be necessary to use an additional 6mm Allen key to hold the axle when removing the expansion wedge. Ensure the expansion wedge is loosened fully before attempting to remove the axle.
7. exPansion Wedge insertion. Insert the wedge and bolt into the axle from the non-drive side and use a good quality 5mm Allen key to tighten it in a standard clockwise direction to 8Nm (as shown in image 7).
7.