Embed Size (px)
Citation preview
INSTALLING "PUPPY LINUX" AS THE ONLY OPERATING
SYSTEM OBJECTIVE AND DESIRED RESULT: Install "Puppy Linux" as the only operating system in either a real computer or a virtual machine. BASIC ADVICE "Puppy Linux" is a lean Linux distro that will run in ancient Intel-based and AMD-based computers with tiny amounts of RAM. However, installation is a little tricky so here are the steps that we usually take in order to install this small but mighty version of GNU/Linux.
STEP-BY-STEP INSTRUCTIONS: Step 1: Go to http://puppylinux.org/main/Download%20Latest%20Release.htm Step 2: Download the installation .ISO file for the desired version of "Puppy Linux". Step 3: Use the installation .ISO file to burn a LiveCD disc. Step 4: Insert the installation LiveCD disc into the DVD or CD drive of your computer.
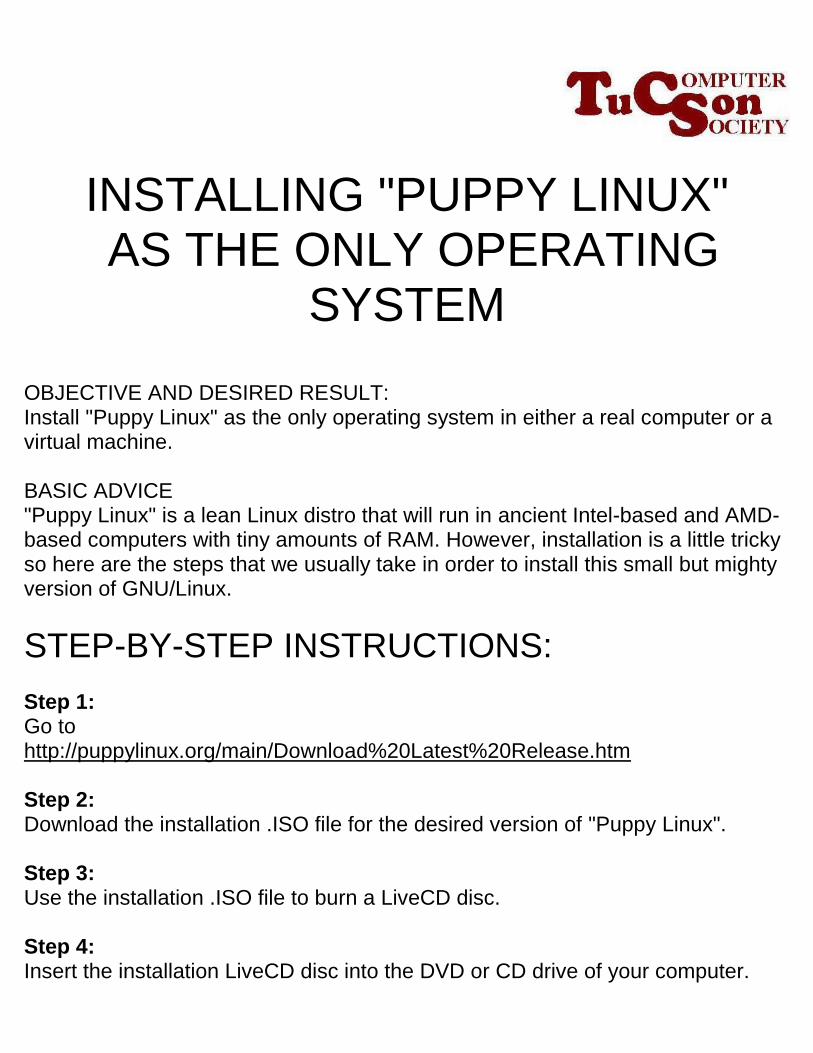
Step 5: Turn on the power switch of your computer and make it boot from the installation LiveCD. Step 6: The Puppy Linux "Desktop" will be displayed. Then a "Personalize Settings" box will be displayed:
Step 7: Click on the "drop down list button" for the time zone.
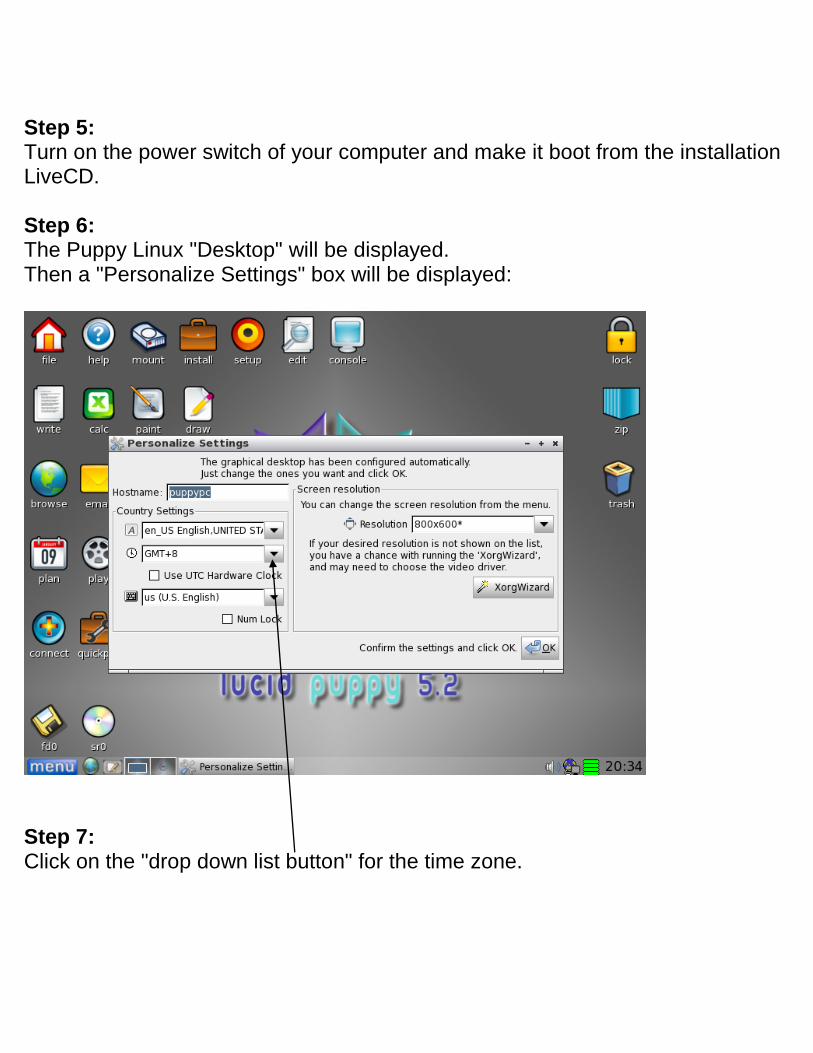
Step 8: A drop-down list of time zones will be displayed:
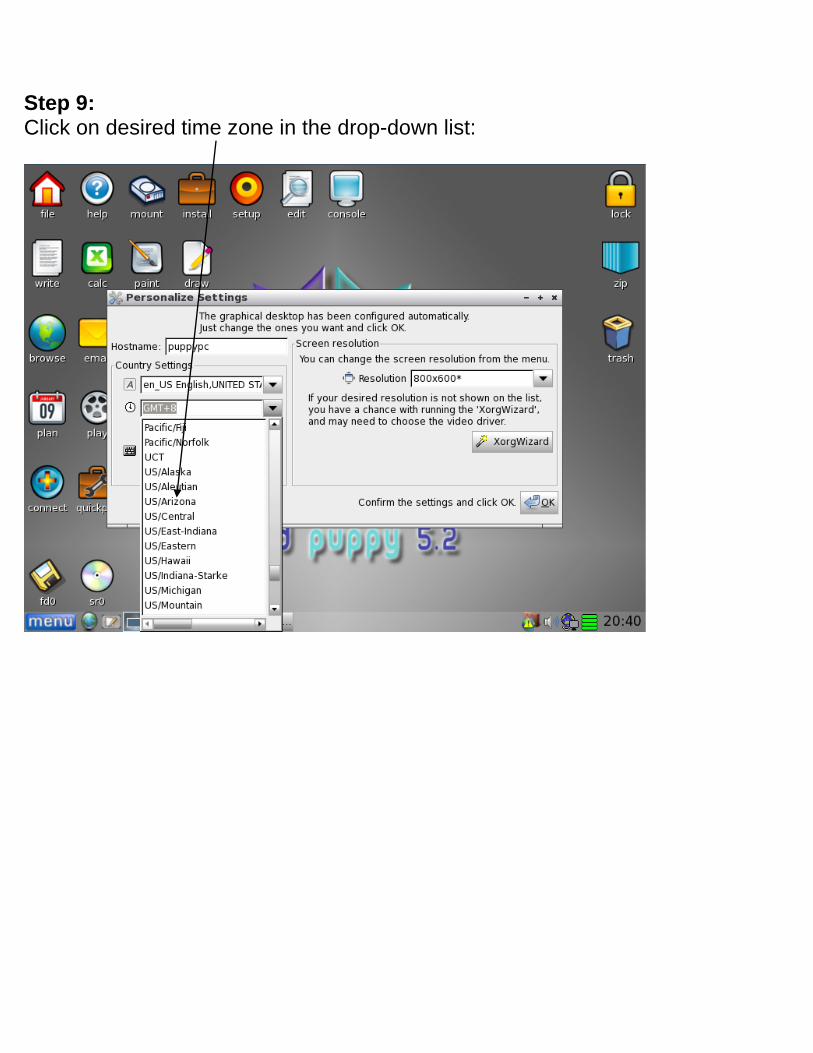
Step 9: Click on desired time zone in the drop-down list:
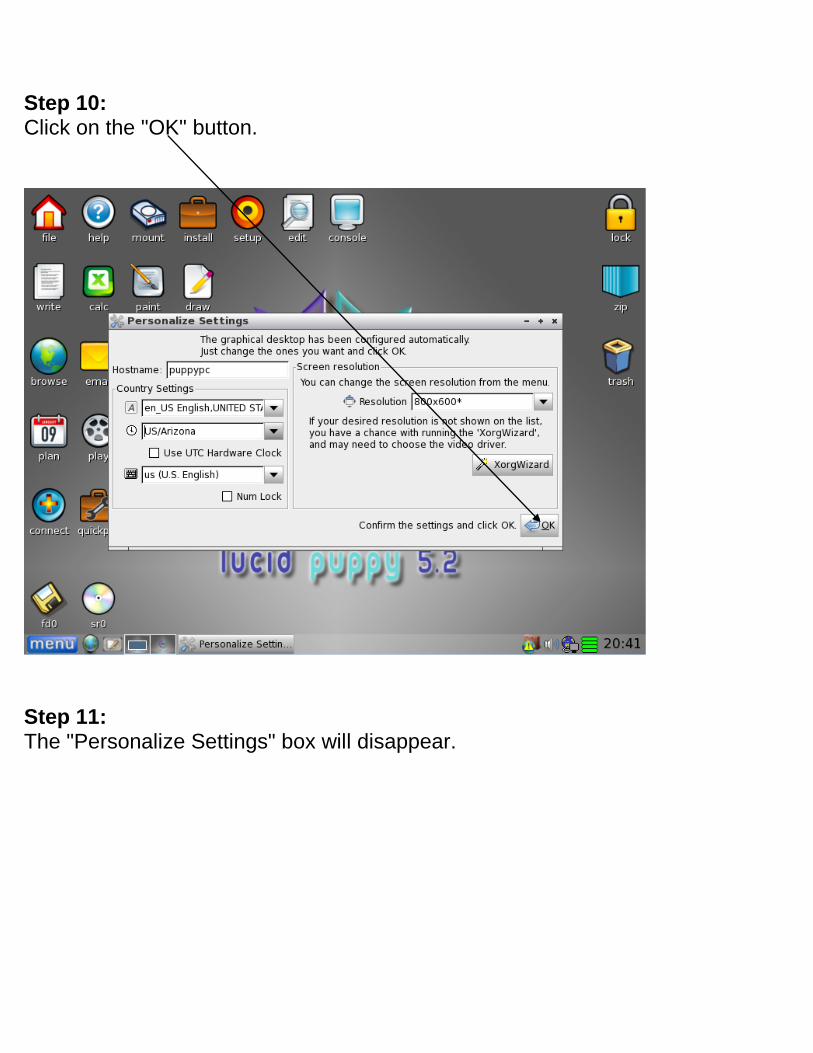
Step 10: Click on the "OK" button.
Step 11: The "Personalize Settings" box will disappear.
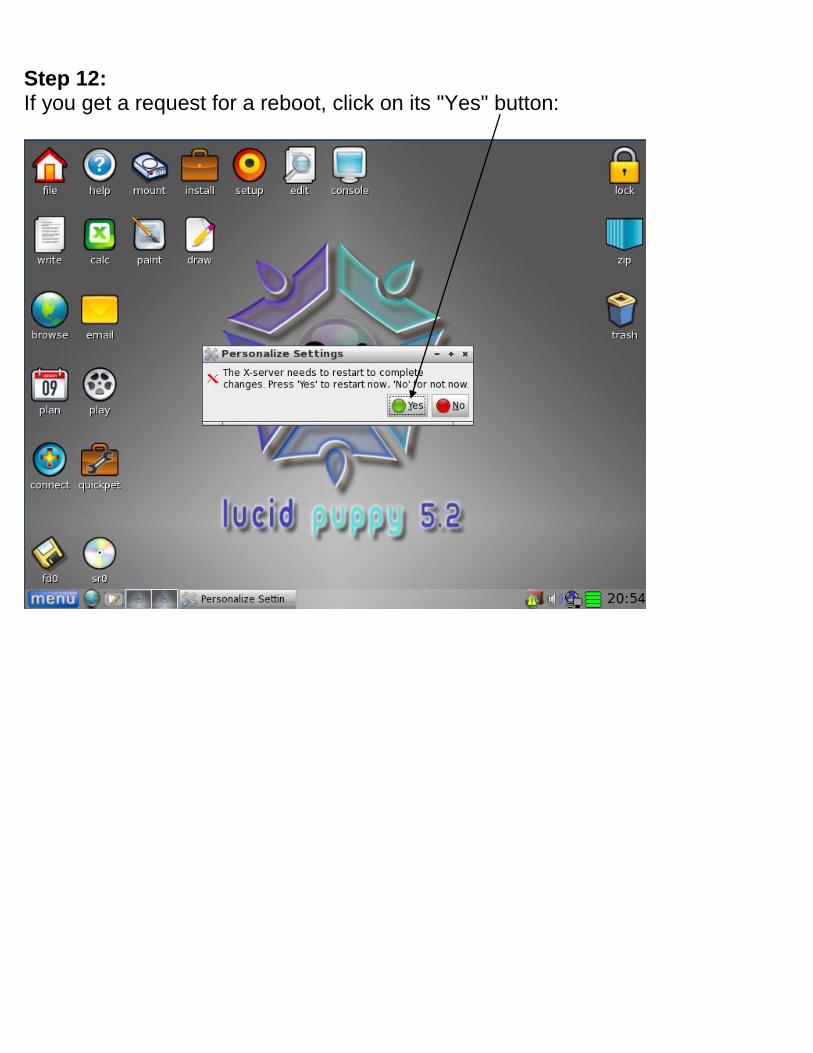
Step 12: If you get a request for a reboot, click on its "Yes" button:
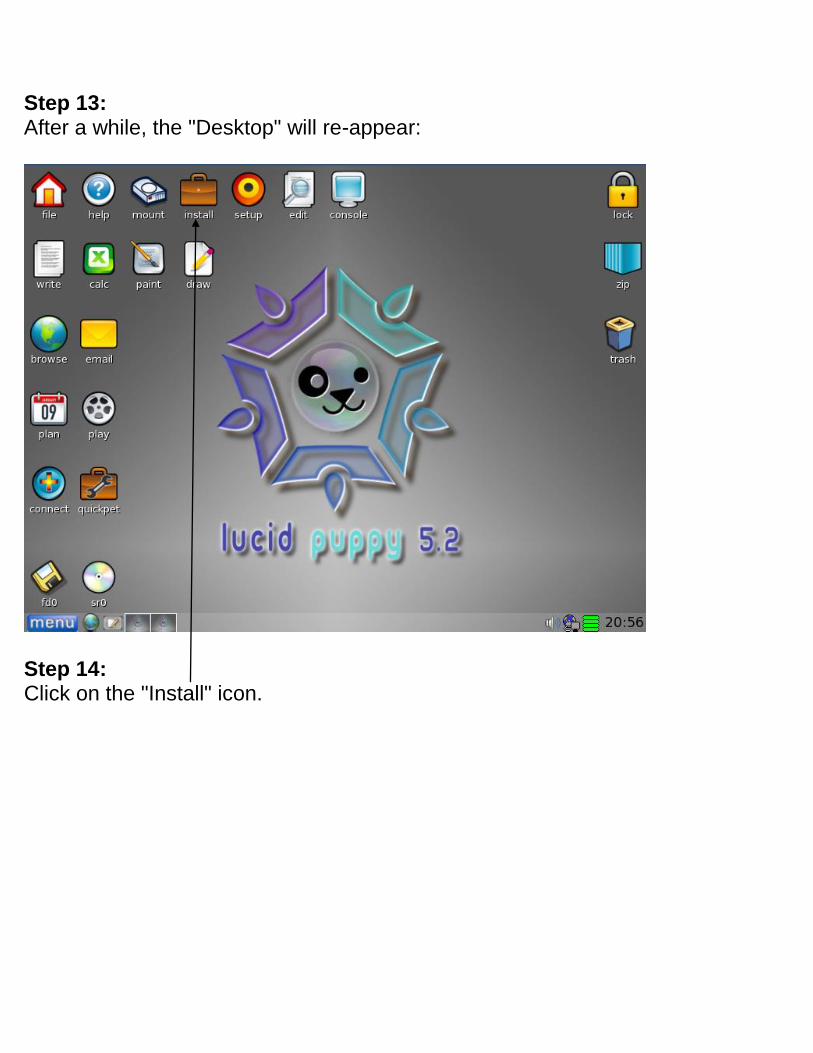
Step 13: After a while, the "Desktop" will re-appear:
Step 14: Click on the "Install" icon.
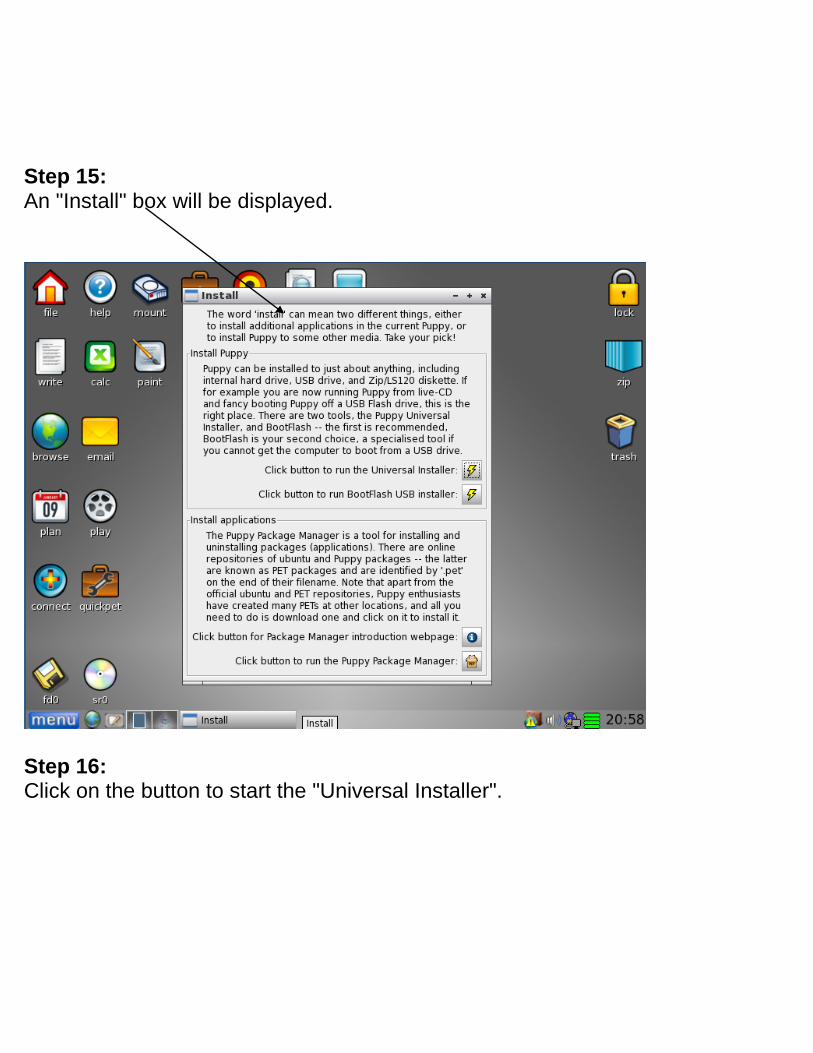
Step 15: An "Install" box will be displayed.
Step 16: Click on the button to start the "Universal Installer".
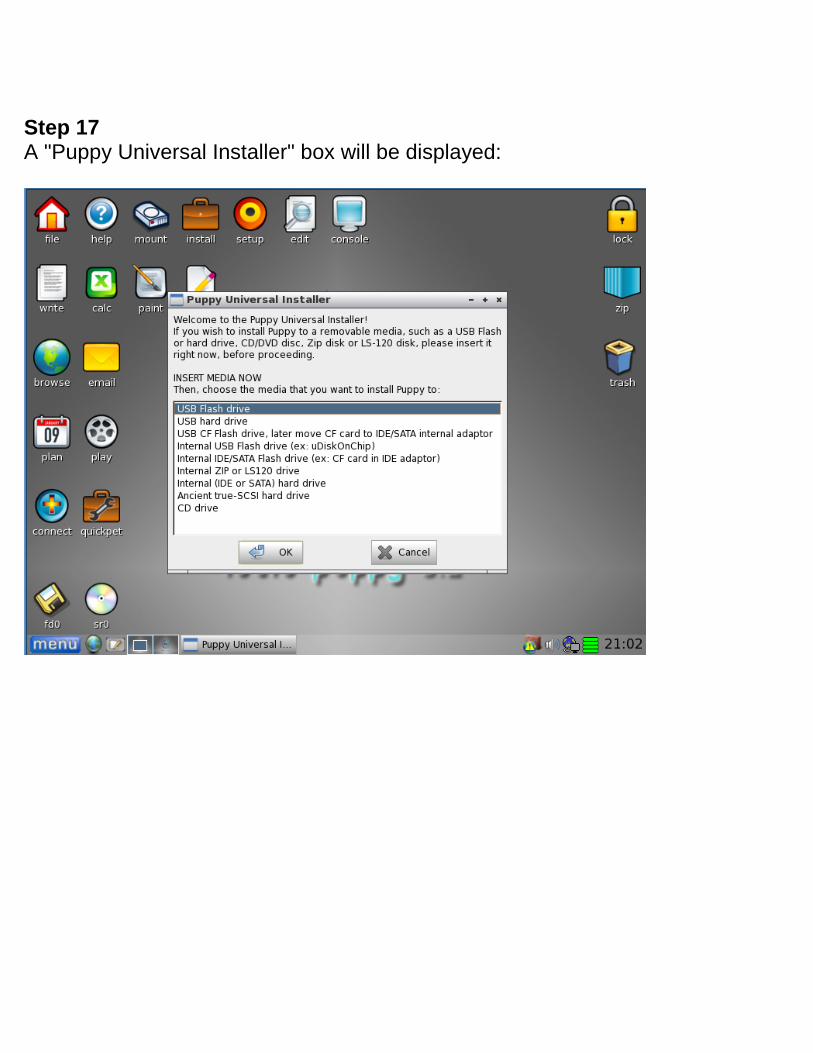
Step 17 A "Puppy Universal Installer" box will be displayed:
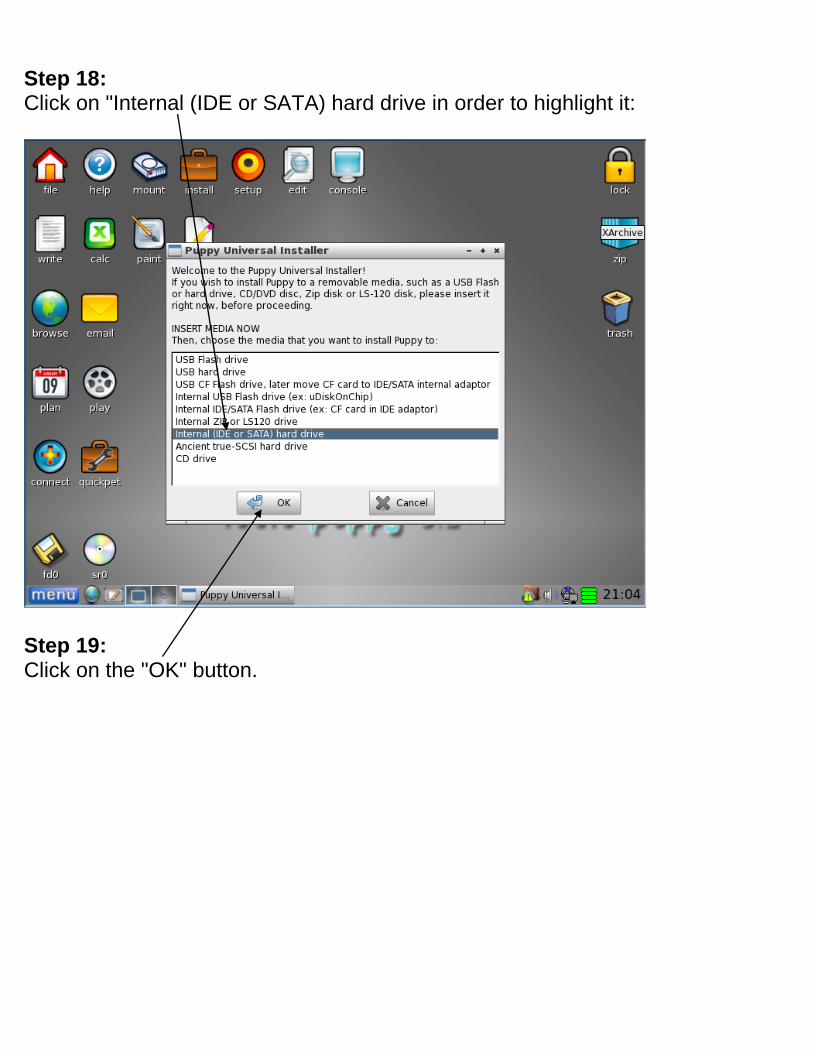
Step 18: Click on "Internal (IDE or SATA) hard drive in order to highlight it:
Step 19: Click on the "OK" button.
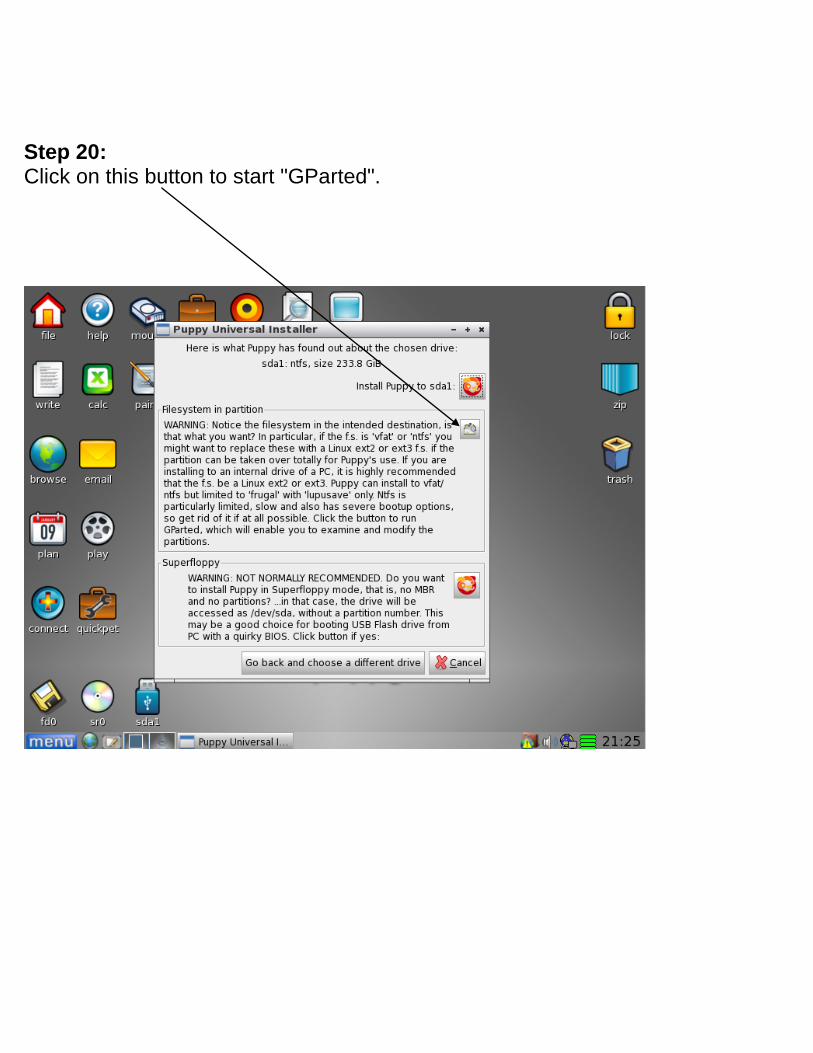
Step 20: Click on this button to start "GParted".
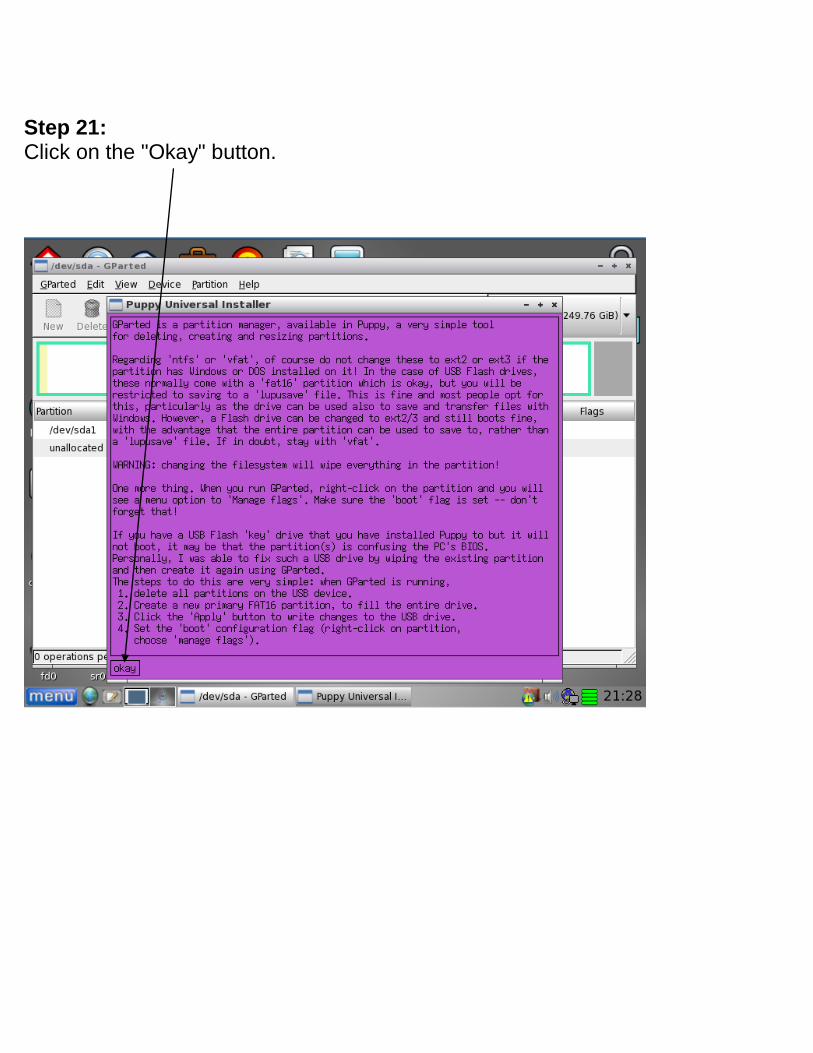
Step 21: Click on the "Okay" button.
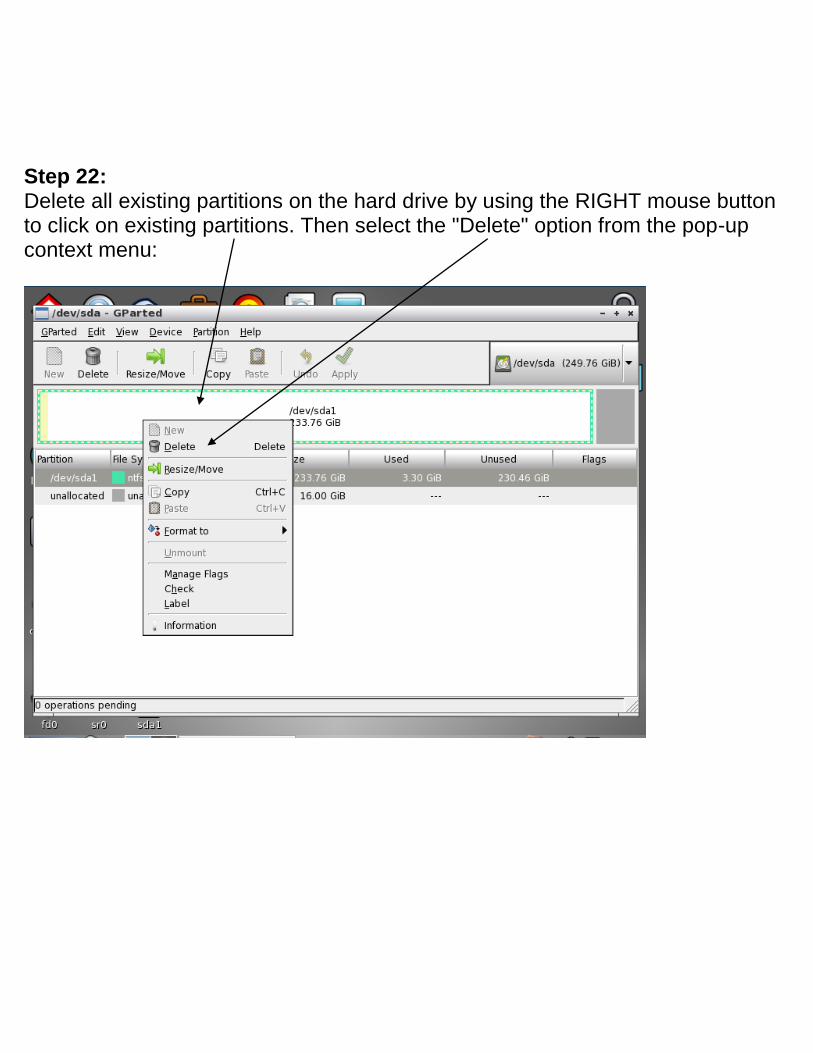
Step 22: Delete all existing partitions on the hard drive by using the RIGHT mouse button to click on existing partitions. Then select the "Delete" option from the pop-up context menu:
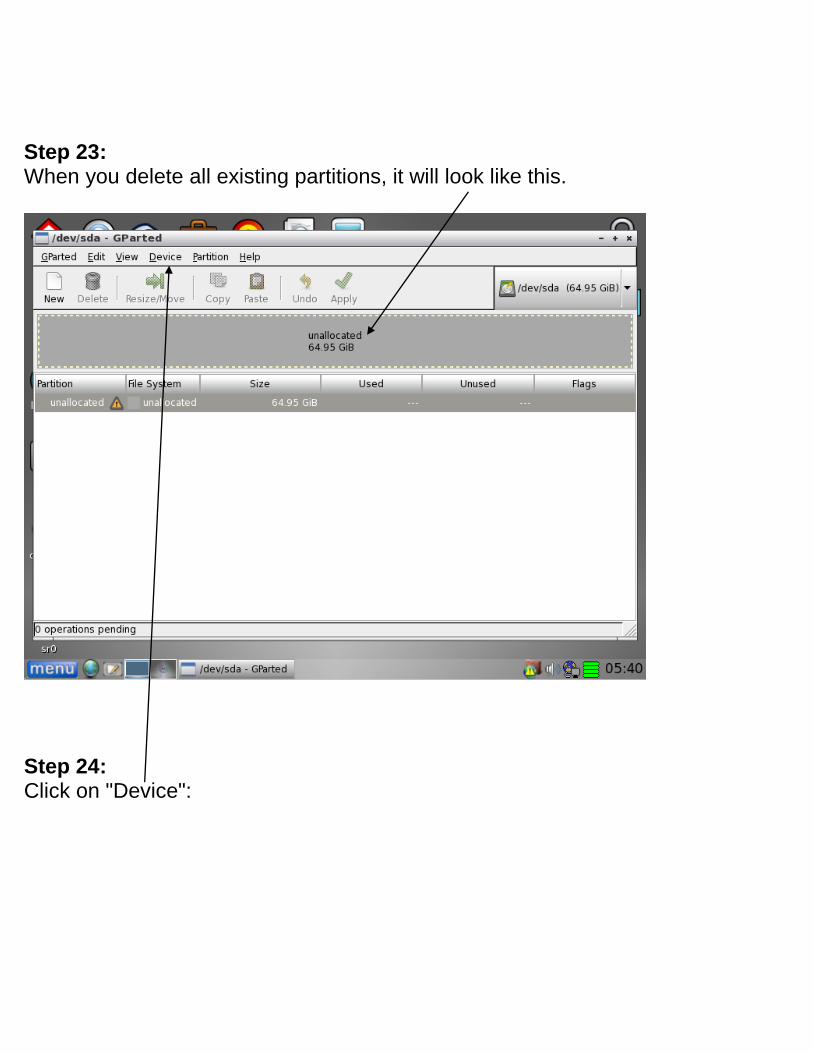
Step 23: When you delete all existing partitions, it will look like this.
Step 24: Click on "Device":

Step 25: Click on "Create Partition Table" in the pull-down menu:

Step 26: Click on the "Apply" button:
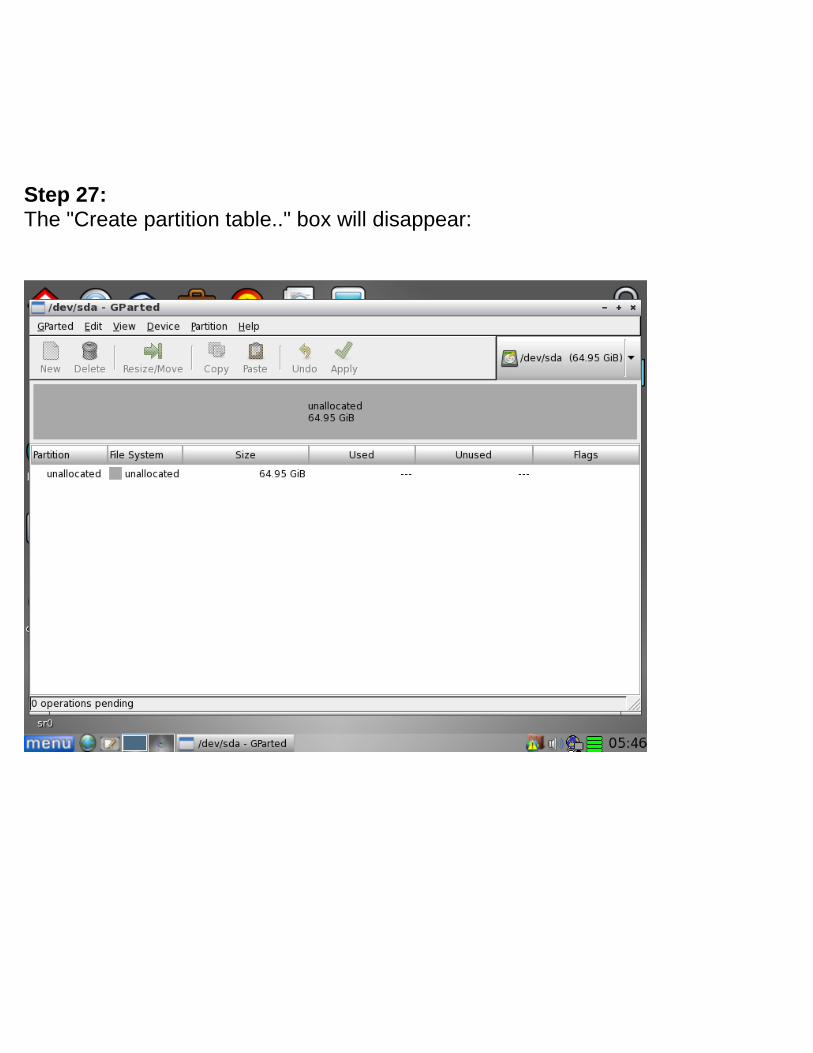
Step 27: The "Create partition table.." box will disappear:
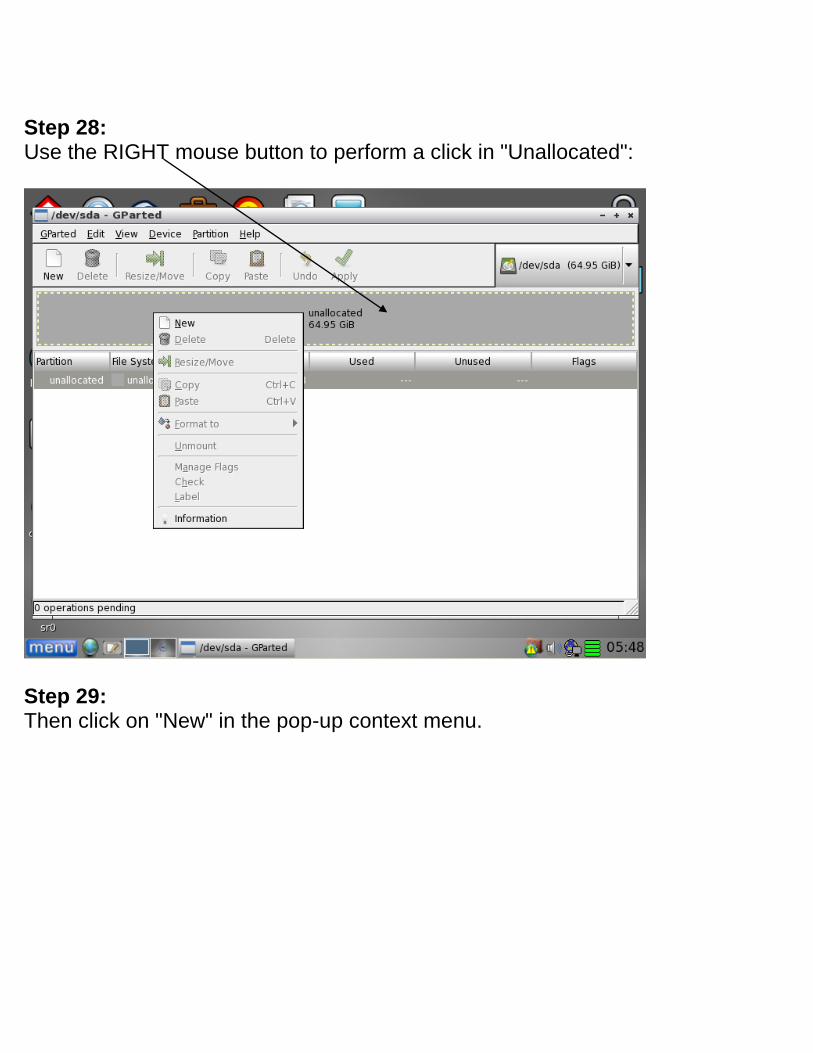
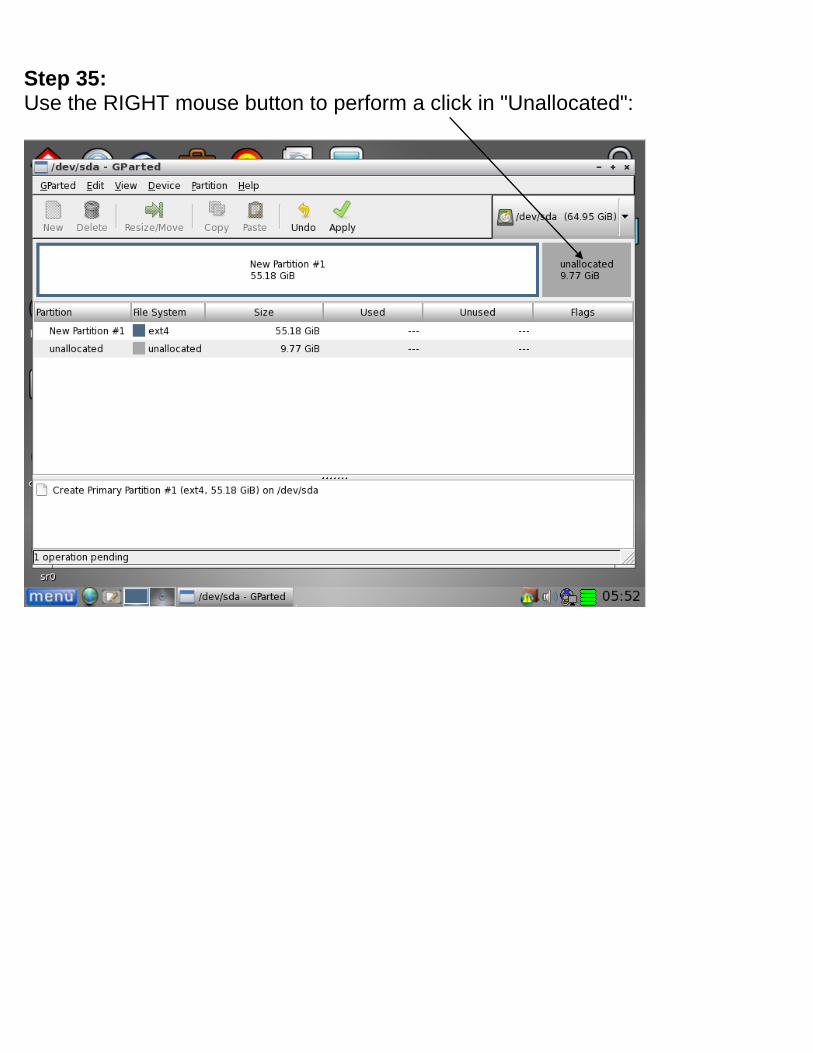
Step 28: Use the RIGHT mouse button to perform a click in "Unallocated":
Step 29: Then click on "New" in the pop-up context menu.
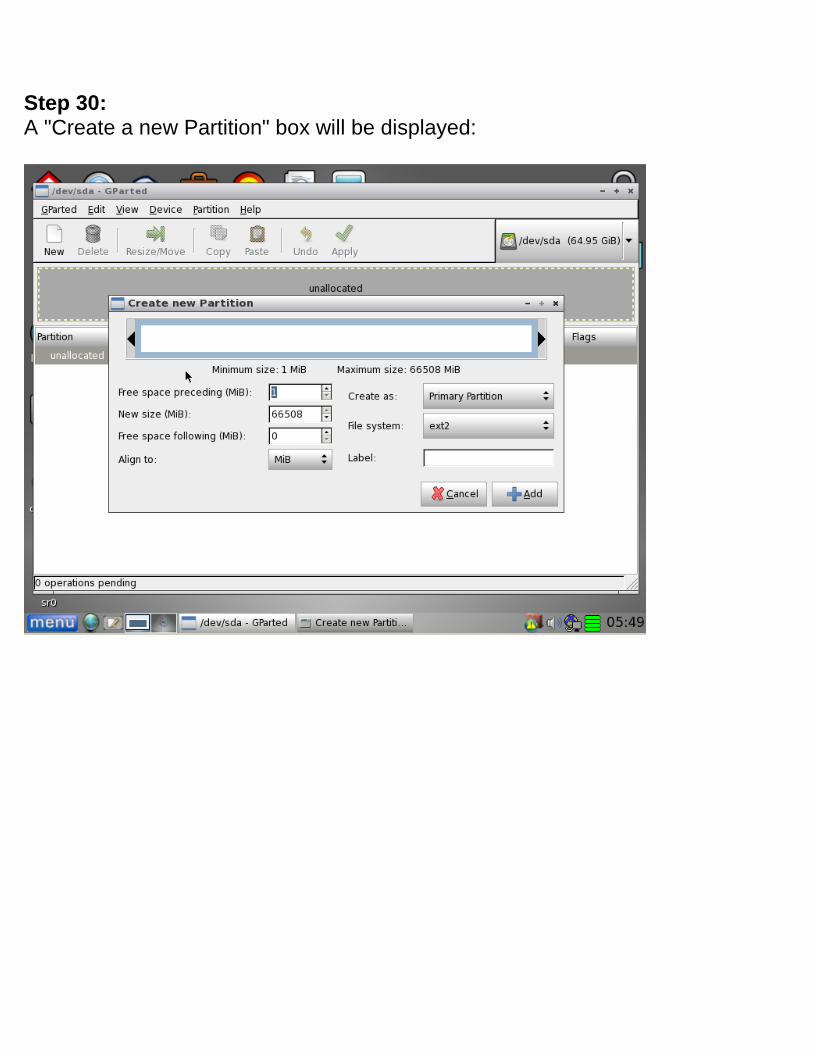
Step 30: A "Create a new Partition" box will be displayed:
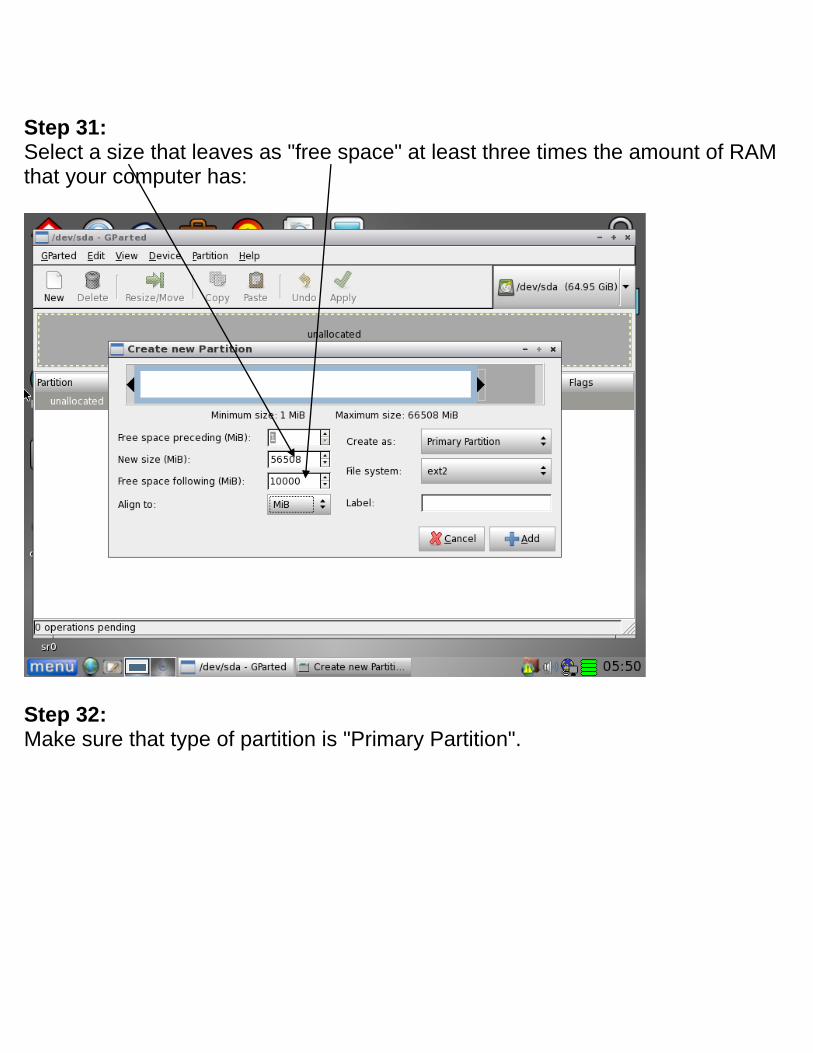
Step 31: Select a size that leaves as "free space" at least three times the amount of RAM that your computer has:
Step 32: Make sure that type of partition is "Primary Partition".
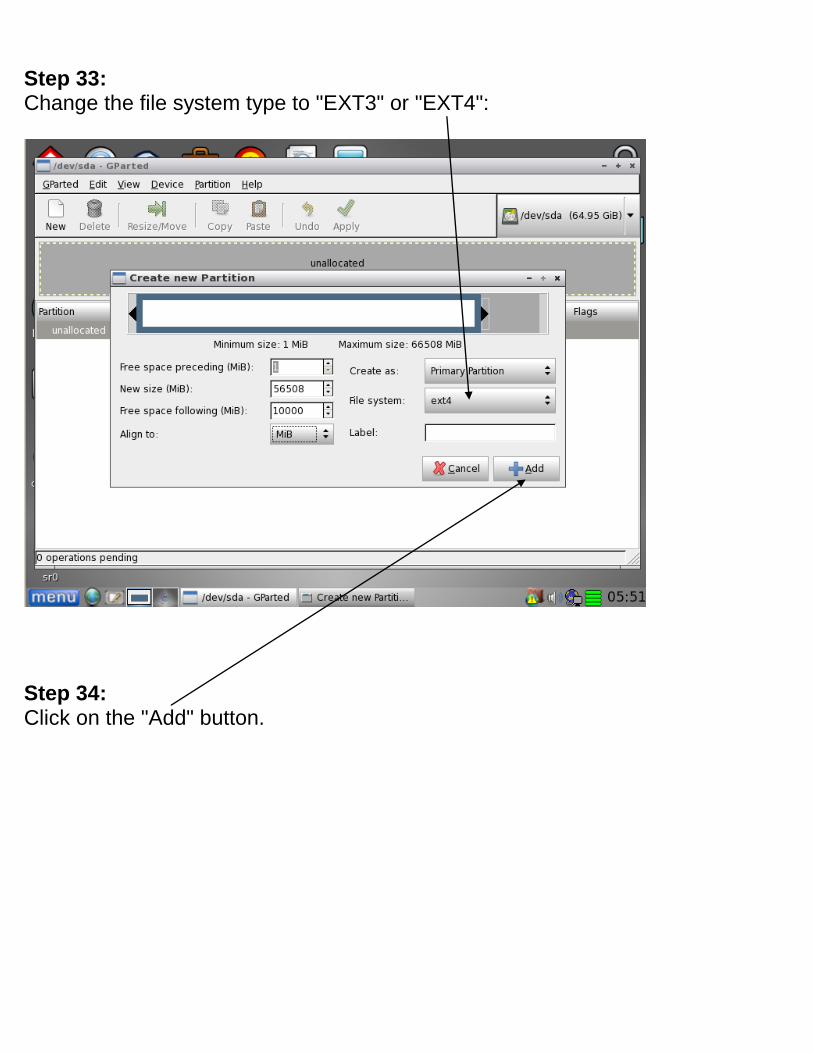
Step 33: Change the file system type to "EXT3" or "EXT4":
Step 34: Click on the "Add" button.
Step 35: Use the RIGHT mouse button to perform a click in "Unallocated":
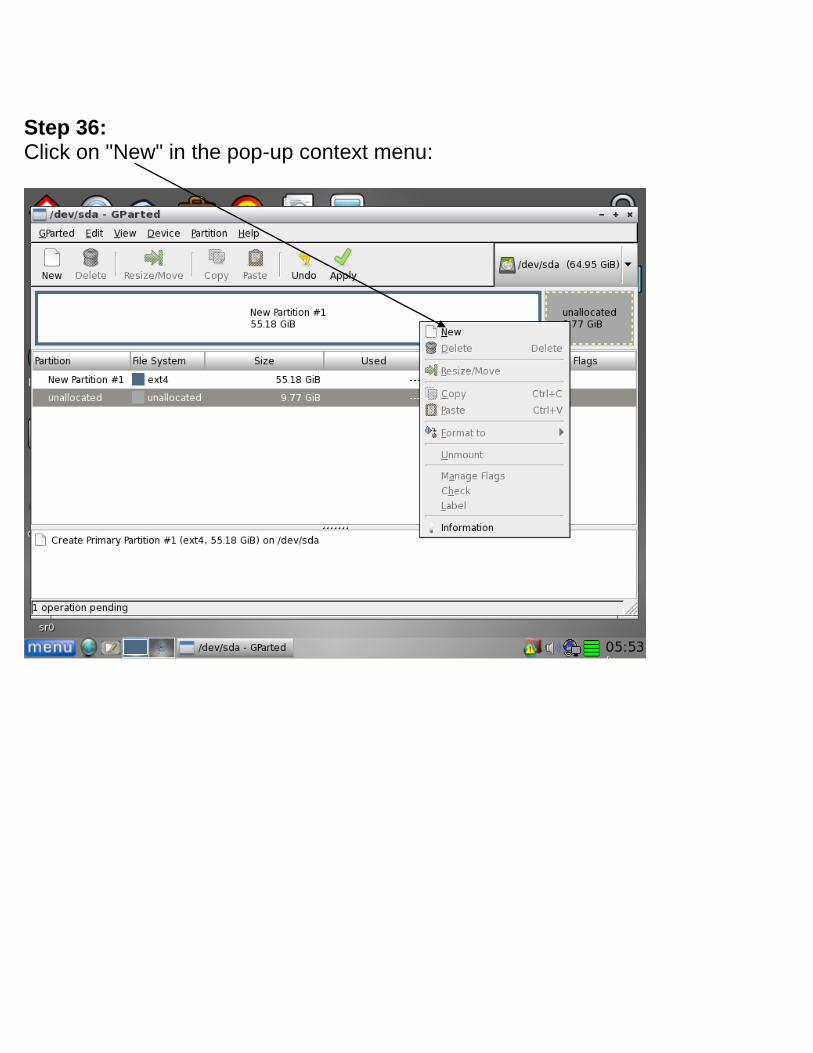
Step 36: Click on "New" in the pop-up context menu:

Step 37: A "Create new Partition" box will be displayed:
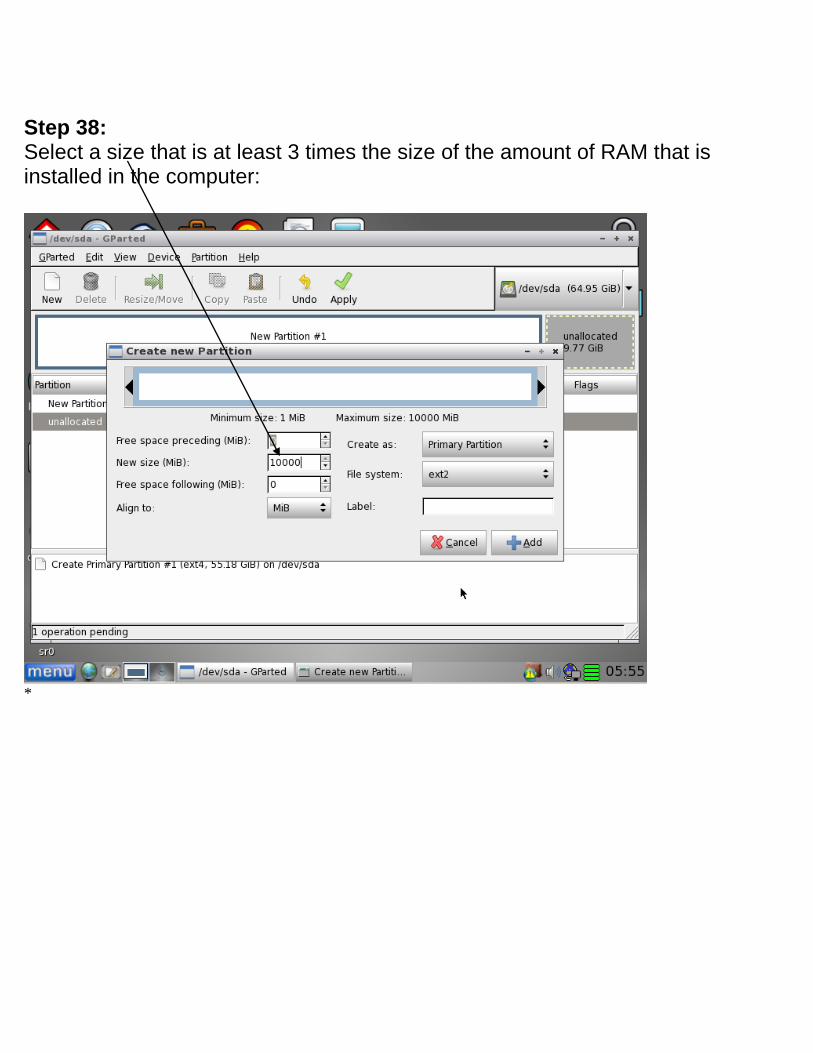
Step 38: Select a size that is at least 3 times the size of the amount of RAM that is installed in the computer:
*

Step 39:
Make sure that the type of partition is "Primary Partition". Change the file system to "linux-swap".
Step 40: Click on the "Add" button.
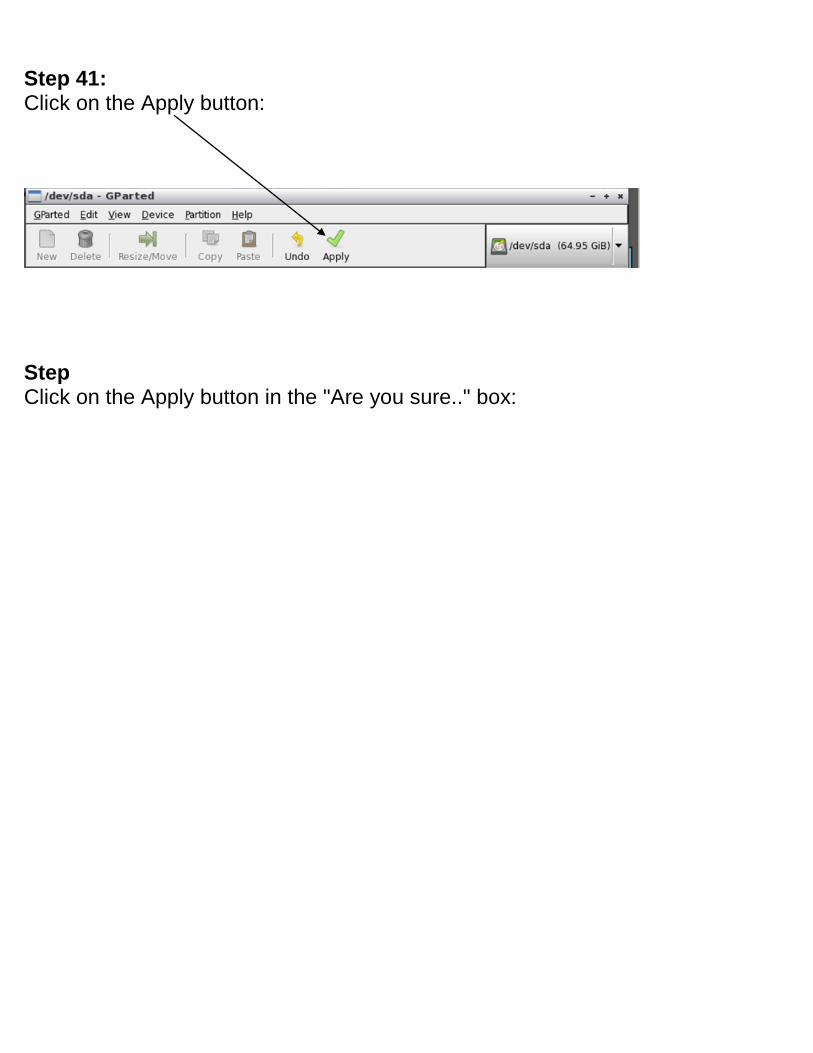
Step 41: Click on the Apply button:
Step Click on the Apply button in the "Are you sure.." box:
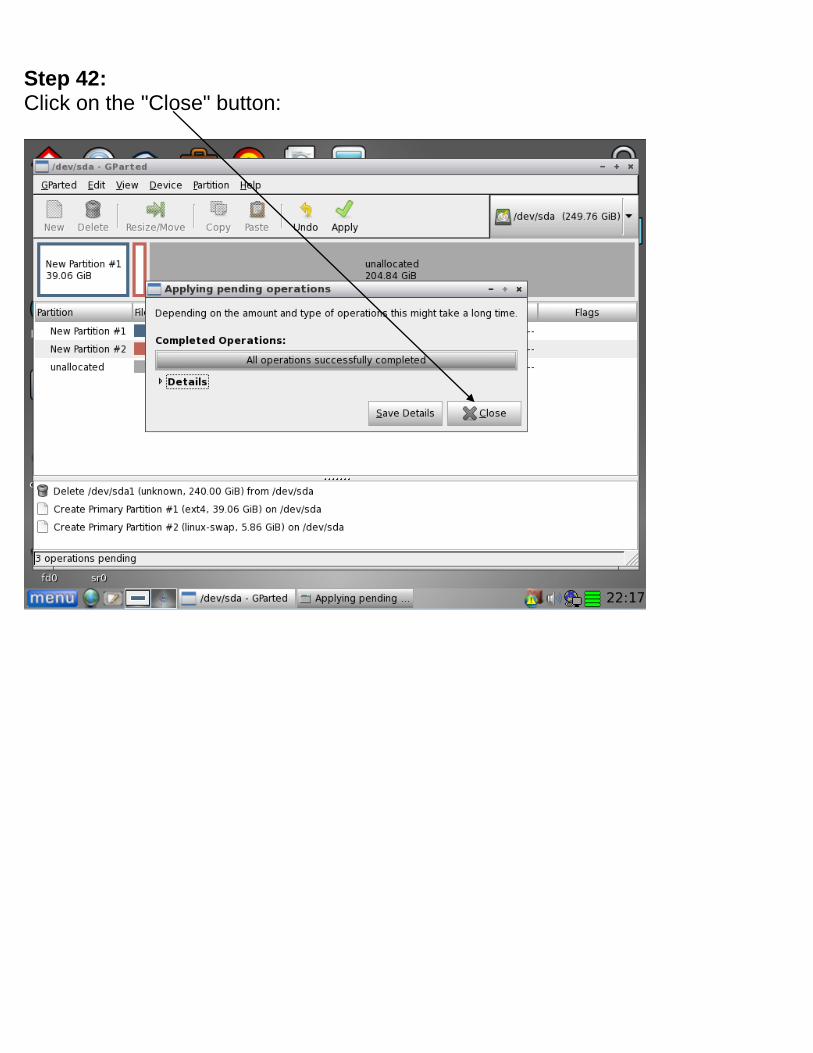
Step 42:
Click on the "Close" button:
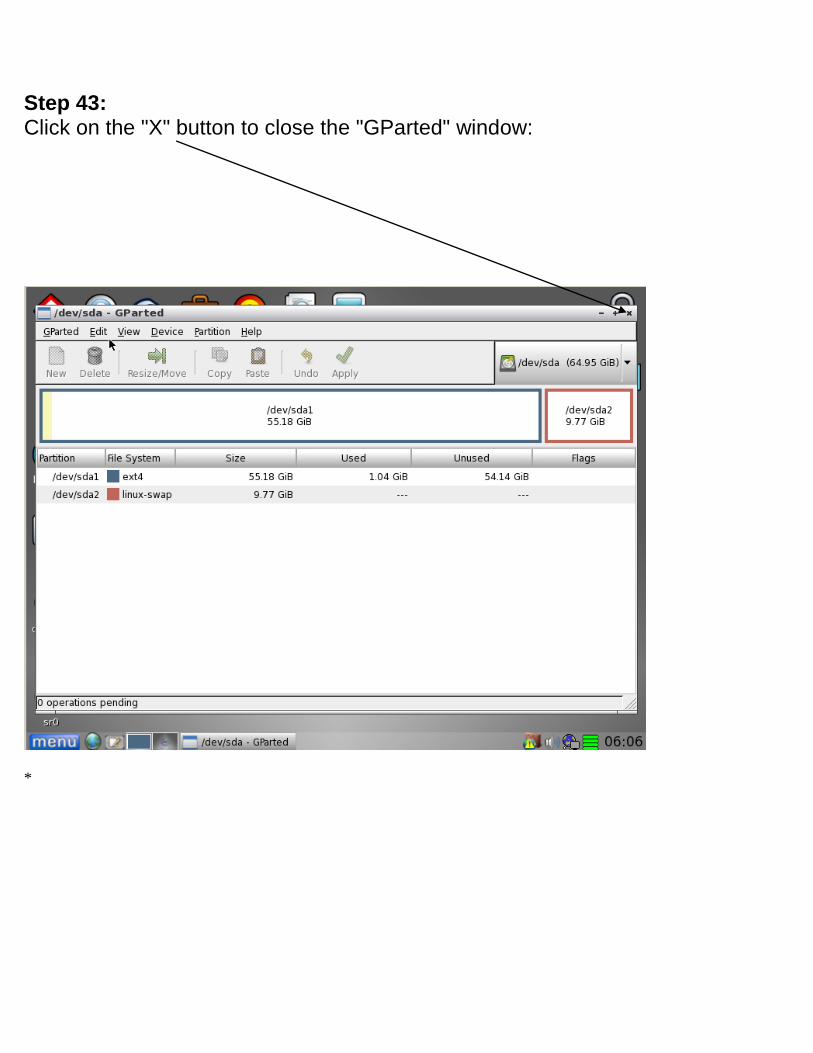
Step 43: Click on the "X" button to close the "GParted" window:
*

Step 44: Click on the "OK" button of the "Puppy Universal Installer" box:
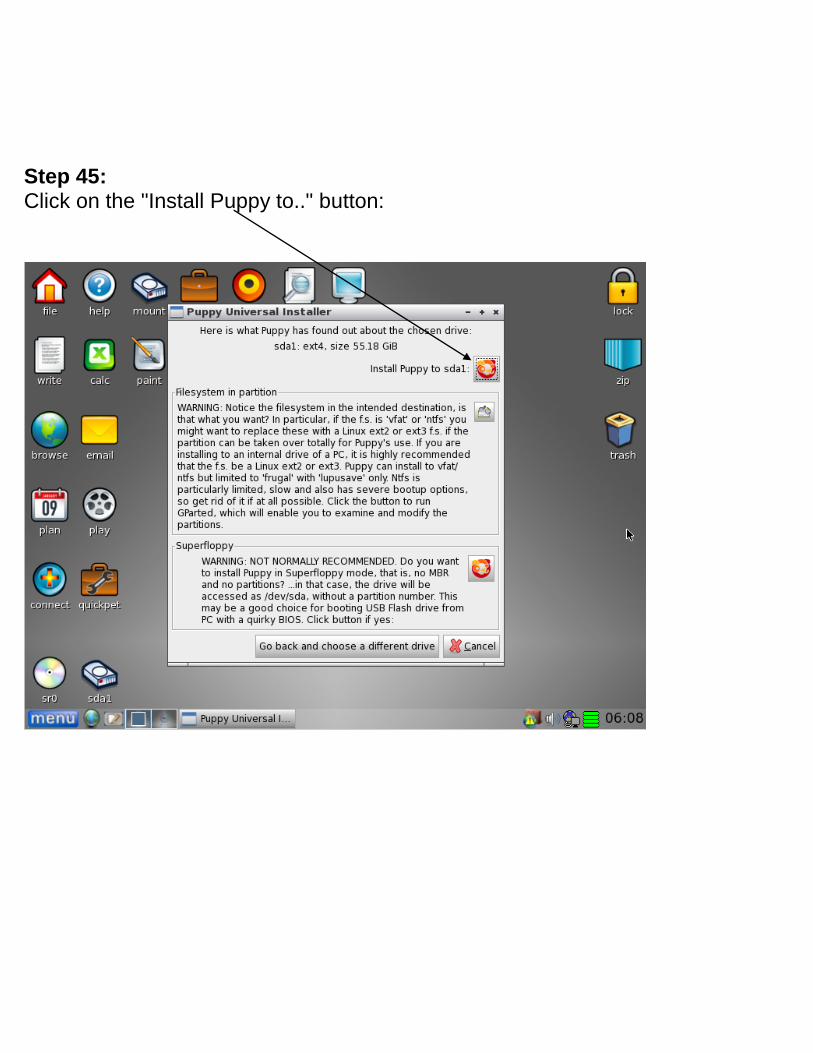
Step 45: Click on the "Install Puppy to.." button:
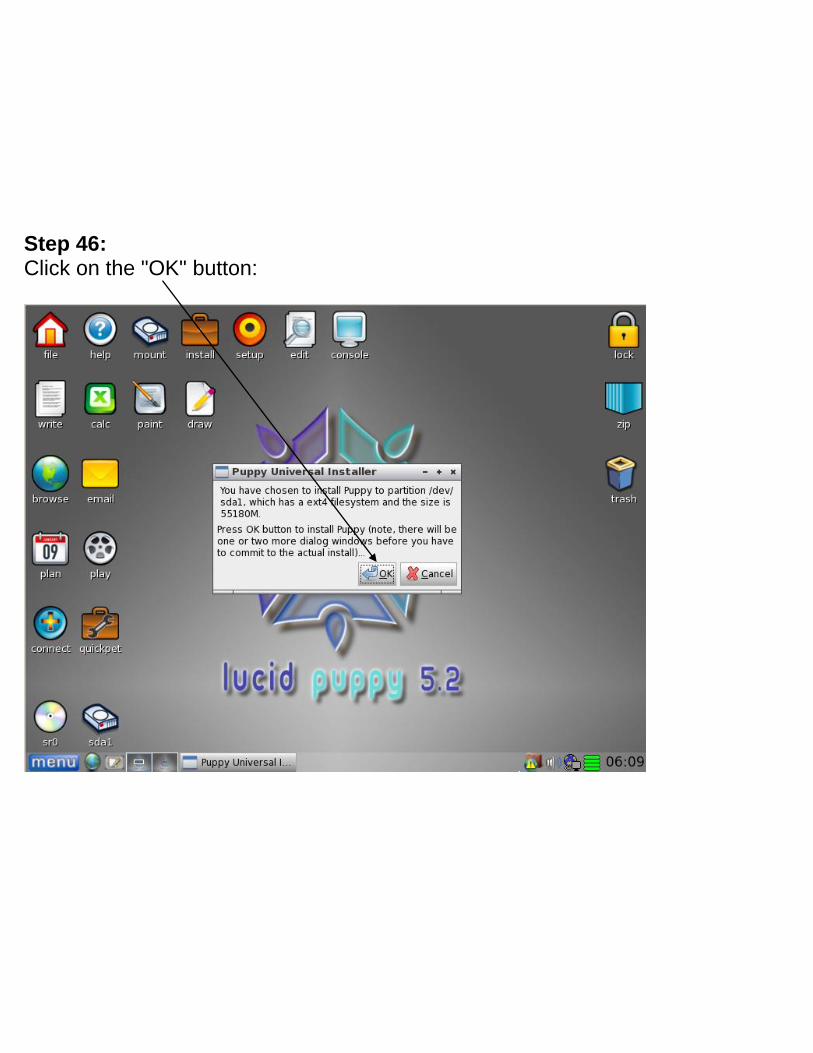
Step 46:
Click on the "OK" button:
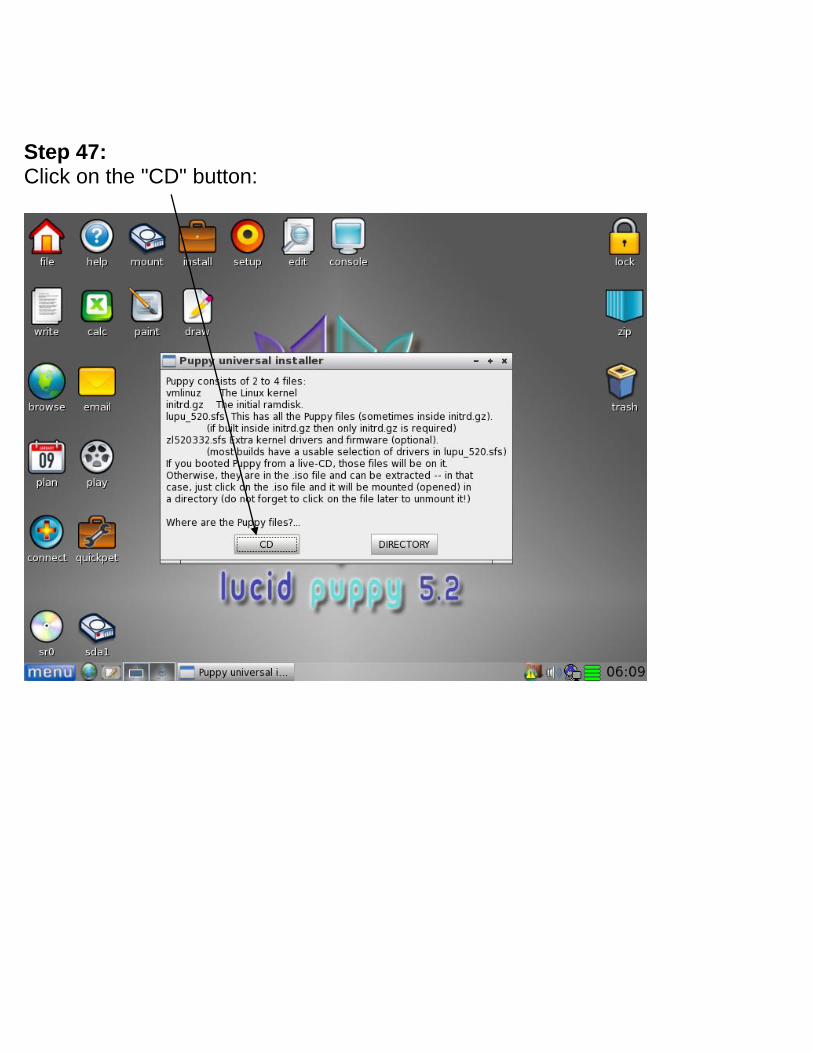
Step 47:
Click on the "CD" button:
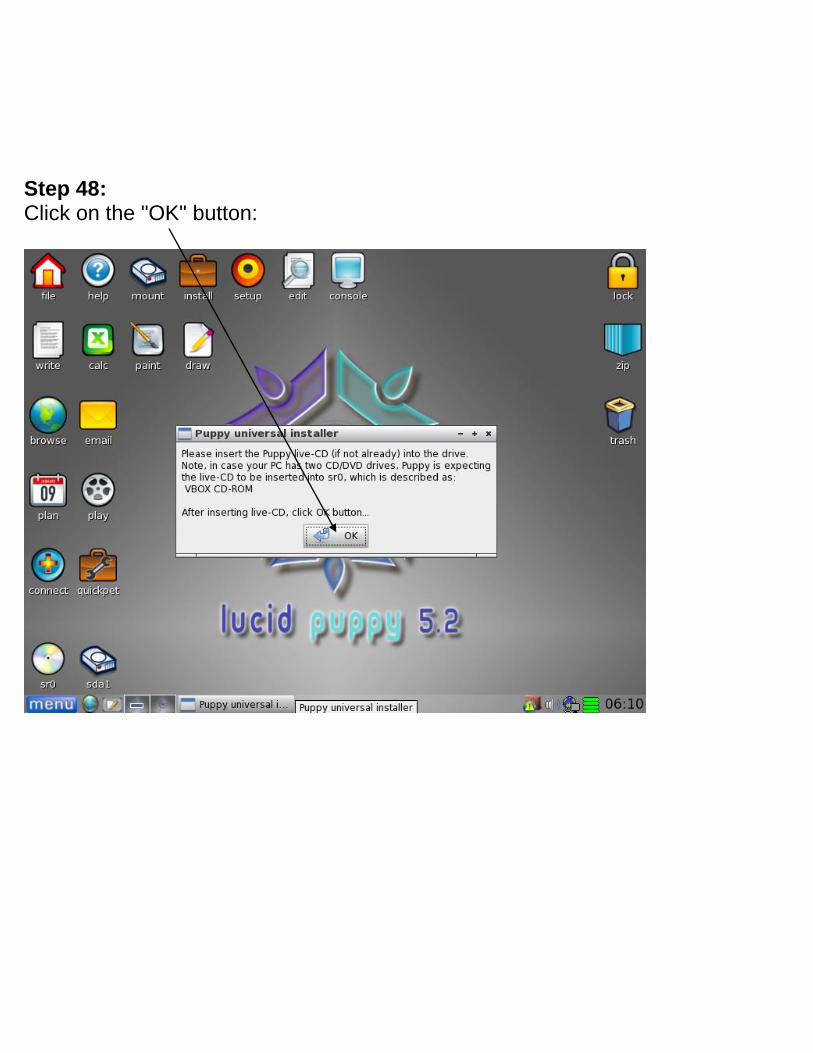
Step 48:
Click on the "OK" button:
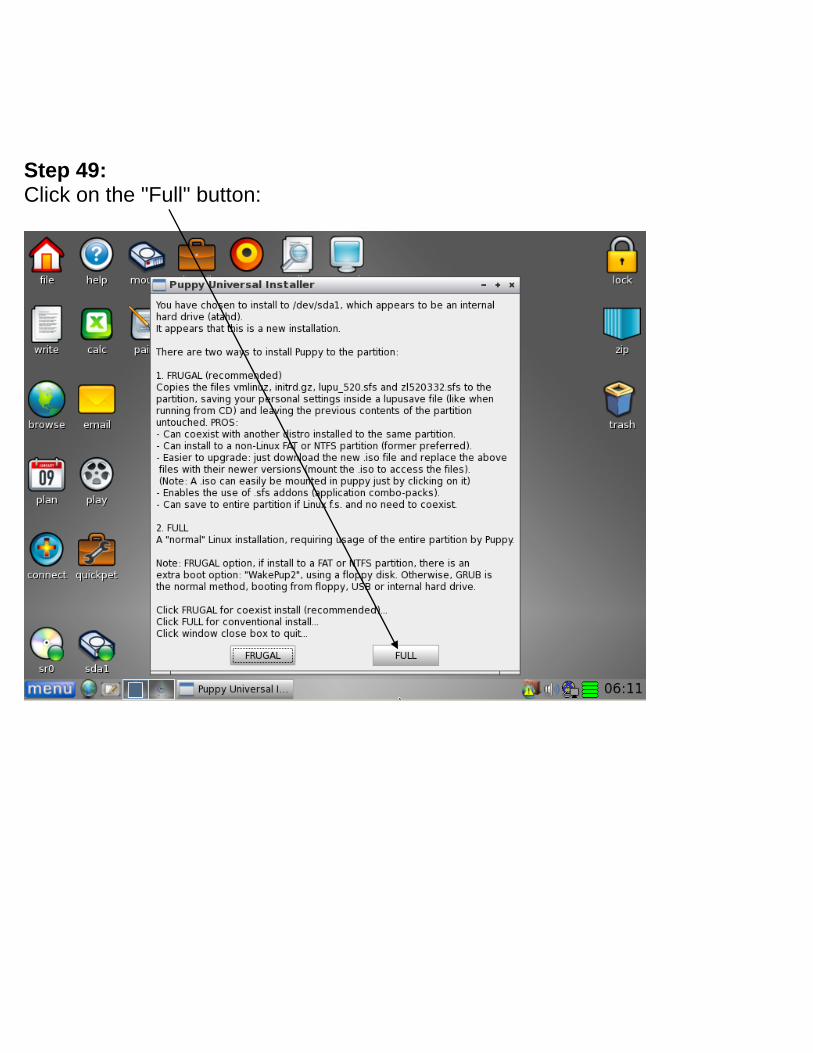
Step 49: Click on the "Full" button:
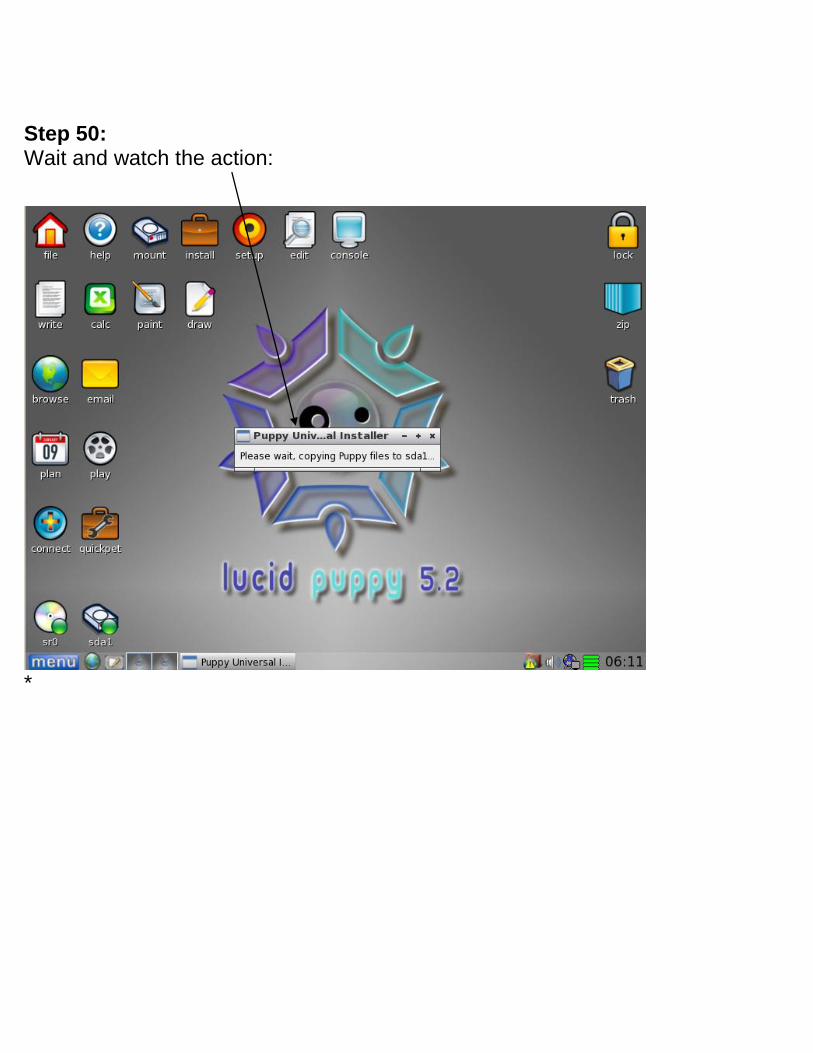
Step 50: Wait and watch the action:
*
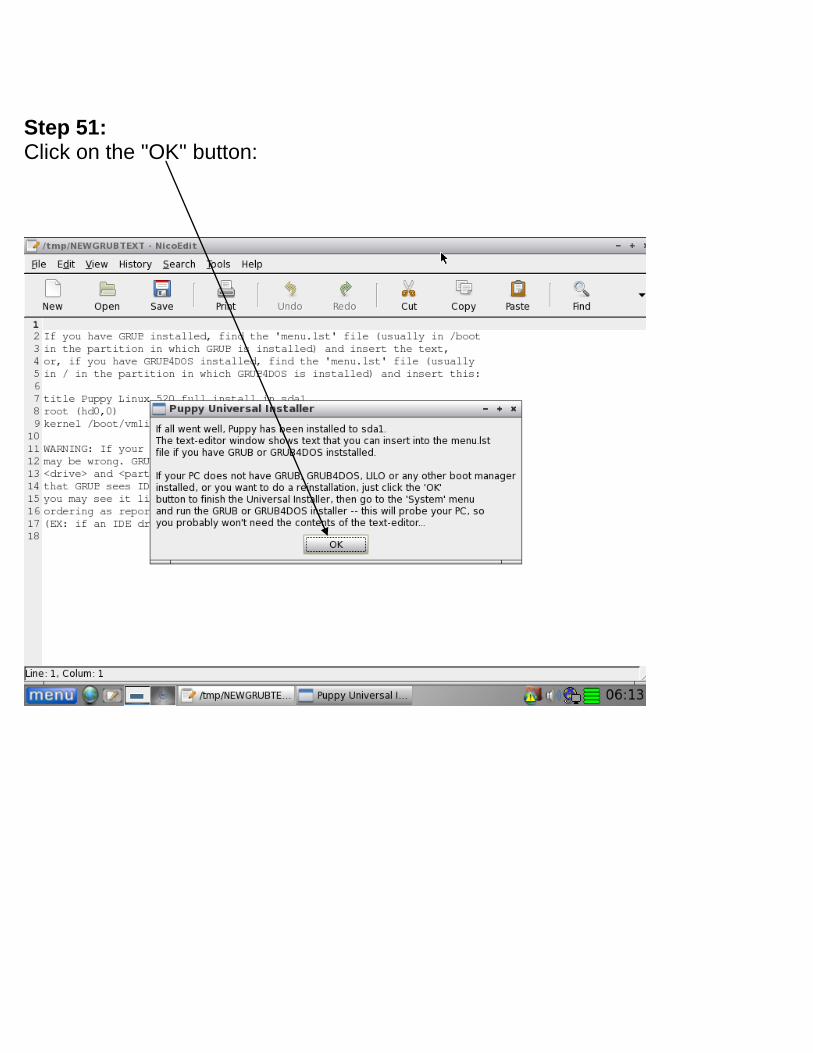
Step 51: Click on the "OK" button:
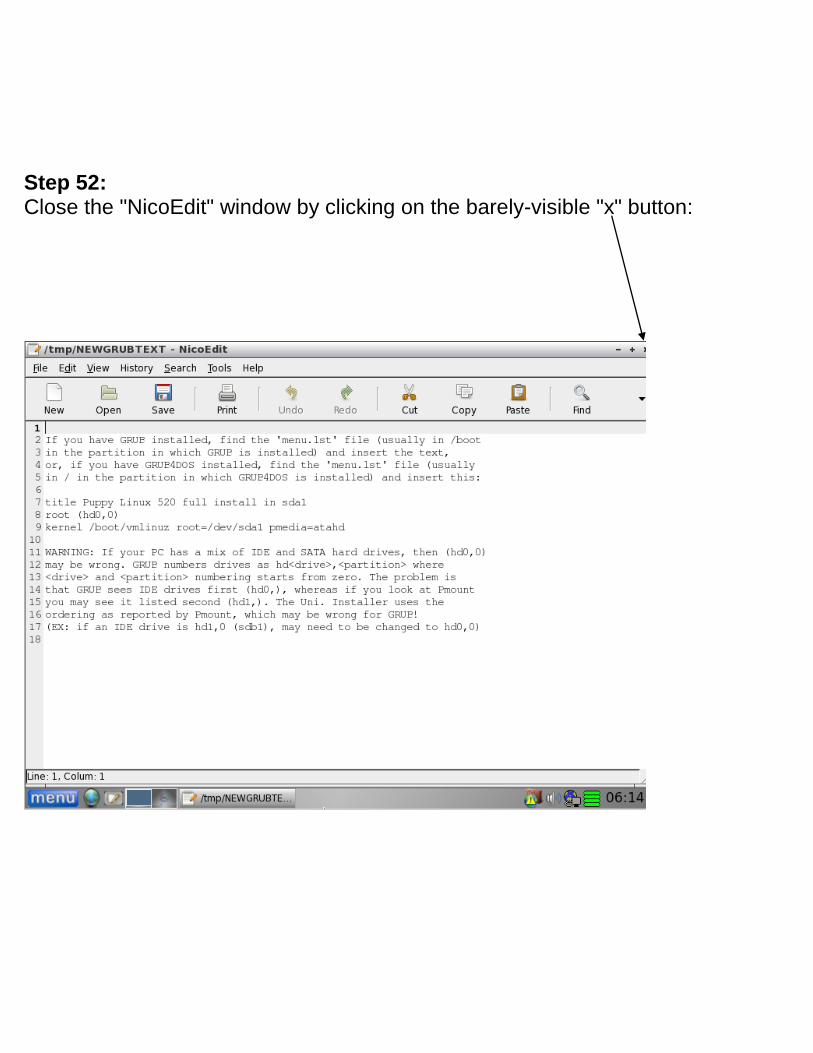
Step 52: Close the "NicoEdit" window by clicking on the barely-visible "x" button:
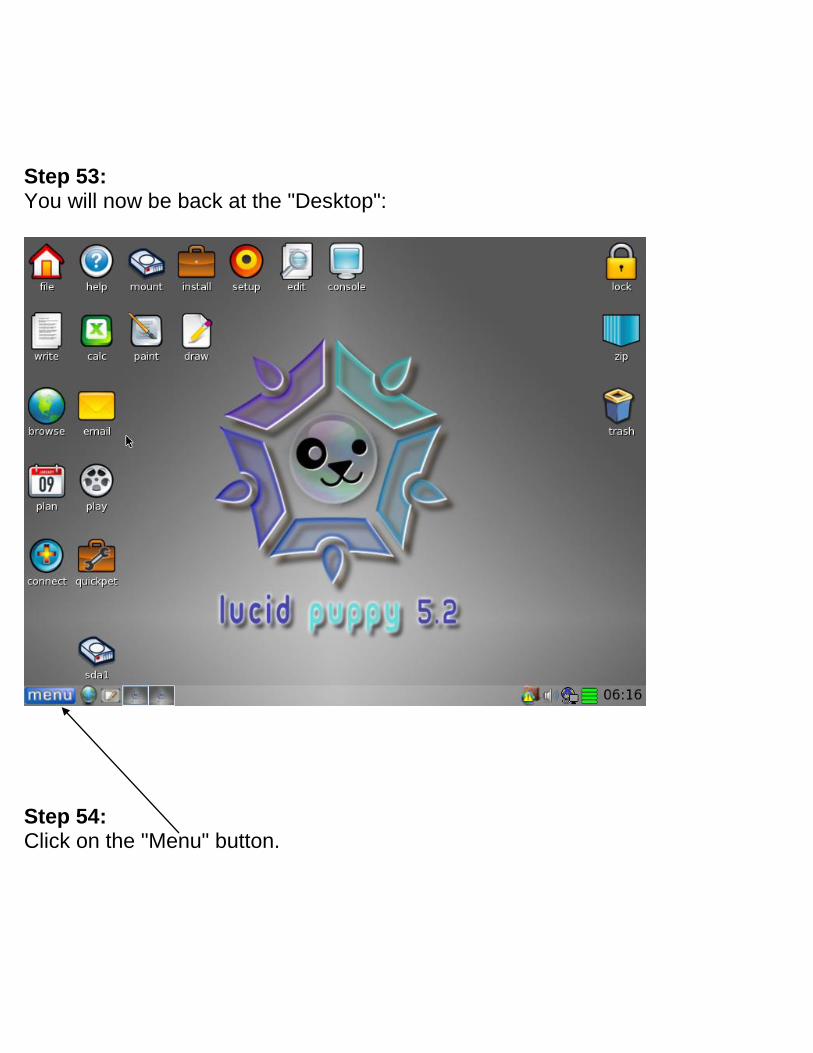
Step 53: You will now be back at the "Desktop":
Step 54: Click on the "Menu" button.

Step 55: Click on "System":
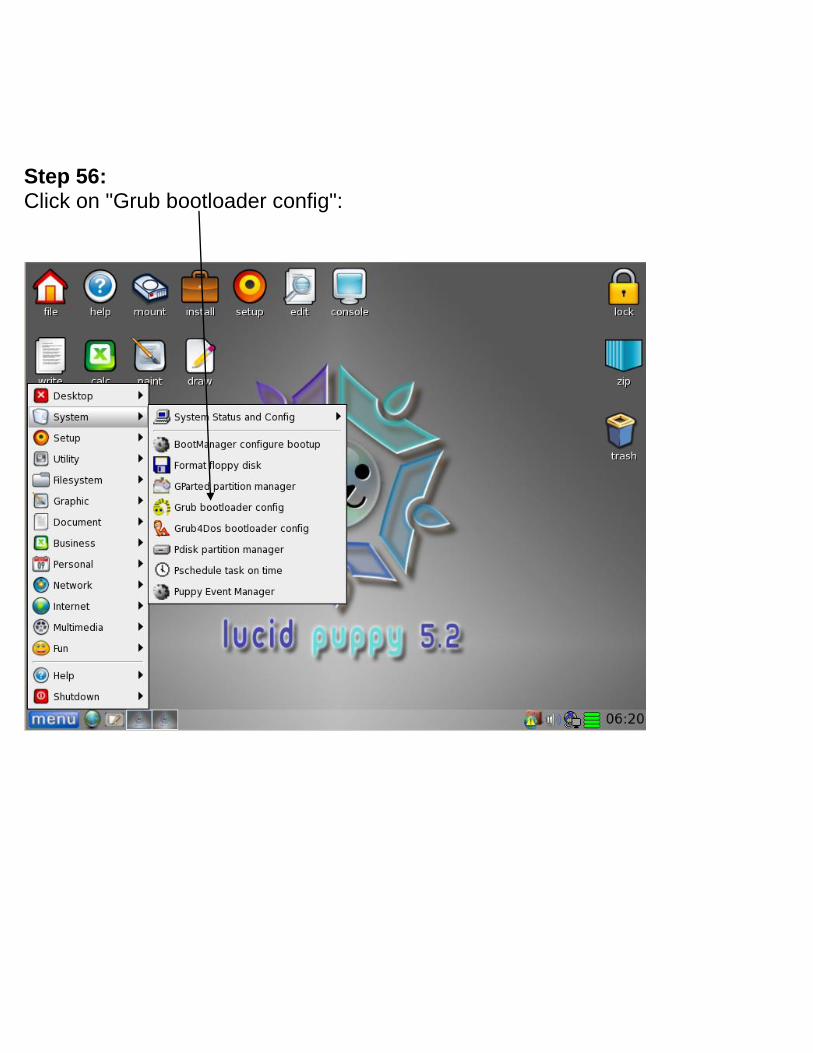
Step 56: Click on "Grub bootloader config":
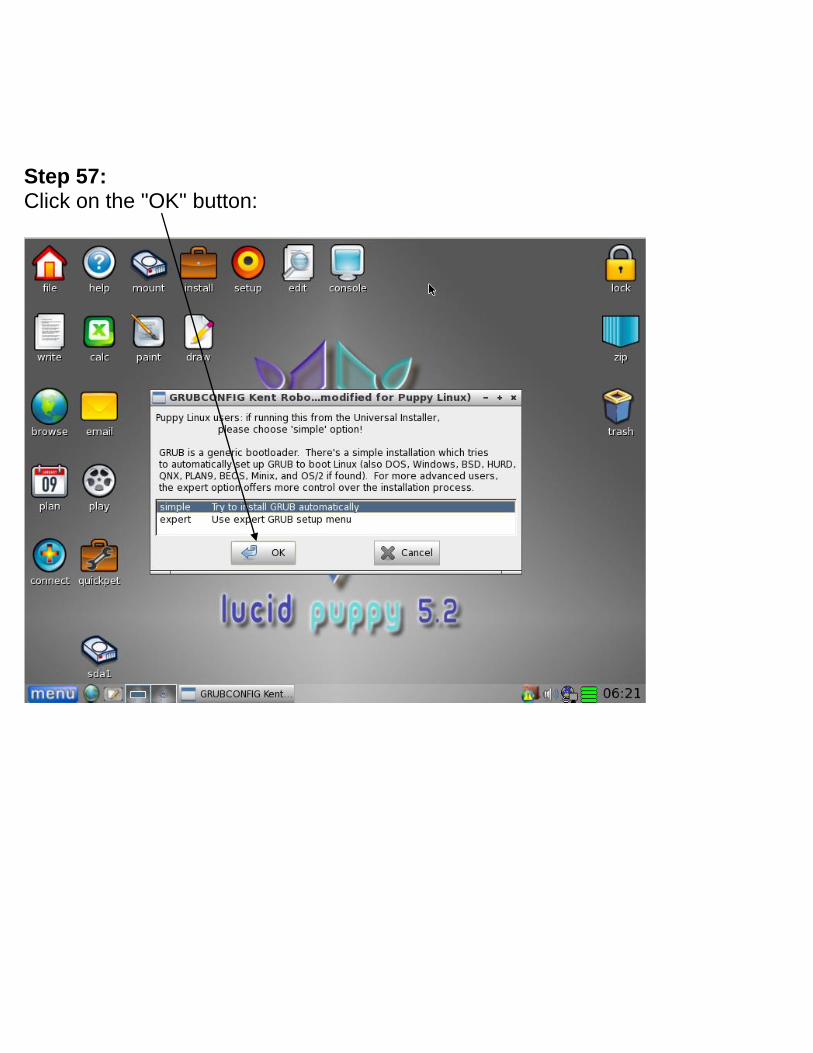
Step 57: Click on the "OK" button:
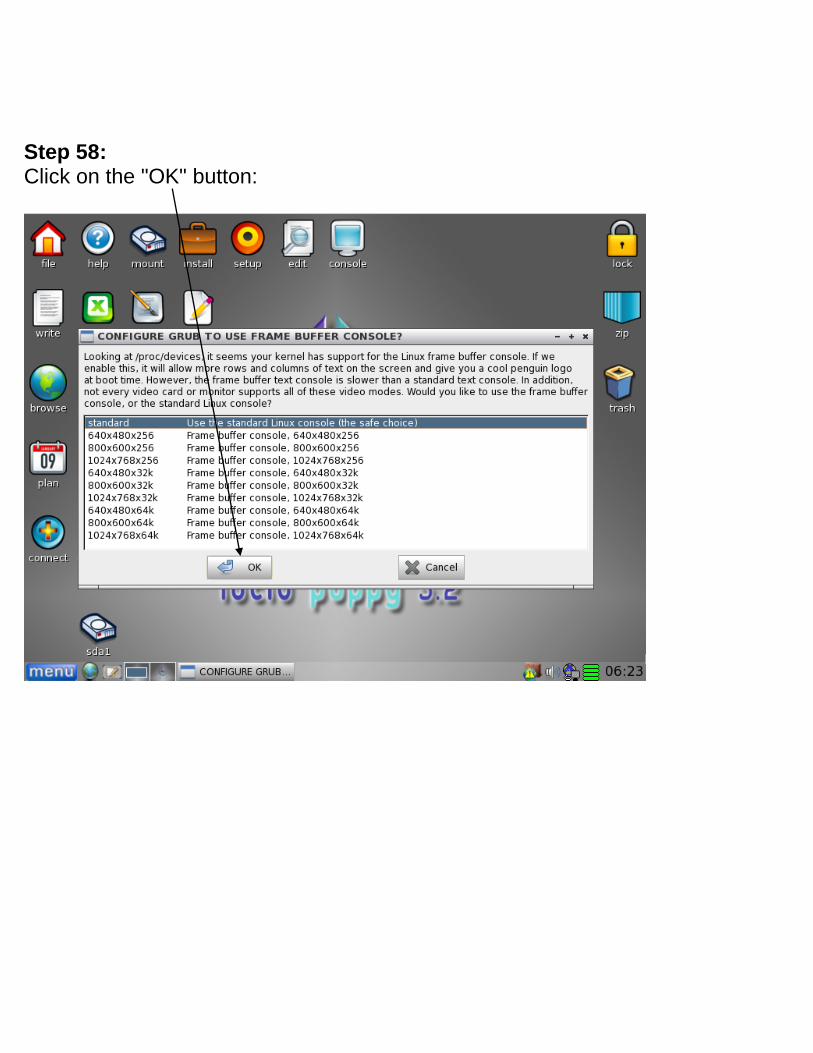
Step 58: Click on the "OK" button:
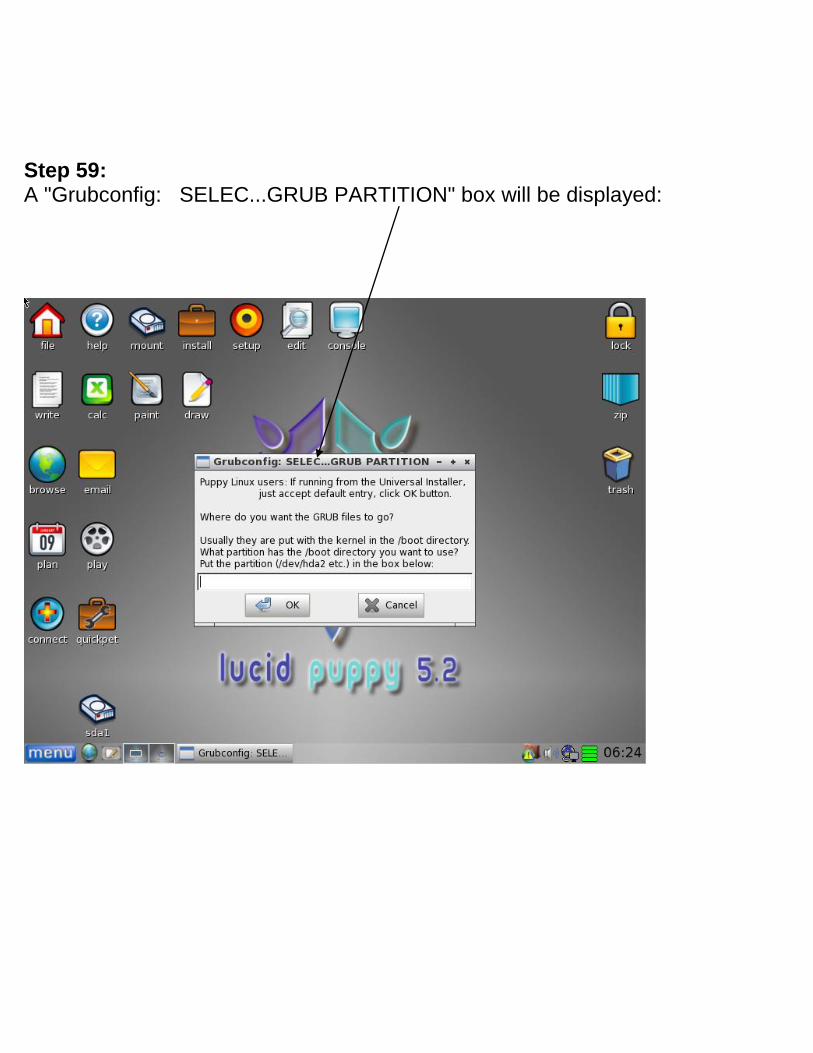
Step 59: A "Grubconfig: SELEC...GRUB PARTITION" box will be displayed:
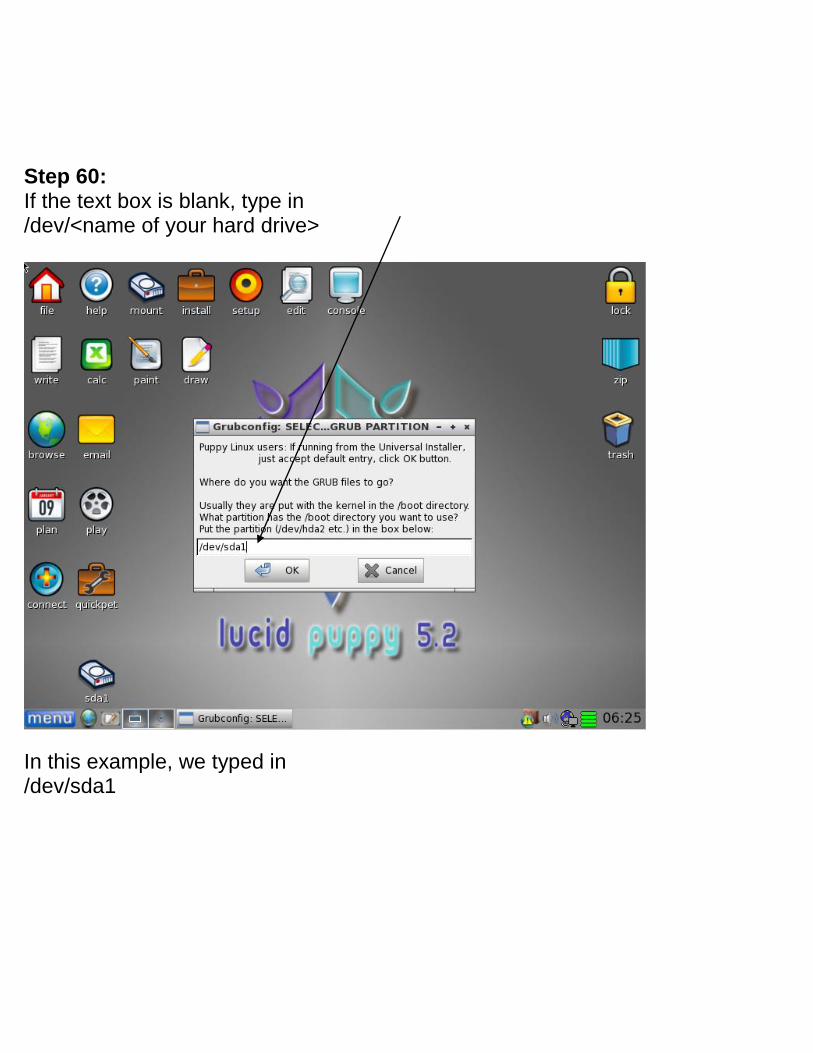
Step 60: If the text box is blank, type in /dev/<name of your hard drive>
In this example, we typed in /dev/sda1
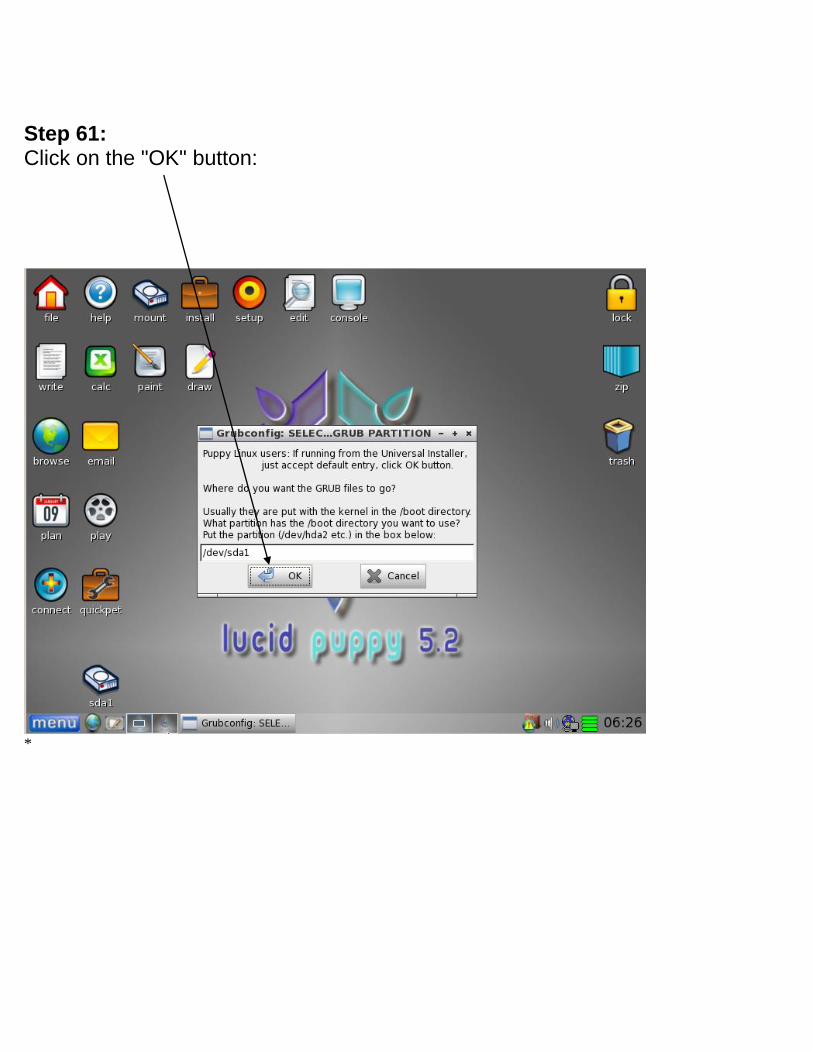
Step 61: Click on the "OK" button:
*
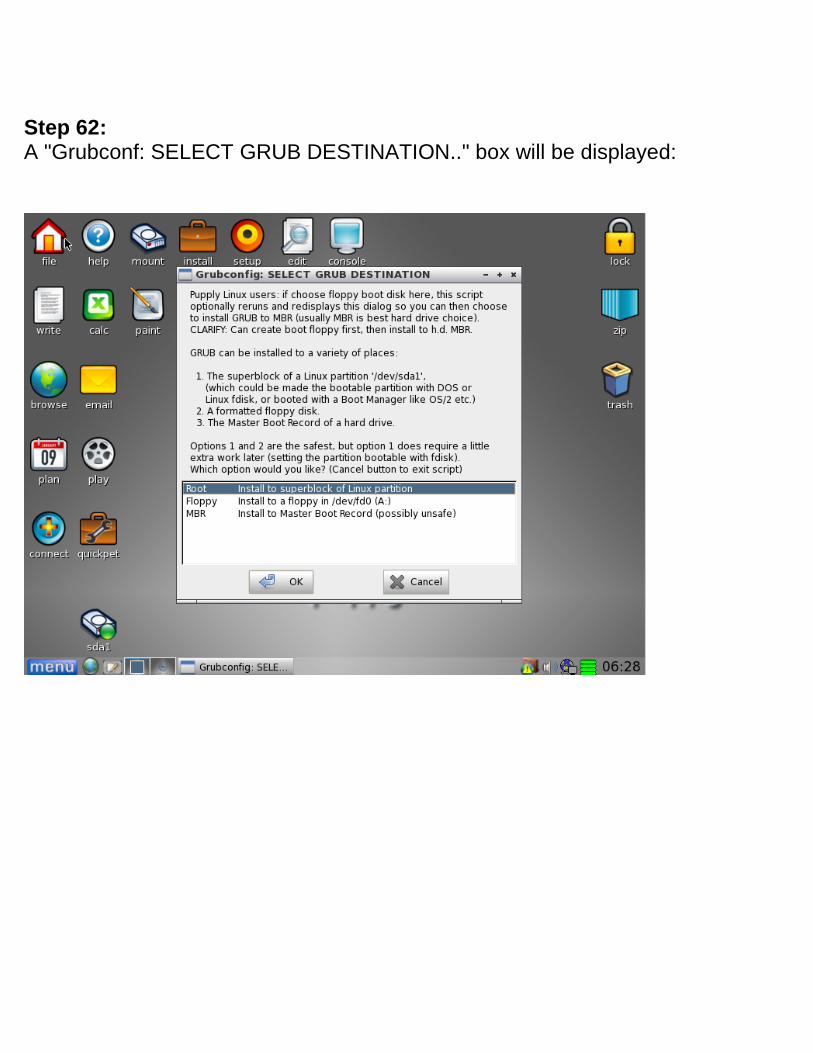
Step 62: A "Grubconf: SELECT GRUB DESTINATION.." box will be displayed:
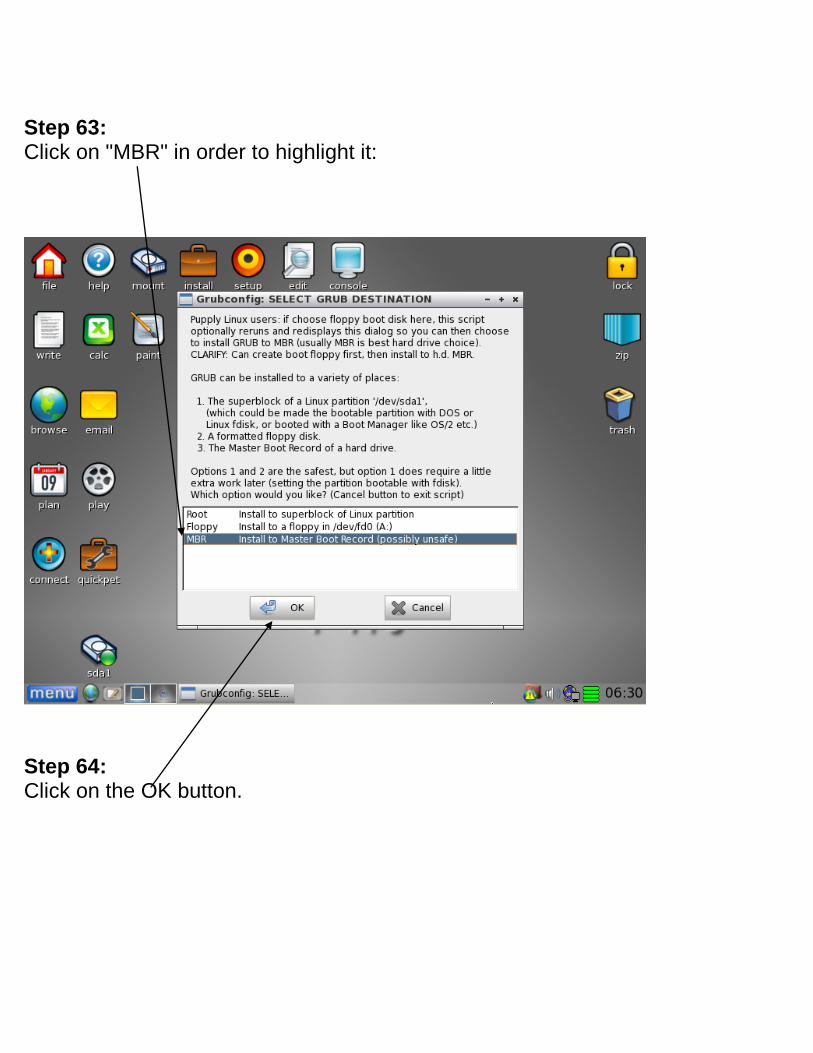
Step 63: Click on "MBR" in order to highlight it:
Step 64: Click on the OK button.
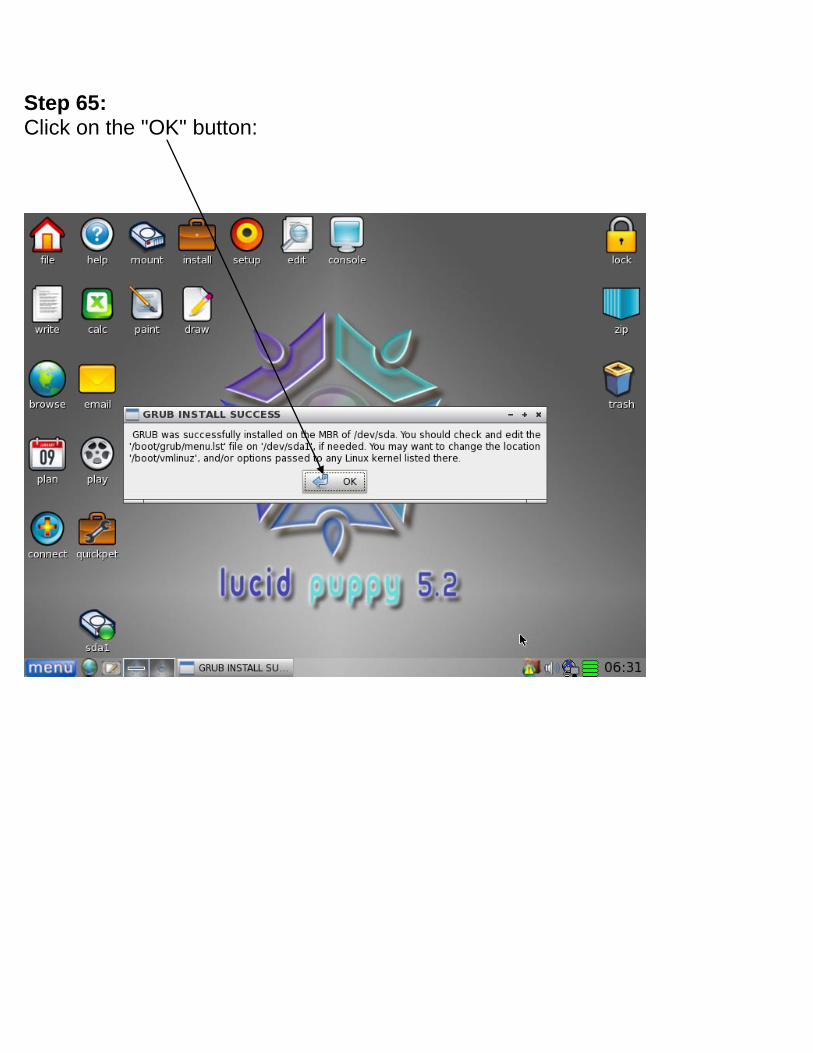
Step 65: Click on the "OK" button:
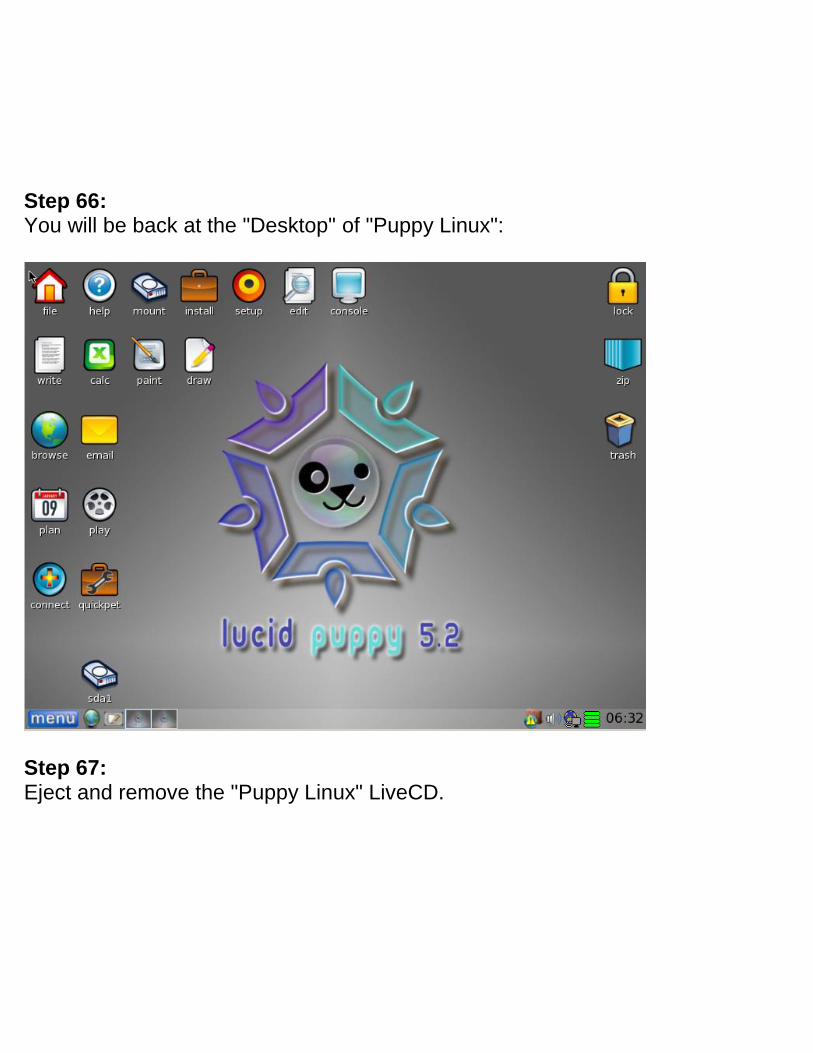
Step 66: You will be back at the "Desktop" of "Puppy Linux":
Step 67: Eject and remove the "Puppy Linux" LiveCD.
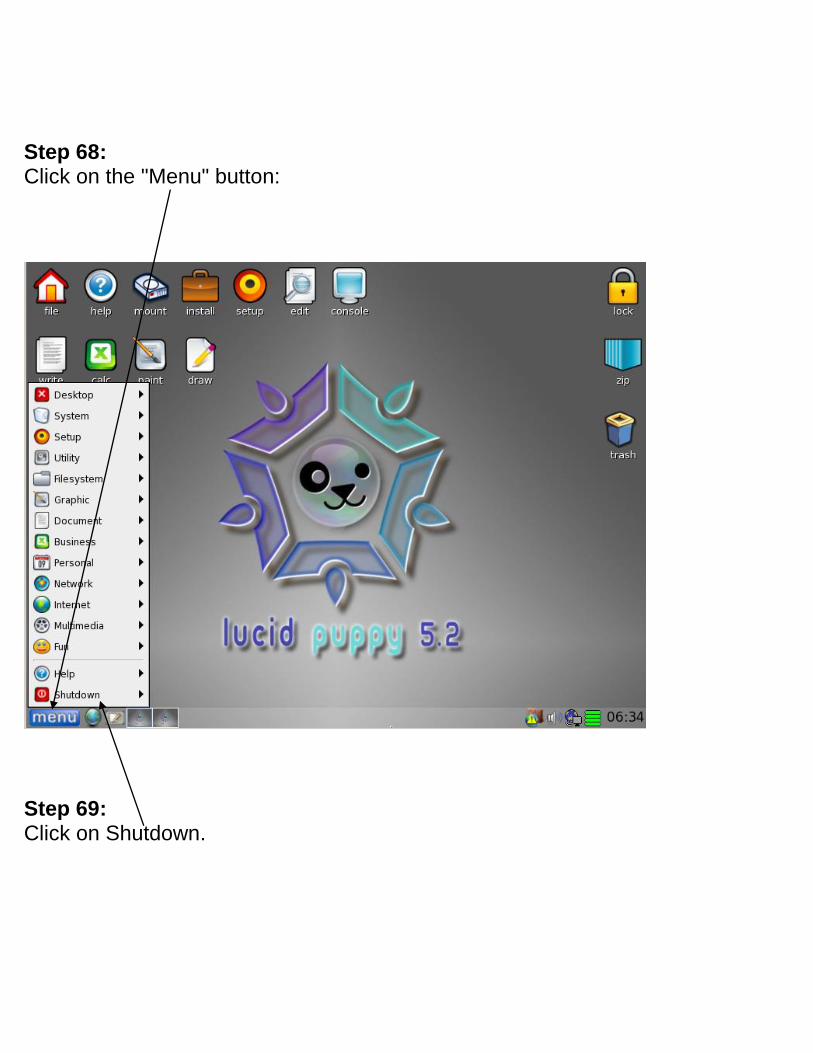
Step 68: Click on the "Menu" button:
Step 69:
Click on Shutdown.
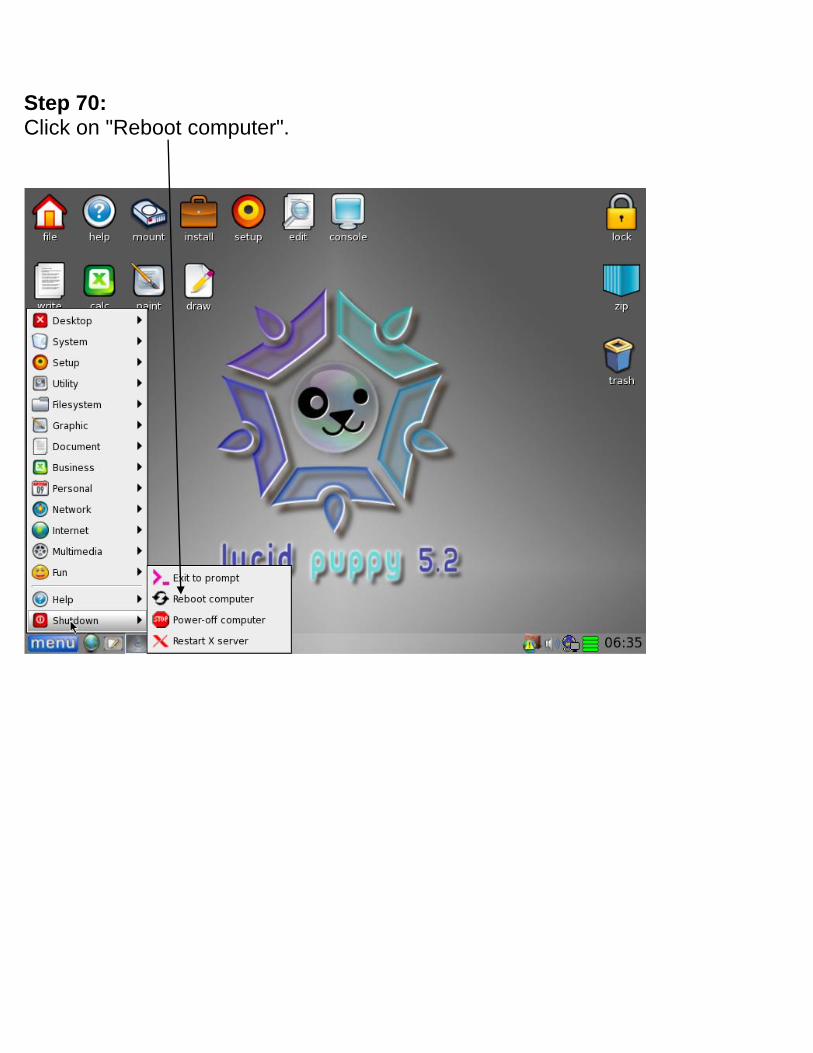
Step 70: Click on "Reboot computer".
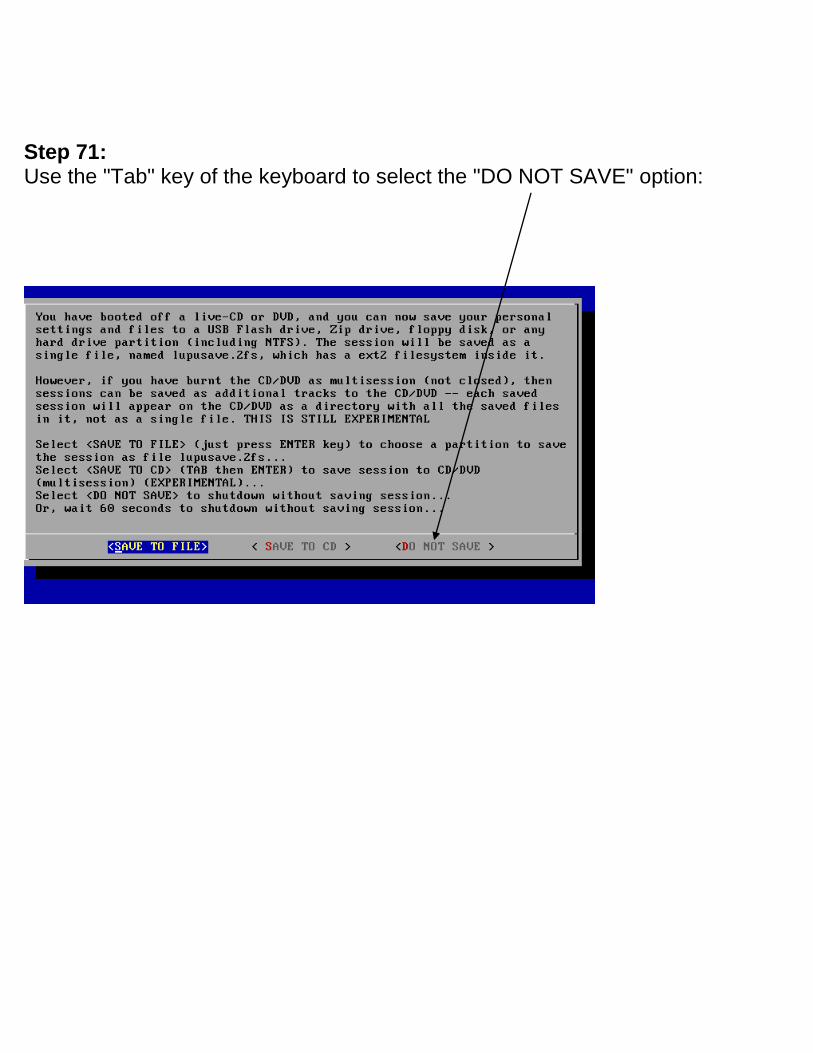
Step 71: Use the "Tab" key of the keyboard to select the "DO NOT SAVE" option:
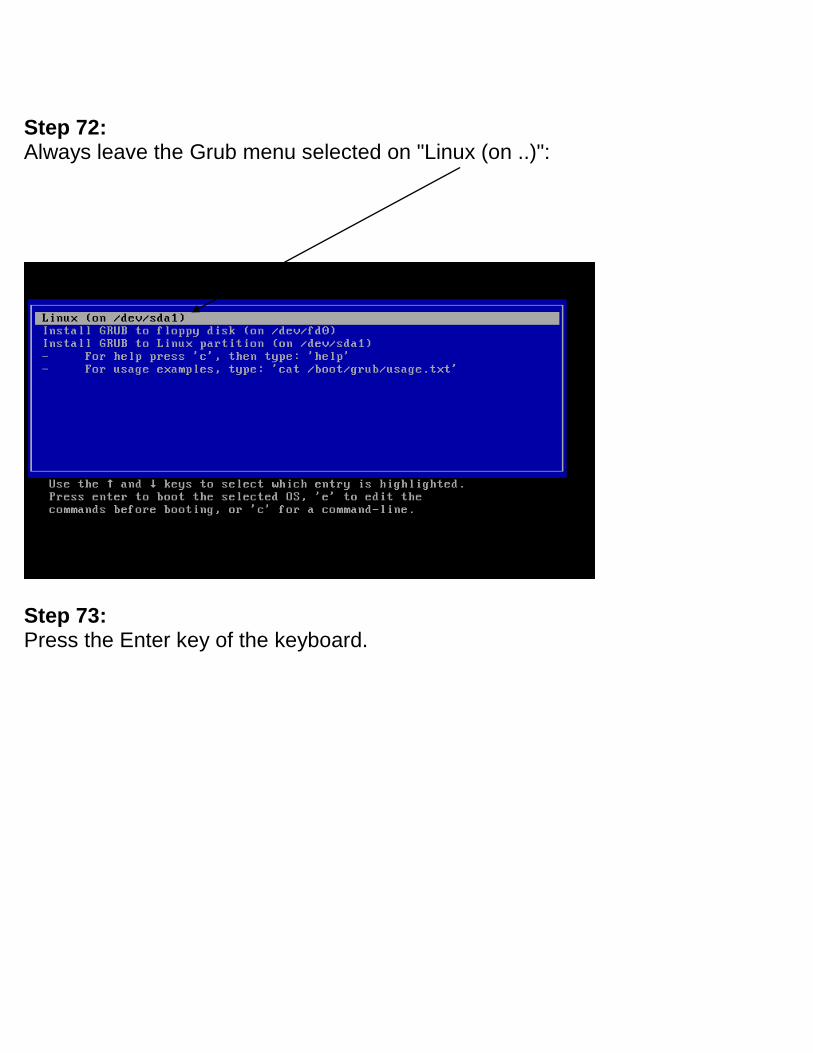
Step 72: Always leave the Grub menu selected on "Linux (on ..)":
Step 73: Press the Enter key of the keyboard.
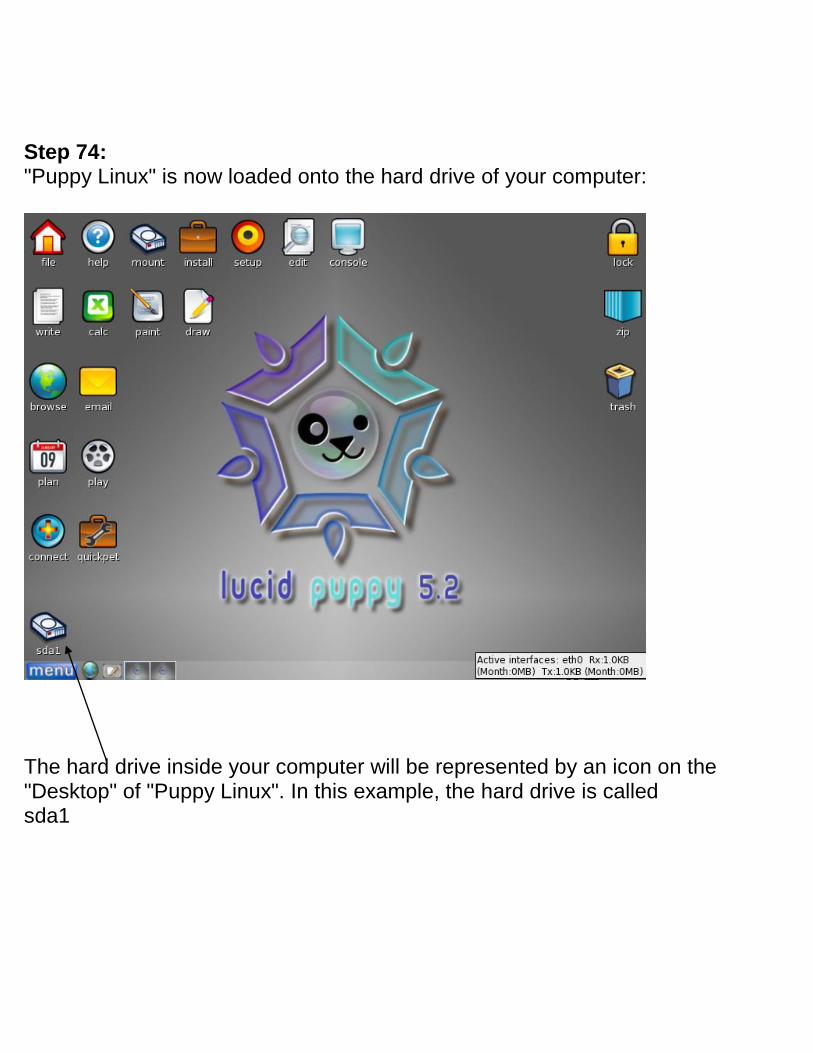
Step 74: "Puppy Linux" is now loaded onto the hard drive of your computer:
The hard drive inside your computer will be represented by an icon on the "Desktop" of "Puppy Linux". In this example, the hard drive is called sda1