Embed Size (px)
Citation preview

Query Management FacilityVersion 12 Release 2
Installing and Managing QMF forWorkstation and QMF for WebSphere
GC27-8883
IBM


Query Management FacilityVersion 12 Release 2
Installing and Managing QMF forWorkstation and QMF for WebSphere
GC27-8883
IBM

NoteBefore using this information and the product it supports, be sure to read the general information under “Notices” at theend of this information.
November 15, 2019 edition
This edition applies to Version 12 Release 2 of IBM Query Management Facility (QMF) Enterprise EditionAdvanced, which is a feature of IBM Db2 12 for z/OS (5650-DB2), Version 12.1. It also applies to Version 12 Release2 of IBM QMF for z/OS (5697-QM2), which is a stand-alone IBM Db2 for z/OS tool. This information applies to allsubsequent releases and modifications until otherwise indicated in new editions.
© Rocket Software Inc. 1995, 2019
Contents
Tables . . . . . . . . . . . . . . . vii
About this information . . . . . . . . ixWho should read this information . . . . . . . ixService updates and support information . . . . ix
Chapter 1. Planning to install . . . . . 1Overview . . . . . . . . . . . . . . . 1
Managing the query environment . . . . . . 1QMF for Workstation system requirements . . . . 2QMF for WebSphere system requirements . . . . 3iSeries terminology . . . . . . . . . . . . 4
Chapter 2. Installing QMF . . . . . . . 5Setup executable . . . . . . . . . . . . . 5Installing QMF for Workstation . . . . . . . . 5Installing a fix pack . . . . . . . . . . . . 8Uninstalling QMF for Workstation . . . . . . . 8Reverting to an earlier fix pack . . . . . . . . 9Deploying QMF for WebSphere to the applicationserver. . . . . . . . . . . . . . . . . 9
Opening the WebSphere Administrative Console . 9Installing the new application . . . . . . . 9Configuring access to JDBC drivers . . . . . 10Starting the application . . . . . . . . . 11Accessing the application . . . . . . . . . 12Completing the installation . . . . . . . . 12
Customizing Java Virtual Machine system propertiesand files . . . . . . . . . . . . . . . 12
Chapter 3. Configuring the environment 15Importing relational data source information fromQMF for Windows . . . . . . . . . . . . 17
QMF for Windows settings . . . . . . . . 18Considerations for configuring the product andenvironment . . . . . . . . . . . . . . 19Overview . . . . . . . . . . . . . . . 21Setting preferences . . . . . . . . . . . . 23
Setting general preferences . . . . . . . . 23Setting Acceleration preferences . . . . . . 24Setting appearance preferences . . . . . . . 25Setting the audit system . . . . . . . . . 26Setting dashboard runtime preferences . . . . 27Setting SMTP and email preferences . . . . . 27Working with global variables . . . . . . . 29Setting help preferences . . . . . . . . . 31Setting JDBC preferences . . . . . . . . . 32Setting LOB preferences . . . . . . . . . 34Setting log preferences. . . . . . . . . . 35Setting output preferences . . . . . . . . 40Setting QMF Data Service preferences . . . . 41Setting QMF Server Registry preferences . . . 43Setting the directory location preference forobjects generated by Export actions . . . . . 43
Setting third party library preferences . . . . 44Specifying virtual data source preferences . . . 45Specifying Visual Designer preferences . . . . 45
Switching QMF to the FIPS-140 security standard . 46Configuring repositories and connecting to thedatabase . . . . . . . . . . . . . . . 46
Creating the JDBC driver configuration file . . . 48Enabling bidirectional text layout transformationsfor DB2 Type 4 UDB JDBC driver . . . . . . 50Using DRDA to connect to database repositoriesand data sources . . . . . . . . . . . 52
Creating a shared repository storage . . . . . . 54Specifying connection parameters and user logininformation . . . . . . . . . . . . . 56Creating and updating tables . . . . . . . 57Protecting repository storage tables and grantinguser permissions. . . . . . . . . . . . 58Setting maximum number of simultaneousdatabase connections . . . . . . . . . . 60
Repositories . . . . . . . . . . . . . . 60Adding repositories to the repository storagetables . . . . . . . . . . . . . . . 61
Data sources . . . . . . . . . . . . . . 71Enabling QMF catalog functionality . . . . . 71Creating personal data sources . . . . . . . 78Creating a new relational data source. . . . . 79Creating a new multidimensional data source . . 84Creating a Hive data source . . . . . . . . 85Working with folder data sources . . . . . . 85Creating a virtual data source . . . . . . . 89Working with JavaScript data sources. . . . . 94Creating a QMF Data Service data source . . . 108
Setting up workspaces . . . . . . . . . . 108Adding content to the workspace. . . . . . 109Adding a workspace as a user. . . . . . . 109
Working with ER diagrams . . . . . . . . . 110Creating ER diagrams . . . . . . . . . 110Creating ER diagram folders . . . . . . . 112Populating ER diagrams automatically . . . . 112
Setting up environments. . . . . . . . . . 113Creating a new environment . . . . . . . 113Editing environment connection settings . . . 114
Creating the repository connection for QMF . . . 115Creating shared repository connections . . . . 116Creating file-based repository connections . . . 118Configuring repository caching . . . . . . 119Creating network repository connections . . . 122Creating web service repository connections . . 124Setting up login mapping for a data source . . 125Creating web links to data objects . . . . . 129
Distributing the configured application . . . . . 130Exporting the configuration data to users . . . . 130
Installing the product silently . . . . . . . 132Exporting and importing the JDBC driver andconnection information . . . . . . . . . 133Exporting update scripts . . . . . . . . 135
iii
Assigning users and groups permission to userepository objects . . . . . . . . . . . . 136
Selecting the users and groups that are allowedrepository object access . . . . . . . . . 137
Assigning users and groups administrativepermission for database-based security . . . . . 138Publishing objects to QMF Server Objects node . . 139Using the Quick Start wizard to configure JDBCdrivers and connect to repositories . . . . . . 140
Chapter 4. Managing resource limits 143Caching . . . . . . . . . . . . . . . 143Assigning administrative privileges . . . . . . 144About collection IDs . . . . . . . . . . . 144
Servers that support long names . . . . . . 145Long names for objects . . . . . . . . . 145Short names for objects . . . . . . . . . 145
Setting up data source resource limits . . . . . 145Setting up query resource limits . . . . . . . 147Definition of a resource limits group . . . . . 148
Default resource limits group . . . . . . . 148Ensuring resource limits groups security . . . 148Creating resource limits groups . . . . . . 149
Setting up resource limits group schedules . . . 149Specifying multiple schedules for one resourcelimits group . . . . . . . . . . . . . 150Determining the resource limits schedule ineffect . . . . . . . . . . . . . . . 150Creating a resource limits group schedule . . . 152
Specifying values for the resource limits . . . . 153Specifying Main resource limits . . . . . . 154Specifying Timeouts resource limits . . . . . 155Specifying Limits resource limits . . . . . . 155Specifying SQL Verbs resource limits . . . . 156Specifying Options resource limits . . . . . 157Specifying Save Data resource limits. . . . . 159Specifying Binding resource limits . . . . . 160Specifying Object Tracking resource limits . . . 161Specifying LOB Options resource limits . . . 162Specifying Cache resource limits . . . . . . 163Specifying Object List resource limits . . . . 164Specifying Acceleration resource limits . . . . 164
Assigning users to resource limits groups . . . . 165Assigning users to repository resource limitsgroups . . . . . . . . . . . . . . . 166Managing user assignments for all repositoryresource limits groups . . . . . . . . . . 167Assigning users to QMF catalog-based resourcelimits groups . . . . . . . . . . . . . 167
Granting QMF catalog user profile enrollment 167Determining which QMF catalog user profile touse . . . . . . . . . . . . . . . . 168Determining database access with QMF cataloguser profiles . . . . . . . . . . . . . 168Assigning users to QMF catalog resource limitsgroups . . . . . . . . . . . . . . 169
Chapter 5. Managing repositories. . . 173Deleting a repository . . . . . . . . . . . 173Editing shared repository storage properties . . . 173
Editing connection parameters and user logininformation . . . . . . . . . . . . . 174Updating database objects . . . . . . . . 175Editing protection options . . . . . . . . 176
Editing QMF catalog plug-in properties . . . . 177Updating QMF catalog tables . . . . . . . 178Updating the protection status of QMF catalogtables . . . . . . . . . . . . . . . 179Selecting a different QMF catalog for the datasource . . . . . . . . . . . . . . . 180
Chapter 6. Using sample tables . . . 183Activating sample tables. . . . . . . . . . 183Sample table names and descriptions . . . . . 183
Chapter 7. Using object trackingreports . . . . . . . . . . . . . . 185Activating object tracking . . . . . . . . . 185Running the object tracking reports . . . . . . 186Maintaining object tracking tables . . . . . . 187
Chapter 8. Using the audit system 189Setting the audit system . . . . . . . . . . 189Reading the audit record table. . . . . . . . 190
Auxiliary audit record tables . . . . . . . 191
Chapter 9. Using the QMF ServerAdministrative Console . . . . . . . 195Deploying QMF Server Administrative Console onthe application server . . . . . . . . . . 195Working with QMF Server Administrative Console 195
Appendix A. Accessibility . . . . . . 197Standard keyboard equivalents in QMF forWorkstation . . . . . . . . . . . . . . 197Standard keyboard navigation . . . . . . . . 197Operating system accessibility . . . . . . . . 197Assistive technology products . . . . . . . . 198Navigation in QMF for Workstation . . . . . . 198Navigation in QMF for WebSphere . . . . . . 200
Appendix B. Customizing QMFobjects . . . . . . . . . . . . . . 201Sample generated SQL . . . . . . . . . . 201Listing physical and logical files for iSeries . . . 201Granting EXECUTE privilege for iSeries . . . . 201Object views. . . . . . . . . . . . . . 202
Q.RAA_OBJ_DIR_X . . . . . . . . . . 202RDBI.USER_ADMIN_VIEW_X. . . . . . . 202RDBLUSER.USER_AUTHID_VIEW_X . . . . 203RDBLADMIN_VIEW . . . . . . . . . . 203RDBI.CATALOG_DIR_X. . . . . . . . . 203RDBI_AUTHID_VIEW_X . . . . . . . . 203SYSIBM.SYSUSERAUTH . . . . . . . . 203RDBI_AUTH_TABLE_X . . . . . . . . . 203Q.RAA_OBJECT_VIEW_X . . . . . . . . 203RDBI.USER_ADMIN_VIEW_X. . . . . . . 204RDBI.USER_AUTHID_VIEW_X . . . . . . 204RDBI.ADMIN_VIEW . . . . . . . . . . 204
iv Installing and Managing QMF for Workstation and QMF for WebSphere
RDBI.CATALOG_DIR_X. . . . . . . . . 204RDBI.AUTHID_VIEW_X . . . . . . . . 204RDBI.AUTHID_TABLE_X . . . . . . . . 205RDBI.TABLE_VIEW2_X . . . . . . . . . 205RDBI.USER_ADMIN_VIEW_X. . . . . . . 206RDBI.USER_AUTHID_VIEW_X . . . . . . 206RDBI.ADMIN_VIEW . . . . . . . . . . 206RDBI.AUTHID_VIEW_X . . . . . . . . 206RDBI.AUTHID_TABLE_X . . . . . . . . 206RDBI.ADMIN_TABLE . . . . . . . . . 206RDBI.USER_ADMIN_VIEW_X. . . . . . . 206RDBI.USER_AUTHID_VIEW_X . . . . . . 207RDBL.ADMIN_VIEW. . . . . . . . . . 207RDBI.AUTHID_VIEW_X . . . . . . . . 207RDBI.AUTHID_TABLE_X . . . . . . . . 207RDBI.ADMIN_TABLE . . . . . . . . . 208
Appendix C. Troubleshooting . . . . 209Problem displaying images in QMF for WebSphereusing Internet Explorer 8 . . . . . . . . . 209
QMF for Workstation Win32 API reverts toprevious version of QMF for Windows . . . . . 209
Appendix D. Messages . . . . . . . 211
Notices . . . . . . . . . . . . . . 275Trademarks . . . . . . . . . . . . . . 276Terms and conditions for product documentation 277Privacy policy considerations . . . . . . . . 277
Glossary . . . . . . . . . . . . . 279
Index . . . . . . . . . . . . . . . 285
Contents v

vi Installing and Managing QMF for Workstation and QMF for WebSphere
Tables
1. Mapping between iSeries and SQL terminology 42. Platforms, versions, and executable files
supported by QMF for Workstation . . . . . 53. QMF applications, components, and features 74. Methods for uninstalling QMF for Workstation 85. Java Virtual Machine parameters . . . . . 136. Binding preferences . . . . . . . . . . 187. The settings that you can import from QMF
for Windows . . . . . . . . . . . . 188. Log category names and descriptions.. . . . 369. Configuring repositories and connecting to a
database task descriptions. . . . . . . . 4710. Property values and corresponding attributes
for the serverBidiStringType andclientBidiStringType properties . . . . . . 50
11. Data source types . . . . . . . . . . 7112. Conversion of folder objects into the Tables
node . . . . . . . . . . . . . . . 8613. . . . . . . . . . . . . . . . . 9614. Resource limits group schedules . . . . . 15015. Determining resource limits . . . . . . . 16816. AUDIT_VIEW . . . . . . . . . . . . 19017. AUDIT_RECORDS . . . . . . . . . . . 19118. EVENT_TYPES . . . . . . . . . . . . 19219. EVENT_CATEGORIES . . . . . . . . . . 19220. EVENT_RESULTS . . . . . . . . . . . 19221. EVENT_OBJECT_TYPES table structure . . . . 19322. QUERY TYPES . . . . . . . . . . . . 19323. AUDIT_RECORDS_SQL table structure. . . . . 193
vii

viii Installing and Managing QMF for Workstation and QMF for WebSphere
About this information
This information contains details about the QMF™ for Workstation and QMF forWebSphere® Administrator applications. 1 The information includes instructionsfor:v Installing QMF for Workstation applicationsv Installing QMF for WebSphere applicationsv Using QMF for Workstation Administrator to configure a repositoryv Using QMF for WebSphere Administrator to configure a repositoryv Setting up resource limits to control resource usage
Specific changes since the previous edition of this book are indicated by a verticalbar (|) to the left of a change. Editorial changes that have no technical significanceare not noted.
Always check the IMS™ Tools Library page for the most current version of thispublication:
www.ibm.com/software/data/db2imstools/db2tools-library.html
Who should read this informationThis information is intended for the person that is responsible for configuring andmaintaining the QMF query and reporting tool set.
The administrator of the QMF query environment should have a workingknowledge of:v Db2®
v QMFv Workstation operating systemsv WebSphere
This information is not intended for users.
Service updates and support informationTo find service updates and support information, including software fix packs,PTFs, Frequently Asked Questions (FAQs), technical notes, troubleshootinginformation, and downloads, see IBM Software Support website.
1. Throughout this information, the IBM® QMF client for WebSphere Application Server is referred to as QMF for WebSphere andthe IBM QMF client for Workstation environment is referred to as QMF for Workstation.
ix

x Installing and Managing QMF for Workstation and QMF for WebSphere
Chapter 1. Planning to install
Before you install QMF, review the system requirements and understand thedifferences between QMF for Workstation and QMF for WebSphere.
OverviewQMF for Workstation Administrator and QMF for WebSphere Administrator areboth part of the DB2® QMF query and reporting tool set for IBM's Db2 relationaldatabase management system.
These two administrative applications are used to configure and manage the queryenvironment for the following applications:v QMF for Workstation which is an Eclipse-based2, rich client desktop application,
that provides querying, reporting and Business Intelligence (BI) solutiondevelopment and execution capabilities.
v QMF for WebSphere which is a Java-based Web application that delivers asubstantial subset of the QMF for Workstation capabilities using a pure HTML,thin-client deployment model. QMF for WebSphere is capable of running on avariety of operating systems, delivering this thin-client, HTML-based experienceto users via a variety of web browsers across a number of platforms.
Managing the query environmentThe QMF for Workstation Administrator and the QMF for WebSphereAdministrator applications are used to perform the administrative tasks that enablethe users of the QMF for Workstation and QMF for WebSphere applications toaccess data.
The tasks the administrator might perform are as follows:v Configuring JDBC driversv Creating repositoriesv Connecting to repositoriesv Configuring data source informationv Setting up resource limits to control resource consumption and user actionsv Monitoring the performance of your query environment
In most instances, a single user is responsible for performing the necessaryadministrative tasks for QMF for Workstation and QMF for WebSphere users. TheQMF administrator can choose to perform the administrative tasks using QMF forWorkstation Administrator or QMF for WebSphere Administrator.
Administrators can configure every feature that is available in the applicationusing QMF for Workstation Administrator. Administrators can configure the most
2. Eclipse is an open source community whose projects are focused on providing an extensible development platform andapplication frameworks for building software. Eclipse provides extensible tools and frameworks that span the softwaredevelopment lifecycle, including support for modeling, language development environments for Java™, C/C++, PHP and others,testing and performance, business intelligence, rich client applications and embedded development. A large, vibrant ecosystem ofmajor technology vendors, innovative start-ups, universities and research institutions and individuals extend, complement andsupport the Eclipse Platform. The Eclipse Foundation is a not-for-profit, member supported corporation that hosts the Eclipseprojects. Full details of Eclipse and the Eclipse Foundation are available at www.eclipse.org.
1
widely used feature set using QMF for WebSphere Administrator. There are somefeatures that cannot be configured using QMF for WebSphere Administrator.
QMF for Workstation system requirementsBefore installing QMF for Workstation ensure that your environment meets thefollowing minimum requirements.
Hardware requirements
Each workstation on which QMF for Workstation runs should accommodate thefollowing minimum requirements:v Hardware configuration that supports WindowsWindowsv Minimum of 1 GB of disk spacev Minimum of 1 GB of RAM
Software requirements
QMF for Workstation can run on any of the following operating systems:v Microsoft Windows 7v Microsoft Windows 8v Microsoft Windows 8.1v Microsoft Windows 10v Microsoft Windows Server 2008v Microsoft Windows Server 2012
Database servers
QMF for Workstation supports the following database servers:v IBM Db2 LUWv IBM Db2 for z/OSv IBM BigSQLv Microsoft SQL Serverv MySQLv IBM Netezzav Oracle Databasev PostgreSQLv Red Brickv SolidDBv Teradata
Prerequisites
The following QMF for Workstation functions have software dependencies:v Database connectivity requires an appropriate JDBC driver for each type of
RDBMS that is accessed.v Exporting result sets to Microsoft Excel requires a minimum level of Excel 2003.
If you are running a pre-2003 version of Microsoft Excel, the Export to Excelfeature is not supported.
2 Installing and Managing QMF for Workstation and QMF for WebSphere
QMF for WebSphere system requirementsBefore installing QMF for WebSphere, ensure that your environment meets thefollowing minimum requirements.
Hardware requirementsv Hardware configuration that supports IBM WebSphere V8.5.5 or V9.0 or Apache
Tomcat 7 or 8v Minimum of 500 MB disk spacev Minimum of 1 GB of RAM on each server in which it is installed and an
additional 50 MB of RAM for each concurrent user
Software requirements
QMF for WebSphere has the following software requirements:v One of the following application servers:
– WebSphere Application Server V8.5.5 or WebSphere Application Server V9using Java 8.
– Apache Tomcat V7.0 or V8.0.v One of the following Web browsers (with JavaScript support enabled) on each
client:– Google Chrome browser V50.0.2661.102 or later– Mozilla Firefox V47.0.1 or later– Microsoft Edge V25.10586.0.0 or later– Microsoft Internet Explorer V10 or later– Apple Safari browser V9.0.3 or later
Database servers
QMF for WebSphere supports the following database servers:v IBM Db2 LUWv IBM Db2 for z/OSv IBM BigSQLv Microsoft SQL Serverv MySQLv IBM Netezzav Oracle Databasev PostgreSQLv Red Brickv SolidDBv Teradata
Prerequisites
The following QMF for WebSphere functions have software dependencies:v Database connectivity requires an appropriate JDBC driver for each type of
RDBMS that is accessed.v Exporting result sets to Excel requires a minimum level of Excel 2003.
Chapter 1. Planning to install 3
If you are running a pre-2003 version of Excel, the Export to Excel feature is notsupported.
v QMF for WebSphere requires JRE V7 or later to access QMF Data Service datasources.
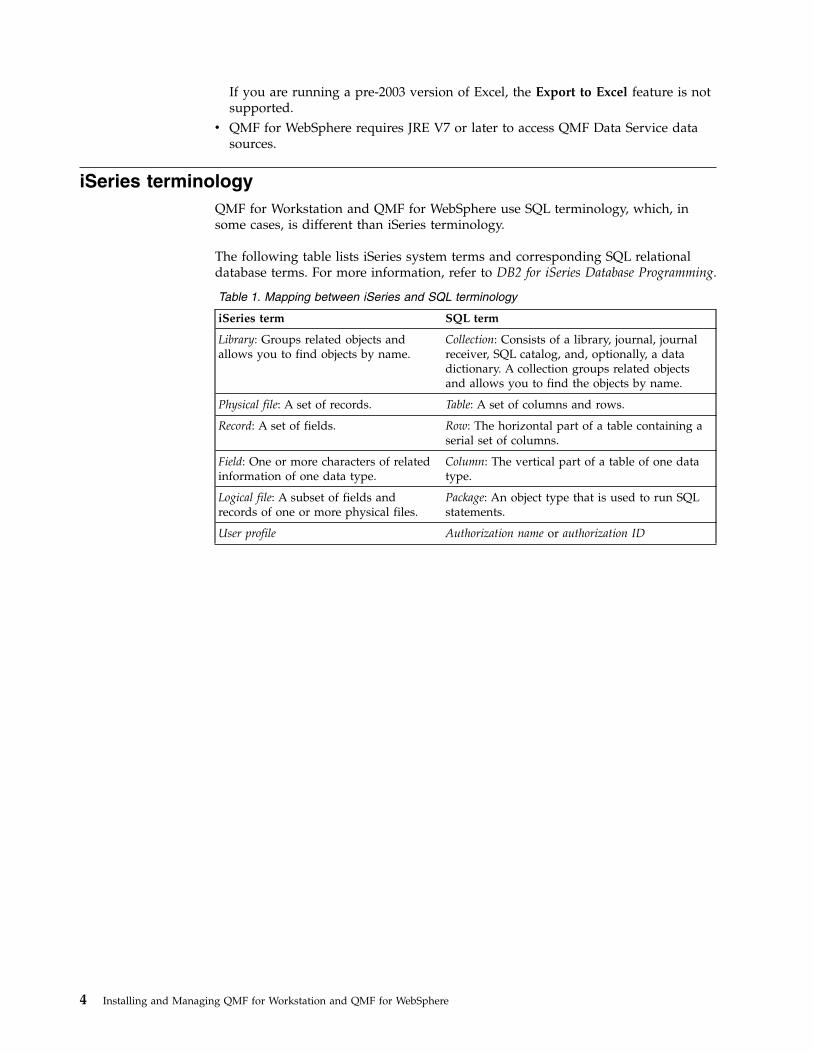
iSeries terminologyQMF for Workstation and QMF for WebSphere use SQL terminology, which, insome cases, is different than iSeries terminology.
The following table lists iSeries system terms and corresponding SQL relationaldatabase terms. For more information, refer to DB2 for iSeries Database Programming.
Table 1. Mapping between iSeries and SQL terminology
iSeries term SQL term
Library: Groups related objects andallows you to find objects by name.
Collection: Consists of a library, journal, journalreceiver, SQL catalog, and, optionally, a datadictionary. A collection groups related objectsand allows you to find the objects by name.
Physical file: A set of records. Table: A set of columns and rows.
Record: A set of fields. Row: The horizontal part of a table containing aserial set of columns.
Field: One or more characters of relatedinformation of one data type.
Column: The vertical part of a table of one datatype.
Logical file: A subset of fields andrecords of one or more physical files.
Package: An object type that is used to run SQLstatements.
User profile Authorization name or authorization ID
4 Installing and Managing QMF for Workstation and QMF for WebSphere
Chapter 2. Installing QMF
Installing QMF involves running the setup executable file to install the QMF forWorkstation and, optionally, deploying QMF for WebSphere to an applicationserver.
Note: To check the installation results, see the installation log file in the temporaryfolder of the user home directory.
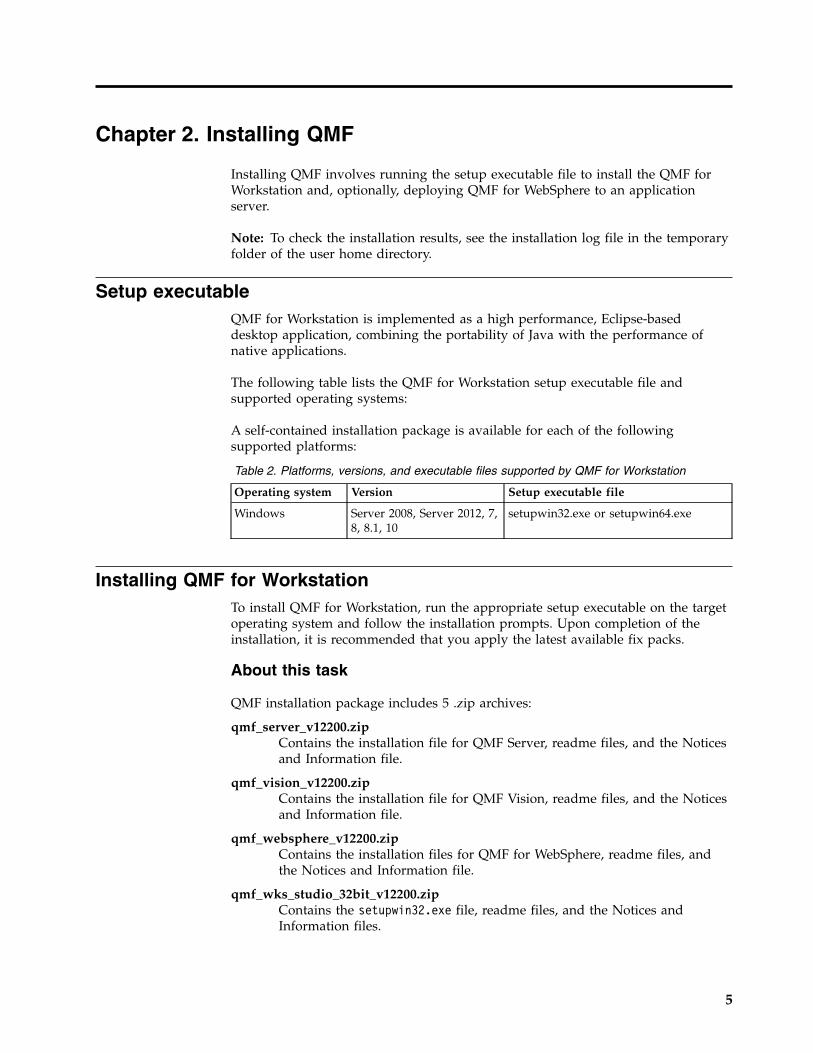
Setup executableQMF for Workstation is implemented as a high performance, Eclipse-baseddesktop application, combining the portability of Java with the performance ofnative applications.
The following table lists the QMF for Workstation setup executable file andsupported operating systems:
A self-contained installation package is available for each of the followingsupported platforms:
Table 2. Platforms, versions, and executable files supported by QMF for Workstation
Operating system Version Setup executable file
Windows Server 2008, Server 2012, 7,8, 8.1, 10
setupwin32.exe or setupwin64.exe
Installing QMF for WorkstationTo install QMF for Workstation, run the appropriate setup executable on the targetoperating system and follow the installation prompts. Upon completion of theinstallation, it is recommended that you apply the latest available fix packs.
About this task
QMF installation package includes 5 .zip archives:
qmf_server_v12200.zipContains the installation file for QMF Server, readme files, and the Noticesand Information file.
qmf_vision_v12200.zipContains the installation file for QMF Vision, readme files, and the Noticesand Information file.
qmf_websphere_v12200.zipContains the installation files for QMF for WebSphere, readme files, andthe Notices and Information file.
qmf_wks_studio_32bit_v12200.zipContains the setupwin32.exe file, readme files, and the Notices andInformation files.
5
qmf_wks_studio_64bit_v12200.zipContains the setupwin64.exe file, readme files, and the Notices andInformation files.
This topic describes how to run the setup process to install QMF. It assumes youhave downloaded the QMF setup executable file to your computer. It providesinformation about the properties and values you can set during the installationprocess.
During installation you will specify license information and where to install theproduct. You will also select which the feature set (Administrator, User or both) toinstall.
You can stop the installation at time by clicking Cancel.
Procedure1. Go to the directory where you have downloaded setup executable file.2. Run the setup executable file to begin the installation. The installer program
prepares the product for installation.3. On the Introduction panel, read the recommendations and description of the
installation process and click Next.4. On the License Agreement panel, read the licensing terms and select I accept
the terms of the License Agreement to proceed with the installation. ClickNext.
Note: If you select I do not accept the terms in the license agreement, theinstallation process stops.
5. On the Choose Install Folder panel, select Choose to specify the directorywhere QMF will be installed or accept the default destination. Click Next.v Select Typical if you want to install the workstation application, all of its
components and features and download the QMF for WebSphere applicationfiles.For a description of the applications, components, and features, see QMFapplications, components, and features.
v If you want to install particular components, select Custom and choose fromthe applications, components, and features listed in the panel beneaththeInstall Set field.If you selected specific applications and components to install and you thenwant to revert to the options of typical installation, select Typical from theInstall Set drop-down list.
6 Installing and Managing QMF for Workstation and QMF for WebSphere
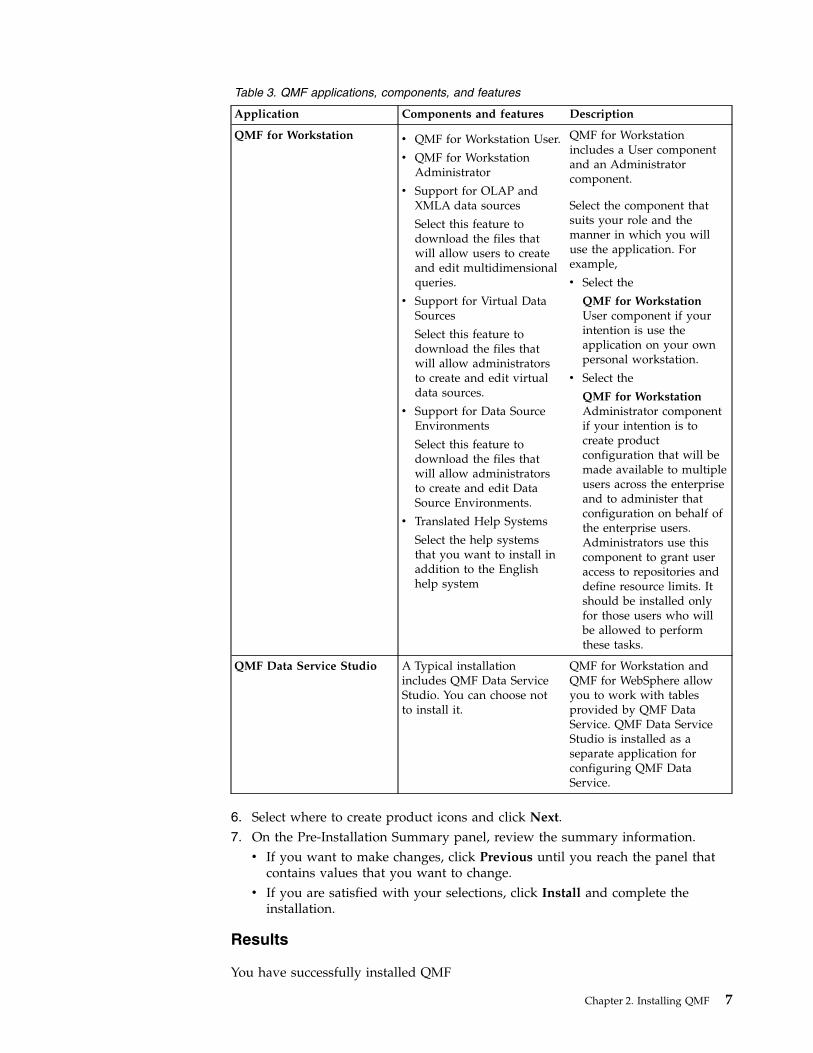
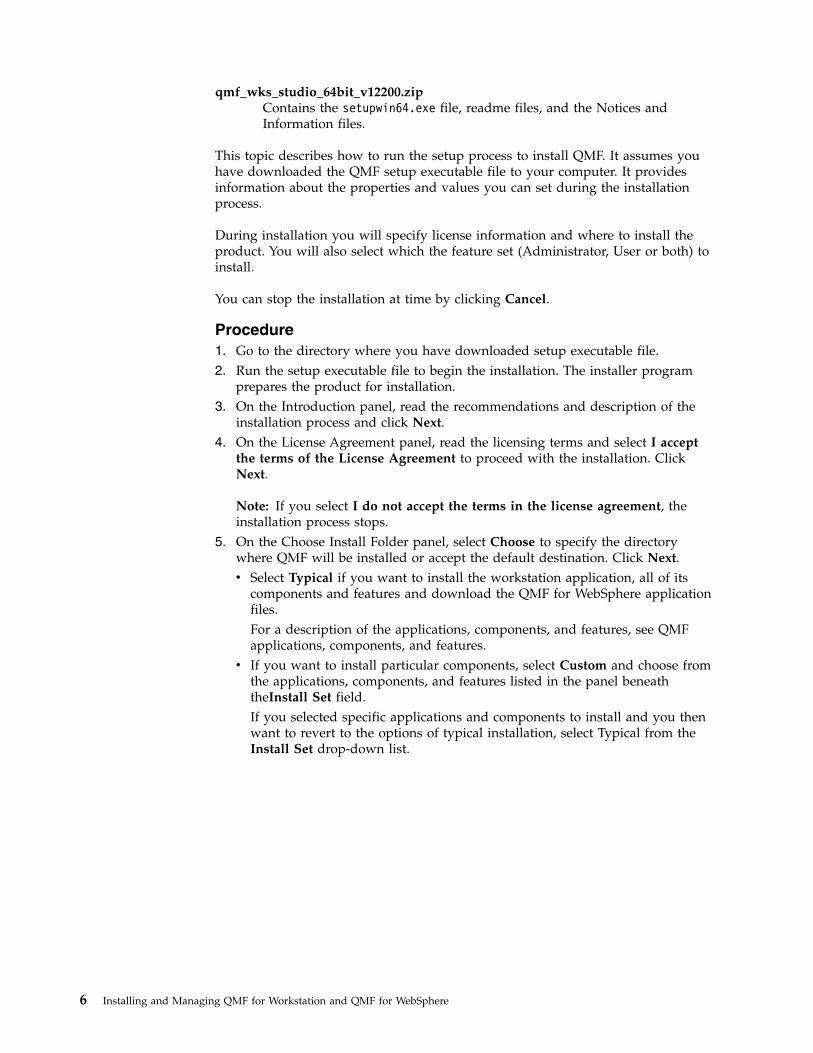
Table 3. QMF applications, components, and features
Application Components and features Description
QMF for Workstation v QMF for Workstation User.
v QMF for WorkstationAdministrator
v Support for OLAP andXMLA data sources
Select this feature todownload the files thatwill allow users to createand edit multidimensionalqueries.
v Support for Virtual DataSources
Select this feature todownload the files thatwill allow administratorsto create and edit virtualdata sources.
v Support for Data SourceEnvironments
Select this feature todownload the files thatwill allow administratorsto create and edit DataSource Environments.
v Translated Help Systems
Select the help systemsthat you want to install inaddition to the Englishhelp system
QMF for Workstationincludes a User componentand an Administratorcomponent.
Select the component thatsuits your role and themanner in which you willuse the application. Forexample,
v Select the
QMF for WorkstationUser component if yourintention is use theapplication on your ownpersonal workstation.
v Select the
QMF for WorkstationAdministrator componentif your intention is tocreate productconfiguration that will bemade available to multipleusers across the enterpriseand to administer thatconfiguration on behalf ofthe enterprise users.Administrators use thiscomponent to grant useraccess to repositories anddefine resource limits. Itshould be installed onlyfor those users who willbe allowed to performthese tasks.
QMF Data Service Studio A Typical installationincludes QMF Data ServiceStudio. You can choose notto install it.
QMF for Workstation andQMF for WebSphere allowyou to work with tablesprovided by QMF DataService. QMF Data ServiceStudio is installed as aseparate application forconfiguring QMF DataService.
6. Select where to create product icons and click Next.7. On the Pre-Installation Summary panel, review the summary information.v If you want to make changes, click Previous until you reach the panel that
contains values that you want to change.v If you are satisfied with your selections, click Install and complete the
installation.
Results
You have successfully installed QMF
Chapter 2. Installing QMF 7
If you selected QMF Data Service Studio from the installation wizard, theapplication is installed into a separate directory inside the QMF for Workstationroot directory.
After completing the installation successfully, you are ready to configure theproduct for use.
Installing a fix packThis topic describes how install a fix pack of the QMF for Workstation application.
About this task
You use the same steps to install a fix pack as you do to install the originalapplication. The application must not be uninstalled before the new fix pack can beintroduced. When the fix pack executable file is run, the existing installation ofQMF for Workstation is automatically updated. For specific steps, see “InstallingQMF for Workstation” on page 5.
Important: For Arabic and Hebrew languages, to avoid problems with theapplication installation, remove previous fix pack and install the current fix packover QMF for Workstation Version 12.1.
Note: Depending on the fix pack, if you implement repository or QMF catalogprotection using static SQL packages, it might be necessary to rebind them. Whenyou download the fix pack executable, check the accompanying readme file forsteps on how to rebind your existing static SQL packages.
Uninstalling QMF for WorkstationTo uninstall QMF for Workstation use the add or remove program facility of youroperating system or select the Uninstall option from the Start programs menu.
If you do not plan on reinstalling QMF for Workstation, you must delete allrepository storage before you uninstall the product. To delete repository storageusing QMF for Workstation Administrator, right-click the repository storage in theRepositories view and select Delete Repository Storage from the pop-up menu.
Note: You should only delete repository storage if you no longer want to retainthe QMF objects that are stored in the repository storage.
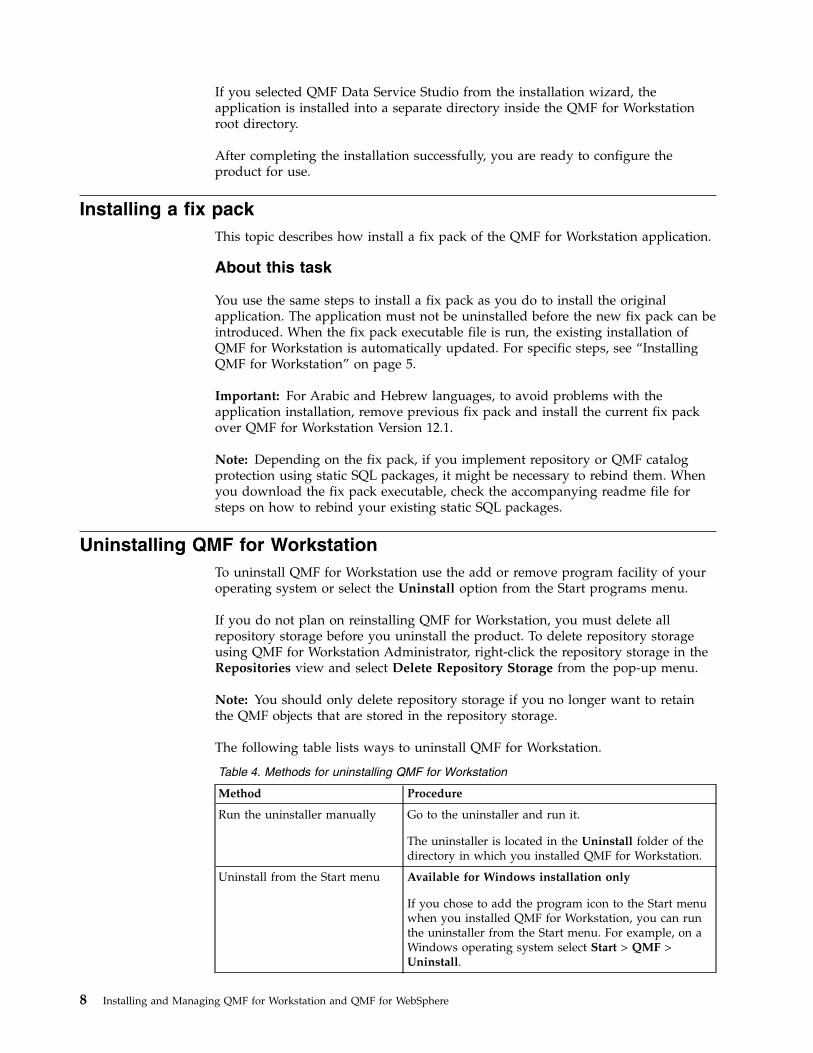
The following table lists ways to uninstall QMF for Workstation.
Table 4. Methods for uninstalling QMF for Workstation
Method Procedure
Run the uninstaller manually Go to the uninstaller and run it.
The uninstaller is located in the Uninstall folder of thedirectory in which you installed QMF for Workstation.
Uninstall from the Start menu Available for Windows installation only
If you chose to add the program icon to the Start menuwhen you installed QMF for Workstation, you can runthe uninstaller from the Start menu. For example, on aWindows operating system select Start > QMF >Uninstall.
8 Installing and Managing QMF for Workstation and QMF for WebSphere
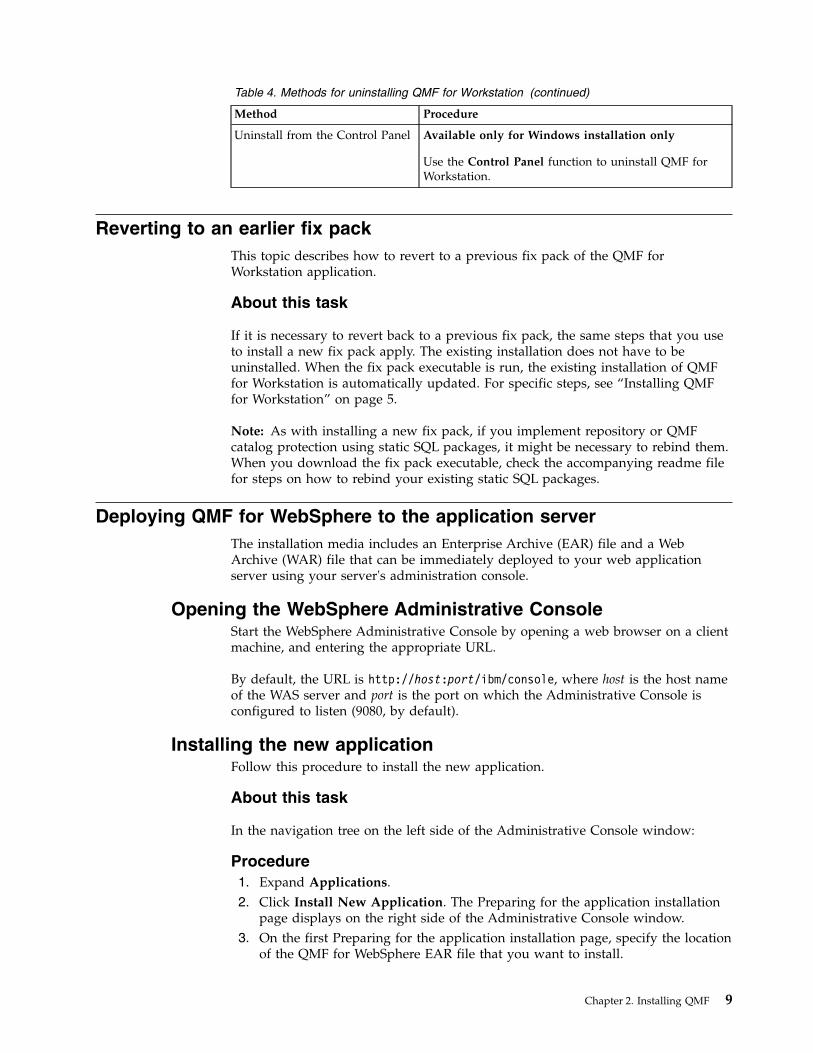
Table 4. Methods for uninstalling QMF for Workstation (continued)
Method Procedure
Uninstall from the Control Panel Available only for Windows installation only
Use the Control Panel function to uninstall QMF forWorkstation.
Reverting to an earlier fix packThis topic describes how to revert to a previous fix pack of the QMF forWorkstation application.
About this task
If it is necessary to revert back to a previous fix pack, the same steps that you useto install a new fix pack apply. The existing installation does not have to beuninstalled. When the fix pack executable is run, the existing installation of QMFfor Workstation is automatically updated. For specific steps, see “Installing QMFfor Workstation” on page 5.
Note: As with installing a new fix pack, if you implement repository or QMFcatalog protection using static SQL packages, it might be necessary to rebind them.When you download the fix pack executable, check the accompanying readme filefor steps on how to rebind your existing static SQL packages.
Deploying QMF for WebSphere to the application serverThe installation media includes an Enterprise Archive (EAR) file and a WebArchive (WAR) file that can be immediately deployed to your web applicationserver using your server's administration console.
Opening the WebSphere Administrative ConsoleStart the WebSphere Administrative Console by opening a web browser on a clientmachine, and entering the appropriate URL.
By default, the URL is http://host:port/ibm/console, where host is the host nameof the WAS server and port is the port on which the Administrative Console isconfigured to listen (9080, by default).
Installing the new applicationFollow this procedure to install the new application.
About this task
In the navigation tree on the left side of the Administrative Console window:
Procedure1. Expand Applications.2. Click Install New Application. The Preparing for the application installation
page displays on the right side of the Administrative Console window.3. On the first Preparing for the application installation page, specify the location
of the QMF for WebSphere EAR file that you want to install.
Chapter 2. Installing QMF 9
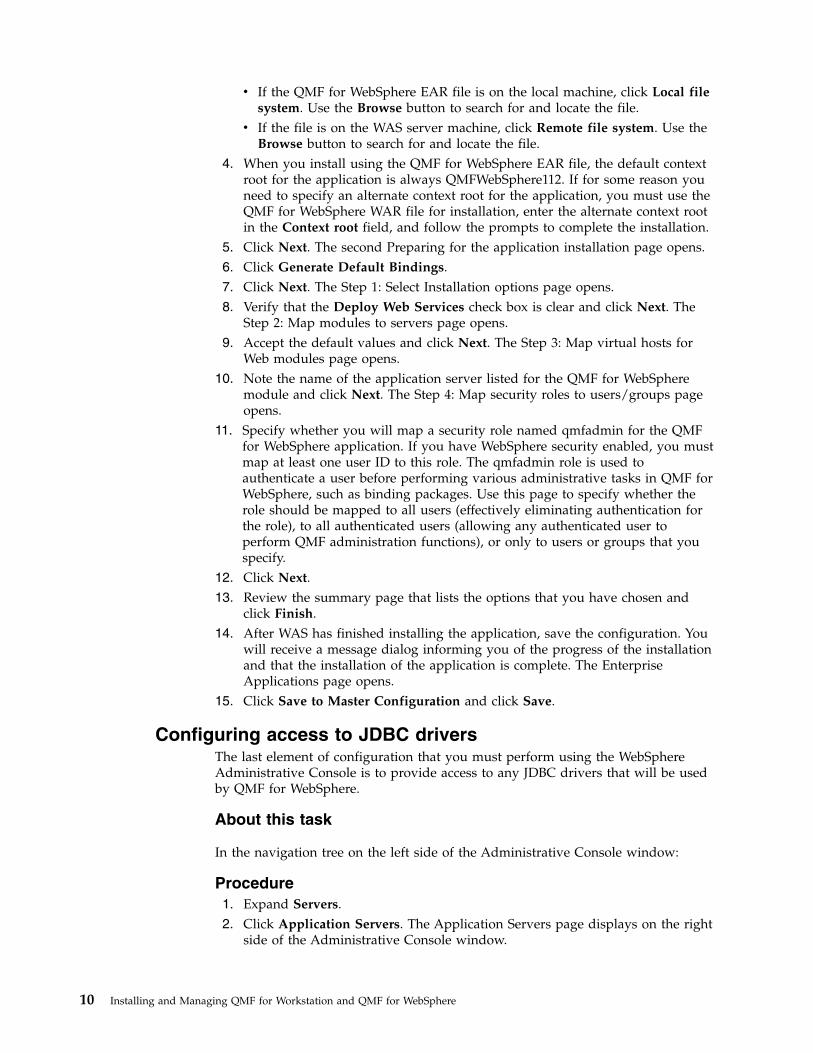
v If the QMF for WebSphere EAR file is on the local machine, click Local filesystem. Use the Browse button to search for and locate the file.
v If the file is on the WAS server machine, click Remote file system. Use theBrowse button to search for and locate the file.
4. When you install using the QMF for WebSphere EAR file, the default contextroot for the application is always QMFWebSphere112. If for some reason youneed to specify an alternate context root for the application, you must use theQMF for WebSphere WAR file for installation, enter the alternate context rootin the Context root field, and follow the prompts to complete the installation.
5. Click Next. The second Preparing for the application installation page opens.6. Click Generate Default Bindings.7. Click Next. The Step 1: Select Installation options page opens.8. Verify that the Deploy Web Services check box is clear and click Next. The
Step 2: Map modules to servers page opens.9. Accept the default values and click Next. The Step 3: Map virtual hosts for
Web modules page opens.10. Note the name of the application server listed for the QMF for WebSphere
module and click Next. The Step 4: Map security roles to users/groups pageopens.
11. Specify whether you will map a security role named qmfadmin for the QMFfor WebSphere application. If you have WebSphere security enabled, you mustmap at least one user ID to this role. The qmfadmin role is used toauthenticate a user before performing various administrative tasks in QMF forWebSphere, such as binding packages. Use this page to specify whether therole should be mapped to all users (effectively eliminating authentication forthe role), to all authenticated users (allowing any authenticated user toperform QMF administration functions), or only to users or groups that youspecify.
12. Click Next.13. Review the summary page that lists the options that you have chosen and
click Finish.14. After WAS has finished installing the application, save the configuration. You
will receive a message dialog informing you of the progress of the installationand that the installation of the application is complete. The EnterpriseApplications page opens.
15. Click Save to Master Configuration and click Save.
Configuring access to JDBC driversThe last element of configuration that you must perform using the WebSphereAdministrative Console is to provide access to any JDBC drivers that will be usedby QMF for WebSphere.
About this task
In the navigation tree on the left side of the Administrative Console window:
Procedure1. Expand Servers.2. Click Application Servers. The Application Servers page displays on the right
side of the Administrative Console window.
10 Installing and Managing QMF for Workstation and QMF for WebSphere
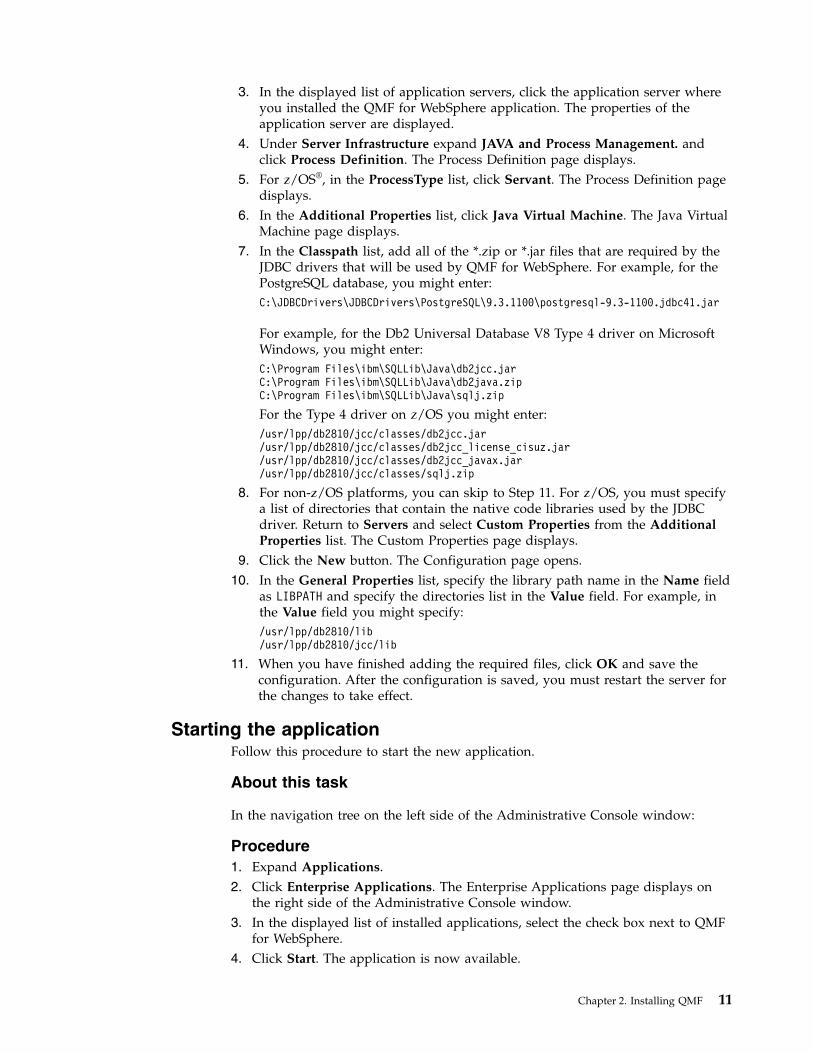
3. In the displayed list of application servers, click the application server whereyou installed the QMF for WebSphere application. The properties of theapplication server are displayed.
4. Under Server Infrastructure expand JAVA and Process Management. andclick Process Definition. The Process Definition page displays.
5. For z/OS®, in the ProcessType list, click Servant. The Process Definition pagedisplays.
6. In the Additional Properties list, click Java Virtual Machine. The Java VirtualMachine page displays.
7. In the Classpath list, add all of the *.zip or *.jar files that are required by theJDBC drivers that will be used by QMF for WebSphere. For example, for thePostgreSQL database, you might enter:C:\JDBCDrivers\JDBCDrivers\PostgreSQL\9.3.1100\postgresql-9.3-1100.jdbc41.jar
For example, for the Db2 Universal Database V8 Type 4 driver on MicrosoftWindows, you might enter:C:\Program Files\ibm\SQLLib\Java\db2jcc.jarC:\Program Files\ibm\SQLLib\Java\db2java.zipC:\Program Files\ibm\SQLLib\Java\sqlj.zip
For the Type 4 driver on z/OS you might enter:/usr/lpp/db2810/jcc/classes/db2jcc.jar/usr/lpp/db2810/jcc/classes/db2jcc_license_cisuz.jar/usr/lpp/db2810/jcc/classes/db2jcc_javax.jar/usr/lpp/db2810/jcc/classes/sqlj.zip
8. For non-z/OS platforms, you can skip to Step 11. For z/OS, you must specifya list of directories that contain the native code libraries used by the JDBCdriver. Return to Servers and select Custom Properties from the AdditionalProperties list. The Custom Properties page displays.
9. Click the New button. The Configuration page opens.10. In the General Properties list, specify the library path name in the Name field
as LIBPATH and specify the directories list in the Value field. For example, inthe Value field you might specify:/usr/lpp/db2810/lib/usr/lpp/db2810/jcc/lib
11. When you have finished adding the required files, click OK and save theconfiguration. After the configuration is saved, you must restart the server forthe changes to take effect.
Starting the applicationFollow this procedure to start the new application.
About this task
In the navigation tree on the left side of the Administrative Console window:
Procedure1. Expand Applications.2. Click Enterprise Applications. The Enterprise Applications page displays on
the right side of the Administrative Console window.3. In the displayed list of installed applications, select the check box next to QMF
for WebSphere.4. Click Start. The application is now available.
Chapter 2. Installing QMF 11
Accessing the applicationUpon completion, you should be able to access QMF for WebSphere using one ofthe following URLs (assuming the use of the suggested context root ofQMFWebSphere112)
URL to launch QMF for WebSphere application:
http(s)://[server]:[port]/[ContextRoot]/user
For example: http://www.ibm.com:9080/QMFWebSphere112/user
URL to launch QMF for WebSphere Administrator application:
http(s)//:[server]:[port]/[ContextRoot]/admin
For example: http://www.ibm.com:9080/QMFWebSphere112/admin
Completing the installationThe final steps to installing QMF for WebSphere are to set up JDBC driver libraryinformation, configure repositories, and set up repository connection information.
About this task
The QMF for WebSphere administrator is virtually identical to the QMF forWorkstation administrator. However, if you have installed QMF for WebSphere onthe same system as QMF for Workstation, the two applications have differentconfiguration files (located in the user's Application Data folder). You must takedirect action to register JDBC drivers and define repositories for both QMF forWorkstation and QMF for WebSphere.
You can configure your new installation of QMF for WebSphere in two ways:
Procedure1. Use the QMF for WebSphere application to configure drivers and repositories.
(See Chapter 3, “Configuring the environment,” on page 15 for moreinformation).
2. Configure the drivers and repositories using QMF for Workstation and thencopy the .bi.jdbc.drivers and repositories.xml files from the application datalocation on the workstation to the equivalent application data location on theweb server.
Customizing Java Virtual Machine system properties and filesYou can specify Java Virtual Machine system properties and files for saving theQMF for Workstation/WebSphere system properties and files, especially when youconfigure a cluster to share application settings and other folders among clusternodes and to set a timeout for a user session.
About this task
By default, all QMF for Workstation/WebSphere system properties and files arestored in the user home directory, the path to which is in the user.home JavaVirtual Machine system property. But you can use qmf.instance.area.global,
12 Installing and Managing QMF for Workstation and QMF for WebSphere
qmf.instance.area.shared, or qmf.instance.area Java Virtual Machine systemproperties to customize the directories for storing files.
If you want to specify a timeout for a user session to close the session when theuser does not work with application, use the qmf.use.session.timeout parameter.
Use the VirtualDataSource.dir parameter for QMF for WebSphere to avoidpossible errors when working with virtual data sources in cluster mode.
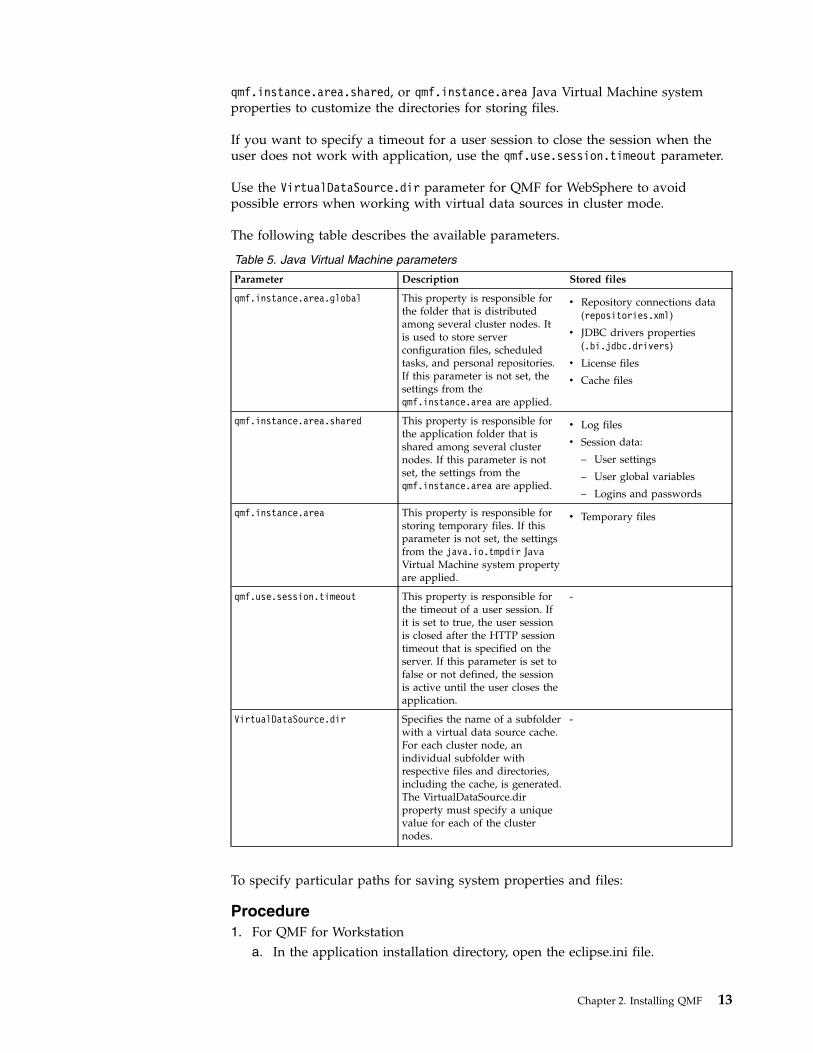
The following table describes the available parameters.
Table 5. Java Virtual Machine parameters
Parameter Description Stored files
qmf.instance.area.global This property is responsible forthe folder that is distributedamong several cluster nodes. Itis used to store serverconfiguration files, scheduledtasks, and personal repositories.If this parameter is not set, thesettings from theqmf.instance.area are applied.
v Repository connections data(repositories.xml)
v JDBC drivers properties(.bi.jdbc.drivers)
v License files
v Cache files
qmf.instance.area.shared This property is responsible forthe application folder that isshared among several clusternodes. If this parameter is notset, the settings from theqmf.instance.area are applied.
v Log files
v Session data:
– User settings
– User global variables
– Logins and passwords
qmf.instance.area This property is responsible forstoring temporary files. If thisparameter is not set, the settingsfrom the java.io.tmpdir JavaVirtual Machine system propertyare applied.
v Temporary files
qmf.use.session.timeout This property is responsible forthe timeout of a user session. Ifit is set to true, the user sessionis closed after the HTTP sessiontimeout that is specified on theserver. If this parameter is set tofalse or not defined, the sessionis active until the user closes theapplication.
-
VirtualDataSource.dir Specifies the name of a subfolderwith a virtual data source cache.For each cluster node, anindividual subfolder withrespective files and directories,including the cache, is generated.The VirtualDataSource.dirproperty must specify a uniquevalue for each of the clusternodes.
-
To specify particular paths for saving system properties and files:
Procedure1. For QMF for Workstation
a. In the application installation directory, open the eclipse.ini file.
Chapter 2. Installing QMF 13
b. Add the parameters the value of that you want to customize with the -Dprefix and specify the path for the new storage. For example,-Dqmf.instance.area=C:\work\
c. Save the eclipse.ini file.2. For QMF for WebSphere:
a. Start the WebSphere Administrative Console by opening a web browser ona client machine, and entering the appropriate URL.
b. Navigate to the Process definition and, in the Custom properties for JavaVirtual Machine, add the required properties qmf.instance.area.global,qmf.instance.area.shared, qmf.instance.area, or qmf.use.session.timeoutdepending on the parameters that you want to modify.
c. Save the added parameters.
14 Installing and Managing QMF for Workstation and QMF for WebSphere
Chapter 3. Configuring the environment
Configuring the environment for QMF for Workstation and QMF for WebSphereinvolves a number of administrative steps.
This chapter provides an overview of the administrative tasks. It is intended toprovide you with an understanding of the broad concepts before you configure theenvironment. The administrative tasks include:1. Setting up the connection data needed to access the relational data sources in
your enterprise:v Providing the location of the JDBC driver files that will be used to access the
relational data sources in your enterprisev Creating a direct connection using DRDA
2. Creating a repository within which data source definitions and authoredcontent will reside
3. Defining the means by which users will connect to your repository, therebygaining access to your configured data sources and QMF content.
Configuring JDBC Drivers
QMF for Workstation and QMF for WebSphere use JDBC drivers to connect torelational data sources. The product is already preloaded with the configurationinformation for each of the popular JDBC drivers (Db2, Informix®, Oracle, MySQL,SQL Server, Derby). However, the product does not include the actual JDBC driverfiles. Administrators must define the location of the JDBC driver files in order forQMF for Workstation and QMF for WebSphere to load and use the driver. Youonly need to define the location of the driver files for those database types thatyou intend to access using the QMF products.
Using DRDA to connect to relational data sources: Depending on yourenvironment, you can use DRDA to connect directly to relational data sources.
Defining a repository
Prior versions of QMF for Workstation and QMF for WebSphere used a ServerDefinitions File (SDF) to store the location of data sources accessible within theQMF products. In recent releases, the SDF has been replaced by a contentrepository. The repository offers the following key improvements over the olderSDF approach:v The repository is not limited to storing data source (server) definitions. It is
capable of storing all content created within the QMF products, includingqueries, forms, reports, dashboards, result sets and scheduled jobs. This isparticularly useful when creating content that executes against non-Db2 datasources, where storage within a QMF catalog is not appropriate.
v The repository has the ability to tailor the environment of a given QMF user. Forexample, queries, reports and dashboards can be routed to use US-based datasources for North American users and European data sources for Europeanusers. This mapping of data sources is done dynamically, without the need tochange the underlying QMF objects.
15
v Similarly, the repository has the ability to tailor the presentation of QMF objectson a per user or regional basis. Business users can be presented with a set offolders arranged in business terms whereas technical users may retain adatabase-centric tree of available objects.
Repositories are stored within a relational database of your choosing. Similar to aQMF catalog, they consist of a set of tables, accessible via stored procedures orstatic SQL packages. You may choose to place the repository tables in the samedatabase as your production data or within a stand alone database createdspecifically for repository use. The repository is essentially a structured form of theSDF file, with additional capabilities. As such, it can be adequately served by adistributed database such as Db2 on LUW, Informix, Oracle, SQL Server orMySQL.
Repositories can also be given an optional security model. If you elect to userepository security, you have the additional ability to control the repository contenton a per user and group basis. For example, users in group A may see data sourcesA, B and C whereas users in group B see data sources A, D and E. Permissions canbe applied to all QMF objects, including queries, forms, procedures, dashboardsand individual workspace folders.
If you elect to use repository security, you may use one of the following methods:v LDAP/Active Directory: QMF uses an external Active Directory or LDAP-based
service to authenticate the user and obtain the user and group listings.v Database security: QMF uses the user's database logon as the basis of the
security model. This approach is equivalent to the QMF catalog security model.v Internal security: Users and groups can be defined directly within QMF itself.
QMF also supports personal repositories. A personal repository is stored within theQMF built-in database engine. This type of repository is intended for individualuse, providing a means of storing content on a local workstation without the needfor a relational database.
Defining the means by which users connect to your repository
Once your repository has been created, your final step involves creating theconnection information that QMF for Workstation and QMF for WebSphere willuse to connect to the repository. Once this connection has been defined, you areready to distribute the configuration information with the installation of QMF forWorkstation. Users that install the product will then be immediately connected toyour repository when they open the software.
Distributing your configuration settings with the installationprogram
Once you have finished configuring your environment , you are ready to make itavailable to your users. Your final steps include:1. Defining the data sources in the repository that will be accessible to QMF users.2. Distributing the configuration information with the setup program.3. Copying the configuration information to QMF for WebSphere.
16 Installing and Managing QMF for Workstation and QMF for WebSphere
Importing relational data source information from QMF for WindowsYou can add relational data source information to a repository from an existingserver definition file by using the Import QMF for Windows Configuration Settingswizard.
About this task
The Import QMF for Windows Configuration Settings wizard opens automaticallythe first time you launch QMF for Workstation. Also you can open the wizard byselecting File > Import > QMF for Windows Configuration Settings.
Note: Data sources in QMF for Windows Version 8.1 and QMF for WebSphereVersion 8.1 and prior were referred to as servers in the SDF.
To import the related data source information from QMF for Windows:
Procedure1. Select the settings and preferences that you want to import on the first page of
the Import QMF for Windows Configuration Settings wizard.2. Select Import the content of the last used server definition file, and then
select whether to add the related data source information to a new personalrepository or to the current repository. Click Next.
Note: If you are running QMF for Workstation for the first time, the currentrepository option is not available. If you select the new personal repositoryoption, the repository created will have the same name as the server definitionfile from which you are importing content. If a repository with this namealready exists or if the name contains restricted symbols, you are prompted toenter a unique and valid name.
3. To add user authentication information and search filter settings, select Importserver-related information check box.
4. Specify the server definition file on the second page of the Import QMF forWindows Configuration Settings wizard. The default path to the serverdefinition file is specified automatically. If the server definition file is notlocated in the default path, specify the correct path in the File path field.
5. Select encoding type from the Encoding list. If encoding is correct, you canview the contents of the specified file in the preview area.
6. If required, prepare configuration packages by selecting Bind Packages, andthen click Next.
7. Select the server whose settings you want to edit from the Servers Found list.Each of the servers that are defined in the server definition file are displayedin the list.
8. To modify the connection parameters to the selected server, edit the Alias,URL and Driver fields. If you selected Bind Packages, click Next to proceed.Otherwise, click Finish to complete the import process.
9. Review the list of data sources for which you want to bind packages in theQMF Catalog table.
10. Specify the settings for package binding. Some settings are specified bydefault. The following table lists the default values:
Chapter 3. Configuring the environment 17
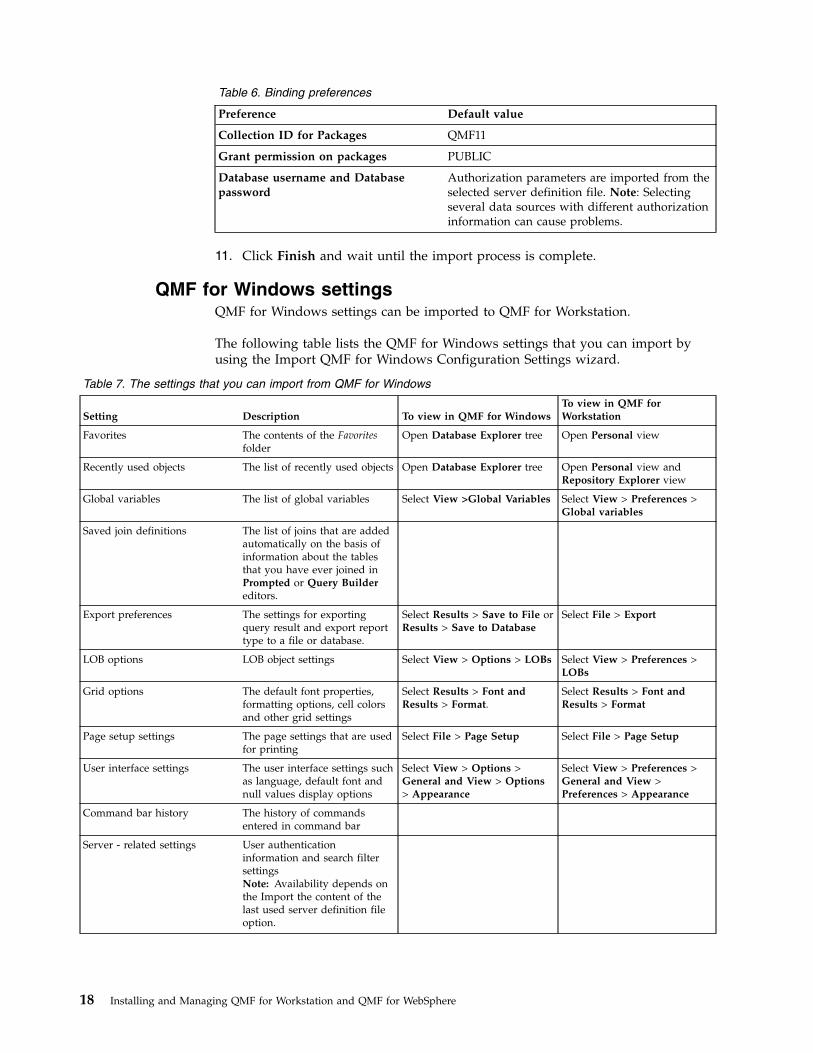
Table 6. Binding preferences
Preference Default value
Collection ID for Packages QMF11
Grant permission on packages PUBLIC
Database username and Databasepassword
Authorization parameters are imported from theselected server definition file. Note: Selectingseveral data sources with different authorizationinformation can cause problems.
11. Click Finish and wait until the import process is complete.
QMF for Windows settingsQMF for Windows settings can be imported to QMF for Workstation.
The following table lists the QMF for Windows settings that you can import byusing the Import QMF for Windows Configuration Settings wizard.
Table 7. The settings that you can import from QMF for Windows
Setting Description To view in QMF for WindowsTo view in QMF forWorkstation
Favorites The contents of the Favoritesfolder
Open Database Explorer tree Open Personal view
Recently used objects The list of recently used objects Open Database Explorer tree Open Personal view andRepository Explorer view
Global variables The list of global variables Select View >Global Variables Select View > Preferences >Global variables
Saved join definitions The list of joins that are addedautomatically on the basis ofinformation about the tablesthat you have ever joined inPrompted or Query Buildereditors.
Export preferences The settings for exportingquery result and export reporttype to a file or database.
Select Results > Save to File orResults > Save to Database
Select File > Export
LOB options LOB object settings Select View > Options > LOBs Select View > Preferences >LOBs
Grid options The default font properties,formatting options, cell colorsand other grid settings
Select Results > Font andResults > Format.
Select Results > Font andResults > Format
Page setup settings The page settings that are usedfor printing
Select File > Page Setup Select File > Page Setup
User interface settings The user interface settings suchas language, default font andnull values display options
Select View > Options >General and View > Options> Appearance
Select View > Preferences >General and View >Preferences > Appearance
Command bar history The history of commandsentered in command bar
Server - related settings User authenticationinformation and search filtersettingsNote: Availability depends onthe Import the content of thelast used server definition fileoption.
18 Installing and Managing QMF for Workstation and QMF for WebSphere

Considerations for configuring the product and environmentThere are several things to consider before configuring the product.
This section provides an overview of the administrative tasks to help youunderstand of the broad concepts prior to starting the configuration process.1. Setting up the connection data needed to access the relational data sources in
your enterprise:v Providing the location of the JDBC driver files that will be used to access the
relational data sources in your enterprisev Creating a direct connection using DRDA
2. Creating a repository within which data source definitions and authoredcontent will reside
3. Defining the means by which users will connect to your repository, therebygaining access to your configured data sources and QMF content.
Connecting to relational data sources
Using JDBC to connect to relational data sources: You can use JDBC drivers toconnect to relational data sources. The product is already preloaded with theconfiguration information for each of the popular JDBC drivers (Db2, Informix,Oracle, MySQL, SQL Server, Derby and so on). However, the product does notinclude the actual JDBC driver files. Administrators must define the location of theJDBC driver files in order for QMF for Workstation and QMF for WebSphere toload and use the driver. You must define the location of the driver files for thosedatabase types that you intend to access using the QMF products.
Using DRDA to connect to relational data sources: Depending on yourenvironment, you can use DRDA to connect directly to relational data sources.
Defining a repository
Prior versions of QMF for Workstation and QMF for WebSphere used a ServerDefinitions File (SDF) to store the location of data sources accessible within theQMF products. In recent releases, the SDF has been replaced by a contentrepository. The repository offers the following key improvements over the olderSDF approach:v The repository is not limited to storing data source (server) definitions. It is
capable of storing all content created within the QMF products, includingqueries, forms, reports, dashboards, result sets and scheduled tasks. This isparticularly useful when creating content that executes against non-Db2 datasources, where storage within a QMF catalog is not appropriate.
v The repository has the ability to tailor the environment of a given QMF user. Forexample, queries, reports and dashboards can be routed to use US-based datasources for North American users and European data sources for Europeanusers. This mapping of data sources is done dynamically, without the need tochange the underlying QMF objects.
v Similarly, the repository has the ability to tailor the presentation of QMF objectson a per user or regional basis. Business users can be presented with a set offolders arranged in business terms whereas technical users can retain adatabase-centric tree of available objects.
Repositories are stored within a relational database of your choosing. Similar to aQMF catalog, they consist of a set of tables, accessible via stored procedures or
Chapter 3. Configuring the environment 19
static SQL packages. You can choose to place the repository tables in the samedatabase as your production data or within a stand alone database createdspecifically for repository use. The repository is essentially a structured form of theSDF file, with additional capabilities. As such, it can be adequately served by adistributed database such as Db2 on LUW, Informix, Oracle, SQL Server orMySQL.
Repositories can also be given an optional security model. If you elect to userepository security, you have the additional ability to control the repository contenton a per user and group basis. For example, users in group A can see data sourcesA, B and C whereas users in group B see data sources A, D and E. Permissions canbe applied to all QMF objects, including queries, forms, procedures, dashboardsand individual workspace folders.
If you elect to use repository security, you can use one of the following methods:v LDAP/Active Directory: QMF uses an external Active Directory or LDAP-based
service to authenticate the user and obtain the user and group listings.v Database security: QMF uses the user's database logon as the basis of the
security model. This approach is equivalent to the QMF catalog security model.v Internal security: Users and groups can be defined directly within QMF itself.
QMF also supports personal repositories. A personal repository is stored within theQMF built-in database engine. This type of repository is intended for individualuse, providing a means of storing content on a local workstation without the needfor a relational database.
Defining the means by which users connect to your repository
Once your repository has been created, your final step involves creating theconnection information that QMF for Workstation and QMF for WebSphere willuse to connect to the repository. Once this connection has been defined, you areready to distribute the configuration information with the installation of QMF forWorkstation. Users that install the product will then be immediately connected toyour repository when they open the software.
Distributing your configuration settings with the installationprogram
Once you have completed the above administration steps, your QMF environmentis ready for use. Your final steps include:1. Defining the data sources in the repository that will be accessible to QMF users.2. Distributing the configuration information with the setup program.3. Copying the configuration information to QMF for WebSphere.
Using the Quick Start wizard to configure repositories andconnect to the database
You can use the Quick Start wizard to configure the QMF for Workstation for firsttime use or personal use and perform the following tasks:1. Define JDBC driver libraries;2. Define and establish repository connections;3. Add data sources.
20 Installing and Managing QMF for Workstation and QMF for WebSphere
For information about using the Quick Start wizard, see Using the Quick Startwizard to configure repositories and connect to the database.
OverviewAdministrators configure QMF so users can access the data sources needed tocreate queries, reports, and visual dashboards.
Generally, configuration tasks are performed by the Administrator from QMFAdministrator component. The Administrator component consists of a variety ofviews, perspectives, and editors to facilitate the process. For description of theviews, perspectives, and editors, see Perspectives, Views, and Editors in the Productoverview help.
Configuring QMF can be divided into the following tasks:v Setting up repositories and connecting to the database
This involves the following sub-tasks:– Defining the JDBC driver library– Configuring the repository storage– Creating the repository– Defining the connection to the database
v Populating repositories with the data sources, workspaces, and environmentsthat define how users interact with data and determine what is exposed to theusers in the QMF User component.This involves the following sub-tasks:– Creating virtual data sources– Setting up workspaces– Creating entity relationship (ER) diagrams– Setting up environments
v Setting permissions for accessing dataThis activity involves the following sub-task:– Assigning users and groups permission to use repository objects
v Managing resources and usageQMF provides administrators with the capability to optimize usage by settingup and managing resource limits.Managing resources and usage involves the following tasks:– Setting up data source resource limits– Creating resource limits groups– Setting up group schedules– Assigning users to resource limits groups
After configuring QMF, the administrator creates a repository connection, whichprovides users with access to the data.
Using QMF for Workstation versus QMF for WebSphere to createthe configuration
You can configure QMF for multiple users by using either the QMF for WebSphereAdministrator component or the QMF for Workstation Administrator component.
Chapter 3. Configuring the environment 21
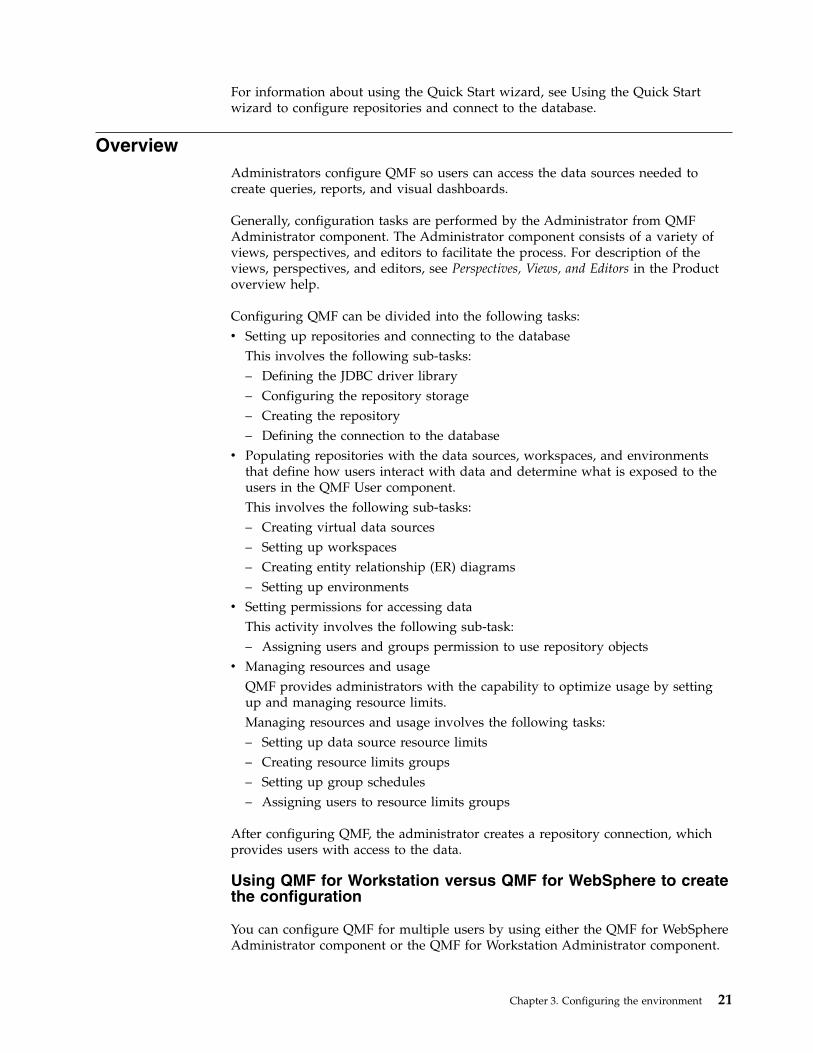
The method you choose to configure QMF is a matter of preference. The followingdiagrams illustrate both methods.
1. Start QMF for WebSphere in your web browser.2. Using the Administrator component, complete the configuration steps for a
shared configuration.3. Provide users with URL.
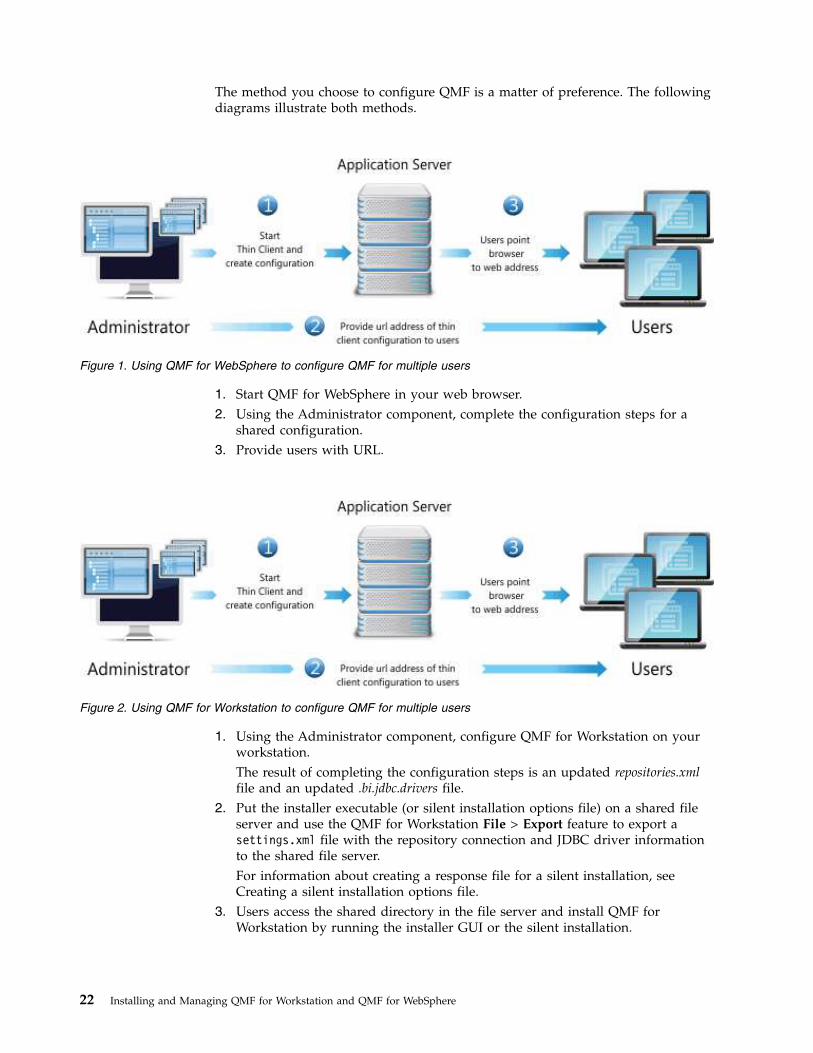
1. Using the Administrator component, configure QMF for Workstation on yourworkstation.The result of completing the configuration steps is an updated repositories.xmlfile and an updated .bi.jdbc.drivers file.
2. Put the installer executable (or silent installation options file) on a shared fileserver and use the QMF for Workstation File > Export feature to export asettings.xml file with the repository connection and JDBC driver informationto the shared file server.For information about creating a response file for a silent installation, seeCreating a silent installation options file.
3. Users access the shared directory in the file server and install QMF forWorkstation by running the installer GUI or the silent installation.
Figure 1. Using QMF for WebSphere to configure QMF for multiple users
Figure 2. Using QMF for Workstation to configure QMF for multiple users
22 Installing and Managing QMF for Workstation and QMF for WebSphere
When users run the installer, the configuration data in the settings.xml isapplied to the installed application. As a result, when users start QMF, they areconnected to a repository and have access to the data sources as determined bythe Administrator’s configuration.
Setting preferencesThe Preferences dialog is used to set user preferences that will apply to specificQMF objects and functions.
The Preferences window consists of two panes. The left pane displays the list ofpreferences groups and the right pane displays the page for the selected group.The following groups of preferences are displayed in the Preferences window.
Setting general preferencesYou use the General page of the Preferences window to specify the language,orientation direction, locale settings, and object default actions.
About this task
To specify the general user preferences for the current QMF application interfacesession:
Procedure1. Select View > Preferences. The Preferences window opens. Select General
from the tree.2. Conditional: If available as an option on the Preferences window, select from
the Language drop-down list of supported languages the language that willbe used for the current application interface session. Select the value Auto touse the local language of the current machine.
3. Select from the Direction drop-down list the orientation that will be used todisplay information in the current QMF application interface session. You canselect Left-to-Right or Right-to-Left. You can select Auto to use the defaultorientation of the current machine.
4. Select from the Locale setting for numbers, currencies, times, and datesdrop-down list the language that will be used to display numbers, currencies,times and dates in the current QMF application interface session. Select thevalue Auto to use the local language of the current machine.
5. Click one of the Default Action for Objects radio buttons to specify the actionthat QMF will perform when you double-click an object that is included in anexplorer tree. Select Run object to run the object that is selected. SelectDisplay object to display the SQL content of the object.
6. In the Default Tab for the Query Editor area, you can specify the tab onwhich the Visual Query Editor is opened by default for a new query.
7. In the Scheduler Type area, select the scheduler that you want to use for thescheduled tasks:v Select the QMF for Workstation scheduler option to work with the
application scheduler.v Select the Native option, to work with the operating system scheduler.
Restriction: If Native is selected, scheduled tasks are not run on schedulein the 64-bit application installed in Windows 7 or Windows Vista whenUser Account Control is disabled.
Chapter 3. Configuring the environment 23
8. Click the Line width ellipsis (...) or enter the value of the maximum linewidth.The available values for line width are from 10 to 1000. The default value is79.This value is used in the Query menu item Reformat Text for SQL text.Additionally, the value specified in the Line width field:v Controls the maximal line length in the DDL scripts, which are displayed
when you create or update repository storage or QMF catalogs.v Controls the maximal line length in the DDL scripts that are produced
when you run the Export Update Scripts wizard.
Note: The Export Update Scripts wizard provides users with the capabilityto upload the DDL to a mainframe data set and run it in the z/OSenvironment. Using the Line width field you can ensure the data sets meetthe limitation requirement of 72 characters per line.
9. Select the Convert rollover time check box if you want QMF to allow Java toconvert and express 24 hour rollover time as the next day. For example, if youselect the check box, Java converts 2012-01-01:24:00:00 to2012-01-02:00:00:00. The converted format is displayed by QMF in the resultsets and visual projects.Clear the Convert rollover time check box if you want QMF to preclude Javafrom converting and expressing the 24 hour rollover time as the next day. Ifyou clear the check box, QMF uses the timestamp value saved in the database.
Note: The Convert rollover time feature applies only if you are using aDRDA connection with a Db2 database.
10. Select the Always run in background check box to perform long runningoperations displayed in the Progress dialog in the background withoutblocking you from doing other work.
11. Select the Always run objects by clicking the Results tab check box to runQMF objects automatically when you click the Results tab in the editor for thefirst time.
12. Click Apply to save your preferences choices.13. Click Restore Defaults to restore the default preference values.14. Click OK to close the Preferences window.
Setting Acceleration preferencesUse the Acceleration page of the Preferences window to specify the queryacceleration settings.
About this task
To set the acceleration preferences, complete the following procedure:
Procedure1. From the main menu, select View > Preferences. The Preferences window
opens.2. On the left side of the window, click Acceleration.3. To be able to override the acceleration options that were specified for your
resource limits group by the administrator, select the Override accelerationoptions if possible check box on the right side of the screen.
24 Installing and Managing QMF for Workstation and QMF for WebSphere
Note: The settings from this page are applied only if the following conditionsare met:v The Acceleration options can be overriden check box is selected in the
resource limits for the current data source .v The object that you are running does not have specified resource limits or if
the Acceleration options can be overriden check box is selected in the objectresource limits.
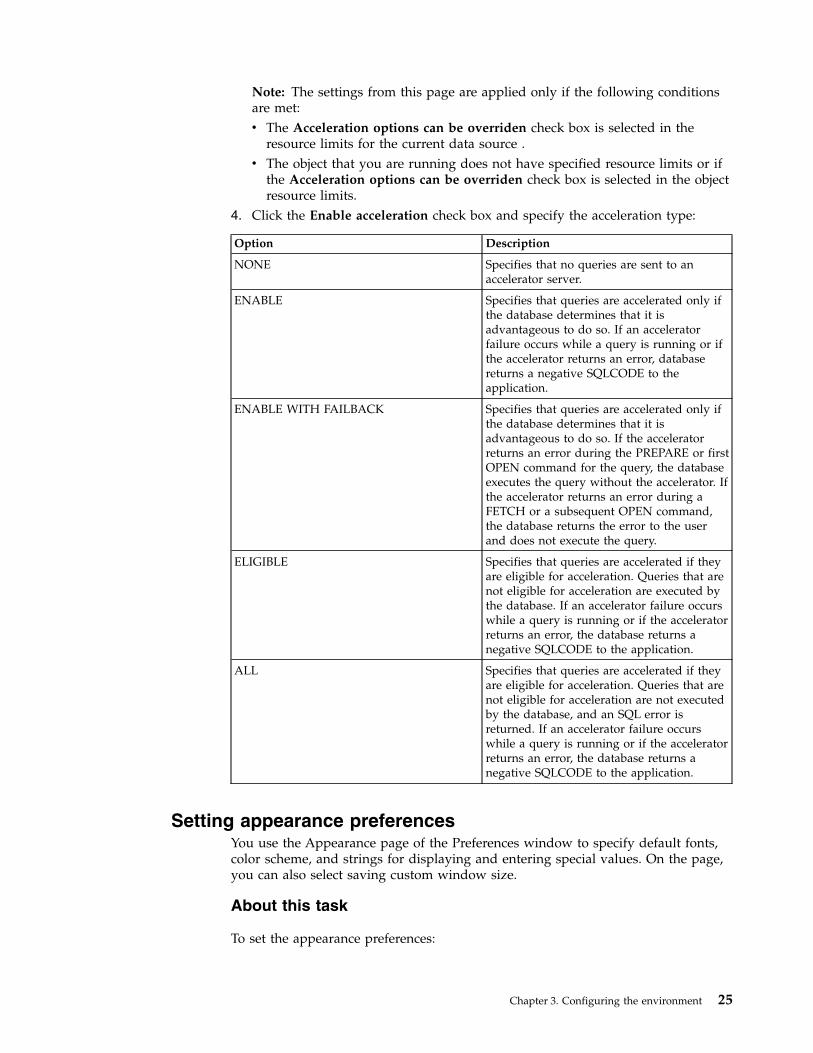
4. Click the Enable acceleration check box and specify the acceleration type:
Option Description
NONE Specifies that no queries are sent to anaccelerator server.
ENABLE Specifies that queries are accelerated only ifthe database determines that it isadvantageous to do so. If an acceleratorfailure occurs while a query is running or ifthe accelerator returns an error, databasereturns a negative SQLCODE to theapplication.
ENABLE WITH FAILBACK Specifies that queries are accelerated only ifthe database determines that it isadvantageous to do so. If the acceleratorreturns an error during the PREPARE or firstOPEN command for the query, the databaseexecutes the query without the accelerator. Ifthe accelerator returns an error during aFETCH or a subsequent OPEN command,the database returns the error to the userand does not execute the query.
ELIGIBLE Specifies that queries are accelerated if theyare eligible for acceleration. Queries that arenot eligible for acceleration are executed bythe database. If an accelerator failure occurswhile a query is running or if the acceleratorreturns an error, the database returns anegative SQLCODE to the application.
ALL Specifies that queries are accelerated if theyare eligible for acceleration. Queries that arenot eligible for acceleration are not executedby the database, and an SQL error isreturned. If an accelerator failure occurswhile a query is running or if the acceleratorreturns an error, the database returns anegative SQLCODE to the application.
Setting appearance preferencesYou use the Appearance page of the Preferences window to specify default fonts,color scheme, and strings for displaying and entering special values. On the page,you can also select saving custom window size.
About this task
To set the appearance preferences:
Chapter 3. Configuring the environment 25
Procedure1. Select View > Preferences. The Preferences window opens. Select Appearance
from the tree.2. In the Default Fonts area, define the font type for headings and columns of
query results, classic reports.3. Specify a string in the Display null values as field that QMF will use to
display null values that are retrieved from a database data source.4. Specify a string in the Enter null values as field that you will use when you
enter null values in the query results or in database tables using the tableeditor.
5. Specify a string in the Enter default values as field that you will use whenyou enter default values in the query results or in database tables using thetable editor.
6. Select from the Color scheme in text editors drop-down list what type ofcolor scheme will be supported in the text editors. In most instances you willchoose QMF to specify that the default color schemes used by the text editorsare acceptable. If you will be working in high contrast mode, you will have toselect system default.
7. If you use a high definition display, select the Display large icons check boxin the Icon Size area to double the size of all the icons.
8. If you customize the size and position of the windows in the application andwant to save these changes, in the Window Size area, select Save customwindow size and position check box. To revert your changes, clear the checkbox.
9. Click Apply to save your preferences choices.10. Click Restore Defaults to restore the default preference values.11. Click OK to close the Preferences dialog box.
Setting the audit systemUse the Audit page of the Preferences window to enable and configure the auditsystem for QMF.
About this task
To enable and configure the audit system:
Procedure1. From the main menu, select View > Preferences.2. On the left side of the window, select Audit.3. Select the Enable audit check box.4. To set the audit system to record only failed events, select the Record failed
events only check box.5. In the Backup interval (days) field, specify a time interval to define how often
database backup files are created.
Note: After backup files are created, the original database is cleared.6. In the Delete all backup files older than (days) field, specify an age for
database backup files to be deleted.7. Select the Record SQL statements for users check box to set the audit system
to record SQL statements made by users for queries against the database.v Select All Users to record SQL statements made by all users.
26 Installing and Managing QMF for Workstation and QMF for WebSphere
v Click the Specify Users... button to open the Data Source Users dialog andspecify particular users. Click OK to accept the changes or Cancel to leavethe dialog without saving the changes.
8. Click Apply to apply the settings and remain on the page or click OK to applythe settings and close the window.
Results
After audit is enabled, all information that is gathered by the audit system is savedto the tables under the AUDIT schema in an H2 database. This database is created inthe application data folder. The summarized information from all the tables ispresented in the AUDIT_VIEW table. For information about reading audit records, seeChapter 8, “Using the audit system,” on page 189.
Setting dashboard runtime preferencesYou use the Dashboard Runtime page of the Preferences dialog to specify theGoogle Map API key.
About this task
To specify the dashboard runtime user preferences for the current QMF applicationinterface session:
Procedure1. Select View > Preferences. The Preferences window opens. Select Dashboard
Runtime from the tree.2. Set values for the Dashboard Runtime: You can obtain the Google Map APIs
from the Google Code web site.v In the Google Maps JavaScript API key field, specify the Google Maps
JavaScript API key to enable the usage of the Google Map layout object invisual dashboards in the HTML5 rendering mode.You can obtain the Google Maps JavaScript APIs from the Google Developersweb site.
v Set the Display null values as to specify how null values are displayed inthe dashboards.
3. Click Apply to save your preferences choices.4. Click Restore Defaults to restore the default preference values.5. Click OK to close the Preferences window.
Setting SMTP and email preferencesYou use the Email page of the Preferences window to specify the list of availableSMTP servers and email notifications from the application.
About this task
The following topics describe how to specify SMTP server preferences and to setemail notifications from scheduled tasks:
Setting SMTP server preferencesYou use the SMTP area of the Preferences window to specify the list of availableSMTP servers.
Chapter 3. Configuring the environment 27
About this task
Defining parameters for commonly used SMTP servers in the SMTP area savesusers from having to specify these parameters every time they need to send anemail message by using these servers. For example, if the SMTP server password isexpired, you just need to change it once in the SMTP area instead of updatingauthorisation information for every object that uses this SMTP server.
The servers listed in the SMTP area can be used in the following procedures:v Adding a Send Mail action to a Visual Projectv Sending email messages by using the File > Send to commandv Sending email messages by using the MAIL TO procedure command.
To specify SMTP server preferences:
Procedure1. Select View > Preferences to open the Preferences window. Select Email from
the tree and navigate to the SMTP area.2. Add a new server to the list by clicking Add Server.3. In the SMTP window specify SMTP server parameters including its name,
address and port number.4. Optional: If the SMTP server requires authentication, select Use SMTP
authentication, and then specify user name and password in the User andPassword fields.
5. Optional: If it is necessary to specify additional access preferences, clickAdvanced to open the Advanced SMTP Settings window where you can addrequired keywords supported by javamail. Click OK.
6. Click OK to close the SMTP window and then click Apply to save yourpreferences choices.
Tip: Select or clear the Enabled check box to control the SMTP settingsglobally.
7. Optional: If you need to restore default preferences, click Restore Defaults.8. Click OK to close the Preferences window.
Specifying email notification preferencesYou can globally configure a list of email notifications with debug information,which are sent for failed scheduled tasks. This information can be useful for fastfixing the problems with scheduled tasks.
Before you begin
Note: For remote tasks the preferences must be specified on the web server.
About this task
To configure an email notification:
Procedure1. Select View > Preferences to open the Preferences window. Select Email from
the tree.2. In the Email Notifications area, click Add Notification to add a configuration
for sending notifications.
28 Installing and Managing QMF for Workstation and QMF for WebSphere

3. In the Email Notification Settings window, type the name for the notification inthe Name field.
4. In the Message Properties area, specify the following settings:v Select the format of the body text from the Format list. The available formats
are Text and HTML.v The address to that the email must be sent in the To field.v The address to that a carbon copy of the email must be sent in the Cc field.v The address from that the email must be sent in the From field.
5. To specify SMTP server parameters, click SMTP Settings. In the SMTP Settingswindow, specify whether to use the server that is predefined by administratoror a custom one.a. If you decide to use a predefined SMTP server, select the server from the
list of predefined servers or click Add Server to create one.b. If you decide to use a custom server, specify server parameters: its address
and port number. If the SMTP server requires authentication, select UseSMTP authentication, and then specify user name and password. If it isnecessary to specify extra access preferences, click Advanced to open theAdvanced SMTP Settings window where you can add keywords that aresupported by javamail. Click OK.
Click OK to close the SMTP Settings window.6. Click OK to save the specified notification settings. The specified notification
appears in the Email Notifications area. You can select it for a particular taskin the Task List window.
Tip: Select or clear the Enabled check box to control the notifications globally.
Working with global variablesGlobal variables are variables that stay active while the current session of QMF isactive. This is in contrast to substitution variables that are active only during theexecution of an object (query, form, procedure).
For objects that use substitution variables, values are entered via a window whenthe object is run. After the object runs, the variable and the value that you used nolonger exists. For objects that use global variables, the value currently defined forthe global variable is used.
There are two types of global variables:v System global variables are pre-loaded with the QMF application. That means their
values are re-initialized each time you open the QMF application. System globalvariables begin with the letters DSQQW, DSQAO, DSQEC, DSQDC, and DSQCP.You cannot add or delete system global variables. However, you can edit thedefault values for the system global variables.
v User global variables are defined by the user. User global variables can bespecified with any unique name that does not begin with the letters DSQQW,DSQAO, DSQEC, DSQDC, and DSQCP. User global variables values can beavailable during the current session or permanently. Use QMF client componentsto work with user global variables.
Using the Global Variables page of the Preferences window you can view, add,delete and edit your user global variables. You can also edit the values of thesystem global variables.
Chapter 3. Configuring the environment 29

Specifying user variablesYou use the Global Variables page of the Preferences window to view, add, delete,and edit user global variables.
About this task
To view, add, edit and delete user defined global variables:
Procedure1. Select View > Preferences. The Preferences window opens. Select Global
Variables from the tree. The Global Variables page opens.2. The system and user global variables that are defined for your session are
listed in the Variables list box. The name of the global variable is listed in theName field. The current value for the global variable is listed in the Valuefield. The lifetime setting is listed in the Variable Lifetime field.
3. To add a user-defined variable, click the Add button. The New Variablewindow opens.a. In the Name field, type the name of the new user variable
Note: You can type any combination of unique characters that are notused. Do not begin a user variable with the system global variable prefixesof DSQQW, DSQAO, DSQEC, DSQDC, and DSQCP.
b. Optional: In the Description field, type the text describing the uservariable that is displayed in the Description column on the GlobalVariables page.
c. In the Value field, type the initial value of the user variable.d. In the Variable Lifetime area, select the lifetime for the created variable:v If you want the variable to be available for use during the current QMF
session, select Current session.v If you want the variable to be available persistently, select Permanent.
This option is useful when you use the variable in different objects anddistribute them among other users.
e. Click OK.
Note: User variables cannot be used with the task scheduler in the thin client.4. To edit the value of a user variable, click the Value field for the variable that
you want to change and type the new value for the variable.5. To edit the description of the permanent user variables, click the Description
field for the variable that you want to change and type the text.
Note: The description of the current session variable is read-only.6. To edit the lifetime of a user variable, click the Variable Lifetime field for the
variable that you want to change and select the lifetime that you want toapply to this variable.
7. To delete a user variable, select an existing user variable from the Variableslist and click the Remove button. The user variable is deleted.
8. Click Apply to save your preferences choices.9. Click Restore Defaults to restore the default preference values.
10. Click OK to close the Preferences dialog.
30 Installing and Managing QMF for Workstation and QMF for WebSphere
Editing system global variable valuesYou use the Global Variables page of the Preferences dialog to edit any systemglobal variable values.
About this task
To edit system global variable values:
Procedure1. Select View > Preferences. The Preferences window opens. Select Global
Variables from the tree. The Global Variables page opens.2. The system global variables are listed in the Variables list by name. System
global variable start with the prefix of DSQQW, DSQAO, DSQEC, DSQDC,or DSQCP.
Restriction: System global variables whose names start with DSQAO cannotbe edited.
3. The current system global variable values are listed in the Value field. To editthe value of a global variable, click in the Value field for the system globalvariable that you want to change. Type the new value for the system globalvariable in the Value field.
4. Click Restore Defaults to restore the default values for all the system globalvariables.
5. Click Apply to save your preferences choices.6. Click OK to close the Preferences window.
Setting help preferencesIf you are using QMF for Workstation, you use the Help page of the Preferenceswindow to specify the default values for how help information is displayed and tochange the interface and port specification for the internal server that the helpsystem uses.
About this task
To change the web browser adapter setting:
Procedure1. Select View > Preferences. The Preferences window opens. Select Help from
the tree.2. The help system can display information in either the Help view or in a
browser. If the help is displayed in a browser, the browser can be an embeddedbrowser or a full external browser. If the embedded browser is supported onyour system, help will use it by default to display help. If you prefer to alwaysuse a full external browser, select Use external browser from the drop-downlist.
3. By default, context-sensitive help for workstation windows is displayed in theHelp view. If you prefer to display workstation window context-sensitive helpin infopops, select Open window context help in an infopop from thedrop-down list.
4. By default, context-sensitive help for dialogs is displayed in the dialog's tray,which is similar to the Help view. If you prefer to display dialogcontext-sensitive help in infopops, select Open dialog context help in aninfopop from the drop-down list.
Chapter 3. Configuring the environment 31

5. Click Apply to save your preferences choices.6. Click Restore Defaults to restore the default preference values.7. Click OK to close the Preferences window.
Including help content from a remote serverThe help system includes an internal server that serves the help contents to thebrowser. You use this preference page to change the interface and port that theinternal server uses.
About this task
You should only change these settings if you experience problems and cannot viewhelp with the default preferences.
To change the interface and port that the help server uses:
Procedure1. Select View > Preferences. The Preferences dialog opens. Expand the Help
branch by clicking the plus sign. Select Content from the tree.2. Select the Include help content from a remote infocenter check box. The
Remote Infocenter window becomes available.3. Click Add . The Add new infocenter window opens.4. Specify the name of a local IP interface to be used by the server in the Name
field.5. Specify the host of a local IP interface to be used by the server in the Host
field.6. Specify the URL of a local IP interface to be used by the server in the Path
field.7. Select Use port and specify the number of a specific port the server will listen
to.8. Click OK. The Add new infocenter window closes and control returns to the
Preferences window. The new infocenter is displayed in the RemoteInfocenters window.
9. To edit an infocenter, click Edit . The Edit [infocenter name] infocenterwindow opens.
10. To delete and infocenter, click Delete . The selected infocenter is removedfrom the list.
11. To view the properties of a specific infocenter, click View Properties . TheProperties for [infocenter name] window opens with the name, host, path,port, and URL displayed.
12. To test an infocenter's connection to the local IP interface, click TestConnection . The Test Connection window opens displaying the test results.
13. To disable an infocenter without deleting it, click Disable . The infocenter isnow disabled, and its status in the Enabled column is changed to disabled.
14. Click Apply to save your preferences choices.15. Click Restore Defaults to restore the default preference values.16. Click OK to close the Preferences window.
Setting JDBC preferencesYou can use the Preferences window to set up the JDBC driver information.
32 Installing and Managing QMF for Workstation and QMF for WebSphere
About this task
QMF administrators are responsible for distributing the JDBC driver informationthat users will need in order to access any data source. In most cases,administrators distribute this information by deploying a preconfigured JDBClibrary settings file when the application interface that you are using is installed.
Advanced users can define or change JDBC driver location information using theJDBC Libraries page of the Preferences window to specify the JDBC driverinformation for each type of database (such as Db2, Informix, Oracle) that will beaccessed. The JDBC driver locations must be accessible to QMF. QMF will retainthe JDBC driver information. You would only repeat this specification process toadd new drivers or make changes to the properties of an existing driver.
To define JDBC driver information:
Procedure1. Select View > Preferences to open the Preferences window. Select JDBC
Libraries. The JDBC Libraries page opens. All of the JDBC driver libraries thatyou have already set up are listed in the JDBC driver libraries area. The JARfiles associated with selected driver library are listed in the Driver files area.Additional information about the selected driver library is displayed on theDetails panel.
2. To add new JDBC driver, select Add Driver. The Add New Driver Librarywindow opens.
3. The JDBC driver information for each type of database is organized bylibraries. Enter a name for the library in the Enter new library name field. It isrecommended that the name that you specify describes the JDBC informationthat will be included in the library. For example, if you are adding JDBC driverinformation for accessing Db2 databases, you might call the library Db2.However, this is a descriptive field and can include any text.
4. Specify the actual name of the driver class that will be used in the Driver classname field. This can be found in your JDBC driver documentation. Forexample: com.ibm.db2.jcc.DB2Driver.
5. Optional: Specify a generic example of a correctly formatted URL that could beused to connect to the database in the URL templates field. For example, if youare adding JDBC driver information for accessing Db2 databases, you mightspecify the following JDBC URL template: jdbc:db2://host:50000/database. Thegeneric information as specified in the template is presented when you areadding data sources to the repository and when you are creating repositoryconnections. You will replace the generic information with the specific databaseinformation.
6. Click OK to create the driver library and close the Add New Driver Librarywindow.
7. If you are using QMF for Workstation, add the location information for theJDBC driver files to the library.If you are using QMF for Workstation, click AddDriver Files. The Add Files to [libraryname] window opens. Search for andselect the JDBC driver files that you want to add. Click Open. The location ofthe JDBC driver files is saved in the JDBC library that you have selected.
8. You can make the following changes to the JDBC driver information:v To edit the JDBC driver library information, select an existing JDBC driver
library from the list and click Edit Driver. The Edit Driver Library windowopens where you can make changes to the Library name, Driver class name,and JDBC URL template fields.
Chapter 3. Configuring the environment 33
v If you are using QMF for Workstation, to edit the name and location of thefiles that contain the JDBC drivers, select a file from the list of files that havebeen added to the JDBC library, and click Edit.
v To remove a JDBC driver library, select an existing JDBC driver library fromthe list and click Remove Driver. The library, including all the JAR files thatit contains, is removed.
v If you are using QMF for Workstation, to remove a JAR file from a JDBCdriver library, select an existing file from the list and click Remove.Toremove a JAR file from a JDBC driver library, select an existing file from thelist and click Remove Driver File. The file is removed.
9. Click OK. The JDBC library information is saved. The Preferences windowcloses. You must repeat this process for each type of JDBC driver that will beused to access various database data sources such as Informix or SQL Server.
Setting LOB preferencesYou use the LOBs page of the Preferences dialog to specify options that willcontrol retrieving and saving LOB data.
About this task
LOB data (Large Object data) is large text or binary objects in a database. LOBs canbe large strings of text, images, and so on. If a query result set contains a largeamount of LOB data, processing resources could be severely strained. The LOBpreferences page contains a number of LOB data retrieval restrictions that you canuse to manage repository resources. To specify LOB data preferences:
Procedure1. Select View > Preferences. The Preferences window opens. Select LOBs from
the tree.2. Check Override LOB options if possible to grant yourself the ability to
override the LOB options that have been specified by your QMF administratorfor your resource limits group. Your administrator must have given yourresource limits group permission to override the LOB options. If you do nothave permission to override LOB options, this check box is not available.
3. Use the LOB Retrieval Option radio buttons to specify how large object data(LOB) will be retrieved. There are four choices:v Select Disable LOB columns to disable LOB data retrieval. By selecting this
option, you will not be able to query any table that contains LOB data.v Select Disable LOB data retrieval to disable LOB data retrieval but allow
access to the other columns in the tables that contain LOB data. By selectingthis option, you can query tables that contain LOB data and result data forall columns except those that contain LOBs will be returned.
v Select Retrieve LOB data on demand to specify that you want to retrieve allLOB data from a table but only display selected columns of the LOB data inthe query results.By selecting this option, you can query tables that contain LOB data andyour result data will be returned for all columns that contain LOB objects. Toconserve resources, however, the retrieved LOB data is stored in a file.Pointers (<LOB LOCATOR>) to the LOB data objects are displayed in the queryresults. You click the pointer to view the LOB data.You can also pull the data from the database by double-clicking on thepointer.
34 Installing and Managing QMF for Workstation and QMF for WebSphere
v Select Retrieve LOB data automatically to specify that you want to retrieveall LOB data from a table and immediately display the retrieved LOB data inthe query results.This option pulls ALL of the LOB data for ALL of the LOB columns from thedatabase to the local computer. The actual LOB data is not displayed in gridsand reports. Instead, pointers to the LOB data are displayed.This option can potentially consume a large amount of resources on the localcomputer.
4. Use the LOB Saving Option radio buttons to specify whether you can savelarge object data (LOB). There are two choices:v Select Disable LOB data to disable saving LOB data on a database data
source.v Select Enable LOB data to allow saving LOB data on a database data source.
5. Specify the maximum size of a LOB column in the Maximum LOB columnsize field. You specify the size in kilobytes, up to 2G (the maximum LOB size).The default is 0, which specifies there is no maximum size. If you query a tablewith LOB data that is larger than the maximum, the LOB data will not bereturned for display.
6. Click Apply to save your preferences choices.7. Click Restore Defaults to restore the default preference values.8. Click OK to close the Preferences window.
Setting log preferencesYou use the Log page of the Preferences window to activate a log file that willtrack QMF processing information.
About this task
The log file information can be useful in debugging.
To specify the log file preferences for the QMF session:
Procedure1. Select View > Preferences. The Preferences window opens. Select Log from the
tree.2. Check Enable log to activate the log file for debugging purposes. If this check
box is selected, the log file option fields are enabled. Check one or more of thelog file options to indicate what information should be gathered. It isrecommended that all options remain checked. The available log file optionsare as follows:v Print stack trace for log exceptionsv Print report to log filev Print log class and method
3. Click Apply to save your preferences choices.4. Click Restore Defaults to restore the default preference values.5. Click OK to close the Preferences window.
Chapter 3. Configuring the environment 35
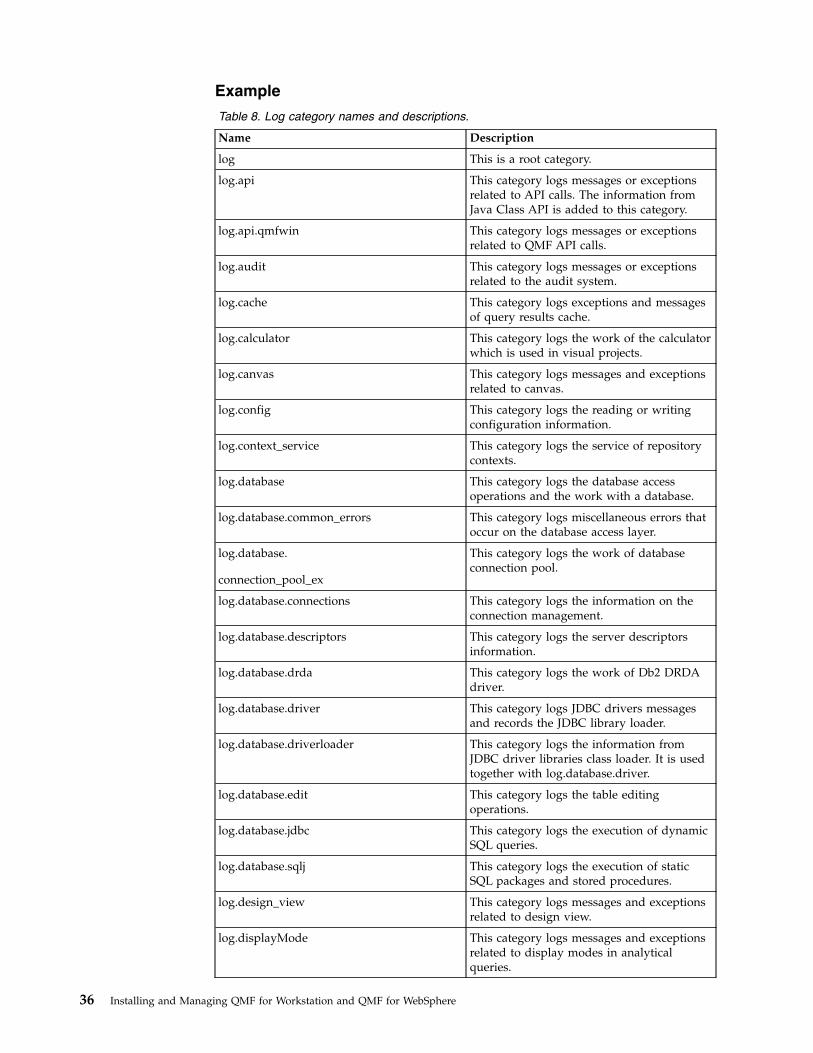
Example
Table 8. Log category names and descriptions.
Name Description
log This is a root category.
log.api This category logs messages or exceptionsrelated to API calls. The information fromJava Class API is added to this category.
log.api.qmfwin This category logs messages or exceptionsrelated to QMF API calls.
log.audit This category logs messages or exceptionsrelated to the audit system.
log.cache This category logs exceptions and messagesof query results cache.
log.calculator This category logs the work of the calculatorwhich is used in visual projects.
log.canvas This category logs messages and exceptionsrelated to canvas.
log.config This category logs the reading or writingconfiguration information.
log.context_service This category logs the service of repositorycontexts.
log.database This category logs the database accessoperations and the work with a database.
log.database.common_errors This category logs miscellaneous errors thatoccur on the database access layer.
log.database.
connection_pool_ex
This category logs the work of databaseconnection pool.
log.database.connections This category logs the information on theconnection management.
log.database.descriptors This category logs the server descriptorsinformation.
log.database.drda This category logs the work of Db2 DRDAdriver.
log.database.driver This category logs JDBC drivers messagesand records the JDBC library loader.
log.database.driverloader This category logs the information fromJDBC driver libraries class loader. It is usedtogether with log.database.driver.
log.database.edit This category logs the table editingoperations.
log.database.jdbc This category logs the execution of dynamicSQL queries.
log.database.sqlj This category logs the execution of staticSQL packages and stored procedures.
log.design_view This category logs messages and exceptionsrelated to design view.
log.displayMode This category logs messages and exceptionsrelated to display modes in analyticalqueries.
36 Installing and Managing QMF for Workstation and QMF for WebSphere
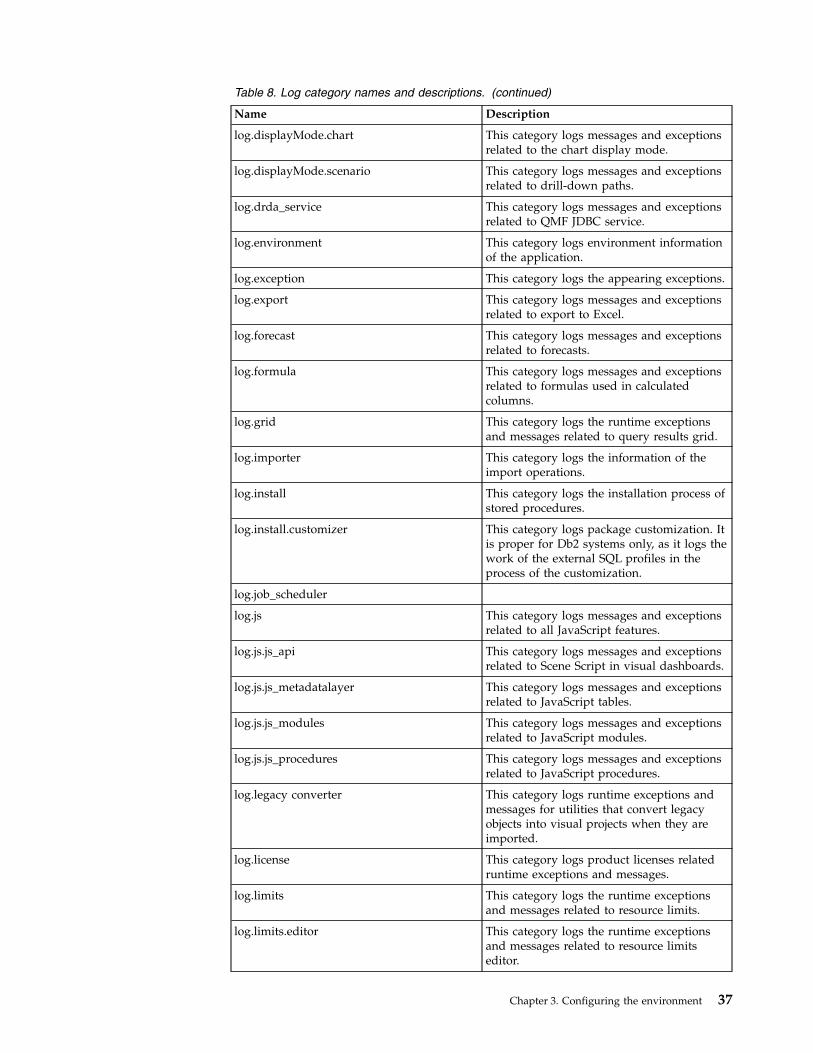
Table 8. Log category names and descriptions. (continued)
Name Description
log.displayMode.chart This category logs messages and exceptionsrelated to the chart display mode.
log.displayMode.scenario This category logs messages and exceptionsrelated to drill-down paths.
log.drda_service This category logs messages and exceptionsrelated to QMF JDBC service.
log.environment This category logs environment informationof the application.
log.exception This category logs the appearing exceptions.
log.export This category logs messages and exceptionsrelated to export to Excel.
log.forecast This category logs messages and exceptionsrelated to forecasts.
log.formula This category logs messages and exceptionsrelated to formulas used in calculatedcolumns.
log.grid This category logs the runtime exceptionsand messages related to query results grid.
log.importer This category logs the information of theimport operations.
log.install This category logs the installation process ofstored procedures.
log.install.customizer This category logs package customization. Itis proper for Db2 systems only, as it logs thework of the external SQL profiles in theprocess of the customization.
log.job_scheduler
log.js This category logs messages and exceptionsrelated to all JavaScript features.
log.js.js_api This category logs messages and exceptionsrelated to Scene Script in visual dashboards.
log.js.js_metadatalayer This category logs messages and exceptionsrelated to JavaScript tables.
log.js.js_modules This category logs messages and exceptionsrelated to JavaScript modules.
log.js.js_procedures This category logs messages and exceptionsrelated to JavaScript procedures.
log.legacy converter This category logs runtime exceptions andmessages for utilities that convert legacyobjects into visual projects when they areimported.
log.license This category logs product licenses relatedruntime exceptions and messages.
log.limits This category logs the runtime exceptionsand messages related to resource limits.
log.limits.editor This category logs the runtime exceptionsand messages related to resource limitseditor.
Chapter 3. Configuring the environment 37
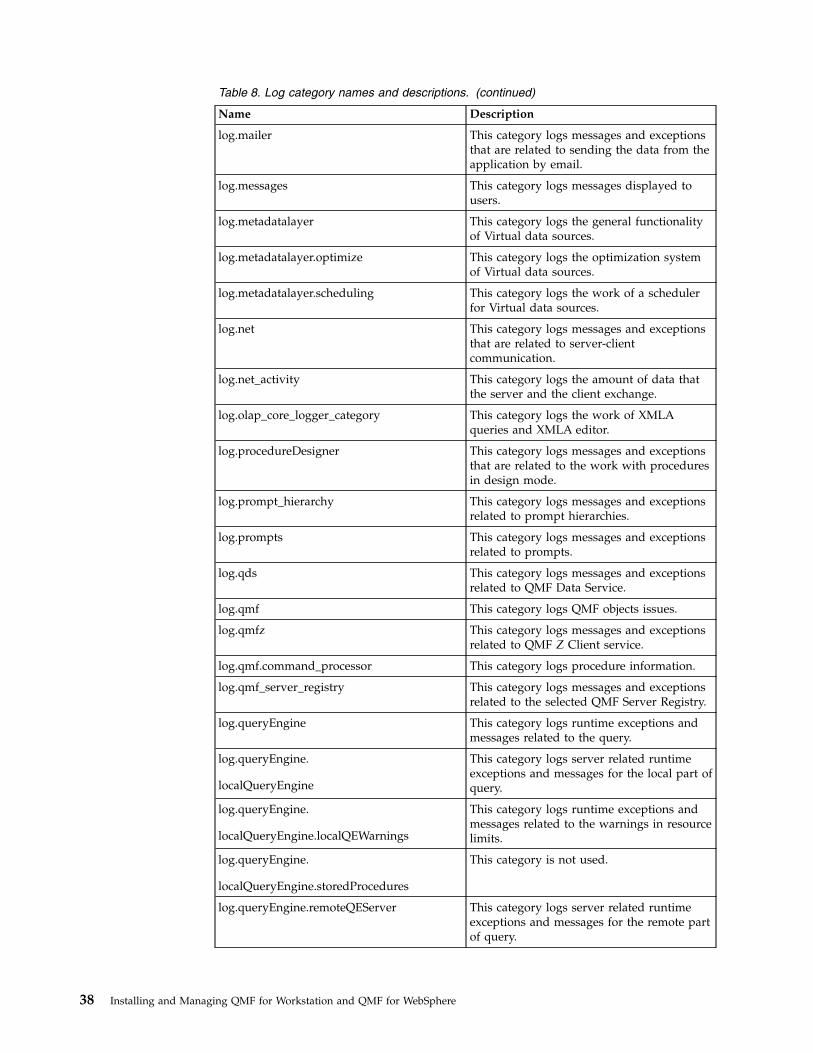
Table 8. Log category names and descriptions. (continued)
Name Description
log.mailer This category logs messages and exceptionsthat are related to sending the data from theapplication by email.
log.messages This category logs messages displayed tousers.
log.metadatalayer This category logs the general functionalityof Virtual data sources.
log.metadatalayer.optimize This category logs the optimization systemof Virtual data sources.
log.metadatalayer.scheduling This category logs the work of a schedulerfor Virtual data sources.
log.net This category logs messages and exceptionsthat are related to server-clientcommunication.
log.net_activity This category logs the amount of data thatthe server and the client exchange.
log.olap_core_logger_category This category logs the work of XMLAqueries and XMLA editor.
log.procedureDesigner This category logs messages and exceptionsthat are related to the work with proceduresin design mode.
log.prompt_hierarchy This category logs messages and exceptionsrelated to prompt hierarchies.
log.prompts This category logs messages and exceptionsrelated to prompts.
log.qds This category logs messages and exceptionsrelated to QMF Data Service.
log.qmf This category logs QMF objects issues.
log.qmfz This category logs messages and exceptionsrelated to QMF Z Client service.
log.qmf.command_processor This category logs procedure information.
log.qmf_server_registry This category logs messages and exceptionsrelated to the selected QMF Server Registry.
log.queryEngine This category logs runtime exceptions andmessages related to the query.
log.queryEngine.
localQueryEngine
This category logs server related runtimeexceptions and messages for the local part ofquery.
log.queryEngine.
localQueryEngine.localQEWarnings
This category logs runtime exceptions andmessages related to the warnings in resourcelimits.
log.queryEngine.
localQueryEngine.storedProcedures
This category is not used.
log.queryEngine.remoteQEServer This category logs server related runtimeexceptions and messages for the remote partof query.
38 Installing and Managing QMF for Workstation and QMF for WebSphere
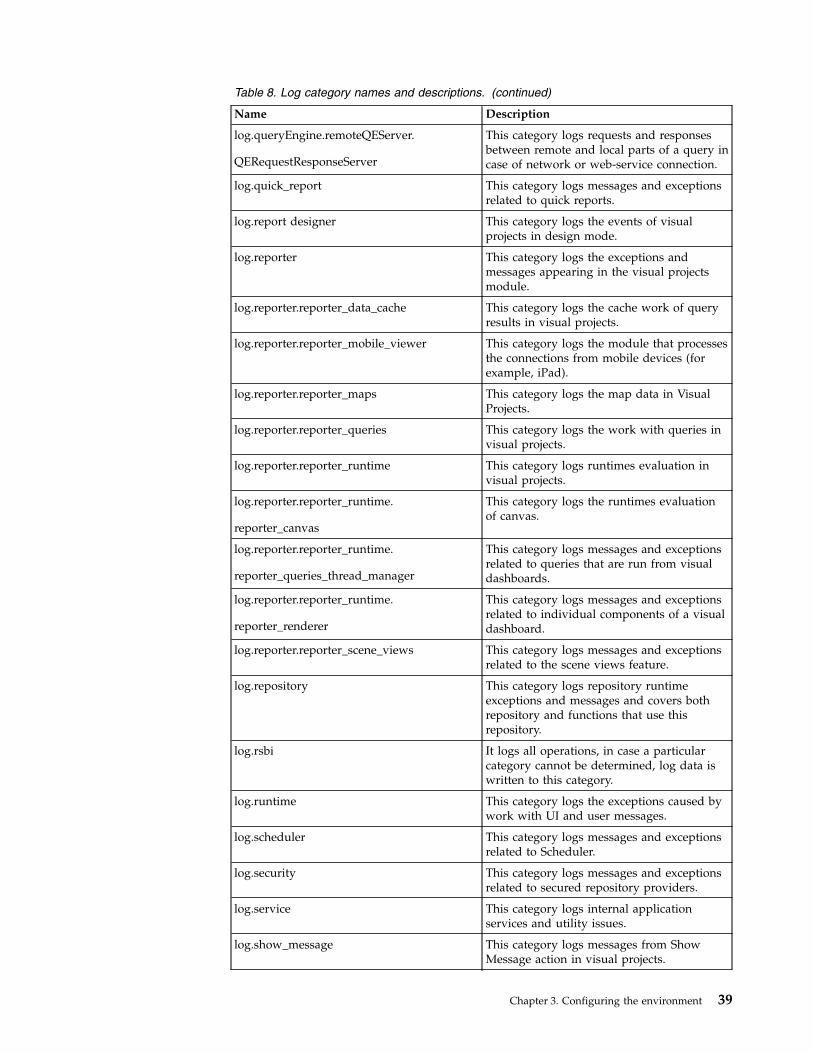
Table 8. Log category names and descriptions. (continued)
Name Description
log.queryEngine.remoteQEServer.
QERequestResponseServer
This category logs requests and responsesbetween remote and local parts of a query incase of network or web-service connection.
log.quick_report This category logs messages and exceptionsrelated to quick reports.
log.report designer This category logs the events of visualprojects in design mode.
log.reporter This category logs the exceptions andmessages appearing in the visual projectsmodule.
log.reporter.reporter_data_cache This category logs the cache work of queryresults in visual projects.
log.reporter.reporter_mobile_viewer This category logs the module that processesthe connections from mobile devices (forexample, iPad).
log.reporter.reporter_maps This category logs the map data in VisualProjects.
log.reporter.reporter_queries This category logs the work with queries invisual projects.
log.reporter.reporter_runtime This category logs runtimes evaluation invisual projects.
log.reporter.reporter_runtime.
reporter_canvas
This category logs the runtimes evaluationof canvas.
log.reporter.reporter_runtime.
reporter_queries_thread_manager
This category logs messages and exceptionsrelated to queries that are run from visualdashboards.
log.reporter.reporter_runtime.
reporter_renderer
This category logs messages and exceptionsrelated to individual components of a visualdashboard.
log.reporter.reporter_scene_views This category logs messages and exceptionsrelated to the scene views feature.
log.repository This category logs repository runtimeexceptions and messages and covers bothrepository and functions that use thisrepository.
log.rsbi It logs all operations, in case a particularcategory cannot be determined, log data iswritten to this category.
log.runtime This category logs the exceptions caused bywork with UI and user messages.
log.scheduler This category logs messages and exceptionsrelated to Scheduler.
log.security This category logs messages and exceptionsrelated to secured repository providers.
log.service This category logs internal applicationservices and utility issues.
log.show_message This category logs messages from ShowMessage action in visual projects.
Chapter 3. Configuring the environment 39
Table 8. Log category names and descriptions. (continued)
Name Description
log.statistics This category is used only as a container.
log.statistics.queryEngine This category logs statistics of the time spenton separate blocks of a query executionprocess.
log.time_trace This category logs messages and exceptionsrelated to the time trace function.
log.tracking This category logs exceptions and messagesrelated to object tracking.
log.transformation This category logs messages and exceptionsrelated to query transformations.
log.transformation.complex This category logs messages and exceptionsrelated to complex transformations.
log.transformation.simple This category logs messages and exceptionsrelated to simple transformations.
log.ui This category logs user interface operations.
log.value This category logs only the value runtimeexceptions and messages in visual projects.
log.web.ide This category logs the messages andexceptions that are related to the launch ofQMF for WebSphere and its work.
Setting output preferencesYou can use the Output page of the Preferences window to activate the Outputview that tracks the information about errors, queries, procedures, and connectionsin QMF.
About this task
The information from the Output view can be useful for debugging. It can bedelivered as a report in the Output view and automatically added to the log file.
To specify the output file preferences for the QMF session:
Procedure1. Select View > Preferences. The Preferences window opens. Select Output from
the tree.2. On the Output page, you can specify the following options:
Show errorsThis option displays all error texts in the Output view.
Show query textThis option displays all texts of the run queries in the Output view.
Show procedure textThis option displays all texts of the run procedures in the Output view.
Show connection statusThis option displays the statuses of connections to data sources in theOutput view.
40 Installing and Managing QMF for Workstation and QMF for WebSphere

Show debug messages for JavaScript featuresThis option displays debug messages for all JavaScript features:JavaScript procedures, JavaScript modules, and JavaScript tables.
Automatically activate Output viewWhen an error occurs or a message appears, this option automaticallyopens the Output view.
3. Click Apply to save your preferences choices.4. Click Restore Defaults to restore the default preference values.5. Click OK to close the Preferences window.
Setting QMF Data Service preferencesUse the QMF Data Service page of the Preferences window to specify the generalsettings for QMF Data Service data sources.
About this task
To set the general settings for QMF Data Service data sources, complete thefollowing procedure:
Procedure1. From the main menu, select View > Preferences. The Preferences window
opens.2. On the left side of the window, click QMF Data Service.3. In the Connection timeout (secs) field, specify the time interval to wait for the
connection with the server to be established.4. In the Operation timeout (secs) field, specify the time interval to wait for
operations to run.5. To shift the password symbols to upper case for the connection to the server,
select the Shift password to upper case check box.6. Click OK.
Results
You set the general preferences for QMF Data Service data sources.
Setting driver preferencesUse the Driver page of the Preferences window to specify the driver settings forQMF Data Service data sources.
About this task
To set the driver preferences, complete the following procedure:
Procedure1. From the main menu, select View > Preferences. The Preferences window
opens.2. On the left side of the window, expand QMF Data Service and click Driver.3. In the Connection overrides field, type one or more parameters and their
values that you want to insert into the JDBC URL that the application uses toconnect to the server. The specified values override the default values of theparameters. Consider the following example: HOST=<host_name>;PORT=<port_number>. Here, you specify that you want connect to the
Chapter 3. Configuring the environment 41

<host_name> server and use the <port_number> port. If you leave the fieldblank, the JDBC URL is generated automatically.
4. Click OK.
Results
You set the driver preferences for QMF Data Service data sources.
Setting SSL preferencesUse the SSL page of the Preferences window to specify the SSL certificates settingsfor QMF Data Service data sources.
About this task
To set the SSL certificates settings for QMF Data Service data sources, complete thefollowing procedure:
Procedure1. From the main menu, select View > Preferences. The Preferences window
opens.2. On the left side of the window, expand QMF Data Service and click SSL.3. To enable the use of SSL certificates, select the Enable the use of SSL
certificates for QMF Data Service check box.4. In the Communication with Server area, select the protocol that you want to
use for communication between the application and the server.5. In the Server Authentication area, select the authentication strategy that you
want to use.v If you want all server certificates to be authenticated, select Require server
validation.v If you want to allow the use of self-signed server certificates, select Allow
self-signed certificate.v If you want to allow the use of all certificates, select Trust all certificates.
6. If you choose the Require server validation or the Allow self-signedcertificate strategy, you must specify the necessary information in the fields inthe Server Authentication area.a. In the Truststore field, specify the path to the file that contains the server
certificate signed by the certification authority or a self-signed servercertificate.
b. In the Password field, type the password for the truststore file.c. From the Type list, select the type of your truststore file.
7. To enable the client authentication by the server, click Enable clientauthentication and type the necessary information in the fields in the ClientAuthentication area.a. In the Keystore field, specify the path to the file that contains the client
certificate signed by the certification authority or a self-signed clientcertificate.
b. In the Password field, type the password for the keystore file.c. From the Type list, select the type of your keystore file.d. Click Refresh and select the appropriate item from the Alias list.
8. Click OK.
42 Installing and Managing QMF for Workstation and QMF for WebSphere
Results
You set the SSL preferences for QMF Data Service data sources.
Setting QMF Server Registry preferencesQMF Server Registry is a connecting link between QMF Server and QMF clientcomponents. QMF Server Registry collects and provides a list of available QMFservers that the client components can then connect to.
About this task
To set the QMF Server Registry preferences, complete the following steps:
Procedure1. From the main menu, click View > Preferences.2. In the Preferences window, click QMF Server Registry.3. In the Current Server Registry area, from the Registry type list, select the type
of registry that you want to use. The following types are available:
None No registry is used.
Auto The registry that was discovered automatically is used. See the addressof the registry in the Registry URL field.
CustomUse the Custom Registry URL field to specify the custom QMF ServerRegistry.
The Status field displays the availability status of the selected registry. Torefresh the status, click Refresh Status.
4. Click Apply. Then click OK.
Setting the directory location preference for objects generatedby Export actions
You can set preferences in QMF so that objects generated from various QMFactions are exported to a specific location on either the local file system or theserver file system.
Before you begin
If you are using QMF for Workstation, create a folder on the local file system.
If you are using QMF for WebSphere, create a folder on application server filesystem.
When you set the Server-Side File System preference, you will point to one ofthese folders.
About this task
This task describes how to specify (through preference settings) the location towhich generated objects will be exported.
To set the export directory preference:
Chapter 3. Configuring the environment 43
Procedure1. Select View > Preferences and select Server-Side File System from the tree.2. Select the Enable access to the server file system check box.3. Type the path in the Root output directory field to indicate where generated
objects will be exported.When data and objects are generated by the EXPORT procedure, scheduled tasks(Copy or Execute object) or by event actions such as Export to PDF and Exportto Excel, they will be exported to path you specify.The directory you specify must exist on either the local file system or on theserver file system.
4. Type the path in the Root input directory field to indicate the path of the rootdirectory for dynamart source files.
Note: You need to specify a Root input directory path, otherwise the settingsare incorrect, and the EXPORT using server-side file system will yield an error.
5. Click Apply to save your preferences.6. To restore preferences to the default values, click Restore Defaults.7. Click OK to close the Preferences window.
Setting third party library preferencesYou use the Third-Party Libraries page of the Preferences window to specify thelocation of any third-party software that is required by QMF.
About this task
To specify the third party library preferences:
Procedure1. Select View > Preferences. The Preferences window opens. Select Third-Party
Libraries from the tree.2. The third-party software whose location has been defined to QMF is listed by
name, package name and location. In most instances, the location informationfor third party libraries is specified when QMF is installed.
3. To add additional location information for third party software, click Add. TheNew Third-Party Library window opens. Specify the path to the software in thePath field. If applicable, specify the packages name in the Packages (optional)field. Click OK. The path to the software is added to the Third party librarylist. Control returns to the Preferences window.
4. To edit the location information for defined third party software, select Edit.The Edit Library dialog opens. You can change the path to the selected softwarein the Path field. You can change the packages name in the Packages (optional)field. Click OK. The changes that you have made are applied. Control returnsto the Preferences window.
5. To remove third party library information, click the third party library in theThird party libraries list and click Remove. The third party library informationis removed from the list.
6. Click Apply to save your preferences choices.7. Click Restore Defaults to restore the default preference values.8. Click OK to close the Preferences window.
44 Installing and Managing QMF for Workstation and QMF for WebSphere
Specifying virtual data source preferencesYou use the Virtual Data Source page of the Preferences window to enable theautomatic cache refresh option for virtual data sources.
About this task
For detailed information about enabling automatic cache refresh for virtual datasources, see “Enabling automatic cache refresh for virtual and JavaScript datasources” on page 94.
Specifying Visual Designer preferencesIf you are using QMF for Workstation, you use the Visual Designer page of thePreferences window to specify preferences that will effect the creation of visualprojects.
About this task
To specify the preferences that will effect the creation of visual projects:
Procedure1. Select View > Preferences. The Preferences window opens. Select Visual
Designer from the tree.2. Click one of the Visual Designer Ruler Unit radio buttons to specify the
default units that will be used for the ruler that spans the editor window inthe Visual Designer perspective. Your choices are pixels, inches, orcentimeters.
3. Select a formatting schema for date values of a classic report in theFormatting for &DATE values drop-down list.
4. Select a formatting schema for time values of a classic report in theFormatting for &TIME values drop-down list.
5. Select the Reset global variables when entering runtime mode check box toreset the global variable values back to default values each time a visualproject is run.
6. Expand Visual Designer in the tree and select Fonts.7. To make a different set of fonts available for visual dashboards, specify the
path to a custom set of fonts in the Search directory field and click RefreshAssociations.
8. Select Project Explorer from the tree.9. Specify a specific number of times that you can undo an action in the design
editor in the Undo limit field. A value of '0' indicates that there is no limit tothe number of times that you can undo an action.
10. In the Rename preferences radio group, specify whether you will beprompted to confirm when you attempt to rename an object in the designeditor. The available options include:v Always prompt - You will always be prompted when you attempt to
rename an object.v Prompt when referenced - You will only be prompted when the object has
references to other objects.v Never prompt - You will never be prompted when you attempt to rename
an object.
Chapter 3. Configuring the environment 45
11. In the Delete preferences radio group, specify whether you will be promptedto confirm when you attempt to delete an object in the design editor. Theavailable options include:v Always prompt - You will always be prompted when you attempt to delete
an object.v Prompt when referenced - You will only be prompted when the object has
references to other objects.v Never prompt - You will never be prompted when you attempt to delete an
object.12. Click Apply to save your preferences choices.13. Click Restore Defaults to restore the default preference values.14. Click OK to close the Preferences window.
Switching QMF to the FIPS-140 security standardYou can switch QMF to the FIPS-140 computer security standard by configuring asecurity provider definition.
About this task
To switch to the FIPS-140 standard:
Procedure1. In the QMF installation directory, open the java.security file in edit mode.2. Find a list of security provider definitions by looking for the following:
security.provider.N=, where N represents a number.3. Insert the following line to the first position of this list:
security.provider.1=com.ibm.crypto.fips.provider.IBMJCEFIPS
4. Modify the numbers for the other security provider definitions in the list. Whenyou open QMF, the application will work in FIPS-140 mode.
Configuring repositories and connecting to the databaseYou need to configure the repositories and define the QMF connection to thedatabase.
About this task
Repositories provide a logical grouping of QMF objects (queries, procedures, visualreports, and visual dashboards) and contain the database connection informationand resource limits. Generally speaking, only administrators work withrepositories.
The tasks required to configure repositories and connect to a database vary,depending on whether you are configuring QMF for yourself or for multiple users.
If you are configuring QMF for multiple users, you perform the following tasks:1. Define the JDBC driver library2. Configure the repository storage3. Create a shared repository4. Define the connection to the database5. Create the repository connection
46 Installing and Managing QMF for Workstation and QMF for WebSphere
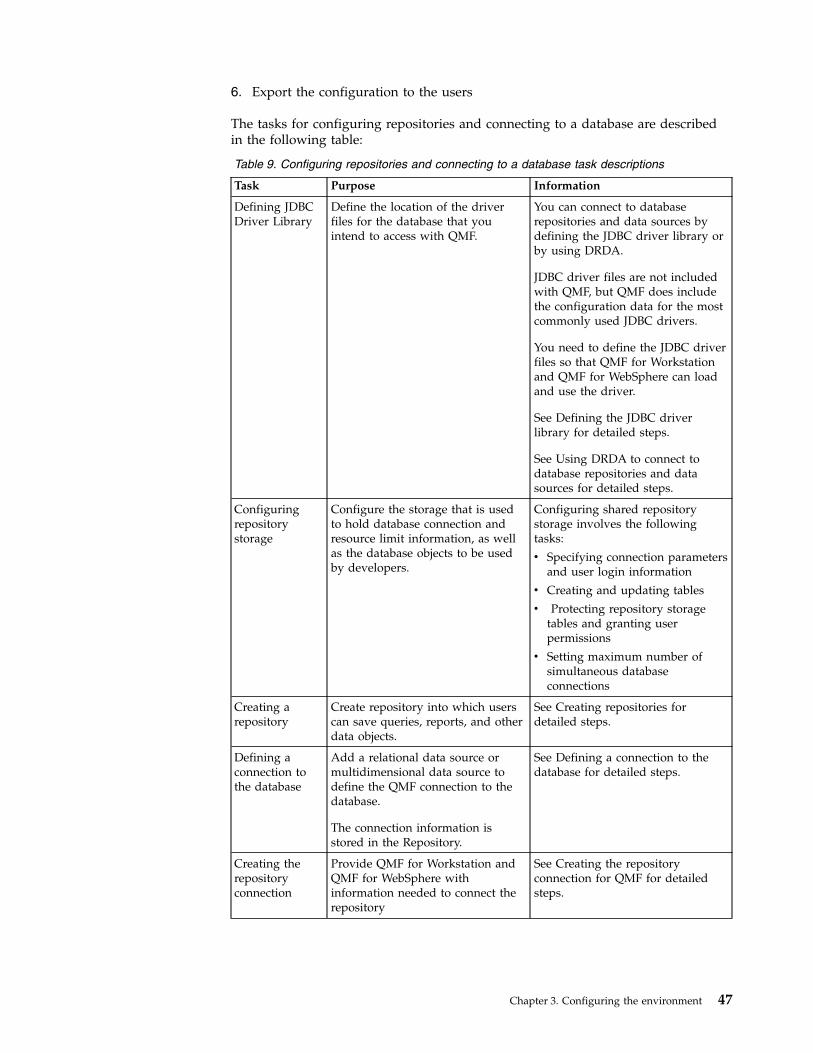
6. Export the configuration to the users
The tasks for configuring repositories and connecting to a database are describedin the following table:
Table 9. Configuring repositories and connecting to a database task descriptions
Task Purpose Information
Defining JDBCDriver Library
Define the location of the driverfiles for the database that youintend to access with QMF.
You can connect to databaserepositories and data sources bydefining the JDBC driver library orby using DRDA.
JDBC driver files are not includedwith QMF, but QMF does includethe configuration data for the mostcommonly used JDBC drivers.
You need to define the JDBC driverfiles so that QMF for Workstationand QMF for WebSphere can loadand use the driver.
See Defining the JDBC driverlibrary for detailed steps.
See Using DRDA to connect todatabase repositories and datasources for detailed steps.
Configuringrepositorystorage
Configure the storage that is usedto hold database connection andresource limit information, as wellas the database objects to be usedby developers.
Configuring shared repositorystorage involves the followingtasks:
v Specifying connection parametersand user login information
v Creating and updating tables
v Protecting repository storagetables and granting userpermissions
v Setting maximum number ofsimultaneous databaseconnections
Creating arepository
Create repository into which userscan save queries, reports, and otherdata objects.
See Creating repositories fordetailed steps.
Defining aconnection tothe database
Add a relational data source ormultidimensional data source todefine the QMF connection to thedatabase.
The connection information isstored in the Repository.
See Defining a connection to thedatabase for detailed steps.
Creating therepositoryconnection
Provide QMF for Workstation andQMF for WebSphere withinformation needed to connect therepository
See Creating the repositoryconnection for QMF for detailedsteps.
Chapter 3. Configuring the environment 47
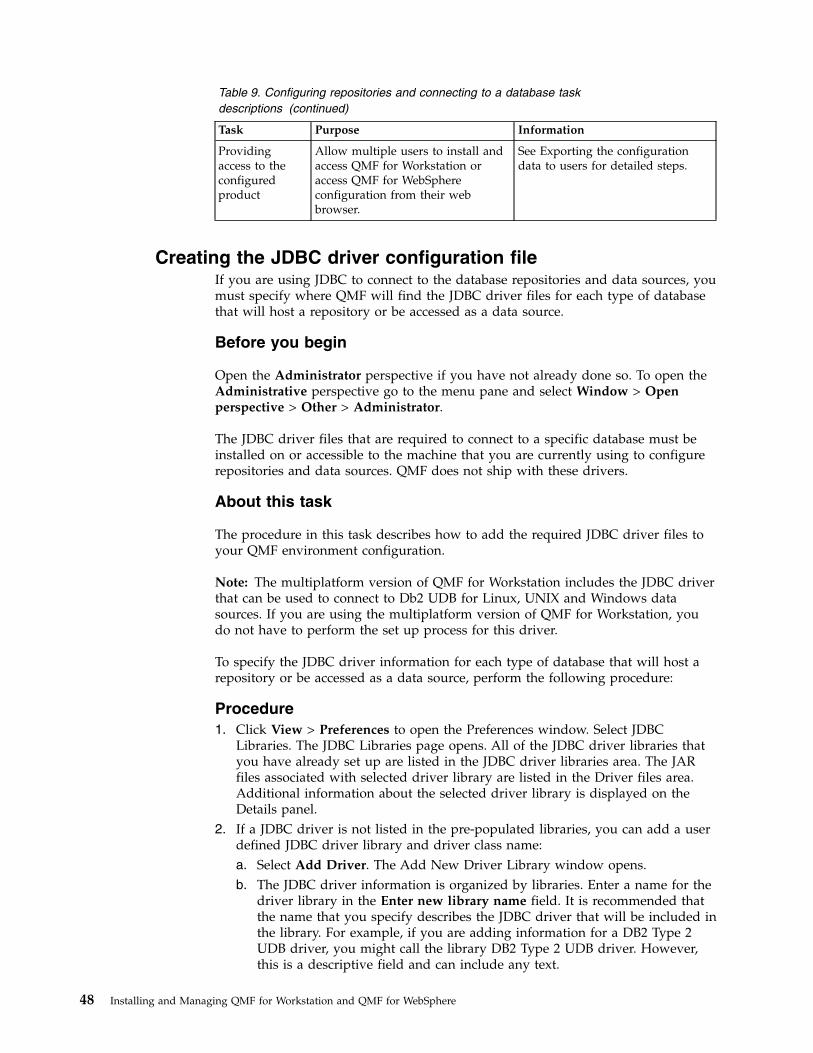
Table 9. Configuring repositories and connecting to a database taskdescriptions (continued)
Task Purpose Information
Providingaccess to theconfiguredproduct
Allow multiple users to install andaccess QMF for Workstation oraccess QMF for WebSphereconfiguration from their webbrowser.
See Exporting the configurationdata to users for detailed steps.
Creating the JDBC driver configuration fileIf you are using JDBC to connect to the database repositories and data sources, youmust specify where QMF will find the JDBC driver files for each type of databasethat will host a repository or be accessed as a data source.
Before you begin
Open the Administrator perspective if you have not already done so. To open theAdministrative perspective go to the menu pane and select Window > Openperspective > Other > Administrator.
The JDBC driver files that are required to connect to a specific database must beinstalled on or accessible to the machine that you are currently using to configurerepositories and data sources. QMF does not ship with these drivers.
About this task
The procedure in this task describes how to add the required JDBC driver files toyour QMF environment configuration.
Note: The multiplatform version of QMF for Workstation includes the JDBC driverthat can be used to connect to Db2 UDB for Linux, UNIX and Windows datasources. If you are using the multiplatform version of QMF for Workstation, youdo not have to perform the set up process for this driver.
To specify the JDBC driver information for each type of database that will host arepository or be accessed as a data source, perform the following procedure:
Procedure1. Click View > Preferences to open the Preferences window. Select JDBC
Libraries. The JDBC Libraries page opens. All of the JDBC driver libraries thatyou have already set up are listed in the JDBC driver libraries area. The JARfiles associated with selected driver library are listed in the Driver files area.Additional information about the selected driver library is displayed on theDetails panel.
2. If a JDBC driver is not listed in the pre-populated libraries, you can add a userdefined JDBC driver library and driver class name:a. Select Add Driver. The Add New Driver Library window opens.b. The JDBC driver information is organized by libraries. Enter a name for the
driver library in the Enter new library name field. It is recommended thatthe name that you specify describes the JDBC driver that will be included inthe library. For example, if you are adding information for a DB2 Type 2UDB driver, you might call the library DB2 Type 2 UDB driver. However,this is a descriptive field and can include any text.
48 Installing and Managing QMF for Workstation and QMF for WebSphere
c. Specify the actual name of the driver class that will be used in the Driverclass name field. This can be found in your JDBC driver documentation. Forexample, for a DB2 Type 2 UDB driver you might specify:com.ibm.db2.jdbc.app.DB2Driver.
d. Optionally, you can specify a generic example of a correctly formatted URLthat could be used to connect to the database in the URL templates field. Toadd a URL template, select the Add URL template icon. The text Newtemplate displays in the Template field. Replace the text New templatewith a sample of how the URL should be formatted. For example, if you areadding JDBC driver information for DB2 Type 2 UDB driver, you mightspecify the following JDBC URL template: jdbc:db2://host:50000/database.The generic information as specified in the template is presented when youare adding data sources to the repository and when you are creatingrepository connections. You will replace the generic information with thespecific database information.
e. Optionally, you can add additional JDBC driver properties to the URLtemplate. Click JDBC driver properties. The Advanced JDBC Settingswindow opens. Select the properties that will be supported or can be usedwhen connecting to a database using JDBC. They will be reflected in theURL template.
f. Click OK to create the driver library and close the Add New Driver Librarywindow.
3.
a. Click the library to which you want to add JAR file location information.b. Click Add Driver Files. The Add JARS to [libraryname] window opens.c. Search for and select the JDBC driver files that you want to add.d. Click Open. The location of the JDBC driver JAR files is saved in the JDBC
library that you have selected.4. Select Apply. The JDBC library information that you have specified is saved in
the .bi.jdbc.drivers file for the current machine. You must repeat theprevious step for each pre-populated and user defined driver that will be usedto access various database repositories or data sources.
5. You can make the following changes to the JDBC driver information:v To edit user defined JDBC driver library information, select an existing JDBC
driver library from the list and click Edit Driver. The Edit Driver Librarywindow opens where you can make changes to the Edit library name,Driver class name, and URL templates fields.
v If you are using QMF for Workstation, to edit the location of the JAR files,select a JAR file from the list of files that have been added to the JDBClibrary, and click Edit. The Edit JAR URL window opens. Specify the nameand location in the Edit JAR location field.
v To remove a JDBC driver library, select an existing JDBC driver library fromthe list and click Remove Driver. The library, including all the JAR files thatit contains, is removed. You can not remove any pre-populated libraries.
v If you are using QMF for Workstation, to remove a JAR file from a JDBCdriver library, select an existing JAR file from the list and click Remove. TheJAR file is removed.
6. Click OK. The Preferences window closes.
Results
The JDBC driver information is saved and QMF can connect to your database.
Chapter 3. Configuring the environment 49
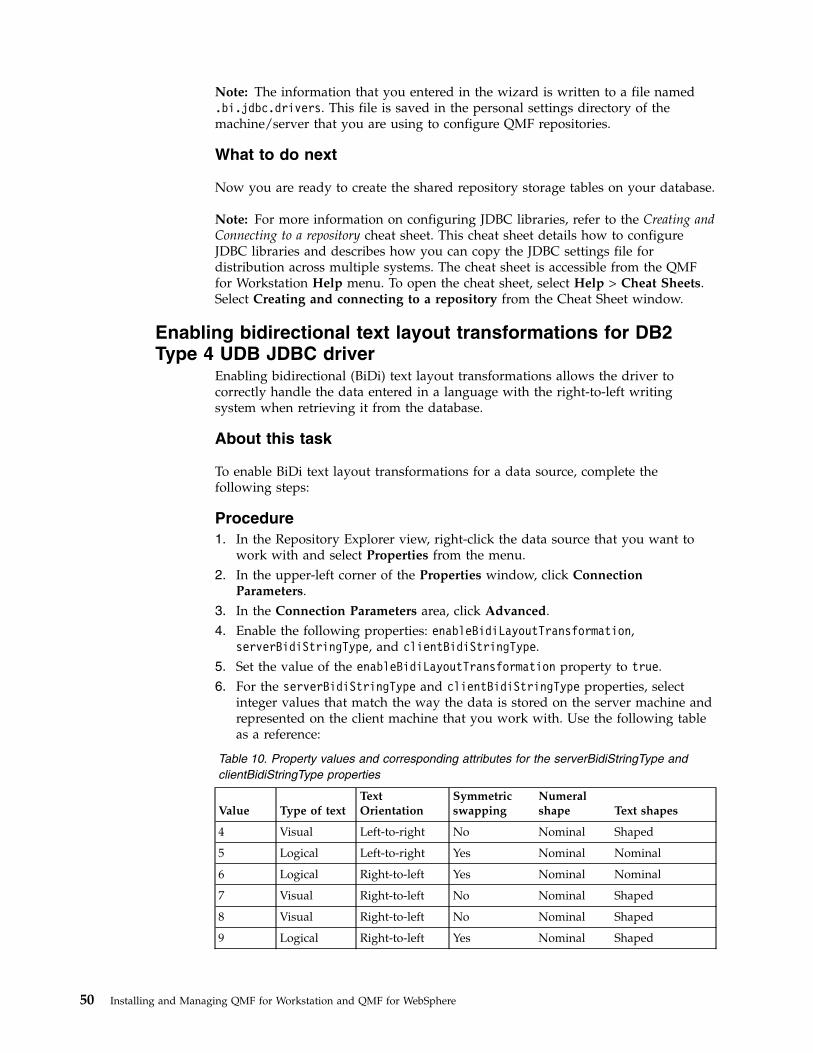
Note: The information that you entered in the wizard is written to a file named.bi.jdbc.drivers. This file is saved in the personal settings directory of themachine/server that you are using to configure QMF repositories.
What to do next
Now you are ready to create the shared repository storage tables on your database.
Note: For more information on configuring JDBC libraries, refer to the Creating andConnecting to a repository cheat sheet. This cheat sheet details how to configureJDBC libraries and describes how you can copy the JDBC settings file fordistribution across multiple systems. The cheat sheet is accessible from the QMFfor Workstation Help menu. To open the cheat sheet, select Help > Cheat Sheets.Select Creating and connecting to a repository from the Cheat Sheet window.
Enabling bidirectional text layout transformations for DB2Type 4 UDB JDBC driver
Enabling bidirectional (BiDi) text layout transformations allows the driver tocorrectly handle the data entered in a language with the right-to-left writingsystem when retrieving it from the database.
About this task
To enable BiDi text layout transformations for a data source, complete thefollowing steps:
Procedure1. In the Repository Explorer view, right-click the data source that you want to
work with and select Properties from the menu.2. In the upper-left corner of the Properties window, click Connection
Parameters.3. In the Connection Parameters area, click Advanced.4. Enable the following properties: enableBidiLayoutTransformation,
serverBidiStringType, and clientBidiStringType.5. Set the value of the enableBidiLayoutTransformation property to true.6. For the serverBidiStringType and clientBidiStringType properties, select
integer values that match the way the data is stored on the server machine andrepresented on the client machine that you work with. Use the following tableas a reference:
Table 10. Property values and corresponding attributes for the serverBidiStringType andclientBidiStringType properties
Value Type of textTextOrientation
Symmetricswapping
Numeralshape Text shapes
4 Visual Left-to-right No Nominal Shaped
5 Logical Left-to-right Yes Nominal Nominal
6 Logical Right-to-left Yes Nominal Nominal
7 Visual Right-to-left No Nominal Shaped
8 Visual Right-to-left No Nominal Shaped
9 Logical Right-to-left Yes Nominal Shaped
50 Installing and Managing QMF for Workstation and QMF for WebSphere

Table 10. Property values and corresponding attributes for the serverBidiStringType andclientBidiStringType properties (continued)
Value Type of textTextOrientation
Symmetricswapping
Numeralshape Text shapes
10 Logical Contextualleft-to-right
Yes Nominal Nominal
11 Logical Contextualright-to-left
Yes Nominal Nominal
Consider the following descriptions of the attributes listed in Table 1:
Type of textSpecifies the relationship between the order of text as stored in memoryor on external media and its order for correct display. Possible valuesare:v Visual – text is stored in the same order as it is displayedv Logical – text is stored in the order it is intended to be read
Text orientationSpecifies the direction in which the text is stored. Possible values are:v Left-to-right – marks the text as left-to-rightv Right-to-left – marks the text as right-to-leftv Contextual left-to-right – the direction of the text is determined
by analyzing the text itself. If the first strong character belongs to theleft-to-right script or there are no strong characters in the text, it ismarked as left-to-right. If the first strong character belongs to aright-to-left script, the text is marked as right-to-left.
v Contextual right-to-left – the direction of the text is determinedby analyzing the text itself. If the first strong character belongs to theleft-to-right script, the text is marked as left-to-right. If the firststrong character belongs to a right-to-left script or there are no strongcharacters in the text, it is marked as right-to-left.
Symmetric swappingSpecifies whether characters that have an implied directional meaning,such as <, >, (, ), and so on, are replaced with their mirror images. Thisoption is meant for texts that are written in right-to-left writing systemsand are stored in Visual order. Symmetric swapping is not performedfor texts that are stored in logical order. Possible values are:v Yes – symmetric swapping is enabledv No – symmetric swapping is disabled
Numeral shapeSpecifies whether numbers are presented by using the European digitshapes or the Arabic-Indic digit shapes. Possible values are:v Nominal – numbers are presented by using the European digit shapesv National – numbers are presented by using the Arabic-Indic digit
shapes
Text shapesSpecifies the encoding for Arabic symbols. Possible values are:v Nominal – Arabic letters are encoded with intrinsic code points, in the
"06xx" range for Unicode
Chapter 3. Configuring the environment 51
v Shaped – Arabic letters are encoded as presentation forms which canbe Initial, Middle, Final, or Isolated
Using DRDA to connect to database repositories and datasources
You can use the Direct DRDA Connection to establish a connection to Db2database repositories and data sources.
Before you begin
The Direct DRDA Connection is supported only for DB2 for z/OS Version 8,Version 9, and Version 10 and for Db2 for z/OS Version 11 and Version 12. Do notuse it for Db2 LUW or DB2 for iSeries.
About this task
In contrast to JDBC driver libraries, the Direct DRDA Connection is included withQMF and does not require additional driver installation.
You can specify the Direct DRDA Connection when creating a relational datasource, shared repository storage, or shared repository connection.
You can enable the use of SSL certificates for the Direct DRDA Connection to makethe connection secure.
To specify the Direct DRDA Connection:
Procedure1. From the JDBC Driver drop-down list of the connection parameters section,
select Direct DRDA Connection. The connection will be used to access thedatabase that hosts the repository storage.
2. In the JDBC URL list specify the URL that points to the database that hosts therepository storage.The templates for the URL can be displayed in the list:jdbc:rsbi:db2://{server}:{port}/{database}
You must specify the server, port, and database information.
Note: You can also use the Build URL by URL Template window to form thecorrect string. To do so, click Build URL to open the Build URL by URLTemplate window. From the JDBC URL drop-down list, select the template. Inthe table, specify the server, port, and database information and click OK. Theresult URL string is added to the JDBC URL list.
3. Click Advanced to specify Direct DRDA Connection string properties and theirvalues to be used for the database that hosts the repository storage tables.See Direct DRDA Connection properties for more information.
4. To bind the direct DRDA package click Bind Packages. The Bind Packagesdialog opens.In order for Direct DRDA Connection to properly work you must bind DirectDRDA packages when you are connecting to a database for the first time.When the binding operation completes, users can connect to the database byusing Direct DRDA Connection. They do not have to bind packages again.a. In the Owner ID field you can enter a privileged SQLID with the necessary
rights for the binding process, in case a user who establishes a server
52 Installing and Managing QMF for Workstation and QMF for WebSphere
connection has no administrator privileges for the database. If the value ofthis field is not specified, the CURRENT SQLID, the user name set in theSet User Information dialog, will be used to perform the installationprocess.
b. Click Install to start the installation process.5. Continue specifying the relational data source, shared repository storage, or
shared repository connection parameters.
Direct DRDA Connection propertiesDirect DRDA Connection properties define how the connection to a particular datasource is established. You can specify Direct DRDA Connection properties in theAdvanced JDBC Settings window.
The Direct DRDA Connection has the following properties:
Parameters
securityMechanismThis property specifies the Direct DRDA Connection security mechanism. Thedata type of this property is integer. Possible values are:v SECMEC.I_USRIDPWD = 3
Neither user ID nor password is encrypted.v SECMEC.I_EUSRIDPWD = 9
Both user ID and password are encrypted.v SECMEC.I_EUSRPWDDTA = 13
The user ID, Password, and Data are encrypted.
If you do not specify a value for securityMechanism, the requester attempts toconnect using the security mechanism without any encryption.
If the server accepts only encrypted login information, the requester attemptsto switch to the corresponding security mechanism.
If a connection cannot be established because the server does not support thatsecurity mechanism, an exception is thrown.
sslConnectionThis property specifies whether the use of SSL certificates is enabled for thecurrent connection. The data type of this property is string. Possible values are:
true Specifies that the use of SSL certificates is enabled.
false Specifies that the use of SSL certificates is disabled.
sslTrustStoreLocationThis property specifies the path to the truststore file that is used for theconnection. The data type of this property is string. The value must contain apath to the truststore file.
sslTrustStorePasswordThis property specifies the password to the truststore file that is used for theconnection. The data type of this property is string. The value must contain apassword to the truststore file.
enableBidiLayoutTransformationThis property specifies the way the Direct DRDA Connection processesbidirectional data. Enabling this property allows QMF DRDA driver tocorrectly handle the data entered in a language with the right-to-left writing
Chapter 3. Configuring the environment 53
system (such as Arabic) that is stored in visual order. If the data is stored inlogical order, enabling this option will result in incorrect data output.
true The enableBidiLayoutTransformation property is enabled.
false The enableBidiLayoutTransformation property is disabled.
Note: If the enableBidiLayoutTransformation option is enabled, users cannotinsert, edit, or delete any data in the database. Also, with theenableBidiLayoutTransformation option enabled, the driver is configured tohandle BiDi data on the server machine and on the client machine differently.See the table in the Db2 Type 4 UDB JDBC driver parameters for bidirectionallayout transformations procedure for details. For the server machine, see the rowthat corresponds with value 4. For the client machine, see the row thatcorresponds with value 5.
Enabling SSL connection for DRDA driverYou can enable the use of SSL certificates for a repository connection to make theconnection secure.
About this task
To enable the use of SSL certificates for a repository connection, complete thefollowing procedure:
Procedure1. In the Repository Connections view, right-click the connection for which you
want to enable the use of SSL certificates and select Edit from the menu.2. In the Edit Repository Connection window, click Advanced.3. In the Advanced JDBC Settings window, enable the sslConnection parameter
and set the parameter value to true.4. Enable the sslTrustStoreLocation parameter and specify the location of the
truststore file in the Value column.
Note: Use the JDK Keytool utility to configure the truststore file.5. Optional: Enable the sslTrustStorePassword parameter and specify the
password for the selected truststore file in the Value column.6. Click OK to close the Advanced JDBC Settings window.7. Click Finish to close the Edit Repository Connection window.
Creating a shared repository storageA shared repository storage is a set of database tables. You must create a sharedrepository storage for storing database connection and resource limit information,as well as the database objects that users will use for reporting and queryingactions.
Before you begin
Before you begin this task, make sure you have:v Installed and configured your database management system (DBMS).v Installed the JDBC driver JAR files and license files so that QMF can connect to
the database.
54 Installing and Managing QMF for Workstation and QMF for WebSphere
Open the Administrator perspective if you have not already done so. To open theAdministrative perspective go to the menu pane and select Window > Openperspective > Other > Administrator.
Make sure the Repository view is open in the workbench. To open the Repositoryview select Window > Show view > Repositories. The Repositories tab opens inthe workbench.
About this task
Creating the repository storage tables is a multistep process with multiple optionspresented in each step. The options you select in one step will determine the nextstep in the process.
The steps in this topic provide an overview of the process for creating the sharedrepository storage on your database, so that the data in the repositories can beobtained for further relocation or distribution in a network. See the subsequenttopics in this section for detailed descriptions of the wizards employed.
The maximal line length of the DDL scripts displayed when creating sharedrepository storage is determined by the value set in the Line width field on theGeneral Preferences page. See Setting general preferences in the User help for moreinformation.
To create the repository storage on your database:
Procedure1. Right-click in the Repositories view. Select New > Shared Repository Storage.
The Enter connection parameters for new shared repository storage page of theCreate New Shared Repository Storage wizard opens.
2. On the Enter connection parameters for new shared repository storage page,specify the JDBC connection information and user login information that willbe used to connect to the database that will host the repository storage.
3. Click Next. The Create or upgrade repository storage tables page of the wizardopens.
4. On the Create or upgrade repository storage tables page, specify that thedatabase objects that are required by the QMF applications in order to accessthe repository storage will be created or upgraded.
5. Click Next. If necessary, the Upgrade repository storage tables page openslisting the SQL statements that will be used to create or update the requiredrepository storage tables. If this page opens, click Next. The Protect repositorystorage tables page of the wizard opens.
6. On the Protect repository storage tables page of the wizard specify whether thedatabase repository storage tables will be protected from unauthorized users.
7. Click Finish.
Results
You have created the shared repository storage on your database.
What to do next
The next step is to add repositories to the repository storage tables.
Chapter 3. Configuring the environment 55
Specifying connection parameters and user login informationThe first step to creating shared repository storage is to specify the connectionparameters and the user login information that will be used when accessing thedatabase that hosts the repository storage.
About this task
To specify the connection and user login information for the database that hoststhe repository storage:
Procedure1. Open the Create New Shared Repository Storage wizard and navigate to the
Enter connection parameters for new shared repository storage page.2. In the JDBC Driver field specify the library for the JDBC driver that will be
used to access the database that is hosting the repository storage. You canselect from a drop down list of libraries that you defined when you set up theJDBC driver information. You can use the ellipsis (...) to the right of the fieldto open the Select JDBC Driver dialog where you can create additional JDBCdriver libraries.
Note: If you work with a Db2 for z/OS database, you can use the DirectDRDA Connection. In contrast to JDBC libraries, the Direct DRDA Connectioncomes with QMF and does not require additional driver installation.
You can enable the use of SSL certificates for the Direct DRDA Connection tomake the connection secure.
Note: The Direct DRDA Connection is supported only for DB2 for z/OSVersion 9 and Version 10 and for Db2 for z/OS Version 11 and Version 12. Donot use it for Db2 LUW or DB2 for iSeries.
3. In the JDBC URL list, specify the URL that points to the database that hoststhe repository storage within which the repository to which you want toconnect resides.The format for the URL can be displayed in the list.
Note: You can also use the Build URL by URL-template dialog box to formthe correct string.
Click Build URL to open the Build URL by URL Template dialog box. Fromthe JDBC URL drop-down list, select the template. In the table, specify theserver, port, and database information and click OK. The result URL string isadded to the JDBC URL list.
4. Click Advanced to specify any driver-specific connection string keywords andtheir values that will be used for the database that is hosting the repositorystorage tables. The list of available advanced properties will changedepending on both the type of driver being used, and the version of thedriver. For information on any keywords that are required by a selecteddatabase driver, consult the specific driver's documentation.
Note: For the DB2 Type 4 UDB driver and the DB2 Universal JDBC Driver, toreceive extended SQL exception error messages, check theretrieveMessagesFromServerOnGetMessage option in the Advanced JDBCSettings window.
56 Installing and Managing QMF for Workstation and QMF for WebSphere
5. To configure a PassTickets-based Single Sign-on connection between QMF andDb2 for z/OS database, click Single Sign-on.
6. If you use the Direct DRDA Connection, bind packages by clicking the BindPackages button.
7. Specify the user information. Click the Set User Information button to openUser Information dialog.
8. In the User Information dialog, select User ID and password are required torequire the use of a user ID and password when accessing the database that ishosting the repository storage. If the database that is hosting the repositorystorage allows access without a user ID and password, selecting this optionwill override that allowance, and a user ID and password will be required toaccess the repository storage tables.
9. Specify the user ID and password that will be used to access the database inthe User ID and Password fields. The user ID and password that you specifywhen connecting to the host repository are used to authorize the user in thatrepository. The user ID and password that you specify must haveadministrative privileges on the host database in order to create the repositorystorage tables. This mode is only available on Db2.
10. To remember this password every time you use the specified user ID toconnect to the database, select the Remember password check box.
11. Click Test Connection to test the connection to the database. If you havespecified any information incorrectly you will not be able to connect.
12. Click Next. The Create or upgrade the repository storage tables page of thewizard opens.
Creating and updating tablesThe second step to creating shared repository storage is to specify whether thedatabase objects that are required by the QMF applications in order to access therepository storage will be created or updated.
About this task
Several database tables are required to support the shared repository storage that isbeing created on the database. You must specify whether QMF should check to seeif the tables exist or need updating.
To create or update the repository storage tables:
Procedure1. Open the Create New Shared Repository Storage wizard and navigate to the
Create or upgrade repository storage tables page.2. Select one of the following options:v Click Repository storage tables have already been created to bypass this
step. You might select this option if all the repository storage tables alreadyexist and you are certain that the tables have not changed. An example ofthis situation might be if you are editing the repository storage options andyour intent is to re-bind packages or re-run stored procedures for therepository storage tables. Click Next. The Protect repository storage tablespage of the wizard opens.
v Click Create or upgrade repository storage tables to check if the tables havebeen created or have to be updated.
Chapter 3. Configuring the environment 57
3. Optionally you can type the owner name in the Owner ID field, if you workwith Db2 databases. The Owner ID provides the administrator privileges to theuser who operates under the login without SYSADM authority.
Tip: (for Db2 for z/OS databases)
When the user without administrator privileges creates or updates the sharedrepository storage tables and enters the owner name in the Owner ID field, theuser login and Owner ID are automatically inserted to the RSBI.AUTHID_TABLEas the PRIMARY_ID and SECONDARY_ID correspondingly. This allows the user tocreate shared repositories with database-based security provider andautomatically work with the repositories as an administrator.
4. If repository storage tables have not been created, you can select the Enablecustomization of database object names check box to open a window whereyou can customize how database objects are named.
5. Click Next. Depending on the status of the tables you will proceed as follows:v If all the tables have been created and have not changed, a message is issued.
Click OK in the message window. The Protect repository storage tables pageof the wizard opens.
v If the tables have to be created or updated and you did not select the Enablecustomization of database object names check box, the Enter SubstitutionVariable Values window opens. Enter your customized database object namesin the Value column and click OK. For non-Db2 for z/OS® databases, thispage does not open. Then theUpdate repository storage tables page of thewizard opens listing the SQL statements that will be used to create or updatethe required repository storage tables. You can make changes to the SQLstatements as described on the page. Click Next. The Protect repositorystorage tables page opens.
v If the tables have to be created and you selected the Enable customization ofdatabase object names check box, then the Enter Substitution VariableValues window opens. Enter your customized database object names in theValue column and click OK.
Note: The Value column of the window displays the default name of eachdatabase object. This gives you an opportunity to review and/or rename theobjects that will be created. For example, one could preface all index nameswith the prefix "IX".The Enter Substitution Variable Values window closes and the Updaterepository storage table page of the wizard opens.Click Next. The Protect repository storage tables page opens.
Protecting repository storage tables and granting userpermissions
The last step to creating shared repository storage is to specify whether the sharedrepository storage tables will be protected from unauthorized users.
About this task
Several tables in repository storage are used by QMF to store processinginformation. Some of these tables store sensitive information, for example thepermissions table. By default all users can access these repository storage tablesand make changes to the tables. You can choose to protect the repository storagetables. In protection mode the repository storage tables are accessed using acollection of stored procedures or static SQL packages depending on what the
58 Installing and Managing QMF for Workstation and QMF for WebSphere
database that is hosting the repository storage supports. Users of the repositorystorage must then be granted permission to run the stored procedures or staticSQL packages.
To protect the repository storage tables:
Procedure1. Open the Create New Shared Repository Storage wizard and navigate to the
Protect repository storage tables page.2. Specify whether the shared repository storage tables will be protected from
unauthorized users. By default the Protection method check box is not selected.This means that all users will have access to the repository storage tables andcan make changes to any of those tables. To specify that you will protect therepository storage tables, select the Protection method check box. The fieldsthat you will use to specify the protection method become available.
3. Select one of the following protection methods:v Select Stored procedures to specify that you will use stored procedures to
protect the repository storage tables. You can select this option if therepository storage tables are located on one of the following databases:– Informix– DB2 UDB LUW V9 and above– DB2 z/OS V9 and above in NFM– DB2 iSeries (when accessed with IBM Toolbox JDBC driver)– Microsoft SQL Server
v Select Static SQL packages to specify that you will use static SQL packagesto protect the repository storage tables. You can select this option if therepository storage tables are located on a Db2 database that you will connectto using the IBM DB2 Universal driver for JDBC or the Direct DRDAconnectivity provided by the product (the latter option is available for Db2for z/OS connectivity only).
4. Type, or select from the drop-down list, the name that you want to use toidentify the collection of stored procedures or static SQL packages in theCollection ID field.
5. Optionally you can type the owner name in the Owner ID field, if you workwith Db2 databases. The Owner ID provides the administrator privileges to theuser who operates under the login without SYSADM authority.
6. Click Create. The stored procedures are created or the static SQL packages arebound. A message is issued that informs you of the success of the eitherprocess. You can also use the Delete button to remove a collection of storedprocedures or packages.
7. Specify which users will have permission to run the stored procedures or staticSQL packages for the repository storage tables on this database. To grantpermission to all users, enter PUBLIC in the User IDs field and click Grant. Togrant permission to specific users, type their user IDs in the field and clickGrant. A message is issued that informs you that the selected user IDs havebeen granted permission to run the stored procedures or packages.Optionally, you can revoke permission to run the stored procedures or staticSQL packages from any user that is listed in the User IDs list box. To revokepermission from one or more users, highlight one or more of the user IDs andclick Revoke. A message is issued informing you that permission to run thestored procedures or static SQL packages has been revoked from the selecteduser IDs.
Chapter 3. Configuring the environment 59
8. Click Finish. The repository storage tables are created. The location of the newrepository storage tables is listed in the Repositories view. After you havecreated the shared repository storage in the database, you can add one or morerepositories that will share the storage. Each repository that you create can haveits own independent objects, security models, and users.
Setting maximum number of simultaneous databaseconnections
An advanced feature in creating repository storage tables allows you to specify themaximum number of simultaneous database connections.
About this task
This advanced feature exists in both Workstation and WebSphere, and contains theconcurrent access to repository storage database limit.
To set the maximum number of simultaneous database connections:
Procedure1. In the Repositories view right-click the repository storage that you want to
work with. Select Edit from the pop-up menu. The Edit Repository Storagewindow opens.
2. Click the Advanced tab.3. Specify the number of database connections in the Maximum number of
simultaneous database connections field. The default value is 10.4. Click OK. The maximum number of simultaneous database connections is set
in the repository storage tables.
RepositoriesRepository is a storage of QMF objects and database connection information.
QMF supports personal and shared repositories. The Administrator componentprovides the tools to create, manage, and maintain repositories.
Main features of repositories:v Repositories organize all accessible data sources and objects in a tree structure.v Repositories use security models to control user access to their content.v Repositories can be stored in most commonly used databases. You can choose to
place repository tables in the same database as your production data or within astand-alone database that is created specifically for work with repositories.
v Repositories can be served by a distributed database such as Db2 on LUW,Informix, Oracle, SQL Server, or MySQL.
Repository security
To control access to the repository for different individual users and groups ofusers, administrators assign shared repositories a security model. For example,users in group A can see data sources A, B and C, whereas users in group B seedata sources A, D, and E. Permissions can be applied to all QMF objects, includingqueries, dashboards, and individual workspace folders.
You can use the following security models:
60 Installing and Managing QMF for Workstation and QMF for WebSphere
v LDAP/Active Directory:QMF uses an LDAP-based service, such as Active Directory, to authenticate theuser and obtain the user and group lists.
v Database security:QMF uses the user database login as the basis of the security model. Thissecurity model is available only if the repository storage for the repository islocated on a Db2 or Oracle database.
v Internal security:Using this method, users and groups can be defined within QMF itself andsaved directly in repositories.
Personal repositories
Personal repositories serve a single user and provide the ability to store content ona local workstation without a relational database.
If you are configuring QMF for personal use, see the detailed information on howto create a personal repository in the Creating personal repositories topic of UserHelp.
QMF includes a pre-configured personal repository named Samples. The Samplesrepository includes a relational data source for connecting to sample content.
The personal repositories that you create are stored in the home directory of themachine that is running QMF.
Personal repositories do not support security models.
Shared repositories
If a shared repository is assigned a security model, it can be administered by alimited number of users. Otherwise, all the users have the administrator rights.Shared repositories support the security and workspace features that allow theadministrator to control the view of enterprise resources on an individual or groupbasis. They also support the login mapping feature, and network or Web servicerepository connections that allow users to access databases through a connectionthat is set on another system.
If you are configuring QMF for multiple users, you create a shared repository.
Note: In QMF for Workstation and QMF for WebSphere V9.1 Fix Pack 6 and later,the following changes have occurred:v Database-based repositories are now referred to as shared repositories.v Personal repositories have replaced file-based repositories. You can no longer
create file-based repositories. However, you can still connect to any file-basedrepositories that were created prior to V9.1 Fix Pack 6
Adding repositories to the repository storage tablesYou can add repositories to the repository storage tables. Repositories serve as acentralized place in which an aggregation of data, such as queries, procedures,forms, dashboards, and, reports are developed for a specific set of data sources.Each repository that you create can have its own independent objects, securitymodels, and users.
Chapter 3. Configuring the environment 61
Before you begin
Make sure the Repository view is open in the workbench. To open the Repositoryview select Window > Show view > Repositories. The Repositories tab opens inthe workbench.
About this task
The information in this topic describes how to add a repository within therepository storage tables on a database.
As part of the procedure for adding repositories, you define the permissions foraccessing the repositories. These permissions determine which users or user groupshave access to the repositories.
To add a repository to the repository storage table, perform the following steps:
Procedure1. In the Repositories view right-click the repository storage to which you want
to add a repository. Select New > Shared Repository from the pop-up menu.The Create New Shared Repository wizard opens.
2. Specify the name that will be used to identify the repository in the Name field.3. Optionally, type a comment that describes the repository in the Comment field.
This comment will display with the properties for the repository.4. Select the type of security that will be applied to the repository. From the
Security provider drop-down list select one of the following:v None: Specifies that no additional security beyond what is provided by the
database that is hosting the repository will be applied. All users will havefull access to the contents of the repository.
v Internal: Specifies that a layer of security beyond what is provided at thedatabase level will be applied. This level of security allows you to defineusers and groups, and then assign them permission to access the repository.This level of security also allows you to control which objects a user orgroup can access or view when they are connected to the repository. Userand group definitions, and their assignments, are stored within therepository. Users will log on to QMF for Workstation or QMF for WebSphereusing their defined user IDs and passwords. They will be granted access to arepository or to repository objects based on the permissions that they areassigned by the QMF administrator.
v LDAP: Specifies that a layer of security beyond what is provided at thedatabase level will be applied. This level of security allows you to control theusers and groups who are permitted access to the repository. This level ofsecurity also allows you to control which objects a user or group can accessor view when connected to the repository. If you choose the LDAP securityoption, the user identities and group affiliations are obtained from anexisting LDAP server. Users will log on to QMF for Workstation or QMF forWebSphere using their LDAP user names and passwords. They will begranted access to a repository or to repository objects based on thepermissions that they are assigned by the QMF administrator.
v Database-based: Specifies that the security settings of the host database willbe used to protect the shared repository.
5. If you selected either Internal or LDAP security, click Next. One of thefollowing wizard pages opens:
62 Installing and Managing QMF for Workstation and QMF for WebSphere
v If you selected Internal security, the Internal security provider options pageopens. Specify the user name and password that will identify the QMFadministrator account. The QMF administrator account is the account that isused to create additional administrative accounts, as well as apply securitypermission levels to different users and groups.
v If you selected LDAP security, the LDAP security provider options pageopens. Specify one or more values for the LDAP fields. These fields are usedto obtain all LDAP users and groups. You will be asked to specify an existingLDAP group in your directory that represents the QMF administratoraccount. All LDAP accounts that belong to this group will have QMFadministrator privileges and can create additional administrative accounts, aswell as apply security permission levels to different users and groups.
6. Click Finish.
Results
You have created and added to the list of available repositories that are containedwithin the shared repository storage.
What to do next
The next step is to configure data source information in the repository.
If you have applied Internal security to the repository you can choose to create theusers and groups that can access the repository at this point, or after you haveconfigured data source information. If you assigned LDAP security to therepository, all the users and groups that were obtained from your LDAP server canaccess the repository. For both types of secured repositories, Internal and LDAP,you assign users and groups permission to access repository objects on an ongoingbasis as the needs of your environment dictate or change.
If you are just creating the repository, you must populate the repository with datasource information before you can specify the level of access a user or group willhave to the objects that are in the repository.
Specifying internal security fieldsFor repositories with Internal security, you must specify the user name andpassword that will identify the QMF administrator account.
Administrator loginUse this field to specify a user name that will identify the QMFadministrator. The QMF administrator account is the account that is usedto create additional administrative accounts as well as create new user andgroup accounts. In addition, only administrator accounts can be used toapply security permissions to user and groups.
Administrator passwordUse this field to specify the password that will be used in conjunction withthe user ID that is specified in the Administrator login field.
Confirm Administrator passwordUse this field to confirm the password that you specified in theAdministrator password field.
Days for password expiration (0 - without limit)Use this field to specify the number of days until the password will expire.A value of zero (0) indicates that the password will not expire.
Chapter 3. Configuring the environment 63
Warning before password expiration date (days)Use this field to specify the number of days prior to the expiration daythat a warning to change the password will be issued.
Specifying users and groups for Internal security optionThe Internal security option requires that you identify the users and groups thatwill be able to access the repository.
About this task
Each repository that you create can have a different set of users and groups thatare allowed access. After you identify the users and groups that are allowed toaccess the repository, you can then assign them permission to access specificobjects within the repository.
To set up the users and groups that can access a repository that has Internalsecurity:
Procedure1. Open the Users and Groups view by selecting Window > Show View > Users
and Groups.2. To add a new user that will be able to access this repository, right-click the
Users node and select New > User from the pop-up menu. The NewRepository User window opens. Specify the new user information.
3. To add a new group that will be able to access this repository, right-click theGroups node and select New > Group from the pop-up menu. The NewRepository Group window opens. Specify the new group information.
4. To edit a user's password, right-click the user name in the tree and select SetPassword from the pop-up menu. The Set Password For User window opens.Specify the new password in the Password field.
5. To delete a user or group, right-click a user or group name in the tree andselect Delete from the pop-up menu. The selected user or group is deleted.
6. To refresh the list of user and groups names, right-click anywhere in the viewor on any element in the tree and select Refresh from the pop-up menu. Thelist is refreshed.
7. To edit a user's or group's properties, right-click a user or group name in thetree and select Properties from the pop-up menu. The Properties for [User]window opens if you have selected a user or the Properties for [Group]window opens if you have selected a group. Edit the fields that you want tochange and click OK.
8. You can choose to either leave the Users and Groups view open or close theview by clicking the close icon. The next step to setting up users and groupsfor repositories with Internal security is to assign permission to use repositoryobjects.
Creating a user:
You must define each user that will be allowed to access a repository that has beenassigned the Internal security option.
About this task
To create a new user that will be allowed to access a repository with Internalsecurity:
64 Installing and Managing QMF for Workstation and QMF for WebSphere
Procedure
1. Open the New Repository User window, by expanding the repository tree tothe Users and Groups branch, then right-click Users, select New > User
2. Specify the ID that the user will use to connect to the repository in the Username field.
3. Specify the user's full name in the Full name field.4. Specify the password for the user name in the Password field.5. Retype the password for the user name in the Confirm password field.6. Optionally, you can type a description of the user in the Description field. This
description is displayed with the user's properties.7. To automatically create a default home workspace for the user, select the Has a
home workspace check box.8. Add the new user to a group by using the Group Membership check boxes.
Each group that you have created is listed. You can select one or more groupcheck boxes. The user will be added to each group whose check box is selected.If the group that you want to add the user to is not listed, you must define thegroup.
9. Click Finish. The user identity is created and will be allowed to access therepository. You will repeat this process for each new user that will have accessto the repository. After specifying the users and groups that can access therepository, the next step is to assign them permission to use repository objects.
Creating new group:
You must define each group that will be allowed to access a repository that hasbeen assigned the Internal security option.
About this task
To create a new group that will be allowed to access a repository with Internalsecurity:
Procedure
1. Open the New Repository Group window, by expanding the repository tree tothe Users and Groups branch, then right-click Groups, select New > Group
2. Specify the name of the group in the Group Name field.3. Add users to the new group by using the Members check boxes. Each user that
you have created is listed. You can select one or more user's check boxes.4. Specify the parent folder for the new group by using the Parent field. The
current group hierarchy is displayed. From the tree, select the group that willbe the parent for the new group.
5. Optionally, you can type a description of the group in the Description field.This description is displayed with the group's properties.
6. Click Finish to create the new group.
Editing user properties:
You can edit the properties that you have specified for each user that will beallowed to access a repository that has been assigned the Internal security option.
Chapter 3. Configuring the environment 65

About this task
To edit a user's properties:
Procedure
1. Open the Users and Groups view by selecting Window > Show View > Users& Groups > Other. Expand the QMF Workbench and select Users and Groups.Right-click a user name in the tree and select Properties from the pop-upmenu. The Properties for [User] window opens.
2. On the User General page of the Properties for [User] window, the User namefield displays the name of the selected user. You can edit the following userfields on this page:v Type any changes to the user's user name in the User name field.v Type any changes to the user's full name in the Full Name field.v Type any changes to the description in the Description field.v Specify a new password for the user by clicking the Set Password button.
The Set Password for [User] window opens where you can specify the newpassword.
3. On the User Membership page of the Properties for [User] window, you canadd and remove the user to and from groups. All of the groups that have beencreated for the repository are listed in the Member of list box. Each group hasa corresponding check box. The check box is selected if the user belongs to thatgroup and cleared if the user does not belong to the group. To add the user toa group, select the group's corresponding check box. To remove the user from agroup, clear the group's corresponding check box.
4. Click OK. The changes that you have made to the user's properties are saved.
Editing group properties:
You can edit the properties for each group that can access an internally securedrepository.
About this task
To edit a group's properties:
Procedure
1. Open the Users and Groups view by selecting Window > Show View > Users& Groups > Other. Expand the QMF Workbench and select Users and Groups.Right-click a group name in the tree and select Properties from the pop-upmenu. The Properties for [Group] window opens.
2. The Group name field in the Group General page of the Properties windowdisplays the name of the selected group. You can make changes to the name ofthe group in this field.
3. The parent group for the selected group displays in the Parent group field. Tochange the parent group of the selected group, click Change. The Edit ParentGroup window opens. Expand the branches of the Groups tree until youexpose the group to which you want to add the selected group. Click Set AsParent. The selected group will be moved to the new parent group.
4. The description for the group is displayed in the Description field. You canedit the description text by typing new text directly in the field.
5. Click Apply to apply the Group General properties that you have changed.
66 Installing and Managing QMF for Workstation and QMF for WebSphere
6. You can add and remove users to and from the selected group using the GroupMembership page of the Properties for [Group] window. All of the users thathave been defined for the repository are listed in the Members list box. Thecorresponding check box for each user is selected if the user belongs to thegroup and clear if the user does not belong to the group. To add the user to agroup, select the group's corresponding check box. To remove the user from agroup, clear the group's corresponding check box.
7. Click Apply to apply the Group Membership properties that you havechanged.
8. Click OK. The changes that you have made to the group's properties are saved.
Specifying LDAP security fieldsIf you specified the LDAP security option for a repository, you must specify theLDAP security parameters in order to obtain the user identities and groupaffiliations from your LDAP server.
About this task
Note: All users and groups that are defined in your LDAP server are obtained andgranted permission to access the repository. To specify what type of access theusers and groups can have to the repository, you edit the repository's securityproperties assigning permission levels to each user or group.
Specifying LDAP Main fields:
You must specify the LDAP Main fields if you have selected LDAP security for thedatabase repository.
Host Use this field to specify the IP address of the LDAP server.
Port Use this field to specify the contact port that is used by your LDAP server.For example, the LDAP protocol specifies the use of TCP/IP port number389 for LDAP. However, this value can vary based on what has beenspecified in your environment.
To use the Secure Sockets Layer (SSL) protocol to communicate with theLDAP server, select the Use SSL check box and specify the appropriateSSL port number in the Port field.
Note: The LDAP server that you use must be configured to use SSL.
Auth typeUse this field to specify what type of LDAP authentication should occurfor this repository. Select None to allow a user to authenticate to an LDAPserver as an anonymous user. Select Simple to require that a userauthenticates to the LDAP server with a distinguished name (DN) and apassword.
User DNUse this field to specify the user-distinguished name that can be used toaccess your LDAP directory. This field is available only if your LDAPdirectory requires authentication in order to access, and you specifiedSimple in the Auth Type field.
PasswordUse this field to specify the password that is associated with the user'sdistinguished name that you specified in the User DN field.
Chapter 3. Configuring the environment 67
Base DNUse this field to specify (or select from the drop-down list) thedistinguished name or names that will lead to the entry in the LDAPdirectory under which all users and groups will be retrieved. Adistinguished name is a unique name for an entry in your LDAP directory.For example: ou=people, o=eastcoast.
Account requiredSelect this check box to specify that a master account can be used to editthe LDAP repository settings.
Login Specifies the login that will be used as the master account.
PasswordSpecifies the password that will be used for the master account.
Specifying LDAP Group fields:
You must specify the LDAP Group fields if you have selected LDAP security forthe database repository.
Base RDNUse this field to specify the relative distinguished name for a group. Forexample: o=Sales.
Search scopeSpecifies the possible scopes for the directory search. You can specify:v One level: To search the one level below the Base RDN level, excluding
the base object.v Subtree: To search the whole subtree rooted at the Base RDN level,
including the base object and all its child objects.
Object classSpecify the object class to which the group belongs. For example:objectclass:posixGroup indicates that all entries under Base RDN belongto the posixGroup class.
Name attributeSpecify the name of an attribute whose value specifies the group name.
Description attributeSpecify the name of an attribute whose value specifies the description ofthe group.
Name filterThis field specifies the standard search string that will be used to searchgroups by name. This field is generated based on the values that youspecify in the Name attribute and Object class fields.
All groups filterThis field specifies the standard search string that will return all the groupsunder the Base RDN. This field is generated based on the values that youspecify in the Name attribute and Object class fields.
User's groupUse this field to specify the group to which the member belongs.
Administrator's groupUse this field to specify the group whose members will be grantedadministrator permissions within the content of the QMF products.
68 Installing and Managing QMF for Workstation and QMF for WebSphere
Member attributeSpecifies the name of a groups entry's attribute whose value specifiesmembership in the group. You can specify an RDN that will refer to a userentry or a user's name.
Member typeSpecifies the member type based on what was specified in the Memberattribute field. If you specified an RDN in the Member attribute field, themember type is DN. If you specified a user name in the Member attributefield, the member type is Value.
Identity typeSpecifies the attribute that is used to identify the group and the type ofaccess the group has to the repository. Using the identity attribute ensuresretaining the granted permissions to the repository for the group, if thegroup is renamed or moved to another folder in the LDAP directory. Thepossible values are the following:v DN is the default value. It means that the distinguished name for the
group is used for identification.v Custom attribute means that the name of the attribute specified in the
Custom Attribute field is used for identification.
Custom attributeThis field is available only if you selected Custom attribute identity type.Specify the name of an attribute which value will be used for identificationof the group.
Specifying LDAP User fields:
You must specify the LDAP User fields if you have selected LDAP security for thedatabase repository.
Base RDNUse this field to specify the relative distinguished name for a user. Forexample: uid=Mike.
Search ScopeSpecifies the possible scopes for the directory search. You can specify:v Onelevel: To search the one level below the Base RDN level, excluding
the base object.v Subtree: To search the whole subtree rooted at the Base RDN level,
including the base object and all its child objects.
Object classSpecify the object class to which the user belongs. For example:objectclass:sales indicates that all entries under Base RDN belong to thesales class.
Name attributeSpecify the name of an attribute whose value specifies the user name.
Description attributeSpecify the name of an attribute whose value specifies the description ofthe user.
Name filterThis field specifies the standard search string that will be used to searchusers by name. This field is generated based on the values that you specifyin the Name attribute and Object class fields.
Chapter 3. Configuring the environment 69
All users filterThis field specifies the standard search string that will return all the usersunder the Base RDN. This field is generated based on the values that youspecify in the Name attribute and Object class fields.
Full name attributeUse this field to specify the name of the attribute that contains a user's fullname.
Login attributeSpecify the name of an attribute whose value specifies the login of theuser.
Identity typeSpecifies the attribute that is used to identify the user and the type ofaccess the user has to the repository. Using the identity attribute ensuresretaining the granted permissions to the repository for the user, if the useris renamed or moved to another folder in the LDAP directory. The possiblevalues are the following:v DN is the default value. It means that the distinguished name for the
user is used for identification.v Login attribute means that the name of the attribute specified in the
Login attribute field is used for identification.v Custom attribute means that the name of the attribute specified in the
Custom attribute field is used for identification.
Custom attributeThis field is available only if you selected Custom attribute identity type.Specify the name of an attribute which value will be used for identificationof the user.
Note: If a user and a group have the same value of identity attribute, they aredetermined as different security objects in the repository.
Specifying LDAP Authenticator fields:
You must specify the LDAP Authentication fields if you have selected LDAPsecurity for the database repository.
Authenticator typeUse this field to specify the type of authentication that will occur. You canchoose:v Bind: to use an LDAP bind operation.v Compare: to use a string compare with the value of the Password
attribute and that of a user's entry.
User's password attributeUse this field to specify the attribute that will be retrieved in a user's entryas a password. This field is used only if you specified Compare in theAuthenticator type field.
Append base DNSelect this check box to specify that when authenticating a user, the baseDN will be appended to a user's RDN. This field is used only if youspecified Bind in the Authenticator type field.
Allow empty passwordSelect this check box to allow an empty password.
70 Installing and Managing QMF for Workstation and QMF for WebSphere
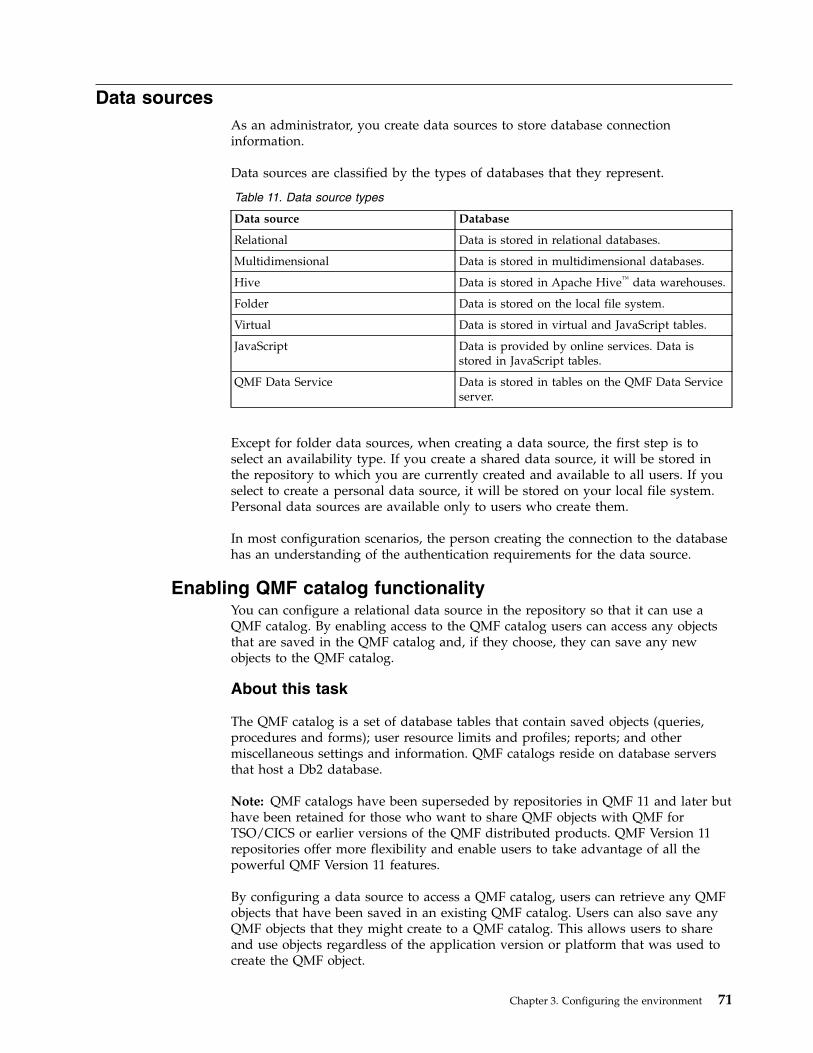
Data sourcesAs an administrator, you create data sources to store database connectioninformation.
Data sources are classified by the types of databases that they represent.
Table 11. Data source types
Data source Database
Relational Data is stored in relational databases.
Multidimensional Data is stored in multidimensional databases.
Hive Data is stored in Apache Hive™ data warehouses.
Folder Data is stored on the local file system.
Virtual Data is stored in virtual and JavaScript tables.
JavaScript Data is provided by online services. Data isstored in JavaScript tables.
QMF Data Service Data is stored in tables on the QMF Data Serviceserver.
Except for folder data sources, when creating a data source, the first step is toselect an availability type. If you create a shared data source, it will be stored inthe repository to which you are currently created and available to all users. If youselect to create a personal data source, it will be stored on your local file system.Personal data sources are available only to users who create them.
In most configuration scenarios, the person creating the connection to the databasehas an understanding of the authentication requirements for the data source.
Enabling QMF catalog functionalityYou can configure a relational data source in the repository so that it can use aQMF catalog. By enabling access to the QMF catalog users can access any objectsthat are saved in the QMF catalog and, if they choose, they can save any newobjects to the QMF catalog.
About this task
The QMF catalog is a set of database tables that contain saved objects (queries,procedures and forms); user resource limits and profiles; reports; and othermiscellaneous settings and information. QMF catalogs reside on database serversthat host a Db2 database.
Note: QMF catalogs have been superseded by repositories in QMF 11 and later buthave been retained for those who want to share QMF objects with QMF forTSO/CICS or earlier versions of the QMF distributed products. QMF Version 11repositories offer more flexibility and enable users to take advantage of all thepowerful QMF Version 11 features.
By configuring a data source to access a QMF catalog, users can retrieve any QMFobjects that have been saved in an existing QMF catalog. Users can also save anyQMF objects that they might create to a QMF catalog. This allows users to shareand use objects regardless of the application version or platform that was used tocreate the QMF object.
Chapter 3. Configuring the environment 71
In addition, if users configure a data source to access a QMF catalog, they cancontrol resource usage with the resource limits that have been set for the datasource and the user and saved in the QMF catalog.
To configure a data source so that it can access a QMF catalog:
Procedure1. Open the QMF Catalog Wizard.2. Specify what type of catalog objects you will create using the Create or update
catalog objects page of the QMF Catalog Wizard.3. Click Next.4. If it was decided that a set of QMF catalog tables has never been created on the
data source, the Choose object listing option page opens. Select an option andclick Next. The Creating objects page of the wizard opens. The SQL to createthe catalog tables is displayed. You can make changes to the SQL. If it wasdecided that a set of QMF catalog tables has already been created for this datasource and there are no required updates, than this step is bypassed.
5. Click Next.6. The Protect QMF catalog tables page of the wizard opens. From the Protect
QMF catalog tables page you will specify whether the QMF catalog tables willbe protected from unauthorized users. You will also specify user permission touse those stored procedures or SQL packages.
7. Click Next.8. The Select QMF Catalog page of the wizard opens. From the Select QMF
Catalog page you will select the QMF catalog that the data source will use.9. Click Finish. The QMF Catalog Wizard closes. Control returns to the Enable
data source plug-ins page of the Create Relational Data Source wizard.
Creating or updating QMF catalog objectsThe first step to enabling QMF catalog functionality is to choose whether the QMFcatalog objects will be created or updated on the current data source.
About this task
To create or update QMF catalog database objects:
Procedure1. On the Enable data source plug-ins page of the Create Relational Data Source
wizard, select QMF Catalog Plug-in Enable plug-in check box. The Create orupdate catalog objects page of the QMF Catalog Wizard opens.
2. On the Create or update catalog objects page, you will specify whether a set ofQMF catalog tables has ever been created on the data source and what kind ofobject names (long or short) are or will be supported by the QMF catalog thatexists or will be created. Select one of the following:v Select Catalog tables have already been created if the QMF catalog tables
already exist on this data source. A set of catalog tables would have beencreated for the data source when it was originally configured in either arepository or by a prior version of the application. You would select thisoption if you know the tables have already been created and you only wantto rerun stored procedures or rebind the catalog packages.
v Select Create or update catalog tables to support short names if you areconfiguring a new data source that has never had the QMF catalog tablesinstalled and you will only use short names for objects, or you are upgrading
72 Installing and Managing QMF for Workstation and QMF for WebSphere
from a previous version of the application and the existing QMF catalogtables will continue to support only short names for objects. If no QMFcatalog tables exist on the data source, then they will be created. If you areupgrading to a new version, and a set of tables exist on the data source, theywill be checked and updated or added as necessary. You are given theopportunity to confirm and modify the SQL statements used to create thetables. Any data that is in the existing catalog tables is maintained.
v Select Create or update catalog tables to support long names if you areconfiguring a data source for the first time and want to create a set of QMFcatalog tables that use long names; you are upgrading from a previousversion of the application and the existing QMF catalog tables will continueto support only long names for objects; or you want to convert the existingcatalog tables that support short names to catalog tables that support longnames. To select this option, the data source that you are configuring mustsupport long names. If you choose to create the QMF catalog tables so thatthey support long names, QMF applications prior to Version 8.1 will not beable to use the long names QMF catalog tables.If no QMF catalog tables exist on the data source, then they will be createdand they will support long names. If a set of QMF catalog tables that supportlong names are detected on the data source, they will be updated or addedto as necessary. If an existing set of QMF catalog tables that use short namesare detected on the data source, they will be converted to support longnames. The data source will be checked to ensure that the support for longnames is available. There is no requirement to use long names in the QMFcatalog tables. If the data source uses long names, the QMF catalog tables canstill use short names. Once converted, only 8.1 or later of QMF applicationscan use these QMF catalog tables.You are given the opportunity to confirm and modify the SQL statementsused to create or update the tables. Any data that is in the existing catalogtables is maintained.
v If you do not want to create a set of QMF catalog tables for this data source,select Do not create catalog tables. You would select this option if the datasource you are configuring will not host a QMF catalog; will use a set ofQMF catalog tables that reside on a different data source; or a set of QMFcatalog tables has already been created for this data source and you are justselecting a different QMF catalog.
3. If catalog tables have not been created, you can select the Enable customizationof database object names check box to open a window where you cancustomize how database objects are named.
4. Click Next to open the next page of the wizard. If you selected:v Catalog tables have already been created option, the Protect QMF Catalog
tables page of the wizard opens.v Create or update catalog tables to support short names or Create or update
catalog tables to support long names option and you did not check theEnable customization of database object names check box, the Chooseobject listing option page of the wizard opens. Select an option and clickNext. The Creating objects page opens. On the page, type any changes thatyou want to make to the SQL statements and click Next. The Protect QMFCatalog tables page opens.
v Create or update catalog tables to support short names or Create or updatecatalog tables to support long names option and you checked the Enablecustomization of database object names check box, the Choose object listingoption page of the wizard opens. Select an option and click Next. The EnterSubstitution Variable Values window opens. The Value column of the dialog
Chapter 3. Configuring the environment 73
displays the default name of each database object. This gives you anopportunity to review and/or rename the objects that will be created. Forexample, one could preface all index names with the IX . Enter yourcustomized database object names in the Value column and click OK. TheCreating objects page opens. On the page, type any changes that you want tomake to the SQL statements and click Next. The Protect QMF Catalog tablespage opens.
v Do not create catalog tables option, the Protect QMF Catalog tables page ofthe wizard opens.
Creating database objects for the QMF catalogThe second step to enabling QMF catalog functionality is to review and run theSQL that is used to create the database objects for the QMF catalog.
About this task
This step of the process is necessary only if catalog objects were created on thedata source or the existing catalog objects need to be updated.
To modify the SQL statements that will be used to create or update the requireddatabase objects:
Procedure1. If you chose to create or update catalog tables, the Choose object listing option
page of the QMF Catalog Wizard opens.2. Select an object listing option from the radio group:v Include all objects - This option includes all objects that are saved in the
data source, regardless of a user's ability to access them.v Include only objects accessible by either the user's primary or current
authorization ID
v Include only objects accessible any of the user's primary or secondaryauthorization ID
3. Click Next. The Creating objects page of the QMF Catalog Wizard opens.4. The SQL that will be used to create or update the tables is displayed in the
field. Type any changes that you want to make to the SQL statements directlyin the field. You can modify any of the SQL statements to customize anyparameters. You can not change the name of any of the objects. You must use asemi-colon(;) to separate multiple statements. Unless absolutely necessary, it isrecommended that you run the SQL as it is displayed.
Note: You can switch the RDBI.PROFILE_VIEW to use RDBI.PROFILES orQ.PROFILES tables by specifying them in SQL. When you switch the table, youmust specify correct values for the ENVIRONMENT column for each CREATOR.v In the existing table row for a particular CREATOR, specify <NULL> to make the
creator available for both QMF for TSO and CICS and QMF for Workstationor QMF for WebSphere.
v Copy the existing table row for a particular creator and replace TSO or CICSwith WINDOWS. The creator is available for both QMF for TSO and CICS andQMF for Workstation or QMF for WebSphere.
5. Click Next. A QMF catalog named Default will be created when this step isrun. The Protect QMF Catalog tables page of the wizard opens.
74 Installing and Managing QMF for Workstation and QMF for WebSphere

Protecting catalog tables and granting user permissionsThe third step to configuring a relational data source to use a QMF catalog is tospecify whether the QMF catalog tables will be protected from unauthorized usersand to specify the users that will have permission to access the tables.
About this task
Several tables in the QMF catalog store sensitive information that should not beavailable to the public. You can choose to protect the QMF catalog tables. Inprotection mode, the QMF catalog tables are accessed using a collection of storedprocedures or SQL packages depending on what the database that is hosting theQMF catalog supports. Users of the QMF catalog must then be granted permissionto run the stored procedures or static SQL packages.
To protect the QMF catalog tables:
Procedure1. Open the Protect QMF Catalog tables page of the QMF Catalog Wizard.2. To specify the type of protection that will be applied to the QMF catalog
tables, select one of the following from the Connect using Protected Moderadio group:v Never: You select this option to specify that no protection will be placed on
the QMF catalog tables. This method will expose the QMF catalog tables tounauthorized use. With no protection the QMF catalog tables can beaccessed by any user using dynamic queries. When the databaseadministrator grants permissions to a user to access the QMF catalog thatresides on the database, that permission will extend to the whole QMFcatalog including the tables in the QMF catalog that store sensitiveinformation.
v If possible: You select this option to specify that the QMF catalog tableswill be protected using either stored procedures or static SQL packages ifthey are available on the data source. You will specify the users that canrun the stored procedures or static SQL packages. If a set of storedprocedures or static SQL packages is not available, access to the QMFcatalog tables will be as if they are unprotected.
v Always: You select this option to specify that the QMF catalog tables willalways be protected using either stored procedures or static SQL packages.You will specify the users that can run the stored procedures or static SQLpackages. If a set of stored procedures or static SQL packages is notavailable, the query to access the QMF catalog tables will fail.
3. If you selected If possible or Always from the Connect using ProtectedMode radio group, the Protect check box becomes available.
4. Select the Protect check box. The protection method options become available.5. Select one of the following protection methods:v Select Stored procedures to specify that you will use stored procedures to
protect the QMF catalog tables. You can select this option if the repositorystorage tables are located on one of the following databases:– DB2 UDB LUW V9 and above– DB2 z/OS V9 and above– DB2 iSeries (when accessed with IBM Toolbox JDBC driver)
v Select Static SQL packages to specify that you will use static SQL packagesto protect the QMF catalog tables. You can select this option if therepository storage tables are located on a Db2 database that you will
Chapter 3. Configuring the environment 75
connect to using the IBM DB2 Universal driver for JDBC or the DirectDRDA connectivity provided by the product (the latter option is availablefor Db2 for z/OS connectivity only).
6. Type, or select from the drop-down list, the name that you want to use toidentify the collection of stored procedures or static SQL packages in theCollection ID field.
7. Optionally you can type the owner name in the Owner ID field, if you workwith Db2 databases. The Owner ID provides the administrator privileges tothe user who operates under the login without SYSADM authority.
8. Click Create. The stored procedures are created or the static SQL packages arebound. A message is issued that informs you of the success of either process.You can also use Delete to remove a collection of stored procedures or staticpackages.
9. You must specify which users will have permission to run the storedprocedures or static SQL packages for the QMF catalog tables on thisdatabase. To grant permission to all users, highlight PUBLIC in the User IDslist and click Grant. To grant permission to specific users, type their user IDsin the field, highlight one or more of the user ID(s) and click Grant. Amessage is issued that informs you that the selected user IDs have beengranted permission to run the stored procedures or static SQL packages.Optionally, you can revoke permission to run the stored procedures or SQLpackages from any user that is listed in the User IDs list box. To revokepermission from one or more users, highlight one or more of the user IDs andclick Revoke. A message is issued informing you that permission to run thestored procedures or static SQL packages has been revoked from the selecteduser IDs.
10. Click Next. The Select QMF Catalog page of the QMF Catalog Wizard opens.
Selecting the QMF catalogThe last step to configuring a data source so that it can access a QMF catalog is toselect a QMF catalog.
About this task
To select the QMF catalog for the data source:
Procedure1. Open the Select QMF Catalog page of the QMF Catalog Wizard.2. From the Data source name list, select the data source that hosts the QMF
catalog that you want the data source that you are configuring to use. Thiscould be the same data source as the one you are currently configuring or adifferent data source that has already been configured in your repository.
3. From the Catalog list, select the catalog that you want the current data sourcethat you are configuring to use. You can choose one of the following types ofcatalogs:v Default: This is the main QMF catalog. It is created automatically as a result
of running the SQL statements to create objects on the data source. Allobjects saved to a default catalog are saved together. The Default catalog isthe only catalog that can be used by QMF for TSO/CICS and versions ofQMF prior to 7.2.
v Extended: Extended catalogs are extensions of the default catalog. While adata source can only host a single default QMF catalog, it can host multipleextended catalogs. Extended catalogs are useful when several data sourcesshare one QMF catalog. Without extended catalogs, all objects would be
76 Installing and Managing QMF for Workstation and QMF for WebSphere
saved into the default QMF catalog. With extended catalogs, each data sourcecan isolate their saved objects in a particular catalog extension.
4. Optional: To create a new extended catalog that will reside on the current datasource, select the Add icon. The Add Catalog window opens.
5. Optional: To edit the name or the CCSID of an existing extended QMF catalog,select the Edit icon. The Edit Catalog window opens. You can also use thiswindow to edit the CCSID for the Default QMF catalog.
6. Optional: To delete an existing extended catalog from the current data sourceselect the Remove icon. You should use caution when deleting extendedcatalogs as QMF for Workstation removes the extended catalog and all of itscontents regardless of whether other data sources might be configured to usethe extended catalog.
7. Optional: Select Refresh List to refresh the list of available extended catalogs inthe list box.
8. If you want your users to always use the current QMF catalog when workingwith the current database, select the Require the use of this catalog serverwhen accessing the current server check box.
9. Click Finish. The QMF Catalog Wizard closes. This is the last step toconfiguring a data source to use a QMF catalog. Control returns to the Enabledata source plug-ins page of the Create Relational Data Source wizard.
Creating an extended catalogYou can create extended QMF catalogs to organize user access to objects within theoverall default QMF catalog.
About this task
Instead of all objects being in the main default catalog, they can be isolated insmaller extended catalogs. There are many reasons to use extended catalogs. Youcan use them to control a user's view of objects. You can use them to isolate objectsfrom one data source that is sharing a QMF catalog on another data source. Anextended catalog can contain only the selected objects from a specific data source.You can also set up extended catalogs that have different CCSID settings from themain Default catalog.
Note: Performance, a user's views of objects, and the overall maintenance of yourquery environment can be adversely impacted when a data source uses anextended catalog (or a Default catalog) that resides on a different data source.
To create an extended catalog:
Procedure1. Open the Add Catalog window.2. Specify a unique name for the extended catalog in the Name field.3. Select a CCSID code page for the extended catalog from the CCSID list.4. Optional: Select the Create system profile entry check box to create an entry in
the System Profile table that is stored on the catalog server. A catalog server isa database server on which a QMF catalog resides. If you select this check box,QMF will create a user profile entry so that users can access the database withtheir own user IDs; otherwise the user IDs must be assigned to a group.
5. Click OK. The new extended catalog is created.
Chapter 3. Configuring the environment 77

Editing an extended catalog's propertiesYou can change the name or CCSID properties of an extended QMF catalog. Youcan also change the CCSID property of the default QMF catalog.
About this task
To edit the properties of an extended or default QMF catalog:
Procedure1. Open the Edit Catalog window.2. Specify a new name for the extended catalog in the Name field. You can not
change the name of the Default QMF catalog.3. Select a new CCSID code page for the extended catalog from the CCSID list.
You can change the CCSID of the Default QMF catalog.4. Click OK. The changes to the QMF catalog: property values are saved.
Creating personal data sourcesWhen creating a data source, you can select to make it personal. It allows you tostore this data source on the local file system and access it via any repositoryconnection. A personal data source is not accessible only when you establish aconnection to a repository that has another data source under the same name.
About this task
Personal data sources are available only to users who create them.
To create a personal data source, complete the following steps:
Procedure1. In the Repository Explorer, right-click the category of data sources to which
you want to add a personal data source.2. Click New > Data Source Type. The wizard for creating data sources opens.3. On the page of availability type selection, select Personal.
Note: This step is skipped when:v You create a folder data source, because folder data sources can only be
personal.v You are only authorized to create personal data sources in the repository.
4. Complete the procedure of creating the data source as instructed in the topicfor this particular type of data sources.
5. Click Finish. You created a personal data source. It is now located under thenode of the respective data source type. The created personal data source willbe displayed in all of the repositories to which you are connected.
6. To delete the personal data source, right-click it and select Delete. The deleteddata source will not be displayed in any of the repositories to which you areconnected.
Exporting personal data sourcesYou can export personal data sources.
78 Installing and Managing QMF for Workstation and QMF for WebSphere
About this task
To export personal data sources, complete the following steps:
Procedure1. From the main menu, select File > Export... The Export wizard opens.2. Select Personal data sources and click Next. The Export personal data sources
page of the wizard opens.3. When specifying the .wso file for export, you can:v Leave the path and the name of the default .wso file unchanged.v Type a path to another .wso file and its name or click Browse to navigate to
the file.4. From the list, select the personal data source that you want to export. To filter
the list, type a filter text in the field above the list.
Restriction: Folder data sources cannot be exported.5. Click Finish. The selected personal data source is exported to the specified file
in the local file system.
Importing personal data sourcesYou can import personal data sources from you local file system.
About this task
To import personal data sources, complete the following steps:
Procedure1. From the main menu, select File > Import... The Import wizard opens.2. Select Personal data sources and click Next. The Import personal data sources
page of the wizard opens.3. In the File name field, specify a path to a .wso file and the .wso file name, or
click Browse to navigate to a .wso file that you want to import anddouble-click it.
4. From the list, select the personal data source that you want to import. To filterthe list, type a filter text in the field above the list.
Restriction: Folder data sources cannot be imported.5. Click Finish. The imported personal data source will be displayed in any
repository to which a user connects and will be added to the category wherethe other data sources of the same type are stored.
Creating a new relational data sourceYou must add configuration information to your repositories for all relational datasources.
About this task
Relational data sources are accessed using JDBC. A relational data source storesdata in database tables. Each database table comprises a number of columns, andone or more rows. Queries for relational data sources are written in SQL.
To create a new relational data source:
Chapter 3. Configuring the environment 79
Procedure1. From the Repositories view, right-click the repository to which you want to
add the relational data source configuration information. Select New >Relational Data Source. The Create New Relational Data Source wizardopens.
2. On the page of availability type selection, select Personal or Shared.
Note: For more information about types of data source availability, see “Datasources” on page 71.
3. Click Next to open the Add new relational data source name and connectionparameters page of the wizard.
4. In the JDBC Driver field specify the library for the JDBC driver that will beused to access the database that is hosting the repository storage. You canselect from a drop down list of libraries that you defined when you set up theJDBC driver information. You can use the ellipsis (...) to the right of the fieldto open the JDBC Libraries dialog where you can create additional JDBCdriver libraries.
Note: If you work with a DB2 for z/OS database, you can use the DirectDRDA Connection. In contrast to JDBC libraries, the Direct DRDA Connectioncomes with QMF and does not require additional driver installation.
You can enable the use of SSL certificates for the Direct DRDA Connection tomake the connection secure.
Note: The Direct DRDA Connection is supported only for DB2 for z/OSVersion 9, Version 10, Version 11, and Version 12. Do not use it for DB2 LUWor DB2 for iSeries.See Using DRDA to connect to database repositories and data sources formore information.
5. In the JDBC URL list, specify the URL that points to the database that hoststhe repository storage within which the repository to which you want toconnect resides.The format for the URL can be displayed in the list.
Note: You can also use the Build URL by URL Template dialog box to formthe correct string.
Click Build URL to open the Build URL by URL Template dialog box. Fromthe JDBC URL drop-down list, select the template. In the table, specify theserver, port, and database information and click OK. The result URL string isadded to the JDBC URL list.
6. Click Advanced to specify any driver-specific connection string keywords andtheir values that will be used when connecting to this shared repository. Forinformation on any keywords that are required by a selected database driver,consult the specific driver's documentation.
Note: For the DB2® Type 4 UDB driver, to receive extended SQL exceptionerror messages, check the retrieveMessagesFromServerOnGetMessage optionin the Advanced JDBC Settings window.
7. To configure a PassTickets-based Single Sign-on connection between QMF andDb2 for z/OS database, click Single Sign-on.
80 Installing and Managing QMF for Workstation and QMF for WebSphere
8. If you use the Direct DRDA Connection, bind packages by clicking the BindPackages button.
9. Click Set User Information. The User Information window opens.10. Select the User ID and password are required check box to specify that user
information will be requested each time this data source is accessed. Thischeck box can be left clear if the data source does not require logoninformation, or if the logon information is obtained using some other means,such as Kerberos or Windows authentication.
11. Select the Try to use repository login and password to connect to this datasource check box to specify that before requesting logon information from theuser, the current repository login and password will be used to try andconnect to the data source (such as the case in Kerberos security).
12. Specify the user ID and password that will be used to access the data sourcein the User name and Password fields. Click OK. The User Informationwindow closes and control returns to the Create New Relational Data Sourcewizard.
13. To test the connection, click Test Connection.14. Click Next. The second page of the Create New Relational Data Source wizard
opens where you will enable the Database and QMF catalog plug-ins for thedata source.
Enabling data source plug-insThe second step in configuring a relational data source is to enable one or more ofthe available plug-ins that provide additional functionality for the data source.
About this task
For each relational data source that you configure in the repository you can enableadditional functionality that applies specifically to that data source. QMF CatalogPlug-in is an example of such functionality. When you enable the QMF Catalogplug-in for a relational data source, users can access the QMF catalog that youspecify whenever they are connected to the data source. They will be able to viewand access any objects that are saved in the QMF catalog and, if they choose, theycan save any new objects to the QMF catalog. With the QMF Catalog plug-inenabled, accelerator tables are displayed only in the Accelerator node of the datasource tree of objects. With the plug-in disabled, accelerator tables are displayedboth in the Accelerator node and the Database node of the tree.
If the database that you are using supports IDAA, Acceleration Database Plug-inbecomes available on the Properties page of your data source. Click Parameters toconfigure protection options for Accelerator tables. The procedure is identical toconfiguring protection options for QMF catalog tables. For more information, seethe Protecting catalog tables and granting user permissions topic of AdministratorHelp.
To enable plug-ins for a relational data source:
Procedure1. Open the Enable data source plug-ins page of the Create New Relational Data
Source wizard.2. To configure this data source to use a QMF catalog, select the Enable Plug-in
check box. The QMF Catalog Wizard opens. Upon completion of the wizard'sprocessing, control returns to the Enable data source plug-ins page of theCreate New Relational Data Source wizard.
Chapter 3. Configuring the environment 81
3. The QMF catalog will be available to this relational data source. By default, thenode label for the QMF catalog as it will appear in the repository will be QMFCatalog. You can specify a unique name. Type the name that you want to useto identify this QMF catalog in the Catalog Label field. Optionally, you cantype a comment that describes the QMF catalog in the Comment field.
4. To change any of the QMF catalog plug-in parameters, click Parameters. TheQMF Catalog Plug-in Parameters window opens. Upon completion ofmodifying the parameters, control returns to the Enable data source plug-inspage of the Create New Relational Data Source wizard. You can also open theQMF Catalog Plug-in Parameters window from the Repository Explorer viewby right-clicking a data source, selecting Properties from the pop-up menu, andselecting Plug-ins from the Properties list.
5. By default, the node label for all of the native database objects for thisrelational data source as it appears in the repository will be Database. You canspecify a unique name. Type the name that you want to use to identify thesedatabase objects in the Label field. You can also choose to type a comment thatdescribes the native database objects in the Comment field.
6. Click Next. The third page of the Create New Relational Data Source wizardopens where you will select the resource limits provider for the data source.
Selecting the resource limits providerThe third step in configuring a relational data source is to specify whether theresource limits that will govern access to the data source will be provided from therepository or from the QMF catalog.
About this task
To specify the resource limits provider for a relational data source:
Procedure1. Open the Select resource limits provider page of the Create New Relational
Data Source wizard.2. From the Resource limits provider drop-down list, select where the resource
limits for this data source are defined. Your choices are:v Repository if the resource limits are defined in the repository.v QMF Catalog if the resource limits are defined in a QMF catalog. This option
is only available if you have enabled the QMF Catalog plug-in for the datasource.
3. Click Finish. The Repositories view lists the data source configurationinformation under a folder named Relational Data Sources. The objects foreach data source will be organized in two folders that will include databaseobjects and QMF catalog objects if the QMF catalog was enabled. You havecompleted the process of configuring a relational data source in the repository.You would now customize the feature set of the data source.
Note: From the Repositories view of the data source, you can view and movethe listed objects. However, if you want to run any objects you must beconnected to the repository. To connect to the repository you must set uprepository connection information if it has not been created. Click therepository connection information for the repository that is listed in theRepository Connections view. When you are connected to the repository selectthe object to run from the Repository Explorer view.
4. To add, edit, or delete resource limits, right-click the data source in theRepository Explorer view (after it has been created) and click Properties from
82 Installing and Managing QMF for Workstation and QMF for WebSphere
the pop-up menu. Select Resource Limits from the Properties tree. You canadd, edit, and delete resource limits groups, schedules and user assignments.
5. You can selectively perform any of the following to customize the feature set ofthe data source:v Set up login mapping for the data source.v Add data source information to a workspace.v Set up customized workspaces and assign the users and groups that will be
allowed to use them.v Assign the users and groups permission to access any repository object.v Create, edit, or delete resource limits groups, schedules, and resource limit
values.v Set up repository connections.
Specifying additional parametersYou can specify additional data source parameters on the Information page of thedata source Properties window.
About this task
You must specify the settings for additional data source parameters that determinehow the data source retrieves data. To specify these additional parameters:
Procedure1. From the Repository Explorer view, right-click the data source that you want to
edit and click Properties. The Properties window opens.2. Select Information. The Information page opens.3. Specify the settings in the Additional parameters table. Valid additional
parameters include:
Emulate Host QMF Column Naming (Db2 Only)Specifies whether the data source emulates the column namingconventions of the host QMF catalog. This option is only valid for Db2data sources.
Enable Spatial ExtensionsSpecifies whether extensions are enabled for spatial data that is storedin the data source.
Schema Retrieval MethodSpecifies how schemas are retrieved from the database. If you selectgetTables, the schemas are organized by their table names. If you selectgetSchemas, the schemas are organized by their owners. If you selectgetTables/getSchemas, the schemas are organized according to thefiltering options that you have specified in the Set Name Filter dialog:if the Name field contains the % character, the schemas are organized bytheir owners. If the Name field contains anything else, the schemas areorganized by their table names.
Note: getTables/getSchemas is the default schema retrieval method fornon-Db2 databases.
Do Not Access Database to Retrieve Query MetadataSpecifies whether query metadata is retrieved from the host database.
Use this parameter to reduce the time of running the query and displaythe result set faster. It is FALSE by default. When this parameter is set
Chapter 3. Configuring the environment 83

to TRUE, the application does not refer to database and does notretrieve the metadata. So the result set is displayed faster, but theamount of R/W (read and write) queries is smaller than when themetadata are retrieved and this parameter is set to FALSE.
4. When you finished specifying the additional parameters, click Apply. Thechanges are saved to the data source.
5. Click OK. The Properties window closes.
Creating a new multidimensional data sourceYou must add configuration information to your repositories for allmultidimensional data sources.
About this task
Multidimensional data sources are accessed using XMLA. Multidimensional data isorganized by one or more dimensions. Multidimensional data structures are oftenreferred to as cubes. Queries for multidimensional data sources accessed usingXMLA are written in MDX.
To configure multidimensional data source information in a repository:
Procedure1. Open the New Multidimensional Data Source wizard in one of the following
ways:v Right-click the Multidimensional Data Sources node in the Repositories
view. Select New. Select Multidimensional Data Source from the pop-upmenu. The New Multidimensional Data Source wizard opens.
v From the File menu, select New. Select Other from the pop-up menu. TheNew window opens. Expand the Repository folder. Select MultidimensionalData Source. The Create New Multidimensional Data Source wizard opens.
2. On the page of availability type selection, select Personal or Shared. ClickNext.
Note: For more information about types of data source availability, see “Datasources” on page 71.
3. In the Data Source Name field, type a name that will be used to identify thedata source in the repository. This can be any name.
4. QMF will use XML for Analysis (XMLA) via HTTP protocol to connect to amultidimensional data source. You specify the URL that will point to the datasource in the HTTP URL field.
5. Select User ID and password are required to require the use of a user ID andpassword when accessing this multidimensional data source. If the data sourceallows access without a user ID and password, selecting this option willoverride that allowance, and a user ID and password will be required to accessthe data source.
6. Specify the user ID and password that will be used to access the data source inthe User name and Password fields. To test the connection, click the TestConnection button.
7. Select the multidimensional data source that you want to add to the repositoryfrom the Data Source list box. All the data sources that are located at thespecified URL address are listed in the Data Source list box. You can refreshthe list using the refresh button.
84 Installing and Managing QMF for Workstation and QMF for WebSphere
8. Optional: Type a comment that describes the data source in the Descriptionfield. This comment will display with the properties for the data source.
9. Click Finish. The multidimensional data source is listed in the Repositoriesview under the Multidimensional Data Sources node. You would repeat thisprocess for all multidimensional data sources that you want to be accessiblefrom the repository.
Results
Note: Support for resource limits or login mapping is not available formultidimensional data sources.
Creating a Hive data sourceYou can create Hive data sources to work with Apache Hadoop, which is the opensource software framework, used to reliably managing large volumes of structuredand unstructured data.
Before you begin
Make sure you have defined the Hive driver library JAR files so that QMF canconnect to Hive data sources.
About this task
Hive data source is a data warehouse infrastructure that provides datasummarization and ad hoc querying. Hive data sources are accessed using specialdrivers for JDBC. The current JDBC interface for Hive only supports runningqueries and fetching results.
To create a Hive data source:
Procedure1. Select File > New > Other > Repository > Hive Data Source. The Create New
Hive Data Source wizard opens.2. On the page of availability type selection, select Personal or Shared. Click
Next.
Note: For more information about types of data source availability, see “Datasources” on page 71.
3. Type the data source name in the Data Source Name field.4. Specify the necessary parameters in the Connection Parameters area. You must
set the Host name, Port number, and Database name.5. Click Set User Information button to specify the necessary user parameters.6. Click Advanced button to select the advanced parameters supported by the
installed Hive driver.7. In the Description field, you can enter the description of the created data
source.8. Click Finish to create the Hive data source and close the Create New Hive
Data Source wizard.
Working with folder data sourcesCreate folder data sources to access data files on your file system as tables.
Chapter 3. Configuring the environment 85
Folder data sources provide users with a convenient way to work with data files inseparate data sources. When creating a folder data source, you select a folder onyour file system, and all the data files of supported types that are located there areconverted by the application into tables.
In the Repository Explorer tree, the Tables node structure is based on conversionof the folder and its content.
Table 12. Conversion of folder objects into the Tables node
File system object Folder data source object
Root folder Root schema
v Subfolder (if included)
v .xls file
v .xlsx file
Schema
v Data file of a supported type (except .xls,.xlsx files)
v Spreadsheet in a .xls or .xlsx file
Table
You work with such tables in the standard query editor. You can also configure thedisplay of content of data files.
Folder data sources can be accessed locally, only by users who created them,regardless of the repository connection they are using.
Creating folder data sourcesCreate folder data sources to access data files from your file system as tables. Youcan work with the following file formats: xls, xlsx, csv, txt, xml, ixf, dbf, tab, ctab.
About this task
Each created folder data source represents a folder selected from your file systemso that all data files of supported types in this folder are converted into tables. Bydefault, all folder data sources are personal.
To create a folder data source, perform the following steps:
Procedure1. Open the Create Folder Data Source wizard in one of the following ways:v Right-click the Folder Data Sources node in the Repositories view. Select
New > Folder Data Source from the context menu. The Create Folder DataSource wizard opens.
v Select File > New > Other. The New window opens. Expand the Repositoryfolder. Select Folder Data Source. The Create Folder Data Source wizardopens.
2. Enter a name for the new folder data source in the Data Source Name field.3. Specify the folder data source parameters in the Parameters area:v In the Directory field, specify the path to the source folder, or browse for it
by clicking the ellipsis (...) button.v To include the subfolders in the selected source folder, select the Include
subfolders check box.
86 Installing and Managing QMF for Workstation and QMF for WebSphere
v To include the hidden files in the selected source folder, select the Includehidden files check box.
4. In the Comment field, type a comment to describe the created folder datasource. The comment will be displayed in the properties of this data source.
5. Click Finish.
Results
You created a folder data source. It is now located under the Folder Data Sourcesnode.
Editing folder data sourcesYou can configure the display of content of data files in folder data sources.
About this task
Depending on the format of data files, you can configure different parameters ofdata display in folder data sources. To configure data display in folder data source:
Procedure1. Right-click a table that you want to edit.2. Select Properties > Import Parameters.3. If available, from the Encoding list, select the encoding type.4. In Settings, specify how content of the data file is converted into the table.
The steps to perform in Settings depend on the type of the data files andcorrespond to the analogous procedure for imported files. For moreinformation, see topics on importing data files in “Specifying conversionoptions for Excel files in folder data sources” on page 88 and “Specifyingconversion options for CSV and TXT files in folder data sources” on page 88.
5. Click Metadata to configure the table fields.6. Select what columns to include in the result set by checking the check boxes
to the left of the Field name column.7. To edit a column name, click a cell in the Field name column and enter a new
name.8. To specify a different data type, click a cell in the Type column and select a
data type from the list. Available options are the following:v INTEGER can be used to store signed whole numbers between -2 147 483
648 and 2 147 483 647.v BIGINT can be used to store large signed whole numbers between -9 223
372 036 854 775 808 and 9 223 372 036 854 775 807.v DOUBLE can be used to store large numbers with a floating decimal point.v CHAR is used to store fixed-length string of characters. For example, you
can use it to store employee phone number which is generally fixed inlength.
v VARCHAR is used to store variable-length string of characters likeemployee name.
v DECIMAL is used to store the fixed precision and scale numbers. This datatype should be used for precise values, such as currency.
v DATE is used to store a date only.v TIME is used to store a time only.v TIMESTAMP is used to store both a date and a time.
Chapter 3. Configuring the environment 87

Note: DATE, TIME, and TIMESTAMP data types support different formatoptions that define how the values are displayed in the result set.
Note: The supported ranges and the precision of values might varydepending on the database you use.
9. In the Length field, specify a maximum number of characters for the VARCHARtype.
10. In the Precision field, specify a maximum total number of digits for theDECIMAL type.
11. In the Scale field, specify a maximum number of:v fractional digits for the DECIMAL typev digits in the fractional seconds part for the TIMESTAMP or TIMESTAMP WITH
TIMEZONE type12. In the Preview pane, you can track how each selection changes the layout of
the result set.13. To save the changes and close the dialog, click OK.14. To save the changes without closing the dialog, click Apply.15. To restore the original metadata configuration, click Restore Defaults.16. To cancel the changes to the fields, click Cancel.
Specifying conversion options for Excel files in folder data sources:
You use the Settings tab of the Import Parameters wizard to specify how QMF willconvert the data of the Excel file into a table in the folder data source.
About this task
To specify conversion options in Settings for the Excel file:
Procedure
1. Click the Settings tab of the Import Parameters wizard.2. In the First row number field, type the row number of the Excel sheet that you
want to be the first row in the result set.3. In the First column number field, type the column number of the Excel sheet
that you want to be the first column in the result set.4. To limit the number of rows in the result set, select the Row limit check box
and type the number of rows.5. To limit the number of columns in the result set, select the Column limit check
box and type the number of columns.6. If you want to turn the first row of the Excel document into the column names
of the result set, select the First row contains column names check box.7. In the Preview pane, you can track how each selection changes the layout of
the result set.
Specifying conversion options for CSV and TXT files in folder data sources:
You use the Settings tab of the Import Parameters wizard to specify how QMF willconvert the data of the CSV or TXT file into a table in the folder data source.
About this task
To specify conversion options in Settings for the CSV or TXT file:
88 Installing and Managing QMF for Workstation and QMF for WebSphere

Procedure
1. Click the Settings tab of the Import Parameters wizard.2. Select the Skip rows starting with check box and specify a string in the text
field to exclude certain rows from the result set.3. Select what symbol is used to display decimal points in the file in the Decimal
separator drop-down list.4. Select the First row contains column names check box to specify that the first
line of the file contains the names of columns to be created.5. To specify that the columns will be created based on a fixed set of character
lengths, click Fixed width and then specify the specific widths of the columnsby entering the character lengths in the Specify columns width field. Wheneach character length is reached in the text, the characters after that point areplaced in a separate column, regardless of the content of the text.
6. To specify that the columns will be created automatically by breaking at certainsymbols, click Separated by and then selecting the symbols check boxes below.When the result set is made, each time these symbols are encountered in thetext, the characters after the symbol are placed in a separate column.
7. Select the Merge separators check box to consolidate columns that are createdby multiple adjacent separators into one column. For example, if Comma andSpace are selected and the text includes the string NAME, DEPT, three columnswill be created. The first column contains NAME, and was created when thecomma was encountered. The second column is empty, and was created whenthe space was encountered. The third column contains DEPT, and was createdwhen the remaining text was encountered. By selecting the Merge separatorscheck box, only one column is created when the comma and the space areencountered.
8. Select whether a single or double quotation marks are used to delineate text inthe Text qualifier drop-down list. Text that is contained in the specified quotesis always displayed as is, whether it contains a separator symbol or not.
9. In the Preview pane, you can track how each selection changes the layout ofthe result set.
Creating a virtual data sourceCreate a virtual data source to tailor the way users view enterprise data. Virtualdata sources introduce a database metadata layer that allows you to optionallyhide the complexities of your underlying database structures.
About this task
To create a new virtual data source:
Procedure1. Open the New Virtual Source wizard in one of the following ways:v Right-click the Virtual Data Sources node in the Repositories view. Select
New > New Virtual Data Source from the pop-up menu. The New VirtualSource wizard opens.
v Select File > New > Other. The New window opens. Expand the Repositoryfolder. Select New Virtual Data Source.
The Create New Virtual Source wizard opens.2. On the page of availability type selection, select Personal or Shared. Click
Next.
Chapter 3. Configuring the environment 89
Note: For more information about types of data source availability, see “Datasources” on page 71.
3. Enter a name for the new virtual data source in the Data Source Name field.4. Specify the virtual data source parameters in the Parameters area:
a. Select In-memory check box to create an inner in-memory database for thework of the virtual data source.
b. If you want to save the inner database in to the file system, select Back upserver on shutdown check box. Then when you shut down the applicationin normal mode the database will be saved to the file system and retrievedat the next launch of the application.
5. Click Finish. The new virtual data source is listed under the Virtual DataSources node.
Results
You have added a new virtual data source.
The new virtual data source is displayed under the Virtual Data Sources node.
What to do next
You can now add tables to the virtual data source.
Editing virtual data sourcesUse the virtual data source editor to manage the content and structure of virtualdata sources and to administer user and user group authorization to a data source.
To edit a virtual data source, locate it in the Repository Explorer view anddouble-click it. The [DataSourceName] editor opens.
The [DataSourceName] editor consists of two sections:v The Structure section, from which you can modify the structure of a virtual data
source.v The Security section, from which you can administer users and user groups
authorization to the data source stored in the secured repository.
Modifying the structure of virtual data sources:
Use the Structure tab of the virtual data source editor to modify the structure ofvirtual data sources.
About this task
To modify the structure of your virtual data source, complete the following steps:
Procedure
1. In the Repository Explorer pane, select the table or query that you want to addto your virtual data source and click Copy Selected. You added an object toyour virtual data source.You can also add tables to your virtual data source by using the Virtual Tablewizard. For more information, see the Creating virtual tables topic of the UserHelp.
2. In the Tables pane, edit the tables that are stored in your virtual data source.
90 Installing and Managing QMF for Workstation and QMF for WebSphere
a. To add a column to your table, select the table and click Add Column.b. To edit the expression of a calculated column, select a column with an
expression and click Edit.c. To delete a column from your table, expand the table, select the column that
you want to remove, and click Delete.d. To change the position of a column, expand your table, select the column
that you want to reposition and click Move Up or Move Down.e. To specify cache expiration schedules for your table, select it and click
Assign Expiration Schedules.f. To edit the source query of your table, right-click the table and select Edit
Table SQL or Edit Table Link..., depending on the type of your sourcequery.
Administering virtual data sources:
Use the Security tab of the virtual data source editor to set user roles andpermissions for your virtual data source that is stored in a secured repository.
About this task
Complete the following steps to administer your virtual data source:
Procedure
1. To apply user permissions to a table or a column, expand Tables in the Tablespane and select the table that you want to administer.
2. See the list of users and user groups in the Groups or users names pane.a. To filter the list, select or clear the Show users and Show groups check
boxes.b. To edit the permissions of each user or user group, select it and drag it to
the Permissions pane.3. Edit the permissions that are currently authorized for each owner in the
Permissions pane. For more information about the permissions, see Assigningusers and groups permission to use repository objects.
4. Apply user permissions to specific table rows in the Row level securityconditions pane.a. To apply user permissions on a row level, select the user that you want to
grant permissions to in the Permissions pane.b. In the Row level security conditions pane, select the Override parent’s
conditions check box.c. In the editor area, type the column name, the values of which you want to
use as a filter, and type the condition. For example, if you work with theQ.STAFF table and only want to display managers to a particular user, typeJob=’MGR’.
Note: The Row level security conditions pane is only available for virtualtables based on relational tables.
5. Click Apply to save the settings.
Specifying settings of cache expiration schedules in virtual andJavaScript data sourcesYou can enable caching for virtual data sources and tables that they store on theCache Settings page of virtual data source properties window.
Chapter 3. Configuring the environment 91
About this task
When you enabled caching for a virtual data source, records from the tables storedin this virtual data source are cached. If you open one of these tables, its recordswill be retrieved from cache rather than from the data source. You can also enablecaching for individual tables within a virtual data source.
To enable caching for virtual data sources:
Procedure1. Select File > New > Other > Virtual Data Source Schedule to open the Create
New Expiration Schedule wizard.2. From the Data source list, select the data source to which you want to specify
the cache expiration scheduler.3. In the Schedule name field, enter the name you want to use for this schedule.4. In the Data Expires area, specify the period of the cache expiration. The
available options are:a. Hourly: Select this option to specify that the same cache data will be used
for one hour period.b. Daily: Select this option to specify that the same cache data will be used for
a 24 hour period.c. Weekly: Select this option to specify that the same cache data will be used
for a period of 7 days.d. Monthly: Select this option to specify that the same cache data will be used
for a month.e. At specific date: Select this option to specify that the same cache data will
be used until a specific date is reached. If you select this option, the cachewill be updated on the specific date.
f. Never expires: Select this option to specify that the same cache data willalways be used. If you select this option, the cache will never be updated.
g. Always expired: Select this option to specify that the data will always beupdated every time a query is run against this data source.
5. If you selected Hourly, Daily, Weekly, Monthly, or At specific date, clickNext.
6. Depending on the type of schedule that you are creating one of the followingvariations of the Set schedule properties page of the wizard opens:a. If you selected Hourly, specify the date and time that the hour period will
start in the Begin date and the Begin time fields. In the Expiration Intervalarea, specify expiration interval in Hours and Minutes fields.
b. If you selected Daily, specify the date and time that the 24 hour period willstart in the Begin date and the Begin time fields. You specify when the 24hour period will occur in the Data Expires area:v Select Daily to specify that the 24 period will occur every day.v Select Each to specify that the 24 hour period will occur every number of
days and select the number from the list.v Select Days of week to specify that the 24 hour period will occur on one
or more specific days. You must select the check boxes for the properdays.
c. If you selected Weekly, specify the date and time that the week will start inthe Begin date and the Begin time fields. You can select a number from the
92 Installing and Managing QMF for Workstation and QMF for WebSphere
Each week list to specify that the 7 day period will occur every number ofweeks. In the Days of Week area, specify particular days on which thecache will be updated.
d. If you selected Monthly, specify the date and time that the month will startin the Begin date and the Begin time fields. You can enter a specific day inthe Day field or to specify that data retrieval will occur on a specific day ofthe week in the month in the Or field. In the Select Months area, specifythe required months.
e. If you selected At specific date, specify the date and time that will triggerdata retrieval in the Date and time list. Click the cell, the ellipsis (...)appears. Then click the ellipsis (...) to open a calendar where you will selectthe date and time.
7. Click Finish. The schedule is created and listed in the Schedules node of theparticular virtual data source in the Repository Explorer view.
Scheduling cache expiration for virtual and JavaScript datasourcesYou can use expiration schedules for virtual data sources and tables that they storeon the Cache Settings page of virtual data source Properties window.
About this task
When the Use expiration schedules check box is clear the caching expiration modeequals Always Expired for a virtual data source. Records from the tables stored inthis data source are updated each time on-demand.
To specify particular cache schedule for virtual data sources or their tables,complete the following procedure:
Procedure1. From the Repositories or Repository Explorer view, right-click a virtual data
source and select Properties.2. In the Properties for [data source] window, select Cache Settings.3. On the Cache Settings page, select the Use expiration schedules check box.
The schedule expiration settings become available.4. From the Default expiration schedule list, select the schedule that you want
to use as the default one for the whole data source.
Note: A created data source has Always Expired default settings.5. To assign a particular cache expiration schedule to a particular table click the
Schedule name column of the table the settings of which you want to modifyand select the required scheduler from the list of available ones.
Note: If tables contain any substitution variables, only Always Expiredexpiration schedule is applied to such tables.
6. If you have any tables that require authorization for accessing them, you mustspecify the authorization settings for the data source. Click the ManageAuthorization button. The Manage Authorization dialog opens.
7. All the data sources that require authorization are listed there. Thisauthorization data will be used for updating the cache. Click Login columnfor the required data source. The Edit Data Source Login dialog opens.
8. Enter the proper values in the Login, Password, and Verify Password fieldsand click OK.
Chapter 3. Configuring the environment 93
9. When you finish specifying authorization data for all required data sources,click OK in the Manage Authorization dialog.
10. Click Apply and then click OK to close the Properties for [data source]window.
Enabling automatic cache refresh for virtual and JavaScript datasourcesEnabling the application to automatically refresh the cache of virtual andJavaScript data sources allows users to run queries against these types of datasources faster.
Before you begin
Before you can enable the automatic cache refresh option for a data source, makesure to schedule cache expiration for that data source. For more information, seethe Scheduling cache expiration for virtual and JavaScript data sources topic ofAdministrator Help.
About this task
To enable the automatic cache refresh option for a virtual or JavaScript data source,complete the following steps:
Procedure1. From the main menu, select View > Preferences.2. On the left side of the Preferences window, click Virtual Data Source.3. Select the Enable automatic cache refresh check box.4. Click Apply, then click OK.5. Optional: To invalidate the cache manually, right-click a data source and select
Invalidate Data Source Cache from the menu.
Working with JavaScript data sourcesYou can collect data from network resources and store it inside the application inthe form of JavaScript data sources.
The following topics include reference information about JavaScript data sources:
Creating a JavaScript data sourceCreate a JavaScript data source to collect data from a web service as a data sourceand process it in the form of relational tables.
About this task
To create a JavaScript data source, perform the following steps:
Procedure1. From the main menu, select File > New > Other.2. In the New window, expand the Repository folder and select JavaScript Data
Source. The Create JavaScript Data Source wizard opens.3. On the page of availability type selection, select Personal or Shared. Click
Next.
94 Installing and Managing QMF for Workstation and QMF for WebSphere
Note: For more information about types of data source availability, see “Datasources” on page 71.
4. Enter a name for the data source in the Data Source Name field.5. In the Connection Parameters area:
a. In the URL field, enter the URL of the web resource to that you want toconnect and get data.
b. Select the User ID and password are required check box to request userinformation each time when the web resource is accessed. If the webresource does not require logon information, leave the check box clear.
c. Select the Allow users to save password check box if you want to allow theapplication to remember the password for the entered user ID.
6. Click Next. On the JavaScript Parameters page of the wizard, specify the globalparameters for the data source that you can address by using thedataSource.parameters object in JavaScript modules. You can easily modifythese parameters if you need to connect to other web resource or with otheruser credentials.a. Click Add Parameter, enter the parameter name and value in the
corresponding columns.b. To delete parameters from the data source, select them and click Remove
Parameter.7. Click Finish.
Results
You created a JavaScript data source. The editors for the Authenticate, CommonFunctions, and Disconnect JavaScript modules open. Now, populate the data sourcewith JavaScript tables.
Objects and methods in JavaScript data sources:
Use the dataSource object to address the parameters and the sendHTTPRequest()method to create RSBIHttpRequest objects in JavaScript data source.
Object Properties Possible Values Description
dataSource.parameters Object The parameters that are specified for theJavaScript data source on the second page of theCreate JavaScript Data Source wizard.
For example, if the supportTeamEmail parameterswas specified in the wizard, you can address it byusing dataSource.parameters.supportTeamEmailin the code.
dataSource.url String The URL that was specified for the JavaScript datasource.
dataSource.userinfo.login String The user name that was specified for the networkresource in JavaScript data source.
dataSource.userinfo.password Srting The password that was specified for the networkresource in JavaScript data source.
sendHTTPRequest() method
You can use the sendHTTPRequest() method to create RSBIHttpRequest objects inJavaScript data sources only.
Chapter 3. Configuring the environment 95
Table 13.
Parameter Description
method Specifies the HTTP method to use, such as"GET", "POST", "PUT", "DELETE", and so on.
url Specifies the URL to send the request to.
headers Specifies the list of header field definitionsas a JavaScript object. (Optional)
body Specifies the data that is sent in the requestto the server. It is relevant for the "PUT","PATCH", and "POST" methods. (Optional)
Note:
v When you use the sendHTTPRequest() method, SSL certificates are ignored.v If the url parameter does not contain the http prefix, the url is relative to the one
that is specified in the dataSource.url property. For example, dataSource.url =www.example.com and url = page1, the final url is www.example.com/page1.
Examplesvar request = dataSource.sendHTTPRequest("GET",url);
RSBIHttpRequest class:
The class that is used to make HTTP requests. It has the same functions as thestandard JavaScript object XMLHttpRequest 1.0. The latter is also supported but itis recommended to use RSBIHttpRequest.
NTLM authentication
You can specify the additional parameters in the open() method ofRSBIHttpRequest class to use NTLM authentication. See Example 2.
Parameters
Parameter Description
method Specifies the HTTP method to use, such as "GET", "POST","PUT", "DELETE" and so on.
url Specifies the URL to send the request to.
async Supplies a Boolean value indicating whether or not toperform the operation asynchronously.
username Required for NTLM authentication. This parameter specifiesthe name of the user.
password Required for NTLM authentication. This parameter specifiesthe password of the user.
domain Required for NTLM authentication. This parameter specifiesthe name of the domain.
workstation Optional for NTLM authentication. This parameter specifiesthe name of the workstation.
96 Installing and Managing QMF for Workstation and QMF for WebSphere
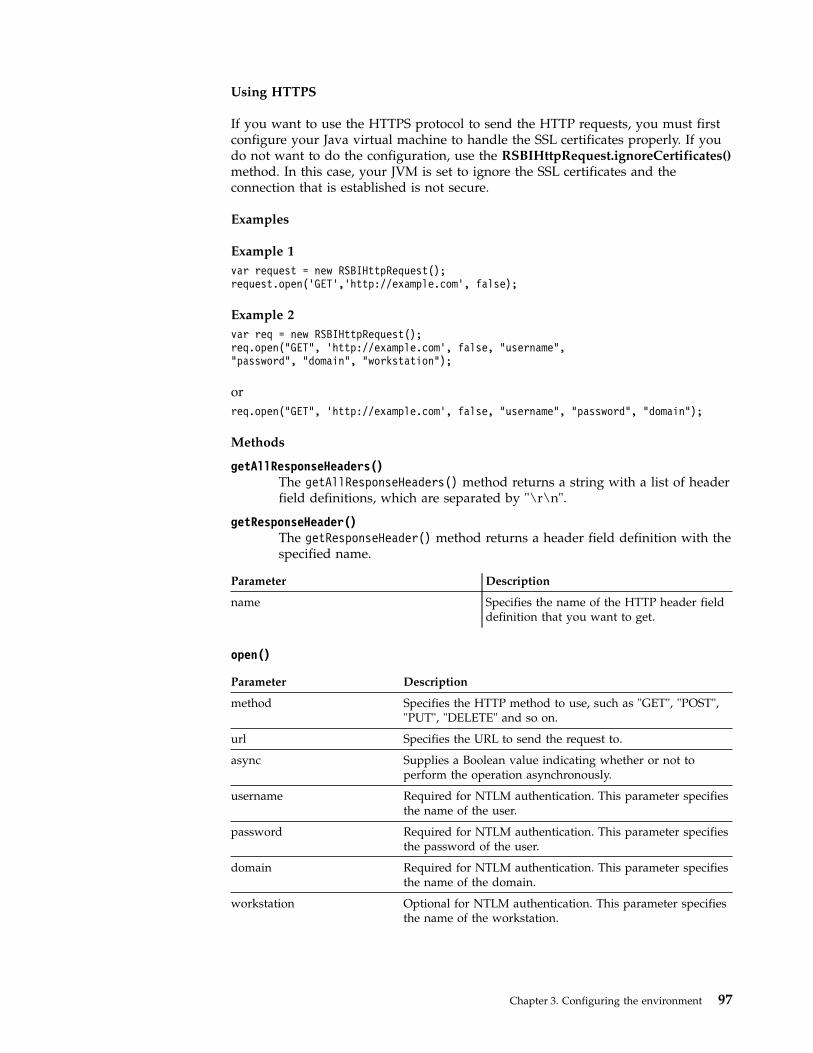
Using HTTPS
If you want to use the HTTPS protocol to send the HTTP requests, you must firstconfigure your Java virtual machine to handle the SSL certificates properly. If youdo not want to do the configuration, use the RSBIHttpRequest.ignoreCertificates()method. In this case, your JVM is set to ignore the SSL certificates and theconnection that is established is not secure.
Examples
Example 1var request = new RSBIHttpRequest();request.open(’GET’,’http://example.com’, false);
Example 2var req = new RSBIHttpRequest();req.open("GET", ’http://example.com’, false, "username","password", "domain", "workstation");
orreq.open("GET", ’http://example.com’, false, "username", "password", "domain");
Methods
getAllResponseHeaders()The getAllResponseHeaders() method returns a string with a list of headerfield definitions, which are separated by "\r\n".
getResponseHeader()The getResponseHeader() method returns a header field definition with thespecified name.
Parameter Description
name Specifies the name of the HTTP header fielddefinition that you want to get.
open()
Parameter Description
method Specifies the HTTP method to use, such as "GET", "POST","PUT", "DELETE" and so on.
url Specifies the URL to send the request to.
async Supplies a Boolean value indicating whether or not toperform the operation asynchronously.
username Required for NTLM authentication. This parameter specifiesthe name of the user.
password Required for NTLM authentication. This parameter specifiesthe password of the user.
domain Required for NTLM authentication. This parameter specifiesthe name of the domain.
workstation Optional for NTLM authentication. This parameter specifiesthe name of the workstation.
Chapter 3. Configuring the environment 97
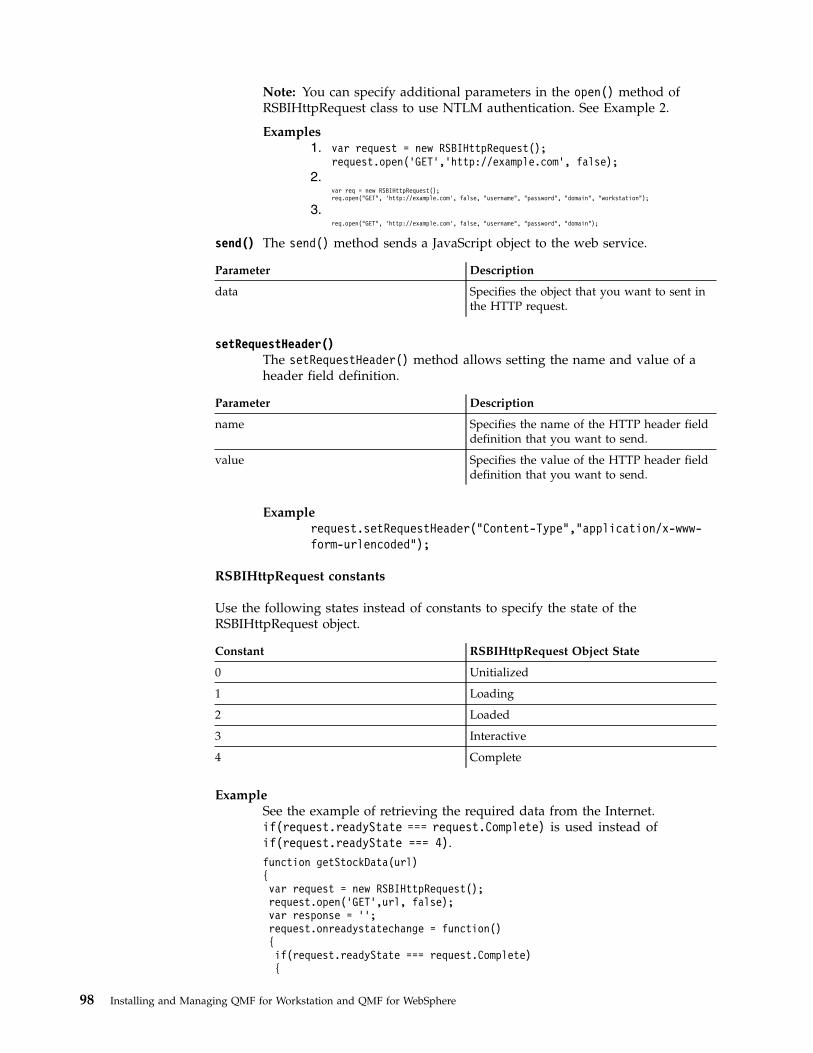
Note: You can specify additional parameters in the open() method ofRSBIHttpRequest class to use NTLM authentication. See Example 2.
Examples1. var request = new RSBIHttpRequest();
request.open(’GET’,’http://example.com’, false);2.
var req = new RSBIHttpRequest();req.open("GET", ’http://example.com’, false, "username", "password", "domain", "workstation");
3.req.open("GET", ’http://example.com’, false, "username", "password", "domain");
send() The send() method sends a JavaScript object to the web service.
Parameter Description
data Specifies the object that you want to sent inthe HTTP request.
setRequestHeader()The setRequestHeader() method allows setting the name and value of aheader field definition.
Parameter Description
name Specifies the name of the HTTP header fielddefinition that you want to send.
value Specifies the value of the HTTP header fielddefinition that you want to send.
Examplerequest.setRequestHeader("Content-Type","application/x-www-form-urlencoded");
RSBIHttpRequest constants
Use the following states instead of constants to specify the state of theRSBIHttpRequest object.
Constant RSBIHttpRequest Object State
0 Unitialized
1 Loading
2 Loaded
3 Interactive
4 Complete
ExampleSee the example of retrieving the required data from the Internet.if(request.readyState === request.Complete) is used instead ofif(request.readyState === 4).function getStockData(url){var request = new RSBIHttpRequest();request.open(’GET’,url, false);var response = ’’;request.onreadystatechange = function(){if(request.readyState === request.Complete){
98 Installing and Managing QMF for Workstation and QMF for WebSphere
response = request.responseText;}}request.send(null);return response;}
Modules in JavaScript data sources:
The following topics include reference information about preset and user modulesin JavaScript data sources.
Users can work with the following preset modules in JavaScript data sources:v Authenticate can contain the script for connecting to a web service and
authorizing at it.v Common Functions can contain the common script with global functions that you
want to use in other modules. For example, functions for getting data from aweb service or caching.
v Disconnect can contain the script for disconnecting from a web service andlogging out from it.
Users can also create additional modules to expand the functionality of aJavaScript data source according to their needs.
The preset and user modules are always initialized in the following order:1. Common Functions module2. User modules3. Authenticate module4. Load Data modules of the JavaScript tables that are stored in the data source.
Load Data modules are used to process the data from a network resource in arelational table.
5. Disconnect module
Working with JavaScript TablesYou can use JavaScript Tables to collect the data from network resources andprocess it in the form of relational tables.
For example, you need to collect the stock exchange information from a financialportal for a certain period of time and save this information so that you can use itin QMF as a typical relational table.
For this, you create a JavaScript Table, specify its structure, and save it to aJavaScript data source or a virtual data source. In the JavaScript Table editor, youwrite a script that populates the table with the required data retrieved over HTTPor HTTPS. When you run a query based on the created JavaScript Table, the scriptretrieves the data and saves it in a table that is used by the query.
If it is necessary, you can use external functions and objects from different modulesthat are either saved in a repository or located on a web server.
You can run queries based on a JavaScript Table and use them to create quickreports, forecasts, or add them to visual dashboards.
Chapter 3. Configuring the environment 99
Creating JavaScript Tables:
You use the Create JavaScript Table wizard to add a new JavaScript Table andspecify its structure.
About this task
To create a JavaScript Table:
Procedure
1. Select File > New > Other. In the opened window select JavaScript Tables andclick Next. The Create New JavaScript Table wizard opens.
2. On the Add New JavaScript Table page, specify the name for the table youcreate and select a JavaScript data source or a virtual data source where youwant to save it. Click Next.
Note: The Data Source list contains only virtual data sources from the currentrepository connection.
3. On the JavaScript Table Structure page, define the table structure including thelist of columns, their order, value types and required parameters. You can alsoadd comments to any column.
4. Click Finish to close the wizard. The JavaScript Table with the specified nameand structure is added to the selected JavaScript data source or virtual datasource. After closing the wizard, JavaScript Table editor opens.
5. In the JavaScript Table editor, you create scripts to populate the JavaScriptTable with the required data.
6. When you finish working with script, save the changes and close the editor.
Results
Now you can use the created JavaScript Table as a typical relational table. Forexample, you can run queries based on the created JavaScript Table, use them tocreate quick reports, forecasts, or add to visual dashboards.
Writing scripts to populate JavaScript Table:
Once you created a JavaScript Table and specified its structure, you need to write ascript that will populate the table with the required data.
About this task
You write the script in the JavaScript Table editor according to general JavaScriptsyntax rules. The editor opens automatically after you close the Create NewJavaScript Table wizard.
To manage the content of a JavaScript Table, you can also use the following specialfunctions of the table global object:
appendData()Inserts the data specified by a two-dimensional array to the end of theJavaScript Table.
replaceData()Completely replaces the content of a JavaScript Table with the data
100 Installing and Managing QMF for Workstation and QMF for WebSphere
specified by a two-dimensional array of the following form: [[<row 1column1>, <row 1 column 2>,...], [<row 2 column 1>, <row 2 column2>,...],...].
eraseData()Removes JavaScript Table records that satisfy the specified SQL condition.If you call eraseData() function without arguments or with null argument,all table records are removed.
setTag()Links the JavaScript Table with some additional information specified by astring. This information can be retrieved by the getTag() method. To clearthe information, use setTag() with null argument or without arguments.
getTag()Returns the additional information related to the JavaScript Table.
include()You can include external code in your JavaScript Table script by using theinclude() method.
To trace HTTP request, response, and record logs, use the log() function.
You can also use prompted variables in the script. A user will be prompted toenter variable values when running a query based on the created JavaScript Table.If you use a prompted variable in the script, note the following peculiarities:v The JavaScript Table cache is ignored.v When a user works with a JavaScript Table in QMF for WebSphere, all the
retrieved data will be available to that user only.
You can work with the preset modules or create custom ones.
When you finish working with the script, save the changes and close the editor.
Procedure
1. If you want to work with the preset modules, add JavaScript to them. For moreinformation about modules, see “Modules in JavaScript data sources” on page99.
2. To add a user module:a. In the Repository Explorer view, right-click the Modules node of the data
source and select New > JavaScript Module.b. In the New JavaScript Module wizard, specify the name for the JavaScript
Module in the Name field and click Finish to open the JavaScript Moduleeditor.
3. Type script in the modules and save them.
Important: If you work with preset modules, do not duplicate names ofvariables in different modules to avoid conflicts during their execution.
JavaScript Table Example:
The following example demonstrates how to use JavaScript Tables.
Chapter 3. Configuring the environment 101
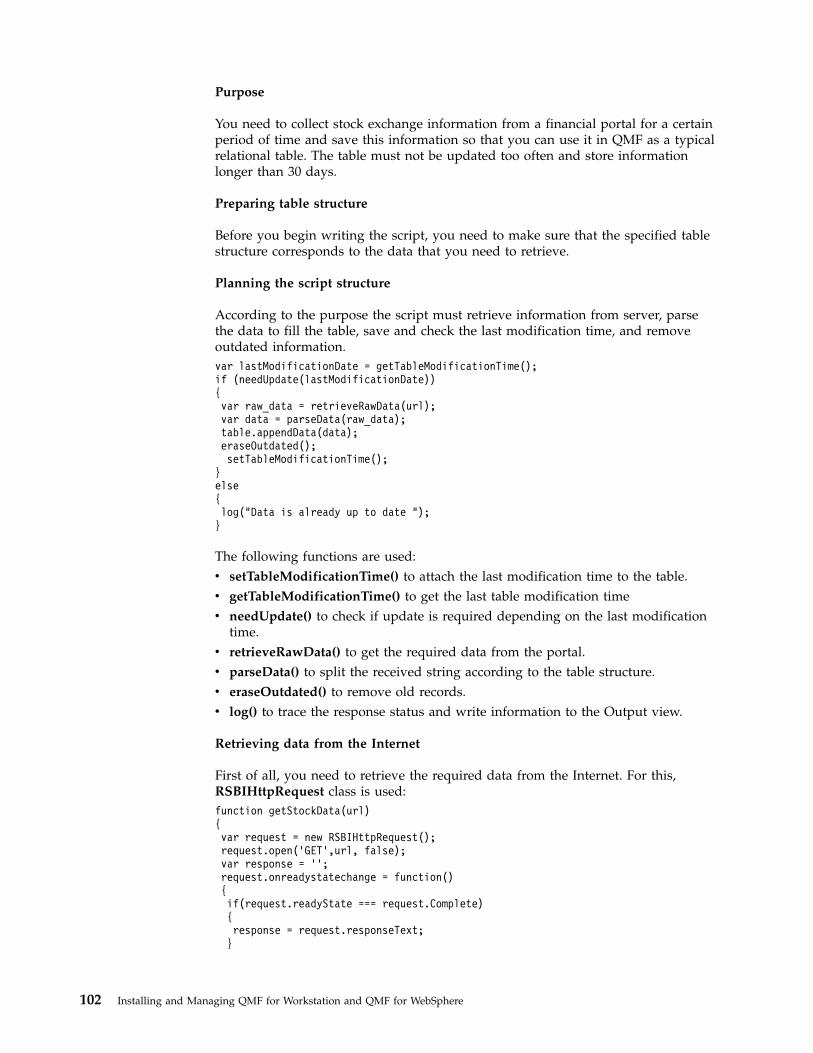
Purpose
You need to collect stock exchange information from a financial portal for a certainperiod of time and save this information so that you can use it in QMF as a typicalrelational table. The table must not be updated too often and store informationlonger than 30 days.
Preparing table structure
Before you begin writing the script, you need to make sure that the specified tablestructure corresponds to the data that you need to retrieve.
Planning the script structure
According to the purpose the script must retrieve information from server, parsethe data to fill the table, save and check the last modification time, and removeoutdated information.var lastModificationDate = getTableModificationTime();if (needUpdate(lastModificationDate)){var raw_data = retrieveRawData(url);var data = parseData(raw_data);table.appendData(data);eraseOutdated();setTableModificationTime();
}else{log("Data is already up to date ");}
The following functions are used:v setTableModificationTime() to attach the last modification time to the table.v getTableModificationTime() to get the last table modification timev needUpdate() to check if update is required depending on the last modification
time.v retrieveRawData() to get the required data from the portal.v parseData() to split the received string according to the table structure.v eraseOutdated() to remove old records.v log() to trace the response status and write information to the Output view.
Retrieving data from the Internet
First of all, you need to retrieve the required data from the Internet. For this,RSBIHttpRequest class is used:function getStockData(url){var request = new RSBIHttpRequest();request.open(’GET’,url, false);var response = ’’;request.onreadystatechange = function(){if(request.readyState === request.Complete){response = request.responseText;}
102 Installing and Managing QMF for Workstation and QMF for WebSphere
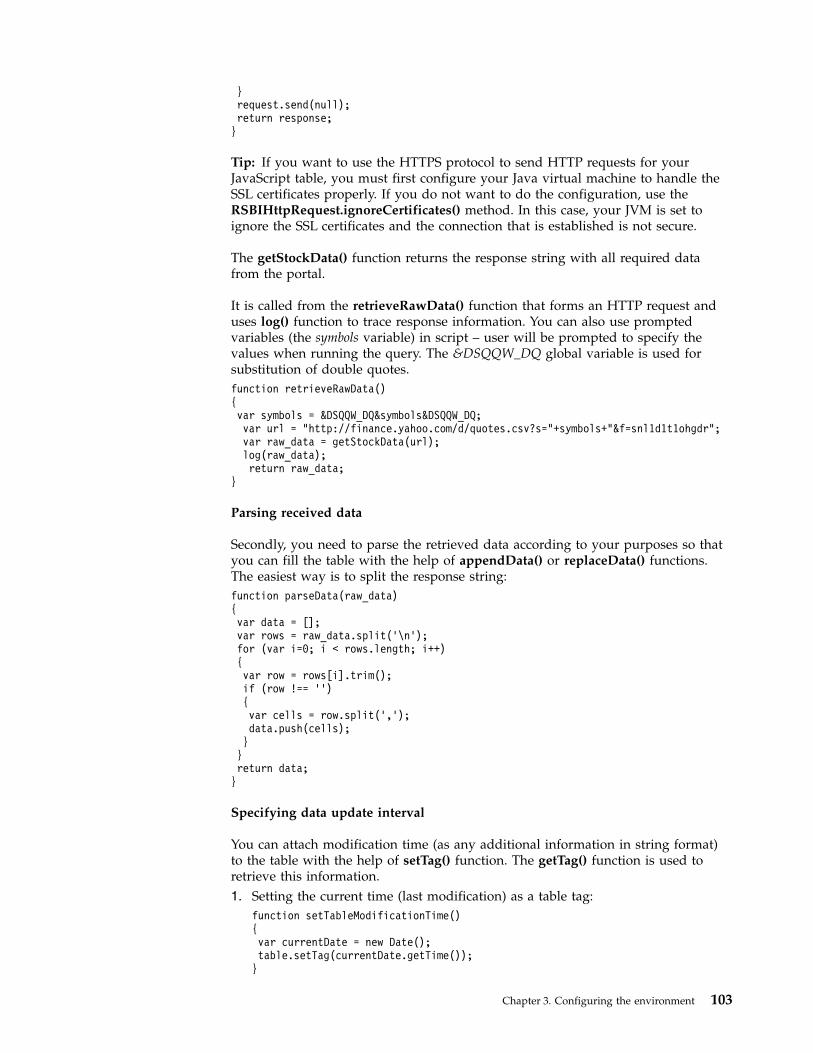
}request.send(null);return response;}
Tip: If you want to use the HTTPS protocol to send HTTP requests for yourJavaScript table, you must first configure your Java virtual machine to handle theSSL certificates properly. If you do not want to do the configuration, use theRSBIHttpRequest.ignoreCertificates() method. In this case, your JVM is set toignore the SSL certificates and the connection that is established is not secure.
The getStockData() function returns the response string with all required datafrom the portal.
It is called from the retrieveRawData() function that forms an HTTP request anduses log() function to trace response information. You can also use promptedvariables (the symbols variable) in script – user will be prompted to specify thevalues when running the query. The &DSQQW_DQ global variable is used forsubstitution of double quotes.function retrieveRawData(){var symbols = &DSQQW_DQ&symbols&DSQQW_DQ;var url = "http://finance.yahoo.com/d/quotes.csv?s="+symbols+"&f=snl1d1t1ohgdr";var raw_data = getStockData(url);log(raw_data);return raw_data;
}
Parsing received data
Secondly, you need to parse the retrieved data according to your purposes so thatyou can fill the table with the help of appendData() or replaceData() functions.The easiest way is to split the response string:function parseData(raw_data){var data = [];var rows = raw_data.split(’\n’);for (var i=0; i < rows.length; i++){var row = rows[i].trim();if (row !== ’’){var cells = row.split(’,’);data.push(cells);}}return data;}
Specifying data update interval
You can attach modification time (as any additional information in string format)to the table with the help of setTag() function. The getTag() function is used toretrieve this information.1. Setting the current time (last modification) as a table tag:
function setTableModificationTime(){var currentDate = new Date();table.setTag(currentDate.getTime());
}
Chapter 3. Configuring the environment 103
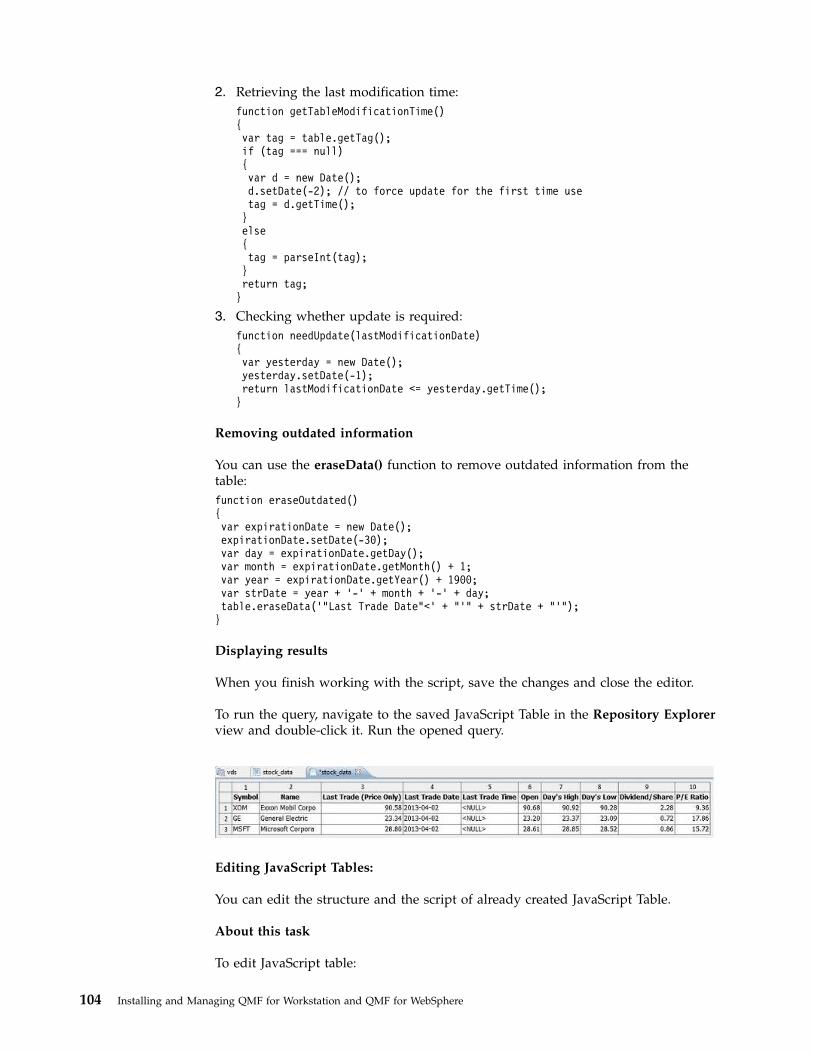
2. Retrieving the last modification time:function getTableModificationTime(){var tag = table.getTag();if (tag === null){var d = new Date();d.setDate(-2); // to force update for the first time usetag = d.getTime();}else{tag = parseInt(tag);}return tag;
}
3. Checking whether update is required:function needUpdate(lastModificationDate){var yesterday = new Date();yesterday.setDate(-1);return lastModificationDate <= yesterday.getTime();
}
Removing outdated information
You can use the eraseData() function to remove outdated information from thetable:function eraseOutdated(){var expirationDate = new Date();expirationDate.setDate(-30);var day = expirationDate.getDay();var month = expirationDate.getMonth() + 1;var year = expirationDate.getYear() + 1900;var strDate = year + ’-’ + month + ’-’ + day;table.eraseData(’"Last Trade Date"<’ + "’" + strDate + "’");}
Displaying results
When you finish working with the script, save the changes and close the editor.
To run the query, navigate to the saved JavaScript Table in the Repository Explorerview and double-click it. Run the opened query.
Editing JavaScript Tables:
You can edit the structure and the script of already created JavaScript Table.
About this task
To edit JavaScript table:
104 Installing and Managing QMF for Workstation and QMF for WebSphere
Procedure
1. In the Repositories or Repository Explorer view, navigate to the requiredJavaScript Table.
2. To edit the structure of the JavaScript Table, right-click this table and selectProperties from the popup menu.a. Open the Structure page in the Properties window.b. Change the table structure including the list of columns, their order, value
types and required parameters. You can also add comments to any column.c. To cancel unsaved changes, click Restore Defaults.d. To save the updated structure of the JavaScript Table, click Apply, and then
OK.
Note: All the data will be removed from the table.3. To edit the script of the JavaScript Table, right-click this table and select Edit
Source Script from the popup menu. In the opened JavaScript Table editor,rewrite the script according to your purposes. Once you finished editing thesource script, save the JavaScript Table.
Scheduling cache expiration for virtual and JavaScript datasourcesYou can use expiration schedules for virtual data sources and tables that they storeon the Cache Settings page of virtual data source Properties window.
About this task
When the Use expiration schedules check box is clear the caching expiration modeequals Always Expired for a virtual data source. Records from the tables stored inthis data source are updated each time on-demand.
To specify particular cache schedule for virtual data sources or their tables,complete the following procedure:
Procedure1. From the Repositories or Repository Explorer view, right-click a virtual data
source and select Properties.2. In the Properties for [data source] window, select Cache Settings.3. On the Cache Settings page, select the Use expiration schedules check box.
The schedule expiration settings become available.4. From the Default expiration schedule list, select the schedule that you want
to use as the default one for the whole data source.
Note: A created data source has Always Expired default settings.5. To assign a particular cache expiration schedule to a particular table click the
Schedule name column of the table the settings of which you want to modifyand select the required scheduler from the list of available ones.
Note: If tables contain any substitution variables, only Always Expiredexpiration schedule is applied to such tables.
6. If you have any tables that require authorization for accessing them, you mustspecify the authorization settings for the data source. Click the ManageAuthorization button. The Manage Authorization dialog opens.
Chapter 3. Configuring the environment 105
7. All the data sources that require authorization are listed there. Thisauthorization data will be used for updating the cache. Click Login columnfor the required data source. The Edit Data Source Login dialog opens.
8. Enter the proper values in the Login, Password, and Verify Password fieldsand click OK.
9. When you finish specifying authorization data for all required data sources,click OK in the Manage Authorization dialog.
10. Click Apply and then click OK to close the Properties for [data source]window.
Specifying settings of cache expiration schedules in virtual andJavaScript data sourcesYou can enable caching for virtual data sources and tables that they store on theCache Settings page of virtual data source properties window.
About this task
When you enabled caching for a virtual data source, records from the tables storedin this virtual data source are cached. If you open one of these tables, its recordswill be retrieved from cache rather than from the data source. You can also enablecaching for individual tables within a virtual data source.
To enable caching for virtual data sources:
Procedure1. Select File > New > Other > Virtual Data Source Schedule to open the Create
New Expiration Schedule wizard.2. From the Data source list, select the data source to which you want to specify
the cache expiration scheduler.3. In the Schedule name field, enter the name you want to use for this schedule.4. In the Data Expires area, specify the period of the cache expiration. The
available options are:a. Hourly: Select this option to specify that the same cache data will be used
for one hour period.b. Daily: Select this option to specify that the same cache data will be used for
a 24 hour period.c. Weekly: Select this option to specify that the same cache data will be used
for a period of 7 days.d. Monthly: Select this option to specify that the same cache data will be used
for a month.e. At specific date: Select this option to specify that the same cache data will
be used until a specific date is reached. If you select this option, the cachewill be updated on the specific date.
f. Never expires: Select this option to specify that the same cache data willalways be used. If you select this option, the cache will never be updated.
g. Always expired: Select this option to specify that the data will always beupdated every time a query is run against this data source.
5. If you selected Hourly, Daily, Weekly, Monthly, or At specific date, clickNext.
6. Depending on the type of schedule that you are creating one of the followingvariations of the Set schedule properties page of the wizard opens:
106 Installing and Managing QMF for Workstation and QMF for WebSphere
a. If you selected Hourly, specify the date and time that the hour period willstart in the Begin date and the Begin time fields. In the Expiration Intervalarea, specify expiration interval in Hours and Minutes fields.
b. If you selected Daily, specify the date and time that the 24 hour period willstart in the Begin date and the Begin time fields. You specify when the 24hour period will occur in the Data Expires area:v Select Daily to specify that the 24 period will occur every day.v Select Each to specify that the 24 hour period will occur every number of
days and select the number from the list.v Select Days of week to specify that the 24 hour period will occur on one
or more specific days. You must select the check boxes for the properdays.
c. If you selected Weekly, specify the date and time that the week will start inthe Begin date and the Begin time fields. You can select a number from theEach week list to specify that the 7 day period will occur every number ofweeks. In the Days of Week area, specify particular days on which thecache will be updated.
d. If you selected Monthly, specify the date and time that the month will startin the Begin date and the Begin time fields. You can enter a specific day inthe Day field or to specify that data retrieval will occur on a specific day ofthe week in the month in the Or field. In the Select Months area, specifythe required months.
e. If you selected At specific date, specify the date and time that will triggerdata retrieval in the Date and time list. Click the cell, the ellipsis (...)appears. Then click the ellipsis (...) to open a calendar where you will selectthe date and time.
7. Click Finish. The schedule is created and listed in the Schedules node of theparticular virtual data source in the Repository Explorer view.
Modifying connection parameters in JavaScript data sourcesYou can edit the URL and logon information of the existing JavaScript data source.
About this task
To modify connection parameters of JavaScript data sources:
Procedure1. In the Repositories or Repository Explorer view, right-click the JavaScript data
sources the parameters of that you want to modify and select Properties.2. In the Connection Parameters area:
a. In the URL field, enter the URL of the web resource to that you want toconnect and get data.
b. Select the User ID and password are required check box to request userinformation each time when the web resource is accessed. If the webresource does not require logon information, leave the check box clear.
c. Select the Allow users to save password check box if you want to allow theapplication to remember the password for the entered user ID.
3. In the JavaScript parameters table, you can add or remove parameters:a. Click Add Parameter, enter the parameter name and value in the
corresponding columns.b. To delete parameters from the data source, select them and click Remove
Parameter.
Chapter 3. Configuring the environment 107
4. To cancel unsaved changes, click Restore Defaults.5. To save the updated structure of the JavaScript Table, click Apply, and then
OK.
Creating a QMF Data Service data sourceQMF Data Service data sources allow users to work with tables provided by QMFData Service.
About this task
To create a QMF Data Service data source, perform the following steps:
Procedure1. From the main menu, select File > New > Other > Repository > QMF Data
Service Data Source. The Create QMF Data Service Data Source wizard opens.2. On the page of availability type selection, select Personal or Shared. Click
Next.
Note: For more information about types of data source availability, see “Datasources” on page 71.
3. In the Data Source Name area, specify the name for the data source.4. In the Connection Parameters area, specify host server name, port number, and
encoding.
Note: If the encoding that you want to specify for the data source is notpresent in the Encoding list, you can type it manually.
5. Click Set User Information.6. In the User Information window, you can specify user information for accessing
the data source and allow users to save password.7. If you want to access tables that are provided by one of the server subsystems,
select the Subsystem check box. From the list, select the subsystem that youwant to work with.If you want to access virtual tables, leave the check box clear.
8. To test the connection, click Test Connection.9. Click Finish.
Results
You created a QMF Data Service data source.
Setting up workspacesUse the workbench to create workspaces for QMF for WorkstationQMF users.
As the administrator you can choose to have your QMF users work withrepository objects from a workspace, or directly from the repository. Everyrepository that you create has one default workspace that is created automatically.Initially, all users have access to the default workspace.
The first step to setting up a workspace is to specify the contents of the workspace.
108 Installing and Managing QMF for Workstation and QMF for WebSphere
Advantages of using workspaces
There are advantages to having your users access repository objects from aworkspace. If you have chosen the Internal or LDAP security option for therepository, you can create one or more workspaces and assign specific users andgroups varying levels of access to the entire workspace or to specific objects withinthe workspace. If you have chosen no additional security for the repository, thenone or more workspaces can help organize repository objects.
If you choose not to use workspaces and have your QMF users access repositoryobjects directly from the repository, you should recommend they alter the viewsthat are opened by default with the User perspective. Instead of opening theWorkspaces view by default, change the perspective so that the RepositoryExplorer view opens by default.
Adding content to the workspaceYou can populate workspaces by adding data source and repository objects thatwill be available to the users of the workspace.
About this task
To add content to a workspace, perform the following procedure:
Procedure1. From the Repositories or Repository Explorer view select an object (such as a
data source, folder, query, dashboard, report) that you want to add to theworkspace. The object that you select must be available to you in the repositoryto which you are currently connected.
2. With the mouse button pressed drag the object to the workspace folder. Releasethe mouse button. You can also right-click the object and select Copy from thepop-up menu, then right-click the workspace folder to which you want to addthe object.
3. Depending on the type of object that you selected a pop-up menu opens. Oneor more of the following options become available:v Copy Here to make a copy of the object in the workspace.v Move here to move the object from the repository to the workspace.v Create link here to create a link to the object. Each time a user or group
accesses the object they will actually link to the resource.v Create offline entry to create an offline entry to the object. The Create
Offline entries window opens. Check each of the entries that you want tocopy (in their entirety). Offline entries allow you to work with an object froma data source without actually accessing the data source. Users areresponsible for keeping offline entries in the workspace synchronized withthe actual contents of the repository.
v Paste as Offline is the same as Create offline entry except the object wascopied to the clipboard rather than dragged to the workspace.
Adding a workspace as a userYou can optionally choose to set up additional workspaces for your users andgroups.
Chapter 3. Configuring the environment 109
About this task
To add a workspace as a user, perform the following procedure:
Procedure1. Select File > New > Other. The New window opens. Expand the Repository
folder. Select Workspace. The Create New User Workspace wizard opens.2. Specify the name for the new workspace in the Name field.3. Specify a comment that describes the workspace in the Comment field.4. Click Finish. After you have created a workspace, you specify what data source
information and objects will be available in the workspace, and specify the userand groups that will have permission to use the workspace.
Working with ER diagramsUse ER diagrams to specify relationships among columns of related tables andstore these relations.
For example, a table stores the staff data for everyone in a company. This tableincludes a column that is named DEPT that stores the identifier of the departmentin which an employee works. Another table stores the organization data of eachdepartment in the company. This table includes a column that is named DEPTNAMEthat stores the name of each department in the company. These two tables arerelated, as they have columns that can be easily joined. But when a user openseither one of these tables, this relationship is not readily apparent. By creating anER diagram that includes these two tables and all of their possible joins, you canmake this relationship much easier to see. Now when users open these tables, theER Diagrams editor displays all of the relationships that you saved, and users canmake more effective and dynamic reports.
Creating ER diagramsUse ER diagrams to create abstract and conceptual representations of relationaldatabases that can be used for building conceptual connections among tablecolumns.
About this task
To create an ER diagram:
Procedure1. From the main menu, select File > New > Other. The New window opens.2. Expand the QMF Objects folder, select ER Diagram, and click Next. The
Create New ER Diagram wizard opens.3. Enter a name for the ER diagram in the Name field.4. Enter the data source that you want to associate with the ER diagram in the
Data source list. The Data source list is populated with all data sources in therepository.
5. Click Finish. The new ER diagram is added to the data source and the ERDiagram editor with this diagram opens.
Editing ER diagramsWhen you created an ER diagram manually, you must specify the tables andcolumn joins that you want to include in the entity relationship.
110 Installing and Managing QMF for Workstation and QMF for WebSphere
About this task
When you include tables that have possible column connections in your ERdiagram, you make the process of building queries and reports much easier foryour users.
To edit an ER diagram:
Procedure1. Double-click the ER diagram that you want to edit. The ER Diagram editor
opens. The associated data source is displayed in the left pane of the editor.2. Expand the Tables node of the Database folder.3. Drag each of the tables that you want to include in the diagram to the right
pane of the editor. A visual representation of each table that you add isdisplayed.
Restriction: Accelerator tables cannot be added to an ER diagram.4. To set up join conditions between tables, select a column from one table and
drag it to a column in another table. A connecting line is drawn between thejoined columns. You can set up multiple join conditions.
5. To edit a join condition, right-click a connection line and select Edit. The JoinTables window opens.
6. Select the type of join for linking two tables. The available join types are:v Inner join includes only those rows with matching values in both tables in
the query results.v Left outer join includes all the rows from the left table and only the rows
from the right table that match with rows from the left table in the queryresults.
v Right outer join includes all the rows from the right table and only therows from the left table that match with rows from the right table in thequery results.
v Full outer join includes s all rows from both tables in the query result.7. Click Change. The new join conditions are saved.8. To delete a join condition, right-click a connection line and select Delete.
Note: All the join modifications (adding, editing, and deleting) that youspecify for two tables in an ER diagram are automatically applied to thesetables in other ER diagrams in this data source. If you add only one of thejoined tables to an ER diagram, you can add the other table automatically byright-clicking the ER diagram and selecting Add Linked Tables.
9. To add a textual note to the ER diagram, right-click in the ER diagram editorand select Add Text. A text box is displayed. You can add text, resize the textbox, and move the text box from one point in the diagram to another. Use textnotes allow to convey additional information about the tables and joins in theER diagram to your users.
10. To delete a text box, right-click it and select Delete.11. To show or hide a column of a table, right-click the column name in the table
diagram and select Hide/Show columns. The Hide/Show Columns windowopens and contains all of the available table columns.
12. Select a column's associated check box to show the column, clear it to hide thecolumn, and click OK. The Hide/Show Columns window closes and thechanges to the table diagram are displayed.
Chapter 3. Configuring the environment 111

13. When you are finished adding tables and configuring join conditions, click theSave icon. The edited ER diagram is saved to the ER Diagrams folder of thedata source. Now, when a user builds a query that includes one or more ofthese tables, the join conditions that you configured are automatically addedto the query and displayed in the Query Builder editor.
Creating ER diagram foldersYou can create entity relationship diagram folders to add a folder for ER diagramsto the data source.
About this task
To create an ER diagram folder:
Procedure1. From the main menu, select, select File > New > Other. The New window
opens.2. Expand the QMF Objects folder, select ER Diagrams folder, and click Next.
The Create New ER Diagrams Folder wizard opens.3. Specify attributes for an ER Diagrams Folder:
a. Enter a name for the ER diagram folder in the Name field.b. Enter a parent folder for the new ER diagram folder in the Parent folder
field.c. Optional: If you want to add a comment to describe the new folder with ER
Diagrams, type it in the Comment field. This comment is displayed in theproperties of the created ER diagram folder.
4. Click Finish. The Create New ER Diagrams Folder wizard closes and the newER diagram folder is displayed under the parent folder in the data source.
Results
You can create new ER diagrams, copy the existing ones, or move them to ERdiagram folders for grouping. You can also populate ER diagram folders with ERdiagrams automatically.
Populating ER diagrams automaticallyYou can specify the tables to which you want to create joins automatically andQMF populates existing ER diagram folders with ER diagrams for these tables.
Before you begin
You must have an ER diagram folder to populate it.
About this task
To populate ER diagrams:
Procedure1. In the Repository Explorer view, right-click the ER diagram folder that you
want to populate and select Populate.2. In the Set Name Filter window, you can specify the following criteria:
112 Installing and Managing QMF for Workstation and QMF for WebSphere
a. In the Object owner field, specify the identifier that owns the tables thatyou want to join in ER diagrams. You must specify the owner in the correctformat for identifiers. You can use a pattern with a wildcard character inthis field to match multiple owners.
b. In the Object name field, specify the identifier that names the tables join inER diagrams. You must specify the name in the correct format foridentifiers. You can specify a matching pattern with a wildcard character tomatch multiple names.
3. Click OK to close the Set Name Filter window and start the populatingprocess.
Results
When the ER diagram is built, it is displayed in the ER Diagram editor. Fordetailed information about editing the created ER diagrams, see the Editing ERdiagrams topic.
Setting up environmentsAn environment is a collection of data source definitions.
Environments allow you to point a repository object to a different data sourcewithout making any changes to the objects themselves. This can be useful fortesting purposes when it is not recommended to test objects against productiondata. You can define a test environment that points to a test data source and use itfor development. Users can use a production environment once all objects havebeen tested.
One default environment always exists and cannot be deleted.
When you create a new environment, it reads data source definitions from thedefault environment. You can then change those definitions so they point todifferent locations.
If you have more than one environment available, you can switch between them.
Creating a new environmentYou can create a new environment using the Create New Environment wizard.
About this task
To create a new environment:
Procedure1. From the Administrator perspective, select File > New > Other. The New
window opens.2. Expand the Environments folder, select Environment and click Next. The
Create New Environment wizard opens.3. Specify a name for the environment in the Environment Name field and click
Next.4. Use the check box to select the data sources that you want to include in the
environment from the Environments Contents table. Clear items use originaldata source definitions (as defined in the default environment).
Chapter 3. Configuring the environment 113
5. Select the connection string you want to specify and click Test Connection.The Log on to Data Source window opens. The Connection Settings wizardopens.
6. Specify a user name in the User name field and a password in the Passwordfield and click OK. The system displays The connection to the data sourcewas established.
7. To change the connection string of the data source, select the connection stringthat you want to edit and click the ellipsis (...). The Connection Settingswizard opens.
8. Either specify a new JDBC URL in the JDBC URL field or use the Build JDBCURL field to build the JDBC URL.
9. Click Advanced to specify additional JDBC settings. The Advanced JDBCSettings wizard opens.
10. Enter any required driver-specific connection string keywords for this datasource and click OK.
Note: For more information on any keywords that might be required orsupported by the selected driver, consult the driver's documentation.
11. Click OK. The Connection Settings window closes and control returns to theCreate New Environment wizard.
12. Click Finish. The Create New Environment wizard closes and the newenvironment is listed under the Environments node.
Editing environment connection settingsYou can edit connection settings and add data sources to an environment by usingthe Edit Environment dialog.
About this task
To edit the connection settings from an existing environment:
Procedure1. From the Repositories view, expand the Environments folder, right-click the
environment that you want to edit and select Edit. The Edit Environmentwindow opens.
2. Use the check box to select the data sources that you want to include in theenvironment from the Environments Contents table. Clear items use originaldata source definitions (as defined in the default environment).
3. Select the connection string you want to specify and click Test Connection.The Log on to Data Source window opens. The Connection Settings wizardopens.
4. Specify a user name in the User name field and a password in the Passwordfield and click OK. The system displays The connection to the data sourcewas established.
5. To change the connection string of the data source, select the connection stringthat you want to edit and click the ellipsis (...). The Connection Settingswizard opens.
6. Either specify a new JDBC URL in the JDBC URL field or use the Build JDBCURL field to build the JDBC URL.
7. Click Advanced to specify additional JDBC settings. The Advanced JDBCSettings wizard opens.
114 Installing and Managing QMF for Workstation and QMF for WebSphere
8. Enter any required driver-specific connection string keywords for this datasource and click OK.
Note: For more information on any keywords that can be required orsupported by the selected driver, consult the driver's documentation.
9. Click OK. The Connection Settings window closes and control returns to theEdit Environment window.
10. Click OK. The Edit Environment window closes and the changes to theenvironment are saved.
Creating the repository connection for QMFQMF needs to know how to access the application data (as grouped by therepository name) so that users will have access to this data. The way to providethis connection data to QMF is to create it using the QMF connection wizard.
About this task
You must create connection information for each repository. The repositoryconnection information specifies how a shared repository will be accessed. Youdecide the type of connection to create depending on how you want to set up yourenvironment.
The repository connection information is saved in a file called settings.xml. Thisfile is saved in the personal settings directory of the machine that is running theapplication interface. You can use this file to streamline the process of setting upthe environment for all users of QMF.
To create repository connection information:
Procedure1. Open the Create New Repository Connection wizard by right-clicking
anywhere in the Repository Connections view and selecting New > RepositoryConnection.
2. Select the type of connection that you will create from one of the followingradio buttons:v Shared repository to create a repository connection to a shared repository
using a client/server JDBC connection. With client/server access, the user'sworkstation establishes a direct connection to the repository database usingits locally installed JDBC driver. For this type of connection each workstationthat runs QMF for Workstation and the server (workstation) that runs QMFfor WebSphere must have JDBC drivers installed.
v File-based repository to create a repository connection to a file-basedrepository stored at a given location. (QMF for Workstation only)
v Network repository to create a repository connection to a shared repositoryusing direct network access. Network connectivity permits users to access ashared repository without the need for direct database connectivity from theworkstation. Connecting to repositories using a network connection allowsfor consolidation of data access at a central server and removes the need todistribute JDBC drivers across each desktop running QMF for Workstation.
v Web service repository to create a repository connection to a sharedrepository through the QMF for WebSphere web services API using a HTTPor HTTPS connection. Web service connectivity permits users to access ashared repository without the need for direct database connectivity from the
Chapter 3. Configuring the environment 115
workstation. Connecting to repositories using a web service connectionallows for consolidation of data access at a central server and removes theneed to distribute JDBC drivers across each desktop running QMF forWorkstation.
3. Click Next. The second page of the Create New Repository Connection wizardopens. The second page of the wizard differs depending on the type of therepository connection that you are defining.
Creating shared repository connectionsYou create a shared repository connection to set up the information that will enableyou to connect to a shared repository that resides in a database using aclient/server JDBC connection.
About this task
The steps in this task describe how to create a shared repository connection.
Note: The connection mode for the shared repository connection is determined bysettings on the Protection tab of the Edit Repository Storage window.
To complete the process of creating a shared repository connection:
Procedure1. Open the second page of the Create New Repository Connection wizard.2. Specify a name for the repository connection in the Connection name field.
This name will be used to identify the connection as it appears in theRepository Connections view. You can enter any name but it is recommendedthat the name identifies the repository for which this connection informationapplies.
3. Select the Connect immediately check box to connect to the shared repositoryimmediately. If this check box is clear, the connection information will becreated, saved and displayed in the Repository Connections view, but youwill not be immediately connected to the repository.
4. In the JDBC Driver field specify the library for the JDBC driver that will beused to access the database that is hosting the repository storage. You canselect from a drop down list of libraries that you defined when you set up theJDBC driver information. You can use the ellipsis (...) to the right of the fieldto open the JDBC Libraries dialog where you can create additional JDBCdriver libraries.
Note: If you work with a Db2 for z/OS database, you can use the DirectDRDA Connection. In contrast to JDBC libraries, the Direct DRDA Connectioncomes with QMF and does not require additional driver installation.
Note: The Direct DRDA Connection is supported only for DB2 for z/OSVersion 8, Version 9 and Version 10 and Db2 for z/OS Version 11 and Version12. Do not use it for Db2 LUW or DB2 for iSeries.See the Using DRDA to connect to database repositories and data sources topic formore information.
5. In the JDBC URL list, specify the URL that points to the database that hoststhe repository storage within which the repository to which you want toconnect resides.The format for the URL can be displayed in the list.
116 Installing and Managing QMF for Workstation and QMF for WebSphere
Note: You can also use the Build URL by URL Template dialog box to formthe correct string.
Click Build URL to open the Build URL by URL Template dialog box. Fromthe JDBC URL drop-down list, select the template. In the table, specify theserver, port, and database information and click OK. The result URL string isadded to the JDBC URL list.
6. Click Advanced to specify any driver-specific connection string keywords andtheir values that will be used when connecting to this shared repository. Forinformation on any keywords that are required by a selected database driver,consult the specific driver's documentation.
Note: For the DB2® Type 4 UDB driver, to receive extended SQL exceptionerror messages, check the retrieveMessagesFromServerOnGetMessage optionin the Advanced JDBC Settings window.
7. To configure a PassTickets-based Single Sign-on connection between QMF andDb2 for z/OS database, click Single Sign-on.
8. In the JDBC Driver field specify the library for the JDBC driver that will beused to access the database that hosts the repository. Select from a drop-downlist of libraries that you defined when you set up the JDBC driverinformation. Click the ellipsis (...) to open the JDBC Libraries window whereyou can create additional JDBC driver libraries.
9. In the JDBC URL field specify the URL that points to the database that hoststhe repository storage within which the repository to which you want toconnect resides. The format for the URL can be displayed in the field if youspecified an example when setting up the JDBC libraries.
10. Optional: If you are using the Direct DRDA Connection to connect to therepository for the first time, you must bind Direct DRDA packages. To do so,complete the following steps:a. Click Bind Packages.b. In the Owner ID field, enter a privileged SQLID with the necessary rights
for the binding process. If the value of this field is not specified, the username from the Set User Information dialog will be used.
c. Click Install.11. Click Set User Information to specify the user information that will be used
to connect to the repository. The Set User Information window opens.a. Select the User ID and password are required check box to specify that
user information will be requested each time a connection is made to thisshared repository. In some cases, leaving this check box clear will enableusers to access the repository without overtly specifying their userinformation.
b. Enter the user ID and password that will be used to access the specifiedrepository database in the User name and Password fields.
c. To remember the password, select the Remember password check box.If you do not select the Remember password check box, the system willprompt you for a user ID and password whenever you open the EditRepository Connection wizard.
d. To enable the Single-Use Password Mode, click Advanced and selectEnabled.In the Repository storage connections timeout field, enter the time inminutes that the Single-Use Password Mode feature will remain enabled(while not being used) without being closed by application.
Chapter 3. Configuring the environment 117
Note: A value of zero 0 sets unlimited idle state for the connectiontimeout, meaning that connection will close only when the session ends.Enabling the Single-Use Password Mode feature provides users with theability to log into the repository for the entire session without having toreenter his or her user ID and password.
12. Click OK to close the User Information window.13. Select Hide from web service clients to exclude this connection from the list
of available connections in the Repository connection name field in QMF forWebSphere.This check box is displayed in QMF for WebSphere user interface only. If youare working in the QMF for Workstation user interface, Hide from webservice clients is not an option.If you select this check box, the user cannot establish a web service connectionto this repository connection.
14. In the Repository name field, select the repository to connect to. If norepositories are listed, click Refresh .
15. Click Finish.The repository connection that you have just created will appear in theRepository Connections view. If you have QMF Registry configured for yourQMF client, select Local from the Server list in the Repository Connectionsview.If you selected the Connect immediately check box, you are connected to thisrepository. This repository connection information is entered in theconnections settings file.The next step to creating repository connectioninformation is to distribute this information to each user that will be runningQMF for Workstation or to the server (workstation) that is running QMF forWebSphere.
Creating file-based repository connectionsIf you are using QMF for Workstation, you can create a file repository connectionto set up the information that will enable you to connect to a file-based repositorythat is stored on a local or network drive.
About this task
File connections can only be created for legacy, file-based repositories. The laterversions of QMF for Workstation and QMF for WebSphere have replaced file-basedrepositories with personal repositories.
To complete the creation of a file-based repository connection:
Procedure1. Open the second page of the Create New Repository Connection wizard.2. Specify a name for the repository connection in the Connection name field.
This name will be used to identify the connection as it appears in theRepository Connections view. You can enter any name but it is recommendedthat the name identifies the repository for which this connection informationapplies.
3. Select the Connect immediately check box to connect to the file-basedrepository immediately. If this box is clear, the connection information will becreated, saved and displayed in the Repository Connections view, but you willnot be immediately connected to the repository.
118 Installing and Managing QMF for Workstation and QMF for WebSphere
4. Click Finish.The repository connection that you have just created will appear in theRepository Connections view. If you have QMF Registry configured for yourQMF client, select Local from the Server list in the Repository Connectionsview.If you selected the Connect immediately check box, you are connected to thisrepository. This repository connection information is entered in the connectionssettings file.
Configuring repository cachingYou can configure a caching functionality on your repositories. When caching isenabled on a repository, the system saves the content of the repository(dashboards, queries, visual reports, and other objects) to the memory on theworkstation client or on on the web server if you are using QMF for WebSphere.
About this task
This task describes how to configure repository caching.
Considerations:v Caching happens in local memory on your machine if you are using QMF for
Workstation and in memory on the web server if you are using QMF forWebSphere.Subsequently, the next time you access the repository objects, information isretrieved from memory (without sending a request to the repository), henceretrieval time is reduced.The following content is cached:– Content of objects– Path to objects– Metadata to tables
v When you make changes to cached repository objects, the cache is refreshed toreflect the changes.
v For QMF for Workstation, the repository cache is cleared whenever you shutdown your machine or close the application.
v For QMF for Workstation, users can set repository caching parameters for theversion of the application running on their machine.
v For QMF for WebSphere, repository caching is shared between all connectionsmade with the same Repository Connection login.
v For QMF for WebSphere, you must have administrator authorization in order tochange repository connection settings.
To configure repository caching:
Procedure1. Open the second page of the Creating New Repository Connection wizard or of
the Edit Repository Connection wizard.2. In the Repository cache area, select the Enable check box to activate cache
configuration options.The radio buttons for predefined cache validation are enabled in thePredefined modes section.
Chapter 3. Configuring the environment 119
To implement a predefined cache validation mode, select the associated radiobutton. The cache validation processing for each predefined mode are asfollows:v Low relevance-High performance
If selected, cache validation is not performed.v Balanced relevance/performance
If selected cache validation is performed every 5 minutes. This is the defaultsetting for cache validation.
v High relevance-Low performance
If selected cache validation is performed every 60 seconds (1 minute).3. To implement custom cache validation, select the Use custom cache settings
check box.When you select the Use custom cache settings check box, the options forpredefined cache validation modes are disabled.Click Custom. . . to launch the Repository Cache Settings wizard.Use this wizard to specify cache size information and to set validationintervals.The wizard consists of two panes:v The Repository Caches pane on the left
This pane lists the specific types of repository-related data to cache.v The Repository Caches Settings pane on the right
This pane is where you set the caching parameters.You can set parameter values for general caching, which are applied to eachtype of repository-related data.You can also set parameter values for the different types of repository-relateddata. These types include:– Content Cache
– Server Metadata Cache
– Structure Cache
– Table Metadata Cache
a. To set general cache settings, click Repository Caches in the list pane andset a value in the Cache validation time (minutes) field.The value you enter represents how often (in minutes) that cache validationoccurs.The value you enter determines how often the cache validates that theobjects in it haven't changed. The system checks the last updated date forevery cached object stored in the repository.The default value is 5 minutes.Any object that has been changed gets removed from the cache.Any object that has not been accessed within the time specified, are notremoved from the cache.Enter 0 (zero) if you never want to refresh the cache. This is useful forrepositories with static content.
b. To set parameter values for the different types of repository-related data,expand Repository Caches and select the type of data to configure. Thetypes of repository-related data and their configuration parameters are asfollows:v Content Cache
120 Installing and Managing QMF for Workstation and QMF for WebSphere
Includes the following parameter:– Content size (megabytes) specifies the maximum size allowed (in
megabytes) for cached content.The value entered represents the total combined size of all objectsstored in the cache and saved to memory on your machine if you areusing QMF for Workstation and on the web server if you are usingQMF for WebSphere.When a new object is added to the cache whose size has reached themaximum allowed size, the system removes objects until it has enoughspace to accommodate the new object.Those objects that have not been accessed for the longest period oftime are removed first.
v Server Metadata Cache
Includes the following parameters:– Lifetime limit (minutes)
Parameter sets maximum time (in minutes) for records to be kept incache. Lifetime is calculated for each record starting from the momentof its creation. Upon expiration of specified lifetime record is forcedout of cache.
– Inactivity (minutes)
Parameter sets maximum time (in minutes) for records to be kept incache without being referenced. Inactivity period is calculated for eachrecord starting from the moment of its last use. Upon expiration ofspecified inactivity period record is forced out of cache.
v Structure Cache
Includes the following parameters:– Lifetime limit (minutes)
Parameter sets maximum time (in minutes) for records to be kept incache. Lifetime is calculated for each record starting from the momentof its creation. Upon expiration of specified lifetime record is forcedout of cache.
– Inactivity (minutes)
Parameter sets maximum time (in minutes) for records to be kept incache without being referenced. Inactivity period is calculated for eachrecord starting from the moment of its last use. Upon expiration ofspecified inactivity period record is forced out of cache.
v Table Metadata Cache
Includes the following parameters:– Lifetime limit (minutes)
Parameter sets maximum time (in minutes) for records to be kept incache. Lifetime is calculated for each record starting from the momentof its creation. Upon expiration of specified lifetime record is forcedout of cache.
– Inactivity (minutes)
Parameter sets maximum time (in minutes) for records to be kept incache without being referenced. Inactivity period is calculated for eachrecord starting from the moment of its last use. Upon expiration ofspecified inactivity period record is forced out of cache.
4. Click Finish to exit the wizard.
Chapter 3. Configuring the environment 121
Results
You have enabled repository caching and have set the parameters by whichcaching occurs. The settings are saved to the product configuration.
The system allows you to read and write (save) file Cache settings and uses it toset the current settings directly to the Caches. All settings are grouped by servicesin the set of configuration records.
Creating network repository connectionsYou create a network repository connection to set up the information that willenable you to connect to a shared repository using direct network access.
About this task
Network connectivity permits users to access a shared repository without the needfor direct database connectivity from the workstation. Connecting to repositoriesusing a network connection allows for consolidation of data access at a centralserver and removes the need to distribute JDBC drivers across each desktoprunning QMF for Workstation.
QMF for Workstation users can connect to repositories via a centralized machinerunning the QMF network repository service. Network connectivity providessimilar capabilities to the web-based approach but does not require a webapplication server in order to operate. In order to use network connectivity youmust set up and start the network repository service.
Note: When you create a network repository connection in QMF for Workstation(client) the version of network repository service (server) must be at the samerelease levels. If the release levels (between the client and server) do not match,network repository connections will not work.
To complete the creation of a network repository connection:
Procedure1. Set up and start network repository service.2. Open the second page of the Create New Repository Connection wizard.3. Specify a name for the repository connection in the Connection name field.
This name will be used to identify the connection as it appears in theRepository Connections view. You can enter any name but it is recommendedthat the name identifies the repository for which this connection informationapplies.
4. Select the Connect immediately check box to connect to the repositoryimmediately. If this check box is clear, the connection information will becreated, saved and displayed in the Repository Connections view, but you willnot be immediately connected to the repository.
5. Specify the name or the IP address of the server (or workstation) that isrunning your network service in the Server host field.
6. Specify the contact port for the network server in the Port field.7. Click Refresh.
The available repository connections for the specified network repositoryservice are retrieved. Select the repository connection that you want to use fromthe list of available repository connections.
122 Installing and Managing QMF for Workstation and QMF for WebSphere
8. Click Finish.The repository connection that you have just created will appear in theRepository Connections view. If you have QMF Registry configured for yourQMF client, select Local from the Server list in the Repository Connectionsview.If you selected the Connect immediately check box, you are connected to thisrepository. This repository connection information is entered in the connectionssettings file.
Setting up network repository servicesQMF for Workstation users can connect to shared repositories by using acentralized machine that runs the QMF network repository service.
About this task
To set up the QMF network repository service:
Procedure1. During the installation of QMF for Workstation, all *.jar files are placed in the
API installation directory. Copy them to a required directory on the servermachine.
2. Copy the product license files to the directory on the server machine referred toin 1. The product license files are located under WEB-INF/config in QMF forWebSphere or in the QMF for Workstation installation directory.
3. Copy the repositories.xml and .bi.jdbc.drivers files to the directory on the servermachine referred to in 1. These files are created at installation and populatedwhen you configure repositories with repository connection information and setup JDBC drivers. If you use the QMF for Workstation administratorcomponent, you find the files in the QMF for Workstation installation directory.If you use the QMF for WebSphere Administrator application you find the filesin the QMF for WebSphere installation WEB-INF/config directory.
4. To start the network repository service, run the following lines as onecommand:java -cp CLASSPATH com.ibm.bi.qmf.core.repository.RepositoryServicePORT_NUMBER PATH_TO_REPOSITORIES.XML
Where:v CLASSPATH: Contains the location of the files that were copied to the
directory on the server in step one.v PORT_NUMBER: The port on which the network repository service must
operate. It can be any free TCP/IP port of your choosing.v PATH_TO_REPOSITORIES.XML: Provides the path containing the
repositories.xml and .bi.jdbc.drivers files. If omitted, the files are assumed tobe in the current directory.
Sample command line (issue the following lines as one command):java -cp "$qmf_jar_file_name.jar"com.ibm.bi.qmf.core.repository.RepositoryService
8889
5. QMF for Workstation users connect to the network repository service by usingthe machine name and designated port as defined in the Network Repositoryconnection information.
Chapter 3. Configuring the environment 123
Creating web service repository connectionsYou create a Web service repository connection to set up the information that willenable you to connect to a shared repository through the QMF for WebSphere webservices API using a HTTP or HTTPS connection.
About this task
You can used web-based connectivity to access a shared repository without theneed for direct database connectivity from the workstation. By using this methodto connect to repositories you consolidate data access at a central server, thusremoving the need to distribute JDBC drivers across each desktop running QMFfor Workstation.
Web-based connectivity is provided by the QMF for WebSphere built-in repositoryweb service. To enable this facility, you must have QMF for WebSphere deployedto a WebSphere Application Server (WAS) instance. In addition, you must haverepository connection information available to this version of QMF for WebSphere.QMF for Workstation users connect to the repository using the URL and port tothe QMF for WebSphere server.
Note: When you create a web repository connection in QMF for Workstation(client) the version of web repository service (server) must be at the same releaselevels. If the release levels (between the client and server) do not match, webrepository connections will not work.
To complete the creation of a web service repository connection:
Procedure1. Deploy QMF for WebSphere to a WebSphere Application Server (WAS)
instance; configure one or more shared repositories, and set up sharedrepository connection information for each repository.
2. Open the second page of the Create New repository Connection wizard.3. Specify a name for the repository connection in the Connection name field.
This name will be used to identify the connection as it appears in theRepository Connections view. You can enter any name but it is recommendedthat the name identifies the repository for which this connection informationapplies.
4. Select the Connect immediately check box to connect to the web servicerepository immediately. If this box is clear, the connection information will becreated, saved and displayed in the Repository Connections view, but you willnot be immediately connected to the repository.
5. In the Web Server URL field, specify the URL to launch the instance of QMFfor WebSphere whose web services API will be used for this connection. This isthe URL address that was created when the instance of QMF for WebSpherewas deployed.
6. Click Refresh. The available repository connections that have been defined forthe instance of QMF for WebSphere that you specified in the Web Server URLfield are retrieved. Select the repository connection that you want to use fromthe list of available connections.
7. Click Finish.
124 Installing and Managing QMF for Workstation and QMF for WebSphere
The repository connection that you have just created will appear in theRepository Connections view. If you have QMF Registry configured for yourQMF client, select Local from the Server list in the Repository Connectionsview.If you selected the Connect immediately check box, you are connected to thisrepository. This repository connection information is entered in the connectionssettings file.
Results
Currently, when the QMF for WebSphere client opens, it connects to the lastaccessed repository. An additional connection URL parameter has been added tocontrol which repository connection should be used when the QMF for WebSphereclient opens.
For example:http://host:port/QMF/user?repository=MyConnection
If the connection parameter points to an invalid connection, then the system opensopen the Switch Repository window. You can pass logon information for securedrepository connections using the user and password parameters.
For example:http://host:port/QMF/user?repository=MyConnection&user=userLogin&password=userPassword
.
Setting up login mapping for a data sourceLogin mapping enables a user to login to a repository and gain access to one ormore of the database data sources that have been configured in that repositoryusing a single user ID and password.
About this task
With login mapping, administrators can set up users so that they can login to arepository and access any data source without specifying another user ID andpassword that is specific to the database data source. By setting up login mapping,users do not have to continually reenter login information every time they access adatabase data source, and they do not have to know the login information for eachdatabase data source.
You set up login mapping for each data source that you include in the repository.Login mapping can only be set up for data sources that reside in protectedrepositories. Protected repositories are those repositories that were created with thesecurity option Internal, LDAP, or Database-based. When setting up loginmapping for a Db2 database users, you can use a trusted connection if a trustedcontext is created for the managed data source. In this case, the specifiedconnection to the application is recognized as trusted and the database does notrequire individual user credentials.
When users are assigned several login, it is required to specify priority for each ofthem. To better understand how it works, consider the following:v User X is a member of two groups, Group A and Group B. You have assigned a
login mapping ID and password for Group A that gives all users assigned to
Chapter 3. Configuring the environment 125
Group A a certain level of access to the data source. You have assigned a loginmapping ID and password for Group B that gives all users assigned group B alesser level of access to the database data source. As a member of both groups,when User X accesses the data source, it is unclear what login information thatshould be used. Should it be the based on the user as a member of Group A orGroup B. The Priority field resolves this issue. You would assign a priority valueto the login information. For example, Group A is assigned a priority of 10 andGroup B is assigned a priority of 5. When a user that is a member of bothgroups accesses the data source, access is granted based on the login informationof the group, to which the user is a member, with the highest priority. In thisexample that would be Group A. It is important to note that in this scenario,you can not assign the same priority value to more than one group.
v User X is a member of two groups, Group A and Group B. However, User Xmust have a distinct level of access to a data source that is different than anyother member of either group. You will use the Priority field to resolve thisissue. You will assign a login mapping user ID and password to Group B andassign a priority value of 5 to the mapping information. You will assign a loginmapping user ID and password to Group A and assign a priority value of 10 tothe mapping information. You will assign a login mapping user ID andpassword for User X and assign a priority value of 25 to mapping information.When User X accesses the data source, the mapping information with thehighest priority value will be used. It is important to note that in this scenario,you can not assign the same priority value to a group and individual user that isa member of the group.
The topics below describe how to set up login mapping with and without trustedconnection.
Login mapping without trusted connectionsThis topic describes the procedures of setting up login mapping without trustedconnections.
About this task
To set up login mapping for a data source without trusted context:
Procedure1. Right-click a data source in the Repositories or the Repository Explorerview.
Select Properties from the menu. The Properties window opens. Select LoginMapping from the tree. The Login Mapping page of the window opens. Allusers and groups that have been defined for the repository are listed in theData source login list. This list is empty if you have not defined any users orgroups.
2. If you set up login mapping for a Db2 database, make sure the Use trustedconnections check box is deselected.
3. To set up mapping for a user or group, select a user or group and click theEdit data source login button above the list box. The Edit Data Source Loginwindow opens.
4. Specify the user ID that will be used to login to the database data source inthe Login field.
5. Specify the password that will be used to login to the database data source inthe Password field.
6. Verify the password by retyping it in the Verify password field.
126 Installing and Managing QMF for Workstation and QMF for WebSphere
7. Specify the priority that will be placed on this login information in thePriority field. You can enter any numerical value in this field with the valueof 1 having the lowest priority. The Priority value is used to determine whatlogin mapping ID and password will be invoked for a user that is a memberof multiple groups. To find more information about priority, see “Setting uplogin mapping for a data source” on page 125.
8. Click OK. The data source login information for the selected user or group islisted in the Data source login list as follows:v Login mapping owner lists the name of the user or group that will use this
login to access the data source. This is the same name that appears in theUsers and groups list box.
v Auth ID specifies the login user ID that will be used to access the datasource for the user or group.
v Priority specifies the priority that is assigned to the login information. Thispriority value determines which login information will be invoked for usersthat are members of multiple groups.
You will repeat this process for each user or group for which you want to setup login mapping information.
9. To edit existing data source login information, select the data source logininformation from the Data source login list table and click the Edit datasource login button located above the list box. The Edit Data Source Loginwindow opens. You can make changes to any of the fields. Click OK to closethe Edit data source login window.
10. To delete existing data source login information, select the data source loginfrom the Data source login list table and click the Remove data source loginbutton located above the list box.
11. Click OK. The login mapping parameters that you have specified for eachuser or group are in effect for the data source. You must set up login mappinginformation individually for each data source in the repository.
Login mapping for Db2 databases with trusted connectionsThis topic describes the procedure of setting up login mapping by means oftrusted connections.
About this task
When you set up logging mapping for users who connect to Db2 data sources, youmay use a trusted context. Trusted context is an entity created by a databaseadministrator that determines whether a connection to the database can be used asa trusted connection. The database does not require individual credentials toauthenticate users of such trusted connection. It is very practical when anadministrator has a lot of user credentials to manage. To use a trusted context, youspecify system authorization credentials that were used when creating the trustedcontext for the current connection to be recognized as trusted. For users who workover a trusted connection, you can assign Auth ID attributes that are specified inthe trusted context to define their privileges when connected to the database.
Note: You can only use this option if there is a trusted context created for the datasource.
To set up login mapping for a data source using a trusted connection:
Chapter 3. Configuring the environment 127
Procedure1. Right-click a data source in the Repositories or the Repository Explorerview.
Select Properties from the menu. The Properties window opens. Select LoginMapping from the tree. The Login Mapping page of the window opens. Allusers and groups that have been defined for the repository are listed in theData source login list. This list is empty if you have not defined any users orgroups.
2. Select the Use trusted connections check box. The System AuthorizationCredentials dialog opens.
3. Enter the system authorization credentials for the connection to be recognizedas trusted. In the ID field, enter the SYSTEM AUTHID specified in the trustedcontext.
4. Click OK to close the System Authorization Credentials dialog.
Note: If the entered information is incorrect, an error message is shown toprompt you to try again.
5. To edit the system authorization credentials, click the Edit systemauthorization credentials button.
6. Select the Use repository login if Auth ID is not specified check box if youwant a repository login to be used when an Auth ID is not assigned.
7. To assign an Auth ID or edit an assigned Auth ID, select them in the Datasource login list table and click Edit user account information. The UserAccount Information window opens.
8. In the Auth ID field, specify an Auth ID from the list provided by the trustedcontext.
9. In the Priority field, specify the priority that will be placed on this logininformation. You can enter any numerical value in this field with the value of1 having the lowest priority. The Priority value is used to determine whichAuth ID will be invoked for a user that is a member of multiple groups. Tofind more information about priority, see “Setting up login mapping for a datasource” on page 125.
10. Click OK. The data source login information for the selected user or group islisted in the Data source login list table as follows:v Login mapping owner lists the name of the user or group that will use this
login to access the data source. This is the same name that appears in theUsers and groups list box.
v Auth ID specifies the login that is used when a trusted connection isestablished.
Note: If the Auth ID is not specified, the repository login will be used. Ifthe login is not found in the trusted context, a connection error is registeredand the user is returned to the log on dialog.
v Priority specifies the priority that is assigned to the login information. Thispriority value determines which Auth ID will be invoked for users that aremembers of multiple groups.
You will repeat this process for each user or group for which you want to setup login mapping information using the trusted context.
11. To delete existing data source login information, select the data source loginfrom the Data source login list table and click the Remove data source loginbutton located above the list box.
128 Installing and Managing QMF for Workstation and QMF for WebSphere
12. Click OK. The login mapping parameters that you have specified for eachuser or group are in effect for the data source. You must set up login mappinginformation individually for each data source in the repository.
Creating web links to data objectsUse the Web Link wizard to create web links to QMF objects. You can use theselinks to open the objects directly in web browsers.
Before you begin
If you are using QMF for Workstation, the Web Link wizard is available only whenyou have an available web service repository connection.
Note: QMF users can also create web links. However, they can view, edit, or deleteonly the web links that they created. As administrator, you can view, edit, or deleteall the web links.
About this task
To create a web link to data objects:
Procedure1. From the main menu, select File > New > Other > Web Link to open the Web
Link wizard.
Note: You can also access this wizard from the repository tree pop-up menuoption Create Web Link . If you access the wizard by using this method, theRepository object field and User-Defined Parameters are pre-filledautomatically.
2. From the Repository object field, select the object to which you want to createa web link.
3. Specify settings for the following Predefined Parameters:v The Toolbar check box indicates whether to show or hide the toolbar.v The Run check box indicates whether to run the object when it is opened.v The Environment check box indicates whether to use the default
environment to run the object.If you want to use an environment other than the default one, select thecheck box and choose from the list of environments.
v The Renderer mode check box is available for visual reports. It determinesthe mode in which visual report is rendered.
4. Specify User-Defined Parameters to represent the selected parameters ofrepository objects.You can add parameters into the generated URL by selecting Include in URLcheck box.When the Toolbar check box is selected, the URL formula is:http://{host}:{port}/{app_context}/g?object_name¶m1=value1
When the Toolbar check box is clear, for visual dashboards the URL formula is:http://{host}:{port}/{app_context}/go?object_name¶m1=value1
5. Click Next to display the second page of the Web Link wizard.On the page, you can add data sources. Use the Add Data Source and RemoveData Source buttons to edit the list of data sources. In the Login and Passwordfields, you can enter logins and passwords for added data sources.
Chapter 3. Configuring the environment 129
|||

You can specify the access mode for the web link as Public or Private. Weblinks are private by default.v For private web links, you can enter the data source credentials.
– If you enter the data source credentials on this page, you need to provideonly the repository storage credentials and repository credentials whenyou access the link.
– If you do not enter the data source credentials on this page, you need toprovide data source credentials, repository storage credentials, andrepository credentials when you access the link.
v For public web links, you can enter the data source credentials, repositorystorage credentials, and repository credentials. If you enter these credentialson this page, you will not be prompted to enter them when you access theweb link. The credentials are saved and used at the time of access.
In the Web link name field, enter the name for the current object, that youwant to use in the URL and in the tab title in your browser.For example, if you specify NEW_OBJECT_NAME in the Web link name fieldand check the Toolbar check box, the following URL is generated:http://{host}:{port}/{app_context}/g?NEW_OBJECT_NAME
When the Toolbar check box is clear, the URL is:http://{host}:{port}/{app_context}/go?NEW_OBJECT_NAME
You can change the link name by using the Web link name field.If you leave the Web link name field empty, a new name is createdautomatically.
6. Click Create to generate a web link.If the specified link name exists, you must either rename it, or leave the Weblink name field empty to create the name automatically.
7. Click Open Web Link to open the created web link in the browser.8. Click Finish to close the Web Link wizard.
Distributing the configured applicationThe administrator is responsible for distributing a fully configured and operationalapplication to the users.
To do this, the administrator needs to ensure that the application executable, theJDBC JAR files, a populated JDBC driver information file, and a populatedrepository connection information file are available to each machine that is runningQMF for Workstation and to each server (or workstation) that is running QMF forWebSphere.
Exporting the configuration data to usersQMF administrators are responsible for ensuring that the application executable,the JDBC JAR files, a populated JDBC driver information file, and a populatedrepository connection information file are available to each machine that is runningQMF for Workstation and to each server (or workstation) that is running QMF forWebSphere.
About this task
The following steps describe the most streamlined process for making the QMFconfiguration available to your users.
130 Installing and Managing QMF for Workstation and QMF for WebSphere
||
|
|||
|||
||||
Procedure1. Ensure that the JDBC JAR files are available (assuming that the location of the
JDBC driver files is identical for each machine) as follows:v to each machine running QMF for Workstation that will connect directly to
repositories and data sources using direct database connections.v to each server (workstation) running QMF for WebSphere that will connect
directly to repositories and data sources using direct database connections.2. Place the QMF for Workstation installation executable in a directory that is
available to all users.3. Using QMF for Workstation administrative perspective, specify the JDBC driver
location information for each type of JDBC driver that will be used to connectto shared repositories and database data sources. The .bi.jdbc.drivers file isautomatically updated. Place the JDBC driver information file(.bi.jdbc.drivers) alongside the QMF for Workstation installation executable.
4. Using QMF for Workstation administrative perspective, specify the informationrequired to connect to one or more shared repositories. The repositories.xmlfile is automatically updated. Place the connection settings file(repositories.xml) alongside the QMF for Workstation installation executable.
5. You can set up a silent installation of QMF for Workstation. A silent installationruns on its own without user intervention. There is no need for users tomonitor the installation and provide input via dialog boxes. Using a silentinstallation, you as the administrator can control what features are installed onthe users machine. To set up a silent installation, create the silent installationoptions file, modify the executable name to include the silent installationparameters, and place the file alongside the QMF for Workstation installationexecutable.
6. QMF for Workstation users can now install the application by running theexecutable. The repository connection information and JDBC driver informationwill automatically be set up on their machine. . If the application executablehas the silent installation parameter specified, the user will not have to respondto any dialog messages. In lieu of users running the executable, administratorscan also use distribution software to complete the installation of QMF forWorkstation on each user machine.
7. To update each instance of QMF for WebSphere with the latest repositoryconnection and JDBC driver information. You can do one of the following:v Drop the repository connections file (repositories.xml) and the JDBC driver
information file (.bi.jdbc.drivers) in the home directory of the workstationor server that is running QMF for WebSphere. This makes the repositoryconnection and JDBC driver information available to each user of that QMFfor WebSphere application.
v Using QMF for Workstation, export the repository connections settings file(repositories.xml), the JDBC driver information file (.bi.jdbc.drivers),and, optionally, JAR driver files to a general location. The exported file iscalled settings.zip. Using QMF for WebSphere Administrator, import thesettings file. The repository connection and JDBC driver information isupdated on the server (or workstation) that is running QMF for WebSphere.
Results
You have exported the QMF configuration data to your users. Users can now beginusing the product.
Chapter 3. Configuring the environment 131
What to do next
Each time the repository connections or JDBC information files are updated, theymust be distributed again to all the users of QMF for Workstation and to all theservers (or workstations) that are running QMF for WebSphere
Installing the product silentlyA silent installation runs on its own without user intervention. Users must notmonitor the installation and provide input via dialog boxes. Using a silentinstallation, you as the administrator can control what features are installed on theuser machine. To set up a silent installation, you must create a silent installationoptions file and place the file in the same directory as the QMF for Workstationinstallation executable.
About this task
To install the product silently, see the following topics:
Creating a response fileTo run a silent installation of QMF for Workstation, you must create a response filethat specifies all installation options. This file must specify all the features that youwant to install and installation paths.
About this task
To create a response file:
Procedure1. In the command line, run the installation command.v See the examples for a Windows installation to the current directory:
setupwin32.exe -r installer.properties
orsetupwin64.exe -r installer.properties
where:-r specifies that the installation software runs in record mode.v See the example for a Windows installation to the custom directory:
setupwin32.exe -r C:\drive_path\response_file.properties
orsetupwin64.exe -r C:\drive_path\response_file.properties
where:– -r specifies that the installation software is run in the record mode.– C:\drive_path\response_file.properties specifies the path to the
response file that you want to create.2. As the installation proceeds, you select the features that each user that runs this
executable installs on their machine.3. Upon completion of the installation, the application is installed in the directory
that you specified during the installation.
Results
The response file is created and saved in the current directory or the directory thatyou specified in the path.
132 Installing and Managing QMF for Workstation and QMF for WebSphere
What to do next
Distribute the files to the user machines to that you want to install the softwareand run the silent installation.
Running the silent installationTo run a silent installation of QMF for Workstation, you distribute the response fileamong the user machines to that you want to install the application.
Before you begin
You must have the response file.
About this task
To run the silent installation :
Procedure1. Optional: If you want the JDBC, repository storage, repository connection, and
license information to be included in the user installation, copy the repositoriesconnections file (repositories.xml), the JDBC driver file (.bi.jdbc.drivers),license file (*.lic), and storage file (.storage) from the application homedirectory to the directory where the installation executable is stored.
2. To prepare for the silent mode, rename the response file toinstaller.properties and place it in the same directory with setupwin32.exeor setupwin64.exe. Use the command line to pass the following arguments forthe Windows OS:setupwin32.exe -i silent
orsetupwin64.exe -i silentwhere:v -i silent: specifies that the installation software runs in silent mode.
Note: If you want to use the response file that is stored in the directory that isdifferent from the one where the installation executable is stored, specify theabsolute path to the response file in the argument:
setupwin32.exe -i silent -f C:\drive_path\response_file.properties
or
setupwin64.exe -i silent -f C:\drive_path\response_file.properties
Results
The installation is silent; the product directories are created without notification tothe user.
Exporting and importing the JDBC driver and connectioninformation
QMF administrators can distribute repository connection and JDBC driverinformation by exporting the repositories.xml file, the .bi.jdbc.drivers file, and,optionally, JAR driver files; and then importing the settings.zip or thesettings.xml file.
Chapter 3. Configuring the environment 133
About this task
To export and then import the repository connection and JDBC driver information:
Procedure1. Populate the repository connection repositories.xml and the JDBC driver
information .bi.jdbc.drivers files.2. Open the Export window by selecting File > Export. Select Connection and
JDBC library settings from the list of available export destinations.3. Click Next. The Export Connection and JDBC Library Settings page of the
wizard opens.4. A single file called settings.zip will be exported. If you are using QMF for
Workstation, specify where to save the settings.zip file in the Settings filefield. You can use Browse to locate a directory that is accessible to all users.
5. Select the connection information that you want to include in the exportedsettings file. All of the repository connections that are currently defined arelisted in the Repository connections list box. Select the check box for eachconnection that you want to include in the output file.
6. All of the JDBC driver libraries that you have defined are listed in the JDBClibraries list box. Select the check box for each JDBC driver library that youwant to include in the output file.
7. Optional: If you want to export the JAR files that are associated with theselected JDBC drivers, select the Export JAR files check box.
8. Click Finish. If you are using QMF for WebSphere, your web browserautomatically downloads the settings.zip file. If you are using QMF forWorkstation, the Export Connection and JDBC Library Settings page of thewizard closes. The files are exported to the location that you specified in theSettings file field.
9. For each instance of QMF that is installed on another machine or server,import the repository connections and JDBC driver information file, byselecting File > Import. Select Connection and JDBC library settings from theImport window. The Import Connection and JDBC Library Settings page ofthe wizard opens.
Note: You can import the repository connections and JDBC driver informationfile in the ZIP format as well as the XML format. This is intended as abackward compatibility feature, because in previous versions of QMF therepository connections and JDBC driver information file was exported in theXML format.
10. Specify where to find the settings.zip/settings.xml file in the Settings filefield. You can use Browse to locate the file.
11. Select the Repository connections check box to import the repositoryconnections that have been included in the settings.zip/settings.xml file.
12. Select the JDBC library settings check box to import the JDBC driverinformation that has been included in the settings.zip/settings.xml file.
13. Select the Driver files check box to import the JAR files that have beenincluded in the settings.zip file. Then, specify the folder where to save theimported driver files.
14. Specify how you want conflicts with previous settings files to be resolvedusing the Conflict resolving radio buttons. Select Override existing settingsto replace all conflicting information with new information. Select Keepexisting settings to not update any existing information with new
134 Installing and Managing QMF for Workstation and QMF for WebSphere
information. Select Manually resolve conflicts to open the Conflicts windowwhere you will manually resolve conflicts between existing and new settinginformation. For each conflict you can specify whether you want to overwritethe current settings or keep them intact.
15. Click Finish. The Import Connections and JDBC Library Settings windowcloses. The repository connection settings and JDBC driver information filesare updated for the current machine running QMF for Workstation and thecurrent server (or workstation) running QMF for WebSphere. You can repeatthis process each time the JDBC driver information or repository connectioninformation is updated.
Exporting update scriptsUse the Export Update Script feature to apply product updates to all yourrepository storages and QMF catalogs when you installed a product update.
About this task
The scripts that are generated by the Export Update Script feature automate theprocess for updating table structures, rebinding packages, and re-creating storedprocedures.
The maximal line length of the DDL scripts that are generated by this feature isdetermined by the value set in the Line width field on the General Preferencespage. For more information, see Setting general preferences in the user help.
To generate the update scripts in the newly installed product version, perform thefollowing procedure:
Procedure1. From the main menu, select File > Export, select Export Update Script, and
click Next.The Export Storage Update Scripts wizard opens.
2. In the Repository Storages table, select the repository storages that you want toupdate. Use Select All and Deselect All buttons for more convenient selection.
3. In the Settings pane, specify the following settings for the repository storages:(Use the same settings for all selected storages.)v Protect using: Stored procedures or Static SQL Packages to set the
protection method for the newly installed version of the product.v Collection ID for packages to set the collection ID for the packages to
update.v Owner ID for packages to set the owner ID for the packages to update if it
is necessary to change a default.v Grant permission on packages to to specify particular users and groups for
which you are granting permissions. Users and groups must be separated bycommas.
v Database username to set the username that is used to access the databases.v Database password to set the password that is used to access the databases.
4. Click Next
5. In the QMF Catalogs table, select the QMF catalogs to update. Use Select Alland Deselect All buttons for more convenient selection.All settings on the Repository Storages wizard page by default are duplicatedon the QMF Catalogs page.
Chapter 3. Configuring the environment 135
v Protect using: Stored procedures or Static SQL Packages to set theprotection method for the newly installed version of the product.
v Collection ID for packages to set the collection ID for the packages toupdate.
v Owner ID for packages to set the owner ID for the packages to update if itis necessary to change a default.
v Grant permission on packages to to specify particular users and groups forwhich you are granting permissions. Users and groups must be separated bycommas.
v Database username to set the username that is used to access the databases.v Database password to set the password that is used to access the databases.
6. Click Finish to generate the files to update repository storages and QMFcatalogs.The following files are generated and stored in a directory of your choosing:v Database update SQL (.ddl files)v Package installation properties (.bndtask) filesv Package installation scripts (bind.bat and bind.sh)v Repository connections configuration file (repositories.xml)
This file updates configuration of existing and updated installations of theproduct.
Note: The: .ddl scripts must be run first to avoid errors. The names of the .ddland .bndtask files are generated in the following format:v <host>_<port>_<database>_repository.ddl
v <host>_<port>_<database>_repository.bndtask
Assigning users and groups permission to use repository objectsYou can assign security permission levels for users and groups and control theiraccess to repositories and any object in the repository.
About this task
Security permission levels for users and groups can only be assigned for securedrepositories (those created with Internal or LDAP security). You can applypermission levels to any object that is listed in the repository including forexample, directories, folders, workspaces and individual query and reportingobjects.
Only users who have been identified as QMF administrators can assign securitypermission levels to users and groups. In addition, users that have been grantedfull permission privileges can modify permissions that have been applied toobjects.
To assign users and groups different levels of permission to use repository objects:
Procedure1. Right-click any repository object that is listed in the Repositories, Repository
Explorer or Workspaces views. Select Properties from the pop-up menu. TheProperties window opens. Select Security from the sidebar. The Security pageof the window opens.
136 Installing and Managing QMF for Workstation and QMF for WebSphere
2. Each user or group that has been granted permission to use this repository islisted in the Group or user names list. To add additional users and groups,click the Add button. The Select Users or Groups window opens.
3. Each user and group can be assigned different levels of permissions for theselected repository object. The levels of permission that are available are listedin the Permissions for list. To assign a level of permission, select a group oruser and check the corresponding check box for the level of permissions thatyou want to assign. Your choices are:v Full: grants the user or group permission to perform all functions (edit, view,
browse and delete) on the repository object. In addition, full permissionallows users to modify permissions that have been assigned to the repositoryobject.
v Edit: grants the user or group permission to make changes to, as well asview and browse, the repository object.
v Browse: grants the user or group permission to see the contents of therepository object. For example, browse privileges on a directory in therepository allows a user to see what is inside that directory. Browseprivileges on a query object allows a user to open and run the query object.
v View: grants the user or group permission to see the repository object listedin the repository. For example, view privileges on a directory in therepository allows the user only to see the directory. The user cannot open thedirectory or see the contents of the directory. View privileges on a queryobject allow a user only to see the object. They cannot open or run the object.
v None: denies the user or group permission to see that the repository object isincluded in the repository.
4. Click Apply permissions to child folders and objects to apply the selectedlevel of permission to all of the folders and objects that are under the object towhich the permission is being applied.
5. To remove permission from a user or group, select the user or group from theGroup or user names list. Click Remove. The user or group will be removedfrom the list.
6. Click Apply.7. Click OK.
Selecting the users and groups that are allowed repositoryobject access
You must select the users and groups that will be allowed to access a repositoryobject.
About this task
To select the users and groups that will be allowed access to a repository object:
Procedure1. Right-click any repository object that is listed in the Repositories, Repository
Explorer or Workspace views. Select Properties from the pop-up menu. TheProperties window opens. Select Security from the tree. The Security page ofthe window opens. Click Add. The Select Users or Groups window opens.
2. The users and groups that are available for assignment are listed in the Groupor user names list box. These are the users and groups that you either specifiedusing the Users and Groups view if you selected Internal repository security,or obtained from your LDAP server if you selected LDAP repository security.
Chapter 3. Configuring the environment 137
3. To filter the users and groups that are listed you can:v Use the Name filter field.v Clear the Show users check box. Only Groups will be listed.v Clear the Show groups check box. Only Users will be listed.
4. To select a user or group and grant them permission to use this repositoryobject, select the user or group from the Group or user names list box and clickthe move right (>>) icon. The user or group is now listed in the Selectedobjects list box.
5. To remove a user or group from the Selected objects list box, click the moveleft (<<) icon.
6. Click OK. The Select Users or Groups window closes. The users or groups thatyou have moved to the Selected objects list box are added as users and groupsthat can access the repository object. They are listed in the Group or usernames list box of the Properties dialog.
Assigning users and groups administrative permission fordatabase-based security
Database-based security takes the security settings of the host database and usesthese settings to protect the shared repository.
Before you begin
Make sure you are operating on the RSBI objects.
About this task
To determine if a user has administrator authorization, QMF calls for the contentsof RSBI.ADMIN_VIEW and runs the following SQL statement:SELECT COUNT(*) FROM RSBI.ADMIN_VIEW WHERE AUTHID=:OWNER
Where OWNER is the user login. If this statement returns the value that is greaterthan zero, the user is the repository administrator.
The database-based security for shared repositories requires SYSADM authority onDb2 and DBA authority on Oracle. Without this authority users cannot administerthe repository.
For Db2 databases you can populate the RSBI.AUTHID_TABLE with PRIMARY_IDs andSECONDARY_IDs pairs of users and groups, where the group does have SYSADMauthority.
Results
The ADMIN_VIEW will have the list from SYSIBM.SYSUSERAUTH with the addition of thePRIMARY_IDs from the AUTHID_TABLE, whose SECONDARY_IDs are also in the list fromSYSIBM.SYSUSERAUTH.
Example
The following examples illustrate the QMF authorization processes on differentserver types:
138 Installing and Managing QMF for Workstation and QMF for WebSphere
Db2 for z/OSCREATE VIEW "RSBI"."ADMIN_VIEW" ("AUTHID")ASSELECT A."GRANTEE" AS "AUTHID"FROM "SYSIBM"."SYSUSERAUTH" AWHERE A."SYSADMAUTH" IN (’G’, ’Y’)UNIONSELECT A."PRIMARY_ID" AS "AUTHID"FROM "RSBI"."AUTHID_TABLE" AINNER JOIN"SYSIBM"."SYSUSERAUTH" B ONB."GRANTEE" = A."SECONDARY_ID"
DB2 for iSeriesCREATE VIEW "RSBI"."ADMIN_VIEW" ("AUTHID")ASSELECT "AUTHID"FROM "RSBI"."ADMIN_TABLE"
Db2 LUWCREATE VIEW "RSBI"."ADMIN_VIEW" ("AUTHID")ASSELECT A."GRANTEE" AS "AUTHID"FROM "SYSIBM"."SYSDBAUTH" AWHERE A."DBADMAUTH" = ’Y’UNIONSELECT A."PRIMARY_ID" AS "AUTHID"FROM "RSBI"."AUTHID_TABLE" AINNER JOIN"SYSIBM"."SYSDBAUTH" B ONB."GRANTEE" = A."SECONDARY_ID"
DB2 for z/VM®
CREATE VIEW "RSBI"."ADMIN_VIEW" ("AUTHID")ASSELECT A."NAME" AS "AUTHID"FROM "SQLDBA"."SYSUSERLIST" AWHERE A."AUTHOR" = ’’AND A."DBAAUTH" = ’Y’UNIONSELECT A."PRIMARY_ID" AS "AUTHID"FROM "RSBI"."AUTHID_TABLE" AINNER JOIN"SQLDBA"."SYSUSERLIST" B ONB."NAME" = A."SECONDARY_ID"
OracleCREATE VIEW "RSBI"."ADMIN_VIEW" ("AUTHID")ASSELECT A."GRANTEE" AS "AUTHID"FROM "SYS"."DBA_ROLE_PRIVS" AWHERE A."GRANTED_ROLE" = ’DBA’
Publishing objects to QMF Server Objects nodeObjects that are available on the QMF Server can be viewed inside QMF from theQMF Server Objects node of the repository tree of objects. You can add (publish)objects to the QMF Server Objects node by using the Publish to QMF Serverwizard.
Chapter 3. Configuring the environment 139

About this task
To publish one or several objects to the QMF Server Objects node of therepository tree of objects, complete the following steps:
Procedure1. In the Repository Explorer view, select the objects that you want to publish,
right-click the selection, and select Publish to QMF Server from the menu.
Restriction: Currently, the following objects can be published:v Analytical queriesv Compound dynamartsv Dynamartsv Forecastsv Tablesv Virtual tablesv Visual queries
Note that objects with prompts cannot be published to QMF Server Objectsnode.The Publish to QMF Server wizard opens.
2. In the wizard, make sure that the objects that you want to publish are selectedfrom the Current table list.
3. In the New name field, specify the name that the object acquires when it ispublished.
4. In the Field definitions area, you can edit the result set structure for the objectthat you want to publish:v To add a column or a calculated column to the result set, click Add Column
and select a column from the list or type an expression.v To remove a column from the result set, click Remove Column.v To reorder the result set rows, select the row that you want to reposition and
click Move Up or Move Down.5. Click Next.6. On the Specify user names and passwords for data sources page of the wizard,
specify data sources that the objects use:v To add a data source to the list, click Add Data Source.v To remove a data source from the list, click Remove Data Source.v In the Login and Password fields, specify user credentials for the data
sources that you add.7. Click Finish.
Using the Quick Start wizard to configure JDBC drivers and connect torepositories
You can run the QMF Quick Start wizard to configure repositories and connect tothe database.
About this task
The QMF Quick Start wizard configures QMF to connect to data by defining theJDBC libraries, connecting to a repository and adding data sources.
140 Installing and Managing QMF for Workstation and QMF for WebSphere
Running the Quick Start wizard is appropriate if you want to minimize theamount of time required to achieve a functional QMF environment for personaluse.
The Quick Start wizard is ideal for users that have little experience working withJDBC drivers and Data Sources to create working production configuration.
Procedure1. From the menu bar, select Help > Quick Start.
The Welcome to the Quick Start Wizard page opens. Click Next.2. On the Define JDBC libraries page,v If you do not want to add JDBC drivers to the list that is provided, click
Next.v If you want to add JAR files for a particular driver, click Select directory
with driver's JAR files icon, select a directory with associated files, and clickOK.
The JDBC library provides information about a particular JDBC driver. Itdefines the path to the driver, its JDBC URLs, and list of supported properties.For more information, see “Setting JDBC preferences” on page 32.
3. On the Repository Connections page,v From the Server list, select the QMF Server whose repository connections
you want to display, or select Local to display the repository connections thatare available on your local machine.
Note: QMF Server-based repository connections will be available to you onlyif you have an instance of QMF Registry configured for your QMF client.
v Right-click the repository that you want to connect to, establish theconnection, and click Next.
v Click the Create new connection to Repository icon to add a new repositoryconnection as described in “Creating the repository connection for QMF” onpage 115. Click Next.
4. On the Data Sources page,v If you do not want to add any data source to the list that is provided, click
Finish.v To add a data source, use one of the icons above the provided list depending
on the type of the data source that you want to add. Complete the procedureas described in “Data sources” on page 71. Click Finish.
Results
You have configured JDBC libraries and connected to a repository with datasources.
What to do next
As an administrator, you can generate and export the settings.xml file to users sothat users can begin using the product. For more information, see “Exporting andimporting the JDBC driver and connection information” on page 133.
Chapter 3. Configuring the environment 141

142 Installing and Managing QMF for Workstation and QMF for WebSphere
Chapter 4. Managing resource limits
Resource limits help you manage resource consumption on a database data source.By specifying resource limits you can control the actions a user can perform andimplement limits on the resources a user can consume when they access the datasource using QMF.
Resource limits can be applied globally to data sources or they can be applied toindividual queries that access any data source. Data source and query resourcelimits allow you to control resource consumption on a per user, group, day of theweek, or time of day basis.
CachingIn QMF, caching is a feature that allows you to accelerate the applicationperformance, but affects the relevance of the data.
You can configure the caching functionality for the following entities:v Repositoriesv Queriesv Data sourcesv Virtual data sourcesv Visual dashboards and visual reports
Repository cacheWhen caching is configured for a repository, the application saves thecontents of that repository, including all the objects and metadata, in thelocal memory of your computer or on the web server. Repository cache iscleared when the time limit is exceeded.
Repository cache is also cleared when you exit the application. Caches ofother QMF entities are not cleared when you exit the application.
Query cacheWhen caching is configured for a query, the results of that query are savedin cache after its first run. Later, if the query is run again unchanged, theresults are retrieved from cache. Query cache is cleared when the time limitis exceeded.
Data source cacheWhen caching is configured for a data source, data from the tables in thatdata source is saved in cache, so that users can work with it withoutdirectly accessing the database. Data source cache is available for relationaldata sources only. The cache is cleared when the time limit is exceeded.
Virtual data source cacheWhen caching is configured for a virtual data source, records from thetables in that data source are saved in cache, so that users can work withthe contents of the tables without directly accessing the database. Virtualdata source cache is cleared when the time limit is exceeded and can beupdated regularly. You can configure the application to update the cache ofvirtual data sources automatically in two distinct ways:
143
v Expired cache can be updated when the user tries to run a query againstthe outdated data. This is the default option for QMF for Workstation,although it can be re-configured.
v Expired cache can be updated regularly, according to the schedule. Thisis the default option for QMF for WebSphere, although it can bere-configured.
Visual dashboard cache and visual report cacheWhen caching is configured for a visual dashboard or a visual report,cache stores the results of the queries that provide data for that visualdashboard or visual report. This allows the dashboard or report to functionfaster, but affects the relevance of the data. Visual dashboards and visualreports cache is cleared when the time limit is exceeded.
QMF allows users to automate the update and expiration of virtual data sourcecache and visual dashboard cache by using schedules.
Assigning administrative privilegesQMF administrative privileges should be given only to those users who will beresponsible for creating and managing repositories.
If your repository will be stored in a database and you want to protect yourresources, only users familiar with administering databases should be given QMFadministrative privileges. In many environments having a single user responsiblefor managing repositories centralizes and streamlines control over databaseresources.
Those users without QMF administrative privileges do not have the QMF forWorkstation Administrator component installed and must be given the informationnecessary to connect to a repository that is created by the QMF administrator.Users without the Administrator component can create personal repositories.
About collection IDsCollection IDs identify a group of static SQL packages or stored procedures thatserve a particular purpose or function.
QMF includes a set of embedded SQL statements for working with databases.These statements are installed as queries on the database server during the QMFconfiguration, through a process commonly referred to as binding.
The database type determines whether the queries are bound as packages of staticSQL statements (for Db2 UDB and Db2 for z/OSdatabases) or as a set of storedprocedures (for all supported databases, but this option is not recommended forDb2 UDB and Db2 for z/OS). This group of installed packages or storedprocedures is called a collection.
Each version of QMF has its own collection. When QMF connects to databaseserver, it automatically detects proper installed collection and uses it. However, itis useful practice to incorporate the application version in the collection ID name tohelp users differentiate collections from one version of QMF to another.
Depending on the database type, the length of the collection ID can have somerestrictions.
144 Installing and Managing QMF for Workstation and QMF for WebSphere
In the case of stored procedures, the notion of a collection is usually synonymouswith owner ID or schema. The maximum length for collection ID field is determinedby database restriction on the maximum schema length. For more details onschema length limits see the database documentation.
The collections of packages are supported by Db2 databases only. Db2 databasescan function in either short names or long names mode, depending on theirconfiguration. In short names mode the maximum number of characters allowed incollection ID field is 8.
The following Db2 databases can be set up to support long names:v iSeries V5R1 or laterv DB2 for z/OS V8 or laterv DB2 UDB V8 or later
For these Db2 databases the maximum length of the collection ID is 128 characters.
Servers that support long namesLong names apply to the names of objects that reside in the QMF catalog.
The following servers support long names:v iSeries V5R1 or laterv zOS V8 or later
Long names for objectsLong names apply to the names of objects that reside in the QMF catalog.
Long names for QMF objects that can be saved in the QMF catalog tables thatsupport long names can be up to 128 characters for the owner and name fields.
Short names for objectsLong names apply to the names of objects that reside in the QMF catalog.
Short names for QMF objects that can be saved in the QMF catalog tables can beup to eight (8) characters for the owner and up to eighteen (18) characters for thename.
Setting up data source resource limitsYou can set up one or more unique sets of resource limits that can be applied toindividual users or to groups of users when they access a data source.
About this task
For every data source that you add to a repository, the Create Relational DataSource wizard creates a default set of resource limits. Based on your resource limitsprovider selection, the default resource limits for the data source are stored in therepository or the QMF catalog. The resource consumption at the data source forevery user of QMF for Workstation and QMF for WebSphere is automaticallycontrolled by that default set of resource limits. The default resource limits arenon-restrictive and are always active.
Chapter 4. Managing resource limits 145

To modify the default resource limits or set up new, unique resource limits for adata source:
Procedure1. From the Repository Explorer view, right-click a relational data source. Select
Properties from the pop-up menu. The Properties for [data source] windowopens. Click Resource Limits. The Resource Limits window opens.
2. All resource limits groups that exist for a data source are listed in the Resourcelimits groups list box. Every data source has a resource limits group calledDefault. The Default resource limits group includes all users and has noresource limitations. Use the Show resource limits groups whose names matchfield and the Refresh List button to search for specific resource limits groupsthat exist on the data source. Use a percent (%) sign in the Show resourcelimits groups whose names match field to list all resource limits groups thatexist on the data source.
3. Create a new resource limits group for the data source by clicking Add. TheNew Resource Limits Group window opens. Specify field values and click OK.
Note: The Add button is always available for the data sources with the QMFCatalog resource limits provider. However, if the limits are stored in arepository instead of a QMF Catalog, then Add is available only for the datasources that exist in secured repositories.
4. Create a schedule and specify resource limit values for the resource limitsgroup by selecting the resource limits group from Resource limits groups listbox and clicking Edit. The Edit Resource Limits Group window opens. Specifyfield values and click OK.
5. Assign users to a resource limits group by selecting the resource limits groupfrom the Resource limits groups list box and clicking Assign. If you are usinga repository as your resource limits provider, the Assignment for [resourcelimits group name] window opens. If you are using a QMF catalog as yourresource limits provider, the Assign User Profiles to [resource limits groupname] window opens. Specify field values and click OK.
Note: The Assign button is available only in the following scenarios:v You are using a repository as your resource limits provider and the data
source that you are working with exists in a secured repository.v You are using a QMF Catalog as your resource limits provider.
6. To delete a resource limits group, select the group from Resource limits groupslist box and click Delete. The resource limits group is removed from Resourcelimits groups list box.
Note: The Delete button is always available for the data sources with the QMFCatalog resource limits provider. However, if the limits are stored in arepository instead of a QMF Catalog, then Delete is available only for the datasources that exist in secured repositories.
7. Click OK to close the Resource Limits page of the Properties window.
Note: If a resource limit has been set at the data source level in QMF Serverand at the query level in QMF clients, QMF will apply the most restrictive limitof the two. For example, if the Maximum Rows to Fetch limit is set to 150,000rows at the query level, but set to 100,000 rows at the data source level, thenQMF will apply the data source limit of 100,000 rows when the query is run,
146 Installing and Managing QMF for Workstation and QMF for WebSphere
since the lower number constitutes a more restrictive limit. This selectionprocess is repeated for every resource limit that is set at both the query anddata source levels.
Setting up query resource limitsYou can set up one or more unique sets of resource limits that can be applied to anindividual query.
About this task
Each time a user runs the query at any data source, the resource limits assigned tothe user will control their resource consumption at that data source. Each set ofresource limits can place specific restrictions that can be implemented based on thetime of day or day of week that the query is run. You can apply resource limits toany query that has been saved in a repository. The resource limits that you canapply to a query are the Timeouts, LOBs, and Cache resource limits.
To set up resource limits for a query:
Procedure1. From the Repository Explorer or Repositories view, right-click a query that has
been saved in the repository. Select Properties from the pop-up menu. TheProperties for [query name] window opens. Click the Resource Limits folder.The Resource Limits window opens.
2. All resource limits groups that exist for a query are listed in the Resourcelimits groups list box. Every data source has a resource limits group calledDefault. The Default resource limits group includes all users and has noresource limitations. Use the Show resource limits groups whose names matchfield and the Refresh List button to search for specific resource limits groupsthat exist on the data source. Use a percent (%) sign in the Show resourcelimits groups whose names match field to list all resource limits groups thatexist on the data source.
3. Create a new resource limits group for the data source by clicking the Addicon. The New Resource Limits Group window opens. Specify field values andclick OK.
4. Create a schedule and specify resource limit values for the resource limitsgroup by selecting the resource limits group from Resource limits groups listbox and clicking the Edit icon. The Edit Resource Limits Group Schedulewindow opens. Specify field values and click OK.
5. Assign users to a resource limits group by selecting the resource limits groupfrom the Resource limits groups list box and clicking Assign. If you are usinga repository as your resource limits provider, the Assignment for [resourcelimits group name] window opens. If you are using a QMF catalog as yourresource limits provider, the Assign User Profiles to [resource limits groupname] window opens. Specify field values and click OK.
6. To delete a resource limits group, select the group from Resource limits groupslist box and click the Delete icon. The resource limits group is removed fromResource limits groups list box.
7. Click OK to close the Resource Limits page of the Properties window.
Note: If a resource limit has been set at the query level and the data sourcelevel, QMF will apply the most restrictive limit of the two. For example, if theMaximum Rows to Fetch limit is set to 150,000 rows at the query level, but set
Chapter 4. Managing resource limits 147
to 100,000 rows at the data source level, then QMF will apply the data sourcelimit of 100,000 rows when the query is run, since the lower number constitutesa more restrictive limit. This selection process is repeated for every resourcelimit that is set at both the query and data source levels.
Definition of a resource limits groupA resource limits group is a set of resource limits that are implemented collectively,for each user that is assigned to the group, according to a specified schedule. Youcan create as many resource limits groups as you want, with each group having adifferent set of resource limits implemented according to different schedules.
There are many permutations available to you for setting up resource limitsgroups. The most common ways to set up resource limits groups and controlresource usage are by:v data sourcev userv day of the weekv time of day
For example, a resource limits group can contain one set of limits that is in effectweekdays between 8 AM and 6 PM and another that is in effect on weekends andoff-hours. In addition, each resource limits group can have different users assignedallowing them to perform only certain functions on specific database data sourcesor when running specific queries.
Default resource limits groupInitially, all users are assigned to the default resource limits group. Users who arenot assigned to any other resource limits group are governed by the limits definedin the default resource limits group.
The default resource limits group is assigned a set of default resource limits and adefault schedule. The default resource limits are not restrictive and the defaultschedule implements the resource limits 24 hours a day, every day of the week.You can edit the default resource limits group and change the resource limits andthe schedule.
Note: Resource limits are always active. Governing based on default resourcelimits is performed even if you do not set up resource limits groups. You shouldreview the limits specified for the default resource limits group to ensure thatunassigned users that are governed by the default group are not granted limitsthat are more extensive or restrictive than you intend.
Ensuring resource limits groups securityIn order to protect the limits that have been specified for each user, QMFcatalog-based resource limits groups are securely stored in the tableRDBI.RESOURCE_TABLE that is part of the QMF catalog and resides on adatabase server.
You must have the authorization to execute the QMF application package on thedatabase server in order to make any changes to a resource limits group. Thisprevents unauthorized users from changing the resource limits.
148 Installing and Managing QMF for Workstation and QMF for WebSphere
A view named RDBI.RESOURCE_VIEW is defined for the resource limits table.QMF applications access the resource limits information using the view so thetable remains intact.
Note: The Default resource limits group resource limit information is stored in therepository and not in the RDBI.RESOURCE_TABLE on the database server. Thatmeans any user who can access the repository can make changes to the resourcelimits of the default resource limits group.
Creating resource limits groupsA resource limits group is a set of resource limits that are implemented collectively,for each user that is assigned to the group.
About this task
You can create one or more resource limits groups for each data source that youadd to the repository. Resource limits groups can be created in the followingscenarios:v You are using a repository as your resource limits provider and the data source
that you are working with exists in a secured repository.v You are using a QMF Catalog as your resource limits provider.
To create a resource limits groups:
Procedure1. From the Repository Explorer view, right-click a data source. Select Properties
from the pop-up menu. The Properties for [data source] window opens. ClickResource Limits. The Resource Limits window opens. Select a resource limitsgroup from the Resource limits groups list box. Click the Add icon. The NewResource Limits Group window opens.
2. Type a name for the group in the Group name field. There are no restrictionson the name.
3. Optional: In the Comments field you can specify up to 80 characters ofcomments describing the resource limits group.
4. You can select the Create this group using schedules from the Default groupcheck box to create the resource limits group with the same schedules as thedefault group. If this check box is cleared, the new resource limits group has noschedules. You create or modify a resource limits group's schedule using theEdit Resource Limits Group Schedule window.
5. Click OK. The New Resource Limits Group window closes. The new resourcelimits group is created. Control returns to the Resource Limits window. Thenext step to setting up resource limits is to create or edit the resource limitsgroup schedules.
Setting up resource limits group schedulesThe resource limits group schedule determines when the resource limits specifiedfor the group are in effect. You can create as many schedules for a resource limitsgroup as you need. Each schedule can be set up to implement a unique set ofresource limits.
Chapter 4. Managing resource limits 149

Specifying multiple schedules for one resource limits groupSpecify resource limits during different time periods using multiple schedules forone resource limits groups.
When a user accesses a data source the resource limits groups to which the userhas been assigned are identified. The schedules of the identified groups areverified to determine which resource limits are currently in effect. Because userscan be assigned to multiple resource limits groups, each with multiple schedules,there can easily be overlapping spans of time when technically multiple sets ofresource limits could be in effect.
In the cases of overlapping schedules, a unique schedule number is used todetermine which schedule is in effect. The schedule with the lowest number takesprecedence.
For example, suppose that a resource limits group has the following fourschedules:
Table 14. Resource limits group schedules
Schedule # 1 2 3 4
From Day Wednesday Monday Monday Sunday
To Day Wednesday Friday Friday Saturday
From Time 10:30 9:00 17:00 00:00
To Time 11:30 17:00 9:00 24:00
You will notice that schedule #1 is embedded in schedule #2 and schedules #1, #2,and #3 are embedded in schedule #4. If a user accessed this data source onWednesday at 11:00, schedules #1, #2, and #4 could be in effect. The schedule withthe lowest number is used.
When you create your resource limits group schedules, it is recommended that youstagger your numbering so additional schedules can be inserted where appropriateor deleted without impact. Keep in mind that schedules do not have to benumbered sequentially but once a schedule is assigned a number it cannot bechanged.
All time and day ranges of the schedules are inclusive. That means if the Fromtime is 08:00, the schedule is in effect exactly at 08:00. If the To time is 17:00 theschedule is in effect until 16:59:59. The from and to times can wrap aroundmidnight, and the from and to days can wrap around weekends.
When users are accessing data sources in different time zones, the clock used todetermine time resides on the data source being accessed. For example, a user inNew York is accessing a data source in California and it is 9:00 AM Monday inNew York. Based on the example schedules, schedule 3 is in effect becauseaccording to the data source it is 6:00 California time.
Determining the resource limits schedule in effectEach resource limits group schedule has a unique number that specifies thepriority of the schedule.
The resource limits group schedule specifies the limits that have been set up for agroup of users. For each resource limits group, there can be more than one
150 Installing and Managing QMF for Workstation and QMF for WebSphere
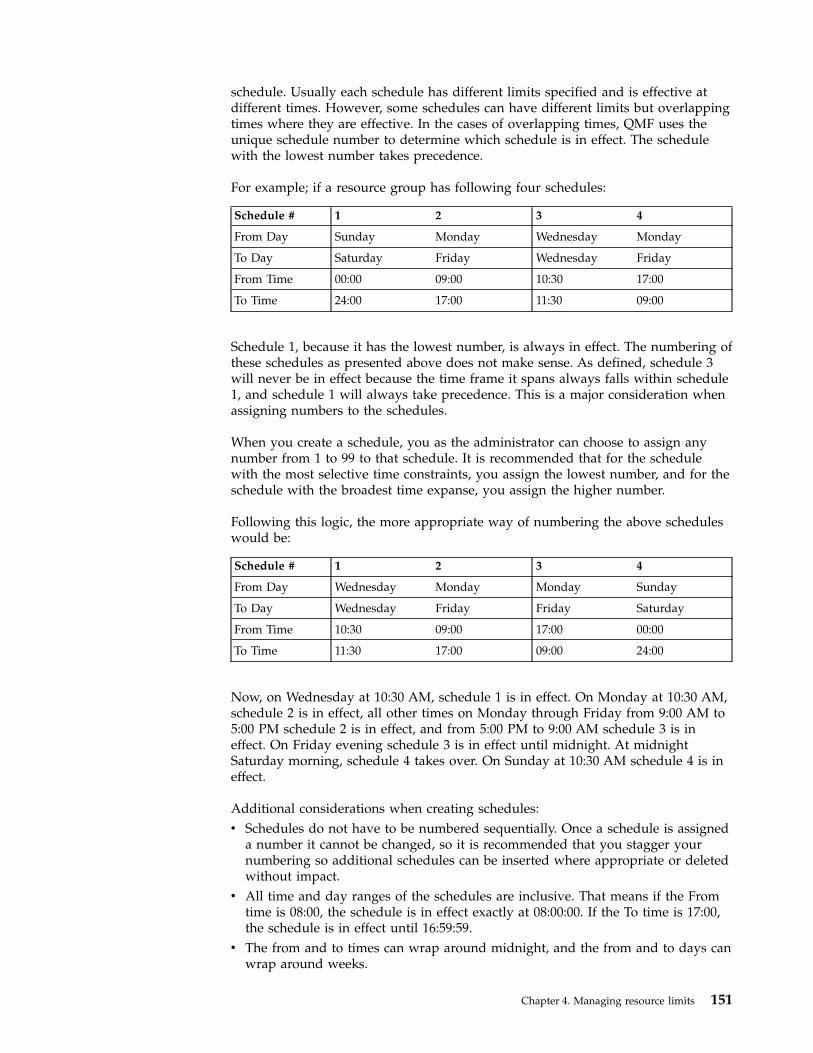
schedule. Usually each schedule has different limits specified and is effective atdifferent times. However, some schedules can have different limits but overlappingtimes where they are effective. In the cases of overlapping times, QMF uses theunique schedule number to determine which schedule is in effect. The schedulewith the lowest number takes precedence.
For example; if a resource group has following four schedules:
Schedule # 1 2 3 4
From Day Sunday Monday Wednesday Monday
To Day Saturday Friday Wednesday Friday
From Time 00:00 09:00 10:30 17:00
To Time 24:00 17:00 11:30 09:00
Schedule 1, because it has the lowest number, is always in effect. The numbering ofthese schedules as presented above does not make sense. As defined, schedule 3will never be in effect because the time frame it spans always falls within schedule1, and schedule 1 will always take precedence. This is a major consideration whenassigning numbers to the schedules.
When you create a schedule, you as the administrator can choose to assign anynumber from 1 to 99 to that schedule. It is recommended that for the schedulewith the most selective time constraints, you assign the lowest number, and for theschedule with the broadest time expanse, you assign the higher number.
Following this logic, the more appropriate way of numbering the above scheduleswould be:
Schedule # 1 2 3 4
From Day Wednesday Monday Monday Sunday
To Day Wednesday Friday Friday Saturday
From Time 10:30 09:00 17:00 00:00
To Time 11:30 17:00 09:00 24:00
Now, on Wednesday at 10:30 AM, schedule 1 is in effect. On Monday at 10:30 AM,schedule 2 is in effect, all other times on Monday through Friday from 9:00 AM to5:00 PM schedule 2 is in effect, and from 5:00 PM to 9:00 AM schedule 3 is ineffect. On Friday evening schedule 3 is in effect until midnight. At midnightSaturday morning, schedule 4 takes over. On Sunday at 10:30 AM schedule 4 is ineffect.
Additional considerations when creating schedules:v Schedules do not have to be numbered sequentially. Once a schedule is assigned
a number it cannot be changed, so it is recommended that you stagger yournumbering so additional schedules can be inserted where appropriate or deletedwithout impact.
v All time and day ranges of the schedules are inclusive. That means if the Fromtime is 08:00, the schedule is in effect exactly at 08:00:00. If the To time is 17:00,the schedule is in effect until 16:59:59.
v The from and to times can wrap around midnight, and the from and to days canwrap around weeks.
Chapter 4. Managing resource limits 151
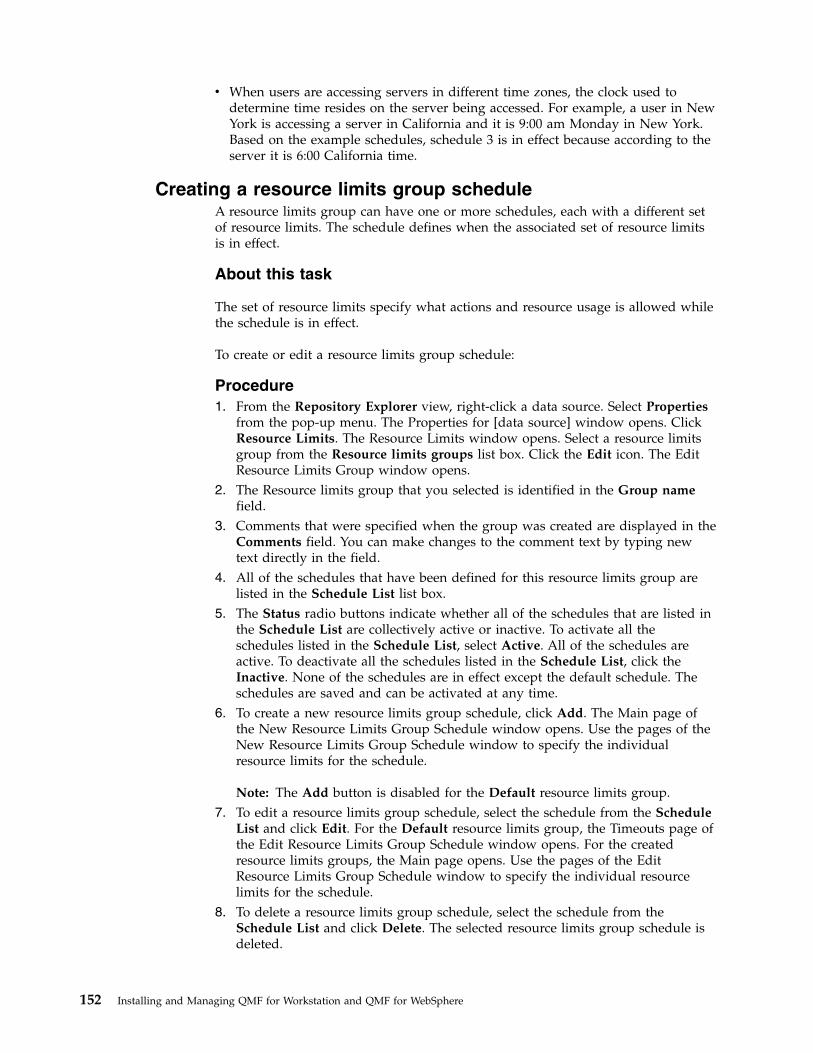
v When users are accessing servers in different time zones, the clock used todetermine time resides on the server being accessed. For example, a user in NewYork is accessing a server in California and it is 9:00 am Monday in New York.Based on the example schedules, schedule 3 is in effect because according to theserver it is 6:00 California time.
Creating a resource limits group scheduleA resource limits group can have one or more schedules, each with a different setof resource limits. The schedule defines when the associated set of resource limitsis in effect.
About this task
The set of resource limits specify what actions and resource usage is allowed whilethe schedule is in effect.
To create or edit a resource limits group schedule:
Procedure1. From the Repository Explorer view, right-click a data source. Select Properties
from the pop-up menu. The Properties for [data source] window opens. ClickResource Limits. The Resource Limits window opens. Select a resource limitsgroup from the Resource limits groups list box. Click the Edit icon. The EditResource Limits Group window opens.
2. The Resource limits group that you selected is identified in the Group namefield.
3. Comments that were specified when the group was created are displayed in theComments field. You can make changes to the comment text by typing newtext directly in the field.
4. All of the schedules that have been defined for this resource limits group arelisted in the Schedule List list box.
5. The Status radio buttons indicate whether all of the schedules that are listed inthe Schedule List are collectively active or inactive. To activate all theschedules listed in the Schedule List, select Active. All of the schedules areactive. To deactivate all the schedules listed in the Schedule List, click theInactive. None of the schedules are in effect except the default schedule. Theschedules are saved and can be activated at any time.
6. To create a new resource limits group schedule, click Add. The Main page ofthe New Resource Limits Group Schedule window opens. Use the pages of theNew Resource Limits Group Schedule window to specify the individualresource limits for the schedule.
Note: The Add button is disabled for the Default resource limits group.7. To edit a resource limits group schedule, select the schedule from the Schedule
List and click Edit. For the Default resource limits group, the Timeouts page ofthe Edit Resource Limits Group Schedule window opens. For the createdresource limits groups, the Main page opens. Use the pages of the EditResource Limits Group Schedule window to specify the individual resourcelimits for the schedule.
8. To delete a resource limits group schedule, select the schedule from theSchedule List and click Delete. The selected resource limits group schedule isdeleted.
152 Installing and Managing QMF for Workstation and QMF for WebSphere
Note: The Delete button is disabled for the Default resource limits group.9. Click OK. The Edit Resource Limits Group window closes. The new resource
limits group schedule is created and any changes that you have made to theresource limits parameters are saved. Control returns to the Resource Limitswindow. The next step to setting up resource limits is to specify the values forthe resource limits group schedule.
Specifying values for the resource limitsFrom the Edit Resource Limits Group Schedule window you enter the resourcelimits that you want to be in effect for the schedule.
About this task
To specify the individual resource limits:
Procedure1. From the Repository Explorer view, right-click a data source. Select Properties
from the pop-up menu. The Properties for [data source] window opens. ClickResource Limits. The Resource Limits window opens. Select a resource limitsgroup from the Resource limits groups list box. Click the Edit icon. The EditResource Limits Group window opens. Select a schedule from the ScheduleList. Click Edit. The Edit Resource Limits Group Schedule window opens.
2. Using the following pages of the Edit Resource Limits Group Schedule windowspecify the parameters that will set up the resource limits for the selectedresource limits group schedule:v Select the Main page to assign the schedule a priority and specify the time of
day and day of the week the schedule is in effect. You must specify theseparameters when you are creating a new schedule. For the Default resourcelimits groups, this page is not available.
v Select the Timeouts page to specify warning and cancellation limits for idlequeries, idle connections, and server response time.
v Select the Limits page to specify warning and cancellation limits for themaximum number of rows and bytes of data that can be retrieved. Inaddition, select this page to specify the maximum number of simultaneousconnections that can be established to the database server.
v Select the SQL Verbs page to limit the SQL verbs that users assigned to thisresource limits group are allowed to use when this schedule is in effect.
v Select the Options page to specify access options including: database datasource access using either the QMF for Workstation or QMF for WebSphereuser interface and programming interface; database update confirmation;isolation levels for user queries; mandatory account information; and theability to fetch all rows automatically, export data, edit tables, and only runsaved queries.
v Select the Save Data page to allow users assigned to this resource limitsgroup and using this schedule to save data at the database server.
v Select the Binding page to allow users assigned to this resource limits groupand using this schedule to bind or drop static packages for their queries.
v Select the Object Tracking page to turn on QMF for Workstation or QMF forWebSphere object tracking. You must turn on object tracking in order to havemeaningful object tracking reports.
Chapter 4. Managing resource limits 153

v Select the LOB Options page to allow users, assigned to this resource limitsgroup and using this schedule, to access tables containing large object data(LOB).
v Select the Cache page to control caching options for each user.v Select the Object List page to define the default owner name that will be
used to filter data source objects and specify a specific list of owner namesthat can be used to filter data source objects aside from the default name.
v Select the Acceleration page to specify the acceleration options.
Note: Acceleration is available only for Db2 z/OS databases that supportIDAA.
3. Click OK. The Edit Resource Limits Group Schedule window closes. All thechanges that you have made to the resource limits parameters are saved. TheEdit Resource Limits Group window stays open. From the Resource LimitsGroup window, the next step to setting up resource limits is to assign users tothe resource limits groups.
Specifying Main resource limitsOn the Main page of the Edit Resource Limits Group Schedule window youspecify the day and time when the schedule will be in effect.
The Main resource limits are as follows:
NumberThis resource limit is available only in the New Resource Limits GroupSchedule window. Populate this text field with a number from 1 to 99. Thisnumber is used to identify the schedule and represent the schedule'spriority. A number is assigned to the schedule only when it is created. Theschedule number must be unique. Once assigned, you cannot change theschedule number and its assigned priority.
The schedule's priority number is used to decide which schedule is ineffect when schedules overlap. If two schedules for the resource limitsgroup cover the same time period, the schedule with the lower numbertakes precedence.
Day RangeSelect from the drop down lists a day of the week that will be the startingday and a day of the week that will be the ending day for the schedule.The schedule is in effect from the starting day to the ending day, inclusive.You can specify a day range that wraps around the end of the week. Forexample, selecting Friday through Monday activates the schedule Friday,Saturday, Sunday, and Monday. In reverse, selecting Monday throughFriday activates the schedule Monday, Tuesday, Wednesday, Thursday, andFriday.
Time RangeSelect from the drop down lists a time to start and a time to end theschedule. The schedule is in effect from the start time to the end time,inclusive. Time is specified using a 24 hour clock. You can specify a timerange that wraps around midnight. For example, selecting 23:00 through7:00 will activate the schedule from 11:00 at night until 7:00 in the morning.In reverse, selecting 7:00 through 23:00 will activate the schedule from 7:00in the morning till 11:00 at night.
Status Use these radio buttons to set the status of the individual schedule. Thestatus of the whole Resource Limits group, set using Status on the Edit
154 Installing and Managing QMF for Workstation and QMF for WebSphere
Resource Limits Group window, takes precedence over the individualschedule status. There are two choices of status:v Active to activate this schedule.v Inactive to deactivate this schedule. An inactive schedule remains as it
was defined until you activate it or delete the schedule from theresource limits group. You can activate the schedule at any time.
Specifying Timeouts resource limitsOn the Timeouts page of the Edit Resource Limits Group Schedule window youset the timeout warning and cancellation limits for idle queries, idle connections,and data source response time.
Idle Query Timeouts and Server Response Timeouts resource limits can be set forboth data sources and for individual queries. The Idle Connection Timeoutsresource limit can only be set for data sources and not for individual queries. TheTimeouts resource limits are as follows:
Idle Query TimeoutsThese fields specify the amount of time that a query can remain idle. TheWarning limit field displays the number of seconds that a query canremain idle before the user is informed and asked if the query should becanceled. The Cancel limit field displays the number of seconds that aquery can remain idle before the query is automatically canceled.
Server Response TimeoutsThese fields specify the amount of time that can be spent waiting for aresponse from the database. The Warning limit field specifies the numberof seconds that can elapse before the user is informed and asked if thedatabase request should be canceled. The Cancel limit field specifies thenumber of seconds that can elapse before the database request isautomatically canceled.
Note: A lower timeout limit prevents long running, runaway queries. Ahigher timeout limit allows database requests to complete when thedatabase server is slow due to resource contention or other reasons.
Idle Connection TimeoutsThis field specifies the amount of time that an idle connection to adatabase data source is retained. The Cancel limit field specifies thenumber of seconds that an idle connection is retained before it isautomatically closed.
Note: A lower timeout limit minimizes the resources consumed at thedatabase by idle connections. A higher timeout limit minimizes theoverhead of establishing connections.
Specifying Limits resource limitsOn the Limits page of the Edit Resource Limits Group Schedule window you setthe warning and cancellation limits for the maximum number of rows and bytes ofdata that can be retrieved from the database data source. In addition, you canspecify the maximum number of simultaneous connections that can be establishedto the data source.
Limits resource limits can be set for data sources. The Limits resource limits are asfollows:
Chapter 4. Managing resource limits 155
Maximum Rows to FetchThese fields specify the limits for the number of rows of data that can beretrieved from a database data source when running a query. The Warninglimit field specifies the number of rows that can be retrieved from the datasource before you are notified that a row limit has been reached. The useris prompted to select whether more data should be fetched or should thequery be canceled. The Cancel limit field displays the number of rows thatcan be retrieved from the data source before the row limit is reached. Thequery is then automatically canceled.
Maximum Bytes to FetchThese fields specify the limits for the number of bytes of data that can beretrieved from a database data source when running a query. The Warninglimit specifies the number of bytes that can be retrieved from the datasource before the user is notified that the byte limit has been reached. Theuser is then prompted to specify whether more data should be fetched orshould the query be canceled. The Cancel limit displays the number ofbytes that can be retrieved from the data source before the byte limit isreached. The query is then automatically canceled.
Maximum ConnectionsThis field specifies the limit for the number of simultaneous connectionsthat can be established to a database data source. The Cancel limitspecifies the number of simultaneous connections that can be established toa data source before the query requesting the next connection isautomatically canceled. Setting the limit to zero (0) indicates that there isno limit to the number of connections.
Generally, connections to database data sources are reused. If you run onequery at a data source, then run another query at the same data source,only one connection is required. However, if you run those two queriessimultaneously, then two connections are required. If another connection toa data source is required and this limit is reached, an error is returned andthe operation is not performed.
Note: To enable table editing, you must specify that two or moresimultaneous connections are allowed.
Specifying SQL Verbs resource limitsOn the SQL Verbs page of the Edit Resource Limits Group Schedule window youspecify the SQL verbs that users assigned to this resource limits group are allowedto use when this schedule is in effect.
If a user tries to run a query that contains a disallowed verb, the query is canceledwithout sending the SQL to the data source. SQL Verbs resource limits can be setfor data sources.
The use of the following SQL verbs can be controlled:v ACQUIREv ALTERv CALLv COMMENTv CREATEv DELETEv DROP
156 Installing and Managing QMF for Workstation and QMF for WebSphere
v EXPLAINv GRANTv INSERTv LABELv LOCKv REFRESHv RENAMEv REVOKEv SETv SELECTv UPDATE
Specifying Options resource limitsOn the Options page of the Edit Resource Limits Group Schedule window youspecify the levels of access users have to a data source and the data source objects.
Options resource limits can be set for data sources. The Options resource limitsare as follows:
Allow access to data source from user interfaceThis field specifies whether you have permission to access a data sourcefrom the QMF for Workstation user interface when the current resourcelimits group schedule is in effect.
Allow access to data source from programming interfaceThis field specifies whether you have permission to access a data sourcefrom the QMF for Workstation application programming interface (API)when the current resource limits group schedule is in effect.
Fetch all rows automaticallyThis field specifies how the data source will send query results data to theapplication. By default, data is requested from the data source only asrequired to display query results. For example, if 20 rows fill up the queryresults window, only 20 rows are requested from the data source. Whenyou scroll down to make the 21st row visible, more data is requested. Ifyou run a query and then wait before scrolling down, the query remainsactive for that wait time, consuming resources at the data source. If thisparameter is enabled, data is requested repeatedly until all data is received,independent of your scrolling requests.
Confirm database updatesThis field specifies whether or not you must confirm all data sourcechanges resulting from the queries that you run or the actions that youperform when editing tables. If this check box is selected, you will beprompted for confirmation before any data source changes can occur. Ifthis check box is cleared, data source changes can occur withoutconfirmation.
You can override this resource limit setting using the Confirm parameterin a Procedure command. The following table shows the correlation of theparameters, depending on the specified values.
Confirm database updatesvalue Procedure parameter value
The confirmation dialogbehavior
Selected confirm=yes appears
Chapter 4. Managing resource limits 157
Confirm database updatesvalue Procedure parameter value
The confirmation dialogbehavior
Selected confirm=no does not appear
Selected not specified appears
Cleared confirm=yes appears
Cleared confirm=no does not appear
Cleared not specified does not appear
Enable exporting of dataThis field specifies whether a user can export query result data to a fileusing the Export command from the File menu or the EXPORT DATAprocedure command.
Enable table editingThis field specifies whether or not you can edit a table using the tableeditor feature .
Allow running saved queries onlyThis field specifies whether or not you can create and save new queries atthe database data source. If checked, you can only run queries that aresaved at the database data source. If clear, you can run queries, as well ascreate and save new queries at the database data source.
Isolation level for queries
The Isolation level for queries parameter only applies to databases thatsupport transactions.
This field specifies the level of transaction isolation to be applied to auser's queries. There are varying levels of isolation, each with a differingdegree of impact on transaction processing in the database.
Consult with your database administrator or the database serverdocumentation to determine if the database server being used is configuredto support transaction processing.
Valid values include:v Default specifies that the isolation level for a query will be the default
specified for all applications.v Repeatable Read specifies that the isolation level for a query will be
Repeatable Read (RR). The RR isolation level provides the mostprotection from other applications.
v All (RS) specifies that the isolation level for a query will be ReadStability (RS).
v Cursor Stability (CS) specifies that the isolation level for your querywill be Cursor Stability (CS). The CS isolation level provides themaximum concurrency with data integrity.
v Change (UR) specifies that the isolation level for your query will beUncommitted Read (RS) which allows an application to readuncommitted data.
v No Commit (NC) specifies that the isolation level for your query will beNo Commit (NC). An application running with an isolation level of NCcan not make permanent database changes.
158 Installing and Managing QMF for Workstation and QMF for WebSphere
AccountThis field specifies the default account information that will be sent to adata source when you connect to that data source.
Account can be overriddenThis field specifies whether you are allowed to override the defaultaccounting information specified in the Account field when connecting to adata source. If selected, you can enter a new accounting string using theSet User Information window. If clear, you cannot enter new accountinginformation and you are prevented in some cases from accessing datasource objects that are not owned by your resource limits group.
Require account informationThis field specifies whether you must specify a valid accounting string inthe Set User Information window before connecting to a database whenthis schedule is in effect.
Allow printingThis check box must be selected in order for you to print objects that arestored on the data source.
Specifying Save Data resource limitsOn the Save Data page of the Edit Resource Limits Group Schedule window youspecify whether users assigned to this resource limits group and using thisschedule can save data at the database data source.
Save Data resource limits can be set for data sources. The Save Data resourcelimits are as follows:
Allow save data commandThis field specifies whether you can save data at the database data source.Saving data can be extremely resource-intensive. As a result it can have asignificant impact on your database and network.
Default table space
Note: This field is not displayed when you connect to a Db2 for z/OSdatabase.This field specifies the default table space name that will be used for tablescreated with the save data command. This field is only available if theAllow save data command has been selected. The syntax of the table spacename that you specify must conform to the database rules for table spacenames. Any value that you specify is used as part of the CREATE TABLESQL statement that runs when you save data to a new table. Entering anasterisk (* ) specifies that the default table space will be taken from a user'sprofile in the RDBI.PROFILE_TABLE or Q.PROFILES that are specified by theadministrator when your profile was created.
Default table space can be overridden
Note: This field is not displayed when you connect to a Db2 for z/OSdatabase.This field specifies whether you can override the default table space. Ifselected, you can specify any table space name subject to database securityauthorizations. If this check box is not selected, you must use the tablespace name specified in the Default table space field.
Allow to replace any existing dataThis field specifies whether a user can override the existing data when the
Chapter 4. Managing resource limits 159
||
||
objects are exported or imported to the database. If this option is selected,a user can replace the existing data with the new one in the database. Ifthis check box is clear, a user can only append new data to the existingone.
Specifying Binding resource limitsOn the Binding page of the Edit Resource Limits Group Schedule window youspecify whether users assigned to this resource limits group and using thisschedule can bind or drop static packages for their queries to or from the datasource.
Binding resource limits can only be set for data sources. The Binding resourcelimits are as follows:
Allow binding of packagesThis field specifies whether or not you can bind static packages for yourqueries on the database data source.
Allow dropping of packagesThis field specifies whether or not you can drop static packages from thedatabase data source.
Default collection IDThis field specifies the default collection ID for the static packages that youbind.
Default collection ID can be overriddenThis field specifies whether you must use the default collection ID. If thischeck box is selected, you can specify any collection ID subject to databasesecurity authorizations. If this check box is clear, you must use the defaultcollection ID that is specified in the Default collection ID field.
Default isolation levelThis field specifies the default isolation level for the static packages thatyou bind. You can select one of the isolation levels:v Repeatable Read specifies that the default isolation level for the static
packages will be Repeatable Read (RR). The RR isolation level isolatesthe SQL statements in the static package from the actions of concurrentusers for rows the requester reads and changes, including phantomrows. RR isolation provides the most protection.
v All (RS) specifies that the default isolation level for the static packageswill be Read Stability (RS). The RS isolation level isolates the SQLstatements in the static package from the actions of concurrent users forrows the requester reads and changes
v Cursor Stability (CS) specifies that the default isolation level for thestatic packages will be Cursor Stability (CS). The CS isolation levelisolates the SQL statements in the static package and the current row towhich the database cursor is positioned from the actions of concurrentusers for changes the requester makes.
v Change (UR) specifies that the default isolation level for the staticpackages will be Uncommitted Read (UR). The UR isolation levelisolates the SQL statements in the static package from the actions ofconcurrent users for changes the requester makes.
v No Commit (NC) specifies that the default isolation level for the staticpackages will be No Commit (NC). The NC isolation level does notisolate the SQL statements in the static package from the actions ofconcurrent users for changes the requester makes.
160 Installing and Managing QMF for Workstation and QMF for WebSphere
Default isolation level can be overriddenThis field specifies whether you can override the isolation level specified inthe Default isolation level field. If this check box is selected, you canspecify any isolation level when binding packages. If this check is notselected, you must use the default isolation level specified in the DefaultIsolation Level field to bind static packages.
Specifying Object Tracking resource limitsOn the Object Tracking page of the Edit Resource Limits Group Schedule windowyou activate object tracking.
Object tracking must be enabled in order to collect the tracking data that is used topopulate object tracking reports. Object tracking reports can help you locateunused objects, locate frequently accessed data sources such as tables or columnsand spot potential problem areas.Object Tracking resource limits can be set fordata sources.
The Object Tracking resource limits are as follows:
Enable summary object trackingThis field specifies whether summary object tracking is activated for yourresource limits group. Summary tracking records the number of times anobject is run, and the most recent times it was run and modified.
Enable detailed object trackingThis field specifies whether detailed object tracking is activated for yourresource limits group. Detailed tracking records each time the object is run,who ran it, and the results. A large amount of data can be collected if thisoption is selected.
Note: This option must be enabled to use ad hoc object tracking or SQLtext tracking.
Enable ad-hoc object trackingThis field specifies whether a record of each ad-hoc query is kept in thesummary or detail object tracking tables. An ad-hoc query is a query thathas not been named or saved at the database data source.
Note: The Enable detailed object tracking option must be enabled inorder to enable this option.
Enable SQL text trackingThis field specifies whether a record of the SQL text of each query is keptin the detail tracking table.
Note: The Enable detailed object tracking option must be enabled inorder to enable this option.
Last Used timestamp optionThis field specifies when and by which commands data objects areupdated.
Note: In cases when the object is saved to the QMF Catalog, the data iskept in the column LAST_USED of the table Q.OBJECT_DIRECTORY. Ifthe object is saved to the repository, then the data is kept in the columnLAST_USED of the RSBI.OBJECTS table.
The following options are available:
Chapter 4. Managing resource limits 161
v Update when object is accessed (legacy mode)
Data is updated when you run any of the following commands againstthe object:– CONVERT
– DISPLAY
– EXPORT
– IMPORT
– RUN
– SAVE
v Update when object is run, saved or imported
Data is updated after performing RUN, SAVE or IMPORT commands.v Update only when object is run
Data is updated only after performing RUN command.
Last Used timestamp options can be overriddenIndicates whether the DSQEC_LAST_RUN variable value is ignored.
This check box is cleared by default.
Select this check box to change the variable value and override theresource limit.
Specifying LOB Options resource limitsOn the LOB Options page of the Edit Resource Limits Group Schedule windowyou control a users ability to access, retrieve, and save data to and from tablescontaining large objects (LOBs).
A Large Object (LOB) is a Db2 for z/OS and Db2 for Linux, UNIX, and Windowsdata type that houses non-traditional data such as text, multimedia, image, video,photograph, sound, or any very large data file inside a database table. Retrievingor saving LOB data can consume a substantial amount of resources. Even justaccessing a table that contains LOB data can be resource consumptive. Using theLOB Options resource limits, you can control access to tables on the database datasource that include LOB data.LOB Options resource limits can be applied to bothdata sources and individual queries.
The LOB Options resource limits are as follows:
LOB Retrieval OptionThis field specifies whether a user can retrieve large object (LOB) datawhen this schedule is in effect. You can select one of the following:v Disable LOB columns specifies that users can not retrieve LOB data and
can not query or access any table that contains LOB data.v Disable LOB data retrieval specifies that users can not retrieve LOB
data but can query tables that contain LOB data. Query result data willbe returned for all columns in the table except those that contain LOBdata.
v Retrieve LOB data on demand specifies that users can query tables thatcontain LOB data and result data will be returned for all columnsincluding those columns that contain LOB objects. However, the resultsdata for the LOB columns will not actually be displayed in the column.A pointer is displayed. When the user selects the pointer, the LOB datawill be displayed in the query results.
162 Installing and Managing QMF for Workstation and QMF for WebSphere
You can also pull the data from the database by double-clicking on thepointer.
v Retrieve LOB data automatically specifies that users can query tablesthat contain LOB data and the result data will be returned for allcolumns, including those columns that contain LOB objects.This option pulls ALL of the LOB data for ALL of the LOB columnsfrom the database to the local computer.This option can potentially consume a large amount of resources andtime. The actual LOB data is not displayed in grids and reports. Instead,pointers to the LOB data are displayed.
Enable saving LOB dataThis field specifies whether users can save LOB data on the database datasource.
Maximum LOB column sizeThis field specifies the maximum size of a LOB column, in kilobytes, up to2G (the maximum LOB size). The default is 0, no maximum. If a userqueries a table with LOB data that is larger than the maximum, the LOBdata will not be returned for display.
LOB options can be overriddenThis field specifies whether a user can override the default LOB Optionsresource limits that have been specified for their group.
Specifying Cache resource limitsOn the Cache page of the Edit Resource Limits Group Schedule window youactivate caching for query results.
With this resource limit enabled, when a query is run, the results will be cached. Ifthe query is run again, and nothing has changed, the results will be taken from thecached results rather than run again at the data source.Cache resource limits canbe applied to both data sources and individual queries.
The Cache resource limits are as follows:
Cache is enabledThis field specifies whether the caching of result set data is enabled.Caching is disabled by default. If caching is enabled, result data from aquery is cached (stored) and is available for use by other users that havethe same privileges to access this data on the data source. Caching resultset data can significantly decrease resource consumption and improveperformance. The cached result set data is not automatically refreshed.
Auto data fetching enabledThis field specifies how the cached rows of data will be retrieved. Thisresource limit becomes available if Cache is enabled is selected. Whenselected, this option specifies that if the query result set is taken from thecache, the entire result set will be presented. When this option is notselected, 100 rows (the default) of the query result set is presented.
Data expiration intervalThis field specifies the time period the query result set data will remain incache. You can set the time period by specifying the number of days,hours, and minutes. After this period, the cached query result set data willbe updated.
Chapter 4. Managing resource limits 163
Cache options can be overriddenThis field specifies whether the cache options can be overridden.
Specifying Object List resource limitsOn the Object List page of the Edit Resource Limits Group Schedule window youspecify default and allowed owner names for data sources.
With Object List resource limits, you can define the default owner name that willbe used to filter data source objects. You can also specify a specific list of ownernames that can be used to filter data source objects aside from the default name.
The Object List resource limits are as follows:
Default Owner NameThis field specifies the default owner name that will be used to filter thedata source object list.
Default Owner Name can be overriddenThis check box allows the user to override the current default owner name.
Allowed Owner NamesThis field specifies the list of additional owner names that can be used tofilter the data source object list. Owner names should be separated by acomma.
Allow <USERNAME>This check box allows the current user's owner name to be used to filterthe data source object list.
Allow <SQLID>This check box allows the current user's SQLID to be used to filter the datasource object list.
Specifying Acceleration resource limitsUse the Acceleration page of the Edit Resource Limits Group Schedule window toactivate query acceleration. The Acceleration page is available only for Db2 forz/OS databases that support IDAA.
With this resource limit enabled, you are able to save your data to the acceleratorserver that is associated with the database that you are currently using, and runaccelerated queries. With this resource limit disabled, you cannot run acceleratedqueries.
The Acceleration page includes the following settings:
Enable accelerationThis check box specifies whether the acceleration is enabled.
Acceleration typeThis field specifies the conditions that determine whether the queries arerun by the database or by the accelerator. The following options areavailable:
Option Description
NONE Specifies that no queries are sent to anaccelerator server.
164 Installing and Managing QMF for Workstation and QMF for WebSphere
Option Description
ENABLE Specifies that queries are accelerated only ifthe database determines that it isadvantageous to do so. If an acceleratorfailure occurs while a query is running or ifthe accelerator returns an error, databasereturns a negative SQLCODE to theapplication.
ENABLE WITH FAILBACK Specifies that queries are accelerated only ifthe database determines that it isadvantageous to do so. If the acceleratorreturns an error during the PREPARE or firstOPEN command for the query, the databaseexecutes the query without the accelerator. Ifthe accelerator returns an error during aFETCH or a subsequent OPEN command,the database returns the error to the userand does not execute the query.
ELIGIBLE Specifies that queries are accelerated if theyare eligible for acceleration. Queries that arenot eligible for acceleration are executed bythe database. If an accelerator failure occurswhile a query is running or if the acceleratorreturns an error, the database returns anegative SQLCODE to the application.
ALL Specifies that queries are accelerated if theyare eligible for acceleration. Queries that arenot eligible for acceleration are not executedby the database, and an SQL error isreturned. If an accelerator failure occurswhile a query is running or if the acceleratorreturns an error, the database returns anegative SQLCODE to the application.
Acceleration options can be overriddenThis check box specifies whether acceleration options can be overridden.
Assigning users to resource limits groupsYou must specifically assign users to a resource limits group.
About this task
Once assigned, what each user can do using QMF for Workstation and QMF forWebSphere is dictated by the resource limits group schedule. All users who are notassigned to a resource limits group are automatically included in the defaultresource limits group Default. The Default resource limits group schedule has norestrictions.
In order to assign a user to a resource limits group, you must first specifyinformation that defines the user to QMF for Workstation and QMF forWebSphere. The process of defining users to the applications and then assigningthem to a resource limits group varies slightly depending on the resource limitsprovider that was selected for the data source.
Chapter 4. Managing resource limits 165
Assigning users to repository resource limits groupsTo assign a user to a repository-based resource limits group, you select directlyfrom the list of available users and groups that were given access to the securedrepository when it was created.
About this task
The users and groups that are available for selection were defined based on thetype of security that was selected for the repository. If LDAP security was selected,the users and groups were obtained from the LDAP server. If Internal security wasselected, you define the user and group information using the Users and Groupsview. If no security has been specified for the repository, and resource limits arerepository based, you do not have the ability to create resource limits groups andmake assignments.
The order in which you create user information or resource limits groups does notmatter. You can create user information first, then create resource limits groups.You can create resource limits groups first, then user information. This flexibility isintended as creating and editing user information and resource limits groupassignments is an ongoing process as the needs of your organizations change
To assign a user to a repository-based resource limits group:
Procedure1. From the Repository Explorer view, right-click a data source. Select Properties
from the pop-up menu. The Properties for [data source] window opens. ClickResource Limits. The Resource Limits window opens. There are two pages.Click the Resource Limits tab. On the tab, click Refresh List. Select a resourcelimits group from the list of available resource groups. Click Assign. TheAssignment for [resource limits group name] window opens.
2. The users that have been defined for the data source and are available forassignment, but have not been assigned to the selected resource limits group,are listed in the Not assigned list box. The users that have been assigned to theselected resource limits group are listed in the Assigned list box. To filter theusers that are listed in the Not assigned list specify the user ID of a specificuser or a wildcard character in the Name filter field. A percent (%) sign willgenerate a list of all users that have been defined for the data source. If notlisted, the user or group has not been defined. You can define a new user orgroup, and then refilter the list.
3. Select the user that you want to assign to the resource limits group from theNot assigned list. Click Assign. The user is moved to the Assigned list.
4. To remove a user from the resource limits group, select the user from theAssigned list. Click Unassign. The user is moved to the Not assigned list. Toremove all the users from the Assigned list and move them to the Notassigned list, click Unassign All.
5. Click OK. Your additions or changes to the resource limits group userassignments are saved.
Results
Note: You can also make user assignments to resource limits groups on theAssignment page of the Resource Limits window.
166 Installing and Managing QMF for Workstation and QMF for WebSphere
Managing user assignments for all repository resource limits groupsEach user and group that is defined for a data source can be assigned to one ormore repository resource limits groups.
About this task
The Assignment page of the Resource Limits window lists each user or group thatis defined for a data source and each resource limits group that is defined for thedata source. From this window, you can assign a user to one or more resourcelimits groups from a single dialog.
To make user assignments for all resource limits groups from one dialog:
Procedure1. From the Repository Explorer view, right-click a data source. Select Properties
from the pop-up menu. The Properties for [data source] window opens. ClickResource Limits. The Resource Limits window opens. There are two pages.Click the Assignment tab.
2. The users and groups that have been defined for the data source are listed inthe Users and Groups field. Expand the Groups folder to see all groups.Expand the Users folder to see all users.
3. Each Users and Groups cell has a corresponding Resource groups drop-downlist box. The Resource groups list displays all the resource limits groups thathave been defined for the data source. To select a resource limits group, clickthe Resource groups cell for the user or group, click the downward arrow, andselect a new resource limits group from the list of available resource limitsgroups.
4. Click Save or OK. The new assignment is made.
Assigning users to QMF catalog-based resource limits groupsTo assign a user to a QMF catalog-based resource limits group you must firstdefine a user profile for the user, and then you assign the user profile to theresource limits group.
The order in which you create user profiles or resource limits groups does notmatter. You can create user information first, then create resource limits groups.You can create resource limits groups first, then user information. This flexibility isintended as creating and editing user information and resource limits groupassignments is an ongoing process as the needs of your organizations change.
Granting QMF catalog user profile enrollmentWhen a user connects to a data source the correct user profile for their user ID islocated and their enrollment status is verified to determine which resource limitsgroup to use.
Access to a data source will be granted to a user based on the following types ofuser ID enrollment:v Restricted enrollment, where each user ID must have a matching user profile to
gain access to the data source.v Open enrollment, where each user ID can either have a matching user profile to
gain access to a data source or automatically fall into a default user profile calledSYSTEM.
Chapter 4. Managing resource limits 167
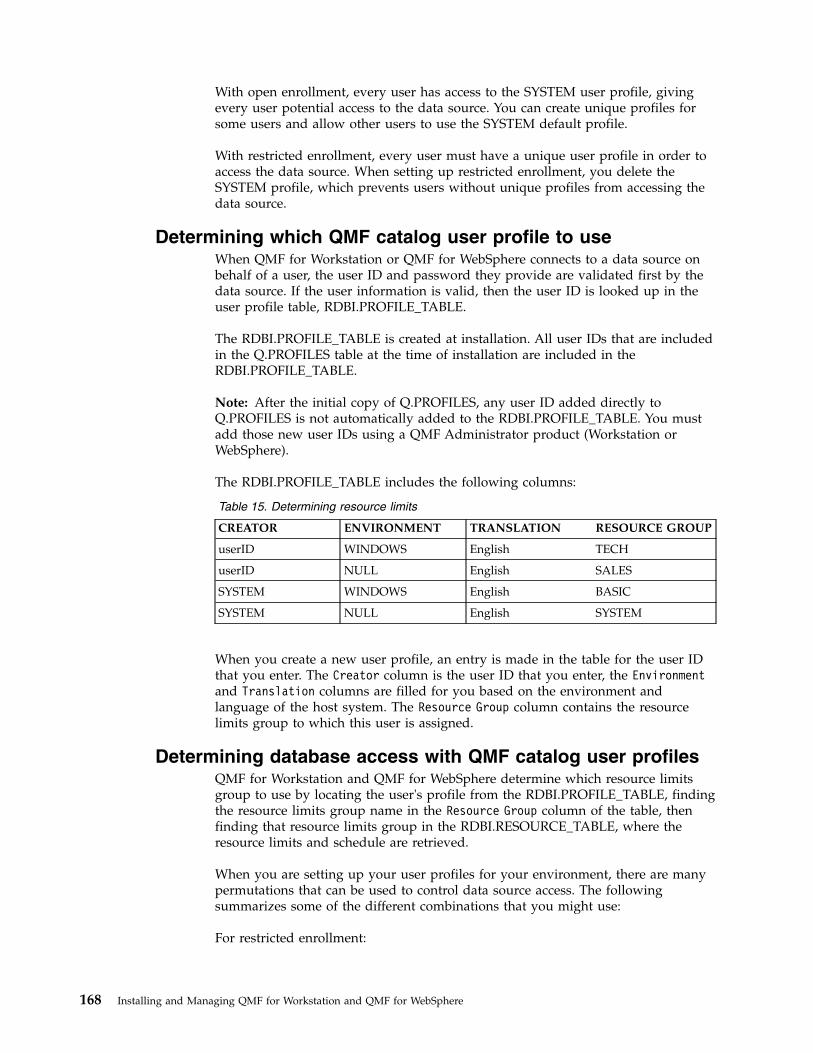
With open enrollment, every user has access to the SYSTEM user profile, givingevery user potential access to the data source. You can create unique profiles forsome users and allow other users to use the SYSTEM default profile.
With restricted enrollment, every user must have a unique user profile in order toaccess the data source. When setting up restricted enrollment, you delete theSYSTEM profile, which prevents users without unique profiles from accessing thedata source.
Determining which QMF catalog user profile to useWhen QMF for Workstation or QMF for WebSphere connects to a data source onbehalf of a user, the user ID and password they provide are validated first by thedata source. If the user information is valid, then the user ID is looked up in theuser profile table, RDBI.PROFILE_TABLE.
The RDBI.PROFILE_TABLE is created at installation. All user IDs that are includedin the Q.PROFILES table at the time of installation are included in theRDBI.PROFILE_TABLE.
Note: After the initial copy of Q.PROFILES, any user ID added directly toQ.PROFILES is not automatically added to the RDBI.PROFILE_TABLE. You mustadd those new user IDs using a QMF Administrator product (Workstation orWebSphere).
The RDBI.PROFILE_TABLE includes the following columns:
Table 15. Determining resource limits
CREATOR ENVIRONMENT TRANSLATION RESOURCE GROUP
userID WINDOWS English TECH
userID NULL English SALES
SYSTEM WINDOWS English BASIC
SYSTEM NULL English SYSTEM
When you create a new user profile, an entry is made in the table for the user IDthat you enter. The Creator column is the user ID that you enter, the Environmentand Translation columns are filled for you based on the environment andlanguage of the host system. The Resource Group column contains the resourcelimits group to which this user is assigned.
Determining database access with QMF catalog user profilesQMF for Workstation and QMF for WebSphere determine which resource limitsgroup to use by locating the user's profile from the RDBI.PROFILE_TABLE, findingthe resource limits group name in the Resource Group column of the table, thenfinding that resource limits group in the RDBI.RESOURCE_TABLE, where theresource limits and schedule are retrieved.
When you are setting up your user profiles for your environment, there are manypermutations that can be used to control data source access. The followingsummarizes some of the different combinations that you might use:
For restricted enrollment:
168 Installing and Managing QMF for Workstation and QMF for WebSphere
v User ID matches a user profile. User profile names a resource limits group.Resource limits group exists. Access to data source is based on the resourcelimits and schedule for the group.
v User ID does not match a user profile. There is no default user profile calledSYSTEM. User is denied access to the data source.
For open enrollment:v User ID matches a user profile. User profile names a resource limits group.
Resource limits group exists. Access to data source is based on the resourcelimits and schedule for the group.
v User ID does not match a user profile. There is a default user profile calledSYSTEM. The default user profile SYSTEM names a resource limits group. Theresource limits group exists. Access to data source is based on the resource limitsand schedule for the group.
v User ID matches a user profile. No resource limits group is assigned. Access tothe data source is based on the limits set for the default resource limits group.
v User ID does not match a user profile. There is a default user profile calledSYSTEM. There is no resource limits group that has been defined for theSYSTEM user profile. User has access to the data source based on the limits setfor the default resource limits group.
Assigning users to QMF catalog resource limits groupsTo assign a user to a QMF catalog-based resource limits group you must firstdefine a user profile for the user, and then you assign the user profile to theresource limits group.
About this task
The order in which you create user profiles or resource limits groups does notmatter. You can create user information first, then create resource limits groups.You can create resource limits groups first, then user information. This flexibility isintended as creating and editing user information and resource limits groupassignments is an ongoing process as the needs of your organizations change.
Note: The users with the specified <NULL> or <WINDOWS> value in the ENVIRONMENTcolumn and the users with values that match Language User Interface of thePreferences in the TRANSLATION column are available for assigning the resourcelimits group. For more information, see “Determining which QMF catalog userprofile to use” on page 168.
To assign users to a QMF catalog resource limits group:
Procedure1. From the Repository Explorer view, right-click a data source. Select Properties
from the pop-up menu. The Properties for [data source] window opens. Clickthe Resource Limits folder. The Resource Limits window opens. There are twopages. Click the Resource Limits tab. Click Refresh List. Select a resourcelimits group from the list of available resource groups. Click Assign. If theselected resource limits group is not Default, the Assign User Profiles to[resource limits group name] window opens.
2. Click Refresh List. The user profiles that have been created for the data sourceand are available for assignment are listed in the Not assigned list boxincluding the SYSTEM user profile. You can modify the user profiles that arelisted using the Show User Profiles with "creator" matching field. In this field
Chapter 4. Managing resource limits 169
you can specify the user ID of a specific user profile or a wildcard character. Apercent (%) sign will generate a list of all user profiles that have been createdfor the data source. Click Refresh List to initiate the search. All the userprofiles are stored in RDBI.PROFILE_VIEW that match the value you entered areretrieved. It can be populated from RDBI.PROFILE_TABLE or Q.PROFILES. Formore information about the RDBI.PROFILE_TABLE or Q.PROFILES tables, see“Creating database objects for the QMF catalog” on page 74. The users thathave been assigned to the selected resource limits group are listed in theAssigned list box.
3. If the user ID that you want to assign to a resource limits group is not listed inthe Not assigned list, click Create New to create a new user profile. The NewProfile window opens. In the Creator field, specify a valid user ID for a user.Click OK. The New Profile window closes. The new user profile is created andassigned to the resource limits group. Control returns to the Assign UserProfiles to [resource limits group name] window.
4. Select the user that you want to assign to the resource limits group from theNot assigned list. Click Assign. The user is moved to the Assigned list. Tomove all the users from the Not assigned list to the Assign list, click AssignAll.
5. To remove a user from the resource limits group, select the user from theAssigned list. Click Unassign. The user is moved to the Not assigned list. Toremove all the users from the Assigned list and move them to the Notassigned list, click Unassign All.
6. Click OK. Your additions or changes to the resource limits group userassignments are saved.
Results
Note: You can also make user assignments to resource limits groups, and create,edit and delete user profiles, from the User Profiles page of the Resource Limitswindow.
Managing user profilesAll users that will be assigned to a QMF catalog based resource limits group musthave a user profile.
About this task
You can use the User Profiles page of the Resource Limits window to create, editor delete user profiles, and assign new user profiles that you create to QMF catalogresource limits groups.
To create, edit or delete user profiles:
Procedure1. From the Repository Explorer view, right-click a data source. Select Properties
from the pop-up menu. The Properties for [data source] window opens. Clickthe Resource Limits folder. The Resource Limits window opens. There are twopages. Click the User Profiles tab.
2. Click Refresh List. The user profiles that have been created for the data sourceand meet the most recent search criteria are listed in the User Profiles list boxincluding the SYSTEM user profile. You can modify the user profiles that arelisted using the Show user profiles whose names match field. In this field youcan specify the user ID of a specific user profile or a wildcard character. A
170 Installing and Managing QMF for Workstation and QMF for WebSphere
percent (%) sign will generate a list of all user profiles that have been createdfor the data source. Click Refresh List to initiate the search.
3. To add a new user profile, click Add. The User Profile window opens. Specifythe field values and click OK. The user profile is created and assigned to aresource group that you specify. Control returns to the User Profiles page.
4. To edit a user profile, select the user profile that you want to change from theUser Profiles list. Click Edit. The User Profile window opens. Make thechanges to the field values and click OK. The changes are saved and controlreturns to the User Profiles page.
5. To delete a user profile, select the user profile that you want to delete from theUser Profiles list. Click Delete. The user profile is deleted from the profiletable.
Note: If you are choosing to use restricted enrollment, you must delete theSYSTEM user profile.
6. Click Apply or OK. The changes that you have made to the user profiles aresaved.
Creating user profilesYou can create a new user profile or edit an existing user profile using the UserProfile dialog.
About this task
If you are creating a new user profile, you can assign the new user profile to aresource limits group from the same window. If you are editing a user profile youcan change the resource limits group assignment to a different group. In eithercase, the resource limits group you select must already have been created.
To create a new or edit an existing user profile:
Procedure1. From the Repository Explorer view, using QMF for Workstation, right-click a
data source. Select Properties from the pop-up menu. The Properties for [datasource] dialog opens. Click the Resource Limits folder. The Resource Limitswindow opens. There are two pages. Click the User Profiles tab. Click Add.The User Profile window opens.
2. Specify a valid user ID for the user profile in the Creator field.3. Specify a resource limits group to which the user profile will become a member
in the Resource group field. Unless otherwise specified all new user profilesare automatically assigned to the default resource limits group SYSTEM. To seea list of the resource limits groups defined for this data source, click the buttonwith three dots to the right of the field. The Resource Limits Groups windowopens. From the Resource Limits Groups window, select a resource limits groupfor the user profile. Click OK. The user profile is assigned to the selectedresource limits group. Control returns to the User Profile window.
4. Specify a table space name that will be used when this user saves data usingthe SAVE DATA command in the Space field. This field is only applicable if theDefault table space can be overridden resource limit setting in the Save Datatab has been checked, allowing users to override the default table space namewith a unique name. Click OK. The user profile is created.
Chapter 4. Managing resource limits 171
Selecting a resource limits group for a user profileUse the Resource Limits Group at window to view a list of the resource limitsgroups that have been defined for the data source.
About this task
You can select from the list of available groups, the resource limits group to whichyou will assign the user profile that you are creating or editing.
To select a resource limits group for a user profile:
Procedure1. From the Repository Explorer view, using QMF for Workstation, right-click a
data source. Select Properties from the pop-up menu. The Properties for [datasource] window opens. Click the Resource Limits folder. The Resource Limitswindow opens. There are two pages. Click the User Profiles tab. Click Add.The User Profile window opens. Click the button with three dots. The ResourceLimits Group at window opens.
2. From the Resource limits group list, select the resource limits group to whichyou want to assign the user profile.
3. Click OK. The user profile is assigned to the resource limits group that youselected. The Resource Limits Groups at window closes. Control returns to theUser Profile window.
172 Installing and Managing QMF for Workstation and QMF for WebSphere
Chapter 5. Managing repositories
Administrators are responsible for the ongoing maintenance of shared repositories,and the query and reporting environment.
The following tasks describe maintaining repositories:
Deleting a repositoryYou can delete a repository from shared repository storage.
About this task
To delete a repository:
Procedure1. The Repositories view is usually open and docked to the left, next to the
Repository Explorer view. If closed, you can open the Repositories view byselecting Repositories from the View menu.
2. From the Repositories view, right-click the repository that you want to delete.3. From the pop-up menu, select Delete Repository. A confirmation message is
issued. If you are sure that you want to delete the repository, click OK.
Editing shared repository storage propertiesYou can edit the properties of shared repository storage.
About this task
To edit shared repository storage properties:
Procedure1. The Repositories view is usually open and docked to the left, next to the
Repository Explorer view. If closed, you can open the Repositories view byselecting Repositories from the View menu.
2. From the Repositories view, right-click the shared repository storage whoseproperties you want to modify. From the pop-up menu, select Edit. A multiplepage Edit Repository Storage window opens displaying the properties that youcan change.
3. Select Connection to change the JDBC connection or user login information.The Connection page opens. You can make any of the JDBC connection or userlogin information changes from this page.
4. Select Objects to update the repository storage database objects. The Objectspage opens. You can update the repository storage database objects from thispage.
5. Select Protection to change the protection status of the repository storagetables. The Protection page opens. You can make any changes to the protectionstatus of the repository storage tables and grant or revoke users access to thetables from this page.
173
v Unprotected: Specifies that you will connect to the repository in unprotectedmode. In this mode, dynamic query access to the repository storage tables,within which the repository resides, will be allowed. If the repository storagetables are restricted to the connecting user ID, the connection will fail. If therepository storage tables are unrestricted to the connecting user ID, theconnection will be made and the dynamic query will process.
v Auto: Specifies that the protection mode will be selected automaticallydepending on whether a collection of stored procedures or static SQLpackages are available. If available, the repository storage tables withinwhich the repository resides will be accessed using the specified storedprocedures or static SQL packages. If the stored procedures or static SQLpackages are unavailable, dynamic query access (unprotected mode) will beused.
v Protected: Specifies that you will connect to the repository in protected modeusing the specified stored procedures or static SQL packages to access therepository storage tables within which the repository resides. If the specifiedset of stored procedures or static SQL packages are not available, theconnection will fail.
6. Click OK. The Edit Repository Storage window closes. The changes that youhave made are applied.
Editing connection parameters and user login informationYou use the Connection page of the Edit Repository Storage window to edit theconnection information and the user login information that will be used to connectto the shared repository storage.
About this task
To edit the connection parameters and login user information for shared repositorystorage:
Procedure1. Open the Connection page of the Edit Shared Repository Storage window.2. In the JDBC Driver field specify the library for the JDBC driver that will be
used to access the database that is hosting the repository storage. You canselect from a drop down list of libraries that you defined when you set up theJDBC driver information. You can use the ellipsis (...) to the right of the fieldto open the Select JDBC Driver dialog where you can create additional JDBCdriver libraries.
Note: If you work with a Db2 for z/OS database, you can use the DirectDRDA Connection. In contrast to JDBC libraries, the Direct DRDA Connectioncomes with QMF and does not require additional driver installation.
You can enable the use of SSL certificates for the Direct DRDA Connection tomake the connection secure.
Note: The Direct DRDA Connection is supported only for DB2 for z/OSVersion 9 and Version 10 and for Db2 for z/OS Version 11 and Version 12. Donot use it for Db2 LUW or DB2 for iSeries.
3. In the JDBC URL list, specify the URL that points to the database that hoststhe repository storage within which the repository to which you want toconnect resides.The format for the URL can be displayed in the list.
174 Installing and Managing QMF for Workstation and QMF for WebSphere
Note: You can also use the Build URL by URL-template dialog box to formthe correct string.
Click Build URL to open the Build URL by URL Template dialog box. Fromthe JDBC URL drop-down list, select the template. In the table, specify theserver, port, and database information and click OK. The result URL string isadded to the JDBC URL list.
4. Click Advanced to specify any driver-specific connection string keywords andtheir values that will be used for the database that is hosting the repositorystorage tables. The list of available advanced properties will changedepending on both the type of driver being used, and the version of thedriver. For information on any keywords that are required by a selecteddatabase driver, consult the specific driver's documentation.
Note: For the DB2 Type 4 UDB driver and the DB2 Universal JDBC Driver, toreceive extended SQL exception error messages, check theretrieveMessagesFromServerOnGetMessage option in the Advanced JDBCSettings window.
5. To configure a PassTickets-based Single Sign-on connection between QMF andDb2 for z/OS database, click Single Sign-on.
6. If you use the Direct DRDA Connection, bind packages by clicking the BindPackages button.
7. In the User Information dialog, select User ID and password are required torequire the use of a user ID and password when accessing the database that ishosting the repository storage. If the database that is hosting the repositorystorage allows access without a user ID and password, selecting this optionwill override that allowance, and a user ID and password will be required toaccess the repository storage tables.
8. To remember this password every time you use the specified user ID toconnect to the database, select the Remember password check box.
9. Click Test Connection to test the connection to the database. If you havespecified any information incorrectly you will not be able to connect.
10. If you have completed making changes to the repository storage properties,click OK. If you will be making additional changes, click the Objects orProtection tab, depending on the changes that you are making.
Updating database objectsYou use the Objects page of the Edit Shared Repository Storage dialog to updatethe database objects that are required for the repository storage.
About this task
To update the repository storage objects that reside on the database:
Procedure1. Open the Objects page of the Edit Repository Storage window.2. Optionally you can type the owner name in the Owner ID field, if you work
with Db2 databases. The Owner ID provides the administrator privileges to theuser who operates under the login without SYSADM authority.
Tip: (for Db2 for z/OS databases)
Chapter 5. Managing repositories 175
When the user without administrator privileges creates or updates the sharedrepository storage tables and enters the owner name in the Owner ID field, theuser login and Owner ID are automatically inserted to the RSBI.AUTHID_TABLEas the PRIMARY_ID and SECONDARY_ID correspondingly. This allows the user tocreate shared repositories with database-based security provider andautomatically work with the repositories as an administrator.
3. Click Update to check if the repository storage objects have been created orhave to be updated. Depending on the status of the objects you will proceed asfollows:v If all the objects have not changed, a message is issued. Click OK in the
message window.v If the objects have to be updated, then the Update repository storage tables
page opens listing the SQL statements that will be used to update therequired repository storage tables. You can make changes to the SQLstatements as described on the page.
4. If you have completed making changes to the repository storage properties,click OK. If you will be making additional changes, click the Connection orProtection tab, depending on the changes that you are making.
Editing protection optionsYou use the Protection page of the Edit Shared Repository Storage window toupdate the protection options for the repository storage tables.
About this task
To update the protection options for the repository storage tables:
Procedure1. Open the Protection page of the Edit Shared repository Storage window.2. Depending on the current status of the Protection method check box, you can
change the protection status of the repository storage table in one of thefollowing ways:v Clear the Protection method check box to remove the protected status of the
repository storage tables. This means that all users will have access to therepository storage tables and can make changes to any of those tables.
v Select the Protection method check box to specify that you will protect therepository storage tables. The fields that you will use to specify theprotection method become available.
3. Select one of the following protection methods:v Select Stored procedures to specify that you will use stored procedures to
protect the repository storage tables. You can select this option if therepository storage tables are located on one of the following databases:– Informix– DB2 UDB LUW V9 and above– DB2 z/OS V9 and above in NFM– DB2 iSeries (when accessed with IBM Toolbox JDBC driver)– Microsoft SQL Server
v Select Static SQL packages to specify that you will use static SQL packagesto protect the repository storage tables. You can select this option if therepository storage tables are located on a Db2 database that you will connect
176 Installing and Managing QMF for Workstation and QMF for WebSphere
to using the IBM DB2 Universal driver for JDBC or the Direct DRDAconnectivity provided by the product (the latter option is available for Db2for z/OS connectivity only).
4. Type, or select from the drop-down list, the name that you want to use toidentify the collection of stored procedures or static SQL packages in theCollection ID field.
5. Optionally you can type the owner name in the Owner ID field, if you workwith Db2 databases. The Owner ID provides the administrator privileges to theuser who operates under the login without SYSADM authority.
6. Click Create. The stored procedures are created or the static SQL packages arebound. A message is issued that informs you of the success of the eitherprocess. You can also use the Delete button to remove a collection of storedprocedures or packages.
7. Specify which users will have permission to run the stored procedures or staticSQL packages for the repository storage tables on this database. To grantpermission to all users, enter PUBLIC in the User IDs field and click Grant. Togrant permission to specific users, type their user IDs in the field and clickGrant. A message is issued that informs you that the selected user IDs havebeen granted permission to run the stored procedures or packages.Optionally, you can revoke permission to run the stored procedures or staticSQL packages from any user that is listed in the User IDs list box. To revokepermission from one or more users, highlight one or more of the user IDs andclick Revoke. A message is issued informing you that permission to run thestored procedures or static SQL packages has been revoked from the selecteduser IDs.
8. If you have completed making changes to the repository storage properties,click OK. If you will be making additional changes, click the Objects orConnection tab, depending on the changes that you are making.
Editing QMF catalog plug-in propertiesYou use the QMF Catalog Plug-in Parameters dialog to change or update the QMFcatalog plug-in parameters for a data source.
About this task
To edit the QMF catalog plug-in properties:
Procedure1. The Repositories view is usually open and docked to the left, next to the
Repository Explorer view. If closed, you can open the Repositories view byselecting Repositories from the View menu.
2. From the Repositories view, right-click the data source whose QMF catalogplug-in properties you want to modify. From the pop-up menu, selectProperties. The Properties window opens. Select Plug-ins. The Plug-inswindow opens. If the QMF Catalog Plug-in has been enabled for this datasource (the Enable plug-in check box is selected), the Parameters button isavailable. Click Parameters. The QMF Catalog Plug-in Parameters windowopens.
Note: If the database that you are using supports IDAA and QMF CatalogPlug-in is disabled for the data source, Accelerator-only tables are displayed in
Chapter 5. Managing repositories 177
the Database node and the Accelerator node of the data source tree of objects.If the plug-in is enabled, Accelerator-only tables are displayed only in theAccelerator node.
3. Select Catalog Tables to update the QMF catalog tables. The Catalog Tablespage opens. You can update the QMF catalog tables from this page.
4. Select Protection to change the protection status of the QMF catalog tables. TheProtection page opens. You can make any changes to the protection status ofthe QMF catalog tables and grant or revoke users access to the tables from thispage.
5. Select Catalog to change the QMF catalog that the current data source will use.The Catalog page opens. You can make any changes to the QMF catalogselected for this data source.
6. Select Sample Tables to create a set of sample tables for the current datasource. The Sample Tables page opens. You can create the sample tables fromthis page.
7. Click OK. The Edit QMF Catalog Plug-in Parameters window closes. Thechanges that you have made are applied.
Updating QMF catalog tablesUse the Catalog Tables page of the QMF Catalog Plug-in Parameters window toupdate the QMF Catalog tables for a data source.
About this task
You would update the QMF Catalog tables if a new version of QMF has beeninstalled or if you want to change from a QMF catalog that supports short namesto one that supports long names.
Procedure1. Open the Catalog Tables page of the QMF Catalog Plug-in Parameters window.2. To update a set of QMF catalog tables that supports short names for objects,
select Update catalog tables to support short names. QMF will check theexisting QMF catalog tables on the data source, and update or add to theexisting tables as necessary. You are given the opportunity to confirm andmodify the SQL statements used to create the tables. Any data that is in theexisting catalog tables is maintained.Select this option if you are upgrading from a previous version of QMF and theexisting QMF catalog tables will continue to support only short names forobjects.
3. To update a set of QMF catalog tables that supports long names for objects,select Update catalog tables to support long names. QMF will check theexisting QMF catalog tables on the data source, and update or add to theexisting tables as necessary. You are given the opportunity to confirm andmodify the SQL statements used to create the tables. Any data that is in theexisting catalog tables is maintained.Select this option if you are upgrading from a previous version of QMF and theexisting QMF catalog tables will continue to support long names for objects.You would also select this option if you want to update the QMF catalog tablesfrom supporting short names to supporting long names. If an existing set ofQMF catalog tables that use short names is detected on the data source, thosetables will be converted to support long names.
178 Installing and Managing QMF for Workstation and QMF for WebSphere

Note: In order to select this option, the data source must support long names.QMF will check to ensure that the data source supports long names.
Tip: When the QMF Catalog tables are updated, QMF checks whether therequired objects exist and restores the objects that are dropped to theappropriate locations in a database.
The names of the objects that are generated in a database when you create theQMF Catalog and their property values are stored in the RDBI.SERVER_INFOtable. If a database administrator renames some objects in a database, theinformation in the RDBI.SERVER_INFO becomes invalid. During the updateprocess, QMF detects the objects that were renamed and saves their actualnames to the RDBI.SERVER_INFO table. The changes that are made to theRDBI.SERVER_INFO table during the update process are displayed in a log file.
4. Click OK to close the QMF Catalog Plug-in Parameters window. Any changesthat you have made to the QMF Catalog Plug-in parameters are saved.
Updating the protection status of QMF catalog tablesUse the Protection page of the QMF Catalog Plug-in Parameters window to updatethe QMF catalog tables protection options.
About this task
You would update the QMF catalog table protection if you are updating yourversion of QMF; changing the type of protection that has been specified for thetables; or changing the stored procedures or static SQL packages that youoriginally specified. You can also change user permissions to use the QMF catalogpackages at any time.
Procedure1. Open the Protection page of the QMF Catalog Plug-in Parameters window.2. To change the type of protection that will be applied to the QMF catalog tables,
select one of the following from the Connect using Protected Mode radiogroup:v Never: You select this option to specify that no protection will be placed on
the QMF catalog tables. This method will expose the QMF catalog tables tounauthorized use. With no protection the QMF catalog tables can be accessedby any user using dynamic queries. When the database administrator grantspermissions to a user to access the QMF catalog that resides on the database,that permission will extend to the whole QMF catalog including the tables inthe QMF catalog that store sensitive information.
v If possible: You select this option to specify that the QMF catalog tables willbe protected using either stored procedures or static SQL packages if they areavailable on the data source. You will specify the users that can run thestored procedures or static SQL packages. If a set of stored procedures orstatic SQL packages is not available, access to the QMF catalog tables will beas if they are unprotected.
v Always: You select this option to specify that the QMF catalog tables willalways be protected using either stored procedures or static SQL packages.You will specify the users that can run the stored procedures or static SQLpackages. If a set of stored procedures or static SQL packages is notavailable, the query to access the QMF catalog tables will fail.
3. If you selected If possible or Always from the Connect using Protected Moderadio group, the Protect check box becomes available.
Chapter 5. Managing repositories 179
4. Select one of the following protection methods:v Select Stored procedures to specify that you will use stored procedures to
protect the QMF catalog tables. You can select this option if the repositorystorage tables are located on one of the following databases:– DB2 UDB LUW V9 and above– DB2 z/OS V9 and above– DB2 iSeries (when accessed with IBM Toolbox JDBC driver)
v Select Static SQL packages to specify that you will use static SQL packagesto protect the QMF catalog tables. You can select this option if the repositorystorage tables are located on a Db2 database that you will connect to usingthe IBM DB2 Universal driver for JDBC or the Direct DRDA connectivityprovided by the product (the latter option is available for Db2 for z/OSconnectivity only).
5. Type, or select from the drop-down list, the name that you want to use toidentify the collection of stored procedures or static SQL packages in theCollection ID field.
6. Optionally you can type the owner name in the Owner ID field, if you workwith Db2 databases. The Owner ID provides the administrator privileges to theuser who operates under the login without SYSADM authority.
7. Click Create. The stored procedures are created or the static SQL packages arebound. A message is issued that informs you of the success of either process.You can also use Delete to remove a collection of stored procedures or staticpackages.
8. You must specify which users will have permission to run the storedprocedures or static SQL packages for the QMF catalog tables on this database.To grant permission to all users, highlight PUBLIC in the User IDs list and clickGrant. To grant permission to specific users, type their user IDs in the field,highlight one or more of the user ID(s) and click Grant. A message is issuedthat informs you that the selected user IDs have been granted permission torun the stored procedures or static SQL packages. Optionally, you can revokepermission to run the stored procedures or SQL packages from any user that islisted in the User IDs list box. To revoke permission from one or more users,highlight one or more of the user IDs and click Revoke. A message is issuedinforming you that permission to run the stored procedures or static SQLpackages has been revoked from the selected user IDs.
9. Click OK to close the QMF Catalog Plug-in Parameters window. Any changesthat you have made to the QMF Catalog Plug-in parameters are saved.
Selecting a different QMF catalog for the data sourceUse the Catalog page of the QMF Catalog Plug-in Parameters dialog to select adifferent QMF catalog for the data source.
About this task
To select a different catalog for the data source:
Procedure1. Open the Catalog page of the QMF Catalog Plug-in Parameters window.2. From the Data source name drop-down list of available data sources in the
currently connected to repository, select the data source that hosts the QMFcatalog that you want to use.
180 Installing and Managing QMF for Workstation and QMF for WebSphere

3. From the list of available QMF catalogs available on the data source that youselected in Data source name, select the QMF catalog that you want the datasource to use. If the QMF catalog is not listed, you can add a new extendedQMF catalog using the Add icon. You can also edit an existing extended QMFcatalog's properties using the Edit icon or delete an existing extended QMFcatalog using the Delete icon.
4. Click OK to close the QMF Catalog Plug-in Parameters window. Any changesthat you have made to the QMF Catalog Plug-in parameters are saved.
Chapter 5. Managing repositories 181

182 Installing and Managing QMF for Workstation and QMF for WebSphere
Chapter 6. Using sample tables
Nine sample tables are supplied with the QMF for Workstation and QMF forWebSphere applications.
These tables contain information about a fictitious electrical parts manufacturingcompany. They can be useful while you are learning how to use QMF forWorkstation or QMF for WebSphere. Sample tables are only available if you haveenabled a QMF catalog for a data source.
Activating sample tablesYou must activate the sample tables.
About this task
To activate the sample tables:
Procedure1. From the Repository Explorer view, right-click a data source that has been
configured to access a QMF catalog. Select Properties from the pop-up menu.The Properties for [data source] dialog opens. Click the Plug-ins folder. ThePlug-ins dialog box opens. Select Plug-ins from the properties tree. Verify thatthe Enable plug-in check box is selected. Click the Parameters button. TheQMF Catalog Plug-in Parameters dialog box opens. Click the Sample Tablestab. The Sample Tables dialog box opens.
2. From the Sample Tables dialog box, click Create.3. If you are prompted with the message that says existing sample tables will be
overwritten if new tables are created, respond to the confirmation message byclicking Yes.
4. The status bar at the bottom of the dialog window lists the sample tables thatare being created.
5. Click OK to close the QMF Catalog Plug-in Parameters dialog box.
Sample table names and descriptionsThis list includes the name of each sample table that is included with the QMFapplication.
The following sample tables are available:
Q.APPLICANTThe company's prospective employees
Q.INTERVIEWThe interview schedule for the company's prospective employees
Q.ORGOrganization of the company by department, within division
Q.PARTSMaterials supplied by the company
183

Q.PRODUCTSProducts produced by the company
Q.PROJECTThe company's projects
Q.STAFFThe company's employees
Q.SALESSales information for the company
Q.SUPPLIERVendors that supply materials to the company
184 Installing and Managing QMF for Workstation and QMF for WebSphere
Chapter 7. Using object tracking reports
Object tracking reports show you detailed and summary information on objectusage by QMF for Workstation or QMF for WebSphere users.
With this information, you can spot potential problem areas and see where changesto resource limits group schedules are needed. Object tracking reporting isavailable for data sources with repository based or QMF catalog based resourcelimits. In order to report on object usage you must activate object tracking for adata source.
Activating object trackingTo track a user's object usage on a data source, you must activate object trackingfor their resource limits group.
About this task
You can activate object tracking for a resource limits group on a data source whenyou define or update the schedules for the resource limits group.
Note: If your user ID has the required authority, you can query the detail andsummary tracking tables directly using QMF for Workstation or QMF forWebSphere and see any tracking information contained within those tables.
To activate object tracking for a data source:
Procedure1. Right-click a data source from either the Repositories or Repository Explorer
views. Select Properties from the pop-up menu. The Properties for [datasource] window opens. Click the Resource Limits folder. The Resource Limitswindow opens. There are two pages. Click the Resource Limits tab.
2. Select a resource limits group from the list of available resource limits groups.Click Edit. The Edit Resource Limits Group window opens.
3. All of the schedules that have been defined for this resource limits group arelisted in the Schedule List list box. To edit the resource limits group schedule,select the schedule from the Schedule List list box and click Edit. The EditResource Limits Group Schedule window opens.
4. Select the Object Tracking tab.5. Check the type of object tracking that you want to activate. Your choices are:v Enable summary object tracking: Select this check box to activate summary
object tracking. Summary object checking tracks an object and keeps asummarized record of actions that pertain to the record.
v Enable detailed object tracking: Select this check box to activate detailedobject tracking. Detailed object checking keeps a detailed record of eachaction taken using an object.
v Enable ad hoc object tracking: Select this check box to keep a record of eachad hoc SQL query and the SQL text of that query. Detailed object trackingmust be activated in order to use ad hoc object tracking.
185

v Enable SQL text tracking: Select this check box to specify that a record ofthe SQL text of each SQL query is kept. Detailed object tracking must beactivated in order to use SQL text tracking.
6. Click OK.
Running the object tracking reportsAfter activating object tracking you can run any of the existing reports or you cancreate your own report.
About this task
To run an object tracking report:
Procedure1. Right-click a data source from either the Repositories or Repository Explorer
views. Select Object Tracking Reports from the pop-up menu. The ObjectTracking Reports window opens.
2. Select a report from the list of available reports and click Run. The list ofavailable report includes both standard object tracking reports that come withthe application and customized object tracking reports that you might haveadded. The following standard object tracking reports are available:v Cancellation Summary By User: This report shows which users most
frequently have their queries cancelled. High rates of cancellation canindicate that the user needs more training or greater resource privileges.
v Cancellation Details For Single User: This report provides details about thequeries that were cancelled for a specific user, including the query name,SQL text, and reason for cancellation.
v Performance Summary (Maximum) by Query: This report showsperformance data for queries, including their maximum elapsed time andnumber of times run. The report is sorted in descending order to highlightthe queries with the most resource consumption.
v Performance Summary (Average) By Query: This report shows performancedata for queries, including their average elapsed time and number of timesrun. It is sorted in descending order to highlight the queries with the mostresource consumption.
v Performance Summary (Cumulative) For Single Query: This report showswhich users most often run a specific query and the elapsed time of thequery. Use this report once a problem query is identified to determine theusers who run the query most frequently.
v Performance Details For Single Query: This report shows detail statistics foreach run of a query. It provides performance information, such as elapsedtime and bytes fetched for each run.
v Performance Profile For Single User: This report shows which queries havebeen run by a user and the resources consumed by the queries. The report issorted in descending order to highlight the queries with the most resourceconsumption.
v Performance Summary (Cumulative) By User: This report shows whichusers are most actively using QMF and consuming the most resources.
v Time Period Performance Summary (Cumulative) By User: This reportshows, within a time period, which users most actively used QMF andconsumed the most resources.
186 Installing and Managing QMF for Workstation and QMF for WebSphere
v Cancellation Summary By Repository User: This report shows which usersmost frequently have their queries that are stored in the repository cancelled.High rates of cancellation can indicate that the user needs more training orgreater resource privileges.
v Performance Summary (Maximum) by Repository Query: This report showsperformance data for queries that are stored in a repository, including theirmaximum elapsed time and number of times run. The report is sorted indescending order to highlight the queries with the most resourceconsumption.
v Performance Summary (Average) by Repository Query: This report showsperformance data for queries that are stored in a repository, including theiraverage elapsed time and number of times run. It is sorted in descendingorder to highlight the queries with the most resource consumption.
v Performance Summary (Cumulative) by Repository User: This report showswhich users are most actively using a repository and consuming the mostresources.
v Time Period Performance Summary (Cumulative) By Repository User: Thisreport shows, within a time period, which users most actively used arepository and consumed the most resources.
3. A customized object tracking report is a visual report that you have created andsaved to a file. After you create the report, you can add the customized reportto the list of available object tracking reports, by clicking the Add button in theObject Tracking Reports window. The Add Object Tracking Report windowopens. Specify the name of the report as it will appear in the list of availableobject tracking reports in the Report title field. Optionally, you can enter adescription of the report in the Report description field. Specify the name ofthe file where the visual report was saved in the Report file name field.Specify where the query that was used for the visual report resides in theQuery for report field. If the visual report includes a query that runs against anextended QMF catalog, specify the name and where the query resides in theExtended query for the report field. Click OK. The report is added to the list.
Maintaining object tracking tablesDetail and summary object tracking tables should be maintained on a regular basis.
Detailed object tracking data about repository based objects is stored in theRSBI.OBJ_ACTIVITY_DTL table and detailed object tracking data about QMFcatalog based objects is stored in the Q.OBJ_ACTIVITY_DTL table. Summarizedobject tracking data about repository based objects is stored in theRSBI.OBJ_ACTIVITY_SUMM table and summarized object tracking data aboutQMF catalog based objects is stored in the Q.OBJ_ACTIVITY_SUMM table.
A row is added to the Q.OBJ_ACTIVITY_DTL table and theRSBI.OBJ_ACTIVITY_DTL for each use of an object. For example, if a user executesa query (object) 20 times, 20 rows are added to the table.
Only one row is added to the summary tables Q.OBJ_ACTIVITY_SUMM andRSBI.OBJ_ACTIVITY_SUMM for each object regardless of the amount of times theobject is used. So in this example, the object usage count, a field in the table,would increase by 20, but no new rows are added. Rows are added to thesummary table only when a new object is created and rows are automaticallydeleted when an object is deleted.
Chapter 7. Using object tracking reports 187
Since the summary tables will not grow without boundaries and the detail tableswill, it is more important to perform maintenance on the detail tables with greaterfrequency than the summary tables. The following are recommendations foroptimum performance of the Q.OBJ_ACTIVITY_DTL table andRSBI.OBJ_ACTIVITY_DTL detail tables:v Run RUNSTATS for the table space and index.v Delete old data periodically.
For example, for a Db2 database, you can run this query to delete all rows olderthan 30 days from the QMF catalog object detail table (if your user ID haspermission to access the summary and detail tables):DELETE FROM Q.OBJ_ACTIVITY_DTL WHERE "DATE" (CURRENT DATE - 30 DAYS)
For a Db2 database, you can run the following query to delete all rows olderthan 30 days from the repository object detail table (if your user ID haspermission to access the summary and detail tables).If you are using Db2 for LUW:DELETE FROM RSBI.OBJ_ACTIVITY_DTL WHERE( DAYS ( CURRENT DATE ) - DAYS ( DATE (’1970001’))) - ETIME/3600/24/1000 >30
If you are using Db2 for z/OS:DELETE FROM RSBI.OBJ_ACTIVITY_DTL WHERECAST(( DAYS ( CURRENT DATE ) - DAYS ( DATE (’1970001’))) AS BIGINT )*86400000 - ETIME > 2592000000
v For Db2 for z/OS, perform maintenance on the repository object detail table andits associated auxiliary table (RSBI.ACTIVITY_LOB_DATA) and index(RSBI.IACTIVITY_LOB_DATA). For Db2 for z/OS, perform maintenance on theQMF catalog object detail table and its associated table space (RAADB.RAAIX2 )and index (Q.RAAIX2). Q.RAAIX2 is a default name that can be changed by thedatabase administrator when the QMF catalog is created.
Note: The first-used, last-used and last-modified summary statistics stored in thesummary table are not affected when you delete detailed data.
188 Installing and Managing QMF for Workstation and QMF for WebSphere
Chapter 8. Using the audit system
QMF provides an audit system to collect detailed information on user actions.
The audit system covers the following categories of user actions:v Connecting to and disconnecting from various types of repositoriesv Working with Repository Explorer objectsv Working with QMF objectsv Using Web APIv Using the task scheduler
Setting the audit systemUse the Audit page of the Preferences window to enable and configure the auditsystem for QMF.
About this task
To enable and configure the audit system:
Procedure1. From the main menu, select View > Preferences.2. On the left side of the window, select Audit.3. Select the Enable audit check box.4. To set the audit system to record only failed events, select the Record failed
events only check box.5. In the Backup interval (days) field, specify a time interval to define how often
database backup files are created.
Note: After backup files are created, the original database is cleared.6. In the Delete all backup files older than (days) field, specify an age for
database backup files to be deleted.7. Select the Record SQL statements for users check box to set the audit system
to record SQL statements made by users for queries against the database.v Select All Users to record SQL statements made by all users.v Click the Specify Users... button to open the Data Source Users dialog and
specify particular users. Click OK to accept the changes or Cancel to leavethe dialog without saving the changes.
8. Click Apply to apply the settings and remain on the page or click OK to applythe settings and close the window.
Results
After audit is enabled, all information that is gathered by the audit system is savedto the tables under the AUDIT schema in an H2 database. This database is created inthe application data folder. The summarized information from all the tables ispresented in the AUDIT_VIEW table. For information about reading audit records, seeChapter 8, “Using the audit system.”
189
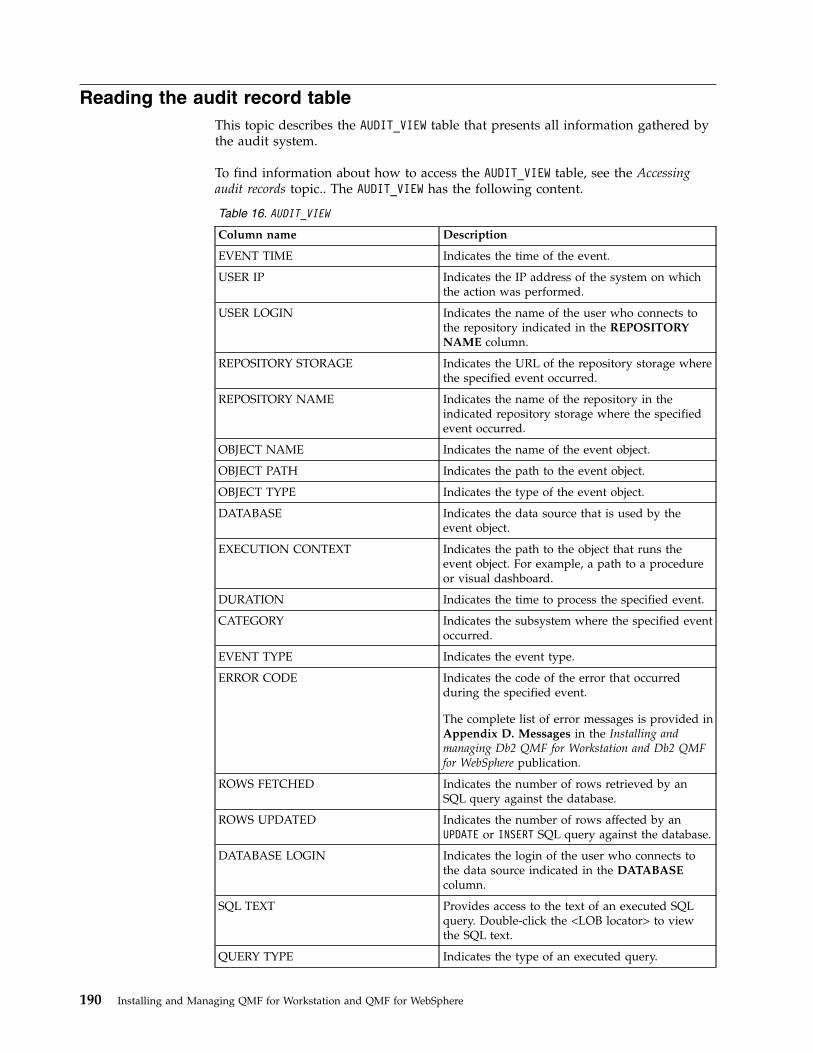
Reading the audit record tableThis topic describes the AUDIT_VIEW table that presents all information gathered bythe audit system.
To find information about how to access the AUDIT_VIEW table, see the Accessingaudit records topic.. The AUDIT_VIEW has the following content.
Table 16. AUDIT_VIEW
Column name Description
EVENT TIME Indicates the time of the event.
USER IP Indicates the IP address of the system on whichthe action was performed.
USER LOGIN Indicates the name of the user who connects tothe repository indicated in the REPOSITORYNAME column.
REPOSITORY STORAGE Indicates the URL of the repository storage wherethe specified event occurred.
REPOSITORY NAME Indicates the name of the repository in theindicated repository storage where the specifiedevent occurred.
OBJECT NAME Indicates the name of the event object.
OBJECT PATH Indicates the path to the event object.
OBJECT TYPE Indicates the type of the event object.
DATABASE Indicates the data source that is used by theevent object.
EXECUTION CONTEXT Indicates the path to the object that runs theevent object. For example, a path to a procedureor visual dashboard.
DURATION Indicates the time to process the specified event.
CATEGORY Indicates the subsystem where the specified eventoccurred.
EVENT TYPE Indicates the event type.
ERROR CODE Indicates the code of the error that occurredduring the specified event.
The complete list of error messages is provided inAppendix D. Messages in the Installing andmanaging Db2 QMF for Workstation and Db2 QMFfor WebSphere publication.
ROWS FETCHED Indicates the number of rows retrieved by anSQL query against the database.
ROWS UPDATED Indicates the number of rows affected by anUPDATE or INSERT SQL query against the database.
DATABASE LOGIN Indicates the login of the user who connects tothe data source indicated in the DATABASEcolumn.
SQL TEXT Provides access to the text of an executed SQLquery. Double-click the <LOB locator> to viewthe SQL text.
QUERY TYPE Indicates the type of an executed query.
190 Installing and Managing QMF for Workstation and QMF for WebSphere
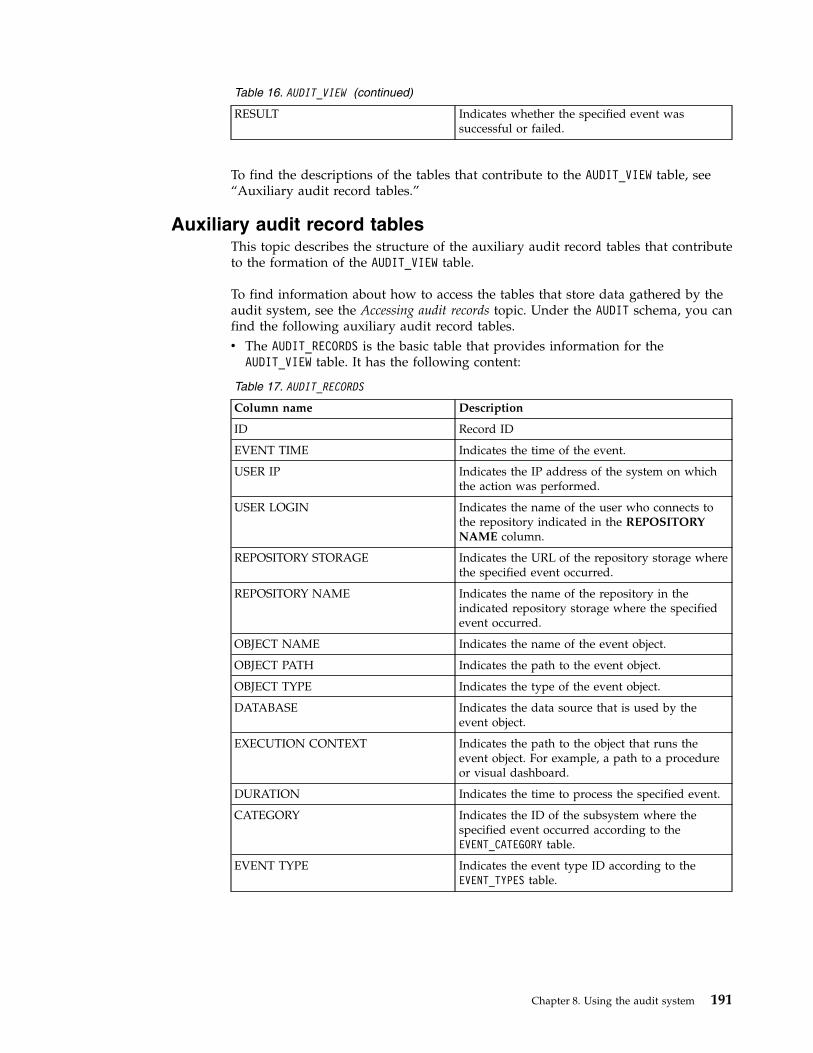
Table 16. AUDIT_VIEW (continued)
RESULT Indicates whether the specified event wassuccessful or failed.
To find the descriptions of the tables that contribute to the AUDIT_VIEW table, see“Auxiliary audit record tables.”
Auxiliary audit record tablesThis topic describes the structure of the auxiliary audit record tables that contributeto the formation of the AUDIT_VIEW table.
To find information about how to access the tables that store data gathered by theaudit system, see the Accessing audit records topic. Under the AUDIT schema, you canfind the following auxiliary audit record tables.v The AUDIT_RECORDS is the basic table that provides information for the
AUDIT_VIEW table. It has the following content:
Table 17. AUDIT_RECORDS
Column name Description
ID Record ID
EVENT TIME Indicates the time of the event.
USER IP Indicates the IP address of the system on whichthe action was performed.
USER LOGIN Indicates the name of the user who connects tothe repository indicated in the REPOSITORYNAME column.
REPOSITORY STORAGE Indicates the URL of the repository storage wherethe specified event occurred.
REPOSITORY NAME Indicates the name of the repository in theindicated repository storage where the specifiedevent occurred.
OBJECT NAME Indicates the name of the event object.
OBJECT PATH Indicates the path to the event object.
OBJECT TYPE Indicates the type of the event object.
DATABASE Indicates the data source that is used by theevent object.
EXECUTION CONTEXT Indicates the path to the object that runs theevent object. For example, a path to a procedureor visual dashboard.
DURATION Indicates the time to process the specified event.
CATEGORY Indicates the ID of the subsystem where thespecified event occurred according to theEVENT_CATEGORY table.
EVENT TYPE Indicates the event type ID according to theEVENT_TYPES table.
Chapter 8. Using the audit system 191
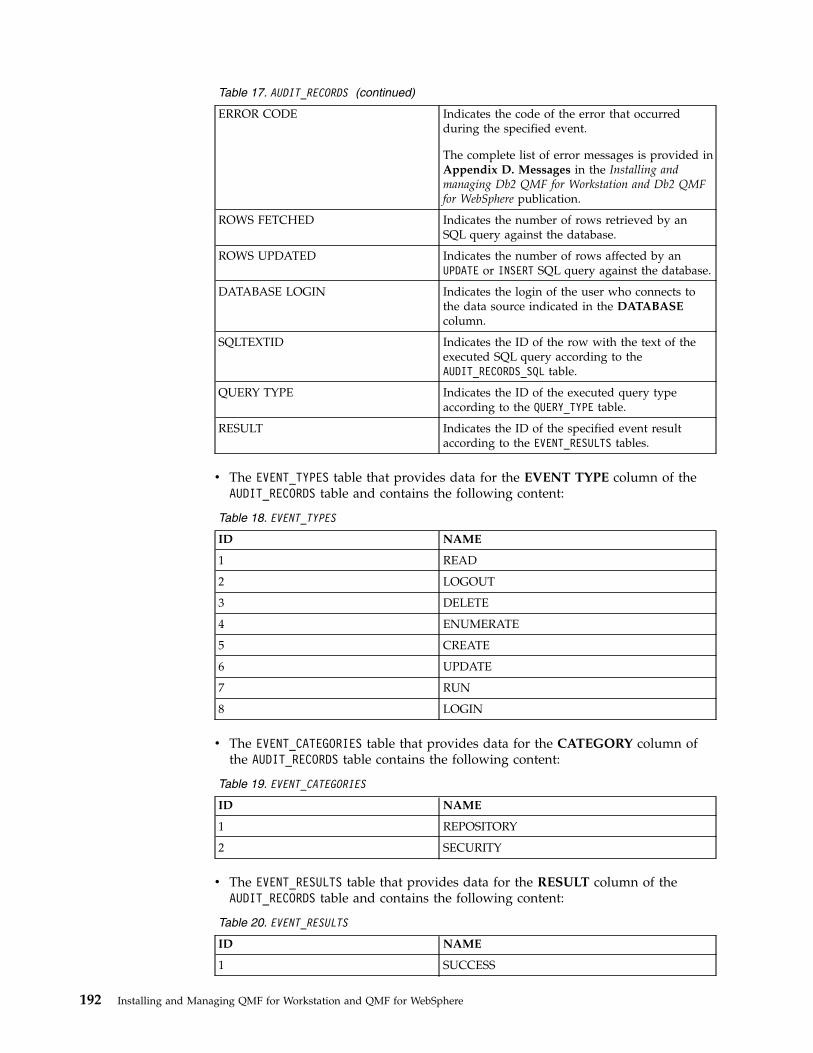
Table 17. AUDIT_RECORDS (continued)
ERROR CODE Indicates the code of the error that occurredduring the specified event.
The complete list of error messages is provided inAppendix D. Messages in the Installing andmanaging Db2 QMF for Workstation and Db2 QMFfor WebSphere publication.
ROWS FETCHED Indicates the number of rows retrieved by anSQL query against the database.
ROWS UPDATED Indicates the number of rows affected by anUPDATE or INSERT SQL query against the database.
DATABASE LOGIN Indicates the login of the user who connects tothe data source indicated in the DATABASEcolumn.
SQLTEXTID Indicates the ID of the row with the text of theexecuted SQL query according to theAUDIT_RECORDS_SQL table.
QUERY TYPE Indicates the ID of the executed query typeaccording to the QUERY_TYPE table.
RESULT Indicates the ID of the specified event resultaccording to the EVENT_RESULTS tables.
v The EVENT_TYPES table that provides data for the EVENT TYPE column of theAUDIT_RECORDS table and contains the following content:
Table 18. EVENT_TYPES
ID NAME
1 READ
2 LOGOUT
3 DELETE
4 ENUMERATE
5 CREATE
6 UPDATE
7 RUN
8 LOGIN
v The EVENT_CATEGORIES table that provides data for the CATEGORY column ofthe AUDIT_RECORDS table contains the following content:
Table 19. EVENT_CATEGORIES
ID NAME
1 REPOSITORY
2 SECURITY
v The EVENT_RESULTS table that provides data for the RESULT column of theAUDIT_RECORDS table and contains the following content:
Table 20. EVENT_RESULTS
ID NAME
1 SUCCESS
192 Installing and Managing QMF for Workstation and QMF for WebSphere
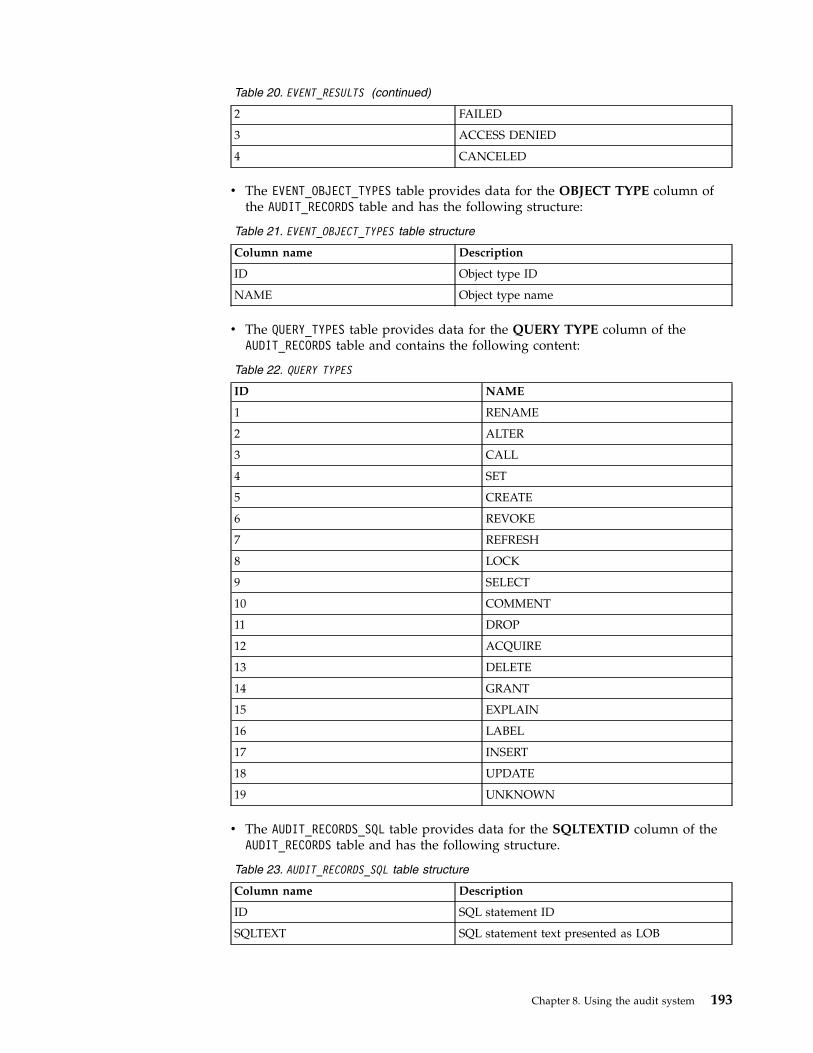
Table 20. EVENT_RESULTS (continued)
2 FAILED
3 ACCESS DENIED
4 CANCELED
v The EVENT_OBJECT_TYPES table provides data for the OBJECT TYPE column ofthe AUDIT_RECORDS table and has the following structure:
Table 21. EVENT_OBJECT_TYPES table structure
Column name Description
ID Object type ID
NAME Object type name
v The QUERY_TYPES table provides data for the QUERY TYPE column of theAUDIT_RECORDS table and contains the following content:
Table 22. QUERY TYPES
ID NAME
1 RENAME
2 ALTER
3 CALL
4 SET
5 CREATE
6 REVOKE
7 REFRESH
8 LOCK
9 SELECT
10 COMMENT
11 DROP
12 ACQUIRE
13 DELETE
14 GRANT
15 EXPLAIN
16 LABEL
17 INSERT
18 UPDATE
19 UNKNOWN
v The AUDIT_RECORDS_SQL table provides data for the SQLTEXTID column of theAUDIT_RECORDS table and has the following structure.
Table 23. AUDIT_RECORDS_SQL table structure
Column name Description
ID SQL statement ID
SQLTEXT SQL statement text presented as LOB
Chapter 8. Using the audit system 193

194 Installing and Managing QMF for Workstation and QMF for WebSphere
Chapter 9. Using the QMF Server Administrative Console
QMF Server Administrative Console allows you to administer the QMF Server.
The following topics describe how to use the QMF Data Server AdministrativeConsole:
Deploying QMF Server Administrative Console on the applicationserver
The installation package includes an Enterprise Archive (EAR) file and a WebArchive (WAR) file that can be immediately deployed to your web applicationserver using the server administration console.
About this task
To deploy QMF Server Administrative Console to your application server, completethe following steps:
Procedure1. To install QMF Server Administrative Console, follow the standard installation
procedure for IBM web-based applications. For more information about theprocedure, see the online help.
2. When the installation is complete, open your web browser and type thefollowing URL: http://host:port/QMFRocketShuttleDataServer121, where hostis the name of your host server and port is the number of the port that youwant to use.
Note: The repositories.xml, .bi.jdbc.drivers, and .lic configuration filesfrom QMF are required to start QMF Server via web console.QMF Server Administrative Console is displayed.
Working with QMF Server Administrative ConsoleUse the QMF Server Administrative Console to administer QMF Server.
On the QMF Server Administrative Console web page, you can perform thefollowing actions:v Click START to start a new QMF Server session.v Click STOP to end the current QMF Server session.v To configure QMF Data Service to work with a QMF Server session, view the
CONNECTION INFORMATION FOR QMF DATA SERVICE area. Thefollowing connection information is available in the area:
Database TypeShows the database type that the service works with.
DomainShows the web address of the server that runs the QMF ServerAdministrative Console.
Port Shows the number of the currently used QMF Server port.
195
Available LocationsShows the list of available repository connections.
For more detailed information, see the QMF Data Service documentation.v Click AVAILABLE JDBC DRIVERS to view the list of JDBC drivers that are
specified in QMF for WebSphere.v Click RUNTIME INFORMATION to display the runtime information for QMF
Server. The following runtime information is available:
Session NumberShows the ordinal number of the current session.
Connection ThreadsShows the amount of data streams that are used for user connections tothe server.
Active SessionsShows the number of active sessions.
Waiting SessionsShows the number of suspended sessions.
Total MemoryShows the amount memory that is available for the JVM.
Free MemoryShows the amount of free memory that is available for the JVM.
v Click
to display the CONFIGURATION dialog. In theCONFIGURATION dialog of QMF Server Administrative Console, you canperform the following actions:– In the Port field, specify the port that you want to work with. The default
value is 1527. If the Port field is left blank, the default value is used.– In the VM arguments field, specify changes that you want to make to the
Java Virtual Machine that runs QMF Data Server. For more information aboutVM arguments, consult the Oracle documentation.
– From the QMF Log Level list, select the type of QMF messages that you wantto save in the log.
– In the Classpath field, specify the path to the JDBC driver files.– In the Path to Logs field, specify the location where you want to save the log
files.– From the DRDA Protocol Log Level list, select the type of QMF Server
messages that you want to save in the log.
196 Installing and Managing QMF for Workstation and QMF for WebSphere
Appendix A. Accessibility
Software accessibility features help those with physical disabilities, such asrestricted mobility or limited vision, use their computers.
Note: The QMF for Workstation application provides the best accessibilityfunctionality. Users with physical disabilities who must make use of the QMFaccessibility features should install and run QMF for Workstation, as opposed toQMF for WebSphere.
Standard keyboard equivalents in QMF for WorkstationKeyboard equivalents use keyboard keys to perform mouse actions instead ofusing a mouse.
The keyboard is the most frequently used alternative for performing mousefunctions. QMF supports the standard keyboard equivalents that include:v Shortcut, or accelerator keys, to perform the most frequently used functions in
pull-down menus without going to the menu. For example:– Ctrl+S to save– Ctrl+P to print– Ctrl+R to run a queryShortcuts display in the pull-down menu next to its function.
v Mnemonics, or access keys, are available to perform each function on a menu orwindow. A mnemonic for a function is the underlined character in the functionname. For example:– Press F to open the File menu– Press O to open the Open windowUse ALT to activate the mnemonic and move the keyboard focus.
For more information, refer to the documentation for your operating system for acomplete list of standard keyboard equivalents.
Standard keyboard navigationKeyboard navigation refers to using keys instead of a mouse to move from item toitem on your screen.
The movement is usually in the order specified by the operating system or yourapplication. QMF applications follow the standards with regard to the typical keysused for keyboard navigation such as using TAB and SHIFT+TAB to movebetween controls, and arrow keys to move up, down, and sideways between items.
Operating system accessibilityMost operating systems have a set of accessibility options that enable individualswith disabilities to customize system-wide settings.
QMF applications:v Inherit their settings from the operating system
197

v Do not interfere with keyboard accessibility features built into the operatingsystem
Assistive technology productsQMF applications support assistive technology products, such as screen readersand voice synthesizers.
Each QMF application interface requires special navigation when using a screenreader with query results. See Navigation in QMF for Workstation for moreinformation.
Navigation in QMF for WorkstationThe following table shows how to accomplish various tasks using keystrokes.
To: Process:
Activate mnemonics inmenus
Press the Alt key. Mnemonics in each menu are activated.
Obtain online help Press F1 to open a specific help task or Alt+H to open the Helpmenu. Use the arrow keys to move through the menuselections. Press Enter to open a menu command.
Display keyboardshortcuts
Press Ctrl+Shift+L.
Display the Draw Querywizard
Press Ctrl+D.
Display the switch list ofthe editors of the openedQMF objects and switchbetween the editors
Press Ctrl+F6 to move forward in the switch list andCtrl+Shift+F6 to move in the opposite direction.
Left to right switchbetween the tabs of theopened QMF objects
Press Ctrl+Page Up
Right to left switchbetween the tabs of theopened QMF objects
Press Ctrl+Page Down
Move focus through eachelement
Press TAB to move forward or SHIFT+TAB to move in theopposite direction.
Emulate clicks on a link Use the TAB key to jump from link to link, then press the Enterkey to open the link.
Emulate clicks on abutton
Use the TAB key to jump from button to button, then pressSpace key to activate the button.
Within a window,activate the default action
Press the Enter key.
Within a window, cancelthe action
Press the ESC key.
Left to right switchbetween views
Press Ctrl+F7
Right to left switchbetween views
Press Ctrl+Shift+F7
Left to right switchbetween perspectives
Press Ctrl+F8
198 Installing and Managing QMF for Workstation and QMF for WebSphere
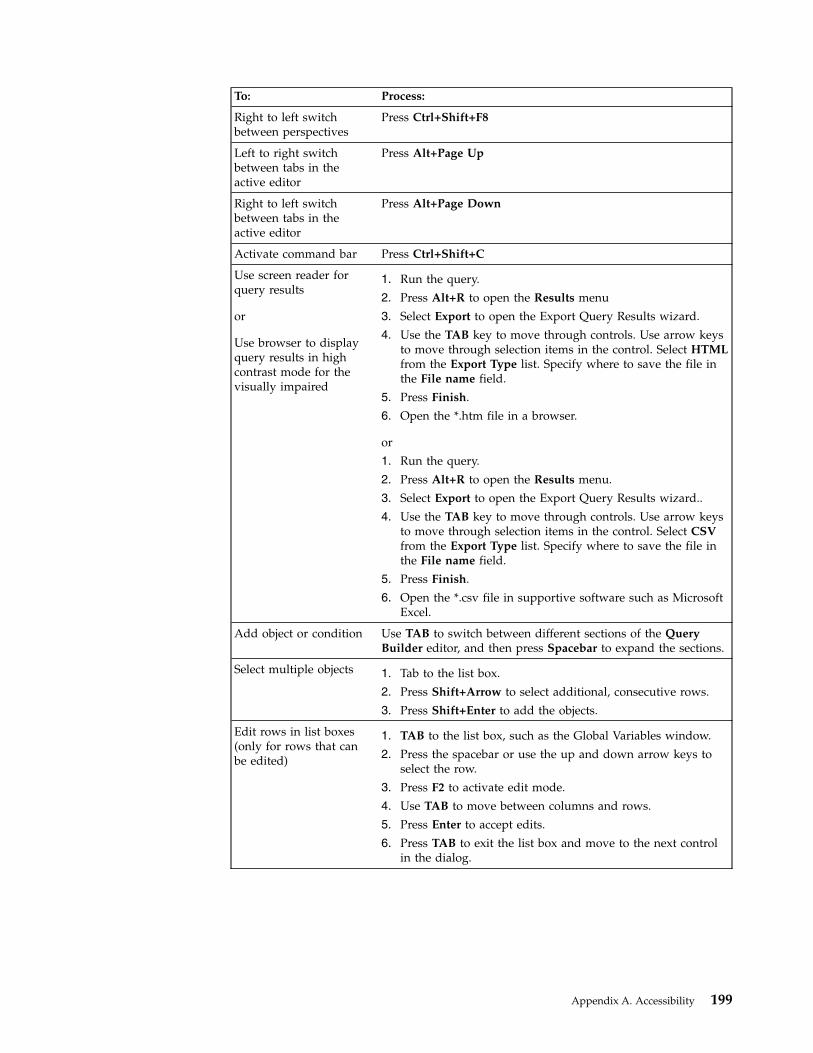
To: Process:
Right to left switchbetween perspectives
Press Ctrl+Shift+F8
Left to right switchbetween tabs in theactive editor
Press Alt+Page Up
Right to left switchbetween tabs in theactive editor
Press Alt+Page Down
Activate command bar Press Ctrl+Shift+C
Use screen reader forquery results
or
Use browser to displayquery results in highcontrast mode for thevisually impaired
1. Run the query.
2. Press Alt+R to open the Results menu
3. Select Export to open the Export Query Results wizard.
4. Use the TAB key to move through controls. Use arrow keysto move through selection items in the control. Select HTMLfrom the Export Type list. Specify where to save the file inthe File name field.
5. Press Finish.
6. Open the *.htm file in a browser.
or
1. Run the query.
2. Press Alt+R to open the Results menu.
3. Select Export to open the Export Query Results wizard..
4. Use the TAB key to move through controls. Use arrow keysto move through selection items in the control. Select CSVfrom the Export Type list. Specify where to save the file inthe File name field.
5. Press Finish.
6. Open the *.csv file in supportive software such as MicrosoftExcel.
Add object or condition Use TAB to switch between different sections of the QueryBuilder editor, and then press Spacebar to expand the sections.
Select multiple objects 1. Tab to the list box.
2. Press Shift+Arrow to select additional, consecutive rows.
3. Press Shift+Enter to add the objects.
Edit rows in list boxes(only for rows that canbe edited)
1. TAB to the list box, such as the Global Variables window.
2. Press the spacebar or use the up and down arrow keys toselect the row.
3. Press F2 to activate edit mode.
4. Use TAB to move between columns and rows.
5. Press Enter to accept edits.
6. Press TAB to exit the list box and move to the next controlin the dialog.
Appendix A. Accessibility 199
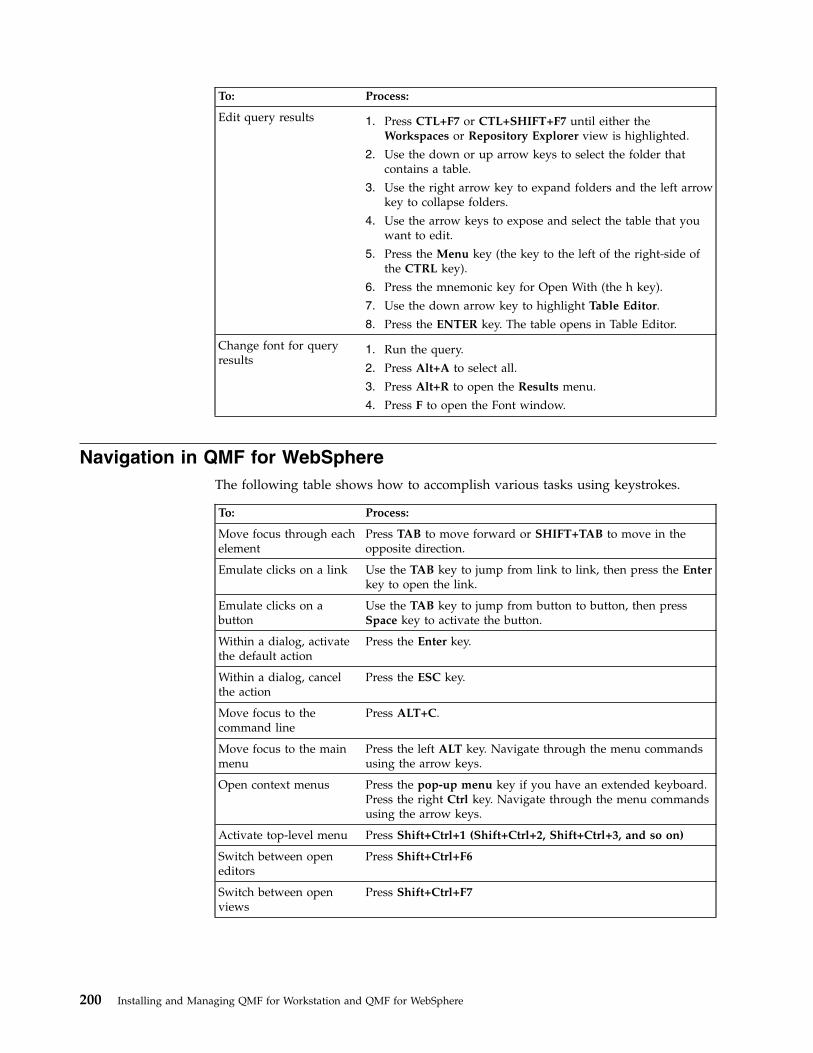
To: Process:
Edit query results 1. Press CTL+F7 or CTL+SHIFT+F7 until either theWorkspaces or Repository Explorer view is highlighted.
2. Use the down or up arrow keys to select the folder thatcontains a table.
3. Use the right arrow key to expand folders and the left arrowkey to collapse folders.
4. Use the arrow keys to expose and select the table that youwant to edit.
5. Press the Menu key (the key to the left of the right-side ofthe CTRL key).
6. Press the mnemonic key for Open With (the h key).
7. Use the down arrow key to highlight Table Editor.
8. Press the ENTER key. The table opens in Table Editor.
Change font for queryresults
1. Run the query.
2. Press Alt+A to select all.
3. Press Alt+R to open the Results menu.
4. Press F to open the Font window.
Navigation in QMF for WebSphereThe following table shows how to accomplish various tasks using keystrokes.
To: Process:
Move focus through eachelement
Press TAB to move forward or SHIFT+TAB to move in theopposite direction.
Emulate clicks on a link Use the TAB key to jump from link to link, then press the Enterkey to open the link.
Emulate clicks on abutton
Use the TAB key to jump from button to button, then pressSpace key to activate the button.
Within a dialog, activatethe default action
Press the Enter key.
Within a dialog, cancelthe action
Press the ESC key.
Move focus to thecommand line
Press ALT+C.
Move focus to the mainmenu
Press the left ALT key. Navigate through the menu commandsusing the arrow keys.
Open context menus Press the pop-up menu key if you have an extended keyboard.Press the right Ctrl key. Navigate through the menu commandsusing the arrow keys.
Activate top-level menu Press Shift+Ctrl+1 (Shift+Ctrl+2, Shift+Ctrl+3, and so on)
Switch between openeditors
Press Shift+Ctrl+F6
Switch between openviews
Press Shift+Ctrl+F7
200 Installing and Managing QMF for Workstation and QMF for WebSphere
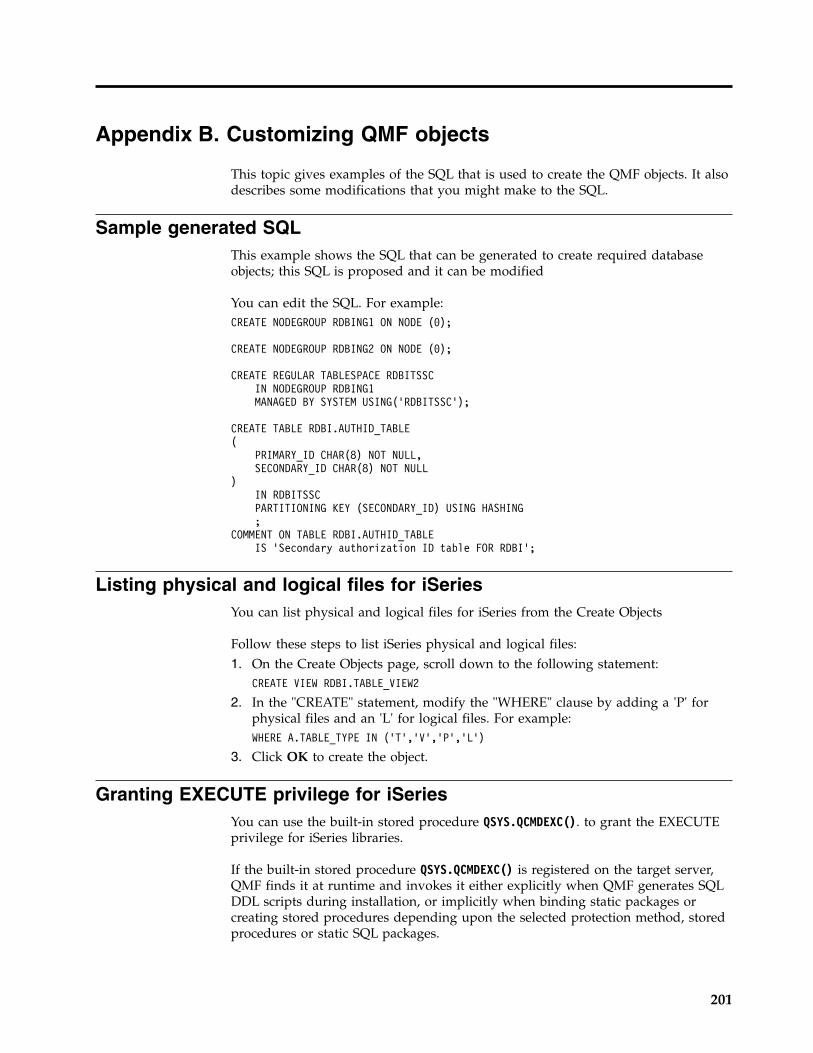
Appendix B. Customizing QMF objects
This topic gives examples of the SQL that is used to create the QMF objects. It alsodescribes some modifications that you might make to the SQL.
Sample generated SQLThis example shows the SQL that can be generated to create required databaseobjects; this SQL is proposed and it can be modified
You can edit the SQL. For example:CREATE NODEGROUP RDBING1 ON NODE (0);
CREATE NODEGROUP RDBING2 ON NODE (0);
CREATE REGULAR TABLESPACE RDBITSSCIN NODEGROUP RDBING1MANAGED BY SYSTEM USING(’RDBITSSC’);
CREATE TABLE RDBI.AUTHID_TABLE(
PRIMARY_ID CHAR(8) NOT NULL,SECONDARY_ID CHAR(8) NOT NULL
)IN RDBITSSCPARTITIONING KEY (SECONDARY_ID) USING HASHING;
COMMENT ON TABLE RDBI.AUTHID_TABLEIS ’Secondary authorization ID table FOR RDBI’;
Listing physical and logical files for iSeriesYou can list physical and logical files for iSeries from the Create Objects
Follow these steps to list iSeries physical and logical files:1. On the Create Objects page, scroll down to the following statement:
CREATE VIEW RDBI.TABLE_VIEW2
2. In the "CREATE" statement, modify the "WHERE" clause by adding a 'P' forphysical files and an 'L' for logical files. For example:WHERE A.TABLE_TYPE IN (’T’,’V’,’P’,’L’)
3. Click OK to create the object.
Granting EXECUTE privilege for iSeriesYou can use the built-in stored procedure QSYS.QCMDEXC(). to grant the EXECUTEprivilege for iSeries libraries.
If the built-in stored procedure QSYS.QCMDEXC() is registered on the target server,QMF finds it at runtime and invokes it either explicitly when QMF generates SQLDDL scripts during installation, or implicitly when binding static packages orcreating stored procedures depending upon the selected protection method, storedprocedures or static SQL packages.
201

If the built-in stored procedure QSYS.QCMDEXC() is not registered on the targetserver, then QMF does not invoke it at all. However, the libraries RSBI, Q, RDBI,and the library where QMF stored procedures or static SQL packages are createdmay not be granted the proper privileges. In this case, the database administratormust perform the following grant privilege operations for iSeries libraries:v GRTOBJAUT OBJ(RSBI) OBJTYPE(*LIB) USER(*PUBLIC) AUT(*EXECUTE);v GRTOBJAUT OBJ(Q) OBJTYPE(*LIB) USER(*PUBLIC) AUT(*EXECUTE);v GRTOBJAUT OBJ(RDBI) OBJTYPE(*LIB) USER(*PUBLIC) AUT(*EXECUTE);v GRTOBJAUT OBJ(QFWPKG) OBJTYPE(*LIB) USER(*PUBLIC) AUT(*EXECUTE);
where QFWPKG is the library of QMF stored procedures or static SQL packages.
Object viewsObject views determine how lists are built.
The following views are created when objects are created:v RDBI.TABLE_VIEWv Q.RAA_OBJECT_VIEW
You can alter these views when you install QMF to tailor the list building. Theseviews differ based on the Db2 platform.
Lists for the extended catalog are built by the views that are created when youselect the Create Objects option. For queries, forms, and procedures, the viewQ.RAA_OBJECT_VIEW_X is the key and it interacts with other views and tables.
Q.RAA_OBJ_DIR_XLook at the catalog_ids and owner names in Q.RAA_OBJ_DIR_X and display orfail to display each object based on the conditions below.
"Yes" to any of the following questions causes the query, procedure or form to bedisplayed in the list:1. Does the object owner match the current user ID?2. Does the object owner match the current SQLID?3. Does the object owner match the secondary authorization ID of the current user
ID having the same catalog ID?4. Is the object SHARED? (Restricted = N)5. Is the user a SYSADM having the same catalog _ID?
RDBI.USER_ADMIN_VIEW_XThis view determines whether the user or a secondary authorization ID of the useris a SYSADM.
It checks RDBI.ADMIN_VIEW and RDBI.CATALOG_DIR_X for:v The current user ID or SQLIDv Secondary authorization ID of the current user having the same catalog_ID in
RDBI.CATALOG_DIR_X
202 Installing and Managing QMF for Workstation and QMF for WebSphere
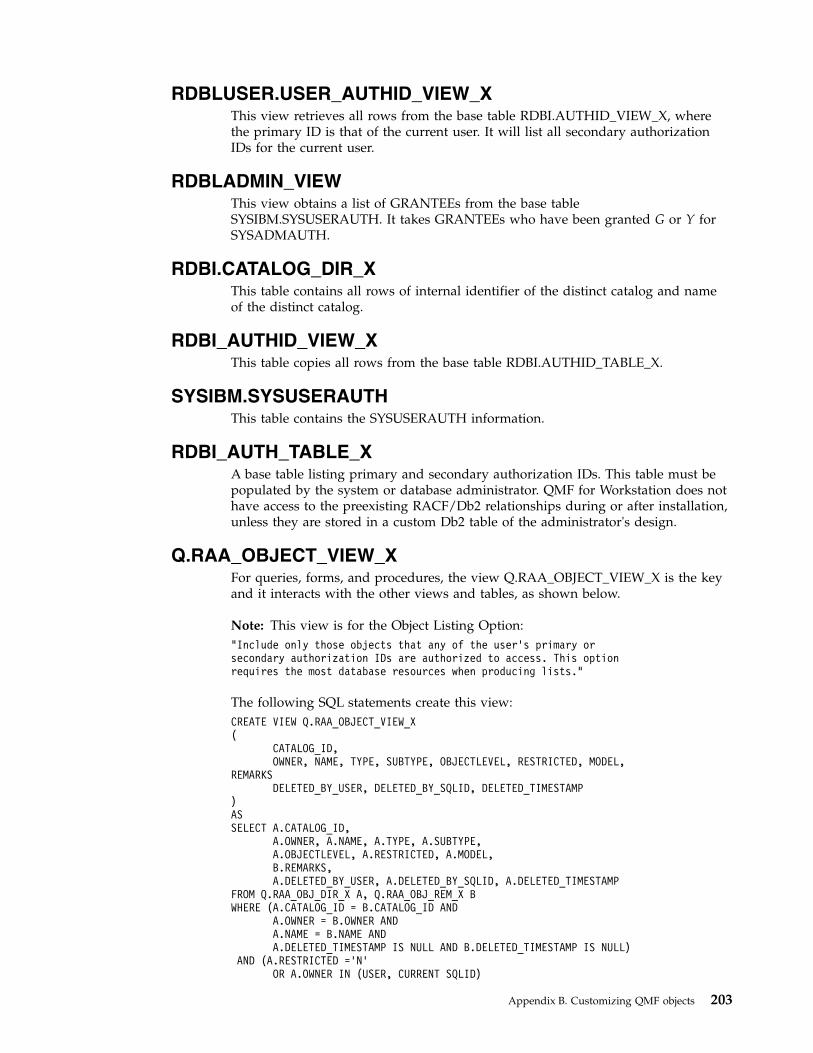
RDBLUSER.USER_AUTHID_VIEW_XThis view retrieves all rows from the base table RDBI.AUTHID_VIEW_X, wherethe primary ID is that of the current user. It will list all secondary authorizationIDs for the current user.
RDBLADMIN_VIEWThis view obtains a list of GRANTEEs from the base tableSYSIBM.SYSUSERAUTH. It takes GRANTEEs who have been granted G or Y forSYSADMAUTH.
RDBI.CATALOG_DIR_XThis table contains all rows of internal identifier of the distinct catalog and nameof the distinct catalog.
RDBI_AUTHID_VIEW_XThis table copies all rows from the base table RDBI.AUTHID_TABLE_X.
SYSIBM.SYSUSERAUTHThis table contains the SYSUSERAUTH information.
RDBI_AUTH_TABLE_XA base table listing primary and secondary authorization IDs. This table must bepopulated by the system or database administrator. QMF for Workstation does nothave access to the preexisting RACF/Db2 relationships during or after installation,unless they are stored in a custom Db2 table of the administrator's design.
Q.RAA_OBJECT_VIEW_XFor queries, forms, and procedures, the view Q.RAA_OBJECT_VIEW_X is the keyand it interacts with the other views and tables, as shown below.
Note: This view is for the Object Listing Option:"Include only those objects that any of the user’s primary orsecondary authorization IDs are authorized to access. This optionrequires the most database resources when producing lists."
The following SQL statements create this view:CREATE VIEW Q.RAA_OBJECT_VIEW_X(
CATALOG_ID,OWNER, NAME, TYPE, SUBTYPE, OBJECTLEVEL, RESTRICTED, MODEL,
REMARKSDELETED_BY_USER, DELETED_BY_SQLID, DELETED_TIMESTAMP
)ASSELECT A.CATALOG_ID,
A.OWNER, A.NAME, A.TYPE, A.SUBTYPE,A.OBJECTLEVEL, A.RESTRICTED, A.MODEL,B.REMARKS,A.DELETED_BY_USER, A.DELETED_BY_SQLID, A.DELETED_TIMESTAMP
FROM Q.RAA_OBJ_DIR_X A, Q.RAA_OBJ_REM_X BWHERE (A.CATALOG_ID = B.CATALOG_ID AND
A.OWNER = B.OWNER ANDA.NAME = B.NAME ANDA.DELETED_TIMESTAMP IS NULL AND B.DELETED_TIMESTAMP IS NULL)
AND (A.RESTRICTED =’N’OR A.OWNER IN (USER, CURRENT SQLID)
Appendix B. Customizing QMF objects 203
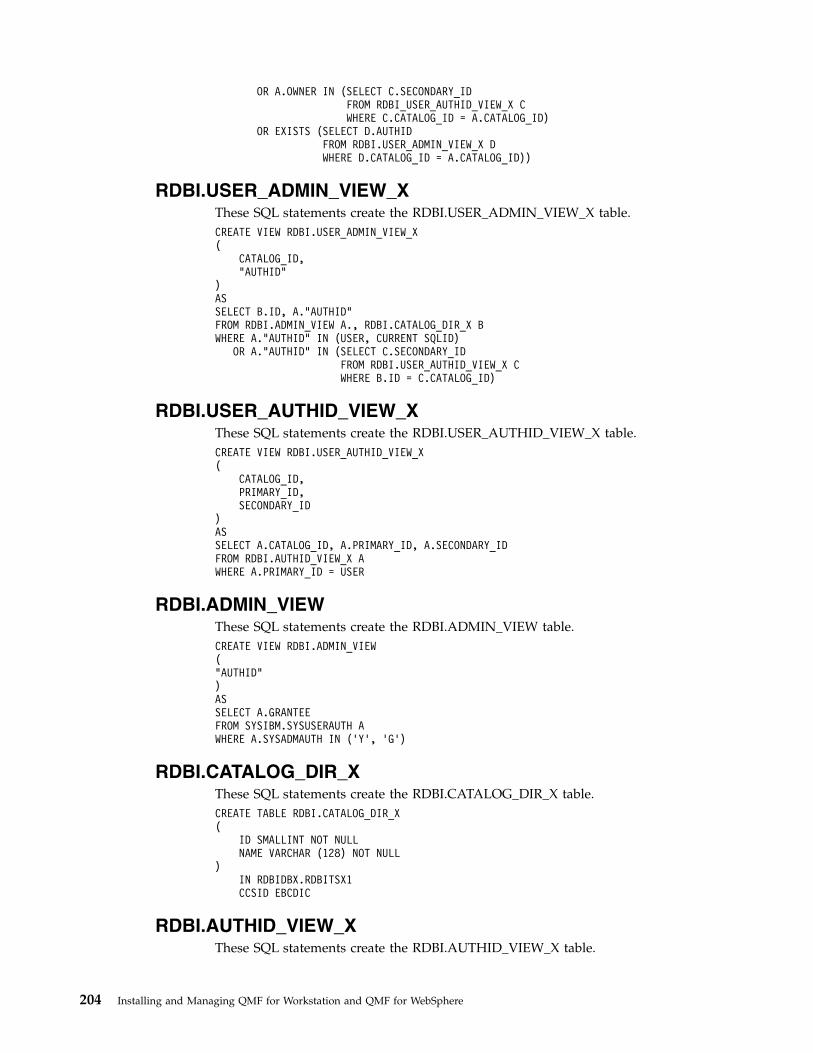
OR A.OWNER IN (SELECT C.SECONDARY_IDFROM RDBI_USER_AUTHID_VIEW_X CWHERE C.CATALOG_ID = A.CATALOG_ID)
OR EXISTS (SELECT D.AUTHIDFROM RDBI.USER_ADMIN_VIEW_X DWHERE D.CATALOG_ID = A.CATALOG_ID))
RDBI.USER_ADMIN_VIEW_XThese SQL statements create the RDBI.USER_ADMIN_VIEW_X table.CREATE VIEW RDBI.USER_ADMIN_VIEW_X(
CATALOG_ID,"AUTHID"
)ASSELECT B.ID, A."AUTHID"FROM RDBI.ADMIN_VIEW A., RDBI.CATALOG_DIR_X BWHERE A."AUTHID" IN (USER, CURRENT SQLID)
OR A."AUTHID" IN (SELECT C.SECONDARY_IDFROM RDBI.USER_AUTHID_VIEW_X CWHERE B.ID = C.CATALOG_ID)
RDBI.USER_AUTHID_VIEW_XThese SQL statements create the RDBI.USER_AUTHID_VIEW_X table.CREATE VIEW RDBI.USER_AUTHID_VIEW_X(
CATALOG_ID,PRIMARY_ID,SECONDARY_ID
)ASSELECT A.CATALOG_ID, A.PRIMARY_ID, A.SECONDARY_IDFROM RDBI.AUTHID_VIEW_X AWHERE A.PRIMARY_ID = USER
RDBI.ADMIN_VIEWThese SQL statements create the RDBI.ADMIN_VIEW table.CREATE VIEW RDBI.ADMIN_VIEW("AUTHID")ASSELECT A.GRANTEEFROM SYSIBM.SYSUSERAUTH AWHERE A.SYSADMAUTH IN (’Y’, ’G’)
RDBI.CATALOG_DIR_XThese SQL statements create the RDBI.CATALOG_DIR_X table.CREATE TABLE RDBI.CATALOG_DIR_X(
ID SMALLINT NOT NULLNAME VARCHAR (128) NOT NULL
)IN RDBIDBX.RDBITSX1CCSID EBCDIC
RDBI.AUTHID_VIEW_XThese SQL statements create the RDBI.AUTHID_VIEW_X table.
204 Installing and Managing QMF for Workstation and QMF for WebSphere
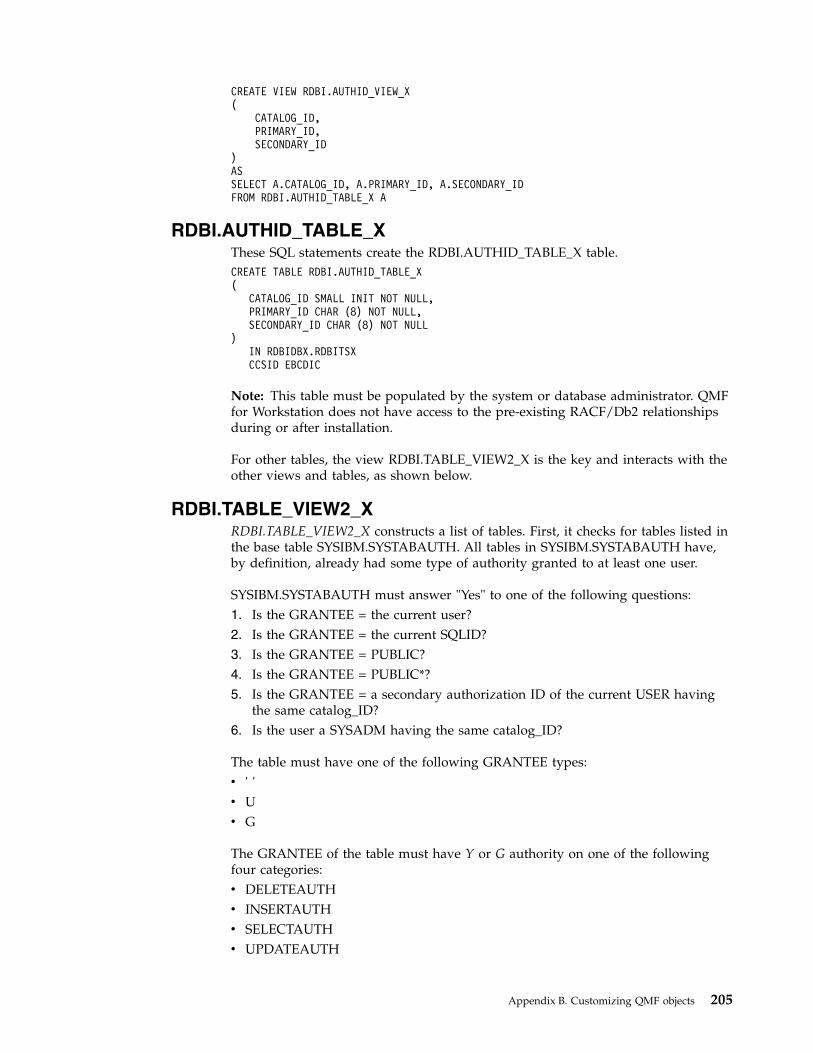
CREATE VIEW RDBI.AUTHID_VIEW_X(
CATALOG_ID,PRIMARY_ID,SECONDARY_ID
)ASSELECT A.CATALOG_ID, A.PRIMARY_ID, A.SECONDARY_IDFROM RDBI.AUTHID_TABLE_X A
RDBI.AUTHID_TABLE_XThese SQL statements create the RDBI.AUTHID_TABLE_X table.CREATE TABLE RDBI.AUTHID_TABLE_X(
CATALOG_ID SMALL INIT NOT NULL,PRIMARY_ID CHAR (8) NOT NULL,SECONDARY_ID CHAR (8) NOT NULL
)IN RDBIDBX.RDBITSXCCSID EBCDIC
Note: This table must be populated by the system or database administrator. QMFfor Workstation does not have access to the pre-existing RACF/Db2 relationshipsduring or after installation.
For other tables, the view RDBI.TABLE_VIEW2_X is the key and interacts with theother views and tables, as shown below.
RDBI.TABLE_VIEW2_XRDBI.TABLE_VIEW2_X constructs a list of tables. First, it checks for tables listed inthe base table SYSIBM.SYSTABAUTH. All tables in SYSIBM.SYSTABAUTH have,by definition, already had some type of authority granted to at least one user.
SYSIBM.SYSTABAUTH must answer "Yes" to one of the following questions:1. Is the GRANTEE = the current user?2. Is the GRANTEE = the current SQLID?3. Is the GRANTEE = PUBLIC?4. Is the GRANTEE = PUBLIC*?5. Is the GRANTEE = a secondary authorization ID of the current USER having
the same catalog_ID?6. Is the user a SYSADM having the same catalog_ID?
The table must have one of the following GRANTEE types:v ' 'v Uv G
The GRANTEE of the table must have Y or G authority on one of the followingfour categories:v DELETEAUTHv INSERTAUTHv SELECTAUTHv UPDATEAUTH
Appendix B. Customizing QMF objects 205
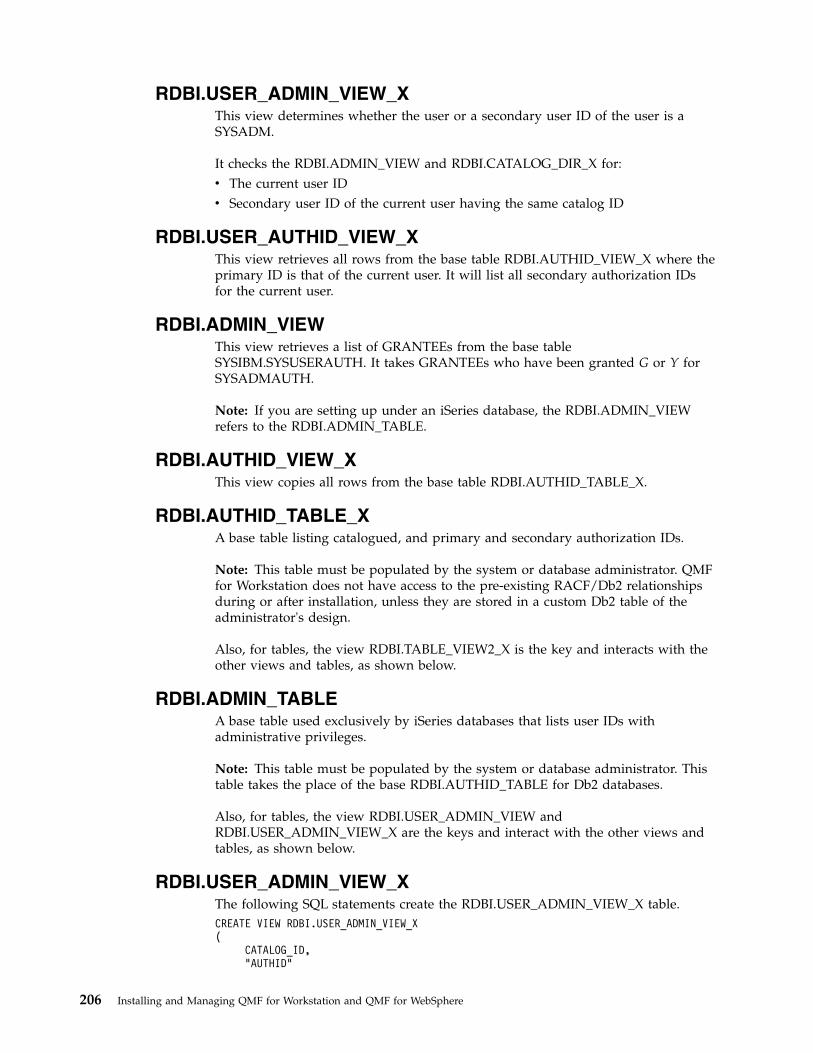
RDBI.USER_ADMIN_VIEW_XThis view determines whether the user or a secondary user ID of the user is aSYSADM.
It checks the RDBI.ADMIN_VIEW and RDBI.CATALOG_DIR_X for:v The current user IDv Secondary user ID of the current user having the same catalog ID
RDBI.USER_AUTHID_VIEW_XThis view retrieves all rows from the base table RDBI.AUTHID_VIEW_X where theprimary ID is that of the current user. It will list all secondary authorization IDsfor the current user.
RDBI.ADMIN_VIEWThis view retrieves a list of GRANTEEs from the base tableSYSIBM.SYSUSERAUTH. It takes GRANTEEs who have been granted G or Y forSYSADMAUTH.
Note: If you are setting up under an iSeries database, the RDBI.ADMIN_VIEWrefers to the RDBI.ADMIN_TABLE.
RDBI.AUTHID_VIEW_XThis view copies all rows from the base table RDBI.AUTHID_TABLE_X.
RDBI.AUTHID_TABLE_XA base table listing catalogued, and primary and secondary authorization IDs.
Note: This table must be populated by the system or database administrator. QMFfor Workstation does not have access to the pre-existing RACF/Db2 relationshipsduring or after installation, unless they are stored in a custom Db2 table of theadministrator's design.
Also, for tables, the view RDBI.TABLE_VIEW2_X is the key and interacts with theother views and tables, as shown below.
RDBI.ADMIN_TABLEA base table used exclusively by iSeries databases that lists user IDs withadministrative privileges.
Note: This table must be populated by the system or database administrator. Thistable takes the place of the base RDBI.AUTHID_TABLE for Db2 databases.
Also, for tables, the view RDBI.USER_ADMIN_VIEW andRDBI.USER_ADMIN_VIEW_X are the keys and interact with the other views andtables, as shown below.
RDBI.USER_ADMIN_VIEW_XThe following SQL statements create the RDBI.USER_ADMIN_VIEW_X table.CREATE VIEW RDBI.USER_ADMIN_VIEW_X(
CATALOG_ID,"AUTHID"
206 Installing and Managing QMF for Workstation and QMF for WebSphere
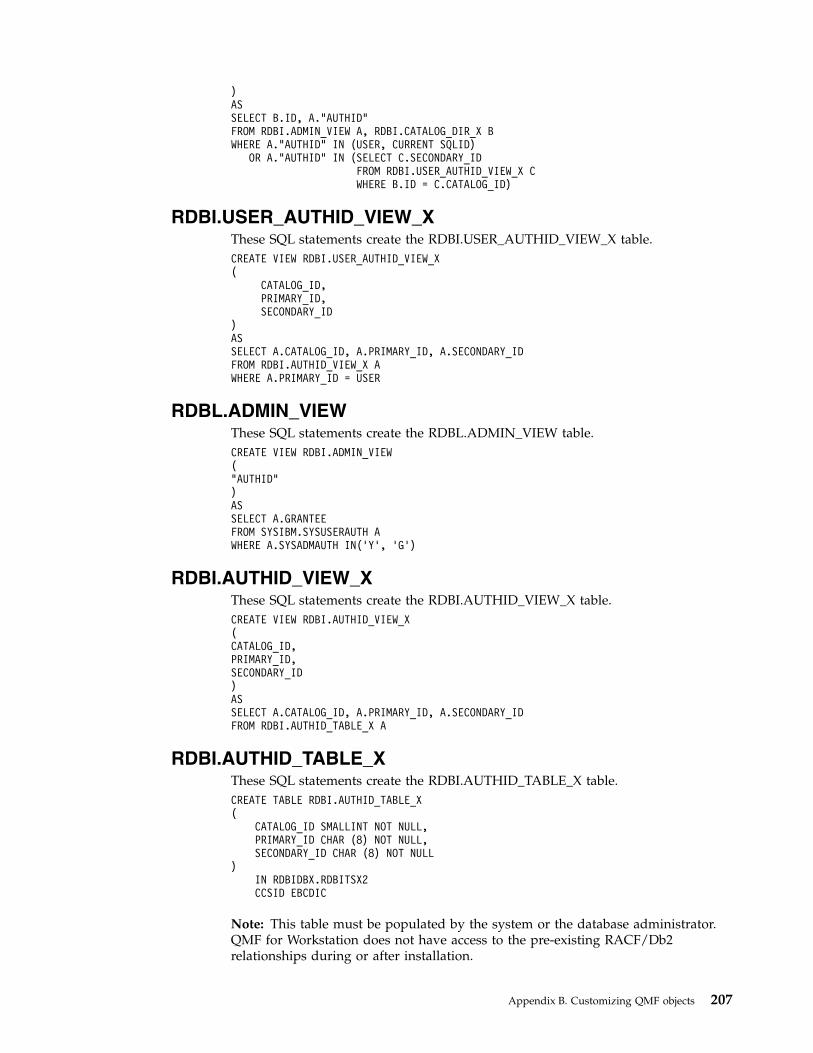
)ASSELECT B.ID, A."AUTHID"FROM RDBI.ADMIN_VIEW A, RDBI.CATALOG_DIR_X BWHERE A."AUTHID" IN (USER, CURRENT SQLID)
OR A."AUTHID" IN (SELECT C.SECONDARY_IDFROM RDBI.USER_AUTHID_VIEW_X CWHERE B.ID = C.CATALOG_ID)
RDBI.USER_AUTHID_VIEW_XThese SQL statements create the RDBI.USER_AUTHID_VIEW_X table.CREATE VIEW RDBI.USER_AUTHID_VIEW_X(
CATALOG_ID,PRIMARY_ID,SECONDARY_ID
)ASSELECT A.CATALOG_ID, A.PRIMARY_ID, A.SECONDARY_IDFROM RDBI.AUTHID_VIEW_X AWHERE A.PRIMARY_ID = USER
RDBL.ADMIN_VIEWThese SQL statements create the RDBL.ADMIN_VIEW table.CREATE VIEW RDBI.ADMIN_VIEW("AUTHID")ASSELECT A.GRANTEEFROM SYSIBM.SYSUSERAUTH AWHERE A.SYSADMAUTH IN(’Y’, ’G’)
RDBI.AUTHID_VIEW_XThese SQL statements create the RDBI.AUTHID_VIEW_X table.CREATE VIEW RDBI.AUTHID_VIEW_X(CATALOG_ID,PRIMARY_ID,SECONDARY_ID)ASSELECT A.CATALOG_ID, A.PRIMARY_ID, A.SECONDARY_IDFROM RDBI.AUTHID_TABLE_X A
RDBI.AUTHID_TABLE_XThese SQL statements create the RDBI.AUTHID_TABLE_X table.CREATE TABLE RDBI.AUTHID_TABLE_X(
CATALOG_ID SMALLINT NOT NULL,PRIMARY_ID CHAR (8) NOT NULL,SECONDARY_ID CHAR (8) NOT NULL
)IN RDBIDBX.RDBITSX2CCSID EBCDIC
Note: This table must be populated by the system or the database administrator.QMF for Workstation does not have access to the pre-existing RACF/Db2relationships during or after installation.
Appendix B. Customizing QMF objects 207
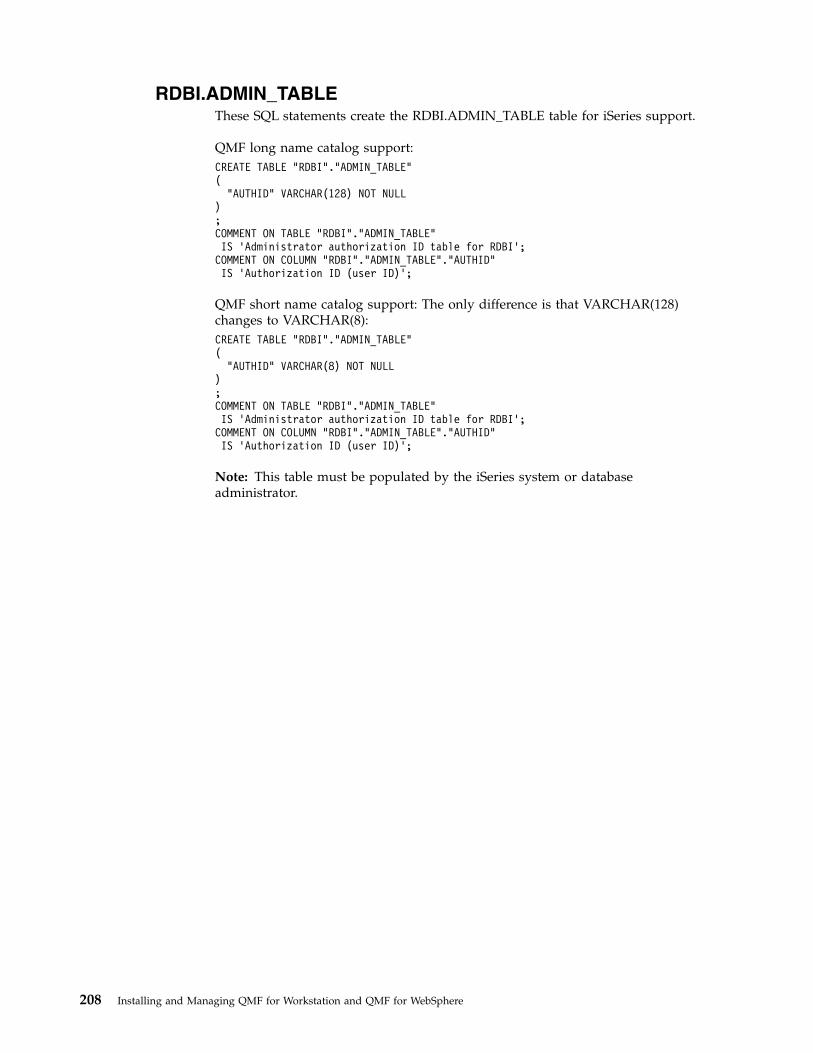
RDBI.ADMIN_TABLEThese SQL statements create the RDBI.ADMIN_TABLE table for iSeries support.
QMF long name catalog support:CREATE TABLE "RDBI"."ADMIN_TABLE"(
"AUTHID" VARCHAR(128) NOT NULL);COMMENT ON TABLE "RDBI"."ADMIN_TABLE"IS ’Administrator authorization ID table for RDBI’;COMMENT ON COLUMN "RDBI"."ADMIN_TABLE"."AUTHID"IS ’Authorization ID (user ID)’;
QMF short name catalog support: The only difference is that VARCHAR(128)changes to VARCHAR(8):CREATE TABLE "RDBI"."ADMIN_TABLE"(
"AUTHID" VARCHAR(8) NOT NULL);COMMENT ON TABLE "RDBI"."ADMIN_TABLE"IS ’Administrator authorization ID table for RDBI’;COMMENT ON COLUMN "RDBI"."ADMIN_TABLE"."AUTHID"IS ’Authorization ID (user ID)’;
Note: This table must be populated by the iSeries system or databaseadministrator.
208 Installing and Managing QMF for Workstation and QMF for WebSphere
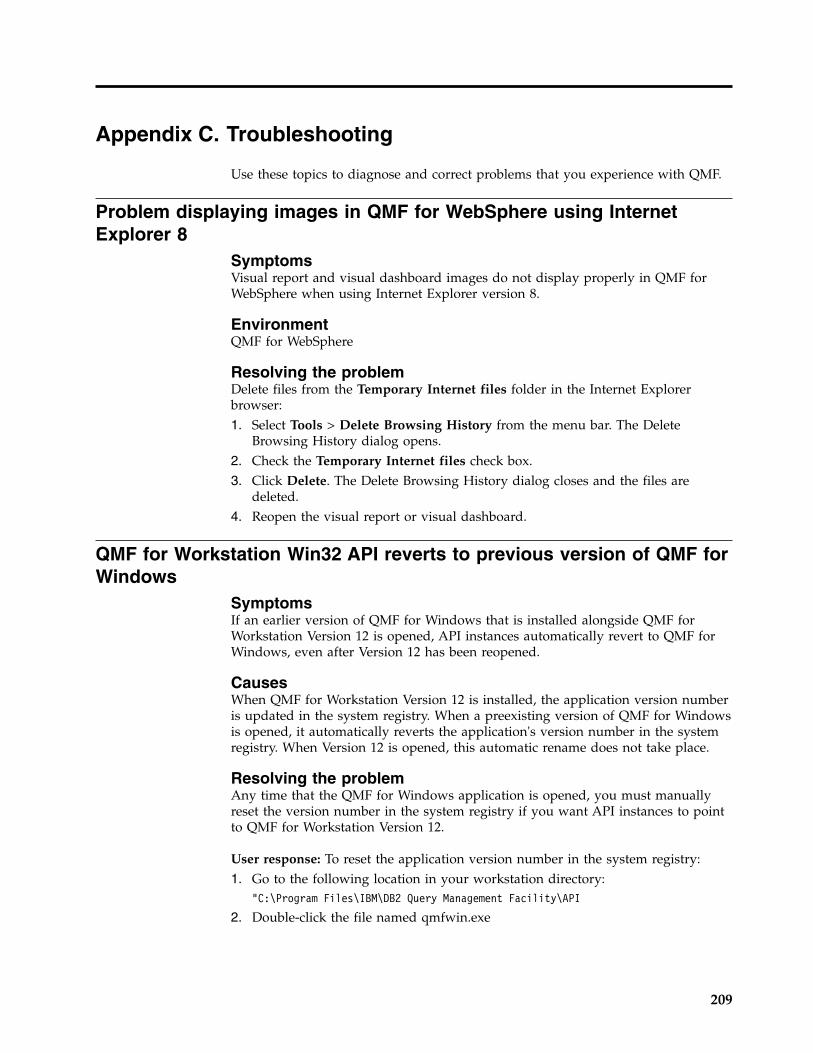
Appendix C. Troubleshooting
Use these topics to diagnose and correct problems that you experience with QMF.
Problem displaying images in QMF for WebSphere using InternetExplorer 8
SymptomsVisual report and visual dashboard images do not display properly in QMF forWebSphere when using Internet Explorer version 8.
EnvironmentQMF for WebSphere
Resolving the problemDelete files from the Temporary Internet files folder in the Internet Explorerbrowser:1. Select Tools > Delete Browsing History from the menu bar. The Delete
Browsing History dialog opens.2. Check the Temporary Internet files check box.3. Click Delete. The Delete Browsing History dialog closes and the files are
deleted.4. Reopen the visual report or visual dashboard.
QMF for Workstation Win32 API reverts to previous version of QMF forWindows
SymptomsIf an earlier version of QMF for Windows that is installed alongside QMF forWorkstation Version 12 is opened, API instances automatically revert to QMF forWindows, even after Version 12 has been reopened.
CausesWhen QMF for Workstation Version 12 is installed, the application version numberis updated in the system registry. When a preexisting version of QMF for Windowsis opened, it automatically reverts the application's version number in the systemregistry. When Version 12 is opened, this automatic rename does not take place.
Resolving the problemAny time that the QMF for Windows application is opened, you must manuallyreset the version number in the system registry if you want API instances to pointto QMF for Workstation Version 12.
User response: To reset the application version number in the system registry:1. Go to the following location in your workstation directory:
"C:\Program Files\IBM\DB2 Query Management Facility\API
2. Double-click the file named qmfwin.exe
209

Note: Win32 API uses active repository connections. If there is not an activerepository connection, the system brings up a dialog box that lists all availableconnections where you must select the connection you want to use.
210 Installing and Managing QMF for Workstation and QMF for WebSphere
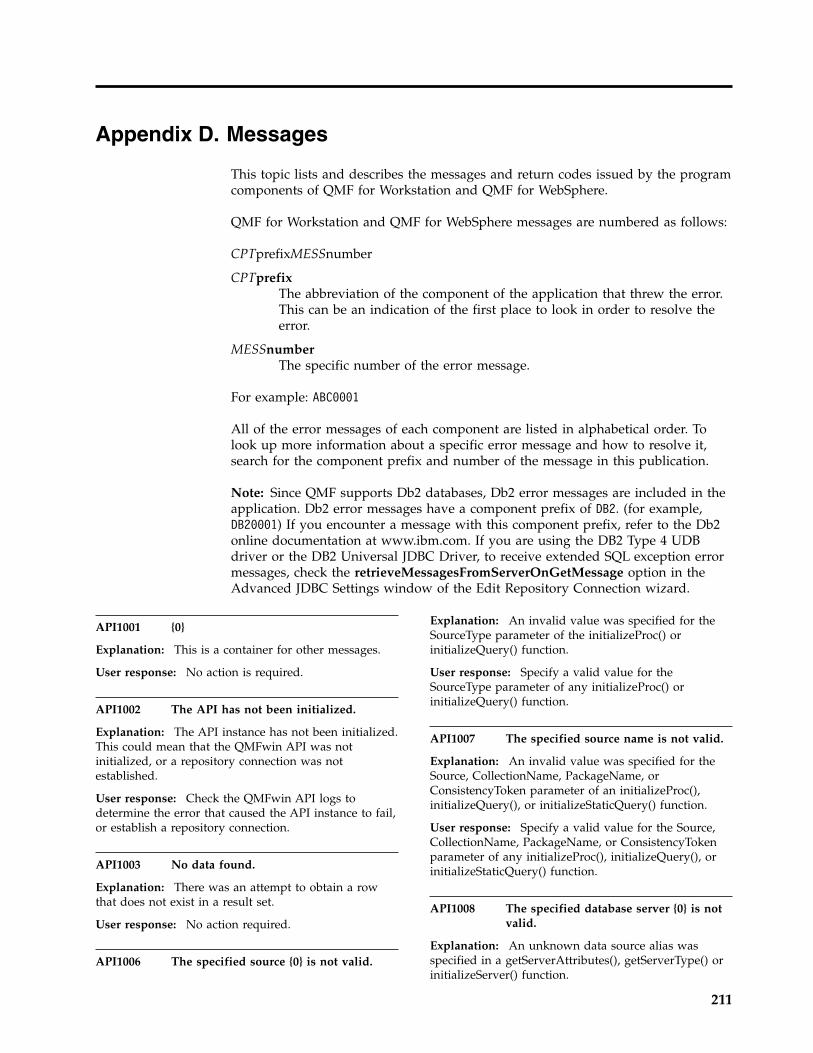
Appendix D. Messages
This topic lists and describes the messages and return codes issued by the programcomponents of QMF for Workstation and QMF for WebSphere.
QMF for Workstation and QMF for WebSphere messages are numbered as follows:
CPTprefixMESSnumber
CPTprefixThe abbreviation of the component of the application that threw the error.This can be an indication of the first place to look in order to resolve theerror.
MESSnumberThe specific number of the error message.
For example: ABC0001
All of the error messages of each component are listed in alphabetical order. Tolook up more information about a specific error message and how to resolve it,search for the component prefix and number of the message in this publication.
Note: Since QMF supports Db2 databases, Db2 error messages are included in theapplication. Db2 error messages have a component prefix of DB2. (for example,DB20001) If you encounter a message with this component prefix, refer to the Db2online documentation at www.ibm.com. If you are using the DB2 Type 4 UDBdriver or the DB2 Universal JDBC Driver, to receive extended SQL exception errormessages, check the retrieveMessagesFromServerOnGetMessage option in theAdvanced JDBC Settings window of the Edit Repository Connection wizard.
API1001 {0}
Explanation: This is a container for other messages.
User response: No action is required.
API1002 The API has not been initialized.
Explanation: The API instance has not been initialized.This could mean that the QMFwin API was notinitialized, or a repository connection was notestablished.
User response: Check the QMFwin API logs todetermine the error that caused the API instance to fail,or establish a repository connection.
API1003 No data found.
Explanation: There was an attempt to obtain a rowthat does not exist in a result set.
User response: No action required.
API1006 The specified source {0} is not valid.
Explanation: An invalid value was specified for theSourceType parameter of the initializeProc() orinitializeQuery() function.
User response: Specify a valid value for theSourceType parameter of any initializeProc() orinitializeQuery() function.
API1007 The specified source name is not valid.
Explanation: An invalid value was specified for theSource, CollectionName, PackageName, orConsistencyToken parameter of an initializeProc(),initializeQuery(), or initializeStaticQuery() function.
User response: Specify a valid value for the Source,CollectionName, PackageName, or ConsistencyTokenparameter of any initializeProc(), initializeQuery(), orinitializeStaticQuery() function.
API1008 The specified database server {0} is notvalid.
Explanation: An unknown data source alias wasspecified in a getServerAttributes(), getServerType() orinitializeServer() function.
211
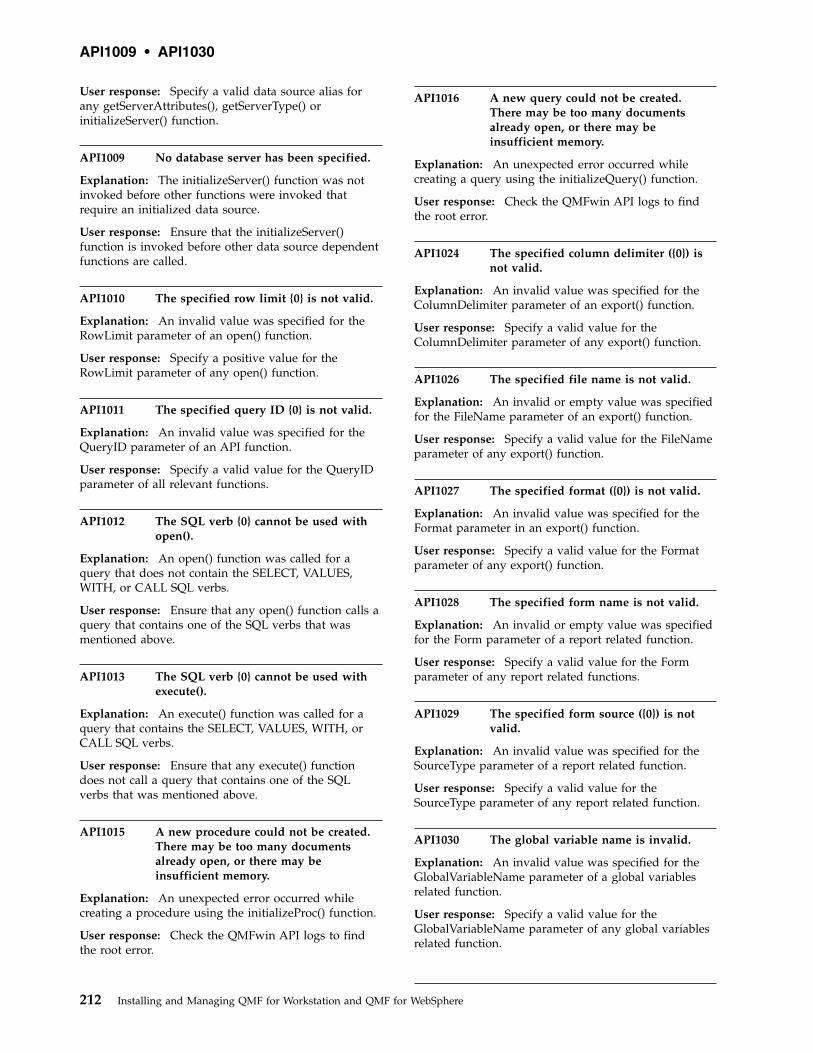
User response: Specify a valid data source alias forany getServerAttributes(), getServerType() orinitializeServer() function.
API1009 No database server has been specified.
Explanation: The initializeServer() function was notinvoked before other functions were invoked thatrequire an initialized data source.
User response: Ensure that the initializeServer()function is invoked before other data source dependentfunctions are called.
API1010 The specified row limit {0} is not valid.
Explanation: An invalid value was specified for theRowLimit parameter of an open() function.
User response: Specify a positive value for theRowLimit parameter of any open() function.
API1011 The specified query ID {0} is not valid.
Explanation: An invalid value was specified for theQueryID parameter of an API function.
User response: Specify a valid value for the QueryIDparameter of all relevant functions.
API1012 The SQL verb {0} cannot be used withopen().
Explanation: An open() function was called for aquery that does not contain the SELECT, VALUES,WITH, or CALL SQL verbs.
User response: Ensure that any open() function calls aquery that contains one of the SQL verbs that wasmentioned above.
API1013 The SQL verb {0} cannot be used withexecute().
Explanation: An execute() function was called for aquery that contains the SELECT, VALUES, WITH, orCALL SQL verbs.
User response: Ensure that any execute() functiondoes not call a query that contains one of the SQLverbs that was mentioned above.
API1015 A new procedure could not be created.There may be too many documentsalready open, or there may beinsufficient memory.
Explanation: An unexpected error occurred whilecreating a procedure using the initializeProc() function.
User response: Check the QMFwin API logs to findthe root error.
API1016 A new query could not be created.There may be too many documentsalready open, or there may beinsufficient memory.
Explanation: An unexpected error occurred whilecreating a query using the initializeQuery() function.
User response: Check the QMFwin API logs to findthe root error.
API1024 The specified column delimiter ({0}) isnot valid.
Explanation: An invalid value was specified for theColumnDelimiter parameter of an export() function.
User response: Specify a valid value for theColumnDelimiter parameter of any export() function.
API1026 The specified file name is not valid.
Explanation: An invalid or empty value was specifiedfor the FileName parameter of an export() function.
User response: Specify a valid value for the FileNameparameter of any export() function.
API1027 The specified format ({0}) is not valid.
Explanation: An invalid value was specified for theFormat parameter in an export() function.
User response: Specify a valid value for the Formatparameter of any export() function.
API1028 The specified form name is not valid.
Explanation: An invalid or empty value was specifiedfor the Form parameter of a report related function.
User response: Specify a valid value for the Formparameter of any report related functions.
API1029 The specified form source ({0}) is notvalid.
Explanation: An invalid value was specified for theSourceType parameter of a report related function.
User response: Specify a valid value for theSourceType parameter of any report related function.
API1030 The global variable name is invalid.
Explanation: An invalid value was specified for theGlobalVariableName parameter of a global variablesrelated function.
User response: Specify a valid value for theGlobalVariableName parameter of any global variablesrelated function.
API1009 • API1030
212 Installing and Managing QMF for Workstation and QMF for WebSphere
API1031 The specified host variable is not valid.
Explanation: An invalid value was specified for theValue parameter of a setHostVariable() function.
User response: Specify a valid value for the Valueparameter of any setHostVariable() function.
API1033 The specified owner and name ({0}) arenot valid.
Explanation: An invalid value was specified for theOwnerAndName parameter of an API function.
User response: Specify a valid value for theOwnerAndName parameter of any relevant APIfunction.
API1034 The specified page length ({0}) is notvalid.
Explanation: An invalid value was specified for thePageLength parameter of an exportReport() orexportVisualReport() function.
User response: Specify a valid value for thePageLength parameter of any exportReport() orexportVisualReport() functions.
API1035 The specified page width ({0}) is notvalid.
Explanation: An invalid value was specified for thePageWidth parameter of an exportReport() orexportVisualReport() function.
User response: Specify a valid value for thePageWidth parameter of any exportReport() orexportVisualReport() function.
API1037 The specified procedure ID ({0}) is notvalid.
Explanation: An invalid value was specified for theProcID parameter or a procedure related function.
User response: Specify a valid value for the ProcIDparameter of any procedure related functions.
API1038 The specified resource ({0}) is not valid.
Explanation: An invalid value was specified for theResource parameter of a getResourceLimit() function.
User response: Specify a valid value for the Resourceparameter of any getResourceLimit() function.
API1039 The specified range of rows andcolumns is not valid.
Explanation: Invalid values were specified for theFirstRow, FirstCol, LastRow, and LastCol parameters ofan exporting result set function.
User response: Specify valid values for the FirstRow,FirstCol, LastRow, and LastCol parameters of anyexporting result set function.
API1040 The specified string delimiter ({0}) is notvalid.
Explanation: An invalid value was specified for theStringDelimeter parameter of an export() function.
User response: Specify a valid value for theStringDelimeter parameter of any export() function.
API1041 The specified table name is not valid.
Explanation: An invalid value was specified for theTableName parameter of an export() function.
User response: Specify a valid value for theTableName parameter of any export() function.
API1042 The specified target server is invalid.
Explanation: An invalid value was specified for theServer parameter of a saveData() or copyQMFObject()function.
User response: Specify a valid value for the Serverparameter of any saveData() or copyQMFObject()function.
API1044 The specified time ({0}) is not valid.
Explanation: An invalid value was specified for theTime parameter of a getQMFObjectInfo() function.
User response: Specify a valid value for the Timeparameter of any getQMFObjectInfo() function.
API1045 The specified type ({0}) is not valid.
Explanation: An invalid value was specified for theType parameter of a getQMFObjectInfo() function.
User response: Specify a valid value for the Typeparameter of any getQMFObjectInfo() function.
API1046 The specified variable ({0}) is not valid.
Explanation: An invalid value was specified for theVariableName parameter of a setVariable() function.
User response: Specify a valid value for theVariableName parameter of any getVariable() function.
API1053 The SQL verb ({0}) cannot be used withExecuteStoredProcedure().
Explanation: A query that does not contain the CALLSQL verb was specified for anexecuteStoredProcedureEx() function.
User response: Specify a CALL query for anyexecuteStoredProcedureEx() function.
API1031 • API1053
Appendix D. Messages 213
API1054 Can't prepare a static section.
Explanation: A static query was specified for aprepare() function; only dynamic queries can bespecified.
User response: Specify a dynamic query for anyprepare() function.
API10004 The values specified for ForceDialogand SuppressDialog are mutuallyexclusive.
Explanation: The initializeServer() function was calledand the values that were specified for ForceDialog andSuppressDialog parameters were mutually exclusive
User response: Check the code that invokes theinitializeServer() function.
API10005 The specified value is not valid.
Explanation: The value that was specified for theparameter of a function is incorrect.
User response: Check to ensure that all of thespecified parameter values for all of the functions thatwere called in the API instance are valid.
BIC00000 Internal Error
Explanation: There was an internal error.
User response: Collect support data by selecting Help> Collect Support Data and forward it to customersupport.
BIC00001 Illegal Argument
Explanation: The specified argument is not valid.
User response: Collect support data by selecting Help> Collect Support Data and forward it to customersupport.
BIC00002 Null Pointer
Explanation: A null pointer exception occurred.
User response: Collect support data by selecting Help> Collect Support Data and forward it to customersupport.
BIC00004 {0}
Explanation: The specified exception occurred.
User response: Correct the specified exception and tryagain.
BIC00005 Unknown exception.
Explanation: An error occurred while retrieving aresource string.
User response: Collect support data by selecting Help> Collect Support Data and forward it to customersupport.
BIC00006 This feature is not supported by QMF
Explanation: The specified feature is not supported byQMF
User response: No action is required.
BIC00007 Object is not supported by QMF
Explanation: The specified object is not supported byQMF
User response: No action is required.
BIC00009 Fetching of children is cancelled byuser.
Explanation: The operation was cancelled by the user.
User response: Retry to fetch the specified objects.
CLC00001 Cannot convert {0} to number.
Explanation: The specified element can not beconverted into a numeral.
User response: Specify valid element to convert into anumeral.
CLC00002 Unable to evaluate linReg: data serieshave different numbers of elements.
Explanation: The data series specified for the x and yvariables contain different numbers of data points.
User response: Specify data series that contain thesame number of data points.
CLC00003 Unable to evaluate linReg: not enoughdata.
Explanation: The data series specified do not containenough rows to calculate the linear regression.
User response: Specify a query result set that containsmore than one row of data points.
CLC00004 Unable to evaluate linReg: coefficient isout of range.
Explanation: The value that you specified for thenParam parameter of the linreg() function is invalid.
User response: Specify either a 0 or a 1 for thenParam parameter. A 0 returns the slope of the linear
API1054 • CLC00004
214 Installing and Managing QMF for Workstation and QMF for WebSphere
regression. A 1 returns the intercept of the linearregression.
CLC00005 Illegal data row range specified: from {0}to {1}
Explanation: The range of data rows specified for thenFirstRow and nLastRow parameters is invalid.
User response: Specify a valid range of data rows. ThenFirstRow value must specify a row before thenLastRow value in the query result set.
CLC00006 Unable to calculate gammaIP: domainerror.
Explanation: Invalid arguments were specified in thegammaIP function.
User response: Specify a valid argument in thegammaIP function.
CLC00009 "{0}" function is not found in Lib class,but supported in expressions.
Explanation: An internal error occurred.
User response: Collect support data by selecting Help> Collect Support Data and forward it to customersupport.
CLC00010 "{0}" function has wrong argumentsdescription.
Explanation: An internal error occurred.
User response: Collect support data by selecting Help> Collect Support Data and forward it to customersupport.
CLC00011 Type conversion error. Object of {0} typecannot be converted to {1} type.
Explanation: The indicated object can not beconverted to the indicated type.
User response: Specify a valid object to be convertedto the indicated type.
CLC00012 Evaluation of expression failed: {0}
Explanation: The evaluation of the indicatedexpression failed.
User response: Specify a valid expression forevaluation.
CLC00014 Evaluation of expression has failed.
Explanation: The evaluation of the specifiedexpression has failed.
User response: Check the syntax of the expression forerrors and try again.
CLC00016 Cannot parse an expression: {0}
Explanation: An internal error occurred.
User response: Collect support data by selecting Help> Collect Support Data and forward it to customersupport.
CLC00018 Unknown function name: {0}.
Explanation: The indicated function name is not valid
User response: Specify a valid function name.
CLC00030 Unable to process URL: ''{0}''
Explanation: The indicated URL is invalid.
User response: Specify a valid URL.
CLC00034 "{0}" function description is missing.
Explanation: An internal error occurred.
User response: Collect support data by selecting Help> Collect Support Data and forward it to customersupport.
CLC00038 Multiple declarations of "{0}" library inLibraryFactory class.
Explanation: An internal error occurred.
User response: Collect support data by selecting Help> Collect Support Data and forward it to customersupport.
CLC00039 Multiple declarations of "{0}" library inLibraryFactory class.
Explanation: An internal error occurred.
User response: Collect support data by selecting Help> Collect Support Data and forward it to customersupport.
CLC00040 Cannot load "{0}" library inLibraryFactory class.
Explanation: An internal error occurred.
User response: Collect support data by selecting Help> Collect Support Data and forward it to customersupport.
CLC00041 Types "{0}" and "{1}" are not acceptablefor "{2}" function.
Explanation: The arguments that were passed to thefunction are of invalid types.
User response: Check the syntax of the expression forerrors and try again.
CLC00005 • CLC00041
Appendix D. Messages 215
CLC00042 Type "{0}" is not acceptable for "{1}"function.
Explanation: The specified function does not acceptparameters of the given type.
User response: Check the syntax of the expression forerrors and try again.
CLC00043 Information service is undefined.
Explanation: An internal error occurred.
User response: Collect support data by selecting Help> Collect Support Data and forward it to customersupport.
CLC00044 Aggregation service is undefined.
Explanation: An internal error occurred.
User response: Collect support data by selecting Help> Collect Support Data and forward it to customersupport.
CLC00045 Hierarchy service is undefined.
Explanation: An internal error occurred.
User response: Collect support data by selecting Help> Collect Support Data and forward it to customersupport.
CLC00046 Color service is undefined.
Explanation: An internal error occurred.
User response: Collect support data by selecting Help> Collect Support Data and forward it to customersupport.
CLC00047 PPI service is undefined.
Explanation: An internal error occurred.
User response: Collect support data by selecting Help> Collect Support Data and forward it to customersupport.
CLC00048 Value provider is undefined.
Explanation: An internal error occurred.
User response: Collect support data by selecting Help> Collect Support Data and forward it to customersupport.
CLC00049 Function "{0}" is defined for {1}argument(s).
Explanation: An invalid number of parameters werespecified for the indicated function.
User response: Specify a correct number of
parameters for the indicated function.
CLC00050 Function "{0}" is undefined for argument{1}.
Explanation: An invalid number of parameters werespecified for the indicated function.
User response: Specify a valid number of parametersfor the indicated function.
CLC00051 One of the operands does not havemeasurement units.
Explanation: One of the operands of the function doesnot have measurement units.
User response: Make sure that all of the operands inthe function have measurement units.
CLC00052 Cannot multiply two measured values.
Explanation: Measured values can not be multiplied.
User response: Specify values that are not measuredto be multiplied.
CLC00053 Cannot create list from elements of "{0}"type.
Explanation: A list can not be created using elementsof the indicated type.
User response: Specify elements of a different type tobe listed.
CLC00054 List cannot contain elements of differenttypes.
Explanation: The specified list can not containelements of different types.
User response: Specify elements of the same type tobe listed.
CLC00055 Types "{0}", "{1}" and "{2}" are notacceptable for "{3}" function.
Explanation: The indicated function is not compatiblewith the given types.
User response: Check the syntax of the expression forerrors and try again.
CLC00056 Argument(s) with measurement unitsare not acceptable for "{0}" function.
Explanation: The indicated function can not containarguments with measurement units.
User response: Remove all measurement units fromthe arguments of the function.
CLC00042 • CLC00056
216 Installing and Managing QMF for Workstation and QMF for WebSphere
CLC00057 Incorrect index given.
Explanation: An error occurred in the LineTextfunction.
User response: Check the arguments that are specifiedfor the LineText function for errors.
CLC00058 Types "{0}", "{1}", "{2}" and "{3}" are notacceptable for "{4}" function.
Explanation: The indicated function is not compatiblewith the given types.
User response: Check the expression syntax for errorsand try again.
CLC00059 Calculator exception cause: {0}
Explanation: A generic error occurred.
User response: Check the syntax of the expression forerrors and try again.
CLC00060 Value for variable ''{0}'' is not defined.
Explanation: The value for the indicated variable isnot defined.
User response: Define the value for the indicatedvariable.
CLC00061 Function "{0}" caused error: {1}
Explanation: The indicated function caused theindicated error.
User response: Correct the indicated error and rerunthe function.
CLC00062 Property "{0}" contains error: {1}
Explanation: The indicated property caused theindicated error.
User response: Correct the indicated error and rerunthe function.
CLC00063 List sizes are not comparable.
Explanation: Invalid parameters with type List werespecified for add, multiply, divide, or subtractfunctions.
User response: Specify a valid value for the Listparameter of any add, multiply, divide, or subtractfunctions.
CLC00066 Cannot be evaluated for empty list.
Explanation: No value was specified for the Listparameter of a function.
User response: Specify a valid value for the List
parameter of any relevant function.
CLC00067 Function @if has odd number ofparameters: @if(cond1, exp1, cond2,exp2, ..., expn). expn is used when therearen't true conditions
Explanation: The syntax of an @if function is invalid.
User response: Check the syntax of any @if functionsfor errors and try again.
DAL01001 The feature is not supported.
Explanation: The specified feature is not supported bythe database.
User response: Collect support data by selecting Help> Collect Support Data and forward it to customersupport.
DAL01002 No column named ''{0}'' was found.
Explanation: The indicated column was not found.
User response: Check the column name for errors orspecify a different column name.
DAL01004 The current row is unsuitable for get/setoperations.
Explanation: The specified row can not be retrieved orset.
User response: Collect support data by selecting Help> Collect Support Data and forward it to customersupport.
DAL01005 The database cursor has been closed.
Explanation: The requested operation could not becompleted because the cursor is closed.
User response: Collect support data by selecting Help> Collect Support Data and forward it to customersupport.
DAL01006 An error occurred while accessing thefile. {0}
Explanation: An input/output error occurred whileaccessing the file.
User response: Collect support data by selecting Help> Collect Support Data and forward it to customersupport.
DAL01007 Character encoding {0} is not supported.
Explanation: The indicated character encoding is notsupported.
User response: Use a character set that is supportedby your current JVM.
CLC00057 • DAL01007
Appendix D. Messages 217
DAL01008 An error occurred while accessing thedatabase.{0}
Explanation: An error occurred while accessing theindicated database.
User response: Collect support data by selecting Help> Collect Support Data and forward it to customersupport.
DAL01009 An internal error occurred. {0}
Explanation: The indicated internal error occurred.
User response: Collect support data by selecting Help> Collect Support Data and forward it to customersupport.
DAL01011 Class {0} is not suitable for serverdescription
Explanation: An internal error occurred.
User response: Collect support data by selecting Help> Collect Support Data and forward it to customersupport.
DAL01012 Requested operation is not available inoffline mode
Explanation: The specified operation is not availablein offline mode.
User response: Specify a different operation to applyto the active object, or switch to online mode and tryagain.
DAL01013 Cannot create connection to server ''{0}''due to the following: {1}
Explanation: A connection to the indicated servercould not be established due to the indicated error.
User response: Resolve the indicated error and retryto connect to the server.
DAL01014 Invalid set of connection parametersused,
Explanation: An internal error occurred.
User response: Collect support data by selecting Help> Collect Support Data and forward it to customersupport.
DAL01016 Cannot parse data (base64 encodingrules violation)
Explanation: The XML file is corrupted.
User response: Fix any errors in the XML file and tryagain.
DAL01017 Duplicate query with name ''{0}'' isdetected in package ''{1}''.
Explanation: An internal error occurred; the indicatedpackage contains several queries with the samespecified name.
User response: Collect support data by selecting Help> Collect Support Data and forward it to customersupport.
DAL01018 The source data is not compatible withthe target table.
Explanation: The attempt to save data in the databasetable failed because of the following:
v Number of columns does not match.
v Columns have incompatible types.
User response: Select compatible target table and tryagain.
DAL01019 Operation is not supported.
Explanation: An internal error occurred; the requestedoperation can not be performed due to internallimitations.
User response: Collect support data by selecting Help> Collect Support Data and forward it to customersupport.
DAL01020 Invalid SQL type definition: ''{0}''
Explanation: An internal error occurred; the indicatedSQL type definition is invalid (it can be mapped tomore than one known data types).
User response: Collect support data by selecting Help> Collect Support Data and forward it to customersupport.
DAL01021 This product does not contain SQLjsupport module
Explanation: QMF does not support or can notinitialize the SQLj support module.
User response: Collect support data by selecting Help> Collect Support Data and forward it to customersupport.
DAL01022 Cannot have two different driverlibraries with the same driver name.
Explanation: The driver with the specified drivername is already defined in another library definition.
User response: Use (edit) the already defined driverlibrary instead of creating a new one.
DAL01008 • DAL01022
218 Installing and Managing QMF for Workstation and QMF for WebSphere
DAL01023 An error has occurred while savingdriver libraries list: {0}
Explanation: The indicated error occurred while thedriver libraries list was being saved.
User response: Resolve the indicated error and tryagain.
DAL01025 An error has occurred while loading thedriver libraries list: {0}
Explanation: The indicated error occurred while tryingto load the driver libraries list.
User response: Resolve the indicated error and tryagain.
DAL01026 Operation cannot be performed due toresource limits restriction: {0}
Explanation: The operation could not be performeddue to the indicated resource limits restriction.
User response: Check your current resource limits byselecting Resource Limits from the View menu. Specifyan operation within your resource limits or contactyour administrator for specific permissions.
DAL01027 User name is missing.
Explanation: The user name is missing from the UserInformation dialog name field.
User response: Specify a user name.
DAL01028 Password is missing.
Explanation: The password is missing from the UserInformation dialog.
User response: Specify a password.
DAL01029 Wrong JDBC URL: {0}.
Explanation: The indicated JDBC URL cannot beprocessed by QMF. The URL may be incorrect.
User response: Check the JDBC URL for errors orspecify a different URL.
DAL01030 Query parameter {0} is of wrong Javatype. Data type ''{1}'' is required.
Explanation: An internal error occurred while runningthe query. The query parameters have invalid types.
User response: Collect support data by selecting Help> Collect Support Data and forward it to customersupport.
DAL01031 Cached server descriptor cannot berestored due to the following: {0}
Explanation: The cached server descriptor cannot berestored due to the following error.
User response: Resolve the indicated error and tryagain.
DAL01032 An error occurred while making remotemethod call. {0}
Explanation: The indicated error occurred while theoperation was running on the server side.
User response: Refer to the indicated error descriptionfor possible response(s).
DAL01033 Client request cannot be processed byremote server.
Explanation: An internal error occurred; the clientrequest cannot be processed by a remote server.
User response: Collect support data by selecting Help> Collect Support Data and forward it to customersupport.
DAL01034 Attempt to use incomplete metadatadescriptor is detected.
Explanation: An internal error occurred.
User response: Collect support data by selecting Help> Collect Support Data and forward it to customersupport.
DAL01035 Editing is not supported for this dataset.
Explanation: An internal error occurred; this data setcannot be edited.
User response: Collect support data by selecting Help> Collect Support Data and forward it to customersupport.
DAL01036 The current row is unsuitable forediting.
Explanation: An internal error occurred; the currentrow can not be edited.
User response: Collect support data by selecting Help> Collect Support Data and forward it to customersupport.
DAL01037 The database server does not supporttable renaming
Explanation: Tables in this database server can not berenamed by QMF.
User response: No action is required.
DAL01023 • DAL01037
Appendix D. Messages 219
DAL01038 The edit operation was cancelled.
Explanation: The table editing operation wascancelled by the user.
User response: No action is required.
DAL01039 The record could not be updated(possibly concurrent edit/deleteoperations).
Explanation: The record could not be updated. This ismost likely because it is locked due to a concurrentedit/delete operation.
User response: Refresh the result set and try again.
DAL01040 The record could not be deleted(possibly concurrent edit/deleteoperations).
Explanation: The record could not be deleted. This ismost likely because it is locked due to a concurrentedit/delete operation.
User response: Refresh the result set and try again.
DAL01041 The value of a calculated column islonger than specified in the metadata
Explanation: The data could not be exported becauseone or more of the calculated columns in the result setcontains data that is longer than what is allowed in thecolumn's definition.
User response: Increase the maximum column lengthor modify the data in the calculated column.
DAL01042 Invalid type conversion detected.
Explanation: An internal error occurred; a typeconversion in the specified operation is invalid.
User response: Collect support data by selecting Help> Collect Support Data and forward it to customersupport.
DAL01043 An attempt was made to modify adeleted record.
Explanation: An internal error occurred; records thathave already been deleted can not be modified orrestored.
User response: Collect support data by selecting Help> Collect Support Data and forward it to customersupport.
DAL01044 Connection is blocked due to thefollowing: {0}
Explanation: The attempted connection was blockeddue to the indicated error or restriction.
User response: Depending on the indicated problem,either resolve the specified error or contact youradministrator to remove the restriction.
DAL01046 This product does not contain staticmode support module for selecteddatabase.
Explanation: This product does not contain staticmode support module for selected database.
User response: Collect support data by selecting Help> Collect Support Data and forward it to customersupport.
DAL01048 Driver class name ''{0}'' is not loaded.This may be caused by an incorrectdriver class name or missing JDBCdriver libraries.
Explanation: The indicated driver class name can notbe loaded. This may be caused by an incorrect driverclass name or missing JDBC driver libraries.
User response: Check that there is a proper definitionfor the JDBC driver library that refers to the indicateddriver class.
DAL01049 Selected protection mode is notsupported by database.
Explanation: The selected protection mode is notsupported by the specified database.
User response: Collect support data by selecting Help> Collect Support Data and forward it to customersupport.
DAL01050 Driver specific functionality is notavailable due to: {0}
Explanation: Driver specific functionality is notavailable due to the indicated error.
User response: Resolve the indicated error and retry.Verify that the JDBC driver library for the driver isproperly configured and that it contains all of thenecessary JAR files. If the problem persists, collectsupport data by selecting Help > Collect Support Dataand forward it to customer support.
DAL01200 Generic data access error has occurred.{0}
Explanation: An error with no textual descriptionoccurred. Additional information may follow themessage. This error code may refer to different error
DAL01038 • DAL01200
220 Installing and Managing QMF for Workstation and QMF for WebSphere

conditions depending on product versions.
User response: Collect support data by selecting Help> Collect Support Data and forward it to customersupport.
DAL01201 Generic data access error has occurred.{0}, {1}
Explanation: An error with no textual descriptionoccurred. Additional information may follow themessage. This error code may refer to different errorconditions depending on product versions.
User response: Collect support data by selecting Help> Collect Support Data and forward it to customersupport.
DAL01202 Generic data access error has occurred.{0}, {1}, {2}
Explanation: An error with no textual descriptionoccurred. Additional information may follow themessage. This error code may refer to different errorconditions depending on product versions.
User response: Collect support data by selecting Help> Collect Support Data and forward it to customersupport.
DAL01203 Generic data access error has occurred.{0}, {1}, {2}, {3}
Explanation: An error with no textual descriptionoccurred. Additional information may follow themessage. This error code may refer to different errorconditions depending on product versions.
User response: Collect support data by selecting Help> Collect Support Data and forward it to customersupport.
DAL01204 Generic data access error has occurred.{0}, {1}, {2}, {3}, {4}
Explanation: An error with no textual descriptionoccurred. Additional information may follow themessage. This error code may refer to different errorconditions depending on product versions.
User response: Collect support data by selecting Help> Collect Support Data and forward it to customersupport.
DAL01205 Generic data access error has occurred.{0}, {1}, {2}, {3}, {4}, {5}
Explanation: An error with no textual descriptionoccurred. Additional information may follow themessage. This error code may refer to different errorconditions depending on product versions.
User response: Collect support data by selecting Help
> Collect Support Data and forward it to customersupport.
DAL01206 Generic data access error has occurred.{0}, {1}, {2}, {3}, {4}, {5}, {6}
Explanation: An error with no textual descriptionoccurred. Additional information may follow themessage. This error code may refer to different errorconditions depending on product versions.
User response: Collect support data by selecting Help> Collect Support Data and forward it to customersupport.
DAL01207 Generic data access error has occurred.{0}, {1}, {2}, {3}, {4}, {5}, {6}, {7}
Explanation: An error with no textual descriptionoccurred. Additional information may follow themessage. This error code may refer to different errorconditions depending on product versions.
User response: Collect support data by selecting Help> Collect Support Data and forward it to customersupport.
DAL01208 Generic data access error has occurred.{0}, {1}, {2}, {3}, {4}, {5}, {6}, {7}, {8}
Explanation: An error with no textual descriptionoccurred. Additional information may follow themessage. This error code may refer to different errorconditions depending on product versions.
User response: Collect support data by selecting Help> Collect Support Data and forward it to customersupport.
DDM0001 Unexpected error occurred.
Explanation: An internal error in the driver code wasdetected.
User response: Send an error report to the developers.
DDM0002 Object {0} have no fields with codepoint{1}
Explanation: An internal error in the driver code wasdetected.
User response: Send an error report to the developers.
DDM0003 Socket open exception. {0}
Explanation: Unable to establish TCP/IP connection.
User response: Check the host and port details in theJDBC URL; ping the server to check that the networkconnection works.
DAL01201 • DDM0003
Appendix D. Messages 221
DDM0004 Socket write exception. {0}
Explanation: There was a network connection failureor an internal error in the driver code was detected.
User response: Check you network connection. If theconnection works fine, send an error report to thedevelopers.
DDM0005 Data format exception detected.
Explanation: An internal error in the driver code wasdetected.
User response: Send an error report to the developers.
DDM0006 Invalid JDBC URL {0}
Explanation: An internal error in the driver code wasdetected.
User response: Send an error report to the developers.
DDM0007 DSS header format error detected.
Explanation: An internal error in the driver code wasdetected.
User response: Send an error report to the developers.
DDM0008 Unsupported CCSID {0}
Explanation: An internal error was detected in thedriver code.
User response: Send an error report to the developers.
DDM0009 Cipher error {0}
Explanation: An internal error in the driver code wasdetected.
User response: Send an error report to the developers.
DDM0010 Object {0} does not contain requiredfield {1}
Explanation: An internal error in the driver code wasdetected.
User response: Send an error report to the developers.
DDM0011 Object {0} does not support value {1}
Explanation: An internal error was detected in thedriver code.
User response: Send an error report to the developers.
DDM0012 Syntax error detected: {0}
Explanation: An internal error in the driver code wasdetected.
User response: Send an error report to the developers.
DDM0013 Syntax error detected: {0}
Explanation: An internal error in the driver code wasdetected.
User response: Send an error report to the developers.
DDM0014 Object {0} can hold no more repeatedfields {1}
Explanation: An internal error in the driver code wasdetected.
User response: Send an error report to the developers.
DDM0015 Illegal port number value: {0}
Explanation: The JDBC URL contains an invalid valuein the Port field.
User response: Specify a correct port number in theJDBC URL.
DDM0016 {0} is invalid length for the field {1} ofobject {2}
Explanation: An internal error was detected in thedriver code.
User response: Send an error report to the developers.
DDM0017 Unknown FD:OCA descriptor type id {0}
Explanation: An internal error was detected in thedriver code.
User response: Send an error report to the developers.
DDM0018 Null value for non nullable datadetected.
Explanation: An internal error was detected in thedriver code.
User response: Send an error report to the developers.
DDM0019 Whole number of FD:OCA {0} tripletrepeating groups cannot be placed in {1}bytes
Explanation: An internal error was detected in thedriver code.
User response: Send an error report to the developers.
DDM0004 • DDM0019
222 Installing and Managing QMF for Workstation and QMF for WebSphere
DDM0020 Illegal CPT triplet detected.
Explanation: An internal error was detected in thedriver code.
User response: Send an error report to the developers.
DDM0021 Illegal duplicated field {1} in object {0}
Explanation: An internal error was detected in thedriver code.
User response: Send an error report to the developers.
DDM0022 Referenced FD:OCA triplet {0} notfound
Explanation: An internal error was detected in thedriver code.
User response: Send an error report to the developers.
DDM0023 FD:OCA {0} triplets cannot bereferenced from RLO triplet
Explanation: An internal error was detected in thedriver code.
User response: Send an error report to the developers.
DDM0024 Replication factor {0} is detected in RLOtriplet while only 1 and 0 is allowed byDRDA
Explanation: An internal error was detected in thedriver code.
User response: Send an error report to the developers.
DDM0025 FD:OCA {0} triplets cannot bereferenced from GDA triplet
Explanation: An internal error was detected in thedriver code.
User response: Send an error report to the developers.
DDM0026 Unknown DRDA type {0}
Explanation: An internal error was detected in thedriver code.
User response: Send an error report to the developers.
DDM0027 Infinite element count is not allowed forRLO handler of {0}
Explanation: An internal error was detected in thedriver code.
User response: Send an error report to the developers.
DDM0028 An error occurred while parsing triplethandler for DRDA type {0}
Explanation: An internal error was detected in thedriver code.
User response: Send an error report to the developers.
DDM0029 Unspecified value for JDBC statementvariable {0}
Explanation: An internal error was detected in thedriver code.
User response: Send an error report to the developers.
DDM0030 Illegal type conversion.
Explanation: An internal error was detected in thedriver code.
User response: Send an error report to the developers.
DDM0031 Illegal date or time format detected: {0}
Explanation: An internal error was detected in thedriver code.
User response: Send an error report to the developers.
DDM0032 Prepared statement parameter type {0}(from java.sql.Type set) is notsupported.
Explanation: An internal error was detected in thedriver code.
User response: Send an error report to the developers.
DDM0033 Unknown Db2 type {0}
Explanation: An internal error was detected in thedriver code.
User response: Send an error report to the developers.
DDM0035 Statement is closed.
Explanation: An attempt to work with a closedStatement object was detected.
User response: Fix your program code.
DDM0036 ResultSet is closed.
Explanation: An attempt to work with a closedResultSet object was detected.
User response: Fix your program code.
DDM0020 • DDM0036
Appendix D. Messages 223
DDM0037 Object is closed.
Explanation: An attempt to work with a closed objectwas detected.
User response: Fix your program code.
DDM0038 Operation cannot be performed incurrent ResultSet state.
Explanation: An attempt to work with a ResultSetcolumn of a result set that is not positioned on anyvalid record was detected.
User response: Fix your program code.
DDM0039 Error reply is received.
Explanation: An internal error in the driver code wasdetected.
User response: Send an error report to the developers.
DDM0040 Error reply is received for {0} command.
Explanation: An internal error in the driver code wasdetected.
User response: Send an error report to the developers.
DDM0041 Error detected while processing {0}object.
Explanation: An internal error in the driver code wasdetected.
User response: Send an error report to the developers.
DRL00001 The maximum number of connections tothe server has been reached.
Explanation: The maximum number of connections tothe server has been reached.
User response: Increase the maximum of number ofconnections parameter in the Repository Storage dialogor set the value to zero to remove this restriction.
DSCERRCD0001 FD:OCA triplet is not used inDRDA descriptors, or the type code isinvalid.
Explanation: An internal error in the driver code wasdetected.
User response: Send an error report to the developers.
DSCERRCD0002 FD:OCA triplet sequence error.
Explanation: An internal error in the driver code wasdetected.
User response: Send an error report to the developers.
DSCERRCD0003 An array description is required,and this is not one (too many or too fewRow Lay Out (RLO) triplets).
Explanation: An internal error in the driver code wasdetected.
User response: Send an error report to the developers.
DSCERRCD0004 A row description is required, andthis is not one (too many or too fewRLO triplets).
Explanation: An internal error in the driver code wasdetected.
User response: Send an error report to the developers.
DSCERRCD0005 Late environmental descriptor justreceived, not supported.
Explanation: An internal error in the driver code wasdetected.
User response: Send an error report to the developers.
DSCERRCD0006 Malformed triplet; requiredparameter is missing.
Explanation: An internal error in the driver code wasdetected.
User response: Send an error report to the developers.
DSCERRCD0007 Parameter value is not acceptable.
Explanation: An internal error in the driver code wasdetected.
User response: Send an error report to the developers.
DSCERRCD0017 Meta-Data Descriptor (MDD)present is not recognized as a StructuredQuery Language (SQL) descriptor.
Explanation: An internal error in the driver code wasdetected.
User response: Send an error report to the developers.
DSCERRCD0018 MDD class is not recognized as avalid SQL class.
Explanation: An internal error in the driver code wasdetected.
User response: Send an error report to the developers.
DSCERRCD0019 MDD type is not recognized as avalid SQL type.
Explanation: An internal error in the driver code wasdetected.
DDM0037 • DSCERRCD0019
224 Installing and Managing QMF for Workstation and QMF for WebSphere
User response: Send an error report to the developers.
DSCERRCD0033 Representation is incompatiblewith SQL type (in prior MDD).
Explanation: An internal error in the driver code wasdetected.
User response: Send an error report to the developers.
DSCERRCD0034 CCSID is not supported.
Explanation: An internal error in the driver code wasdetected.
User response: Send an error report to the developers.
DSCERRCD0050 Group Data Array (GDA)references a local identifier (LID) whichis not a Scalar Data Array (SDA) orGDA.
Explanation: An internal error in the driver code wasdetected.
User response: Send an error report to the developers.
DSCERRCD0051 GDAlength override exceeds limits.
Explanation: An internal error in the driver code wasdetected.
User response: Send an error report to the developers.
DSCERRCD0052 GDAprecision exceeds limits.
Explanation: An internal error in the driver code wasdetected.
User response: Send an error report to the developers.
DSCERRCD0053 GDA scale greater than precision orscale negative.
Explanation: An internal error in the driver code wasdetected.
User response: Send an error report to the developers.
DSCERRCD0054 GDA length override missing orincompatible with data type.
Explanation: An internal error in the driver code wasdetected.
User response: Send an error report to the developers.
DSCERRCD0065 RLOreferences a LID which is notan RLO or GDA.
Explanation: An internal error in the driver code wasdetected.
User response: Send an error report to the developers.
DSCERRCD0066 RLOfails to reference a requiredGDA or RLO.
Explanation: An internal error in the driver code wasdetected.
User response: Send an error report to the developers.
ERM0001 Permanent Agent Error.
Explanation: An internal error in the driver code wasdetected.
User response: Send an error report to the developers.
ERM0002 Not Authorized to Command.
Explanation: An internal error in the driver code wasdetected.
User response: Send an error report to the developers.
ERM0003 Command Check.
Explanation: An internal error in the driver code wasdetected.
User response: Send an error report to the developers.
ERM0004 Command Not Supported.
Explanation: An internal error in the driver code wasdetected.
User response: Send an error report to the developers.
ERM0005 Manager Dependency Error.
Explanation: An internal error in the driver code wasdetected.
User response: Send an error report to the developers.
ERM0006 Manager-level Conflict.
Explanation: An internal error in the driver code wasdetected.
User response: Send an error report to the developers.
ERM0007 Conversational Protocol Error.
Explanation: An internal error in the driver code wasdetected.
User response: Send an error report to the developers.
ERM0008 Parameter Not Supported.
Explanation: An internal error in the driver code wasdetected.
User response: Send an error report to the developers.
DSCERRCD0033 • ERM0008
Appendix D. Messages 225
ERM0009 Resource Limits Reached.
Explanation: An internal error in the driver code wasdetected.
User response: Send an error report to the developers.
ERM0010 Data Stream Syntax Error.
Explanation: An internal error in the driver code wasdetected.
User response: Send an error report to the developers.
ERM0011 Target Not Supported.
Explanation: An internal error in the driver code wasdetected.
User response: Send an error report to the developers.
ERM0012 Parameter Value Not Supported.
Explanation: An internal error in the driver code wasdetected.
User response: Send an error report to the developers.
ERM0013 Conversational Protocol Error.
Explanation: An internal error in the driver code wasdetected.
User response: Send an error report to the developers.
ERM0014 RDB Currently Accessed.
Explanation: An internal error in the driver code wasdetected.
User response: Send an error report to the developers.
ERM0015 RDB Access Failed Reply Message.
Explanation: An internal error in the driver code wasdetected.
User response: Send an error report to the developers.
ERM0016 Not Authorized To RDB.
Explanation: An internal error in the driver code wasdetected.
User response: Send an error report to the developers.
ERM0017 RDB Not Found.
Explanation: An internal error in the driver code wasdetected.
User response: Send an error report to the developers.
ERM0018 Resource Limits Reached.
Explanation: An internal error in the driver code wasdetected.
User response: Send an error report to the developers.
ERM0019 Data Stream Syntax Error.
Explanation: An internal error in the driver code wasdetected.
User response: Send an error report to the developers.
ERM0020 Invalid Request.
Explanation: An internal error in the driver code wasdetected.
User response: Send an error report to the developers.
ERM0021 Abnormal End Unit of Work Condition.
Explanation: An internal error in the driver code wasdetected.
User response: Send an error report to the developers.
ERM0022 RDB Package Binding Process Active.
Explanation: An internal error in the driver code wasdetected.
User response: Send an error report to the developers.
ERM0023 Query Not Open.
Explanation: An internal error in the driver code wasdetected.
User response: Send an error report to the developers.
ERM0024 RDB Not Accessed.
Explanation: An internal error in the driver code wasdetected.
User response: Send an error report to the developers.
ERM0025 Data Descriptor Mismatch.
Explanation: An internal error in the driver code wasdetected.
User response: Send an error report to the developers.
ERM0026 Object Not Supported.
Explanation: An internal error in the driver code wasdetected.
User response: Send an error report to the developers.
ERM0009 • ERM0026
226 Installing and Managing QMF for Workstation and QMF for WebSphere
ERM0027 RDB Package Binding Not Active.
Explanation: An internal error in the driver code wasdetected.
User response: Send an error report to the developers.
ERM0028 RDB Update Reply Message.
Explanation: An internal error in the driver code wasdetected.
User response: Send an error report to the developers.
ERM0029 SQL Error Condition.
Explanation: An internal error in the driver code wasdetected.
User response: Send an error report to the developers.
ERM0030 End of Data.
Explanation: An internal error in the driver code wasdetected.
User response: Send an error report to the developers.
ERM0031 End of Query.
Explanation: An internal error in the driver code wasdetected.
User response: Send an error report to the developers.
ERM0032 Commitment Request.
Explanation: An internal error in the driver code wasdetected.
User response: Send an error report to the developers.
ERM0033 End Unit of Work Condition.
Explanation: An internal error in the driver code wasdetected.
User response: Send an error report to the developers.
ERM0034 Invalid Descriptor.
Explanation: An internal error in the driver code wasdetected.
User response: Send an error report to the developers.
ERM0035 Open Query Complete.
Explanation: An internal error in the driver code wasdetected.
User response: Send an error report to the developers.
ERM0036 Open Query Failure.
Explanation: An internal error in the driver code wasdetected.
User response: Send an error report to the developers.
ERM0037 Query Previously Opened.
Explanation: An internal error in the driver code wasdetected.
User response: Send an error report to the developers.
ERM0038 Command Violation.
Explanation: An internal error in the driver code wasdetected.
User response: Send an error report to the developers.
ERM1200 Generic DRDA error has occurred. {0}
Explanation: The indicated generic DRDA error hasoccurred.
User response: Resolve the indicated generic DRDAerror and try again.
ERM1201 Generic DRDA error has occurred. {0},{1}
Explanation: The two indicated generic DRDA errorhave occurred.
User response: Resolve the two indicated errors andtry again.
ERM1202 Generic DRDA error has occurred. {0},{1}, {2}
Explanation: The three indicated generic DRDA errorshave occurred.
User response: Resolve the three indicated errors andtry again.
ERM1203 Generic DRDA error has occurred. {0},{1}, {2}, {3}
Explanation: The four indicated generic DRDA errorshave occurred.
User response: Resolve the four indicated errors andtry again.
ERM1204 Generic DRDA error has occurred. {0},{1}, {2}, {3}, {4}
Explanation: The five indicated generic DRDA errorshave occurred.
User response: Resolve the five indicated errors andtry again.
ERM0027 • ERM1204
Appendix D. Messages 227
ERM1205 Generic DRDA error has occurred. {0},{1}, {2}, {3}, {4}, {5}
Explanation: The six indicated generic DRDA errorshave occurred.
User response: Resolve the six indicated errors andtry again.
ERM1206 Generic DRDA error has occurred. {0},{1}, {2}, {3}, {4}, {5}, {6}
Explanation: The seven indicated generic DRDAerrors have occurred.
User response: Resolve the seven indicated errors andtry again.
ERM1207 Generic DRDA error has occurred. {0},{1}, {2}, {3}, {4}, {5}, {6}, {7}
Explanation: The eight indicted generic DRDA errorshave occurred.
User response: Resolve the eight indicated errors andtry again.
ERM1208 Generic DRDA error has occurred. {0},{1}, {2}, {3}, {4}, {5}, {6}, {7}, {8}
Explanation: The nine indicated generic DRDA errorshave occurred.
User response: Resolve the nine indicated errors andtry again.
EXPT1000 Cannot perform export command: {0}
Explanation: The indicated export command can notbe performed.
User response: Resolve the first indicated error andtry again.
EXPT1001 An unsupported data type {0} wasencountered.
Explanation: The result set contains columns with thetypes that are not supported by the IXF370 format.
User response: Make sure that the result set does notcontain columns with any of the following types:BINARY, VARBINARY, ROWID, LONGVARBINARY,CLOB, DBCLOB, BLOB, GRAPHIC, VARGRAPHIC, orLONGVARGRAPHIC.
EXPT1002 The length of column {0} must be lessthan {1}.
Explanation: The length of the indicated column mustbe less than the indicated length due to restrictions ofthe IXF format.
User response: Make sure that the indicated data
column is less than the indicated length. Try to exportusing another format (for example, XML).
EXPT1003 The precision of column {0} must be anodd number between {1} and {2},inclusive.
Explanation: The precision of the indicated columnmust be an odd number between the two indicatedvalues due to restrictions of the IXF format.
User response: Make sure the precision of theindicated data column is an odd number between thetwo indicated values. Try to export using anotherformat (for example, XML).
EXPT1004 The data could not be exported due toan unsupported CCSID {0}.
Explanation: The indicated CCSID is not supportedfor export.
User response: Specify a valid CCSID for export. Alist of supported CCSIDs can be obtained from theCCSID drop down menu in the Export dialog.
EXPT1005 The data could not be exported becausethe single-byte code page is notspecified.
Explanation: A result set containing CLOB, CHAR,VARCHAR, or LONGVARCHAR columns wasexported in IXF format but a CCSID that contains asingle-byte code page was not specified.
User response: Select a CCSID that contains asingle-byte code page.
EXPT1006 The data could not be exported becausethe double-byte code page is notspecified.
Explanation: A result set containing DBCLOB,GRAPHIC, VARGRAPHIC, or LONGVARGRAPHICcolumns was exported in IXF format but a CCSID thatcontains a double-byte code page was not specified.
User response: Select a CCSID that contains adouble-byte code page.
EXPT1007 The value in column {0} exceeds themaximum length supported by thedBASE file format.
Explanation: The value in the indicated columnexceeds the character limit that is supported by thedBASE file format.
User response: Shorten the value in the indicatedcolumn or specify a different file format for export.
ERM1205 • EXPT1007
228 Installing and Managing QMF for Workstation and QMF for WebSphere
EXPT1008 The data type of column {0} is notsupported in dBASE files.
Explanation: The data type of the indicated column isnot supported by the dBASE file format.
User response: Specify a different data type for theindicated column or select a different file format forexport. Supported types: CHAR, VARCHAR,SMALLINT, INTEGER, DECIMAL, BIGINT, DOUBLE,FLOAT, DATE, and TIME.
EXPT1009 The row length in a dBASE file cannotexceed 4000 characters.
Explanation: The summary length of all of the resultset's columns exceeds 4,000 characters, which is notsupported by the dBASE file format.
User response: Make sure that the length is shorterthan 4,000 characters, or select a different file format forexport.
EXPT1010 The specified data source does not exist.
Explanation: There was an attempt to export a resultset to a data source that does not exist
User response: Specify a valid data source.
EXPT1011 The operation cancelled.
Explanation: The user cancelled the export commandwhen prompted for a user name and password.
User response: Specify a valid user name andpassword for the export command.
EXPT1012 Name must be specified.
Explanation: There was an attempt to export a resultset to a table that does not exist.
User response: Specify a valid export table.
EXPT1013 Invalid storage entry.
Explanation: The storage file contains corrupted data.
User response: Setup fonts and font mapping for PDFexport.
EXPT1014 Cannot create font {0} for PDF
Explanation: The indicated font can not be created forthe PDF file format.
User response: Specify a different font for conversion,specify a different file format for export, or set up fontsand font mapping for PDF file export.
EXPT1015 {0} font is not mapped
Explanation: The indicated font name is not mappedto the physical font file.
User response: Set up fonts and font mapping forPDF file export.
FRM1001 The input line type is invalid.
Explanation: Corrupted form. The form loader ishanging on a line with a certain first character, becauseevery line in a form file, according to the form fileformat, starts with certain character (T, V, R, H, E, *)that define the line type. The current line's firstcharacter has an unknown type.
User response: Try to open and save again with exactsame version of QMF that was used to create the form.
FRM1002 The input line is too short.
Explanation: The form loader is hanging on a linewith a certain character count, because each line typemust have a character count greater than a certainnumber (T > 15, V > 11, R > 3, or H > 44). The currentline is too short.
User response: Try to open and save again with exactsame version of QMF that was used to create the form.
FRM1003 The boolean value is invalid. Validvalues are YES or NO.
Explanation: Corrupted form: A boolean value in theform file has a string other than YES or NO.
User response: Try to open and save again with exactsame version of QMF that was used to create the form.
FRM1004 The numeric value is invalid. Validvalues are NONE, COLUMNS,DEFAULT, or an integer value.
Explanation: Corrupted form: The form loader waitsfor a valid Integer value or predefined word (NONE,COLUMNS, or DEFAULT).
User response: Try to open and save again with exactsame version of QMF that was used to create the form.
FRM1005 An invalid code was encountered.
Explanation: Corrupted form: Every table structure ina form file has its own column types. The form loaderwaits for certain column types depending on the tabletype.
User response: Try to open and save again with exactsame version of QMF that was used to create the form.
EXPT1008 • FRM1005
Appendix D. Messages 229

FRM1006 The object header is too short.
Explanation: The form loader is hanging on a linewith a certain character count, because each line typemust have a character count greater than a certainnumber (T > 15, V > 11, R > 3, or H > 44). The currentline is too short.
User response: Try to open and save again with exactsame version of QMF that was used to create the form.
FRM1007 The object header is invalid.
Explanation: Corrupted form: The object headercontains unexpected fields or data.
User response: Try to open and save again with exactsame version of QMF that was used to create the form.
FRM1008 Invalid usage code.
Explanation: The "new column" of the form dialogcontains an invalid usage code.
User response: Leave the usage code field empty orselect one from the combo box.
FRM1009 The value specified for {0} is invalid.Valid values are {1}.
Explanation: In the form dialog page, there are severalplaces where you can type or choose a listed value. Aninvalid listed value was entered.
User response: Enter a valid value from the list.
FRM1010 The column heading "{0}" is too long.
Explanation: The length of the column heading mustbe less then 40 characters.
User response: Ensure that the column heading is lessthan 40 characters.
FRM1011 There is no condition expression withID {0}.
Explanation: A form has a few detail blocks in the“detail” branch (by default – one) and each detail canuse a condition that defines the detail as enabled ordisabled. The condition typed in the C1, C2, .. C999format and the condition with the according indexshould exist in the “conditions” branch.
User response: Specify YES, NO, or Ci where Ci is theexisting condition.
FRM1012 Line Wrapping Width must be NONEwhen Number of Fixed Columns is notNONE.
Explanation: In the Options page of the form designer,when any number is defined in the Number of Fixed
Columns field, the Line Wrapping Width field must beset to NONE.
User response: Specify NONE in either the LineWrapping Width field or the Number of FixedColumns field
FRM1013 The ID for calculation {0} is alreadybeing used by a different calculation.
Explanation: In the Calculations page of the formdesigner, two or more calculations with the same IDwere specified.
User response: Ensure that each calculation ID isunique.
FRM1014 The ID for condition {0} is already beingused by a different condition.
Explanation: In the Conditions page of the formdesigner, two or more conditions with the same IDwere specified.
User response: Ensure that each of the conditions areunique.
FRM1015 Line Wrapping Width must be 0 if anycolumn uses a column wrapping editcode.
Explanation: If a column uses the wrapping edit code,then in the Options page of the form designer, the LineWrapping Width field must be set to NONE.
User response: Either set the Line Wrapping Widthfield to NONE, or do not use the line wrapping editcode.
FRM1016 Automatically Reorder Report Columnsmust be TRUE when using the ACROSSusage code.
Explanation: If any columns have the ACROSS usagecode, then in the Options page of the form designer,the Automatically Reorder Report Columns field mustbe set to TRUE.
User response: Either set the Automatically ReorderReport Columns field to TRUE or do not use theACROSS usage code.
FRM1017 The ACROSS usage code requires othercolumns to use the GROUP andaggregate usage codes.
Explanation: If any columns use the ACROSS usagecode, then all other columns must use either the OMIT,GROUP, or AGGREGATION usage code.
User response: Set the OMIT, GROUP, orAGGREGATION usage codes for all other columns.
FRM1006 • FRM1017
230 Installing and Managing QMF for Workstation and QMF for WebSphere
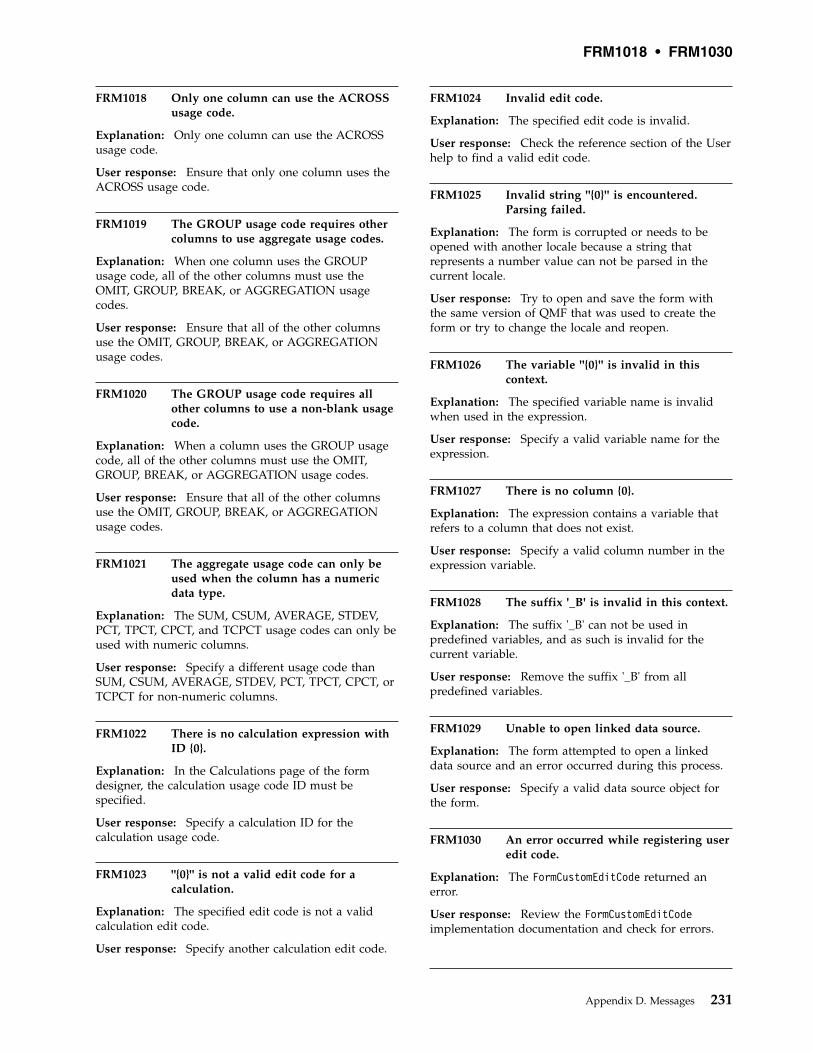
FRM1018 Only one column can use the ACROSSusage code.
Explanation: Only one column can use the ACROSSusage code.
User response: Ensure that only one column uses theACROSS usage code.
FRM1019 The GROUP usage code requires othercolumns to use aggregate usage codes.
Explanation: When one column uses the GROUPusage code, all of the other columns must use theOMIT, GROUP, BREAK, or AGGREGATION usagecodes.
User response: Ensure that all of the other columnsuse the OMIT, GROUP, BREAK, or AGGREGATIONusage codes.
FRM1020 The GROUP usage code requires allother columns to use a non-blank usagecode.
Explanation: When a column uses the GROUP usagecode, all of the other columns must use the OMIT,GROUP, BREAK, or AGGREGATION usage codes.
User response: Ensure that all of the other columnsuse the OMIT, GROUP, BREAK, or AGGREGATIONusage codes.
FRM1021 The aggregate usage code can only beused when the column has a numericdata type.
Explanation: The SUM, CSUM, AVERAGE, STDEV,PCT, TPCT, CPCT, and TCPCT usage codes can only beused with numeric columns.
User response: Specify a different usage code thanSUM, CSUM, AVERAGE, STDEV, PCT, TPCT, CPCT, orTCPCT for non-numeric columns.
FRM1022 There is no calculation expression withID {0}.
Explanation: In the Calculations page of the formdesigner, the calculation usage code ID must bespecified.
User response: Specify a calculation ID for thecalculation usage code.
FRM1023 "{0}" is not a valid edit code for acalculation.
Explanation: The specified edit code is not a validcalculation edit code.
User response: Specify another calculation edit code.
FRM1024 Invalid edit code.
Explanation: The specified edit code is invalid.
User response: Check the reference section of the Userhelp to find a valid edit code.
FRM1025 Invalid string ''{0}'' is encountered.Parsing failed.
Explanation: The form is corrupted or needs to beopened with another locale because a string thatrepresents a number value can not be parsed in thecurrent locale.
User response: Try to open and save the form withthe same version of QMF that was used to create theform or try to change the locale and reopen.
FRM1026 The variable ''{0}'' is invalid in thiscontext.
Explanation: The specified variable name is invalidwhen used in the expression.
User response: Specify a valid variable name for theexpression.
FRM1027 There is no column {0}.
Explanation: The expression contains a variable thatrefers to a column that does not exist.
User response: Specify a valid column number in theexpression variable.
FRM1028 The suffix '_B' is invalid in this context.
Explanation: The suffix '_B' can not be used inpredefined variables, and as such is invalid for thecurrent variable.
User response: Remove the suffix '_B' from allpredefined variables.
FRM1029 Unable to open linked data source.
Explanation: The form attempted to open a linkeddata source and an error occurred during this process.
User response: Specify a valid data source object forthe form.
FRM1030 An error occurred while registering useredit code.
Explanation: The FormCustomEditCode returned anerror.
User response: Review the FormCustomEditCodeimplementation documentation and check for errors.
FRM1018 • FRM1030
Appendix D. Messages 231

FRM1031 The user-defined edit routine classcould not be found. {0}
Explanation: The user implementation classFormCustomEditCode can not be loaded by theClassloader.
User response: Check the className.jar CLASSPATH.
FRM1032 An error occurred while initializinguser-defined edit routine class. {0}
Explanation: An error occurred.
User response: See additional information in thewrapped exception.
GERR00001 Generic driver error has occurred. {0}
Explanation: An internal error in the driver code wasdetected.
User response: Send an error report to the developers.
GERR00002 Generic driver error has occurred. {0},{1}, {2}
Explanation: An internal error in the driver code wasdetected.
User response: Send an error report to the developers.
GERR00003 Generic driver error has occurred. {0},{1}, {2}, {3}
Explanation: An internal error in the driver code wasdetected.
User response: Send an error report to the developers.
GERR00004 Generic driver error has occurred. {0},{1}, {2}, {3}, {4}
Explanation: An internal error in the driver code wasdetected.
User response: Send an error report to the developers.
GERR00005 Generic driver error has occurred. {0},{1}, {2}, {3}, {4}, {5}
Explanation: An internal error in the driver code wasdetected.
User response: Send an error report to the developers.
GERR00006 Generic driver error has occurred. {0},{1}, {2}, {3}, {4}, {5}, {6}
Explanation: An internal error in the driver code wasdetected.
User response: Send an error report to the developers.
GERR00007 Generic driver error has occurred. {0},{1}, {2}, {3}, {4}, {5}, {6}, {7}
Explanation: An internal error in the driver code wasdetected.
User response: Send an error report to the developers.
GERR00008 Generic driver error has occurred. {0},{1}, {2}, {3}, {4}, {5}, {6}, {7}, {8}
Explanation: An internal error in the driver code wasdetected.
User response: Send an error report to the developers.
IXF01002 The LOB column index is invalid.
Explanation: The file contains an invalid index of aLOB column.
User response: The imported IXF file is corrupted orhas an unknown format.
IXF01003 The LOB column length is invalid.
Explanation: The IXF file contains a LOB column thathas an invalid length.
User response: The imported IXF file is corrupted orhas an unknown format.
IXF01004 The end of the file was encounteredprematurely.
Explanation: A premature end of file was encounteredwhile importing data from the IXF file.
User response: The imported IXF file is corrupted orhas and unknown format.
IXF01005 The length of record {0} is invalid.
Explanation: A corrupted record was encounteredwhile importing data from the IXF file.
User response: The imported IXF file is corrupted orhas an unknown format.
IXF01006 An invalid record length wasencountered in record {0}.
Explanation: An invalid record length wasencountered while importing data from the IXF file.
User response: The imported IXF file is corrupted orhas an unknown format.
IXF01007 An invalid name length wasencountered in record {0}.
Explanation: An invalid column name length wasencountered while importing data from the IXF file.
FRM1031 • IXF01007
232 Installing and Managing QMF for Workstation and QMF for WebSphere

User response: The imported IXF file is corrupted orhas an unknown format.
IXF01008 An unrecognized record type wasencountered in record {0}.
Explanation: An unknown record type wasencountered while importing data from the IXF file.
User response: The imported IXF file is corrupted orhas an unknown format.
IXF01009 An invalid value was encountered inrecord {0}.
Explanation: An unexpected data value wasencountered while importing data from the IXF file.
User response: The imported IXF file is corrupted orhas an unknown format.
IXF01010 An unsupported data type wasencountered in record {0}.
Explanation: An unsupported data type wasencountered while importing data from the IXF file.
User response: The imported IXF file is corrupted orhas an unknown format.
IXF01011 An unsupported CCSID wasencountered in record {0}.
Explanation: The IXF file contains character datawhich is encoded using a CCSID that is not supportedby QMF.
User response: Create an IXF file using anotherCCSID to import to QMF.
IXF01012 The column length is invalid.
Explanation: An invalid column name wasencountered while importing data from the IXF file.
User response: The imported IXF file is corrupted orhas an unknown format.
IXF01013 The data record ID in record {0} isnegative.
Explanation: An invalid data identifier wasencountered while importing data from the IXF file.
User response: The imported IXF file is corrupted orhas an unknown format.
IXF01014 The position for a column is negative inrecord {0}.
Explanation: An invalid column position wasencountered while importing data from the IXF file.
User response: The imported IXF file is corrupted orhas an unknown format.
IXF01015 The "IXF" identifier was not found inrecord {0}.
Explanation: The imported IXF file has no “IXF”signature, which is required at the beginning of itscontents.
User response: The imported IXF file is corrupted orhas unknown format.
IXF01016 The version of the IXF file is "{0}",which is not supported.
Explanation: The imported IXF file version is notsupported by QMF.
User response: Check to see if the IXF file is version 0,1 or 2. all others are not supported.
IXF01017 An invalid record count wasencountered in record {0}.
Explanation: An invalid column count wasencountered while importing data from the IXF file.
User response: The imported IXF file is corrupted orhas an unknown format.
IXF01018 IXF file contents are corrupted.
Explanation: The imported IXF file is corrupted.
User response: Check that you are specifying an IXFfile to import.
IXF01019 Data format is not supported in host IXFfiles.
Explanation: An unsupported column type wasencountered while importing data from the IXF file.
User response: The imported IXF file is corrupted orhas an unknown format.
JOB1000 {0}
Explanation: This is a wrapped message.
User response: Resolve the indicated error and tryagain.
JOB1001 Unknown JDF file format.
Explanation: An incorrect job file was selected whileimporting a job file in the old format (.jdf) to the newformat (.jdfx).
User response: Select a correct job file in the oldformat to import.
IXF01008 • JOB1001
Appendix D. Messages 233
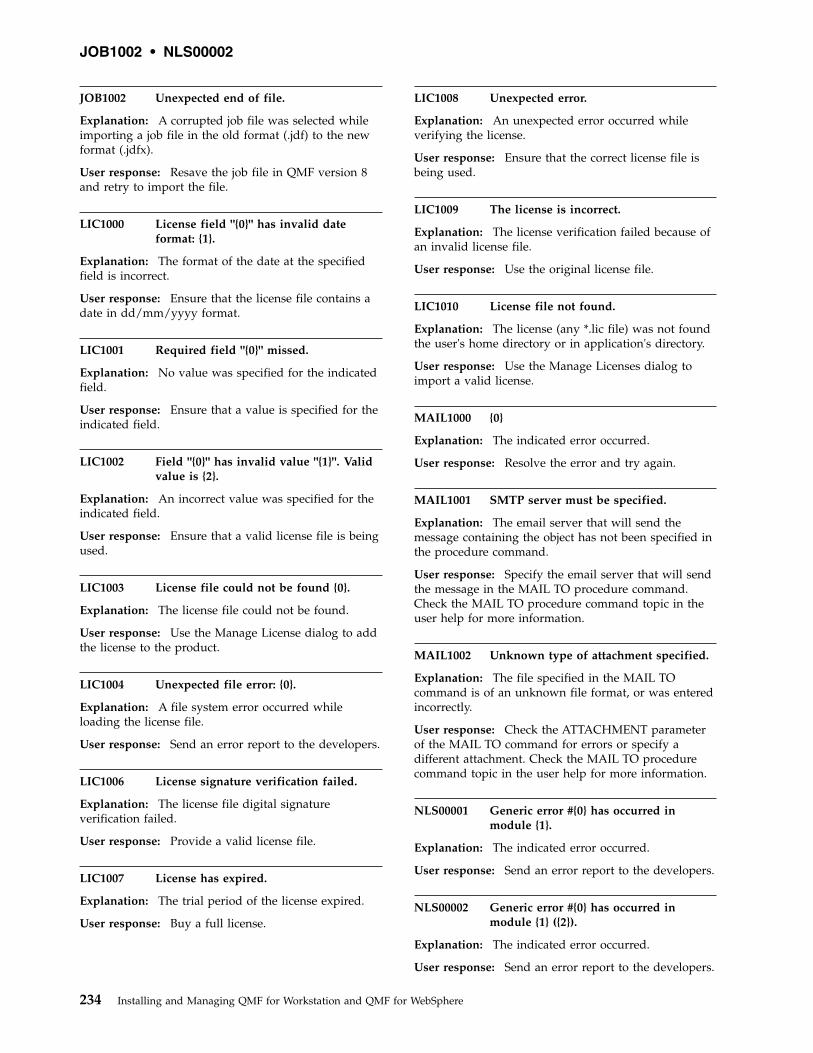
JOB1002 Unexpected end of file.
Explanation: A corrupted job file was selected whileimporting a job file in the old format (.jdf) to the newformat (.jdfx).
User response: Resave the job file in QMF version 8and retry to import the file.
LIC1000 License field "{0}" has invalid dateformat: {1}.
Explanation: The format of the date at the specifiedfield is incorrect.
User response: Ensure that the license file contains adate in dd/mm/yyyy format.
LIC1001 Required field "{0}" missed.
Explanation: No value was specified for the indicatedfield.
User response: Ensure that a value is specified for theindicated field.
LIC1002 Field "{0}" has invalid value "{1}". Validvalue is {2}.
Explanation: An incorrect value was specified for theindicated field.
User response: Ensure that a valid license file is beingused.
LIC1003 License file could not be found {0}.
Explanation: The license file could not be found.
User response: Use the Manage License dialog to addthe license to the product.
LIC1004 Unexpected file error: {0}.
Explanation: A file system error occurred whileloading the license file.
User response: Send an error report to the developers.
LIC1006 License signature verification failed.
Explanation: The license file digital signatureverification failed.
User response: Provide a valid license file.
LIC1007 License has expired.
Explanation: The trial period of the license expired.
User response: Buy a full license.
LIC1008 Unexpected error.
Explanation: An unexpected error occurred whileverifying the license.
User response: Ensure that the correct license file isbeing used.
LIC1009 The license is incorrect.
Explanation: The license verification failed because ofan invalid license file.
User response: Use the original license file.
LIC1010 License file not found.
Explanation: The license (any *.lic file) was not foundthe user's home directory or in application's directory.
User response: Use the Manage Licenses dialog toimport a valid license.
MAIL1000 {0}
Explanation: The indicated error occurred.
User response: Resolve the error and try again.
MAIL1001 SMTP server must be specified.
Explanation: The email server that will send themessage containing the object has not been specified inthe procedure command.
User response: Specify the email server that will sendthe message in the MAIL TO procedure command.Check the MAIL TO procedure command topic in theuser help for more information.
MAIL1002 Unknown type of attachment specified.
Explanation: The file specified in the MAIL TOcommand is of an unknown file format, or was enteredincorrectly.
User response: Check the ATTACHMENT parameterof the MAIL TO command for errors or specify adifferent attachment. Check the MAIL TO procedurecommand topic in the user help for more information.
NLS00001 Generic error #{0} has occurred inmodule {1}.
Explanation: The indicated error occurred.
User response: Send an error report to the developers.
NLS00002 Generic error #{0} has occurred inmodule {1} ({2}).
Explanation: The indicated error occurred.
User response: Send an error report to the developers.
JOB1002 • NLS00002
234 Installing and Managing QMF for Workstation and QMF for WebSphere
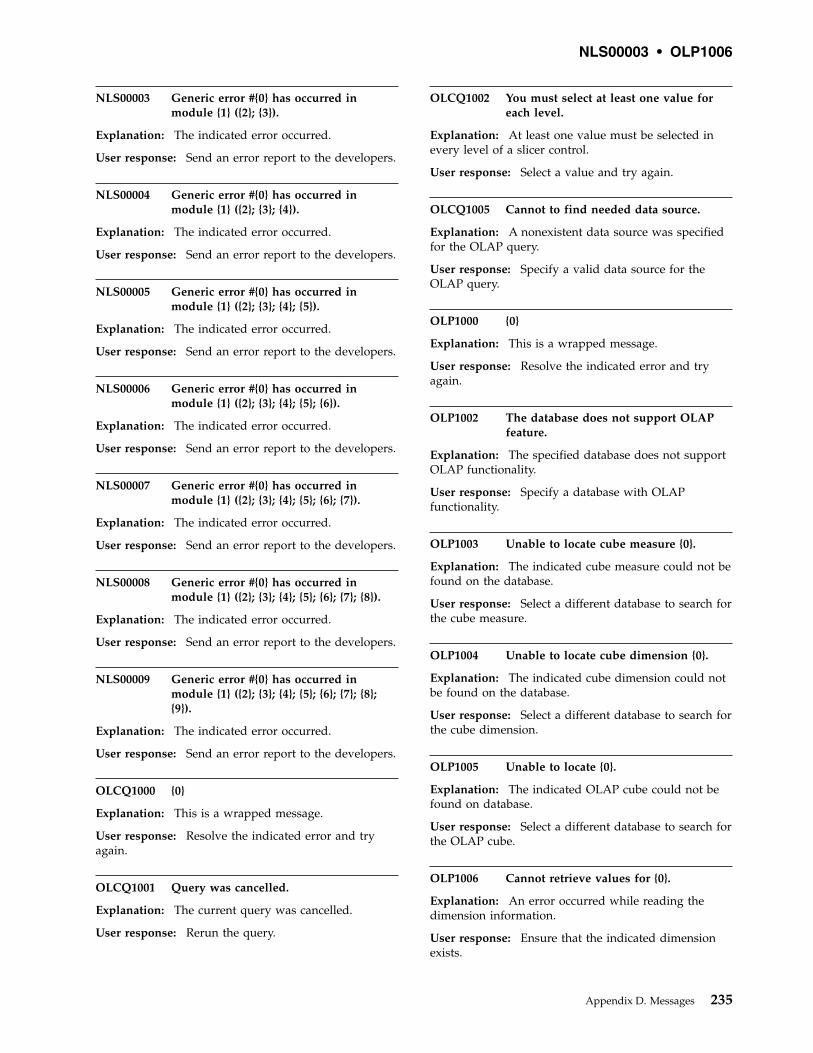
NLS00003 Generic error #{0} has occurred inmodule {1} ({2}; {3}).
Explanation: The indicated error occurred.
User response: Send an error report to the developers.
NLS00004 Generic error #{0} has occurred inmodule {1} ({2}; {3}; {4}).
Explanation: The indicated error occurred.
User response: Send an error report to the developers.
NLS00005 Generic error #{0} has occurred inmodule {1} ({2}; {3}; {4}; {5}).
Explanation: The indicated error occurred.
User response: Send an error report to the developers.
NLS00006 Generic error #{0} has occurred inmodule {1} ({2}; {3}; {4}; {5}; {6}).
Explanation: The indicated error occurred.
User response: Send an error report to the developers.
NLS00007 Generic error #{0} has occurred inmodule {1} ({2}; {3}; {4}; {5}; {6}; {7}).
Explanation: The indicated error occurred.
User response: Send an error report to the developers.
NLS00008 Generic error #{0} has occurred inmodule {1} ({2}; {3}; {4}; {5}; {6}; {7}; {8}).
Explanation: The indicated error occurred.
User response: Send an error report to the developers.
NLS00009 Generic error #{0} has occurred inmodule {1} ({2}; {3}; {4}; {5}; {6}; {7}; {8};{9}).
Explanation: The indicated error occurred.
User response: Send an error report to the developers.
OLCQ1000 {0}
Explanation: This is a wrapped message.
User response: Resolve the indicated error and tryagain.
OLCQ1001 Query was cancelled.
Explanation: The current query was cancelled.
User response: Rerun the query.
OLCQ1002 You must select at least one value foreach level.
Explanation: At least one value must be selected inevery level of a slicer control.
User response: Select a value and try again.
OLCQ1005 Cannot to find needed data source.
Explanation: A nonexistent data source was specifiedfor the OLAP query.
User response: Specify a valid data source for theOLAP query.
OLP1000 {0}
Explanation: This is a wrapped message.
User response: Resolve the indicated error and tryagain.
OLP1002 The database does not support OLAPfeature.
Explanation: The specified database does not supportOLAP functionality.
User response: Specify a database with OLAPfunctionality.
OLP1003 Unable to locate cube measure {0}.
Explanation: The indicated cube measure could not befound on the database.
User response: Select a different database to search forthe cube measure.
OLP1004 Unable to locate cube dimension {0}.
Explanation: The indicated cube dimension could notbe found on the database.
User response: Select a different database to search forthe cube dimension.
OLP1005 Unable to locate {0}.
Explanation: The indicated OLAP cube could not befound on database.
User response: Select a different database to search forthe OLAP cube.
OLP1006 Cannot retrieve values for {0}.
Explanation: An error occurred while reading thedimension information.
User response: Ensure that the indicated dimensionexists.
NLS00003 • OLP1006
Appendix D. Messages 235
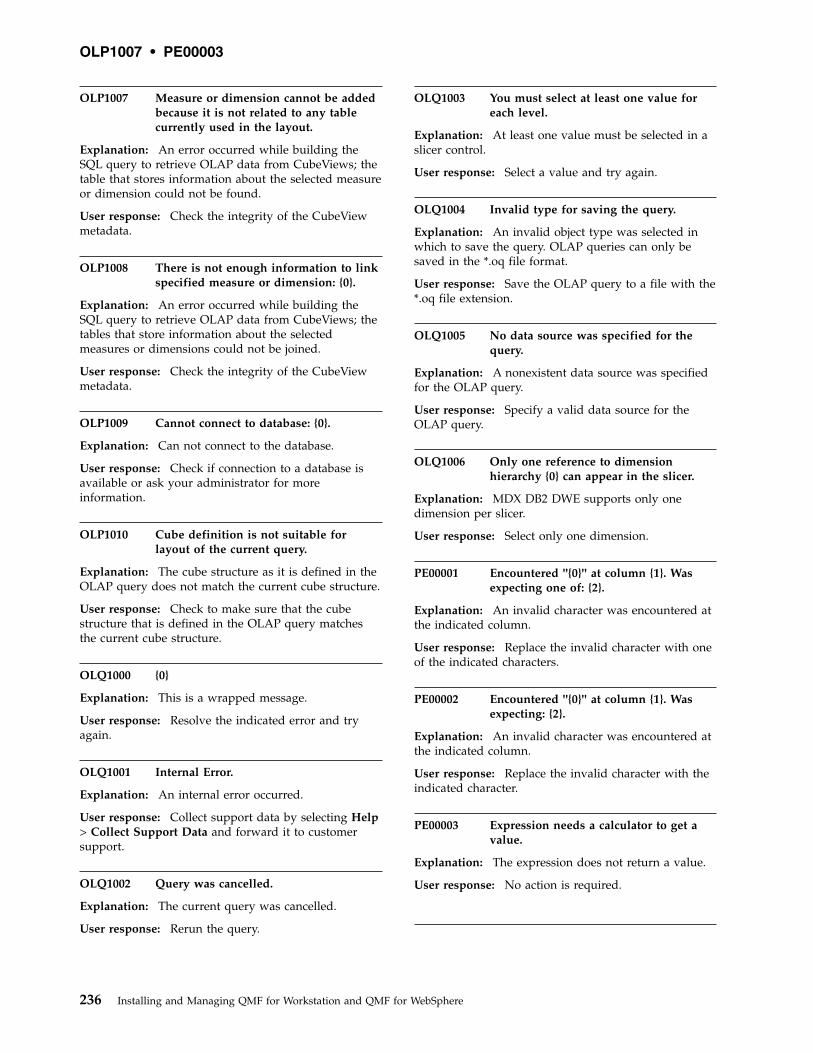
OLP1007 Measure or dimension cannot be addedbecause it is not related to any tablecurrently used in the layout.
Explanation: An error occurred while building theSQL query to retrieve OLAP data from CubeViews; thetable that stores information about the selected measureor dimension could not be found.
User response: Check the integrity of the CubeViewmetadata.
OLP1008 There is not enough information to linkspecified measure or dimension: {0}.
Explanation: An error occurred while building theSQL query to retrieve OLAP data from CubeViews; thetables that store information about the selectedmeasures or dimensions could not be joined.
User response: Check the integrity of the CubeViewmetadata.
OLP1009 Cannot connect to database: {0}.
Explanation: Can not connect to the database.
User response: Check if connection to a database isavailable or ask your administrator for moreinformation.
OLP1010 Cube definition is not suitable forlayout of the current query.
Explanation: The cube structure as it is defined in theOLAP query does not match the current cube structure.
User response: Check to make sure that the cubestructure that is defined in the OLAP query matchesthe current cube structure.
OLQ1000 {0}
Explanation: This is a wrapped message.
User response: Resolve the indicated error and tryagain.
OLQ1001 Internal Error.
Explanation: An internal error occurred.
User response: Collect support data by selecting Help> Collect Support Data and forward it to customersupport.
OLQ1002 Query was cancelled.
Explanation: The current query was cancelled.
User response: Rerun the query.
OLQ1003 You must select at least one value foreach level.
Explanation: At least one value must be selected in aslicer control.
User response: Select a value and try again.
OLQ1004 Invalid type for saving the query.
Explanation: An invalid object type was selected inwhich to save the query. OLAP queries can only besaved in the *.oq file format.
User response: Save the OLAP query to a file with the*.oq file extension.
OLQ1005 No data source was specified for thequery.
Explanation: A nonexistent data source was specifiedfor the OLAP query.
User response: Specify a valid data source for theOLAP query.
OLQ1006 Only one reference to dimensionhierarchy {0} can appear in the slicer.
Explanation: MDX DB2 DWE supports only onedimension per slicer.
User response: Select only one dimension.
PE00001 Encountered ''{0}'' at column {1}. Wasexpecting one of: {2}.
Explanation: An invalid character was encountered atthe indicated column.
User response: Replace the invalid character with oneof the indicated characters.
PE00002 Encountered ''{0}'' at column {1}. Wasexpecting: {2}.
Explanation: An invalid character was encountered atthe indicated column.
User response: Replace the invalid character with theindicated character.
PE00003 Expression needs a calculator to get avalue.
Explanation: The expression does not return a value.
User response: No action is required.
OLP1007 • PE00003
236 Installing and Managing QMF for Workstation and QMF for WebSphere
PE00004 Parse exception occurred.
Explanation: An error occurred while parsing theexpression.
User response: Check the expression syntax for errorsand try again.
PRC1000 An unexpected error occurred whileparsing the command.
Explanation: An internal error occurred.
User response: Collect support data by selecting Help> Collect Support Data and forward it to customersupport.
PRC1001 An error occurred while parsing thecommand: unexpected token "{0}".
Explanation: An unexpected token was encounteredwhile parsing the procedure.
User response: Check the procedure's text for syntaxerrors (using the documentation or Content Assist viaCtrl+Space)
PRC1002 An error occurred while parsing thecommand: unexpected character ''{0}''.
Explanation: An unexpected character wasencountered while parsing the procedure.
User response: Check the procedure's text for syntaxerrors or invalid characters (using the documentation orContent Assist via Ctrl+Space)
PRC1003 The parameter ''{0}'' is invalid in thiscontext.
Explanation: An unsupported parameter token wasencountered while parsing the procedure.
User response: Check the procedure's text for syntaxerrors (using the documentation or Content Assist viaCtrl+Space)
PRC1004 The parameter ''{0}'' cannot be specifiedtwice.
Explanation: The indicated parameter was specifiedtwice in the same procedure command.
User response: Only specify one instance of theindicated parameter.
PRC1005 ''{1}'' is not a valid value for parameter''{0}''.
Explanation: The indicated value is not valid for theindicated parameter.
User response: Specify a valid value for the indicatedparameter. See the Procedure Commands section of the
user help for more information on procedurecommands and their parameters.
PRC1006 You cannot set variable ''{0}''.
Explanation: The indicated variable can not be setmanually.
User response: Specify a valid variable and try again.
PRC1008 An error occurred while parsing thecommand: unexpected end of line.
Explanation: An unexpected end of line wasencountered while parsing the procedure.
User response: Check the procedure's text for syntaxerrors (using the documentation or Content Assist viaCtrl+Space)
PRC1009 An error occurred while parsing thecommand: unrecognized command ''{0}''.
Explanation: The indicated command is not valid.
User response: Check the procedure text for errors orspecify a different command.
PRC1010 Parsing error at lines {0}-{1} (command#{2}). {3}
Explanation: a syntax error was encountered whileparsing procedure.
User response: Check the procedure's text for syntaxerrors (using the documentation or Content Assist viaCtrl+Space)
PRC1011 An error occurred while parsing thecommand: invalid object name ''{0}''.
Explanation: The indicated object name is invalid.
User response: Check the procedure text for errorsand specify a valid object name. See the ProcedureCommands section of the user help for moreinformation.
PRC1012 You must specify object type or objectname.
Explanation: A required object type or name was notspecified.
User response: Specify a valid object type or namewhere needed in the procedure command text. See theProcedure Commands section of the user help for moreinformation.
PE00004 • PRC1012
Appendix D. Messages 237

PRC1013 ''{0}'' is an invalid variable name.
Explanation: The indicated variable name is invalid.
User response: Check the variable name for syntaxerrors or specify another valid variable. Check theProcedure Commands section of the user help for moreinformation.
PRC1014 Close bracket reached before end.
Explanation: An unexpected close bracket wasencountered while parsing the procedure.
User response: Check the procedure's text for syntaxerrors (using the documentation or Content Assist viaCtrl+Space)
PRC2001 An error occurred while retrieving {0}.{1}
Explanation: The indicated error occurred whileretrieving the indicated object.
User response: Resolve the error and rerun theprocedure.
PRC2002 {0} does not exist.
Explanation: The indicated object does not exist.
User response: Specify a valid object in the procedurecommand.
PRC2003 {0} exists but is of the wrong type.
Explanation: The indicated object exists in an openwindow of the editor, but the object type that wasspecified in the procedure command does not matchthe type of the object.
User response: Make sure the object type that isspecified in the procedure command matches the typeof the object in the open window of the editor.
PRC2004 {0} does not exist or is of the wrongtype.
Explanation: There is no object of the specified objecttype open in an open window of the editor, or theobject type is incorrect.
User response: Make sure that the object type that isspecified in the procedure command matches the typeof the object that is in the open window.
PRC2005 The procedure issued a commandagainst a current object, but no currentobject of the correct type exists.
Explanation: The procedure does not specify a specificobject name, only an object type. In this instance, if anobject of this type is open in another window of the
editor, the procedure will run correctly. Since an objectof the type specified is not open in another window,the procedure failed to run.
User response: Make sure an object of the specifiedtype is open in another window, or specify a specificobject name.
PRC2006 {0}
Explanation: This is a wrapped message.
User response: Resolve the indicated error and tryagain.
PRC2007 The CONVERT command can only beissued against queries; it cannot beapplied to {0}.
Explanation: The indicated object can not beconverted using the CONVERT command.
User response: Specify a query to be converted usingthe CONVERT command. For more information, seethe CONVERT topic in the Procedure Commandssection of the user help.
PRC2008 The operation was cancelled.
Explanation: The operation was cancelled by the user.
User response: Rerun the operation.
PRC2011 Saving in {0} format is not supported.
Explanation: The selected format is not supportedwhen exporting an object. Reports may only beexported in TEXT, HTML and PDF formats.
User response: Change the export data format in theprocedure command.
PRC2017 The maximum nesting depth ofprocedures was exceeded.
Explanation: More than 50 nested procedure levels arenot support.
User response: Redesign the procedure to decrease itsdepth.
PRC2018 The specified query did not return aresult set.
Explanation: The SAVE DATA command was issuedagainst a query that does not contain a result set.
User response: Ensure that the query you are trying tosave contains a result set.
PRC1013 • PRC2018
238 Installing and Managing QMF for Workstation and QMF for WebSphere
PRC2020 An error occurred while saving theobject at the server. {0}
Explanation: The indicated error occurred while theobject was being saved at the server.
User response: Resolve the indicated error and rerunthe procedure.
PRC2022 The operation cannot be performedbecause no data is available.
Explanation: The EXPORT DATA command wasissued against an object that does not contain data.
User response: Ensure that the object that you aretrying to export contains data.
PRC2025 The procedure was terminated becauseit recursively invokes itself.
Explanation: The procedure recursively invoked itself.Recursion is not supported in procedures.
User response: Rewrite the procedure and remove therecursion.
PRC2026 An error occurred while running theprocedure. {0}
Explanation: The indicated error occurred while theprocedure was being run.
User response: Resolve the indicated error and rerunthe procedure.
PRC2028 An error occurred while importing the{0} file.
Explanation: An error occurred while the file wasbeing imported.
User response: Ensure that object that is beingimported is of a supported format.
PRC2029 Could not connect to a server {1}: {0}
Explanation: The data source alias that was specifiedin the CONNECT TO command is undefined.
User response: Ensure that the command refers to avalid data source in the repository.
PRC2030 Specified object {0} for import hasincompatible type.
Explanation: The IMPORT or DISPLAY command wasissued against an object with an unsupported type.
User response: Ensure that the object to be importedor displayed is of a valid type.
PRC2031 Specified command, or some of itsparameters unsupported.
Explanation: The procedure contains commands orparameters that are not supported.
User response: Check the procedure's text for syntaxerrors (using the documentation or Content Assist viaCtrl+Space)
PRC2032 Cannot save non-QMF object into QMFCatalog.
Explanation: The specified object is a non-QMF objectand can not be saved into the QMF Catalog.
User response: Specify a different location in whichthe save the object or specify a different object to besaved.
PRC2033 You cannot set the value of {0}.
Explanation: The indicated parameter's value can notbe manually set with the SET GLOBAL command.
User response: Values for some DSQ variables cannotbe set manually (for example DSQAO_CONNECT_ID,DSQAO_NUM_FETCHED, etc). Rewrite the procedureto exclude these variable values.
PRC2035 The printer name ''{0}'' is invalid.
Explanation: The indicated printer name is invalid.
User response: Check the spelling of the printer name,or specify a different printer to use for the PRINTcommand.
PRC2036 You are not authorized to use the tableeditor at this data source.
Explanation: The Enable Table Editing resource limitfor the data source is turned off; you can not openTable Editor of the data source
User response: Ask your administrator to enable thisresource limit.
PRC2037 You are not authorized to edit tables atthis data source.
Explanation: The Enable Table Editing resource limitfor the data source is turned off; you cannot edit valuesin a query's grid cells.
User response: Ask your administrator to enable thisresource limit.
PRC2020 • PRC2037
Appendix D. Messages 239
PROC1000 REXX procedure references cannot bedetermined.
Explanation: References for the procedure cannot bebuilt for REXX procedures.
User response: You can view references at theRepository or Workspaces views for genericprocedures only.
PROC1001 Some substitution variables are notdefined.
Explanation: Some of the substitution variables of theprocedure are not defined.
User response: Ensure that all of the substitutionvariables are defined for the procedure, or run thisprocedure without the /batch parameter in thecommand line. In this case QMF will ask for all of thenecessary variables values.
QEL00001 You are not allowed to run queriesreturning LOB data.
Explanation: You are not allowed to run queries thatcontain large object data.
User response: Check your LOB Options resourcelimits by selecting Resource Limits from the Viewmenu to see your specific allowances or ask youradministrator for more information.
QEL00002 The Maximum Rows to Fetch limit hasbeen exceeded. {0} rows were retrievedso far.
Explanation: The Maximum Rows to Fetch limit hasbeen reached. The indicated number of rows have beenretrieved so far.
User response: Check your Maximum Rows to Fetchresource limit by selecting Resource Limits from theView menu to see your specific allowances or ask youradministrator for more information.
QEL00003 The Maximum Bytes to Fetch limit hasbeen exceeded. {0} bytes were retrievedso far.
Explanation: The Maximum Bytes to Fetch limit hasbeen reached. The indicated number of bytes have beenretrieved so far.
User response: Check your Maximum Bytes to Fetchresource limit by selecting Resource Limits from theView menu to see your specific allowances or ask youradministrator for more information.
QEL00004 The length of a LOB column exceeds themaximum allowable length.
Explanation: The length of a LOB column in the queryresults exceeds the maximum allowable length.
User response: Check your Maximum LOB columnsize by selecting Resource Limits from the View menuto see your specific allowances or ask youradministrator for more information.
QEL00005 You are not allowed to use the ''{0}'' SQLverb.
Explanation: You are not allowed to use the indicatedSQL verb.
User response: Check your SQL Verbs limits byselecting Resource Limits from the View menu to seeyour specific allowances or ask your administrator formore information.
QEL00006 You are not allowed to save data todatabase.
Explanation: You are not allowed to save data to thedatabase.
User response: Check you Save Data resource limitsby selecting Resource Limits from the View menu tosee your specific allowances or ask your administratorfor more information.
QEN00001 Query was cancelled.
Explanation: The active query was cancelled.
User response: Rerun the query.
QEN00003 Unexpected token: {0}
Explanation: An unexpected token was encounteredwhile parsing the query that calls the stored procedure.
User response: Check the query's syntax for errors.
QEN00004 Unexpected token: {0} is expected but {1}was found.
Explanation: An unexpected closed bracket wasencountered while parsing the query that calls thestored procedure.
User response: Check the query's syntax for errors.
QEN00005 Unexpected end of statement.
Explanation: An unexpected end of statement wasencountered while parsing the query that calls thestored procedure.
User response: Check the query's syntax for errors.
PROC1000 • QEN00005
240 Installing and Managing QMF for Workstation and QMF for WebSphere
QEN00006 Expression {0} is not a stored procedure.
Explanation: An internal error occurred.
User response: Collect support data by selecting Help> Collect Support Data and forward it to customersupport.
QEN00007 End of statement is expected but {0} wasfound
Explanation: Tokens were encountered after the end ofstatement while parsing the query that calls the storedprocedure.
User response: Check the query's syntax for errors.
QEN00008 Unsupported parameter data type: {0}
Explanation: An unsupported parameter wasencountered while parsing the query that calls thestored procedure.
User response: Check the query's syntax for errors.
QEN00009 {0} is invalid value for this type: {1}
Explanation: When prompted for a value for a storedprocedure parameter, the user entered a value that isnot valid for that parameter's type.
User response: Specify a valid value for theparameter.
QMF1004 You are not authorized to print objectsfrom ''{0}'' data source.
Explanation: The indicated data source name has arestriction on printing for the current user.
User response: Contact your administrator to checkyour specific permissions for printing.
QMF1005 QMF Catalog table structure is obsolete.Catalog tables must be updated.
Explanation: The indicated an error occurred becausethe QMF Catalog has an obsolete structure.
User response: Contact your administrator to upgradethe QMF Catalog.
QMF1006 You are not authorized to save data tofiles from ''{0}'' data source.
Explanation: The indicated data source name has arestriction on saving data for the current user.
User response: Contact your administrator to checkyour specific permissions for saving data.
QRL00001 You are not authorized to access thisdata source in user interface mode.
Explanation: You are not authorized to access thisdata source in user interface mode.
User response: Check your Options limits by selectingResource Limits from the View menu to see yourspecific allowances or ask your administrator for moreinformation.
QRL00002 You are not authorized to access thisdata source in automation mode.
Explanation: You are not authorized to access thisdata source in automation mode.
User response: Check your Options limits by selectingResource Limits from the View menu to see yourspecific allowances or ask your administrator for moreinformation.
QRL00003 You are not authorized to run unsavedqueries.
Explanation: You are not authorized to run unsavedqueries.
User response: Check your Options limits by selectingResource Limits from the View menu to see yourspecific allowances or ask your administrator for moreinformation.
QRL00004 You are not authorized to save data fromthis data source to a file.
Explanation: You are not authorized to save data fromthis data source to a file.
User response: Check your Save Data limits byselecting Resource Limits from the View menu to seeyour specific allowances or ask your administrator formore information.
QRL00005 You are not authorized to save data fromthis data source to the database.
Explanation: You are not authorized to save data fromthis data source to the database.
User response: Check your Save Data limits byselecting Resource Limits from the View menu to seeyour specific allowances or ask your administrator formore information.
QRL00006 You are not authorized to retrieve LOBdata.
Explanation: You are not authorized to retrieve LOBdata.
User response: Check your LOB Options limits byselecting Resource Limits from the View menu to see
QEN00006 • QRL00006
Appendix D. Messages 241
your specific allowances or ask your administrator formore information.
QRL00008 No resource group for user {0} wasfound.
Explanation: No resource group for the indicated userwas found.
User response: Specify a valid resource group for theuser.
QRL00009 The operation cannot be performedbecause the processing of LOB data isdisabled.
Explanation: The operation cannot be performedbecause the processing of LOB data is disabled.
User response: Check you LOB Options limits byselecting Resource Limits from the View menu to seeyour specific allowances or ask your administrator formore information.
QRY0999 {0}
Explanation: This is a wrapped message.
User response: Resolve the indicated error and tryagain.
QRY1001 Query was cancelled.
Explanation: The query was cancelled.
User response: Rerun the query.
QRY1002 An invalid header record wasencountered.
Explanation: The query was loaded with errors.
User response: Try to reload the query; otherwise thequery is corrupted.
QRY1003 No data source was specified for thequery.
Explanation: No data source was specified for thequery.
User response: Specify a data source for the query.
QRY1004 An unexpected ''R'' record wasencountered: {0}.
Explanation: An error was encountered while loadinga type R record from the prompted query file duringstorage of info in the prompted query structure.
User response: Collect support data by selecting Help> Collect Support Data and forward it to customersupport.
QRY1005 An unexpected ''T'' record wasencountered: {0}.
Explanation: An error was encountered while loadinga type Trecord from the prompted query file duringstorage of info in the prompted query structure.
User response: Collect support data by selecting Help> Collect Support Data and forward it to customersupport.
QRY1006 An invalid ''T'' record was encountered:{0}.
Explanation: An error was encountered while loadinga type T record from the prompted query file duringstorage of info in the prompted query structure.
User response: Collect support data by selecting Help> Collect Support Data and forward it to customersupport.
QRY1007 A ''T'' record with invalid columninformation was encountered: {0}.
Explanation: An error was encountered while loadinga type T record from the prompted query file duringstorage of info in the prompted query structure.
User response: Collect support data by selecting Help> Collect Support Data and forward it to customersupport.
QRY1008 An unrecognized table type wasencountered: {0}.
Explanation: An error was encountered while loadinga record from the prompted query file during storageof info in the prompted query structure.
User response: Collect support data by selecting Help> Collect Support Data and forward it to customersupport.
QRY1009 An invalid value in an ''R'' record fortable 1110 was encountered: {0}.
Explanation: An error was encountered while loadinga type R record from the prompted query file duringstorage of info in the prompted query structure.
User response: Collect support data by selecting Help> Collect Support Data and forward it to customersupport.
QRY1010 An invalid value in an ''R'' record fortable 1150 was encountered: {0}.
Explanation: An error was encountered while loadinga type R record from the prompted query file duringstorage of info in the prompted query structure.
User response: Collect support data by selecting Help
QRL00008 • QRY1010
242 Installing and Managing QMF for Workstation and QMF for WebSphere
> Collect Support Data and forward it to customersupport.
QRY1011 An invalid value in an ''R'' record fortable 1210 was encountered: {0}.
Explanation: An error was encountered while loadinga type R record from the prompted query file duringstorage of info in the prompted query structure.
User response: Collect support data by selecting Help> Collect Support Data and forward it to customersupport.
QRY1012 An invalid value in an ''R'' record fortable 1310 was encountered: {0}.
Explanation: An error was encountered while loadinga type R record from the prompted query file duringstorage of info in the prompted query structure.
User response: Collect support data by selecting Help> Collect Support Data and forward it to customersupport.
QRY1013 An invalid value in an ''R'' record fortable 1410 was encountered: {0}.
Explanation: An error was encountered while loadinga type R record from the prompted query file duringstorage of info in the prompted query structure.
User response: Collect support data by selecting Help> Collect Support Data and forward it to customersupport.
QRY1014 An out of sequence 'R' record for table1310 was encountered.
Explanation: An error was encountered while loadinga type R record from the prompted query file duringstorage of info in the prompted query structure.
User response: Collect support data by selecting Help> Collect Support Data and forward it to customersupport.
QRY1015 An invalid ''V'' record was encountered:{0}.
Explanation: An error was encountered while loadinga type V record from the prompted query file duringstorage of info in the prompted query structure.
User response: Collect support data by selecting Help> Collect Support Data and forward it to customersupport.
QRY1016 There must be less than 16 tables inPrompted Query.
Explanation: There must be less than sixteen tablescalled from the Prompted Query editor.
User response: Ensure that there are less than sixteentables called from the Prompted Query editor andrerun the query.
QRY1017 The same correlation ID wasencountered for two or more tables.
Explanation: The PqTable object for the specifiedcorrelation ID already exists.
User response: Select another table for the PromptedQuery editor.
QRY1018 An invalid table correlation ID wasencountered.
Explanation: An error was encountered whileretrieving a valid correlation ID.
User response: Try to add the query to the PromptedQuery editor again, or collect support data by selectingHelp > Collect Support Data and forward it tocustomer support.
QRY1019 A column on which to join tables is inmore than one of the tables in thequery.
Explanation: A join column can only exist in one tablewhen multiple tables are joined in a single query.
User response: Ensure that any join columns in thequery exist in only one table.
QRY1020 A column on which to join tables is notin any of the tables in the query.
Explanation: A specified join column is not present inany of the tables in the query.
User response: Check the join column name for errors,or specify a different join column.
QRY1021 Type of join columns for joined tablesmismatch.
Explanation: A columns that join two or more tablesmust all be of the same column type.
User response: Ensure that all of the columns thatmake up a single join are of the same column type.
QRY1011 • QRY1021
Appendix D. Messages 243
QRY1022 The expression contains a syntax error:{0}
Explanation: The indicated expression contains asyntax error.
User response: Correct the syntax error and rerun thequery.
QRY1023 An invalid connector for a rowcondition was encountered.
Explanation: An invalid connector for a row conditionwas encountered.
User response: Check all row conditions for errorsand rerun the query.
QRY1024 An invalid expression type in a rowcondition was encountered.
Explanation: An invalid expression type in a rowcondition was encountered.
User response: Check all expression types in the rowconditions for errors and rerun the query.
QRY1025 An invalid operator in a row conditionwas encountered.
Explanation: An invalid operator in a row conditionwas encountered.
User response: Check all operators in the rowconditions for errors and rerun the query.
QRY1026 The selected relational operator is notvalid for numeric data.
Explanation: An invalid operator in a row conditionwas encountered for numeric data.
User response: Check all of the operators in the rowconditions for errors and rerun the query.
QRY1027 An invalid sort direction wasencountered.
Explanation: An invalid sort direction wasencountered. Valid directions are Ascending orDescending.
User response: Check all instances where sortdirections are applied and change them to eitherascending or descending.
QRY1028 The prompted query format is an earlierversion, and contains join conditionsthat cannot be migrated to the currentversion. These join conditions havebeen deleted.
Explanation: A join condition can only appear with
the higher of the two tables involved in the join. Also, atable cannot be joined with a preceding table if there isa third table between them with no join conditions.
User response: Reordered elements of the array ofjoins to match the current order of the tables.
QRY1029 The table {0} does not exist.
Explanation: The indicated table is called in the SQLcode, but does not exist in the data source.
User response: Check the table name for errors, orenter a different table to be called.
QRY1030 The prompted query cannot be savedbecause a table name exceeds themaximum length allowed in theprompted query export format.
Explanation: The prompted query cannot be savedbecause a table name exceeds the maximum lengthallowed in the prompted query export format.
User response: Decrease the length of the table name.
QRY1031 The prompted query cannot be savedbecause a column name used in a joincondition exceeds the maximum lengthallowed in the prompted query exportformat.
Explanation: The prompted query cannot be savedbecause a column name used in a join conditionexceeds the maximum length allowed in the promptedquery export format.
User response: Decrease the length of the join columnname.
QRY1032 The prompted query cannot be savedbecause a column expression exceedsthe maximum length allowed in theprompted query export format.
Explanation: The prompted query cannot be savedbecause a column expression exceeds the maximumlength allowed in the prompted query export format.
User response: Decrease the length of the columnexpression name.
QRY1033 The prompted query cannot be savedbecause an expression in a rowcondition exceeds the maximum lengthallowed in the prompted query exportformat.
Explanation: The prompted query cannot be savedbecause an expression in a row condition exceeds themaximum length allowed in the prompted queryexport format.
QRY1022 • QRY1033
244 Installing and Managing QMF for Workstation and QMF for WebSphere
User response: Decrease the length of the rowcondition.
QRY1034 An invalid record was encountered.
Explanation: An internal error occurred.
User response: Collect support data by selecting Help> Collect Support Data and forward it to customersupport.
QRY1035 Only a SELECT query can be shown inthe prompted view.
Explanation: Only a SELECT query can be shown inthe Prompted Query editor.
User response: Make sure that the specified querycontains a SELECT statement.
QRY1036 Only simple SELECT statements aresupported.
Explanation: Only simple SELECT statements aresupported.
User response: Ensure that the specified query onlycontains simple SELECT statements.
QRY1037 Unrecognized table reference.
Explanation: An error occurred while parsing the SQLtext to construct the prompted query.
User response: Check the SQL text for errors and tryagain.
QRY1038 You cannot view a query that hassubselects in the prompted view.
Explanation: Subselects are not supported for queriesthat are viewed in the Prompted Query editor.
User response: Ensure that specified query does notcontain subselects if it is to be viewed in the PromptedQuery editor.
QRY1039 Table locator references are notsupported.
Explanation: An error occurred while parsing the SQLtext to construct the prompted query.
User response: Check the SQL text for errors and tryagain.
QRY1040 Table functions are not supported.
Explanation: An error occurred while parsing the SQLtext to construct the prompted query.
User response: Check the SQL text for errors and tryagain.
QRY1041 Only AND conditions are supported forjoins in the prompted view.
Explanation: Only AND conditions are supported forjoins in queries that are viewed in the Prompted Queryeditor.
User response: Ensure that the specified query onlycontains AND conditions for joins if it is to be viewedin the Prompted Query editor.
QRY1042 Quantified predicates are not supported.
Explanation: An error occurred while parsing the SQLtext to construct the prompted query.
User response: Check the SQL text for errors and tryagain.
QRY1043 'Exists' predicates are not supported.
Explanation: An error occurred while parsing the SQLtext to construct the prompted query.
User response: Check the SQL text for errors and tryagain.
QRY1044 Only simple LIKE statements aresupported.
Explanation: Only simple LIKE statements aresupported.
User response: Ensure that the specified query onlycontains simple LIKE statements.
QRY1045 Only simple row conditions aresupported.
Explanation: Only simple row conditions aresupported.
User response: Ensure that the specified query onlycontains simple row conditions.
QRY1046 Expression cannot be empty.
Explanation: An error occurred while constructing thequery.
User response: Check the query's syntax for errorsand try again.
QRY1047 Invalid type for saving the query.
Explanation: The type that was set for the query isinvalid.
User response: Specify a valid type for the query orcollect support data by selecting Help > CollectSupport Data and forward it to customer support.
QRY1034 • QRY1047
Appendix D. Messages 245
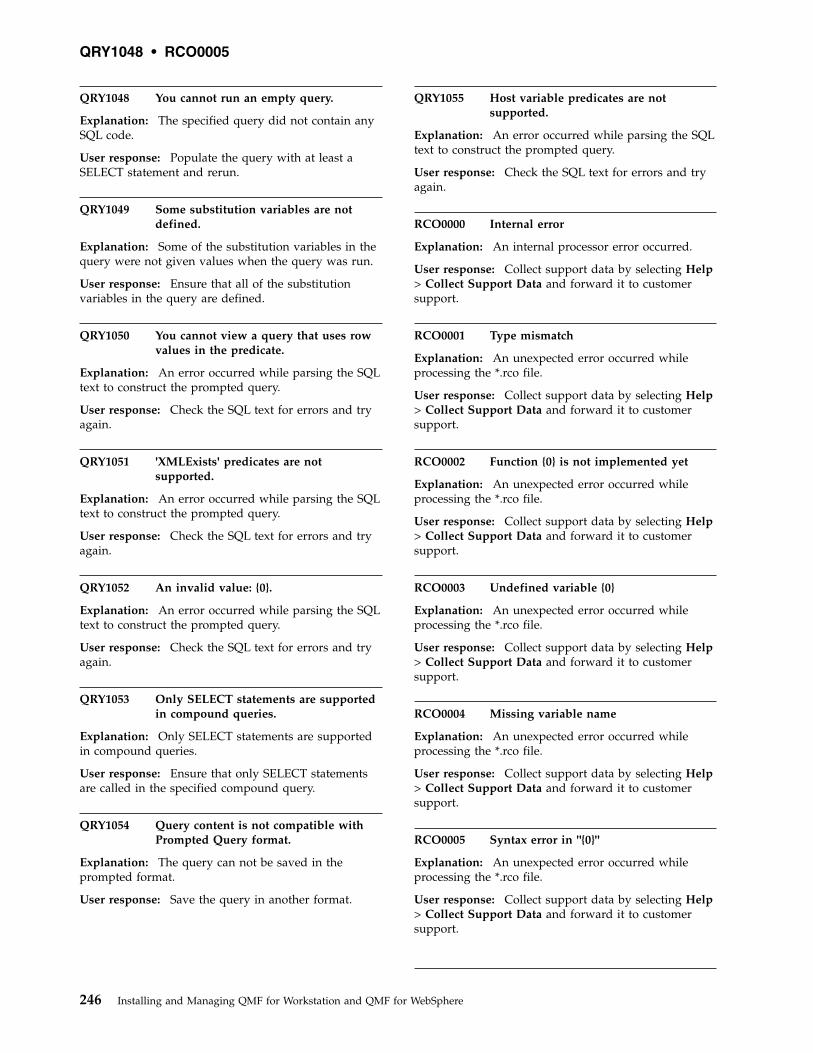
QRY1048 You cannot run an empty query.
Explanation: The specified query did not contain anySQL code.
User response: Populate the query with at least aSELECT statement and rerun.
QRY1049 Some substitution variables are notdefined.
Explanation: Some of the substitution variables in thequery were not given values when the query was run.
User response: Ensure that all of the substitutionvariables in the query are defined.
QRY1050 You cannot view a query that uses rowvalues in the predicate.
Explanation: An error occurred while parsing the SQLtext to construct the prompted query.
User response: Check the SQL text for errors and tryagain.
QRY1051 'XMLExists' predicates are notsupported.
Explanation: An error occurred while parsing the SQLtext to construct the prompted query.
User response: Check the SQL text for errors and tryagain.
QRY1052 An invalid value: {0}.
Explanation: An error occurred while parsing the SQLtext to construct the prompted query.
User response: Check the SQL text for errors and tryagain.
QRY1053 Only SELECT statements are supportedin compound queries.
Explanation: Only SELECT statements are supportedin compound queries.
User response: Ensure that only SELECT statementsare called in the specified compound query.
QRY1054 Query content is not compatible withPrompted Query format.
Explanation: The query can not be saved in theprompted format.
User response: Save the query in another format.
QRY1055 Host variable predicates are notsupported.
Explanation: An error occurred while parsing the SQLtext to construct the prompted query.
User response: Check the SQL text for errors and tryagain.
RCO0000 Internal error
Explanation: An internal processor error occurred.
User response: Collect support data by selecting Help> Collect Support Data and forward it to customersupport.
RCO0001 Type mismatch
Explanation: An unexpected error occurred whileprocessing the *.rco file.
User response: Collect support data by selecting Help> Collect Support Data and forward it to customersupport.
RCO0002 Function {0} is not implemented yet
Explanation: An unexpected error occurred whileprocessing the *.rco file.
User response: Collect support data by selecting Help> Collect Support Data and forward it to customersupport.
RCO0003 Undefined variable {0}
Explanation: An unexpected error occurred whileprocessing the *.rco file.
User response: Collect support data by selecting Help> Collect Support Data and forward it to customersupport.
RCO0004 Missing variable name
Explanation: An unexpected error occurred whileprocessing the *.rco file.
User response: Collect support data by selecting Help> Collect Support Data and forward it to customersupport.
RCO0005 Syntax error in "{0}"
Explanation: An unexpected error occurred whileprocessing the *.rco file.
User response: Collect support data by selecting Help> Collect Support Data and forward it to customersupport.
QRY1048 • RCO0005
246 Installing and Managing QMF for Workstation and QMF for WebSphere
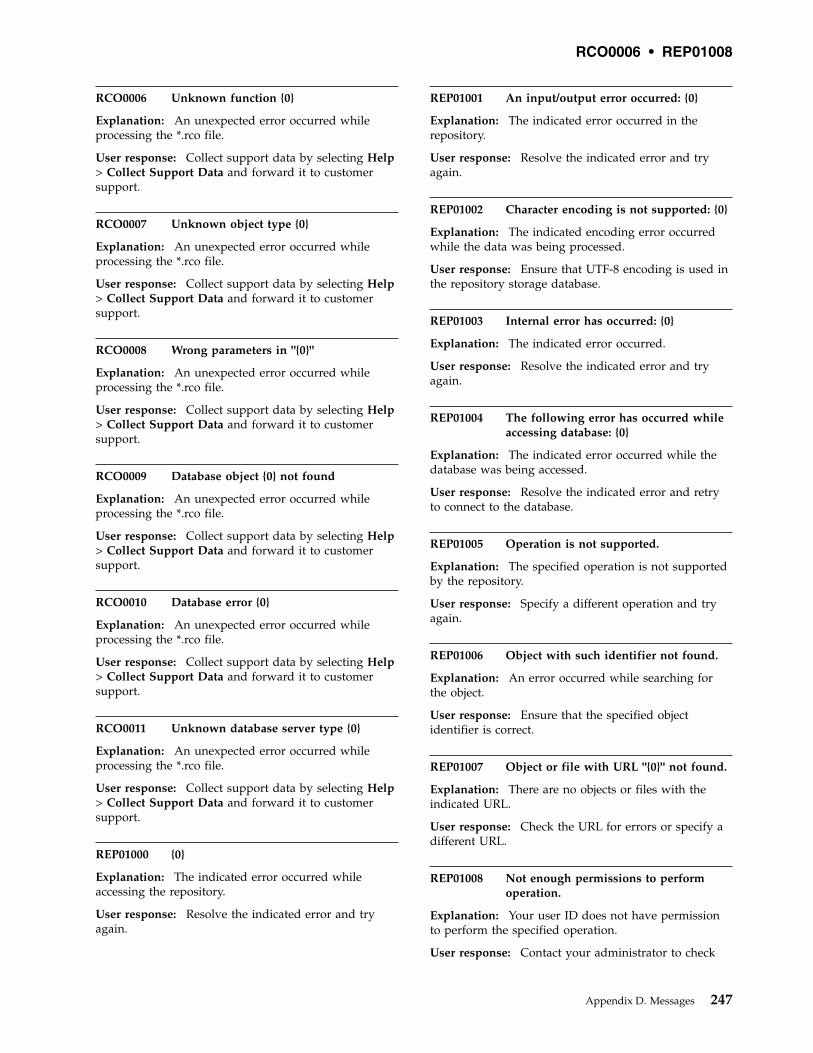
RCO0006 Unknown function {0}
Explanation: An unexpected error occurred whileprocessing the *.rco file.
User response: Collect support data by selecting Help> Collect Support Data and forward it to customersupport.
RCO0007 Unknown object type {0}
Explanation: An unexpected error occurred whileprocessing the *.rco file.
User response: Collect support data by selecting Help> Collect Support Data and forward it to customersupport.
RCO0008 Wrong parameters in "{0}"
Explanation: An unexpected error occurred whileprocessing the *.rco file.
User response: Collect support data by selecting Help> Collect Support Data and forward it to customersupport.
RCO0009 Database object {0} not found
Explanation: An unexpected error occurred whileprocessing the *.rco file.
User response: Collect support data by selecting Help> Collect Support Data and forward it to customersupport.
RCO0010 Database error {0}
Explanation: An unexpected error occurred whileprocessing the *.rco file.
User response: Collect support data by selecting Help> Collect Support Data and forward it to customersupport.
RCO0011 Unknown database server type {0}
Explanation: An unexpected error occurred whileprocessing the *.rco file.
User response: Collect support data by selecting Help> Collect Support Data and forward it to customersupport.
REP01000 {0}
Explanation: The indicated error occurred whileaccessing the repository.
User response: Resolve the indicated error and tryagain.
REP01001 An input/output error occurred: {0}
Explanation: The indicated error occurred in therepository.
User response: Resolve the indicated error and tryagain.
REP01002 Character encoding is not supported: {0}
Explanation: The indicated encoding error occurredwhile the data was being processed.
User response: Ensure that UTF-8 encoding is used inthe repository storage database.
REP01003 Internal error has occurred: {0}
Explanation: The indicated error occurred.
User response: Resolve the indicated error and tryagain.
REP01004 The following error has occurred whileaccessing database: {0}
Explanation: The indicated error occurred while thedatabase was being accessed.
User response: Resolve the indicated error and retryto connect to the database.
REP01005 Operation is not supported.
Explanation: The specified operation is not supportedby the repository.
User response: Specify a different operation and tryagain.
REP01006 Object with such identifier not found.
Explanation: An error occurred while searching forthe object.
User response: Ensure that the specified objectidentifier is correct.
REP01007 Object or file with URL "{0}" not found.
Explanation: There are no objects or files with theindicated URL.
User response: Check the URL for errors or specify adifferent URL.
REP01008 Not enough permissions to performoperation.
Explanation: Your user ID does not have permissionto perform the specified operation.
User response: Contact your administrator to check
RCO0006 • REP01008
Appendix D. Messages 247
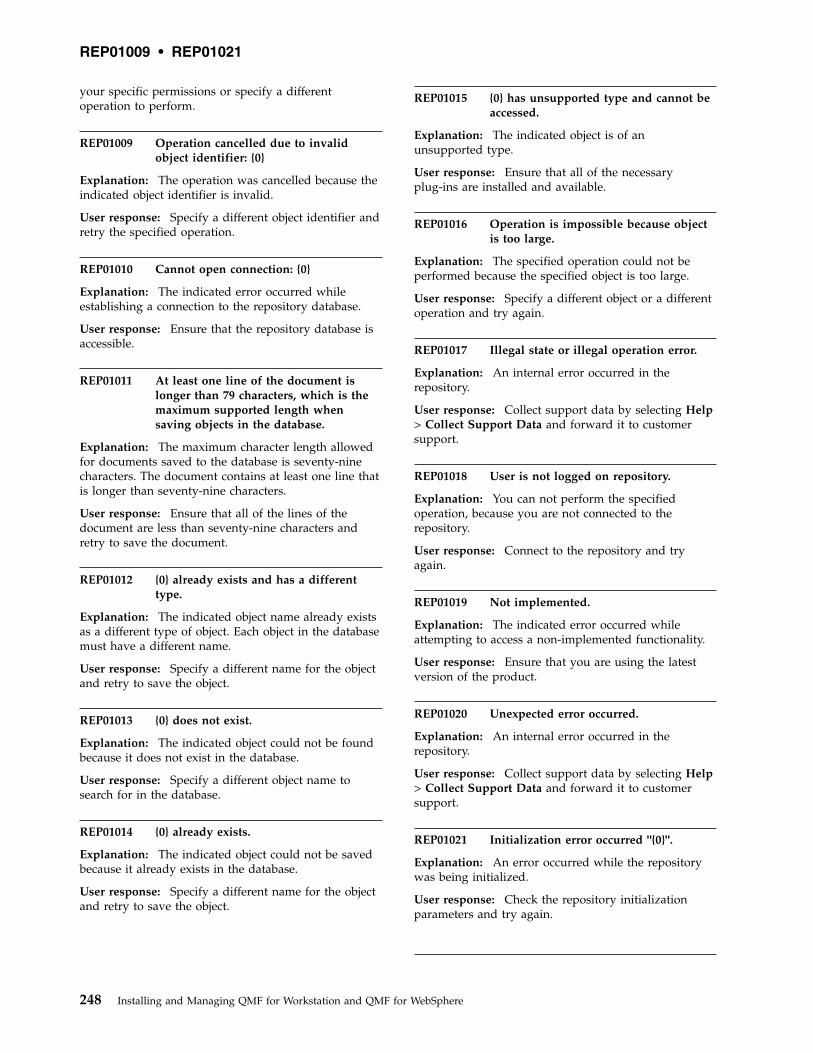
your specific permissions or specify a differentoperation to perform.
REP01009 Operation cancelled due to invalidobject identifier: {0}
Explanation: The operation was cancelled because theindicated object identifier is invalid.
User response: Specify a different object identifier andretry the specified operation.
REP01010 Cannot open connection: {0}
Explanation: The indicated error occurred whileestablishing a connection to the repository database.
User response: Ensure that the repository database isaccessible.
REP01011 At least one line of the document islonger than 79 characters, which is themaximum supported length whensaving objects in the database.
Explanation: The maximum character length allowedfor documents saved to the database is seventy-ninecharacters. The document contains at least one line thatis longer than seventy-nine characters.
User response: Ensure that all of the lines of thedocument are less than seventy-nine characters andretry to save the document.
REP01012 {0} already exists and has a differenttype.
Explanation: The indicated object name already existsas a different type of object. Each object in the databasemust have a different name.
User response: Specify a different name for the objectand retry to save the object.
REP01013 {0} does not exist.
Explanation: The indicated object could not be foundbecause it does not exist in the database.
User response: Specify a different object name tosearch for in the database.
REP01014 {0} already exists.
Explanation: The indicated object could not be savedbecause it already exists in the database.
User response: Specify a different name for the objectand retry to save the object.
REP01015 {0} has unsupported type and cannot beaccessed.
Explanation: The indicated object is of anunsupported type.
User response: Ensure that all of the necessaryplug-ins are installed and available.
REP01016 Operation is impossible because objectis too large.
Explanation: The specified operation could not beperformed because the specified object is too large.
User response: Specify a different object or a differentoperation and try again.
REP01017 Illegal state or illegal operation error.
Explanation: An internal error occurred in therepository.
User response: Collect support data by selecting Help> Collect Support Data and forward it to customersupport.
REP01018 User is not logged on repository.
Explanation: You can not perform the specifiedoperation, because you are not connected to therepository.
User response: Connect to the repository and tryagain.
REP01019 Not implemented.
Explanation: The indicated error occurred whileattempting to access a non-implemented functionality.
User response: Ensure that you are using the latestversion of the product.
REP01020 Unexpected error occurred.
Explanation: An internal error occurred in therepository.
User response: Collect support data by selecting Help> Collect Support Data and forward it to customersupport.
REP01021 Initialization error occurred "{0}".
Explanation: An error occurred while the repositorywas being initialized.
User response: Check the repository initializationparameters and try again.
REP01009 • REP01021
248 Installing and Managing QMF for Workstation and QMF for WebSphere
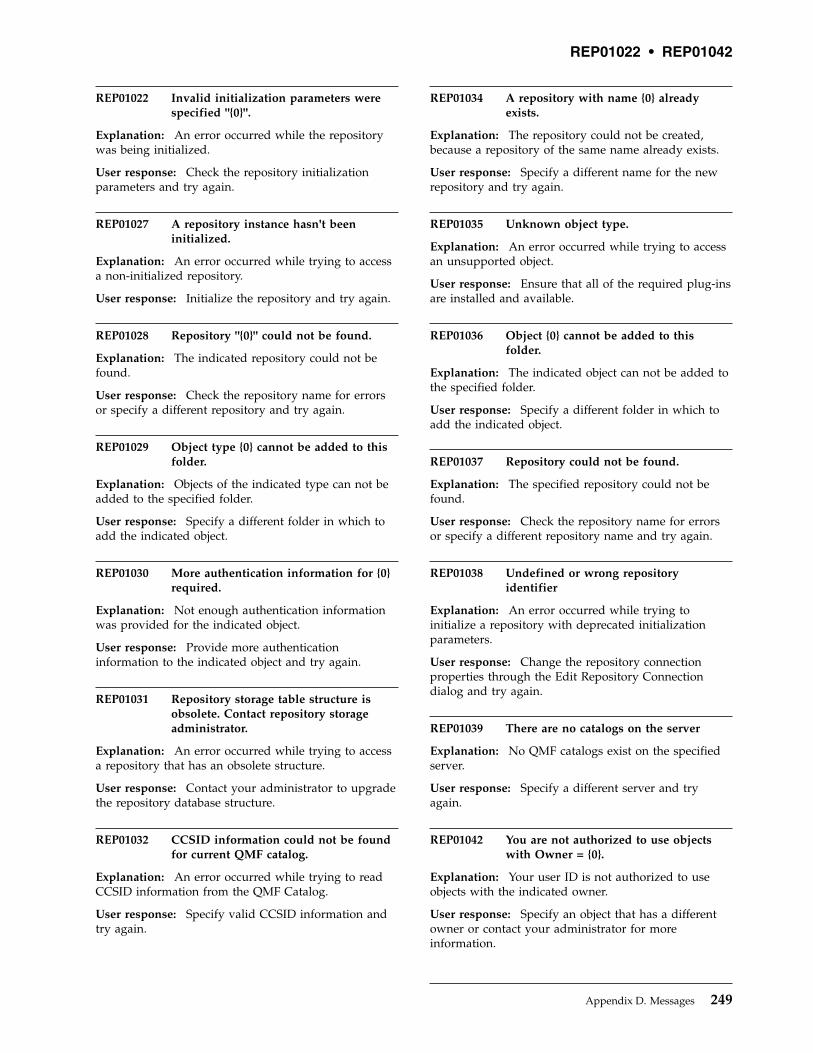
REP01022 Invalid initialization parameters werespecified "{0}".
Explanation: An error occurred while the repositorywas being initialized.
User response: Check the repository initializationparameters and try again.
REP01027 A repository instance hasn't beeninitialized.
Explanation: An error occurred while trying to accessa non-initialized repository.
User response: Initialize the repository and try again.
REP01028 Repository "{0}" could not be found.
Explanation: The indicated repository could not befound.
User response: Check the repository name for errorsor specify a different repository and try again.
REP01029 Object type {0} cannot be added to thisfolder.
Explanation: Objects of the indicated type can not beadded to the specified folder.
User response: Specify a different folder in which toadd the indicated object.
REP01030 More authentication information for {0}required.
Explanation: Not enough authentication informationwas provided for the indicated object.
User response: Provide more authenticationinformation to the indicated object and try again.
REP01031 Repository storage table structure isobsolete. Contact repository storageadministrator.
Explanation: An error occurred while trying to accessa repository that has an obsolete structure.
User response: Contact your administrator to upgradethe repository database structure.
REP01032 CCSID information could not be foundfor current QMF catalog.
Explanation: An error occurred while trying to readCCSID information from the QMF Catalog.
User response: Specify valid CCSID information andtry again.
REP01034 A repository with name {0} alreadyexists.
Explanation: The repository could not be created,because a repository of the same name already exists.
User response: Specify a different name for the newrepository and try again.
REP01035 Unknown object type.
Explanation: An error occurred while trying to accessan unsupported object.
User response: Ensure that all of the required plug-insare installed and available.
REP01036 Object {0} cannot be added to thisfolder.
Explanation: The indicated object can not be added tothe specified folder.
User response: Specify a different folder in which toadd the indicated object.
REP01037 Repository could not be found.
Explanation: The specified repository could not befound.
User response: Check the repository name for errorsor specify a different repository name and try again.
REP01038 Undefined or wrong repositoryidentifier
Explanation: An error occurred while trying toinitialize a repository with deprecated initializationparameters.
User response: Change the repository connectionproperties through the Edit Repository Connectiondialog and try again.
REP01039 There are no catalogs on the server
Explanation: No QMF catalogs exist on the specifiedserver.
User response: Specify a different server and tryagain.
REP01042 You are not authorized to use objectswith Owner = {0}.
Explanation: Your user ID is not authorized to useobjects with the indicated owner.
User response: Specify an object that has a differentowner or contact your administrator for moreinformation.
REP01022 • REP01042
Appendix D. Messages 249
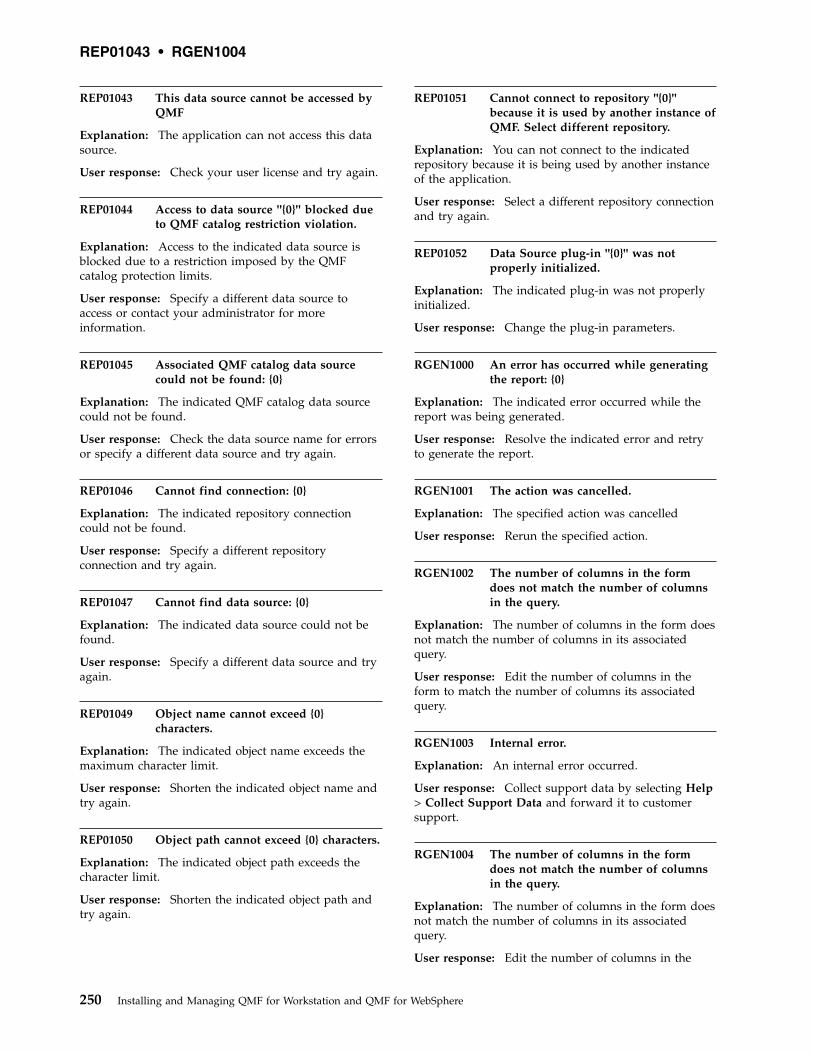
REP01043 This data source cannot be accessed byQMF
Explanation: The application can not access this datasource.
User response: Check your user license and try again.
REP01044 Access to data source ''{0}'' blocked dueto QMF catalog restriction violation.
Explanation: Access to the indicated data source isblocked due to a restriction imposed by the QMFcatalog protection limits.
User response: Specify a different data source toaccess or contact your administrator for moreinformation.
REP01045 Associated QMF catalog data sourcecould not be found: {0}
Explanation: The indicated QMF catalog data sourcecould not be found.
User response: Check the data source name for errorsor specify a different data source and try again.
REP01046 Cannot find connection: {0}
Explanation: The indicated repository connectioncould not be found.
User response: Specify a different repositoryconnection and try again.
REP01047 Cannot find data source: {0}
Explanation: The indicated data source could not befound.
User response: Specify a different data source and tryagain.
REP01049 Object name cannot exceed {0}characters.
Explanation: The indicated object name exceeds themaximum character limit.
User response: Shorten the indicated object name andtry again.
REP01050 Object path cannot exceed {0} characters.
Explanation: The indicated object path exceeds thecharacter limit.
User response: Shorten the indicated object path andtry again.
REP01051 Cannot connect to repository "{0}"because it is used by another instance ofQMF. Select different repository.
Explanation: You can not connect to the indicatedrepository because it is being used by another instanceof the application.
User response: Select a different repository connectionand try again.
REP01052 Data Source plug-in "{0}" was notproperly initialized.
Explanation: The indicated plug-in was not properlyinitialized.
User response: Change the plug-in parameters.
RGEN1000 An error has occurred while generatingthe report: {0}
Explanation: The indicated error occurred while thereport was being generated.
User response: Resolve the indicated error and retryto generate the report.
RGEN1001 The action was cancelled.
Explanation: The specified action was cancelled
User response: Rerun the specified action.
RGEN1002 The number of columns in the formdoes not match the number of columnsin the query.
Explanation: The number of columns in the form doesnot match the number of columns in its associatedquery.
User response: Edit the number of columns in theform to match the number of columns its associatedquery.
RGEN1003 Internal error.
Explanation: An internal error occurred.
User response: Collect support data by selecting Help> Collect Support Data and forward it to customersupport.
RGEN1004 The number of columns in the formdoes not match the number of columnsin the query.
Explanation: The number of columns in the form doesnot match the number of columns in its associatedquery.
User response: Edit the number of columns in the
REP01043 • RGEN1004
250 Installing and Managing QMF for Workstation and QMF for WebSphere
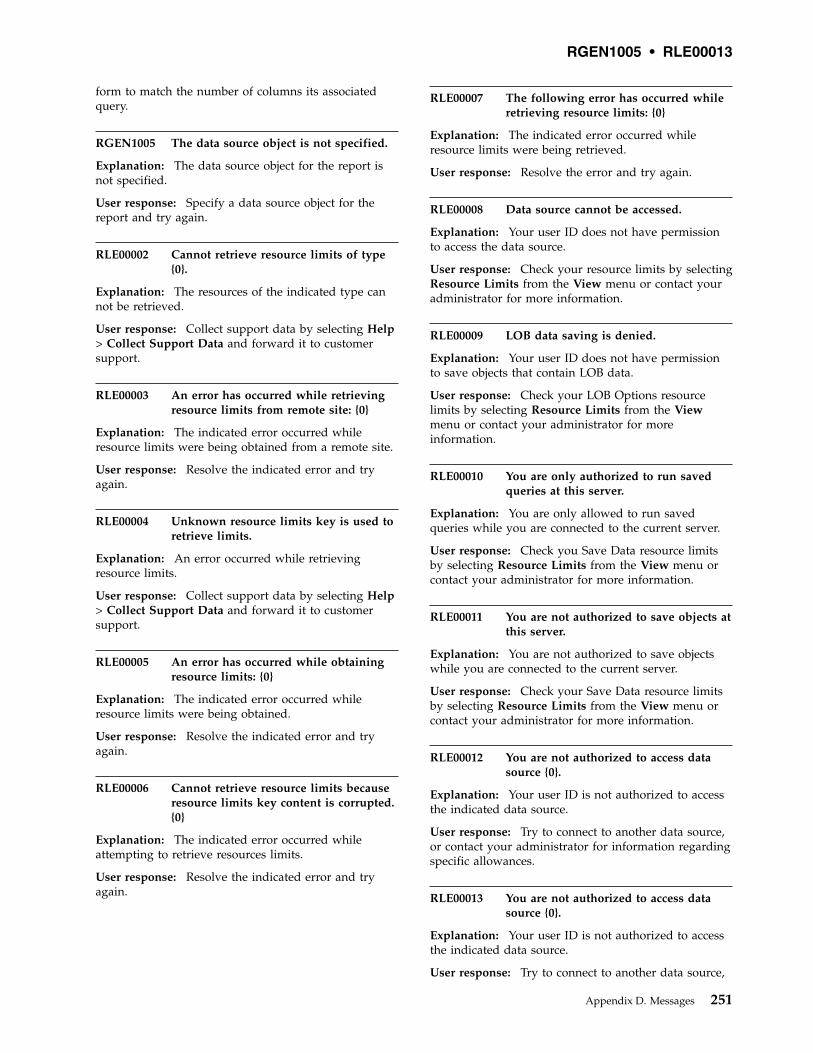
form to match the number of columns its associatedquery.
RGEN1005 The data source object is not specified.
Explanation: The data source object for the report isnot specified.
User response: Specify a data source object for thereport and try again.
RLE00002 Cannot retrieve resource limits of type{0}.
Explanation: The resources of the indicated type cannot be retrieved.
User response: Collect support data by selecting Help> Collect Support Data and forward it to customersupport.
RLE00003 An error has occurred while retrievingresource limits from remote site: {0}
Explanation: The indicated error occurred whileresource limits were being obtained from a remote site.
User response: Resolve the indicated error and tryagain.
RLE00004 Unknown resource limits key is used toretrieve limits.
Explanation: An error occurred while retrievingresource limits.
User response: Collect support data by selecting Help> Collect Support Data and forward it to customersupport.
RLE00005 An error has occurred while obtainingresource limits: {0}
Explanation: The indicated error occurred whileresource limits were being obtained.
User response: Resolve the indicated error and tryagain.
RLE00006 Cannot retrieve resource limits becauseresource limits key content is corrupted.{0}
Explanation: The indicated error occurred whileattempting to retrieve resources limits.
User response: Resolve the indicated error and tryagain.
RLE00007 The following error has occurred whileretrieving resource limits: {0}
Explanation: The indicated error occurred whileresource limits were being retrieved.
User response: Resolve the error and try again.
RLE00008 Data source cannot be accessed.
Explanation: Your user ID does not have permissionto access the data source.
User response: Check your resource limits by selectingResource Limits from the View menu or contact youradministrator for more information.
RLE00009 LOB data saving is denied.
Explanation: Your user ID does not have permissionto save objects that contain LOB data.
User response: Check your LOB Options resourcelimits by selecting Resource Limits from the Viewmenu or contact your administrator for moreinformation.
RLE00010 You are only authorized to run savedqueries at this server.
Explanation: You are only allowed to run savedqueries while you are connected to the current server.
User response: Check you Save Data resource limitsby selecting Resource Limits from the View menu orcontact your administrator for more information.
RLE00011 You are not authorized to save objects atthis server.
Explanation: You are not authorized to save objectswhile you are connected to the current server.
User response: Check your Save Data resource limitsby selecting Resource Limits from the View menu orcontact your administrator for more information.
RLE00012 You are not authorized to access datasource {0}.
Explanation: Your user ID is not authorized to accessthe indicated data source.
User response: Try to connect to another data source,or contact your administrator for information regardingspecific allowances.
RLE00013 You are not authorized to access datasource {0}.
Explanation: Your user ID is not authorized to accessthe indicated data source.
User response: Try to connect to another data source,
RGEN1005 • RLE00013
Appendix D. Messages 251
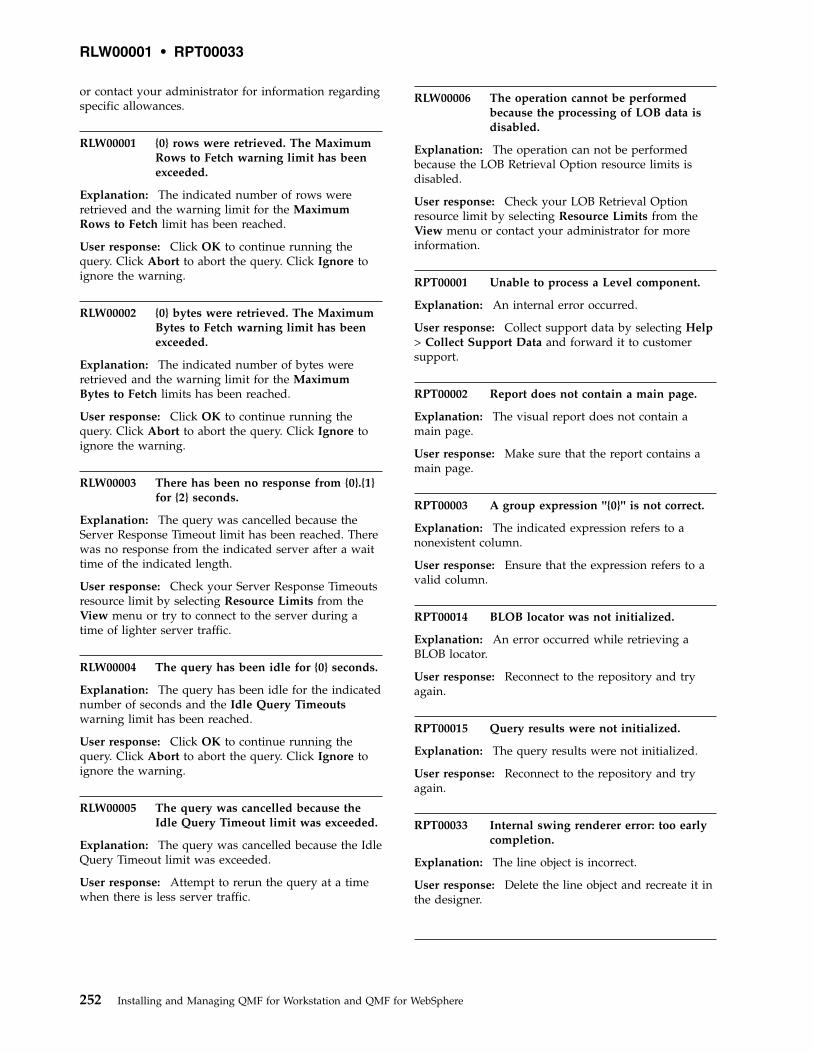
or contact your administrator for information regardingspecific allowances.
RLW00001 {0} rows were retrieved. The MaximumRows to Fetch warning limit has beenexceeded.
Explanation: The indicated number of rows wereretrieved and the warning limit for the MaximumRows to Fetch limit has been reached.
User response: Click OK to continue running thequery. Click Abort to abort the query. Click Ignore toignore the warning.
RLW00002 {0} bytes were retrieved. The MaximumBytes to Fetch warning limit has beenexceeded.
Explanation: The indicated number of bytes wereretrieved and the warning limit for the MaximumBytes to Fetch limits has been reached.
User response: Click OK to continue running thequery. Click Abort to abort the query. Click Ignore toignore the warning.
RLW00003 There has been no response from {0}.{1}for {2} seconds.
Explanation: The query was cancelled because theServer Response Timeout limit has been reached. Therewas no response from the indicated server after a waittime of the indicated length.
User response: Check your Server Response Timeoutsresource limit by selecting Resource Limits from theView menu or try to connect to the server during atime of lighter server traffic.
RLW00004 The query has been idle for {0} seconds.
Explanation: The query has been idle for the indicatednumber of seconds and the Idle Query Timeoutswarning limit has been reached.
User response: Click OK to continue running thequery. Click Abort to abort the query. Click Ignore toignore the warning.
RLW00005 The query was cancelled because theIdle Query Timeout limit was exceeded.
Explanation: The query was cancelled because the IdleQuery Timeout limit was exceeded.
User response: Attempt to rerun the query at a timewhen there is less server traffic.
RLW00006 The operation cannot be performedbecause the processing of LOB data isdisabled.
Explanation: The operation can not be performedbecause the LOB Retrieval Option resource limits isdisabled.
User response: Check your LOB Retrieval Optionresource limit by selecting Resource Limits from theView menu or contact your administrator for moreinformation.
RPT00001 Unable to process a Level component.
Explanation: An internal error occurred.
User response: Collect support data by selecting Help> Collect Support Data and forward it to customersupport.
RPT00002 Report does not contain a main page.
Explanation: The visual report does not contain amain page.
User response: Make sure that the report contains amain page.
RPT00003 A group expression ''{0}'' is not correct.
Explanation: The indicated expression refers to anonexistent column.
User response: Ensure that the expression refers to avalid column.
RPT00014 BLOB locator was not initialized.
Explanation: An error occurred while retrieving aBLOB locator.
User response: Reconnect to the repository and tryagain.
RPT00015 Query results were not initialized.
Explanation: The query results were not initialized.
User response: Reconnect to the repository and tryagain.
RPT00033 Internal swing renderer error: too earlycompletion.
Explanation: The line object is incorrect.
User response: Delete the line object and recreate it inthe designer.
RLW00001 • RPT00033
252 Installing and Managing QMF for Workstation and QMF for WebSphere
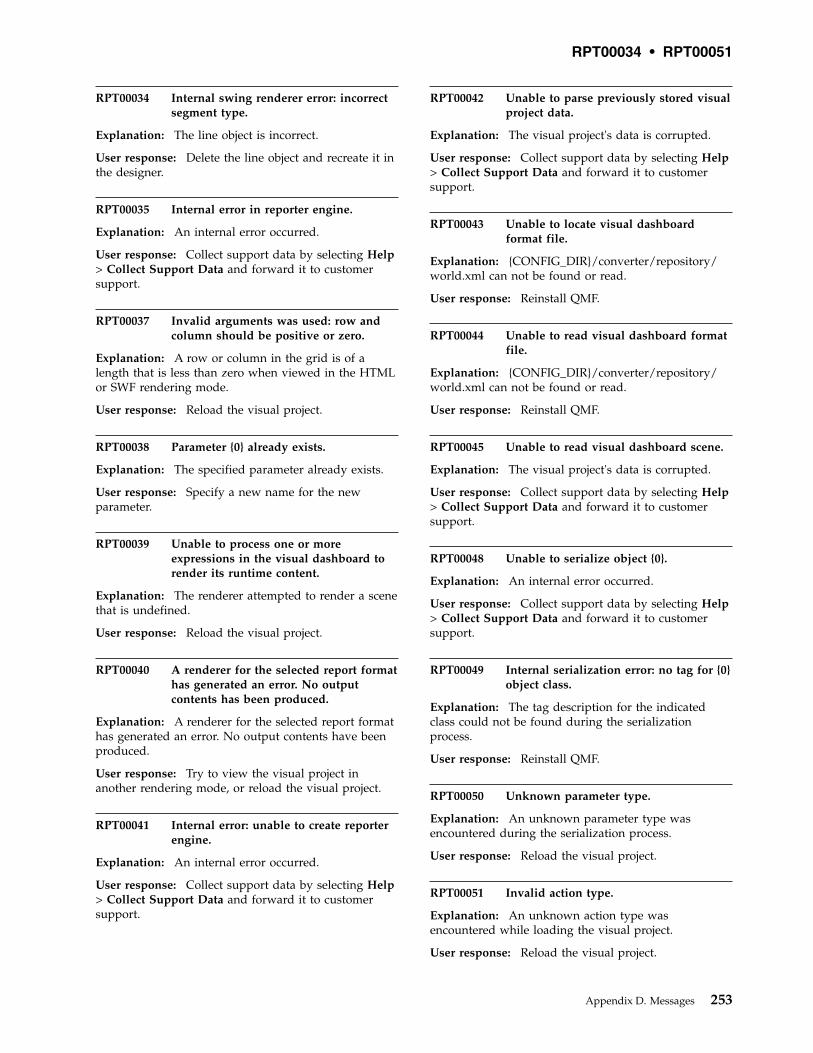
RPT00034 Internal swing renderer error: incorrectsegment type.
Explanation: The line object is incorrect.
User response: Delete the line object and recreate it inthe designer.
RPT00035 Internal error in reporter engine.
Explanation: An internal error occurred.
User response: Collect support data by selecting Help> Collect Support Data and forward it to customersupport.
RPT00037 Invalid arguments was used: row andcolumn should be positive or zero.
Explanation: A row or column in the grid is of alength that is less than zero when viewed in the HTMLor SWF rendering mode.
User response: Reload the visual project.
RPT00038 Parameter {0} already exists.
Explanation: The specified parameter already exists.
User response: Specify a new name for the newparameter.
RPT00039 Unable to process one or moreexpressions in the visual dashboard torender its runtime content.
Explanation: The renderer attempted to render a scenethat is undefined.
User response: Reload the visual project.
RPT00040 A renderer for the selected report formathas generated an error. No outputcontents has been produced.
Explanation: A renderer for the selected report formathas generated an error. No output contents have beenproduced.
User response: Try to view the visual project inanother rendering mode, or reload the visual project.
RPT00041 Internal error: unable to create reporterengine.
Explanation: An internal error occurred.
User response: Collect support data by selecting Help> Collect Support Data and forward it to customersupport.
RPT00042 Unable to parse previously stored visualproject data.
Explanation: The visual project's data is corrupted.
User response: Collect support data by selecting Help> Collect Support Data and forward it to customersupport.
RPT00043 Unable to locate visual dashboardformat file.
Explanation: {CONFIG_DIR}/converter/repository/world.xml can not be found or read.
User response: Reinstall QMF.
RPT00044 Unable to read visual dashboard formatfile.
Explanation: {CONFIG_DIR}/converter/repository/world.xml can not be found or read.
User response: Reinstall QMF.
RPT00045 Unable to read visual dashboard scene.
Explanation: The visual project's data is corrupted.
User response: Collect support data by selecting Help> Collect Support Data and forward it to customersupport.
RPT00048 Unable to serialize object {0}.
Explanation: An internal error occurred.
User response: Collect support data by selecting Help> Collect Support Data and forward it to customersupport.
RPT00049 Internal serialization error: no tag for {0}object class.
Explanation: The tag description for the indicatedclass could not be found during the serializationprocess.
User response: Reinstall QMF.
RPT00050 Unknown parameter type.
Explanation: An unknown parameter type wasencountered during the serialization process.
User response: Reload the visual project.
RPT00051 Invalid action type.
Explanation: An unknown action type wasencountered while loading the visual project.
User response: Reload the visual project.
RPT00034 • RPT00051
Appendix D. Messages 253
RPT00052 Embedded visual dashboard picture iscorrupted.
Explanation: An embedded image in the visualdashboard is corrupted and can not be opened.
User response: Check all of the embedded images inthe visual dashboard and delete any that are corrupted.
RPT00053 Invalid color value.
Explanation: Corrupted tags were encountered whileloading a ColorMap or a ColorSequence.
User response: Reload the visual project.
RPT00054 Invalid threshold value for color map.
Explanation: Corrupted tags were encountered whileloading a ColorMap or a ColorSequence.
User response: Reload the visual project.
RPT00055 Invalid event type.
Explanation: An unknown event type wasencountered.
User response: Reload the visual project.
RPT00056 Missing image alias.
Explanation: An unknown image was found.
User response: Reload the visual project.
RPT00057 Invalid number value.
Explanation: While loading the visual project, a stringthat was supposed to contain a number value wasencountered without digit characters.
User response: Reload the visual project or try using adifferent locale.
RPT00058 Invalid date value.
Explanation: While loading the visual project, a stringthat was supposed to contain a date value wasencountered with characters that could not be parsedinto a date value.
User response: Reload the visual project or try using adifferent locale.
RPT00059 Invalid point value.
Explanation: While loading the visual project, a stringthat was supposed to contain a point value wasencountered with characters that could not be parsedinto a point value.
User response: Reload the visual project.
RPT00060 Unable to read visual dashboard.
Explanation: An error occurred while loading thevisual dashboard.
User response: Reload the visual dashboard.
RPT00061 (Multiple possible messages; see Explanation)
Explanation:
1. Missing query alias. - A query with no query nametag was encountered while loading the visualproject.
2. The offline visual report cannot be saved in file. -Offline visual reports can not be saved to a file.
User response:
1. Reload the visual project.
2. Convert the visual report to an online report beforesaving to a file.
RPT10001 Source Visionary World file has notbeen specified.
Explanation: The Visionary World file can not befound.
User response: Ensure that the Visionary World fileexists and that it can be read.
RPT10002 Configuration directory has not beenspecified.
Explanation: The configuration directory for theconverter can not be found.
User response: Reinstall QMF.
RPT10003 Source Visionary World file has notbeen found.
Explanation: The Visionary World file can not befound.
User response: Ensure that the Visionary World fileexists.
RPT10004 Configuration directory has not beenfound.
Explanation: The configuration directory for theconverter can not be found.
User response: Reinstall QMF.
RPT10005 Configuration file {0} has not beenfound.
Explanation: The configuration file for the convertercan not be found.
User response: Reinstall QMF.
RPT00052 • RPT10005
254 Installing and Managing QMF for Workstation and QMF for WebSphere
RPT10006 Unable to locate Visionary Connectionfile(s) in the folder {0}.
Explanation: The Visionary Connection files do notexist in the proper locations.
User response: Check that all Visionary World filesare saved in the correct locations.
RPT10007 Unable to read Visionary Query file {0}.
Explanation: The Visionary World file that is specifiedin the query can not be found.
User response: Check that all Visionary World filesare saved in the correct locations.
RPT10008 Unable to locate Visionary Scene file {0}.
Explanation: The indicated scene file is not saved inthe correct location.
User response: Check that all Visionary World filesare saved in the correct locations.
RPT10009 Unable to read an image file {0}.
Explanation: The image file that is specified by theindicated name can not be found.
User response: Check that all Visionary World filesare saved in the correct locations.
RPT10010 Picture file {0} is too large.
Explanation: The indicated picture file is too long.
User response: Specify a smaller picture file to beused in the visual project.
RPT10011 XML parsing error.
Explanation: An XML parsing error occurred whileattempting to convert the Visionary World.
User response: Save the Visionary World file inVisionary and try again.
RPT10012 XML reading error.
Explanation: An input/output error occurred whileattempting to read the XML data.
User response: Try to convert the XML data again.
RPT10013 Unable to create Visual Dashboardobject.
Explanation: An error occurred while attempting toconvert the Visionary World file.
User response: Try to convert the Visionary World fileagain.
RPT10014 Cannot parse configuration file {0}.
Explanation: An error occurred while attempting toparse the converter configuration files.
User response: Reinstall QMF.
RPT10015 Visual Dashboard for a connection isnot specified.
Explanation: The Visionary World file was not loadedproperly.
User response: Reload the Visionary World file.
RPT10016 Invalid color description has beenfound.
Explanation: Corrupted tags were encountered whileloading a ColorMap or ColorSequence.
User response: Reload the Visionary World file.
RPT10017 Invalid color map description has beenfound.
Explanation: Corrupted tags were encountered whileloading a ColorMap.
User response: Reload the Visionary World file.
RPT10018 Unknown tag: {0}
Explanation: Unknown tags were encountered whileattempting to convert the Visionary World file.
User response: Try to convert the Visionary World fileagain.
RPT10019 Invalid scene template description.
Explanation: An error occurred while loading theVisionary World scene file.
User response: Reload the Visionary World scene file.
RPT10020 Corrupted property value has beenfound.
Explanation: An incorrect format or a corrupted valuewas specified in a property tag.
User response: Reload the Visionary World file.
RPT10021 Invalid URL or path format: ''{0}''
Explanation: The indicated URL or path format isinvalid.
User response: Check the URL for errors or specify adifferent URL.
RPT10006 • RPT10021
Appendix D. Messages 255
RPT10022 Unknown or unsupported event type
Explanation: A corrupted or unknown event type wasencountered.
User response: Reload the Visionary World file.
RPT10023 Function name in expression is missing
Explanation: A function name in an expression ismissing.
User response: Reload the Visionary World file.
RPT10024 Cannot parse function argument
Explanation: The function argument could not beparsed while loading the Visionary World file.
User response: Reload the Visionary World file.
RPT10025 Invalid scene template description.
Explanation: An error occurred while loading theVisionary World scene file.
User response: Reload the Visionary World file.
RPT10026 Unable to parse a number: {0}
Explanation: While loading the Visionary World file, astring that was supposed to contain a number valuewas encountered without digit characters.
User response: Reload the Visionary World file.
RPT10027 PointSet component XML is corrupted.
Explanation: While loading the Visionary World file, astring that was supposed to contain a point value wasencountered with characters that could not be parsedinto PointSet value.
User response: Reload the Visionary World file.
RPT10028 Unknown expression type {0}.
Explanation: An unknown expression type wasencountered while loading the Visionary World file.
User response: Reload the Visionary World file.
RPT10029 One or more queries do not have alias.
Explanation: A query alias tag that does not contain aname property was encountered while converting theVisionary World file.
User response: Reload the Visionary World file.
RPT10031 Unable to parse a point value.
Explanation: While loading the Visionary World file, astring that was supposed to contain a point value wasencountered with characters that could not be parsedinto PointSet value.
User response: Reload the Visionary World file.
RPT10032 Visionary World XML has beencorrupted.
Explanation: An error occurred while attempting toload the Visionary World file.
User response: Reload the Visionary World file.
RPT10033 Internal error: unable to accessVisionary World.
Explanation: An internal error occurred.
User response: Collect support data by selecting Help> Collect Support Data and forward it to customersupport.
RPT10034 Unable to add parameter {0} to a VisualDashboard
Explanation: An internal error occurred.
User response: Collect support data by selecting Help> Collect Support Data and forward it to customersupport.
RPT20001 Unable to access repository duringVisual Report conversion.
Explanation: The repository could not be accessedwhile the Visual Report was being converted.
User response: This could possibly be because youwere not connected to the repository. Make sure youare connected and try again.
RPT20002 Source visual report file has not beenspecified.
Explanation: The source visual report file has not beenspecified.
User response: Specify the source visual report file.
RPT20003 Source visual report file has not beenfound.
Explanation: The source visual report file could not befound.
User response: Specify a valid source visual reportfile.
RPT10022 • RPT20003
256 Installing and Managing QMF for Workstation and QMF for WebSphere
RPT20004 Visual Report name has not beenspecified.
Explanation: The visual report name has not beenspecified.
User response: Specify a name for the visual report.
RPT20005 Unable to create visual report.
Explanation: An error occurred while creating thevisual report.
User response: Reload the visual report.
RPT20006 Unable to open an embedded image.
Explanation: An embedded image file was not found.
User response: Reload the visual report.
RPT20007 Unknown section type: {0}
Explanation: The structure of a section set and typewas not found while loading the visual report.
User response: Reload the visual report.
RPT20008 Unable to create Visual Report pagecomponent.
Explanation: An error occurred while parsing andcreating a page component.
User response: Reload the visual report.
RPT20009 Internal error: unable to access VisualReport.
Explanation: An internal error occurred.
User response: Collect support data by selecting Help> Collect Support Data and forward it to customersupport.
RPT20011 Unable to set a line style for a linecontrol.
Explanation: An undefined line style was encounteredwhile loading the visual report.
User response: Reload the visual report.
RPT20012 Invalid linked picture alias has beenfound in Visual Report.
Explanation: A link to a picture without a name wasencountered while parsing the visual report data.
User response: Reload the visual report.
RPT20013 Unable to create Visual Report control.
Explanation: An error occurred while loading aprimitive or control object.
User response: Reload the visual report.
RPT20015 Invalid parameter name ''{0}'' has beenfound.
Explanation: The parameter value is invalid.
User response: Specify a different name for theparameter indicated.
RPT20016 Invalid parameter value ''{0}'' has beenfound.
Explanation: The parameter value is invalid.
User response: Specify a different value for theparameter indicated.
RPT30001 Navigate to Embedded Scene:Embedded Scene not found for name''{0}''.
Explanation: The Navigate to Embedded Scene actionfailed because the indicated embedded scene could notbe found.
User response: Correct the name of the embeddedscene that is associated with the Navigate toEmbedded Scene action, or specify another.
RPT30002 Navigate back: can`t execute exit action(maybe history is empty).
Explanation: The Navigate Back action failed,possibly because the navigation history is empty.
User response: Reload the visual project and tryagain.
RPT30021 DesignReporter: LevelTemplate is null.
Explanation: An internal error occurred.
User response: Collect support data by selecting Help> Collect Support Data and forward it to customersupport.
RPT30022 DesignReporter: unknown component{0}.
Explanation: An unknown component wasencountered during runtime rendering.
User response: Reload the visual project.
RPT20004 • RPT30022
Appendix D. Messages 257
RPT30024 The template is invalid. FillStyle orLineStyle property is null!
Explanation: An error occurred while running thesubstitution rule to change the Wedge template.
User response: Check the FillStyle and LineStyleproperties for errors.
RPT30025 The template is invalid. Height == {0}!
Explanation: An error occurred while running thesubstitution rule to change a template.
User response: Check the Height property for errors.
RPT30026 The template is invalid. Width == {0}!
Explanation: An error occurred while running thesubstitution rule to change a template.
User response: Check the Width property for errors.
RPT30028 Cannot load resources for package {0}and locale {1}.
Explanation: The bundle for the resource can not befound.
User response: Restart the application. If this does notfix the problem, reinstall the application.
RPT30029 Request for resource string ''{0}'' frompackage {1} failed.
Explanation: An error occurred while requesting astring resource.
User response: Restart the application. If this does notfix the problem, reinstall the application.
RPT30035 No OutputComponentCreator in mapfor {0}.
Explanation: An internal error occurred.
User response: Collect support data by selecting Help> Collect Support Data and forward it to customersupport.
RPT30038 Could not find {0}.
Explanation: One of the objects in the Connectionsfolder could not be found.
User response: Reload the project or delete theconnection and try again.
RPT30040 Chart cannot read query result set.
Explanation: An error occurred while creating aClusterGraph, OrganizationChart, or TreeChart.
User response: Reconnect to the repository and reloadthe visual project.
RPT30042 Error - axisLength is infinite.totalPercentages:{0}m_sceneRuntimePanel.getZoomFactor(){1}
Explanation: The value of an axis's PercentageLengthproperty is invalid.
User response: Check the PercentageLength propertyvalue of the axis for errors.
RPT30044 Unknown checkbox value: {0}.
Explanation: A value other than UNCHECKED, CHECKED,or INDETERMINATE was specified.
User response: Ensure that any action that sets thevalue of a checkbox sets it to UNCHECKED, CHECKED, orINDETERMINATE.
RPT30045 Unknown m_style: {0}.
Explanation: An invalid style property was specifiedfor a ComboBox object.
User response: Check the style property for theComboBox object for errors.
RPT30047 Line is not horizontal or vertical.
Explanation: A segment in an ElbowConnector objectis set to neither vertical or horizontal.
User response: Reload the visual project.
RPT30048 Unsupported segment type: {0}.
Explanation: An unsupported segment type wasencountered for an ElbowConnector object.
User response: Reload the visual project.
RPT30049 Could not get corner type last: {0} start:{1} end: {2}.
Explanation: The start and end coordinates of a linesegment do not define a corner in an ElbowConnectorobject.
User response: Reload the visual project, or delete andrecreate the ElbowConnector object.
RPT30050 Should not have gotten here.
Explanation: An internal error occurred.
User response: Collect support data by selecting Help> Collect Support Data and forward it to customersupport.
RPT30024 • RPT30050
258 Installing and Managing QMF for Workstation and QMF for WebSphere
RPT30052 Unknown horizontal align: {0}.
Explanation: A value other than LEFT, RIGHT, or CENTERwas encountered in the HorizontalAlign property of anobject.
User response: Ensure that any action that sets thevalue of the HorizontalAlign property of an object setsit as LEFT, RIGHT, or CENTER.
RPT30053 Unknown vertical align: {0}.
Explanation: A value other than TOP, BOTTOM, or CENTERwas encountered in the VerticalAlign property of anobject.
User response: Ensure that any action that sets thevalue of the VerticalAlign property of an object sets itas TOP, BOTTOM, or CENTER.
RPT30054 Unknown location anchor: {0}.
Explanation: A value other than BOTTOMLEFT,LEFTCENTER, TOPLEFT, BASELINELEFT, BOTTOMCENTER,CENTER, TOPCENTER, BASELINECENTER, BOTTOMRIGHT,RIGHTCENTER, or BASELINERIGHT was encountered in theLocationAnchor property of an object.
User response: Ensure that any action that sets thevalue of the LocationAnchor property of an object setsit as BOTTOMLEFT, LEFTCENTER, TOPLEFT, BASELINELEFT,BOTTOMCENTER, CENTER, TOPCENTER, BASELINECENTER,BOTTOMRIGHT, RIGHTCENTER, or BASELINERIGHT.
RPT30055 Unknown arrowheadStyle: {0}.
Explanation: A value other than NONE, TRIANGLE,CIRCLE, DIAMOND, or SWEPTPOINTER was encountered inthe MarkerShape property of an arrow object.
User response: Ensure that any action that sets thevalue of the MarkerShape property of an arrow objectsets it as NONE, TRIANGLE, CIRCLE, DIAMOND, orSWEPTPOINTER.
RPT30056 Unknown marker shape: {0}.
Explanation: A value other than HOLLOWCIRCLE,HOLLOWDIAMOND, HOLLOWSQUARE, HOLLOWTRIANGLE,HOLLOWTRIANGLE2, HOLLOWSTAR, HOLLOWPLUS, SOLIDCIRCLE,SOLIDDIAMOND, SOLIDSQUARE, SOLIDTRIANGLE,SOLIDTRIANGLE2, SOLIDSTAR,SOLIDPLUS, CROSS, PLUS,BOXCROSS, or BOXPLUS was encountered in theMarkerShape property of a data point object.
User response: Ensure that any action that sets thevalue of the MarkerShape property of a data pointobject sets it as HOLLOWCIRCLE, HOLLOWDIAMOND,HOLLOWSQUARE, HOLLOWTRIANGLE, HOLLOWTRIANGLE2,HOLLOWSTAR, HOLLOWPLUS, SOLIDCIRCLE, SOLIDDIAMOND,SOLIDSQUARE, SOLIDTRIANGLE, SOLIDTRIANGLE2,SOLIDSTAR,SOLIDPLUS, CROSS, PLUS, BOXCROSS, orBOXPLUS.
RPT30060 Unknown attachmentStyle: {0}.
Explanation: A value other than TOPLEFT, TOPCENTER,TOP, TOPRIGHT, CENTERLEFT, CENTER, CENTERRIGHT,BOTTOMLEFT, BOTTOMCENTER, BOTTOM, or BOTTOMRIGHT wasencountered in the AttachmentStyle property of aconnector object.
User response: Ensure that any action that sets thevalue of the AttachmentStyle property of a connectorobject sets it as TOPLEFT, TOPCENTER, TOP, TOPRIGHT,CENTERLEFT, CENTER, CENTERRIGHT, BOTTOMLEFT,BOTTOMCENTER, BOTTOM, or BOTTOMRIGHT.
RPT30061 Unknown border type for table: {0}.
Explanation: An invalid value was encountered in theBorderType property of an object.
User response: Ensure that any action that sets theBorderType property of an object sets a valid value.
RPT30062 Unknown m_horizontalAlign: {0}.
Explanation: An invalid value was encountered in theHorizontalAlign property of a table cell.
User response: Ensure that any action that sets theHorizontalAlign property of a table cell sets a validvalue.
RPT30063 Unknown m_verticalAlign: {0}.
Explanation: An invalid value was encountered in theVerticalAlign property of a table cell.
User response: Ensure that any action that sets theVerticalAlign property of a table cell sets a valid value.
RPT30064 Unknown border type for table: {0}.
Explanation: An invalid value was encountered in theBorder property of a table.
User response: Ensure that any action that sets theBorder property of a table sets a valid value.
RPT30065 Unknown scrollBarStyle: {0}.
Explanation: An invalid value was encountered in theScrollBarStyle property of an object.
User response: Ensure that any action that sets theScrollBarStyle property of an object sets a valid value.
RPT30066 Unknown AlignmentStyle: {0}.
Explanation: An invalid value was encountered in theAlignmentStyle property of a textbox object.
User response: Ensure that any action that sets theAlignmentStyle property of a textbox object sets a validvalue.
RPT30052 • RPT30066
Appendix D. Messages 259
RPT30068 Unknown lineStylePattern: {0}.
Explanation: An invalid value was encountered in theLineStylePattern property of an object.
User response: Ensure that any action that sets theLineStylePattern property of an object sets a validvalue.
RPT30069 Unknown gradient type: {0}.
Explanation: An invalid value was encountered in theGradientType property of an object.
User response: Ensure that any action that sets theGradientType property of an object sets a valid value.
RPT30070 Unknown borderType: {0}.
Explanation: An invalid value was encountered in theBorderType property of a textbox or embedded sceneobject.
User response: Ensure that any action that sets theBorderType property of a textbox or embedded sceneobject sets a valid value.
RPT30071 Unknown imageAnchor: {0}.
Explanation: An invalid value was encountered in theImageAnchor property of an object.
User response: Ensure that any action that sets theImageAnchor property of an object sets a valid value.
RPT30072 Embedded Scene: UnknownscrollBarStyle.
Explanation: An invalid value was encountered in theScrollBarStyle property of an embedded scene object.
User response: Ensure that any action that sets theScrollBarStyle property of an embedded scene objectsets a valid value.
RPT30073 Embedded Scene: unknown typeOfFind:{0}.
Explanation: An internal error occurred.
User response: Collect support data by selecting Help> Collect Support Data and forward it to customersupport.
RPT30076 The cell chosen by client not found.
Explanation: The action can not be performed whenusing the HTML rendering mode.
User response: Reload the visual project.
RPT30077 Grid cell's click event could not bedispatched.
Explanation: The action can not be performed whenusing the HTML rendering mode.
User response: Reload the visual project.
RPT30079 Unknown page type - {0}.
Explanation: An internal error occurred.
User response: Collect support data by selecting Help> Collect Support Data and forward it to customerservice.
RPT30082 Parameters group cloning problem {0}.
Explanation: An internal error occurred.
User response: Collect support data by selecting Help> Collect Support Data and forward it to customersupport.
RPT30083 No class in map for {0}.
Explanation: An internal error occurred.
User response: Collect support data by selecting Help> Collect Support Data and forward it to customersupport.
RPT30088 Unable to serialize an object: {0}.
Explanation: An internal error occurred.
User response: Collect support data by selecting Help> Collect Support Data and forward it to customersupport.
RPT30089 Value must be positive: {0}.
Explanation: The indicated value must be a positivenumber.
User response: Ensure that the indicated value is apositive number.
RPT30090 Level was null when zoom was {0}.
Explanation: No level is specified for the indicatedzoom percentage.
User response: Ensure that a level is specified for theindicated zoom percentage.
RPT30091 Chart can't find parent column: {0}.
Explanation: The indicated parent column could notbe found in the result set.
User response: Ensure that a valid column named isspecified in the DataLocator property of the group.
RPT30068 • RPT30091
260 Installing and Managing QMF for Workstation and QMF for WebSphere

RPT30092 Chart can't find child column: {0}.
Explanation: The indicated child column could not befound in the result set.
User response: Ensure that a valid column named isspecified in the DataLocator property of the group.
RPT30095 Hierarchy chart must have oneDataTemplate child.
Explanation: A hierarchy chart must have oneDataTemplate child.
User response: Check the Project Explorer and ensurethat the hierarchy chart only has one DataTemplatechild.
RPT30096 CurrentRowIndex < 0.
Explanation: The specified row index is less than zero.The row index must be an integer that is equal to orgreater than zero.
User response: Ensure the specified row index is aninteger that is equal to or greater than zero.
RPT30097 Unknown interval: {0}.
Explanation: An invalid value was specified for theDateAxis property of an object.
User response: Ensure that any action that sets thevalue of the DateAxis property of an object sets a validvalue.
RPT30098 Unhandled interval: {0}.
Explanation: An invalid value was specified for theDateAxis property of an object.
User response: Ensure that any action that sets thevalue of the DateAxis property of an object sets a validvalue.
RPT30099 Unknown dateInterval: {0}.
Explanation: An invalid value was specified for theDateAxis property of an object.
User response: Ensure that any action that sets thevalue of the DateAxis property of an object sets a validvalue.
RPT30104 Shouldn't get here - roundIncrement: {0}power: {1}.
Explanation: An internal error occurred.
User response: Collect support data by selecting Help> Collect Support Data and forward it to customersupport.
RPT30105 Group name is undefined for groupheader.
Explanation: An internal error occurred.
User response: Collect support data by selecting Help> Collect Support Data and forward it to customersupport.
RPT30106 Group name is undefined for groupfooter.
Explanation: An internal error occurred.
User response: Collect support data by selecting Help> Collect Support Data and forward it to customersupport.
RPT30107 m_templateRows contained a {0}.
Explanation: An internal error occurred.
User response: Collect support data by selecting Help> Collect Support Data and forward it to customersupport.
RPT30109 Embedded Scene: Linked not found forname {0}.
Explanation: The value of the LinkedScene propertyof an embedded scene is invalid.
User response: Ensure that the scene that theembedded scene is linked to exists and that the linktext is correct.
RPT30111 Unable to clone component {0}.
Explanation: An internal error occurred.
User response: Collect support data by selecting Help> Collect Support Data and forward it to customersupport.
RPT30112 Property {0} of component {1} doesn'tappear to be of type {2}.
Explanation: The property of the indicated object is ofan invalid type.
User response: Ensure that any action or expressionthat sets the value of the property sets it to a validtype.
RPT30114 Swing output cannot be created forcomponent {0}.
Explanation: An internal error occurred.
User response: Collect support data by selecting Help> Collect Support Data and forward it to customersupport.
RPT30092 • RPT30114
Appendix D. Messages 261
RPT30117 Component {0} does not support action{1}.
Explanation: The indicated component does notsupport the indicated action.
User response: Specify a different action for thecomponent and try again.
RPT30118 Component {0} does not supportproperty {1}.
Explanation: The indicated component does notsupport the indicated property.
User response: Specify a different property and tryagain.
RPT30120 (Multiple possible messages; see Explanation)
Explanation:
1. The global parameter ''{0}'' does not exist - Theindicated global parameter does not exist.
2. Query ''{0}'' does not contain column named ''{1}'' -The indicated column does not exist in theindicated query.
User response:
1. Check the global parameter name for errors orspecify a different global parameter.
2. Check the column name for errors or specify adifferent column name.
RPT30121 Result set index ''{0}'' for query ''{1}'' isout of bounds.
Explanation: An invalid value was set for theResultSetIndex of a layout object.
User response: Ensure that any action that sets theResultSetIndex property of a layout object sets a validvalue.
RPT30122 Query with key ''{0}'' does not exist.
Explanation: A query with the indicated key does notexist in the repository.
User response: Select the query in the RepositoryExplorer or Workspaces view and copy and paste thekey value from the Properties view, or specify adifferent query's key.
RPT30123 Component ''{0}'' cannot be created dueto the following problem: {1}
Explanation: The indicated component can not becreated due to the indicated error.
User response: Resolve the indicated error and tryagain.
RPT30124 Result set index cannot be defined.
Explanation: An internal error occurred.
User response: Collect support data by selecting Help> Collect Support Data and forward it to customersupport.
RPT30126 Security list ''{0}'' cannot be found.
Explanation: The indicated security list can not befound.
User response: Check the security list name for errorsor specify a different security list.
RPT30127 Visual project ''{0}'' cannot be loadedbecause of missing project descriptor.
Explanation: The indicated visual project can not beloaded because it is missing a project descriptor.
User response: Ensure that the visual project has aproject descriptor and retry to load the project.
RSE01000 {0}
Explanation: The indicated error occurred whileaccessing the repository security provider.
User response: Resolve the indicated error and tryagain.
RSE04000 System internal error occurred, pleasecheck the error log.
Explanation: A system internal error occurred.
User response: Check the error log by selectingOutput from the context menu of the Window menu.
RSE04001 Cannot find User {0}
Explanation: The indicated user can not be found.
User response: Check the name of the user for errorsand try again.
RSE04002 User {0} already exists;
Explanation: The indicated user already exists.
User response: Specify a different user.
RSE04003 Group {0} already exists;
Explanation: The indicated group already exists.
User response: Specify a different group.
RPT30117 • RSE04003
262 Installing and Managing QMF for Workstation and QMF for WebSphere
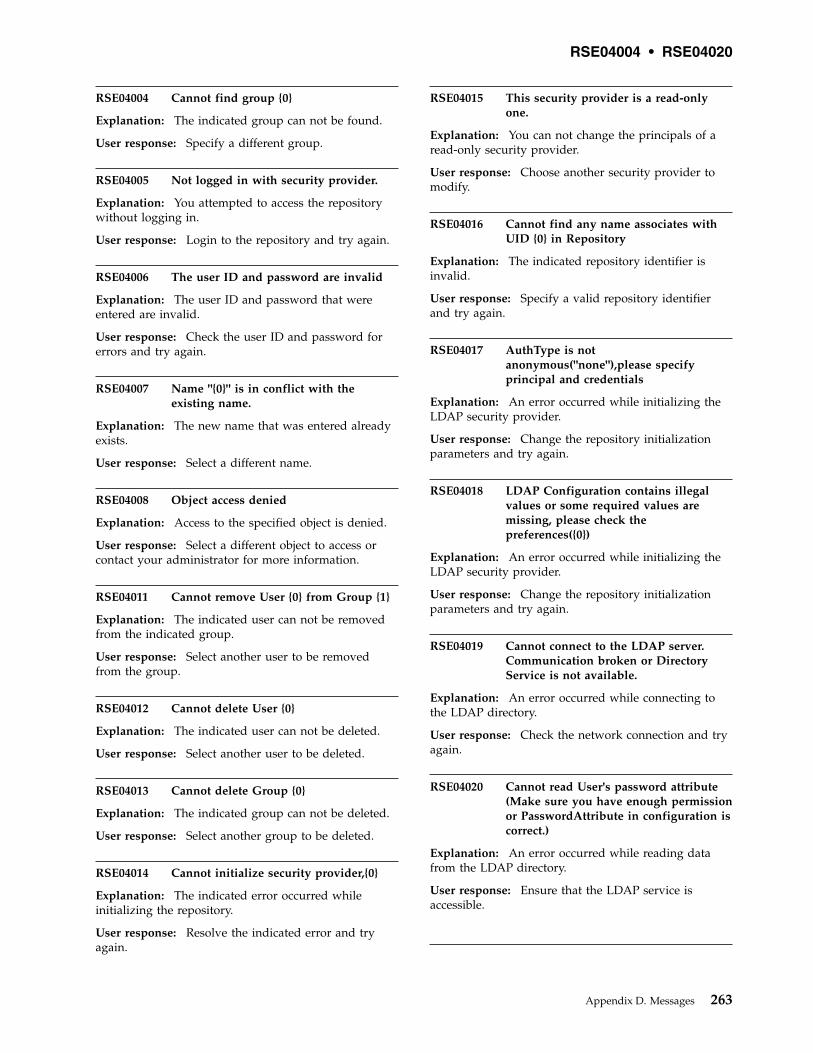
RSE04004 Cannot find group {0}
Explanation: The indicated group can not be found.
User response: Specify a different group.
RSE04005 Not logged in with security provider.
Explanation: You attempted to access the repositorywithout logging in.
User response: Login to the repository and try again.
RSE04006 The user ID and password are invalid
Explanation: The user ID and password that wereentered are invalid.
User response: Check the user ID and password forerrors and try again.
RSE04007 Name "{0}" is in conflict with theexisting name.
Explanation: The new name that was entered alreadyexists.
User response: Select a different name.
RSE04008 Object access denied
Explanation: Access to the specified object is denied.
User response: Select a different object to access orcontact your administrator for more information.
RSE04011 Cannot remove User {0} from Group {1}
Explanation: The indicated user can not be removedfrom the indicated group.
User response: Select another user to be removedfrom the group.
RSE04012 Cannot delete User {0}
Explanation: The indicated user can not be deleted.
User response: Select another user to be deleted.
RSE04013 Cannot delete Group {0}
Explanation: The indicated group can not be deleted.
User response: Select another group to be deleted.
RSE04014 Cannot initialize security provider,{0}
Explanation: The indicated error occurred whileinitializing the repository.
User response: Resolve the indicated error and tryagain.
RSE04015 This security provider is a read-onlyone.
Explanation: You can not change the principals of aread-only security provider.
User response: Choose another security provider tomodify.
RSE04016 Cannot find any name associates withUID {0} in Repository
Explanation: The indicated repository identifier isinvalid.
User response: Specify a valid repository identifierand try again.
RSE04017 AuthType is notanonymous("none"),please specifyprincipal and credentials
Explanation: An error occurred while initializing theLDAP security provider.
User response: Change the repository initializationparameters and try again.
RSE04018 LDAP Configuration contains illegalvalues or some required values aremissing, please check thepreferences({0})
Explanation: An error occurred while initializing theLDAP security provider.
User response: Change the repository initializationparameters and try again.
RSE04019 Cannot connect to the LDAP server.Communication broken or DirectoryService is not available.
Explanation: An error occurred while connecting tothe LDAP directory.
User response: Check the network connection and tryagain.
RSE04020 Cannot read User's password attribute(Make sure you have enough permissionor PasswordAttribute in configuration iscorrect.)
Explanation: An error occurred while reading datafrom the LDAP directory.
User response: Ensure that the LDAP service isaccessible.
RSE04004 • RSE04020
Appendix D. Messages 263
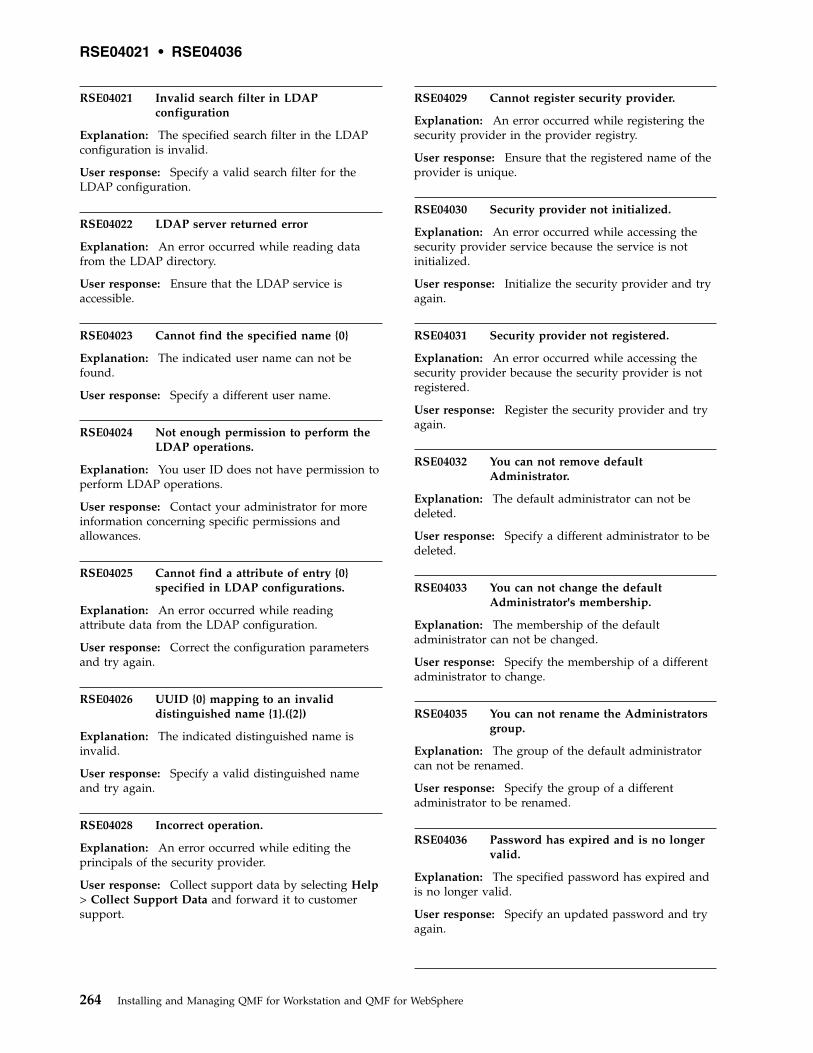
RSE04021 Invalid search filter in LDAPconfiguration
Explanation: The specified search filter in the LDAPconfiguration is invalid.
User response: Specify a valid search filter for theLDAP configuration.
RSE04022 LDAP server returned error
Explanation: An error occurred while reading datafrom the LDAP directory.
User response: Ensure that the LDAP service isaccessible.
RSE04023 Cannot find the specified name {0}
Explanation: The indicated user name can not befound.
User response: Specify a different user name.
RSE04024 Not enough permission to perform theLDAP operations.
Explanation: You user ID does not have permission toperform LDAP operations.
User response: Contact your administrator for moreinformation concerning specific permissions andallowances.
RSE04025 Cannot find a attribute of entry {0}specified in LDAP configurations.
Explanation: An error occurred while readingattribute data from the LDAP configuration.
User response: Correct the configuration parametersand try again.
RSE04026 UUID {0} mapping to an invaliddistinguished name {1}.({2})
Explanation: The indicated distinguished name isinvalid.
User response: Specify a valid distinguished nameand try again.
RSE04028 Incorrect operation.
Explanation: An error occurred while editing theprincipals of the security provider.
User response: Collect support data by selecting Help> Collect Support Data and forward it to customersupport.
RSE04029 Cannot register security provider.
Explanation: An error occurred while registering thesecurity provider in the provider registry.
User response: Ensure that the registered name of theprovider is unique.
RSE04030 Security provider not initialized.
Explanation: An error occurred while accessing thesecurity provider service because the service is notinitialized.
User response: Initialize the security provider and tryagain.
RSE04031 Security provider not registered.
Explanation: An error occurred while accessing thesecurity provider because the security provider is notregistered.
User response: Register the security provider and tryagain.
RSE04032 You can not remove defaultAdministrator.
Explanation: The default administrator can not bedeleted.
User response: Specify a different administrator to bedeleted.
RSE04033 You can not change the defaultAdministrator's membership.
Explanation: The membership of the defaultadministrator can not be changed.
User response: Specify the membership of a differentadministrator to change.
RSE04035 You can not rename the Administratorsgroup.
Explanation: The group of the default administratorcan not be renamed.
User response: Specify the group of a differentadministrator to be renamed.
RSE04036 Password has expired and is no longervalid.
Explanation: The specified password has expired andis no longer valid.
User response: Specify an updated password and tryagain.
RSE04021 • RSE04036
264 Installing and Managing QMF for Workstation and QMF for WebSphere
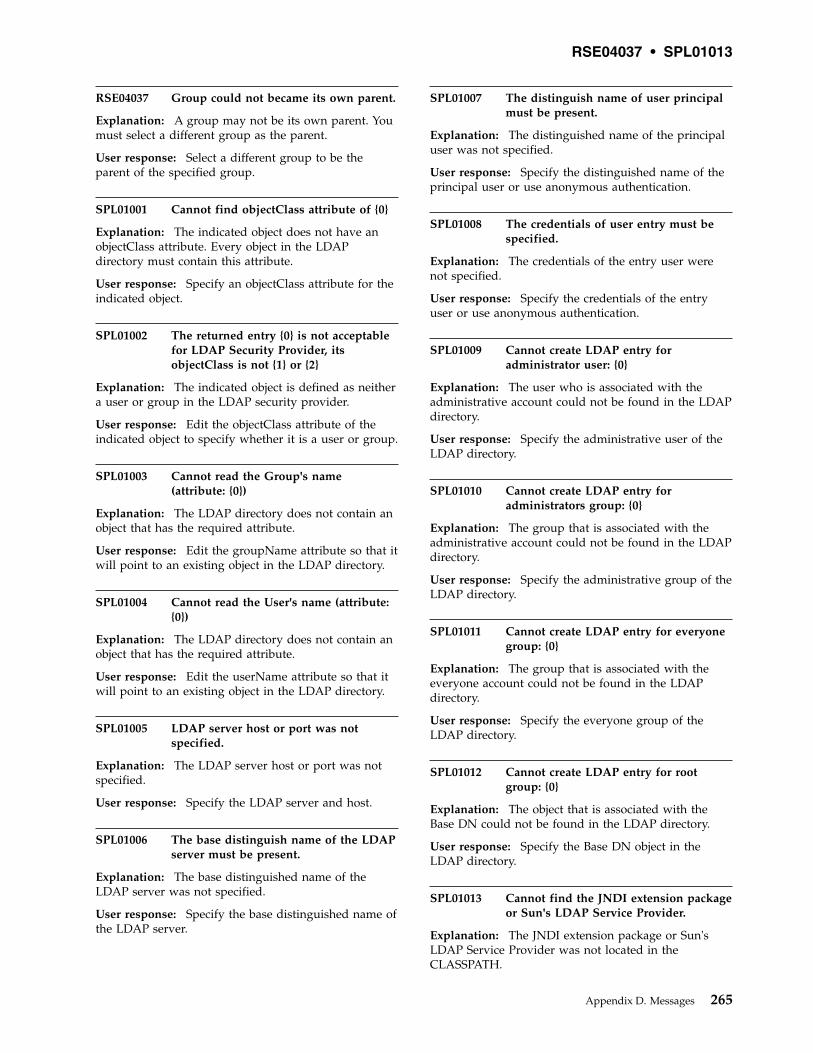
RSE04037 Group could not became its own parent.
Explanation: A group may not be its own parent. Youmust select a different group as the parent.
User response: Select a different group to be theparent of the specified group.
SPL01001 Cannot find objectClass attribute of {0}
Explanation: The indicated object does not have anobjectClass attribute. Every object in the LDAPdirectory must contain this attribute.
User response: Specify an objectClass attribute for theindicated object.
SPL01002 The returned entry {0} is not acceptablefor LDAP Security Provider, itsobjectClass is not {1} or {2}
Explanation: The indicated object is defined as neithera user or group in the LDAP security provider.
User response: Edit the objectClass attribute of theindicated object to specify whether it is a user or group.
SPL01003 Cannot read the Group's name(attribute: {0})
Explanation: The LDAP directory does not contain anobject that has the required attribute.
User response: Edit the groupName attribute so that itwill point to an existing object in the LDAP directory.
SPL01004 Cannot read the User's name (attribute:{0})
Explanation: The LDAP directory does not contain anobject that has the required attribute.
User response: Edit the userName attribute so that itwill point to an existing object in the LDAP directory.
SPL01005 LDAP server host or port was notspecified.
Explanation: The LDAP server host or port was notspecified.
User response: Specify the LDAP server and host.
SPL01006 The base distinguish name of the LDAPserver must be present.
Explanation: The base distinguished name of theLDAP server was not specified.
User response: Specify the base distinguished name ofthe LDAP server.
SPL01007 The distinguish name of user principalmust be present.
Explanation: The distinguished name of the principaluser was not specified.
User response: Specify the distinguished name of theprincipal user or use anonymous authentication.
SPL01008 The credentials of user entry must bespecified.
Explanation: The credentials of the entry user werenot specified.
User response: Specify the credentials of the entryuser or use anonymous authentication.
SPL01009 Cannot create LDAP entry foradministrator user: {0}
Explanation: The user who is associated with theadministrative account could not be found in the LDAPdirectory.
User response: Specify the administrative user of theLDAP directory.
SPL01010 Cannot create LDAP entry foradministrators group: {0}
Explanation: The group that is associated with theadministrative account could not be found in the LDAPdirectory.
User response: Specify the administrative group of theLDAP directory.
SPL01011 Cannot create LDAP entry for everyonegroup: {0}
Explanation: The group that is associated with theeveryone account could not be found in the LDAPdirectory.
User response: Specify the everyone group of theLDAP directory.
SPL01012 Cannot create LDAP entry for rootgroup: {0}
Explanation: The object that is associated with theBase DN could not be found in the LDAP directory.
User response: Specify the Base DN object in theLDAP directory.
SPL01013 Cannot find the JNDI extension packageor Sun's LDAP Service Provider.
Explanation: The JNDI extension package or Sun'sLDAP Service Provider was not located in theCLASSPATH.
RSE04037 • SPL01013
Appendix D. Messages 265
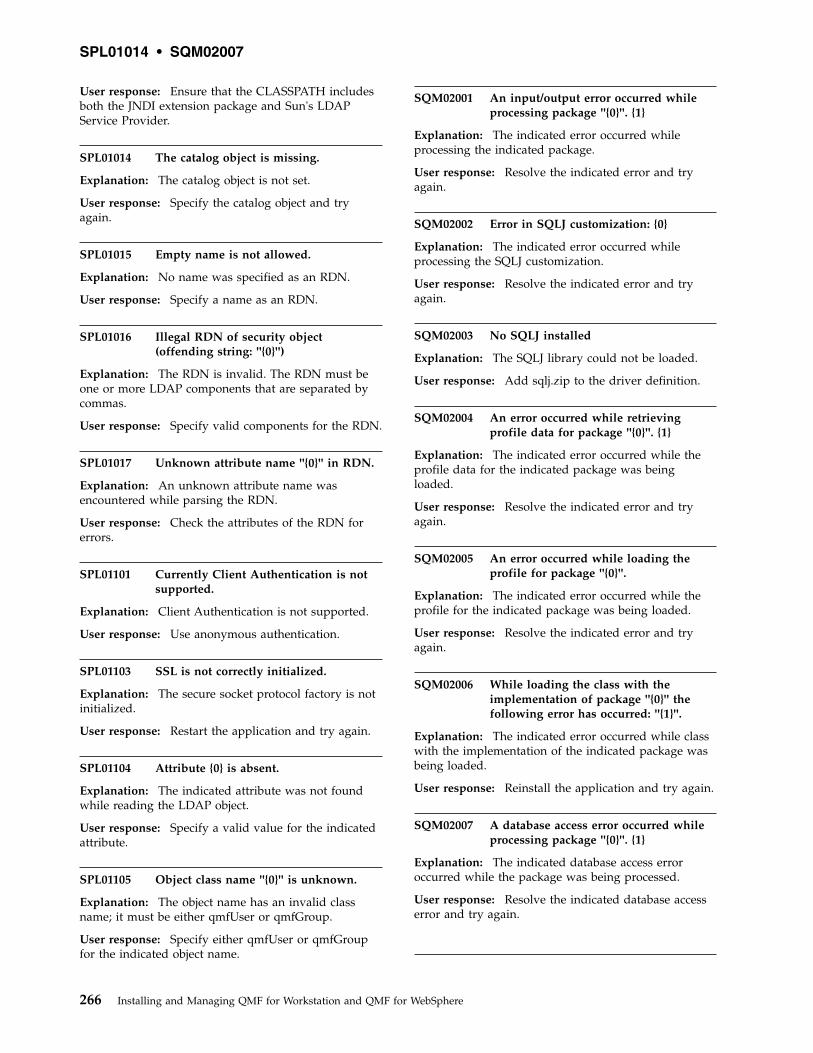
User response: Ensure that the CLASSPATH includesboth the JNDI extension package and Sun's LDAPService Provider.
SPL01014 The catalog object is missing.
Explanation: The catalog object is not set.
User response: Specify the catalog object and tryagain.
SPL01015 Empty name is not allowed.
Explanation: No name was specified as an RDN.
User response: Specify a name as an RDN.
SPL01016 Illegal RDN of security object(offending string: ''{0}'')
Explanation: The RDN is invalid. The RDN must beone or more LDAP components that are separated bycommas.
User response: Specify valid components for the RDN.
SPL01017 Unknown attribute name ''{0}'' in RDN.
Explanation: An unknown attribute name wasencountered while parsing the RDN.
User response: Check the attributes of the RDN forerrors.
SPL01101 Currently Client Authentication is notsupported.
Explanation: Client Authentication is not supported.
User response: Use anonymous authentication.
SPL01103 SSL is not correctly initialized.
Explanation: The secure socket protocol factory is notinitialized.
User response: Restart the application and try again.
SPL01104 Attribute {0} is absent.
Explanation: The indicated attribute was not foundwhile reading the LDAP object.
User response: Specify a valid value for the indicatedattribute.
SPL01105 Object class name ''{0}'' is unknown.
Explanation: The object name has an invalid classname; it must be either qmfUser or qmfGroup.
User response: Specify either qmfUser or qmfGroupfor the indicated object name.
SQM02001 An input/output error occurred whileprocessing package ''{0}''. {1}
Explanation: The indicated error occurred whileprocessing the indicated package.
User response: Resolve the indicated error and tryagain.
SQM02002 Error in SQLJ customization: {0}
Explanation: The indicated error occurred whileprocessing the SQLJ customization.
User response: Resolve the indicated error and tryagain.
SQM02003 No SQLJ installed
Explanation: The SQLJ library could not be loaded.
User response: Add sqlj.zip to the driver definition.
SQM02004 An error occurred while retrievingprofile data for package ''{0}''. {1}
Explanation: The indicated error occurred while theprofile data for the indicated package was beingloaded.
User response: Resolve the indicated error and tryagain.
SQM02005 An error occurred while loading theprofile for package ''{0}''.
Explanation: The indicated error occurred while theprofile for the indicated package was being loaded.
User response: Resolve the indicated error and tryagain.
SQM02006 While loading the class with theimplementation of package ''{0}'' thefollowing error has occurred: ''{1}''.
Explanation: The indicated error occurred while classwith the implementation of the indicated package wasbeing loaded.
User response: Reinstall the application and try again.
SQM02007 A database access error occurred whileprocessing package ''{0}''. {1}
Explanation: The indicated database access erroroccurred while the package was being processed.
User response: Resolve the indicated database accesserror and try again.
SPL01014 • SQM02007
266 Installing and Managing QMF for Workstation and QMF for WebSphere
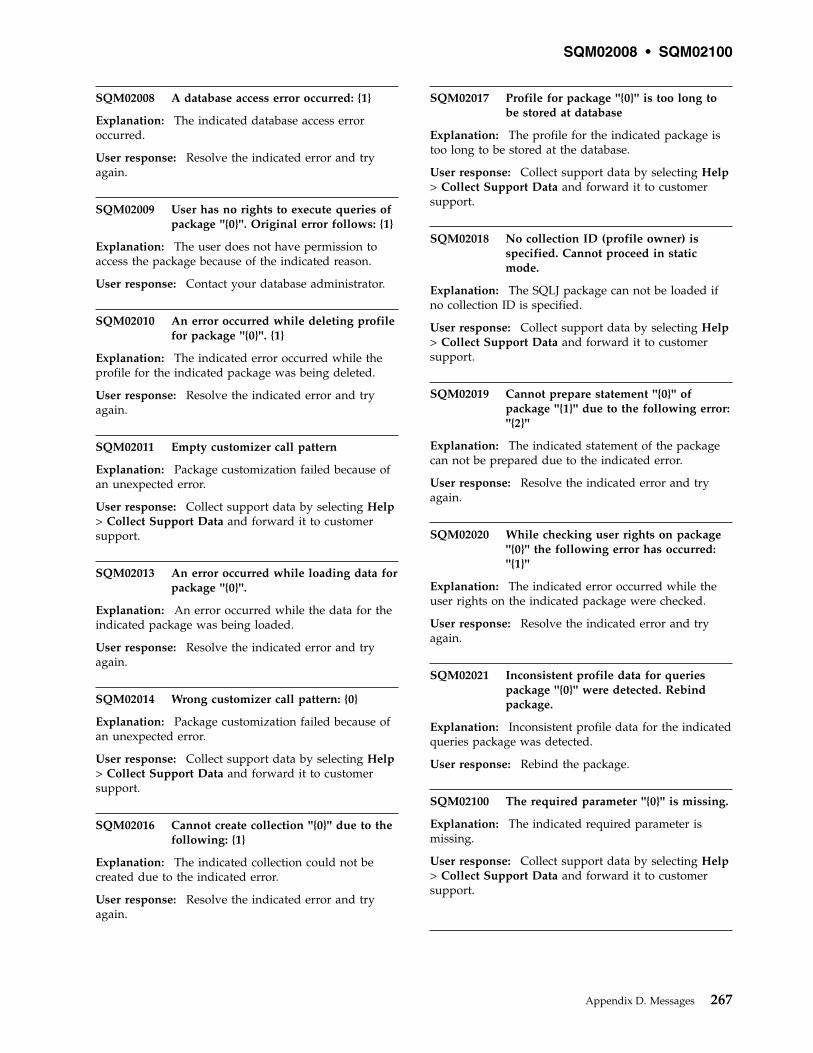
SQM02008 A database access error occurred: {1}
Explanation: The indicated database access erroroccurred.
User response: Resolve the indicated error and tryagain.
SQM02009 User has no rights to execute queries ofpackage ''{0}''. Original error follows: {1}
Explanation: The user does not have permission toaccess the package because of the indicated reason.
User response: Contact your database administrator.
SQM02010 An error occurred while deleting profilefor package ''{0}''. {1}
Explanation: The indicated error occurred while theprofile for the indicated package was being deleted.
User response: Resolve the indicated error and tryagain.
SQM02011 Empty customizer call pattern
Explanation: Package customization failed because ofan unexpected error.
User response: Collect support data by selecting Help> Collect Support Data and forward it to customersupport.
SQM02013 An error occurred while loading data forpackage ''{0}''.
Explanation: An error occurred while the data for theindicated package was being loaded.
User response: Resolve the indicated error and tryagain.
SQM02014 Wrong customizer call pattern: {0}
Explanation: Package customization failed because ofan unexpected error.
User response: Collect support data by selecting Help> Collect Support Data and forward it to customersupport.
SQM02016 Cannot create collection ''{0}'' due to thefollowing: {1}
Explanation: The indicated collection could not becreated due to the indicated error.
User response: Resolve the indicated error and tryagain.
SQM02017 Profile for package ''{0}'' is too long tobe stored at database
Explanation: The profile for the indicated package istoo long to be stored at the database.
User response: Collect support data by selecting Help> Collect Support Data and forward it to customersupport.
SQM02018 No collection ID (profile owner) isspecified. Cannot proceed in staticmode.
Explanation: The SQLJ package can not be loaded ifno collection ID is specified.
User response: Collect support data by selecting Help> Collect Support Data and forward it to customersupport.
SQM02019 Cannot prepare statement ''{0}'' ofpackage ''{1}'' due to the following error:''{2}''
Explanation: The indicated statement of the packagecan not be prepared due to the indicated error.
User response: Resolve the indicated error and tryagain.
SQM02020 While checking user rights on package''{0}'' the following error has occurred:''{1}''
Explanation: The indicated error occurred while theuser rights on the indicated package were checked.
User response: Resolve the indicated error and tryagain.
SQM02021 Inconsistent profile data for queriespackage ''{0}'' were detected. Rebindpackage.
Explanation: Inconsistent profile data for the indicatedqueries package was detected.
User response: Rebind the package.
SQM02100 The required parameter ''{0}'' is missing.
Explanation: The indicated required parameter ismissing.
User response: Collect support data by selecting Help> Collect Support Data and forward it to customersupport.
SQM02008 • SQM02100
Appendix D. Messages 267
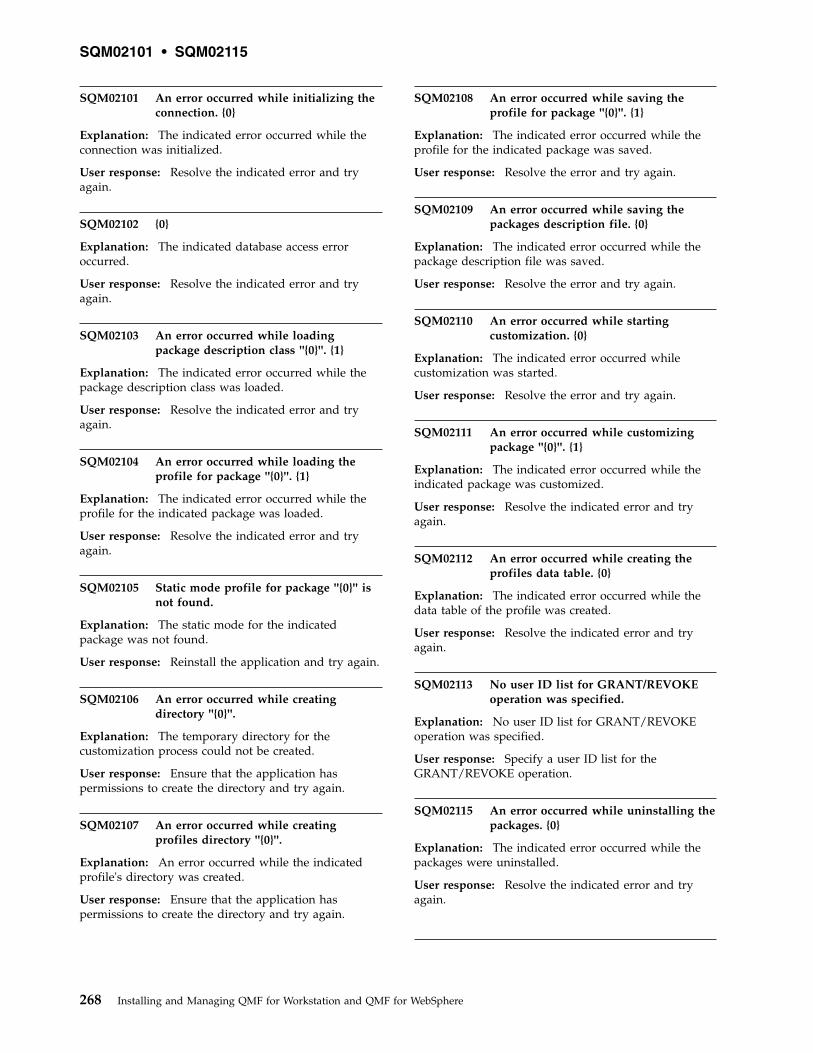
SQM02101 An error occurred while initializing theconnection. {0}
Explanation: The indicated error occurred while theconnection was initialized.
User response: Resolve the indicated error and tryagain.
SQM02102 {0}
Explanation: The indicated database access erroroccurred.
User response: Resolve the indicated error and tryagain.
SQM02103 An error occurred while loadingpackage description class ''{0}''. {1}
Explanation: The indicated error occurred while thepackage description class was loaded.
User response: Resolve the indicated error and tryagain.
SQM02104 An error occurred while loading theprofile for package ''{0}''. {1}
Explanation: The indicated error occurred while theprofile for the indicated package was loaded.
User response: Resolve the indicated error and tryagain.
SQM02105 Static mode profile for package ''{0}'' isnot found.
Explanation: The static mode for the indicatedpackage was not found.
User response: Reinstall the application and try again.
SQM02106 An error occurred while creatingdirectory ''{0}''.
Explanation: The temporary directory for thecustomization process could not be created.
User response: Ensure that the application haspermissions to create the directory and try again.
SQM02107 An error occurred while creatingprofiles directory ''{0}''.
Explanation: An error occurred while the indicatedprofile's directory was created.
User response: Ensure that the application haspermissions to create the directory and try again.
SQM02108 An error occurred while saving theprofile for package ''{0}''. {1}
Explanation: The indicated error occurred while theprofile for the indicated package was saved.
User response: Resolve the error and try again.
SQM02109 An error occurred while saving thepackages description file. {0}
Explanation: The indicated error occurred while thepackage description file was saved.
User response: Resolve the error and try again.
SQM02110 An error occurred while startingcustomization. {0}
Explanation: The indicated error occurred whilecustomization was started.
User response: Resolve the error and try again.
SQM02111 An error occurred while customizingpackage ''{0}''. {1}
Explanation: The indicated error occurred while theindicated package was customized.
User response: Resolve the indicated error and tryagain.
SQM02112 An error occurred while creating theprofiles data table. {0}
Explanation: The indicated error occurred while thedata table of the profile was created.
User response: Resolve the indicated error and tryagain.
SQM02113 No user ID list for GRANT/REVOKEoperation was specified.
Explanation: No user ID list for GRANT/REVOKEoperation was specified.
User response: Specify a user ID list for theGRANT/REVOKE operation.
SQM02115 An error occurred while uninstalling thepackages. {0}
Explanation: The indicated error occurred while thepackages were uninstalled.
User response: Resolve the indicated error and tryagain.
SQM02101 • SQM02115
268 Installing and Managing QMF for Workstation and QMF for WebSphere
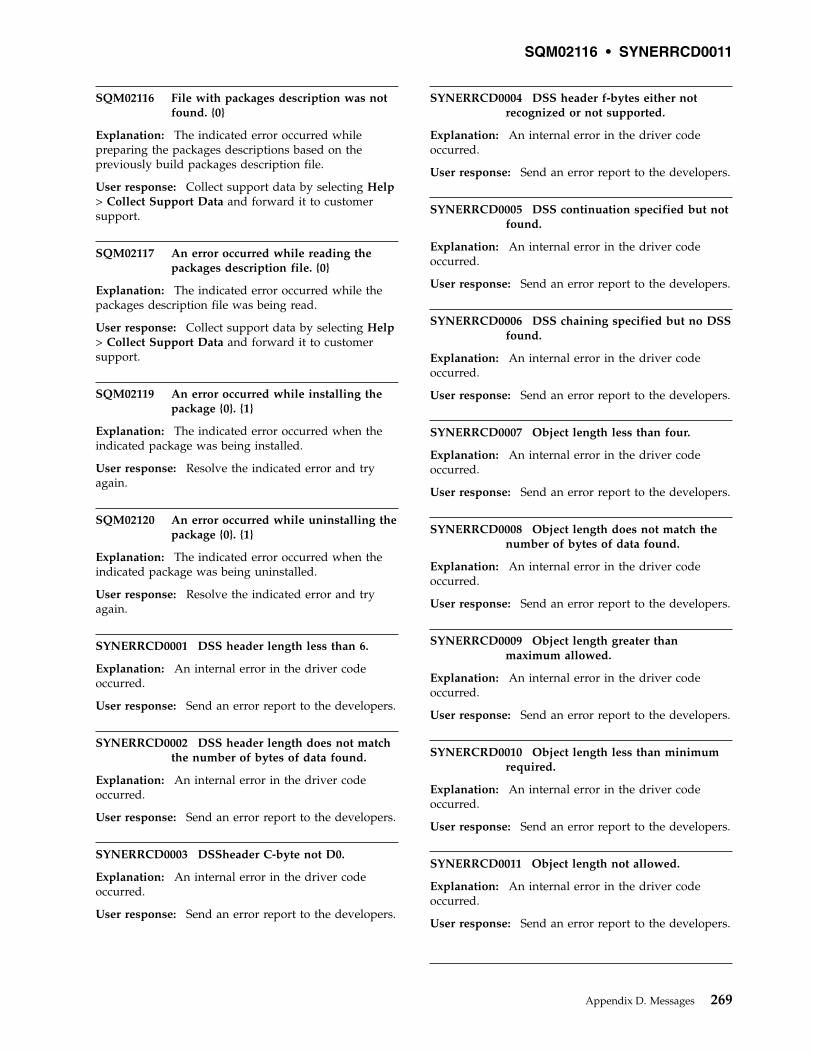
SQM02116 File with packages description was notfound. {0}
Explanation: The indicated error occurred whilepreparing the packages descriptions based on thepreviously build packages description file.
User response: Collect support data by selecting Help> Collect Support Data and forward it to customersupport.
SQM02117 An error occurred while reading thepackages description file. {0}
Explanation: The indicated error occurred while thepackages description file was being read.
User response: Collect support data by selecting Help> Collect Support Data and forward it to customersupport.
SQM02119 An error occurred while installing thepackage {0}. {1}
Explanation: The indicated error occurred when theindicated package was being installed.
User response: Resolve the indicated error and tryagain.
SQM02120 An error occurred while uninstalling thepackage {0}. {1}
Explanation: The indicated error occurred when theindicated package was being uninstalled.
User response: Resolve the indicated error and tryagain.
SYNERRCD0001 DSS header length less than 6.
Explanation: An internal error in the driver codeoccurred.
User response: Send an error report to the developers.
SYNERRCD0002 DSS header length does not matchthe number of bytes of data found.
Explanation: An internal error in the driver codeoccurred.
User response: Send an error report to the developers.
SYNERRCD0003 DSSheader C-byte not D0.
Explanation: An internal error in the driver codeoccurred.
User response: Send an error report to the developers.
SYNERRCD0004 DSS header f-bytes either notrecognized or not supported.
Explanation: An internal error in the driver codeoccurred.
User response: Send an error report to the developers.
SYNERRCD0005 DSS continuation specified but notfound.
Explanation: An internal error in the driver codeoccurred.
User response: Send an error report to the developers.
SYNERRCD0006 DSS chaining specified but no DSSfound.
Explanation: An internal error in the driver codeoccurred.
User response: Send an error report to the developers.
SYNERRCD0007 Object length less than four.
Explanation: An internal error in the driver codeoccurred.
User response: Send an error report to the developers.
SYNERRCD0008 Object length does not match thenumber of bytes of data found.
Explanation: An internal error in the driver codeoccurred.
User response: Send an error report to the developers.
SYNERRCD0009 Object length greater thanmaximum allowed.
Explanation: An internal error in the driver codeoccurred.
User response: Send an error report to the developers.
SYNERCRD0010 Object length less than minimumrequired.
Explanation: An internal error in the driver codeoccurred.
User response: Send an error report to the developers.
SYNERRCD0011 Object length not allowed.
Explanation: An internal error in the driver codeoccurred.
User response: Send an error report to the developers.
SQM02116 • SYNERRCD0011
Appendix D. Messages 269
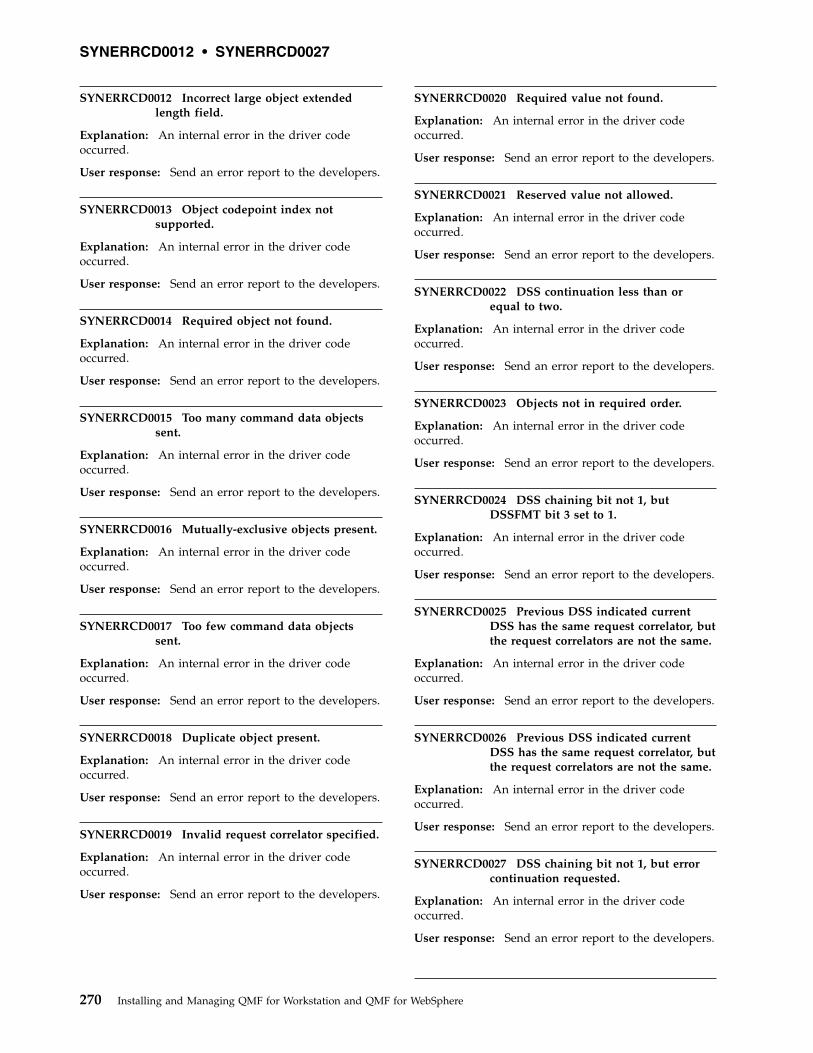
SYNERRCD0012 Incorrect large object extendedlength field.
Explanation: An internal error in the driver codeoccurred.
User response: Send an error report to the developers.
SYNERRCD0013 Object codepoint index notsupported.
Explanation: An internal error in the driver codeoccurred.
User response: Send an error report to the developers.
SYNERRCD0014 Required object not found.
Explanation: An internal error in the driver codeoccurred.
User response: Send an error report to the developers.
SYNERRCD0015 Too many command data objectssent.
Explanation: An internal error in the driver codeoccurred.
User response: Send an error report to the developers.
SYNERRCD0016 Mutually-exclusive objects present.
Explanation: An internal error in the driver codeoccurred.
User response: Send an error report to the developers.
SYNERRCD0017 Too few command data objectssent.
Explanation: An internal error in the driver codeoccurred.
User response: Send an error report to the developers.
SYNERRCD0018 Duplicate object present.
Explanation: An internal error in the driver codeoccurred.
User response: Send an error report to the developers.
SYNERRCD0019 Invalid request correlator specified.
Explanation: An internal error in the driver codeoccurred.
User response: Send an error report to the developers.
SYNERRCD0020 Required value not found.
Explanation: An internal error in the driver codeoccurred.
User response: Send an error report to the developers.
SYNERRCD0021 Reserved value not allowed.
Explanation: An internal error in the driver codeoccurred.
User response: Send an error report to the developers.
SYNERRCD0022 DSS continuation less than orequal to two.
Explanation: An internal error in the driver codeoccurred.
User response: Send an error report to the developers.
SYNERRCD0023 Objects not in required order.
Explanation: An internal error in the driver codeoccurred.
User response: Send an error report to the developers.
SYNERRCD0024 DSS chaining bit not 1, butDSSFMT bit 3 set to 1.
Explanation: An internal error in the driver codeoccurred.
User response: Send an error report to the developers.
SYNERRCD0025 Previous DSS indicated currentDSS has the same request correlator, butthe request correlators are not the same.
Explanation: An internal error in the driver codeoccurred.
User response: Send an error report to the developers.
SYNERRCD0026 Previous DSS indicated currentDSS has the same request correlator, butthe request correlators are not the same.
Explanation: An internal error in the driver codeoccurred.
User response: Send an error report to the developers.
SYNERRCD0027 DSS chaining bit not 1, but errorcontinuation requested.
Explanation: An internal error in the driver codeoccurred.
User response: Send an error report to the developers.
SYNERRCD0012 • SYNERRCD0027
270 Installing and Managing QMF for Workstation and QMF for WebSphere
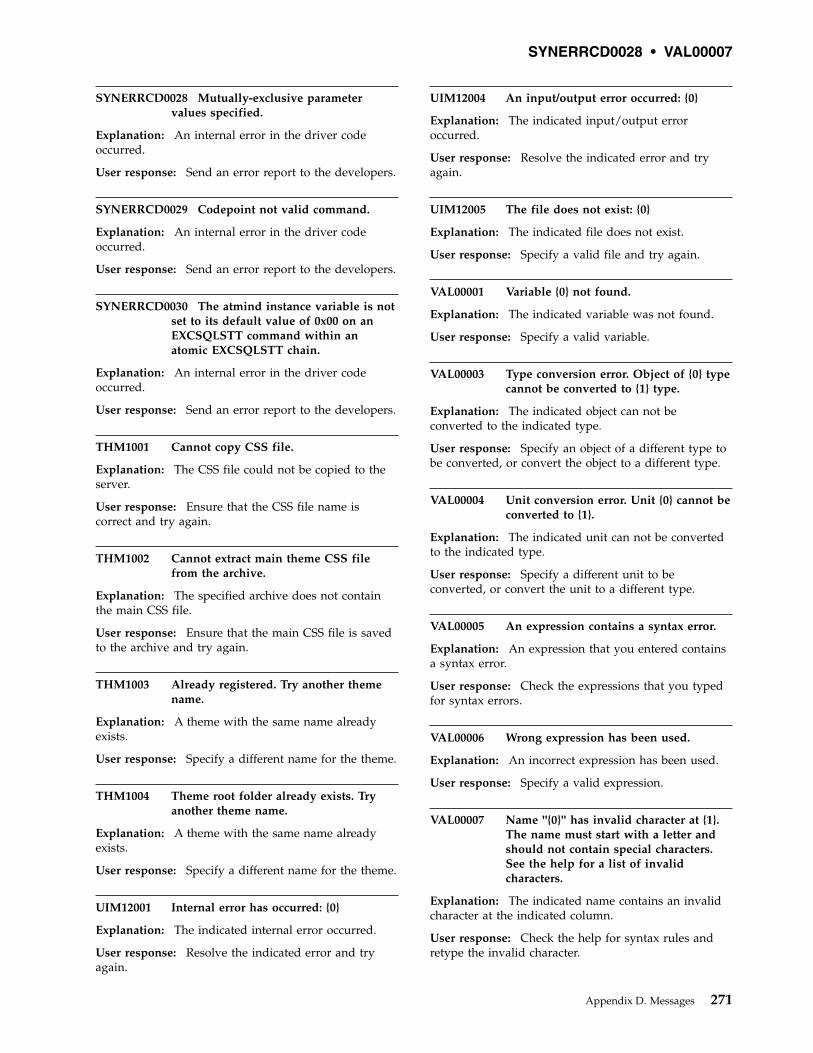
SYNERRCD0028 Mutually-exclusive parametervalues specified.
Explanation: An internal error in the driver codeoccurred.
User response: Send an error report to the developers.
SYNERRCD0029 Codepoint not valid command.
Explanation: An internal error in the driver codeoccurred.
User response: Send an error report to the developers.
SYNERRCD0030 The atmind instance variable is notset to its default value of 0x00 on anEXCSQLSTT command within anatomic EXCSQLSTT chain.
Explanation: An internal error in the driver codeoccurred.
User response: Send an error report to the developers.
THM1001 Cannot copy CSS file.
Explanation: The CSS file could not be copied to theserver.
User response: Ensure that the CSS file name iscorrect and try again.
THM1002 Cannot extract main theme CSS filefrom the archive.
Explanation: The specified archive does not containthe main CSS file.
User response: Ensure that the main CSS file is savedto the archive and try again.
THM1003 Already registered. Try another themename.
Explanation: A theme with the same name alreadyexists.
User response: Specify a different name for the theme.
THM1004 Theme root folder already exists. Tryanother theme name.
Explanation: A theme with the same name alreadyexists.
User response: Specify a different name for the theme.
UIM12001 Internal error has occurred: {0}
Explanation: The indicated internal error occurred.
User response: Resolve the indicated error and tryagain.
UIM12004 An input/output error occurred: {0}
Explanation: The indicated input/output erroroccurred.
User response: Resolve the indicated error and tryagain.
UIM12005 The file does not exist: {0}
Explanation: The indicated file does not exist.
User response: Specify a valid file and try again.
VAL00001 Variable {0} not found.
Explanation: The indicated variable was not found.
User response: Specify a valid variable.
VAL00003 Type conversion error. Object of {0} typecannot be converted to {1} type.
Explanation: The indicated object can not beconverted to the indicated type.
User response: Specify an object of a different type tobe converted, or convert the object to a different type.
VAL00004 Unit conversion error. Unit {0} cannot beconverted to {1}.
Explanation: The indicated unit can not be convertedto the indicated type.
User response: Specify a different unit to beconverted, or convert the unit to a different type.
VAL00005 An expression contains a syntax error.
Explanation: An expression that you entered containsa syntax error.
User response: Check the expressions that you typedfor syntax errors.
VAL00006 Wrong expression has been used.
Explanation: An incorrect expression has been used.
User response: Specify a valid expression.
VAL00007 Name ''{0}'' has invalid character at {1}.The name must start with a letter andshould not contain special characters.See the help for a list of invalidcharacters.
Explanation: The indicated name contains an invalidcharacter at the indicated column.
User response: Check the help for syntax rules andretype the invalid character.
SYNERRCD0028 • VAL00007
Appendix D. Messages 271
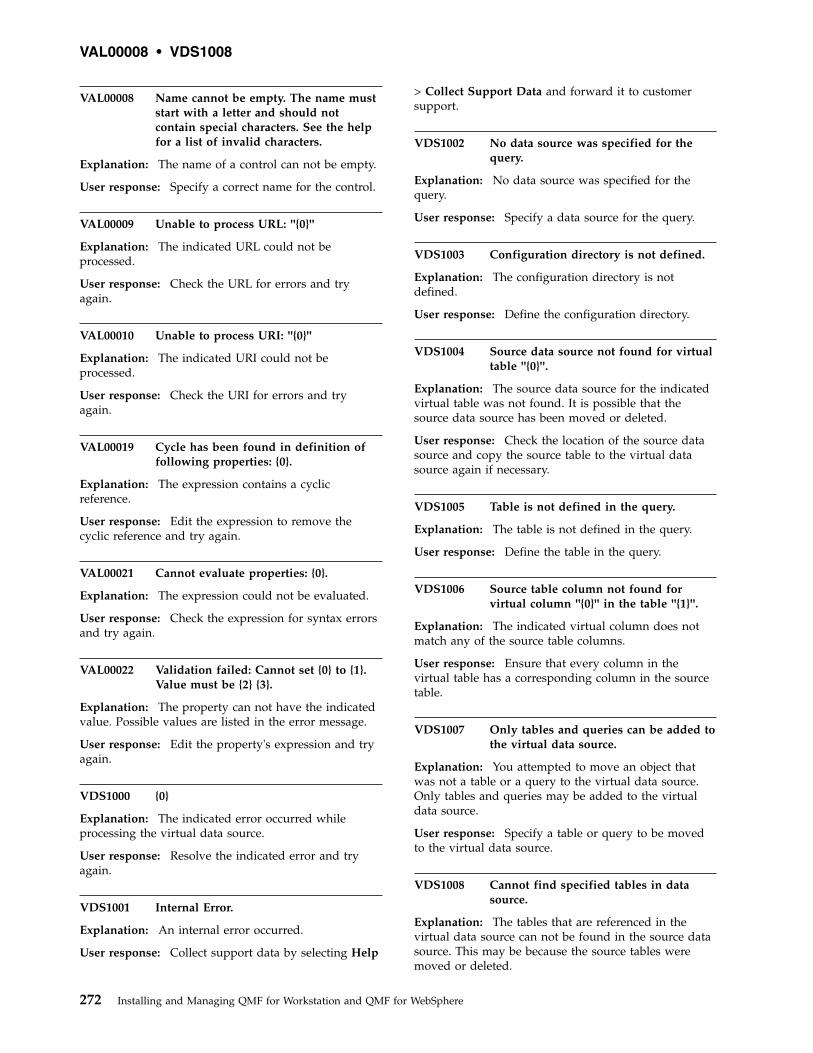
VAL00008 Name cannot be empty. The name muststart with a letter and should notcontain special characters. See the helpfor a list of invalid characters.
Explanation: The name of a control can not be empty.
User response: Specify a correct name for the control.
VAL00009 Unable to process URL: ''{0}''
Explanation: The indicated URL could not beprocessed.
User response: Check the URL for errors and tryagain.
VAL00010 Unable to process URI: ''{0}''
Explanation: The indicated URI could not beprocessed.
User response: Check the URI for errors and tryagain.
VAL00019 Cycle has been found in definition offollowing properties: {0}.
Explanation: The expression contains a cyclicreference.
User response: Edit the expression to remove thecyclic reference and try again.
VAL00021 Cannot evaluate properties: {0}.
Explanation: The expression could not be evaluated.
User response: Check the expression for syntax errorsand try again.
VAL00022 Validation failed: Cannot set {0} to {1}.Value must be {2} {3}.
Explanation: The property can not have the indicatedvalue. Possible values are listed in the error message.
User response: Edit the property's expression and tryagain.
VDS1000 {0}
Explanation: The indicated error occurred whileprocessing the virtual data source.
User response: Resolve the indicated error and tryagain.
VDS1001 Internal Error.
Explanation: An internal error occurred.
User response: Collect support data by selecting Help
> Collect Support Data and forward it to customersupport.
VDS1002 No data source was specified for thequery.
Explanation: No data source was specified for thequery.
User response: Specify a data source for the query.
VDS1003 Configuration directory is not defined.
Explanation: The configuration directory is notdefined.
User response: Define the configuration directory.
VDS1004 Source data source not found for virtualtable ''{0}''.
Explanation: The source data source for the indicatedvirtual table was not found. It is possible that thesource data source has been moved or deleted.
User response: Check the location of the source datasource and copy the source table to the virtual datasource again if necessary.
VDS1005 Table is not defined in the query.
Explanation: The table is not defined in the query.
User response: Define the table in the query.
VDS1006 Source table column not found forvirtual column ''{0}'' in the table ''{1}''.
Explanation: The indicated virtual column does notmatch any of the source table columns.
User response: Ensure that every column in thevirtual table has a corresponding column in the sourcetable.
VDS1007 Only tables and queries can be added tothe virtual data source.
Explanation: You attempted to move an object thatwas not a table or a query to the virtual data source.Only tables and queries may be added to the virtualdata source.
User response: Specify a table or query to be movedto the virtual data source.
VDS1008 Cannot find specified tables in datasource.
Explanation: The tables that are referenced in thevirtual data source can not be found in the source datasource. This may be because the source tables weremoved or deleted.
VAL00008 • VDS1008
272 Installing and Managing QMF for Workstation and QMF for WebSphere
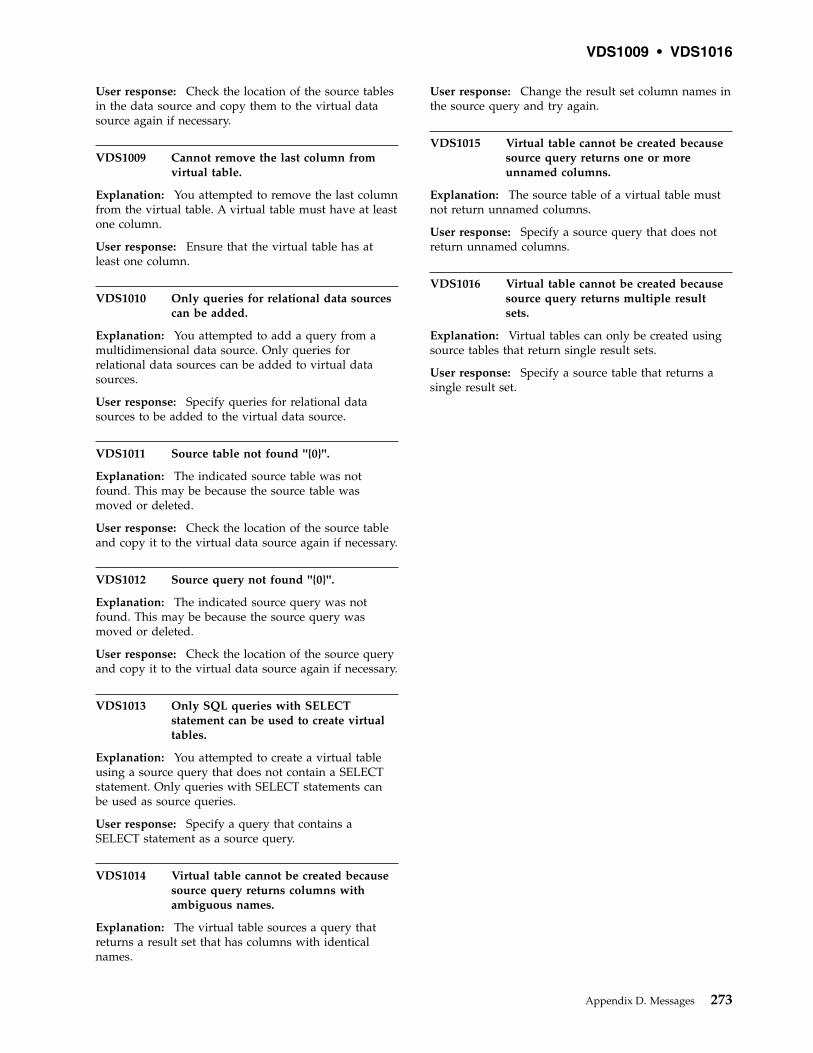
User response: Check the location of the source tablesin the data source and copy them to the virtual datasource again if necessary.
VDS1009 Cannot remove the last column fromvirtual table.
Explanation: You attempted to remove the last columnfrom the virtual table. A virtual table must have at leastone column.
User response: Ensure that the virtual table has atleast one column.
VDS1010 Only queries for relational data sourcescan be added.
Explanation: You attempted to add a query from amultidimensional data source. Only queries forrelational data sources can be added to virtual datasources.
User response: Specify queries for relational datasources to be added to the virtual data source.
VDS1011 Source table not found ''{0}''.
Explanation: The indicated source table was notfound. This may be because the source table wasmoved or deleted.
User response: Check the location of the source tableand copy it to the virtual data source again if necessary.
VDS1012 Source query not found ''{0}''.
Explanation: The indicated source query was notfound. This may be because the source query wasmoved or deleted.
User response: Check the location of the source queryand copy it to the virtual data source again if necessary.
VDS1013 Only SQL queries with SELECTstatement can be used to create virtualtables.
Explanation: You attempted to create a virtual tableusing a source query that does not contain a SELECTstatement. Only queries with SELECT statements canbe used as source queries.
User response: Specify a query that contains aSELECT statement as a source query.
VDS1014 Virtual table cannot be created becausesource query returns columns withambiguous names.
Explanation: The virtual table sources a query thatreturns a result set that has columns with identicalnames.
User response: Change the result set column names inthe source query and try again.
VDS1015 Virtual table cannot be created becausesource query returns one or moreunnamed columns.
Explanation: The source table of a virtual table mustnot return unnamed columns.
User response: Specify a source query that does notreturn unnamed columns.
VDS1016 Virtual table cannot be created becausesource query returns multiple resultsets.
Explanation: Virtual tables can only be created usingsource tables that return single result sets.
User response: Specify a source table that returns asingle result set.
VDS1009 • VDS1016
Appendix D. Messages 273

274 Installing and Managing QMF for Workstation and QMF for WebSphere
Notices
This information was developed for products and services offered in the U.S.A.
IBM may not offer the products, services, or features discussed in this document inother countries. Consult your local IBM representative for information on theproducts and services currently available in your area. Any reference to an IBMproduct, program, or service is not intended to state or imply that only that IBMproduct, program, or service may be used. Any functionally equivalent product,program, or service that does not infringe any IBM intellectual property right maybe used instead. However, it is the user's responsibility to evaluate and verify theoperation of any non-IBM product, program, or service.
IBM may have patents or pending patent applications covering subject matterdescribed in this document. The furnishing of this document does not give youany license to these patents. You can send license inquiries, in writing, to:
IBM Director of LicensingIBM CorporationNorth Castle DriveArmonk, NY 10504-1785U.S.A.
For license inquiries regarding double-byte (DBCS) information, contact the IBMIntellectual Property Department in your country or send inquiries, in writing, to:
Intellectual Property LicensingLegal and Intellectual Property LawIBM Japan, Ltd.1623-14, Shimotsuruma, Yamato-shiKanagawa 242-8502 Japan
The following paragraph does not apply to the United Kingdom or any othercountry where such provisions are inconsistent with local law:INTERNATIONAL BUSINESS MACHINES CORPORATION PROVIDES THISPUBLICATION "AS IS" WITHOUT WARRANTY OF ANY KIND, EITHEREXPRESS OR IMPLIED, INCLUDING, BUT NOT LIMITED TO, THE IMPLIEDWARRANTIES OF NON-INFRINGEMENT, MERCHANTABILITY OR FITNESSFOR A PARTICULAR PURPOSE. Some states do not allow disclaimer of express orimplied warranties in certain transactions, therefore, this statement may not applyto you.
This information could include technical inaccuracies or typographical errors.Changes are periodically made to the information herein; these changes will beincorporated in new editions of the publication. IBM may make improvementsand/or changes in the product(s) and/or the program(s) described in thispublication at any time without notice.
Any references in this information to non-IBM websites are provided forconvenience only and do not in any manner serve as an endorsement of thosewebsites. The materials at those websites are not part of the materials for this IBMproduct and use of those websites is at your own risk.
275
IBM may use or distribute any of the information you supply in any way itbelieves appropriate without incurring any obligation to you.
Licensees of this program who wish to have information about it for the purposeof enabling: (i) the exchange of information between independently createdprograms and other programs (including this one) and (ii) the mutual use of theinformation which has been exchanged, should contact:
IBM CorporationJ46A/G4555 Bailey AvenueSan Jose, CA 95141-1003U.S.A.
Such information may be available, subject to appropriate terms and conditions,including in some cases, payment of a fee.
The licensed program described in this document and all licensed materialavailable for it are provided by IBM under terms of the IBM Customer Agreement,IBM International Program License Agreement, or any equivalent agreementbetween us.
This information contains examples of data and reports used in daily businessoperations. To illustrate them as completely as possible, the examples include thenames of individuals, companies, brands, and products. All of these names arefictitious and any similarity to the names and addresses used by an actual businessenterprise is entirely coincidental.
COPYRIGHT LICENSE:
This information contains sample application programs in source language, whichillustrate programming techniques on various operating platforms. You may copy,modify, and distribute these sample programs in any form without payment toIBM, for the purposes of developing, using, marketing or distributing applicationprograms conforming to the application programming interface for the operatingplatform for which the sample programs are written. These examples have notbeen thoroughly tested under all conditions. IBM, therefore, cannot guarantee orimply reliability, serviceability, or function of these programs. The sampleprograms are provided "AS IS", without warranty of any kind. IBM shall not beliable for any damages arising out of your use of the sample programs.
TrademarksIBM, the IBM logo, and ibm.com® are trademarks or registered trademarks ofInternational Business Machines Corporation in the United States, other countries,or both. These and other IBM trademarked terms are marked on their firstoccurrence in this information with the appropriate symbol (® or ™), indicating USregistered or common law trademarks owned by IBM at the time this informationwas published. Such trademarks may also be registered or common lawtrademarks in other countries. A complete and current list of IBM trademarks isavailable on the Web at http://www.ibm.com/legal/copytrade.shtml.
Java and all Java-based trademarks and logos are trademarks or registeredtrademarks of Oracle and/or its affiliates.
276 Installing and Managing QMF for Workstation and QMF for WebSphere
Linux is a registered trademark of Linus Torvalds in the United States, othercountries, or both.
Microsoft, Windows, Windows NT, and the Windows logo are trademarks ofMicrosoft Corporation in the United States, other countries, or both.
UNIX is a registered trademark of The Open Group in the United States and othercountries.
Other company, product, and service names may be trademarks or service marksof others.
Terms and conditions for product documentationPermissions for the use of these publications are granted subject to the followingterms and conditions:
Applicability: These terms and conditions are in addition to any terms of use forthe IBM website.
Personal use: You may reproduce these publications for your personal,noncommercial use provided that all proprietary notices are preserved. You maynot distribute, display or make derivative work of these publications, or anyportion thereof, without the express consent of IBM.
Commercial use: You may reproduce, distribute and display these publicationssolely within your enterprise provided that all proprietary notices are preserved.You may not make derivative works of these publications, or reproduce, distributeor display these publications or any portion thereof outside your enterprise,without the express consent of IBM.
Rights: Except as expressly granted in this permission, no other permissions,licenses or rights are granted, either express or implied, to the publications or anyinformation, data, software or other intellectual property contained therein.
IBM reserves the right to withdraw the permissions granted herein whenever, in itsdiscretion, the use of the publications is detrimental to its interest or, asdetermined by IBM, the above instructions are not being properly followed.
You may not download, export or re-export this information except in fullcompliance with all applicable laws and regulations, including all United Statesexport laws and regulations.
IBM MAKES NO GUARANTEE ABOUT THE CONTENT OF THESEPUBLICATIONS. THE PUBLICATIONS ARE PROVIDED "AS-IS" AND WITHOUTWARRANTY OF ANY KIND, EITHER EXPRESSED OR IMPLIED, INCLUDINGBUT NOT LIMITED TO IMPLIED WARRANTIES OF MERCHANTABILITY,NON-INFRINGEMENT, AND FITNESS FOR A PARTICULAR PURPOSE.
Privacy policy considerationsIBM Software products, including software as a service solutions, (“SoftwareOfferings”) may use cookies or other technologies to collect product usageinformation, to help improve the end user experience, to tailor interactions withthe end user, or for other purposes. In many cases no personally identifiableinformation is collected by the Software Offerings. Some of our Software Offerings
Notices 277
can help enable you to collect personally identifiable information. If this SoftwareOffering uses cookies to collect personally identifiable information, specificinformation about this offering’s use of cookies is set forth below.
This Software Offering does not use cookies or other technologies to collectpersonally identifiable information.
If the configurations deployed for this Software Offering provide you as customerthe ability to collect personally identifiable information from end users via cookiesand other technologies, you should seek your own legal advice about any lawsapplicable to such data collection, including any requirements for notice andconsent.
For more information about the use of various technologies, including cookies, forthese purposes, see IBM’s Privacy Policy at http://www.ibm.com/privacy andIBM’s Online Privacy Statement at http://www.ibm.com/privacy/details thesection entitled “Cookies, Web Beacons and Other Technologies” and the “IBMSoftware Products and Software-as-a-Service Privacy Statement” athttp://www.ibm.com/software/info/product-privacy.
278 Installing and Managing QMF for Workstation and QMF for WebSphere
Glossary
The glossary provides brief descriptions of product terms.
accessibility. Features that help those with physicaldisabilities, such as restricted mobility or limited vision,use their computer.
breakpoints. Color maps that specify the value atwhich the color changes.
calculated columns. Columns of data that you add tothe query results.
classic reports. Text-based, tabular reports that aregenerated using query results as the data source and aform template.
color map. A color map can be used to vary the colorof a visual project object depending on a valueassociated with the object.
color sequence. A color sequence can be used tomodify the color properties of a visual project objectbased on an index value.
command bar. An interface that allows you to runprocedure commands directly from the QMF forWorkstation interface.
connectivity tool. An interface that allows you todefine dependencies between non-query driven objectssuch as text box objects and label objects. TheConnectivity tool is only available when creating visualdashboards.
cube structure tree. In the layout format, the CubeStructure tree lists the dimensions and measures thatare contained in the cube.
data sources. Data sources allow you to create virtualtables that can be edited and manipulated by userswithout altering the original tables' content. Virtualdata sources work by introducing a metadata layerwhich mediates between an administrator-defined,virtual data source and the underlying data sourcesthat contain the physical tables and views.
data templates. Data templates are used to create andcontrol the visual representation of query result set datawithin layout objects.
Diagram Query Editor. When building queries usingthe Diagram Query editor, you supply table, join,column, sort, and row information and the DiagramQuery editor constructs the Structured Query Language(SQL) statements. The Diagram Query editor is notavailable in QMF for WebSphere.
Draw Query Editor. Use the Draw Query editor tocreate a query object automatically based on the querytype and tables that you specify.
drilldown. A navigation feature that enables yourusers to click an object and jump to another scene thatcontains more information that relates specifically tothe original object's value. The Drilldown wizard isavailable for all layout objects that can display queryresult data.
edit codes. Edit codes specify how to format character,date, graphic, numeric, time and timestamp data thatwill appear in a specific column of a report. You canalso create user-defined edit codes.
embedded scene. An embedded scene object is acontainer through which you can view all or a portionof another scene and then navigate to that scene. Thescene where you place the embedded scene object isconsidered the source scene. The destination scene isthe embedded scene.
event actions. You define event actions to objects toprovide scene interactivity and navigation. As a usernavigates your dashboard, mouse actions triggerpredefined events, such as jumps between scenes,executing of SQL statements, or the launching of otherapplications.
Expression Designer. The Expression Designer is usedto specify any property value that is associated with aselected object. The Expression Designer is analternative way of specifying an object's properties. Foreach property that can be specified for an object, youare given templates that can help you format the valueof that property. In addition, you have more spaceavailable to work and view your property value (whichcan grow quite large if expressions are used).
fast save. When saving your query results data usinga "fast save" method, all the processing occurs at thedatabase. There is no further passing of data betweenthe QMF for Workstation/WebSphere interface and thedatabase. The QMF for Workstation/WebSphereinterface adds SQL to the original query, the query isrerun and the data is saved directly into the specifiedtable(s). Saving query results data using the "fast save"process significantly improves performance when alarge amount of data is to be saved.
file-based repositories. If you are using QMF forWorkstation, you can create a file repository connectionto set up the information that enables you to connect to
279
a file-based repository that is stored on a local ornetwork drive. File connections can only be created forlegacy, file-based repositories.
formatting options. You can customize how the queryresults will appear in the editor window. You canspecify different fonts, colors and text alignments foreach column heading and each cell of the column. Youcan also specify that column and cell formatting beapplied based on the results of a conditionalexpression. You can apply formatting options to entirecolumns, individual cells, column headings, andsummary cells.
forms. Forms are considered objects and they can besaved in your repository, in the QMF catalog, or in afile. When you open a form object that has been saved,you are actually running the form object to generate thereport. When opened, forms automatically use thecurrently active query results as the data source.
form variables. Form variables are codes that you caninsert into text fields to produce information on thereport. For example, you can insert a date variable toproduce the current date whenever the report isprinted.
global parameter. A global parameter is available toyour entire visual project and to the user of your visualdashboard. You can pass global parameters when youspecify object properties or when you create eventactions. You also have the option of making globalparameters public at runtime so they are accessible tothe user.
global resources. Global resources can be used by allthe pages of a visual report or all the scenes of a visualdashboard. You can use global resources for computingobject properties.
global variables. Global variables are variables thatstay active while the current session of QMF forWorkstation/WebSphere is active. This is in contrast tosubstitution variables that are active only during theexecution of an object (query, procedure, form). Forobjects that use global variables, the value currentlydefined for the global variable is used.
grouping and aggregation. Grouping and aggregationoptions can be applied to query result columns toorganize the result data into logical or summarizedgroupings. By adding grouping and aggregation youcan automatically obtain summary information aboutyour data and display the data more logically. Forexample you can roll up data in a report bydepartment or average departmental commissions.
information zooming. Information zooming is anavigation feature that presents a more detailed viewof data as your user zooms in on a scene or a datapoint in a layout. Every layout object and scene has adefault zoom level (100% zoom). You can set upinformation zooming navigation for whole scenes and
for individual layout objects. Information zooming onthe layout object allows you to provide more queryinformation on each data point as the user zooms in ona layout object. You use the same query results data foreach zoom level. Information zooming on the scenelevel allows you to display an entirely different layoutand query results data for each zoom level.
JDBC drivers. QMF for Workstation/WebSphere usesJDBC to connect to all database repositories and datasources. QMF for Workstation/WebSphere does notinclude JDBC drivers. The location of the JDBC driversthat QMF for Workstation/WebSphere will use toconnect to repositories and data sources must bedefined. QMF for Workstation/WebSphereadministrators are responsible for identifying whereeach instance of the application interface will find theJDBC drivers.
job definition files. Job definition files (.jdfx) arelegacy QMF files that can be imported to set upscheduled jobs.
task scheduler. QMF for Workstation/WebSphere hasthe ability to schedule procedures, queries, quickreports, and visual reports to be executed on a periodic,recurring basis or at a specific date and time. You canschedule your object to run at any given time usingyour local scheduler or the QMF for WebSpherescheduler.
layout objects. In a visual dashboard scene, layoutobjects are used to display query results in visualformats, such as charts, graphs, maps, tables and grids.For most layout objects, you display the results ofmultiple queries in a single layout. For example, youcould create a single XY chart that displays salesfigures derived from one query and spending figuresderived from another query. You can nest multiplelayout objects. When you nest layout objects, you canpass query result information from a higher levellayout object to a lower level layout object. Because youhave the ability to pass this information, you can usenested layout objects to display more detailedinformation that relates to a specific data value.
Layout Properties dialog. An interface that allows youto set all the options that are available for formattingquery results. The Layout Properties dialog uses a treestructure to represent the columns in the query results.Depending on what you have selected in the queryresults, the Layout Properties tree displays branches forall columns in the query results or for a single columnin the query results. You can apply formatting optionsto entire columns, individual cells, column headings,and summary cells.
Legacy Visionary world. You can create a newdashboard from an existing Visionary world that wascreated using a previous version of QMF Visionary. TheVisionary world that you import must have been
280 Installing and Managing QMF for Workstation and QMF for WebSphere
exported as an XML file using QMF for VisionaryVersion 8.1, Fix Pack 13 or later.
LOB data. A large object (LOB) is a Db2 for z/OS andDb2 for Linux, UNIX®, and Windows data type thathouses nontraditional data such as text, multimedia,image, video, photograph, sound, or any very largedata file inside a database table. Retrieving or savingLOB data can consume a substantial amount ofresources.
network repositories. A connection to a sharedrepository using direct network access. Networkconnectivity permits users to access a shared repositorywithout the need for direct database connectivity fromthe workstation. Connecting to repositories using anetwork connection allows for consolidation of dataaccess at a central server and removes the need todistribute JDBC drivers across each desktop runningQMF for Workstation. This type of connection is notapplicable to QMF for WebSphere users.
OLAP queries. OLAP queries enable users todynamically access different dimensions ofmultidimensional data. Using QMF for Workstationand QMF for WebSphere you can create an OLAPquery for multidimensional data sources that is queriedusing MDX and accessed using XMLA.
palette objects. From the Palette view, you can insertany graphical object that is listed into your visualproject. All objects from the Palette view can beinserted in a visual dashboard. Not all objects availablefrom the Palette view can be inserted in a visual report.The objects that cannot be inserted in a visual reporthave interactive properties, and visual reports are notinteractive.
personal repositories. Personal repositories serve asingle user and are stored in the personnel settingsdirectory of the workstation (server) that is running theQMF for Workstation/WebSphere application interface.
perspectives. An interface used for querying data andformatting results.
procedures. A set of commands that enable you to runqueries, print reports, import and export data, as wellas perform other functions.
Project Explorer view. The Project Explorer viewdetails in a tree structural all the elements and objectsof each visual report and each dashboard.
Prompted Query editor. An interface that allows youto build simple to complex queries. The PromptedQuery editor prompts you for the information it needsto build the SQL statement. You can also set sort androw conditions using the Prompted Query editor. (QMFfor Workstation only)
QMF catalogs. A set of database tables that containsaved objects (queries, procedures and forms); user
resource limits and profiles; reports; and othermiscellaneous settings and information. QMF catalogsreside on database servers that host a Db2 database.
Query Editor. An interface that allows you to openany database table that is accessible to you in yourworkspace.
query parameters. Query parameters contain thevalue that will be sent to the query and used atruntime.
regular save. When saving your query results datausing a "regular save" method, the interface that youare using (QMF for Workstation or QMF forWebSphere) saves the retrieved query results to thedatabase using an individual SQL INSERT statementfor each row of data. This type of save can beexpensive in terms of performance due to the overheadof passing large amounts of data back to the database.
relational query. A query is a request for informationfrom a data source. To request information from arelational data source your query is constructed usingSQL statements.
resource limits. QMF for Workstation/WebSphereresource limits control your data source access andresource consumption. You must be connected to thedata source in order to view the resource limits that arein effect for your user ID when you access that datasource.
scene parameters. A parameter that is available onlyto a specific scene in a visual dashboard. You can passscene parameters when you create embedded scenesand event actions.
scheduled tasks. You can schedule your procedure,query, quick report, or visual report to run at any giventime using your local scheduler or the QMF forWebSphere scheduler. Objects that have been scheduledto run at another time are referred to as scheduledtasks.
shared repositories. Shared repositories are located ona database and can be shared by many users. OnlyQMF for Workstation/WebSphere administrators cancreate shared repositories.
SQL Query editor. For those with SQL experience,one way of creating a query is to type their own SQLstatements in the SQL Query editor. You can write asingle SQL statement that will return a single result setor multiple SQL statements that will return multipleresult sets. The editor provides coloring support foryour SQL statements.
static SQL packages. Several tables in repositorystorage are used by QMF to store processinginformation. Some of these tables store sensitiveinformation, for example the permissions table. Bydefault all users can access these repository storage
Glossary 281
tables and make changes to the tables. You can chooseto protect the repository storage tables. In protectionmode, the repository storage tables are accessed using acollection of stored procedures or static SQL packagesdepending on what the database that is hosting therepository storage supports. Users of the repositorystorage must then be granted permission to run thestored procedures or static SQL packages.
substitution variables. Substitution variables are usedto enter changing values to a SQL query at run time.This feature enables you to substitute a part of an SQLstatement and make it more generic. Substitutionvariables are active only while the object (query,procedure or form) is running. As a result, only oneobject can access the substitution variable. The variablewill not exist after the object is executed.
Table Editor. An interface that allows you to open anydatabase table that is accessible to you in yourworkspace.
Table Viewer. An interface that allows you to openany database table that is accessible to you in yourworkspace.
translation tables. Translation tables enable dashboarddesigners to publish a single visual dashboard that maybe viewed in multiple languages. When contentdevelopers create a dashboard, button captions, labels,tool tips and other embedded text is entered directlyinto the property values of the dashboard objects.Using translation tables, content developers can supplyalternate versions of this entered text, to be displayedwhen the user is in a different locale. For example, aJapanese developer may elect to author a newdashboard in Japanese but then also include translationtables for German and French, each of which will beused when the dashboard is viewed under German andFrench locales.
usage codes. Usage codes provide summaryinformation about the data in a column. For example,usage codes can provide total summary information atthe end of a column, or partial summaries at controlbreaks in a table. The usage codes available depend onthe data in the column and the type of summary.
user preferences. The Preferences dialog is used to setuser preferences that will apply to specific functions inthe current QMF for Workstation/WebSphereapplication interface session. The Preferences dialogconsists of two panes. The left pane displays ahierarchical tree to organize the preferences and theright pane displays the pages of actual preferencevalues.
variables bar. You can use the Variables bar to specifya property value. The Variables bar is located in themenu bar. From the Variables bar you can choose a
global or local parameter that has been defined for thevisual project and a column name from a set of queryresults.
views. QMF for Workstation/WebSphere viewssupport editors and provide alternative presentations aswell as ways to navigate the information in yourwindow. Each view displays as a pane in the mainworkstation window. Each perspective of QMF forWorkstation/WebSphere initially displays the viewsthat are most commonly used to perform specificfunctions.
visual dashboards. Visual dashboards presentinteractive or persistent data obtained from queryingmultiple heterogeneous data sources across theenterprise. Visual dashboards present data in a sceneformat using a wide variety of graphics includingcharts, graphs, maps and user interface widgets. Datadriven graphical objects can be easily linked so thatuser selections will trigger unique data displays.Content developers can create a visual dashboard thatcan be viewed by multiple users with either QMF forWorkstation or QMF for WebSphere.
visual designer. You can quickly design visual reportsand dashboards using the intuitive Visual Designerperspective that includes an editor that presents bothdesign and runtime views of the project; the ProjectExplorer view which details the structural content ofeach visual report and each dashboard; and the Palette,Properties, Events and Output views which support theVisual Designer editor and assist in creating visualreports and dashboards.
visual reports. Visual reports are page-based, printablereports that include both formatted text and graphics todisplay persistent data to a wide variety of users.Visual reports can also contain data driven graphics(such as maps and charts) inserted in different sections(such as the headers or footers) of the report. Each ofthe data driven graphics can present data from multiplequeries that are run across the enterprise.
web service repositories. You create a Web servicerepository connection to set up the information thatenables you to connect to a shared repository throughQMF for WebSphere web services API using a HTTP orHTTPS connection. Web-based connectivity permitsusers to access a shared repository without the need fordirect database connectivity from the workstation.Connecting to repositories using a web-basedconnection allows for consolidation of data access at acentral server and removes the need to distribute JDBCdrivers across each desktop running QMF forWorkstation. This type of connection does not apply toQMF for WebSphere.
workspaces. All of the data sources and objects thatyou can access are contained in one or moreworkspaces that have been pre-populated for you bythe QMF for Workstation/WebSphere administrator.
282 Installing and Managing QMF for Workstation and QMF for WebSphere

Each workspace to which you have access is listed inthe Workspaces view. From the Workspaces view, youcan perform the majority of query and reportingfunctions.
zoom. If you are using QMF for Workstation, you canuse the Zoom option to view in hexadecimal or binarynumber the contents of a cell in the query results.
Glossary 283

284 Installing and Managing QMF for Workstation and QMF for WebSphere
Index
Aacceleration
preferences 24acceleration resource limits 164accelerator 24, 164accessibility 197
assistive technology 198keyboard equivalents 197keyboard navigation 197navigation in WebSphere 200navigation in Workstation 198operating system 197
administrative privileges 144administrator 1Appearance preferences 25application
accessing 12completing installation 12deploying to WebSphere Application
Server 9installing new version 9starting 11
auditaudit system
audit database 26, 189, 190, 191audit system 189
Bbinding resource limits 160
Ccache 93, 94, 105cache in virtual data sources 92, 106cache resource limits 163cache settings 93, 105caching 119, 143
repository data 119collection IDs 144configuring 46
environment 15overview 21
connecting users to data 46connecting with 46, 52connection properties 53Create
JavaScript Tables 100creating repository tables 60
Ddata source resource limits 145data sources 71
folder data sources 86login mapping 125, 126, 127
dataSource object 95default resource limits group 148
deploying qmf data server administrativeconsole 195
DRDA 46, 52, 53driver class name 33driver preferences 41
EEdit
JavaScript Tables 104email preferences 27, 28environments
creating 113editing connection settings 114setting up 113
ER diagram 110ER diagram folders 112ER diagrams 110ERDs 110Exporting configuration data 130Exporting update scripts 135
Ffile-based repositories 115, 118FIPS-140 46fix pack 8folder data sources 86, 87
GGeneral preferences 23global variables 29
system 31user variables 30
Hhelp content 32Help preferences 31Hive data sources 85host 32
Iimport
CSVseparator options 88
TXTseparator options 88
XLS 88XLSX 88
import CSVseparator options 88
import settings 18Import settings from QMF for
Windows 18import TXT
separator options 88
import XLS 88import XLSX 88install 5installation 5, 8, 9internal security 63
group properties 66new groups 65new users 64user properties 66users and groups 64
iSeriesgranting EXECUTE privilege 201listing logical files 201listing physical files 201
JJARS 33, 48JavaScript 96, 100JavaScript data source 94JavaScript data sources 94
dataSource 95dataSource.parameters 95dataSource.url 95dataSource.userinfo.login 95dataSource.userinfo.password 95modify connection parameters 107sendHTTPRequest() 95
JavaScript Tables 99, 100, 102JDBC 46JDBC drivers 48
configuring access 10exporting and importing 134
JDBC libraries 33JDBC preferences 33
LLDAP security 67
authenticator fields 70group fields 68main fields 67user fields 69
limits resource limits 155links
non-IBM Web sites 277LOB options resource limits 162LOBs preferences 34Log preferences 35login mapping 125, 126, 127long name objects 145long name servers 145
Mmodules in JavaScript data sources
Authenticate 99Common Functions 99Disconnect 99
multidimensional data sources 84
285

Nnetwork connections 122network repositories 115notices
legal 275
Oobject list resource limits 164object tracking reports 185
activating 185maintaining tables 187running 186
object tracking resource limits 161object views 202
Q.RAA_OBJ_DIR_X 202Q.RAA_OBJECT_VIEW_X 203RDBI_AUTH_TABLE_X 203RDBI_AUTHID_VIEW_X 203RDBI.ADMIN_VIEW 204, 206RDBI.AUTHID_TABLE_X 205, 206,
207RDBI.AUTHID_VIEW_X 205, 206,
207RDBI.CATALOG_DIR_X 203, 204RDBI.TABLE_VIEW2_X 205RDBI.USER_ADMIN_VIEW_X 202,
204, 206RDBI.USER_AUTHID_VIEW_X 206,
207RDBL.ADMIN_VIEW 207RDBLADMIN_VIEW 203RDBLUSER.USER_AUTHID_
VIEW_X 203SYSIBM.SYSUSERAUTH 203
objectscustomizing 201
options resource limits 157Output preferences 40overview 1, 130
Ppath 32personal data sources 78, 79populating ER diagrams 112port 32preferences
Appearance 23, 25Dashboard Runtime 23driver 41email 27General 23Global Variables 23Help 23, 31JDBC 33JDBC Libraries 23LOBs 23, 34Log 23, 35Output 40QMF Data Service 41QMF Server registry 43Server-Side File System 43SMTP 27, 28SSL 42Third Party Libraries 44
preferences (continued)Third-Party Libraries 23user 23virtual data source 45Visual Designer 23, 45
QQMF catalogs 71
database access 168database objects 74extended 77objects 72properties 177
data sources 180protection status 179tables 178
protecting and grantingpermissions 75
resource limits security 148selecting a catalog 76user profiles 168
enrollment 167QMF Data Service data source 108
creating 108QMF Data Service preferences 41QMF for WebSphere system
requirements 3QMF for Workstation system
requirements 2QMF Server registry preferences 43qmf.instance.area 12qmf.instance.area.global 12qmf.instance.area.shared 12qmf.use.session.timeout 12query environment
setting up 15query resource limits 147
Rrefresh 94relational data sources 79
additional parameters 83enabling plug-ins 81QMF catalogs 71
database objects 74extended 77extended properties 78objects 72protecting and granting
permissions 75selecting a catalog 76
resource limits provider 82remote server 32removing application 8repositories 173
creating connections 115file-based 118network 122shared 116web service 124
creating web linksdata objects 129
data sources 71, 78, 79folder 87
repositories (continued)data sources (continued)
Hive 85JavaScript 94multidimensional 84relational 79virtual 86, 89, 90, 91
deleting 173QMF catalog properties 177
data sources 180protection status 179tables 178
shared properties 173database objects 175JDBC connections 174protection options 176
virtual data sources 90repository connections
networksetting up 123
repository objects caching 119repository storage 60
shared 54adding repositories 62internal security fields 63JDBC connections 56LDAP security fields 67
resource limits 143acceleration 164binding 160cache 163data source 145group schedule values 153
main 154group schedules 150, 152groups 149
assigning users 165limits 155LOB options 162object list 164object tracking 161options 157QMF catalogs 169
creating user profiles 171managing user profiles 170user profiles 172
query 147repositories 166
managing user assignments 167save data 159SQL verbs 156timeouts 155
resource limits group 148determining the schedule 150specifying multiple schedules 150
resource limits groupsassigning users 167
reverting 9RSBIHttpRequest class 96running setup process 5
Ssample tables 183
activating 183names and descriptions 183
save data resource limits 159
286 Installing and Managing QMF for Workstation and QMF for WebSphere
SDF 17security
database-based 138FIPS-140 46
selecting setup executable 5Server Administrative Console 195server definition files
importing data sources 17Server-Side File System 23
preferences 43service information ixsetting 24shared repositories 115, 116, 119short name objects 145silent installation 132, 133simultaneous database connections 60
setting maximum number 60SMTP preferences 28SQL
generated sample 201SQL verbs resource limits 156SSL preferences 42static SQL packages 58, 116stored procedures 58, 116support information ixsystem requirements
QMF for WebSphere 3QMF for Workstation 2
Ttables 57
protecting and grantingpermissions 58
Third Party Libraries preferences 44timeouts resource limits 155
UURL template 33users and groups
assigning DBA authorization 138assigning SYSADM
authorization 138repository objects 136
selecting 137using 195
Vvirtual data source 94
administration 90, 91editing 90, 91preferences 45tables 93, 105
virtual data source editor 90, 91opening 90security 91structure 90
virtual data sources 89Visual Designer
preferences 45
Wweb service repositories 115, 124WebSphere administrative console
opening 9working with qmf data server
administrative console 195workspaces 108
adding a new workspace 110adding content 109
Index 287

288 Installing and Managing QMF for Workstation and QMF for WebSphere


IBM®
Product Number: 5650-DB25615-DB25697-QM2
Printed in USA


![pkef]Qmf ;+/If0f lgodfjnL, @)%^¤‰पभोक्ता... ·](https://img.pdfslide.us/doc/110x75/5afbc6f67f8b9a5f58914954/pkefqmf-if0f-lgodfjnl-.jpg)


