Embed Size (px)
Citation preview
Installation Oreka TR on Linux CentOS 7
Contents
What is Oreka TR? 1
Architecture 1
Prerequisites (provided by customer): 2
Prerequisites (provided by Orecx): 2
OrkAudio Installation 3
Configuring OrkAudio for Active Recording 5
Upgrading OrkAudio (optional) 6
OrkWeb/Orktrack Installation 8
Additional documentation: 11
Upgrading Orkweb/Orktrack 12
What is Oreka TR? Oreka TR is an enterprise cross-platform system for recording and retrieval of audio streams, computer screens, and text messages (SMS). It supports recording from VoIP telephony systems via active and passive recording methods. It also supports recording from TDM telephony systems.
The Oreka TR user interface (OrkWeb) is web-based and provides a rich feature set such as call live monitoring, recordings playback, extensive search and query capabilities, audit trail, reporting, tagging, media manager, and many others.
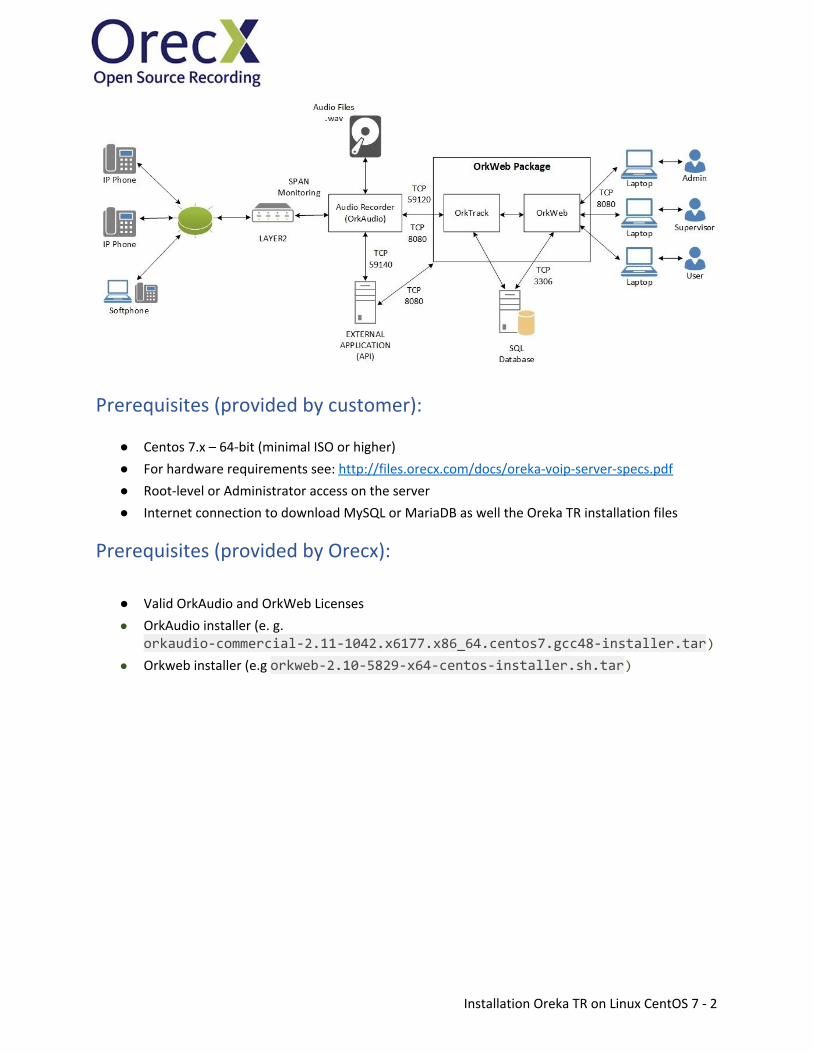
Architecture The Oreka TR system consists of a combination of the following services:
● OrkAudio : This is the audio capture background service. It supports active and passive VoIP recording as well as TDM based recording.
● OrkTrack : This service centrally tracks activity on the entire system and logs recordings to any popular SQL database. It is also responsible for background tasks such as the Media Manager, User and Group Auto-Provisioning as well as most API functionality through a RESTful interface.
● OrkWeb : This service is the web interface accessible via any standard compliant web browser. It
relies on the Tomcat web server.
Installation Oreka TR on Linux CentOS 7 - 1
Prerequisites (provided by customer):
● Centos 7.x – 64-bit (minimal ISO or higher)
● For hardware requirements see: http://files.orecx.com/docs/oreka-voip-server-specs.pdf
● Root-level or Administrator access on the server
● Internet connection to download MySQL or MariaDB as well the Oreka TR installation files
Prerequisites (provided by Orecx):
● Valid OrkAudio and OrkWeb Licenses
● OrkAudio installer (e. g. orkaudio-commercial-2.11-1042.x6177.x86_64.centos7.gcc48-installer.tar)
● Orkweb installer (e.g orkweb-2.10-5829-x64-centos-installer.sh.tar)
Installation Oreka TR on Linux CentOS 7 - 2
OrkAudio Installation
1. Download the installer to the recording server system. Use the link as well as the username and password provided by Orecx to get the installers.
NOTE: If “wget” is not installed , you may install it with the following command
# yum -y install wget
2. Untar the file:
# tar -xvf
tarorkaudio-commercial-2.11-1042.x6177.x86_64.centos7.gcc48-installer.tar
3. Run the installer:
# ./orkaudio-commercial-2.11-1042.x6177.x86_64.centos7.gcc48-installer.sh
NOTE: if PERL is not installed you will receive the following error:
./orkaudio-commercial-2.11-1042.x6177.x86_64.centos7.gcc48-installer.sh:
line 27: /usr/bin/perl: No such file or directory,
you may install PERL with the following command
# yum install perl
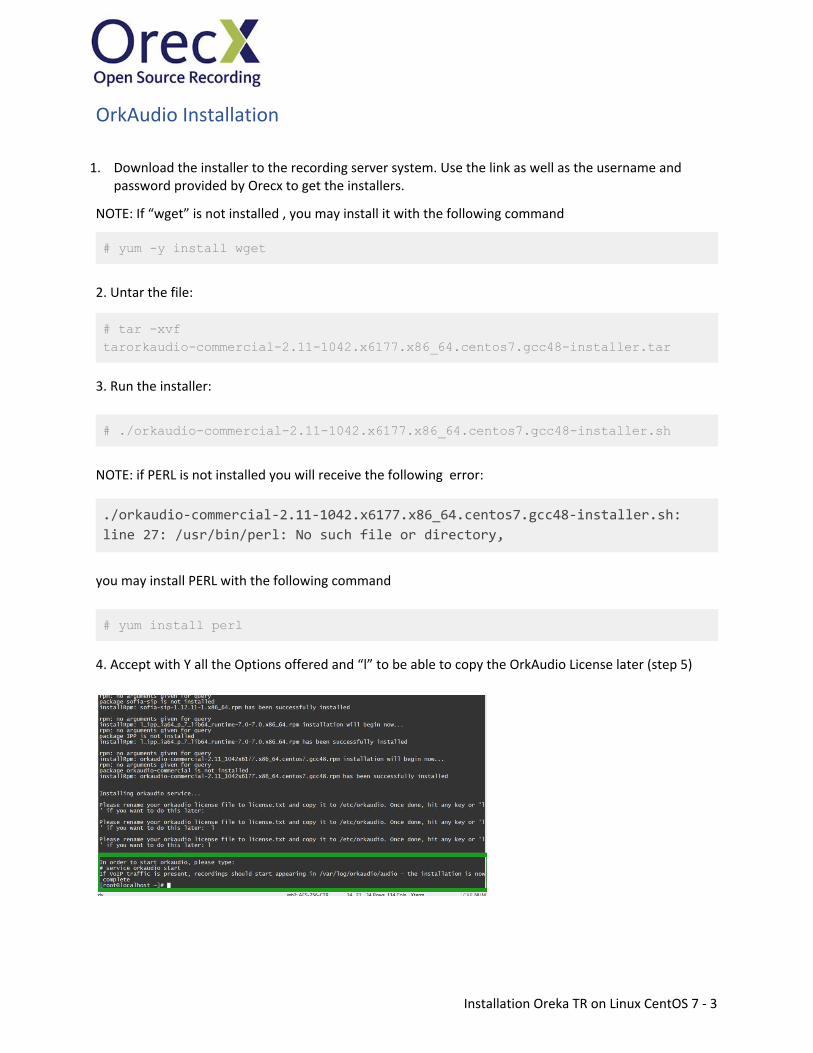
4. Accept with Y all the Options offered and “l” to be able to copy the OrkAudio License later (step 5)
Installation Oreka TR on Linux CentOS 7 - 3
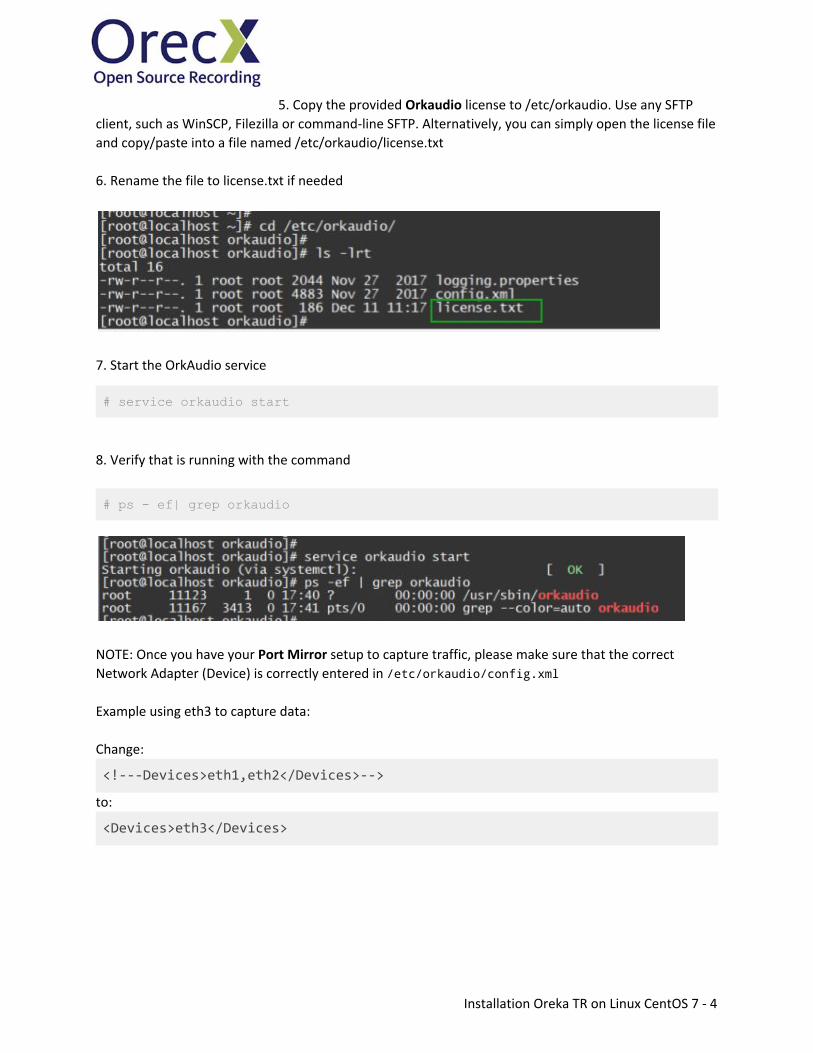
5. Copy the provided Orkaudio license to /etc/orkaudio. Use any SFTP client, such as WinSCP, Filezilla or command-line SFTP. Alternatively, you can simply open the license file and copy/paste into a file named /etc/orkaudio/license.txt 6. Rename the file to license.txt if needed
7. Start the OrkAudio service
# service orkaudio start
8. Verify that is running with the command
# ps - ef| grep orkaudio
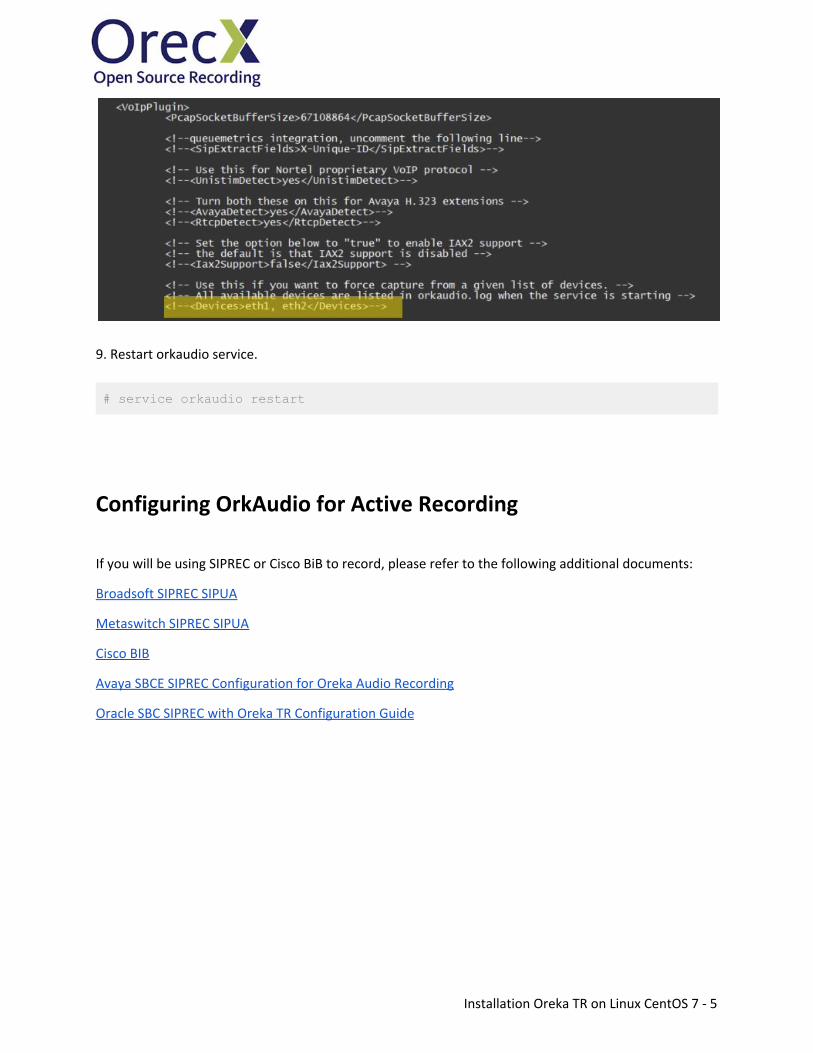
NOTE: Once you have your Port Mirror setup to capture traffic, please make sure that the correct Network Adapter (Device) is correctly entered in /etc/orkaudio/config.xml Example using eth3 to capture data: Change:
<!---Devices>eth1,eth2</Devices>-->
to:
<Devices>eth3</Devices>
Installation Oreka TR on Linux CentOS 7 - 4
9. Restart orkaudio service.
# service orkaudio restart
Configuring OrkAudio for Active Recording
If you will be using SIPREC or Cisco BiB to record, please refer to the following additional documents:
Broadsoft SIPREC SIPUA
Metaswitch SIPREC SIPUA
Cisco BIB
Avaya SBCE SIPREC Configuration for Oreka Audio Recording
Oracle SBC SIPREC with Oreka TR Configuration Guide
Installation Oreka TR on Linux CentOS 7 - 5
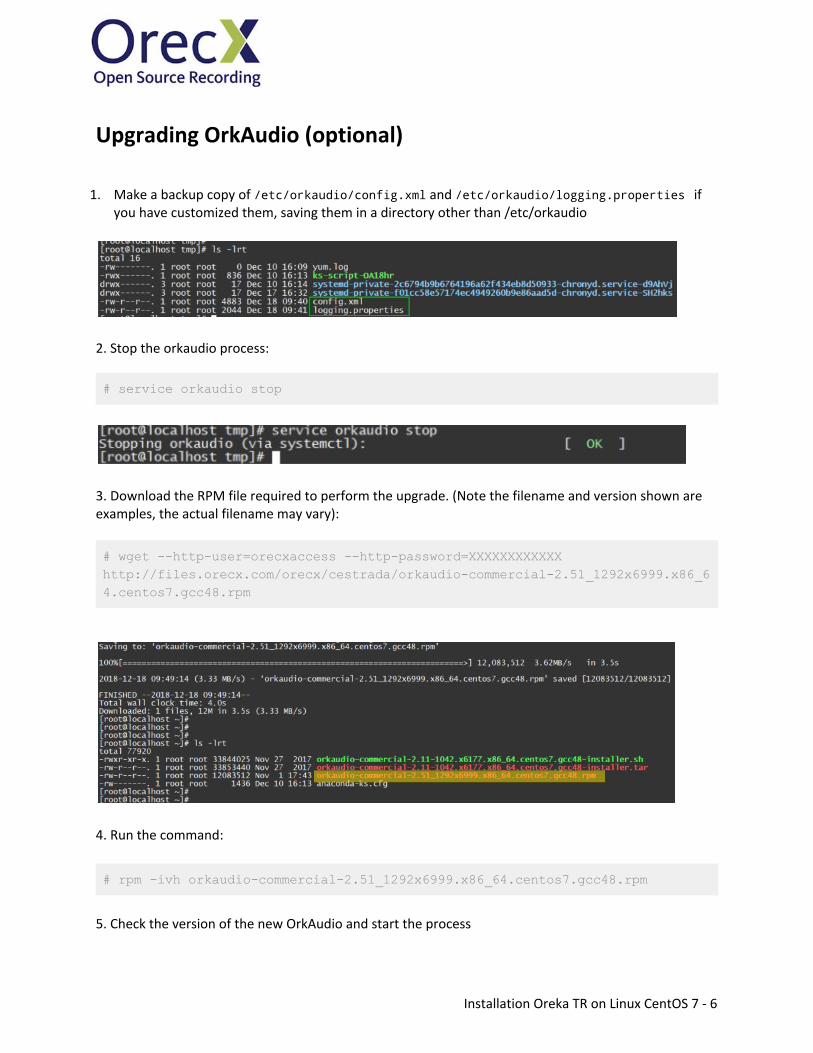
Upgrading OrkAudio (optional)
1. Make a backup copy of /etc/orkaudio/config.xml and /etc/orkaudio/logging.properties if you have customized them, saving them in a directory other than /etc/orkaudio
2. Stop the orkaudio process:
# service orkaudio stop
3. Download the RPM file required to perform the upgrade. (Note the filename and version shown are examples, the actual filename may vary):
# wget --http-user=orecxaccess --http-password=XXXXXXXXXXXX
http://files.orecx.com/orecx/cestrada/orkaudio-commercial-2.51_1292x6999.x86_6
4.centos7.gcc48.rpm
4. Run the command:
# rpm -ivh orkaudio-commercial-2.51_1292x6999.x86_64.centos7.gcc48.rpm
5. Check the version of the new OrkAudio and start the process
Installation Oreka TR on Linux CentOS 7 - 6
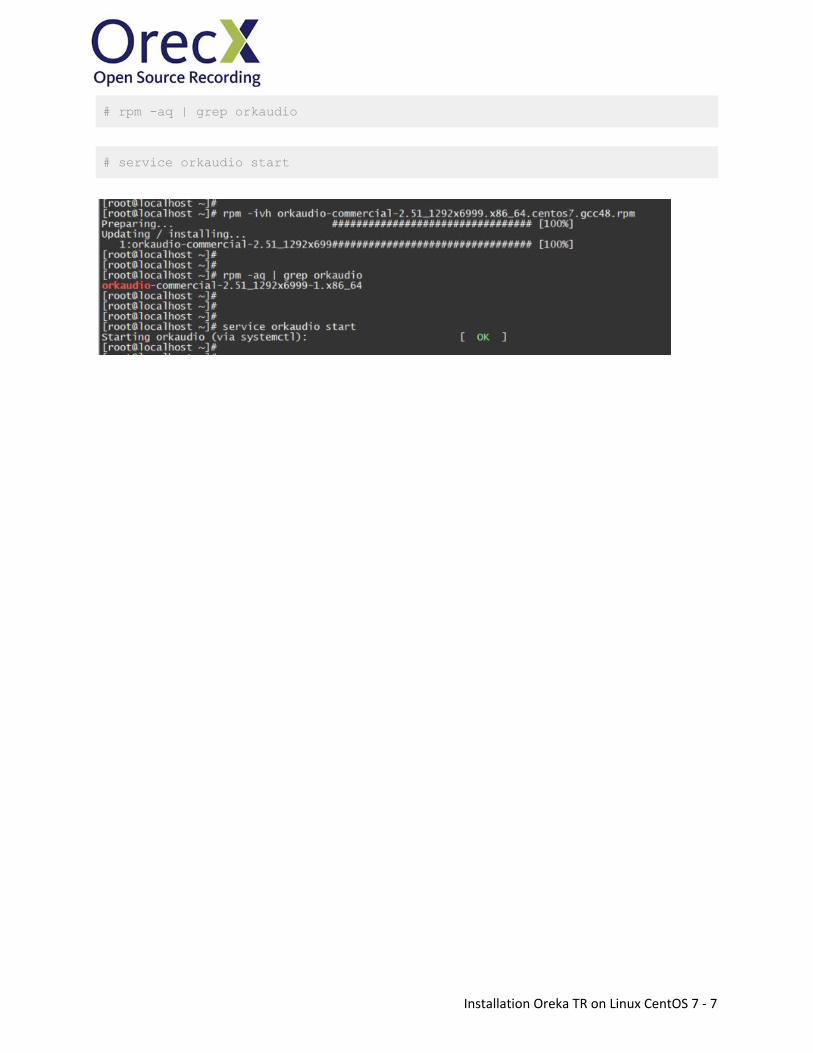
# rpm -aq | grep orkaudio
# service orkaudio start
Installation Oreka TR on Linux CentOS 7 - 7
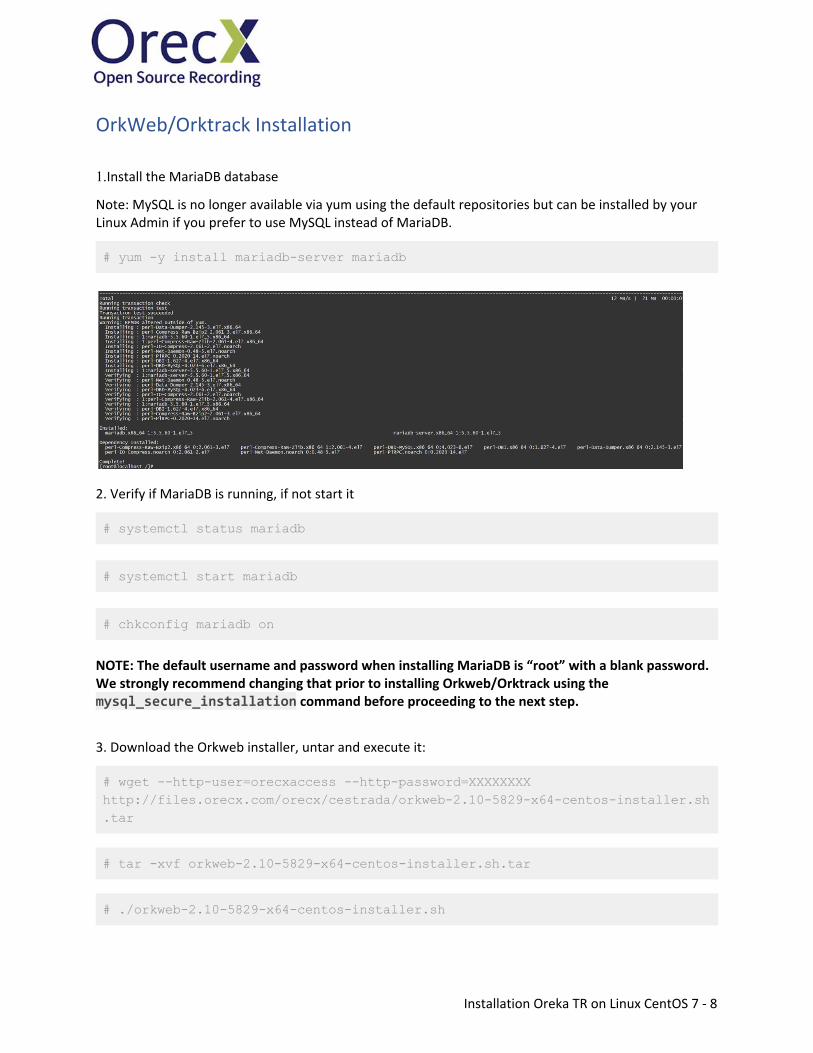
OrkWeb/Orktrack Installation
1.Install the MariaDB database
Note: MySQL is no longer available via yum using the default repositories but can be installed by your Linux Admin if you prefer to use MySQL instead of MariaDB.
# yum -y install mariadb-server mariadb
2. Verify if MariaDB is running, if not start it
# systemctl status mariadb
# systemctl start mariadb
# chkconfig mariadb on
NOTE: The default username and password when installing MariaDB is “root” with a blank password. We strongly recommend changing that prior to installing Orkweb/Orktrack using the mysql_secure_installation command before proceeding to the next step.
3. Download the Orkweb installer, untar and execute it:
# wget --http-user=orecxaccess --http-password=XXXXXXXX
http://files.orecx.com/orecx/cestrada/orkweb-2.10-5829-x64-centos-installer.sh
.tar
# tar -xvf orkweb-2.10-5829-x64-centos-installer.sh.tar
# ./orkweb-2.10-5829-x64-centos-installer.sh
Installation Oreka TR on Linux CentOS 7 - 8
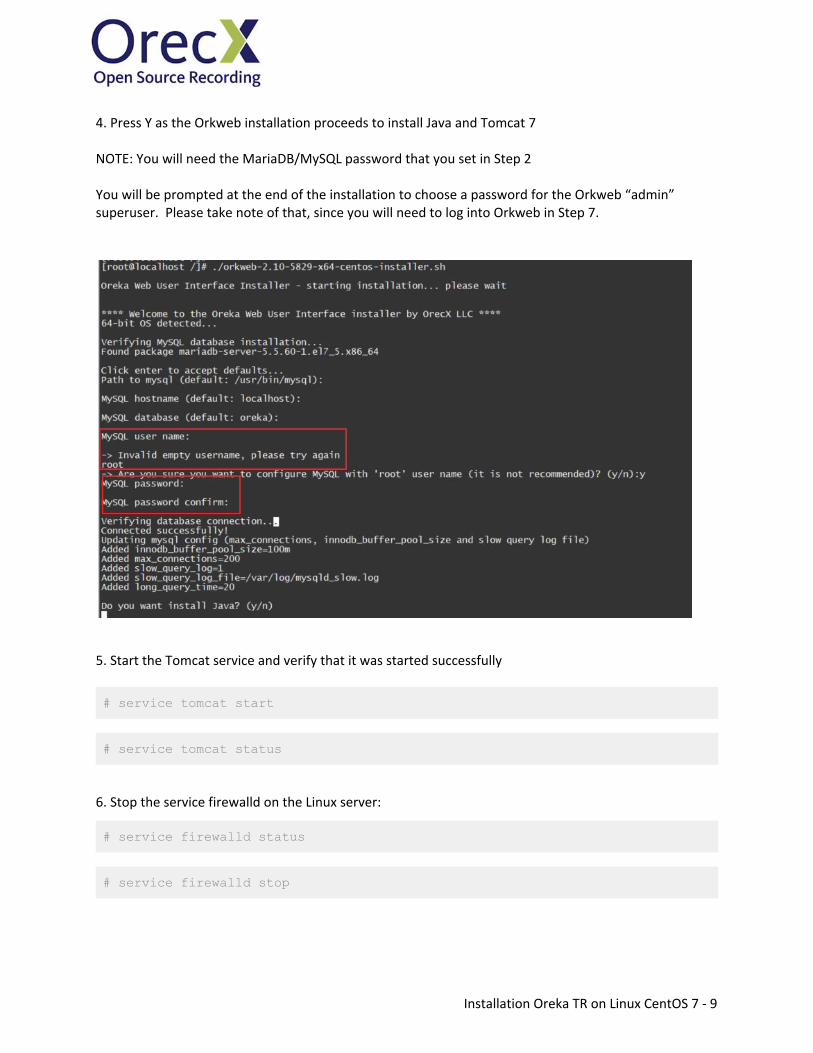
4. Press Y as the Orkweb installation proceeds to install Java and Tomcat 7 NOTE: You will need the MariaDB/MySQL password that you set in Step 2 You will be prompted at the end of the installation to choose a password for the Orkweb “admin” superuser. Please take note of that, since you will need to log into Orkweb in Step 7.
5. Start the Tomcat service and verify that it was started successfully
# service tomcat start
# service tomcat status
6. Stop the service firewalld on the Linux server:
# service firewalld status
# service firewalld stop
Installation Oreka TR on Linux CentOS 7 - 9

7. Open in a browser and navigate to: http://hostname.or.ip.address.of.server:8080/orkweb
In this example http://192.168.2.39:8080/orkweb/app
8. Enter “admin” as the username and the password that you chose at the end of the Orkweb installation
Installation Oreka TR on Linux CentOS 7 - 10
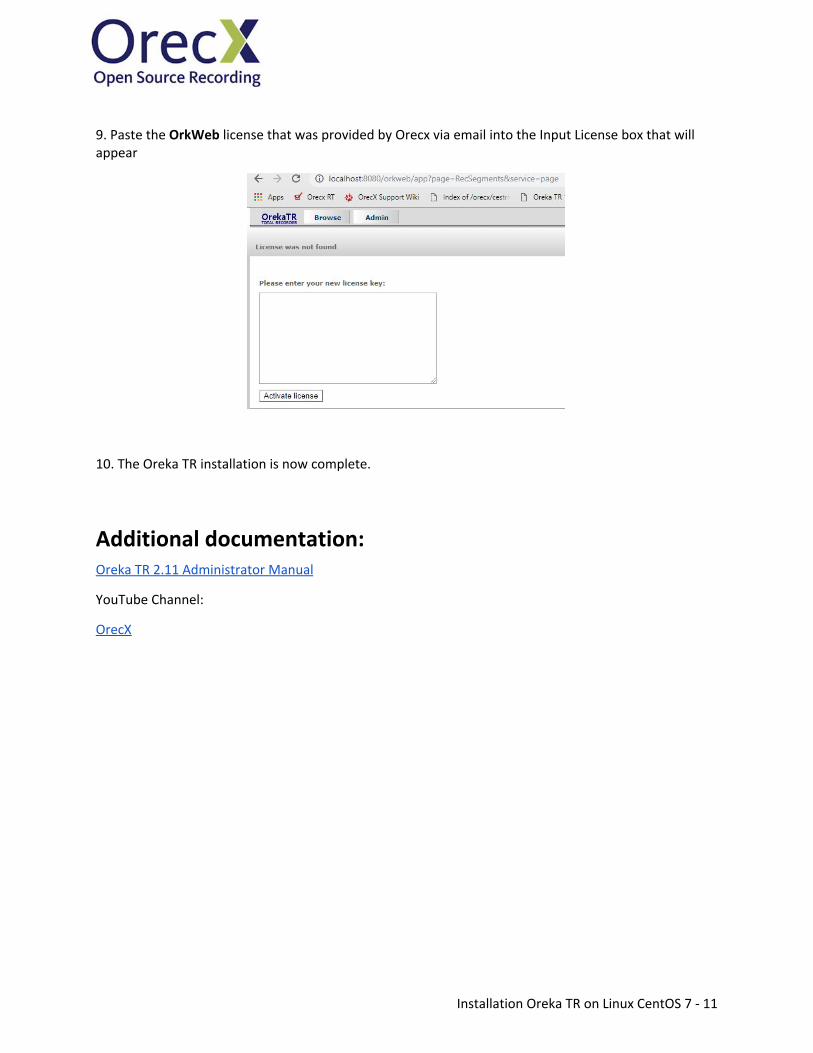
9. Paste the OrkWeb license that was provided by Orecx via email into the Input License box that will appear
10. The Oreka TR installation is now complete.
Additional documentation: Oreka TR 2.11 Administrator Manual
YouTube Channel:
OrecX
Installation Oreka TR on Linux CentOS 7 - 11
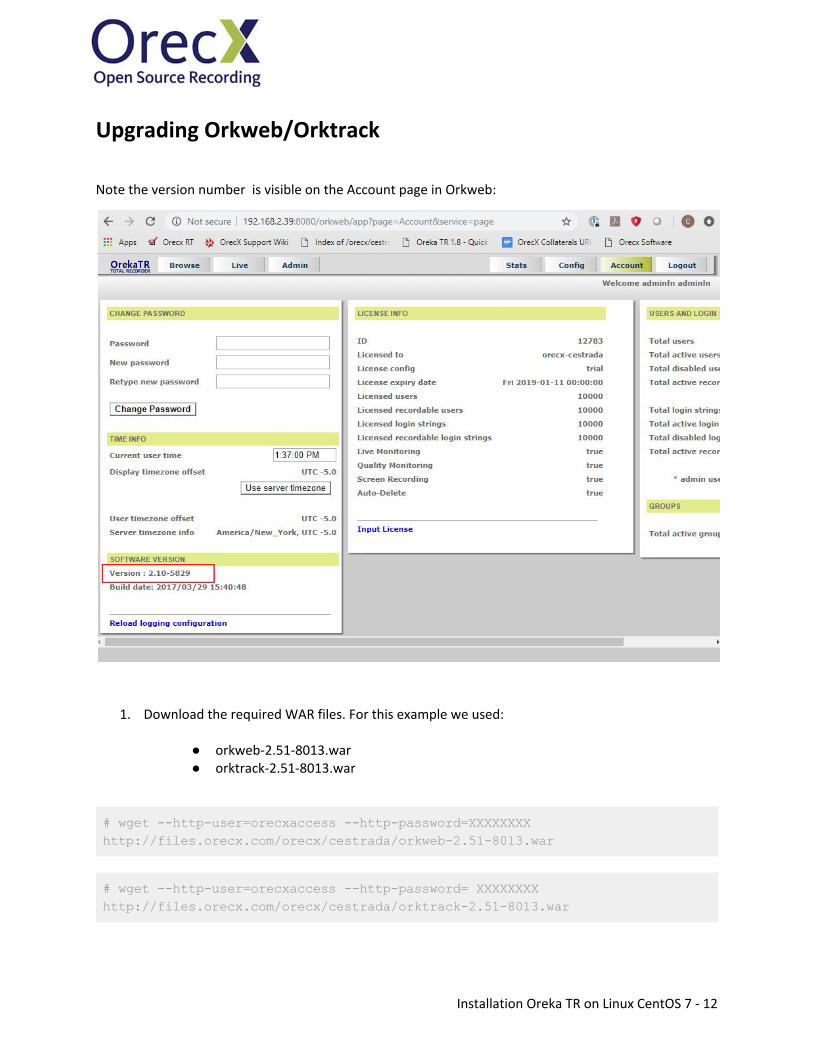
Upgrading Orkweb/Orktrack
Note the version number is visible on the Account page in Orkweb:
1. Download the required WAR files. For this example we used:
● orkweb-2.51-8013.war ● orktrack-2.51-8013.war
# wget --http-user=orecxaccess --http-password=XXXXXXXX
http://files.orecx.com/orecx/cestrada/orkweb-2.51-8013.war
# wget --http-user=orecxaccess --http-password= XXXXXXXX
http://files.orecx.com/orecx/cestrada/orktrack-2.51-8013.war
Installation Oreka TR on Linux CentOS 7 - 12

2. Backup the “oreka” database (MariaDB or MySQL root password required)
# mysqldump -uroot -p<password> oreka > orekaDB.sql
3. Stop the tomcat service
# service tomcat stop
4. Move the existing webapp directories /opt/tomcat7/webapps/orkweb and /opt/tomcat7/webapps/orktrack to another directory on the system in order to back them up in the case of a required rollback ex:
# mv /opt/tomcat/webapps/orkweb /home/backup/orkweb
# mv /opt/tomcat7/webapps/orktrack /home/backup/orktrack
5. Copy the downloaded OrkWeb and OrkTrack WAR files to /opt/tomcat7/webapps/ while renaming them to them to orkweb.war and orktrack.war respectively # cp orktrack-2.51-8013.war orktrack.war
# cp orkweb-2.51-8013.war orkweb.war
7. Start the tomcat service
# service tomcat start
Installation Oreka TR on Linux CentOS 7 - 13

8. Validate that you are now at the version that you downloaded by looking at the Account page in Orkweb.
Installation Oreka TR on Linux CentOS 7 - 14