Embed Size (px)
Citation preview
-1-
INSTALLATION INSTRUCTIONS
ARCHER
FREESTANDING BATHK-45594T/K-45594T-GR/K-45595T/K-45595T-GR
BEFORE YOU BEGINBEFORE YOU BEGIN
, 2011
Copyright Kohler China Ltd., 2011
PRODUCT REQUIREMENTSPRODUCT REQUIREMENTS
B. Installer Hazard Notification
CAUTION!! Risk of personal injury.
Cast iron baths are extremely heavy, and need
at least 5 persons for help. When installing these
products, please wear appropriate safety
equipment for the risk of clipping your fingers.
A. Introduction
�
�
�
Please read these instructions carefully tofamiliarize yourself with the required tools, materials,and installation sequences. Follow the sections thatpertain to your particular installation. This will helpyou avoid costly mistakes. In addition to properinstallation, read all operating and safety instructions.All information is based on the latest productinformation available at the time of publication.Kohler Co. reserves the right to make changes inproduct characteristics, packaging, or availability atany time without notice.These instructions contain important care, cleaning,
and warranty information-please leave these
instructions for the consumer.
A.
�
�
�
A.
�
�
�
�
�
�
B.
5
A. Summary Of Key Requirements
�
�
�
�
�
�
Observe all local plumbing codes.
Install the bath tub to a level floor.
Provide properly-dimensioned space.
Make sure the flooring offers adequate support for
your bath.
Observe all local plumbing and building codes.
Be careful with the painted surfaces of the back of
the bath and its wood surround to avoid scratch
during transportation and installation.
Do not support the bath by the rim.
CAUTION: Risk of product or property
damage.
368 201419
1186742-T01-A
-2-
B.
�
�
�
B. Product Inspection
�
�
�
Uncrate and inspect bath for damage. Leave all
materials in the crate during construction to prevent
damage.
Carefully open the accessory cartons and remove
the components and hardware pack.
If you observe any damage, do not install the bath
or the accessory. Report the specific problem to
your dealer.
B. Clearance Requirements
Check the rough-in and room dimensions to provide
adequate available space for the bath unit.
�
�
�
�
�
�
�
�
�
�
�
�
�
�
�
�
�
Safety glassesTape measurePencilLevelBlade screwdriverPhillips screwdriverPliersSealantSquareKnifeConventional woodworking tools and materialsDrop cloth 2 4
,s or 2 6
,s
Water-resistant wall materialMetal shimsAdjustable wrenchHex wrenchRags
A. Tools And Materials Required (Not Supplied)
INSTALLATION REQUIREMENTSINSTALLATION REQUIREMENTS
A.
�
�
�
�
�
�
�
�
�
�
�
�
�
�
�
�
�
2x4 2x6
B.
A.
B.
�
SITE REQUIREMENTSSITE REQUIREMENTS
B. Preparation
NOTE: Adequate floor support must be provided. Referto roughing-in sheet packed with your bath for specificfloor loading requirements.
Make sure the floor offers adequate support for yourbath and verify that the subfloor is flat and level.
�
A. Old Bath Removal (if necessary)
1186742-T01-A
C.C. Plumbing Preparation
Position the plumbing according to rough-in dimensions.
Check the supplies for leaks.
INSTALL THE FREESTANDING BATHINSTALL THE FREESTANDING BATH
-3-
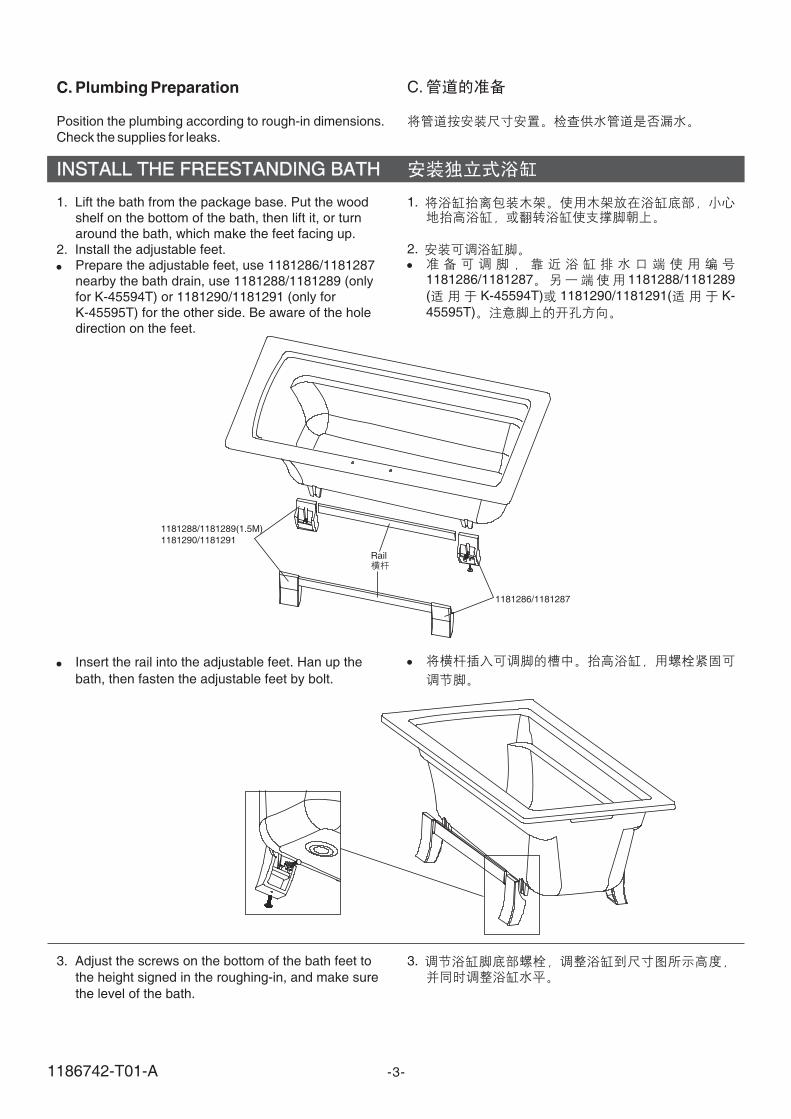
1.
2.
1181286/1181287 1181288/1181289
( K-45594T) 1181290/1181291( K-
45595T)
�
�
3.
1.
2. Install the adjustable feet.Prepare the adjustable feet, use 1181286/1181287nearby the bath drain, use 1181288/1181289 (onlyfor K-45594T) or 1181290/1181291 (only forK-45595T) for the other side. Be aware of the holedirection on the feet.
�
Lift the bath from the package base. Put the woodshelf on the bottom of the bath, then lift it, or turnaround the bath, which make the feet facing up.
� Insert the rail into the adjustable feet. Han up the
bath, then fasten the adjustable feet by bolt.
3. Adjust the screws on the bottom of the bath feet to
the height signed in the roughing-in, and make sure
the level of the bath.
1181290/1181291
1181286/1181287
1181288/1181289(1.5M)
Rail
1186742-T01-A
-4-
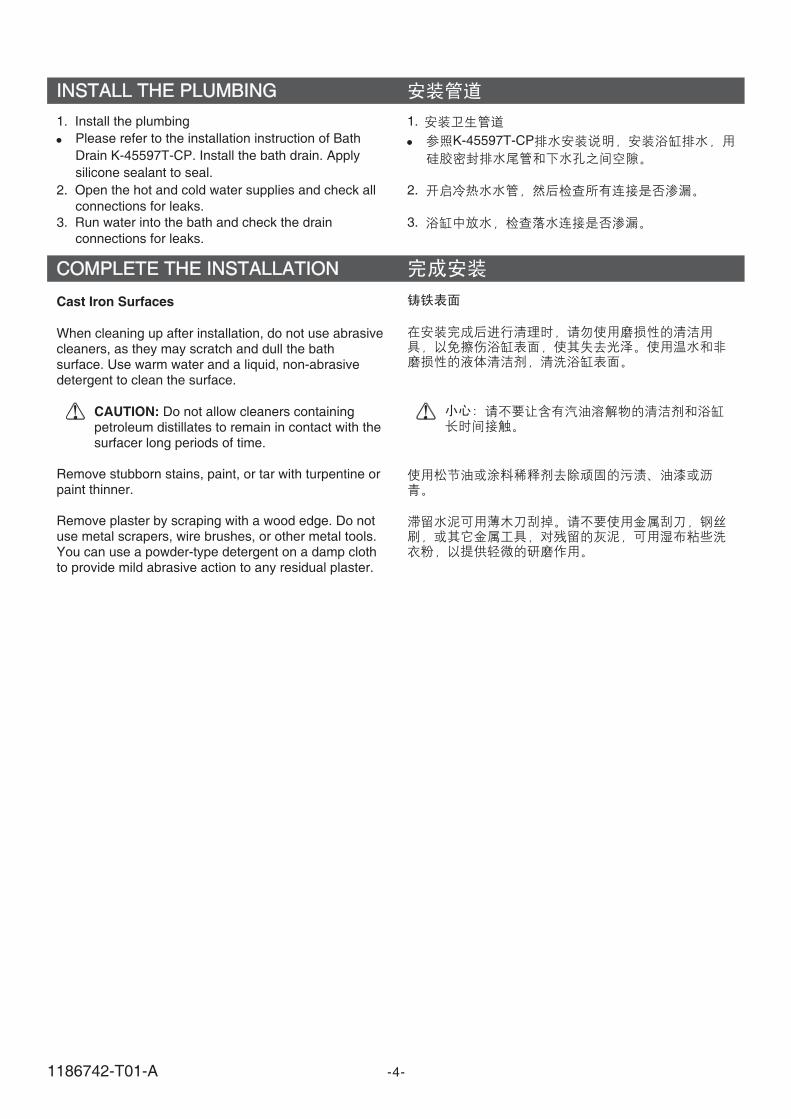
INSTALL THE PLUMBINGINSTALL THE PLUMBING
2.
3.
2. Open the hot and cold water supplies and check all
connections for leaks.
3. Run water into the bath and check the drain
connections for leaks.
COMPLETE THE INSTALLATIONCOMPLETE THE INSTALLATION
Cast Iron Surfaces
CAUTION:
When cleaning up after installation, do not use abrasivecleaners, as they may scratch and dull the bathsurface. Use warm water and a liquid, non-abrasivedetergent to clean the surface.
Do not allow cleaners containingpetroleum distillates to remain in contact with thesurfacer long periods of time.
Remove stubborn stains, paint, or tar with turpentine orpaint thinner.
Remove plaster by scraping with a wood edge. Do notuse metal scrapers, wire brushes, or other metal tools.You can use a powder-type detergent on a damp clothto provide mild abrasive action to any residual plaster.
1.
� K-45597T-CP
1.
�
Install the plumbing
Please refer to the installation instruction of Bath
Drain K-45597T-CP. Install the bath drain. Apply
silicone sealant to seal.
1186742-T01-A
-5-
IMPORTANT CONSUMER INFORMATIONIMPORTANT CONSUMER INFORMATION
Safeguard ASME/ANSI
A112.19.1M
pH 3 8 (
)
�
�
�
The Safeguard slip resistant surface on this bathtub
meets or exceeds the requirements of ASME/ANSI for
A112.19.1M slip resistance.
Improper maintenance or cleansers may
permanently remove the slip resistant surface on
Kohler bathtubs.
All housekeeping and maintenance
employees must be trained in the proper cleaning of
Kohler bathtubs. Post a copy of this notice in a readily-
visible location.
use steel wool, wire brushes, metal scrapers
or abrasive sponge pads to clean a Kohler bath tub.
use buffing machines on the slip resistant
surface.
use high alkaline or strong acid cleansers.
use abrasive cleansers.
When using commercial cleansers, use cleansers
with a pH of between three and eight.
Follow cleanser manufacturer instructions very
carefully.
DANGER!!
NOTICE:
DO NOT
DO NOT
DO NOT
DO NOT
�
�
� Use only non-abrasive cleansers and a soft nylon
brush to clean the slip resistant surface.
1186742-T01-A