Embed Size (px)
Citation preview

WinTV USBInstallation and
Reference Manual
®
Hauppauge! ®

WinTV-USBInstallation and Reference Manual
Copyright (c) Hauppauge Computer Works, Inc. 2000
Hauppauge Computer Works, Inc. Telephone: 631-434-160091 Cabot Court Fax: 631-434-3198Hauppauge, NY 11788 Tech Support: 631-434-3197
Hauppauge Computer Works, GmbH Telephone: 02161-694880Krefelder Straße 673e Fax: 02161-694881541061 Mönchengladbach, Germany BBS: 02161-177353
Technical Support: 02161-6948840
Hauppauge Computer Works, Ltd Phone: 0207-378-19976 Bank Chambers Fax: 0207-357-9171Borough High Street Technical Support: 0207-378-0202London, U.K. SE1 9QQ BBS: 0207-357-6587
Internet addresses:Sales: [email protected]
Technical Support: [email protected]
Web site:http://www.hauppauge.com
®

FCC Statement
Radio Interference Statement:
The WinTV USB have been tested and found to comply with the limits for a
Class B digital device, pursuant to part 15 of the FCC Rules. These limits are
designed to provide reasonable protection against harmful interference in a residen-
tial installation. This equipment generates, uses, and can radiate radio frequency
energy and, cause harmful interference to radio communications. However, there is
no guarantee that interference will not occur in a particular installation. If this
equipment does cause harmful interference to radio or television reception, which
can be determined by turning the equipment off and on, the user is encouraged to
try to correct the interference by one or more of the following measures:
• reorient or relocate the receiving antenna.
• increase the separation between the equipment and receiver.
• connect the equipment into an outlet on a circuit different from that to which
the receiver is connected.
• consult the dealer or an experienced radio/TV technician for help.
FCC ID: H90WINCAST M A D E I N U S A
CAUTION: Changes or modifications not expressly approved by the party
responsible for compliance to the FCC Rules could void the user’s authority to
operate the equipment.
CE Statement:This equipment has been tested and complies with EN 55013, EN 55020 and
IEC 801-3 part 3 standards.
CE
Table of Contents
WinTV-USB Installation and Reference Manual Revision 4.8FCC Statement ........................................................................................
CE Statement.............................................................................................
Installing the WinTV-USB 1Installation overview...............................................................................1-1
Board connections .................................................................................1-1
WinTV-USB board diagram ................................................................1-2
Installing the WinTV-USB...................................................................1-2
Installing the WinTV-USB under Windows98 ......................................1-3
Primary Surface mode ...........................................................................1-5
Connecting WinTV-USB to a VCR, Video Camera or Camcorder........1-5
Connecting WinTV- USB to a Sound Card ..........................................1-6
Adjusting the Audio Volume..................................................................1-6
The WinTV32 & WinTV2000 application 2The WinTV32 window........................................................................2-1
The WinTV2000 window ...................................................................2-2
Running the WinTV application ..........................................................2-2
Still Frame Image Capture mode ............................................................2-4
Motion Video Capture mode .................................................................2-5
Using the mouse in WinTV ..................................................................2-5
Single click TitleMode/NoTitleMode makes WinTV easy to use! ...........2-6
Setting up your TV channels .................................................................2-7
Setting preferences in Title mode ...........................................................2-8
Setting full screen TV mode ..................................................................2-9
Image Save, Print, Copy to Clipboard ..................................................2-10
Adjusting the video image color ............................................................2-11
Options menu .....................................................................................2-11
Keyboard control of the WinTV application.........................................2-12
Setting up a shortcut to the WinTV application] ..................................2-12
Creating Digital Video movies with WinTV-Capture 3Overview of Video Clip Capture ............................................................3-1
Setting the video image size ....................................................................3-3
i

Setting the number of frames per second captured....................................3-3
Preview Video ......................................................................................3-5
Using Audio with WinTV-Capture ......................................................3-5
Suggestions on capturing video ...............................................................3-5
Tips on improving capture performance ..................................................3-7
Teletext Data Reception using VTPlus 4Installation of the VTPlus software.........................................................4-2
Running VTPlus ..................................................................................4-2
Quikselect .............................................................................................4-4
Dynamic Data Link to Teletext...............................................................4-4
Using the WinTV-radio Application 5Running the WinTV-radio application ..................................................5-1
The WinTV-radio window....................................................................5-1
Using the WinTV-radio buttons ............................................................5-2
Programming the Presets........................................................................5-2
How WinTV Works 6Video Overlay mode of operation ...........................................................6-1
Primary Surface mode of operation.........................................................6-2
Troubleshooting 7Troubleshooting the WinTV-USB driver ...............................................7-1
Problem: Bad colors in the TV window..................................................7-2
Problem: Poor TV picture quality ..........................................................7-2
Problem: TV picture displays a black screen ...........................................7-3
Problem: Snapshots don’t display correctly..............................................7-3
Updating the WinTV-USB driver 8Updating the WinTV-USB Driver.........................................................8-1
Removing the WinTV-USB driver with HCWCLEAR........................8-2
Restarting the WinTV-USB driver with HCWRESET .......................8-4
Technical Support ATechnical support telephone .................................................................A-1
Service ................................................................................................A-1
Warranty BWarranty ..............................................................................................B-1
ii

Trademarks: WinTV and the Hauppauge logo are registered trademarks of
Hauppauge Computer Works, Inc. Intercast and the Intercast logo are trademarks
of Intel Corp. Microsoft is a registered trademark and Windows and the Microsoft
logo are trademarks of Microsoft Corporation. IBM and PC are trademarks of
International Business Machines Corporation.
Some WinTV models are manufactured under license from Dolby Laboratories.
"Dolby," "Pro Logic" and the double-D symbol are trademarks of Dolby
Laboratories.
dbx-TV is a trademark of THAT Corp.
6/9/00
iii

iv

Introduction
This manual covers all of the WinTV USB models:
WinTV-USB
WinTV-USB FM
References to the WinTV USB apply to all models. The Windows98 driver for
all of the WinTV USB models will be referred to as the WinTV-USB driver,
and the installation CD-ROM will be referred to as the WinTV Installation
CD-ROM.
The WinTV application, which is referred to in this manual as the WinTV
application, will show your TV or video in a window on your PC screen. There
are two versions: the WinTV32 and the WinTV2000. Both applications have
the same features, but have a different “look and feel”.
For models which have particular features (such as the chapter on the Radio appli-
cation), we will note which models these features are available on.
For a description of how the WinTV USB displays video on your VGA screen,
see the chapter entitled How WinTV USB Works.


Installing the WinTV USB
Note: DO NOT PLUG THE WinTV-USB into your PC until
your PC has fully booted..
To install WinTV USB under Windows 98 or 2000, you will follow these steps:
� Plug the WinTV USB into your PC or laptop’s USB port(After booting
intoWindows)
� Install the drivers with the WinTV USB Installation CD-ROM
� After the WinTV USB driver is installed, you will then install the WinTV
application software from the WinTV Installation CD-ROM
Diagram
The following diagram shows the main functions and connectors of the WinTV-
USB. Since there are several different models with different features and func-
tions, your board may not have all of the components installed.
Board connectionsFM: FM radio antenna connection (on some models)
TV: TV antenna or cable TV connection
Audio LineOut: Audio output 1/8” minijack (connects to sound card LineIn jack)
Video In: S-video input with composite adapter.
Audio Line In: Audio input 1/8” minijack
1-1

Contents of the WinTV-USB package.
WinTV-USB or WinTV-USB-FM unit
1 meter audio cable - sound cable for connecting between the WinTV-USB
and your sound card
S-Video to composite adapter
FM radio antenna (on WinTV USB-FM models equipped with FM radio)
WinTV-USB Warranty registration card
WinTV-USB Installation CD-ROM with:
WinTV2000 application
WinTV driver for Windows98 and Windows2000
Microsoft NetMeeting for video conferencing
Installing the WinTV-USB
Note: DO NOT PLUG THE WinTV-USB into your PC until
your PC has fully booted..
Turn on and boot into Windows98 and/or Windows 2000.
1-2
WinTV-USB Installation and Reference Manual

Then plug the WinTV-USB into one of the USB connectors on the back of your
PC, not a USB hub or keyboard.
Installing the driver under Windows98 orWindows2000
After the WinTV-USB is installed, the Add New Hardware Wizard will
appear.
Select Search for the best driver for your device (Recommended).
Click NEXT.
When you see this dialog box, insert the WinTV USB Installation CD-ROM
into your CD-ROM drive.
Select CD-ROM drive and click NEXT.
Once the Hauppauge WinTV-USB video driver has been detected, click NEXT.
You will see a number of files copied to your hard disk.
Click FINISH to reboot Windows.
After (rebooting), you may be asked to insert your Windows98 CD ROM.
WinTV-USB Installation and Reference Manual
1-3

Note: Be sure to use the exact version of Windows 98 CD-
ROM that is installed on your system. If you are using
Windows98 SE, do not use a Windows98 Gold CD-ROM.
Also if Plug-n-Play does not correctly load the driver, you may
manually load the driver from the WinTV-USB CD-Rom. Open the
USB folder and double click the file “USB98.exe” to manually
install the driver. Once the driver is finished, you must manually
run the SETUP.EXE on the WinTV-USB root directory to install
the WinTV viewing application.
Connecting the WinTV-USB to a VCR, VideoCamera or Camcorder
Most VCR’s or camcorders have a female RCA jack labeled “Video Out”. Most
also have a jack labeled “Audio Out”. Most video cameras simply have one output
connection labeled "Video Out".
To connect the video to the WWiinnTTVV--UUSSBB, use shielded video cables (not sup-
plied) with male RCA connectors on both ends:
- connect from the “Video Out” jack on your video camera, VCR or cam-
corder to the Composite Video input jack on the WinTV-USB.
Note: USB has a high quality S-Video input jack, which
requires an S-Video to Composite video Adapter (supplied)
to connect to your Camcorder or VCR.
1-4
WinTV-USB Installation and Reference Manual

To connect the audio from your VCR or camcorder, use an 1/8” stereo minijack exten-
sion cable (1/8” male minijacks on one end, and RCA onthe other end) and connect
the “Audio Output” RCA” on the VCR or camcorder to the Audio Line In jack on
the WinTV USB.
Note:. If you need a female RCA to 1/8” minijack adapter, these
adapters can be found at most Radio Shack stores.
Connecting the WinTV-USB to a Sound Card
The board's audio output should be connected to a sound card using the supplied
Audio Cable:
- plug one end of the Audio Cable into the jack marked LineOut (Audio Line
Out jack J4) on the USB unit
- plug the other end of the Audio Cable into your soundcard’s LineIn jack.
Note: Most sound cards have three round jacks on the outside of
the PC. They are: Microphone Input, Audio Output and Line
Input. The Audio Output would go to your speakers, while the
Microphone input might go to a microphone (if you are using one). The
LineIn jack is normally indicated on the sound card by the words IN or
LineIn stamped into the metal bracket on the outside of your PC. This
is where you would plug your Audio Cable, Also Some Laptops do not
have a Line in and you would have to connect the USB device to the
Mic input on the Laptop, or to a seperate set of powered speakers.
Adjusting the Audio Volume
Once the audio cable is connected to your Sound Card, the WinTV application can
change the audio volume coming from the WinTV USB by adjusting the LineInput
sound volume of the VolumeControl program in Windows.
The VolumeControl program is normally installed with Windows or by the sound
card installation program, and allows the control of volume from the various sound
sources. If you cannot hear sound when running the application, you might need to
check the volume level of LineInput in VolumeControl.
WinTV-USB Installation and Reference Manual
1-5

The VolumeControl application is started by clicking either:
Start/Programs/Accessories/Multimedia/VolumeControl
or
Start/Programs/Accessories/Entertainment/VolumeControl
or
Double click the speaker icon in Systray
You should see Line-In balance as one of the selections. If not, then click on
Options/Properties and under Show the following volume controls check
Line-In. Then click OK.
You should now see a selection for Line-In. Make sure the Select box is
checked, then raise the volume to about 1/2 of the way to the top. This should be a
good starting point for the volume control.
If LineIn is muted or not selected, unmute or select it to hear audio from the
WinTV USB.
In the WinTV application under the Configure/Audio menu, the Mixer ID
should be set at Line-In.
As you adjust the audio volume in the application, you should see the slide bar in
the Volume Control window rise and fall.
1-6
WinTV-USB Installation and Reference Manual

2-1
The WinTV2000 Application
Snapshot button
Freeze
Configuresnapshot
Software remotecontrol
Color/audioconfiguration
Full screen TV
Remove toolbar
Minimize
Close
Snapshot viewer window -double click on each
“thumbnail” to see image fullsize
Current TV channel orvideo source
Click your right mousebutton here to removetoolbars. Click again to
restore toolbar.
Channel configuration
SourceMute

2-2
WinTV-USB Installation and Reference Manual
Previouschannel
DolbyProLogicOn/Off *
Volume
level
Channel
indicator
Mono / Stereo
indicator
TV imagesize
Toolbar
Video source
selectorChannelSuites
Full screenTV mode
Freeze frame
Mute
Motion videocapture mode *
Still frame imagecapture mode
Watch TVmode
Radio*
Channel surf
Volume up/down
Channel name
* on some model ’s

Running the WinTV application
After installing the WinTV application from the WinTV USB Installation
CD-ROM, you will see icons on your Windows background. Start WinTV32 by
double clicking on its icon.
Once the Application is initialized, you should see the RED light illuminate on
the WinTV USB.
You can also click on Start/Programs/HauppaugeWinTV and then click on
the WinTV32 icon.
The first time you run WinTV, you will be asked to scan for TV channels. Click
OK.
If you are using a cable TV connection, in the Broadcast/Cable menu item,
select Cable.
In Video Format, in North America choose NTSC M. In South America,
choose PAL M or PAL N.
After the scan is complete, you will have a list of TV channels which are active in
your area.
WinTV-USB Installation and Reference Manual
2-3
To set up a External video source: go into suite manager and click on INPUT
Sources. Highlight COMPOSITE and click ADD. Pick your video format and
give it a name, then click ADD. Now you have a external video channel.
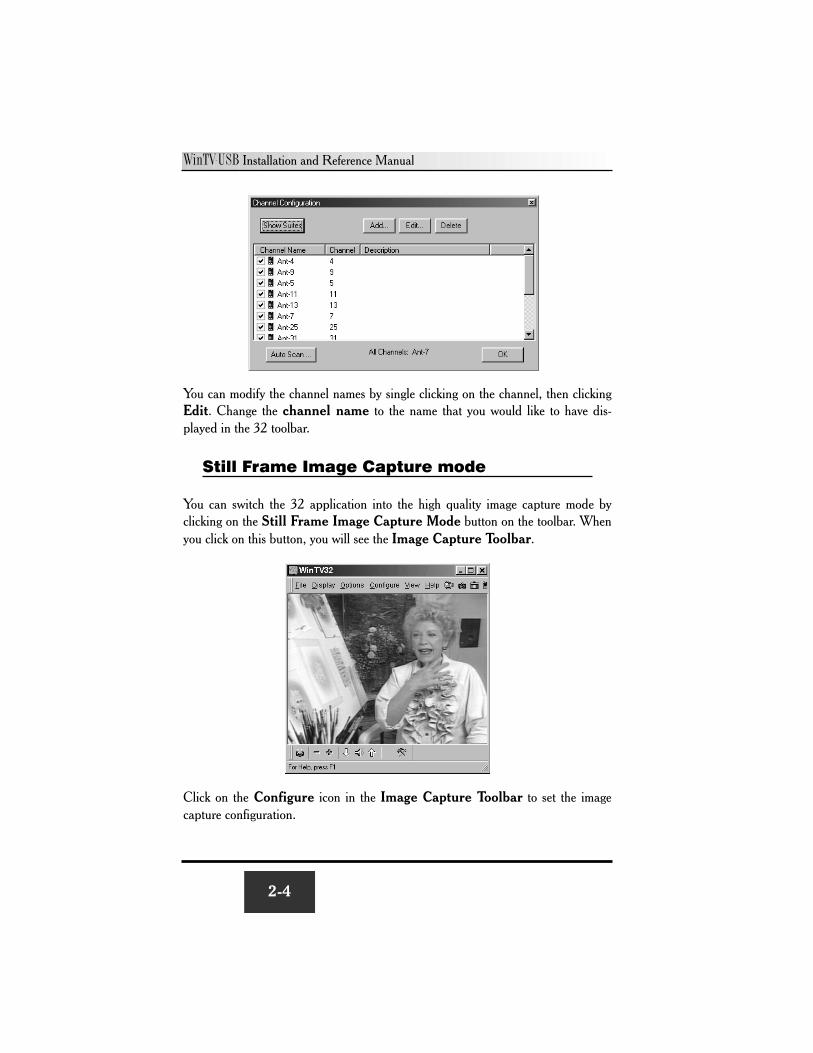
You can modify the channel names by single clicking on the channel, then clicking
Edit. Change the channel name to the name that you would like to have dis-
played in the 32 toolbar.
Still Frame Image Capture mode
You can switch the 32 application into the high quality image capture mode by
clicking on the Still Frame Image Capture Mode button on the toolbar. When
you click on this button, you will see the Image Capture Toolbar.
Click on the Configure icon in the Image Capture Toolbar to set the image
capture configuration.
2-4
WinTV-USB Installation and Reference Manual

You can capture images up to 1600x1200 pixels.
To reduce the effects of motion in the video image, but with lower image resolution,
in the Fields Captured option choose 1 (Motion).
Motion Video Capture mode
You can switch the 32 application into the motion video capture mode by clicking
on the Motion Video Capture Mode button on the toolbar (see page 3-1 for its
location).
To setup for motion image capture, click the 422/YUV button:
WinTV-USB Installation and Reference Manual
2-5
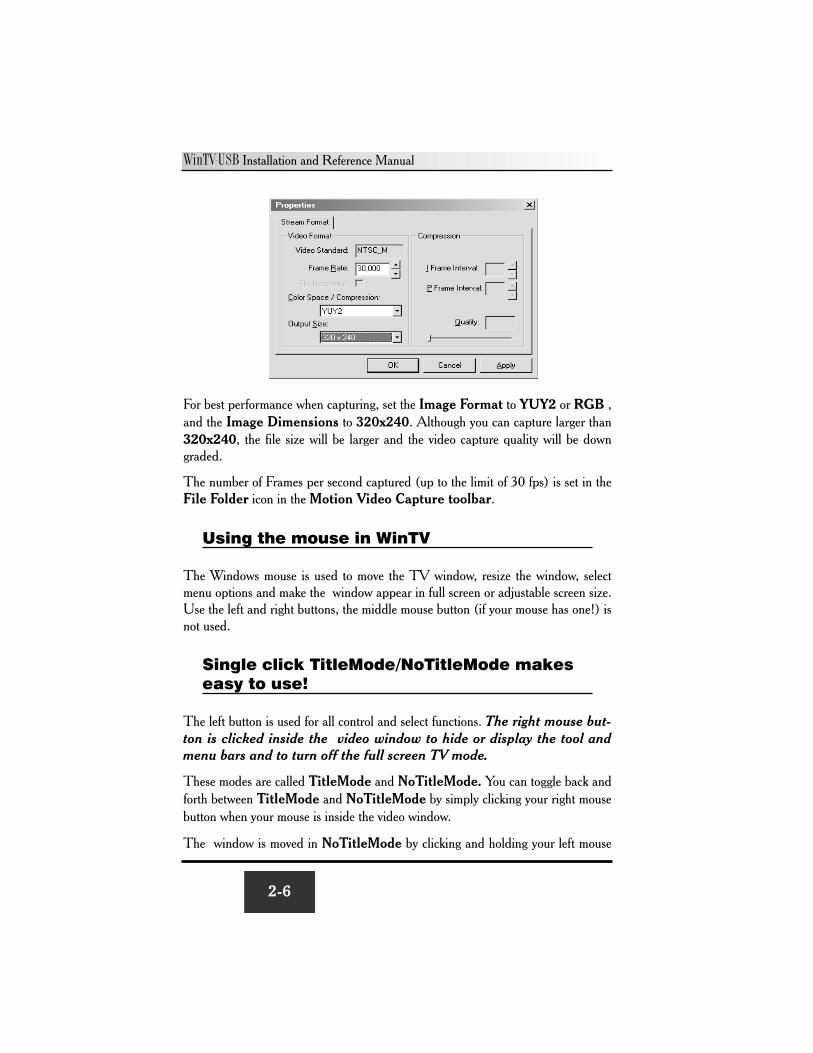
For best performance when capturing, set the Image Format to YUY2 or RGB ,
and the Image Dimensions to 320x240. Although you can capture larger than
320x240, the file size will be larger and the video capture quality will be down
graded.
The number of Frames per second captured (up to the limit of 30 fps) is set in the
File Folder icon in the Motion Video Capture toolbar.
Using the mouse in WinTV
The Windows mouse is used to move the TV window, resize the window, select
menu options and make the window appear in full screen or adjustable screen size.
Use the left and right buttons, the middle mouse button (if your mouse has one!) is
not used.
Single click TitleMode/NoTitleMode makeseasy to use!
The left button is used for all control and select functions. The right mouse but-
ton is clicked inside the video window to hide or display the tool and
menu bars and to turn off the full screen TV mode.
These modes are called TitleMode and NoTitleMode. You can toggle back and
forth between TitleMode and NoTitleMode by simply clicking your right mouse
button when your mouse is inside the video window.
The window is moved in NoTitleMode by clicking and holding your left mouse
2-6
WinTV-USB Installation and Reference Manual

button in the middle of the WinTV window and moving it to the new position.
Then let it go! Move the WinTV window in TitleMode by clicking and holding
your mouse button on the Title Bar (where it says Hauppauge WinTV32), hold-
ing it down and dragging it to the new position.
You can set a different size and a different place on your VGA screen for the
WinTV window in TitleMode and NoTitleMode. Then by simply clicking
with the right mouse button, the window will switch from one saved size and place
on the screen to the other! Try clicking your right mouse button several times in the
middle of the TV window and see what happens.
To set the window size, “grab” a corner of the WinTV window with your mouse
(hold down the left mouse button when it is on one of the corners of the window)
and then drag it to the preferred size, then release the mouse button.
For example, if you would like to watch without the tool/menu bars in a small cor-
ner of the Windows screen, click the right mouse button inside the video window
and the tool/menu bars will disappear. Then drag the window to its preferred size
and location on the Windows screen. Now click the right mouse button inside the
window and the application will now save the correct size and location on screen
for NoTitleMode. Every time you select the NoTitleMode by right clicking in
the window, the window will resize and move to the saved position.
To select which bars and indicators are shown when in the TitleBar and
NoTitleBar modes, click on View. You can eliminate the status bar and the tool-
bar in the TitleMode or add the status bar in the NoTitleMode.
Setting up your TV channels
To set up the TV channels in the application, click on
Configure/Channels/SuiteManager:
WinTV-USB Installation and Reference Manual
2-7

You’ll see the Channel Manager. From the Channel Manager, you can Add,
Edit or Delete channels.
You can also create channel suites, which are subsets of the All Channel suite.
For example, you can have a suite of just TV news channels, and name this suite
“News”.
Channel Suites allow you to create a subset of all the channels, so that you can
channel surf through only those channels. To set up a new Channel Suite, click on
Show Suites. Then click on Suites (in the left column), then click Add. You
can then name the suite and add channels to the suite.
To change to a suite, in the 32 toolbar, right click your mouse button in the
Channel Suite area (the default is All Channels). You will then see a list of
suites. Click on the one you would like to switch to.
Setting preferences in Title mode
Click Display/Preferences/View and then click on the Title Mode tab.
Aspect Ratio On forces the viewed aspect ratio to 4:3. When turned off it will
allow arbitrary aspect ratios.
Annunciators On display the TV channel on screen when you change channels,
and display the volume when you adjust the volume.
2-8
WinTV-USB Installation and Reference Manual

Setting full screen TV mode
Click Display/Preferences/View and then click on the TV Mode tab.
Set Allow Resolution Change.
If you then click on the TV icon on the 32 Toolbar, the application will switch the
VGA mode to the chosen size (using the Windows Quick Res feature), allowing
the image to be viewed full screen.
WinTV-USB Installation and Reference Manual
2-9

Image Save, Print and Copy to Clipboard
The process to save, print or copy an image starts with the digitizing of a single
video frame. When one of these functions are clicked on, the next video frame is
moved into your PC’s main system memory instead of the VGA display. Your
PC’s processor then converts the digitized video image into a 24-bit DIB image (a
format which is used internally in Windows), and then copied back into the VGA
memory so that you can see the image which will be printed or saved. This
becomes a “frozen” image in the window.
The video images which are digitized can be saved to disk, printed to a color or
black/white printer or copied to the clipboard. These functions can be viewed from
the File menu:
There are a few things which need to be noted. First, because a video frame is
composed of two “fields”, an odd field with the odd lines in the image and an even
field composed of the even lines, there might be a distortion in the frozen image if
there was rapid motion while the image was being moved into main system memo-
ry. This distortion is called “interlaced artifact”.
Another item to note is that the video image, when converted into a 24-bit DIB
image, will look lighter than it did when it was in motion. You can adjust the
image’s brightness, contrast and color saturation and hue by clicking on
Configure/Color. These adjustments are made during the digitizing process on
the board and will affect both the “live” image and the frozen image.
2-10
WinTV-USB Installation and Reference Manual

Adjusting the video image’s color
You can adjust the brightness, contrast saturation and hue of the live TV image by using
the color adjustment menu. Click on Configure/Color to get the adjustment menu:
Options Menu
The Options Menu has settings for Always-on-Top mode and Aspect ratio mode plus
duplicates buttons found on the toolbar for operation without a mouse.
Always-on-Top mode
The Always-on-Top mode conveniently puts the TV window “on top of” other Windows
windows. In this mode, you can easily move the TV window to the No-Title mode by
clicking the right mouse button in the middle of the TV screen.
Aspect ratio
The natural TV window size has a 4:3 aspect ratio. By unclicking the Aspect Ratio set-
ting in the Options menu, you can change the TV window to any size you want! Make it
tall, short or any size. With Aspect Ratio turned on, the window size will always be
forced to a 4:3 ratio.
WinTV-USB Installation and Reference Manual
2-11

Keyboard control of the 32 application
Convenient keyboard controls duplicate the functions of the toolbar.
Volume Up = Page Up
Volume Down = Page Down
Mute = Ctrl+M
Channel Up = Plus (+)
Channel Down = Minus (-)
Print a Frame = Ctrl+P
Copy to Clipboard = Ctrl+C
Copy from Clipboard = Ctrl+V
Freeze Frame = Ctrl+F
Full screen TV mode = Ctrl+T
Reset tool bar = Alt +M
Take a snapshot = Space bar
Right mouse button = Title mode/No title mode/Turns off TV mode
Setting up a shortcut
You can set up a shortcut to the application at any time. To do this, click your
right mouse button on your Windows background. Then click on New. You
should see the following dialog box:
Then click on Shortcut.
2-12
WinTV-USB Installation and Reference Manual

Click on Browse, then look in the Program Files/ directory. Select
WinTV 32.exe.
Then click on NEXTto finish to set up the shortcut.
WinTV-USB Installation and Reference Manual
2-13

2-14
WinTV-USB Installation and Reference Manual

Creating Digital Video movies withWinTV-USB
Overview of Video Clip Capture
Live video which is digitized by the video digitizer (see “How WinTV USB
works”) can be “captured” as a video sequence (or “video clip”) by using the
WinTV Capture program. This program is provided in the WinTV
Application and uses Microsoft’s WDM for Windows capability which is built
into Windows 98 and 2000.
WinTV-Capture creates a file type called AVI (Audio/Video Interleaved) on
your hard disk. This file contains digitized video and, optionally, audio.
WinTV USB gives high quality captured video by storing uncompressed digitized
video in an AVI file. This compares with compression methods such as JPEG and
MPEG, where some loss of video quality is accepted in order to reduce the
amount of data stored. Uncompressed video capture creates high quality digital
video movies, but requires optimized system performance to avoid lost video frames
(called “dropped frames”.)
To create the best quality digital videos, use the following steps:
• Compress/Edit, etc. by using the appropriate 3rd party software with these
functions
• Edit the raw video. Add special effects, cut, paste, etc. using one of the popu-
lar digital video editing programs such as Adobe Premiere, MGI VideoWave
or U-Lead MediaStudio.
• After editing the video, compress the video for the playback target. For exam-
ple, if you are creating a video to be used in a multimedia presentation, com-
press with either Intel’s Indeo or Supermac’s Cinepak. If you are creating a
CD-Video, use MPEG compression to get up to 74 minutes of video on a
CD-ROM.
3-1

Using WinTV Capture
The WinTV-Capture program is an easy-to-use program that previews live
video, captures an AVI file to disk, and plays back the AVI file to your VGA
screen. WinTV-Capture can capture and playback video clips, but does not pro-
vide video editing capabilities. Digital video editing programs such as Adobe
Premiere or U-Lead MediaStudio can be used to edit your digital videos.
With WinTV-Capture you can set the number of frames per second that are cap-
tured and the size of the video image. You need to experiment to determine how
much video your PC can store to the disk (in terms of image size and frames per
second) because capturing video clips is very CPU and hard disk intensive.
-Software Remote Capture window: Found in WinTV 2000
Setting the video image size
The maximum suggested video image capture size is 320x240. When playing back
the video on slower PC’s, a smaller image size might be needed. To set the image
size, click on FMT Button:
3-2
WinTV-USB Installation and Reference Manual

The WinTV-Capture program can use several different types of color formats
when capturing video clips. For highest capture performance, choose the YUY2
OR RGB formats. These give excellent capture image quality and frame rate, but
will give slow performance on playback of 320x240 image size videos.
YUY2 OR RGB formats are also good if you plan to edit your video clips with
Adobe Premiere or MediaStudio, and plan to compress the digital videos using
Cinepak or Indeo. If you do not plan to edit your videos and want good playback
performance, choose a smaller image size (160x120). Capture and playback perfor-
mance is determined by your system configuration, including CPU and hard disk
speed.
Setting the number of frames per second captured
To set the number of frames per second captured, click on File/CaptureSetup:
The number of video buffers will depend upon how much RAM you have in your
system. The maximum number of buffers is 1000.
After setting the video format, the number of frames per second and possibly creat-
ing a new file name (by clicking on File/SetCaptureFile), you can start captur-
ing video by clicking on the Capture Video icon.
Using Audio with -Capture
To capture audio along with video, the WinTV USB must be connected to a
sound board capable of saving sound clips. To connect the USB to a sound board
do the following:
WinTV-USB Installation and Reference Manual
3-3

a) Make sure the audio output of the card is plugged into the LineInput of the
sound board.
b) Make sure the LineInput volume for recording is set correctly and not muted.
Open the Volume control panel, then click on Options/Properties. In the
panel Adjust volume for recording set for Recording. Make sure
LineInput is checked under Show the following volume controls and
that the volume for LineInput is not muted and is set at an appropriate level.
Capturing audio along with video puts a greater
strain on your PC than capturing video alone. If your
PC drops many frames while capturing audio and
video together, then capture the audio separately with the audio
capture utility from Windows. The audio can be merged with
video later on during the video edit stage.
Suggestions on capturing video
Captured image sizes can be either 160x120 or 320x240 pixels.
For the best trade off between image size and captured frames per second, use a
320 x 240 image. With a 166MHz processor MMX (or better) and a reason-
ably fast hard disk drive, you should be able to capture 30 frames per second using
the YUY2 OR RGB format.
3-4
WinTV-USB Installation and Reference Manual

The consumption of hard disk space is dependent upon the size of the video image
while capturing, the image format plus the number of frames/second. Using the
YUY2 OR RGB image format, the following chart shows hard disk space con-
sumed:
image size frames/second bytes per second 1 minute video
160x120 15 frames/sec 425 Kbytes/sec 26 Mbytes
320x240 15 frames/sec 850 Kbytes/sec 52 Mbytes
320x240 30 frames/sec 1.7 Mbytes/sec 104 Mbytes
Video consumes quite a bit of hard disk space! At 320x240, you will only be able
to store about 10 minutes of video on a 1 Gigabyte hard disk!
To reduce the amount of hard disk space used by your digital videos, you can edit
the video using one of the popular 32-bit digital video editors (such as Adobe’s
Premiere or U-Lead’s MediaStudio). After editing, you can compress the video
using a software playback format such as Indeo or Cinepak (both of these are sup-
ported by Windows98). Typical compression achieved by these formats is 30:1.
Tips on improving capture performance
Do not use DoubleSpace or any other disk compression scheme! This severely
slows down your hard disk.
Turn off screen savers and do not connect to a local area network.
Most professionals capture video and audio separately. This allows them to “lay
down” the audio track on top of the video tracks while editing. Capturing video
separately will increase the performance of your video captures.
There are several hard disks on the market which are designed for higher perfor-
mance video captures. These drives use 1:1 interleaving and track caching to elim-
inate gaps caused by a hard disk drive seeking to the next track. They are available
with both IDE and SCSI interfaces.
WinTV-USB Installation and Reference Manual
3-5

3-6

Teletext Data Reception using VTPlus (InEurope ONLY)
Teletext is used in Europe and other parts of the world to transmit digital data
along with a television picture. Teletext data is transmitted in an invisible part of
the TV picture called the "Vertical Blanking Interval" or VBI.
Teletext data is normally formatted into pages. A master index is also transmitted
which lists the various categories that can be received, and which Teletext page they
are being transmitted on. Teletext data must be inserted into the VBI by your TV
broadcaster, and can only be received on the WinTV USB if the Hauppauge
Teletext decoder is installed.
An example of a Teletext page follows. Each Teletext page has a page number, a
date and the current time in the right hand corner:(The time shown in a selected
page will only Update if “Update Continuosly is selected- see later, in this
section).
VTPlus for WinTV USB is a sophisticated Teletext software application which
runs exclusively on the Hauppauge WinTV. VTPlus allows you to view multiple
Teletext pages, save or print Teletext pages and create Dynamic Data Links so that
Teletext data can be used in other Windows applications. The WinTV applica-
tion does not have to be active while the VTPlus Teletext application is running.
4-1

Starting VTPlus
If the VTPlus application is provided on CD-ROM, then it will automatically be
installed from the Installation CD-ROM.
To start VTPlus, click on the VTPlus button in WinTV32 or click on the
TELE button in WinTV2000. this will close the TV application and launch
VTPlus. The WinTV USB cannot run the application and VTPlus at the same
time.
You need to create a VTPLUS suite within the WinTV 32 or WinTV 2000
applications.
(Go to configure-channels, Suite manager, Suites) and choose ADD suite and
name the new suite “VTPLUS”.
Configuring VTPlus
The first time that you run VTPlus, it is recommended that you first check the fol-
lowing configuration setting:
Go to Options, Program options, and make sure that in the General tab,
Multiple Channel Mode is selected but not Background Memory Active.
If Background Memory Active is selected and greyed out then, temporarily,
you will need to de-select the Multiple Channel Mode option.
4-2
WinTV-USB Installation and Reference Manual

VTPlus toolbar
*Note: These fuctions are not applicable in the UK.
1. Reception indicator: when this symbol is red, your requested page is being
received.
2. Script: shortcut for Options/Script. See Help for information on program-
ming the Script.
3. Select previous Subpage: indicates, when dark, that there are subpages
before the current subpage. When a light grey, there are no subpages before
the current page.
4. Select next Subpage: indicates, when dark, that there are subpages after
the current subpage. When light grey, there are no subpages after the current
page. For example, if the current page is 100 and there are no subpages in
page 100, the Select next Subpage icon will be light grey.
5. Reveal button: shortcut for Show/HiddenCharacters. When you use this
button you might see hidden text, such as VPS time codes or answers from a
Quiz.
WinTV-USB Installation and Reference Manual
4-3
Reveal invisible text
Current Teletext service
Current page number
*TOP text select*Select TV channel
Set Time/Date
Next Subpage
Previous Subpage
Script
Reception indicator

Quickselect Teletext pages
By using the Ctrl+N key a Create and Receive page pops up requesting a page
number. Type the requested page number. If this page is to be received continuous-
ly (every time the page is received, the page is automatically updated), click the
Update Continuously box.
Many Teletext pages have a reference to other pages. For example, the TV guide
section has a number of page referrals to movie background information which is
being transmitted in other pages. Quickselect allows you to select these pages
directly. Double click the left mouse button on the desired page number in the cur-
rent Teletext page, and a new Window appears with the selected page.
If you do not want to open a new Window, but simply change to the new page,
push the Shift-Key while double-clicking on the page number in the current
Teletext page, and the new selected page will appear in the original window.
With Quickselect, several pages can be called at once. If a Teletext page refers to a
page sequence such as “Share Prices: 500-505”, mark the first page number with
a single mouse click, click a page number and start the reception with a left
Doubleclick on the end page. The distance between the selected pages must not be
more than 11.
Example: “News from Page 300-303” are selected with by a single click on 300
and a Doubleclick on 303. The multiple page reception will open individual win-
dows for each of the pages within the selected page numbers.
Dynamic Data Exchange with Teletext
DDE links can be created between the Teletext pages and any Windows program
supporting DDE. Programs supporting a live DDE link from a Teletext page
include the Microsoft EXCEL spreadsheet and Microsoft WORD.
To create a link, use your mouse to highlight the section of the Teletext page of
interest. For example, if the current Teletext page has financial data, highlight with
the mouse the financial item of interest by click on the beginning of the field on the
Teletext page, holding your mouse button down, and releasing the mouse button at
the end of the field.
4-4
WinTV-USB Installation and Reference Manual

Then click on Edit/Copy option from the Edit menu and click the left button
mouse. The information is now in the PC memory. To create a link to the DDE
supported applications (such as your spreadsheet), select “edit past special” in
your application and choose the past link option. VTPlus will now create a
direct link to your program.
When the data changes in the selected field on the Teletext page, VTPlus will
deliver the data automatically to your DDE supported program. Updates through
the DDE occur when all subpages are being received and at every update, when
the option Update Continuously is marked.
Note: For DDE to operate it is necessary for the VTPlus pro-
gram to be running and for the specific page to be shown.
WinTV-USB Installation and Reference Manual
4-5

4-6
WinTV-USB Installation and Reference Manual

Using the Radio Application
If you have purchased the -radio device, in addition to watching TV you can also
tune in radio stations on the FM band.
The radio device has two aerial inputs, one for TV and one for FM radio. If your
TV antenna (or cable TV network) carries both TV and FM radio, you can con-
nect to the TV antenna connector only:
Running the Radio Application
Click on Start / Programs / Hauppauge WinTV and then Radio to run the
radio application.
The radio window
5-1
FM radio antenna
TV antenna

Using the Radio Buttons
Volume: The audio volume is adjusted by setting the LineIn level in the
Volume Control applet.
Tune: Fine tune the current radio channel.
Seek: Search for the next active FM radio channel.
Mem: Sets a FM radio channel preset. To assign the current station to
a preset, click on Mem and then on one of the Preset buttons (1-10).
Mute: Turn off the sound.
Mono: Force mono reception.
Scan: Searches for new stations until you click on Stop. Click the
RIGHT mouse button anywhere on the -radio window to set the Scan mode.
Min: Minimizes the -radio window.
CD: Starts the Audio CD-Player for playing back Audio-CD´s.
TV: Closes the radio application and starts the application.
OFF: Closes the radio application.
1 - 10: Preset 1 - 10
Programming the Presets
To assign a radio station to a special Preset button do the following:
1. Tune in the desired station with the Seek button (or by using Tune).
2. Click on the Mem button. It will change to red.
3. Click on one of the Preset buttons (1-10).
Using the right Mouse button
When you click the RIGHT mouse button in the -radio window, this menu comes
up:
5-2
WinTV-USB Installation and Reference Manual

1. Scan Mode: Presets - When Presets is chosen and the Scan button is
clicked, -radio tunes in only the stations which are assigned to the Preset but-
tons.
2. Scan Mode: All - When All is chosen and the Scan button is clicked, -
radio tunes in all radio stations.
3. Frequencies - A list of all frequencies assigned to the preset buttons is
shown.
4. Tool Tips - Turn on/off bubble help.
5. Minimize - Minimizes the -radio application window.
WinTV-USB Installation and Reference Manual
5-3

5-4
WinTV-USB Installation and Reference Manual

How WinTV-USB Works
Video Overlay mode of operation
Live TV can be displayed on your VGA screen by using either the Video
Overlay or the Primary Surface mode. The mode which is used is dependent
upon your PC’s hardware and software. If your PC:
- has a VGA display adapter which supports Windows98 Direct Draw,
- and your VGA has a Video Port which is designed to accept digital video,
- and your VGA has enough display memory to hold the digitized video image
then ’s Video Digitizer “pushes” YUV 4:2:2 video pixels for temporary storage
into an off-screen part of the VGA memory called a Secondary Surface. This
method is called Video Overlay and DIB draw. The VGA display adapter
will then convert the video image from YUV 4:2:2 into RGB video and continu-
ously overlay the VGA screen with the video image. Using Video Overlay, the
VGA controller treats the live TV image just like any other window, which results
in a 24-bit video image on your VGA screen. You will also be able to display full
screen TV at all VGA resolutions.
VGA chips which have Video Ports include: the S3 Trio 64V+, S3 ViRGE
3D, Cirrus Logic 5446, ATI Rage II, Tseng Labs ET6000.
Primary Surface mode of operation
If your VGA display adapter has a Direct Draw driver but does not have either a
Video Port or enough memory to hold the video image off-screen, then the board
converts the YUV 4:2:2 video pixels into an RGB format which is compatible
with your VGA display adapter’s operating mode (8 bits per pixel, 16 bits per
pixel or 24-bits per pixel) and then moves the pixels directly into the display mem-
ory or Primary Surface of your VGA.
VGA chips which can support Primary Surface mode include: the S3 Trio 64,
S3 Vision 968, Matrox Millennium and Mystique and Tseng ET6000.
This results in a high quality video image whose color depth is dependent upon
your VGA display adapter’s operating mode. For example, your TV image when
running in a 256 color mode will not be as good as when running your VGA in
16-bit per pixel mode.
6-1

Also, because the video is moved directly onto the Primary Surface, features such
as close captioning and full-screen TV in resolutions greater than 640x480 will be
disabled.
6-2
WinTV-USB Installation and Reference Manual

Troubleshooting
This chapter includes troubleshooting help for solving common problems.
Problem: Bad colors in the TV window
If your VGA display is running in 256 color mode, the TV picture will be dis-
played with only 256 colors. This compares with the 16 million different colors
which are in the original TV image. The colors in the TV window will change
depending upon which Windows programs are being run, and what color palettes
are being used.
To fix this problem, first try running your VGA adapter at a minimum of 16 bits
per pixel. If you do not have enough memory on your VGA adapter to run at 16
bits per pixel in the current resolution, either lower the resolution (example: from
1024x768 to 800x600) or add more VGA memory to your VGA display
adapter.
Error message: “could not find "ksclock.dll" or otherfiles on the WIN98 CD”
Be sure that the directory is correct where windows is looking. Your cd rom
drive(D:\ for example). in some cases D:\win98 if the windows 98 files are located
on your harddrive(preinstalled on the system), it should be looking for c:\win-
dows\options\cabs
Error message: “error code 69 during installation ofdrivers.”
Cancel and browse the CD rom. double click on the USB98.EXE file located in
the WIN98 Folder. after installing, the system will reboot.
System locks or does not shut down correctly with theUSB pluged in:
Look in your systems BIOS for Legacy USB support and set it to
ENABLED. A bios update may be necessary if this setting is not present.
Problem: Poor TV picture quality
A poor TV image could be caused if your VGA display adapter does not have
7-1

enough video RAM to hold the TV image. In this case, resorts to Primary
Surface mode, which lowers image quality. A memory upgrade on your VGA dis-
play adapter might fix this problem.
Another possible cause of this problem could be that your VGA display adapter
does not support Windows 98 Direct Draw. In this case, you might consider an
upgrade to a new Windows VGA accelerator which has Direct Draw support and
is compatible with the USB.
A poor video picture might also indicate a bad signal. To verify a bad signal, try
one or more of these:
Move your antenna or check your cable connection.
Move possible interference sources, such as other computers or television sets,
away from your PC.
Contact the cable company to check your signal quality.
Problem: TV picture displays a black screen
The TV picture might display a black screen under the following conditions:
Momentary loss of signal
A weak video signal
Channel changing
A scrambled channel
Changing channels may cause a temporary black screen. Tofix the problem, switch the channel up or down, then return tothe original channel.
The audio might continue to broadcast, even though the video picture displays a
black screen. This indicates a strong audio signal and a weak video signal.
A scrambled channel is not a valid channel: Set Primary.exe to DIBDRAW Mode!
Problem: Snapshots don't display correctly
When using a 256 color palette, snapshots display incorrectly. To correct the problem, try oneor both of these:
Change your Windows color palette to 16-bit.
Copy the image to a graphics program and save the image as a 24-bit image.
7-2
WinTV-USB Installation and Reference Manual

Primary Surface mode & DIB Draw
It is sometimes useful to use a mode of operation of your VGA card known as
Primary Surface mode or DIB Draw. This can be helpful in eliminating
VGA compatibility problems, or improving picture quality on some VGA boards
when used in some resolutions.
To use Primary Surface mode, run the program "PRIMARY", which is installed
with the WinTV application. Click Start/ Programs/WinTV and then, Click
on Primary. Click on Force Primary or DIB Draw then close the program by
clicking on the X. The Primary program simply makes a setting in the Windows
Registry that tells the application to use the Primary mode or DIB Draw mode of
operation.
This can be changed at any time to "Allow Overlay" by re-running Primary and
clicking Allow Overlay or DIB Draw.
7-3
WinTV-USB Installation and Reference Manual

7-4
WinTV-USB Installation and Reference Manual

Updating the driver
From time to time, there might be a new WinTV USB driver which is an
improvement over the existing driver. Driver updates can be downloaded from the
Hauppauge Internet Web site (see the front page of this manual for the URL).
The WinTV USB update is combined with the driver uninstaller and the driver
installer. Once you have downloaded the updated WinTV USB driver, you can
install the update simply by running the downloaded program. You will see the fol-
lowing message:
Click Next.
8-1
Click Next.
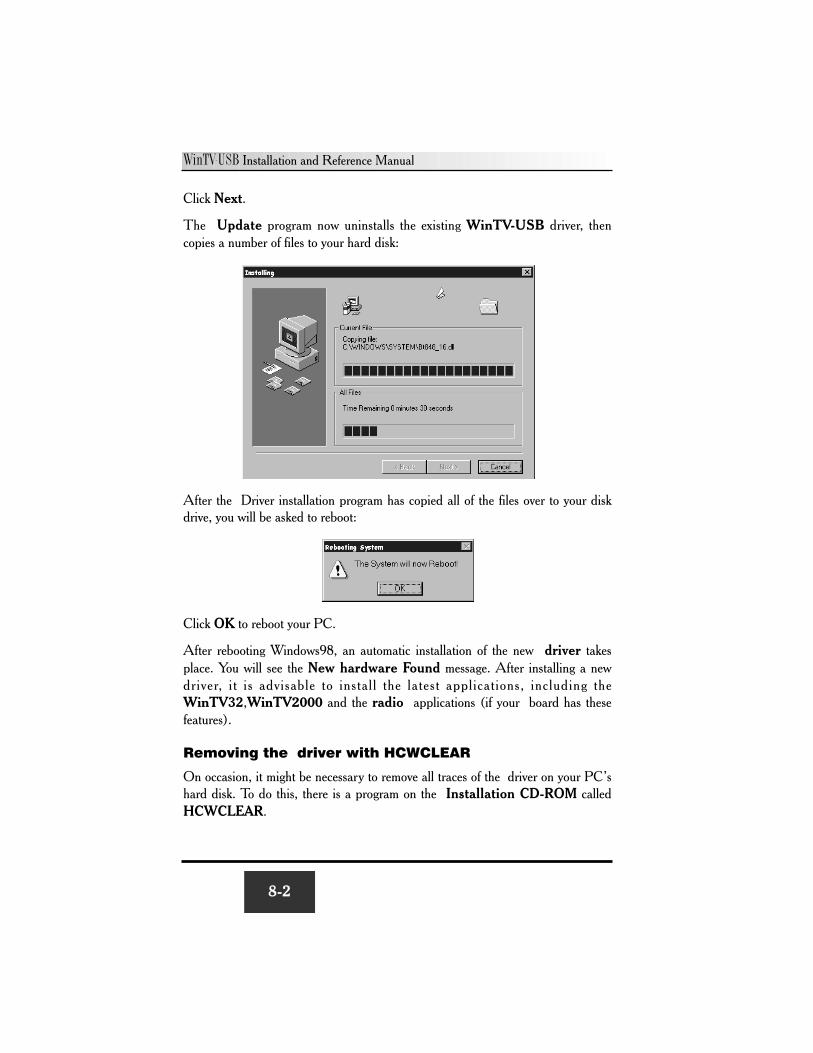
The Update program now uninstalls the existing WinTV-USB driver, then
copies a number of files to your hard disk:
After the Driver installation program has copied all of the files over to your disk
drive, you will be asked to reboot:
Click OK to reboot your PC.
After rebooting Windows98, an automatic installation of the new driver takes
place. You will see the New hardware Found message. After installing a new
driver, it is advisable to install the latest applications, including the
WinTV32,WinTV2000 and the radio applications (if your board has these
features).
Removing the driver with HCWCLEAR
On occasion, it might be necessary to remove all traces of the driver on your PC’s
hard disk. To do this, there is a program on the Installation CD-ROM called
HCWCLEAR.
8-2
WinTV-USB Installation and Reference Manual

The HCWCLEAR application can be found in the MISC/UTILITY directory:
Run HCWCLEAR by double clicking on its icon:
Click OK.
You will then see the following message:
Click Yes.
If there are any errors which come up during the running of HCWCLEAR, then
WinTV-USB Installation and Reference Manual
8-3

it means that there is an application running which is using the drivers. For exam-
ple, if you see the following error:
it means that one of the WinTV USB driver files in use . You can either ignore
the error, or can can double check to make sure there are no applications running
in the system that might be using the WinTV USB driver. In general, to make
sure the re-installation is done correctly, all applications using the WinTV USB
driver should be stopped before HCWCLEAR is run.
Restarting the driver with HCWRESET
A program is included on the USB Installation CD-ROM which resets the
WinTV USB driver. This program can be run if some program has become
“hung up” and the USB no longer is responding.
The HCWRESET application can be found in the MISC/UTILITY directory:
Simply double click on the HCWRESET.exe icon and the WinTV USB driver
will be reset.
8-4
WinTV-USB Installation and Reference Manual

Technical Support
Technical support telephone
If you have questions regarding installation or compatibility, please contact our
technical support staff at:
(631) 434-3197
(631) 434-3198 Fax
USB FAQ-URL
www.hauppauge.com/html/faqusb.htm
Service
If you should need assistance with the installation, operation, or application of your
Hauppauge WinTV USB, there are several options available to you. Your prima-
ry source for information and problem assistance is always your dealer. Should the
need arise, contact your dealer for on-site or repair service.
Hauppauge’s Technical Support and Customer Service staff can aid in solving
many problems. Our service department is available to repair any Hauppauge
product. For completion of repair, the product must be returned to our factory.
If this WinTV USB is not in working order, your only recourse is repair or
replacement, as described above. UNDER NO CIRCUMSTANCES will
Hauppauge be liable for consequential damages, including any lost savings, lost
profits, or any other damages, caused by the use of the WinTV USB or inability
to use it, even if the dealer or Hauppauge has been advised of such liability or
other claims.
A-1

A-2
WinTV-USB Installation and Reference Manual

The Hauppauge Limited Warranty
Warranty
Hauppauge Computer Works, Inc. warrants the WinTV USB to be free from
defects in material and workmanship for a period of 2 years from date of initial
retail purchase. We will, at our option, repair or replace a defective product. The
limited warranty does not cover any losses or damage that occur as a result of:
• Improper installation
• Misuse or neglect or operation with faulty equipment
• Repair or modification by anyone other than Hauppauge Computer Works or
an authorized repair agent
Please complete and return the Warranty Registration Form inserted in this man-
ual. To obtain service under this warranty, contact Hauppauge Computer works at
(631) 434-3197, or fax “RMA Department” at 631-434-3198. Please see the
return procedure in the “Technical Support” chapter.
B-1

B-2
WinTV-USB Installation and Reference Manual