Embed Size (px)
Citation preview

IG-530-BH-2 5/25/07
INFRARED WOODEN SAUNA ROOM INSTRUCTION MANUAL
Read all instructions carefully before using the wooden infrared sauna room
IG-530 BH
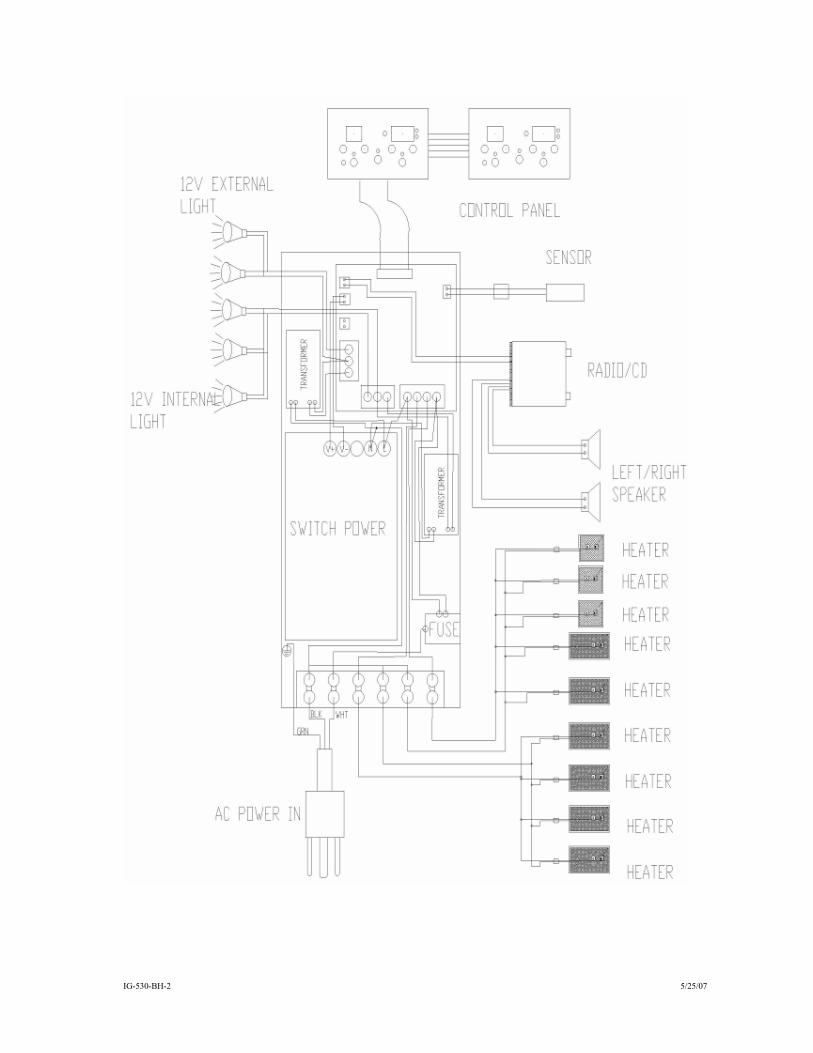
P R E C A U T I O N S F O R U S E . . . . . . . . . . . . . . . . . . . . . . . . . . . . . . . . . . . . . . . . . . . . . . . . . . . . . . . 1 PA R T S N A M E S . . . . . . . . . . . . . . . . . . . . . . . . . . . . . . . . . . . . . . . . . . . . . . . . . . . . . . . . . . . . . . . 2 R E A D B E F O R E I N S TA L L AT I O N . . . . . . . . . . . . . . . . . . . . . . . . . . . . . . . . . . . . . . . . . . . . . . . . . . 3 INSTALLATION OF SAUNA ROOM BODY . . . . . . . . . . . . . . . . . . . . . . . . . . . . . . . . . . . . . . . .4-7 C O N T R O L PA N E L I N S T R U C T I O N . . . . . . . . . . . . . . . . . . . . . . . . . . . . . . . . . . . . . . . . . . . . . . . 9 WARNINGS AND SUGGESTIONS FOR USE.. . . . . . . . . . . . . . . . . . . . . . . . . . . . . . . . . . . . . . . . .10 C L E A N I N G A N D S T O R A G E . . . . . . . . . . . . . . . . . . . . . . . . . . . . . . . . . . . . . . . . . . . . . . . . . . . . . . 1 0 S P E C I F I C AT I O N . . . . . . . . . . . . . . . . . . . . . . . . . . . . . . . . . . . . . . . . . . . . . . . . . . . . . . . . . . . . . 1 0 S A U N A C I R C U I T D I A G R A M . . . . . . . . . . . . . . . . . . . . . . . . . . . . . . . . . . . . . . . . . . . . . . . . . . . . . 11
IG-530-BH-2 5/25/07
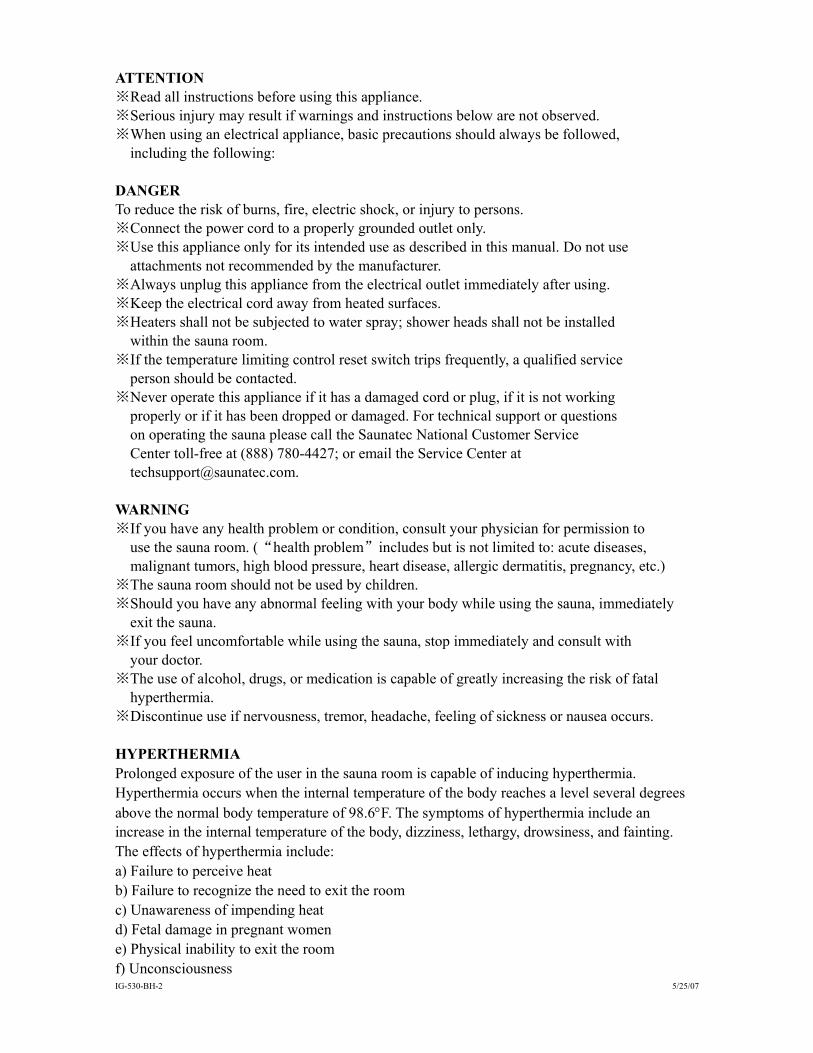
ATTENTION ※Read all instructions before using this appliance. ※Serious injury may result if warnings and instructions below are not observed. ※When using an electrical appliance, basic precautions should always be followed, including the following: DANGER To reduce the risk of burns, fire, electric shock, or injury to persons. ※Connect the power cord to a properly grounded outlet only. ※Use this appliance only for its intended use as described in this manual. Do not use
attachments not recommended by the manufacturer. ※Always unplug this appliance from the electrical outlet immediately after using. ※Keep the electrical cord away from heated surfaces. ※Heaters shall not be subjected to water spray; shower heads shall not be installed within the sauna room. ※If the temperature limiting control reset switch trips frequently, a qualified service person should be contacted. ※Never operate this appliance if it has a damaged cord or plug, if it is not working properly or if it has been dropped or damaged. For technical support or questions on operating the sauna please call the Saunatec National Customer Service Center toll-free at (888) 780-4427; or email the Service Center at [email protected]. WARNING ※If you have any health problem or condition, consult your physician for permission to use the sauna room. (“health problem”includes but is not limited to: acute diseases, malignant tumors, high blood pressure, heart disease, allergic dermatitis, pregnancy, etc.) ※The sauna room should not be used by children. ※Should you have any abnormal feeling with your body while using the sauna, immediately exit the sauna. ※If you feel uncomfortable while using the sauna, stop immediately and consult with your doctor. ※The use of alcohol, drugs, or medication is capable of greatly increasing the risk of fatal
hyperthermia. ※Discontinue use if nervousness, tremor, headache, feeling of sickness or nausea occurs.
HYPERTHERMIA Prolonged exposure of the user in the sauna room is capable of inducing hyperthermia. Hyperthermia occurs when the internal temperature of the body reaches a level several degrees above the normal body temperature of 98.6°F. The symptoms of hyperthermia include an increase in the internal temperature of the body, dizziness, lethargy, drowsiness, and fainting. The effects of hyperthermia include: a) Failure to perceive heat b) Failure to recognize the need to exit the room c) Unawareness of impending heat d) Fetal damage in pregnant women e) Physical inability to exit the room f) Unconsciousness
IG-530-BH-2 5/25/07
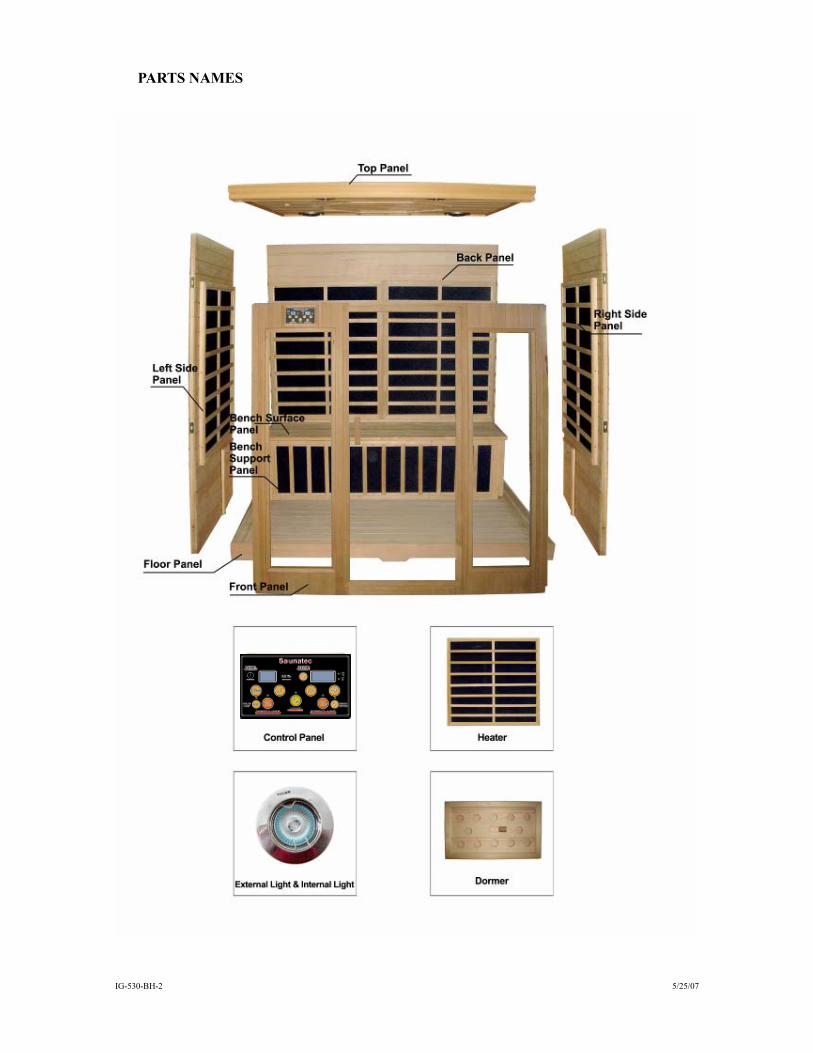
PARTS NAMES
IG-530-BH-2 5/25/07
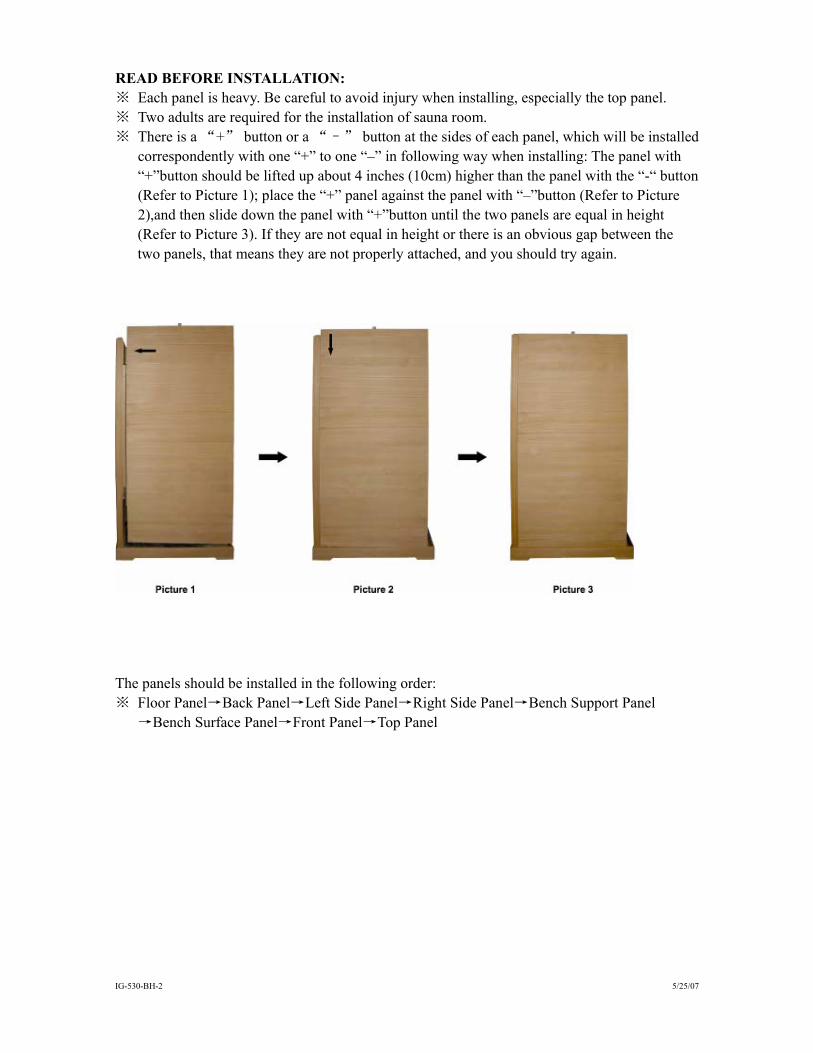
READ BEFORE INSTALLATION: ※ Each panel is heavy. Be careful to avoid injury when installing, especially the top panel. ※ Two adults are required for the installation of sauna room. ※ There is a “+” button or a “–” button at the sides of each panel, which will be installed correspondently with one “+” to one “–” in following way when installing: The panel with
“+”button should be lifted up about 4 inches (10cm) higher than the panel with the “-“ button (Refer to Picture 1); place the “+” panel against the panel with “–”button (Refer to Picture 2),and then slide down the panel with “+”button until the two panels are equal in height (Refer to Picture 3). If they are not equal in height or there is an obvious gap between the two panels, that means they are not properly attached, and you should try again.
The panels should be installed in the following order: ※ Floor Panel→Back Panel→Left Side Panel→Right Side Panel→Bench Support Panel →Bench Surface Panel→Front Panel→Top Panel
IG-530-BH-2 5/25/07
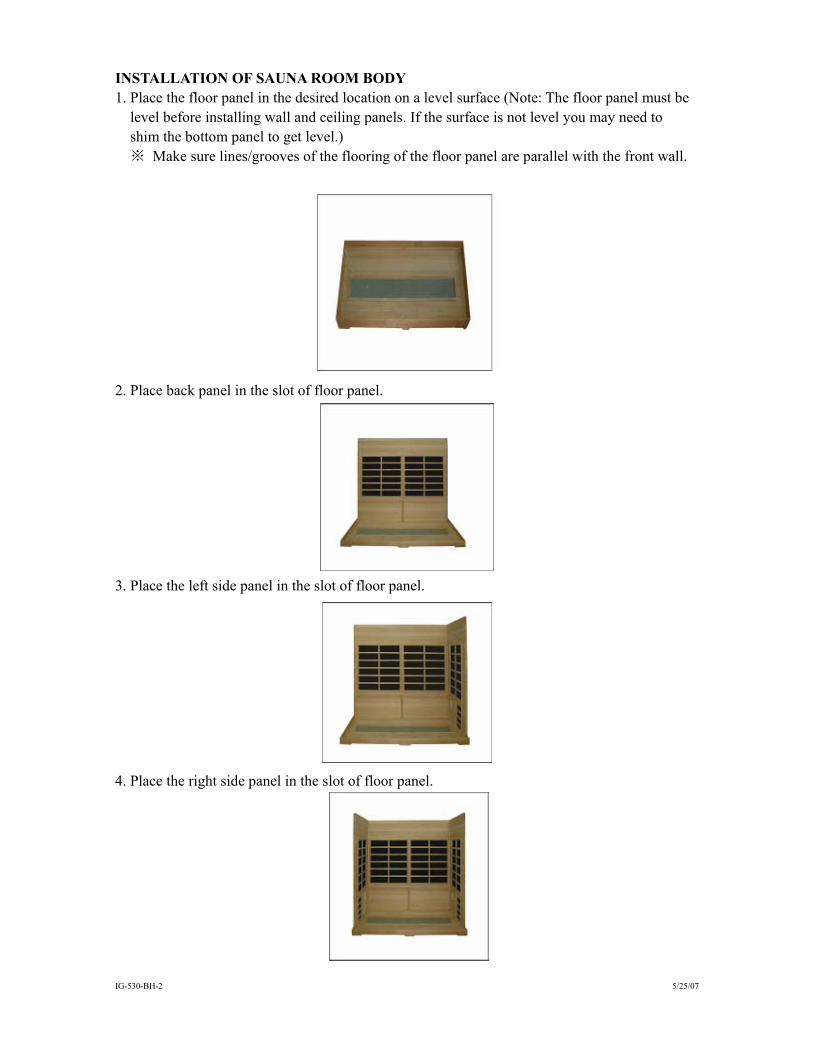
INSTALLATION OF SAUNA ROOM BODY 1. Place the floor panel in the desired location on a level surface (Note: The floor panel must be
level before installing wall and ceiling panels. If the surface is not level you may need to shim the bottom panel to get level.)
※ Make sure lines/grooves of the flooring of the floor panel are parallel with the front wall.
2. Place back panel in the slot of floor panel.
3. Place the left side panel in the slot of floor panel.
4. Place the right side panel in the slot of floor panel.

IG-530-BH-2 5/25/07
5. Place the Bench Support panel first and then place the Bench surface panel into the sauna room. ※ On larger sauna rooms with more than one bench, rotate the wooden bench supports
away from the side walls. ※ Slide the Bench Support Panel down the wooden supports with the heater facing out. ※ Make sure the two side slots of the Bench Support Panel slide completely into the
corresponding grooves of the wooden supports . (Refer to picture 1) ※ Connect the power connector from the back of Bench Support Panel to the floor
Panel. Ensure the connection is completely fastened(Refer to picture 2) ※ Place the Bench Surface Panel on the Bench Support Panel and slide toward the Back
Wall until half. (Refer to picture 3) ※ Connect the power connector from the back of Bench Support Panel to the Right
Wall Panel. Ensure the connection is completely fastened; attach cover with the provided screws. (Refer to picture 4-5)
※ Connect the power connector from the back of Bench Support Panel to the left Wall Panel. Ensure the connection is completely fastened; attach cover with the provided screws. (Refer to picture 4-5)
Place the Bench Surface Panel on the Bench Support Panel and slide toward the Back Wall until flush to the Back Wall.
Picture 2
Picture 4-5

IG-530-BH-2 5/25/07
6. Place the front panel in the slot of floor panel.
7. Place the top panel on the four side panels. Make sure the connection wires from the three side
panels protrude through the corresponding holes of the top panel. ※ Make sure the top panel’s arched side is facing to the front. ※ Make sure the wire is through each hole smoothly and completely. ※ Make sure trim of the top panel fits completely around the four side panels.
8. Make sure each of the lead wires on the top of the left, right, back and front panels is
protruding through the top panel; then plug each of the four lead wires into the four connectors of the top panel.

IG-530-BH-2 5/25/07
WARNING: ELECTRIC SHOCK HAZARD Do not plug cord into electrical outlet before connecting power cord wires to terminal block.
9. Make sure to connect wires in correct location by matching color to correct screw location: ※ Open cover on top side of ceiling panel to see three unconnected power wires (Picture 1) ※ Insert the green wire into “〒” and tighten the screw (Picture 2) ※ Insert the black wire into “L” and tighten the screw (Picture 3) ※ Insert the white wire into “N” and tighten the screw (Picture 4) ※ Visually inspect to ensure the correct connections by color (Picture 5)
10.The power cord is located at the bottom of the back panel. Simply plug into appropriate household outlet when ready to use the sauna. Notice the plug type of your sauna room: Sauna models IG-510 & 520 & 570 have a 15 amp/120-volt plug; Models IG-530 & IG-540 & IG-580 have a 20 amp/120-volt plug.

IG-530-BH-2 5/25/07
CONTROL PANEL INSTRUCTION
1.Press “POWER”to switch on or off. 2.“TIME”refers to control of operating time and indicates the amount of time remaining. ※Once power is on, the default amount of operating time is at 45 minutes. ※Press “UP” and “DOWN” to adjust and set time of use; pressing once will increase
or reduce in 5 minute increments. The maximum operating time is 60 minutes. ※After time of use is set, the number will flash for about three seconds. ※After the set “Time” stops flashing , the number indicated will show operating time
remaining. 3. “TEMP” refers to control of the “set temperature” and also indicates the “actual
temperature” inside sauna room. ※ “°C/°F” refer to the switching of “°C” and “°F”. ※Once the control is turned on, the indicated temperature of use defaults to 120 degrees
F (50°C). ※Press“HIGH”or“LOW”to adjust and set temperature in sauna room; pressing once
will increase in one degree increments. The maximum set temperature is 150°F/65°C. ※After temperature of use is set, the number of temperature will flash for about 5
minutes. ※After the numbers of the set temperature stop flashing, the number indicated will show
actual temperature inside sauna room. 4. Press “External Light” to switch on or off. 5. Press “Internal Light” to switch on or off. 5. Press “BENCH HEATER” to switch on or off.
IG-530-BH-2 5/25/07
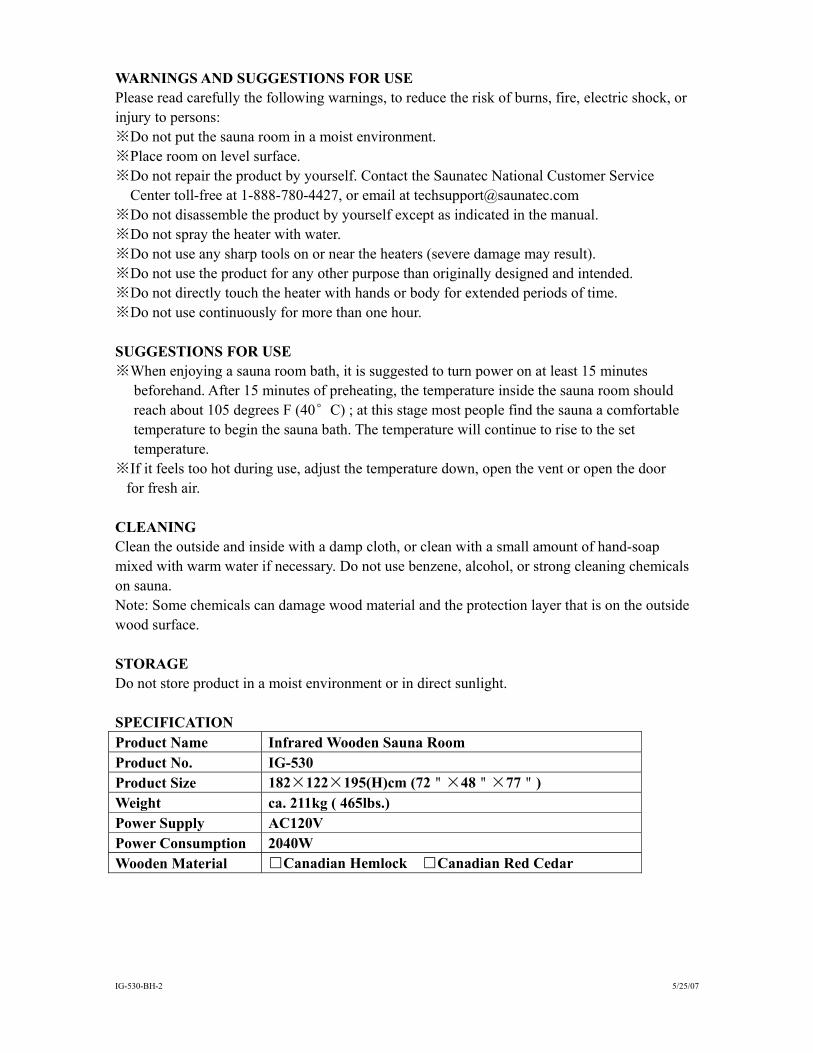
WARNINGS AND SUGGESTIONS FOR USE Please read carefully the following warnings, to reduce the risk of burns, fire, electric shock, or injury to persons: ※Do not put the sauna room in a moist environment. ※Place room on level surface. ※Do not repair the product by yourself. Contact the Saunatec National Customer Service
Center toll-free at 1-888-780-4427, or email at [email protected] ※Do not disassemble the product by yourself except as indicated in the manual. ※Do not spray the heater with water. ※Do not use any sharp tools on or near the heaters (severe damage may result). ※Do not use the product for any other purpose than originally designed and intended. ※Do not directly touch the heater with hands or body for extended periods of time. ※Do not use continuously for more than one hour. SUGGESTIONS FOR USE ※When enjoying a sauna room bath, it is suggested to turn power on at least 15 minutes
beforehand. After 15 minutes of preheating, the temperature inside the sauna room should reach about 105 degrees F (40°C) ; at this stage most people find the sauna a comfortable temperature to begin the sauna bath. The temperature will continue to rise to the set temperature.
※If it feels too hot during use, adjust the temperature down, open the vent or open the door for fresh air.
CLEANING Clean the outside and inside with a damp cloth, or clean with a small amount of hand-soap mixed with warm water if necessary. Do not use benzene, alcohol, or strong cleaning chemicals on sauna. Note: Some chemicals can damage wood material and the protection layer that is on the outside wood surface. STORAGE Do not store product in a moist environment or in direct sunlight.
SPECIFICATION Product Name Infrared Wooden Sauna Room Product No. IG-530 Product Size 182×122×195(H)cm (72"×48"×77") Weight ca. 211kg ( 465lbs.) Power Supply AC120V Power Consumption 2040W Wooden Material □Canadian Hemlock □Canadian Red Cedar
IG-530-BH-2 5/25/07

IG-530-BH-2 5/25/07