Embed Size (px)
Citation preview
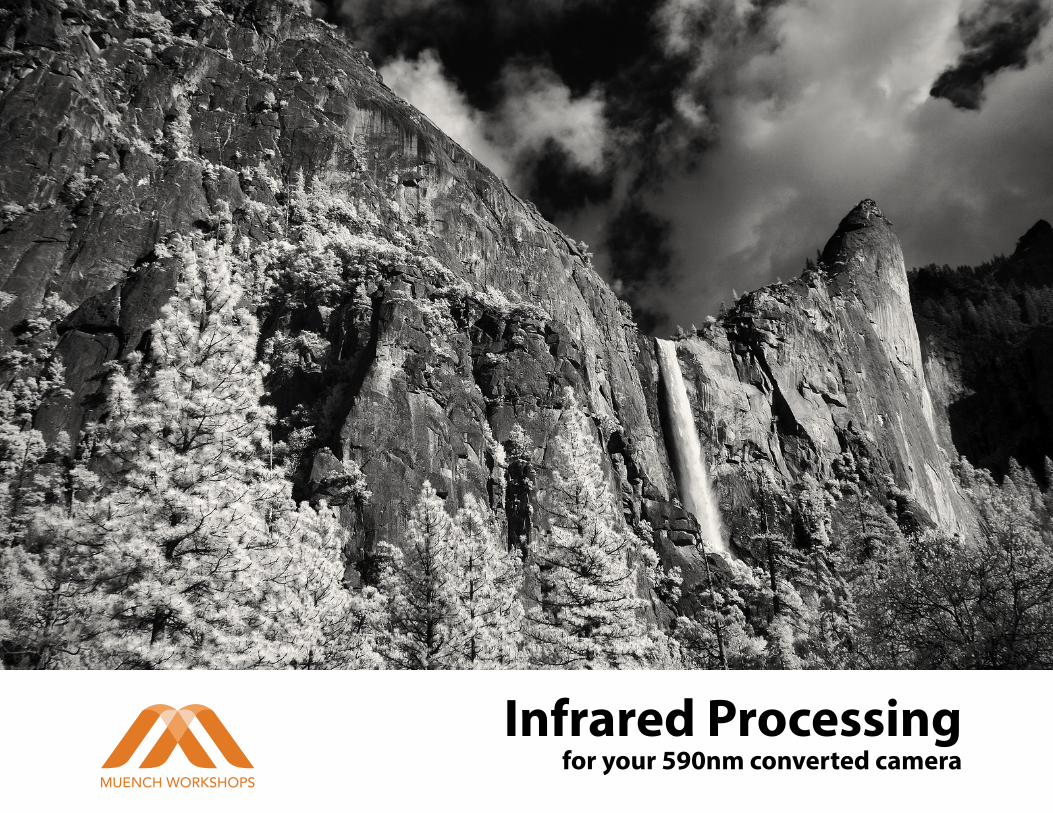
Infrared Processing for your 590nm converted camera
MUENCH WORKSHOPS
Infrared Processing for 590nm Converted Cameras
Infrared photography produces a unique vision of the world, and is just a whole lot of fun to shoot. It provides a great diversion in midday, when the light can be too harsh for color photography. We love to shoot and teach IR on our workshops.
There are many filter options to consider when converting your camera to infrared, each notated by the wavelength of light that they allow to pass through to your sensor. You can read more about filter options here.
We’ve found that the “Super Color” 590nm filter provides a great amount of flexibility in the processing of images, allowing you to process your infrared image to mimic a range of infrared filters, all the way to “deep infrared” (830nm).
Processing infrared images doesn’t need to be difficult, but there are a few things you need to know for best results. Below are the steps that we follow when processing our infrared images. This includes a one-time setup of a new camera profile.
NOTE: This workflow is specifically for processing the 590nm “Super Color” conversion. This is not intended to be a comprehensive manual on Infrared photography generally, and it’s not intended for processing images taken with other IR filters.
Getting Started
What you’ll need: a digital camera converted to 590nm infrared, and a computer running Adobe Lightroom and Adobe Photoshop.
A basic outline of the process looks like this:
Initial, one-time setup • Create DNG Profile • Create Import Preset •
Processing individual images • Apply preset on import • Make basic adjustments • Open as Smart Object in Photoshop • Apply BW Conversion as an Adjustment Layer • Make edits to the Smart Object in Adobe Camera RAW • Optional editing with NIK Silver Efex Pro and Color Efex Pro • Return to Lightroom for final processing
Wondering which camera to get?
We recommend the Sony a6000, a6300 or a6500 cameras and the 590nm Super Color filter conversion. Our favorite lenses are the Zeiss 12mm Touit and the Sony 16-70mm. You can also shoot with the 18-55mm kit lens if you want to start out slow.
The a6000 is currently available from Lifepixel pre-converted, saving you the trouble of buying and then sending the camera in for conversion. Those cameras are available hereThere’s a ton of great information on the Lifepixel site. We would like to especially draw your attention to their articles on lens considerations and cameras.
Camera Settings Before we begin, it’s important to make sure that your newly converted camera is set to capture the proper White Balance and Exposure. It’s also imperative that you have set your Image Quality in camera to RAW.
IR cameras are not capturing visible light, so there are some differences from standard practices as to how you set both White Balance and Exposure.
Custom White Balance
Rather than setting your White Balance on a gray, or neutral object, with IR you’ll want to set it on green grass or foliage in full sun. To accomplish this, you’ll need to set a Custom White Balance, rather than using one of the presets.
Read your camera manual for more information on this process. Some cameras will not be able to set the Custom White Balance this far out of normal range.
For more information, check out the section on White Balance in this article.
Exposure Compensation
The IR filter on your camera significantly changes the quality and physics of the light that reaches your camera’s sensor. With a 590nm conversion you will find that your “normal” exposed images will end up slightly underexposed. With our cameras, we have found that we add about +1 to +1⅔ stops of exposure compensation, depending on the scene. The amount of compensation may vary between different types of conversions and/or camera models, so make sure to inspect your histogram and adjust accordingly.
Other Camera Settings Since you’ll generally be shooting in bright to mixed sunlight, there isn’t a whole lot of need to use manual, or to shoot at a higher ISO. Shoot in Aperture Priority at the optimal aperture for your lens/camera combination—generally ƒ/8 or ƒ/11 will be the sharpest apertures for your lens. Also, set your ISO to 100, as there’s no need to add unnecessary noise to your final image, as you’ll be mostly shooting in well-lit situations.
Keep in mind that the Custom White Balance is important for achieving proper exposure by providing more accurate in-camera review of your images and will ensure consistent results.
Creating the Camera Profile
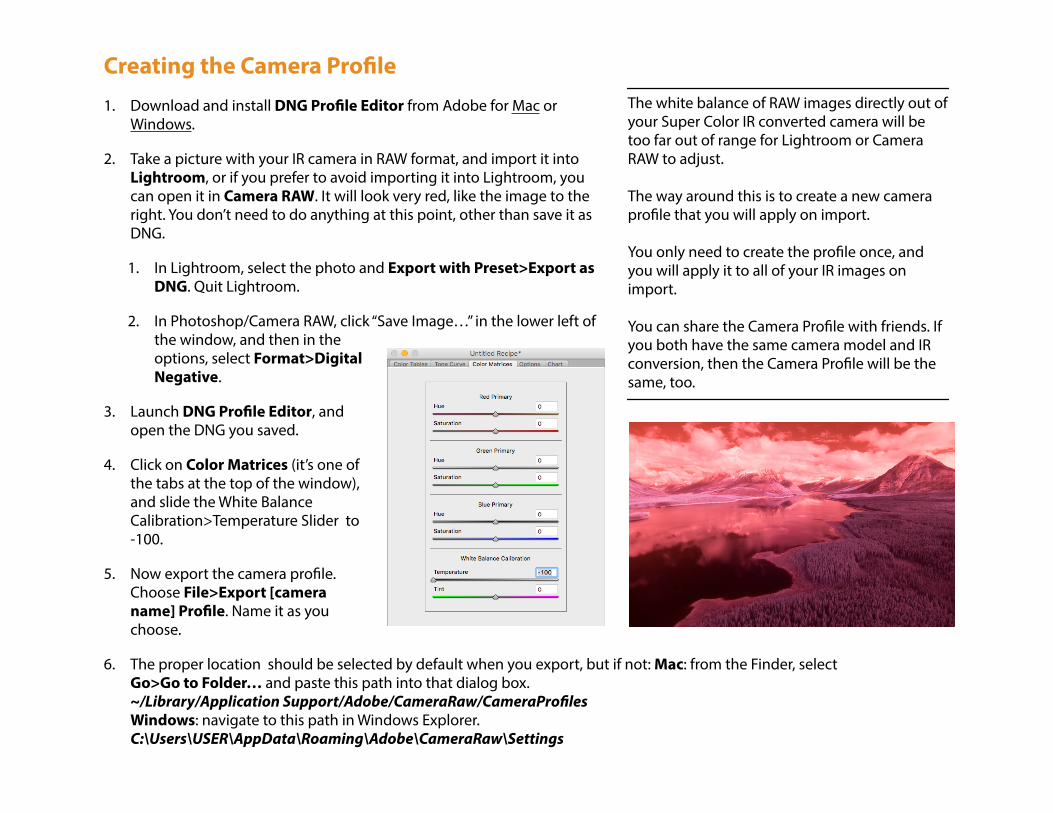
1. Download and install DNG Profile Editor from Adobe for Mac or Windows.
2. Take a picture with your IR camera in RAW format, and import it into Lightroom, or if you prefer to avoid importing it into Lightroom, you can open it in Camera RAW. It will look very red, like the image to the right. You don’t need to do anything at this point, other than save it as DNG.
1. In Lightroom, select the photo and Export with Preset>Export as DNG. Quit Lightroom.
2. In Photoshop/Camera RAW, click “Save Image…” in the lower left of the window, and then in the options, select Format>Digital Negative.
3. Launch DNG Profile Editor, and open the DNG you saved.
4. Click on Color Matrices (it’s one of the tabs at the top of the window), and slide the White Balance Calibration>Temperature Slider to -100.
5. Now export the camera profile. Choose File>Export [camera name] Profile. Name it as you choose.
6. The proper location should be selected by default when you export, but if not: Mac: from the Finder, select Go>Go to Folder… and paste this path into that dialog box.~/Library/Application Support/Adobe/CameraRaw/CameraProfilesWindows: navigate to this path in Windows Explorer.C:\Users\USER\AppData\Roaming\Adobe\CameraRaw\Settings
The white balance of RAW images directly out of your Super Color IR converted camera will be too far out of range for Lightroom or Camera RAW to adjust. The way around this is to create a new camera profile that you will apply on import. You only need to create the profile once, and you will apply it to all of your IR images on import.You can share the Camera Profile with friends. If you both have the same camera model and IR conversion, then the Camera Profile will be the same, too.
Creating Custom Import Settings
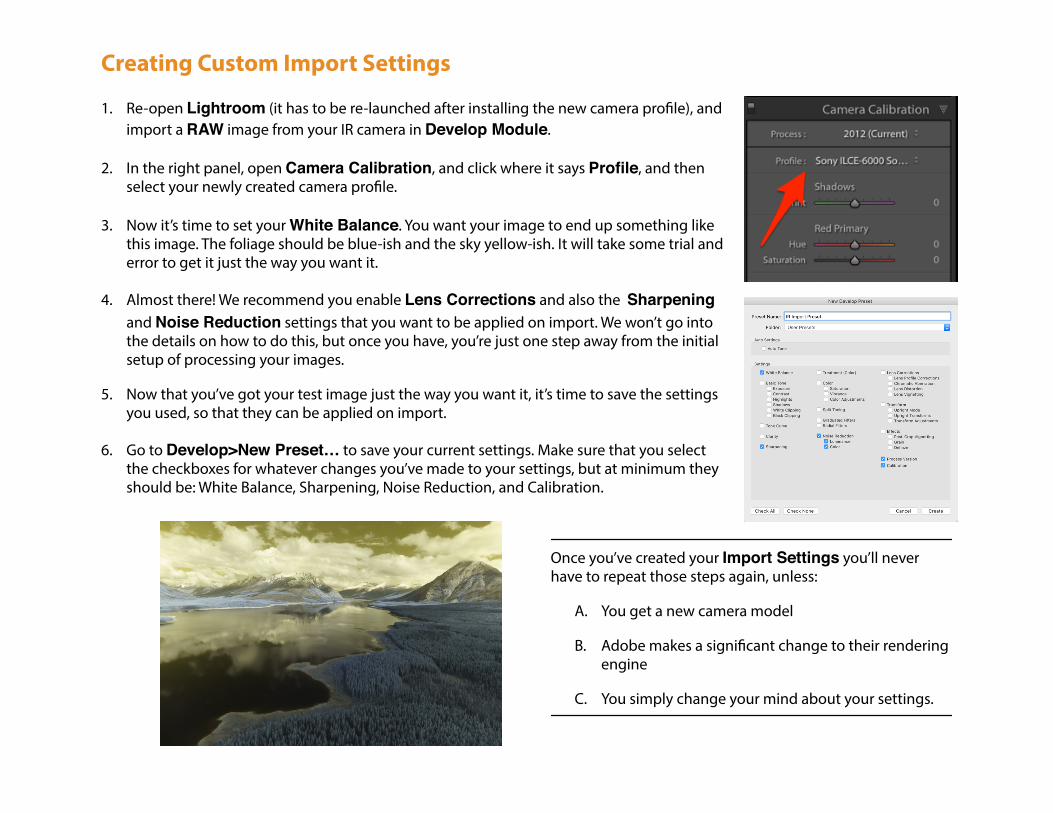
1. Re-open Lightroom (it has to be re-launched after installing the new camera profile), and import a RAW image from your IR camera in Develop Module.
2. In the right panel, open Camera Calibration, and click where it says Profile, and then select your newly created camera profile.
3. Now it’s time to set your White Balance. You want your image to end up something like this image. The foliage should be blue-ish and the sky yellow-ish. It will take some trial and error to get it just the way you want it.
4. Almost there! We recommend you enable Lens Corrections and also the Sharpening and Noise Reduction settings that you want to be applied on import. We won’t go into the details on how to do this, but once you have, you’re just one step away from the initial setup of processing your images.
5. Now that you’ve got your test image just the way you want it, it’s time to save the settings you used, so that they can be applied on import.
6. Go to Develop>New Preset… to save your current settings. Make sure that you select the checkboxes for whatever changes you’ve made to your settings, but at minimum they should be: White Balance, Sharpening, Noise Reduction, and Calibration.
Once you’ve created your Import Settings you’ll never have to repeat those steps again, unless:
A. You get a new camera model
B. Adobe makes a significant change to their rendering engine
C. You simply change your mind about your settings.
Processing Your IR Images
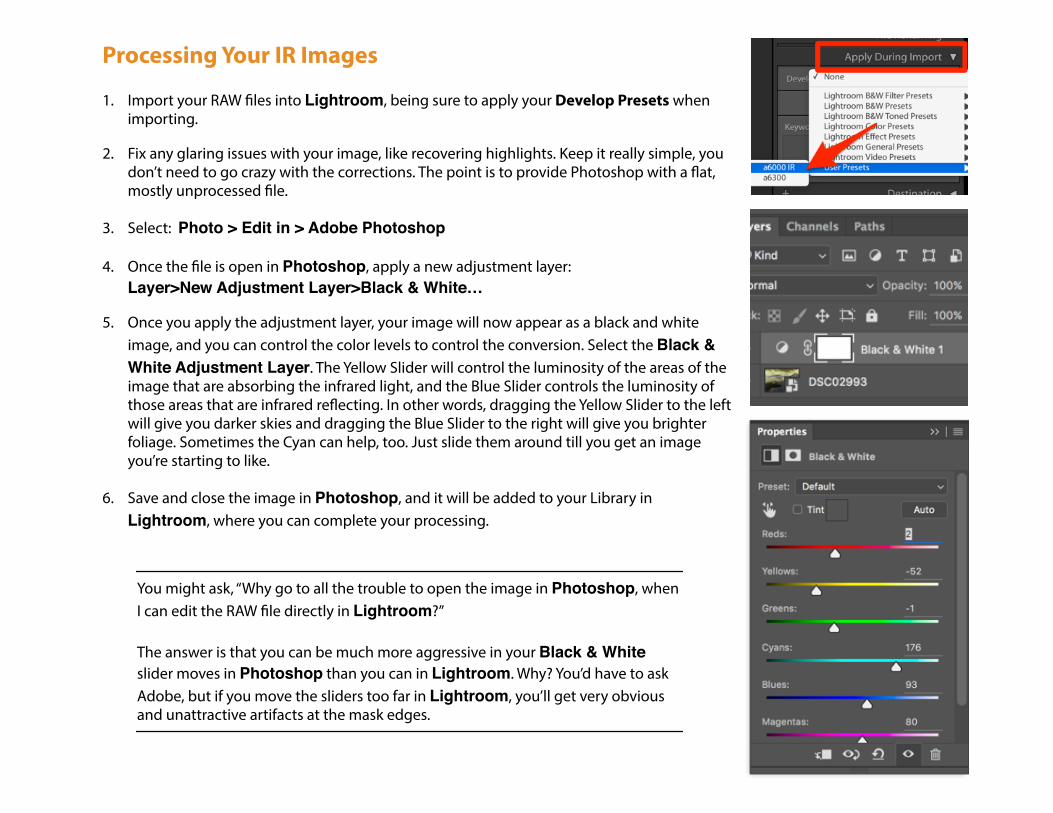
1. Import your RAW files into Lightroom, being sure to apply your Develop Presets when importing.
2. Fix any glaring issues with your image, like recovering highlights. Keep it really simple, you don’t need to go crazy with the corrections. The point is to provide Photoshop with a flat, mostly unprocessed file.
3. Select: Photo > Edit in > Adobe Photoshop
4. Once the file is open in Photoshop, apply a new adjustment layer: Layer>New Adjustment Layer>Black & White…
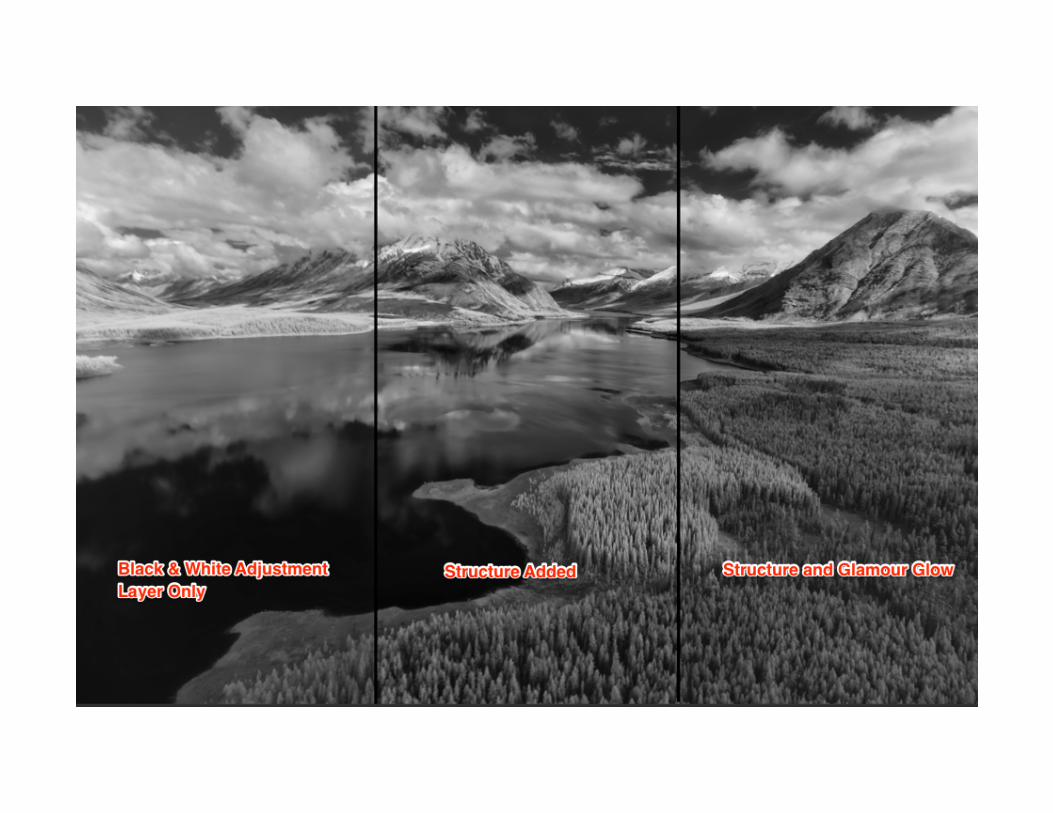
5. Once you apply the adjustment layer, your image will now appear as a black and white image, and you can control the color levels to control the conversion. Select the Black & White Adjustment Layer. The Yellow Slider will control the luminosity of the areas of the image that are absorbing the infrared light, and the Blue Slider controls the luminosity of those areas that are infrared reflecting. In other words, dragging the Yellow Slider to the left will give you darker skies and dragging the Blue Slider to the right will give you brighter foliage. Sometimes the Cyan can help, too. Just slide them around till you get an image you’re starting to like.
6. Save and close the image in Photoshop, and it will be added to your Library in Lightroom, where you can complete your processing.
You might ask, “Why go to all the trouble to open the image in Photoshop, when I can edit the RAW file directly in Lightroom?” The answer is that you can be much more aggressive in your Black & White slider moves in Photoshop than you can in Lightroom. Why? You’d have to ask Adobe, but if you move the sliders too far in Lightroom, you’ll get very obvious and unattractive artifacts at the mask edges.
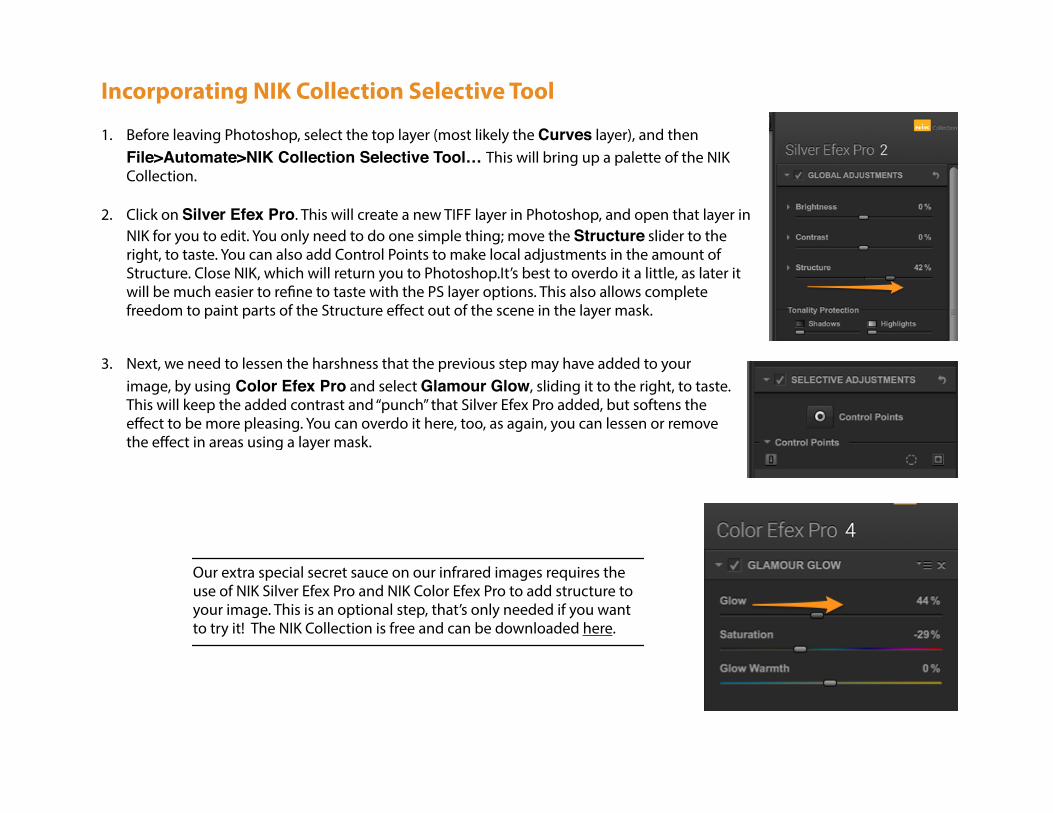
Incorporating NIK Collection Selective Tool 1. Before leaving Photoshop, select the top layer (most likely the Curves layer), and then
File>Automate>NIK Collection Selective Tool… This will bring up a palette of the NIK Collection.
2. Click on Silver Efex Pro. This will create a new TIFF layer in Photoshop, and open that layer in NIK for you to edit. You only need to do one simple thing; move the Structure slider to the right, to taste. You can also add Control Points to make local adjustments in the amount of Structure. Close NIK, which will return you to Photoshop.It’s best to overdo it a little, as later it will be much easier to refine to taste with the PS layer options. This also allows complete freedom to paint parts of the Structure effect out of the scene in the layer mask.
3. Next, we need to lessen the harshness that the previous step may have added to your image, by using Color Efex Pro and select Glamour Glow, sliding it to the right, to taste. This will keep the added contrast and “punch” that Silver Efex Pro added, but softens the effect to be more pleasing. You can overdo it here, too, as again, you can lessen or remove the effect in areas using a layer mask.
Our extra special secret sauce on our infrared images requires the use of NIK Silver Efex Pro and NIK Color Efex Pro to add structure to your image. This is an optional step, that’s only needed if you want to try it! The NIK Collection is free and can be downloaded here.