Embed Size (px)
Citation preview

1
Industrial Radiography Operating Procedures
2
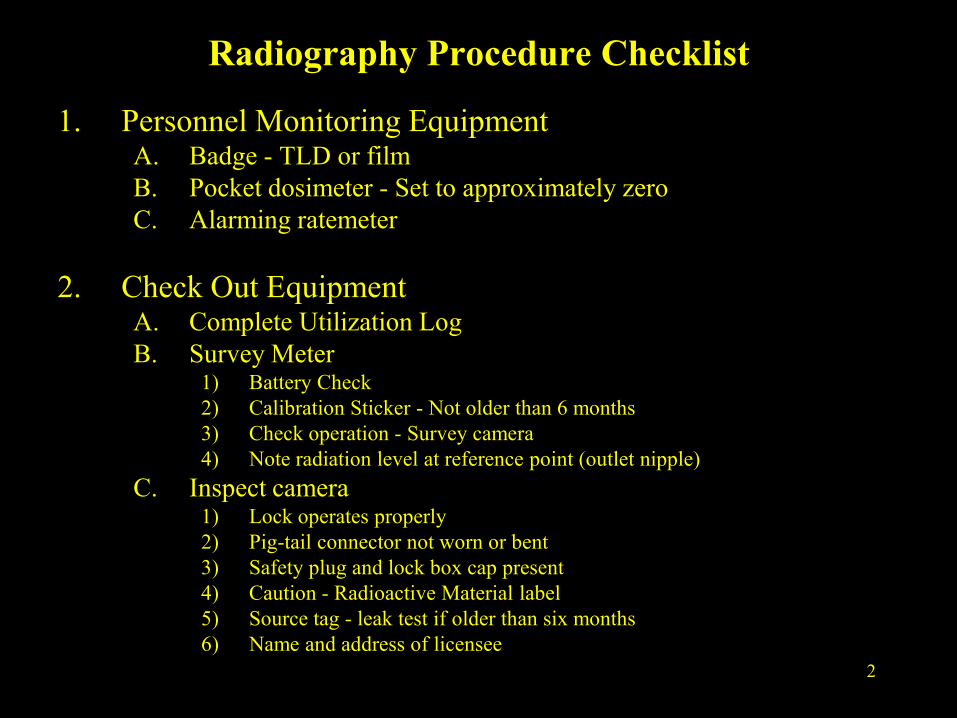
Radiography Procedure Checklist
1. Personnel Monitoring Equipment A. Badge - TLD or film B. Pocket dosimeter - Set to approximately zero C. Alarming ratemeter
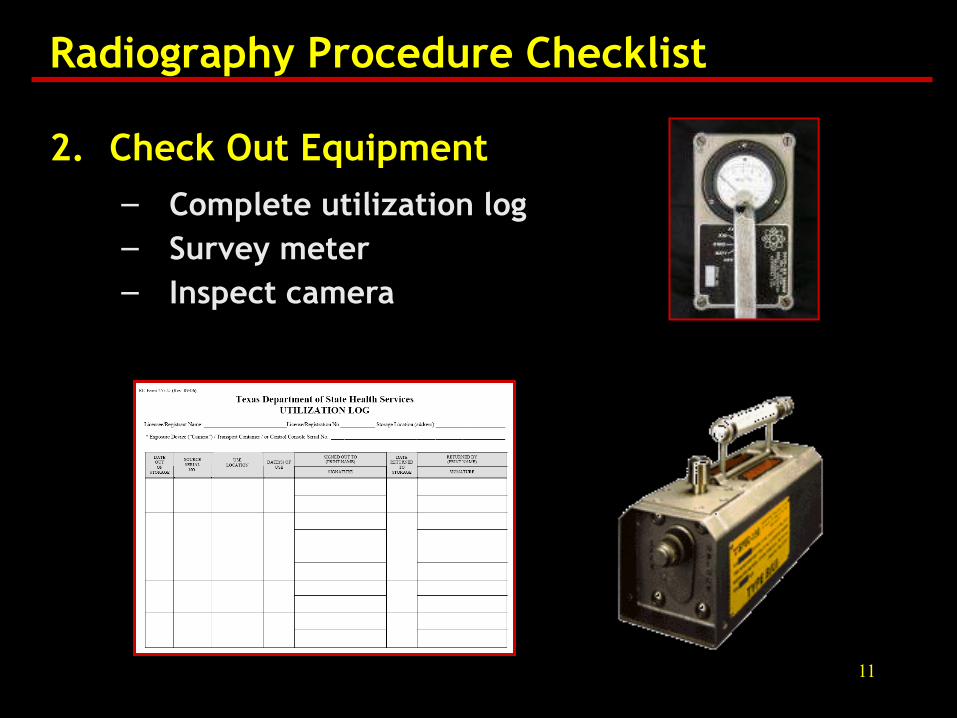
2. Check Out Equipment
A. Complete Utilization Log B. Survey Meter
1) Battery Check 2) Calibration Sticker - Not older than 6 months 3) Check operation - Survey camera 4) Note radiation level at reference point (outlet nipple)
C. Inspect camera 1) Lock operates properly 2) Pig-tail connector not worn or bent 3) Safety plug and lock box cap present 4) Caution - Radioactive Material label 5) Source tag - leak test if older than six months 6) Name and address of licensee

3
Radiography Procedure Checklist (cont’d) D. Source Tube and Collimator
1) No kinks or crimps 2) Disconnect coupling operates properly 3) Collimator attaches securely 4) Check Out Equipment
E. Controls 1) Connector matches with pig-tail and not worn or bent 2) Drive cable not bent or crimped and operates smoothly 3) Crank handle assembly not loose or worn, and not slipping
F. Supplies 1) Signs-Radiation Area; High Radiation Area; Radioactive Material 2) Rope or tape for barricades 3) Film, chemicals, pentrameters, lead numbers and letters
G. Documents 1) Operating and Emergency Procedures 2) NRC Rules and Regulations - Parts 19, 20 and 34 3) NRC Material License; or agreement state radioactive material license and
reciprocity notice 4) NRC Form "Notice to Employees" (Recommended - not required) 5) Leak test record if source is older than six months (Recommended - not required) 6) Shipping papers for transportation
4
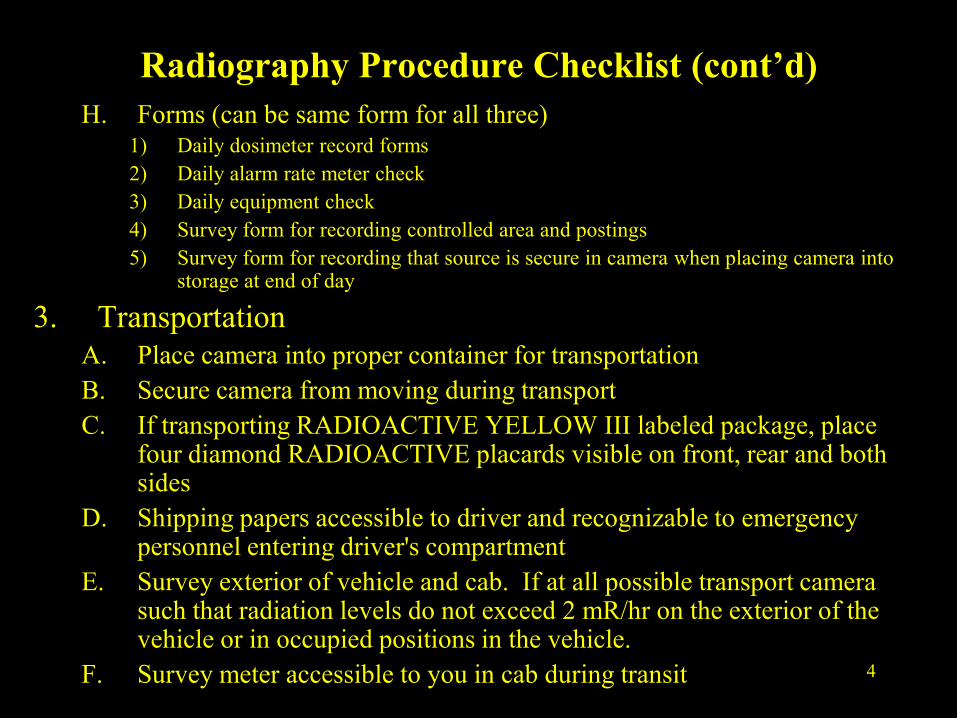
Radiography Procedure Checklist (cont’d) H. Forms (can be same form for all three)
1) Daily dosimeter record forms 2) Daily alarm rate meter check 3) Daily equipment check 4) Survey form for recording controlled area and postings 5) Survey form for recording that source is secure in camera when placing camera into
storage at end of day
3. Transportation A. Place camera into proper container for transportation B. Secure camera from moving during transport C. If transporting RADIOACTIVE YELLOW III labeled package, place
four diamond RADIOACTIVE placards visible on front, rear and both sides
D. Shipping papers accessible to driver and recognizable to emergency personnel entering driver's compartment
E. Survey exterior of vehicle and cab. If at all possible transport camera such that radiation levels do not exceed 2 mR/hr on the exterior of the vehicle or in occupied positions in the vehicle.
F. Survey meter accessible to you in cab during transit

5
Radiography Procedure Checklist (cont’d)
4. Daily at Radiography Site A. Check for badge and charge pocket dosimeter B. Inspect camera, source tube and controls (see above) C. Check survey meter (see above) D. Establish controlled area
1) Barricade area 2) Post area
E. Survey camera - note reference reading for comparison at end F. Set up equipment G. Check for people in controlled area H. Make exposure
1) Go to lowest possible radiation level during exposure 2) Keep look out for people that may enter area 3) Survey perimeter of controlled area, if possible 4) Record first typical controlled area survey early in day
6
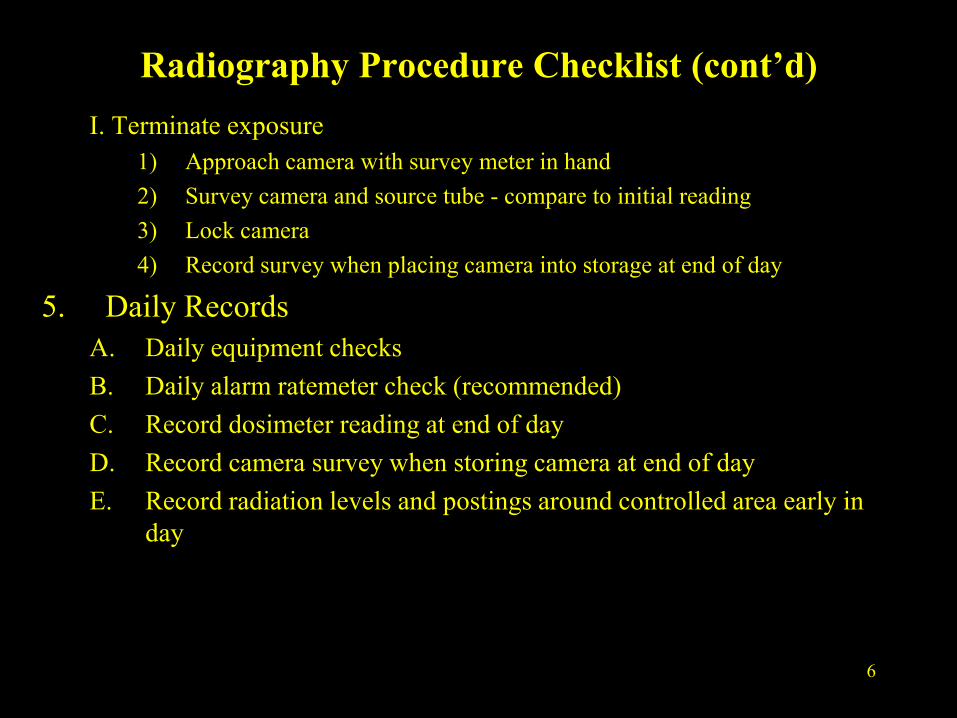
Radiography Procedure Checklist (cont’d) I. Terminate exposure
1) Approach camera with survey meter in hand 2) Survey camera and source tube - compare to initial reading 3) Lock camera 4) Record survey when placing camera into storage at end of day
5. Daily Records A. Daily equipment checks B. Daily alarm ratemeter check (recommended) C. Record dosimeter reading at end of day D. Record camera survey when storing camera at end of day E. Record radiation levels and postings around controlled area early in
day

7
Radiography Procedure Checklist (cont’d) 6. Check In Equipment
A. Complete utilization log B. Inform RSO of any camera, source tube, control or survey meter
maintenance required
7. Emergency A. Do not attempt to return source except by normal operation of controls B. Secure area at 2 mR/hr and notify:
1. Radiation Safety Officer (24 Hour Telephone Numbers)
or
2. (Optional) - Consultant and/or Radiography Service Companies (24 Hour Telephone Numbers)
or
3. Radiation Control Agency (24 Hour Telephone Numbers)
8
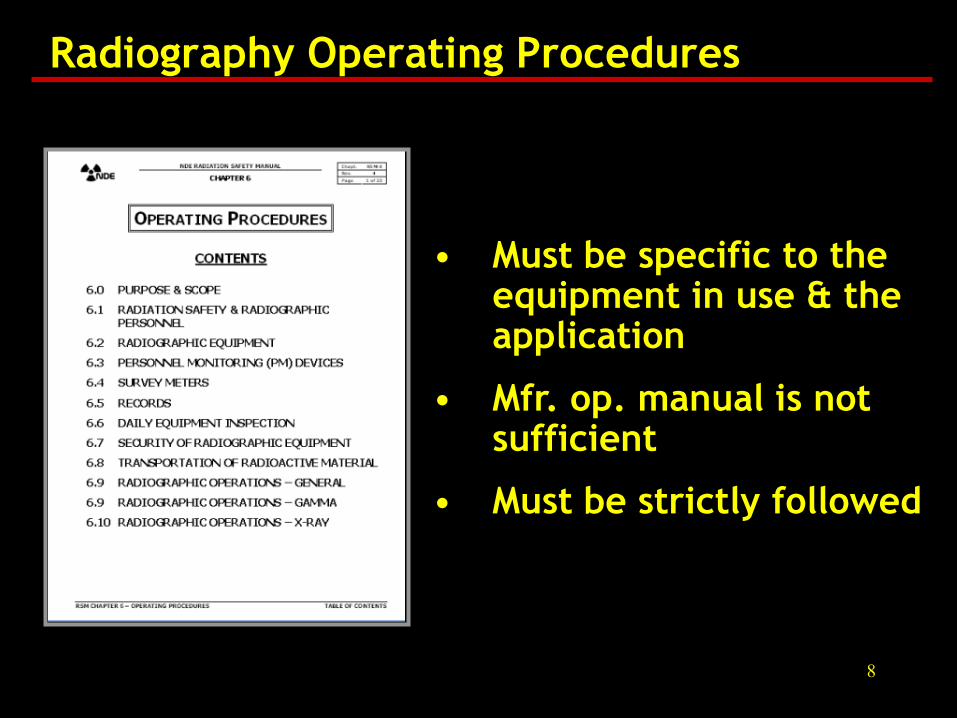
Radiography Operating Procedures
• Must be specific to the equipment in use & the application
• Mfr. op. manual is not sufficient
• Must be strictly followed

9
Radiography Procedure Checklist
1. Personnel Monitoring Equipment
– Personnel monitoring badge (OSLD/TLD/film)
– 0-200 mR range pocket dosimeter (zeroed) or electronic dosimeter
– Alarm ratemeter
– Perform dosimetry checks before doing anything else
10
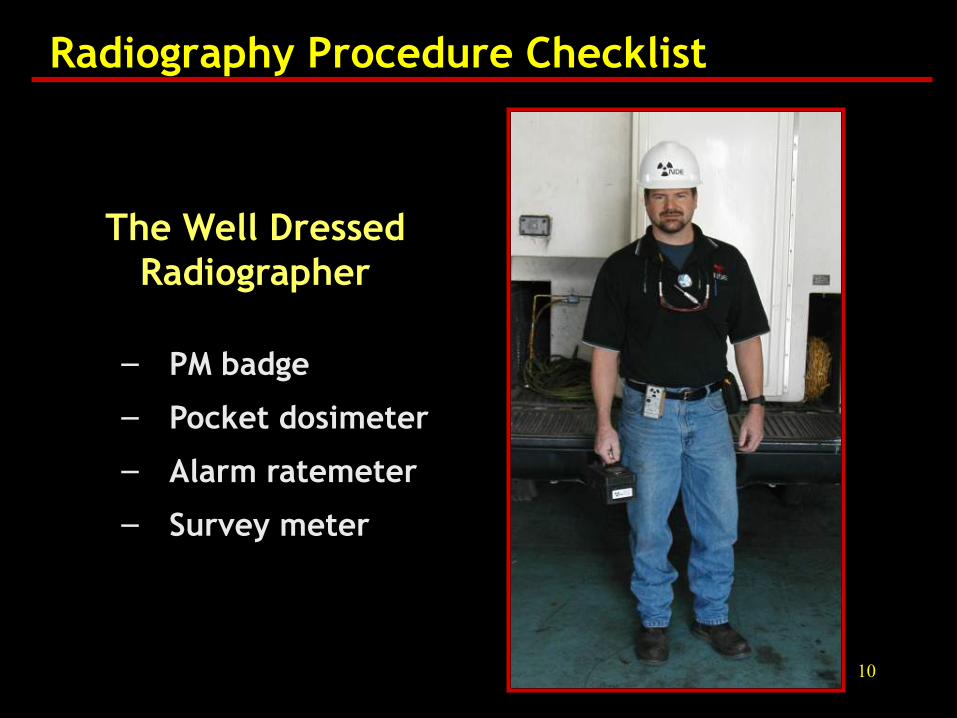
Radiography Procedure Checklist
The Well Dressed Radiographer
– PM badge
– Pocket dosimeter
– Alarm ratemeter
– Survey meter
11
2. Check Out Equipment – Complete utilization log – Survey meter – Inspect camera
Radiography Procedure Checklist
12
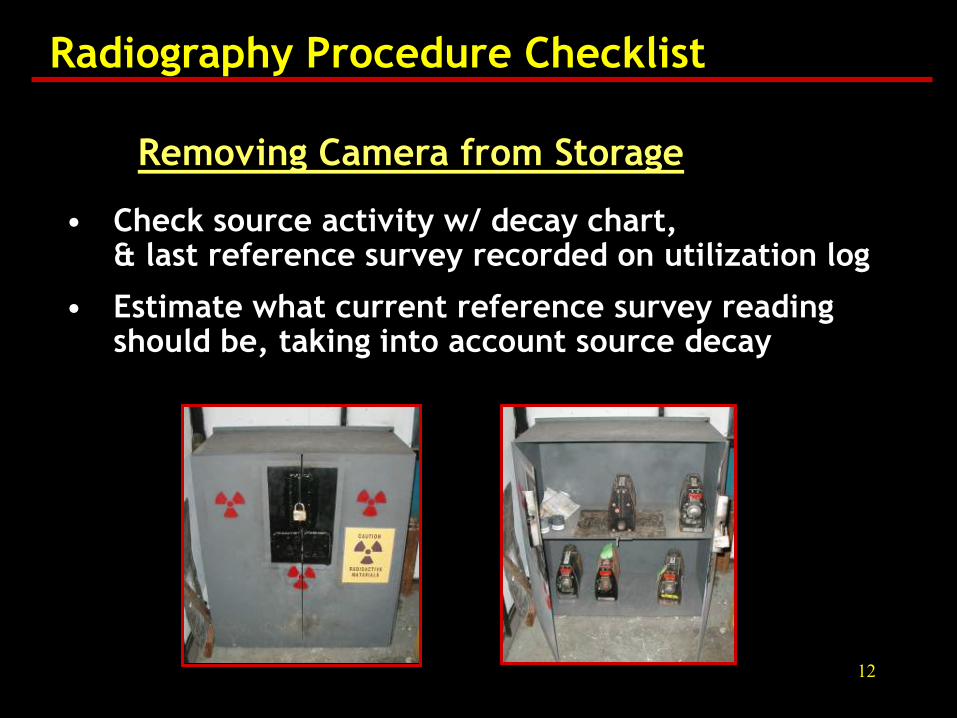
• Check source activity w/ decay chart, & last reference survey recorded on utilization log
• Estimate what current reference survey reading should be, taking into account source decay
Removing Camera from Storage
Radiography Procedure Checklist
13
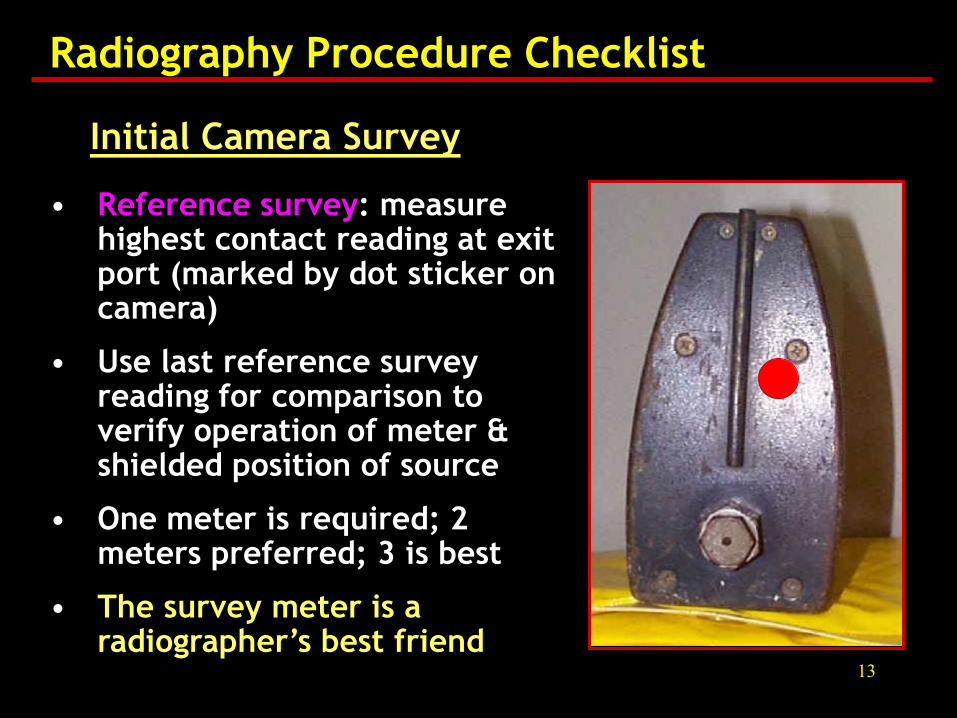
• Reference survey: measure highest contact reading at exit port (marked by dot sticker on camera)
• Use last reference survey reading for comparison to verify operation of meter & shielded position of source
• One meter is required; 2 meters preferred; 3 is best
• The survey meter is a radiographer’s best friend
Radiography Procedure Checklist
Initial Camera Survey

14
2. Check Out Equipment
– Camera & shipping container – Controls – Guide tube & collimator – Warning signs – Jigs, related gear
Radiography Procedure Checklist

15
Daily Equipment Inspection: Camera
• Verify that shipping plug is installed in outlet port, that plug screw & nut turn freely, & that threads are undamaged
• Perform No-Go tests
• Perform misconnect test
• Verify that overall condition of the camera is OK
Radiography Procedure Checklist

16
Daily Equipment Inspection
No-Go Gauge: Testing the drive cable-source assembly connections
Weak Links
Radiography Procedure Checklist

17
Daily Equipment Inspection Drive Cable Connectors
Radiography Procedure Checklist

18
Daily Equipment Inspection
• No-Go gauge tests (not required daily checks, but should be performed when using a camera that was last used by a different crew)
• Without excessive force, use No-Go gauge to check for wear on connectors
Drive Cable
• All positions are no-go; connectors must not pass through gauge
• Do not use any components that fail the No-Go gauge tests; connectors that fail must be replaced
Radiography Procedure Checklist

19
Daily Equipment Inspection
No-Go Gauge Tests
– Male-female connection: assemble male & female parts & verify that larger notch in side of gauge won’t go into notch gap in center of gauge
– Female slot width: verify that gauge will not go into female slot
Radiography Procedure Checklist
20
Daily Equipment Inspection
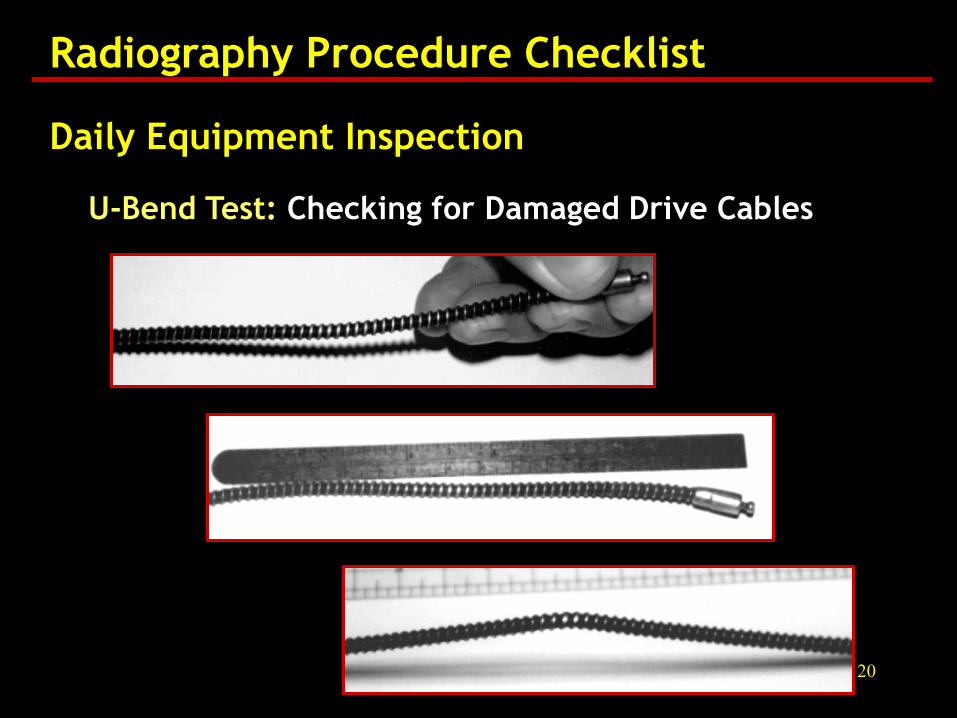
U-Bend Test: Checking for Damaged Drive Cables
Radiography Procedure Checklist
21
Daily Equipment Inspection
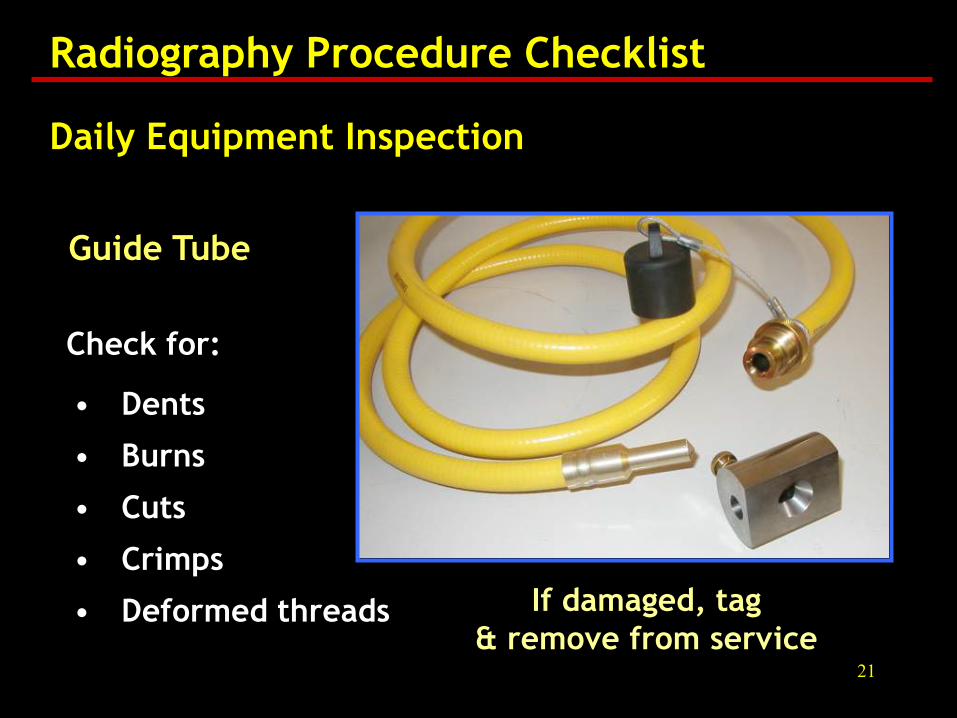
• Dents
• Burns
• Cuts
• Crimps
• Deformed threads
Guide Tube
If damaged, tag & remove from service
Radiography Procedure Checklist
Check for:
22
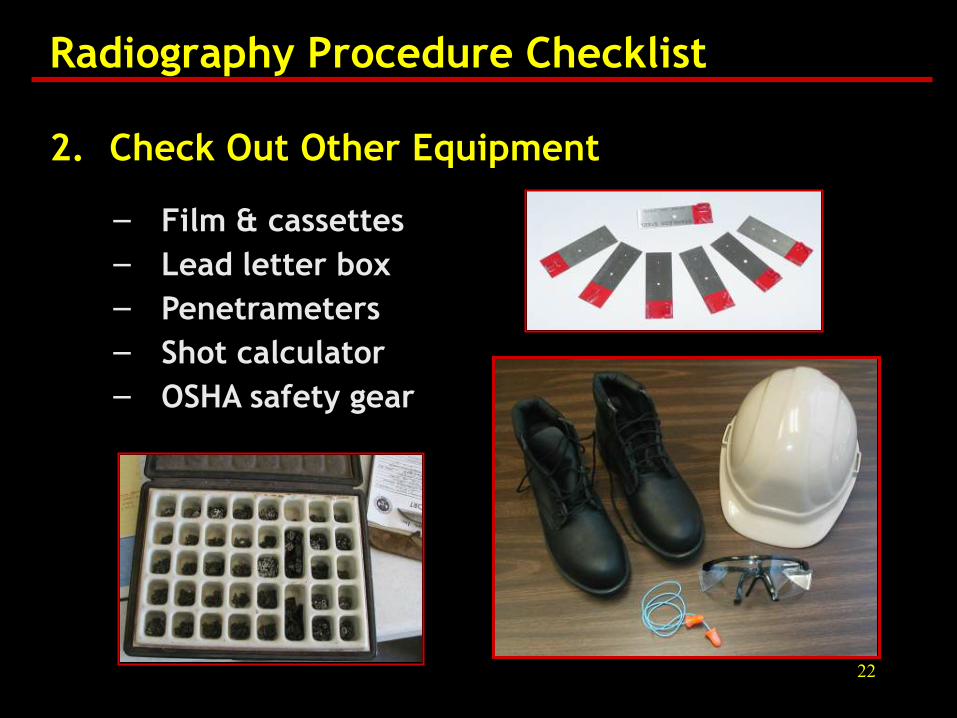
2. Check Out Other Equipment
– Film & cassettes – Lead letter box – Penetrameters – Shot calculator – OSHA safety gear
Radiography Procedure Checklist
23
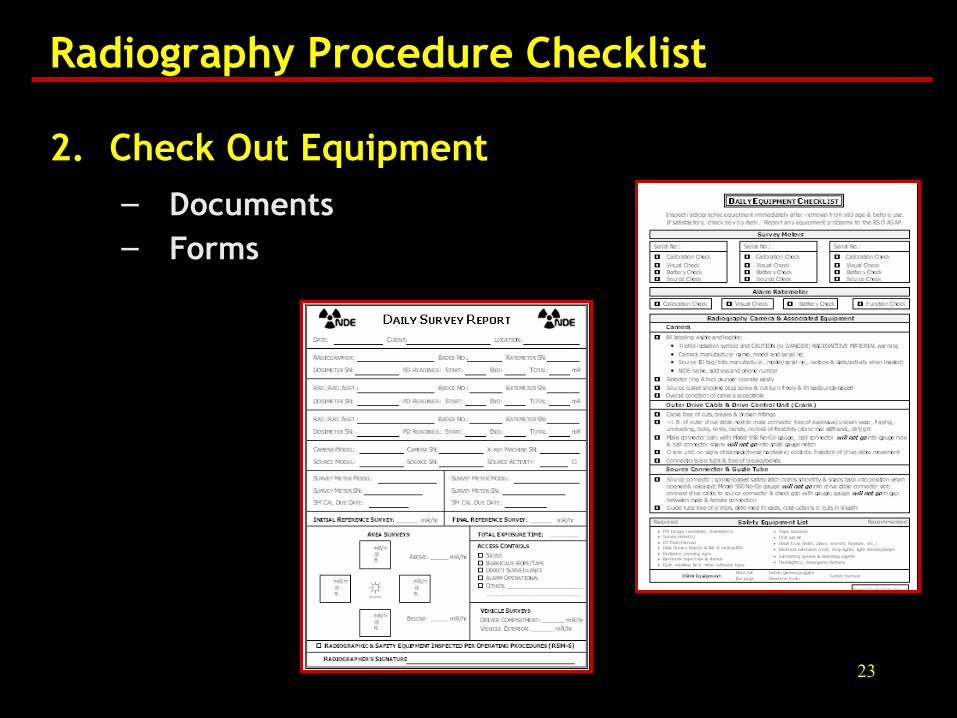
2. Check Out Equipment – Documents – Forms
Radiography Procedure Checklist

24
3. Transportation – Place camera in shipping container (if necessary) – Inspect container condition & labels
Radiography Procedure Checklist
25
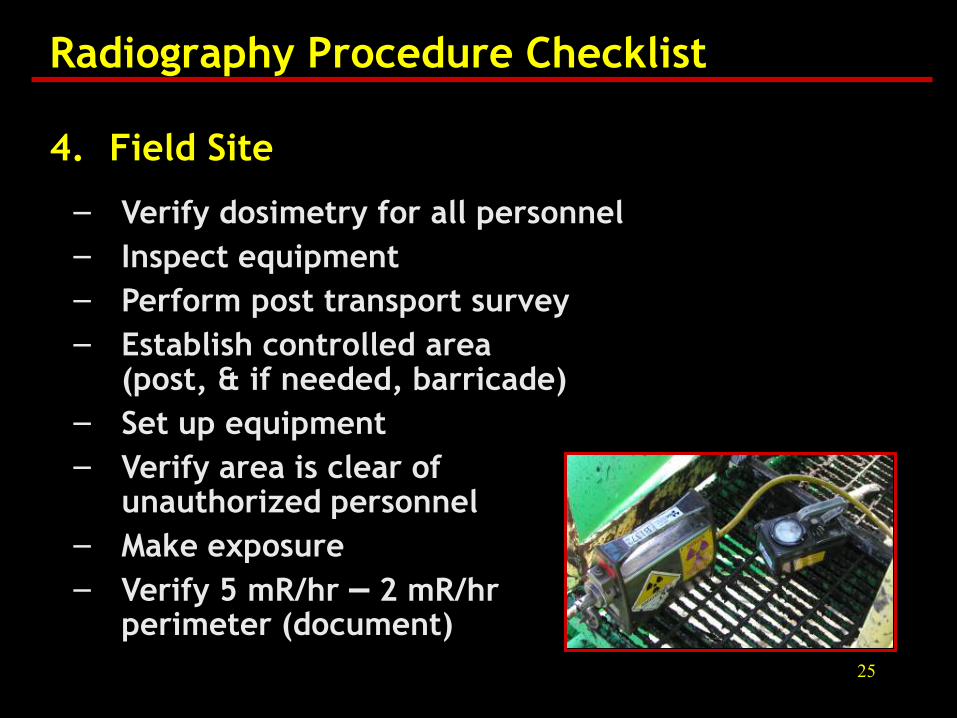
4. Field Site
– Verify dosimetry for all personnel – Inspect equipment – Perform post transport survey – Establish controlled area
(post, & if needed, barricade) – Set up equipment – Verify area is clear of
unauthorized personnel – Make exposure – Verify 5 mR/hr – 2 mR/hr
perimeter (document)
Radiography Procedure Checklist

26
• Posting of 2 mR/hr perimeter isn’t required, but access must be restricted, so direct surveillance, rope/tape barricades & posted warning signs are used to control access
• The 2 mR/hr, rather than 5 mR/hr isodose line is typically posted with "Caution – Radiation Area" signs
• Use of "Danger" in place of "Caution" is not allowed, but OK to use "Danger" barricade tape
Posting & Access Control: Restricted Area
Radiography Procedure Checklist
27
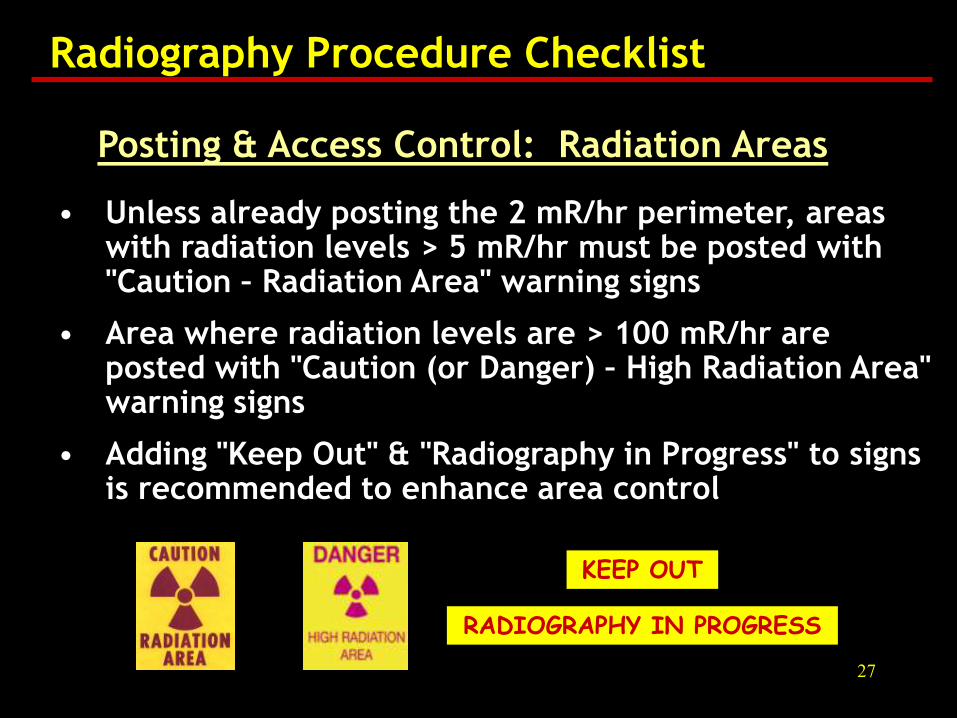
• Unless already posting the 2 mR/hr perimeter, areas with radiation levels > 5 mR/hr must be posted with "Caution – Radiation Area" warning signs
• Area where radiation levels are > 100 mR/hr are posted with "Caution (or Danger) – High Radiation Area" warning signs
• Adding "Keep Out" & "Radiography in Progress" to signs is recommended to enhance area control
Posting & Access Control: Radiation Areas
KEEP OUT
RADIOGRAPHY IN PROGRESS
Radiography Procedure Checklist

28
• Sufficient number of signs must be used to ensure visibility in all directions
• Elevations above & below the level where the setup is located must be evaulated/monitored
• During 1st exposure, perimeter must be surveyed & if needed, adjustments made to ensure boundaries are properly established & controlled
• High radiation area perimeter should not be surveyed, but must be kept under constant surveillance during exposures
Posting & Access Control
Radiography Procedure Checklist
29
5. Daily Records
Radiography Procedure Checklist
– Daily equipment checks
– Daily alarm ratemeter check (recommended)
– Start, end & total dosimeter readings
– Initial reference survey reading on camera upon removal from storage (recommended
– Camera survey upon return to storage (ref. survey)
– Radiation levels & postings around controlled area

30
6. Equipment Return
Radiography Procedure Checklist
– Complete utilization log
– Inform RSO of any problems encountered with equipment; tag & remove from service any equipment needing repair
– Verify batteries are off on meters & alarm ratemeters
– Properly store all equipment (clean if necessary)
31
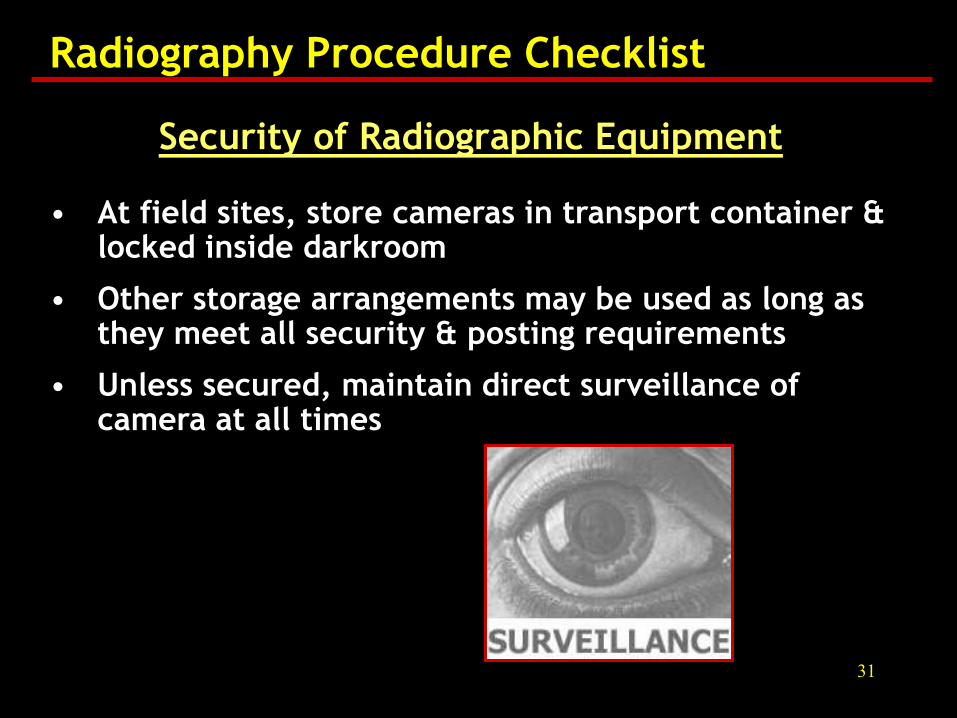
Security of Radiographic Equipment
• At field sites, store cameras in transport container & locked inside darkroom
• Other storage arrangements may be used as long as they meet all security & posting requirements
• Unless secured, maintain direct surveillance of camera at all times
Radiography Procedure Checklist
32
Radiography Operating Procedures
Questions?
32