Embed Size (px)
DESCRIPTION
dental materials
Citation preview
Copyright 2003, Elsevier Science (USA). All rights reserved.
Chapter 46Impression Materials
Chapter 46Impression Materials
Copyright 2003, Elsevier Science (USA).
All rights reserved. No part of this product may be reproduced or transmitted in any form or by any means, electronic or mechanical, including input into or storage in any information system, without permission in writing from the publisher.
PowerPoint® presentation slides may be displayed and may be reproduced in print form for instructional purposes only, provided a proper copyright notice appears on the last page of each print-out.
Produced in the United States of America
ISBN 0-7216-9770-4
Copyright 2003, Elsevier Science (USA). All rights reserved.
IntroductionIntroductionImpression materials are used to obtain an impression of teeth and/or the surrounding oral tissues.
Impression materials are used to obtain an impression of teeth and/or the surrounding oral tissues.
Copyright 2003, Elsevier Science (USA). All rights reserved.
Definition of ImpressionsDefinition of Impressions Impressions are negative reproductions
of dental structures. Impressions are negative reproductions
of dental structures.
Copyright 2003, Elsevier Science (USA). All rights reserved.
Classification of ImpressionsClassification of Impressions Preliminary impressions
• Taken either by the dentist or an expanded-function dental assistant.
• Used to make a reproduction of the teeth and surrounding tissues.
• Used to make (1) diagnostic models, (2) custom trays, (3) provisional coverage, (4) orthodontic appliances, and(5) pretreatment and post‑treatment records.
Preliminary impressions • Taken either by the dentist or an
expanded-function dental assistant.• Used to make a reproduction of the
teeth and surrounding tissues. • Used to make (1) diagnostic models, (2)
custom trays, (3) provisional coverage, (4) orthodontic appliances, and(5) pretreatment and post‑treatment records.
Copyright 2003, Elsevier Science (USA). All rights reserved.
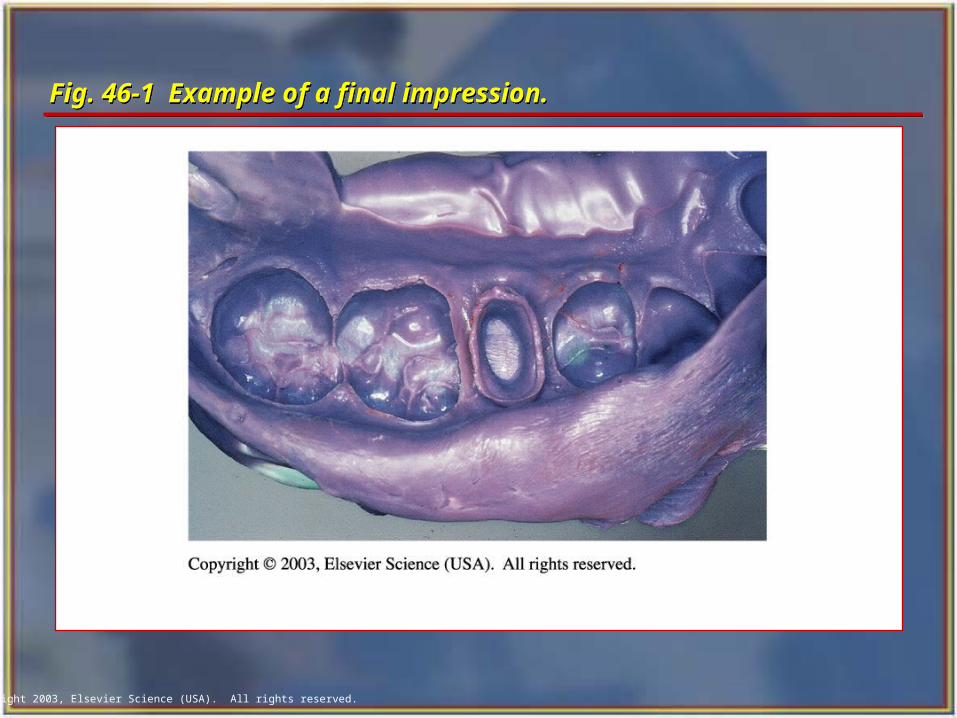
Final impressions• Taken by the dentist.• Used to make the most accurate
reproduction of the teeth and surrounding tissues.
• Used to make indirect restorations, partial or full dentures, and implants.
Final impressions• Taken by the dentist.• Used to make the most accurate
reproduction of the teeth and surrounding tissues.
• Used to make indirect restorations, partial or full dentures, and implants.
Classification of Impressions cont’dClassification of Impressions cont’d
Copyright 2003, Elsevier Science (USA). All rights reserved.
Fig. 46-1 Example of a final impression.Fig. 46-1 Example of a final impression.
Copyright 2003, Elsevier Science (USA). All rights reserved.
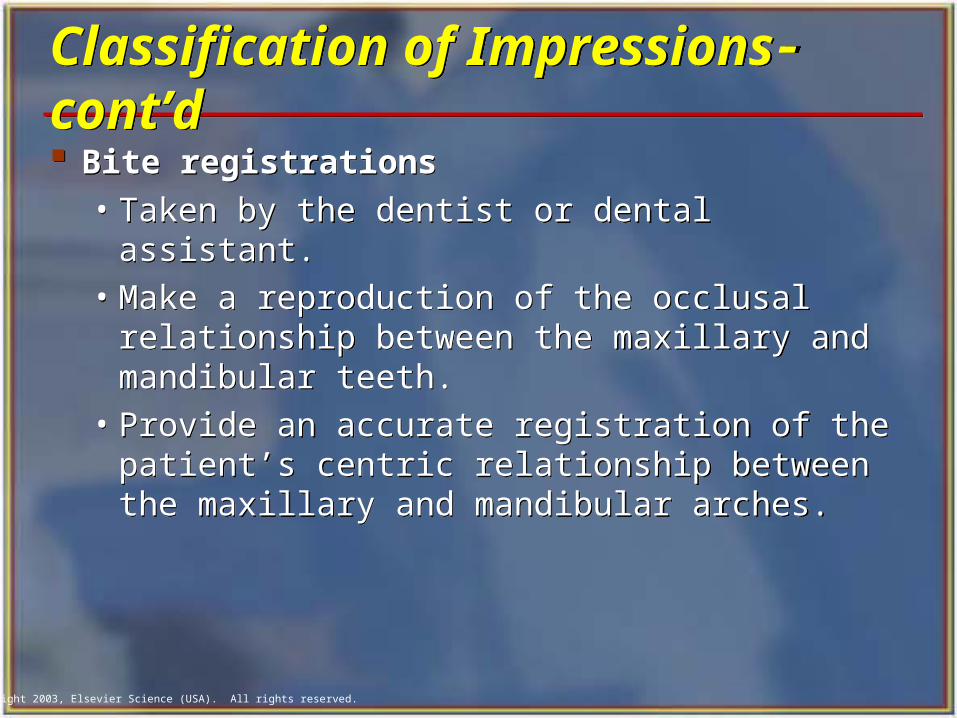
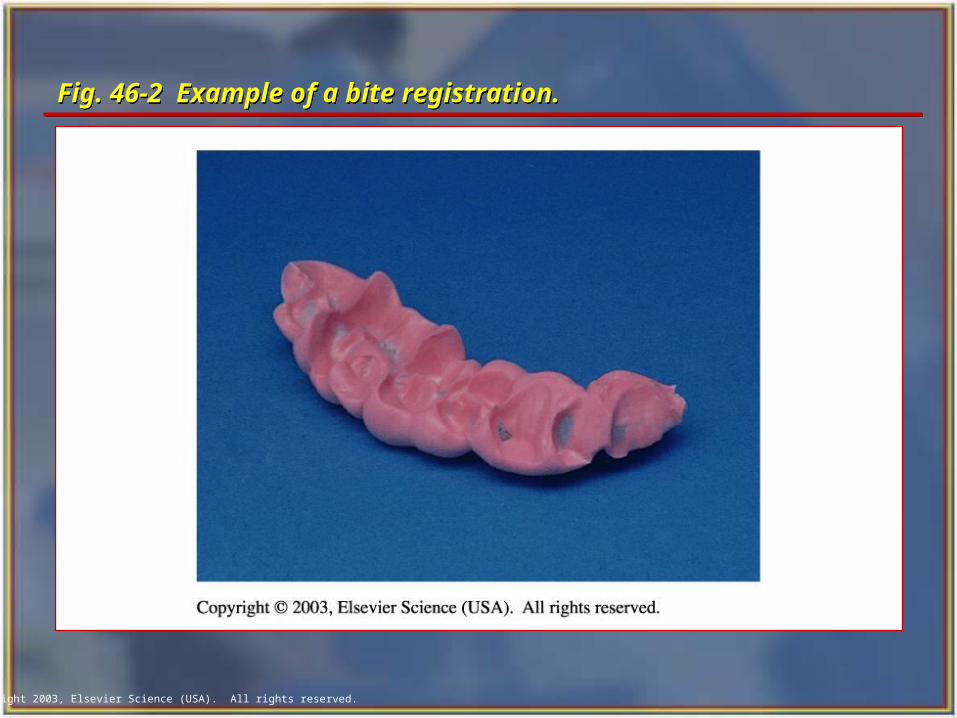
Bite registrations• Taken by the dentist or dental assistant.• Make a reproduction of the occlusal
relationship between the maxillary and mandibular teeth.
• Provide an accurate registration of the patient’s centric relationship between the maxillary and mandibular arches.
Bite registrations• Taken by the dentist or dental assistant.• Make a reproduction of the occlusal
relationship between the maxillary and mandibular teeth.
• Provide an accurate registration of the patient’s centric relationship between the maxillary and mandibular arches.
Classification of Impressions cont’dClassification of Impressions cont’d
Copyright 2003, Elsevier Science (USA). All rights reserved.
Fig. 46-2 Example of a bite registration.Fig. 46-2 Example of a bite registration.
Copyright 2003, Elsevier Science (USA). All rights reserved.
Impression TraysImpression Trays Must be sufficiently rigid to:
• Carry the impression material into the oral cavity.
• Hold the material in close proximity to the teeth.
• Avoid breaking during removal.• Prevent warping of the completed
impression.
Must be sufficiently rigid to:• Carry the impression material into the
oral cavity.• Hold the material in close proximity to
the teeth.• Avoid breaking during removal.• Prevent warping of the completed
impression.
Copyright 2003, Elsevier Science (USA). All rights reserved.
Characteristics of Impression TraysCharacteristics of Impression Trays Quadrant tray
• Covers one half of the arch. Section tray
• Covers the anterior portion of the arch. Full arch tray
• Covers the entire arch. Perforated tray
• Holes in the tray create a mechanical lock to hold the material in place.
Smooth tray• Interior of the tray is painted or sprayed with an
adhesive to hold the impression material.
Quadrant tray• Covers one half of the arch.
Section tray• Covers the anterior portion of the arch.
Full arch tray• Covers the entire arch.
Perforated tray• Holes in the tray create a mechanical lock to hold
the material in place. Smooth tray
• Interior of the tray is painted or sprayed with an adhesive to hold the impression material.

Copyright 2003, Elsevier Science (USA). All rights reserved.
Table 46-1 Types of Stock Trays Table 46-1 Types of Stock Trays
Copyright 2003, Elsevier Science (USA). All rights reserved.
Tray Selection CriteriaTray Selection Criteria Feel comfortable to the patient. Extends slightly beyond the facial surfaces
of the teeth. Extends approximately 2 to 3 mm beyond
the third molar, retromolar, or tuberosity area of the arch.
Is sufficiently deep to allow 2 to 3 mm of material between the tray and incisal or occlusal edges of the teeth.
Feel comfortable to the patient. Extends slightly beyond the facial surfaces
of the teeth. Extends approximately 2 to 3 mm beyond
the third molar, retromolar, or tuberosity area of the arch.
Is sufficiently deep to allow 2 to 3 mm of material between the tray and incisal or occlusal edges of the teeth.
Copyright 2003, Elsevier Science (USA). All rights reserved.
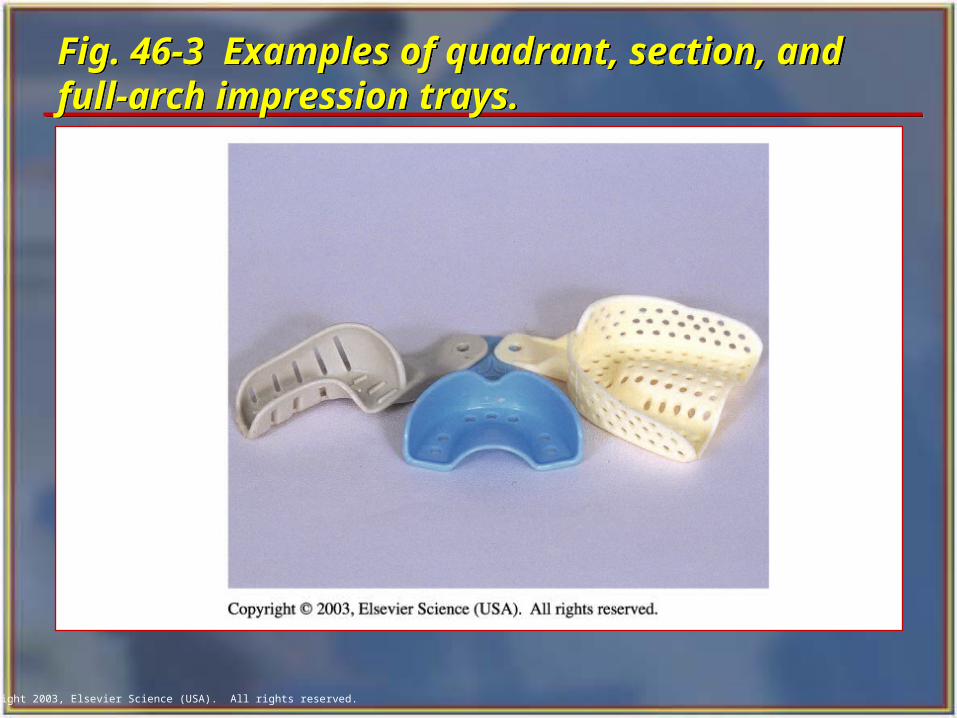
Fig. 46-3 Examples of quadrant, section, and full-arch impression trays. Fig. 46-3 Examples of quadrant, section, and full-arch impression trays.
Copyright 2003, Elsevier Science (USA). All rights reserved.
Tray Adhesives Tray Adhesives VPS adhesives (blue)
• For polyvinyl siloxane and polyether impression materials.
Rubber Base Adhesive (brown) • Used with rubber base impression
materials. Silicone Adhesive (orangish-pink)
• Used with silicone impression materials.
VPS adhesives (blue)• For polyvinyl siloxane and polyether
impression materials. Rubber Base Adhesive (brown)
• Used with rubber base impression materials.
Silicone Adhesive (orangish-pink)• Used with silicone impression materials.
Copyright 2003, Elsevier Science (USA). All rights reserved.
Hydrocolloid Impression MaterialsHydrocolloid Impression Materials Hydro means water. Colloid means gelatin substance. Material used to obtain preliminary and
final impressions.
Hydro means water. Colloid means gelatin substance. Material used to obtain preliminary and
final impressions.

Copyright 2003, Elsevier Science (USA). All rights reserved.
Irreversible Hydrocolloid Irreversible Hydrocolloid
Material that cannot return to a solution state after it becomes a gel.
Alginate is the irreversible hydrocolloid most widely used for preliminary impressions.
Material that cannot return to a solution state after it becomes a gel.
Alginate is the irreversible hydrocolloid most widely used for preliminary impressions.
Copyright 2003, Elsevier Science (USA). All rights reserved.
Makeup of AlginateMakeup of Alginate Potassium alginate
• Comes from seaweed; is also used in foods such as ice cream as a thickening agent.
Calcium sulfate• Reacts with the potassium alginate to
form the gel. Trisodium phosphate
• Added to slow down the reaction time for mixing.
Potassium alginate• Comes from seaweed; is also used in
foods such as ice cream as a thickening agent.
Calcium sulfate• Reacts with the potassium alginate to
form the gel. Trisodium phosphate
• Added to slow down the reaction time for mixing.

Copyright 2003, Elsevier Science (USA). All rights reserved.
Diatomaceous earth• A filler that adds bulk to the material.
Zinc oxide• Adds bulk to the material.
Potassium titanium fluoride• Added so as not to interfere with the
setting and surface strength.
Diatomaceous earth• A filler that adds bulk to the material.
Zinc oxide• Adds bulk to the material.
Potassium titanium fluoride• Added so as not to interfere with the
setting and surface strength.
Makeup of Alginate cont’dMakeup of Alginate cont’d
Copyright 2003, Elsevier Science (USA). All rights reserved.
Physical Phases of AlginatePhysical Phases of Alginate The first phase is a sol (as in solution).
In the sol phase, the material is in a liquid or semiliquid form.
The second phase is a gel. In the gel phase, the material is semisolid, similar to a gelatin dessert.
The first phase is a sol (as in solution). In the sol phase, the material is in a liquid or semiliquid form.
The second phase is a gel. In the gel phase, the material is semisolid, similar to a gelatin dessert.
Copyright 2003, Elsevier Science (USA). All rights reserved.
Packaging and Storing of AlginatePackaging and Storing of Alginate
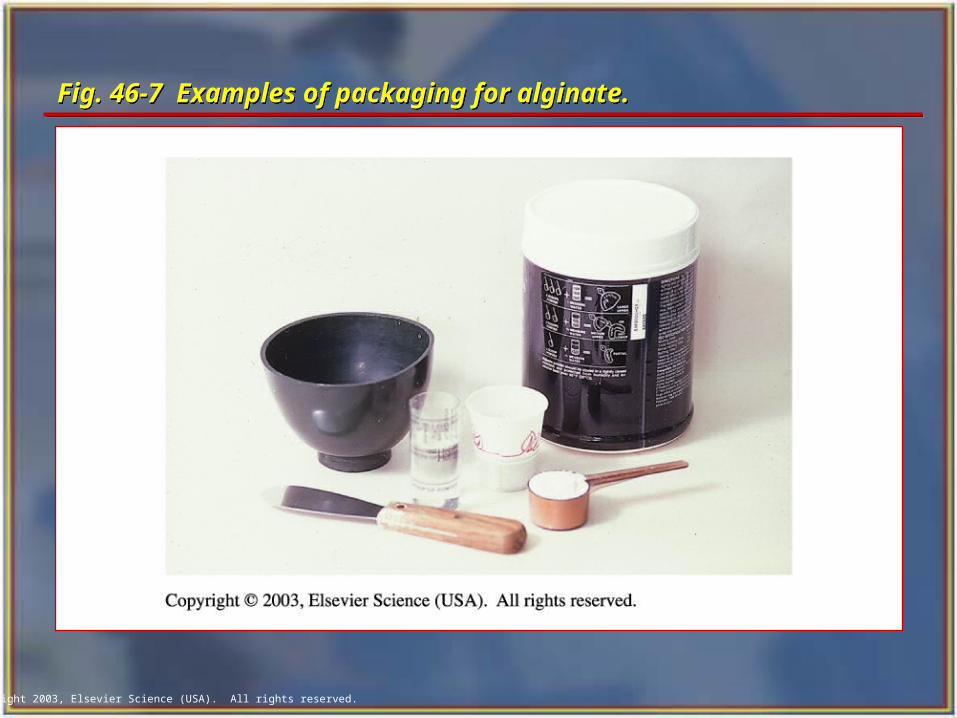
Containers about the size of a coffee can are the most commonly used form of packaging.
Premeasured packages are more expensive, but save time by eliminating the need for measurement of the powder.
Shelf life of alginate is approximately 1 year.
Containers about the size of a coffee can are the most commonly used form of packaging.
Premeasured packages are more expensive, but save time by eliminating the need for measurement of the powder.
Shelf life of alginate is approximately 1 year.
Copyright 2003, Elsevier Science (USA). All rights reserved.
Fig. 46-7 Examples of packaging for alginate.Fig. 46-7 Examples of packaging for alginate.
Copyright 2003, Elsevier Science (USA). All rights reserved.
Causes for Distortion and Dimensional Change of AlginateCauses for Distortion and Dimensional Change of Alginate
If an alginate impression is stored in water or in a very wet paper towel, the alginate will absorb additional water and expand. This condition is called imbibition.
If an alginate impression remains in the open air, moisture will evaporate from the material, causing it to shrink and distort. This condition is called syneresis.
Copyright 2003, Elsevier Science (USA). All rights reserved.
Alginate SettingsAlginate Settings Normal set alginate
• Working time of 2 minutes and a setting time of up to 41/2 minutes after mixing.
Fast set alginate• Working time of 11/4 minutes and a setting time
of 1 to 2 minutes. Working time
• The time allowed for mixing the alginate, loading the tray, and positioning the tray in the patient's mouth.
Setting time • The time required for the chemical action to be
completed.
Normal set alginate• Working time of 2 minutes and a setting time
of up to 41/2 minutes after mixing. Fast set alginate
• Working time of 11/4 minutes and a setting time of 1 to 2 minutes.
Working time• The time allowed for mixing the alginate,
loading the tray, and positioning the tray in the patient's mouth.
Setting time • The time required for the chemical action to be
completed.
Copyright 2003, Elsevier Science (USA). All rights reserved.
Altering the Setting Times of AlginateAltering the Setting Times of Alginate
Cooler water can increase the setting time if additional time is needed for the procedure.
Warmer water can reduce or shorten the setting time of the procedure.
Cooler water can increase the setting time if additional time is needed for the procedure.
Warmer water can reduce or shorten the setting time of the procedure.
Copyright 2003, Elsevier Science (USA). All rights reserved.
Water-to-Powder Ratio Water-to-Powder Ratio An adult mandibular impression
generally requires two scoops of powder and two measures of water.
An adult maxillary impression generally requires three scoops of powder and three measures of water.
An adult mandibular impression generally requires two scoops of powder and two measures of water.
An adult maxillary impression generally requires three scoops of powder and three measures of water.
Copyright 2003, Elsevier Science (USA). All rights reserved.
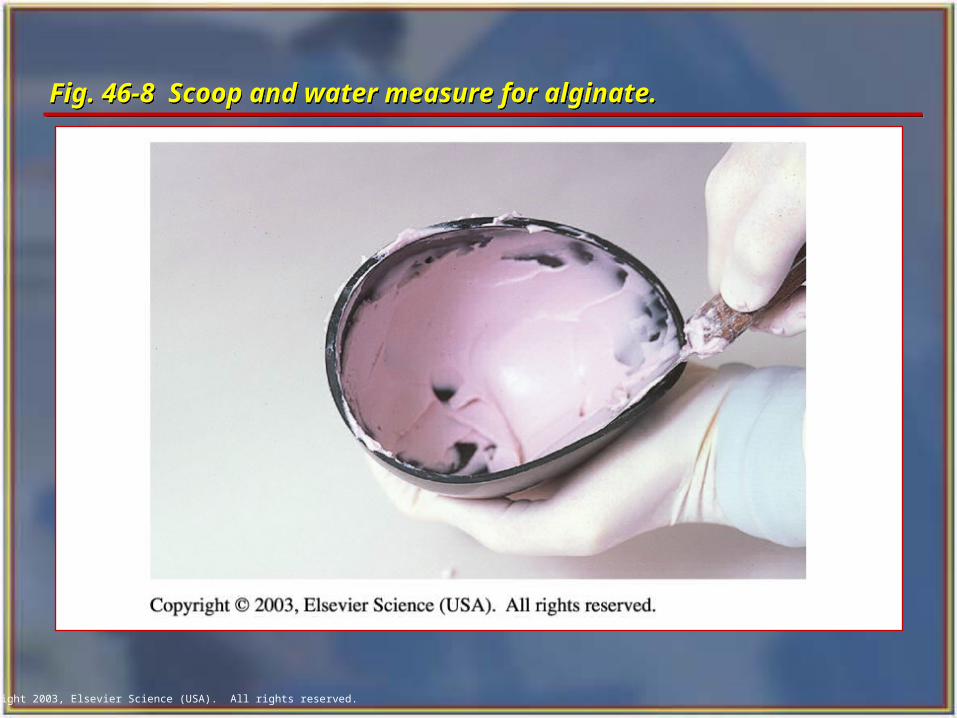
Fig. 46-8 Scoop and water measure for alginate. Fig. 46-8 Scoop and water measure for alginate.
Copyright 2003, Elsevier Science (USA). All rights reserved.
Taking an Alginate ImpressionTaking an Alginate Impression Explain the procedure to the patient:
• The material will feel cold, there is no unpleasant taste, and the material will set quickly.
• Breathe deeply through your nose to help you relax and be more comfortable.
• Use hand signals to communicate any discomfort.
Explain the procedure to the patient:• The material will feel cold, there is no
unpleasant taste, and the material will set quickly.
• Breathe deeply through your nose to help you relax and be more comfortable.
• Use hand signals to communicate any discomfort.
Copyright 2003, Elsevier Science (USA). All rights reserved.
An Acceptable Alginate Impression An Acceptable Alginate Impression The impression tray is centered over the central and
lateral incisors. There is a complete "peripheral roll," which includes
all of the vestibular areas. The tray is not "overseated," which would result in
exposure of areas of the impression tray. The impression is free from tears or voids. There is sharp anatomic detail of all teeth and soft
tissues. The retromolar area, lingual frenum, tongue space,
and mylohyoid ridge are reproduced in the mandibular impression.
The hard palate and tuberosities are recorded in the maxillary impression.
The impression tray is centered over the central and lateral incisors.
There is a complete "peripheral roll," which includes all of the vestibular areas.
The tray is not "overseated," which would result in exposure of areas of the impression tray.
The impression is free from tears or voids. There is sharp anatomic detail of all teeth and soft
tissues. The retromolar area, lingual frenum, tongue space,
and mylohyoid ridge are reproduced in the mandibular impression.
The hard palate and tuberosities are recorded in the maxillary impression.
Copyright 2003, Elsevier Science (USA). All rights reserved.
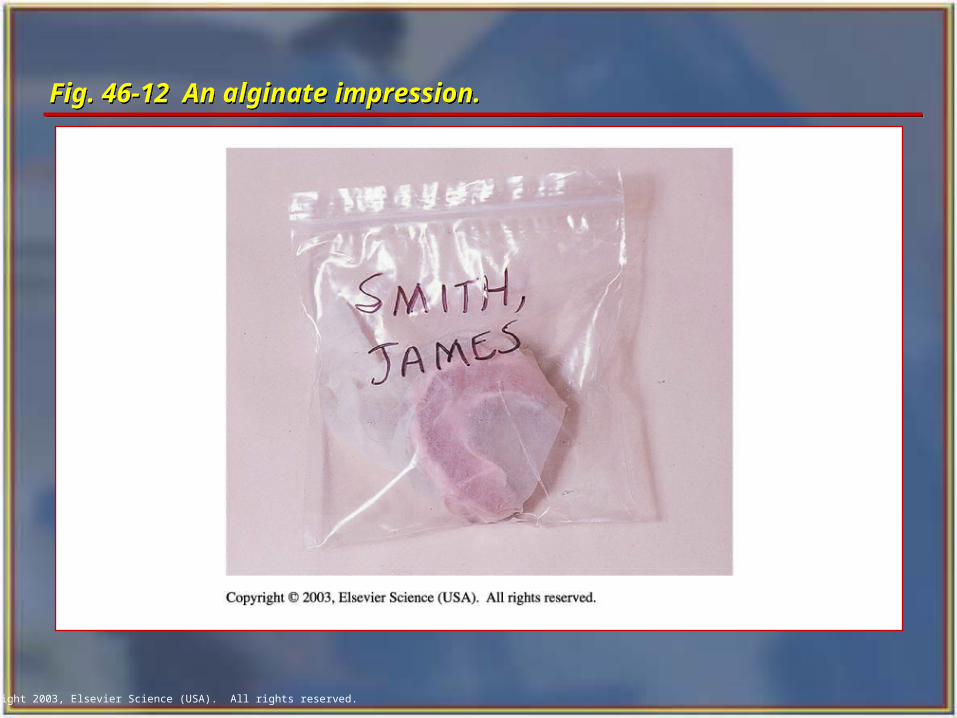
Fig. 46-12 An alginate impression. Fig. 46-12 An alginate impression.
Copyright 2003, Elsevier Science (USA). All rights reserved.
Reversible Hydrocolloid Reversible Hydrocolloid An impression material that changes its
physical state from a sol to a gel and then back to a sol.
An impression material that changes its physical state from a sol to a gel and then back to a sol.
Copyright 2003, Elsevier Science (USA). All rights reserved.
Chemical Makeup of Reversible Hydrocolloid Chemical Makeup of Reversible Hydrocolloid
85% water 13% agar
• Agar is an organic substance derived from seaweed.
Additional chemical modifiers are added to aid in the handling characteristics.
85% water 13% agar
• Agar is an organic substance derived from seaweed.
Additional chemical modifiers are added to aid in the handling characteristics.
Copyright 2003, Elsevier Science (USA). All rights reserved.
Conditioning Bath for Reversible HydrocolloidConditioning Bath for Reversible Hydrocolloid
• The first bath is for liquefying the semisolid material. A special water bath called a “hydrocolloid conditioner” at 212° F liquefies the material. After liquefying, the preset thermostat cools the temperature to 150° F automatically.
• The second bath becomes a storage bath that cools the material, readying it for the impression. At this temperature, the tubes are waiting for use.
• A third bath is kept at 110° F/44° C for tempering the material after it has been placed in the tray.
Three Compartments Three Compartments
Copyright 2003, Elsevier Science (USA). All rights reserved.
Types of Reversible Hydrocolloid Types of Reversible Hydrocolloid Tray material
• Packaged in plastic tubes. Each tube has enough material to fill a full arch, water-cooled tray.
Syringe material• Packaged in plastic or glass cartridges
that fit a syringe or in preloaded syringe or preformed sticks that refill special hydrocolloid inlay syringes.
Tray material• Packaged in plastic tubes. Each tube
has enough material to fill a full arch, water-cooled tray.
Syringe material• Packaged in plastic or glass cartridges
that fit a syringe or in preloaded syringe or preformed sticks that refill special hydrocolloid inlay syringes.
Copyright 2003, Elsevier Science (USA). All rights reserved.
Application of Reversible Hydrocolloid Impression Material Application of Reversible Hydrocolloid Impression Material
1. A stock water-cooled tray is selected, making sure that the tray does not impinge on any of the teeth or soft tissue.
2. Plastic stops are placed in the tray.3. Tubing is connected to the tray and to the water
outlet for drainage.4. The material is liquefied and moved to the
storage bath.5. The light-bodied material is placed in the syringe,
and heavy-bodied material is placed in the tray.6. The light-bodied material is expressed around the
prepared tooth, and the dentist seats the tray.
Copyright 2003, Elsevier Science (USA). All rights reserved.
Elastomeric Impression Materials Elastomeric Impression Materials
A material that is used when an extremely accurate impression is essential. The term elastomeric means having elastic or rubberlike qualities.
A material that is used when an extremely accurate impression is essential. The term elastomeric means having elastic or rubberlike qualities.
Copyright 2003, Elsevier Science (USA). All rights reserved.
Characteristics or Elastomeric Impression MaterialsCharacteristics or Elastomeric Impression Materials
Base • Packaged as a paste in a tube, as a
cartridge, or as putty in a jar. Catalyst
• Also known as the accelerator, is packaged as a paste in a tube, as a cartridge, or as a liquid in a bottle with a dropper top.
Base • Packaged as a paste in a tube, as a
cartridge, or as putty in a jar. Catalyst
• Also known as the accelerator, is packaged as a paste in a tube, as a cartridge, or as a liquid in a bottle with a dropper top.
Copyright 2003, Elsevier Science (USA). All rights reserved.
Forms of Elastomeric Materials Forms of Elastomeric Materials
Light-bodied• Also referred to as syringe type, or
wash type. This material is used because of its ability to flow in and about the details of the prepared tooth. A special syringe, or extruder, is used to place the light-bodied material on and immediately around the prepared teeth.
Light-bodied• Also referred to as syringe type, or
wash type. This material is used because of its ability to flow in and about the details of the prepared tooth. A special syringe, or extruder, is used to place the light-bodied material on and immediately around the prepared teeth.
Copyright 2003, Elsevier Science (USA). All rights reserved.
Regular and heavy-bodied• Often referred to as tray‑type materials,
they are much thicker. As the names imply, they are used to fill the tray. Their stiffness helps to force the light‑bodied material into close contact with the prepared teeth and surrounding tissues to ensure a more accurate impression of the details of a preparation.
Forms of Elastomeric Materials cont’d Forms of Elastomeric Materials cont’d
Copyright 2003, Elsevier Science (USA). All rights reserved.
Basic Impression TechniqueBasic Impression Technique1. The material selected depends upon the dentist’s
preference and the type of impression required for the procedure.
2. The dentist prepares the tooth or teeth for the impression. 3. The light-bodied material is prepared and loaded into the
syringe and transferred to the dentist.4. The dentist places the light-bodied material over and around
the prepared teeth and onto the surrounding tissues.5. The heavy-bodied material is prepared and loaded into the
tray and transferred to the dentist.6. When the impression material has reached final set, the
impression is removed and inspected for accuracy.7. The impression is disinfected, placed in a biohazard bag,
labeled, and readied for the laboratory technician.
1. The material selected depends upon the dentist’s preference and the type of impression required for the procedure.
2. The dentist prepares the tooth or teeth for the impression. 3. The light-bodied material is prepared and loaded into the
syringe and transferred to the dentist.4. The dentist places the light-bodied material over and around
the prepared teeth and onto the surrounding tissues.5. The heavy-bodied material is prepared and loaded into the
tray and transferred to the dentist.6. When the impression material has reached final set, the
impression is removed and inspected for accuracy.7. The impression is disinfected, placed in a biohazard bag,
labeled, and readied for the laboratory technician.
Copyright 2003, Elsevier Science (USA). All rights reserved.
Curing Stages of Elastomeric Materials Curing Stages of Elastomeric Materials Initial set
• The first stage results in stiffening of the paste without the appearance of elastic properties. The material may be manipulated only during this first stage.
Final set • The second stage begins with the appearance
of elasticity and proceeds through a gradual change to a solid rubberlike mass. The material must be in place in the mouth before the elastic properties of the final set begin to develop.
Final cure • The last stage occurs from 1 to 24 hours.
Initial set • The first stage results in stiffening of the paste
without the appearance of elastic properties. The material may be manipulated only during this first stage.
Final set • The second stage begins with the appearance
of elasticity and proceeds through a gradual change to a solid rubberlike mass. The material must be in place in the mouth before the elastic properties of the final set begin to develop.
Final cure • The last stage occurs from 1 to 24 hours.
Copyright 2003, Elsevier Science (USA). All rights reserved.
Types of Elastomeric Materials Types of Elastomeric Materials
Polysulfide Polyether Silicone Polyvinyl siloxane
Polysulfide Polyether Silicone Polyvinyl siloxane
Copyright 2003, Elsevier Science (USA). All rights reserved.
Polysulfide Impression MaterialPolysulfide Impression Material Chemical makeup
• Base: Mercaptan polysulfide.• Cross-linking agent: Sulfur and/or lead
peroxide.• Catalysts: Copper hydroxides, zinc
peroxide, organic hydroperoxide.• Fillers: Zinc sulfate, lithopone, or
calcium sulfate dihydrate.
Chemical makeup• Base: Mercaptan polysulfide.• Cross-linking agent: Sulfur and/or lead
peroxide.• Catalysts: Copper hydroxides, zinc
peroxide, organic hydroperoxide.• Fillers: Zinc sulfate, lithopone, or
calcium sulfate dihydrate.
Copyright 2003, Elsevier Science (USA). All rights reserved.
Manipulation and Technique Considerations for Polysulfide Material Manipulation and Technique Considerations for Polysulfide Material Dispense pastes at the top of the mixing pad. Mix pastes with the tip of a spatula to incorporate the
material first. Transfer the material to the fresh surface of the mixing
pad. Water, saliva, and blood affect polysulfide material. Impression should be removed quickly after settingdo
not rock the tray. Adhesive must be thin and dry before adding the
impression material. Wait 20 to 30 minutes before pouring the impression for
the stress relaxation to occur in the material. Be careful of glove powder contamination of the
impression.
Dispense pastes at the top of the mixing pad. Mix pastes with the tip of a spatula to incorporate the
material first. Transfer the material to the fresh surface of the mixing
pad. Water, saliva, and blood affect polysulfide material. Impression should be removed quickly after settingdo
not rock the tray. Adhesive must be thin and dry before adding the
impression material. Wait 20 to 30 minutes before pouring the impression for
the stress relaxation to occur in the material. Be careful of glove powder contamination of the
impression.

Copyright 2003, Elsevier Science (USA). All rights reserved.
Polyether Impression MaterialPolyether Impression Material
Chemical makeup• Base: Polyether• Cross-linking agent: Sulfate• Catalysts: Glycol-based plasticizers • Filler: Silica
Chemical makeup• Base: Polyether• Cross-linking agent: Sulfate• Catalysts: Glycol-based plasticizers • Filler: Silica
Copyright 2003, Elsevier Science (USA). All rights reserved.
Material is very stiff, which makes it difficult to remove without rocking.
When removing the impression, break the seal and rock slightly to prevent tearing.
Water, saliva, and blood affect polyether material.
Added moisture will increase the impression’s marginal discrepancy.
Increased water absorption occurs if a thinning agent is used.
Manipulation and Technique Considerations for Polyether Material Manipulation and Technique Considerations for Polyether Material
Copyright 2003, Elsevier Science (USA). All rights reserved.
Silicone Impression MaterialSilicone Impression Material
Chemical makeup• Base: Poly dimethyl siloxane• Cross-linking agent: Alkyl ortho
silicate or organo hydrogen siloxane• Catalyst: Organo tin compounds• Filler: Silica
Chemical makeup• Base: Poly dimethyl siloxane• Cross-linking agent: Alkyl ortho
silicate or organo hydrogen siloxane• Catalyst: Organo tin compounds• Filler: Silica
Copyright 2003, Elsevier Science (USA). All rights reserved.
The material has a limited shelf life. The tray requires a special tray adhesive. No syneresis or imbibition but does
respond with shrinkage over time. The material is more flexible, so there is
more chance for distortion during removal. Wait 20 to 30 minutes before pouring of
models for stress relaxation to occur.
Manipulation and Technique Considerations for Silicone Material Manipulation and Technique Considerations for Silicone Material
Copyright 2003, Elsevier Science (USA). All rights reserved.
Polyvinyl Siloxane Impression MaterialPolyvinyl Siloxane Impression Material
Chemical makeup• Base: Silicone polym• Catalyst: Chloroplatinic acid• Filler: Silica
Chemical makeup• Base: Silicone polym• Catalyst: Chloroplatinic acid• Filler: Silica
Copyright 2003, Elsevier Science (USA). All rights reserved.
For dimensional stability, this is the best impression material.
Pouring of the model can be delayed up to 7 to 10 days.
Stiffness of the material makes removal of the tray difficult.
Material dispensed using auto-mixing unit and mixing tips.
For dimensional stability, this is the best impression material.
Pouring of the model can be delayed up to 7 to 10 days.
Stiffness of the material makes removal of the tray difficult.
Material dispensed using auto-mixing unit and mixing tips.
Manipulation and Technique Considerations for Polyvinyl Siloxane Material Manipulation and Technique Considerations for Polyvinyl Siloxane Material

Copyright 2003, Elsevier Science (USA). All rights reserved.
Occlusal Registration Occlusal Registration
An accurate registration of the normal centric relationship of the maxillary and mandibular arches. Also commonly referred to as the bite registration.
An accurate registration of the normal centric relationship of the maxillary and mandibular arches. Also commonly referred to as the bite registration.
Copyright 2003, Elsevier Science (USA). All rights reserved.
Types of Occlusal RegistrationTypes of Occlusal Registration
Wax bite• Useful when the diagnostic casts are
trimmed.• The most common technique is to use
a softened baseplate wax.
Wax bite• Useful when the diagnostic casts are
trimmed.• The most common technique is to use
a softened baseplate wax.
Copyright 2003, Elsevier Science (USA). All rights reserved.
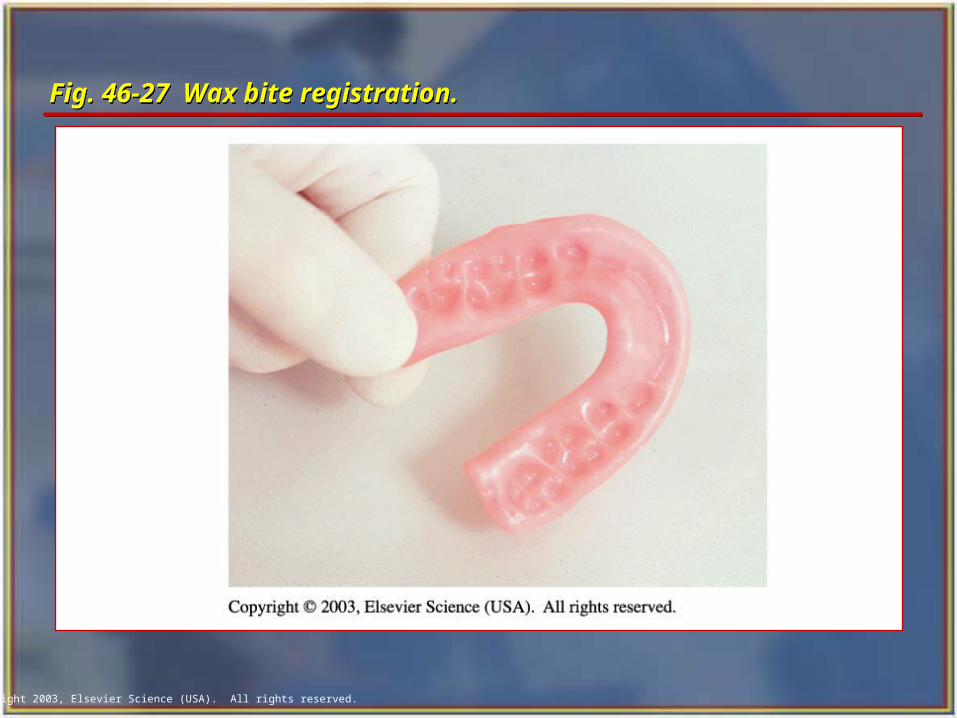
Fig. 46-27 Wax bite registration. Fig. 46-27 Wax bite registration.
Copyright 2003, Elsevier Science (USA). All rights reserved.
Polysiloxane bite registration paste: Supplied both as a paste system and also as cartridges.• The material is fast setting.• There is no resistance to biting forces.• There is no odor or taste for the patient.• It gains dimensional stability over time.• It is convenient to use.
Polysiloxane bite registration paste: Supplied both as a paste system and also as cartridges.• The material is fast setting.• There is no resistance to biting forces.• There is no odor or taste for the patient.• It gains dimensional stability over time.• It is convenient to use.
Types of Occlusal Registration cont’dTypes of Occlusal Registration cont’d
Copyright 2003, Elsevier Science (USA). All rights reserved.
Zinc oxide-eugenol (ZOE) bite registration paste• ZOE paste has little to no resistance
to bite closure and is a fast-setting material.
• Material is supplied in a paste system and dispensed onto a paper pad, mixed, and placed onto a gauze tray for the patient to bite into.
Zinc oxide-eugenol (ZOE) bite registration paste• ZOE paste has little to no resistance
to bite closure and is a fast-setting material.
• Material is supplied in a paste system and dispensed onto a paper pad, mixed, and placed onto a gauze tray for the patient to bite into.
Types of Occlusal Registration cont’dTypes of Occlusal Registration cont’d