Embed Size (px)
Citation preview
Trimble Link for AutoCAD Civil 3D
2013: A Primer and Tutorial California Surveying & Drafting Supply Technical Support Services
© Copyright 2000-2010 California Surveying & Drafting Supply. Not to be copied or distributed without permission. 1
A Brief Description:
Trimble Link is a robust software utility that is an extension of the Autodesk AutoCAD Civil 3D software for managing the import/export of files between it and a Trimble Data Collector that is connected to a PC via USB and running either Trimble Access or Trimble Survey Controller software. It leverages the legacy Data Transfer Utility as a means for the USB connectivity to the Data Controller itself; thus, it also leverages either the ActiveSync (XP) or Windows Mobile Device (Win 7) as well.
NOTE: Trimble Link will NOT work with Survey Pro software.
For a more thorough and detailed description, see http://www.trimble.com/link.shtml
Important Considerations and Limitations:
Trimble Link is a free extension provided by Trimble, but does require registration in order to use it.
There are over a dozen different versions of Trimble Link based on the versions of either AutoCAD Civil 3D or AutoCAD Land Desktop it is paired to support. It is important to be mindful of this when acquiring and installing this support extension. Ref. : http://www.trimble.com/link_ts.asp?Nav=Collection-27103
Help files for this utility can be found in the software (AutoCAD Civil 3D) itself once it is installed. It is version specific; thus, there is little in the way of documentation outside of the software Help Menu.
This utility in no way replaces, enhances, or simplifies the required knowledge for leveraging the tools it supports. Thus, it is not recommended to be used by those who are not at a journeyman-level of experience and understanding of Land Surveying and Civil Engineering practices, workflows, and concepts. Without such understanding, this tool can create more problems than it solves.
NOTE: Trimble Link will NOT work with Survey Pro software.
Overview of the Use Process:
Trimble Link manages files by importing them into the AutoCAD environment via the legacy Data Transfer Utility that is found in GPS Pathfinder Office or is available as a stand-alone utility. It makes this tool an embedded feature of Trimble Link.
Generally, AutoCAD Civil 3D requires data to be in the Field Book format (.fbk) in order to process data. Therefore, Trimble Link accept an .fbk file outright, naturally. That or it will accept either a .job or .csv file that it will, in turn, transform into the field book format for further processing. Again, one of 3 kinds of files going in: .fbk, .job, or .csv
*NOTE: There is a Trimble Style Sheet available for exporting files from the data collector using the Field Book
format. See more details at the end of this primer. It can be found on the CSDS Support Page.

© Copyright 2000-2010 California Surveying & Drafting Supply. Not to be copied or distributed without permission. 2
1. Create/Save a new Drawing File (.dwg) and set up both a new Survey Database and an Equipment Database in the new Saved Drawing file.
With the Data Collector turned on and connected to the PC Workstation via USB…
Open AutoCAD Civil 3D 2013 and on the menu bar activate “Toolspace” button
Save a new drawing (.dwg) file
Make certain the “Survey” dataspace is active along the Toolspace menu on the side
Setup and name a new Survey Database and be very mindful of the database properties, especially “Units” ( right-click on the new db and choose “Edit survey database settings…”)
Setup and name a new Equipment Database and be very mindful of the database properties, especially the “Units” and “Prism” (right-click on the new Equipment db and choose “Manage Equipment Database…”)
© Copyright 2000-2010 California Surveying & Drafting Supply. Not to be copied or distributed without permission. 3
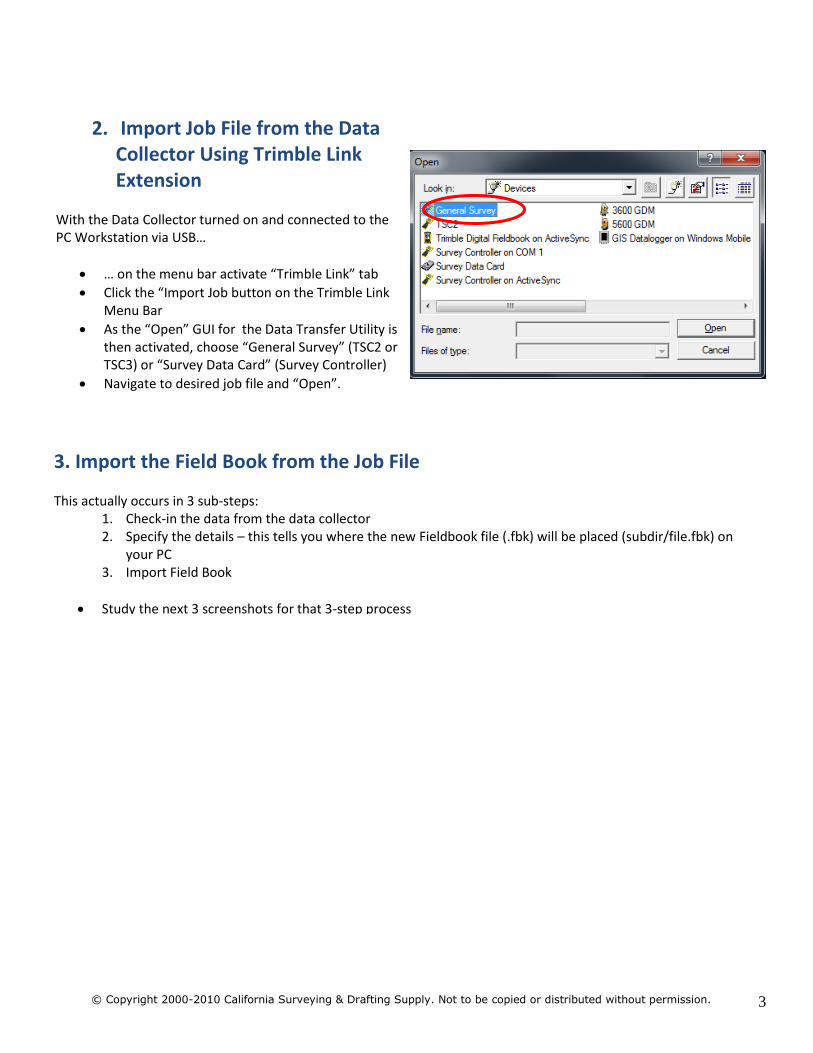
2. Import Job File from the Data Collector Using Trimble Link Extension
With the Data Collector turned on and connected to the PC Workstation via USB…
… on the menu bar activate “Trimble Link” tab
Click the “Import Job button on the Trimble Link Menu Bar
As the “Open” GUI for the Data Transfer Utility is then activated, choose “General Survey” (TSC2 or TSC3) or “Survey Data Card” (Survey Controller)
Navigate to desired job file and “Open”.
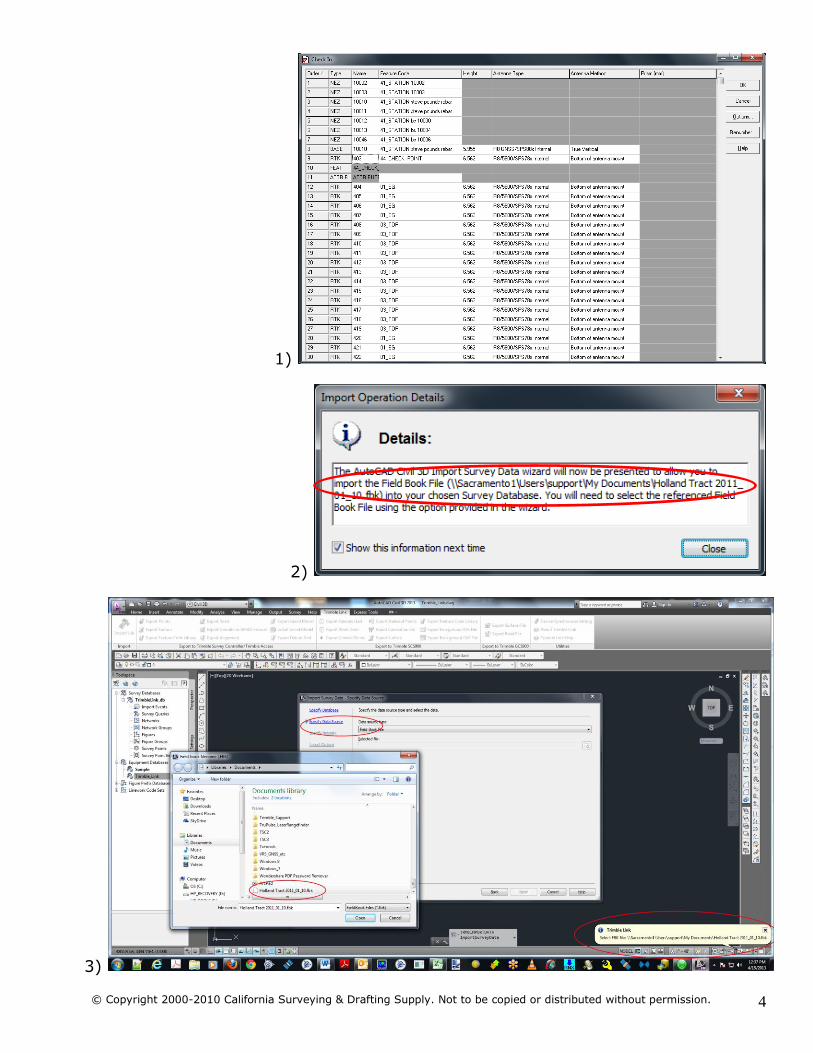
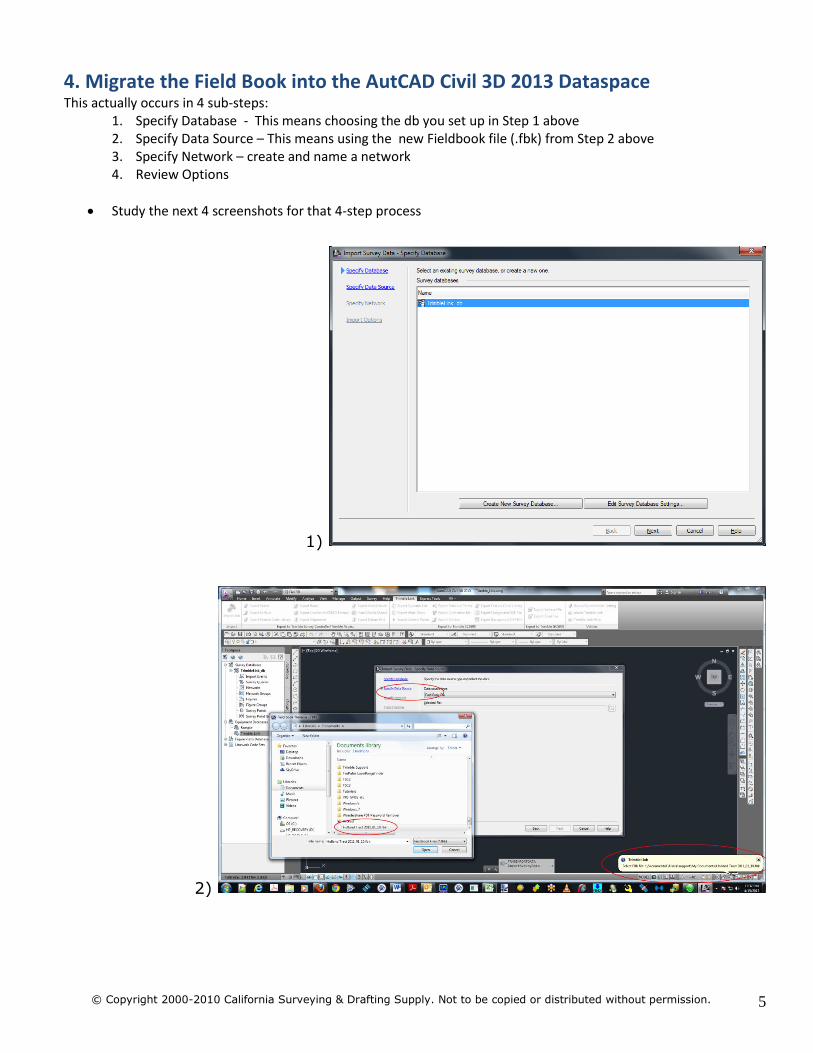
3. Import the Field Book from the Job File
This actually occurs in 3 sub-steps:
1. Check-in the data from the data collector 2. Specify the details – this tells you where the new Fieldbook file (.fbk) will be placed (subdir/file.fbk) on
your PC 3. Import Field Book
Study the next 3 screenshots for that 3-step process
© Copyright 2000-2010 California Surveying & Drafting Supply. Not to be copied or distributed without permission. 4
1)
2)
3)
© Copyright 2000-2010 California Surveying & Drafting Supply. Not to be copied or distributed without permission. 5
1)
2)
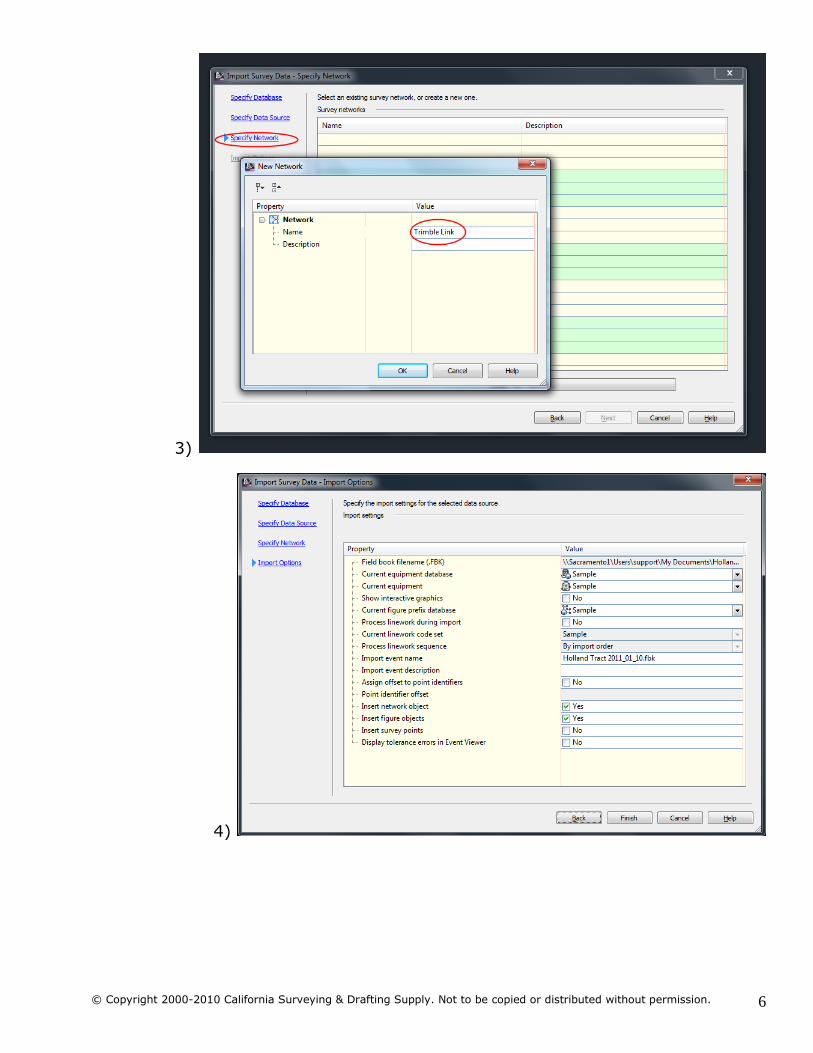
4. Migrate the Field Book into the AutCAD Civil 3D 2013 Dataspace
This actually occurs in 4 sub-steps: 1. Specify Database - This means choosing the db you set up in Step 1 above 2. Specify Data Source – This means using the new Fieldbook file (.fbk) from Step 2 above 3. Specify Network – create and name a network 4. Review Options
Study the next 4 screenshots for that 4-step process
© Copyright 2000-2010 California Surveying & Drafting Supply. Not to be copied or distributed without permission. 6
3)
4)
© Copyright 2000-2010 California Surveying & Drafting Supply. Not to be copied or distributed without permission. 7
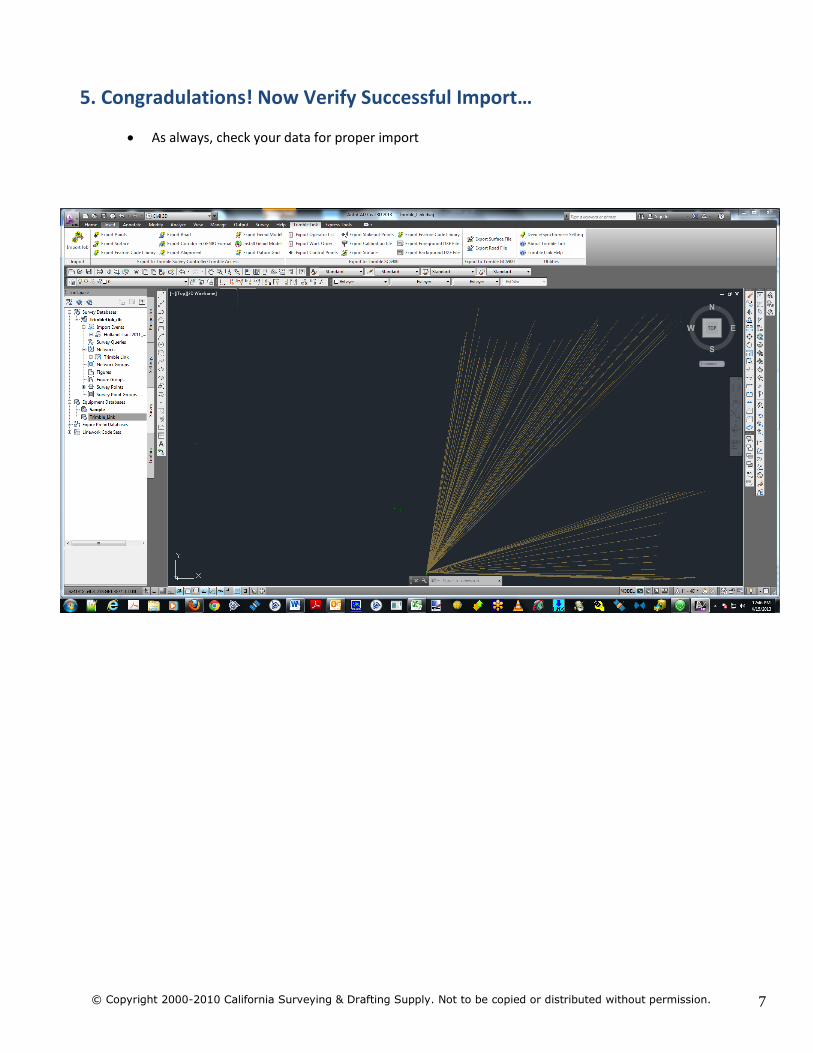
5. Congradulations! Now Verify Successful Import…
As always, check your data for proper import