Embed Size (px)
Citation preview

iGEM Pasteur Paris 2016 Protocols
MICROBIOLOGY EQUIPMENT
✓ Autoclave
✓ Centrifuge
✓ Incubator
✓ Gloves
✓ Petri dish
✓ Pre-sterilized disposable container
✓ Syringe
✓ Centrifuges test tubes with conical bottom
✓ Bottles Erlenmeyer
✓ Beakers
✓ Flasks
✓ Bottles

iGEM Pasteur Paris 2016
Protocols
PCR AMPLIFICATION USING PHUSION DNA POLYMERASE Aim: To reproduce (amplify) selected sections of DNA (inserts A1, A2, B1, B2, C1, C2, E1, E2). Material:
• Template DNA • Phusion HF buffer (5X) • Phusion DNA Polymerase • dideoxy nucleotide triphosphate mix 10 mM (dNTPs) • 0.2 ml thin Wall Tubes PCR tubes • EDTA disodium salt dehydrate • Forward primer • Reverse primer • Nuclease free water
Protocol:
Primers:
Forward 5' GCT CGT GGA TCC GAA TTC G 3'
Reverse 5' GGC CGC TAC TAG TAC AAA AAA C 3'

1. In a 0.2 ml tube, set up the following reaction:
2. Set up the following cycles in a PCR machine ▪ Initial denaturation: 98°C for 2 min ▪ 30 cycles:
1. 94°C for 30 sec 2. 45°C - 72°C for 30 sec depending on your annealing temperature 3. 72°C for 30-60 sec per kb 4. Final extension: 72°C for 5 min.

iGEM Pasteur Paris 2016
Protocols
DIGESTION
Aim: To linearize the different plasmids or create compatible ends on inserts, with appropriate enzymes. We perform restriction enzyme digestion in order to recover linear backbones of the plasmids, and corresponding compatible ends. We choose appropriate restriction sites on the inserts based on the host plasmids. However, initial steps for creating the sites in the DNA are also required. Most of our DNA comes either from PCR production, minipreps or midipreps, or following gel extractions.
Materials:
• Molecular biology equipment: 37 °C and 65 °C water baths, pipette set, ice bucket, electrophoresis tank and power supply, imaging system
• DNA • 10X New England Biolabs (NEB) buffer • Nuclease-free water • Appropriate restriction enzyme at -20 °C Protocol:
1. Design primers with appropriate restriction sites to clone unidirectionally into a vector
2. Addition of 6 bases upstream of the restriction site is sufficient for digestion with most enzymes
3. If fidelity is a concern, choose a proofreading polymerase such as Q5 High- Fidelity DNA Polymerase (NEB #M0491) or Phusion (NEB#M0530)
4. Visit www.NEBPCRPolymerases.com for additional guidelines for PCR optimization
5. Purify PCR product by running the DNA on an agarose gel and excising the band, then followed by using a Gel extraction kit
6. Digest with the appropriate restriction enzyme Standard Restriction Enzyme Protocol - Restriction Enzyme 10 units is sufficient, generally 1 μl is used for 1 μg DNA. - 10X NEBuffer 5 μl - Nuclease-free Water to 50 μl - Incubation time1 hour* Incubation Temperature Enzyme dependent * Can be decreased by using a Time-Saver Qualified enzyme.

iGEM Pasteur Paris 2016
Protocols
DEPHOSPHORYLATION Aim: To reduce vector self-ligation and favor that of vector to insert instead. The presence of a free phosphate group at one end of the linear vector DNA after a restriction enzyme digestion will lead to self ligation, because it is intra-molecular. Materials:
• Molecular biology equipment: 37 °C and 65 °C water baths, pipette set, ice bucket • (Recombinant Shrimp alkaline phosphatase) rSAP Reaction Buffer (10X) • rSAP • DNA • Nuclease-free water
Protocol:
1. Digest vector with the appropriate restriction enzymes. Enzymes that leave non-compatible ends are ideal as they prevent vector self-ligation as well.
2. Dephosphorylation is necessary to prevent self-ligation. NEB offers three products for
dephosphorylation of DNA: x rSAP (NEB #M0371) is heat-inactivable phosphatases -> It works in all
NEBuffers, but rSAP requires that the reaction be supplemented with Zn2+ Dephosphorylation of 5' ends of DNA using rSAP:
o rSAP Reaction Buffer (10X) : 2 μl o DNA ≥ 1 pmol of DNA ends (about 1 μl of 3 kb plasmid at 100 ng/ µl) o 1 μl rSAP (1 unit/ μl) o Nuclease-free Water : to 20 μl o Incubation : 37°C for 30 minutes o Heat Inactivation : 65°C for 5 minutes
Note: Scale larger reaction volumes proportionally

iGEM Pasteur Paris 2016
Protocols
LIGATION Aim: To link an insert to its host plasmid before the transformation. This step happens after the digestion of the insert and the plasmid with the same restriction sites enzymes, or compatible ends that may give illegitimate ligations.
1) T4 ligation Materials:
• Molecular biology equipment: 37 °C and 65 °C water baths, pipette set, ice bucket, electrophoresis tank and power supply, imaging system
• 1.5 ml Eppendorfs • T4 DNA ligase Buffer (10X) • Vector DNA • Insert DNA • Nuclease-free water • T4 DNA Ligase • Topo cloning kit (Invitrogen, Thermofisher)
Protocol:
1. Set up the following reaction in a microcentrifuge tube on ice (T4 DNA Ligase should be added last). Note that the table shows a ligation using a molar ratio of 1:3 vector to insert for the indicated DNA sizes. Use NEBioCalculator to calculate molar ratios.

iGEM Pasteur Paris 2016
Protocols
Agarose gel ELECTROPHORESIS Aim: To know the size of DNA fragments to check the efficiency of a digestion for instance. Materials:
• Molecular biology equipment: 37 °C and 65 °C water baths, pipette set, ice bucket, electrophoresis tank, electrolyte buffer, imaging system.
• Buffer solution (Tris-Acetate 40 mM, EDTA 1 mM pH 8.3) TAE 1X • Agarose powder (Seakem, Thermofisher) • H20 • Ethidium bromide EB (Eurobio 0.7 mg/ml) • Electrophoresis power supply • DNA ladder (Thermofisher Gene Ruler 1kb) Protocol: 1. To have an 0.7% agarose gel, take 0.35 g of agarose and put in 50 ml of TAE 1X
2. Warm it in a microwave for 2 min (until we have no more lumps) and let cool a little under cold running water, swirling (avoiding that agar solidify itself)
3. Add 2 drops of EB 4. Mix it and transfer it on combs + caster 5. Let the agarose gel solidify 6. Fill the electrophoresis chamber with TAE 0.5X buffer 7. Perform the migration during about one hour
8. Observe the gel on a UV table, take a photo for your records with an imaging system (Geldoc, Biorad)

iGEM Pasteur Paris 2016
Protocols
GEL EXTRACTION KIT Aim: To get back the DNA purified thanks to the electrophoresis on agarose gel. Materials:
• Molecular biology equipment: 55 °C water baths or dry block, pipette set, ice bucket, electrophoresis tank and power supply, imaging system, precision balance, microcentrifuge or vacuum manifold, UV face mask, spectrophotometer, UV quartz cuvette
• UV table, with long wavelength position • Scalpel, and blade • Gel extraction Kit from QIAGEN • Isopropanol
Protocol:
1. Excise the DNA fragment from the agarose gel with a clean, sharp scalpel.
2. Weigh the gel slice in a colorless tube. Add 3 volumes Buffer QG to 1 volume gel (100 mg gel ~ 100 μl). The maximum amount of gel per spin column is 400 mg. For >2% agarose gels, add 6 volumes Buffer QG.
3. Incubate at 50°C for 10 min (or until the gel slice has completely dissolved). Vortex the
tube every 2– 3 min to help dissolve gel. After the gel slice has dissolved completely, check that the color of the mixture is yellow (similar to Buffer QG without dissolved agarose). If the color of the mixture is orange or violet, add 10 μl 3 M sodium acetate, pH 5.0, and mix. The mixture turns yellow.
4. Add 1 gel volume of isopropanol to the sample and mix.
5. Place a QIAquick spin column in a provided 2 ml collection tube or into a vacuum
manifold. To bind DNA, apply the sample to the QIAquick column and centrifuge for 1 min at 13000 rpm or apply vacuum to the manifold until all the samples have passed through the column. Discard flow-through and place the QIAquick column back into the same tube. For sample volumes of >800 μl, load and spin/apply vacuum again.
6. If DNA will subsequently be used for sequencing, in vitro transcription, or microinjection,
add 500 μl Buffer QG to the QIAquick column and centrifuge for 1 min or apply vacuum. Discard flow- through and place the QIAquick column back into the same tube.
iGEM Pasteur Paris 2016
Protocols
TRANSFORMATION Aim: To capture ligated plasmid-insert combination, and increase the amount of plasmids by transformation in competent cells. The amount of plasmid supplied is insufficient to perform all our future experiments. Therefore, we need to amplify the amount of plasmids. Materials:
• Microbiology equipment: 42 °C Water bath, 37 °C incubator (static, and shaking), Bunsen burner, sterile rake, petri dishes with appropriate antibiotic on agar, timer
• Antibiotics stock (carbenicillin 50 mg/ml, chloramphenicol 34 mg/ml) • Competent cells DH5-α subcloning efficiency, BL21De3, or Top10 • pUC19 Control DNA (100 pg/μl) • PSB1C3 plasmid (from shipped BioBrick-competent cells testing kit), chloramphenicol
resistance • pET43.1a (Novagen, Gift from D. Gopaul Lab, Institut Pasteur), ampicillin resistance (or
carbenicillin) • SOC (Super optimal Broth + glucose) media • LB (Luria broth) Agar plates containing 50 μg/ml carbenicillin or 34 μg/ml
chloramphenicol
Protocol: Positif control: 1. Thaw on ice one tube of DH5αTM cells. Place 1.5 ml microcentrifuge tubes on ice. 2. Gently mix cells with the pipette tip and aliquot 50 μl of cells for each transformation into a 1.5 ml microcentrifuge tube. 3. Refreeze any unused cells in the dry ice/ ethanol bath for 5 minutes before returning to the -80°C freezer. Do not use liquid nitrogen.
4. Add 1 to 5 μl (1-10 ng) of DNA to the cells and mix gently by tapping the side of the tube. Do not mix by pipetting up and down. For the pUC19 control, add 2.5 μl (250 pg) of DNA to the cells and mix gently.
5. Incubate tubes on ice for 30 minutes 6. Transformation

The transformation:

iGEM Pasteur Paris 2016 Protocols
MINIPREP QIAGEN KIT


�

iGEM Pasteur Paris 2016
Protocols
BACTERIAL CULTURE Aim: In order to obtain a large amount of plasmid or cells, we need to grow the bacteria overnight. Materials:
• Microbiology equipment: 37 °C incubator (static, and shaking), Bunsen burner, sterile loop, petri dishes with appropriate antibiotic on agar
• Antibiotics stock (carbenicillin 50 mg/ml, chloramphenicol 34 mg/ml) • 25 ml flasks • Carbenicillin 50 mg/ml • Chloramphenicol 34 mg/ml • LB medium
Protocol:
1. One colony is picked from the plates and shaken in 25 ml of LB supplemented with carbenicillin or chloramphenicol at 50 μg/ml or 34 μg/ml respectively.
2. The flask is placed in a shaking incubator at 37°C, 150 rpm overnight.

iGEM Pasteur Paris 2016 Protocols
STAB CULTURE
Aim: To store a clone of bacteria to be used later.
Material:
• Microbiology material (click on this link)• LB medium• antibiotic (Carbenicillin or Chloramphenicol at 50 μg/ml or 34 μg/ml respectively in our
experiments)• agar• 2 ml screw-cap vial under sterile conditions
Protocol: 1. Prepare and autoclave 0.7% LB agar (standard LB medium containing 7 g/L agar).
2. Cool the LB agar to below 50°C (when you can hold it comfortably) and add the appropriate antibiotic(s). While still liquid, add 1 ml agar to a 2 ml screw-cap vial under sterile conditions, then let solidify.
3. Using a sterile toothpick, pick a single colony from a freshly grown plate and stab it deep into the soft agar several times.
4. Incubate the vial at 37°C for 8–12 h leaving the cap slightly loose.
5. Seal the vial tightly and store in a dark place, preferably at 4°C.

iGEM Pasteur Paris 2016
Protocols
Protein production IPTG INDUCTION Aim: To increase the production of our protein which is cloned downstream of a promoter
from T7 phage regulated by lacI from the Lac operon. Materials:
• Microbiology equipment: 37 °C incutator (static, and shaking), Bunsen burner, sterile rake, petri dishes with appropriate antibiotic on agar, SDS-PAGE gel, electrophoresis tank and power supply
• Antibiotics stock (carbenicillin 50 mg/ml, chloramphenicol 34 mg/ml) • BL21(DE3) competent cells • Isopropyl β-D galacto pyranoside (IPTG) 0.5 M stock • Gel Code blue Coomassie blue protein stain (Pierce, or EZ-Stain Sigma)
Protocol:
1. Transform expression plasmid into BL21(De3) Escherichia coli cells. Plate on antibiotic selection plates and incubate overnight at 37°C.
2. Resuspend a single colony in 10 ml liquid LB with antibiotic. 3. Incubate at 37°C until OD600nm reaches 0.4–0.8. 4. Induce with 10 or 20 μl of a 0.5 M stock of IPTG
(final concentration of IPTG varies from 0.5 mM or 1.0 mM) and induce for 3 to 5 hours at 37°C.
5. Check for expression by Sodium dodecyl sulfate – poly acrylamide gel electrophoresis (SDS-PAGE) protein gel electrophoresis, Western blot or activity assay. Check expression in both the total cell extract (soluble + insoluble) and the soluble fraction only. *If a fraction of the target protein is insoluble, repeat expression at a lower temperature.
6. For large scale, inoculate 1 liter of LB medium (with antibiotic) with 10 ml of freshly grown culture. Incubate at 37°C until OD600nm reaches 0.4–0.8. Add 0.5 mM or 1 mM IPTG and express protein using optimal time/temperature determined in a small scale trial.
iGEM Pasteur Paris 2016
Protocols
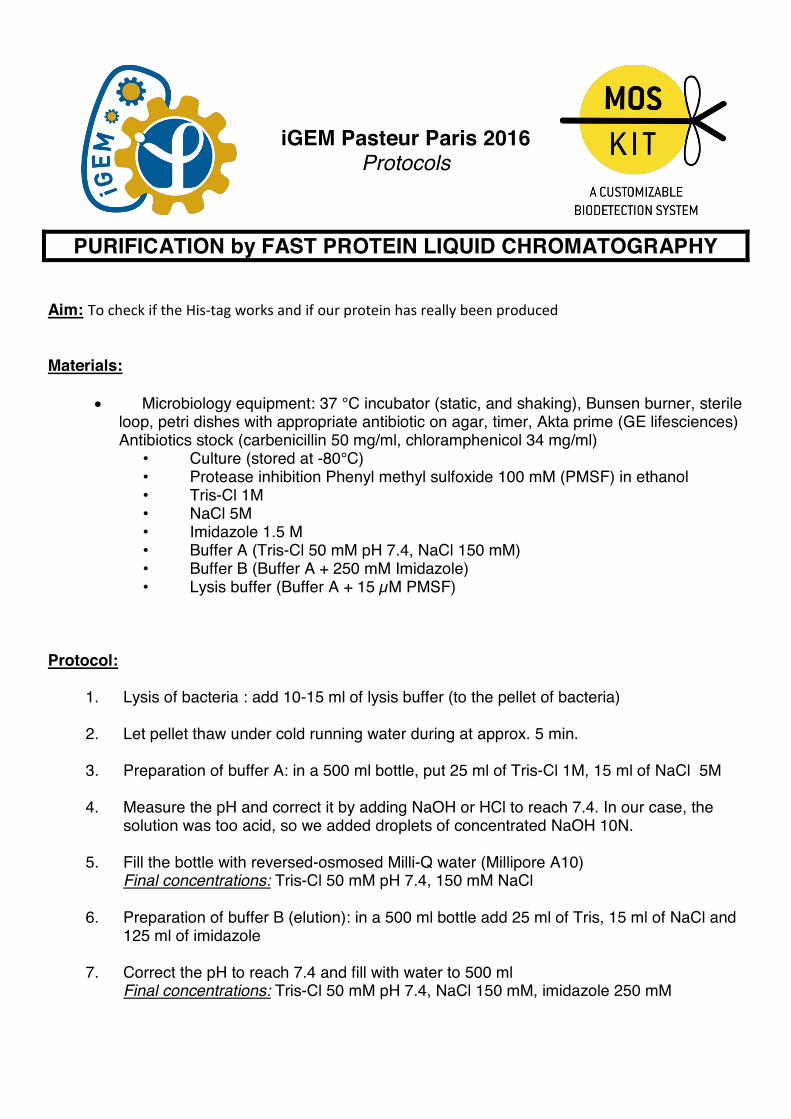
PURIFICATION by FAST PROTEIN LIQUID CHROMATOGRAPHY Aim: To check if the His-tag works and if our protein has really been produced Materials:
x Microbiology equipment: 37 °C incubator (static, and shaking), Bunsen burner, sterile loop, petri dishes with appropriate antibiotic on agar, timer, Akta prime (GE lifesciences) Antibiotics stock (carbenicillin 50 mg/ml, chloramphenicol 34 mg/ml)
• Culture (stored at -80°C) • Protease inhibition Phenyl methyl sulfoxide 100 mM (PMSF) in ethanol • Tris-Cl 1M • NaCl 5M • Imidazole 1.5 M • Buffer A (Tris-Cl 50 mM pH 7.4, NaCl 150 mM) • Buffer B (Buffer A + 250 mM Imidazole) • Lysis buffer (Buffer A + 15 µM PMSF)
Protocol:
1. Lysis of bacteria : add 10-15 ml of lysis buffer (to the pellet of bacteria)
2. Let pellet thaw under cold running water during at approx. 5 min.
3. Preparation of buffer A: in a 500 ml bottle, put 25 ml of Tris-Cl 1M, 15 ml of NaCl 5M
4. Measure the pH and correct it by adding NaOH or HCl to reach 7.4. In our case, the solution was too acid, so we added droplets of concentrated NaOH 10N.
5. Fill the bottle with reversed-osmosed Milli-Q water (Millipore A10) Final concentrations: Tris-Cl 50 mM pH 7.4, 150 mM NaCl
6. Preparation of buffer B (elution): in a 500 ml bottle add 25 ml of Tris, 15 ml of NaCl and 125 ml of imidazole
7. Correct the pH to reach 7.4 and fill with water to 500 ml Final concentrations: Tris-Cl 50 mM pH 7.4, NaCl 150 mM, imidazole 250 mM

8. As our samples were too sticky we sonicated them on ice, during 3 cycles of 1 min sonication (Branson 450, medium tip, power set to just before limit of microtip, duty cycle 60%), and 1 min cooling.
9. Centrifuge the samples for 20 min at 16 000 RPM (30966g), in 50 ml polycarbonate tubes, equilibrated on a precision balance, in a Beckman Avanti X26-J centrifuge equipped with JA-25.50 rotor.
10. Filter our buffers to eliminate impurities though a vacuum equipped filter device with 0.45 µm Whatman filters.
11. The supernatant is put in clean 50 ml Falcon
12. Purification of protein with AKTA prime FPLC from GE lifesciences (Pharmacia) 13. The column used is a BioRad Bioscale Nuvia 5 ml IMAC –fitted with M6 connectors to
the luer system. 14. Collect 1.0 ml fractions, and follow absorbance at 280 nm
15. All the tubes are stored at 4°C

iGEM Pasteur Paris 2016
Protocols
CELLULOSE BINDING TEST Aim: Verify that the C2 protein binds to cellulose. Protocol: - in a 2ml Eppendorf tube, put: - 10mg of Avicel cellulose - 1ml of the used protein purification buffer: PBS (150mM NaCl, 50mM sodium phosphate) or Buffer A (150mM NaCl, 50mM Tris, pH=7,4) - 10µl of BSA (1µg/µl) - 100µl of the fraction of the purified protein C2 Use a mixture without C2 protein as a negative control. - incubate at room temperature for 1 hour, under stirring. - centrifuge the tube at 13,200rpm for 5min. - recover the supernatant and store it in a 1.5ml Eppendorf tube. - wash the pellet with the buffer used before (stir for 5min). - centrifuge the tube at 13,200rpm for 5min. - recover the supernatant and store it in another 1.5ml Eppendorf tube. - denaturate the pellet with 200µl of Laemli 2x at 95°C for 5min. - denaturate 10µl of the two previous supernatants with 10µl of Laemli 2x at 95°C for 5min. - analyse the three samples on an SDS PAGE protein gel.

iGEM Pasteur Paris 2016
Protocols
SILIFICATION & ASSAY Aim: verify that the C2 protein makes silica precipitate by catalyzing the sol/gel process and quantify the silification efficiency of the C2 protein. Protocol: ¾ Silification:
- in a 2ml Eppendorf tube, put: - 22.4µl of pure TEOS - 1.0ml of 1mM HCl - incubate at room temperature for 15min, under stirring. - add 300µl of the C2 protein. Use a mixture without C2 protein as a control for kinetics. Use a mixture with a non specific protein (such as BSA) as a negative control. Use a mixture with only the C2 protein and 1ml of 1mM HCl to check that the C2 protein does not precipitate in these acidic conditions. - incubate at room temperature for 2 hours, under stirring. A silica gel appears. - centrifuge the tube at 13,200rpm for 15min. - recover the supernatant in 1.5ml Eppendorf tube (for the assay). - store the pellet at 4°C to make a patch (see the “patch compression” protocol). ¾ Assay:
- in a 2ml Eppendorf tube, put: - 22.4µl of pure TEOS - 1.0ml of 1mM HCl - incubate at room temperature for 15min, under stirring. N.B.: this stock solution contains 208µg/ml of silicic acid. - perform several dilutions of this stock solution. - in each tube, add 100µl of ammonium molybdate 10%wt. The mixture turns yellow. - incubate at room temperature for 15min under stirring. - for each dilution tube, measure absorbance at 420nm. - establish the standard curve by plotting absorbance vs silicic acid mass. - in a 1.5ml Eppendorf tube, put 1ml of the supernatant got from silification. - add 100µl of ammonium molybdate 10%wt. The mixture turns yellow. - incubate at room temperature for 15min, under stirring. - measure absorbance at 420nm. - thanks to the standard curve, determine the concentration of silicic acid left in the supernatant after silification.

iGEM Pasteur Paris 2016
Protocols
PATCH COMPRESSION Aim: Make a patch by compression with cellulose and the silicated C2 protein. Protocol: - mix mechanically cellulose powder (Avicel) and the silicated C2 protein in the weight ratio you want. - place a Kapton� sheet and the mold on a steel plate. - fill in the slots with the protein/silica/cellulose mixture. - place a Kapton� sheet and a steel plate over it and compress at 200 bars and at room temperature for 5 min. - release the strain and remove the patches from the mold. Schematic:
200bars
Upper press plate
Lower press plate
Steel plate
Kapton� sheet
Mold with slots filled in with the cellulose/silica/protein mixture

iGEM Pasteur Paris 2016
Protocols
ONE POT MIXTURE - PATCH Aim: Prepare a one pot mixture that will be compressed directly after incubation. Protocol: - in a 2ml Eppendorf tube, put: - 8µl of pure TEOS - 330µl of 1mM HCl - incubate at room temperature for 5min. - add 20mg of Avicell cellulose. - add 100µl of the C2 protein. - incubate for 2 hours under stirring, at room temperature. - centrifuge the tube and recover the supernatant for the silification assay (see the “silification & assay” protocol). - compress directly the pellet (see the “patch compression” protocol).

1
iGEM Pasteur Paris 2016
Protocols
IMMUNOLOGIC ASSAY Aim: The goal is to determine whether our immunoassay is effective. We want to ensure that our antibodies are well able to detect the presence or absence of viral protein from Chikungunya and Yellow Fever viruses. We took care to handle non-infectious viral proteins. Materials: • PVDF or nitrocellulose membrane • YFV E protein, CHIKV E2 protein • 4G2 antibody • Secondary antibody (anti-mouse alexafluor 488) • BSA • PBS • Tween • Milk 5% in PBS-Tween • EZ-link kit • Rocker agitator Protocol: Sample preparation: The sample is tagged using EZ-Link kit. 1. Add 500 mL of ultrapure water to the dry-blend Phosphate Buffered Saline (PBS). 2. Prepare 1mg of antibody in 1.0 ml of PBS(+/-BSA1%). 3. Reconstitute 1mg of lyophilized EZ-Link Plus Activated Peroxidase with 100 µl of ultrapure water and add it to the antibody solution or add the protein sample directly to the lyophilized activated. 4. In a fume hood, immediately add 10 µl of Sodium Cyanoborohydride to the reaction and incubate for 1 hour at room temperature. 5. Add 20 µl of Quenching Buffer and react at room temperature for 15 minutes. → The conjugate can be store at 4°C for up to 4 weeks. Membrane: 1. Coating: put 1 µl of a non-diluted antibody on the membrane, let the membrane dry for 5 minutes at room temperature. 2. Saturation: • Put the membrane in PBS-Tween 0,5%-milk 5% on a rocker, 1 hour at room temperature. • Replace the washing solution with a fresh one. 3. Binding: Add the sample in the PBS-Tween 0,5%-milk 5% solution at the appropriate dilution, incubate

2
overnight at 4°C on a rocker. 4. Washing: Wash the membrane 3 times for 5 minutes on a rocker at room temperature. 5. Revelation: Reveal the membrane using approximately 1 ml of Pierce ECL Western Blotting substrate.