Embed Size (px)
Citation preview
Part 2—Heritage Survey Field Guide
Identifying Historic Places
Preface Whether it’s the corner coffee shop that has always served as a local gathering place or the ornate church at the centre of town with a soaring steeple, historic places are vitally important to defining a community’s sense of itself. This series of publications is designed to help Alberta’s municipalities create and implement local heritage programs to protect the historic places they value and wish to preserve. The following manuals describe the steps involved in establishing a municipal heritage program, and in identifying, evaluating and developing municipal historic places. It is intended to be used by municipal staff members; elected officials and heritage advisory committees; local heritage organizations and historical societies; volunteers and business organizations; heritage conservation professionals such as planners and architects; and the owners of historic properties.
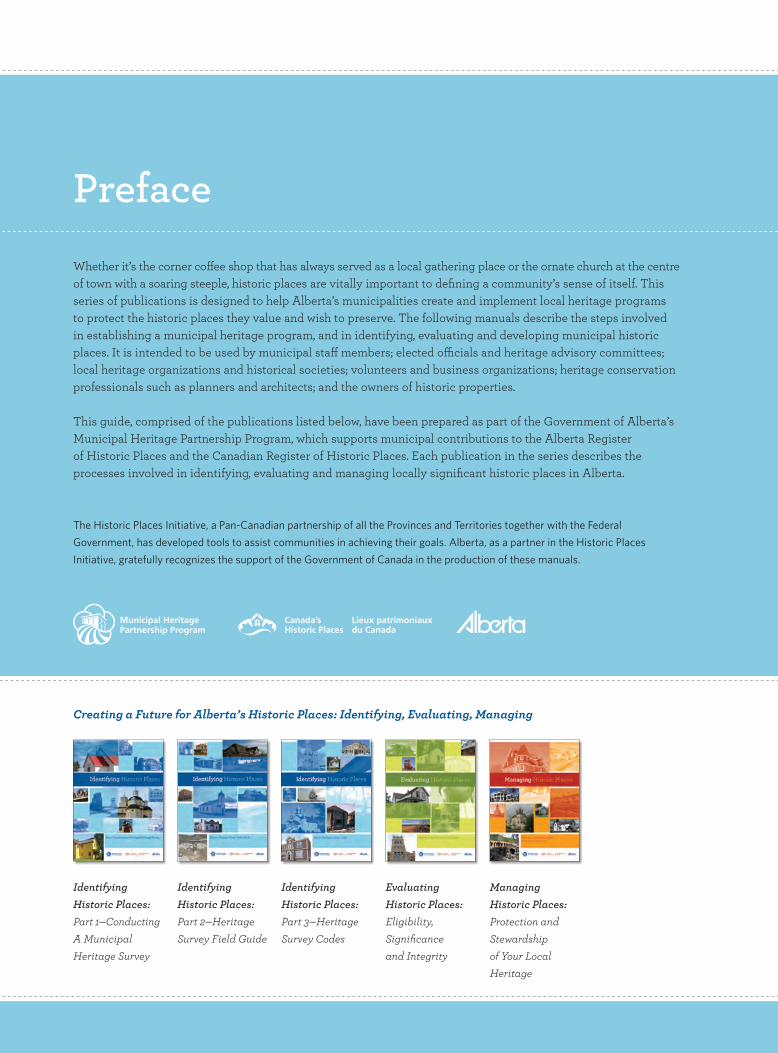
This guide, comprised of the publications listed below, have been prepared as part of the Government of Alberta’s Municipal Heritage Partnership Program, which supports municipal contributions to the Alberta Register of Historic Places and the Canadian Register of Historic Places. Each publication in the series describes the processes involved in identifying, evaluating and managing locally significant historic places in Alberta.
Identifying
Historic Places:
Part 2—Heritage
Survey Field Guide
Identifying
Historic Places:
Part 1—Conducting
A Municipal
Heritage Survey
Identifying
Historic Places:
Part 3—Heritage
Survey Codes
Evaluating
Historic Places:
Eligibility,
Significance
and Integrity
Managing
Historic Places:
Protection and
Stewardship
of Your Local
Heritage
Creating a Future for Alberta’s Historic Places: Identifying, Evaluating, Managing
The Historic Places Initiative, a Pan-Canadian partnership of all the Provinces and Territories together with the Federal
Government, has developed tools to assist communities in achieving their goals. Alberta, as a partner in the Historic Places
Initiative, gratefully recognizes the support of the Government of Canada in the production of these manuals.
Contents02 Preface
05 Introduction
08 Fieldwork
08 Safety09 Systematic fieldwork09 Field notes and survey forms09 Site plan
11 Photography
11 Getting started11 Getting the right shot13 Taking care of film and cameras13 ID card14 Keeping records in the field
15 Historical Research
15 Tombstone information16 Making notes16 Analyzing the evidence16 Survey form completion17 Sources
21 Alberta Heritage Survey Form
22 Field-by-field directions
45 Wrapping Up
45 Heritage Survey documentation46 Storing the Heritage Survey documentation 47 Appendices
47 Appendix A: Commonly-used Codes50 Appendix B: Further Reading51 Appendix C: Archives in Alberta
1
2
3
4 Identifying Historic Places
4 5

5Part 2—Heritage Survey Field Guide
Introduction A completed municipal heritage survey provides a window on a community’s social and architectural history. Undertaking such a project can be a daunting task. However, if it is approached in a deliberate and organized way, the challenges can be addressed and minimized. This book provides detailed information about three aspects of completing a heritage survey.
requirements to completing a heritage surveyThe following three requirements are fundamental to the heritage
survey process and must be met.
k Fieldwork, including photographic documentation
l Historical research
m Heritage Survey form completion
It does not deal with the Places of Interest List (POIL), or the final report required as part of heritage survey programs conducted with the support of the Municipal Heritage Partnership Program.
The first and very important job for fieldworkers or researchers is to fully understand the task at hand. They must know what they are attempting to do, know how they are going to accomplish it and understand all of the requirements involved. Additionally, fieldworkers and researchers should know that the Alberta Heritage Survey Program has minimum requirements for the proper documentation of a resource.
for more information, refer to the
Identifying Historic Places: Part 1—
Conducting a Municipal Heritage
Survey manual.
6 Identifying Historic Places
• Conductfieldworkaccordingtoalogicalanddocumentedplan.• Prepareasiteplanformulti-resourceproperties.• Takeatleasttwophotographsforeachresource(structure,
landscape or object), and take additional photos if needed to show architectural features.
• Thesephotographsmustbeclearandundistorted.Documentasmany sides of the resource as possible.
• Thedevelopmentrequirementsare: • Archival,trueB&Wdevelopment • Twosetsof4"x6"glossyprints • Negativescutinstripsofsix • DigitalreproductionsstoredonCD • Anumberedcontactsheet(index)• Documentthephotographsontheassignedphoto-logs.• UsethefirstphotooneveryassignedrolltophotographanIDcard
that clearly shows: • Roll# • Photographer’sname • Date • Locationofresource(s)photographed• Enteranexactphotorecordoneachsurveyform.• Affixphotographicprintstothesurveyformsusingarchival
mounting squares.
6 7 8
7Part 2—Heritage Survey Field Guide
8 Identifying Historic Places
FieldworkFieldwork is the visual inspection and recording of a resource. This requires that fieldworkers visit a resource to physically examine it, collect and note information on its location and architecture, and photographically document it.
Safety
Always
Let the coordinator know where
you will be; ideally, phone before
you start out and when you return
from the field each day.
Check the weather forecast
each morning.
Urban areas
Be careful to park appropriately.
Be cautious getting in and out of your
car; it’s easy to grow careless.
Be careful you are not in path of
traffic while framing a photograph.
Uneasy about your
surroundings? Leave.
Rural areas
Be careful not to block farm gates
and entrances when you park.
Be careful to close gates behind
you at all times.
Watch out for dogs and other loose
animals such as goats or cattle.
Watch the sky for sudden changes
in weather.
Tread carefully in long grass that
can obscure hazards such as old
machinery and wire.
Always ask if there is an open well
on a rural property.
Feeling uncomfortable on
a property? Leave.
Hazardous sites (mines, etc.)
Never work alone.
Avoid walking on tailings.
Look out for open shafts and
unstable structures.
Worried about conditions? Leave.
Isolated areas
Never work alone.
Be alert to the presence of large
wildlife such as bears, cougars
and elk.
Unsure of the situation? Leave.
safety checklist Whether working in town, in the country or in the wilderness, safety is of paramount importance. The safety of fieldworkers is
more important than documenting any resource. No fieldworker should feel at risk or put themselves in a position where their
safety might be compromised.
9Part 2—Heritage Survey Field Guide
Systematic fieldwork
To ensure accuracy, a fieldworker must take a methodical and systematic approach. With a honed set of techniques, a fieldworker can supply the most exact and detailed information available.
Field notes and survey forms
Since fieldwork is conducted to help with the proper completion of the survey forms, fieldworkers must have a comprehensive understanding of what the forms require. Thorough field notes taken during a field inspection record the details of the location, architectural features, environment and resource condition. If the fieldworkers are also completing the survey forms, they are well advised to transcribe the field notes onto the forms as soon as possible, while the information is still relatively fresh in their minds.
Site plan
Fieldworkers surveying properties that contain multiple resources are required to prepare a site plan that provides an overview of the entire property. This overview includes the exact location of the property: civic address, plan number/block number/lot number or Alberta Township Survey; a list of the resources and resource types; a sketch of the property layout that shows the position of the resources; and historical information that helps to explain the relationship of one resource to another, such as construction or relocation date. For example: The house was built in 1910, and the barn was moved onto the property in 1945.
The Alberta Heritage Survey does not have any standardized forms for this purpose. The project’s municipal coordinator or heritage consultant should provide these for the fieldworkers’ use.
for oganizational details,
see Identifying Historic Places:
Part 1—Conducting a Heritage
Municipal Survey.
10 Identifying Historic Places
Do you have?
Camera
Film with allocated numbers
Pen/pencil
Clipboard/notebook
Photo log sheet
Street plan/map or county/
township grid sheet
Tape measure
GPS unit
Official ID card
In winter: Do you need?
Lined boots
Extra sweater
Thick coat and toque
Thermos with hot beverage
Sunglasses
In summer: Did you remember?
Sunscreen
Mosquito repellent
Water
Hat (for shade)
Strong walking shoes
or light hiking boots
Sunglasses
fieldwork checklistBelow is a list things to consider when working in the field.
Always useful
Cell phone
Whistle
Letter of introduction/FAQ sheet
Fieldwork techniques: Remember to...
Be detailed
Be mobile
Take time
Communicate
109 11
11Part 2—Heritage Survey Field Guide
PhotographyPhotography constitutes a major part of fieldwork, as photos are essential for completing the survey forms. The photographs need to be good-quality shots that tell as much about the resource as possible. Approach this work with detailed professionalism.
Getting started
• Fieldworkersarerequiredtohavea35mmsinglelensreflex(SLR) film (not digital) camera. It can be either manual or automatic, or adjustable for both.
• Alwayscarrymorerollsofallocatednumberedfilmandphotologsinto the field than you think you will need, so you are prepared for unexpected situations that require more photographs.
• CarryIDcardswiththerollnumber,theirname,thedateandthelocation of the survey. Photograph an ID card as the first frame of each roll. The photo can be used as an identifier later in the project.
• Forpropertieswithmultipleresources,alwaysbeginbyphotographingthe main resource and then move to the secondary ones. For example, photograph the house before the garage and the barn before the granary.
Getting the right shot
• Buildingdocumentationisnotartphotography.Thefocusisonrecording each building from all sides.
• Onaruralproperty,whenpossiblewalkaroundthebuildingfirstto assess the situation and determine the best angles and available lighting for recording the building.
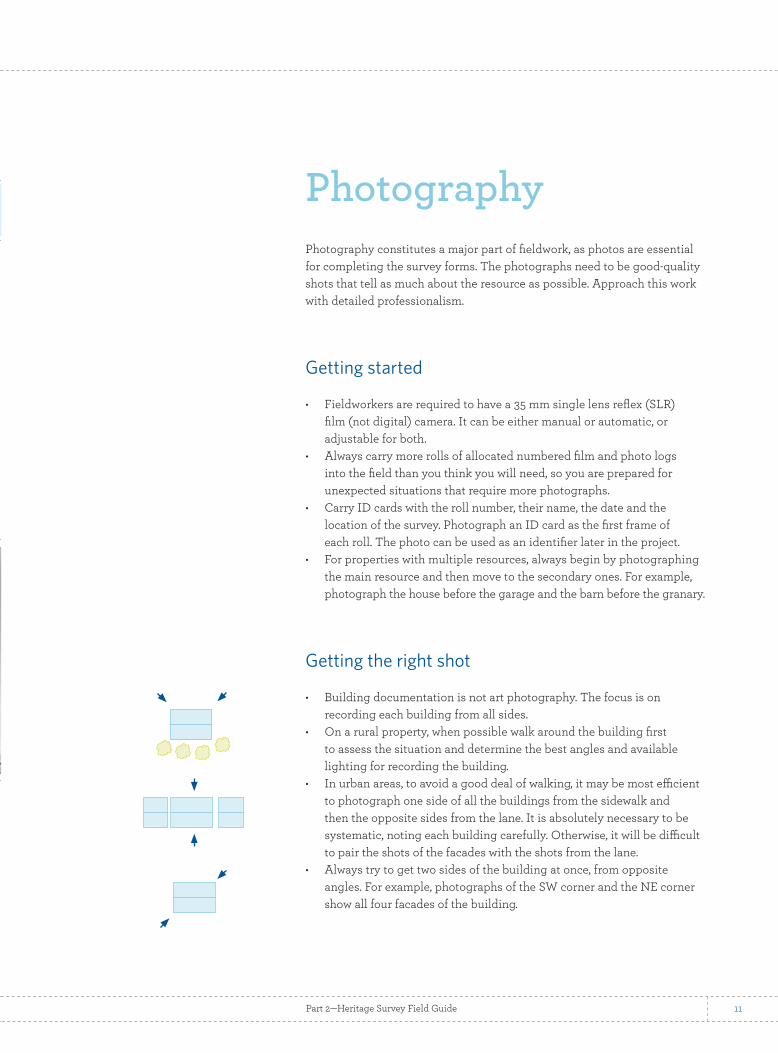
• Inurbanareas,toavoidagooddealofwalking,itmaybemostefficientto photograph one side of all the buildings from the sidewalk and then the opposite sides from the lane. It is absolutely necessary to be systematic, noting each building carefully. Otherwise, it will be difficult to pair the shots of the facades with the shots from the lane.
• Alwaystrytogettwosidesofthebuildingatonce,fromoppositeangles.Forexample,photographsoftheSWcornerandtheNEcornershow all four facades of the building.
12 Identifying Historic Places
• Twophotographsisthebasicrequirement,butthecomplexityandsizeof the building and the number of features of architectural interest determine how many additional photographs are required to document the building.
• Alwaysincludealladditionsandwings.• Sometimesitisimpossibletogetashotoftwofacadesatonce
due to the size of the building, its location on a streetscape or other obstructions (steep banks, trees, other buildings, corrals, etc.). In such cases, get a shot of as much of the building as possible.
Framing the shot
• A standard 50 mm lens will get the
preferred shot with a crisp focus.
• Try to back up sufficiently to get the
whole resource in the view finder.
• Keep alert while framing the shot—
watch out for hazards from behind.
• Make sure rooflines, chimneys,
weather vanes, flag poles, steeples,
crosses, antennas, etc. are not cut off.
• Avoid including any extraneous items
in the foreground that obscure or
detract from the resource (telephone
wires, parked cars, people, dogs, etc.)
• It may be necessary to take a shot
with a zoom or telephoto lens to
record intricate details (wood carvings,
stonework, decorative trim, etc.)
Eliminating distortion
• Try to keep the shot as close
to 50 mm as possible.
• Use or adjust to a wide angle lens
sparingly because it distorts a
structure’s height and width.
• Do not tilt the camera; find another
way to get around an obstruction.
Lighting
• With a manual camera, try to
take meter readings close to the
resource and then step back. If in
doubt, it is better to err on the side
of overexposure. Underexposed
negatives have very little information
on them, while you can almost always
print overexposed negatives.
• If the meter reading takes in a lot of
bright snow, it will advise the camera
to render the snow a mid-gray, which
will result in underexposure. Adjust a
manual camera to “overexpose” the
shot by 1.5–2 f-stops.
• Late afternoon sunlight produces
long shadows, while a high midday
sun may result in backlighting, which
makes it difficult to photograph a
north-facing facade.
• Avoid shooting straight into the sun.
Sun spots ruin the photograph and
obliterate structural details. If possible,
use a lens hood or shield the lens
with something as best as possible.
• Cloudy days often result in the
best photographs.
• A medium yellow filter enhances
contrast and brings out the texture
of wood, brick and stone.
tips on getting the right shot

13Part 2—Heritage Survey Field Guide
Taking care of film and cameras
• Neverleavefilm(usedorunused)sittingontheseatofacarexposed to summer heat.
• Storeexposedandunexposedfilminarefrigerator.• Managefilminasystematicway.Useoneclearlymarkedbagfor
fresh film and another for used film. Large Ziploc bags are ideal for this purpose.
• Alwaysuseneckorwriststrapstoavoiddroppingthecamera.• Remembertocheckthecamera’sbatteriesatintervals,especially
in very cold weather.• Placethecamerainaplasticbagwhentransferringitfromextremely
cold temperatures to warm ones, for example, from outside to a warm car or house. This prevents condensation, which could damage the camera.
• Keepthelensclean,butwipeitonlywithaspecialcleaningtissue.• Keepanultravioletorskylightfilteronthecameraatalltimesforbest
protection of the lens.
ID card
• AlwaysphotographanIDcardonthefirstframeofeachroll.• EnsurethattheIDcardclearlyshowstherollnumber,the
photographer’s name, the date and the location of the survey/work.• PreparetheIDcardonalargenotecard,ablanksheetofpaper
or notebook paper.• Writetheinformationinboldblackprint.
Sample ID Card
JANUARY 16, 2004 J. DOE
04-R0090
Crowsnest Pass - BLAIRMORE

14 Identifying Historic Places
Keeping records in the field
• UseanewphotologsheetandIDcardforeachfreshrolloffilm.• FillintheFilmNumber,Recorder,ProjectNameandTown
(or nearest town) at the top of the photo log sheet.• Logeachphotographontheassignedphotologsheet.FillintheAddress
(or location if there is no address), the View (what is in the picture) and the Date (dd/mm/yyyy). Put the information for the first photograph you take on the first line—this will always be your ID card. Continue insequence.DonotfillintheNegativecolumn(seenotebelow).
• Makesuretonotethefilmnumberandframeforeachphotographinyourfieldnotesforeachresource.
The Negative column of the photo log
sheet is filled in after the return of the
negatives from processing. At that
point it is possible to see what negative
number corresponds to the order of
frames photographed in the field.

15Part 2—Heritage Survey Field Guide
Historical ResearchTo obtain good information, researchers must have a basic understanding of what is required to complete a survey form, standardize their recording and collectively hone their techniques.
Tombstone information
The term “tombstone” information refers to the most fundamental data requirements relating to a resource. These basic pieces of information are vital to providing a basic historic profile of the resource:
• Dateofconstruction• Informationaboutthebuilder• Informationaboutthearchitect,ifapplicable• Informationabouttheoriginalandsuccessiveownersoroccupants• Thehistoryofchangestotheresource• Theresource’susage• Significanteventsassociatedwiththeresource
Collecting such information during the survey stage helps to identify significant resources for the Places of Interest List (POIL), and provides a sound basis for the continuing phases of research required to create a municipal heritage inventory or designate a historic resource.
The basic research for a survey needs to be highly focused on time and efficiency, since hundreds if not thousands of resources are involved. Researchers need to conduct “conveyor belt research,” not in-depth studies.
Researchers must walk a fine line between
doing too much and doing too little.
for more information on the poil, refer
to page 35 of the Identifying Historic
Places: Part 1— Conducting a
Municipal Heritage Survey manual.
16 Identifying Historic Places
Making notes
Keep meticulous notes on cards, in a notebook or on loose sheets in a binder. Arrange the notes in some logical order (e.g., by township, street/avenue, geographic location).
It may be useful to keep information in “source type” binders and develop a cross-referencing system for later use.
Documentinformationsources.Notethedepository(thenameofthearchive, museum, library, etc.) as well as the name of the document and page numbers or any other identifiers.
When notes are complete, turn them over to the municipality in their entirety so they can also be used as a reference for the next level of research.
Analyzing the evidence
Keep in mind the possibility that not all the information collected—oral, published or archival—is correct. There are often contradictory items, and someitemsmaybeflatlyincorrect.Inthesecases,furtherresearchanddetailed analysis may be warranted.
If analysis cannot resolve an issue, note all the information on the survey form and indicate the sources. The next stage of research may produce information that will settle the accuracy problems.
Survey form completion
Condense all the information that is directly relevant to completing the fields on the survey form.

17Part 2—Heritage Survey Field Guide
Sources
To ensure historical accuracy, the research team needs to seek out both primary and secondary sources of information.
A primary source is a document from the time period being researched, and a secondary source is information compiled at a later date. Homestead records and building permits are primary sources, while local history publications and oral evidence are secondary sources.
To obtain historical information, researchers may have to travel to a regional or provincial archives or libraries such as the Sir Alexander Galt Archives in Lethbridge, the Provincial Archives of Alberta in Edmonton or the Glenbow Archives and Library in Calgary.
Possible sources for rural surveys
Tax assessment rolls from the past may be available in the municipal offices, but in many cases all that is easily accessible is the date of construction, now usually held on computer as part of the current tax assessment. The municipality can provide these dates for each building on record. Keep in mind that these dates may not be reliable.
A historic title search begins with the current title and works back to the patent. It reveals ownership, the occupation of the owner, and all mortgages and liens. Property values can help to identify the dates of construction. A historic title search is costly, however, and must be made through either theSouthernAlbertaLandTitlesOfficeinCalgaryortheNorthernAlbertaLand Titles Office in Edmonton.
Oral historical evidence from people in the community who are knowledgeable about buildings can be helpful. These people may not come forward to participate in the municipal survey, so ask the local library, heritage organization, museum or archives for the names of people who might have useful information and how to contact them. When contacting a potential source, clearly explain the nature of the project and have a list of basic questions that are clear and focused. Make sure to get a consent form signed by the informant at the time of your interview, if you are taping it.Notethatinformationcollectedinthiswayisoftenmoredetailedthancasual remarks from owners or occupants during a field visit.
Fieldworkers: A source for research
There is a considerable difference in the
type of research done for rural and urban
surveys. It is almost always more difficult
to obtain the date of construction for
farm buildings. The farmhouse and
perhaps a barn are the only buildings
likely to have been assessed for taxes.
Fieldworkers can assist rural research
by looking carefully for any signs of
construction dates etched in wooden
beams or in cement, etc.
In both rural and urban surveys,
fieldworkers can note any information
that the building occupant or owner
offers and pass this information on to
the researchers for corroboration with
documentary sources.
18 Identifying Historic Places
Photographs of rural resources may be available. Many farm families have aerial photographs of their property, which can be a useful source of information on both the development and attrition of the buildings and the environment of a yard. Consider advertising locally for historic photographs.
Township maps were produced by Dominion Land Surveyors who originally subdivided the land into townships from the 1880s onwards in Alberta. Successive versions of the maps show the extent of settlement in any given year, the location of buildings, as well as topographic features, trails and an increasing development of roads. An extensive collection is available at the Provincial Archives of Alberta and the Glenbow Library. Manytownshipmaps(andFieldNotes)areavailableforpurchaseonlineat:http://alta.registries.gov.ab.ca/SpinII/Searchdos.aspx
Cummins rural directory maps show ownership of each quarter section in Alberta as well as the location of railway stations, post offices, schools and churches. These maps are available on microfilm at the Provincial Archives of Alberta for the years 1923 and 1927.
Local histories for almost all districts of the province are widely available in Alberta libraries, and at www.ouroots.ca, Canada’s Local Histories online. The most comprehensive ones include a history of the town along with profiles of businesseses, changes of ownership and extensive sections on churches, halls, community centres and schools.
Cemetery records often include the dates of birth and death for specific individuals.
Family histories are often available. These may include photos of homes and farmyards. Although the information provided by families may not always be accurate, it can be useful to the researchers, who can analyze it carefully and compare it with information obtained from other sources.
Homestead records are a good source of information. Once a township was subdivided, all quarter sections (minus those reserved as school lands or for the Canadian Pacific Railway and the Hudson’s Bay Company) were open for homesteading.
The names and dates of homestead patents appear in Western Land Grants (1870–1930)atArchiviaNet,anonlineresearchtoolprovidedbytheLibraryand Archives of Canada, at www.collectionscanada.ca/ArchiviaNet.
What an old photograph can tell you
• It shows how the structure
looked at a particular time.
• It may reveal information about
original finishes and decorative
elements.
• Comparing the structure’s
components and appearance in the
historic photograph with a current
photograph will show whether the
building has been altered.
Online research tools can change
over time, so be aware that lnks cited
here may not be up-to-date.
19Part 2—Heritage Survey Field Guide
For Canadian Pacific Railway (CPR) sections (the odd-numbered sections in a township) general information is available via the Glenbow Archives’ online database for CPR lands, at www.glenbow.org.
For more detailed information, turn to additional records held by the Provincial Archives of Alberta. A detailed cross-referencing system complicates their use, but once it is mastered it provides access to the application for a homestead patent and the homestead inspector’s reports. The Provincial Archives of Alberta provides information about how to search homestead records on its website. The url www.tprc.alberta.ca/archives/referenceservices/homesteads/default.aspx will take you to a web page with step-by-step details about tracing the date of application for a homestead, the date of construction and the construction details of the earliest building erected in “proving up” the homestead, as well as the age of the homesteader and all family members. Researching homestead records is very time-consuming, however, and it can only be done in Edmonton. Only in exceptional circumstances would this type of research be done for a heritage survey.
Possible sources for urban surveys
Tax Assessment Rolls (see information on this topic on page 17).
A historic title search (see information on this topic on page 17).
Oral historical evidence (see information on this topic on page 17). Photographs may be available from archives or from other sources in a community. Consider advertising locally for historic photographs of resources in the community.
Fire insurance maps were drawn up by fire insurance companies for their own purposes to indicate the location of all buildings, the number of storeys and the materials used to build them. These maps are indispensable for determining the environmental context of historic streetscapes. Fire insurance maps are only available for a limited span of years, and they are not available for all communities.
Building permits provide different kinds of information, depending on the municipality. Generally, they tell the date the permit was issued; the name of the owner, the builder, and the architect (where relevant); the original name of the building; the building’s purpose; the number of storeys; the estimated cost; and information about materials and construction.

20 Identifying Historic Places
Directories (gazetteers) – for example, Henderson’s directories for Alberta’s cities and Wrigley’s directories for smaller communities – are available at many of Alberta’s archives. Henderson’s can provide a good deal of information and offers the opportunity for cross-referencing. Henderson’s directories may provide the names of building occupants, including all residents of a large apartment block, for instance, as well as their occupations and addresses. By following an address through a series of years, a researcher can determine the date a building was constructed. Wrigley’s directories can provide business names and occupations but do not include residential addresses. Although occasional errors do occur, these directories are invaluable.
Local histories are useful for smaller urban centres within a large rural district or smaller cities like Camrose. There are also a number of community league histories from larger cities as well as commemorative booklets for churches, schools and hospitals.
Architectural plans may be available if the structure had an architect or was a government or institutional structure such as a school or bank. The Provincial Archives of Alberta holds an extensive collection of school plans for the province.
Newspapersandnewspaperclippingfiles about structures or specific individuals may reveal who the builder or contractor was and how much the building was projected to cost. (Scrutinize items on “Tenders Let.”) Newspapersmaybeavailablelocally.Theyarealsoavailableonmicrofilmat the Legislative Library of Alberta in Edmonton, the Glenbow Library and many university and municipal libraries.
Catalogues can help provide information about original building plans if a structure is a lumberyard design or a prefabricated or catalogue house or barn. Illustrated catalogues, including those produced by Eaton’s or the Canadian Pacific Railway, as well as a variety of government department bulletins, provide details about building designs. Ask the Glenbow Library and Archives or your local archives about these catalogues.

21Part 2—Heritage Survey Field Guide
Alberta Heritage Survey FormThe Alberta Heritage Survey Form (survey form) is a standardized four-sheet form for recording survey information. The survey form contains 75 information fields that detail a resource’s location, architecture and history. The format is designed to keep all of Alberta’s heritage surveys consistent and to facilitate database entry. To that end, many of the fields require the use of specific numeric codes.
To meet survey requirements, complete
one survey form for each surveyed resource.
specific numeric codes are listed in
Identifying Historic Places: Part 3—
Heritage Survey Codes.
22 Identifying Historic Places
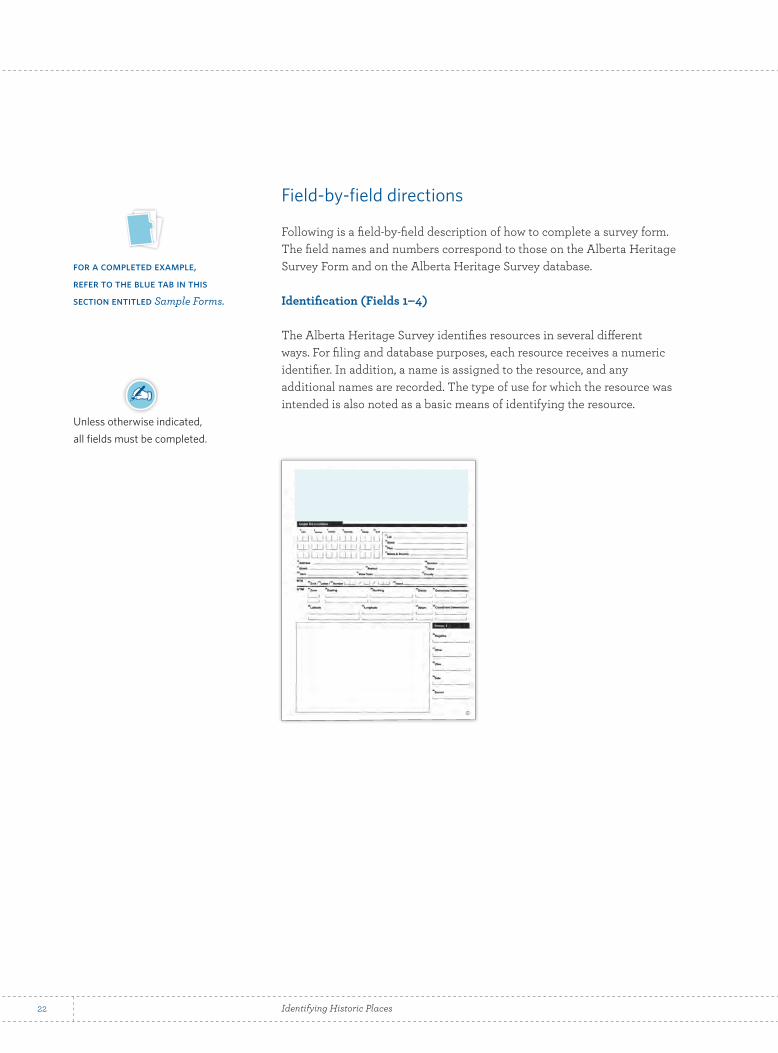
Field-by-field directions
Following is a field-by-field description of how to complete a survey form. The field names and numbers correspond to those on the Alberta Heritage Survey Form and on the Alberta Heritage Survey database.
Identification (Fields 1–4)
The Alberta Heritage Survey identifies resources in several different ways. For filing and database purposes, each resource receives a numeric identifier. In addition, a name is assigned to the resource, and any additional names are recorded. The type of use for which the resource was intended is also noted as a basic means of identifying the resource.
Unless otherwise indicated,
all fields must be completed.
for a completed example,
refer to the blue tab in this
section entitled Sample Forms.
23Part 2—Heritage Survey Field Guide
field 1: Key
Definition The unique identification number issued to the resource by the
Alberta Heritage Survey database.
Instructions If this resource was previously surveyed, it will have an assigned
Key Number, which is at the top of the previous survey form.
Transcribe this number into the boxes for field 1. This number
should also be written in the space provided for the Key
Number at the top of page 3. If the resource was not previously
surveyed, leave this field blank.
Note 1 If previous survey work has been completed, copies of the
original survey forms should be available for reference.
Note 2 For resources that were previously surveyed and have since been
demolished, make a note of the demolition (in red ink) on the
previous forms. Make copies of the previous forms for municipal
use, and submit the originals with the survey documentation.
field 2: Site Name
Definition The common name of the resource; the name associated
with a resource.
Example A A house was constructed in 1910 and was occupied by the
Petro Lupul family from 1914 to 1934. The original occupant is
unknown. The Lupul family has the strongest known association
with the resource. This resource is known as the Lupul House.
Instructions Print the name in the box for field 2.
Example The Lupul House
Note 1 If a specific name is given for the resource, there should be
some information, either in field 61: Owner or field 66: History,
to illuminate the origin of the name.
Note 2 If no name is commonly associated with the resource,
use the name of the person who built the structure.
Note 3 If the resource does not have a name associated with it,
use a generic name such as “farmhouse” or “barn.”
field 3: Other Name(s)
Definition Any other names by which the resource is known.
Example The Lupul House is also known as the Stone House.
Instructions Print other known name(s) in the box for field 3.
Example The Stone House
Note If other name(s) are given for the resource, there should be
some information, either in field 61: Owner or field 66: History,
to illuminate the origin of the name(s).
24 Identifying Historic Places
field 4: Site Type
Definition The site type is defined by the original usage of the resource.
For survey purposes, these usages are divided into major
categories—residential, educational, farming and ranching,
mercantile/commercial, etc. (see Identifying Historic Places:
Part 3—Heritage Survey Codes). The residential category, for
example, includes single dwellings, apartment buildings,
outhouses or privies, etc.
Instructions First select the category and then the site type from the list in
code book. Enter the site type code in the box for field 4.
Example 0101 describes a residential house in a city or town
(single dwelling).
Note 1 A house on a farm has a different code than a house in a town.
A farmhouse comes under the farming and ranching category
and has the code 0501.
Note 2 In some cases a structure has more than one use; for example,
a commercial building with a pharmacy at ground level and an
apartment upstairs. In this case, you would include codes for
both a mercantile/commercial specialty store or shop (code
0409) and a residential apartment building (code 0104). Print
the most important code in the first set of boxes and the lesser
code in the second set of boxes.
Note 3 If you cannot select a site type from the list provided, choose
the code for “other” under the applicable category. Write an
identifying description of the resource on the line next to the
code box.

25Part 2—Heritage Survey Field Guide
Location (Fields 5–35)
The Alberta Heritage Survey provides for several different ways of identifying a resource’s location. This is because in Alberta there are a variety of addressing, legal description and mapping systems in use. Where a resource is located will determine which of these fields is applicable.
fields 5–10: ATS (Alberta Township System)
Definition The legal description of a rural property.
Example SW 9-41-2-West of the 4th Meridian
Instructions field 5: LSD - Enter the LSD (Legal Subdivision), if known (e.g., 1–16).
field 6: Quarter - Enter the quarter section (SW, SE, NW or NE).
field 7: Section - Enter the section number (e.g., 1–36).
field 8: Township - Enter the township number (e.g., 1–126).
field 9: Range - Enter the range number (e.g., 1–30).
field 10: W-M - Enter the number of the meridian (4, 5 or 6).
Note 1 If there are multiple locations, enter them on the successive
lines provided.
Note 2 For urban resources, enter data in fields 8, 9 and 10, if possible.
26 Identifying Historic Places
fields 11–14: PBL (Plan, Block, Lot)
Definition The legal description of an urban property (infrequently used
in rural areas—often a River Lot under these circumstances).
Example Lot 18, Block A, Plan 262L
Instructions field 11: Lot - Enter the lot number.
field 12: Block - Enter the block number.
field 13: Plan - Enter the plan number.
field 14: Metes and bounds - Leave blank.
fields 15–19: Address
Definition The civic address of an urban property.
Example 2341–2345 – 51 Street NW
Instructions field 15: Address - Enter the full address
field 16: Number - Enter the building number (e.g., 41).
field 17: Street - Enter the street number (e.g., 51 NW).
field 18: Avenue - Enter the avenue number (e.g., 23 NW).
field 19: Other - See Note 2 below.
Note 1 Enter the full address of large structures that encompass more
than one lot.
Example 2341–2345 – 51 Street NW
Note 2 If an address contains elements other than numerical
designations, enter the non-numerical portion in field 19: Other.
Example For “42 Alberta Boulevard”, enter “42” in field 16: Number and
“Alberta Boulevard” in field 19: Other.
Note 3 Be aware that the posted house number may not always be the
same as the number listed by a municipality.
field 20: Town
Definition For urban resources, the community in which the
resource is located.
Instructions Print the name of the community in field 20.
field 21: Near Town
Definition For rural resources, the urban community nearest
to the resource.
Instructions Print the name of the community in field 21.
27Part 2—Heritage Survey Field Guide
field 22: County
Definition The name of the county, municipal district or local improvement
district in which the resource is located.
Instructions Print the name in field 22.
fields 23–26: NTS (National Topographic Survey)
Definition The National Topographic Survey map sheet number
that the resource can be located on.
Instructions field 23: Grid - Enter grid reference.
field 24: Letter - Enter the letter.
field 25: Number - Enter the number.
field 26: Name - Enter the map sheet name in the box.
fields 27–35: GPS (Global Positioning System)
Definition The geographic location of the resource, as determined by
using a GPS unit. This can be either UTM (Universal Transverse
Mercator) or Lat-Long (Latitude–Longitude).
Instructions If access to private property is allowed, take a reading nearest
to the resource’s main entrance. If working from the street, take
a reading from the centre of the resource’s street frontage.
Follow the directions for your GPS unit and complete the fields
accordingly.
UTM
field 27: Zone - Enter either “11” or “12”.
field 28: Easting - Enter the easting.
field 29: Northing - Enter the northing.
field 30: Datum - Enter “NAD 83”.
field 31: Coordinate Determination - Enter “GPS”.
LAT-LONG
field 32: Latitude - Enter the latitude.
field 33: Longitude - Enter the longitude.
field 34: Datum - Enter “NAD 83”.
field 35: Coordinate Determination - Enter “GPS”.
Note 1 Longitude is always a negative number.
Note 2 UTM or Lat-Long data are both acceptable. Although it is not
necessary, it is helpful if both fields can be completed.
GPS settings
When taking a UTM or Lat-Long reading,
be sure to set your GPS unit to NAD 83.
Use the decimal degrees setting for
Lat-Long readings. These are the only
acceptable formats for GPS readings for
the Alberta Heritage Survey.
28 Identifying Historic Places
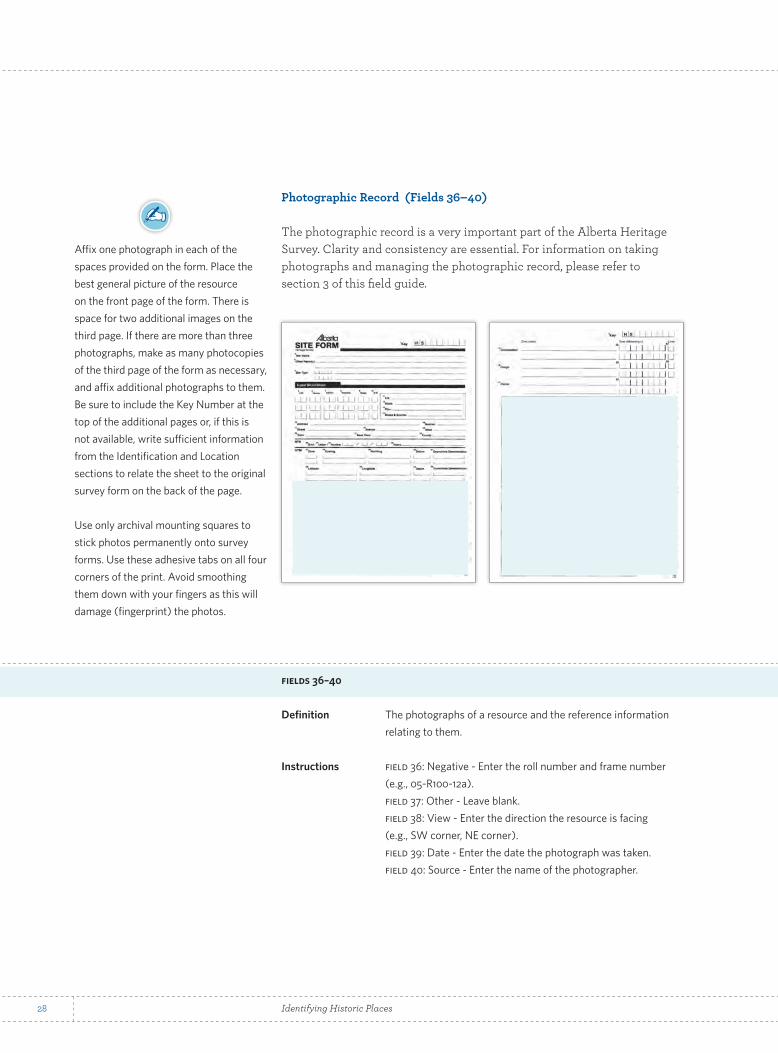
Photographic Record (Fields 36–40)
The photographic record is a very important part of the Alberta Heritage Survey. Clarity and consistency are essential. For information on taking photographs and managing the photographic record, please refer to section 3 of this field guide.
fields 36–40
Definition The photographs of a resource and the reference information
relating to them.
Instructions field 36: Negative - Enter the roll number and frame number
(e.g., 05-R100-12a).
field 37: Other - Leave blank.
field 38: View - Enter the direction the resource is facing
(e.g., SW corner, NE corner).
field 39: Date - Enter the date the photograph was taken.
field 40: Source - Enter the name of the photographer.
Affix one photograph in each of the
spaces provided on the form. Place the
best general picture of the resource
on the front page of the form. There is
space for two additional images on the
third page. If there are more than three
photographs, make as many photocopies
of the third page of the form as necessary,
and affix additional photographs to them.
Be sure to include the Key Number at the
top of the additional pages or, if this is
not available, write sufficient information
from the Identification and Location
sections to relate the sheet to the original
survey form on the back of the page.
Use only archival mounting squares to
stick photos permanently onto survey
forms. Use these adhesive tabs on all four
corners of the print. Avoid smoothing
them down with your fingers as this will
damage (fingerprint) the photos.
29Part 2—Heritage Survey Field Guide
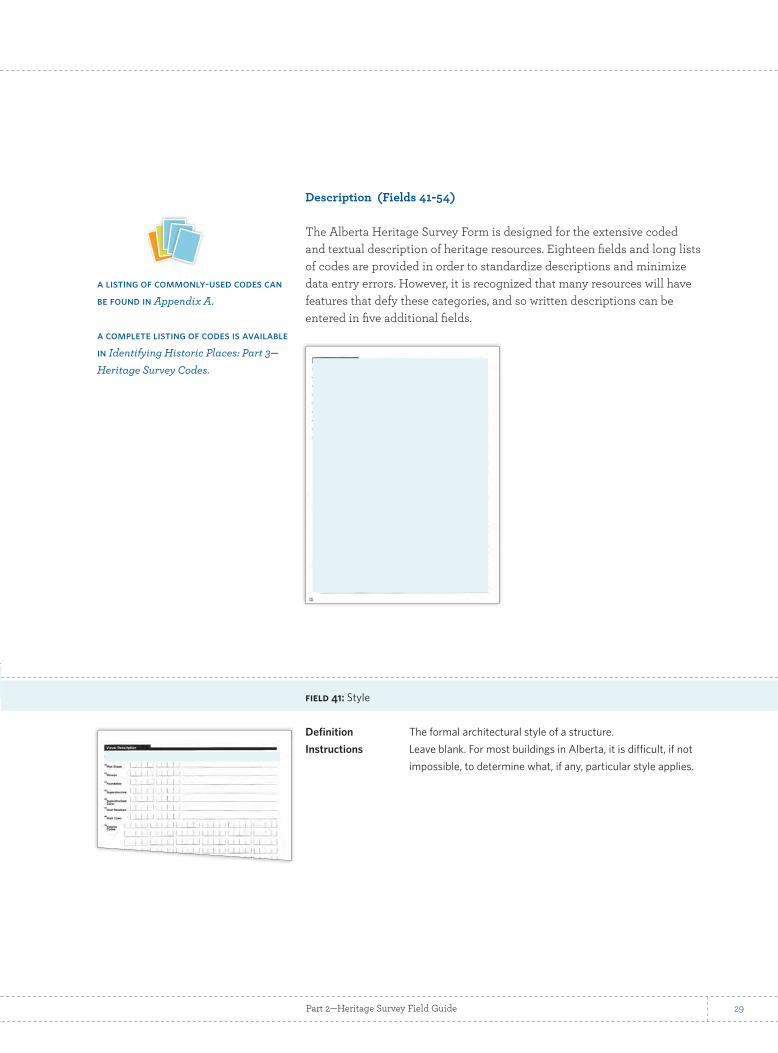
Description (Fields 41-54)
The Alberta Heritage Survey Form is designed for the extensive coded and textual description of heritage resources. Eighteen fields and long lists of codes are provided in order to standardize descriptions and minimize data entry errors. However, it is recognized that many resources will have features that defy these categories, and so written descriptions can be entered in five additional fields.
field 41: Style
Definition The formal architectural style of a structure.
Instructions Leave blank. For most buildings in Alberta, it is difficult, if not
impossible, to determine what, if any, particular style applies.
a listing of commonly-used codes can
be found in Appendix A.
a complete listing of codes is available
in Identifying Historic Places: Part 3—
Heritage Survey Codes.
30 Identifying Historic Places
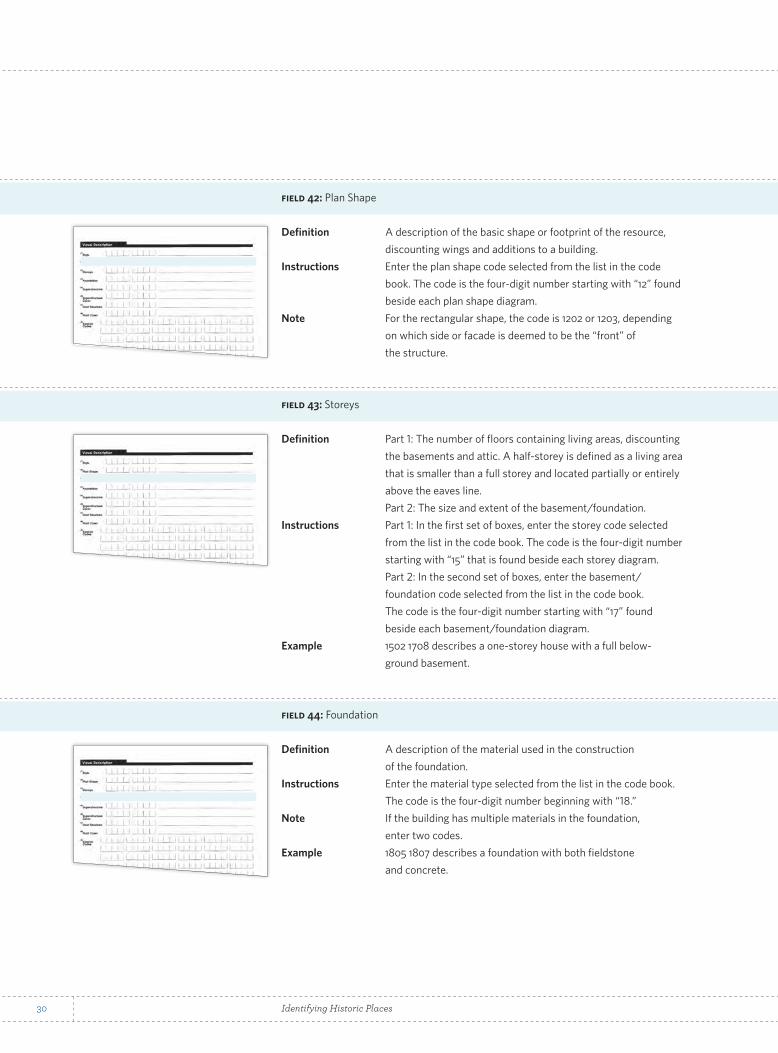
field 42: Plan Shape
Definition A description of the basic shape or footprint of the resource,
discounting wings and additions to a building.
Instructions Enter the plan shape code selected from the list in the code
book. The code is the four-digit number starting with “12” found
beside each plan shape diagram.
Note For the rectangular shape, the code is 1202 or 1203, depending
on which side or facade is deemed to be the “front” of
the structure.
field 43: Storeys
Definition Part 1: The number of floors containing living areas, discounting
the basements and attic. A half-storey is defined as a living area
that is smaller than a full storey and located partially or entirely
above the eaves line.
Part 2: The size and extent of the basement/foundation.
Instructions Part 1: In the first set of boxes, enter the storey code selected
from the list in the code book. The code is the four-digit number
starting with “15” that is found beside each storey diagram.
Part 2: In the second set of boxes, enter the basement/
foundation code selected from the list in the code book.
The code is the four-digit number starting with “17” found
beside each basement/foundation diagram.
Example 1502 1708 describes a one-storey house with a full below-
ground basement.
field 44: Foundation
Definition A description of the material used in the construction
of the foundation.
Instructions Enter the material type selected from the list in the code book.
The code is the four-digit number beginning with “18.”
Note If the building has multiple materials in the foundation,
enter two codes.
Example 1805 1807 describes a foundation with both fieldstone
and concrete.
31Part 2—Heritage Survey Field Guide
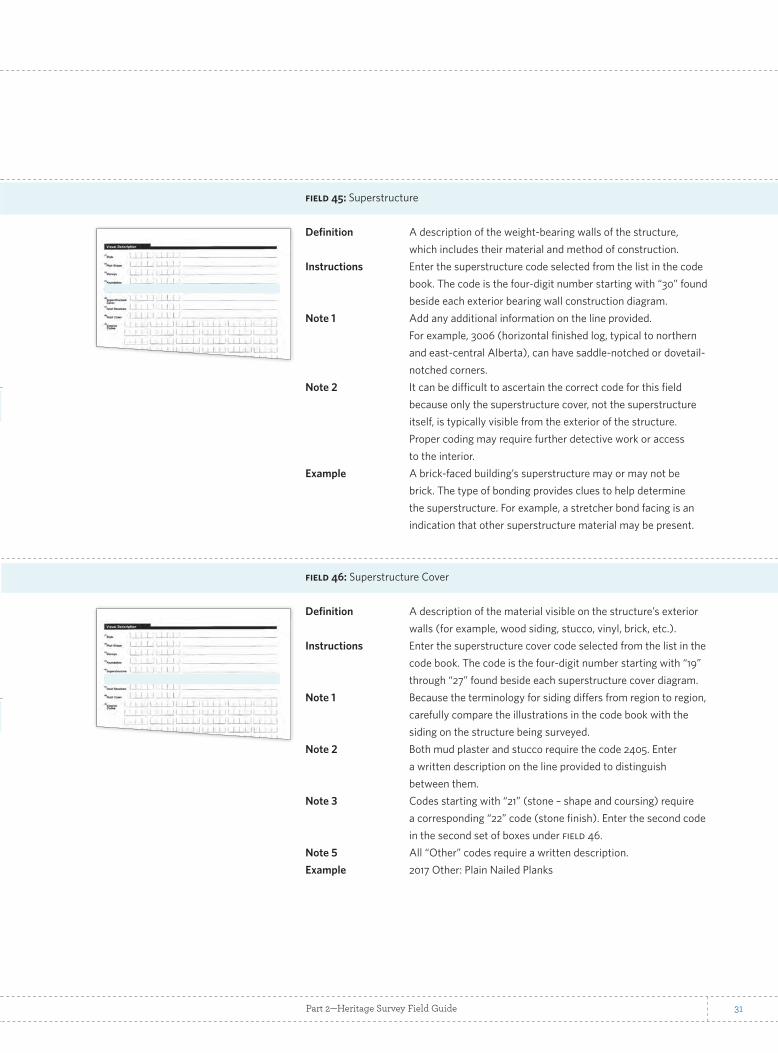
field 45: Superstructure
Definition A description of the weight-bearing walls of the structure,
which includes their material and method of construction.
Instructions Enter the superstructure code selected from the list in the code
book. The code is the four-digit number starting with “30” found
beside each exterior bearing wall construction diagram.
Note 1 Add any additional information on the line provided.
For example, 3006 (horizontal finished log, typical to northern
and east-central Alberta), can have saddle-notched or dovetail-
notched corners.
Note 2 It can be difficult to ascertain the correct code for this field
because only the superstructure cover, not the superstructure
itself, is typically visible from the exterior of the structure.
Proper coding may require further detective work or access
to the interior.
Example A brick-faced building’s superstructure may or may not be
brick. The type of bonding provides clues to help determine
the superstructure. For example, a stretcher bond facing is an
indication that other superstructure material may be present.
field 46: Superstructure Cover
Definition A description of the material visible on the structure’s exterior
walls (for example, wood siding, stucco, vinyl, brick, etc.).
Instructions Enter the superstructure cover code selected from the list in the
code book. The code is the four-digit number starting with “19”
through “27” found beside each superstructure cover diagram.
Note 1 Because the terminology for siding differs from region to region,
carefully compare the illustrations in the code book with the
siding on the structure being surveyed.
Note 2 Both mud plaster and stucco require the code 2405. Enter
a written description on the line provided to distinguish
between them.
Note 3 Codes starting with “21” (stone – shape and coursing) require
a corresponding “22” code (stone finish). Enter the second code
in the second set of boxes under field 46.
Note 5 All “Other” codes require a written description.
Example 2017 Other: Plain Nailed Planks
32 Identifying Historic Places
field 47: Roof Structure
Definition A description of the shape and pitch of the roof of the structure.
Instructions Enter the roof code selected from the list in the code book. The
code is the four-digit number starting with “32” found beside
each roof type diagram.
Additional codes for special roof types are the four-digit codes
starting with “33.” These codes are entered in the second set of
boxes under field 47.
Example 3208 3309 describes a medium hip bellcast roof, where the
eaves flare outward.
Note 1 Gable and hip roofs require a distinction of low, medium
or high pitch.
Note 2 Do not confuse special roof type “gables” with “gabled
dormers.” A dormer with a gabled roof is entered under field 49
(Exterior Codes).
Note 3 A boomtown front is not a roof type. It is included under
field 49: Exterior Codes: Wall Design and Detail.
field 48: Roof Cover
Definition A description of the material that is visible on the roof’s surface.
Instructions Enter the roof cover code selected from the list in the code
book. The code is the four-digit number starting with “34” found
beside each roof cover diagram.
Example 3414 describes a roof covered by wood shingles.
field 49: Exterior Codes
Definition Descriptions of the “form and massing” and additional
architectural features of the structure, including their type,
number, location, etc.
Instructions There are multiple boxes for entering codes from the code book
that describe the characteristics of the structure. These codes
begin with one of the following two-digit sequences: 11, 13, 16, 31,
35–47, and 49–76.
Note 1 Use as many boxes as needed.
Note 2 Use all codes that apply.

33Part 2—Heritage Survey Field Guide
field 49: Exterior Codes (continued)
1101–1109: Massing of Units
Definition A description of the resource’s relationship with surrounding
structures. Is it attached, detached or part of row?
Example 1101 describes a single detached building (typical house,
barn, etc.)
1302–1315: Wings
Definition A description of subsidiary parts of or major additions to a
structure that extend from the main part (not including porches
or verandas).
Example 1304 describes a wing on either side of the main structure.
1610–1639: Bays
Definition A description of the number of major structural openings on
a single floor of a structure (mostly applicable to larger urban,
commercial or institutional structures).
3111–3138: Wall Design and Detail
Definition The design features of the structure.
In Alberta, common features include:
3113 Quoins
3115 Corner Board
3116 Half-timbering
3119 String or Belt Course
3121 Entablature
3129 Date Stones
3130 Decorative Shingle
3131 Decorative Brick
3133 Balcony
3135 Upper-storey Door
3138 Boomtown or False Front
Note Do not confuse code 3122 (Plain Parapet)
with 3138 (Boomtown or False Front).
34 Identifying Historic Places
field 49: Exterior Codes (continued)
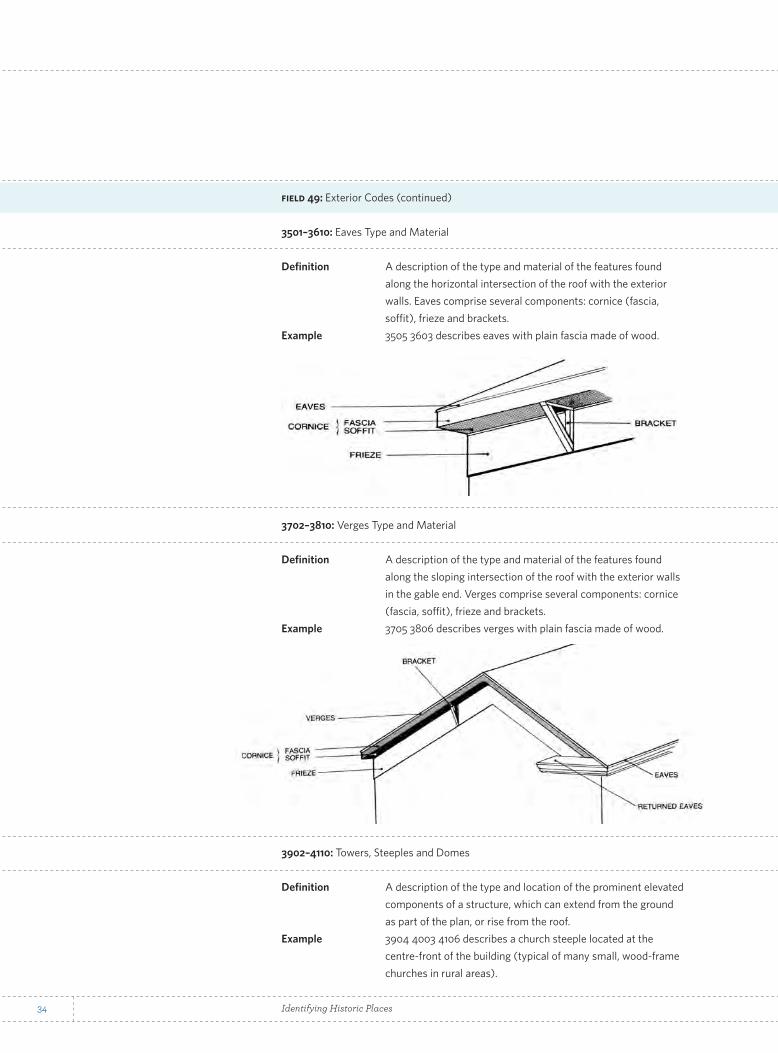
3501–3610: Eaves Type and Material
Definition A description of the type and material of the features found
along the horizontal intersection of the roof with the exterior
walls. Eaves comprise several components: cornice (fascia,
soffit), frieze and brackets.
Example 3505 3603 describes eaves with plain fascia made of wood.
3702–3810: Verges Type and Material
Definition A description of the type and material of the features found
along the sloping intersection of the roof with the exterior walls
in the gable end. Verges comprise several components: cornice
(fascia, soffit), frieze and brackets.
Example 3705 3806 describes verges with plain fascia made of wood.
3902–4110: Towers, Steeples and Domes
Definition A description of the type and location of the prominent elevated
components of a structure, which can extend from the ground
as part of the plan, or rise from the roof.
Example 3904 4003 4106 describes a church steeple located at the
centre-front of the building (typical of many small, wood-frame
churches in rural areas).

35Part 2—Heritage Survey Field Guide
field 49: Exterior Codes (continued)
4202–4223: Dormer Type
Definition A description of a projecting roof feature that has vertical walls
and its own roof.
Example 4204 describes a gabled dormer with returned eaves.
4302–4608: Chimney
Definition A description of the location, material and massing of a
chimney.
Example 4304 4405 4504 4603 describes a chimney located on the
left-rear side of the roof, constructed from brick and with a
single stack.
4702–4713: Roof Trim, Special Features
Definition A description of additional roof features.
In Alberta common features include:
4702 Cupola or Lantern (often on barns)
4703 Balustrade
4704 Finial
4707 Cresting
4709 Monumental Pediment
Note 1 Code a lightning rod or weather vane as 4713 (other).
Note 2 Do not confuse 4706 (spire) with 3904 (steeple).
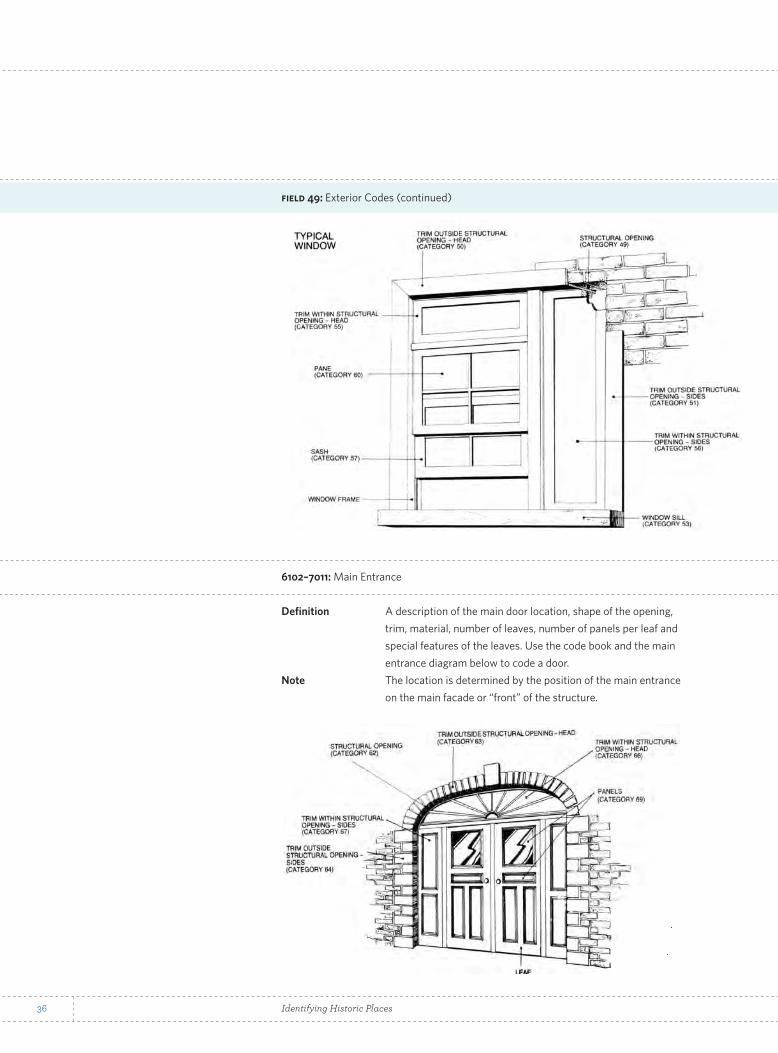
4902–6025: Windows
Definition A description of the typical windows found in the structure:
sills, shape of openings, trim, material, number of sashes,
opening mechanism and pane arrangements. Use the code
book diagrams and the window diagram below to code
a window.
Example 4902 5002 5102 5203 5302 5403 5502 5602 5703 5803 6002
describes a typical wood window frame with plain trim, a plain
slip sill, single or double hung with two sashes, and a pane
arrangement of 2/2.
Note Codes beginning with 59 are used to describe special or unique
windows found in the structure.
36 Identifying Historic Places
6102–7011: Main Entrance
Definition A description of the main door location, shape of the opening,
trim, material, number of leaves, number of panels per leaf and
special features of the leaves. Use the code book and the main
entrance diagram below to code a door.
Note The location is determined by the position of the main entrance
on the main facade or “front” of the structure.
field 49: Exterior Codes (continued)
37Part 2—Heritage Survey Field Guide
7102–7208: Stairs (Exterior Flight of Steps)
Definition A description of the location, design and direction of the main
stairs on the main facade or front of the structure.
Example 7103 7203 describes stairs on the ground floor that have an open
railing with straight steps at the side or parallel with the facade.
7302–7605: Main Porch or Verandah
Definition A description of the type, features and height of a structure’s
porch or verandah.
Example 7306 7413 7504 7601 describes an open verandah with
decorated posts made of wood on the first storey.
Note A porch and verandah differ in the following respects:
A porch is a roofed structure slightly wider than a building’s
main entrance that serves as a shelter for the main door.
A verandah is a roofed structure occupying a considerable
length of a building’s facade that serves as a shelter for the
main door and offers exterior living space.
field 50: Exterior
Definition A written description of the resource, including items that
cannot be represented with codes.
Instructions Concisely list additional features and/or general observations
about the appearance of the resource.
Example Structure is an older farm house. It has an interesting variety of
decorative trim, possibly hand-carved. The doors seem to be
wider than those on neighbouring houses.
field 51: Interior
Definition A written description of a structure’s interior. This field is not
required —consider it a bonus field.
Instructions Concisely list features or general observations about the
appearance of the interior of the structure.
Example This building has original hardwood, brass-fixtured gas
fireplaces (typical of southern Alberta) and wainscoting with
chair rails.
Note This field can be completed with information from the owner or
through a visual inspection.
field 49: Exterior Codes (continued)

38 Identifying Historic Places
field 52: Environment
Definition A written description of a resource’s physical surroundings,
including landscapes and associated structures.
Instructions Concisely list environmental features or general observations
of the surroundings.
Example 1 This store is located on the corner of a busy main street.
Surrounded by modern buildings, it is the only structure
remaining from the period before the 1916 downtown fire.
Example 2 The house is set back approximately 200 metres from the road,
surrounded by old-growth trees. The early site of a garden
on the southwest corner is marked by two rows of caragana
bushes. To the northwest are the associated structures: barn,
granary, shed and original privy.
field 53: Condition
Definition A written description of the fieldworker’s judgment of the
physical condition of the resource at the time of the survey.
Instructions Concisely describe the general condition of the structure,
as judged from outside.
Example This house appears to have been well maintained through
the years, but the roof sags in the centre, the stucco is cracked
and bulging in places, and the chimney has loose bricks.
The foundation is newly painted, and appears sound.
field 54: Alterations
Definition A written description of any apparent alterations to the original
plan, design and materials of the resource.
Instructions Concisely list alterations or general observations regarding
design or materials that are apparent from a visual exterior
inspection or provided by interviews with property owners
or community members.
Example Large addition on south facade of house. Owner reports that
original exterior wall has been removed.
39Part 2—Heritage Survey Field Guide
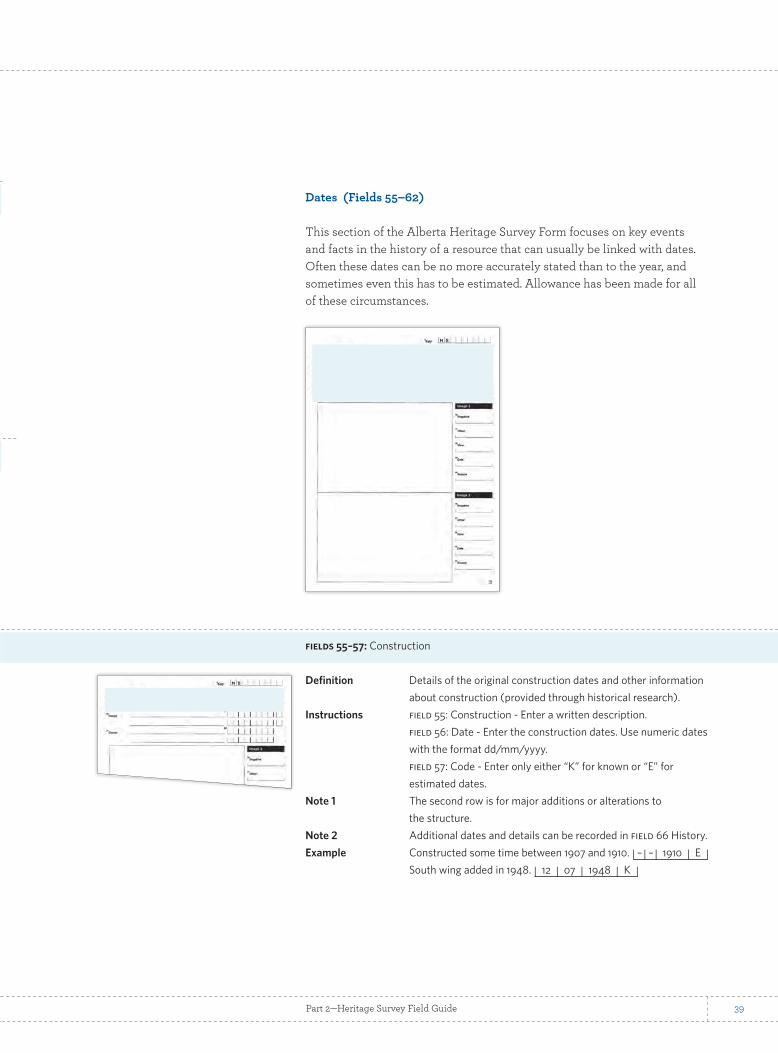
Dates (Fields 55–62)
This section of the Alberta Heritage Survey Form focuses on key events and facts in the history of a resource that can usually be linked with dates. Often these dates can be no more accurately stated than to the year, and sometimes even this has to be estimated. Allowance has been made for all of these circumstances.
fields 55–57: Construction
Definition Details of the original construction dates and other information
about construction (provided through historical research).
Instructions field 55: Construction - Enter a written description.
field 56: Date - Enter the construction dates. Use numeric dates
with the format dd/mm/yyyy.
field 57: Code - Enter only either “K” for known or “E” for
estimated dates.
Note 1 The second row is for major additions or alterations to
the structure.
Note 2 Additional dates and details can be recorded in field 66 History.
Example Constructed some time between 1907 and 1910. | – | – | 1910 | E | South wing added in 1948. | 12 | 07 | 1948 | K |
40 Identifying Historic Places
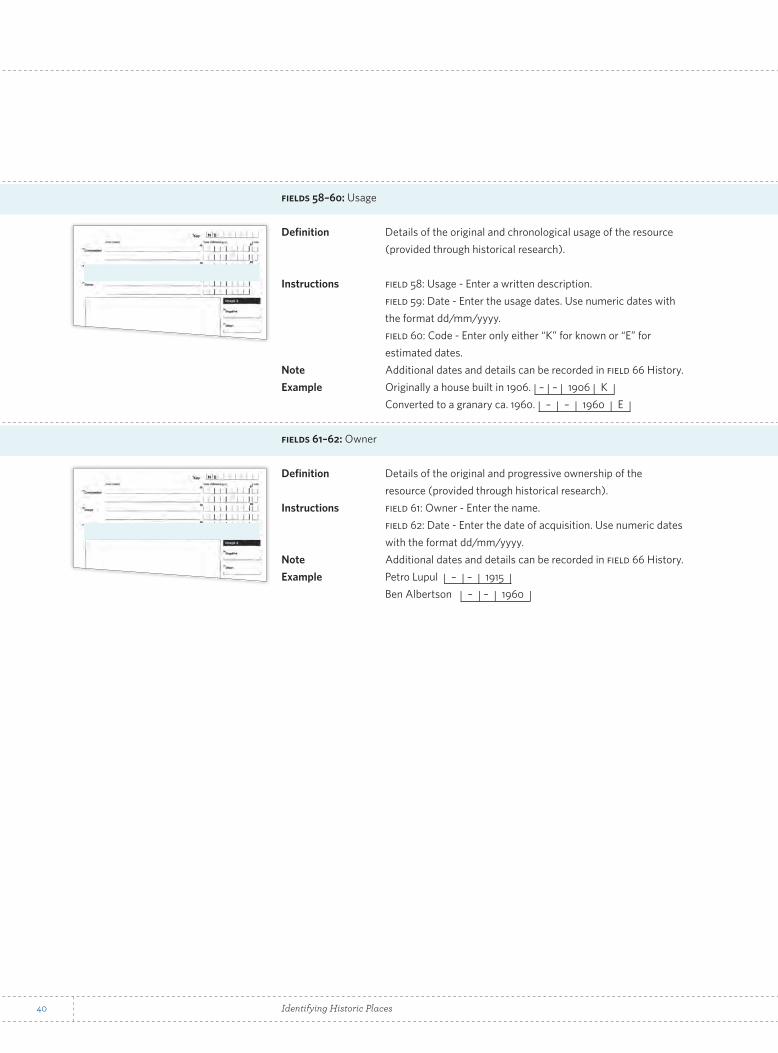
fields 58–60: Usage
Definition Details of the original and chronological usage of the resource
(provided through historical research).
Instructions field 58: Usage - Enter a written description.
field 59: Date - Enter the usage dates. Use numeric dates with
the format dd/mm/yyyy.
field 60: Code - Enter only either “K” for known or “E” for
estimated dates.
Note Additional dates and details can be recorded in field 66 History.
Example Originally a house built in 1906. | – | – | 1906 | K | Converted to a granary ca. 1960. | – | – | 1960 | E |
fields 61–62: Owner
Definition Details of the original and progressive ownership of the
resource (provided through historical research).
Instructions field 61: Owner - Enter the name.
field 62: Date - Enter the date of acquisition. Use numeric dates
with the format dd/mm/yyyy.
Note Additional dates and details can be recorded in field 66 History.
Example Petro Lupul | – | – | 1915 |
Ben Albertson | – | – | 1960 |

41Part 2—Heritage Survey Field Guide
History (Fields 63–69) The Alberta Heritage Survey collects information about the people and events associated with resources, as well as their architectural features. This section of the form focuses on people relating to the design and construction of the resource, as well as providing the opportunity to record general historical information. Information sources are also to be recorded, as is the status of the resource at the time of the survey.
field 63: Architect
Definition The name of the architect and information about his or her
practice (provided through historical research).
Instructions Concisely note the architect’s name and other details
(if known), including any architectural plans.
Examples Vincent Gonella (1890–1940). Gonella was at the beginning of
his career when he designed this structure in 1915. It closely
resembles the three other commercial brick buildings he
designed in town. He also designed two important churches
located in Calgary.
42 Identifying Historic Places
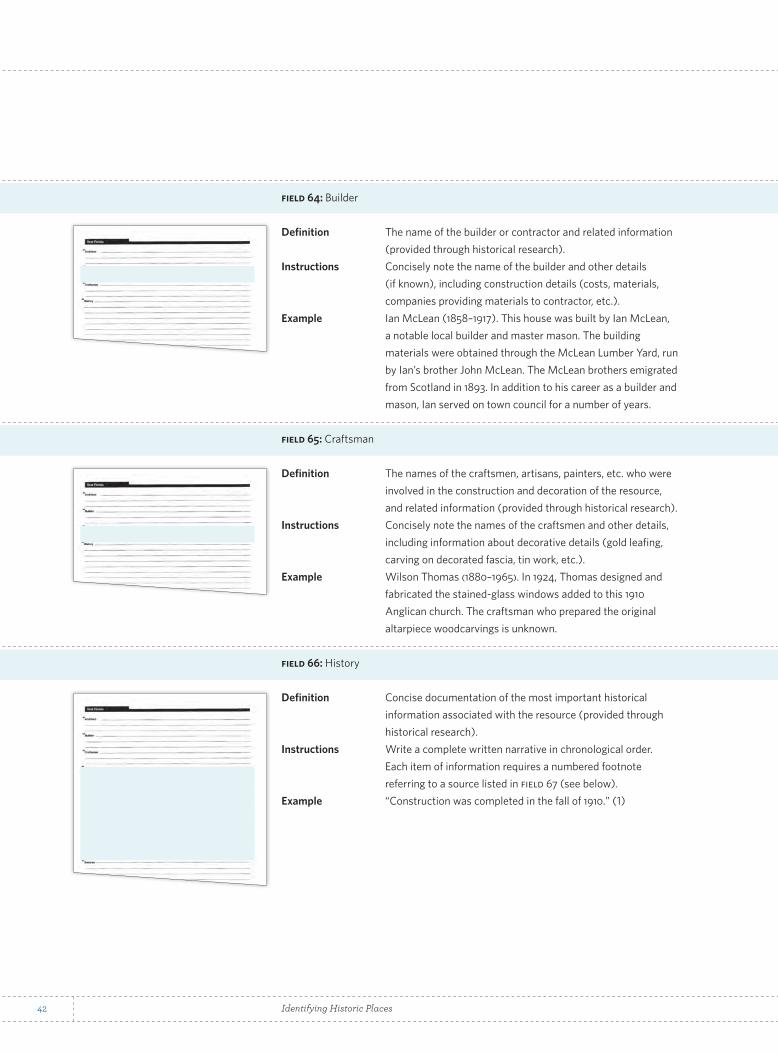
field 64: Builder
Definition The name of the builder or contractor and related information
(provided through historical research).
Instructions Concisely note the name of the builder and other details
(if known), including construction details (costs, materials,
companies providing materials to contractor, etc.).
Example Ian McLean (1858–1917). This house was built by Ian McLean,
a notable local builder and master mason. The building
materials were obtained through the McLean Lumber Yard, run
by Ian’s brother John McLean. The McLean brothers emigrated
from Scotland in 1893. In addition to his career as a builder and
mason, Ian served on town council for a number of years.
field 65: Craftsman
Definition The names of the craftsmen, artisans, painters, etc. who were
involved in the construction and decoration of the resource,
and related information (provided through historical research).
Instructions Concisely note the names of the craftsmen and other details,
including information about decorative details (gold leafing,
carving on decorated fascia, tin work, etc.).
Example Wilson Thomas (1880–1965). In 1924, Thomas designed and
fabricated the stained-glass windows added to this 1910
Anglican church. The craftsman who prepared the original
altarpiece woodcarvings is unknown.
field 66: History
Definition Concise documentation of the most important historical
information associated with the resource (provided through
historical research).
Instructions Write a complete written narrative in chronological order.
Each item of information requires a numbered footnote
referring to a source listed in field 67 (see below).
Example “Construction was completed in the fall of 1910.” (1)
43Part 2—Heritage Survey Field Guide
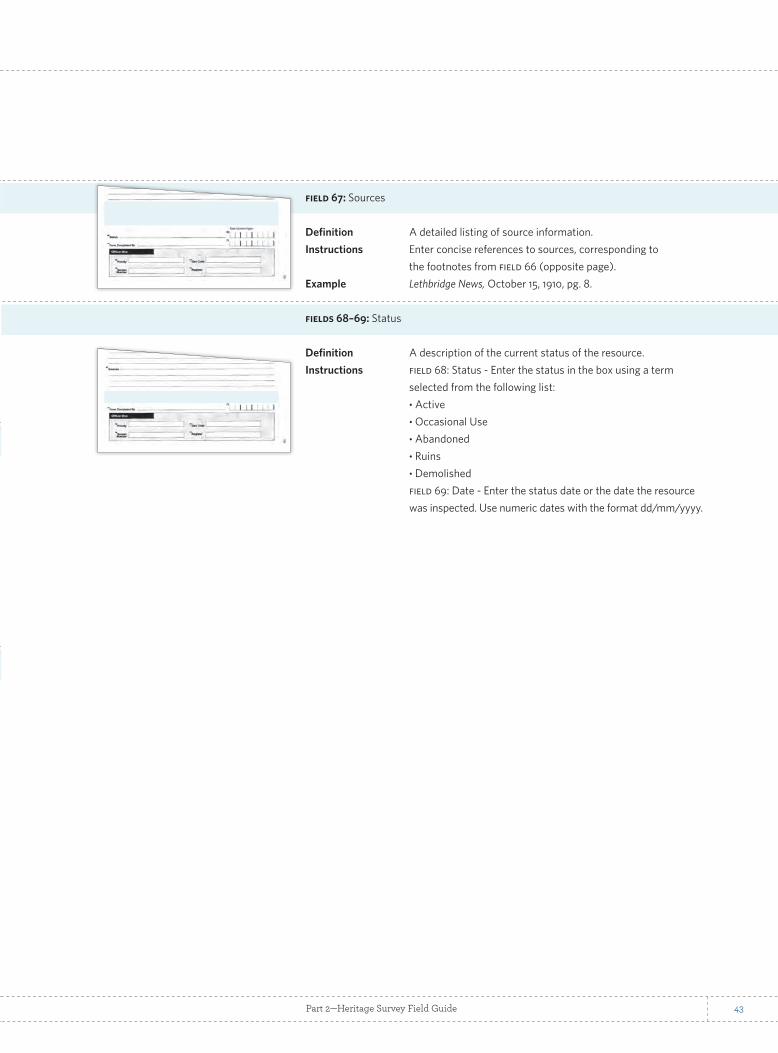
field 67: Sources
Definition A detailed listing of source information.
Instructions Enter concise references to sources, corresponding to
the footnotes from field 66 (opposite page).
Example Lethbridge News, October 15, 1910, pg. 8.
fields 68–69: Status
Definition A description of the current status of the resource.
Instructions field 68: Status - Enter the status in the box using a term
selected from the following list:
• Active
• Occasional Use
• Abandoned
• Ruins
• Demolished
field 69: Date - Enter the status date or the date the resource
was inspected. Use numeric dates with the format dd/mm/yyyy.
44 Identifying Historic Places
Record information (Fields 70–75)
This section of the Alberta Heritage Survey Form provides information on who completed the form and also links the resource with records in other databases.
field 70–71: Form Completed by
Definition The name of the person who completed the survey form.
Instructions field 70: Form Completed By - Print the name in the box
provided.
field 69: Date - Enter the form completion date. Use numeric
dates with the format dd/mm/yyyy.
fields 72–75: Office Use
Definition Fields for use by staff working with the Alberta Heritage
Survey database.
Instructions Leave all fields blank.
45Part 2—Heritage Survey Field Guide
Wrapping UpA completed municipal heritage survey is a valuable resource for heritage planners, historians, and interested members of the public. A great deal of effort is put into the creation of this documentation, so it is worthwhile safeguarding it once the project is complete.
Heritage Survey documentation
The heritage survey documentation is all the survey forms (with attached photographs) and all subordinate information and materials such as maps, additional photographs, research files, methodology and bibliography produced in the course of conducting the heritage survey. All of this information forms a lasting record of the resources researched and documented by the heritage survey project.
Two copies of this documentation are created, one for the municipality and one for the Alberta Heritage Survey Program of the provincial government.
Municipal copy of the Heritage Survey documentation
The heritage survey documentation retained by the municipality will consist of:
• photocopiedsurveyformswithprintsattached• historicalresearchmaterials• maps• projectrecords• finalreport• bibliography
for details of what and how to
submit the survey documentation
to the heritage survey program,
see pages 33-37 of Identifying Historic
Places: Part 1—Conducting a Municipal
Heritage Survey.
46 Identifying Historic Places
Storing the Heritage Survey documentation
Adequate space is needed to store the municipality’s copy of the heritage survey documentation. Access is a key issue in choosing a storage space: ensure that the documents are maintained as a dynamic, usable resource and research tool.
Keep all parts of the heritage survey documentation together to ensure that their whereabouts can be monitored and their condition maintained.
File and store photocopied survey forms with attached photographs in clearly labelled binders – typically ordered by municipal address or legal description.
File attachments (previous survey forms, additional photographs, additional research, etc.) in the binder behind its associated current survey form.
Place additional materials (maps, methodology, final report, bibliography, etc.) at the front of the first binder or file them in a separate binder.
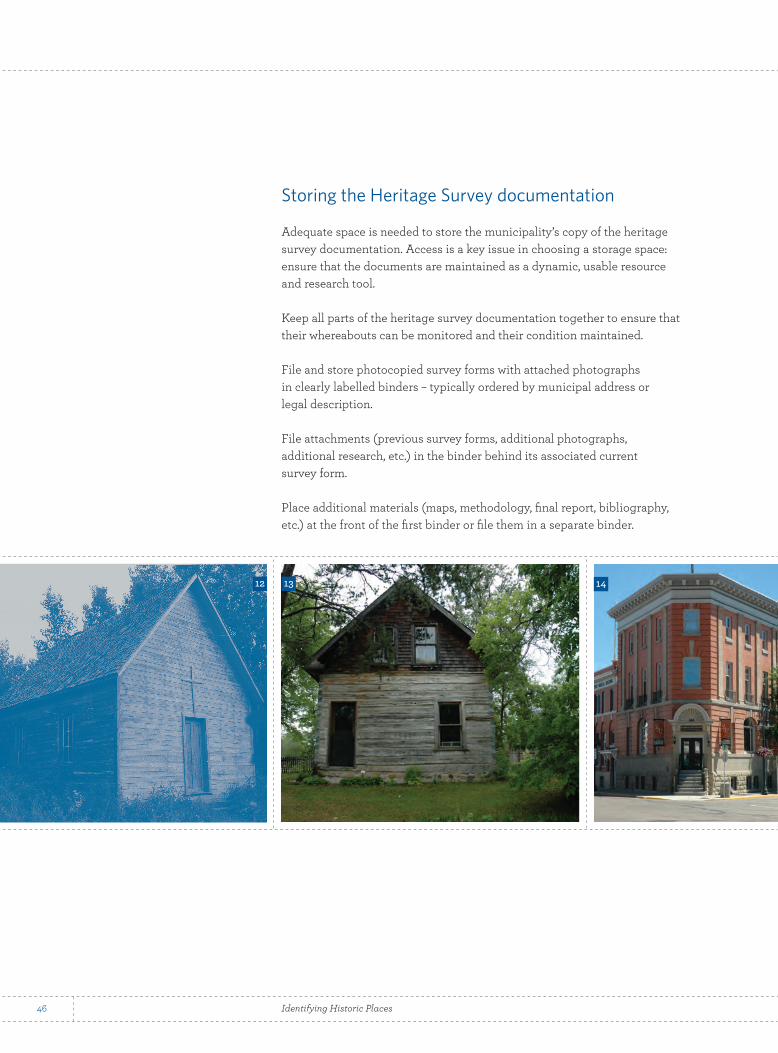
12 13 14
47Part 2—Heritage Survey Field Guide
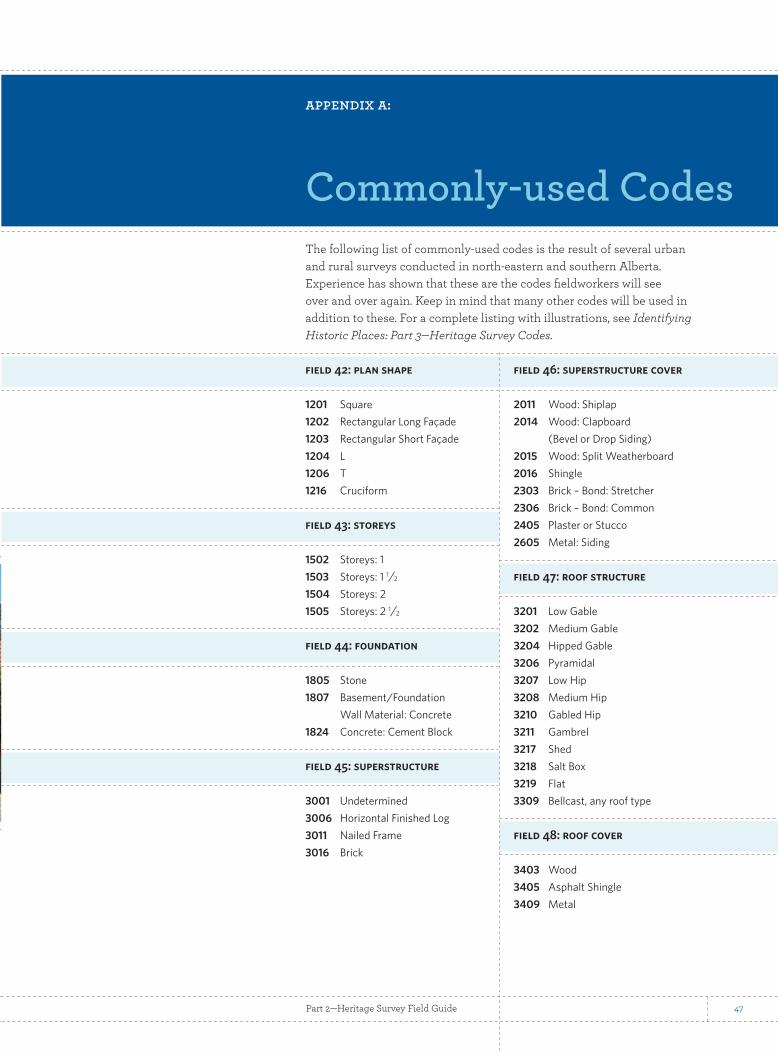
The following list of commonly-used codes is the result of several urban and rural surveys conducted in north-eastern and southern Alberta. Experience has shown that these are the codes fieldworkers will see over and over again. Keep in mind that many other codes will be used in addition to these. For a complete listing with illustrations, see Identifying Historic Places: Part 3—Heritage Survey Codes.
field 42: plan shape
1201 Square
1202 Rectangular Long Façade
1203 Rectangular Short Façade
1204 L
1206 T
1216 Cruciform
field 43: storeys
1502 Storeys: 1
1503 Storeys: 1 1⁄2
1504 Storeys: 2
1505 Storeys: 2 1⁄2
field 44: foundation
1805 Stone
1807 Basement/Foundation
Wall Material: Concrete
1824 Concrete: Cement Block
field 45: superstructure
3001 Undetermined
3006 Horizontal Finished Log
3011 Nailed Frame
3016 Brick
field 46: superstructure cover
2011 Wood: Shiplap
2014 Wood: Clapboard
(Bevel or Drop Siding)
2015 Wood: Split Weatherboard
2016 Shingle
2303 Brick – Bond: Stretcher
2306 Brick – Bond: Common
2405 Plaster or Stucco
2605 Metal: Siding
field 47: roof structure
3201 Low Gable
3202 Medium Gable
3204 Hipped Gable
3206 Pyramidal
3207 Low Hip
3208 Medium Hip
3210 Gabled Hip
3211 Gambrel
3217 Shed
3218 Salt Box
3219 Flat
3309 Bellcast, any roof type
field 48: roof cover
3403 Wood
3405 Asphalt Shingle
3409 Metal
Commonly-used Codes
appendix a:
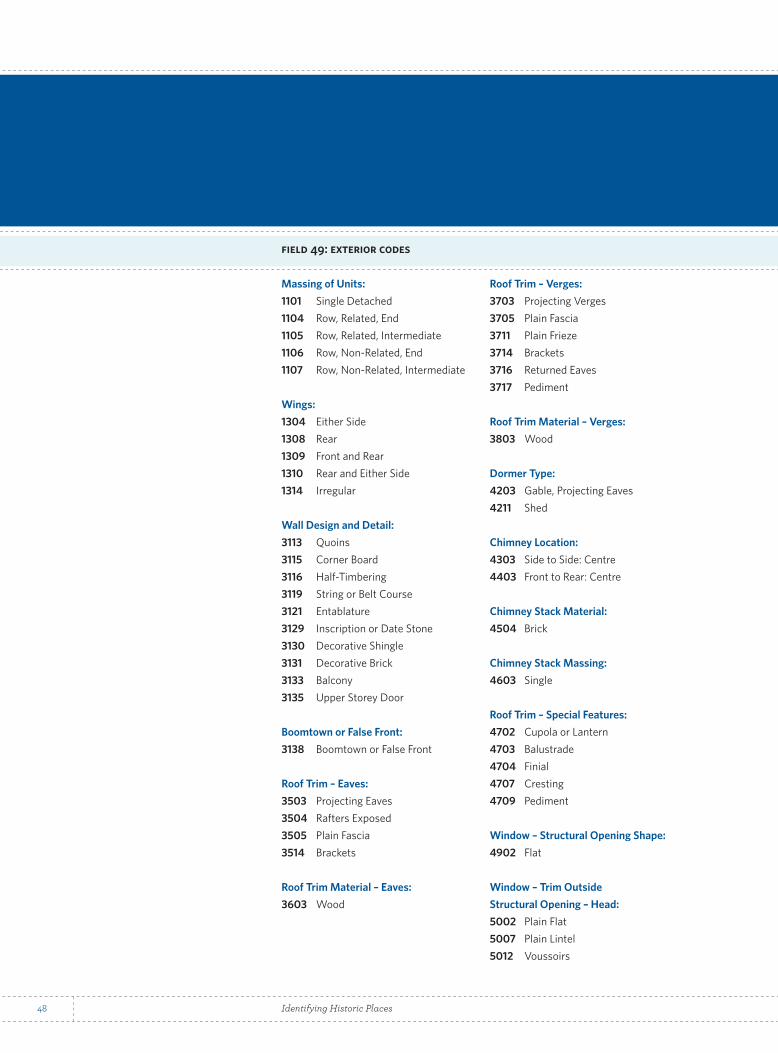
48 Identifying Historic Places
Roof Trim – Verges:
3703 Projecting Verges
3705 Plain Fascia
3711 Plain Frieze
3714 Brackets
3716 Returned Eaves
3717 Pediment
Roof Trim Material – Verges:
3803 Wood
Dormer Type:
4203 Gable, Projecting Eaves
4211 Shed
Chimney Location:
4303 Side to Side: Centre
4403 Front to Rear: Centre
Chimney Stack Material:
4504 Brick
Chimney Stack Massing:
4603 Single
Roof Trim – Special Features:
4702 Cupola or Lantern
4703 Balustrade
4704 Finial
4707 Cresting
4709 Pediment
Window – Structural Opening Shape:
4902 Flat
Window – Trim Outside
Structural Opening – Head:
5002 Plain Flat
5007 Plain Lintel
5012 Voussoirs
field 49: exterior codes
Massing of Units:
1101 Single Detached
1104 Row, Related, End
1105 Row, Related, Intermediate
1106 Row, Non-Related, End
1107 Row, Non-Related, Intermediate
Wings:
1304 Either Side
1308 Rear
1309 Front and Rear
1310 Rear and Either Side
1314 Irregular
Wall Design and Detail:
3113 Quoins
3115 Corner Board
3116 Half-Timbering
3119 String or Belt Course
3121 Entablature
3129 Inscription or Date Stone
3130 Decorative Shingle
3131 Decorative Brick
3133 Balcony
3135 Upper Storey Door
Boomtown or False Front:
3138 Boomtown or False Front
Roof Trim – Eaves:
3503 Projecting Eaves
3504 Rafters Exposed
3505 Plain Fascia
3514 Brackets
Roof Trim Material – Eaves:
3603 Wood

49Part 2—Heritage Survey Field Guide
Window – Trim Outside
Structural Opening – Sides:
5102 Plain
Window – Trim Outside
Structural Opening – Material:
5203 Wood
5204 Stone
Window – Sill Type:
5302 Plain Slip Sill
5305 Plain Lug Sill
Window – Sill Material:
5403 Wood
5404 Stone
Window – Trim Within
Structural Opening – Head:
5502 Plain
Window – Number of Sashes:
5703 Two, Double Hung
Window – Opening Mechanism:
5803 Single or Double Hung
Window – Special Types:
5909 Diamond
5918 Bay, Bow or Oriel
5919 Bay or Bow, 2 or More Storeys
5922 Stained Glass
5923 Blind
Window – Pane Arrangements:
6025 Other
Main Entrance – Location:
6102 Centre (Facade)
Main Entrance –
Structural Opening Shape:
6202 Flat
Main Entrance – Trim Outside
Structural Opening – Head:
6302 Plain Flat
6312 Voussoirs
6323 Flat Hood,
With or without Brackets
6324 Shaped hood,
with or without brackets
Main Entrance – Trim Outside
Structural Opening Material:
6503 Wood
Main Entrance – Trim Within
Structural Opening – Head:
6605 Flat Transom, Blind
6606 Flat Transom, Single Light
6607 Flat Transom, Multiple Lights
Main Entrance – Trim Within
Structural Opening – Sides:
6702 Plain
Main Entrance – Number of Leaves:
6801 One
Main Entrance –
Number of Panels Per Leaf:
6902 Two
6903 Three
Main Entrance – Leaves –
Special Feature:
7008 Glass
Main Stairs – Location and Design:
7102 First or Ground Floor,
Without Railing
7103 First or Ground Floor,
Open Railing
7104 First or Ground Floor,
Closed Railing
Main Stairs – Direction:
7202 Straight
7203 Straight Side
Main Porch – Type:
7303 Recess
7304 Open Porch
7305 Closed Porch
7306 Open Verandah
7307 Closed Verandah
Main Porch – Special Features:
7402 Posts
7404 Piers
7413 Decorated
Main Porch – Material:
7503 Wood
Main Porch – Height:
7601 First Storey
50 Identifying Historic Places
Further ReadingDoherty, E.A. Residential Construction Practices In Alberta 1900–1971. Edmonton: Alberta Municipal Affairs, 1984.
Henry, Les. Catalogue Houses: Eaton’s and Others. Saskatoon: Henry Perspectives, 2000.
Kalman, Harold. A History of Canadian Architecture. Don Mills: Oxford University Press, 2000.
McAlester, Virginia, and Lee McAlester. A Field Guide to American Houses. NewYork:AlfredA.Knopf,2000.
Mills, G.E. Buying Wood and Building Farms: Marketing Lumber and Building Designs on the Canadian Prairies.Ottawa:NationalHistoricSites,Parks Service, Environment Canada, 1991.
Nelson,LeeH.Architectural Character Identifying the Visual Aspect of Historic Buildings as an Aid to Preserving Their Character. Preservation BriefNo.17.WashingtonD.C:NationalParkService,U.S.Departmentof the Interior, 1988.
O’Donnell, Eleanor. Researching A Historic Property.NationalRegisterBulletin#39.WashingtonD.C:NationalParkService,U.S.Department of the Interior, 1998.
Wetherell, Donald G. “How to Research Historic Houses,” Heritage Notes, Number10.Edmonton:AlbertaHistoricalResourcesDivision,AlbertaCommunity Development, 1994.
Wetherell, Donald G., and Irene Kmet. Homes in Alberta. Building Trends and Designs. Edmonton: University of Alberta Press / Alberta Culture and Multiculturalism / Alberta Municipal Affairs, 1991.
Wright, Janet. “How to Research and Evaluate Government and Commercial Buildings.” Heritage Notes,Number9.Edmonton:AlbertaHistorical Resources Division, Alberta Community Development, 1994.
appendix b:

51Part 2—Heritage Survey Field Guide
Archives in Alberta For details on about locations, hours and holdings at these and other Alberta archives, go to www.archivesalberta.org.
Athabasca Archives, Athabasca 780–675–2735
Canadian Architectural Archives, Calgary 403–220–7420 / 403–220–7662
City of Edmonton Archives, Edmonton 780–496–8718
City of Wetaskiwin Archives, Wetaskiwin 780–361–4423
Edson Public Library and Archives, Edson 780–723–6691
Glenbow Archives and Library, Calgary 403–268–4204
Grande Prairie Regional Archives, Grande Prairie 780–532–5482
Jasper–YellowheadMuseum and Archives, Jasper 780– 852–3013
Medicine Hat Museum and Art Gallery, Medicine Hat 403–502–8580
Millet and District Museum and Archives, Millet 780–387–5558
Musée Heritage Museum, St. Albert 780–459–1528
Pincher Creek and District Historical Society, Pincher Creek 403–627–3684 / 403–627–3817
Provincial Archives of Alberta, Edmonton 780–427–1750
Red Deer and District Archives, Red Deer 403–309–8403
Sir Alexander Galt Museum and Archives, Lethbridge 403–329–7302
Town of Okotoks Archives, Okotoks 403–938–8969
Ukrainian Canadian Archives and Museum of Alberta, Edmonton 780–424–0562
United Church of Canada Alberta andNorthwestConferenceArchives, at the Provincial Archives of Alberta, Edmonton 780–427–8687
University of Calgary Library Special Collections, Calgary 403–220–5972
appendix c:
52 Identifying Historic Places
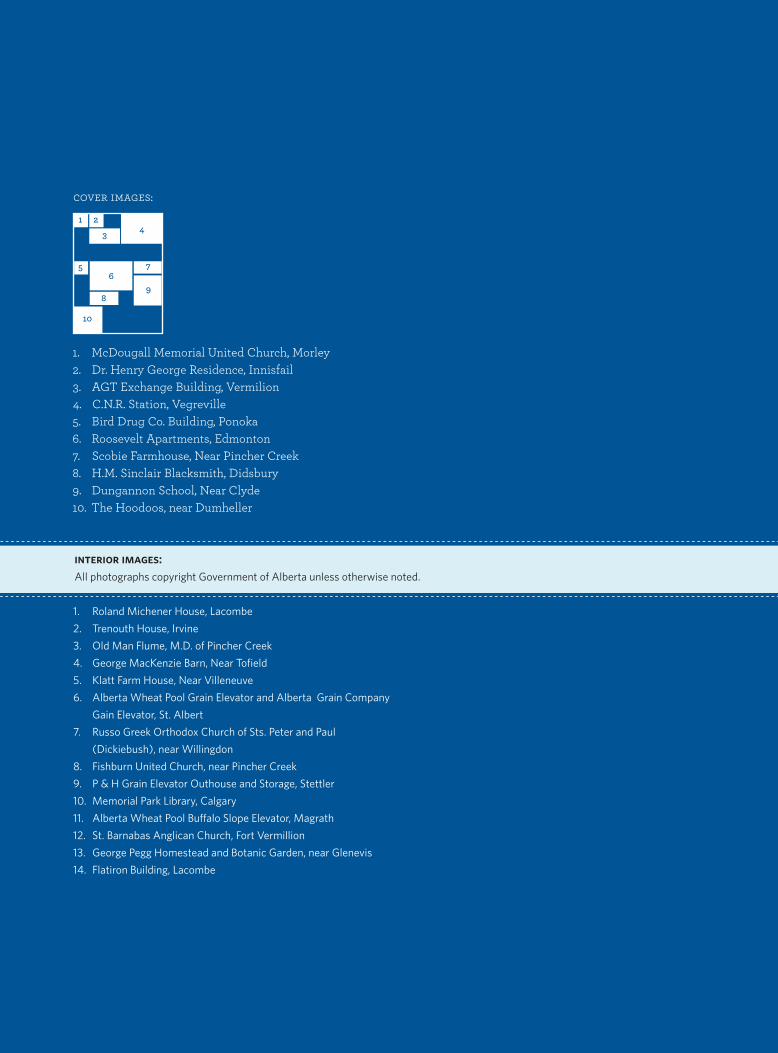
cover images:
1
56
7
89
10
2
34
1. Roland Michener House, Lacombe
2. Trenouth House, Irvine
3. Old Man Flume, M.D. of Pincher Creek
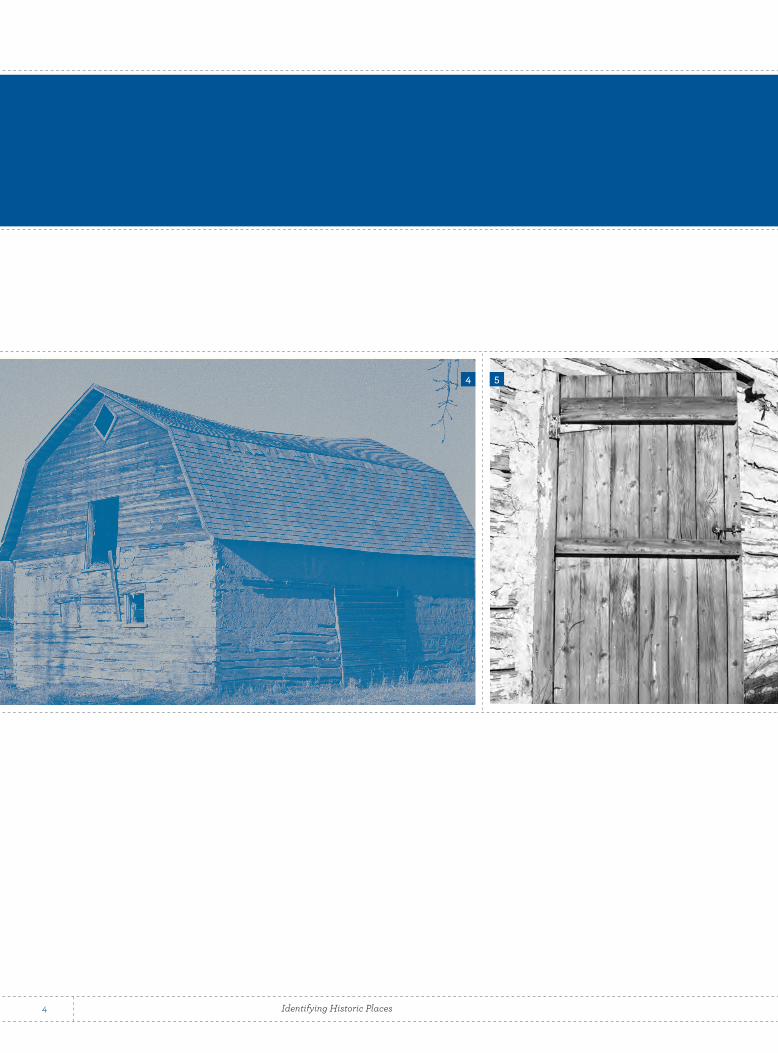
4. George MacKenzie Barn, Near Tofield
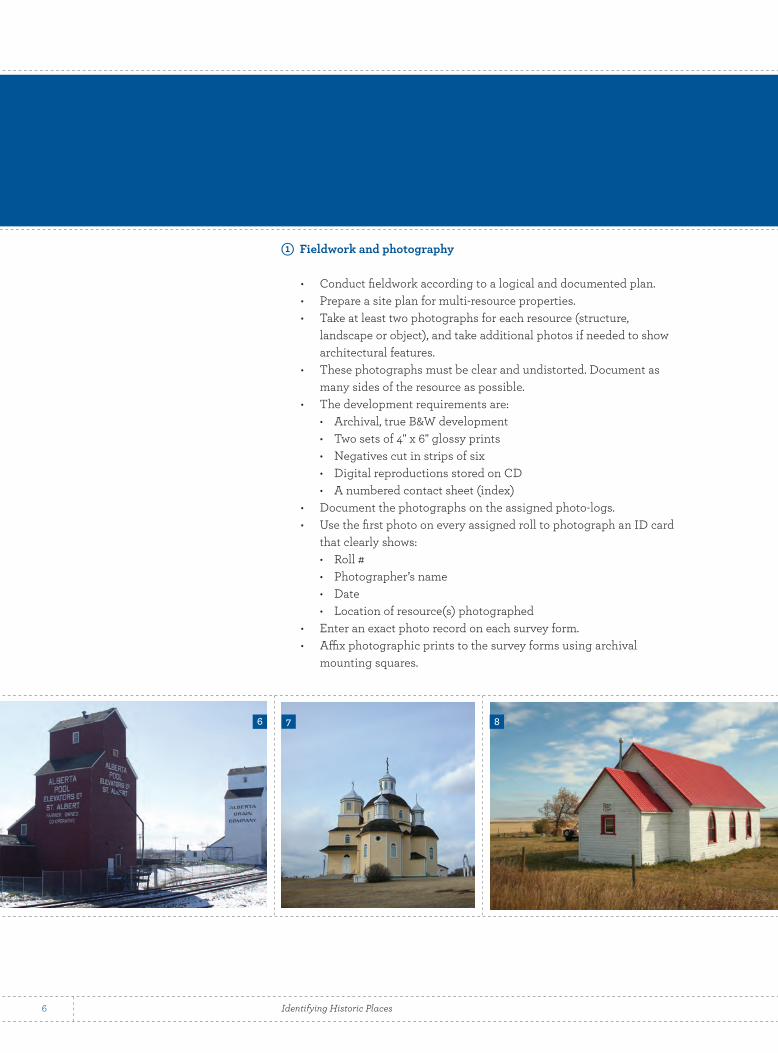
5. Klatt Farm House, Near Villeneuve
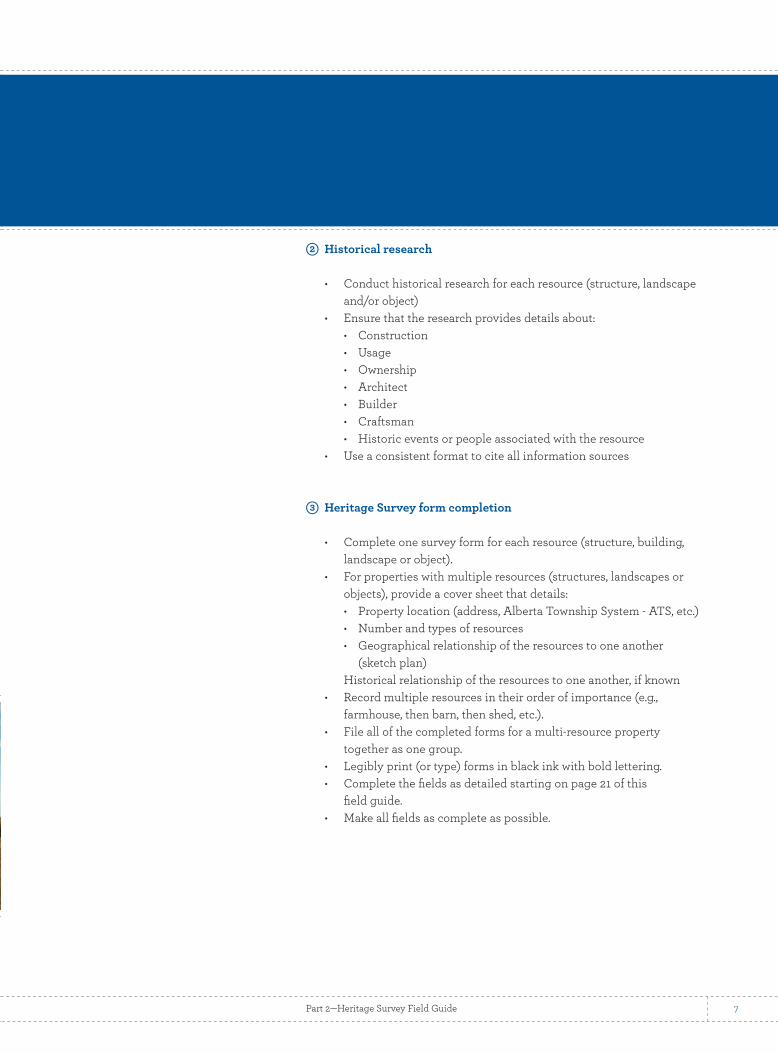
6. Alberta Wheat Pool Grain Elevator and Alberta Grain Company
Gain Elevator, St. Albert
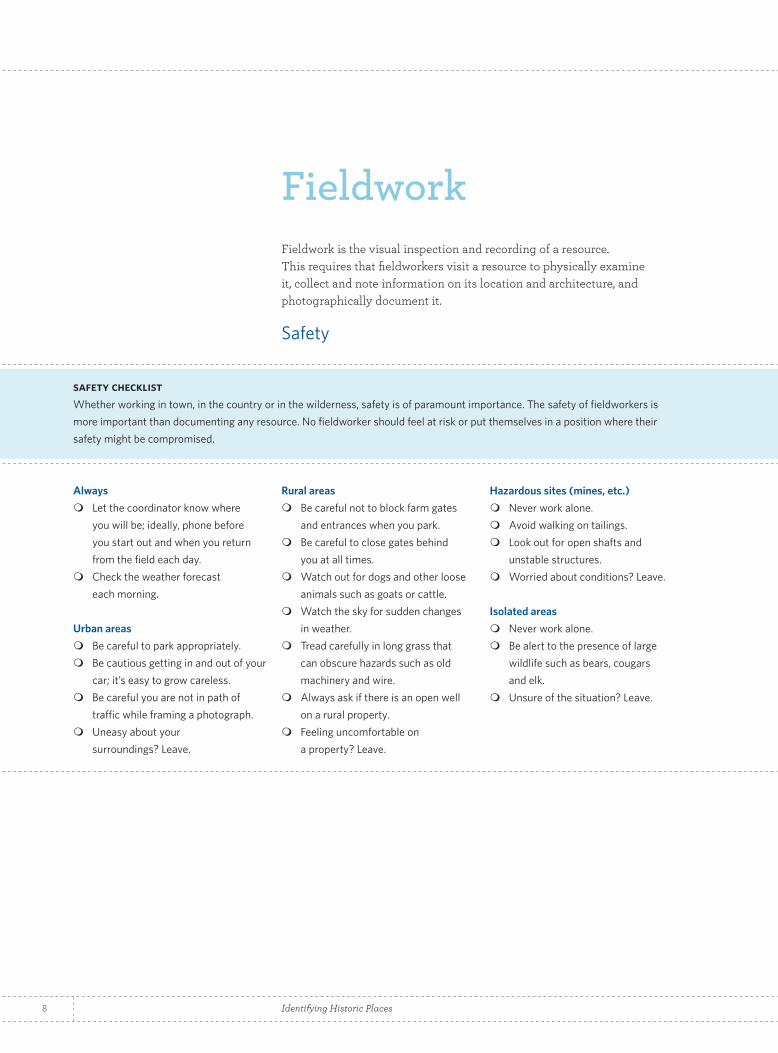
7. Russo Greek Orthodox Church of Sts. Peter and Paul
(Dickiebush), near Willingdon
8. Fishburn United Church, near Pincher Creek
9. P & H Grain Elevator Outhouse and Storage, Stettler
10. Memorial Park Library, Calgary
11. Alberta Wheat Pool Buffalo Slope Elevator, Magrath
12. St. Barnabas Anglican Church, Fort Vermillion
13. George Pegg Homestead and Botanic Garden, near Glenevis
14. Flatiron Building, Lacombe
interior images:All photographs copyright Government of Alberta unless otherwise noted.