Embed Size (px)
Citation preview

Lotus® Team Workplace
Developer's Guide
Version
6.5.1
���
G210-1657-00
Disclaimer
THE INFORMATION CONTAINED IN THIS DOCUMENTATION IS PROVIDED FOR INFORMATIONAL PURPOSES ONLY. WHILE EFFORTS WERE MADE TO VERIFY THE COMPLETENESS AND ACCURACY OF THE INFORMATION CONTAINED IN THIS DOCUMENTATION, IT IS PROVIDED “AS IS” WITHOUT WARRANTY OF ANY KIND, EXPRESS OR IMPLIED. IN ADDITION, THIS INFORMATION IS BASED ON IBM’S CURRENT PRODUCT PLANS AND STRATEGY, WHICH ARE SUBJECT TO CHANGE BY IBM WITHOUT NOTICE. IBM SHALL NOT BE RESPONSIBLE FOR ANY DAMAGES ARISING OUT OF THE USE OF, OR OTHERWISE RELATED TO, THIS DOCUMENTATION OR ANY OTHER DOCUMENTATION. NOTHING CONTAINED IN THIS DOCUMENTATION IS INTENDED TO, NOR SHALL HAVE THE EFFECT OF, CREATING ANY WARRANTIES OR REPRESENTATIONS FROM IBM (OR ITS SUPPLIERS OR LICENSORS), OR ALTERING THE TERMS AND CONDITIONS OF THE APPLICABLE LICENSE AGREEMENT GOVERNING THE USE OF IBM SOFTWARE.
Licensed Materials - Property of IBM
©Copyright IBM Corporation 1999 - 2004 All rights reserved.
US Government Users Restricted Rights - Use, duplication or disclosure restricted by GS ADP Schedule Contract with IBM Corp.
Lotus Software IBM Software Group One Rogers Street Cambridge, MA 02142
List of Trademarks
IBM, the IBM logo, AIX, Domino, Domino Designer, iSeries, Lotus, Lotus Notes, and QuickPlace are trademarks or registered trademarks of International Business Machines Corporation in the United States, other countries, or both.
Microsoft and Windows are registered trademarks of Microsoft Corporation in the United States, other countries, or both.
UNIX is a registered trademark of The Open Group in the United States and other countries.
Java and all Java-based trademarks and logos are trademarks or registered trademarks of Sun Microsystems, Inc. in the United States, other countries, or both.
Other company, product, or service names may be trademarks or service marks of others.
Contents
1 Team Workplace Development Overview . . . . . . . . . . . . . . . . . . . . . . . . . . . . . . 1
What's new in release 6.5.1? . . . . . . . . . . . . . . . . . . . . . . . . . . . . . . . . . . . . . . . . . . . . . . . 1
Development overview . . . . . . . . . . . . . . . . . . . . . . . . . . . . . . . . . . . . . . . . . . . . . . . . . . . . 1
Architecture overview . . . . . . . . . . . . . . . . . . . . . . . . . . . . . . . . . . . . . . . . . . . . . . . . . . . . 2
Creating places with templates and databases . . . . . . . . . . . . . . . . . . . . . . . . . . . . . . . . . . 3
Setting a timezone for places . . . . . . . . . . . . . . . . . . . . . . . . . . . . . . . . . . . . . . . . . . . . . 5
2 Creating and Customizing Place Objects . . . . . . . . . . . . . . . . . . . . . . . . . . . . . . 9
Customizing and creating objects with Notes and Domino Designer . . . . . . . . . . . . . . . . . . . . . . . 9
Finding a place's version . . . . . . . . . . . . . . . . . . . . . . . . . . . . . . . . . . . . . . . . . . . . . . . 10
3 Accessing the Team Workplace Java API . . . . . . . . . . . . . . . . . . . . . . . . . . . . . 13
The Team Workplace Java API . . . . . . . . . . . . . . . . . . . . . . . . . . . . . . . . . . . . . . . . . . . . . 13
Setting up the Team Workplace server to access the API . . . . . . . . . . . . . . . . . . . . . . . . . . 13
Accessing the API from the command line . . . . . . . . . . . . . . . . . . . . . . . . . . . . . . . . . . . . 14
Accessing the API from a Java program . . . . . . . . . . . . . . . . . . . . . . . . . . . . . . . . . . . . . 15
Accessing the API using a QPTool command . . . . . . . . . . . . . . . . . . . . . . . . . . . . . . . . . . 18
XML details . . . . . . . . . . . . . . . . . . . . . . . . . . . . . . . . . . . . . . . . . . . . . . . . . . . . . . . . . . 19
The service node . . . . . . . . . . . . . . . . . . . . . . . . . . . . . . . . . . . . . . . . . . . . . . . . . . . . 22
query (service) . . . . . . . . . . . . . . . . . . . . . . . . . . . . . . . . . . . . . . . . . . . . . . . . . . . . . . 23
search (service) . . . . . . . . . . . . . . . . . . . . . . . . . . . . . . . . . . . . . . . . . . . . . . . . . . . . . 24
Full-text query syntax . . . . . . . . . . . . . . . . . . . . . . . . . . . . . . . . . . . . . . . . . . . . . . . . . . 28
The server node . . . . . . . . . . . . . . . . . . . . . . . . . . . . . . . . . . . . . . . . . . . . . . . . . . . . . 31
getPlaceTypes (server) . . . . . . . . . . . . . . . . . . . . . . . . . . . . . . . . . . . . . . . . . . . . . . . . 32
The place node . . . . . . . . . . . . . . . . . . . . . . . . . . . . . . . . . . . . . . . . . . . . . . . . . . . . . 33
create (place) . . . . . . . . . . . . . . . . . . . . . . . . . . . . . . . . . . . . . . . . . . . . . . . . . . . . . . 36
remove (place) . . . . . . . . . . . . . . . . . . . . . . . . . . . . . . . . . . . . . . . . . . . . . . . . . . . . . . 38
forceRemove (place) . . . . . . . . . . . . . . . . . . . . . . . . . . . . . . . . . . . . . . . . . . . . . . . . . . 39
update (place) . . . . . . . . . . . . . . . . . . . . . . . . . . . . . . . . . . . . . . . . . . . . . . . . . . . . . . 41
The placetype node . . . . . . . . . . . . . . . . . . . . . . . . . . . . . . . . . . . . . . . . . . . . . . . . . . . 42
The person node . . . . . . . . . . . . . . . . . . . . . . . . . . . . . . . . . . . . . . . . . . . . . . . . . . . . 44
iii
add (person) . . . . . . . . . . . . . . . . . . . . . . . . . . . . . . . . . . . . . . . . . . . . . . . . . . . . . . . 50
remove (person) . . . . . . . . . . . . . . . . . . . . . . . . . . . . . . . . . . . . . . . . . . . . . . . . . . . . . 52
update (person) . . . . . . . . . . . . . . . . . . . . . . . . . . . . . . . . . . . . . . . . . . . . . . . . . . . . . 55
The group node . . . . . . . . . . . . . . . . . . . . . . . . . . . . . . . . . . . . . . . . . . . . . . . . . . . . . 58
add (group) . . . . . . . . . . . . . . . . . . . . . . . . . . . . . . . . . . . . . . . . . . . . . . . . . . . . . . . . 59
remove (group) . . . . . . . . . . . . . . . . . . . . . . . . . . . . . . . . . . . . . . . . . . . . . . . . . . . . . 60
update (group) . . . . . . . . . . . . . . . . . . . . . . . . . . . . . . . . . . . . . . . . . . . . . . . . . . . . . . 62
The member node . . . . . . . . . . . . . . . . . . . . . . . . . . . . . . . . . . . . . . . . . . . . . . . . . . . 63
add (member) . . . . . . . . . . . . . . . . . . . . . . . . . . . . . . . . . . . . . . . . . . . . . . . . . . . . . . 65
remove (member) . . . . . . . . . . . . . . . . . . . . . . . . . . . . . . . . . . . . . . . . . . . . . . . . . . . . 69
4 Automating Tasks with PlaceBots . . . . . . . . . . . . . . . . . . . . . . . . . . . . . . . . . . . 73
PlaceBots . . . . . . . . . . . . . . . . . . . . . . . . . . . . . . . . . . . . . . . . . . . . . . . . . . . . . . . . . . . 73
Creating Java PlaceBots . . . . . . . . . . . . . . . . . . . . . . . . . . . . . . . . . . . . . . . . . . . . . . . 73
Creating LotusScript PlaceBots . . . . . . . . . . . . . . . . . . . . . . . . . . . . . . . . . . . . . . . . . . . 76
Creating a PlaceBot . . . . . . . . . . . . . . . . . . . . . . . . . . . . . . . . . . . . . . . . . . . . . . . . . . 77
Running a PlaceBot . . . . . . . . . . . . . . . . . . . . . . . . . . . . . . . . . . . . . . . . . . . . . . . . . . 77
Using the PlaceBot log . . . . . . . . . . . . . . . . . . . . . . . . . . . . . . . . . . . . . . . . . . . . . . . . . 79
Debugging a PlaceBot . . . . . . . . . . . . . . . . . . . . . . . . . . . . . . . . . . . . . . . . . . . . . . . . . 79
Copying a PlaceBot . . . . . . . . . . . . . . . . . . . . . . . . . . . . . . . . . . . . . . . . . . . . . . . . . . . 80
Deleting a PlaceBot . . . . . . . . . . . . . . . . . . . . . . . . . . . . . . . . . . . . . . . . . . . . . . . . . . . 80
Editing a PlaceBot . . . . . . . . . . . . . . . . . . . . . . . . . . . . . . . . . . . . . . . . . . . . . . . . . . . 80
Disabling PlaceBots for security . . . . . . . . . . . . . . . . . . . . . . . . . . . . . . . . . . . . . . . . . . . 80
Running PlaceBots offline . . . . . . . . . . . . . . . . . . . . . . . . . . . . . . . . . . . . . . . . . . . . . . . 81
5 Customizing the Look and Layout of a Place . . . . . . . . . . . . . . . . . . . . . . . . . . 83
Customizing the theme of a place . . . . . . . . . . . . . . . . . . . . . . . . . . . . . . . . . . . . . . . . . . . . 83
Theme layouts . . . . . . . . . . . . . . . . . . . . . . . . . . . . . . . . . . . . . . . . . . . . . . . . . . . . . . 84
Page layout components . . . . . . . . . . . . . . . . . . . . . . . . . . . . . . . . . . . . . . . . . . . . . . . 86
Headlines folder layout components . . . . . . . . . . . . . . . . . . . . . . . . . . . . . . . . . . . . . . . . 87
List folder layout components . . . . . . . . . . . . . . . . . . . . . . . . . . . . . . . . . . . . . . . . . . . . 88
Slideshow folder layout components . . . . . . . . . . . . . . . . . . . . . . . . . . . . . . . . . . . . . . . . 89
Page editing layout components . . . . . . . . . . . . . . . . . . . . . . . . . . . . . . . . . . . . . . . . . . 90
Creating a custom theme from the Standard Default theme . . . . . . . . . . . . . . . . . . . . . . . . . 91
Creating a theme from scratch . . . . . . . . . . . . . . . . . . . . . . . . . . . . . . . . . . . . . . . . . . . . 91
Creating a layout using the <skincomponent> tag . . . . . . . . . . . . . . . . . . . . . . . . . . . . . . . 93
Creating a layout using the <IteratingValue> tag . . . . . . . . . . . . . . . . . . . . . . . . . . . . . . . . 95
iv Team Workplace 6.5.1 Developer's Guide
Using the same HTML in multiple layouts . . . . . . . . . . . . . . . . . . . . . . . . . . . . . . . . . . . . . 95
Reference Guide to Style Sheet Selectors in Team Workplace . . . . . . . . . . . . . . . . . . . . . . . 96
Stylesheet Selectors in the Default Theme . . . . . . . . . . . . . . . . . . . . . . . . . . . . . . . . . . . . 102
6 Using a Place as a Design Template . . . . . . . . . . . . . . . . . . . . . . . . . . . . . . . . . 103
PlaceTypes . . . . . . . . . . . . . . . . . . . . . . . . . . . . . . . . . . . . . . . . . . . . . . . . . . . . . . . . . . 103
Index . . . . . . . . . . . . . . . . . . . . . . . . . . . . . . . . . . . . . . . . . . . . . . . . . . . . . . . . . . . . . 105
Contents v

Chapter 1 Team Workplace Development Overview
This chapter describes features for developers in IBM® Lotus® Team Workplace (QuickPlace®) and provides an architectural overview of Team Workplace.
What's new in release 6.5.1? The name QuickPlace has changed to Team Workplace. The documentation uses the new name, as do parts of the product user interface, for example the installation user interface. The name QuickPlace still occurs in various other parts of the product, for example in server URLs and file names.
For changes to system requirements in this release, including Domino server version requirements, see the Team Workplace 6.5.1 Release Notes.
Development overview IBM Lotus Team Workplace is a self-service Web tool for team collaboration. Use Team Workplace to publish, share, and track all information relevant to a project. Teams can then use Team Workplace to store resources (such as files, discussions, and schedules) related to a project in a common place, where everyone can access the latest information.
This document is intended for Team Workplace Developers, and describes the development features and functionality in Team Workplace 6.5.1.
As a Team Workplace developer, you can:
• Change existing place objects or create new place object with Lotus® Notes® and Domino Designer®.
• Perform a wide variety of actions on places using XML to access the Team Workplace Java™ API.
• Automate certain tasks in places by writing agents, called PlaceBots, which run in places.
• Customize the look and layout of places to make them fit your enterprise.
1
• Use an existing place as a template, called a PlaceType, with which you can create new places containing the same characteristics and customizations.
Architecture overview Before you customize a place, you should have a basic understanding of the Team Workplace architecture. Although Team Workplace has its own metaphors and object model independent of Domino, it is implemented using core Domino technology and takes advantage of Domino data structures. A place is created using templates to structure data, and databases to store the data. Information in a place is stored in data notes — the basic unit of information in a Notes database. The structure of a place is further defined with objects such as rooms, folders, and pages that map to Domino objects.
Because the place objects are based on Domino objects, you can use the Notes client and Domino Designer to view, customize, and create new objects in a place.
Team Workplace also uses a subset of the Domino/Notes security and authentication model to manage access to a place. It is helpful if you are familiar with the Notes security model, in particular with basic access control list (ACL) settings, and the use of Reader and Author fields. For up-to-date information on Notes application security, see the latest Domino Designer 6 Help, available on the Web at http://www.lotus.com/ldd/doc.
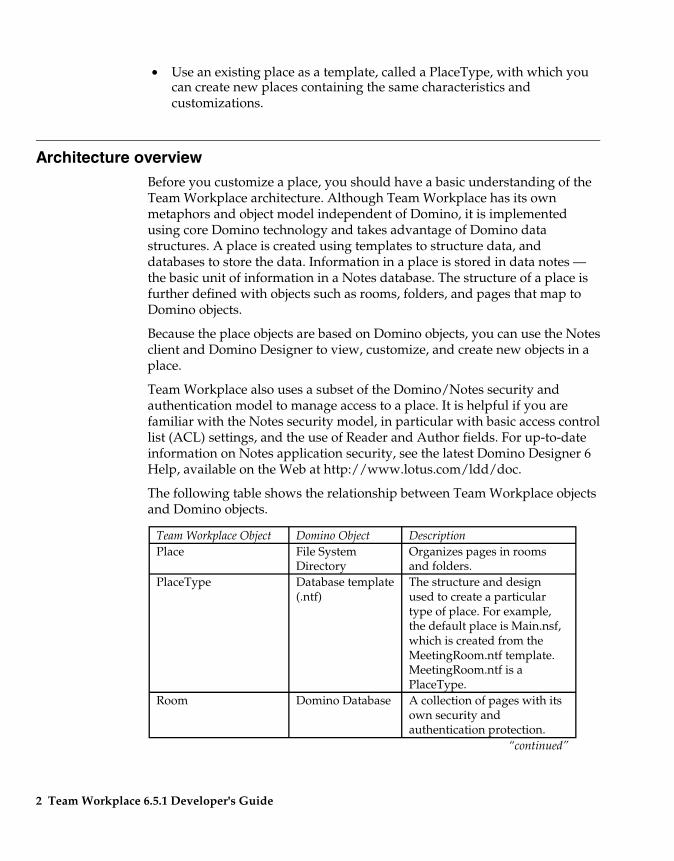
The following table shows the relationship between Team Workplace objects and Domino objects.
Team Workplace Object Domino Object Description Place File System
Directory Organizes pages in rooms and folders.
PlaceType Database template (.ntf)
The structure and design used to create a particular type of place. For example, the default place is Main.nsf, which is created from the MeetingRoom.ntf template. MeetingRoom.ntf is a PlaceType.
Room Domino Database A collection of pages with its own security and authentication protection.
“continued”
2 Team Workplace 6.5.1 Developer's Guide

Team Workplace Object Domino Object Description RoomType Database template
(.ntf) The structure and design used to create a particular type of room.
Folder Domino Folder or View
An organizing structure for collecting and displaying related pages in a site.
Page Domino Form + Subform + Data Note
The basic vehicle for content. You can create content using the Team Workplace editor or import content from an external source.
Member Domino Data Note
A member note contains information about a team member of a place. In addition to this data, the member must be listed in the ACL of main.nsf and in a group in names.nsf to pass authentication.
Form Data note of type “h_Form”
Manages the display of data notes. A form can contain fields for containing data and employ scripts to process and compute data.
Field Data note of type “h_Field”
Allow for user input of data into data notes.
The Team Workplace file directory structure Team Workplace data is stored within a subdirectory named QuickPlace, below the Domino server's data directory. The complete directory structure is as follows.
Subdirectory Content <Domino data Contains the templates used to directory>\QuickPlace\AreaTypes create places and rooms. <Domino data Contains Administrator's place directory>\QuickPlace\QuickPlace files. All places are created from
the Administrator's place. <Domino data Contains the files of a particular directory>\QuickPlace\<place> place. <place> represents the name
of the place.
Creating places with templates and databases When you create a place, you are actually creating several Notes databases (NSF files). Databases are created from Notes templates (NTF files).
Chapter 1: Team Workplace Development Overview 3
Templates are like blueprints for databases. Templates contain the forms and fields that define a database built from that template. These forms and fields define the look of the database and how the database processes and stores data. Templates allow for a controlled development environment. A developer can change a template, then push these changes out to any databases on the server that were created from that template. In Team Workplace, a template is called a PlaceType.
Databases are the basic building blocks of any place.
For more information on Notes templates and databases, see the Domino Designer 6 Help, available on the Web at http://www.lotus.com/ldd/doc.
Place databases The following databases are the building blocks of any place:
• The place database - The place database is the parent database in any place. All other databases in the place are children of the place database.
For example, the place database that installs with Team Workplace is Main.nsf. It is created from the PlaceType MeetingRoom.ntf. Main.nsf contains the structure for a group discussion, including a Welcome page, a folder for threaded discussion topics, and the tools for specifying team members and securing the site.
• The Members Directory database - Each place has a Members Directory database. The Members Directory database, Contacts1.nsf, is created from the Members Directory PlaceType Contacts.ntf. The Members Directory database contains all of the data on place members and what access levels they have.
• A room database - A room database structures the contents of a particular room in a place. The default room PlaceType is PageLibrary.ntf, which provides indexing infrastructure for maintaining the pages in a room. This PlaceType also provides security and authentication features so that access to a room can be limited to a subset of team members.
The database created from the PageLibrary PlaceType is assigned a unique name by the system to allow for multiple rooms within a place.
Team Workplace administration templates When an administrator signs in to a Team Workplace server, they are actually using a place to administer and secure the server. The administrator's place is created from the templates CreateHaiku.ntf and Admin.ntf.
The HaikuCommonForms.ntf template is a central repository for forms used by other templates. This reduces the overhead in a Team Workplace service,
4 Team Workplace 6.5.1 Developer's Guide
allowing for smaller databases, faster creation of a place, and better performance resulting from more efficient server caching.
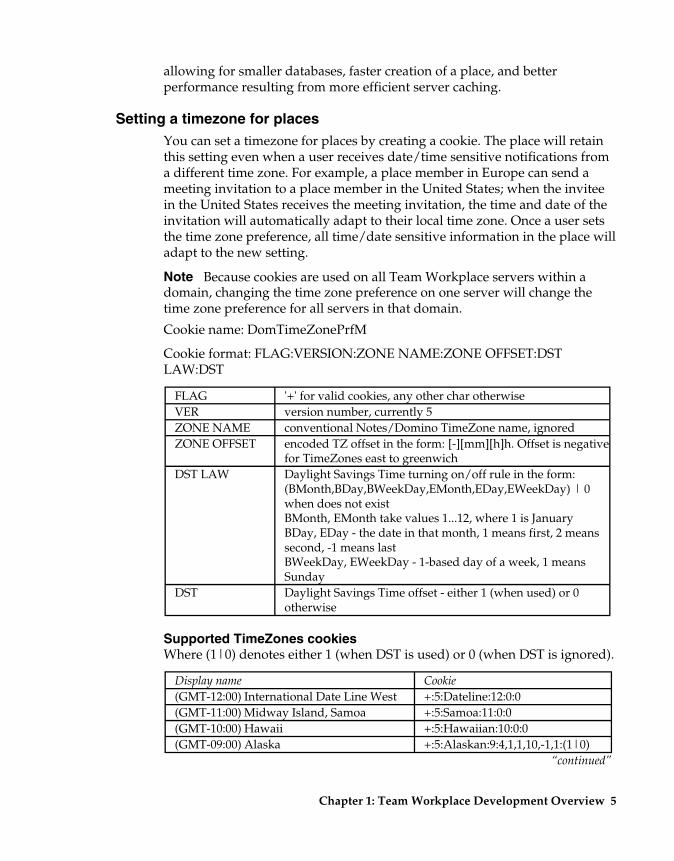
Setting a timezone for places You can set a timezone for places by creating a cookie. The place will retain this setting even when a user receives date/time sensitive notifications from a different time zone. For example, a place member in Europe can send a meeting invitation to a place member in the United States; when the invitee in the United States receives the meeting invitation, the time and date of the invitation will automatically adapt to their local time zone. Once a user sets the time zone preference, all time/date sensitive information in the place will adapt to the new setting.
Note Because cookies are used on all Team Workplace servers within a domain, changing the time zone preference on one server will change the time zone preference for all servers in that domain.
Cookie name: DomTimeZonePrfM
Cookie format: FLAG:VERSION:ZONE NAME:ZONE OFFSET:DST LAW:DST
FLAG '+' for valid cookies, any other char otherwise VER version number, currently 5 ZONE NAME conventional Notes/Domino TimeZone name, ignored ZONE OFFSET encoded TZ offset in the form: [-][mm][h]h. Offset is negative
for TimeZones east to greenwich DST LAW Daylight Savings Time turning on/off rule in the form:
(BMonth,BDay,BWeekDay,EMonth,EDay,EWeekDay) | 0 when does not exist BMonth, EMonth take values 1...12, where 1 is January BDay, EDay - the date in that month, 1 means first, 2 means second, -1 means last BWeekDay, EWeekDay - 1-based day of a week, 1 means Sunday
DST Daylight Savings Time offset - either 1 (when used) or 0 otherwise
Supported TimeZones cookies Where (1|0) denotes either 1 (when DST is used) or 0 (when DST is ignored).
Display name Cookie (GMT-12:00) International Date Line West +:5:Dateline:12:0:0 (GMT-11:00) Midway Island, Samoa +:5:Samoa:11:0:0 (GMT-10:00) Hawaii +:5:Hawaiian:10:0:0 (GMT-09:00) Alaska +:5:Alaskan:9:4,1,1,10,-1,1:(1|0)
“continued”
Chapter 1: Team Workplace Development Overview 5
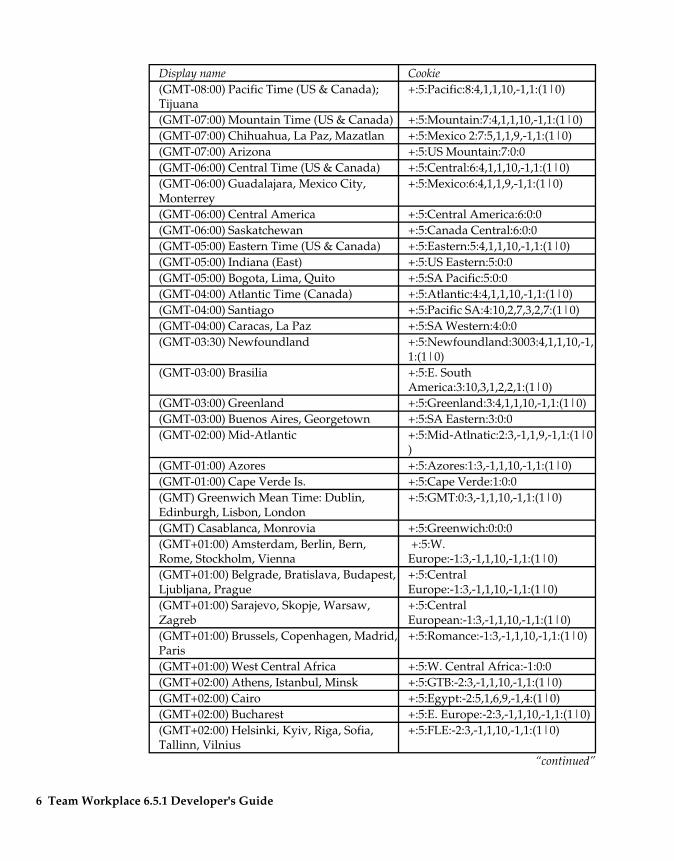
Display name Cookie (GMT-08:00) Pacific Time (US & Canada); +:5:Pacific:8:4,1,1,10,-1,1:(1|0) Tijuana (GMT-07:00) Mountain Time (US & Canada) +:5:Mountain:7:4,1,1,10,-1,1:(1|0) (GMT-07:00) Chihuahua, La Paz, Mazatlan +:5:Mexico 2:7:5,1,1,9,-1,1:(1|0) (GMT-07:00) Arizona +:5:US Mountain:7:0:0 (GMT-06:00) Central Time (US & Canada) +:5:Central:6:4,1,1,10,-1,1:(1|0) (GMT-06:00) Guadalajara, Mexico City, +:5:Mexico:6:4,1,1,9,-1,1:(1|0) Monterrey (GMT-06:00) Central America +:5:Central America:6:0:0 (GMT-06:00) Saskatchewan +:5:Canada Central:6:0:0 (GMT-05:00) Eastern Time (US & Canada) +:5:Eastern:5:4,1,1,10,-1,1:(1|0) (GMT-05:00) Indiana (East) +:5:US Eastern:5:0:0 (GMT-05:00) Bogota, Lima, Quito +:5:SA Pacific:5:0:0 (GMT-04:00) Atlantic Time (Canada) +:5:Atlantic:4:4,1,1,10,-1,1:(1|0) (GMT-04:00) Santiago +:5:Pacific SA:4:10,2,7,3,2,7:(1|0) (GMT-04:00) Caracas, La Paz +:5:SA Western:4:0:0 (GMT-03:30) Newfoundland +:5:Newfoundland:3003:4,1,1,10,-1,
1:(1|0) (GMT-03:00) Brasilia +:5:E. South
America:3:10,3,1,2,2,1:(1|0) (GMT-03:00) Greenland +:5:Greenland:3:4,1,1,10,-1,1:(1|0) (GMT-03:00) Buenos Aires, Georgetown +:5:SA Eastern:3:0:0 (GMT-02:00) Mid-Atlantic +:5:Mid-Atlnatic:2:3,-1,1,9,-1,1:(1|0
) (GMT-01:00) Azores +:5:Azores:1:3,-1,1,10,-1,1:(1|0) (GMT-01:00) Cape Verde Is. +:5:Cape Verde:1:0:0 (GMT) Greenwich Mean Time: Dublin, +:5:GMT:0:3,-1,1,10,-1,1:(1|0) Edinburgh, Lisbon, London (GMT) Casablanca, Monrovia +:5:Greenwich:0:0:0 (GMT+01:00) Amsterdam, Berlin, Bern, +:5:W. Rome, Stockholm, Vienna Europe:-1:3,-1,1,10,-1,1:(1|0) (GMT+01:00) Belgrade, Bratislava, Budapest, +:5:Central Ljubljana, Prague Europe:-1:3,-1,1,10,-1,1:(1|0) (GMT+01:00) Sarajevo, Skopje, Warsaw, +:5:Central Zagreb European:-1:3,-1,1,10,-1,1:(1|0) (GMT+01:00) Brussels, Copenhagen, Madrid, +:5:Romance:-1:3,-1,1,10,-1,1:(1|0) Paris (GMT+01:00) West Central Africa +:5:W. Central Africa:-1:0:0 (GMT+02:00) Athens, Istanbul, Minsk +:5:GTB:-2:3,-1,1,10,-1,1:(1|0) (GMT+02:00) Cairo +:5:Egypt:-2:5,1,6,9,-1,4:(1|0) (GMT+02:00) Bucharest +:5:E. Europe:-2:3,-1,1,10,-1,1:(1|0) (GMT+02:00) Helsinki, Kyiv, Riga, Sofia, +:5:FLE:-2:3,-1,1,10,-1,1:(1|0) Tallinn, Vilnius
“continued”
6 Team Workplace 6.5.1 Developer's Guide
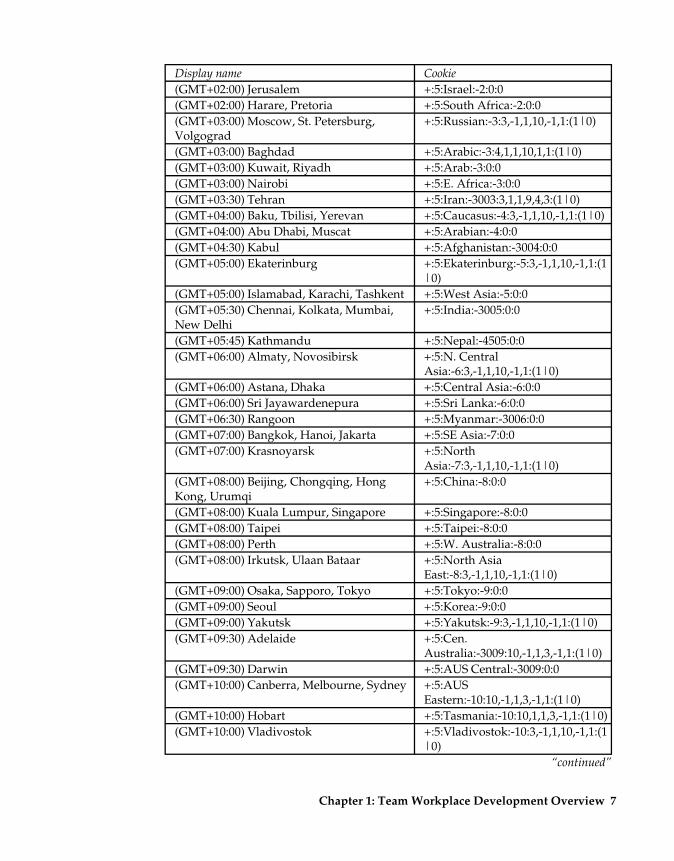
Display name Cookie (GMT+02:00) Jerusalem +:5:Israel:-2:0:0 (GMT+02:00) Harare, Pretoria +:5:South Africa:-2:0:0 (GMT+03:00) Moscow, St. Petersburg, +:5:Russian:-3:3,-1,1,10,-1,1:(1|0) Volgograd (GMT+03:00) Baghdad +:5:Arabic:-3:4,1,1,10,1,1:(1|0) (GMT+03:00) Kuwait, Riyadh +:5:Arab:-3:0:0 (GMT+03:00) Nairobi +:5:E. Africa:-3:0:0 (GMT+03:30) Tehran +:5:Iran:-3003:3,1,1,9,4,3:(1|0) (GMT+04:00) Baku, Tbilisi, Yerevan +:5:Caucasus:-4:3,-1,1,10,-1,1:(1|0) (GMT+04:00) Abu Dhabi, Muscat +:5:Arabian:-4:0:0 (GMT+04:30) Kabul +:5:Afghanistan:-3004:0:0 (GMT+05:00) Ekaterinburg +:5:Ekaterinburg:-5:3,-1,1,10,-1,1:(1
|0) (GMT+05:00) Islamabad, Karachi, Tashkent +:5:West Asia:-5:0:0 (GMT+05:30) Chennai, Kolkata, Mumbai, +:5:India:-3005:0:0 New Delhi (GMT+05:45) Kathmandu +:5:Nepal:-4505:0:0 (GMT+06:00) Almaty, Novosibirsk +:5:N. Central
Asia:-6:3,-1,1,10,-1,1:(1|0) (GMT+06:00) Astana, Dhaka +:5:Central Asia:-6:0:0 (GMT+06:00) Sri Jayawardenepura +:5:Sri Lanka:-6:0:0 (GMT+06:30) Rangoon +:5:Myanmar:-3006:0:0 (GMT+07:00) Bangkok, Hanoi, Jakarta +:5:SE Asia:-7:0:0 (GMT+07:00) Krasnoyarsk +:5:North
Asia:-7:3,-1,1,10,-1,1:(1|0) (GMT+08:00) Beijing, Chongqing, Hong +:5:China:-8:0:0 Kong, Urumqi (GMT+08:00) Kuala Lumpur, Singapore +:5:Singapore:-8:0:0 (GMT+08:00) Taipei +:5:Taipei:-8:0:0 (GMT+08:00) Perth +:5:W. Australia:-8:0:0 (GMT+08:00) Irkutsk, Ulaan Bataar +:5:North Asia
East:-8:3,-1,1,10,-1,1:(1|0) (GMT+09:00) Osaka, Sapporo, Tokyo +:5:Tokyo:-9:0:0 (GMT+09:00) Seoul +:5:Korea:-9:0:0 (GMT+09:00) Yakutsk +:5:Yakutsk:-9:3,-1,1,10,-1,1:(1|0) (GMT+09:30) Adelaide +:5:Cen.
Australia:-3009:10,-1,1,3,-1,1:(1|0) (GMT+09:30) Darwin +:5:AUS Central:-3009:0:0 (GMT+10:00) Canberra, Melbourne, Sydney +:5:AUS
Eastern:-10:10,-1,1,3,-1,1:(1|0) (GMT+10:00) Hobart +:5:Tasmania:-10:10,1,1,3,-1,1:(1|0) (GMT+10:00) Vladivostok +:5:Vladivostok:-10:3,-1,1,10,-1,1:(1
|0) “continued”
Chapter 1: Team Workplace Development Overview 7
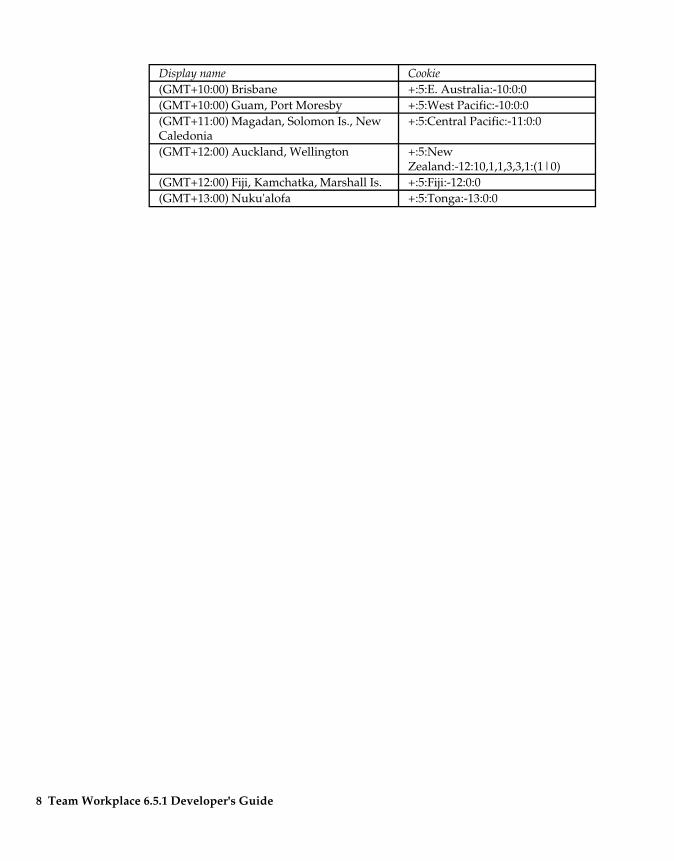
Display name Cookie (GMT+10:00) Brisbane +:5:E. Australia:-10:0:0 (GMT+10:00) Guam, Port Moresby +:5:West Pacific:-10:0:0 (GMT+11:00) Magadan, Solomon Is., New +:5:Central Pacific:-11:0:0 Caledonia (GMT+12:00) Auckland, Wellington +:5:New
Zealand:-12:10,1,1,3,3,1:(1|0) (GMT+12:00) Fiji, Kamchatka, Marshall Is. +:5:Fiji:-12:0:0 (GMT+13:00) Nuku'alofa +:5:Tonga:-13:0:0
8 Team Workplace 6.5.1 Developer's Guide
Chapter 2 Creating and Customizing Place Objects
This chapter describes how to customize existing place objects, and create new objects, using Notes and Domino Designer. It also describes how to find out what version of Team Workplace a place was created with.
Customizing and creating objects with Notes and Domino Designer Because Team Workplace objects are based on Domino objects, you can use the Notes client and Domino Designer to view, customize, and create new objects in a place.
All the data for objects in a place are contained in database notes. To view a place's objects, change an existing object, or create a new object, you can open the place in a Notes client and customize the notes.
You can automate the customization process with Domino Designer. For example, you can write an agent that creates member documents, filling in all of the required fields for identifying members and specifying access to a place.
Note The Team Workplace data schema is subject to change in future versions of the Team Workplace product. Applications written to this data schema may need to be modified in order to work with future versions of the product.
To customize existing objects in Notes 1. Open the place database in Notes.
2. Select the QDK view.
3. Open the object's data note document.
4. Change any values in the document and save it.
Caution Place objects are often interdependent. Changing the value of an object may affect other objects in the place.
9
To create new objects in Notes To create a new place object using a form:
1. Open the place database in Notes.
2. Select the QDK view.
3. Create a document that corresponds to the object you are creating. For example, create a member document to create a place member.
4. Fill in field values to define the new object .
5. Save the document to create the object.
Finding a place's version Using Domino Designer you can find the build number of a particular place, which can tell you on which Team Workplace version the place's data schema is based. After you upgrade a server, the data schema for the places is still that of the previous release. Once you run qptool upgrade -a to upgrade the place data, the data schema for the places is the current release. In your browser you can also find the build version of the Team Workplace server the place is on. To find the Team Workplace version of a place, do the following:
Note You cannot follow these steps if the place is in use. You may want to use the QPTool lock command to lock the place before opening it to find the build number.
For more information on using QPTool lock, see the Team Workplace Administrator's Guide.
1. Open the Main.nsf for the place in Domino Designer.
2. Click Resources - Other.
3. Select the Icon note then right-click and select Design Properties.
4. Click the second tab and look in the $HaikuBuild field.
10 Team Workplace 6.5.1 Developer's Guide
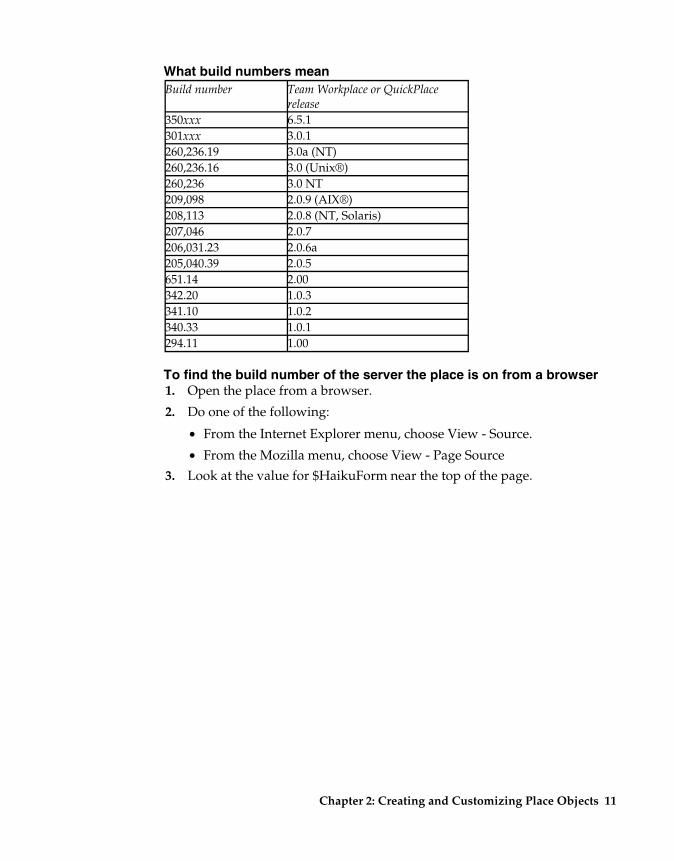
What build numbers mean Build number Team Workplace or QuickPlace
release 350xxx 6.5.1 301xxx 3.0.1 260,236.19 3.0a (NT) 260,236.16 3.0 (Unix®) 260,236 3.0 NT 209,098 2.0.9 (AIX®) 208,113 2.0.8 (NT, Solaris) 207,046 2.0.7 206,031.23 2.0.6a 205,040.39 2.0.5 651.14 2.00 342.20 1.0.3 341.10 1.0.2 340.33 1.0.1 294.11 1.00
To find the build number of the server the place is on from a browser 1. Open the place from a browser.
2. Do one of the following:
• From the Internet Explorer menu, choose View - Source.
• From the Mozilla menu, choose View - Page Source
3. Look at the value for $HaikuForm near the top of the page.
Chapter 2: Creating and Customizing Place Objects 11

Chapter 3 Accessing the Team Workplace Java API
This chapter describes how to access the Team Workplace Java API using XML.
The Team Workplace Java API By using XML to access the Team Workplace Java API, you can perform a number of actions in your Team Workplace service, such as searching all places in the service, getting a list of all places on a particular server, creating a new place, or adding a new person or group to a place.
To access the Team Workplace Java API, you must set up the Team Workplace server, create well-formed XML that specifies the Team Workplace objects and the actions you want performed on them, then run your XML against the Team Workplace processor on the server. The QPAPI process() method processes the XML, performs the actions, and outputs XML detailing the results.
There are three ways to access the Team Workplace Java API: You can create an XML input file and run that file against the Team Workplace processor from the command line or Domino server console, write a Java program that creates the XML and passes it to the Team Workplace processor programmatically, or use the QPTool execute command. For more information, see the following topics:
• Setting up the Team Workplace server to access the API
• Accessing the API from the command line
• Accessing the API from a Java program
• Accessing the API using a QPTool command
• XML details
Setting up the Team Workplace server to access the API To access the Team Workplace Java API you must do the following on the Team Workplace server:
1. Install the Java Developer's Kit (JDK), version 1.3.1. You can find the JDK on Sun Microsystems Java Web site at java.sun.com.
13

2. Add the following files to your CLASSPATH. All are installed with the Team Workplace server:
• log4j-118compat.jar
• quickplace.jar
• xalan.jar
• xercesImpl.jar
• xml-apis.jar
3. Add the following to your PATH:
• Domino server program directory (for example, c: \Lotus\Domino\...)
• Java JDK bin directory
Note Team Workplace for iSeries™ developers should refer to the book Installing and Managing Team Workplace for iSeries for instructions on how to set up the server environment to use Team Workplace Java API. This book is available on the Web at www.lotus.com/ldd/doc.
Accessing the API from the command line You can access the Team Workplace Java API by creating a well-formed XML document and running it against the Team Workplace processor from the command line or Domino server console.
To create and run the XML 1. Create a new XML document in any text editor.
2. Add the appropriate well-formed XML using your own values and save the document as an XML file.
For details of the XML needed for specific actions, see this chapter.
3. On the command line, navigate to the /Lotus/Domino directory and enter the following command to execute the XML: java com.lotus.quickplace.api.QPAPI -i inputfile.xml
This command is processed by the Team Workplace processor, and the QPAPI.process() method is invoked to process the XML. The Java runtime environment you installed is responsible for executing the QPAPI class. You can use the following arguments in your command:
• -i inputfile.xml - inputfile.xml represents the name of the well-formed XML document that you wish to process.
• -o outputfile.xml - outputfile.xml represents the name of the XML output document created by Team Workplace which contains all of the processed output and status codes. If you do not specify an output file, XML is output to stdout by default.
14 Team Workplace 6.5.1 Developer's Guide
• -session file.xml - file.xml represents the name of the well-formed XML document used by Team Workplace during a search to determine the identity of the user performing the search. This document is required as input when accessing the API to search the Team Workplace service.
For example, to search for the word “SSL” in the service, you must specify the user who is performing the search. For example, "cn=John Smith,o=IBM". The search returns documents that John Smith has access to that contain the word “SSL.” For information on the XML syntax required in this document, see the topic “search (service)” in this chapter.
Note If you run the command from the Domino server console you must preface it with “load.” For example load java com.lotus.quickplace.api.QPAPI -i inputfile.xml
Accessing the API from a Java program You can access the Team Workplace Java API by programmatically generating XML and running it against the QPAPI class. The following is required to execute XML from within a Java program:
• You must call the QPAPI.init() method prior to any other Team Workplace processing.
• You must either create an XML DOM tree or XML document(s) specifying the Team Workplace Java API objects and the actions you want taken on them. (If you create XML document(s) they are parsed by the Apache Xerces parser and a XML DOM tree is created.) For more information on creating a XML DOM tree for the Team Workplace Java API, see the Xerces documentation on the Web at xml.apache.org.
• You must call some variation of the QPAPI.process() method to initiate the processing of the either an XML DOM tree or XML document(s). See documentation below for more information on the variations of QPAPI.process().
• You must call the QPAPI.term() method to terminate the Team Workplace processing and free up resources.
Chapter 3: Accessing the Team Workplace Java API 15
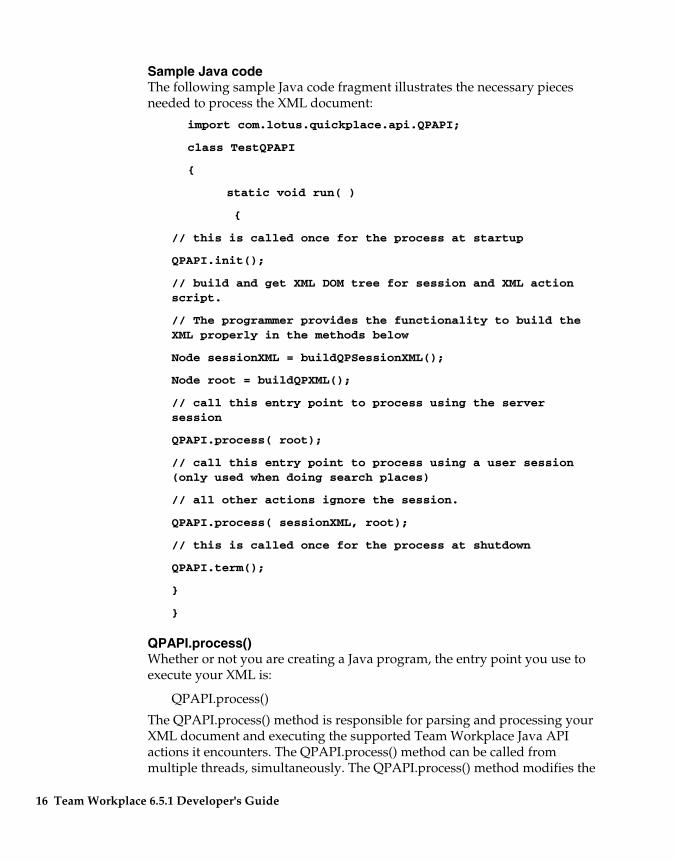
Sample Java code The following sample Java code fragment illustrates the necessary pieces needed to process the XML document:
import com.lotus.quickplace.api.QPAPI;
class TestQPAPI
{
static void run( )
{
// this is called once for the process at startup
QPAPI.init();
// build and get XML DOM tree for session and XML actionscript.
// The programmer provides the functionality to build theXML properly in the methods below
Node sessionXML = buildQPSessionXML();
Node root = buildQPXML();
// call this entry point to process using the serversession
QPAPI.process( root);
// call this entry point to process using a user session(only used when doing search places)
// all other actions ignore the session.
QPAPI.process( sessionXML, root);
// this is called once for the process at shutdown
QPAPI.term();
}
}
QPAPI.process() Whether or not you are creating a Java program, the entry point you use to execute your XML is:
QPAPI.process()
The QPAPI.process() method is responsible for parsing and processing your XML document and executing the supported Team Workplace Java API actions it encounters. The QPAPI.process() method can be called from multiple threads, simultaneously. The QPAPI.process() method modifies the
16 Team Workplace 6.5.1 Developer's Guide
input XML DOM tree by modifying, adding, and deleting the necessary nodes.
There are several variations of the QPAPI.process() method that you can use:
process( String sessionFilename, String inFilename, String outFilename) This entry point is called by QPAPI.main(). So if you execute the QPAPI Java class with arguments, this is the entry point that is called. The parameters have the following meanings:
• sessionFilename - The pathname of the XML document used by TeamWorkplace during a search to determine the distinguished name of theuser performing the search. This document is required as input whenaccessing the Java API to search the Team Workplace service. Thedocument should be properly constructed using the rules and entitiesspecified in the topic “search (service)” in this chapter.
• inFilename - The pathname of the XML document to be processed. Thedocument should be properly constructed using the rules and entitiesspecified in this chapter.
• outFilename - The pathname of a document to be created by the Team Workplace Java API that will contain the processed output XML This document will be very similar to the input document but will be modified by the Team Workplace Java API to show Action Status Codes and output results of the specific actions, if applicable.
process( String inFilename) This entry point is used when you are not concerned about the output XML. If you use this method, you will not be notified on processing results or error status because they are formatted in the output file. The parameters have the following meanings:
inFilename - The pathname of the XML document to be processed. The document should be properly constructed using the rules and entities specified in this chapter.
process( String inFilename, String outFilename) This entry point is used when you want to supply an XML input file and want all processed output to be captured in an XML output file created by the Team Workplace Java API. The parameters have the following meanings:
• inFilename - The pathname of the XML document to be processed. Thedocument should be properly constructed using the rules and entitiesspecified in this chapter.
Chapter 3: Accessing the Team Workplace Java API 17
• outFilename - The pathname of a file to be created by the Team Workplace Java API that will contain the processed output XML. This document will be very similar to the input document but will be modified by the Team Workplace Java API to show Action Status Codes and output results of the specific actions if applicable.
process( Node session, Node root) This entry point is used when you have an XML DOM tree. It is primarily used in Java programs that build the XML structure on the fly. The parameters have the following meanings:
• session - The session Node. If null is specified for a session, the session of the server is used when processing the XML document. This is currently only required when executing the XML search API actions. The session node specifies the distinguished name of the user performing the search.
• root - The root node of your XML DOM tree object. The root node is usually obtained from an XML parser in a Java application.
process( Node root) This entry point is used when you have an XML DOM tree. It is primarily used in Java programs that build the XML structure on the fly. The parameters have the following meanings:
root - The root node of your XML DOM tree object. The root node is usually obtained from an XML parser in a Java application.
Accessing the API using a QPTool command QPTool is a server task that you can run with arguments to do administrative tasks. You can use the QPtool execute command to process your XML. To execute an XML file using QPTool, enter the following in either the command line or Domino server console.
When entering in command line:
qptool execute arguments
When entering in server console:
load qptool execute arguments
18 Team Workplace 6.5.1 Developer's Guide

The following table describes the arguments.
Argument Description -? Prints help on the command -i inputfile Specifies the XML API file to execute.
If no path specified, the default location of the file is the Domino program directory.
-o outputfile Logs results to a specified XML output file. By default logs results to qptool.execute.xml in the Domino program directory.
For more information on QPTool commands, see the Team Workplace Administrator's Guide on the Web at http://www.lotus.com/ldd/doc.
XML details The XML you use to access the Team Workplace API consists of elements that represent Team Workplace objects, such as a service, servers, places, people, and groups. The XML for each Team Workplace object has an action attribute associated with it. This action attribute represents the API to be invoked.
How the XML is processed If you create an XML document, the Team Workplace XML processor processes the XML in the order it appears in the document. When the XML is processed, it is converted into an XML DOM tree structure.
The processor travels down the leftmost branch of the tree, reading each node along the way. If a node contains an action, the processor performs the action, then continues. When it reaches the end of a branch, the processor returns back up the branch to the last node where there was a split and moves down the untravelled branch.
As long as an action is successfully completed, the processor continues on its course. However, if there is an error and the action cannot be completed, the processor stops, backs up to the next sibling node, and continues down the branch.
When the processor has read the entire file, it outputs XML (either in stdout or in another text file) with the results. The output XML is an edited version of the input XML. If an action was completed successfully, the processor removes the action attribute from the XML. The action attributes are removed when successful so that the problems in the output XML can be fixed and the XML used again.
Chapter 3: Accessing the Team Workplace Java API 19
If the action caused an error and was unsuccessful, the action attribute is not removed from the XML. Instead, a <status> and a <message> element are added. The status element contains a number value related to the type of error. The message element contains a text string describing the error. The text string is pulled from the server, and is always in the server's language.
Note All XML must be well-formed, and must start with at least <?xml version="1.0"?> as a processing instruction.
Specifying the local server XML actions only run on the local server. However, you can use the same XML file on different servers and specify which server a particular action is meant to run on. There are two ways to specify which server an action should run on. You can specify that the action should be run on the local server by adding a local="true" attribute to the <server> element. For example, <server local="true">. Or you can specify the hostname of the local server. For example, <server><hostname>local server's DNS name</hostname>.
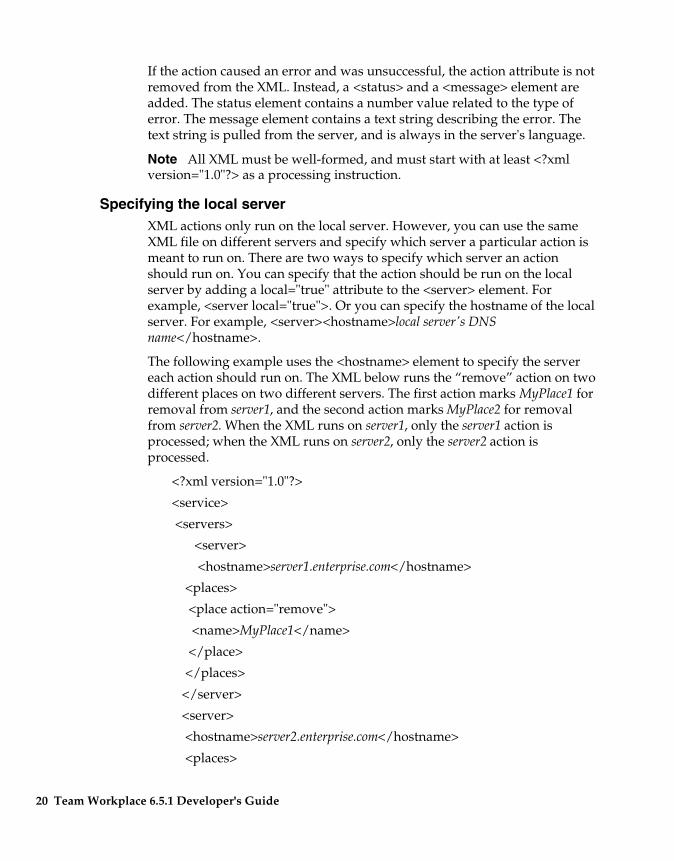
The following example uses the <hostname> element to specify the server each action should run on. The XML below runs the “remove” action on two different places on two different servers. The first action marks MyPlace1 for removal from server1, and the second action marks MyPlace2 for removal from server2. When the XML runs on server1, only the server1 action is processed; when the XML runs on server2, only the server2 action is processed.
<?xml version="1.0"?>
<service>
<servers>
<server>
<hostname>server1.enterprise.com</hostname>
<places>
<place action="remove">
<name>MyPlace1</name>
</place>
</places>
</server>
<server>
<hostname>server2.enterprise.com</hostname>
<places>
20 Team Workplace 6.5.1 Developer's Guide
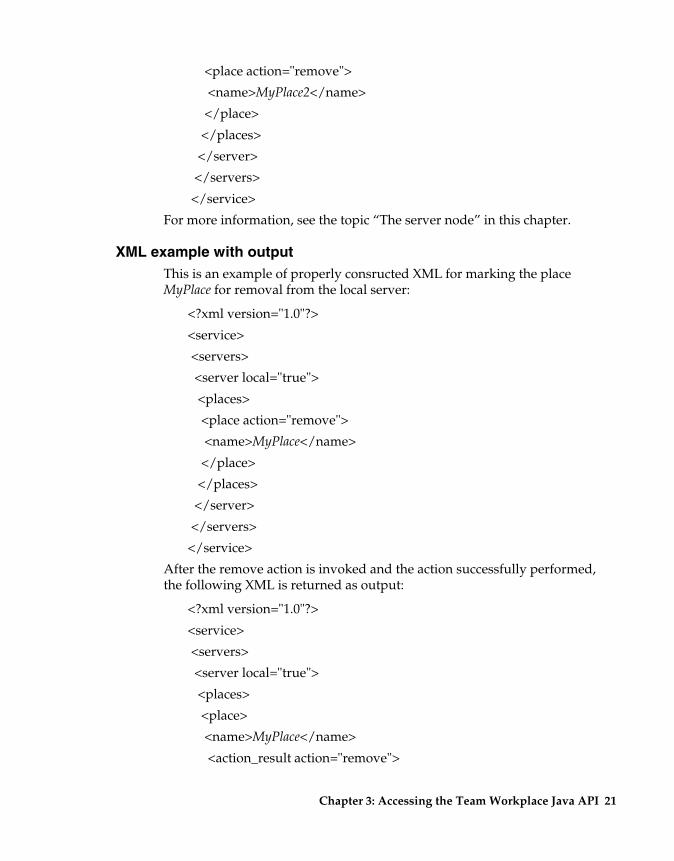
<place action="remove">
<name>MyPlace2</name>
</place>
</places>
</server>
</servers>
</service>
For more information, see the topic “The server node” in this chapter.
XML example with output This is an example of properly consructed XML for marking the place MyPlace for removal from the local server:
<?xml version="1.0"?>
<service>
<servers>
<server local="true">
<places>
<place action="remove">
<name>MyPlace</name>
</place>
</places>
</server>
</servers>
</service>
After the remove action is invoked and the action successfully performed, the following XML is returned as output:
<?xml version="1.0"?>
<service>
<servers>
<server local="true">
<places>
<place>
<name>MyPlace</name>
<action_result action="remove">
Chapter 3: Accessing the Team Workplace Java API 21
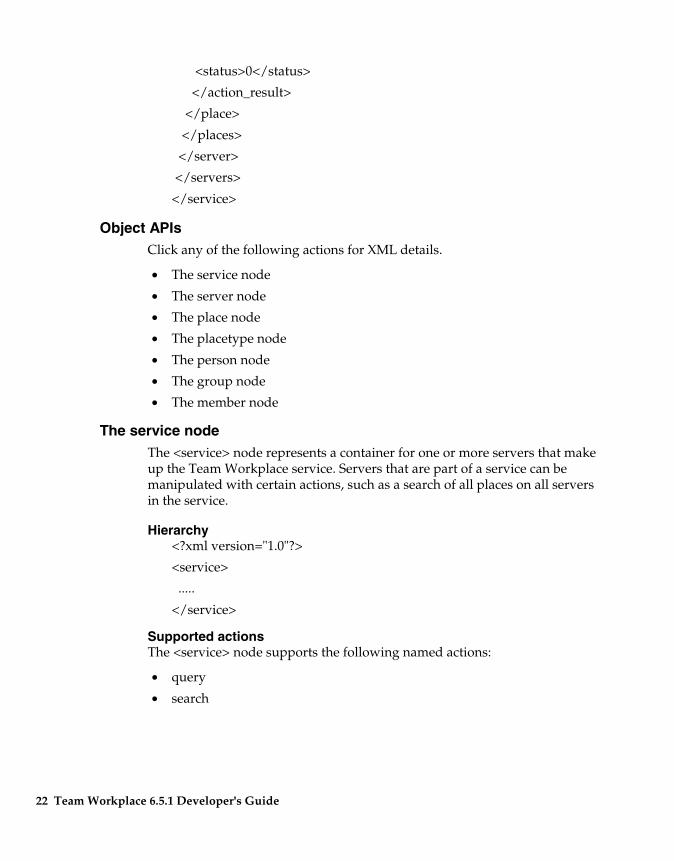
<status>0</status>
</action_result>
</place>
</places>
</server>
</servers>
</service>
Object APIs Click any of the following actions for XML details.
• The service node
• The server node
• The place node
• The placetype node
• The person node
• The group node
• The member node
The service node The <service> node represents a container for one or more servers that make up the Team Workplace service. Servers that are part of a service can be manipulated with certain actions, such as a search of all places on all servers in the service.
Hierarchy <?xml version="1.0"?>
<service>
.....
</service>
Supported actions The <service> node supports the following named actions:
• query
• search
22 Team Workplace 6.5.1 Developer's Guide
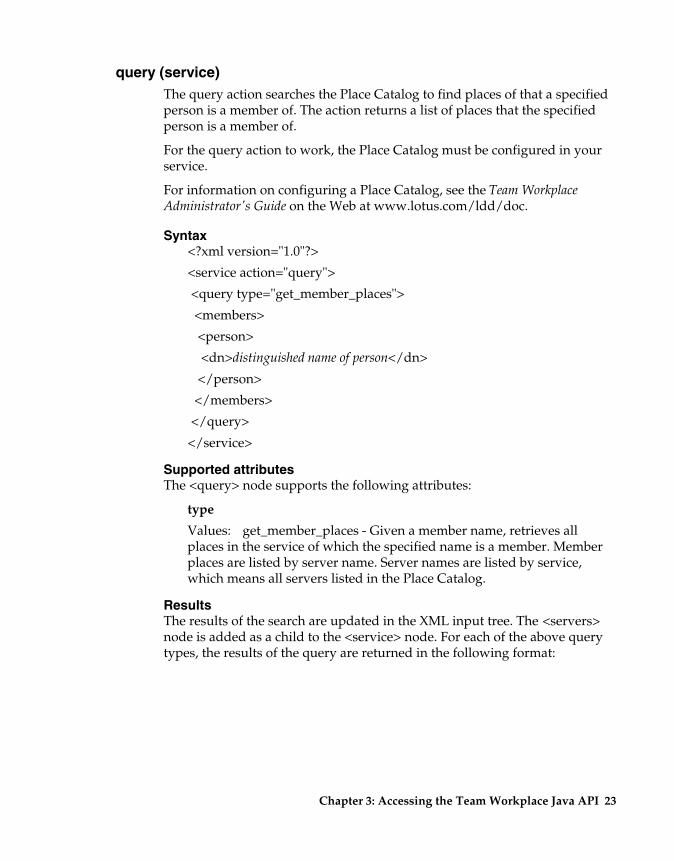
query (service) The query action searches the Place Catalog to find places of that a specified person is a member of. The action returns a list of places that the specified person is a member of.
For the query action to work, the Place Catalog must be configured in your service.
For information on configuring a Place Catalog, see the Team Workplace Administrator's Guide on the Web at www.lotus.com/ldd/doc.
Syntax <?xml version="1.0"?>
<service action="query">
<query type="get_member_places">
<members>
<person>
<dn>distinguished name of person</dn>
</person>
</members>
</query>
</service>
Supported attributes The <query> node supports the following attributes:
type
Values: get_member_places - Given a member name, retrieves all places in the service of which the specified name is a member. Member places are listed by server name. Server names are listed by service, which means all servers listed in the Place Catalog.
Results The results of the search are updated in the XML input tree. The <servers> node is added as a child to the <service> node. For each of the above query types, the results of the query are returned in the following format:
Chapter 3: Accessing the Team Workplace Java API 23
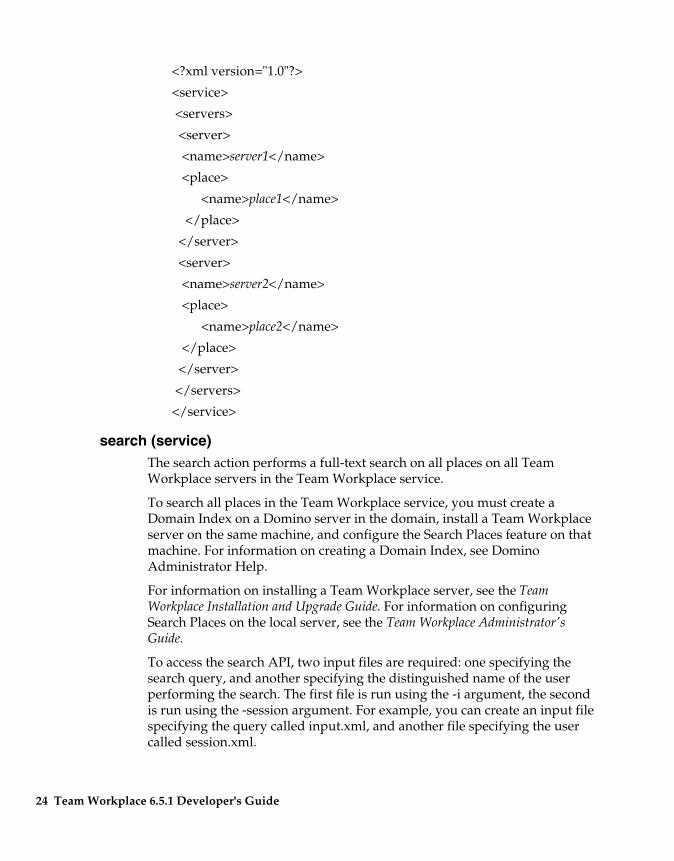
<?xml version="1.0"?>
<service>
<servers>
<server>
<name>server1</name>
<place>
<name>place1</name>
</place>
</server>
<server>
<name>server2</name>
<place>
<name>place2</name>
</place>
</server>
</servers>
</service>
search (service) The search action performs a full-text search on all places on all Team Workplace servers in the Team Workplace service.
To search all places in the Team Workplace service, you must create a Domain Index on a Domino server in the domain, install a Team Workplace server on the same machine, and configure the Search Places feature on that machine. For information on creating a Domain Index, see Domino Administrator Help.
For information on installing a Team Workplace server, see the Team Workplace Installation and Upgrade Guide. For information on configuring Search Places on the local server, see the Team Workplace Administrator's Guide.
To access the search API, two input files are required: one specifying the search query, and another specifying the distinguished name of the user performing the search. The first file is run using the -i argument, the second is run using the -session argument. For example, you can create an input file specifying the query called input.xml, and another file specifying the user called session.xml.
24 Team Workplace 6.5.1 Developer's Guide
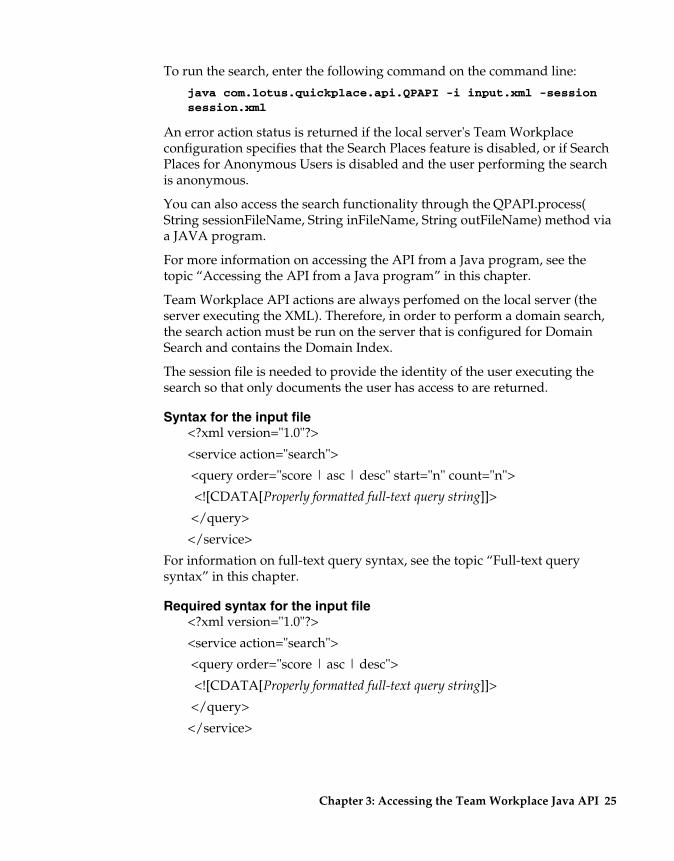
To run the search, enter the following command on the command line:
java com.lotus.quickplace.api.QPAPI -i input.xml -sessionsession.xml
An error action status is returned if the local server's Team Workplace configuration specifies that the Search Places feature is disabled, or if Search Places for Anonymous Users is disabled and the user performing the search is anonymous.
You can also access the search functionality through the QPAPI.process( String sessionFileName, String inFileName, String outFileName) method via a JAVA program.
For more information on accessing the API from a Java program, see the topic “Accessing the API from a Java program” in this chapter.
Team Workplace API actions are always perfomed on the local server (the server executing the XML). Therefore, in order to perform a domain search, the search action must be run on the server that is configured for Domain Search and contains the Domain Index.
The session file is needed to provide the identity of the user executing the search so that only documents the user has access to are returned.
Syntax for the input file <?xml version="1.0"?>
<service action="search">
<query order="score | asc | desc" start="n" count="n">
<![CDATA[Properly formatted full-text query string]]>
</query>
</service>
For information on full-text query syntax, see the topic “Full-text query syntax” in this chapter.
Required syntax for the input file <?xml version="1.0"?>
<service action="search">
<query order="score | asc | desc">
<![CDATA[Properly formatted full-text query string]]>
</query>
</service>
Chapter 3: Accessing the Team Workplace Java API 25
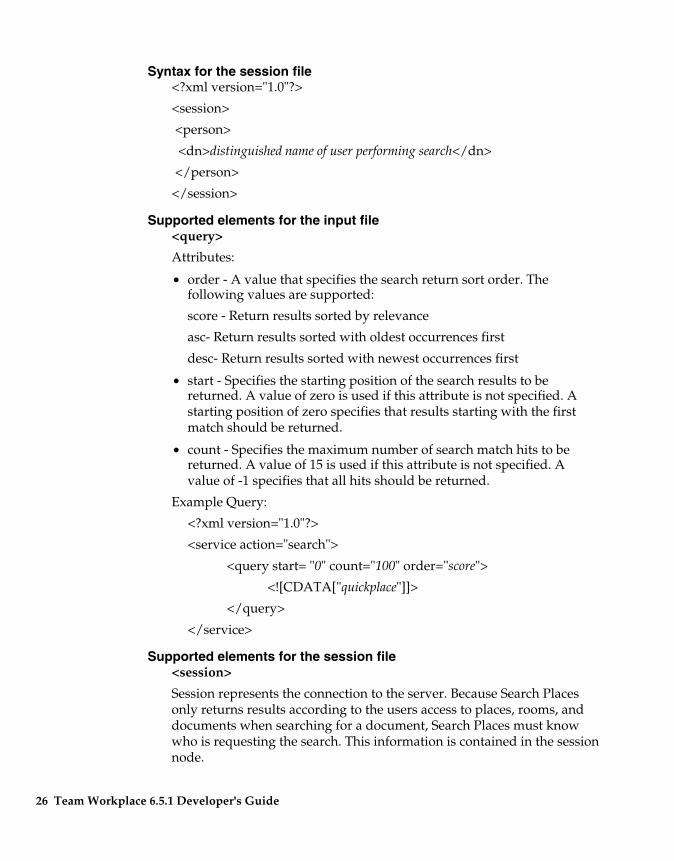
Syntax for the session file <?xml version="1.0"?>
<session>
<person>
<dn>distinguished name of user performing search</dn>
</person>
</session>
Supported elements for the input file <query>
Attributes:
• order - A value that specifies the search return sort order. The following values are supported:
score - Return results sorted by relevance
asc- Return results sorted with oldest occurrences first
desc- Return results sorted with newest occurrences first
• start - Specifies the starting position of the search results to be returned. A value of zero is used if this attribute is not specified. A starting position of zero specifies that results starting with the first match should be returned.
• count - Specifies the maximum number of search match hits to be returned. A value of 15 is used if this attribute is not specified. A value of -1 specifies that all hits should be returned.
Example Query:
<?xml version="1.0"?>
<service action="search">
<query start= "0" count="100" order="score">
<![CDATA["quickplace"]]>
</query>
</service>
Supported elements for the session file <session>
Session represents the connection to the server. Because Search Places only returns results according to the users access to places, rooms, and documents when searching for a document, Search Places must know who is requesting the search. This information is contained in the session node.
26 Team Workplace 6.5.1 Developer's Guide
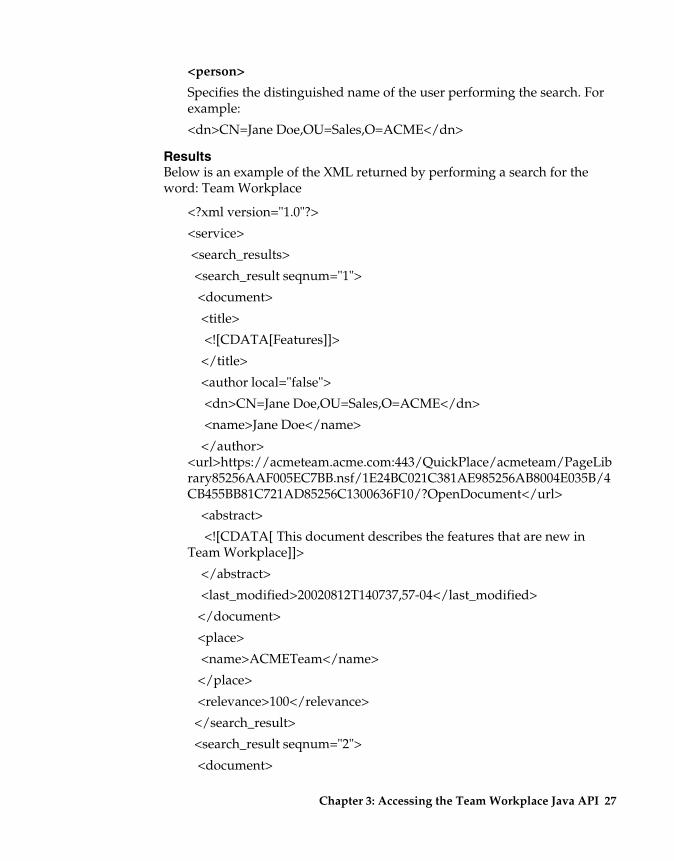
<person>
Specifies the distinguished name of the user performing the search. Forexample:
<dn>CN=Jane Doe,OU=Sales,O=ACME</dn>
Results Below is an example of the XML returned by performing a search for the word: Team Workplace
<?xml version="1.0"?>
<service>
<search_results>
<search_result seqnum="1">
<document>
<title>
<![CDATA[Features]]>
</title>
<author local="false">
<dn>CN=Jane Doe,OU=Sales,O=ACME</dn>
<name>Jane Doe</name>
</author> <url>https://acmeteam.acme.com:443/QuickPlace/acmeteam/PageLib rary85256AAF005EC7BB.nsf/1E24BC021C381AE985256AB8004E035B/4 CB455BB81C721AD85256C1300636F10/?OpenDocument</url>
<abstract>
<![CDATA[ This document describes the features that are new in Team Workplace]]>
</abstract>
<last_modified>20020812T140737,57-04</last_modified>
</document>
<place>
<name>ACMETeam</name>
</place>
<relevance>100</relevance>
</search_result>
<search_result seqnum="2">
<document>
Chapter 3: Accessing the Team Workplace Java API 27
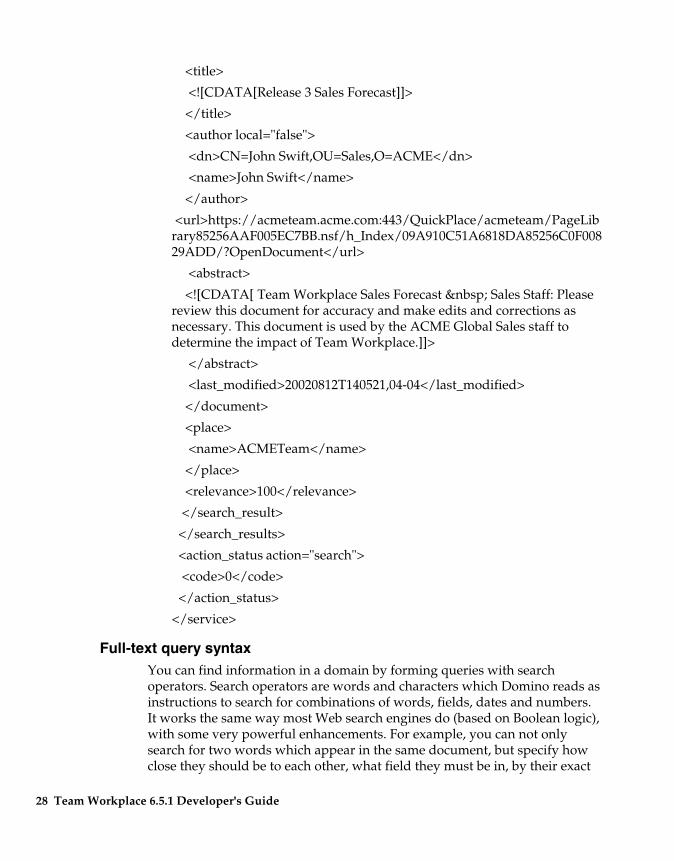
<title>
<![CDATA[Release 3 Sales Forecast]]>
</title>
<author local="false">
<dn>CN=John Swift,OU=Sales,O=ACME</dn>
<name>John Swift</name>
</author>
<url>https://acmeteam.acme.com:443/QuickPlace/acmeteam/PageLib rary85256AAF005EC7BB.nsf/h_Index/09A910C51A6818DA85256C0F008 29ADD/?OpenDocument</url>
<abstract>
<![CDATA[ Team Workplace Sales Forecast Sales Staff: Please review this document for accuracy and make edits and corrections as necessary. This document is used by the ACME Global Sales staff to determine the impact of Team Workplace.]]>
</abstract>
<last_modified>20020812T140521,04-04</last_modified>
</document>
<place>
<name>ACMETeam</name>
</place>
<relevance>100</relevance>
</search_result>
</search_results>
<action_status action="search">
<code>0</code>
</action_status>
</service>
Full-text query syntax You can find information in a domain by forming queries with search operators. Search operators are words and characters which Domino reads as instructions to search for combinations of words, fields, dates and numbers. It works the same way most Web search engines do (based on Boolean logic), with some very powerful enhancements. For example, you can not only search for two words which appear in the same document, but specify how close they should be to each other, what field they must be in, by their exact
28 Team Workplace 6.5.1 Developer's Guide

case, and that one should be judged as more important. Using wildcards you can also search on just a fragment of a word and Domino returns every word containing that fragment.
Operators are reserved words in Domino. If you want to search for an operator as you would normal text, for example in a phrase such as “Gene and Joan,” you must put the phrase in quotes.
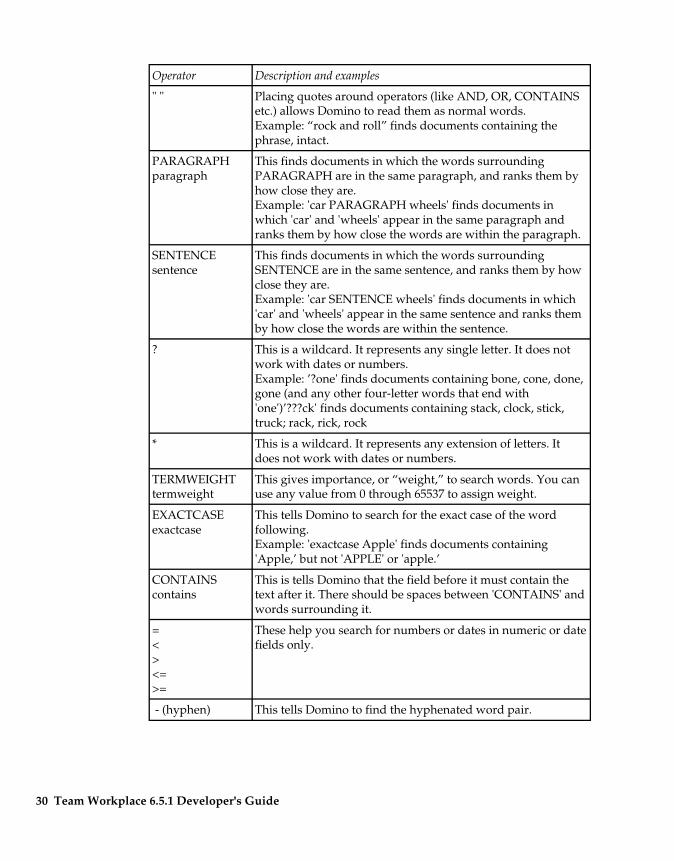
Operator Description and examples
field FIELD [fieldname] (brackets)
These mean 'search this field.’ Domino then expects you to specify the field to search. In this release of Team Workplace field operators only to find text in the $Updatedby and _RevisionDate fields. There should be spaces between 'FIELD' and words surrounding it. Example: 'FIELD $Updatedby CONTAINS Simpson' finds documents whose $Updatedby field contains the word Simpson.
( ) [parentheses]
These determine the order in which Domino processes sections of your query. A part of the query enclosed in parentheses will be processed before parts outside the parentheses.
and AND &
These find documents containing all the conditions or words linked by AND. Example: 'cat AND dog AND fish' finds documents containing all three of these words.
or OR | ACCRUE , (comma)
These find documents containing either of the conditions or words and returns them ranked by number of appearances in the document.
NOT not !
These make the query negative. You can put NOT between words: 'cat AND NOT dog' finds documents containing the word cat, but not the word dog.You can put NOT before any field name: 'NOT[author] CONTAINS Simpson' finds documents whose author field does not contain the word Simpson.You can use NOT after CONTAINS, and before a word: ’[author] CONTAINS NOT Simpson' finds documents whose author field does not contain the word Simpson.You cannot put NOT after =, <, >, <=, or >= and before a date or number: ’[date1] = NOT 12/25/98' does not work.
“continued”
Chapter 3: Accessing the Team Workplace Java API 29
Operator Description and examples
" " Placing quotes around operators (like AND, OR, CONTAINS etc.) allows Domino to read them as normal words. Example: “rock and roll” finds documents containing the phrase, intact.
PARAGRAPH paragraph
This finds documents in which the words surrounding PARAGRAPH are in the same paragraph, and ranks them by how close they are. Example: 'car PARAGRAPH wheels' finds documents in which 'car' and 'wheels' appear in the same paragraph and ranks them by how close the words are within the paragraph.
SENTENCE sentence
This finds documents in which the words surrounding SENTENCE are in the same sentence, and ranks them by how close they are. Example: 'car SENTENCE wheels' finds documents in which 'car' and 'wheels' appear in the same sentence and ranks them by how close the words are within the sentence.
? This is a wildcard. It represents any single letter. It does not work with dates or numbers. Example: ’?one' finds documents containing bone, cone, done, gone (and any other four-letter words that end with 'one')’???ck' finds documents containing stack, clock, stick, truck; rack, rick, rock
* This is a wildcard. It represents any extension of letters. It does not work with dates or numbers.
TERMWEIGHT termweight
This gives importance, or “weight,” to search words. You can use any value from 0 through 65537 to assign weight.
EXACTCASE exactcase
This tells Domino to search for the exact case of the word following. Example: 'exactcase Apple' finds documents containing 'Apple,’ but not 'APPLE' or 'apple.’
CONTAINS contains
This is tells Domino that the field before it must contain the text after it. There should be spaces between 'CONTAINS' and words surrounding it.
= < > <= >=
These help you search for numbers or dates in numeric or date fields only.
- (hyphen) This tells Domino to find the hyphenated word pair.
30 Team Workplace 6.5.1 Developer's Guide
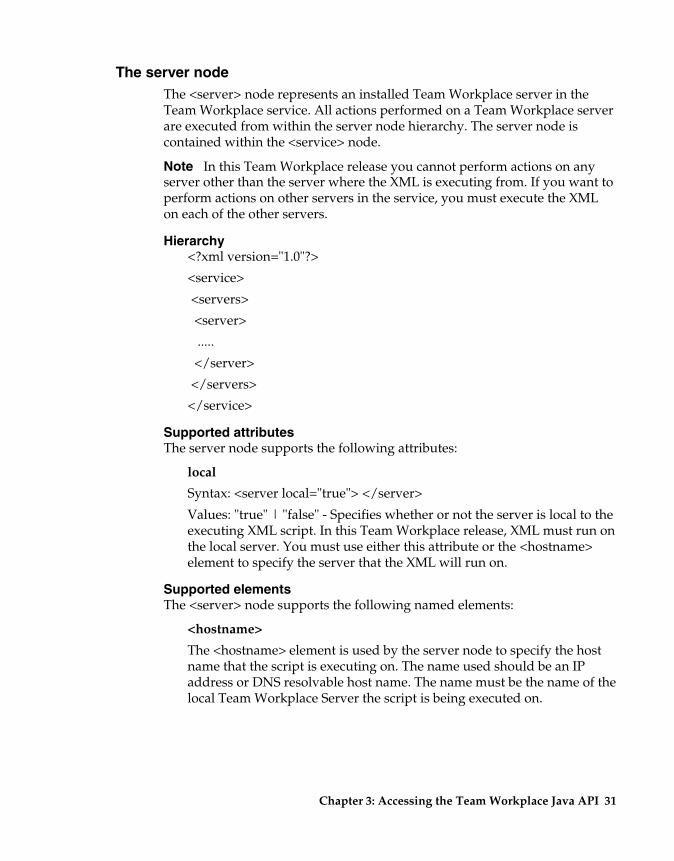
The server node The <server> node represents an installed Team Workplace server in the Team Workplace service. All actions performed on a Team Workplace server are executed from within the server node hierarchy. The server node is contained within the <service> node.
Note In this Team Workplace release you cannot perform actions on any server other than the server where the XML is executing from. If you want to perform actions on other servers in the service, you must execute the XML on each of the other servers.
Hierarchy <?xml version="1.0"?>
<service>
<servers>
<server>
.....
</server>
</servers>
</service>
Supported attributes The server node supports the following attributes:
local
Syntax: <server local="true"> </server>
Values: "true" | "false" - Specifies whether or not the server is local to the executing XML script. In this Team Workplace release, XML must run on the local server. You must use either this attribute or the <hostname> element to specify the server that the XML will run on.
Supported elements The <server> node supports the following named elements:
<hostname>
The <hostname> element is used by the server node to specify the host name that the script is executing on. The name used should be an IP address or DNS resolvable host name. The name must be the name of the local Team Workplace Server the script is being executed on.
Chapter 3: Accessing the Team Workplace Java API 31
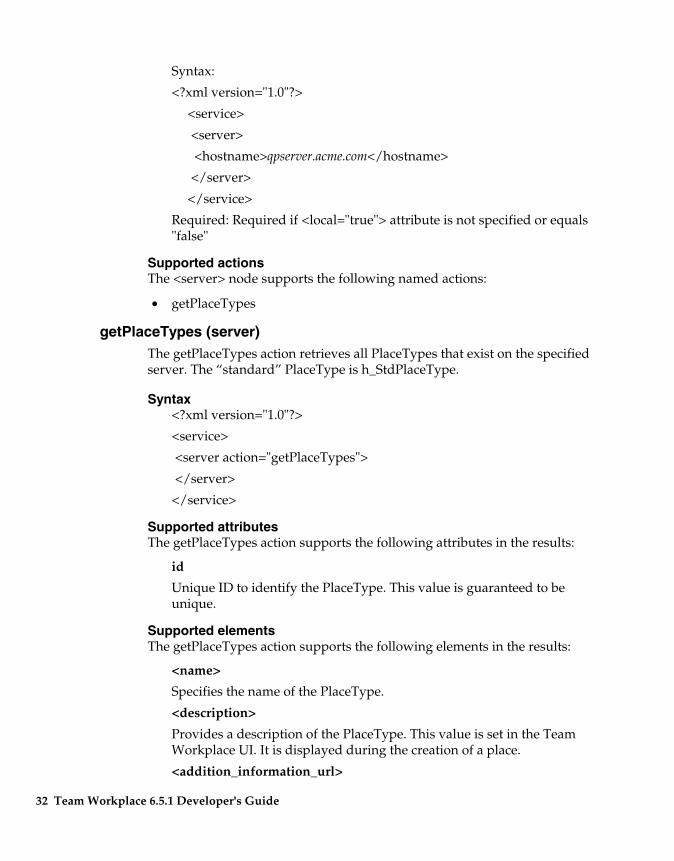
Syntax:
<?xml version="1.0"?>
<service>
<server>
<hostname>qpserver.acme.com</hostname>
</server>
</service>
Required: Required if <local="true"> attribute is not specified or equals "false"
Supported actions The <server> node supports the following named actions:
• getPlaceTypes
getPlaceTypes (server) The getPlaceTypes action retrieves all PlaceTypes that exist on the specified server. The “standard” PlaceType is h_StdPlaceType.
Syntax <?xml version="1.0"?>
<service>
<server action="getPlaceTypes">
</server>
</service>
Supported attributes The getPlaceTypes action supports the following attributes in the results:
id
Unique ID to identify the PlaceType. This value is guaranteed to be unique.
Supported elements The getPlaceTypes action supports the following elements in the results:
<name>
Specifies the name of the PlaceType.
<description>
Provides a description of the PlaceType. This value is set in the Team Workplace UI. It is displayed during the creation of a place.
<addition_information_url>
32 Team Workplace 6.5.1 Developer's Guide
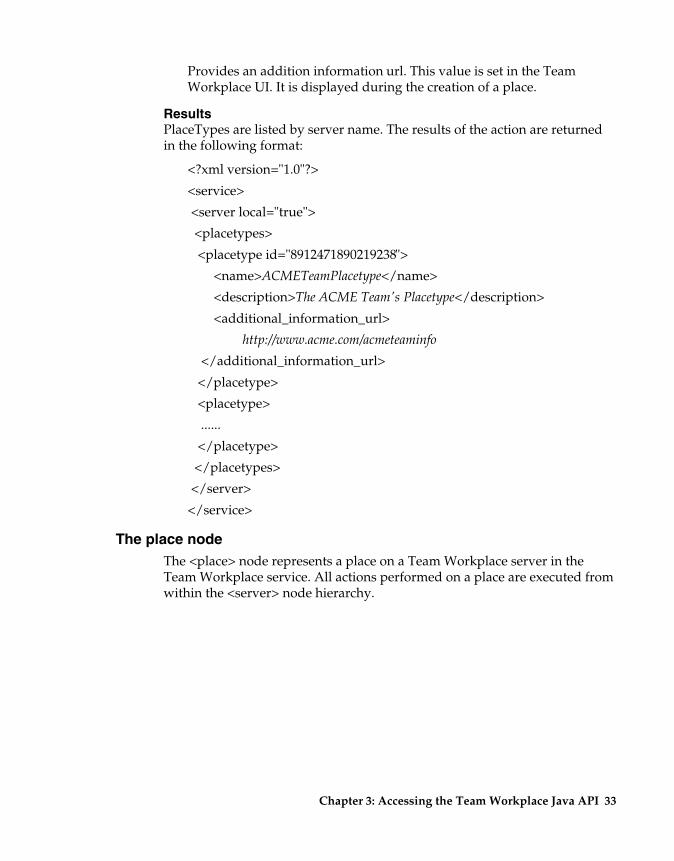
Provides an addition information url. This value is set in the Team Workplace UI. It is displayed during the creation of a place.
Results PlaceTypes are listed by server name. The results of the action are returned in the following format:
<?xml version="1.0"?>
<service>
<server local="true">
<placetypes>
<placetype id="8912471890219238">
<name>ACMETeamPlacetype</name>
<description>The ACME Team's Placetype</description>
<additional_information_url>
http://www.acme.com/acmeteaminfo
</additional_information_url>
</placetype>
<placetype>
......
</placetype>
</placetypes>
</server>
</service>
The place node The <place> node represents a place on a Team Workplace server in the Team Workplace service. All actions performed on a place are executed from within the <server> node hierarchy.
Chapter 3: Accessing the Team Workplace Java API 33
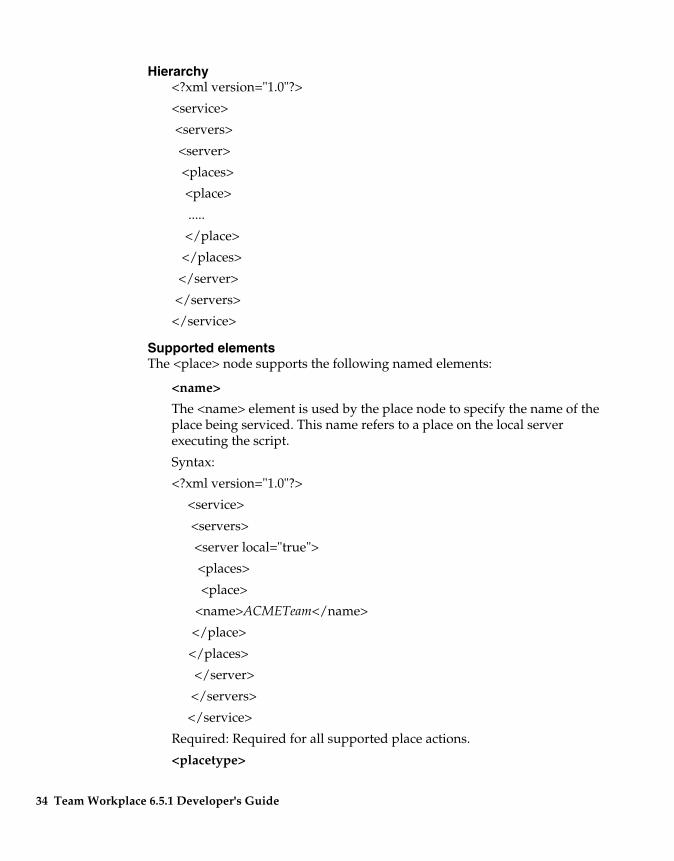
Hierarchy <?xml version="1.0"?>
<service>
<servers>
<server>
<places>
<place>
.....
</place>
</places>
</server>
</servers>
</service>
Supported elements The <place> node supports the following named elements:
<name>
The <name> element is used by the place node to specify the name of the place being serviced. This name refers to a place on the local server executing the script.
Syntax:
<?xml version="1.0"?>
<service>
<servers>
<server local="true">
<places>
<place>
<name>ACMETeam</name>
</place>
</places>
</server>
</servers>
</service>
Required: Required for all supported place actions.
<placetype>
34 Team Workplace 6.5.1 Developer's Guide
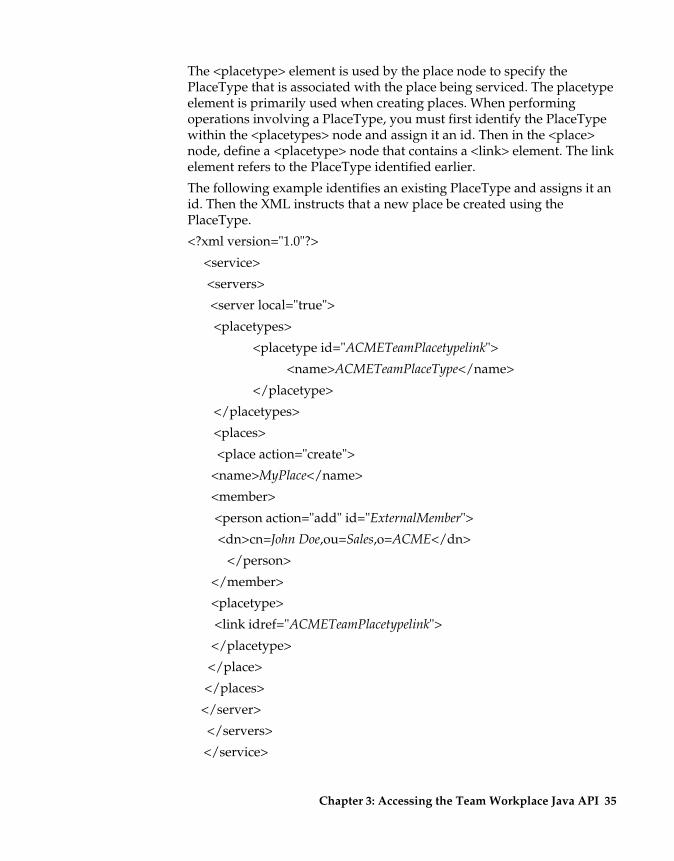
The <placetype> element is used by the place node to specify the PlaceType that is associated with the place being serviced. The placetype element is primarily used when creating places. When performing operations involving a PlaceType, you must first identify the PlaceType within the <placetypes> node and assign it an id. Then in the <place> node, define a <placetype> node that contains a <link> element. The link element refers to the PlaceType identified earlier.
The following example identifies an existing PlaceType and assigns it an id. Then the XML instructs that a new place be created using the PlaceType.
<?xml version="1.0"?>
<service>
<servers>
<server local="true">
<placetypes>
<placetype id="ACMETeamPlacetypelink">
<name>ACMETeamPlaceType</name>
</placetype>
</placetypes>
<places>
<place action="create">
<name>MyPlace</name>
<member>
<person action="add" id="ExternalMember">
<dn>cn=John Doe,ou=Sales,o=ACME</dn>
</person>
</member>
<placetype>
<link idref="ACMETeamPlacetypelink">
</placetype>
</place>
</places>
</server>
</servers>
</service>
Chapter 3: Accessing the Team Workplace Java API 35
For more information on using PlaceType objects see the “The placetype node” in this chapter.
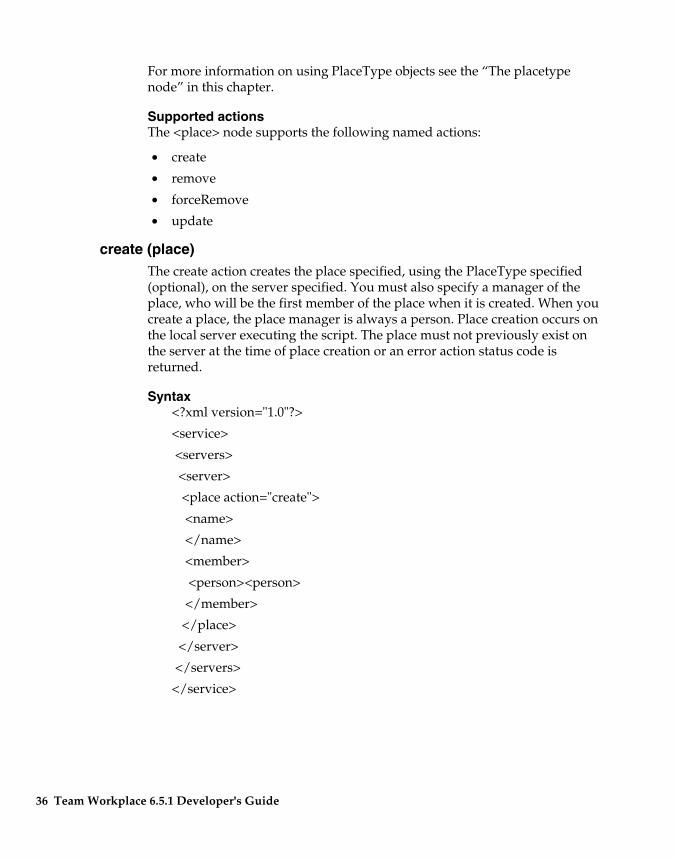
Supported actions The <place> node supports the following named actions:
• create
• remove
• forceRemove
• update
create (place) The create action creates the place specified, using the PlaceType specified (optional), on the server specified. You must also specify a manager of the place, who will be the first member of the place when it is created. When you create a place, the place manager is always a person. Place creation occurs on the local server executing the script. The place must not previously exist on the server at the time of place creation or an error action status code is returned.
Syntax <?xml version="1.0"?>
<service>
<servers>
<server>
<place action="create">
<name>
</name>
<member>
<person><person>
</member>
</place>
</server>
</servers>
</service>
36 Team Workplace 6.5.1 Developer's Guide
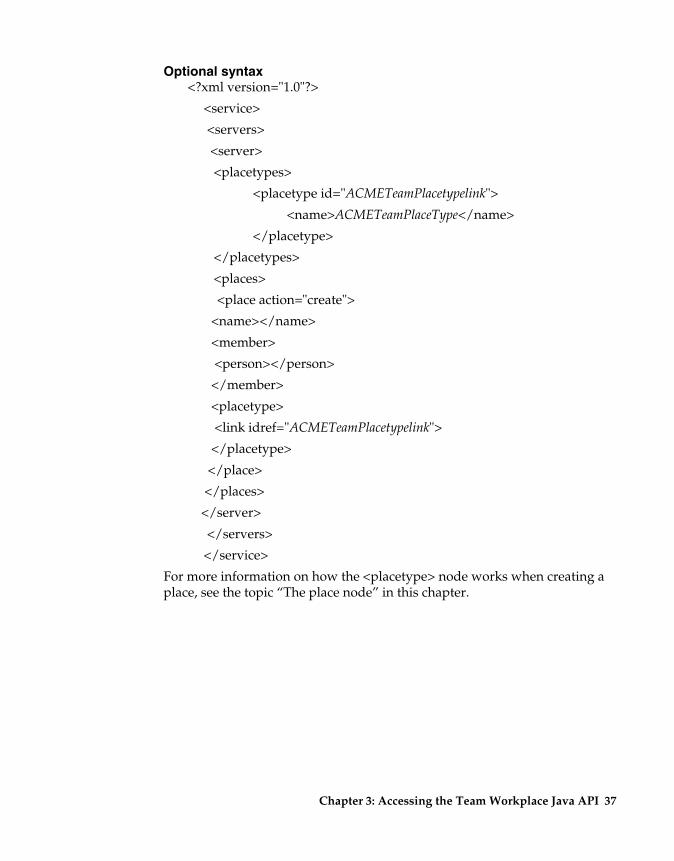
Optional syntax <?xml version="1.0"?>
<service>
<servers>
<server>
<placetypes>
<placetype id="ACMETeamPlacetypelink">
<name>ACMETeamPlaceType</name>
</placetype>
</placetypes>
<places>
<place action="create">
<name></name>
<member>
<person></person>
</member>
<placetype>
<link idref="ACMETeamPlacetypelink">
</placetype>
</place>
</places>
</server>
</servers>
</service>
For more information on how the <placetype> node works when creating a place, see the topic “The place node” in this chapter.
Chapter 3: Accessing the Team Workplace Java API 37
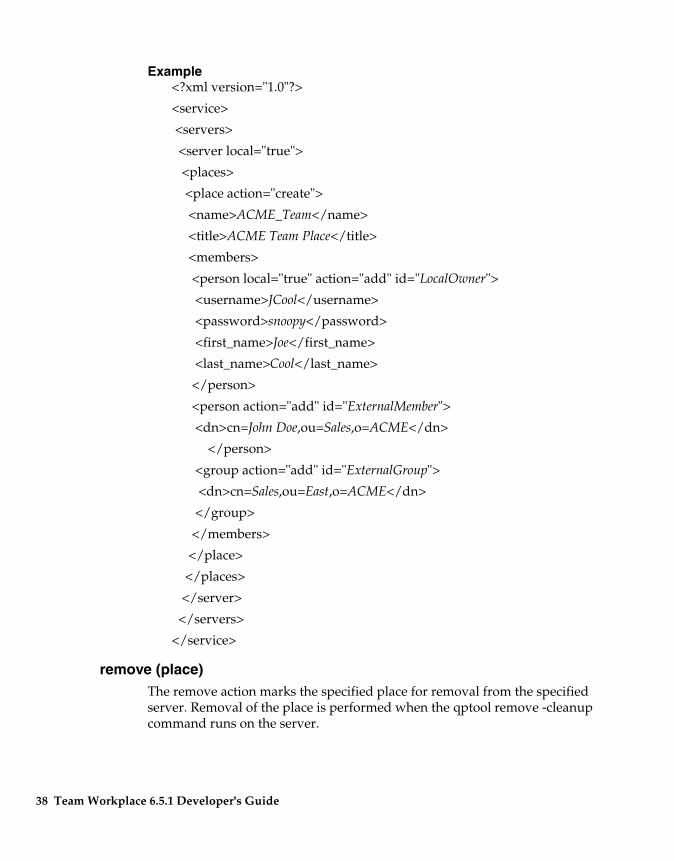
Example <?xml version="1.0"?>
<service>
<servers>
<server local="true">
<places>
<place action="create">
<name>ACME_Team</name>
<title>ACME Team Place</title>
<members>
<person local="true" action="add" id="LocalOwner">
<username>JCool</username>
<password>snoopy</password>
<first_name>Joe</first_name>
<last_name>Cool</last_name>
</person>
<person action="add" id="ExternalMember">
<dn>cn=John Doe,ou=Sales,o=ACME</dn>
</person>
<group action="add" id="ExternalGroup">
<dn>cn=Sales,ou=East,o=ACME</dn>
</group>
</members>
</place>
</places>
</server>
</servers>
</service>
remove (place) The remove action marks the specified place for removal from the specified server. Removal of the place is performed when the qptool remove -cleanup command runs on the server.
38 Team Workplace 6.5.1 Developer's Guide
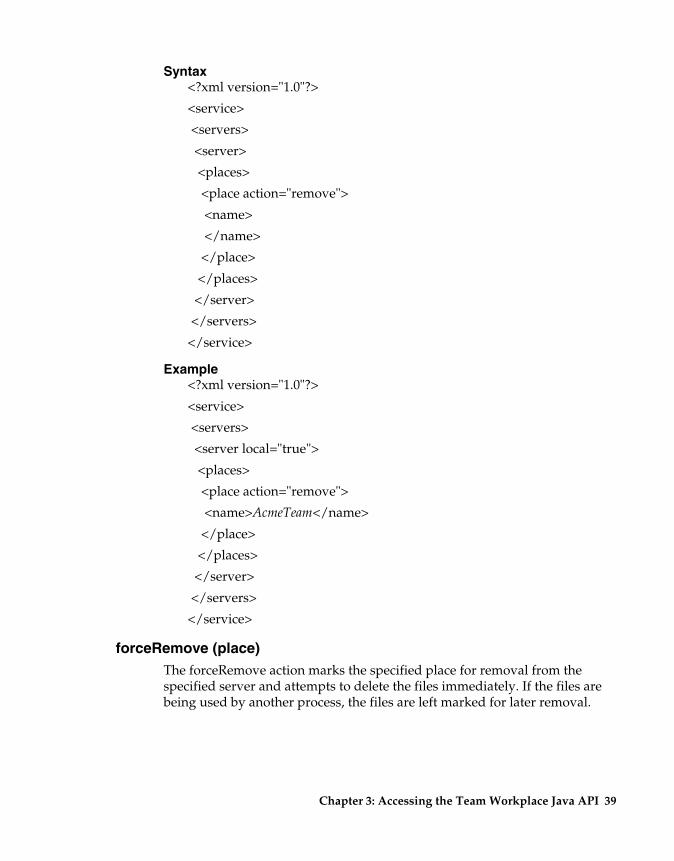
Syntax <?xml version="1.0"?>
<service>
<servers>
<server>
<places>
<place action="remove">
<name>
</name>
</place>
</places>
</server>
</servers>
</service>
Example <?xml version="1.0"?>
<service>
<servers>
<server local="true">
<places>
<place action="remove">
<name>AcmeTeam</name>
</place>
</places>
</server>
</servers>
</service>
forceRemove (place) The forceRemove action marks the specified place for removal from the specified server and attempts to delete the files immediately. If the files are being used by another process, the files are left marked for later removal.
Chapter 3: Accessing the Team Workplace Java API 39
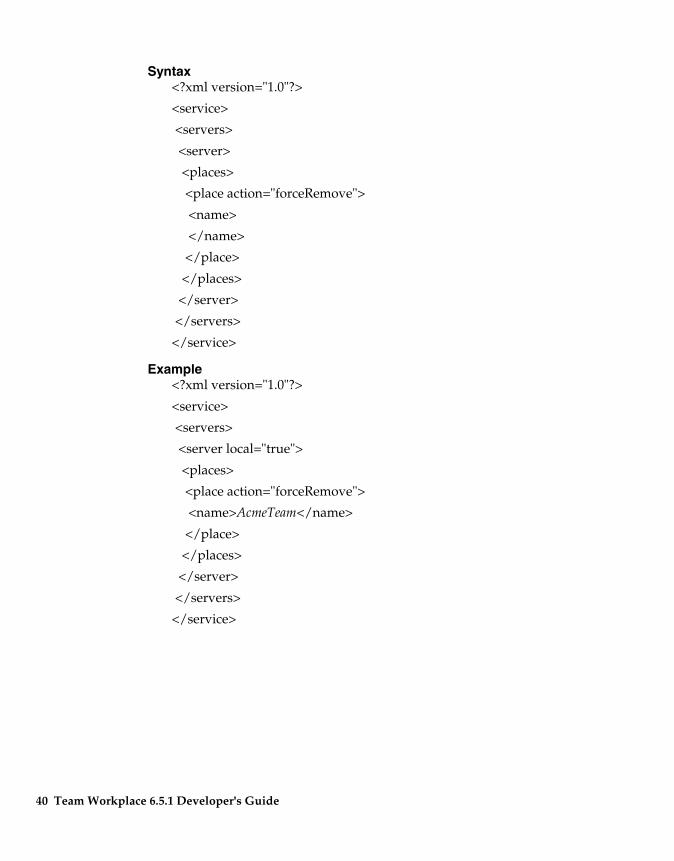
Syntax <?xml version="1.0"?>
<service>
<servers>
<server>
<places>
<place action="forceRemove">
<name>
</name>
</place>
</places>
</server>
</servers>
</service>
Example <?xml version="1.0"?>
<service>
<servers>
<server local="true">
<places>
<place action="forceRemove">
<name>AcmeTeam</name>
</place>
</places>
</server>
</servers>
</service>
40 Team Workplace 6.5.1 Developer's Guide
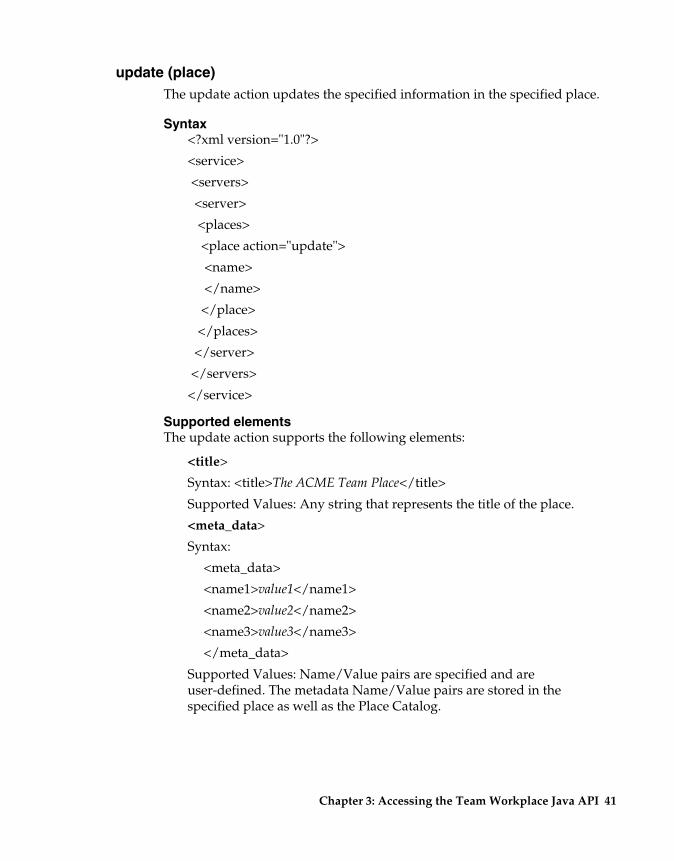
update (place) The update action updates the specified information in the specified place.
Syntax <?xml version="1.0"?>
<service>
<servers>
<server>
<places>
<place action="update">
<name>
</name>
</place>
</places>
</server>
</servers>
</service>
Supported elements The update action supports the following elements:
<title>
Syntax: <title>The ACME Team Place</title>
Supported Values: Any string that represents the title of the place.
<meta_data>
Syntax:
<meta_data>
<name1>value1</name1>
<name2>value2</name2>
<name3>value3</name3>
</meta_data>
Supported Values: Name/Value pairs are specified and are user-defined. The metadata Name/Value pairs are stored in the specified place as well as the Place Catalog.
Chapter 3: Accessing the Team Workplace Java API 41
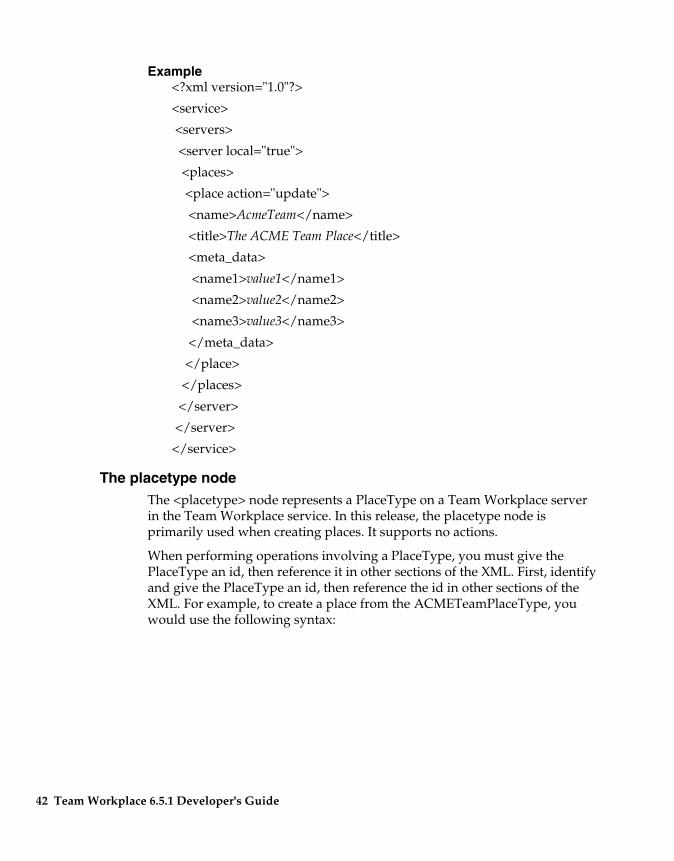
Example <?xml version="1.0"?>
<service>
<servers>
<server local="true">
<places>
<place action="update">
<name>AcmeTeam</name>
<title>The ACME Team Place</title>
<meta_data>
<name1>value1</name1>
<name2>value2</name2>
<name3>value3</name3>
</meta_data>
</place>
</places>
</server>
</server>
</service>
The placetype node The <placetype> node represents a PlaceType on a Team Workplace server in the Team Workplace service. In this release, the placetype node is primarily used when creating places. It supports no actions.
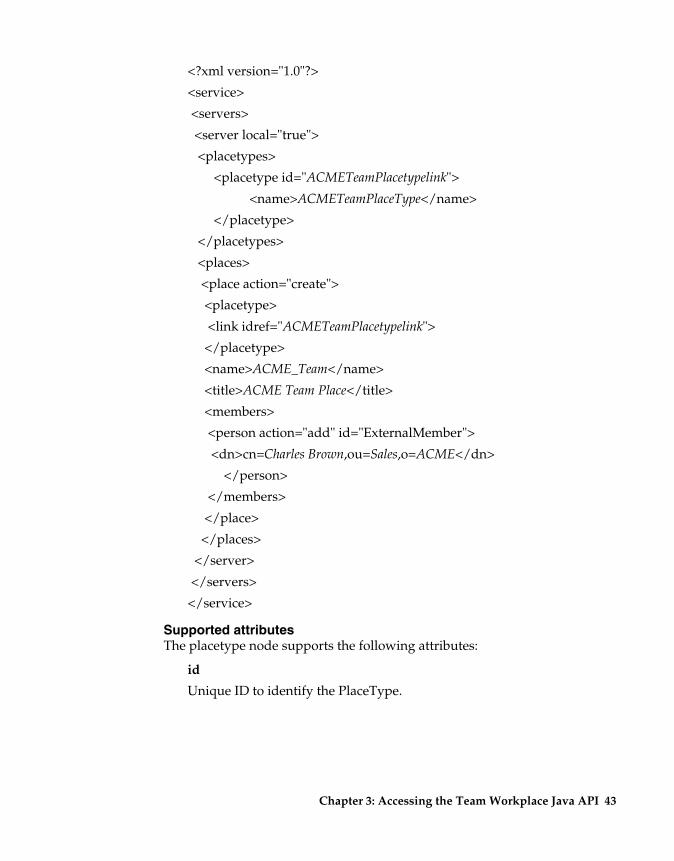
When performing operations involving a PlaceType, you must give the PlaceType an id, then reference it in other sections of the XML. First, identify and give the PlaceType an id, then reference the id in other sections of the XML. For example, to create a place from the ACMETeamPlaceType, you would use the following syntax:
42 Team Workplace 6.5.1 Developer's Guide
<?xml version="1.0"?>
<service>
<servers>
<server local="true">
<placetypes>
<placetype id="ACMETeamPlacetypelink">
<name>ACMETeamPlaceType</name>
</placetype>
</placetypes>
<places>
<place action="create">
<placetype>
<link idref="ACMETeamPlacetypelink">
</placetype>
<name>ACME_Team</name>
<title>ACME Team Place</title>
<members>
<person action="add" id="ExternalMember">
<dn>cn=Charles Brown,ou=Sales,o=ACME</dn>
</person>
</members>
</place>
</places>
</server>
</servers>
</service>
Supported attributes The placetype node supports the following attributes:
id
Unique ID to identify the PlaceType.
Chapter 3: Accessing the Team Workplace Java API 43
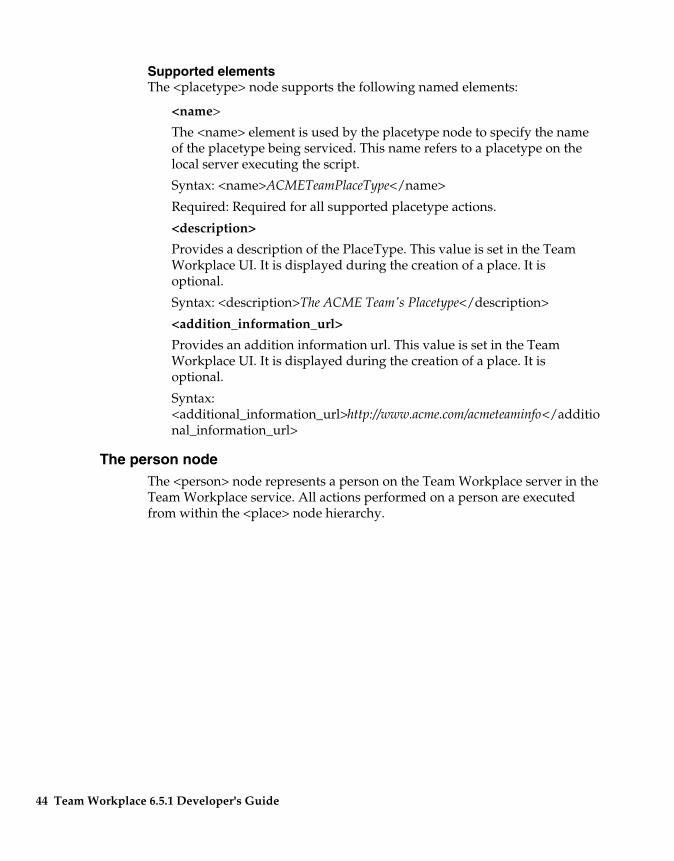
Supported elements The <placetype> node supports the following named elements:
<name>
The <name> element is used by the placetype node to specify the name of the placetype being serviced. This name refers to a placetype on the local server executing the script.
Syntax: <name>ACMETeamPlaceType</name>
Required: Required for all supported placetype actions.
<description>
Provides a description of the PlaceType. This value is set in the Team Workplace UI. It is displayed during the creation of a place. It is optional.
Syntax: <description>The ACME Team's Placetype</description>
<addition_information_url>
Provides an addition information url. This value is set in the Team Workplace UI. It is displayed during the creation of a place. It is optional.
Syntax: <additional_information_url>http://www.acme.com/acmeteaminfo</additio nal_information_url>
The person node The <person> node represents a person on the Team Workplace server in the Team Workplace service. All actions performed on a person are executed from within the <place> node hierarchy.
44 Team Workplace 6.5.1 Developer's Guide

Hierarchy <?xml version="1.0"?>
<service>
<servers>
<server>
<places>
<place>
<members>
<person>
</person>
</members>
</place>
</places>
</server>
</servers>
</service>
Supported attributes The person node supports the following attributes:
id
Syntax:
<person id="personid"></person>
<person idref="personid"></person>
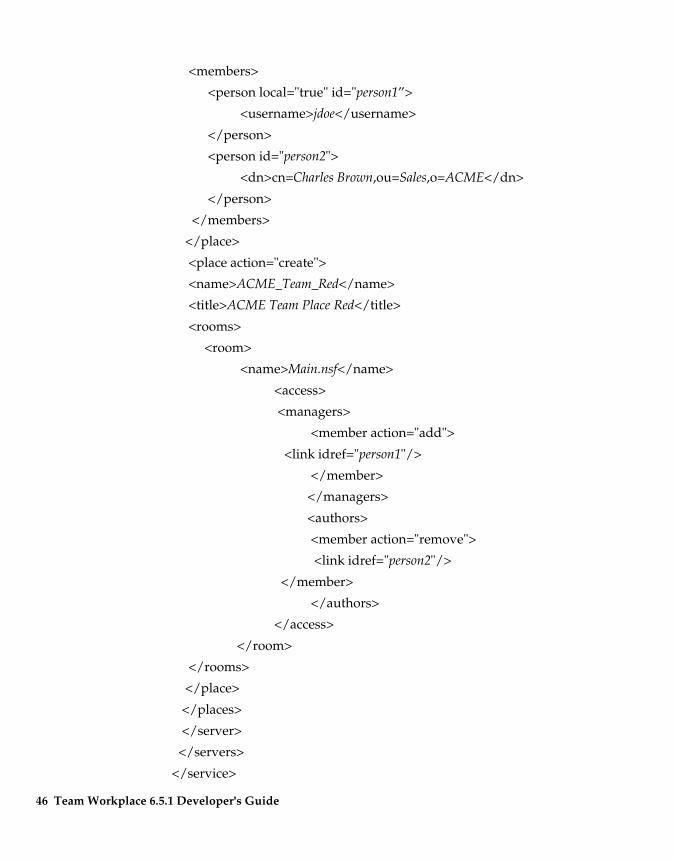
Assigning a person an id allows you to reference them in other sectionsof the XML. For example, if you want to create two places and add thesame user as a member of both, you define and give the user an idwithin the first <place> node, then reference them in the second <place>node. For example:
<?xml version="1.0"?>
<service>
<servers>
<server local="true">
<places>
<place action="create">
<name>ACME_Team_Blue</name>
<title>ACME Team Place Blue</title>
Chapter 3: Accessing the Team Workplace Java API 45
<members>
<person local="true" id="person1”>
<username>jdoe</username>
</person>
<person id="person2">
<dn>cn=Charles Brown,ou=Sales,o=ACME</dn>
</person>
</members>
</place>
<place action="create">
<name>ACME_Team_Red</name>
<title>ACME Team Place Red</title>
<rooms>
<room>
<name>Main.nsf</name>
<access>
<managers>
<member action="add">
<link idref="person1"/>
</member>
</managers>
<authors>
<member action="remove">
<link idref="person2"/>
</member>
</authors>
</access>
</room>
</rooms>
</place>
</places>
</server>
</servers>
</service>
46 Team Workplace 6.5.1 Developer's Guide
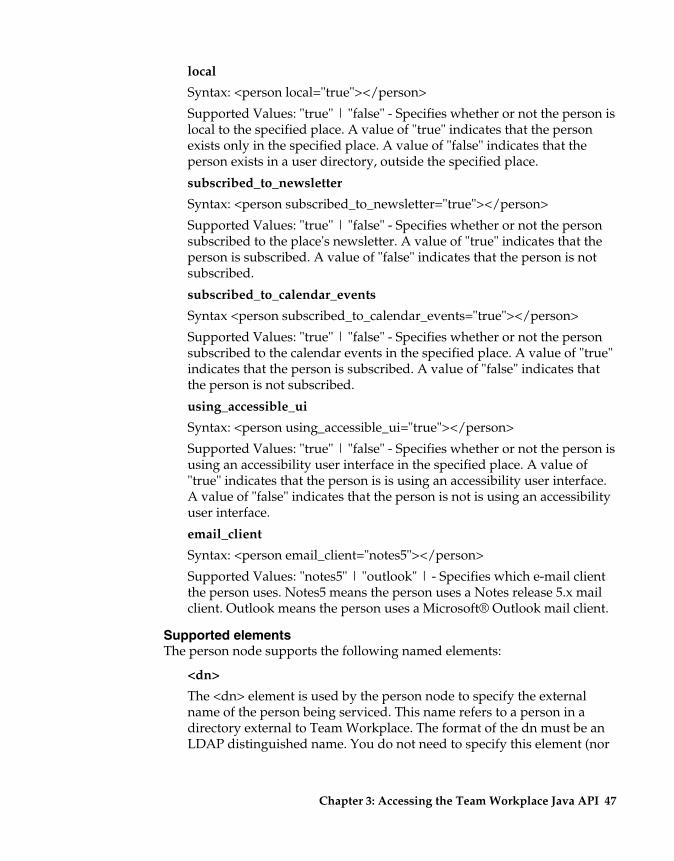
local
Syntax: <person local="true"></person>
Supported Values: "true" | "false" - Specifies whether or not the person is local to the specified place. A value of "true" indicates that the person exists only in the specified place. A value of "false" indicates that the person exists in a user directory, outside the specified place.
subscribed_to_newsletter
Syntax: <person subscribed_to_newsletter="true"></person>
Supported Values: "true" | "false" - Specifies whether or not the person subscribed to the place's newsletter. A value of "true" indicates that the person is subscribed. A value of "false" indicates that the person is not subscribed.
subscribed_to_calendar_events
Syntax <person subscribed_to_calendar_events="true"></person>
Supported Values: "true" | "false" - Specifies whether or not the person subscribed to the calendar events in the specified place. A value of "true" indicates that the person is subscribed. A value of "false" indicates that the person is not subscribed.
using_accessible_ui
Syntax: <person using_accessible_ui="true"></person>
Supported Values: "true" | "false" - Specifies whether or not the person is using an accessibility user interface in the specified place. A value of "true" indicates that the person is is using an accessibility user interface. A value of "false" indicates that the person is not is using an accessibility user interface.
email_client
Syntax: <person email_client="notes5"></person>
Supported Values: "notes5" | "outlook" | - Specifies which e-mail client the person uses. Notes5 means the person uses a Notes release 5.x mail client. Outlook means the person uses a Microsoft® Outlook mail client.
Supported elements The person node supports the following named elements:
<dn>
The <dn> element is used by the person node to specify the external name of the person being serviced. This name refers to a person in a directory external to Team Workplace. The format of the dn must be an LDAP distinguished name. You do not need to specify this element (nor
Chapter 3: Accessing the Team Workplace Java API 47
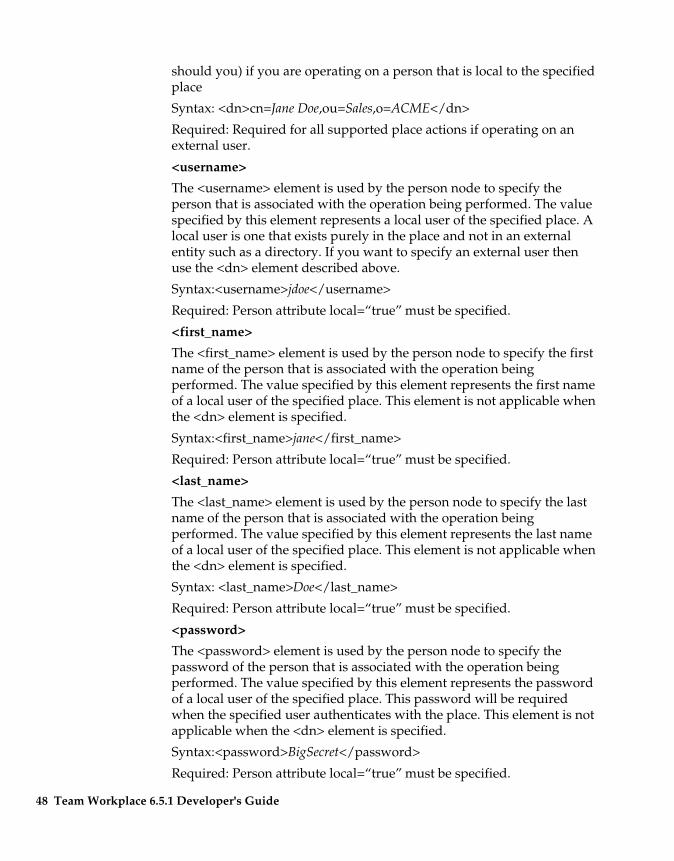
should you) if you are operating on a person that is local to the specifiedplace
Syntax: <dn>cn=Jane Doe,ou=Sales,o=ACME</dn>
Required: Required for all supported place actions if operating on anexternal user.
<username>
The <username> element is used by the person node to specify the person that is associated with the operation being performed. The value specified by this element represents a local user of the specified place. A local user is one that exists purely in the place and not in an external entity such as a directory. If you want to specify an external user then use the <dn> element described above.
Syntax:<username>jdoe</username>
Required: Person attribute local=“true” must be specified.
<first_name>
The <first_name> element is used by the person node to specify the firstname of the person that is associated with the operation beingperformed. The value specified by this element represents the first nameof a local user of the specified place. This element is not applicable whenthe <dn> element is specified.
Syntax:<first_name>jane</first_name>
Required: Person attribute local=“true” must be specified.
<last_name>
The <last_name> element is used by the person node to specify the lastname of the person that is associated with the operation beingperformed. The value specified by this element represents the last nameof a local user of the specified place. This element is not applicable whenthe <dn> element is specified.
Syntax: <last_name>Doe</last_name>
Required: Person attribute local=“true” must be specified.
<password>
The <password> element is used by the person node to specify the password of the person that is associated with the operation being performed. The value specified by this element represents the password of a local user of the specified place. This password will be required when the specified user authenticates with the place. This element is not applicable when the <dn> element is specified.
Syntax:<password>BigSecret</password>
Required: Person attribute local=“true” must be specified.
48 Team Workplace 6.5.1 Developer's Guide
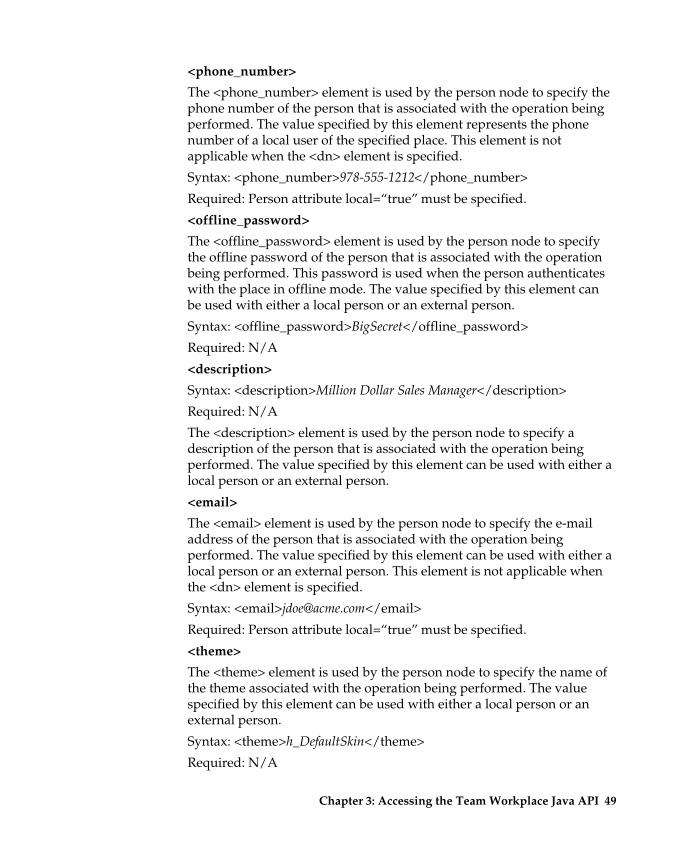
<phone_number>
The <phone_number> element is used by the person node to specify the phone number of the person that is associated with the operation being performed. The value specified by this element represents the phone number of a local user of the specified place. This element is not applicable when the <dn> element is specified.
Syntax: <phone_number>978-555-1212</phone_number>
Required: Person attribute local=“true” must be specified.
<offline_password>
The <offline_password> element is used by the person node to specify the offline password of the person that is associated with the operation being performed. This password is used when the person authenticates with the place in offline mode. The value specified by this element can be used with either a local person or an external person.
Syntax: <offline_password>BigSecret</offline_password>
Required: N/A
<description>
Syntax: <description>Million Dollar Sales Manager</description>
Required: N/A
The <description> element is used by the person node to specify adescription of the person that is associated with the operation beingperformed. The value specified by this element can be used with either alocal person or an external person.
<email>
The <email> element is used by the person node to specify the e-mail address of the person that is associated with the operation being performed. The value specified by this element can be used with either a local person or an external person. This element is not applicable when the <dn> element is specified.
Syntax: <email>[email protected]</email>
Required: Person attribute local=“true” must be specified.
<theme>
The <theme> element is used by the person node to specify the name of the theme associated with the operation being performed. The value specified by this element can be used with either a local person or an external person.
Syntax: <theme>h_DefaultSkin</theme>
Required: N/A
Chapter 3: Accessing the Team Workplace Java API 49
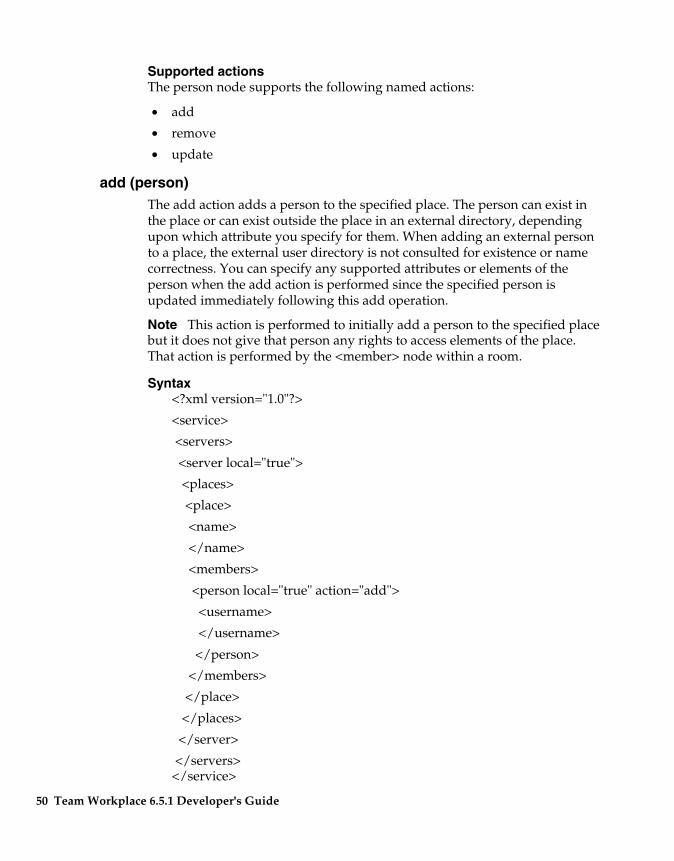
Supported actions The person node supports the following named actions:
• add
• remove
• update
add (person) The add action adds a person to the specified place. The person can exist in the place or can exist outside the place in an external directory, depending upon which attribute you specify for them. When adding an external person to a place, the external user directory is not consulted for existence or name correctness. You can specify any supported attributes or elements of the person when the add action is performed since the specified person is updated immediately following this add operation.
Note This action is performed to initially add a person to the specified place but it does not give that person any rights to access elements of the place. That action is performed by the <member> node within a room.
Syntax <?xml version="1.0"?>
<service>
<servers>
<server local="true">
<places>
<place>
<name>
</name>
<members>
<person local="true" action="add">
<username>
</username>
</person>
</members>
</place>
</places>
</server>
</servers></service>
50 Team Workplace 6.5.1 Developer's Guide
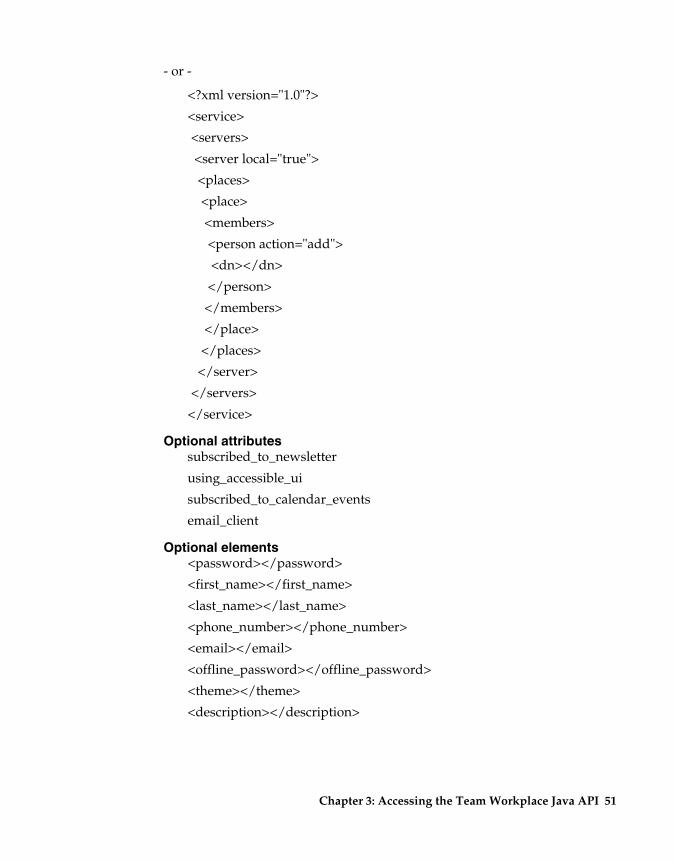
- or -
<?xml version="1.0"?>
<service>
<servers>
<server local="true">
<places>
<place>
<members>
<person action="add">
<dn></dn>
</person>
</members>
</place>
</places>
</server>
</servers>
</service>
Optional attributes subscribed_to_newsletter
using_accessible_ui
subscribed_to_calendar_events
email_client
Optional elements <password></password>
<first_name></first_name>
<last_name></last_name>
<phone_number></phone_number>
<email></email>
<offline_password></offline_password>
<theme></theme>
<description></description>
Chapter 3: Accessing the Team Workplace Java API 51
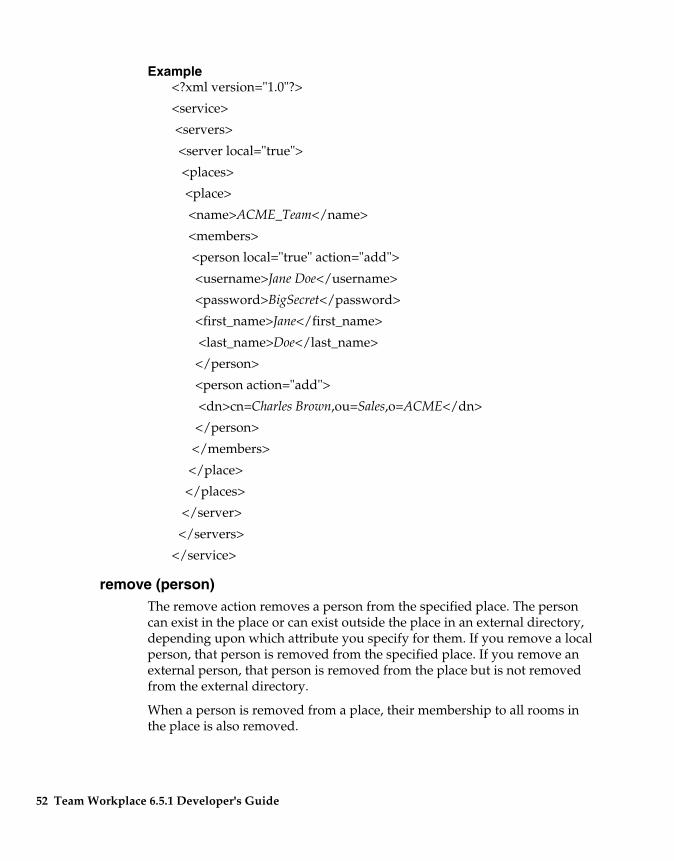
Example <?xml version="1.0"?>
<service>
<servers>
<server local="true">
<places>
<place>
<name>ACME_Team</name>
<members>
<person local="true" action="add">
<username>Jane Doe</username>
<password>BigSecret</password>
<first_name>Jane</first_name>
<last_name>Doe</last_name>
</person>
<person action="add">
<dn>cn=Charles Brown,ou=Sales,o=ACME</dn>
</person>
</members>
</place>
</places>
</server>
</servers>
</service>
remove (person) The remove action removes a person from the specified place. The person can exist in the place or can exist outside the place in an external directory, depending upon which attribute you specify for them. If you remove a local person, that person is removed from the specified place. If you remove an external person, that person is removed from the place but is not removed from the external directory.
When a person is removed from a place, their membership to all rooms in the place is also removed.
52 Team Workplace 6.5.1 Developer's Guide
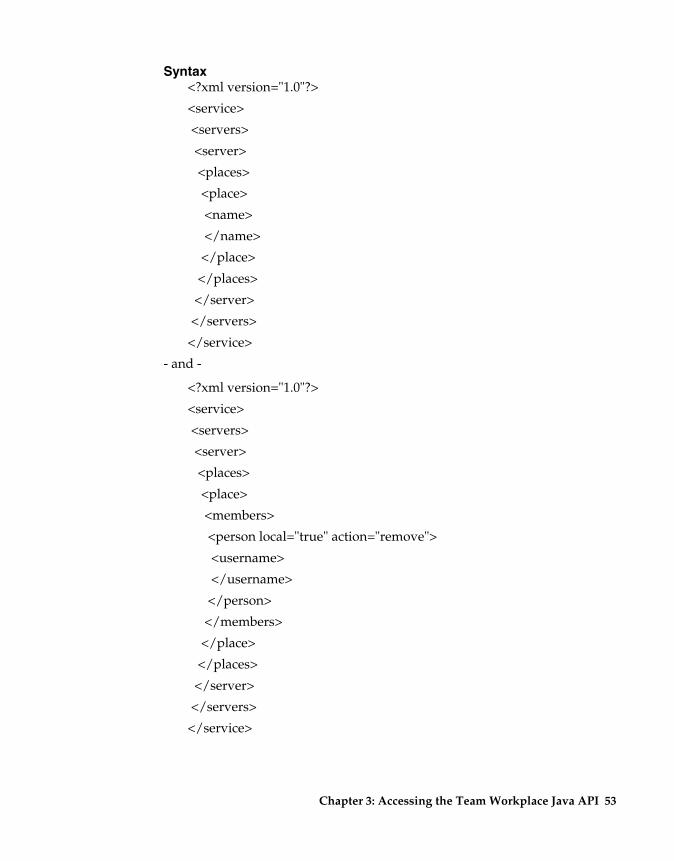
Syntax <?xml version="1.0"?>
<service>
<servers>
<server>
<places>
<place>
<name>
</name>
</place>
</places>
</server>
</servers>
</service>
- and -
<?xml version="1.0"?>
<service>
<servers>
<server>
<places>
<place>
<members>
<person local="true" action="remove">
<username>
</username>
</person>
</members>
</place>
</places>
</server>
</servers>
</service>
Chapter 3: Accessing the Team Workplace Java API 53
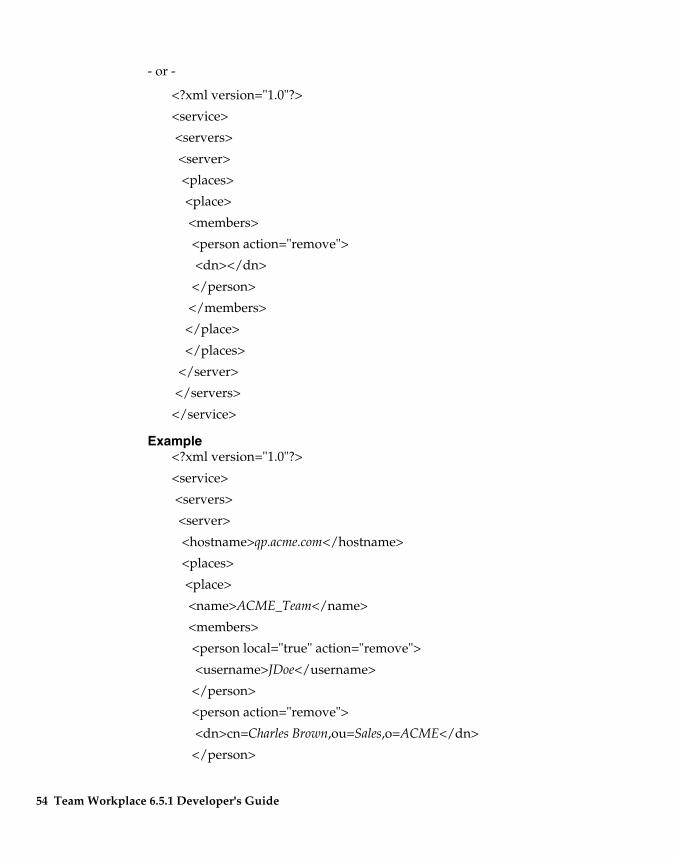
- or -
<?xml version="1.0"?>
<service>
<servers>
<server>
<places>
<place>
<members>
<person action="remove">
<dn></dn>
</person>
</members>
</place>
</places>
</server>
</servers>
</service>
Example <?xml version="1.0"?>
<service>
<servers>
<server>
<hostname>qp.acme.com</hostname>
<places>
<place>
<name>ACME_Team</name>
<members>
<person local="true" action="remove">
<username>JDoe</username>
</person>
<person action="remove">
<dn>cn=Charles Brown,ou=Sales,o=ACME</dn>
</person>
54 Team Workplace 6.5.1 Developer's Guide
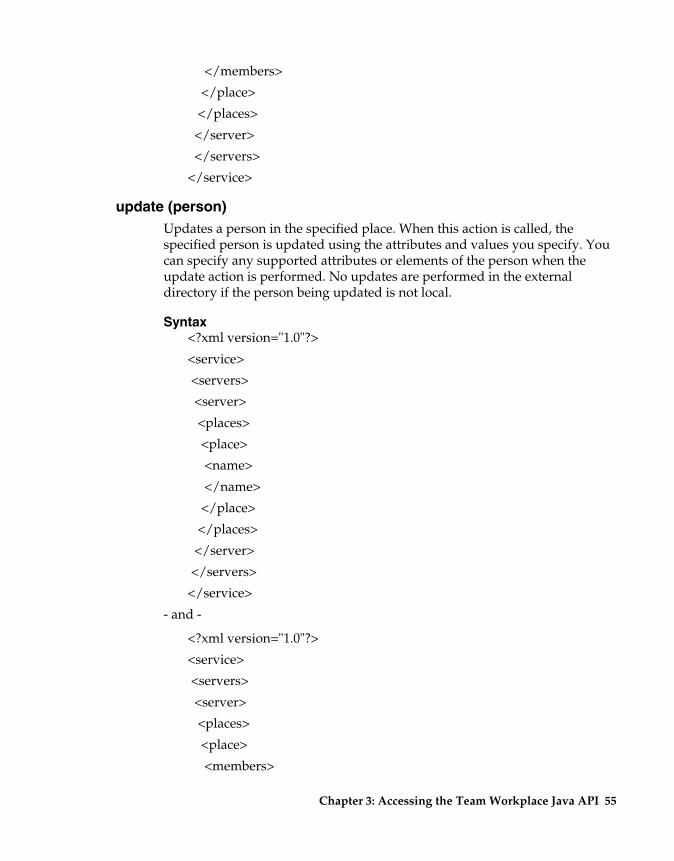
</members>
</place>
</places>
</server>
</servers>
</service>
update (person) Updates a person in the specified place. When this action is called, the specified person is updated using the attributes and values you specify. You can specify any supported attributes or elements of the person when the update action is performed. No updates are performed in the external directory if the person being updated is not local.
Syntax <?xml version="1.0"?>
<service>
<servers>
<server>
<places>
<place>
<name>
</name>
</place>
</places>
</server>
</servers>
</service>
- and -
<?xml version="1.0"?>
<service>
<servers>
<server>
<places>
<place>
<members>
Chapter 3: Accessing the Team Workplace Java API 55
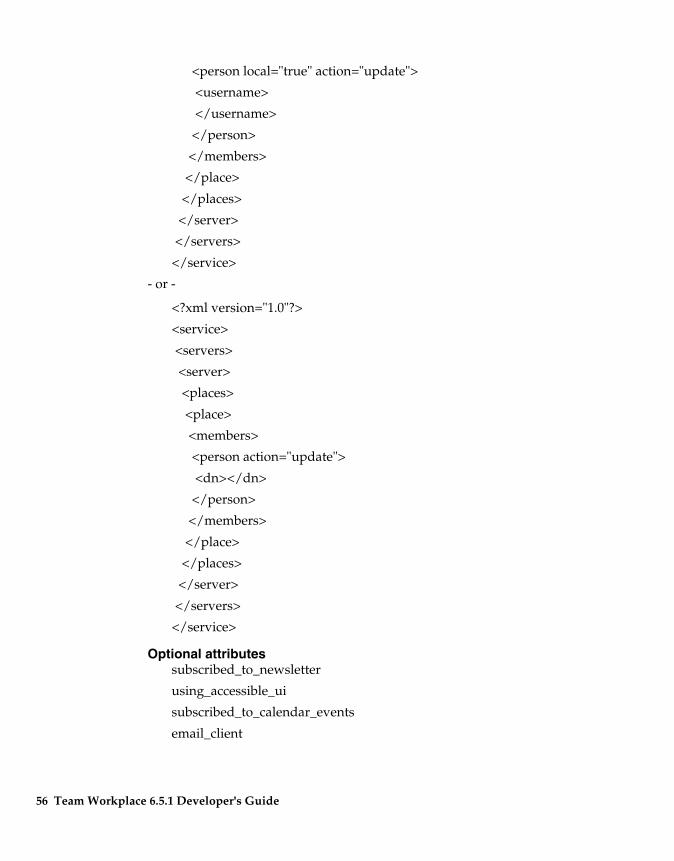
<person local="true" action="update">
<username>
</username>
</person>
</members>
</place>
</places>
</server>
</servers>
</service>
- or -
<?xml version="1.0"?>
<service>
<servers>
<server>
<places>
<place>
<members>
<person action="update">
<dn></dn>
</person>
</members>
</place>
</places>
</server>
</servers>
</service>
Optional attributes subscribed_to_newsletter
using_accessible_ui
subscribed_to_calendar_events
email_client
56 Team Workplace 6.5.1 Developer's Guide
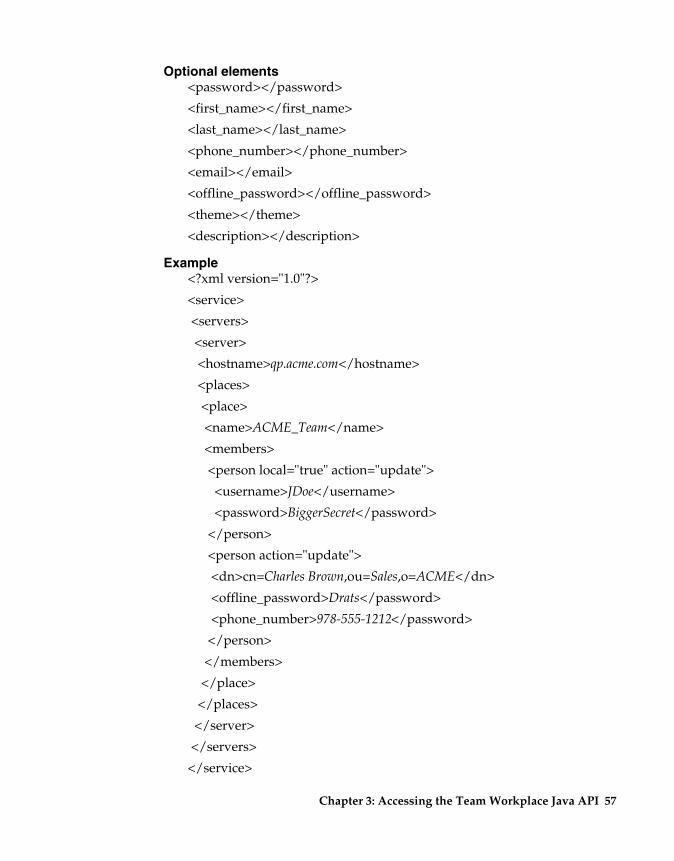
Optional elements <password></password>
<first_name></first_name>
<last_name></last_name>
<phone_number></phone_number>
<email></email>
<offline_password></offline_password>
<theme></theme>
<description></description>
Example <?xml version="1.0"?>
<service>
<servers>
<server>
<hostname>qp.acme.com</hostname>
<places>
<place>
<name>ACME_Team</name>
<members>
<person local="true" action="update">
<username>JDoe</username>
<password>BiggerSecret</password>
</person>
<person action="update">
<dn>cn=Charles Brown,ou=Sales,o=ACME</dn>
<offline_password>Drats</password>
<phone_number>978-555-1212</password>
</person>
</members>
</place>
</places>
</server>
</servers>
</service>
Chapter 3: Accessing the Team Workplace Java API 57
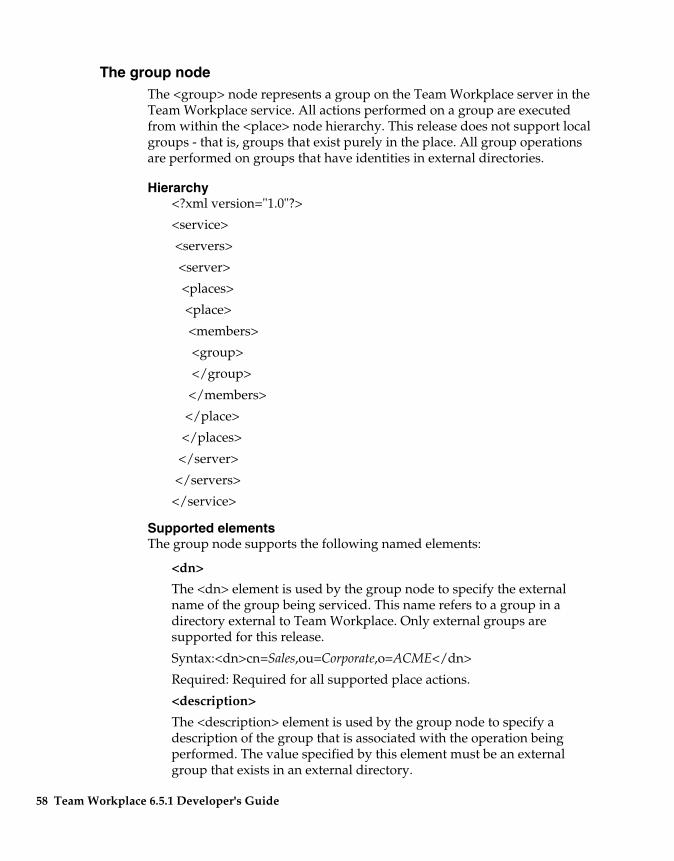
The group node The <group> node represents a group on the Team Workplace server in the Team Workplace service. All actions performed on a group are executed from within the <place> node hierarchy. This release does not support local groups - that is, groups that exist purely in the place. All group operations are performed on groups that have identities in external directories.
Hierarchy <?xml version="1.0"?>
<service>
<servers>
<server>
<places>
<place>
<members>
<group>
</group>
</members>
</place>
</places>
</server>
</servers>
</service>
Supported elements The group node supports the following named elements:
<dn>
The <dn> element is used by the group node to specify the external name of the group being serviced. This name refers to a group in a directory external to Team Workplace. Only external groups are supported for this release.
Syntax:<dn>cn=Sales,ou=Corporate,o=ACME</dn>
Required: Required for all supported place actions.
<description>
The <description> element is used by the group node to specify a description of the group that is associated with the operation being performed. The value specified by this element must be an external group that exists in an external directory.
58 Team Workplace 6.5.1 Developer's Guide
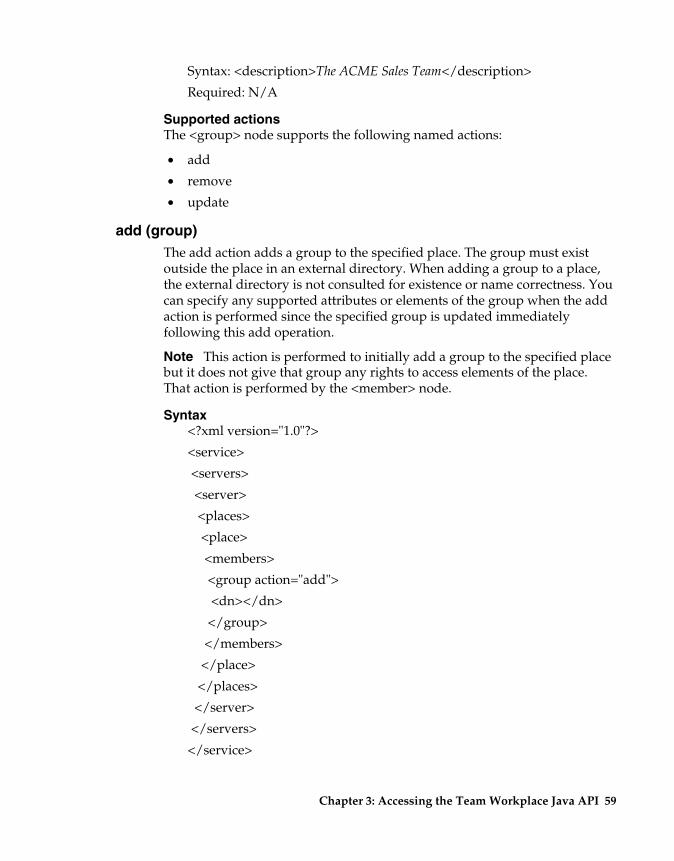
Syntax: <description>The ACME Sales Team</description>
Required: N/A
Supported actions The <group> node supports the following named actions:
• add
• remove
• update
add (group) The add action adds a group to the specified place. The group must exist outside the place in an external directory. When adding a group to a place, the external directory is not consulted for existence or name correctness. You can specify any supported attributes or elements of the group when the add action is performed since the specified group is updated immediately following this add operation.
Note This action is performed to initially add a group to the specified place but it does not give that group any rights to access elements of the place. That action is performed by the <member> node.
Syntax <?xml version="1.0"?>
<service>
<servers>
<server>
<places>
<place>
<members>
<group action="add">
<dn></dn>
</group>
</members>
</place>
</places>
</server>
</servers>
</service>
Chapter 3: Accessing the Team Workplace Java API 59
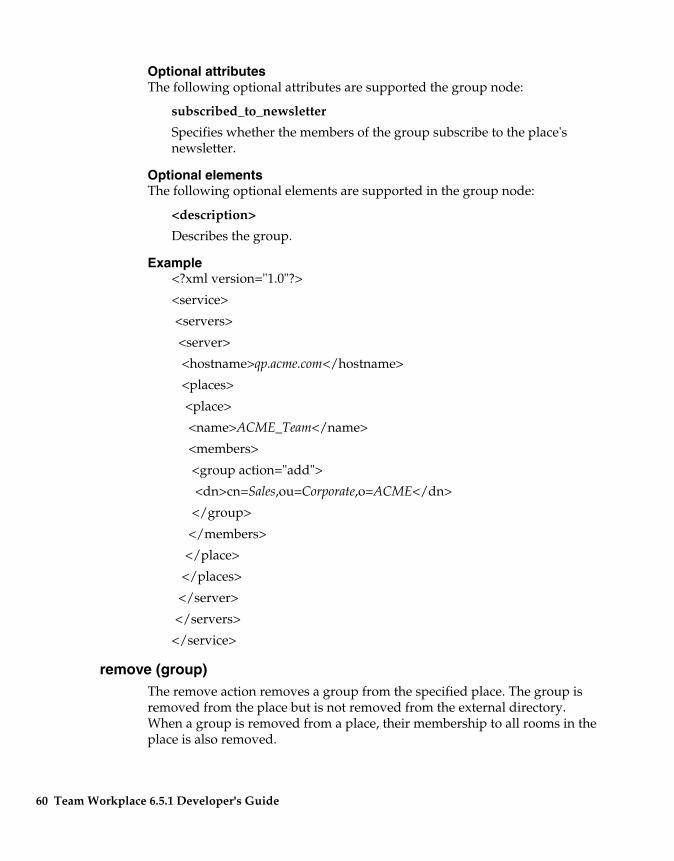
Optional attributes The following optional attributes are supported the group node:
subscribed_to_newsletter
Specifies whether the members of the group subscribe to the place's newsletter.
Optional elements The following optional elements are supported in the group node:
<description>
Describes the group.
Example <?xml version="1.0"?>
<service>
<servers>
<server>
<hostname>qp.acme.com</hostname>
<places>
<place>
<name>ACME_Team</name>
<members>
<group action="add">
<dn>cn=Sales,ou=Corporate,o=ACME</dn>
</group>
</members>
</place>
</places>
</server>
</servers>
</service>
remove (group) The remove action removes a group from the specified place. The group is removed from the place but is not removed from the external directory. When a group is removed from a place, their membership to all rooms in the place is also removed.
60 Team Workplace 6.5.1 Developer's Guide
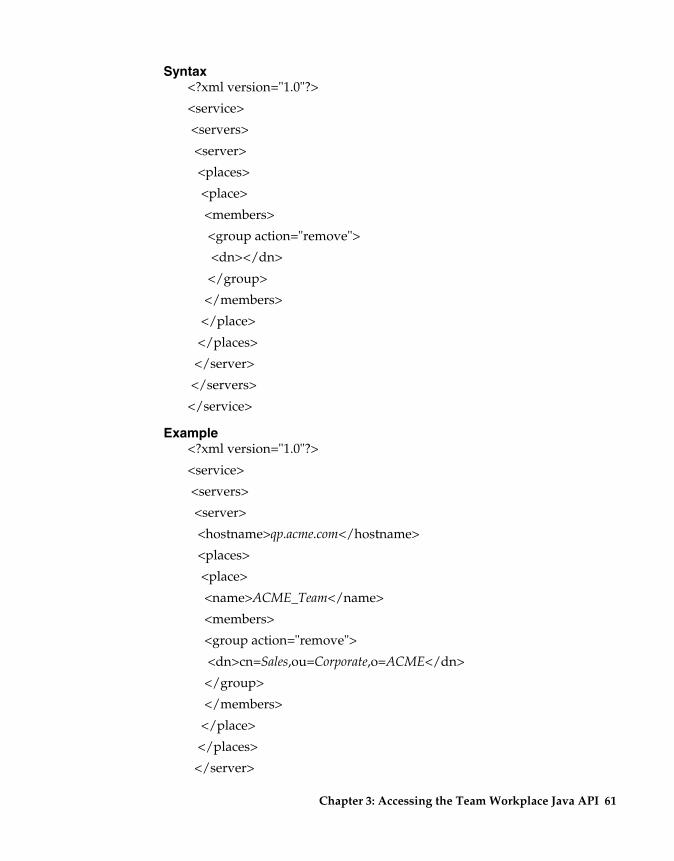
Syntax <?xml version="1.0"?>
<service>
<servers>
<server>
<places>
<place>
<members>
<group action="remove">
<dn></dn>
</group>
</members>
</place>
</places>
</server>
</servers>
</service>
Example <?xml version="1.0"?>
<service>
<servers>
<server>
<hostname>qp.acme.com</hostname>
<places>
<place>
<name>ACME_Team</name>
<members>
<group action="remove">
<dn>cn=Sales,ou=Corporate,o=ACME</dn>
</group>
</members>
</place>
</places>
</server>
Chapter 3: Accessing the Team Workplace Java API 61
</servers>
</service>
update (group) The update action updates a group in the specified place. When this action is called, the specified group is updated using the attributes and values you specify. You can specify any supported attributes or elements of the group when the update action is performed. No updates are performed in the external directory.
Syntax <?xml version="1.0"?>
<service>
<servers>
<server>
<places>
<place>
<members>
<group action="update">
<dn></dn>
</group>
</members>
</place>
</places>
</server>
</servers>
</service>
Optional elements The following optional elements are supported in the group node:
<description>
Describes the group.
62 Team Workplace 6.5.1 Developer's Guide
Example <?xml version="1.0"?>
<service>
<servers>
<server local="true">
<hostname>qp.acme.com</hostname>
<places>
<place>
<name>ACME_Team</name>
<members>
<group action="update">
<dn>cn=Sales,ou=All,o=ACME</dn>
<description>Global Sales Team</description>
</group>
</members>
</place>
</places>
</server>
</servers>
</service>
The member node The <member> node represents a member of one or more rooms in the specified place on the Team Workplace server in the Team Workplace service. All actions performed on a member are executed from within the <room> node hierarchy. The member node is primarily used to define, modify, or remove membership access to one or more rooms in the place. When you perform actions on a member, you must define a <person> or <group> that represents the member you are processing. Operations on a member node are performed using an idref link to the <person> or <group> nodes previously defined in the script. An idref link relationship is demonstrated by the following:
<?xml version="1.0"?>
<service>
<servers>
<server local="true">
Chapter 3: Accessing the Team Workplace Java API 63
<places>
<place>
<members>
<person local="true" id="person1">
<username>jdoe</username>
</person>
<person id="person2">
<dn>cn=Charles Brown,ou=Sales,o=ACME</dn>
</person>
</members>
. . .
<rooms>
<room>
<name>Main.nsf</name>
<access>
<managers>
<member action="add">
<link idref="person1"/>
</member>
</managers>
<authors>
<member action="remove">
<link idref="person2"/>
</member>
</authors>
</access>
</room>
</rooms>
</place>
</places>
</server>
</servers>
</service>
64 Team Workplace 6.5.1 Developer's Guide
Notice that the <person> node is defined first with a corresponding link ID value. That ID value is referenced through the <link idref> element to determine which <person> the <member> node should operate on.
Note The main distinction between a <person> or <group> and a <member> is that a <person> or <group> represents an entity that the place has information about. A <member> represents a <person> or <group> node's access or membership to a particular room.
Supported elements The member node supports the following named elements:
<link>
The <link> element is used by the member node to provide a reference link by ID to a previously defined <person> or <group> node. The idref attribute is specified when <link> is used to reference the entity defined previously with the same value. The value specified by idref must match the value defined for the entity it is used to reference. For example:
<person id="person1"/> and <link idref="person1"/>
Syntax:<link idref="person1"/>
Required: Required for all supported <member> actions being performed on a <person> or <group>.
Supported actions The member node supports the following named actions:
• add
• remove
add (member) The add action adds a person or group with the specified access level to the specified room of the specified place. The person or group must previously exist as a entity in the place (handled by the <person> or <group> nodes) before a membership operation can be performed. When a membership action is performed, the specified entity will have immediate access to the specified room at the specified level of access.
Chapter 3: Accessing the Team Workplace Java API 65
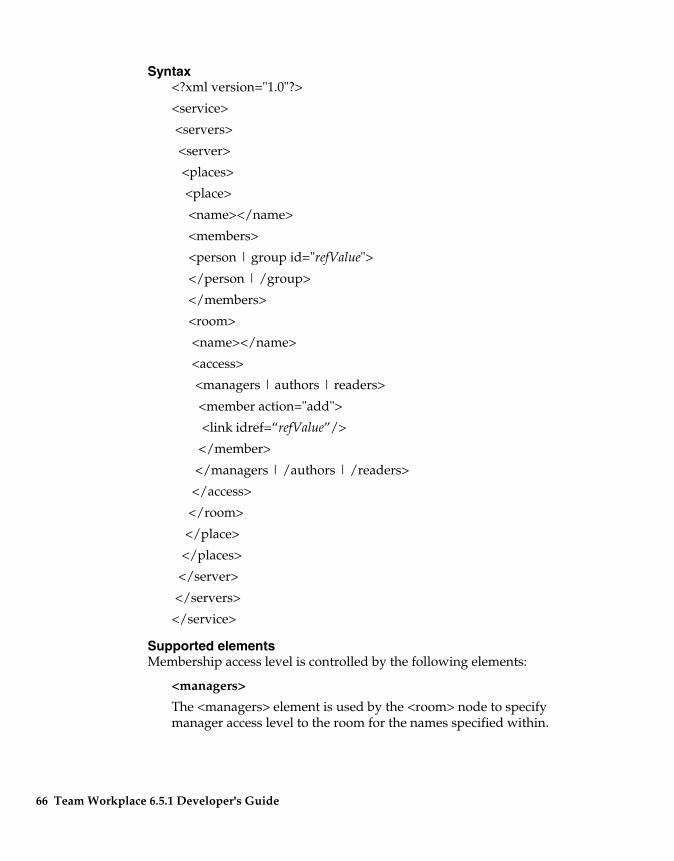
Syntax <?xml version="1.0"?>
<service>
<servers>
<server>
<places>
<place>
<name></name>
<members>
<person | group id="refValue">
</person | /group>
</members>
<room>
<name></name>
<access>
<managers | authors | readers>
<member action="add">
<link idref=“refValue”/>
</member>
</managers | /authors | /readers>
</access>
</room>
</place>
</places>
</server>
</servers>
</service>
Supported elements Membership access level is controlled by the following elements:
<managers>
The <managers> element is used by the <room> node to specify manager access level to the room for the names specified within.
66 Team Workplace 6.5.1 Developer's Guide
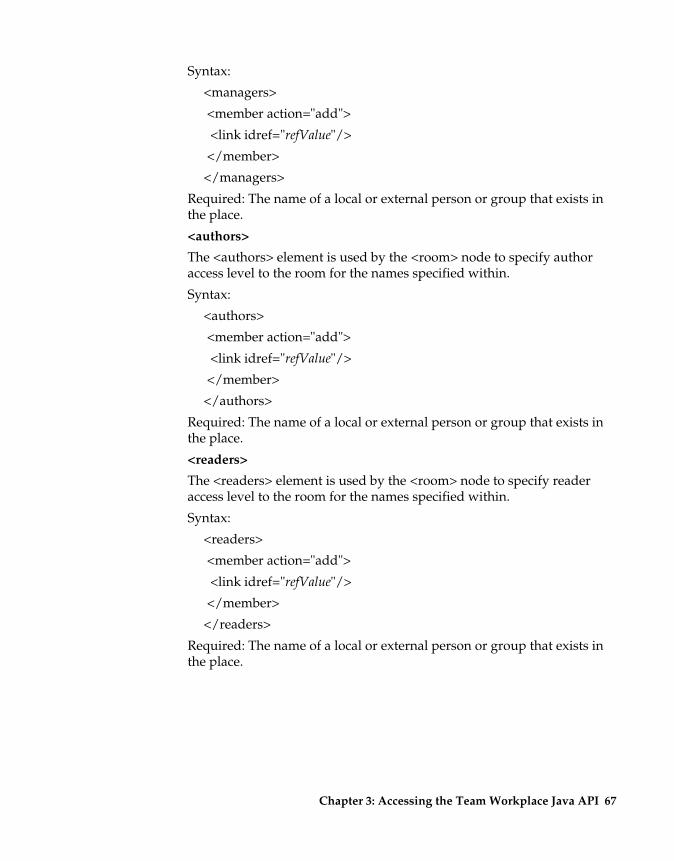
Syntax:
<managers>
<member action="add">
<link idref="refValue"/>
</member>
</managers>
Required: The name of a local or external person or group that exists in the place.
<authors>
The <authors> element is used by the <room> node to specify author access level to the room for the names specified within.
Syntax:
<authors>
<member action="add">
<link idref="refValue"/>
</member>
</authors>
Required: The name of a local or external person or group that exists in the place.
<readers>
The <readers> element is used by the <room> node to specify reader access level to the room for the names specified within.
Syntax:
<readers>
<member action="add">
<link idref="refValue"/>
</member>
</readers>
Required: The name of a local or external person or group that exists in the place.
Chapter 3: Accessing the Team Workplace Java API 67
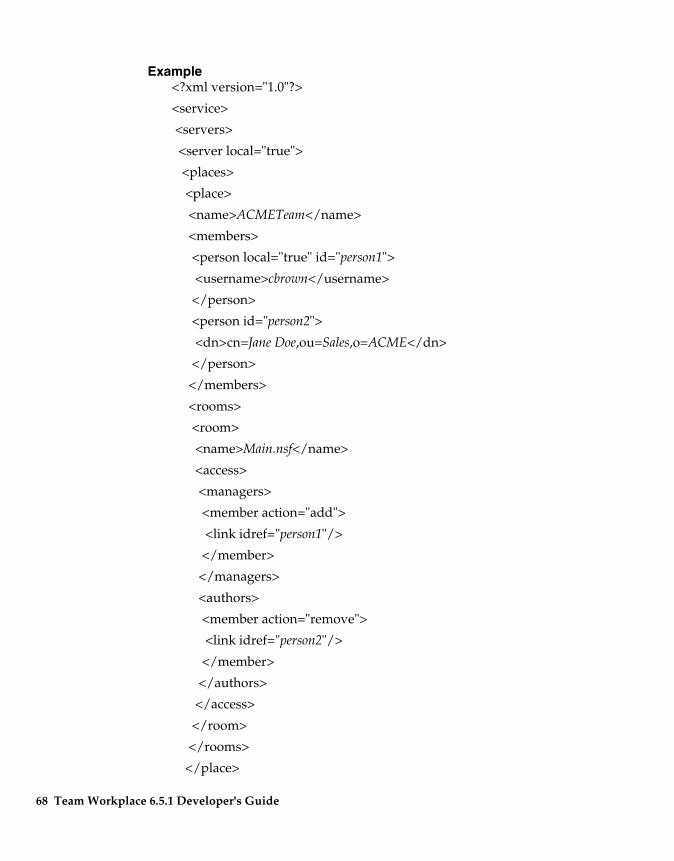
Example <?xml version="1.0"?>
<service>
<servers>
<server local="true">
<places>
<place>
<name>ACMETeam</name>
<members>
<person local="true" id="person1">
<username>cbrown</username>
</person>
<person id="person2">
<dn>cn=Jane Doe,ou=Sales,o=ACME</dn>
</person>
</members>
<rooms>
<room>
<name>Main.nsf</name>
<access>
<managers>
<member action="add">
<link idref="person1"/>
</member>
</managers>
<authors>
<member action="remove">
<link idref="person2"/>
</member>
</authors>
</access>
</room>
</rooms>
</place>
68 Team Workplace 6.5.1 Developer's Guide
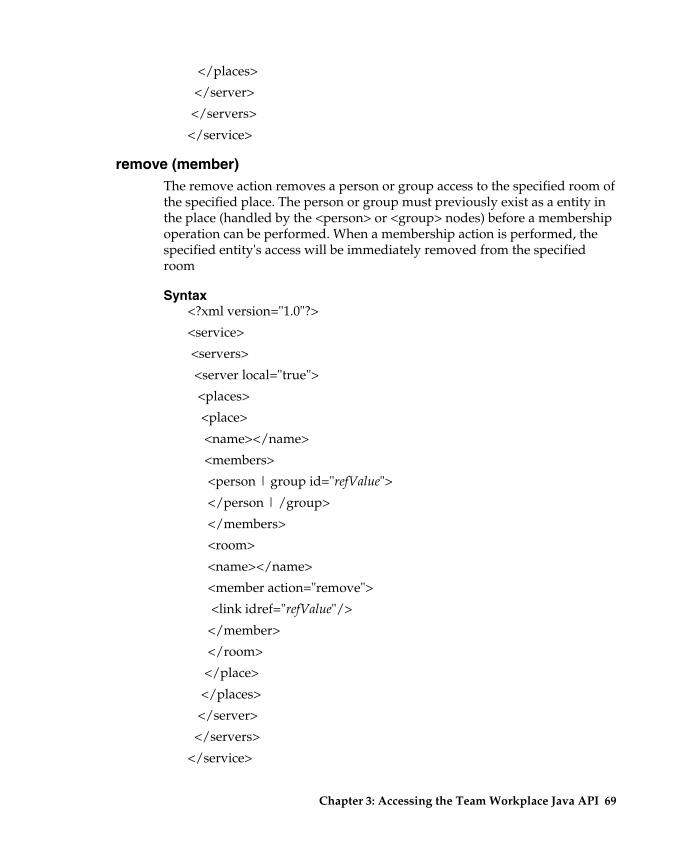
</places>
</server>
</servers>
</service>
remove (member) The remove action removes a person or group access to the specified room of the specified place. The person or group must previously exist as a entity in the place (handled by the <person> or <group> nodes) before a membership operation can be performed. When a membership action is performed, the specified entity's access will be immediately removed from the specified room
Syntax <?xml version="1.0"?>
<service>
<servers>
<server local="true">
<places>
<place>
<name></name>
<members>
<person | group id="refValue">
</person | /group>
</members>
<room>
<name></name>
<member action="remove">
<link idref="refValue"/>
</member>
</room>
</place>
</places>
</server>
</servers>
</service>
Chapter 3: Accessing the Team Workplace Java API 69
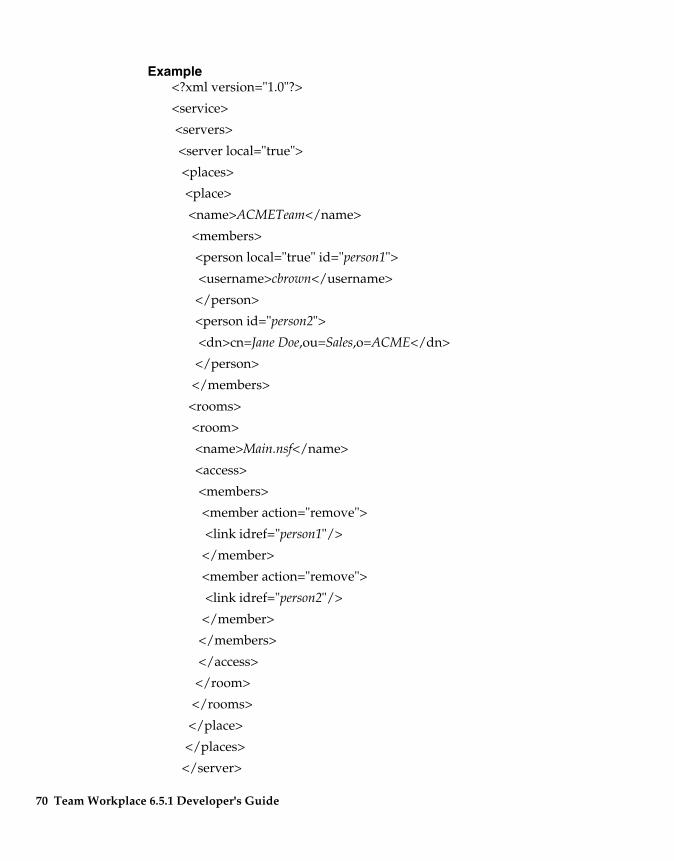
Example <?xml version="1.0"?>
<service>
<servers>
<server local="true">
<places>
<place>
<name>ACMETeam</name>
<members>
<person local="true" id="person1">
<username>cbrown</username>
</person>
<person id="person2">
<dn>cn=Jane Doe,ou=Sales,o=ACME</dn>
</person>
</members>
<rooms>
<room>
<name>Main.nsf</name>
<access>
<members>
<member action="remove">
<link idref="person1"/>
</member>
<member action="remove">
<link idref="person2"/>
</member>
</members>
</access>
</room>
</rooms>
</place>
</places>
</server>
70 Team Workplace 6.5.1 Developer's Guide
</servers>
</service>
Chapter 3: Accessing the Team Workplace Java API 71


Chapter 4 Automating Tasks with PlaceBots
This chapter describes how to automate tasks in a place using PlaceBots.
PlaceBots A PlaceBot is an agent, written either in Java or LotusScript, that performs a task. PlaceBots can access, process, and manage the data in a place. For example, you can create a PlaceBot that sends e-mail to members of a place notifying them when a particular document has been edited.
You can set PlaceBots to run on a schedule, or run when a particular form is submitted. Or you can set a PlaceBot to run manually. You must have Manager access to the place to create, edit, copy, delete, or run PlaceBots manually.
Because of security and performance considerations, some administrators may choose to disable the PlaceBot feature entirely. Consult your server administrator about PlaceBot policies in your organization.
You create PlaceBots using LotusScript or Java to manipulate the Domino back-end object classes. For complete documentation on the Domino object model and how to work with objects using LotusScript or Java, see the latest Domino Designer 6 Help, available on the Web at http://www.lotus.com/ldd/doc.
You can write, debug, and compile Java code for a PlaceBot in a Java development tool, such as Symantec Visual Cafe. You can import the .java file, or compile and import a .class or .jar file. You can also write Java or LotusScript code in any editor and import the resulting files into your place.
Creating Java PlaceBots You can use a Java PlaceBot to access and process data in your place.
Team Workplace supports Java version 1.3.1.
A PlaceBot written in Java may consist of one or multiple files. A Java PlaceBot file must contain a class that extends the Domino Java agent class AgentBase.
73
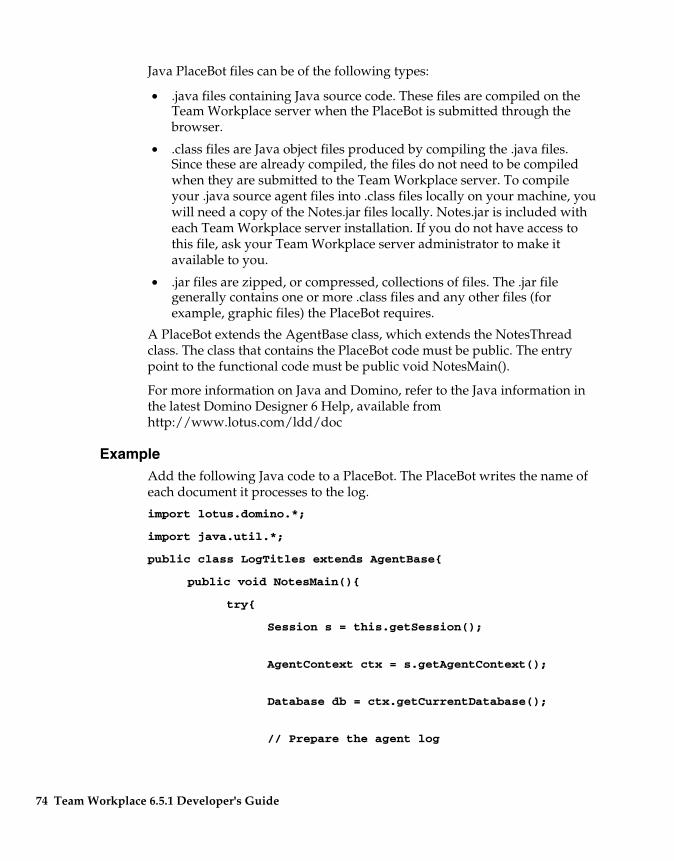
Java PlaceBot files can be of the following types:
• .java files containing Java source code. These files are compiled on the Team Workplace server when the PlaceBot is submitted through the browser.
• .class files are Java object files produced by compiling the .java files. Since these are already compiled, the files do not need to be compiled when they are submitted to the Team Workplace server. To compile your .java source agent files into .class files locally on your machine, you will need a copy of the Notes.jar files locally. Notes.jar is included with each Team Workplace server installation. If you do not have access to this file, ask your Team Workplace server administrator to make it available to you.
• .jar files are zipped, or compressed, collections of files. The .jar file generally contains one or more .class files and any other files (for example, graphic files) the PlaceBot requires.
A PlaceBot extends the AgentBase class, which extends the NotesThread class. The class that contains the PlaceBot code must be public. The entry point to the functional code must be public void NotesMain().
For more information on Java and Domino, refer to the Java information in the latest Domino Designer 6 Help, available from http://www.lotus.com/ldd/doc
Example Add the following Java code to a PlaceBot. The PlaceBot writes the name of each document it processes to the log.
import lotus.domino.*;
import java.util.*;
public class LogTitles extends AgentBase{
public void NotesMain(){
try{
Session s = this.getSession();
AgentContext ctx = s.getAgentContext();
Database db = ctx.getCurrentDatabase();
// Prepare the agent log
74 Team Workplace 6.5.1 Developer's Guide
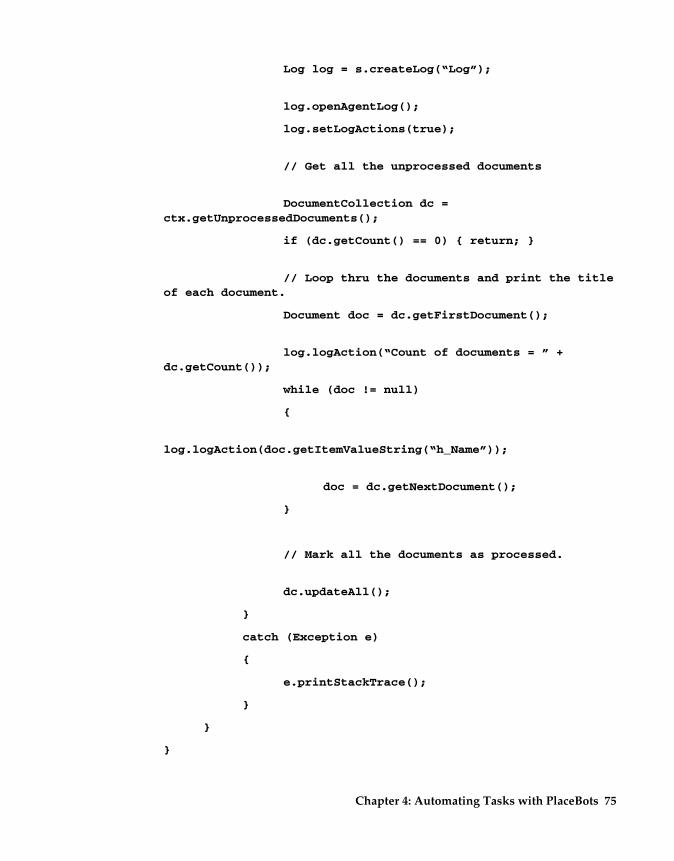
Log log = s.createLog(“Log”);
log.openAgentLog();
log.setLogActions(true);
// Get all the unprocessed documents
DocumentCollection dc =ctx.getUnprocessedDocuments();
if (dc.getCount() == 0) { return; }
// Loop thru the documents and print the titleof each document.
Document doc = dc.getFirstDocument();
log.logAction(“Count of documents = ” +dc.getCount());
while (doc != null)
{
log.logAction(doc.getItemValueString(“h_Name”));
doc = dc.getNextDocument();
}
// Mark all the documents as processed.
dc.updateAll();
}
catch (Exception e)
{
e.printStackTrace();
}
}
}
Chapter 4: Automating Tasks with PlaceBots 75
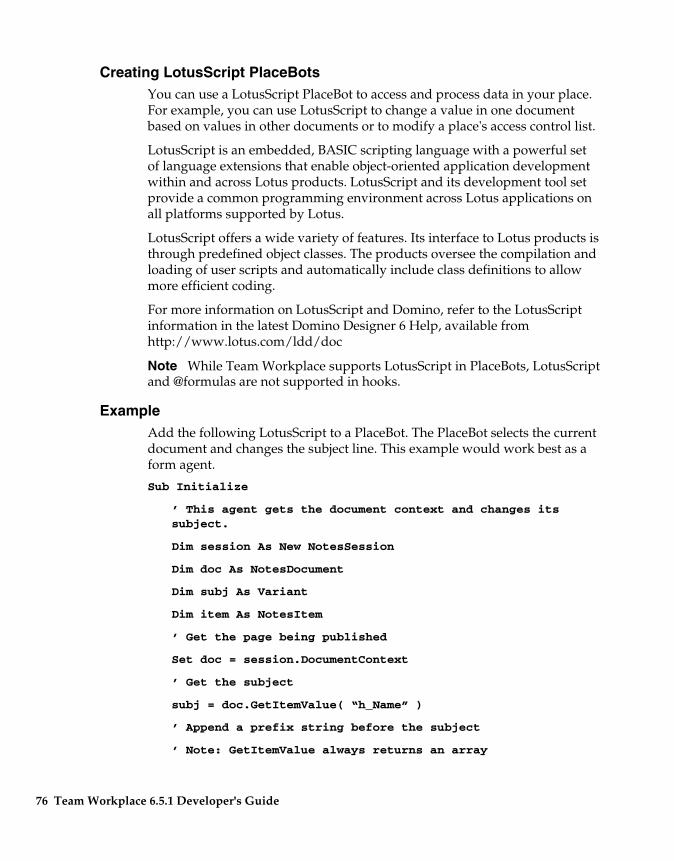
Creating LotusScript PlaceBots You can use a LotusScript PlaceBot to access and process data in your place. For example, you can use LotusScript to change a value in one document based on values in other documents or to modify a place's access control list.
LotusScript is an embedded, BASIC scripting language with a powerful set of language extensions that enable object-oriented application development within and across Lotus products. LotusScript and its development tool set provide a common programming environment across Lotus applications on all platforms supported by Lotus.
LotusScript offers a wide variety of features. Its interface to Lotus products is through predefined object classes. The products oversee the compilation and loading of user scripts and automatically include class definitions to allow more efficient coding.
For more information on LotusScript and Domino, refer to the LotusScript information in the latest Domino Designer 6 Help, available from http://www.lotus.com/ldd/doc
Note While Team Workplace supports LotusScript in PlaceBots, LotusScript and @formulas are not supported in hooks.
Example Add the following LotusScript to a PlaceBot. The PlaceBot selects the current document and changes the subject line. This example would work best as a form agent.
Sub Initialize
’ This agent gets the document context and changes itssubject.
Dim session As New NotesSession
Dim doc As NotesDocument
Dim subj As Variant
Dim item As NotesItem
’ Get the page being published
Set doc = session.DocumentContext
’ Get the subject
subj = doc.GetItemValue( “h_Name” )
’ Append a prefix string before the subject
’ Note: GetItemValue always returns an array
76 Team Workplace 6.5.1 Developer's Guide

’ even if there is only a single value
Set item = doc.ReplaceItemValue( “h_Name”, “Form AgentModified: ” + subj(0))
’ Save the page
Call doc.Save(True, False)
End Sub
Creating a PlaceBot To create a PlaceBot, you name the PlaceBot, specify when the PlaceBot should run, and import the files for the PlaceBot. The files can be either Java or LotusScript files. Use the following steps to create a PlaceBot.
1. Click Customize.
2. In the Advanced section, choose PlaceBots.
3. Click New PlaceBot.
4. Enter a title for your PlaceBot.
5. (Optional) Enter a description of what the PlaceBot does.
6. Specify when the PlaceBot should run.
For more information, see the topic “Running a PlaceBot” in this chapter.
7. Import the files for the PlaceBot.
For a LotusScript agent, import a single .lss LotusScript source file.
For information about creating the file or files for a LotusScript PlaceBot, see the topic “Creating LotusScript PlaceBots” in this chapter.
For a Java agent, import one or more .java, .class or .jar files.
For information on creating the file for a Java PlaceBot, see the topic“Creating Java PlaceBots” in this chapter.
8. Click Done when you have filled in all the required fields.
Running a PlaceBot When you define a PlaceBot, you must specify how the PlaceBot is activated. PlaceBots can be run when a page created from a particular form is submitted, run according to a schedule you specify, or run manually.
Chapter 4: Automating Tasks with PlaceBots 77
To run a PlaceBot when a page is submitted Use this option to have the PlaceBot run each time a page created from a particular form is published.
1. Create the PlaceBot following the steps in the topic “Creating a PlaceBot.”
2. Select the option to run the PlaceBot when a form is submitted.
3. Choose the type of form from the drop-down list.
To run a PlaceBot at a scheduled time Use this option to run a PlaceBot at a time you specify. This is ideal for resource-intensive PlaceBots that you want to run at off-peak times.
1. Create the PlaceBot following the steps in the topic “Creating a PlaceBot.”
2. Choose the option to run the PlaceBot on a scheduled basis.
3. Click Set Schedule.
4. Choose whether to run the PlaceBot on all pages in the current room or only on pages that are new or have been modified since the PlaceBot last ran.
5. (Optional) Choose a folder from the drop down list to limit the PlaceBot to only run on the documents in that folder.
6. Select how frequently you want the PlaceBot to run.
7. Depending on the frequency you chose, fill in the corresponding fields to specify exactly when the PlaceBot should run.
8. (Optional) Specify options that override or supplement the schedule settings. You can use these options to specify starting and stopping dates for running the PlaceBot, or you can disable the PlaceBot.
9. Click Next to submit the schedule settings, or Back to cancel your schedule settings changes and return to the previous scene.
To run a PlaceBot manually If you have Manager access, you can run a PlaceBot manually. You might do this to test a PlaceBot that you have just created, or you may at times want to override the schedule and run the PlaceBot as needed. To run a PlaceBot manually:
1. Click Customize - PlaceBots to see the list of PlaceBots.
2. Select the PlaceBot you want to run.
3. Click Run PlaceBot.
78 Team Workplace 6.5.1 Developer's Guide
Note You can also select a PlaceBot, click PlaceBot Log, then click Run PlaceBot from the Log file.
Using the PlaceBot log When a PlaceBot runs, Team Workplace captures information in a log. You can include log statements in your PlaceBot code that will print information to the log. This is a helpful tool for debugging a PlaceBot or for checking that it is executing as you expect. To open the log:
1. Click Customize - PlaceBots.
2. Select the PlaceBot you want to inspect.
3. Click the PlaceBot Log button. The log displays information from the last time the PlaceBot ran and any statements you may have logged from your PlaceBot.
For an example of a PlaceBot that writes to the Log file, see the topic “Creating Java PlaceBots” in this chapter.
Debugging a PlaceBot As you define and test a PlaceBot, you may need to make some adjustments to make the PlaceBot run successfully. The following are some debugging tips for problems you might encounter.
LotusScript PlaceBots When you run a LotusScript PlaceBot, the Team Workplace server compiles the code before executing it. Thus, the first error you might encounter would be a LotusScript compilation error or warning. The errors and warnings can be difficult to understand. For detailed information, refer to the Lotus LotusScript Release 3.1 Language Reference available as a downloadable file from http://www.lotus.com/ldd/doc
If you get a compilation error, you can click Try Again to reimport the agent file after the compilation error(s) have been fixed.
Java PlaceBots If you import Java source files (.java), you may get compilation errors when the PlaceBot is submitted to the Team Workplace server. For details on Java error messages, refer to the Java documentation.
If you get a compilation error, you can click the Back button of your browser to return to your place.
Chapter 4: Automating Tasks with PlaceBots 79
Copying a PlaceBot You may want to copy and paste a PlaceBot from one room to another, or copy and paste within the same room. To copy a PlaceBot:
1. Click Customize - PlaceBots
2. Select the PlaceBot from the list.
3. Click Copy PlaceBot.
4. Select the room where you want the PlaceBot pasted.
5. Click Next. Team Workplace pastes a copy of the PlaceBot in the target room.
Note If you are copying a form PlaceBot to a new room, you must associate the PlaceBot with a form in the room. This is not done automatically as part of the copy and paste procedure.
Deleting a PlaceBot Only managers can delete PlaceBots from a place. To delete a PlaceBot:
1. Click Customize - PlaceBots.
2. Select the PlaceBot you want to delete.
3. Click Delete PlaceBot.
Editing a PlaceBot After you have tested a PlaceBot, you may want to edit it to change the name, description, files, or to modify the schedule settings. To edit a PlaceBot:
1. Click Customize - PlaceBots.
2. Select the PlaceBot you want to edit.
3. Edit the PlaceBot title, files, or schedule settings.
4. Click Done.
Disabling PlaceBots for security PlaceBots by their nature can present a security risk. Because a PlaceBot can affect the data contained in a place, managers and server administrators must monitor them carefully. Some Team Workplace administrators may choose to disable PlaceBot functionality. Doing this disables the user interface for creating, running and editing PlaceBots, and it completely disables form PlaceBots.
Note Disabling PlaceBots does not disable existing scheduled PlaceBots because these are controlled by the Domino Agent Manager.
80 Team Workplace 6.5.1 Developer's Guide
Running PlaceBots offline You must set up the Domino server to allow Placebots to run offline. QuickPlace supports PlaceBots triggered by form submission, but scheduled PlaceBots do not run offline. Do the following to set up the server:
1. Create two groups in your Domino Directory: DOLS_Restricted_Agents and DOLS_Unrestricted_Agents.
Use the Domino Directory on the Domino server on which you installed the Team Workplace server.
2. Make agent signers members of both groups. Agents signers are users who are allowed to make design element changes in the databases (Team Workplace rooms) that contain the Placebots.
If the PlaceBot has been configured to run as a Web user (Agent Properties - Design tab - Run as web user), use the full name of its signer. Otherwise, use the full name of the signer who modified it last (for example, NewDevelopment/IBM).
3. Add the two groups (DOLS_Restricted_Agents and DOLS_Unrestricted_Agents) to the Agent Restriction section in the Server document.
4. Edit the Server document and select the Security tab.
5. In the Agent Restrictions section, add the groups to the fields “Run restricted LotusScript/Java agents” and “Run unrestricted LotusScript/Java agents.”
6. Cross-certify your Team Workplace server's CERT.ID with the DOLCERT.ID that is located in your Team Workplace server's Domino Directory. Verify that the cross-certification was successful by going to the Certificates view in your Domino Directory and make sure that there is a cross-certificate for /DOLSCERT.
For more information on setting up agents for offline, and on restricted and unrestricted agents, see Domino Administrator Help.
Chapter 4: Automating Tasks with PlaceBots 81

Chapter 5 Customizing the Look and Layout of a Place
This chapter describes how to use themes and HTML to make a place look the way you want.
Customizing the theme of a place When you create a place, you can select its look and the layout by choosing from a gallery of predefined “themes.” The theme controls the look of a place by determining aspects such as fonts and background colors, how an element looks when it is selected, and where the navigational controls appear.
You can create new themes based on existing themes or from scratch. By creating a custom theme, you can give your place a strong brand identity, design it to look like other corporate sites, supply additional functionality, or just give it a unique look.
Themes are implemented using the Team Workplace skins architecture and are defined using HTML. So to customize an existing theme, you just edit the HTML and upload the modified files. Team Workplace provides a set of custom HTML tags that you can use to define the elements in each layout.
You can create a custom theme from an existing theme with minimal HTML development skills. To create a theme from scratch, however, requires more advanced expertise with HTML and Website development.
When you customize a theme, you can take advantage of all of the power of HTML to add functionality to a place. Here are some ways you might enhance a place using themes:
• Apply the corporate brand identity to a place or create a custom graphic identity for a collaborative application.
• Integrate a place seamlessly as a collaborative component within a larger corporate Web site.
• Provide links from a place to other Web sites such as corporate Web sites, eCommerce sites, or to customer support services.
83
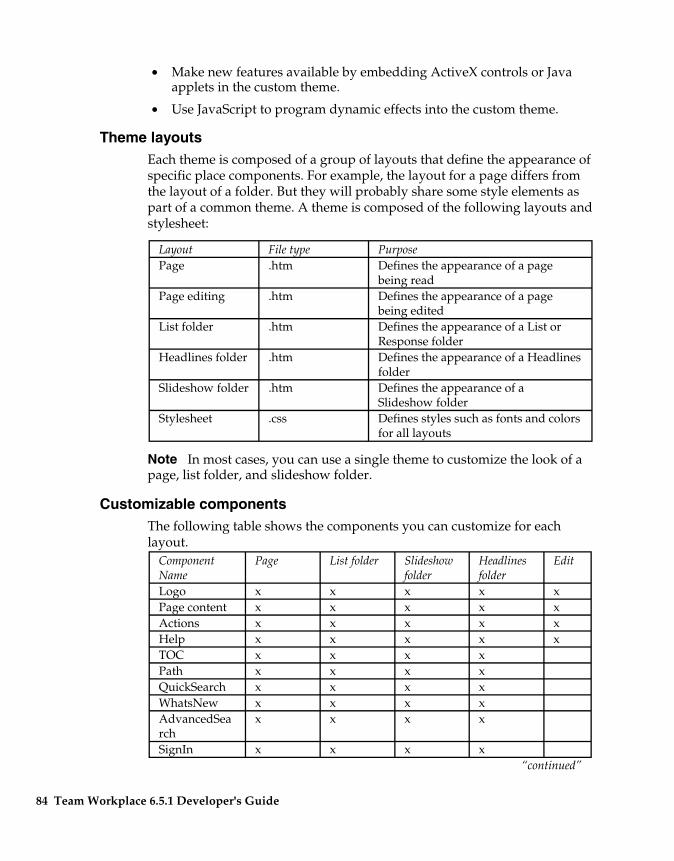
• Make new features available by embedding ActiveX controls or Java applets in the custom theme.
• Use JavaScript to program dynamic effects into the custom theme.
Theme layouts Each theme is composed of a group of layouts that define the appearance of specific place components. For example, the layout for a page differs from the layout of a folder. But they will probably share some style elements as part of a common theme. A theme is composed of the following layouts and stylesheet:
Layout File type Purpose Page .htm Defines the appearance of a page
being read Page editing .htm Defines the appearance of a page
being edited List folder .htm Defines the appearance of a List or
Response folder Headlines folder .htm Defines the appearance of a Headlines
folder Slideshow folder .htm Defines the appearance of a
Slideshow folder Stylesheet .css Defines styles such as fonts and colors
for all layouts
Note In most cases, you can use a single theme to customize the look of a page, list folder, and slideshow folder.
Customizable components The following table shows the components you can customize for each layout.
Component Name
Page List folder Slideshow folder
Headlines folder
Edit
Logo x x x x x Page content x x x x x Actions x x x x x Help x x x x x TOC x x x x Path x x x x QuickSearch x x x x WhatsNew x x x x AdvancedSea rch
x x x x
SignIn x x x x “continued”
84 Team Workplace 6.5.1 Developer's Guide
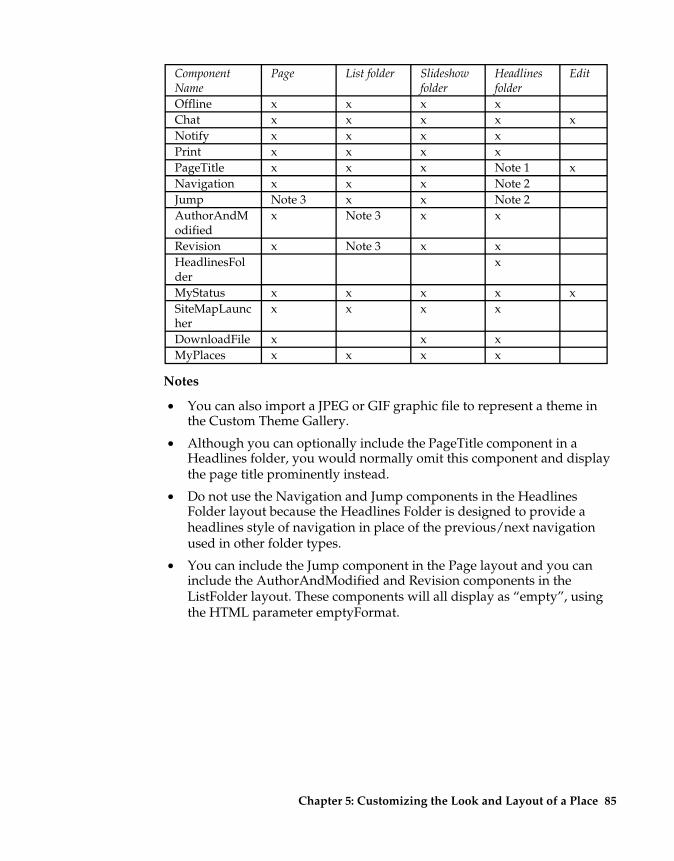
Component Name
Page List folder Slideshow folder
Headlines folder
Edit
Offline x x x x Chat x x x x x Notify x x x x Print x x x x PageTitle x x x Note 1 x Navigation x x x Note 2 Jump Note 3 x x Note 2 AuthorAndM odified
x Note 3 x x
Revision x Note 3 x x HeadlinesFol der
x
MyStatus x x x x x SiteMapLaunc her
x x x x
DownloadFile x x x MyPlaces x x x x
Notes
• You can also import a JPEG or GIF graphic file to represent a theme inthe Custom Theme Gallery.
• Although you can optionally include the PageTitle component in a Headlines folder, you would normally omit this component and display the page title prominently instead.
• Do not use the Navigation and Jump components in the HeadlinesFolder layout because the Headlines Folder is designed to provide aheadlines style of navigation in place of the previous/next navigationused in other folder types.
• You can include the Jump component in the Page layout and you caninclude the AuthorAndModified and Revision components in theListFolder layout. These components will all display as “empty”, usingthe HTML parameter emptyFormat.
Chapter 5: Customizing the Look and Layout of a Place 85
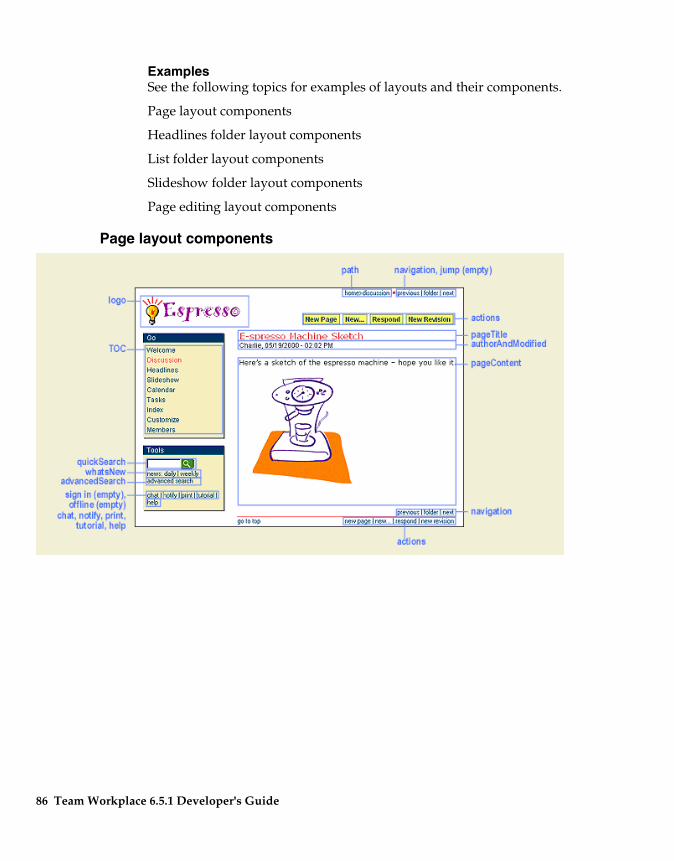
Examples See the following topics for examples of layouts and their components.
Page layout components
Headlines folder layout components
List folder layout components
Slideshow folder layout components
Page editing layout components
Page layout components
86 Team Workplace 6.5.1 Developer's Guide
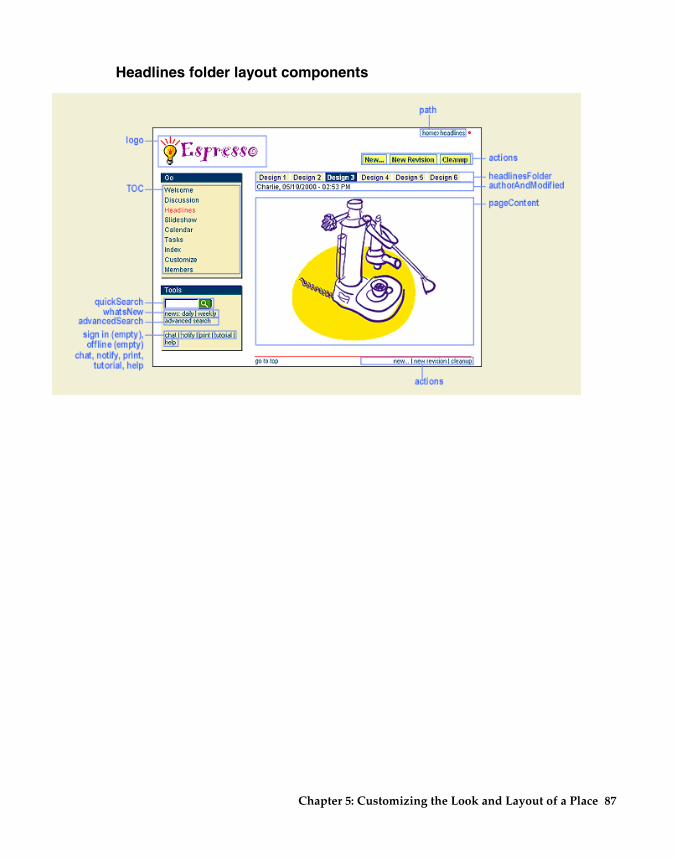
Headlines folder layout components
Chapter 5: Customizing the Look and Layout of a Place 87
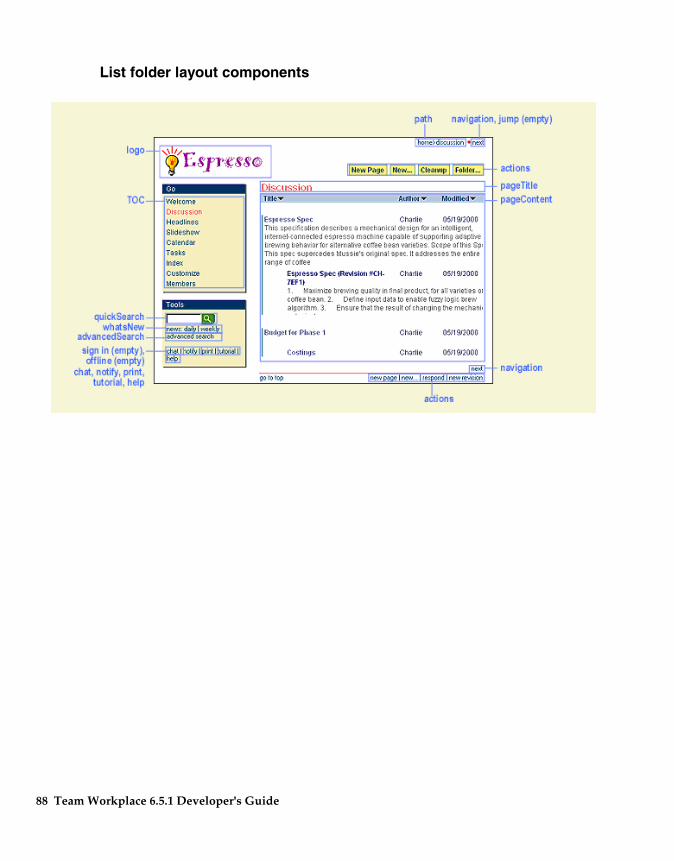
List folder layout components
88 Team Workplace 6.5.1 Developer's Guide
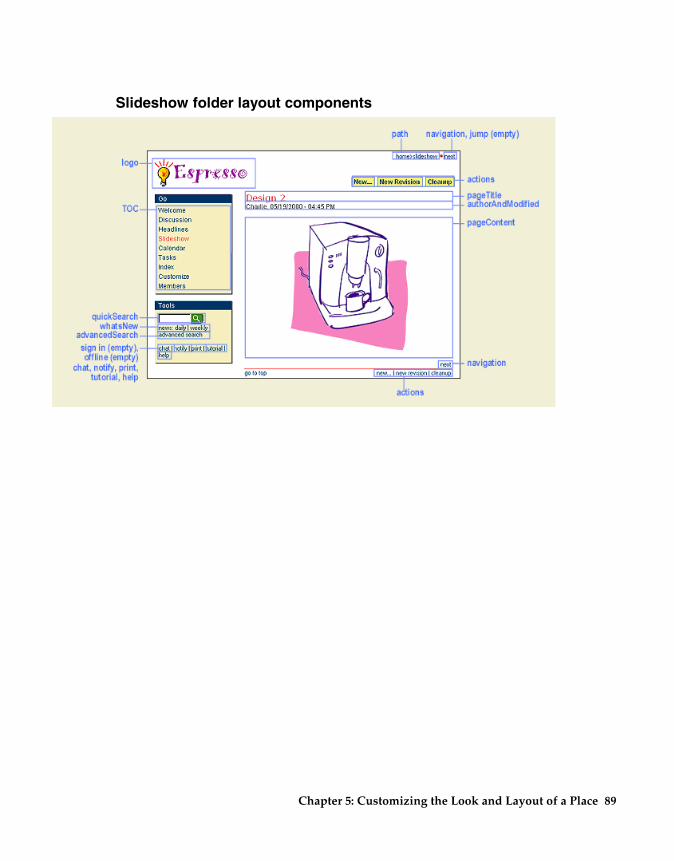
Slideshow folder layout components
Chapter 5: Customizing the Look and Layout of a Place 89
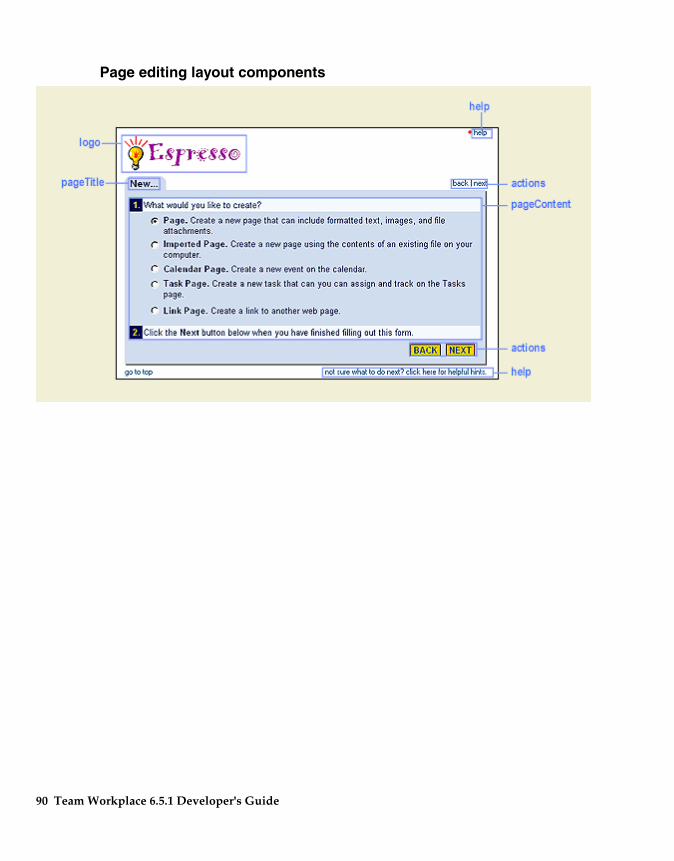
Page editing layout components
90 Team Workplace 6.5.1 Developer's Guide
Creating a custom theme from the Standard Default theme You can create a custom theme based on the Standard Default theme. This is simpler than creating a theme from scratch. Follow the steps below to use the Standard Default theme as a basis for your custom theme.
1. Open a place.
2. Click Customize - Custom Themes - New Theme.
3. Enter a title for the theme you are creating and click Next. Team Workplace returns you to the Custom Themes page.
4. Select your theme, then click it's title. The Edit Theme page displays the file associated with each layout.
5. (Optional) Provide a description of the theme.
6. Drag the file you want to modify to your desktop and open it in an HTML editor.
If you are using an editor such as HomeSite that supports in-place editing, you can right-click a file name and choose the editor from the right-click menu. This opens the editor within Team Workplace.
7. Once you have made changes, copy and paste the new file back to its place in the Edit theme page.
You can also edit the original source file in an HTML editor, and clickthe Reload button from the Edit Theme page to reload the modified file.
8. Click Next.
To apply your custom theme to the place, click Customize - Decorate Choose a theme. Then select your custom theme and click Next.
Creating a theme from scratch To create a theme from scratch, do the following:
1. Choose Customize - Custom Themes - New Theme.
2. Enter a title for the theme.
3. (Optional) Enter a description for the theme.
4. Click the Browse button to locate .css or .htm files for the layout.
5. Select the file from the file system and click OK to upload the .htm file.
6. Click Next to save the theme.
To generate layout files As you develop a theme, Team Workplace can take the code from one layout and apply it to all layouts for which you have not explicitly supplied a file. This is a shortcut for applying a common look and feel to multiple layouts.
Chapter 5: Customizing the Look and Layout of a Place 91
For example, suppose you are creating a place called Haiku. You might start by creating the look and layout you want for a page being read. You can then use this file to generate files for the other layouts. You might have only minor modifications to make to the layout for a page being edited, with possibly more extensive modifications for the various folder styles.
This feature also lets you develop a custom theme in stages, replacing generated layouts with custom files as the theme progresses.
Do the following to create a theme by generating layout files.
1. In the New Theme page, click Browse to locate the HTML file for an existing layout.
2. Select Generate under the other layouts. Layout files are generated based on the existing file.
3. Edit the generated files.
4. Click Reload in your browser to update the layout files.
5. Click Next.
To edit a custom theme The option to edit a custom theme is not available until you have created one or more custom themes.
1. Choose Customize - Custom Themes.
2. Select your theme, then click it.
3. In the Edit theme page, you can modify the name or description, edit the files that make up the custom theme, or replace files.
4. Click Next to save your changes, or Back to return to the Custom Themes page.
To delete a custom theme Deleting a custom theme removes all of the associated files from the place.
1. Choose Customize - Custom Themes.
2. Select the custom theme.
3. Click Delete Theme.
Note You can also delete a custom theme by clicking Delete Theme button from the Edit Theme page.
To reuse a custom theme If you customize a theme, you may want to keep the theme as part of a template from which you can build similar places. To do this, save the place
92 Team Workplace 6.5.1 Developer's Guide
containing the custom theme as a custom PlaceType, which you can then use for creating new Team Workplace applications.
For information on creating a PlaceType, see the “PlaceTypes: using a place as a design template” chapter.
Note You can only create customer themes using Internet Explorer.
Creating a layout using the <skincomponent> tag The HTML tag that controls the style and placement of elements in a place layout is the <SkinComponent tag>. The basic syntax for the <SkinComponent tag> tag is as follows:
name="<skincomponentname>" (required)
format="<format html>" (optional)
selectedformat="<format html>" (optional)
emptyformat="<html>" (optional)
delimiter="<html>" (optional)
PrefixHTML="<html>" (optional)
PostfixHTML="<html>"(optional)
ReplaceString=<"STRING_1=REPLACEMENT_1 && ... && ..." (optional)>
Attribute Description name Required. Specifies the name of the theme
component you are modifying. Valid names are described below.
format The format HTML. The keyword is replaced for each relevant entry
selectedformat Same as format but it applies to the selected value. For example, the format of the selected TOC entry or the selected headlines folder entry.
emptyformat What is returned when there are no values to iterate over.
delimiter The HTML placed between each of the items in a list of values.
PrefixHTML The HTML placed before each of the values in a list.
PostfixHTML The HTML placed after each of the values in a list.
Replacestring Finds and replaces one or more strings with replacement strings.
Chapter 5: Customizing the Look and Layout of a Place 93
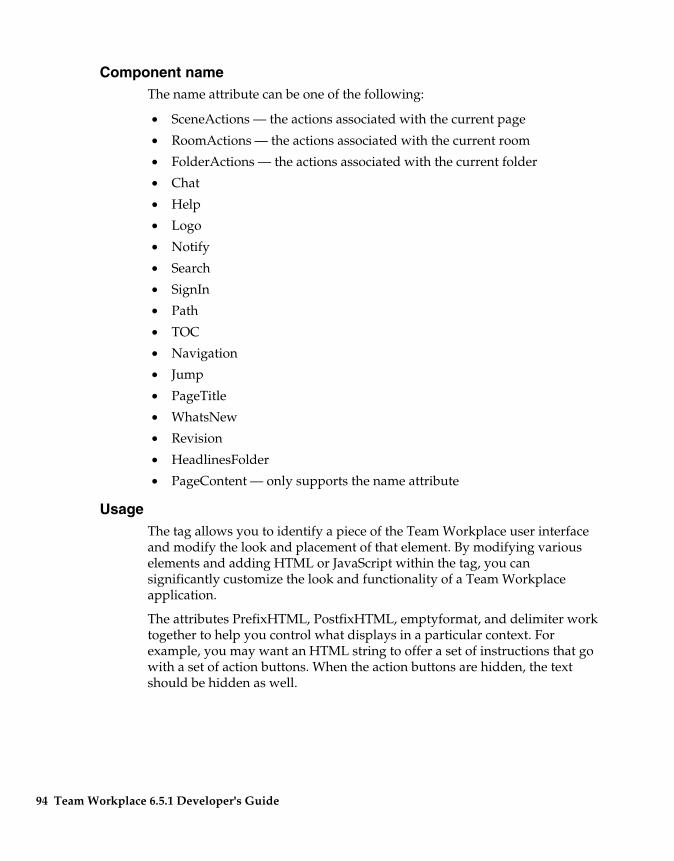
Component name The name attribute can be one of the following:
• SceneActions — the actions associated with the current page
• RoomActions — the actions associated with the current room
• FolderActions — the actions associated with the current folder
• Chat
• Help
• Logo
• Notify
• Search
• SignIn
• Path
• TOC
• Navigation
• Jump
• PageTitle
• WhatsNew
• Revision
• HeadlinesFolder
• PageContent — only supports the name attribute
Usage The tag allows you to identify a piece of the Team Workplace user interface and modify the look and placement of that element. By modifying various elements and adding HTML or JavaScript within the tag, you can significantly customize the look and functionality of a Team Workplace application.
The attributes PrefixHTML, PostfixHTML, emptyformat, and delimiter work together to help you control what displays in a particular context. For example, you may want an HTML string to offer a set of instructions that go with a set of action buttons. When the action buttons are hidden, the text should be hidden as well.
94 Team Workplace 6.5.1 Developer's Guide
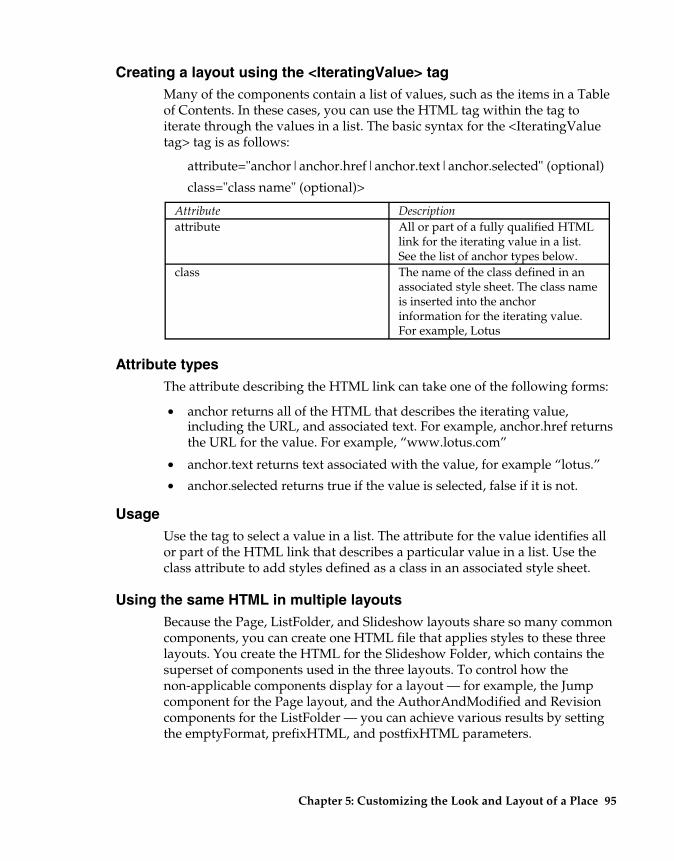
Creating a layout using the <IteratingValue> tag Many of the components contain a list of values, such as the items in a Table of Contents. In these cases, you can use the HTML tag within the tag to iterate through the values in a list. The basic syntax for the <IteratingValue tag> tag is as follows:
attribute="anchor|anchor.href|anchor.text|anchor.selected" (optional)
class="class name" (optional)>
Attribute Description attribute All or part of a fully qualified HTML
link for the iterating value in a list. See the list of anchor types below.
class The name of the class defined in an associated style sheet. The class name is inserted into the anchor information for the iterating value. For example, Lotus
Attribute types The attribute describing the HTML link can take one of the following forms:
• anchor returns all of the HTML that describes the iterating value, including the URL, and associated text. For example, anchor.href returns the URL for the value. For example, “www.lotus.com”
• anchor.text returns text associated with the value, for example “lotus.”
• anchor.selected returns true if the value is selected, false if it is not.
Usage Use the tag to select a value in a list. The attribute for the value identifies all or part of the HTML link that describes a particular value in a list. Use the class attribute to add styles defined as a class in an associated style sheet.
Using the same HTML in multiple layouts Because the Page, ListFolder, and Slideshow layouts share so many common components, you can create one HTML file that applies styles to these three layouts. You create the HTML for the Slideshow Folder, which contains the superset of components used in the three layouts. To control how the non-applicable components display for a layout — for example, the Jump component for the Page layout, and the AuthorAndModified and Revision components for the ListFolder — you can achieve various results by setting the emptyFormat, prefixHTML, and postfixHTML parameters.
Chapter 5: Customizing the Look and Layout of a Place 95
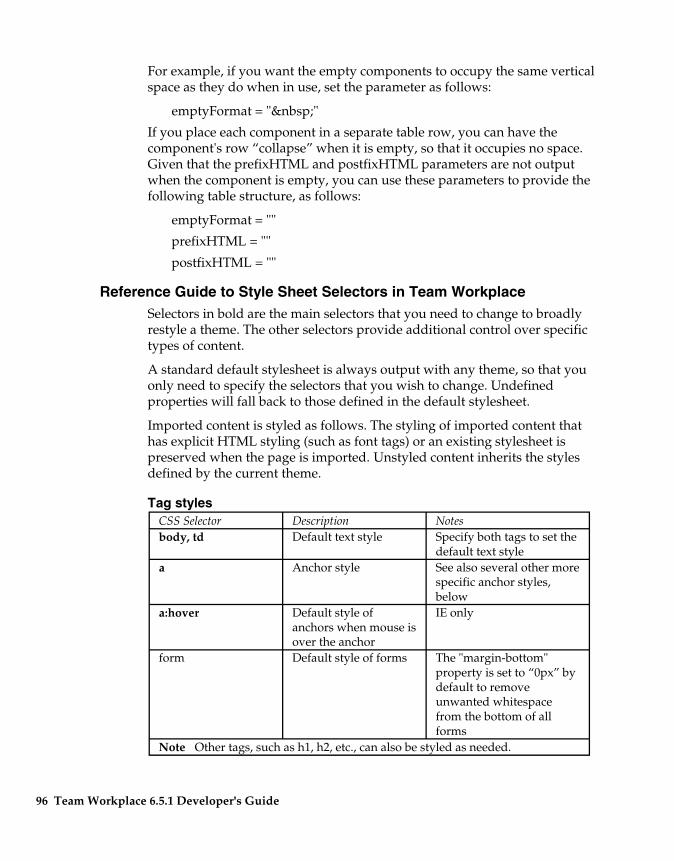
For example, if you want the empty components to occupy the same vertical space as they do when in use, set the parameter as follows:
emptyFormat = " "
If you place each component in a separate table row, you can have the component's row “collapse” when it is empty, so that it occupies no space. Given that the prefixHTML and postfixHTML parameters are not output when the component is empty, you can use these parameters to provide the following table structure, as follows:
emptyFormat = ""
prefixHTML = ""
postfixHTML = ""
Reference Guide to Style Sheet Selectors in Team Workplace Selectors in bold are the main selectors that you need to change to broadly restyle a theme. The other selectors provide additional control over specific types of content.
A standard default stylesheet is always output with any theme, so that you only need to specify the selectors that you wish to change. Undefined properties will fall back to those defined in the default stylesheet.
Imported content is styled as follows. The styling of imported content that has explicit HTML styling (such as font tags) or an existing stylesheet is preserved when the page is imported. Unstyled content inherits the styles defined by the current theme.
Tag styles CSS Selector Description Notes body, td Default text style Specify both tags to set the
default text style a Anchor style See also several other more
specific anchor styles, below
a:hover Default style of anchors when mouse is over the anchor
IE only
form Default style of forms The "margin-bottom" property is set to “0px” by default to remove unwanted whitespace from the bottom of all forms
Note Other tags, such as h1, h2, etc., can also be styled as needed.
96 Team Workplace 6.5.1 Developer's Guide
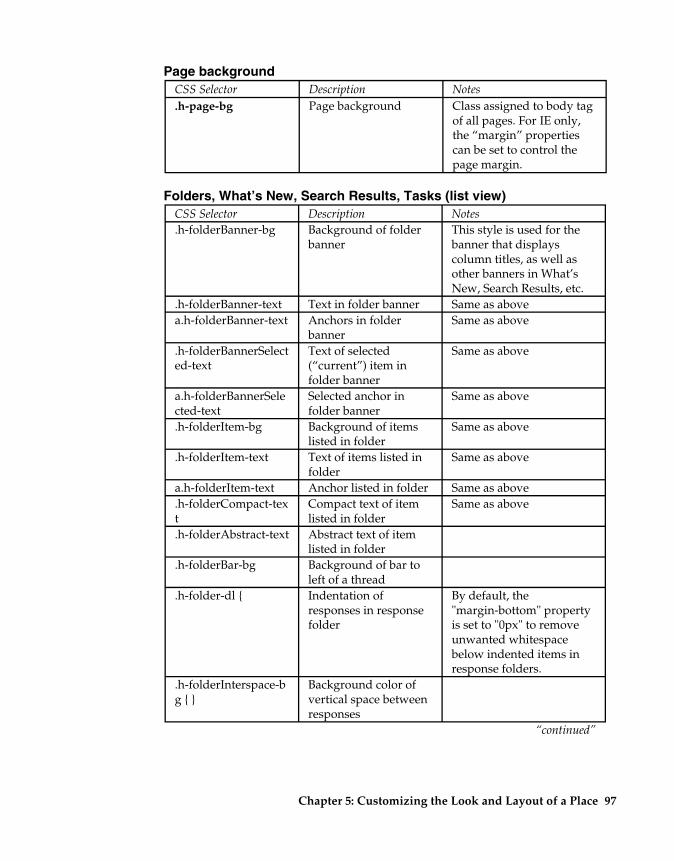
Page background CSS Selector Description Notes .h-page-bg Page background Class assigned to body tag
of all pages. For IE only, the “margin” properties can be set to control the page margin.
Folders, What’s New, Search Results, Tasks (list view) CSS Selector Description Notes .h-folderBanner-bg Background of folder
banner This style is used for the banner that displays column titles, as well as other banners in What’s New, Search Results, etc.
.h-folderBanner-text Text in folder banner Same as above a.h-folderBanner-text Anchors in folder Same as above
banner .h-folderBannerSelect Text of selected Same as above ed-text (“current”) item in
folder banner a.h-folderBannerSele Selected anchor in Same as above cted-text folder banner .h-folderItem-bg Background of items Same as above
listed in folder .h-folderItem-text Text of items listed in Same as above
folder a.h-folderItem-text Anchor listed in folder Same as above .h-folderCompact-tex Compact text of item Same as above t listed in folder .h-folderAbstract-text Abstract text of item
listed in folder .h-folderBar-bg Background of bar to
left of a thread .h-folder-dl { Indentation of
responses in response folder
By default, the "margin-bottom" property is set to "0px" to remove unwanted whitespace below indented items in response folders.
.h-folderInterspace-b Background color of g { } vertical space between
responses “continued”
Chapter 5: Customizing the Look and Layout of a Place 97
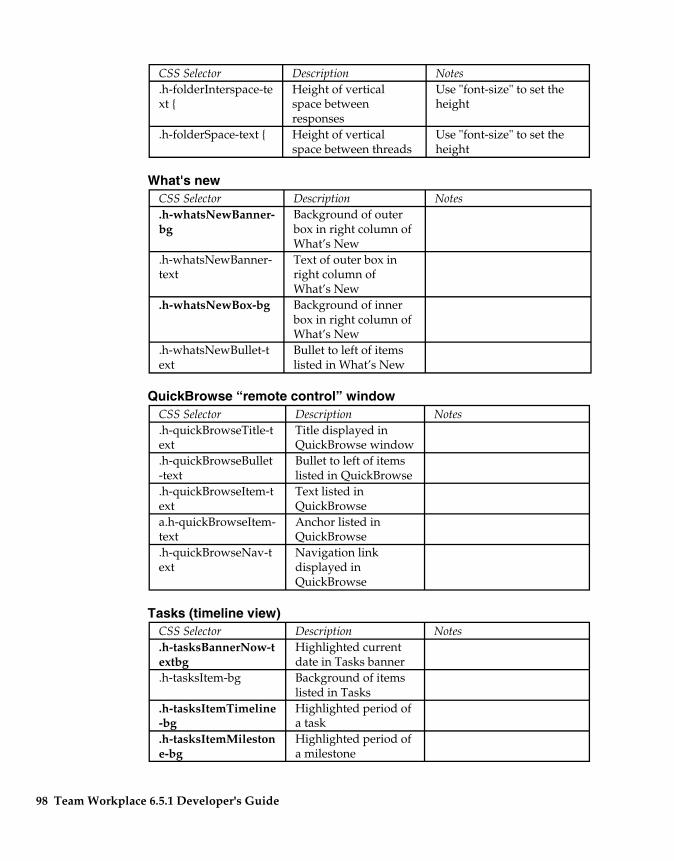
CSS Selector Description Notes .h-folderInterspace-te Height of vertical Use "font-size" to set the xt { space between height
responses .h-folderSpace-text { Height of vertical Use "font-size" to set the
space between threads height
What's new CSS Selector Description Notes .h-whatsNewBanner-bg
Background of outer box in right column of What’s New
.h-whatsNewBanner-text
Text of outer box in right column of What’s New
.h-whatsNewBox-bg Background of inner box in right column of What’s New
.h-whatsNewBullet-t ext
Bullet to left of items listed in What’s New
QuickBrowse “remote control” window CSS Selector Description Notes .h-quickBrowseTitle-t ext
Title displayed in QuickBrowse window
.h-quickBrowseBullet -text
Bullet to left of items listed in QuickBrowse
.h-quickBrowseItem-t ext
Text listed in QuickBrowse
a.h-quickBrowseItem-text
Anchor listed in QuickBrowse
.h-quickBrowseNav-t ext
Navigation link displayed in QuickBrowse
Tasks (timeline view) CSS Selector Description Notes .h-tasksBannerNow-t extbg
Highlighted current date in Tasks banner
.h-tasksItem-bg Background of items listed in Tasks
.h-tasksItemTimeline -bg
Highlighted period of a task
.h-tasksItemMileston e-bg
Highlighted period of a milestone
98 Team Workplace 6.5.1 Developer's Guide
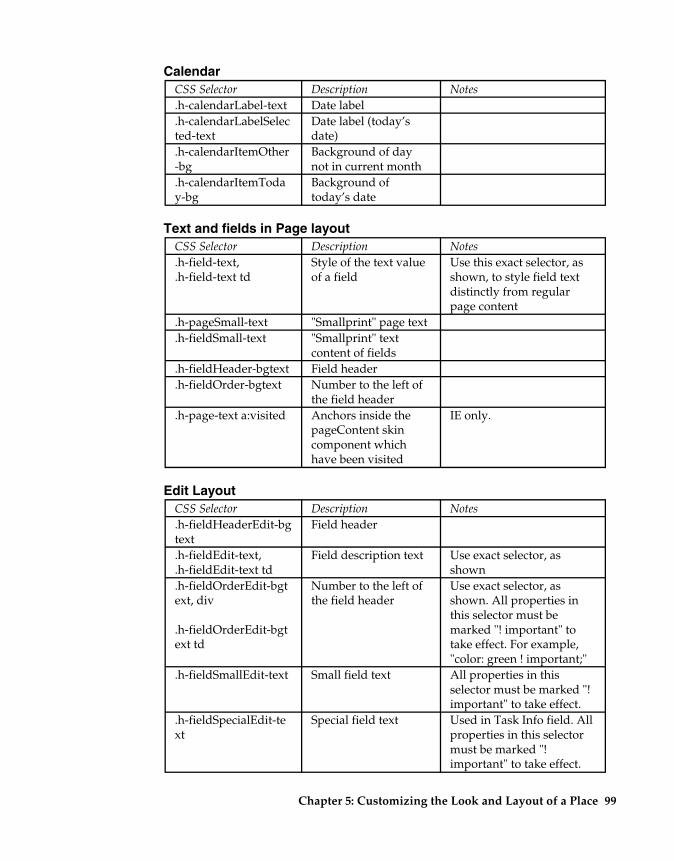
Calendar CSS Selector Description Notes .h-calendarLabel-text Date label .h-calendarLabelSelec ted-text
Date label (today’s date)
.h-calendarItemOther -bg
Background of day not in current month
.h-calendarItemToda y-bg
Background of today’s date
Text and fields in Page layout CSS Selector Description Notes .h-field-text, Style of the text value Use this exact selector, as .h-field-text td of a field shown, to style field text
distinctly from regular page content
.h-pageSmall-text "Smallprint" page text
.h-fieldSmall-text "Smallprint" text content of fields
.h-fieldHeader-bgtext Field header
.h-fieldOrder-bgtext Number to the left of the field header
.h-page-text a:visited Anchors inside the pageContent skin
IE only.
component which have been visited
Edit Layout CSS Selector Description Notes .h-fieldHeaderEdit-bg Field header text .h-fieldEdit-text, Field description text Use exact selector, as .h-fieldEdit-text td shown .h-fieldOrderEdit-bgt Number to the left of Use exact selector, as ext, div the field header shown. All properties in
this selector must be .h-fieldOrderEdit-bgt marked "! important" to ext td take effect. For example,
"color: green ! important;" .h-fieldSmallEdit-text Small field text All properties in this
selector must be marked "! important" to take effect.
.h-fieldSpecialEdit-te Special field text Used in Task Info field. All xt properties in this selector
must be marked "! important" to take effect.
Chapter 5: Customizing the Look and Layout of a Place 99
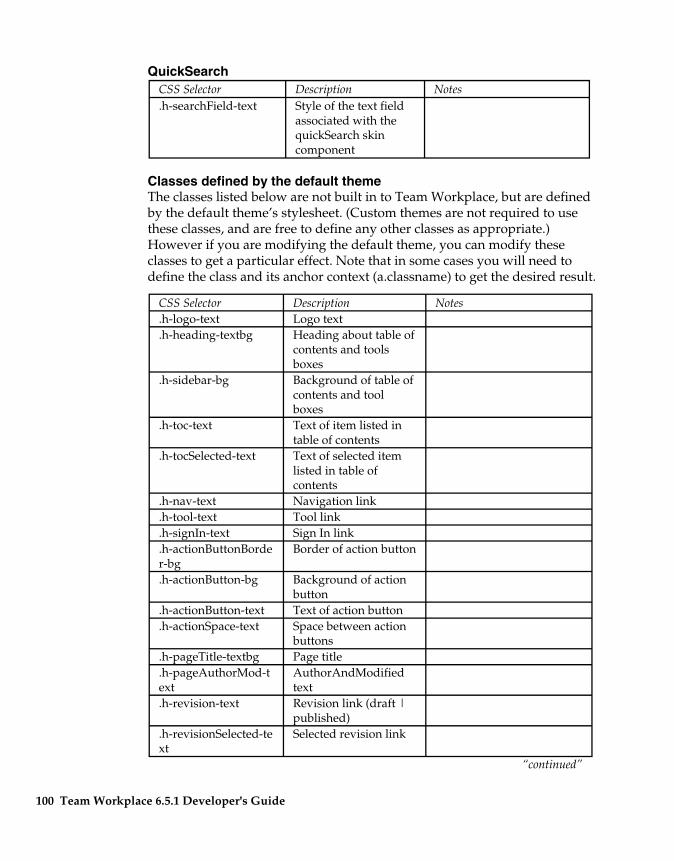
QuickSearch CSS Selector Description Notes .h-searchField-text Style of the text field
associated with the quickSearch skin component
Classes defined by the default theme The classes listed below are not built in to Team Workplace, but are defined by the default theme’s stylesheet. (Custom themes are not required to use these classes, and are free to define any other classes as appropriate.) However if you are modifying the default theme, you can modify these classes to get a particular effect. Note that in some cases you will need to define the class and its anchor context (a.classname) to get the desired result.
CSS Selector Description Notes .h-logo-text Logo text .h-heading-textbg Heading about table of
contents and tools boxes
.h-sidebar-bg Background of table of contents and tool boxes
.h-toc-text Text of item listed in table of contents
.h-tocSelected-text Text of selected item listed in table of contents
.h-nav-text Navigation link
.h-tool-text Tool link
.h-signIn-text Sign In link
.h-actionButtonBorde r-bg
Border of action button
.h-actionButton-bg Background of action button
.h-actionButton-text Text of action button
.h-actionSpace-text Space between action buttons
.h-pageTitle-textbg Page title
.h-pageAuthorMod-t ext
AuthorAndModified text
.h-revision-text Revision link (draft | published)
.h-revisionSelected-te xt
Selected revision link
“continued”
100 Team Workplace 6.5.1 Developer's Guide
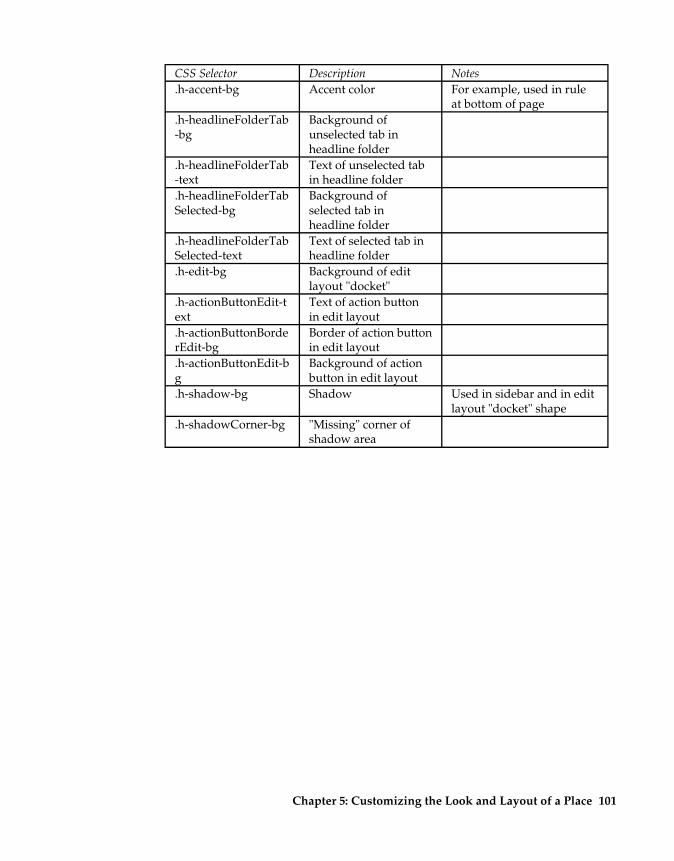
CSS Selector Description Notes .h-accent-bg Accent color For example, used in rule
at bottom of page .h-headlineFolderTab Background of -bg unselected tab in
headline folder .h-headlineFolderTab Text of unselected tab -text in headline folder .h-headlineFolderTab Background of Selected-bg selected tab in
headline folder .h-headlineFolderTab Text of selected tab in Selected-text headline folder .h-edit-bg Background of edit
layout "docket" .h-actionButtonEdit-t Text of action button ext in edit layout .h-actionButtonBorde Border of action button rEdit-bg in edit layout .h-actionButtonEdit-b Background of action g button in edit layout .h-shadow-bg Shadow Used in sidebar and in edit
layout "docket" shape .h-shadowCorner-bg "Missing" corner of
shadow area
Chapter 5: Customizing the Look and Layout of a Place 101
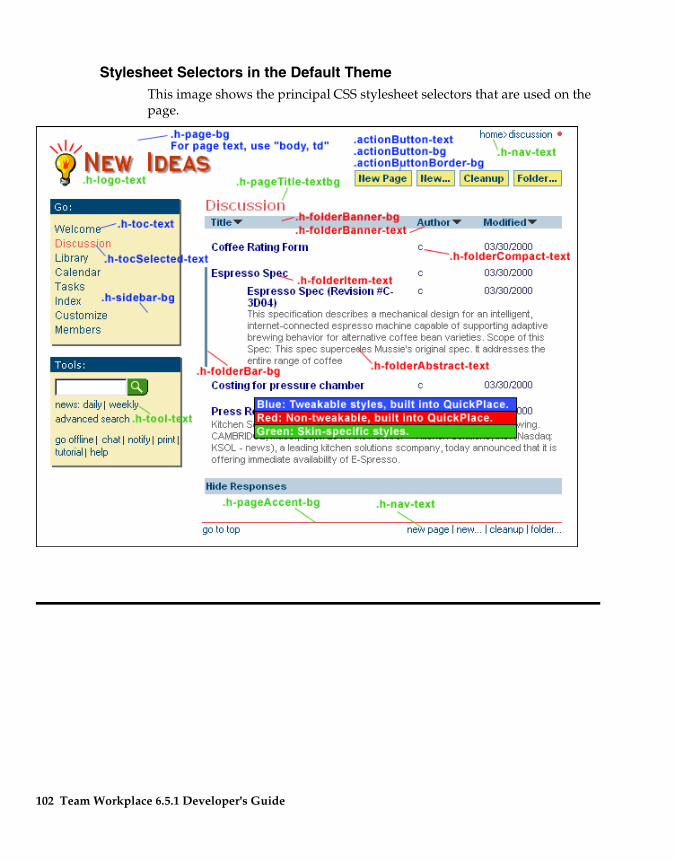
Stylesheet Selectors in the Default Theme This image shows the principal CSS stylesheet selectors that are used on the page.
102 Team Workplace 6.5.1 Developer's Guide
Chapter 6 Using a Place as a Design Template
This chapter describes how to save the design of a place as a PlaceType and use it to create new places.
PlaceTypes As you set up a place to meet the needs of your team or organization, you may want to preserve your customizations for use in other places. For example, if you create a theme that gives a particular place the look and feel of your corporate Web site, you may want to make that design available for creating other places in your organization.
You can preserve the design and structure of a place by creating a custom PlaceType. A PlaceType is a blueprint from which users can create new places. If you are familiar with Domino/Notes® architecture, a PlaceType is a Domino database template.
Creating a PlaceType and making it available to users is a two-step process. A user with Manager access to a place customizes the place, allows it to be a PlaceType, and specifies what design elements will be preserved in the PlaceType. Then a server administrator must actually create the PlaceType on the server so it is presented as a choice to users.
For more information on creating and administering PlaceTypes, see the Team Workplace Administrator's Guide.
To allow a place to be a PlaceType You must have Manager access to designate a place as a PlaceType. To create a PlaceType:
1. Open the place.
2. Click Customize.
3. Click PlaceType Options in the Advanced Customization Features section.
4. Click Edit.
103
5. Select Yes to allow PlaceTypes to be created from the place. The default selection of No prevents the administrator from listing the place as a PlaceType on the server.
6. (Optional) Enter a text description for the PlaceType.
7. (Optional) Click Browse to import a GIF or JPEG image file, no larger than 100 pixels by 80 pixels, that contains a “thumbnail sketch” of a page in the place.
8. (Optional) Enter a URL that links users to a Web page providing details about the PlaceType and how to use it. If you specify the address of a Web page, the linked text “More info” is displayed below the description of the PlaceType in the list of PlaceTypes.
If the Web page is on the current Team Workplace server, you can enter an abbreviated address that begins with a / (forward slash). For example, if the current Team Workplace server is called TestServer and you enter /quickplace/acme/main.nsf, the address will be interpreted as http://testserver/quickplace/acme/main.nsf.
If the Web page is on another server, enter the full address of the Web page. For example, if the page is in a place called Acme on a server called HighTestServer, enter http:// hightestserver/quickplace/acme/main.nsf.
9. Choose Yes to include the current list of members as part of the PlaceType, or No to save the PlaceType with no members.
10. Choose Yes to allow managers of places created from the PlaceType to make changes to the table of contents.
11. Uncheck any features that you do not want included in the PlaceType. For example, unchecking the PlaceBot option means that PlaceBots will be unavailable in places created from this PlaceType.
12. Click Next.
13. Tell the administrator to add the PlaceType to the server.
104 Team Workplace 6.5.1 Developer's Guide
Index
A API
accessing, 13, 14, 15, 18 Architecture
overview, 2 Automation
task, 73
D Databases
creating places with, 3 Debugging
PlaceBots, 79 Directory structure
described, 3
H HTML
customizing themes with, 83 viewing source code, 91
J Java
creating PlaceBots with, 73
L Layouts
creating, 93, 95 examples of, 84 HTML, 95
Log files PlaceBot, 79
LotusScript creating PlaceBots with, 76
M Members directory
creating, 4
O V Objects Versions
comparison with Domino objects, finding a place's version number, 2 10
P PlaceBot log
checking, 79 PlaceBots
copying, 80 creating, 73, 76, 77 debugging, 79 deleting, 80 disabling, 80 editing, 80 logging, 79 overview, 73 running, 77
Places customizing, 9, 83
PlaceTypes defined, 103
S Security
disabling PlaceBots, 80
T Templates
administration, 4 creating places with, 3
Themes creating, 91 creating custom, 91 deleting, 92 HTML and, 83 overview, 83
Time zone settings specifying, 5
Index-105