Embed Size (px)
Citation preview

1
Boca’s Family ofEthernet Products
BOCALANcard-VL
Installation Guide
PRODUCT CODE: BEN1VL

2
BOCALANcard-VL

3
Before You Begin your Installation
The product you have purchased isdesigned to be easily installed into mostIBM PC or compatible systems. Manyproducts have large, easy-to-read legends toallow for the easy configuring of theproduct. This installation manual containsdetailed instructions. Most included software has automaticinstallation programs to place the software correctly onto yourcomputer. However, as all computers are configured differently,you may be required to perform some basic DOS or Windowstasks. If you are not familiar with basic DOS commands such asDIR, CD, or EDIT, you should check your DOS manual, or seekassistance from you local computer dealer to install theproduct.
How to get Technical AssistanceThe dealer that you purchased this product or your computerfrom is the first place you should go for technical assistance.The dealer is usually the most qualified source of help, and is
most familiar with your system and howthis product should be installed. Manydealers have customer service andtechnical support programs, with varyinglevels of support offered, depending on
your needs and computer knowledge. Please contact the dealerfirst whenever a problem occurs.
If your Dealer Can’t Assist youIf you can’t get assistance from your dealer, the manufacturerprovides varying levels of technical assistance as summarizedon the following page.

4
BOCALANcard-VL
CompuServeGO BOCA
Boca BBS407-241-1601
Priority Service900-555-4900
($2 per minute)
Standard FreeTechnical Support
407-241-8088
23
14
567
98
QuickFax407-995-9456
TechnicalSupport Fax
407-997-0918
23
14
567
98
The Standard Free Technical Support number is for quickanswers to specific inquiries on product features and technicalquestions (call 407-241-8088; M-F, 8 am to 6:30 pm EST). Directaccess to technical support representatives is provided on alimited basis.
If you require immediate attention or in-depth help with theinstallation of the product, please call our 900-priority supportnumber for service. This number gives you immediate access tosenior-level technicians. The number is 900-555-4900. You willbe charged $2.00 per minute. The charges will appear on yournext phone bill.
Damaged or Missing ItemsWe use many world-class quality assurance programs to ensurethe product you purchased is of the highest caliber. Sometimes,however, a component may be missing from the box, or isdamaged or corrupt in some way. If this happens, immediatelyreturn the entire package to your place of purchase so you mayexchange it for a new one. Your dealer should be able toprovide you with an exchange far more quickly than bycontacting us directly. If for some reason you are unable toreturn the product directly to its place of purchase, refer to the“Servicing Your Product” and “Warranty” sections in thismanual for instructions.

5
ContentsGetting Started .......................................................................... 6
EXPRESS Installation .............................................................. 7
Section One: Product Overview ......................................... 10
Section Two: Installation and Configuration ................. 15
Section Three: Driver Installation ..................................... 213.1 Installing Drivers to Your Hard Disk ................. 213.2 Novell NetWare Drivers .......................................... 21
3.2.1 DOS ODI Client Driver ................................ 223.2.2 OS/2 ODI Client Driver ................................ 253.2.3 NetWare Server 4.x Driver ........................... 273.2.4 NetWare Server 3.x Driver ........................... 32
3.3 Microsoft Windows NT (NDIS 3.0) ..................... 353.3.1 Microsoft LAN Manager ............................... 373.3.2 Windows for Workgroups (3.1, 3.11) ......... 39
3.4 Banyan Vines.............................................................. 433.5 Artisoft LANtastic ..................................................... 463.6 Packet Drivers ............................................................ 49
Section Four : Troubleshooting .......................................... 51
Appendix A: Specifications ................................................. 54Appendix B: FCC Compliance ............................................ 55Appendix C: Servicing Your Boca Product ..................... 56Appendix D: Pin Assignments ........................................... 58Appendix E: NET.CFG Options for NetWare ................ 59Appendix F: Programmable LED Options ...................... 62Glossary ..................................................................................... 63Limited Warranty .................................................................... 64

6
BOCALANcard-VL
Congratulations on the purchase of your BOCALANcard-VL from Boca Research, Inc., a leader in high-techcomputer enhancement products. Get started byreviewing the package contents as shown below. Getstarted with the streamlined EXPRESS Install on pages 7-9, which is intended for more experienced andknowledgeable users who will using default settings.
Package Contents
Make sure you have received the following items:
If any items are missing or appear damaged, contact yourdealer for assistance.
Getting Started
BOCALANcard-VL
3.5-inchdiskette
Installation Guide
Boca’s Family ofEthernetProducts
installation guide

7
EXPRESS Install
è
Turn OFF your computer .
è
Replaceyoursystemcover .
è
è
è
STARTHERE!
EXPRESS Hardware Installation
Remove yoursystem cover .
è
Insert theboard into aVESA LocalBus slot.
8
BOCALANcard-VL
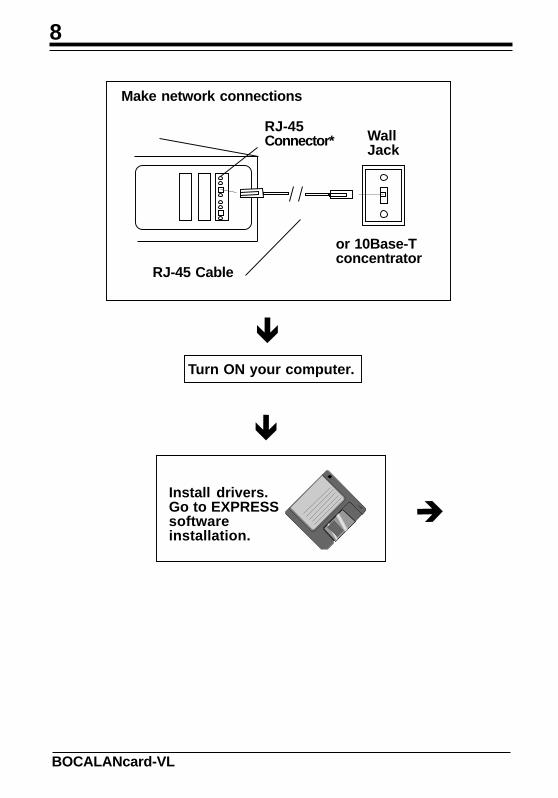
Turn ON your computer .
è
è
Install drivers.Go to EXPRESSsoftwareinstallation.
WallJack
RJ-45Connector*
Make network connections
or 10Base-Tconcentrator
è
RJ-45 Cable

9
EXPRESS Install
EXPRESS Software Installation
BOOT YOUR SYSTEMAND GO TO THE C:\DOS PROMPT.
SELECT THE NETWORK DRIVERS YOUWISH TO INSTALL BY PRESSING THESPACEBAR FOR EACH. FOLLOW ALLON-SCREEN INSTRUCTIONS.
PRESS ENTER TO COPY THE DRIVERSTO YOUR HARD DRIVE.
NOW, GO TO SECTION TWO, PAGE 15, FORINSTRUCTIONS ON HOW TO CONFIGUREYOUR NETWORK OPERATING SYSTEM FORUSE WITH THE BEN1VL DRIVERS.
INSERT THE BOCARESEARCH BEN1VLDISKETTE IN THE A:(or B:) DRIVE.
SELECT BOCALANcard-VLUTILITIES; RUN BENCFG TO SETPROGRAMMABLE LED OPTIONS.
TYPE A:\INSTALL (or B:\INSTALL)AND PRESS ENTER.

10
BOCALANcard-VL
Section One: Product Overview
Congratulations on your purchase of a Boca EthernetAdapter product. These products allow you to connect aVESA local bus computer to a 10Base-T network. TheBOCALANcard-VL (product code: BEN1VL) provides atwisted-pair transceiver with RJ-45 cabling for connectingto an unshielded twisted-pair network (10Base-T).
Features of the Boca Ethernet Adapter:
• Compliant with ISO/ANSI IEEE 802.3 specifications
• Compliant with the Video Electronics StandardsAssociation (VESA) VL-Bus specifications
• High-performance, highly integrated one-chip solution
• On-board support for connecting to a 10Base-T network
• Employs bus-mastering technology
• Designed to work with high-speed 486-based VESAlocal bus systems
• 32-bit wide access to memory and 8/16/32-bit I/Otransfer occur over the VL-Bus

11
• Jumperless adapter—all features such as interruptchannel and I/O address are software-selectable.
NOTE: The BOCALANcard-VL does not use DMA.
• Easy installation and maintenance.
• Extensive software driver support for popular networkoperating systems.
• NE2100 and NE1500T driver-compatible.
• Low-cost solution for networks requiring 10Base-Tconnection.
• One programmable diagnostic LED indicator and onelink status LED indicator.
Other Items You May Need to Complete theInstallation• Suitable tools to install the BOCALANcard-VL Bus
Adapter in your computer.
• Some network operating systems require some of theiroriginal installation diskettes. See your networkinstallation manuals.
Product Overview

12
BOCALANcard-VL
Hardware InstallationThe default settings for the adapter are as follows:
IRQ 9
Base I/O Address 300h
If you need to change any of the default settings, refer toSection Two for instructions. Otherwise, insert the adapterinto a VL-Bus compatible slot. There are usually two VL-Bus slots, depending on the model of your system.
Driver InstallationIt will be necessary to install drivers after you’ve insertedthe Ethernet adapter into your system. Drivers for themore popular network operating systems are included insub-directories on the device driver diskette which camewith this package.
These drivers are standard implementations for theirrespective systems. If you have any difficulty installingthe drivers, then refer to Section Three: Driver Installationfor particular instructions for your system. Also refer tothe README files on the device driver diskette. There isone README file in the root directory, as well as one ineach product-specific directory. Review these files for thelatest information about drivers and installationinstructions.

13
Novell CompatibilityBoca Research Ethernet adapters are hardware compatiblewith the NE2100 and NE1500T. Check if your networkoperating system has drivers for the NE2100 or NE1500Tincluded with it and use these drivers if they are newerthan those on the Boca diskette. NOTE: TheBOCALANcard-VL is not NE2000-compatible.
TroubleshootingIf the adapter does not function after you have installed itwith the necessary software, be sure the adapter is seatedfirmly and that you have set all options correctly. If youstill have difficulty, refer to Section Four: Troubleshooting.
Product Overview

14
BOCALANcard-VL
RJ-45Connector
RJ-45Cable
WallJack
LNK(GREEN)RCV(RED)
RJ-45
Punch-downBlock
BOCALANcard-VL:Sample Configuration
Hub orConcentrator

15
Section Two: Installation and Configuration
The Boca Ethernet adapters are compatible with networkhardware which complies with IEEE Ethernet 802.3standards. The BOCALANcard-VL offers a twisted-pairconnector (transceiver).
STEP 1: Remove the System CoverThese instructions assume an AT-style or compatible VESAlocal-bus machine.
A. Power-down your system, remove the power cord, andunplug the keyboard cable.
B. Use a screwdriver to remove the screws which hold thecover in place. Obviously, locations and types of screwsas well as type of case cover will vary based on yourparticular system. Refer to your computer systemdocumentation for assistance.
C. Carefully slide the cover forward—away from the rearpanel. Be careful not to let the cover catch on internalcables to disk drives, controllers, or the power supply.
Installation and Configuration

16
BOCALANcard-VL
STEP 2: Insert the BoardA. Select an empty VL-Bus compatible slot (usually there
are two) and remove the screw and metal plate thatcovers the external access to the slot you have selected.
B. Insert the board in the slot you have selected so that theedge connectors on the bottom of the board mate withthe slot on the motherboard. Press down firmly on theboard and secure it with the screw you removed in stepA.
STEP 3: Replace the System CoverSlide the cover back over the chassis, again exercising carenot to let it catch on any cabling. Once the cover is back inplace, replace all the screws you removed in step 1B.
STEP 3: Make Network ConnectionsA. Connect one end of the 10Base-T cable to the
BOCALANcard-VL (see illustration on page X). Theremaining end of the cable should be attached to a hubor concentrator.
Boca’s Ethernet products use standard pinouts. Refer toAppendix E for pin assignments.
B. Re-attach all other external cables and power cords totheir original position. Installation of the hardware isnow complete. Continue now with Step 4.
17
Installation and Configuration
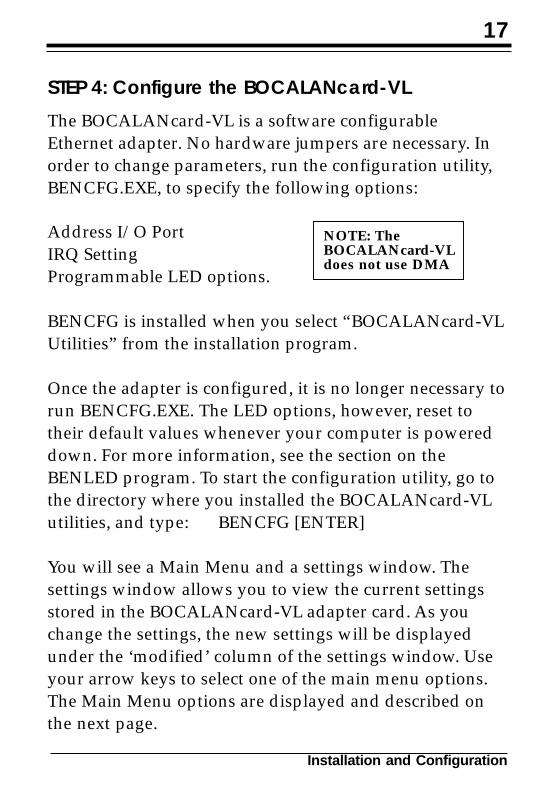
STEP 4: Configure the BOCALANcard-VL
The BOCALANcard-VL is a software configurableEthernet adapter. No hardware jumpers are necessary. Inorder to change parameters, run the configuration utility,BENCFG.EXE, to specify the following options:
Address I/O PortIRQ SettingProgrammable LED options.
BENCFG is installed when you select “BOCALANcard-VLUtilities” from the installation program.
Once the adapter is configured, it is no longer necessary torun BENCFG.EXE. The LED options, however, reset totheir default values whenever your computer is powereddown. For more information, see the section on theBENLED program. To start the configuration utility, go tothe directory where you installed the BOCALANcard-VLutilities, and type: BENCFG [ENTER]
You will see a Main Menu and a settings window. Thesettings window allows you to view the current settingsstored in the BOCALANcard-VL adapter card. As youchange the settings, the new settings will be displayedunder the ‘modified’ column of the settings window. Useyour arrow keys to select one of the main menu options.The Main Menu options are displayed and described onthe next page.
NOTE: TheBOCALANcard-VLdoes not use DMA

18
BOCALANcard-VL
Standard Settings: Allows you to select one of 16 basicconfigurations. By selecting standard settings, you willspecify both the Address I/O and the IRQ at the sametime.
Address I/O: Selects the base I/O address for theBOCALANcard-VL.
IRQ: Selects one of the four hardware IRQ settings for theBOCALANcard-VL: 5, 9, 11, or 12.
LED Options: Allows you to specify events on theBOCALANcard-VL that will cause the programmable(RED) LED to light. This is a helpful diagnostic tool fordetermining possible network problems. Put a ‘Y’ for eachevent you want the LED to light.
Save Changes & Exit: ‘Reprograms’ the BOCALANcard-VL with the settings you have selected in the ‘Modified’column.
Main MenuAddress I/O Current ModifiedIRQ Address I/O 320 300LED Options IRQ 5 5Standard Settings LED Link Enabled N NSave Changes & Exit LED Transmit Activity N NExit Without Saving LED Receive Activity (Network) Y N
LED Polarity N NLED Jabber Indicator N NLED Collision Status N NLED Enabled Y Y

19
Installation and Configuration
Exit Without Saving: Exits BENCFG withoutreprogramming the BOCALANcard-VL.
BENLED ProgramThis utility reprograms your LED options each time yourcomputer is powered up. Each time you power up yourcomputer, the programmable LED reverts back to itsdefault configuration as shown and defined below:
1 LED Link Enabled N2 LED Transmit Activity N3 LED Receive Activity (Network) Y4 LED Polarity N5 LED Jabber Indicator N6 LED Collision Status N7 LED Enabled Y
1. Receiving a valid signal from a network.
2. The BOCALANcard is transmitting data onto the network.
3. The BOCALANcard-VL is receiving data from the network.
4. Turn on this indicator to view polarity status. When ON, theBOCLANcard-VL is cabled correctly. When OFF, thenegative and positive signals for the receive pair have beenswapped. The BOCALANcard-VL automatically adjusts forthis condition. This is used for troubleshooting purposesonly. NOTE: these conditions apply ONL Y when thenormal polarity indicator is ON.

20
BOCALANcard-VL
5. This indicates that the BOCALANcard-VL is jabbering1 onthe network.
6. A collision occurs when more than one workstation on thenetwork is transmitting simultaneously.
7. Turning this option ON enables the red LED.
To program the LED for your custom options each timeyou start your computer, a command has been providedthat you can insert into your AUTOEXEC.BAT, or anyother batch file. The command is BENLED.EXE. Thesyntax for BENLED is
BENLED XX
where XX is the hexadecimal value to be placed into theLED register on the BOCALANcard-VL. The easiest wayto determine this number is by running BENCFG asdescribed earlier in this section. When selecting “Save andExit”, BENCFG tells you the command, including theregister number.
Configuration is complete. Go to Section Three: DriverInstallation.
1 Jabber occurs when there are excessively long data packets beingtransmitted from the node (i.e., workstation, server). At that point, thehub, or concentrator, partitions (isolates) the node from the networkuntil the condition is corrected.
21
Section Three: Driver Installation
3.1 Installing Drivers to Your Hard Disk
To install drivers from the driver diskette to yourcomputer’s hard-disk, run the install program that is onthe diskette. To run the install program, type in thefollowing commands (depending on your system):
A:INSTALL or B:INSTALL [ENTER]
After an introductory screen, you are asked which driversyou wish to install. Follow all on-screen instructions.Please note that all drivers available may not be listed onthis screen. For some applications, such as Windows ForWorkgroups, you will use the setup utilities providedwith those applications to load the drivers from the driverdiskette.
Note: You will always want to install theBOCALANcard-VL utilities (BENCFG and BENLED).
3.2 Novell NetWare Drivers
NetWare drivers include the following:
• Server drivers: v. 3.x, 4.x• Client drivers: DOS ODI, OS/2 ODI
Driver Installation

22
BOCALANcard-VL
Novell’s ODI (Open Datalink Interface) based driversalong with NetWare 3.x and 4.x are the prevalent Novellnetwork operating system revisions in the market today.The driver diskette includes support for NetWare 3.x and4.x with IPXODI client and server drivers. The ODI Clientdrivers included on the driver diskette can be used forworkstations running on NetWare v. 3.x and 4.x. Be sureto check your distribution diskettes for current drivers. Werecommend that the latest available drivers be used.
3.2.1 NetWare DOS ODI Client DriverYou can load the NetWare PCNTNW.COM DOS ODIdriver through the DOS command line or through a batchfile such as AUTOEXEC.BAT.
1. Create a subdirectory in your boot drive with thefollowing files:
NETX.COM: NetWare shell (used with conventionalmemory workstations)
VLM.EXE: Use this instead of NETX.EXE to make useof NetWare Directory Services (NDS) for NetWare 4.xand above.
LSL.COM: Link Support Layer
PCNTNW.COM: The Boca Ethernet Adapter DOS ODIDriver

23
The IPX protocol stack file (IPXODI.COM, for example)
NET.CFG: this is required for configuring options.
NETX.COM, LSL.COM, IPXODI.COM, and VLM.EXEcan be obtained from the Workstation Driver diskette inthe Novell Client Software package. Copy the client filesPCNTNW.COM and NET.CFG from the DOS ODIdirectory of the driver diskette to the subdirectory.
2. To manually load these files from the DOS prompt eachtime the system is restarted, type the followingcommands in the given order to initialize DOS ODIdriver support and the IPX protocol stack:
LSL.COM [ENTER]PCNTNW.COM [ENTER]IPXODI.COM [ENTER]NETX.COM [ENTER]
NETX.COM is compatible with the versions of DOS 3.x,4.x, and 5.x. You must load SETVER.EXE in theCONFIG.SYS file if you are using DOS 6.0.
3. To automatically load these files, use a DOS text editorto create and/or modify a batch file, then save it to disk.You may use your AUTOEXEC.BAT if you desire. Loadthe files in the following order: link support layer, LANDriver, protocol stacks, then the shell. Your batch fileshould look similar to the following:
You must call theNETX file in the samedirectory that theNET.CFG is located.
Driver Installation

24
BOCALANcard-VL
\<subdirectory>\LSL.COM\<subdirectory>\PCNTNW.COM\<subdirectory>\IPXODI.COM\<subdirectory>\NETX.COM
or VLM.EXE*
*NOTE: use VLM.EXE instead of NETX for NDS options.
4. To change any default settings when the driver isloaded, you must create a NET.CFG file on theworkstation diskette. You can use NET.CFG to changethe Boca Ethernet adapter’s operating characteristics.
5. Reboot the workstation. After NETX is executed, and ifa server is present, it will attach to the server. At thispoint you can log into the network using your NetWareutilities. Logging in can be accomplished by:
Type F: [ENTER], then LOGIN [ENTER]
Refer to the NetWare ODI DOS installationdocumentation for more information on installing theDOS ODI driver.

25
3.2.2 NetWare OS/2 Client DriverLoad NetWare OS/2 ODI Driver from the OS/2CONFIG.SYS file as shown below. For more information,refer to the NetWare Requestor for OS/2 installationdocumentation.
1. Using NetWare OS/2 disks provided by Novell, installthe NetWare OS/2 requestor files on the target harddisk and the file server. Follow the instructions onscreen to configure the NetWare OS/2 requestor for anetwork-supported LAN adapter board. If the NetWare-supported LAN adapter contains the PCNET adapteroption, then select that option, otherwise select anyother LAN adapter.
2. Copy the OS/2 ODI Driver, PCNTNW.OS2, from theBoca diskette to the C:\NETWARE directory of the bootdrive.
3. Edit the CONFIG.SYS file and replace the NetWare-supported LAN adapter driver with the name of theOS/2 ODI driver, PCNTNW.OS2. For example:
DEVICE=C:\NETWARE\PCNTNW.OS2
The following is an example of the CONFIG.SYS loadsequence for OS/2 ODI driver support for the IPXprotocol stack:
Driver Installation

26
BOCALANcard-VL
REM --- NetWare Requestor Statements Begin ---DEVICE=C:\NETWARE\LSL.SYSRUN=C:\NETWARE\DDAEMON.EXEDEVICE=C:\NETWARE\PCNTNW.OS2(located in OS2ODI directory on driver diskette)DEVICE=C:\NETWARE\IPX.SYSDEVICE=C:\NETWARE\NWREQ.SYSIFS=DEVICE=C:\NETWARE\NWFIS.IFSRUN=DEVICE=C:\NETWARE\NWDAEMON.EXEREM --- NetWare Requestor Statement End ---
The OS/2 ODI Driver supports multiple protocol stacksand Ethernet frame types. Refer to the NetWare Requestorfor OS/2 installation documentation for more informationon using protocol other stacks or frame types.
You can change any default settings when the driver loadsby creating the file NET.CFG. Refer to the NetWareRequestor for OS/2 installation documentation for moreinformation on configuring the NET.CFG file.
NOTE: NET.CFG is required for all settings. Do notoperate the BOCALANcard-VL without a NET.CFG file.

27
3.2.3 NetWare Server 4.x Driver
For a NetWare 4.x server configuration, the Server 4.xdriver is included on the Boca driver diskette. The driveris located under the 4.x subdirectory in the Novelldirectory of the disk.
The directory structure provided on the driver diskettehas been setup for automatic installation. Follow theguidelines in the Novell NetWare documentation for moredetails to install the driver from the driver diskettes.
Use the LOAD and BIND commands to load the NetWare4.x open datalink interface (ODI) server driver asdescribed below. For more information on thesecommands, refer to the NetWare 4.x LAN driverinstallation documentation. Located in the Driver Disk isthe version 4.x server driver labeled PCNTNW.LAN. Twomethods to loading this driver are to use the servercommand line prompted by “:” or to editAUTOEXEC.NCF. If you use the server command line,you will need to load the driver each time the system isbooted. If you edit AUTOEXEC, it will automatically loadthe driver each time your system is booted.
To install the NetWare Server 4.x, follow the instructionsgiven below:
1. Install NetWare 4.x on your system.
Driver Installation

28
BOCALANcard-VL
2. Copy the ODI server driver, PCNTNW.LAN, from theBOCALANcard-VL driver diskette to the hard diskdirectory where the NetWare 4.x system files arelocated. The path on the diskette should be as follows:
A:\NOVELL\SERVER\4.X
3. Boot NetWare by executing SERVER.EXE. Refer toNetWare documentation on loading disk drivers andmounting volumes.
4. To load the driver manually, simply follow theinstructions given below.
Type the following command at the file server console:
LOAD PCNTNW <ENTER>
(You will need to specify DOS path if the driver is locatedin a DOS partition). Do not use keyboard Port, INT, andDMA keywords. The BOCALANcard-VL requires nokeywords to be specified for interrupt channel, DMAchannel, and I/O address.
Make sure that MSM and ETHERTSM files are present inthe same directory as PCNTNW. The PCNTNW driverwill autoload these files. These files should be copied fromthe diskette from the 4.x subdirectory under the Novelldirectory. Then, bind the driver to the IPX protocol stackby typing:

29
BIND IPX TO PCNTNW NET=xxxx <enter>(Bind to ipx or any other protocol stack).
5. To load the driver using AUTOEXEC, you must editAUTOEXEC.NCF. First, type “LOAD INSTALL” at theserver prompt “:” to access the install utility. Open theMAINTENANCE/SELECTIVE INSTALL to select the“NCF File Options” from the menu to access the “EDITAUTOEXEC”. Add the following command lines inAUTOEXEC.NCF file as shown below. However, for theBOCALANcard-VL requires no keywords to be specifiedfor interrupt channel, DMA channel, and I/O address.
BIND IPX TO PCNTNW NET=xxxx(Bind to ipx or any other protocol stack).
Multiple FRAME type supportThe FRAME keyword should be used with the LOADcommand to designate the desired frame type. Inaddition, the BOARD keyword must be used inconjunction with the FRAME keyword if no IO Address isspecified to support multiple FRAME types. The availableframe values are the following:
Ethernet_802.2 Ethernet_802.3Ethernet_SNAP Ethernet_II
Please refer to the Novell NetWare documentation fordetails regarding each frame type. The BOARD keywordvalue is designated by the user. The range available forBOARD is 0 - 99999999.
Driver Installation

30
BOCALANcard-VL
For example, to load multiple frame types for one physicalBOCALANcard-VL, the following should be entered:
LOAD PCNTNW FRAME=Ethernet_802.2 BOARD=1LOAD PCNTNW FRAME=Ethernet_802.3 BOARD=1LOAD PCNTNW FRAME=Ethernet_II BOARD=1LOAD PCNTNW FRAME=Ethernet_SNAP BOARD=1<ENTER>
Finally, the driver must be bound to the IPX protocol toeach frame type based on the procedure provided in theNovell documentation. Please note that if memory is lowto support multiple frames, the buffer size must beincreased in the STARTUP.NCF in NetWare. For example,the SET RESERVED BUFFERS should be set to below 32from the default setting of below 16. The correct syntax isthe following:
Set ReservedBuffersbelow16Meg=32
Single FRAME type supportThe FRAME keyword should be used with the LOADcommand to designate the desired frame type. For singleFRAME support, no BOARD keyword is needed todesignate one frame type. The available values anddescription to load FRAME types is explained above inthe Multiple FRAME type support section.

31
Using BOARD keywordThe BOARD keyword may be used with the LOADcommand to specify the board number to the selectedadapter board. This keyword is used to load a differentframe type to the same board. See the Multiple FRAMEsupport section above for examples using the BOARDkeyword.
Note: If IOP, IO Port Address, is specified, then BOARDkeyword should not be used. In this case, the same IOPshould be used to load the different frame type.
Driver Installation

32
BOCALANcard-VL
3.2.4 NetWare Server 3x Driver
For a NetWare 3.1x server configuration, the Server 3.1xdriver is included on the Boca diskette. The driver islocated under the 3.1x subdirectory in the Novell directoryof the disk. Please refer to Appendix A for details on thedirectory structure.
Use the LOAD and BIND commands to load the NetWare3.1x open datalink interface (ODI) server driver asdescribed below. For more information on thesecommands, refer to the NetWare 3.1x LAN driverinstallation documentation. Located in the Driver Disk isthe version 3.1x server driver labeled PCNTNW.LAN.Two methods for loading this driver are to use the servercommand line prompted by “:” or to editAUTOEXEC.NCF. If you use the server command line,you will need to load the driver each time the system isbooted. If you edit AUTOEXEC, it will automatically loadthe driver each time your system is booted.
To install the NetWare Server 3.1x, follow the instructionsgiven below:
1. Install NetWare 3.1x on your system.
2. Copy all the files from 3.1x server directory of the Bocadiskette to the hard disk directory where NetWare 3.1xsystem files are located. The following path should beused to access the files from the diskette:

33
A:\NOVELL\SERVER\3.X
3. Boot NetWare by executing SERVER.EXE. Refer toNetWare documentation on loading disk drivers andmounting volumes.
4. To load the driver manually, simply follow theinstructions given below.
Type the following command at the file server console:
LOAD LSLENH.NLMLOAD MSM31X.NLMLOAD ETHERTSM.NLMLOAD PCNTNWLOAD MONITOR (only needed for NetWare 3.11 andmust use version included on disk)<ENTER>
(You will need to specify DOS path if the driver is locatedin a DOS partition).
No keywords need to be specified for interrupt channel,DMA channel, and I/O address.
Make sure that LSLENH, MSM and ETHERTSM files arepresent in the same directory as PCNTNW. The PCNTNWdriver will autoload these files. These files should becopied from the Boca diskette from the 3.1x subdirectoryunder the Novell directory.
Driver Installation

34
BOCALANcard-VL
Then, bind the driver to the IPX protocol stack by typing:
BIND IPX TO PCNTNW NET=xxxx <enter>(Bind to ipx or any other protocol stack).
NOTE: Please make sure that you use the monitorprogram which is distributed on the Boca driverdiskette. The original monitor shipped with NetWare3.11 has a bug and will crash the system.
5. To load the driver using AUTOEXEC, you must editAUTOEXEC.NCF. First, type “LOAD INSTALL” at theserver prompt “:” to access the install utility. Open the“SYSTEM OPTIONS” menu to access “EDITAUTOEXEC”. Add the following command lines inAUTOEXEC.NCF file.
LOAD LSLENH.NLMLOAD MSM31X.NLMLOAD ETHERTSM.NLMLOAD PCNTNWLOAD MONITOR (only needed for NetWare 3.11; mustuse version included on disk)BIND IPX TO PCNTNW NET=xxxx(Bind to ipx or any other protocol stack).
If you need to load multiple boards, consult your Novelldocumentation.
35
The BOCALANcard-VL driver diskette also includes theNDIS 3.0 driver for the Windows NT environment. Thedirectory structure provided on the Boca driver diskettehas been setup for automatic installation. Follow theguidelines in the Microsoft Windows NT User ’s Guide formore details to install the driver.
Note: Some of the custom installation proceduresprovided here are either an abbreviated or a duplicationof the OEM installation guidelines.
To install the NDIS 3.0 driver, simply follow theinstructions given below to navigate through the menudriven functions in Windows NT.
1. Insert the Boca diskette into the system’s floppy drive.
2. From the Control Panel in the Windows NT Mainwindow, double click on the Network icon.
3. In the Network Settings dialog box, choose “AddAdapter.”
4. In the Add Network Adapter dialog box, pull theadapter card list menu and select “<Other> Requiresdisk from manufacturer” from the list.
5. In the next window, specify the drive and path for theBoca files. The Windows NT files reside in the WINNTsubdirectory. So, for example, enter A:\WINNT.
3.3 Microsoft Windows NT (NDIS 3.0)
Driver Installation

36
BOCALANcard-VL
6. Then, select the AMD PCnet Family Ethernet Adapterfrom the dialog box to install the BOCALANcard-VL.
7. Now, while in the AMD PCnet Family Ethernet AdapterCard Setup dialog box, select the bus type to “All”(defaults to All if nothing is selected).
The BOCALANcard-VL does not require IRQ or DMAchannel values to be specified.
8. Finally close the Setup dialog box and exit from theAdd Network adapter dialog box to complete theinstallation. Follow any remaining instructions fromWindows NT to reboot your system, if required.
For additional guidelines, please refer to the MicrosoftWindows NT documentation. In addition, you mayreview the README.TXT file in the WINNT directory ofthe Boca diskette.

37
To install the NDIS driver, follow the instructions givenbelow:
1. Insert the Boca driver diskette into the floppy drive.
2. From the LAN Manager subdirectory on your harddisk, run SETUP to begin installation.
3. Use the ALT key on your keyboard and the highlightedletter to pull down the Configuration menu (ALT + C).
4. From the Network Adapter Drivers dialog box, selectthe AMD PC-Net Family Driver from the menu, ifshown. Otherwise, select Other Driver to import thedriver from the Boca diskette.
5. Then, enter the disk drive letter for the Boca diskette.No path is required because the Boca diskette isstructured for the Microsoft LAN Manager OEM setup.
6. Select the PCnet Family Ethernet adapter and chooseOK.
7. Select the desired protocol from the Network Protocoldialog box and choose OK.
3.3.1 Microsoft LAN Manager
Driver Installation

38
BOCALANcard-VL
8. In the Workstation Configuration dialog box, select thePCnet Family Ethernet adapter and choose OK.
9. Follow the remaining instructions from LAN Managerto complete installation.
NOTE: There are two keywords for changing the transmitand receive buffers via the PROTOCOL.INI driver entry.These keywords are:
RXBUFFERS=4TXBUFFERS=4
If you insert these keywords in the PROTOCOL.INI filein the PCNTND driver section, it will change the numberof transmit and receive buffers.
Designating the BUSTYPE KeywordRemove the I/O address and insert the BUSTYPEkeyword in PROTOCOL.INI under the PCNTND driversection. For example, to designate the BOCALANcard-VLon the local bus, insert the following:
BUSTYPE=VESA

39
Installing the Windows for Workgroups 3.1 DriverThe BOCALANcard-VL driver also supports the Windowsfor Workgroups 3.1 environment. The installation for theNDIS 2.0.1 driver is menu driven through the Windowsinterface. The Boca driver and other relevant files arelocated in the WFW31 subdirectory.
The directory structure provided on the driver diskettehas been setup for automatic installation. Follow theguidelines in the Microsoft Windows for WorkgroupsUser’s Guide for more details to install theBOCALANcard-VL driver from the driver diskettes.
To install the NDIS 2.0.1 driver, follow the instructionsgiven below:
1. Insert the Boca driver diskette in the system’s floppydrive.
2. From the Main group in Windows, choose the ControlPanel icon.
3. In the Network Settings dialog box, choose theAdapters button and the Network Adapters dialog boxshould appear.
3.3.2 Loading the Windows for Workgroups Drivers
Driver Installation

40
BOCALANcard-VL
4. Choose the Add button to install the driver from theBoca diskette.
5. In the list of network adapters, select the “Unlisted orUpdated Network Adapter” option.
6. Enter the drive letter and the WFW31 path to load theNDIS driver. For example, A:\WFW31.
7. Select the AMD PC-Net Driver and choose OK.
8. A setup dialog box appears displaying the defaultsettings. For BOCALANcard-VL adapters, no settingsneed to be specified for one installed adapter.
9. Then, in the Network Adapters dialog box, choose theClose button. Then choose the OK button in theNetwork Settings dialog box.
10. Follow the remaining Window instructions, to restartthe computer to have the driver to take effect.

41
Installing the Windows for Workgroups 3.11 DriverMicrosoft’s Windows for Workgroups 3.11 supports bothNDIS 2.0.1 and NDIS 3.0 drivers. Boca Research providesboth NDIS drivers to run under the Windows forWorkgroups 3.11 environment. Please note the format andprocedure to install the NDIS drivers for Windows forWorkgroups 3.11 is different from that of Windows forWorkgroups 3.1.
The directory structure provided on the Boca driverdiskette has been set up for automatic installation. Followthe guidelines in the Microsoft Windows for Workgroups3.11 User ’s Guide for more details to install theBOCALANcard-VL driver from the driver diskettes. Toinstall the NDIS 2.0.1 and/or NDIS 3.0 drivers, simplyfollow the instructions given below:
NOTE: During this installation, you will need some filesfrom your Windows for Workgroups diskette.
1. Insert the driver diskette into the system’s floppy drive.
2. In the Windows for Workgroups 3.11 Program Manager,double click on the Windows Setup icon from the MAINwindow.
3. While in the Windows Setup dialog box, select theChange Network Settings from the Options menu.
Driver Installation

42
BOCALANcard-VL
4. From the Network Setup dialog box, select the“Drivers...” button to install the NDIS 2.0.1 and NDIS3.0 drivers.
5. Then, in the Network Drivers dialog box, select AddAdapter button.
6. Now, in the Add Network Adapter window, choose the“Unlisted or Updated Network Adapter” from themenu and then select OK.
7. The Install driver dialog box will appear. Enter thefloppy drive with the Boca driver diskette and specifythe WFW311 path to install the drivers. For example:
A:\WFW311Then select OK.
8. The BOCALANcard-VL selection will appear under theNetwork Adapters list. Simply select OK to continue.No values need to be specified for the Interrupt channeland DMA channel since the BOCALANcard-VL issoftware-configurable.
9. Select Close.;
10. Then, select OK to exit. Windows for Workgroups 3.11will ask you to reboot the machine once installation iscompleted The installation for Windows forWorkgroups 3.11 is now completed.

43
3.4 Installing the Banyan VINES Client Driver
The BOCALANcard-VL driver may configured to run inthe Banyan VINES environment for client based systemsonly. The steps to load the driver are as follows:
1. Compile all the files necessary (see enclosed list) forVINES. For ease of use, all of these files were placed inone subdirectory - C:\NDIS
2. Create PROTOCOL.INI, CONFIG.SYS, andAUTOEXEC.BAT (see below as an example)
a. Modify the PROTOCOL.INI to reflect the changesnecessary for the appropriate LAN card section.
b. Modify the AUTOEXEC.BAT and CONFIG.SYS toreflect changes in the DIRECTORY of where the files areto be placed.
3. Run the VINES PCCONFIG to configure the NDISEthernet Driver.
4. Reboot the machine and run the AUTOEXEC.BAT.
5. Run BAN.
Driver Installation

44
BOCALANcard-VL
Files required:
BAN.EXE 32835 02-12-92 6:07pBAN.MSB 2058 02-12-92 6:07pREDIR.MSB 982 02-12-92 6:07pNEWREV.EXE 47933 02-12-92 6:07pNEWREV.MSB 5139 02-12-92 6:07pPCCONFIG.DB 19656 02-12-92 6:07pREDIRALL.EXE 51546 02-12-92 6:07pPCCONFIG.EXE 61155 02-12-92 6:07pPCCONFIG.MSB 5785 02-12-92 6:07pNDISBAN.COM 35356 02-12-92 6:07pNETBIND.EXE 15639 02-12-92 6:07pNDISBAN.DOC 3072 02-12-92 6:07pNDISBAN.OVL 15639 02-12-92 6:07pPROTMAN.DOS 10649 02-12-92 6:07p
User Must Create:
PROTOCOL.INI 3510 5-28-92 11:07aCONFIG.SYS 226 05-29-92 10:05aAUTOEXEC.BAT 112 05-28-92 05:25p
User Must Find:
PCNTND.DOS

45
The following path should be used to access the driverfrom the Boca diskette:
A:\MSLANMAN.DOS\DRIVERS\ETHERNET\PCNET
The modifications to CONFIG.SYS, AUTOEXEC.BAT, andPROTOCOL.INI are shown below as an example:
CONFIG.SYSFILES=20BUFFERS=20DEVICE=C:\NDIS\PROTMAN.DOS /I:C\NDISDEVICE=C:\NDIS\PCNTND.SYS
AUTOEXEC.BATPATH=C:=DOSPROMPT $P$GC:CD\NDISBAN
PROTOCOL.INI[PROTOCOL.INI]DRIVENAME= PROTMAN$
[PCNTND_NIF]DRIVENAME = PCNTND$IOBASE = 0x300INTERRUPT = 3
[VINES_XIF]DRIVENAME = NDISBAN.DOS$BINDINGS = PCNTND_NIF
Driver Installation

46
BOCALANcard-VL
3.5 Artisoft LANtastic/AI Driver
The PCNTLCEXE AI-LANBIOS driver, included on theBoca driver diskette, allows you to operate a BocaEthernet adapter-based node in a LANtastic network. Thedriver is compatible with Artisoft’s LANtastic/AINetwork Operating System v. 4.x and 5.x. You will alsoneed the AILANBIO.EXE file (included in the LANtastic/AI Software package) to provide high-levelcommunications across the LAN. You will not be able torun any network software until the Boca driver and theAILANBIO.EXE are run. Refer to the LANtasticdocumentation for additional details.
1. Copy the Boca driver to the appropriate directory. Makesure that AILANBIO.EXE is also resident. Thecommand line for installing the driver is as follows:
PCNTLC.EXEAILANBIO.EXE (must be obtained from Artisoft’s
LANtastic/AI package)
The default values are invoked if none are entered atthe command line. These defaults are:
IRQ = 5I/O Port = 300hAdapter # = 0MPX = C7

47
The MPX switch specifies the DOS multiplex (MPX)number to use for communication withAILANBIO.EXE. You will need to change this numberONLY if the default MPX number is in use by anotherapplication or NETBIOS. Multiplex numbers 00hthrough BFh are reserved for DOS use; therefore, youmust use a multiplex number between C0h and FFh.
2. Using command line switches, you can assign differentvalues for the Boca Ethernet adapter driver. Example:
PCNTLC.EXE/MPX=D7/IRQ=4/IOBASE=320AILANBIO.EXE/MPX=D7/ADAPTER=1
The command line switches instruct the NETBIOS to loadthe BOCALANcard-VL as Adapter number 1 usinginterrupt request 4, I/O Base Address 320h, and DOSMPX number D7.
3. If the driver is installed successfully, the PCNTLC.EXEdriver will produce the message:
---- PCNTLC DRIVER INSTALLED ----
4. Other switch commands that are available:
•@SWITCH-FILE. Specifies that additional switches are tobe taken from a switch file. Any switches after the switch-file name will be used, and the switch settings take
Driver Installation

48
BOCALANcard-VL
precedence over any settings in the switch file. You mayinvoke switch files from within switch files as often as youwish. The file should contain valid switches and maycontain comment characters (type “;” at the beginning ofeach line or after switches). For example: PCNTLC /@SETUP. The file SETUP contains:
;Boca Research Ethernet Adapter driver setup file;IOBASE=360 ; Use I/O port address 360hIRQ4 ; Use interrupt request 4VERBOSE ; Display verbose information
• HELP instructs PCNTLC.EXE to display informationabout the configuration of the PCNTLC.EXE driver to bedisplayed. See message section of the LANtastic manualfor a detailed description of the VERBOSE output.
• REMOVE command removes the PCNTLC.EXE driverfrom memory. You must remove TSR (terminate and stayresident) programs in the opposite order in which theywere loaded. For example, if you loaded PCNTLC.EXEand then loaded AILANBIO.EXE, you must removeAILANBIO before PCNTLC.EXE.
For more details regarding switches and PCNTLC.EXEmessages, consult the appropriate README file in theLANtastic subdirectory on the Boca diskette and theLANtastic manuals.
49
3.6 Installing the Packet Driver
The Boca Packet Driver for the Boca Ethernet Adaptercontains the DOS version of the packet driver. The driverdiskette includes a number of other utilities which runabove the Packet Driver. A number of documentation filesare also included. These should all be read. Start with thefile INSTALL.TXT.
Copy the Boca packet Driver, PCNTPK.COM, in theappropriate directory. The packet driver can be loadedfrom the DOS prompt or through an AUTOEXEC.BAT file.The command line format for the Packet Driver is:
PCNTPK[-n] [-d] [-w] <int=packet_int_no> [IRQ=int_irq][IOADDR = io_addr] [DMA = dma_no]
[-n]The -n option converts Ethernet type 8137 and NovellPSO-like packets. This is required if you use a standardboot ROM from Boca and use the Packet Driver and IPXincluded in the Packet Driver package as the driversloaded from the boot image file.
[-d]The -d option delays initialization, but maintains theinitialization code after loading.
Driver Installation

50
BOCALANcard-VL
[-w]The -w switch is used for Windows. Install the PacketDriver before running MS-Windows. The switch does notprevent Windows from swapping the network applicationout of memory; it simply detects when this occurs anddrops the packet.
<int=packet_int_no>This is the software interrupt used to communicate withthe packet driver. The range of this parameter is between0x60 and 0x80. Refer to Appendix A of INSTALL.TXT formore details.
[int_no]This is the hardware interrupt number. This can be 5, 9, 11,or 12.
[io_addr]This is the base I/O address. This can be 300h, 320h, 340h,or 360h.
If the [int_no] and [io_addr] are not specified, the PacketDriver assumes the following default values,:
[int_no] = 5[io_addr] = 300h

51
Section Four: Troubleshooting
If you encounter difficulties with your Boca Ethernetproduct, the problem may be a faulty installation orconfiguration settings which conflict with other devices.Check the following:
• STATUS LEDs. The Boca Ethernet adapters have twoLEDs that are visible from the rear of the board. Thesestatus indicators show whether or not the cable isconnected along with a programmable LED. The defaultindicates when data is received from the network.
GREEN: LinkRED: Receive data (default)
Power on the system, connect the network cable, andobserve the LEDs. The green LED shows that it isconnected with another 10Base transceiver. If the greenlight is ON, then the system is connected. See chartexplaining LED status on next page.
Troubleshooting

52
BOCALANcard-VL
GREEN RED STATUS
ON ON or OFF LINK established
OFF OFF No LINK (connection)
ON *OFF No data is currently being
received from the network.
ON *FLASHING Data being received. This is the
normal state of an active network.
ON *ON steady Heavy network traffic or possible
bad cable.
* IF RED IS SET TO DEFAULT
• BOARD SETTINGS. If you are using a Novell network,make sure that the settings in the NET.CFG file arecorrect. Also, when NE2100.COM is executed, NET.CFGmust be in the current default directory.
If you are using another type of network (NDIS, etc.), readthe driver installation instructions again to be sure that I/O address and IRQ settings are correct.
Review the installation again and check software setup.

53
Troubleshooting
Also make sure that any of the setting selections you havemade do not conflict with devices that are currently inyour system. You may want to vary the settings on yourboard to see if it makes a difference. Remember to modifythe NET.CFG or your batch files as well.
• MAKE SURE THAT THE NETWORK YOU ARECONNECTED TO IS FUNCTIONING.
• REPLACE THE ADAPTER WITH ANOTHERKNOWN TO FUNCTION AND TRY TO LOGINAGAIN.
• TRY THE ADAPTER IN A DIFFERENT COMPUTER.
• MAKE SURE THE ADAPTER HAS BEEN INSERTEDIN A LOCAL-BUS CONNECTOR SLOT.
• MAKE SURE YOU ARE NOT USING DRIVERSMADE FOR NE2000 COMPATIBILITY. THEBOCALANCARD-VL IS NE2100, NOT NE2000-COMPATIBLE.
• REFER TO THE README FILE FOR ACOMPREHENSIVE LIST OF POSSIBLE ERRORMESSAGES AND SUGGESTED REMEDIES.
If none of the above isolates and solves the problem, referto Appendix C: Servicing Your Boca Product.

54
BOCALANcard-VL
Appendix A: Specifications
BOCALANcard-VL
• 10Base-T twisted pair transceiver with RJ-45 connector
• 10Base-T operating distance 100 meters (328') maximum hub to
node length
• Diagnostic LEDs: link integrity- and receive-selectable (default)
• Software-Selectable interrupts and a base I/O address.

55
Appendix B: FCC Compliance
This equipment has been tested and found to comply with the limits
for a Class A digital device, pursuant to Part 15 of the FCC Rules.
These limits are designed to provide reasonable protection against
harmful interference when the equipment is operated in a commercial
environment.
This equipment generates, uses, and can radiate radio frequency
energy and, if not installed and used in accordance with the
instructions, may cause harmful interference to radio communications.
Operation of this equipment in a residential area is likely to cause
harmful interference in which case users will be required to correct the
interference at their own expense.”
CHANGES OR MODIFICATIONS TO THIS EQUIPMENT NOT
EXPRESSLY APPROVED BY THE MANUFACTURER COULD
VOID YOUR AUTHORITY TO OPERATE THE EQUIPMENT.
Specifications

56
BOCALANcard-VL
Appendix C: Servicing Your Boca ProductIf your Boca product requires service, first contact the authorized dealerfrom whom you purchased the product. If the dealer is unable to assistyou, and you must contact Boca Research, Inc., please follow theinstructions below. Our electronic BBS is available 24 hours a day at(407) 241-1601 and will support data transmission speeds up to28.8Kbps with settings of N, 8, 1. If you have a modem, the BBS maybe helpful (especially during off hours) if you have a question aboutproduct settings or compatibility, or if you wish to download driversoftware or utilities.
If the Troubleshooting section did not resolve your problem, you maycall our technical support staff for assistance. If you haven’t referred tothe Troubleshooting section, there’s a good chance the solution to yourproblem is there.
NOTE: CALLING TECHNICAL SUPPORT WITHOUT COMPLETEAND ACCURATE INFORMATION CONCERNING YOURPROBLEM MAY BE BOTH TIME-CONSUMING ANDFRUSTRATING FOR YOU.
1. When calling Boca Research Technical Support, have the followinginformation available:
Board name and part #(located on the board)
Computer manufacturerComputer modelPeripherals in systemOperating system and version
2. Call Boca Research Technical Support Department between the hoursof 8:00 a.m. and 6:30 p.m. Monday through Friday EST at (407) 241-8088. A technical support specialist will be available to discuss theproblem(s) you are experiencing. If factory service is required, youwill be given a Return Merchandise Authorization (RMA) number.PLEASE PLACE THIS NUMBER ON THE OUTSIDE OF THEPACKAGE when you return the item(s) for service and reference iton any correspondence included in the package. Boca Research, Inc.will return any product which is not accompanied by an RMAnumber.
If you suspect a problem with aspecific program or softwarepackage, make note of thename, version or releasenumber, and manufacturer ofthe software.

57
3. Refer to the Warranty Statement if the product is covered under thefive-year Boca Research, Inc. Limited Warranty.
4. Certain parts will not be covered under the Boca Research, Inc.Limited Warranty. Dealer installed parts are warranted by thedealer. Parts which you have installed yourself are covered only bythe suppliers warranties. In these cases, Boca Research, Inc. canidentify which parts are defective, but will not replace such partsuntil we receive written authorization from you. Cost of parts andlabor involved in making such repairs will be billed to you C.O.D.
5. When returning the product to Boca Research, Inc. for repairs,please be sure to include:
• the BEN1VL product (board only)• copy of your original invoice• your return street address (for UPS purposes), your phone
number, and the RMA number mentioned above.
Package the product securely in a container equivalent to theoriginal packaging, and insure the package to protect against loss ordamage during transit. Shipping charges must be prepaid; C.O.D.shipments will not be accepted. Please use the address below for allcorrespondence:
Boca Research, Inc.RMA Department - RMA # ___________
1601 Clint Moore RoadBoca Raton, FL 33487-2841
6. If the repairs performed on your product were covered by thewarranty, Boca Research, Inc. will return it prepaid via UPS.
Servicing Your Product

58
BOCALANcard-VL
Appendix D: Pin-Out Assignments
Pin-out assignments for the 10Base-T connector are asfollows:
8-pinRJ45Connector
Pin 1 Pin 8
Bottom ofplug

59
Appendix E: NET.CFG Options for NetWare
Included on the driver disk in the Novell ODI sub-directory is a file that establishes the base settings for youradapter. This file is called NET.CFG, and is a text file thatdescribes these settings. If a configuration is different fromthe default settings or if you are using multiple protocols,you need to modify this NET.CFG file. This appendixexplains how.
The NET.CFG file is a configuration file that containssection headings and options of the ODI software.
You may also need to see the documentation specific toyour protocol for additional NET.CFG information. Useany DOS text editor to modify the file.
ConventionsMain section headings must be left-justified and are notcase sensitive. The heading must precede the options youwant to include in that section. Options are not casesensitive and must be preceded by a tab or hard spaces.
Precede comments with a semicolon (;). End each linewith a hard return. Write all numbers in decimal notationexcept where noted otherwise.
NET.CFG Options

60
BOCALANcard-VL
OptionsThe following chart lists the driver options defined by theDOS ODI software. The options available for the BocaEthernet Adapter driver and IPX protocol stack are shownin a sample NET.CFG file. Protocol stacks other than IPXmay have additional options not listed here. Refer to theother protocol’s documentation for more information. Inthis chart, the main NET.CFG section headings are shadedand flush with the left margin. NET.CFG options are listedunder each heading and indented.
Link Driver BOCANW
DMA (#1 | #2) channel_numberPORT [#1 | #2] hex_starting_address [hex_number_of_ports]NODE ADDRESS hex_addressSLOT numberFRAME frame_typePROTOCOL name hex_protocol_IDframe_typeSAPS numberLINKS STATIONS numberALTERNATEMAX FRAME SIZE numberCONNECTOR DIXINT[#1|#2]channel_numberLED2 (programmable_value)
Link Support
BUFFERS communication_number [size]MEMPOOL number[k]
Protocol protocol name
BIND #board_number

61
The Boca Ethernet driver has these NET.CFG optionsavailable:
• INTERRUPT# (required)• NODE ADDRESS• FRAME• PROTOCOL (such as IPX)• LINK DRIVER
The following figure is a sample of the structure of anygiven NET.CFG file:
LINK DRIVER PCNTNW
FRAME ETHERNET_802.3PROTOCOL IPX 00 ETHERNET_802.3
NET.CFG Options

62
BOCALANcard-VL
Appendix F: Programmable LED Options
The red LED on the BOCALANcard VL can beprogrammed to respond to specific activities on thenetwork cable. Transmit, receive, jabber, collision, andpolarity functions can be detected using theprogrammable red LED. This LED is programmed using asoftware keyword in the network configuration file. Thekeyword is LED1. The syntax is LED1 NN, where NN is ahexadecimal number that denotes the red LED function.
Listed below are the functions, their assigned value, andsome examples of different configurations.
Activity StatementTransmit Activity LED1 90Receive Activity LED1 84Normal Polarity LED1 88Jabber Indicator LED1 82Collision Status LED1 81
For Novell DOS and OS/2 ODI client drivers, use any texteditor to edit the NET.CFG file.
Sample NET.CFG for DOS ODI:
Link Driver BOCANWFRAME ETHERNET_802.2LED1 90PORT 300IRQ 3

63
Glossary
10Base-T. Twisted pair cabling using an RJ-45 connector.
10Base-5. Original Ethernet using coaxial cable.
10Base-2. Also known as “cheapernet”. Another name for ThinEthernet using a BNC connector.
AUI Connector. Attachment Unit Interface; 15-pin “D” connector foruse with external transceivers, such as 10Base-5 or fiber optics.
BNC Connector. BNC jacks and plugs connect network hardware viathin Ethernet cable. A BNC barrel connector joins two lengths of thinEthernet cable with its T-connector.
CSMA/CD. Carrier Sense Multiple Access with Collision Detection.CSMA/CD is the access method used in Ethernet.
DMA. Direct Memory Access. DACK stands for Dma ACKnowledgeand DRQ for Dma ReQuest. DMA provides direct access to systemmemory without adding to CPU overhead. The DACK and DRQchannels govern that communication.
File Server. A device on a LAN that provides mass storage of files.
Hub. Another term for repeater.
Repeater. Used to extend the topology, allowing two or more cablesegments to be joined. In a 10Base-T network, the repeater providesthe central connection point where the gathering of statistics andnetwork management functions take place.
Topology. The physical layout of a network. The principal LANtopologies are bus, ring, and star.

64
BOCALANcard-VL
Limited Warranty
Boca Research, Inc. (BRI) warrants to the original buyer of this BRIproduct that the hardware is free of defects in materials andworkmanship for a period specified in the original sales contract (“theWarranty Period”). Should the product fail to be in working order at anytime during the specified period, BRI, will at its option, repair or replacethis product as described below, provided that in BRI’s soledetermination the part or product has not been abused, misused,repaired, or modified.
All products will be serviced and returned via ground at no charge tocustomers DURING the first year of service.
All returns for limited warranty service require a Return MerchandiseAuthorization (RMA). All customers are required to demonstrate proofof purchase when requesting an RMA. The period of warrantycommences on the date of purchase. A dated copy of the sales slip mustbe included with the returned merchandise.
Products which require Limited Warranty service during the warrantyperiod should be delivered to BRI at the address shown below in theAppendix (Servicing Your Boca Product) with proof of purchase, copy ofcanceled check (if any), and the Return Merchandise Authorization(RMA) number provided by BRI Technical Support. Refer to theAppendix in this manual. Replacement parts or complete products willbe furnished on an exchange basis only. Replaced parts and/or productsbecome the property of BRI.
If the returned product is sent by mail, the purchaser agrees to prepayshipping charges, insure the product or assume the risk of loss ordamage which may occur in transit, and to use a shipping containerequivalent to the original packaging. BRI does not make any warrantiesin respect to the product, either expressed or implied, including noimplied warranties of merchantability or fitness for a particular purpose,except as expressly provided in this agreement. If any labor, repair, orparts replacement is required because of accident, negligence, misuse,theft, vandalism, fire, water or other peril; or because of conditionsoutside of specifications, including, but not limited to, electrical power,

65
Copyright©1995 Boca Research, Inc. All rights reserved. No reproduction of thisdocument in any form is allowed without permission in writing from BocaResearch, Inc. Boca Research is not liable for any damages resulting fromtechnical or editorial errors or omissions contained in this document. Theinformation in this manual is subject to change without notice. Revisions to theproduct(s) in this manual may occur at any time without notice.
TrademarksAll Boca Research products are trademarks of Boca Research, Inc. All otherreferences to computer systems, software, and peripherals use trademarksowned by their respective manufacturers.
Publication Date: June, 1995Printed in the U.S.A. BEN1VL.PM5
temperature, humidity or dust; or by moving, repair relocation, oralteration not performed by BRI, or by any other cause other than normaluse, the warranty and maintenance obligations provided herein shall notapply.
BRI SHALL NOT BE LIABLE FOR ANY SPECIAL, INCIDENTAL, ORCONSEQUENTIAL DAMAGES OR FOR LOSS, DAMAGE, OREXPENSE DIRECTLY OR INDIRECTLY ARISING FROMCUSTOMER’S USE OF OR INABILITY TO USE THE EQUIPMENTEITHER SEPARATELY OR IN COMBINATION WITH OTHEREQUIPMENT, OR FOR PERSONAL INJURY OR LOSS ORDESTRUCTION OF OTHER PROPERTY, OR FROM ANY OTHERCAUSE.
This warranty shall not be applicable to the extent that any provision ofthis warranty is prohibited by any Federal, state, or municipal law whichcannot be preempted. This warranty gives you specific legal rights, andyou may also have other rights which vary from state to state.

66
BOCALANcard-VL
Software License Agreement for the Boca Research BRI Products
Boca Research, Inc. (BRI) grants the owner permission to use BRIsoftware upon adherence to the terms and conditions of thisagreement.
1. The use of BRI software will be limited to computers that containthe BRI board.
2. Any reproductions of the BRI software are also subject to thisagreement.
3. BRI software is not to be modified in any way; it should be used inits original form.
4. Should a change in ownership occur, these three conditions MUSTbe met:
• the BRI board must also be transferred to the new owner.
• any copies of the BRI software which are not being transferred mustbe destroyed.
• the new owner must abide by the terms presented in thisagreement.
5. BRI remains the copyrighted owner of the BRI software. The ONLYrights given to the licensee are those which have been provided forunder this agreement.
6. UNDER NO CIRCUMSTANCES WILL BRI BE HELD LIABLE INANY WAY TO ANY PURCHASER FOR DAMAGES, LOSTREVENUE, LOST WAGES OR FOR ANY OTHER INCIDENTAL ORCONSEQUENTIAL DAMAGES OF ANY KIND WHETHERCOVERED UNDER THIS AGREEMENT OR OTHERWISE. THE BRISOFTWARE IS NOT WARRANTED IN ANY WAY AND ITS USE ISTHE SOLE RESPONSIBILITY OF THE LICENSEE FREE FROM ANYEXPRESSED OR IMPLIED WARRANTIES OF MERCHANTABILITYAND FITNESS FOR A PARTICULAR PURPOSE.
7. BRI provides a five year warranty for the media on which the BRIsoftware is furnished. This warranty is limited to defects in materialsand workmanship; it does not cover the functions provided by the BRIsoftware. This license is subject to termination upon breach of thisagreement. The BRI software and any copies must be destroyed orreturned to Boca Research, Inc.
8. BRI reserves the right to make modifications to the softwarewithout any prior notice.
9. This license is governed by the laws of Florida.

67

68
BOCALANcard-VL
Manual Part # 9412Rev. 2.0