Embed Size (px)
Citation preview
Flyin' Miata970.464.5600
Rev 1.2
Hush-O-Matic Exhaustfor ND
06-49190
Flyin' Miata
Thank you for purchasing an FM Hush-O-Matic exhaust, the muffler with a dual person-ality. It’s loud when you want it to be and quiet when you don’t! Cruising around town the exhaust note is subdued. Dip your right foot into the throttle and enjoy a louder
sporty tone!

Flyin' Miata970.464.5600
Rev 1.2
WARNING: Not everyone can perform every installation. It is critical that you be honest with yourself, in regards to your ability. We’re more than happy to help,
but there are only so many things we can do from the other end of a phone / computer. If in doubt, discuss the install with us before you dive in.
Required tools:
• 14 mm socket or wrench• Ratchet socket wrench• Channel lock pliers• WD40 lubricant• Stud remover (optional)
Torque Specs:
• Nuts on exhaust studs - 29-37 lb-ft
1. Begin by locating the exhaust flange between the stock midpipe and muf-fler. Using a 14mm socket and ratchet, remove the nuts and springs from the studs. Don’t worry if the stud comes out of the muffler. You will be transferring them to the flange on the new muffler. If a stud comes out with the nut still on it, put the base of the stud in a bench vise (not on the threads!) and use a 14mm wrench to remove the nut from the stud.
2. Spray the exhaust hangers with some WD40 to lube the posts on the muffler. Using channel lock pliers, remove the hangers from the posts on the muffler. Leave the rubber hangers on the posts on the car. As you remove the last two hangers, support the muffler and care-fully lower it from the car.
Flyin' Miata970.464.5600
Rev 1.2
1
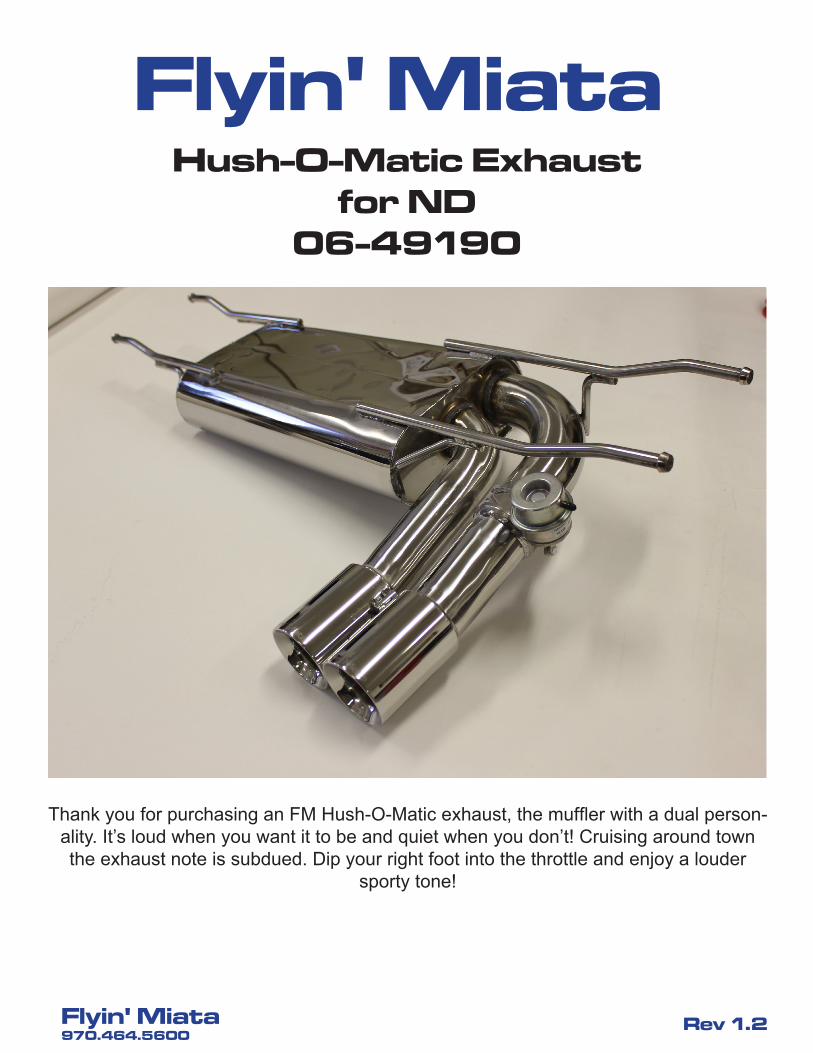
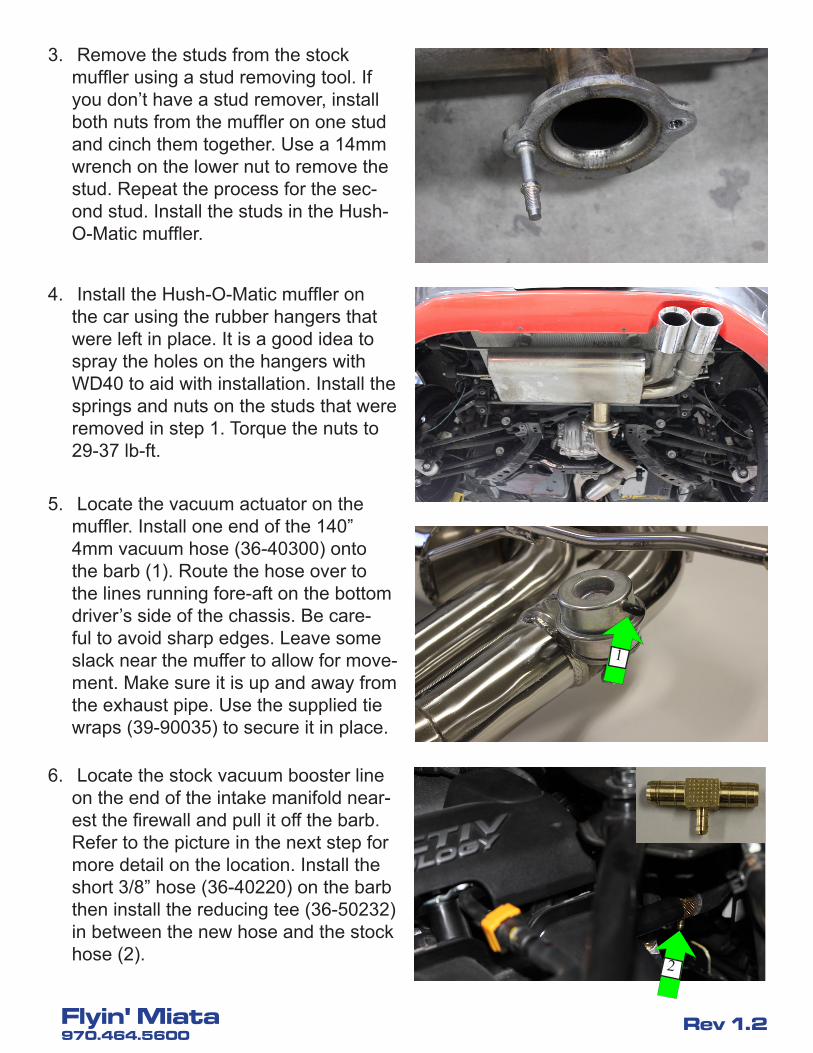
3. Remove the studs from the stock muffler using a stud removing tool. If you don’t have a stud remover, install both nuts from the muffler on one stud and cinch them together. Use a 14mm wrench on the lower nut to remove the stud. Repeat the process for the sec-ond stud. Install the studs in the Hush-O-Matic muffler.
4. Install the Hush-O-Matic muffler on the car using the rubber hangers that were left in place. It is a good idea to spray the holes on the hangers with WD40 to aid with installation. Install the springs and nuts on the studs that were removed in step 1. Torque the nuts to 29-37 lb-ft.
5. Locate the vacuum actuator on the muffler. Install one end of the 140” 4mm vacuum hose (36-40300) onto the barb (1). Route the hose over to the lines running fore-aft on the bottom driver’s side of the chassis. Be care-ful to avoid sharp edges. Leave some slack near the muffer to allow for move-ment. Make sure it is up and away from the exhaust pipe. Use the supplied tie wraps (39-90035) to secure it in place.
6. Locate the stock vacuum booster line on the end of the intake manifold near-est the firewall and pull it off the barb. Refer to the picture in the next step for more detail on the location. Install the short 3/8” hose (36-40220) on the barb then install the reducing tee (36-50232) in between the new hose and the stock hose (2). 2
Flyin' Miata970.464.5600
Rev 1.2
7. It is critical that this be installed between the intake manifold and the check valve in the stock hose coming off of this barb. The check valve is the stiff por-tion of the hose - install the tee per step 6 and you don’t have any issues. The ex-haust valve will remain open if the tee is install on the wrong side of the check valve.
Congratulations! You’re done installing your new Hush-O-Matic exhaust. Remember, on cold starts it will be loud for a few seconds until enough vacuum is built up to oper-ate the actuator on the muffler. Go for a drive and enjoy!
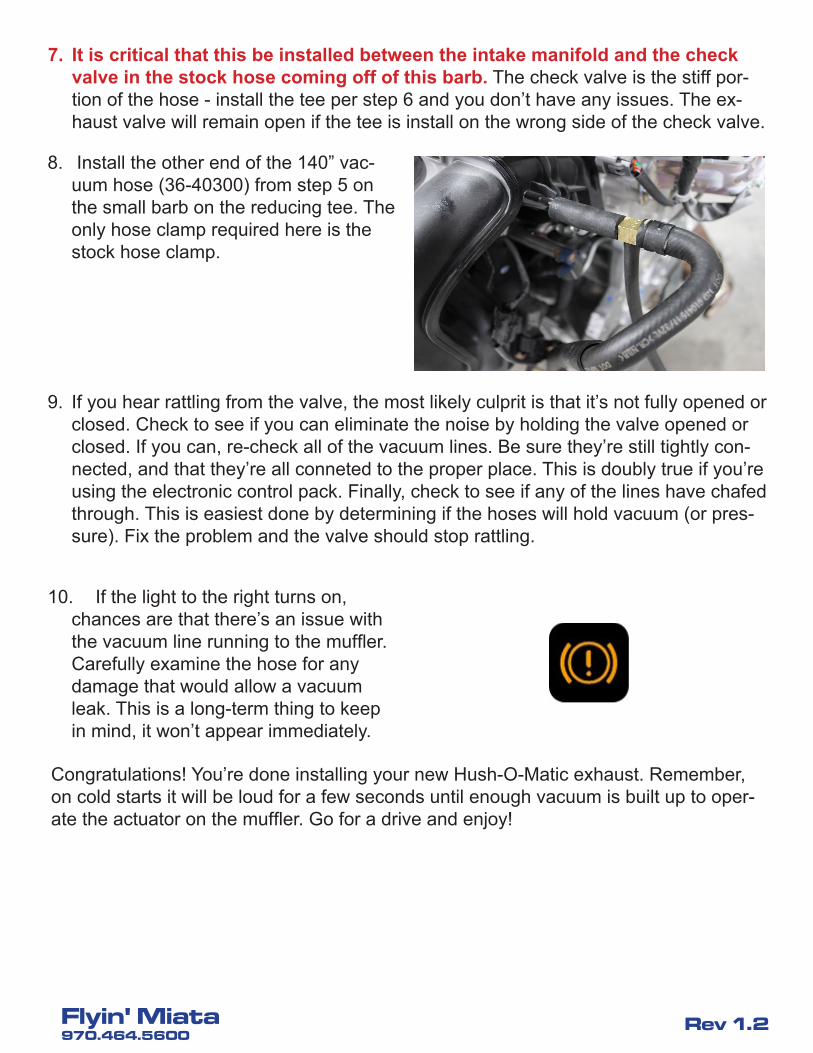
8. Install the other end of the 140” vac-uum hose (36-40300) from step 5 on the small barb on the reducing tee. The only hose clamp required here is the stock hose clamp.
9. If you hear rattling from the valve, the most likely culprit is that it’s not fully opened or closed. Check to see if you can eliminate the noise by holding the valve opened or closed. If you can, re-check all of the vacuum lines. Be sure they’re still tightly con-nected, and that they’re all conneted to the proper place. This is doubly true if you’re using the electronic control pack. Finally, check to see if any of the lines have chafed through. This is easiest done by determining if the hoses will hold vacuum (or pres-sure). Fix the problem and the valve should stop rattling.
10. If the light to the right turns on, chances are that there’s an issue with the vacuum line running to the muffler. Carefully examine the hose for any damage that would allow a vacuum leak. This is a long-term thing to keep in mind, it won’t appear immediately.